Transcripts
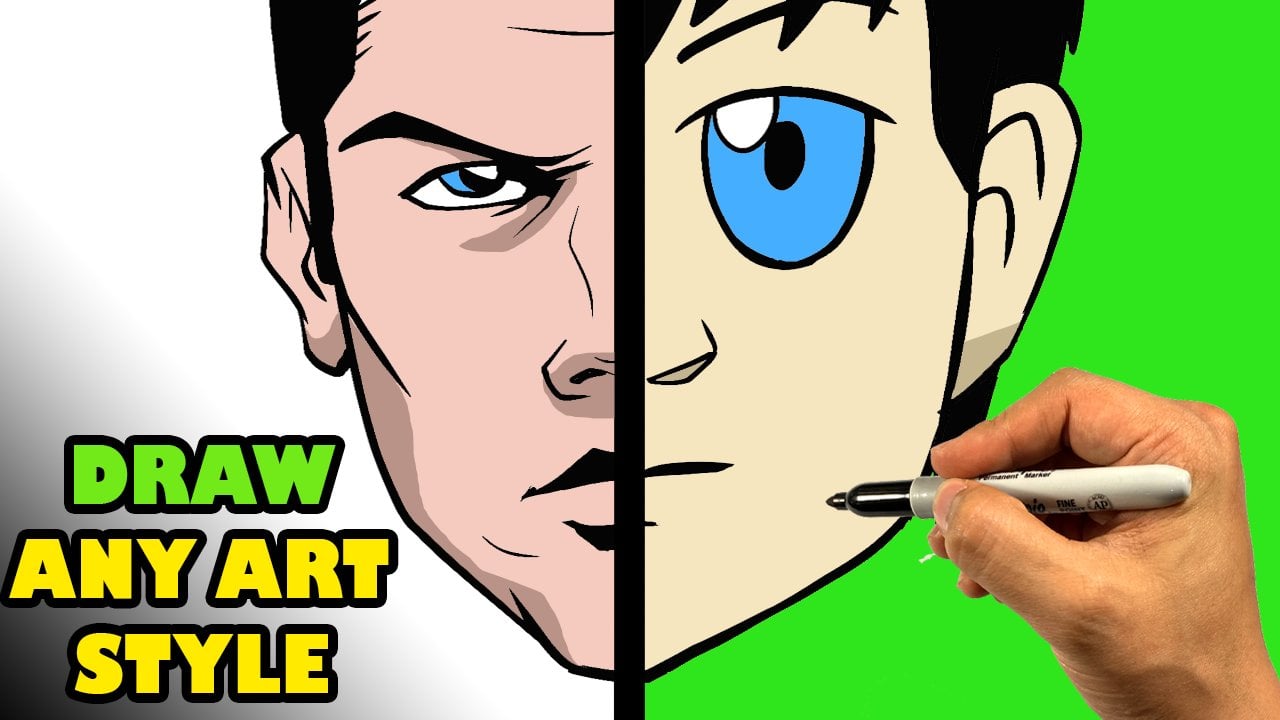
1. How to Draw Attractive Female Faces: Hey, I was gone. By the end of this course, you will be able to draw
attractive female faces on command. Even if you're a
beginner, who am I? I'm Enrique. I'm an
artist and illustrator. I've been illustrating
for the past 15 years. I worked on movies
like Transformers and movies like this Smurfs. What I'm gonna do is we're
going to break this down into different segments and
teach it to you one by one. The stuff that you
see in pin-ups and animated series is, and comics, they all have a very
similar structure for the attractive female face. And I'm going to go through
and teach it to you. First part, we're gonna
go through the structure. The structure of the
head is very important. And I think it is the
scaffolding that you put everything cool onto. This might sound a
little difficult, but it's not really
simple once you get it, it's pretty much easy
to get every time. Then we're gonna
go into the eye. The eye is the
window to the soul. And basically there's always this way that they draw
this and animated movies. And I'm gonna teach you
how that is in reality, that's actually a lot easier to draw this type
of eye than it is to draw more complex,
anatomically heavy. I, I'm gonna show
you how to do that. Okay, it's really attractive, simple curves that
are involved in this. Then after that we're
gonna go into the nose. The nose type is very specific. He sees the round Disney's he
was throughout everything. There's a very specific
type of nose that artists and illustrators use for
this attractive female type. Then beyond this, we're going to go through
how to draw the lips. After that, we're gonna
go into the hair, which is incredibly important. And then from that I'm gonna do a demonstration
and talk to you through the
entire demonstration of everything I had taught
you up until that point. So at the very end, you will have a solid foundation to do anything you want with. Okay, That's pretty much it. Let's hop right into
the course and learn.
2. Basic Structure: Let's go over very quickly some structural things and
this is really valuable. So that's why I'm gonna
be going over it. Just general pen obviously the general proportions
of the head or pretty vital to all of this. So that's why I'm going to
give you a primer here. I'm going to go over here.
And the way I like to draw every single head I draw, you can use either
one of two methods. One circle. That's usually what that does, that encapsulates
the skull shape. Then I draw the
center line downward. It goes maybe like
a shape and a half, maybe extend it another half and maybe I draw
the chin down here. And what I do is I go over here and I curve the
side of the face. And the side of the face here. And that's normally how
I get my initial shape. And when, for
example, like right, right now that faces
mostly aiming right at us. That's the tween, the
eyes, the center line. And if you want something
that's like three-quarters, I would absolutely
turn that center line. So let's just say she's
looking out this direction. And that center line which
is like the middle ear, nose right between your eyes
and that's going to change. And that's how I'm
gonna construct it differently based
on how that looks. So hopefully that makes sense. It's either that or I use
the old-fashioned oval. Just use that to start
and then I start plugging in my center line. The carve it out over
here a little bit. So that's the initial
shape I start with. The next thing I
do is I start with the shape of thirds
vaguely, right? So I'm going to maybe
do the hairline ish. And by hairline, I mean
where the head turns, not so much where the
actual hairline is. For example, somebody
shaves their head. They're not really going to have much of a hairline anymore. So I like doing it right here, maybe a little bit of the top, kinda like a top of the forehead, very
top of the forehead. And then I take this
and this space in here, right in this area and
divide that into thirds. So right here, go boom. Divide that into thirds broadly. Don't overthink it.
Not a huge deal. You don't have to go in here and measure everything out
just approximately. This top third is almost
always the brow line. By brow. I mean, kind of where that just kinda where
the top of the eye is. I don't mean where the actual funny because it's funny
how that works out, right? It's not actually
where the eyebrows are because because people draw their eyebrows in,
it changes a lot. So what it is is normally where that basically the top
of the eye socket is really give her
some glasses here. By that I'm trying to
find the eye socket. Then this line right here, that's usually the
base of the nose. Almost always and that changes based on if they're
looking up or down. But let's just put in like
a nose shape over here. Then you have a chin
down here, right. And then I think
like halfway here, you can IT stuff like
the mouth in-between. But to be honest, I never measure where the
mouth is gonna be in all honesty because I don't really find it like that useful. It's just going to be as
long as it's within this. Third, you'll be fine. You can move up and down
as you can eyeball it. Everybody kinda, my opinion,
same people over here. So let's take that same thing. The other's heads
turned this way. You go over here, Find My top of the headline right
way top of the forehead, that where it's going to curve. And then I'm gonna go over
here divided into thirds. Find the bottom right
here, over here, and over here, let's
approximate that I need to be moved down a bit
There you are, right? They're gonna find
those glasses here. Right on that top line. Over here. Defined the base of
the nose right there. And then you get the mouth. In this area. As far as the ear goes. It's basically where the chin meets at the end of the year. And as far as height of the ear is between
these two thirds here, like usually the bottom of
it might touch the line. We, that third line. Extend that lining. Usually it's a good
way to find the ear. It's within that quadrant again. That varies per person
because the ear is cartilage. So cartilage is very, very different from
person to person. And it can you can change it with a nose job and
stuff like that. You can have you can
change his malleable. It also changes when
you get older too. It gets longer. Write
your ears get longer. When you get older, your nose
gets longer, you get older. But those are some
quick points defined. And the other one I
want to go over really fast because it's the biggest
one is the side view. So they're looking directly, let's just say they're
completely looking sideways. We're looking completely the side of their
head right here. So let's just say a
center line is out over their jaws back here, Let's add assembler totally
looking at direction. You're looking
right at their ear. Something good to remember
is from the front of the, front of the head over here
to the back of the head. The back of that skull shape, roughly about halfway
in here is the ear. Roughly. It doesn't have to
be exactly halfway. But that's going to be a
good place to find the ear. The ear is going to
angle back a bit. But then back here
is like all skull. With a lot of skull. I've talked about this before. The number one mistake
people make within drawing that I've seen in my entire career teaching people over the course
of like ten years, 15 years, is they always underestimate how
much skull is in the back. For some reason. I don't know why that is. I think it's because
we stare at people's faces and stuff and we don't really I don't know. Never you don't really stare at the back
of people's heads. And very often, I don't know if it was just
kind of forget that. Just kind of remember
that the ear is roughly about halfway
from the very front to the very back of the skull that changes with the
hair, stuff like that. We're going to talk
about that later on. We're just going over some
basic structural points of the general
head it over here. And find that top of the
forehead or wherever. That top of the way,
top of the head. And then go from the
bottom of the chin here, that top, and then
divide it into thirds. We have this third already. I'm going to just find
the glasses right here. Fill that in just to
make it more obvious. Nose is gonna come
out down here. For a female tab,
we often don't have a nose hanging over. You know, usually
that's like for a guy's nose, there
are a lot of females. I do have that, that's fine. But we're talking about
a generic generic. Disney asked for me
usually looking at upturned nose, curve over here. I like to curl here to
show it from the mouth, but it's not really important. And then the neck
comes out back here. It's gonna be a little bit
that heads sticking out, usually a thinner neck. Then if you're going to err
on the side of caution, try to air on a thinner neck. Generally. These are
some important things to take away and I'm going
to review them right now. When I draw ahead, I
almost always eat us. Start with a circle, extend that down about a
circle and a half length, and then create my head shape
from that or what I do is I create just a straight-up oval and I just start
chopping into that. Either one is fine
and you're gonna find your own way
to do it, honestly. So it's not a big deal. I would try both out. Not a huge deal. Okay. But this is just
the way I like it. Let's keep going. I split the head into thirds. I'd find the very
top of the hairline. And by hairline, I mean basically the top
of the forehead, even if they're bald, even
they shave their head. It's gonna be where the front of the forehead starts to turn or actually is mid-term and
it becomes a top of the head. So it's like that middle
that turn really right above their approximate
it don't overthink it, not a huge deal. You can always move it
around and then take that point and the
bottom of the chin and divide that into thirds. Vague thirds again,
don't overthink it. Drawings about fun, just
don't worry about it. But in the thirds and then
that first top third is the brow or the top
of the eye socket. Bottom of that third is the base of the nose,
the bottom of that nose. So even if the nose sticks out self, let's look over
here real quick. That point of the
nose is not the base. The base is right here. Right where the nose the
last thing and touches on the bottom of your top of
your mouth, body, your nose. So something to
remember and remember the back of the skull
here that there is one for the sideview. Just remember that
because when you put hair over that, that's
going to affect that. Some people will
doodle just like hair coming back out of
the back of their ear. And you're like, Well,
what the heck happened their head, they don't
have a back of the head. Number one drawing mistakes. So remember not to do
that now you know, because people say, how do
I know to remember that? Well, now, you know, I'm telling you right
now, remember that. That's pretty much it as far
as general measurements. Okay, so let's move forward
and it's the next lesson.
3. Drawing Attractive Eyes: Let's jump into the eyes here. Okay. So for the eyes, We basically the
structure of every I is something of like think
of like an abstract shape. This looks like
kinda like a Lego or something to
kinda go over with. It's the right area
of the left eye. I mean, something like that. You think of abstract shapes, like that kind of abstract
shape and wrap skin around it, you make it organic. That's the general
shape right there. If I was going over to Anne, I like, let's say on this slide, let's just take this, I write here her left eye.
That's right on our side. We're going to go
something like this pull up line over here. It's gonna be a
little bit wrapping over here and be
a line out there. Down over here. See we're still following that format but
making an organic. Then pulling it back here.
Does that make sense? See how this shape looks like
that but this is more skin, leg gets more organic,
it's different. That's something you got. You don't have to remember this, but it's very wide. With female eyes to you will
create a thicker line above. It's going to be the eyelash
and it's going to pull out. Sometimes you can create a thicker line here,
you don't have to. Then you can throw maybe another eyelash out here
because that's the one of the other biggest
mistakes ever is people want to draw
eyelashes like this. That might work for
photo-realistic stuff, but generally that's a really bad idea for
something like this. For pin-ups and stuff like that. You want to draw a
thicker line which, and it looks like a bunch of hair stuff together
and then start pulling out a couple of edges,
eyelash over here. The actual eye itself
for the pupil and iris. I don't know about
the general size, but I know the general rule. I can give you the rule for it is and let's just say you have like an eyeball inside
the head right here. Split that up into thirds. Then put a circle right here, and that's gonna be the
iris and pupil there. You can fit like
three across it. That's the general idea, but you don't have to do that. I've seen them bigger, like an anime, or I've
seen them smaller, but generally, again, if we want to err on
the side of caution, I would err on like bigger. But this one right here is very moderate. What
I'm doing right here. Going to throw like a circle
and square for a highlight. Let's pretty much
always like that. That's circle or square
for that highlight. And then at the center of that, I'm going to draw the
black part, the pupil. The pupil has the
same rule as the, imagine this is the
eyeball, right? That is the eyeball and
this is the iris and pupil. Same rule for this iris
is the colored portion. Let's say this is the iris. The pupil is gonna
be exact same thing. It's going to be that
black part is going to be 1 third of that. So it's 1 third of
a third, right? This is the colored
portion in here. It'd be something like this, such as separate them. So let's make it more obvious. That makes sense. So we have 1 third here, 1 third in here, same thing. So 1 third would
be the black part to that thou when I
stick to all the time, honestly, the 1
third of the pupil. And that changes too based on if you see
something you want, Let's throw a couple
of lines out here. For the iris. That's very, very simple
to do is just technique. For anything. I always draw the highlight. If we're going to
isolate this pupil, the highlight can be a
circle, a square, anything. And then some darkness will
be behind the highlight. And the reason you want to do the darkness behind
the highlight is because that'll make
the highlight pop more. They'll pop forward. Then what I like to do is
because there's ridges inside the colored portion
right inside the iris. I like to do this just
like draw a bunch of lines and then they slowly get further away from
each other and they fade. You can do from both sides
to if it's showing very, very simple thing to do
and it's very effective. You can create a thicker
line here on the iris also, there's almost always
a dark part around it. And it makes it look makes
the inside look lighter, is good for blue eyes, green
eyes, stuff like that. That's it for the general AI. What I would say as
far as like that, we're gonna do a recap
really quick right now. So let's go with a quick recap. The eye has a general
shape like this. If you're looking at the
middle of the face here, this is this shape
which looks like a polygon form is good to
simplify it in your mind. So you can, you can see
the major arcs like that. They can be more slanted. They can be more like
any which way you want. But that's the base.
You can adjust it from that. That's what I'm thinking. I'm not going to draw that out, but that's why I'm
thinking in my head, start drawing the eye. I think of that
stuff in my mind. You don't have to. I would say in
most female types, if you want to make
them more like a pinup, I would not put that much
information in here because right here in the
center of the eye you could draw the sclera. The sclera is the white part. You can draw the tear duct. I would even make
that very light like that or just exit out
like don't even draw it. But never draw like
hardcore unless, like I said, this is not a role. These are all like principles, not rules, rules you have to do. These are principles. This is just like,
Oh, things that pass. Artists have done that worked, and that's all I'm
teaching here. You can go nuts with it. You can draw more
lashes coming out. I would not overdo
it though because it would be too much. But as far as recap goes, thicker line here
for the eyelashes, not singular lines like this. As far as the eyebrow goes. If we want to go over
that real quick, it's almost always a line here, like a thick line that
leads into a thinner line. And maybe you can draw a couple of these separated
lines after, after. You're almost always with everything in drawing,
especially stuff like this, you're thinking of
simple first, okay, that'd be the biggest rule to
keep in your minds. Simple. First, big shapes for the eyebrow is a
one big shape and then I split off a
couple of small shapes. Same thing, big
shapes, small shapes. The simpler you get, the more foundation that you
have to kind of build upon, the easier it reads
to the viewer. Because a big part
of this is how well it reads to the
viewer immediately. So that's the I. Let's jump into the nose next. All right.
4. Attractive Nose Type: Alright, let's get
into the nose. Really quick on the
general knows you're looking at really quickly. Let's say we got like Miss
skeleton here, right? Let's say it's a front
of a skeleton right now. To fill that in. Then this right here is the
nasal cavity that open. So basically when you
go over the nose, the nose, the top part of
the nose like that top part. That's the only
thing that's bone. The rest of it over here, the extended part is cartilage. And because of that, people have radically,
radically different noses. They can also change over time. So if you see somebody
that broke their nose, sometimes it's like off or
he just looks different. People can get nose jobs and they're messing with
the cartilage in here. It can be drastically different. I think I was thinking
of like this is going to date the video. But somebody like
Ashley Simpson, Like 20 years ago, I think
she got like a nose job. She looked at radically
different people look radically different
when you do that. Because it's so simple. It's not that wild with surgery, but because they're
playing with a cartilage. And like I said,
cartilage is more malleable and you can do
a lot more with that. But just remember that. That's a good thing
to remember that only the most malleable part is the tip of the nose kind of like halfway down to bridge. And the bottom of that, that's almost entirely
malleable wall surgically. It's a lot weaker
than the rest of it. That's quick little fun
fact about the no's. Do you know what you're drawing? The nose itself is made up of a couple
of different parts. You have the bridge which essentially that top
flat long parts, right? If you were to simplify
that down bridge, which comes in from between
your eyes, Let's draw this. What do you call it,
the eye socket shape? You have the bridge. Obvious why it's called
that the bridge. You have the nostril over
here, which we all know. The tip right here you
have the ball of the nose, which is essentially made up of, I believe like two muscles like touching or something like that. There is something
that just split in the center of the
ball of the nose because of those muscles. That becomes way more
evident as you get older. As you get older, some people haven't really
deep when they're young. But as you get older, you'll see especially in old men like I'm sure I'm
gonna have that. I have a pretty big nose. I think I would like a triangle. Those basically that that that that ridge that
gets really deep. But yeah, that's that
this is like it's sliding down to the side of the head and then
it kind of connects to your cheek right here. But the nose is this the bridge, the ball, the wings of the nostrils right at
the back and the front. And then this slide going down. You can also add in the bottom right because there's gonna be like a bottom portion of it with a hole for
the nostril there. But that's kind of
all it's made up. Let's talk about that's the general nose with an attractive female knows
you're editing out a lot. Animate, have a noses,
have this as well. You're editing out a bunch. You're simplifying
all that stuff, then you can do this, which is very close, pretty much is an animate nose. But we're gonna put a little
more information than that. That's like really
stripping it of everything. Like an anime like Pokemon or myosin has
put a line here down, then fill it in because
there's gonna be like shadow coming from
the top over here. We're gonna make it a
little bit more than that. So this is everything. This isn't a very
little, It's drips down. Simplified form. It's absence of information. We're gonna go in the middle. One thing I want
to tell you, Let's go back over here to this guy. Let's go to this. Imagine this is a nasal
bone a bit bigger. Let's say this is eye socket. This is the nasal cavity bone in your skeleton like
the cheekbone, whatever. Because this is cartilage and it will radically
look different lengths. So you could get something
like that, like an up, very short, upturned nose. Or you can get a very long one where like it
hangs over your mouth. I've had friends like that
and that's fine. That's good. That's just the way
people are different, but it'll it'll hang over because his cartilage is so different from
person to person. You'll see that. That's almost always. Let's just try to
differentiate those two there. They can change radically. In an attractive female type
is almost always is shorter, upturned nose like you see that a lot in Disney seal on anomie. It's almost always a
shorter upturned nose. Okay. So we're taking that
put that line out there for the usually no
bumping it either. I have a huge bump in mind. So like the bump is comes from there are actually all might come from the
cartilage as well. If you've ever
seen down the side and people have like
a bump on her nose. I have a pretty hardcore
I think right there. There's no bump. It's like a ski slope. For this kind of type. Down over here. We're finding the edge of
that ball right there. And then rolling down
here for the nostril. Then the wings of the nostrils
pretty small like that. We're finding the underneath the ball there and
then the ball. Maybe you can draw like that was supposed to be the
edge of the nostril but the actual nostril hole, you can draw
something like that. And I put a little
bit of value down here because the light's
coming from above. Something a lot of artists do. And this is, I'm going to
teach you in this, this way. I'm teaching you this
specific type of nose is you can draw like
let's say a circle here, not, not super heavy
them circle here. And then put a little
bit of value over here, like because this is in pencil, but a little bit of value here on just the edge of the nose. Why do people do
that? I've always wanted at two, like,
why don't you do that? Why, why do people
put a little bit of value here then to the nose? The reason is the nose has
more blood flow into it. I think it's more capillaries
or something like that. And it basically will become red like in when it's colder
and things like that. So this tends to have
more value, right? We're not working
with color right now. But even in black and white, it would have more
value and it just looks like it has more
blood flow going to it. And it's just more
true to real life. And this light there, there was thrown,
this highlight there. Let me get an eraser. Let me use a straight up
normal eraser here. I don't know if it doesn't
stain to the thing paper that does not work at all, that is a worst eraser ever. And he doesn't back
of this eraser isn't works a little bit. But you do that. You just put at the edge of
the nose, are you fill it in? This is kind of I
would say mildly. I wouldn't say it's
totally advanced, but you're using something
called Halftone, meaning it's not
full-blown shadow. You're using a very light touch. This underneath here,
this is shadow. That's pretty much it, honestly. And that's kinda how it works. It's gonna be small,
an upturned nose. Let's do another one
here, but bigger. Ski slope knows. No bump in it. Pulling down maybe a little bit of a point
there at the edge. Let's do this without
shadow at all. Okay? Line here for the
inside of the nostril. Back just a bit. Then curving around the back of the nostril like the outer edge of the nostril but not, we're going to make
that really small because he make that too
big at ages them the more like upper nostril you
put like if I was to put like really deep
the upper nostril and starts to age them. And what you want is, this
is like a pen AP style. So you want, again, that generic attracted type. It's not always like
that in real life. Obviously in real life, all types of noses
are beautiful, but we're talking about
animated art style pinna. It has a very specific thing. And there you go. That would
be it see without value, see how few lines
there is and that's between this where you
put in everything. I mean, I was just more of
more or less going over it. Then this animate in which
is just like an L-shape. This is a little bit more. It has a little bit more,
but it's still sleek. All that stuff. That's it. Let's move on to the mouth.
5. Drawing the Lips: Let's jump into the mouth. The lips, lips, general lips very broad is also has a geometric kind of viewpoint. So it's something like this. Same thing like the other one. Pretty much like
everything we do is like we're simplifying it down. For right here. You have the bottom lip, you have the part in the mouth. Then you have the top lips. That's geometrically
how it's split. You can split it other ways too. For example, you can draw
a straight line across. This is again, just
to understand it doesn't mean going to draw
it entirely like this. Put these mountain shapes and then you're going to cut
right into, well, hold on. Draw the bottom lip. Then you're going to cut right into it. The center of the lip tends to dig right into the
middle of that, cuts down just a bit there. That's what I'm
trying to portray. Then on top you have the
philtrum, it would fill Trump. This is just how you break
it down in your mind's eye. When you do that, it
helps kind of like draw lips and better even if you're drawing
a straight line. So for example, if I'm drawing a straight line right here, I'm still gonna do this. I'm still gonna
do this entirely. Like von draw, just a
straight line of a mouth, let's say with no nothing. It's going to have that
little band in the middle, kind of portraying that. The bottom lip, if you
want to go more into that, is made up almost entirely
of two fat pads like this. That's why sometimes you
get a curve in the middle. You can draw a
line in the middle there for just the lower lip. That would be the things
to remember for this, Let's go into basically for attractive female
types, looks like that. So at an angle, like I said, I almost
always start with apart. I start with the center. Let's just say it's looking
a little bit to the left. The lips are going a little
bit to the left, right now. I start with that center part, that little dangling part. Now. Continue with a line. May pull back for smile. I'm just doing a center
part line over here, the far end, you're
going to see less of it because he just,
she's turning away. I'm going to go up over there. I'm going to find those
mountains, the top here, up over here, down, up, down those mountains
and is going to curve back. At center, is going to
be above this Mountains. They're going to pull down here. The far end, curve,
the bottom here. And I'm going to
pull it back up. I'm not going to even think
about the two fat pads. I'm just going to
draw it as one. That's one way to draw it. You can always draw
the upper lip bigger. I always error. I talked
about this a lot. Err on the side of caution. If I was to draw one way I would draw with maybe the
lower lip bigger. I just kinda like
the way that looks, but that's a style
thing. It's up to you. Let's draw, draw it again. Let's draw it. Maybe just, I'm just completely forward. I'm going to start with the
edges of lines this time. The edges of the smile or
edges of the mouth pull up. Curve in, guys still put
that curve in the middle. Then continue. I'm just finding the
part of the mouth here. Gonna go out here to the top, find that top center,
top of the lip. And I'm gonna draw a line down. Line down here. Go down here at the bottom. Find that line at the
bottom. That's it. That's one way to do that. You're gonna find with the
mouth and stuff like that. You're going to find
that there's a lot, a lot of different styles. And what you wanna do is you
want to find your style. Do you want to do like
smaller upper lip? Lower lip. Do you want to do let me draw
a lower lip right here with the the parts in the lower lip. So for example, if you
draw a lower lip here, curve underneath their current
curve underneath here, you're going to really show
kind of the part there in a very lower upper
lip right there. And you're going to really see the fat pad right here and
the two fat pads on this one. It looks like at a
mommy or something. You're going to find
your style with these kind of things that
are made up like that. Let's see what else do
I have to touch on it? Let's go to recap real fast. This is the geometric makeup. Either one of these is fine. To use this as a more simpler one is a little
bit more complex. The lower lip is made
up of two fat pads, but you can draw it as you can put a little split
in their part in there, or you can make it just one big one which I think
most people do. You can always change that
around as he went as you want. There is always a dip in the center of the upper
lip that pulls down. It pushes down into
that lower lip, almost always add dip. If you want to simplify,
this is extra. If you want to simplify a thing. People consider this
a cupid's bow shape. I've heard that, put her
on and that does help. That top lip could
be a cupid's bow shaped like an arrow there. Like. I've heard that if you simplify
it down, but that's it. I almost always start with a part of the
mouth and then go outward or I start with
the edges of the mouth and then go still outward. But yeah, that's pretty much it. Let's move on to the next one. All right.
6. Easy Way to Draw Hair: Let's jump into the hair. So something I want you to kind of keep in mind when
we're talking about here. Here is some, we're
going over the head. Cover. Very common hairstyles. I want you to keep in mind
the line for the hairline. Let's just say she's
looking this way. Wrong. Pencil I'm using
position looking this way. The center line, as we talked
about, is this direction. The hairline is
usually right here. If it's going right
down the middle ray, it's kind of like it's a line down the center of your head. So you kind of
imagine that right? Then the hair falls from that. It falls from pretty much
that line right there. Soups inside here. Let's just sit and gravity
will take it down. Same thing, the other end. It's gonna count from that hairline wherever
that may be by the way, because sometimes it's gonna peel from one direction
or the other. It could be coming from
this direction over here, let's just say the
hairline where parts basically the
parting of the hair. Same thing. Let's just say
that's the center line. Let's say the part is over
here, It's to one side. It's going to go over that. Remember, think of a head like it's there and you
got to think in 3D, it's gonna be rolling
over the head. Same thing over here. And it's going to
come down this side. Come down this, let's just say gravity is gonna take it down. That's something you
want to keep in mind, but it really comes from the part of the hair
wherever that ends up. So really keep that in mind. That's a huge, huge, huge thing that took me
so long to understand. I mean, so not so long
to kinda understand. Like to follow a hairline because before I was just
like man who was gonna mess. But when you do that, it
really simplifies things down. That would be one hairstyle,
obviously another, let's say like a small
hairstyle, small hairstyle, common hairstyles where
there's bangs and the front. Every part of this stuff. You're going to draw
another head over here. And let's do a center
line over here. Let's find like
different segments, cedars, one segment right
here. On this side. The part and the heroin there, but you can barely see it. And you have the bangs
over here in the front. It's kind of like
separate segments. For the most part. Let's just say that
the size of the hair go down long again as well. You're, you're, you're
treating the part with the banks like an
entire other chunk. The way I like to
think about it. So I think about
like action figures. I mean, when you think about
action figures and they have the removal hairdos, sometimes that it's sometimes a Haredi will come in chunks. You'll have flank, the
front bangs here and then the part in the hairs back there
which you can hardly see. And then this pulls
down to that. You're thinking of
things in larger forums and then breaking them down. That's a big part of it. Whenever you think
of the strands, the strands are seated. I'm thinking about this large
chunk and then I'm drawing lines with the flow
of the hair, right? What what's the flow
there obviously, it's all going downward. Right? Kind of like a river. Hand-drawn thin lines. But they're all
wherever I put them, wherever I decided to put them, they're all going down down that same river down
that same direction. I'm not drawing any weird
ones like inward like that. But that's the biggest thing
you have to the hairline. Other hairstyles I
can think about. I'm not sure those are the
two biggest ones right here. There's find out what
the part is downward and as far as the
consistency of the hair, if you really want to make
it curly or something. Let me, let me go to
another page over here. If you want to make
it more dynamic, That's another thing
people like to make it look like the hair is
floating or some other. Let's find that
part. Well, let's find the center line first. Then let's find the part
in the hair in the center. And let's just say
it's really buoyant. Has got this kind
of floaty nature. You can totally do that. And you're totally designing
them almost like ribbons. I'm still thinking in big
shapes though. See that? I'm still thinking in large, like almost like
they're piece of blanket or something
flying in the wind. On this side. I still went, I'm thinking of is
I'm thinking of them as these large sheets. Designing these larger pieces
before I go in here and start breaking them up, breaking up these large
shapes into something. Say, you're thinking of
those large strands, designing those firsts
than breaking them up. But same thing all comes
from that hairline. Very, very big part of it. Let's do another more
flotation swan like that. Let's do it in their head.
Line from the center line so we know where we're
going to say there's a lot of wind on this
on one direction. So let's find the center. Well, let's find the part
in the hair over here. Let's add the parts
on this side. Over here. Seeing how I've kind of
wraps around the head. Say this one goes around
the back of the head here. But for the most part it's going to think of these giant chumps. We're designing these
chance and they'll change the shape
of that one over here. Something like that. Maybe the neck and the way. Usually a good
idea is to do like different sizes of these spikes, these prongs sticking
out maybe like a small, a big and a small. But you want to vary it up, maybe like another
strand out here. Good toying with these
larger shapes first, then we're gonna go in here. Let's start breaking
them up a little bit. Start breaking them up.
But it's always starting from large, large shape. Designing that shape. Maybe big, small, vary
it up a little bit. Make it all flow in a certain direction because it's going to look like it's
blowing in the wind there. When you do that, then
you start going in and pulling out small areas. So he toyed with it. Hopefully that makes sense. Like I said, find that hairline design largest shapes
and then break those up. That's huge. That's what I do with
every single drawing. Okay, so let's move on to
the demonstration section.
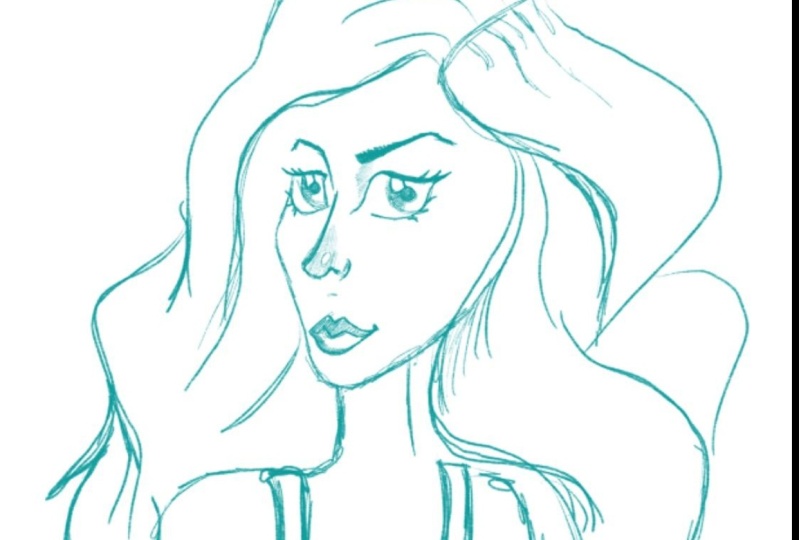
7. Demonstration of Entire Process: Let's go over a
demonstration here. Circle here, straight line
down, the center line. Fun side of the face. So here going very light still. It back out over here up. Everything's gonna be
light lines and I'm going to go darker as it goes. Finding the Bonneville for the part in the hair,
It's gonna be to decide. Going down over here, pulling back and finding that those giant shapes I talked
about with the hair. Think of them like almost
like giant sheets of Lincoln. When he call it my brain's wig. And out here, we're
going to call it like it's like big
pieces of paper, big pieces of cloth. I like to think of it
almost like drapery. Drapery line down here. Curved line over here. Let's just say for the shoulder. She's looking over her shoulder
and the line over here. Maybe like I'll I'll draw like live on top of the neck there. It'd be like a vignette. Then let's go over here. Let's go to the hair,
same on this side. Going over, Let's say it's
going to flow a little bit. Again, we're not gonna go
too far into the hair. Everything's really light. Let's start getting into
some darker values here. Alright. Finally, I'm gonna draw
a line for the eye. Goes talk about the nose. Sunglasses over here. I'm doing this
stuff very light so you can hardly see on the page. Like I said, it'll
start going into the darks just in bed here. On your sheet here for the nose. The mouth here. Okay, I guess we're gonna
start getting into some, sharpen this a little bit. Start getting into
some darker stuff, at least with the face. Let's go over here. Let's start with the eye. Go up over here. Arc, line down here. On this side. Find this side
the same thing over here. Down, making those shapes
I talked about over here. Curve, curve. Cheek outside for the line of the cheek, curving out down. Over here, following the
edge of the nose over there. Upturned nose I talked about line over here. So this is almost
like layer one. I'm going over some,
just some general lines. And that's the first
thing I'm doing. Line over here, underneath
the sound of the lip line up here at the top. Here for the lower
portion of the lip. I think the chin needs
to be more pointed. Curved line back down. I go over here and give a
little more proof to the hair. For the most part, I'm just kinda talking
my way through this. You know, as we're doing
is so now we're gonna go into the AI. Can
do that highlight. I talked about center part
of the eyes, dark line, dark curve or a line, line, line down
here on this side. Line, line, line over here. I talked about the inside
of the eye right there. What I'm gonna do now
is I'm going to do the overarching fake eyelash, eye shadow or the eyelashes stuck thick line right
there, like I mentioned. Here just a bit. So you get that thick
eyelash and I'm gonna pull a line out right here for another line out that therefore
the eyelash or they're making it more, I'll I
should stick it out. Good job. Getting up where we
hear the bottom eyelash just a bit, not a lot. Here, this side. Same thing. Thick eyelash. Line over here, line over here. Thickening up the eyebrow
over here on the far end. Thickening up this one as well, just darkening it up over here. Give me a little bit more, a little bit more
of a line there for the what's called the
curvature of the face here, I'm sorry, the face, the
nostril backline here. Just darkening some
of this stuff out. Nothing while pulling up. Going over here, darkening up. Now, right now I'm more or
less just darkening up what I've already put
them during this up. Alright, going over here to the lip area and literally
I'm just darkening up stuff. I'm gonna fill in the top lip. All right. Let's go into the
nose right here. I'm gonna, I'm gonna
do what I did before. Put like a little
circle here maybe at the end, very light circle. And then I'm going to just give it a little bit
of value right there. Very, very light. Just at the edge
of the nose here. Same thing right here underneath
the eye connecting it, I'm storing a very little, couple of little thin lines. I wouldn't even call
that shadow honestly. It's they call it a Halftone. Just very little
like heparin it on there for twin the
eye, the eyebrow. Now, let's go over here
and get into the hair. Pull over here. These strokes. I'm already going to have it down there because
it is already threw them in there and just throwing
these lines right here. Pulling a couple out. Don't make them all
identical length, right? You want to make them
various lengths up over his little bounce top of
the hair out down here. Same thing, just following this flowy line or are thinking about it like I'm
thinking about drapery. Think about it like I
think about drapery, that's really the
best metaphor on Found and what's
helped me the most. Obviously we have different hair textures and stuff like that. You can think about it
like something else. But as far as those are simple, like those, like big
hair, like for example, my hair my hair is kind of Afro is obviously it's
like I'm the guy, but I mean, that kind of Harris is simpler than long hair
and it was just long. Here's the problem.
We're problem with. Obscuring. Problematic because of the waviness and where
it comes out of it. But again, thinking about this, where it, where it parts,
where parts didn't. That's a huge, huge thing. We're here at this here. These two bubbles
right here might be a little much, it
might be too similar, might change the shape a
little bit by throwing an extra strands sticking out of there. Just to
kind of mix it up. I thought I was just
looking too repetitive like the bulk liquid snowman. Go over here and let me
go up into a shoulder. Didn't really go
over that but it's just the shoulder really. Not hard. This is the bump. Like a line here like she's
address on or something. So we're just doing
like a flat images and then a line across
for the outfits. She probably has honor, a line over here for the
inner armpit pulling down, but we're not really going to go over that part that much. It's just how she's position. Line over here for the clavicle, line over here, it's gonna
go off over there somewhere. We're going to have the other
side of her arm over here. We'll have her chest
her arm over here. I guess over here there'll be
the other strap of address. And I can fill
this in over here. Just went off like a black top or something like that. It's
going to pull back. Again. We don't really need
a lesson for that. It's just literally,
it's like a, what we're looking at here. Going over here,
finding the rest of the hair strand over there sticking out. And just kind of go
back to the hair and that's pretty much it. If you have, you can obviously throw in a
little bit of more likely to enter the back and you're going to see the
back of the hair over here. The rest of it would
just be like strands. But that's pretty much it. That attractive female type. That would be kind
of beginning to end. Alright. Thank you so much. Let's move on to the conclusion.
8. You are Awesome!: Thank you so much
for completing this. You are amazing. So now comes the, I wouldn't say a hard
part, but the fun part. What I want you to do
is I want you to draw as many female heads
as you can and you're going to slowly
get it over time. And I want you to post
anything to me on here, on this place onto a post-it. And the cool part is going
to hold you accountable and I'm going to reply to every
single one. All right? Really, really fun process. I know you're going to love
it, but you are amazing. So congratulate yourself
and you are awesome. Alright? If you want
to find me again, I'm all over Skillshare here, so absolutely come
by, stick around. The other thing I want you
to do is to absolutely hits that Review button
and I will add on anything else that maybe
you have any questions. I will totally add another
video in here to appease that. Thank you so much, you're amazing and I'll
see you next time.
 Enrique Plazola, Learn to Draw the Easy Way