How to Draw Anything with Basic Shapes
 Gabriela Benke, Watercolor With Gaby
Watch this class and thousands more
Watch this class and thousands more
Lessons in This Class
-
-
1.
Introduction
0:40
-
2.
Materials
0:29
-
3.
Warm Up Exercise 1
0:45
-
4.
Warm Up Exercise 2
0:45
-
5.
Basic Shapes
0:33
-
6.
Drawing a Bird Step by Step
3:01
-
7.
Live Example
6:30
-
8.
Playing With Proportions
1:00
-
9.
Final Project
0:50
-
-
- --
- Beginner level
- Intermediate level
- Advanced level
- All levels
Community Generated
The level is determined by a majority opinion of students who have reviewed this class. The teacher's recommendation is shown until at least 5 student responses are collected.
1,987
Students
19
Projects
About This Class

In this class, you’ll learn how to draw anything in using basic shapes. Drawing can be hard sometimes, but it doesn’t have to be like this. You can learn how to draw in an easy and fun way.
We’ll do a bunch of exercises together and for your final project you’ll choose an three reference images and draw them using the method you’ve learned in this class. And by the end of this course you’ll have all the tools you need to keep practicing and improving your drawing skills.
You don’t need any prior knowledge. This course is for everyone who want to learn how to draw or want to learn some exercises to improve their drawing skills.
All the exercises can be done using only pencil and paper, so you don’t have to worry about getting fancy materials.
What you’ll learn:
Warm-up exercises: we’ll do some warm-up exercises to improve your linework and make you more confident in drawing;
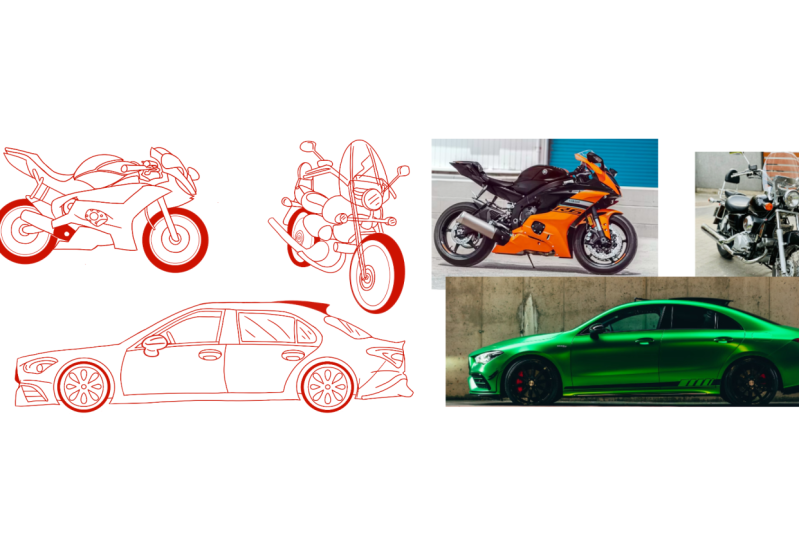
Observing: you’ll learn how to observe and break any object into basic shapes, so you can draw it more easily;
Drawing made easy: you’ll learn how to draw step by step by breaking the subject into basic shapes.
Live Example: I'll show you a simple live example that you can follow along with me step by step.
Playing With Proportions: you're gonna learn how to play with proportions and stylize your drawing.
----
Music used in this course:
Carefree by Kevin MacLeod is licensed under the license Creative Commons Attribution
Origin: Song
Artist: Incompetech
Meet Your Teacher

Hello! My name is Gabriela and I'm an illustrator. I live in Brazil with my husband and our two cats.
I have been drawing since I was a little kid and I'm always studying and improving my art. My goal is to share my knowledge and passion for illustration with you.
See full profileHands-on Class Project
Your final project is to choose three reference images and draw them putting in practice what you learned in this course. Start with the shapes, refine your drawing and then finish your drawing according to your art style.
Throughout the course, we also did some exercises together. Take pictures of your process and share them in your project too.
I can't wait to see your project! I see and give feedback to all projects in all my courses!
If you have any question, don’t hesitate to ask me!


Class Ratings
Why Join Skillshare?
Take award-winning Skillshare Original Classes
Each class has short lessons, hands-on projects
Your membership supports Skillshare teachers
Learn From Anywhere
Take classes on the go with the Skillshare app. Stream or download to watch on the plane, the subway, or wherever you learn best.