How to Draw and Paint a Love Bug Ladybug on a Leaf: Cute Art Lesson for Kids & Beginners | Em Winn | Skillshare

Playback Speed


1.0x


  • 0.5x
  • 0.75x
  • 1x (Normal)
  • 1.25x
  • 1.5x
  • 1.75x
  • 2x

How to Draw and Paint a Love Bug Ladybug on a Leaf: Cute Art Lesson for Kids & Beginners

teacher avatar Em Winn, Teacher, Art Instructor, Artist

Watch this class and thousands more

Get unlimited access to every class
Taught by industry leaders & working professionals
Topics include illustration, design, photography, and more

Watch this class and thousands more

Get unlimited access to every class
Taught by industry leaders & working professionals
Topics include illustration, design, photography, and more

Lessons in This Class

    • 1.

      Introduction and Supplies You Will Need

      1:16

    • 2.

      Step 1: Draw a Love Bug Design

      6:08

    • 3.

      Step 2: Paint the Design

      3:03

  • --
  • Beginner level
  • Intermediate level
  • Advanced level
  • All levels

Community Generated

The level is determined by a majority opinion of students who have reviewed this class. The teacher's recommendation is shown until at least 5 student responses are collected.

1

Student

--

Projects

About This Class

Are you looking for a fun and engaging watercolor painting project for your child? 

Are you searching for an art project that will ensure artistic success and confidence?

Would you like an experienced art teacher guiding your child through the creative process?

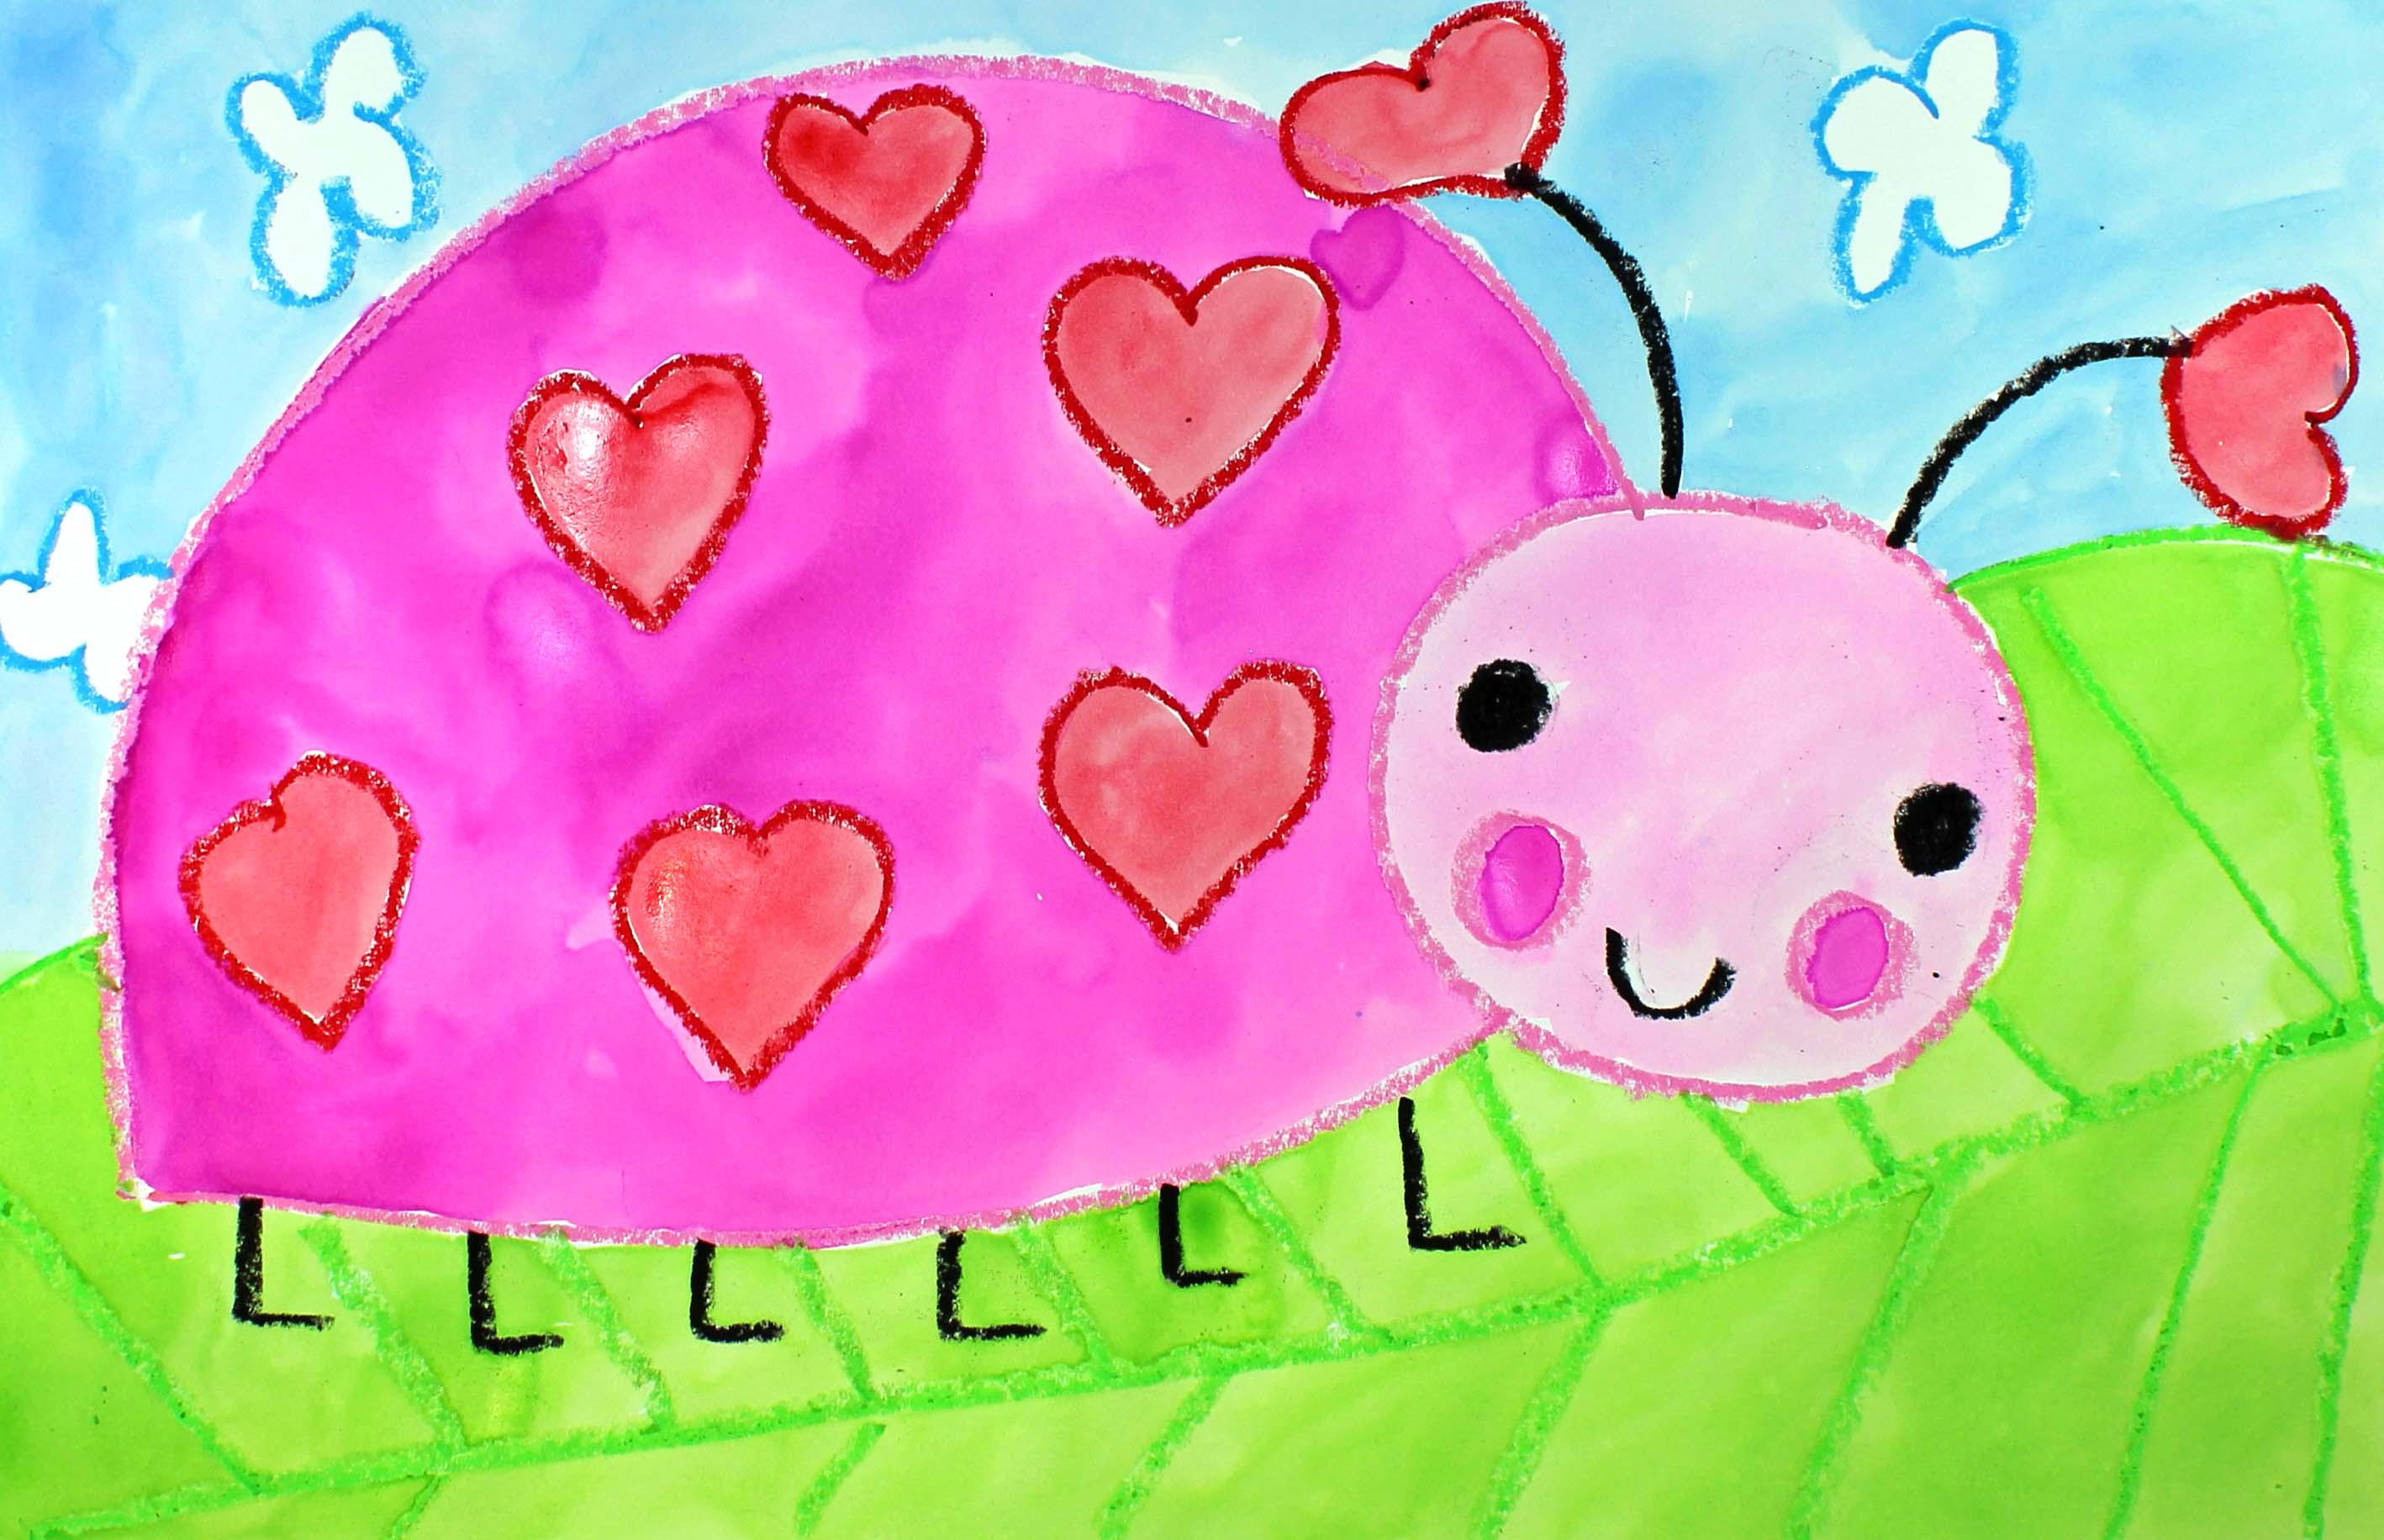
This Love Bug drawing and watercolor painting project may be just what you are looking for! Designed with beginners in mind, this project is perfect for first-time painters and children ages 5+. By following along with me, step-by-step, the beginner artist will learn the skills to create masterpieces of their own long after this project is complete.

Steps in this art project:

  • Step 1: Draw a Love Bug Design
  • Step 2: Paint the Design

The process used to teach this project is a step-by-step method that will inspire and delight the beginner artist into drawing and painting action! This process involves observing, following instructions, and creating until the student is happy with the outcome.

Students will learn basic drawing and watercolor painting techniques and apply these techniques to complete this project. This drawing and painting project is designed to give beginners the skills they need to begin their artistic journey into self-expression, reflection, and creative thinking.

Supplies and materials needed for this project:

  • Watercolor Paint Set
  • Watercolor Paper
  • Paint Brushes
  • Oil Pastels or Crayons
  • paper towel
  • bowl of water
  • mat to protect work area

Let the creative fun begin!

Meet Your Teacher

Teacher Profile Image

Em Winn

Teacher, Art Instructor, Artist

Teacher

Hi. My name is Em Winn and teaching art to children is what I love to do! I pride myself on creating dynamic, meaningful, and engaging art lessons that are taught in a relaxing and joyful way. I have over 20 years teaching experience in the elementary classroom and in the art studio, and I feel that I have a good grasp on how to create a learning environment that makes children feel happy, motivated, confident, and successful. Let the creative fun begin!

See full profile

Level: Beginner

Class Ratings

Expectations Met?
    Exceeded!
  • 0%
  • Yes
  • 0%
  • Somewhat
  • 0%
  • Not really
  • 0%

Why Join Skillshare?

Take award-winning Skillshare Original Classes

Each class has short lessons, hands-on projects

Your membership supports Skillshare teachers

Learn From Anywhere

Take classes on the go with the Skillshare app. Stream or download to watch on the plane, the subway, or wherever you learn best.

Transcripts

1. Introduction and Supplies You Will Need: Hi, friends. How are you? I hope you're having a great day today. I'd like to introduce you to this project. This is a drawing and watercolor painting project that I designed, especially for kids. You do not need to have any drawing or painting experience at all to be successful with this project. I will take you step by step through all the steps that you need to take. Today, we are going to be creating this cute love bug on a leaf. Let's go over the supplies and the materials that you will need for this project. The first thing that you'll need is a piece of watercolor paper. You will need some watercolor paints. You will need some clean water in a bowl or a cup, and you will need a paintbrush. You will need either a set of crayons or a set of oil pastels, and you will need a paper towel. So go ahead and gather all of those supplies and materials, and I'll see you back here in the next video. 2. Step 1: Draw a Love Bug Design: In this step, we are going to draw our love bug design. So let's get started. The first thing that we're going to do is decide what color we would like to draw our love bug. I'm going to draw my love bug, pink. So you can choose whatever color you like. I'm going to choose pink, and let's get started. So the first thing we're going to do is we're going to come to the right side of our piece of paper, not all the way to the edge, but a little bit in. And we're going to make a very large oval, very large oval shape. This is going to be the head of our ladybug. Now that we have the head of our ladybug, we're going to make the body right here. So to make the body, we're going to make a curve line. We'll start about right here. We'll go up. And curve around and then come down. I'm pushing pretty hard with my oil pastel. Now that we have our curve line, this is the back of our ladybug. We're going to close up our ladybug with another slightly curved line, and then we'll go back to the head. Okay. So we have our oval. We have our curve, and then we have the bottom part of our ladybug. Alright, now I think I'm going to make some cheeks right here. So I'm going to use my pink. And then I think that's it for the pink four right now. Now what I'm going to do is I'm going to switch colors. I'm going to choose black, and I'm going to make the other features in my ladybugs face. So I'm going to make some eyes, and I'm just going to make some round circles. Now I'm going to make a little smile. And then I'm also going to make some little antenna. So one coming out here and one coming out here. I feel like I'm finished with my face and my head, so I'm going to come down here to the area where the feet are going to be, and I'm going to make six little legs with feet. So 12, three, four, five, and six. Those are just like the letter L's, right? Mm hmm. Alright, so now I have my features of my face, and I have my feet. I'm going to see if there's anything else that I need to use the black for, and I think I'm finished with the black for right now. Now what I'm going to do is I'm going to create a little bit of detail inside the body of my ladybug. So I'm going to take my red, and I'm going to make some hearts on the body of my ladybug, and I'll spread them out. If your hearts don't look exactly like mine, that's okay. All right. Now, I think what I'm going to do is I'm also going to put some hearts on my antenna. I think that'll be cute. You don't have to do that if you don't want to, but I think it looks cute. All right. Now I'm going to take a look around, see if there are any other places that I'd like to put a heart. I think I might want to add one more heart here, a smaller one. Yeah. There we go. I think that was a good decision. Alright, now I'm going to put my red away. And I think what I'm going to do is I am going to make a leaf for my ladybug to stand on. So I'm going to choose green, a light green. And you can make whatever kind of leaf that you like. I'm going to start here with my leaf line, and I'm going to jump over the body of my ladybug, and I think I'll come out about right here. And then, so this part down here will be the leaf of my ladybug. We'll add some details to the leaf. Alright. Now, I'm finished with my leaf design, and I'm going to put my green away, and I think I'd like to add a few clouds in the sky. So I'm going to choose this lighter blue because a lot of times in my artwork, I like to add clouds. So I'll put just maybe two or three small clouds. And I like to make really big fluffy clouds. There we go. Alrighty. If there's anything else that you feel like you'd like to add to your ladybug design, go ahead and do that now with any color that you like. And when we come back, we will start painting our design. 3. Step 2: Paint the Design: In this step, we are going to add some watercolor paints to our design. So let's get started. The first thing that we're going to do is we are going to add a drop or two of water to each pan of paint. And what this will do is it will soften the paint up a little bit so it is easier for us to use. So I always try to take a moment to do that before I start using my watercolor paints. So let me go ahead and get those ready. And, Now I'm going to turn my attention to my love Bug design, and I think I'm going to paint my love bug pink, my heart's red, my leaf green, and my sky blue. Of course, this is your artwork and you can choose any colors that you like to paint your love buug. So let me get started with that. I'm going to start out with the pink, and I'm going to go right around those hearts because I want to make sure that I paint those red. And what I'm going to do is I'm just going to speed up this video so that you can watch me. Alrighty friends, I'm finished with my painting, and I'm really happy with it. I think that my love bug looks great. I wanted to mention a couple of things. What I did for the head and the face is I wanted a little bit of a lighter pink so it would stand out a little bit from the body. So what I did is I mixed some pink with quite a bit of water, and it made a lighter pink. Remember, if you like a lighter color like this, you add more water. If you want a darker color like this, you add more paint. Also, I'm not quite sure if you can see on the video, but we have here the leaf, and you can see the details of the leaf in real life, but I'm not sure if you can see this on the video. So I hope that you had a lot of fun with this project, and I hope that you have a really good day. I will see you next time.