How to Draw & Paint a Big Daddy Shark for Kids & Beginners | Em Winn | Skillshare

Playback Speed


1.0x


  • 0.5x
  • 0.75x
  • 1x (Normal)
  • 1.25x
  • 1.5x
  • 1.75x
  • 2x

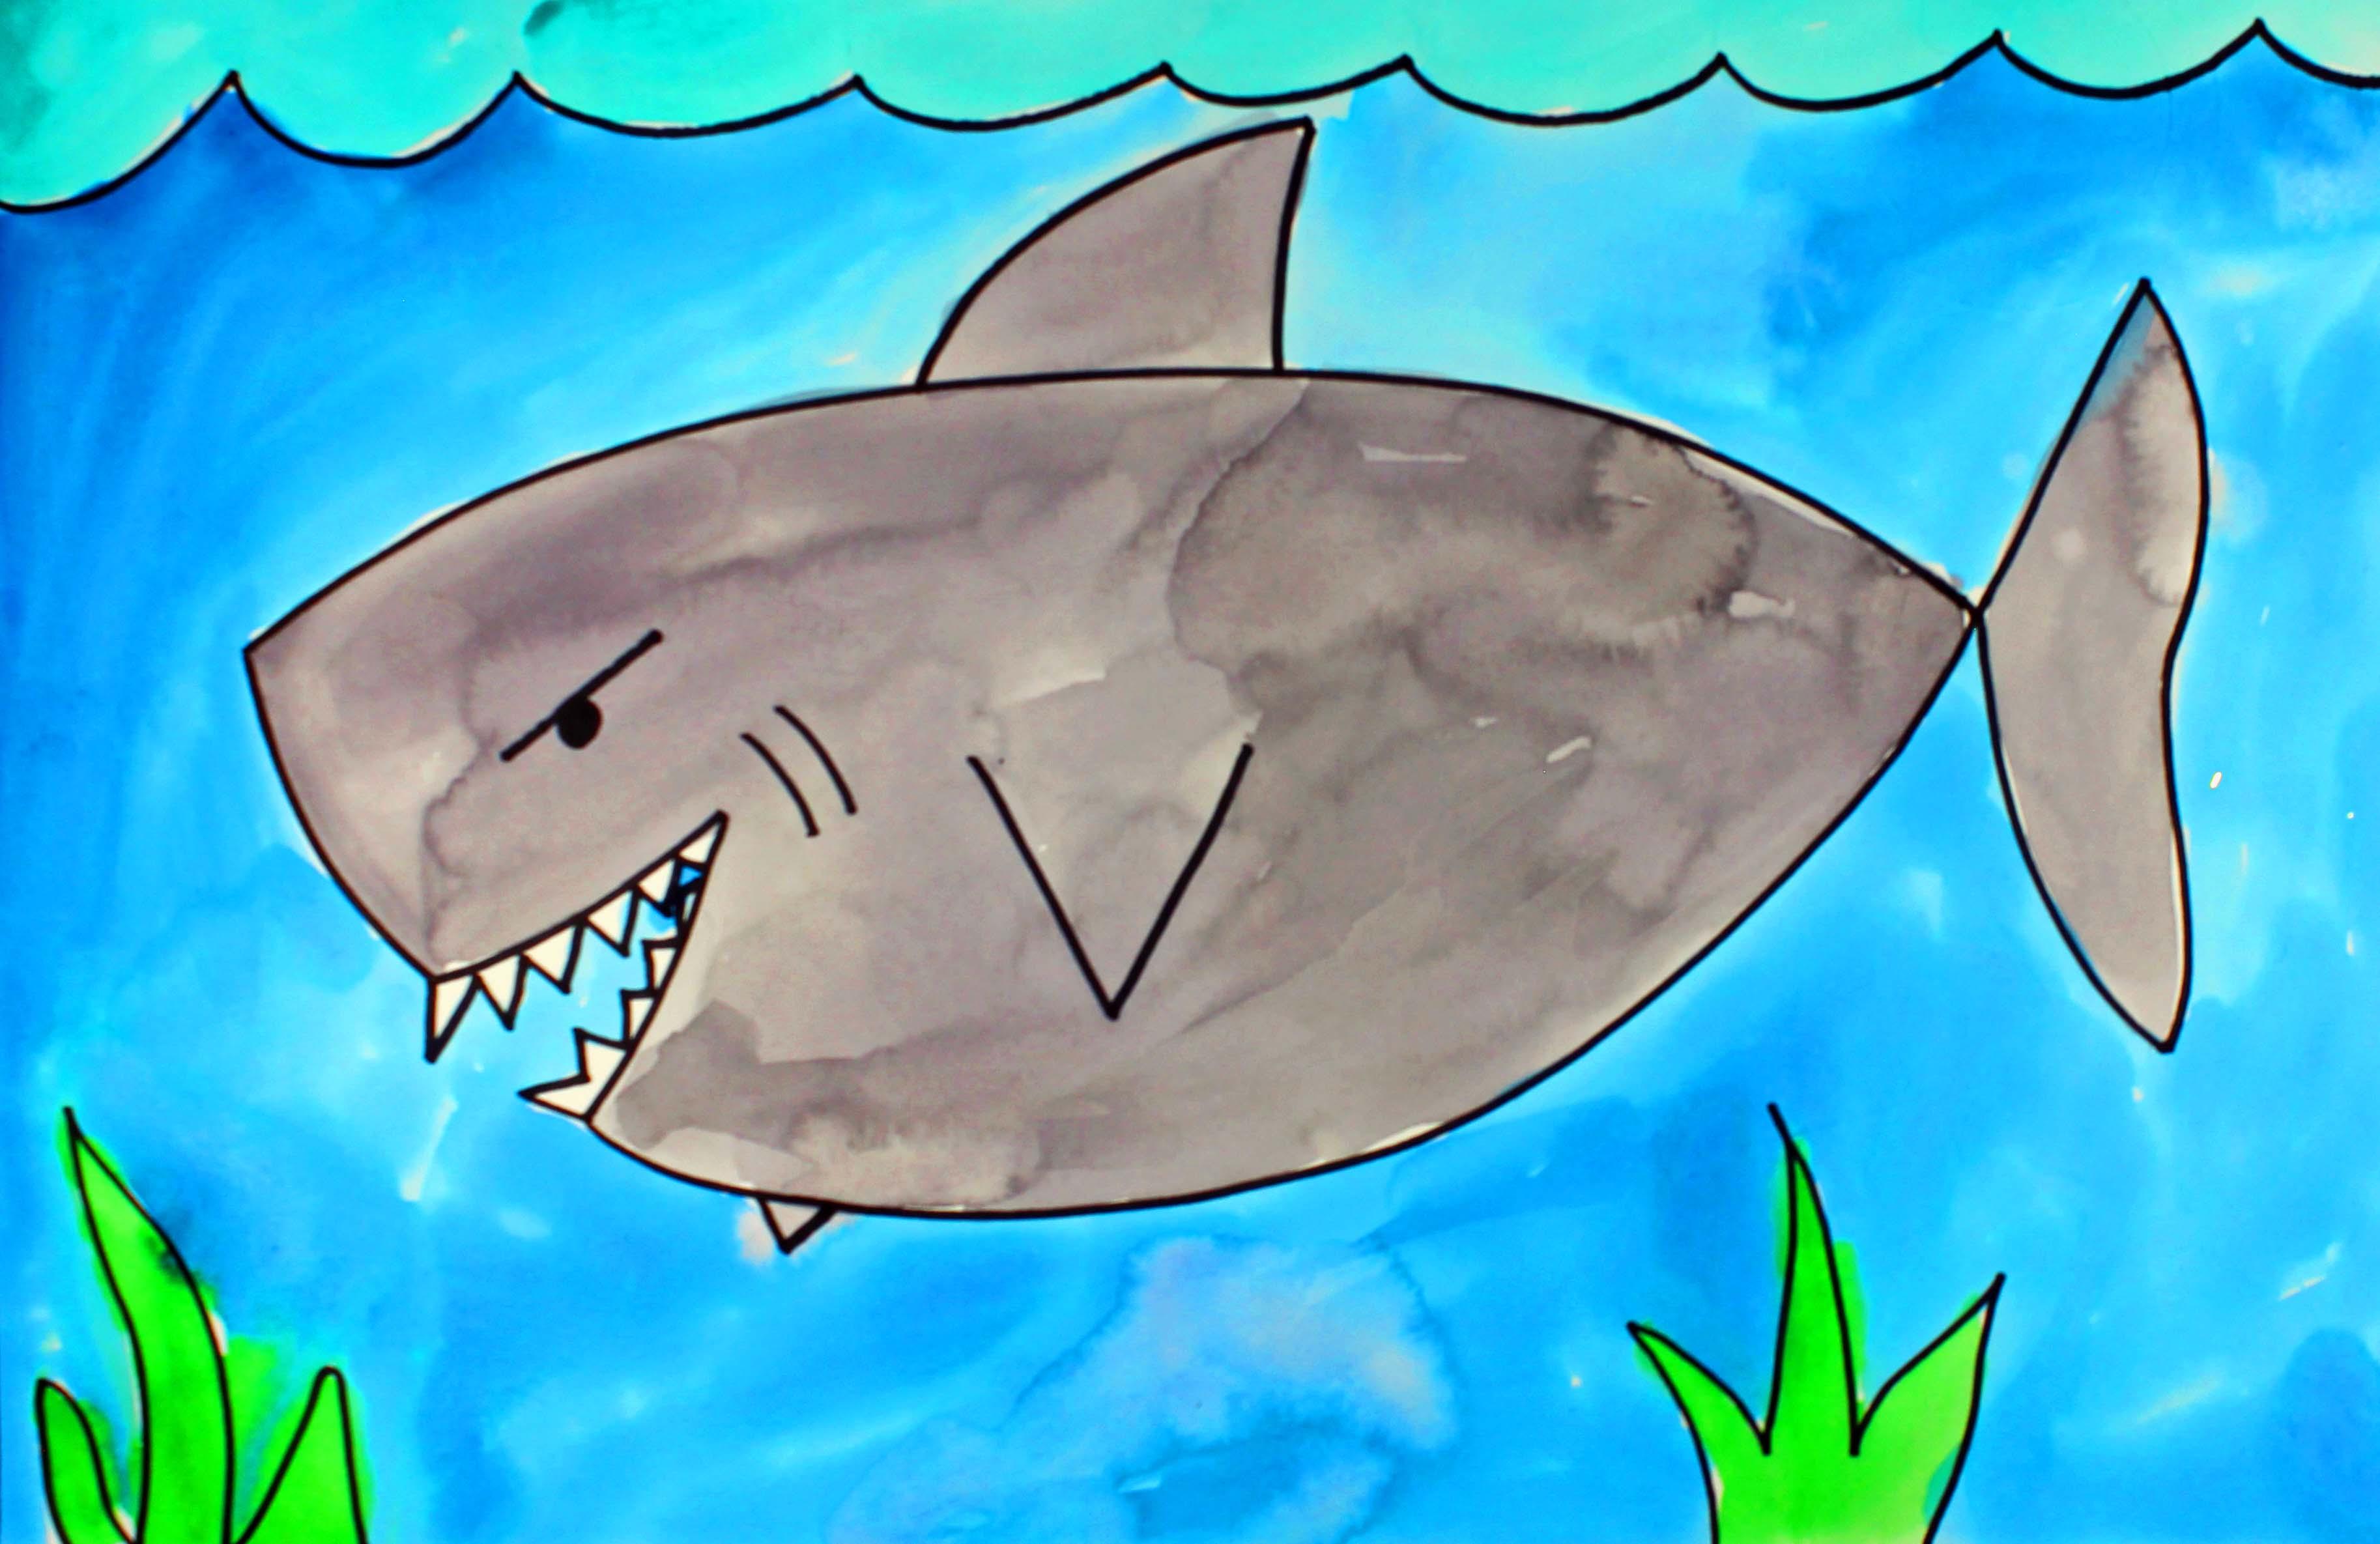
How to Draw & Paint a Big Daddy Shark for Kids & Beginners

teacher avatar Em Winn, Teacher, Art Instructor, Artist

Watch this class and thousands more

Get unlimited access to every class
Taught by industry leaders & working professionals
Topics include illustration, design, photography, and more

Watch this class and thousands more

Get unlimited access to every class
Taught by industry leaders & working professionals
Topics include illustration, design, photography, and more

Lessons in This Class

    • 1.

      Introduction and Supplies You Will Need

      1:20

    • 2.

      Step 1: Draw a Big Daddy Shark

      4:35

    • 3.

      Step 2: Paint the Shark Design

      3:24

  • --
  • Beginner level
  • Intermediate level
  • Advanced level
  • All levels

Community Generated

The level is determined by a majority opinion of students who have reviewed this class. The teacher's recommendation is shown until at least 5 student responses are collected.

1

Student

--

Projects

About This Class

Are you looking for a fun and engaging watercolor painting project for your child? 

Are you searching for an art project that will ensure artistic success and confidence?

Would you like an experienced art teacher guiding your child through the creative process?

This Big Daddy Shark drawing and watercolor painting project may be just what you are looking for! Designed with beginners in mind, this project is perfect for first-time painters and children ages 6+. By following along with me, step-by-step, the beginner artist will learn the skills to create masterpieces of their own long after this project is complete.

Steps in this art project:

  • Step 1: Draw a Big Daddy Shark Design
  • Step 2: Paint the Design

The process used to teach this project is a step-by-step method that will inspire and delight the beginner artist into drawing and painting action! This process involves observing, following instructions, and creating until the student is happy with the outcome.

Students will learn basic drawing and watercolor painting techniques and apply these techniques to complete this project. This drawing and painting project is designed to give beginners the skills they need to begin their artistic journey into self-expression, reflection, and creative thinking.

Supplies and materials needed for this project:

  • Watercolor Paint Set
  • Watercolor Paper
  • Paint Brushes
  • Permanent Marker
  • paper towel
  • bowl of water
  • mat to protect work area

Let the creative fun begin!

Meet Your Teacher

Teacher Profile Image

Em Winn

Teacher, Art Instructor, Artist

Teacher

Hi. My name is Em Winn and teaching art to children is what I love to do! I pride myself on creating dynamic, meaningful, and engaging art lessons that are taught in a relaxing and joyful way. I have over 20 years teaching experience in the elementary classroom and in the art studio, and I feel that I have a good grasp on how to create a learning environment that makes children feel happy, motivated, confident, and successful. Let the creative fun begin!

See full profile

Level: Beginner

Class Ratings

Expectations Met?
    Exceeded!
  • 0%
  • Yes
  • 0%
  • Somewhat
  • 0%
  • Not really
  • 0%

Why Join Skillshare?

Take award-winning Skillshare Original Classes

Each class has short lessons, hands-on projects

Your membership supports Skillshare teachers

Learn From Anywhere

Take classes on the go with the Skillshare app. Stream or download to watch on the plane, the subway, or wherever you learn best.

Transcripts

1. Introduction and Supplies You Will Need: Hi, friends. How are you? I hope you're having a great day today. I'd like to introduce you to this project. This is a drawing and watercolor painting project, a Shark. So I hope that you have fun with this project. Let's get started. You're probably wondering what supplies and materials you will need for this project. So let's talk about that. The first thing that you'll need is a piece of watercolor paper. You will need some watercolor paints. You will need a glass or a cup of clean water and a paintbrush. I use a paint brush that's this size, but whatever size paint brush you have, go ahead and use that. It will be just fine. You will also need a permanent marker. A permanent marker is a marker that won't run around with a color if you add water to it, and you'll need a paper towel just in case you have a spill or a cleanup. So go ahead and gather those supplies and materials, and I'll meet you back here in just a minute. 2. Step 1: Draw a Big Daddy Shark: All righty friends, so let's get started drawing our shark. The first thing that we're going to do is we're going to take our marker, make sure that you put the cap on the back of your marker so it doesn't get lost. And we're going to start here maybe about 3 " in. So we're going to go about 3 " to the right, and we're going to make a slightly curved line. And when I say slightly, I mean slightly. We are not going to make a big, big curve line like this. It's going to be slightly curved. Let me show you what I mean. So we're going to come on our piece of paper. And then we're not going to go all the way to the end because we need to make sure that we have room left for his tail. So I have my really long curve line. This is going to be the top in the back of our shark. Then we're going to start back here, and this is going to be our shark's nose, and we're going to come down with a curve line like this. You can already see the shape of the nose, right? Now, after you get maybe about 3 " or so, we're going to come in. With a curve line, and then we're going to come back down with another curve line. This is going to be our shark's mouth. Now what we're going to do is we are going to attach the bottom part of our shark's mouth to this back part of his body. So here we go. We want a curve line. And then attach. Okay. So now you can see the actual body shape of the shark. In the next step, let's put our tail and our fins on our shark. So let's come out from the point here and make a slanted straight line like this. And then let's move to the bottom and make a slightly curved line like this. Now we're going to come down. Just like that. So it's a little bit of a wavy line. Now we're going to come back up here and we're going to make a curve line. It's almost in the middle, but a little bit to the front. Curve line, and then a slightly curved line back down to the body. That's his top fin. Now let's make his side fin. It's just a big V. And then let's make another V, but very small over on the other side because this is the other fin on the other side of his body. Alright, now we're going to move to his teeth, and let's make some really big and ferocious teeth. This is how I like to make my shark's teeth. If you want to make his teeth a different way, go ahead and do that. Alright, now let's make two lines right here and let's make his eye. And then let's make a line that goes above his eye. This is like his eyebrow area, and it shows expression. So it makes him look a little bit more fierce. Alright, let's add a little bit of detail. Let's add a little bit of detail to the background. So I'm just going to make some lines going like this, and these are going to represent the ocean. And if your fin pops out the top, that's okay. That's just showing that his fin is popping out on the top of the waves. And then if you'd like to make something down here underneath or to the sides, you can go ahead and do that. I'm just going to make some plants coming out like this. If you want to make some small fish, you can go ahead and do that, as well. It's up to you. This is your artwork, and you should be able to do exactly what you want to do. So I think that I'm finished, and I feel like my shark is pretty ferocious and that's the look that I wanted. So when we come back, we will start painting our sharks. 3. Step 2: Paint the Shark Design: Alrighty friends, welcome back. In this step, what we're going to do is we are going to apply some watercolor paints to our shirk. And the first thing that I'm going to do is I'm going to prepare my paints to make sure that they're nice and soft and ready for me to start painting. So I'm going to put one or two drops of water inside each pan of paint, and I'll let that sit for just a minute. Let's talk about the colors that we are going to be painting our shark and our background. I am going to choose to paint my shark a grayish color, but you can choose the colors that you'd like to use for your own artwork. So to make a gray color, what you need to do is you need to put a little bit of water inside one of your paint wells and then add just a little bit of black. Black is a very powerful color, so you will notice that you just need a very small amount of black and more water than black to make gray. So I'm just going to be doing that. And then I'm going to test out that color. To see how I feel about it. And then, oh, I think that that's perfect. If you want your paint to be a little bit lighter, you add more water. If you'd like your paint to be a little bit darker, you add more paint. That's one of the rules of watercolor painting. Alright, so I'm just going to take a minute to paint this shark, and then after I do that, I am going to start on my background. And I'm going to remember that if I touch one color with another, then the colors might run around together, and that's just the nature of watercolor paint. So you can watch me. I'll speed up this video. And Alright, friends, I'm back, and I'm finished with my shark painting. I painted all of my shark and the background except for his teeth. I wanted those to stay white. So it's up to you whether or not you'd like to paint those shark teeth. I hope that you enjoyed this project. I'll see you next time. Okay.