Transcripts
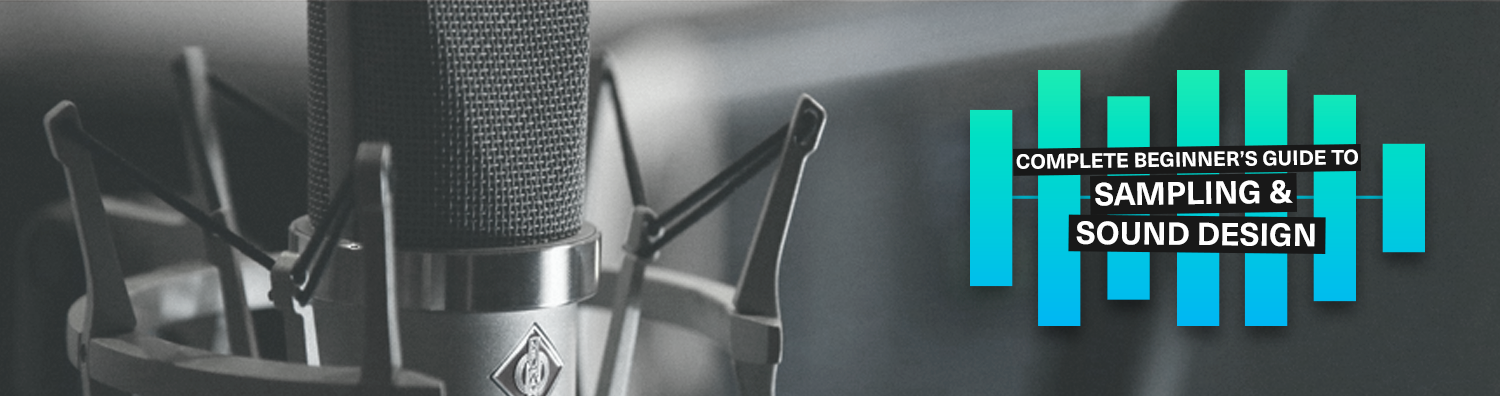
1. Course Overview: Welcome to the complete
beginners guide to sampling. This course for musicians of all levels is a
comprehensive guides or audio sampling and virtual
instrument creation for composition
and Sound Design. My name is Steve lifted and
I'll be your instructor. I've been creating music electronically for
over 30 years, and during that time
I've gained experience designing sounds
and composing and producing music using a variety of software and
hardware samplers. The course contains
over two hours of video lessons and
as in-depth and detailed explanations of using sample engines and how the different elements
work together. How to take any
sound and make it playable across
your midi keyboard. Why and how creating your own sampled instruments can really help define
your own unique sound. How to use noise reduction,
waveform editing loops, round robins and
velocity layers to make ultra realistic sound
in virtual instruments. How to use envelopes, low-frequency
oscillators and filters to modulate your instruments. And how to layer sounds
and add effects such as delay and reverb to make your
sounds more interesting. During the course, you'll see every step taken in the creation of four unique
sample-based instruments. This is a deep dive into all
of the common elements of instrument creation and
sound design using samplers, whether you are brand new to sampling or an experienced
sound designer, beat maker or producer. This course will help
you to really understand how to construct exactly
the sound you're looking for and make super realistic sample-based virtual
instruments from scratch. We'll be using the built-in
samples within Logic Pro X. Throughout the course. I've included a short
introduction to Native Instruments contact at the end to show
how you can apply the concepts you've learned
to any sampler and know precisely how to use it to get the sound you need for
your compositions. So join in and learn the
art of sound design for music production using sampling to create any sound
you can imagine.
2. 1 Introduction: Hi there, my name
is Steve method and this course is gonna be
an Introduction to Sampling. Now, in this course
we're going to look at what sampling is and why
you would choose to use it. We didn't look at exactly
how sampling works. We can find out how
to get samples, including recording our own. We're going to take the
samples and maintenance of playable instruments
and will actually be not just talking about it, but actually making insurance. So we can play along as
the course progresses. We're going look at
sound design techniques and how we use modulation
and envelopes, filters and effects to create interesting sounds
from the samples we got from the
sounds of the report. And then we're going to
look at how we can make more interesting and
realistic instruments using round robins
and velocity mayors, stuck in sounds on top of each other to make a
really interesting. Now throughout the
course with Libya creating a whole range
of sampler instruments. And some of those
instruments have been used to create the trap you can hear playing
in the background now.
3. Prerequisites: So what do you need to get
the most out of this course? While you're certainly going to need a computer and you'll need some kind of digital
audio workstation. Throughout this course,
I'll be using logic, but this will work in any
digital audio workstation. I will be using the
logic specific samplers. But really the idea
of the course is to teach you the concepts of sampling and how
sampling works. And that should
translate very easily on to whichever sampling
engine you choose to use. There are good
sample engines built into most of the popular DAWs. As I said, I'll be using logic, but I know that able to turn and Cubase and
others like it has got very similar and fully
functional engines within them. Right at the end
we're going to look at different sample engine, one called contact, which is separate to your digital
audio workstation. And just really just
to show you how the concepts and the
techniques I've shown you throughout the course
runs can translate into different Sampling engine. I would definitely
recommend that you listen to the
course on headphones. Certainly you're going
to want headphones or very good speakers to create silence and to do
any kind of sound design. Ready to hear the nuances and to hear things like
noise in the samples. Finally, I would recommend
that you use some kind of midi controller keyboard
is absolutely possible to create samples and to play your samples even without the use of a
midi controller keyboard. But it will make things
much, much easier for you.
4. How sampling works: So what exactly is sampling and why would
you choose to use it? Well, if you've taken
my previous course, which is an introduction to
synthesis and sound design. You'll probably recognize
this diagram on here. This is the common
architecture of a synthesizer. And we can see that we have an oscillator,
filters, envelopes, low-frequency oscillators
and amplifiers, and all these things
combine to create sound. Now the sound is
actually generated at the oscillator right at the
beginning of the synthesizer. And it's triggered typically by a midi controller keyboard
or a keyboard on a, on a harbor synthesizer. Sampling simply replaces the oscillator with
audio samples. So it takes actual audio files
that have been recorded, typically from
either an instrument or some other kind of sound. And uses that as a sound
source rather than the oscillator that
you would normally get inside a synthesizer. But the rest of the items, the rest of the architecture is actually very, very similar. And certainly if
you're well-versed with using synthesizers, you'll find that sampling has gotten a lot
of common ground. That briefly explains
how sampling works, but why would you use
it in the first place? Well, opens up a whole
realm of possibilities for you to be able to create
instruments that you can play on your midi
controller keyboard. It could be an instrument
that perhaps that you don't own or perhaps there's one that you haven't
learned yet. And as long as you can
get a single note of that instrument and you really
can play on your keyboard. It's also often used with
hardware synthesisers, perhaps older analog hardware synthesizers that don't
allow you to store presets. It allows us to create very realistic
sounding instruments. And so quite often you'll, you'll find sample
libraries online. Vst instruments that
you can use to play, play very realistic kind of orchestral sounds
or guitars bases, other kinds of instruments
that can be hyper-realistic. It can be used for very complex sound design to create unique instruments
for your own compositions. Perhaps taking
several sounds and synthesisers and
filters and amplifiers and LFOs and combining
them together to make very interesting and unique sounds for
your composition. Or perhaps it's just for some found sounds
that you've made. You really can
make an instrument from any noise that
you can record.
5. Getting samples: So the first question
to answer is, where do we get
our samples from? But by far, the
easiest way to get samples is to go and find samples that somebody
else has recorded and they're prepared to
license them to you. So there are a number of places online where you
can go and get samples. Some are free and
some are commercial. They're paid for. Usually pay for
subscriptions or you pay, pay per sample or
per sample pack. For free sounds, we
have freesound.org, the Free Music Archive, Pixabay. There are many,
many others online. Just look for, for
royalty free samples. And you're looking for
samples that have got some sort of creative
commons license. On the commercial
side of things, there are a number of
different options. Here are some for
you to go check out. Spliced.com is very popular. This is a subscription service. You have new cloud.com, loop masters.com,
ADSR, sounds.com. And these were a mixture of
a subscription services or you can go and buy sample
packs from these places. The other option and
certainly the one that I'd recommend is to learn
to record the samples yourself this way
you can know that your sounds are
absolutely unique. Now, it doesn't take a great deal to go
and record sounds. Of course you can use
a proper mike setup, maybe just a simple
condenser mike or a dynamic mic of some kind. You might have
something already. You might prefer to go for a really complex
Mike setups with close mikes and room Mike's and get very complex about it. Then you might want
to start recording different articulations
and round robins, and we'll talk about some
of that a bit later. But actually, it really doesn't take much
to record a sound. Now, you could plug-in instrument later on
we'll be playing with some samples that were I plugged in it plugged
a guitar just straight into my audio interface and just recorded my guitar. You could use your phone. So your phones have got a
very good voice recorder, whether there's an Android
phone or an iPhone. And that's perfectly,
perfectly acceptable to use. And the other option is to use something that's a bit
more designed for the job. So something like this, which is a just a
simple field recorder. These go from very, very cheap like this one, too much more expensive devices. But there are a whole number
of ways to record audio. And for the purposes
of this course, if you just want
to follow along, probably the laptop or the phone that you're watching this on has got a microphone and some sort of voice recording
software built into it. And that'll be
perfectly fine for now.
6. Our first instrument: Logic Quick Sampler: Okay, so here we are in logic. I've just got a completely
empty project open. I have not done
anything to it yet. What we're gonna do
is we're going to create our first
sample instruments. So what we'll do is there are some samplers
built into logic. We're gonna be using two
of them on this course. So the first one we're going to use is something
called the quick sampler. And it's about
basic sampler, but, but really is quite,
quite feature-rich. The great advantage of,
the great advantage of quick sampler is, is really, really quick too, to
create an instrument. And then the instruments
that you create with quick sampler can be used in the more complex
sampler later on. So to open up quick sample, I'm just gonna go down here. And from this drop-down
list, at the moment, by default is loaded
the electric piano. From this list here, I'm
just going to go down and choose quick
sampler from this, from this drop-down list here. And this will open
quick sampler here. So let me, let me just zoom in a little bit here so
you can see it a bit better. So this is the quick sampler. There's probably a bunch
of things in there. They look quite
familiar to you if you are used to working
with synthesisers. Really, as I say, a
sample engine is very, very similar to a synthesizer. The big difference being
how the sound is generated. In a traditional synthesizer, we would use oscillators or perhaps a wave table to create
that initial sound source. Then we'd use the filters, which you can see
here, the amplifier, the envelopes, and perhaps some low-frequency
oscillators, LFOs to really shake that sound. And that's exactly what
we're gonna do here. We're going to start off with a really, really
simple instrument. And actually we're going
to record it ourselves. Like I said, this is my by far my preferred way of
getting the samples, which I'm going to
use for sound design. So handily or handily for us, we have a recorder built
into, into quick sampler. So if I click up the top
here and click on recorder, I will get this record button will appear in the
middle of the interface. Now, what you need to do here is by default there
is no input setup. So what you'll need
to do is just drop this down and choose your input. Now you can either
input directly from your audio interface or from some other
microphone you've got, you've got plugged in. Or you can input from a bus. So you might route
some other instruments through sample from that. We're going to, I'm just
going to choose input two, which is where I've
got the microphone. And this is so simple. Now I've got a large diaphragm
condenser mic in front me. It's not a very
expensive condenser mic, but it's absolutely
enough to record the samples we're
going to do so all I'm gonna do is I'm
going to stop talking. I'm going to play a sound into this microphone
and we're going to capture it in quick sampler. And we're going to turn
that into an instrument. An easy one to do here is to use a wine glass and a pencil. Just simply hold the wine glass up and hit it once
with a pencil. I was actually on my way to the kitchen to get a wine glass. And I remember that in the
cupboard back from years ago. In the back of the cupboard, there was this thing
called a singing bowl. So this is a brass bowl. Hopefully you can see that
there is a brass bowl and it's got a wooden
mallet with it. And if I don't touch the ball and hit it
with the mallets, let me get this so
you can see it. If I hit this, it brings
up a very similar, obviously slightly
more metallic sound, but very similar sound to that of hitting a wine glass
or something like that. So to do this and all I need to do is just press Record
button in the middle. I'm just going to hit
one note with the, with the mallet onto the, onto this singing bowl
here and let it play out. So a couple of things. One is to make sure that the sound is
completely finished. So you've got all the tale of any reverb is all completely over before you
press the stop button. The other one, and
this sounds obvious, but it's to make sure that
there's no other sound because even your breathing
or tapping the table, I'm moving the mouse
on the computer. Whatever other sounds may be coming from outside the room. They're gonna be picked up and they're gonna be in your sample. And as we start playing
this instrument, you might hear the footsteps
of somebody above. You sneeze and in the
background, that's not ideal. So make sure your environment
is nice and quiet. When you're ready. Just press the record button. Okay. You could, you could notice that the logic was actually
quite clever there. So I press the record button. It took me a second or so to actually strike on
the brass bowl. But it was able to detect
that, that transient. So it's able to detect
the the kind of background noise beforehand and then know exactly when i'd, I'd hit the ball. So what do we have now? So in here we can see
the waveform of the, of the ring in bulk. I can zoom in by clicking these things and
just scrolling with my mouse. I can kind of zoom in on
this waveform and you can see it's quite a complex thing. And this is one of the
things that really is a marked difference between traditional oscillator based
synthesis and sampling. And that is that there is
no way that, or, well, no, there's no way that we could create a waveform like this. Using traditional,
traditional oscillators, we might be able to get
some approximation of it through the use of filters
and LFOs and envelopes, et cetera, and effects. But straight from the outset, the sound that we're starting with is a very, very
complex waveform. So the zoom controls allow you to zoom in and out
with the scroll. Well, we'll leave it there
for now. That's fine. The, I guess the thing to do is just to play
the instruments. So what's happened is the sample engines
recorded the sample. And now if I simply
play my midi keyboard, I'll be able to hear that note pitched across the
whole keyboard. There we go. That's your
first instrument created. It really is that simple. It's called quicksand for,
and it's got the right name. Now, there are a number of things that we can
do with this now, but this really is just, I'm a very simple, very quick instrument
and you can see how simple it is to, to create your first instrument, to record a simple sound and be able to play
down the track. Now, I could play
single-dose colds. And we are. So what we can do next
is we'll look at some of the other controls that we got inside the logic
quick sampler.
7. Waveform and amplifier settings: Okay, So just looking around
the quick sampler then, we'll, I'll point out a
few things to you here. The first thing to note is that we are in
classic mode here. I'll explain the other
most to you shortly, but were in classic mode here. So just make sure that
that is selected. Here's our waveform here. And we can, we've seen that
we can zoom in and out. You'll notice here that
this got this thing here. So C-sharp four, and here the
root key is C-sharp four. There's actually $0.23
above C-sharp four. Now, assent is a
fraction of a semitone. There are a $0.100
in a semitone, so it's very slightly, so almost a quarter of a
semitone above C-sharp four. Now, this has been
detected by logic. So it's actually detected
that the sound of this bowl that I used for a sampling our instrument is
actually a C-sharp four. So this is the famous C-sharp
four on the keyboard, and it's matched
those sounds up. So he's been able to detect what the, what the root key is. You'll see breaches again
later in the course. Along here we have our
playback direction so I can play in
forward or reverse. So in forward and in reverse. So one thing that's shown us is that our sample
is rather low. So we couldn't use this
to trim down our sample. So just trucking on this
white arrow at the end here, the right hand arrow, we can drag this down to
something more reasonable. We can also move the style so we could start
the sample, everyone. Let's just hear that
reversed again or with the with the Sam Shelton. Okay. So we can hear that's a much more reasonable
length sound. Now. Now, you'll notice
that I can't change it back to play in a forward direction right now because this bar has
popped up over the top, this is telling me, this is, you can see this moving
as I move these things. This enables me to go in and type precise
values into here. To get rid of this bar,
just click this cross here, and I'm back here so I
can change this back to play in a forward direction. I could also change the
status of my sample. So I might want to just cut into it somewhat and I
can just start here. I'm missing out the beginning, that first transient
of the sample. This can be really
quite useful sometimes. And again, we'll
cover this as we create more instruments
in this course, you'll see that we've moved the start position
of our samples is, is quite a common thing to do. We can also fade it by moving this thing on the top-left and we
could be, could fade out. Now, obviously this
instrument has already gotten a kind of natural
fade out built into it. But if we were to have an
instrument that played a continuous amplitude or a play that a continuous volume, we might want to
fade in and out too, just to make the, make
it a little less harsh. We can also achieve
very similar thing with the envelope or with
the amplifier envelope. Which let's move on to have a look at the
amplifier envelope. So down in the bottom
right-hand side here we have the
amplifier envelope. This by default is
an ADSR envelope. So this stands for attack, decay, sustain, and release. And by adjusting things
within this graph here, we can adjust the amplitude
of the sound over time, so the volume of the
sound over time. We can, for instance, if we were to increase
the attack, it would, it would mean that the
volume would slowly ramp up at the beginning of the
of the sound offload, press the key, and then continue on as
normal, normal course. So with the amplitude
or with the, sorry, but the attack set at 0, it renews straight away. If I was to increase
that attack slightly, we don't get that initial
harsh transient and the kind of gradually moving
to the sound or gradually, gradually increase the volume. Now this is quite a short sound, so we're not going to get
the full effect of that, but we certainly will use the amplitude or the
amplifier envelope later on inside the amplifier. Then we also have polyphony, so that's the number of voices that we can
play concurrently. So at the moment
this is set to 16, which is the default
means that I can play 16 bells all
at the same time. We've got pan, which is simply
R stereo, stereo field. So we can move it to the
left and to the right. And then we have the
master volume here, as you'd expect in the amplifier section
of any synthesizer. Next, then we have some pitch. So we could, we can tune
our, our instruments style. Logic has done a
very good job of identifying exactly the
pitch of this note. But there are definitely
instances that we want to just fine tune the pitch. We can also add some glides. So Let's have a look at
the pitch phone so I can, I can de-tune things. I don't want, wants to
do that. For instance, using an LFO or something. We'll look at that again, Lisa. So I've got my cool space
and this goes in semitones. And then I'll put
my phone picture. She's incentives listed before I sent is 100th of a semitone. We have glide, which tells you expect would
basically synthesized as a sound in every pitch between the two keys
that you press. And the gliders is setting the number of milliseconds it takes to get from
one pitch to another. So if I set this to
around 1 thousand, that's about a second
between pitches. Okay? So that is
the pitch section.
8. Filter controls: Then switch on a filter. So if you've used any
kind of synthesizer, any kind of EQ, you'll
understand these filters. There's a number of filters
built into the quick sampler. By default, it's a 12th decibel per octave
low-pass filter. And as I start to play, you'll hear how this would typically use
a low-pass filter to remove some of the
Harsha, higher frequencies. The filter off, the filter on. Okay, so we can hear the sum of the high-frequency
has been removed. We have residents. Residents just adds a little
boost just before the, just before the cutoff. This exactly the same as
any of the synthesizer. How we can get all sorts of
interesting noises of that. Let's just set those back to there and then there's some dry. So there's some kind
of quite subtle. But boats overdrive
on the filter. And then the other
one worth noting here is the key scale. So what this will do is
it will adjust the filter depending on where you're
playing on the keyboard. So it will shift the cutoff of the filter relative to the
key that you're playing.
9. LFO controls: Finally then we have the LFO. So we use it LFO on a sample engineering in exactly the same
way as we would do in a normal synthesiser. So we have two LFOs and they can have a number
of different wave forms, as you can see here,
sideways triangles. So wave, square waves
and we can have some randomized as well or
randomly generated signals. So this will give us the
frequency of the LFO, how fast or slow the Ellis, the LFO is oscillating. We can also tie that to if, if we, if we click this little
note here, it goes yellow. This will now tied to the, to the tempo which is set
within, within Logic. My tempo currently is set
to 110 beats per minute. So when I click this, you'll
notice that it's changed from hurts to note values. So eight, 16s, 32s, all the way down to very, very long notes to
very, very short notes. So we'll leave that
around 16, the 16th note. What we'll do is we'll just
attach the LFO to something to see exactly how that works. Now the way we do
that is down here. So we might want to set the
target to be the, let's see. The picture is a
nice simple one. So we can say that we want to
adjust the pitch by $0.10. So that's added a
little bit of vibrato. Let me just wrap that
up a little bit. So just to kind of
an extreme value. So you get some better idea
of how that's working. So we go from really extreme
and maybe that's something that you want to
do for the sound that you're trying to design, right down to
something a little, a little bit more
subtle, just to add a small vibrato effect. And that's quite nice. We can also set a fading. So we can say, how long should the sound played
before the LFO starts? We're going to use this
later to add a little bit of vibrato to an instrument. But we're just gonna
let the, let the sound play for a couple of
seconds or seconds, second half, and then
introduce some vibrato. And this is quite
a common thing, particularly amongst
the string players, whether the note will sound and then gradually they'll
introduce some, some vibrato on the string. Okay, so that just about covers the different modulation
types within the, within the quick sampler. The last thing to look
out then in this section, is to look at the
one-shot and the slice.
10. One shots: So the one shot is not going to really work with
that much in this course. But the one-shot
means that every time I press a key,
moment in classic mode, when I press a key, soon
as I come off the key, the sound stops according
to the ADSR envelope or the amplitude envelope that I have set on the bottom right here with one shortly will
always play to the end. Even when I take my
finger off the key there. So you can see the sound is continuing to
ring out and it will always, always play to the
end of the sample. Now, this is really
useful for drum sounds. So this is a common use for
it is to use on drum sounds. Because you, That's
a typical kind of instrument where if you hit a drum, it
will still ring. Our symbol is still ring out
even if you go hit it again, so you don't want to go. Clipping that sounds short. Necessarily. You might want
to continue hitting it.
11. Using filters, LFOs and effects: So let's, let's
use the LFO's and the filters to do some sound
design with our simple belt, though it's quite a useful
instrument right now. There's a lot more
that we can do with it is simply a sound source. So let's, let's use our
LFO and let's maybe change the target of our LFO. But first of all,
let's set our filter. So okay, So we've, we can use a low-pass
filter here. Maybe we can use the LFO to
do something fancy with that. So let's, let's change that
to be our filter cutoff. And you can see here
that this is the amount that we assigned to our LFO is shown with this kind of orange outline around
the filter cutoff here. So if I press a note now, It's moving the filter
cutoff with the LFO as, as, as the note place. I'm just automating that for us. You can really
think of an LFO is just something that's
automated new adjusted adults. So I could easily achieve that effect just
by clicking with my mouse and wiggling it
as I, as I press a note. But one, that's not
very accurate and two is means I can only
play with one hand. So we're using the
LFO to automate that. We might want to automate
many things the same time. But here we can do this. We're going to
change this to be, sorry, I clicked
the wrong thing. So bipolar, we're
gonna change it to be I've run the lifespan
and our depressor. Nope, I get this much
more interesting. Okay, so thinking back to
our synthesisers, the, the, one of the bits on the
signal path chain for a synthesizers effects now, commonly, when you use a software synthesizer
has got effects built in quite a lot in
the graphics built in. But of course you
can add your own on just inside logic
or inside your DAW. Now, the logic samplers don't
have any effects built-in. It really is just
what you can see here in the quick sampler. But that doesn't stop us from
adding effects afterwards. So some samplers
like contact have some quite complex and
effects built-in inside, inside logic, but we're
just going to add effects in the usual way. So let's, for example, maybe let's add a reverb. So I'm going to use the
Valhalla super-massive, which is absolutely incredible. Free reverb plugin. This is going to just on my, on my sample instrument here. Let's just pick
something from here. Let's pick the Horsehead nebula. This effect is now
being played, um, or will affect any sounds that I placed through
the Pixar plus. So let's listen to this. Okay? So you can see
that we've gone from a simple bringing,
bringing to this. So you really can achieve
a lot with sampling. And we're going to take this even further later
on in the course. But it really is a fantastic tool for
sound design and a real way that you can do. You can make your music, make your composition
stand up by using unique sounds that
only you have. In the final section on
kinda quick sampler. Then we're going to
have a look at how we can use loops and
slice loops up to, to create sounds using loops.
12. Slicing loops and samples: Okay, so the last
thing to look out inside the quick sample is a really great feature that enables you to take audio file, slice them up and assign different slices with the
audio file to your keyboard. This is a really great
technique for taking longer audio files are a
little snippet of music, perhaps some music
that you've written, slice and dice up and being able to play that in
interesting ways. So as I mentioned earlier, there are lots of places
to go get loops online. I would definitely
recommend writing your own loops and
try it out with here. What I'm going to do
here is I'm going to use the loops from within logic. So in logical and press
O on the keyboard or click on this little loop icon, which is, sorry,
which is up here. This is going to open up
this loop inspector for me. Then I can simply drag
either an audio file or a loop from the roof
and splitter into, into the quick sampler. So I'm going to
choose this liquid disco auto wire guitar. I'm going to drag that in here. When I go to drag
something in here, you'll notice I've
got these two boxes, pop up original and optimized. Original is going to
bring it in exactly as it's recorded, optimizes, going to optimize
it for loud dress and normalize it is going
to search for loop points. And it's going to
crop any silence from the beginning
and end of the loop. Now, because I'm dragging
this in from Apple Loops, I know that it's
already optimized for loudness or know that there's
no silence either end, I want to create my own, or
I don't necessarily want to or need to search
for loop points. So I'm going to
drag it into here. And you'll see that it's
just an audio file, right? So it's an audio file
and it looks like a sample and exactly the same way as we've
seen it before. Now. That sounded much more
like the original, but it's just talking
down on the keyboard. This is actually
something that's interesting to point out, is that you'll notice that
the speed of the sample, we didn't really notice
it so much with the, with the bell sound. But it's very obvious here
that as we use a sample, the sample engine could do one or two things as we move
up and down the keyboard. Now, typically, a lot
of sample end-users, this is the only way in order to play a sample or a low pitch, the sample engine will simply play the sample more slowly and this is
what's happening here. So if I play low down, simply playing
back the sample at a slower speed and that
generates a lower pitch. And if I play at the
top of the keyboard, it's playing much faster in order to generate
a high pitch. Now, the logic sample is, I've got some pretty clever
technology built into them. This is access using
this button here. What this button
will do is, it will, it will allow you to adjust the pitch but keep the speed
of the sample the same. So now when I press
something to the bottom, it plays at the same speed, but it's still a
lower pitch than something if I played it
and stop the keyboard. Which is very, very clever, is not so good. In my experience
at extreme ends. You don't wanna be too far
off the original pitch and we see how it will see later
how we get around that. But the one way to get
around it at least. But the, but it's certainly
very clever and the buffer. Now why are we using a
single sample or we can only use a single audio file. So for now we'll leave
that switched on and that allows us to get a pretty cool
effect from an audio file. Anyway, the point in
this section is to look at how we can play individual sections of that
audio file now so to do that, we're going to click on this
button up here, says slice. This is going to
give us a slightly different view overall GFR. And the most obvious thing here is that we can see
these markers here, which are the slice points in each slice is assigned to a key. So we've got C1, C-sharp, D-sharp, E, 1F1, et cetera. What this means is that
when I press this key, it will play this section
between these two markers. So we'll play from here to here. So if I press D-sharp one is going to play
that that portion. If I was to press E to I would just get
that bit of the sample. We can take our samples
and we can slice them up and we can map them
onto the keyboard. Um, I'm gonna do it in
a fairly simple way. So you can see that logic
has tried its very best to put samples if I'm going to go through and
just remove some of these. So I'm just going
to right-click on the markers and
just remove them. The ones that I don't want. So let's just try and find sensible smallest set
of sensible samples. So that will move this here. All I'm doing is just
trying to slice up the sound just at
the moment by I, by what looks like
a sensible set of wave shapes of
a reasonable size. We can properly
that one as well. Maybe move this one here
and remove this one. And probably remove
that one too. So what I've got now is across my keyboard and I've
got a set of samples. One thing I'm gonna
do here is just, I find it a little bit easier. Is Darren here? I've got this box here
that says chromatic. I'm gonna change this just
so it's all the white keys. That means I don't
need to press the, the sharps and flats
because it doesn't, it's not really related
to pitch anymore. So it's going to always
play its original pitch, but it's going to
use the keyboard as a way of just being able to say your trigger this
sample, trigger that sample. So when I press C
one, press D1, E1, sorry, you want to press F1, G1. In fact, that one seems a
bit on the server as well. So G1 now is going to trigger
this sample A1 and B1. I can now play this
in interesting ways. Or I've got the potential to
play in interesting ways. Whether I can do that or
not is a different matter. But you'll notice that
every time I press a key, it restarts the sample. So if I press this a, okay, so I could play
something perhaps like this. Okay, So I'm not the
greatest composition ever, but you get the idea. So it's just the slice
and cyclic sample. It just allows us to take a, a audio file of arbitrary
length. Don't go too long. This is eight bars and
allows us to kind of slice it up and then use the keyboard to play sections of that sample. Okay, before we move on, we're going to make one more instrument inside
the quick sampler and look at how
we can use loops.
13. Our second instrument: Loop points: Okay, so for our final
session inside quick sampler, we're going to create
another instrument. And this time we're going
to create an instrument that plays for as long as
we've got the keys held down. Now, I'm going to
use this really, really battered and
worse for wear Ukulele. So I've got this here. It's in the right state.
Absolutely. Can't play. It doesn't matter. But is
held together with stickers. I think that's the only
thing holding it together. But this is one of the
beauties of sampling, is that I can't
play the ukulele, but if I sampled by ukulele, I can play it. I've played. And you can easily get
access to sample libraries, which are all sorts
of instruments from whole orchestras and
orchestral sections to very expensive
grand pianos on, in some of the most impressive and kind of famous recording
studios in the world. I think there is a certain
beauty to samples, which you play yourself. You can really, it's like
having a time machine. You can go and play a sample
that you played years ago and be taken back to that time in that place where
he recorded that sample. And it's a lovely thing to do. And I often find that, that's instruments that are quite badly played can make
some of the best samples. Now, you can never tell
with a sample what it's gonna be like until you've actually created the
instrument from it. So you could, you can
record something. You think this is
gonna sound fantastic. Drop it and it just
doesn't work as a sample. So if that's happened to
you or if it happens to you as you're practicing the things that we
do in this course. Don't worry, okay,
probably happens. I don't know, one in five times, something like that to me. You're just go to all the
effort, record a thing. You'll drop it into the sample engine, which doesn't work. And for that reason I would
definitely recommend using, in fact a quick sample is
a great tool for this. Use it using some
experimental audio file. So rather than,
you'll see later, it can be quite time-consuming to record all the
samples we need for a really sophisticated
and complex instruments. Just record a few
first and drop them. Or even one and just enter a quick sampler and just play the thing to see if it's
going to work out for you. If you get if you
can get the chance. Okay, So all I'm gonna
do is I'm going to play this ukulele
into this microphone, and the same as we did
with the bowl before. And I'm going to
play it quite badly, but I'm going to use
it to demonstrate to you one that even a badly, badly played instruments
can sound quite good. And to that, we can, how we can use loops within
our sample to find loops, points within our sample just to continuously play that sample while the keys pressed down. So that's the noise doesn't
stop when the sample does. So I'm going to just pop over here into the recorder mode, exactly as it did before. Choose my input, which is number two from my
audio interface. That's what
microphone I can see. It's picking up sound here. So I'll press Record and I'm
just going to strum this a pluck 111 note a couple
of times into the recorder. And there we are. So
that's our recorded sound. Let's pop over to
probably one shots. Easiest way to here this back. You can see it's slowed
the sample down. So let's make sure we
click this button here. Okay, so let's go
over to classic here. So you can hear. It's not really a
playable instrument. So let's put that on. We can, we can follow
the tempo here, or we can set a speed. So we can just play it back at the speed that we recorded. By choosing this
follows tempo here, what it does is it tries
to match the tempo of the sample with the door, with the beats per minute. You've got sitting in logic, which at the moment is 110. So I'm going to uncheck that. You can see that that's
pretty close to what we, what we note that we sampled. It sounds pretty
good. First, firstly, I'm going to do is I'm just
going to chop the end of it. So I've got a lot of extraneous
noise and the end here, so I'm just going to excuse me, I'm just going to this one. The cut, the suborder
while I was doing there as I was hitting
the cross rate. And we'll come to that now. When I play this, if I, even if I hold the key down, it will continue to loop. Now, I can I can stop
that from happening. So I could say no loop. I could I could have it loop, just go round and
round and round. I bought this can
do is going to play the sound all the
way from the star, all the way to the end,
but it hits the end, is going to go
back to the start. However. Sometimes when
you're creating instruments, the start of a sound
that transient bit at the start of the sound is not something that you want
to repeat on a loop. So within your sample or
whichever sample this is, you will be able to
define loop points. Let's have a look
at how this works. So these blue points I get in quick sampler by
dragging these kind of circular or
semicircular arrows, I just define a loop
point within here. So I can say that when
I, when I play this, what I want to do is
I'm just going to loop between here and here. So when I press my, press a key on the
keyboard, it's going to play this first section. The first blue section is saying they're going
to continuously play this section in the middle until I release and then
screenplay the rest. So let's listen to that. And then it stops. So let's get rid of this. I'm quite okay with that. Now, there are a number of different things
that we can do so we could get it
to loop forward. And that makes sense for a
sound like this which has got a transient on each block. We can, we could reverse it. So we could say, okay, let's, let's play
the loop in reverse. We could play to
the end on release. And if I increase
the the release on the amplifier envelope
gets in there. The reason we didn't, it didn't, although it was set to
play with Lisa reasonably inherit is that the that the release part of
the ADSR envelope was shorten the release section. So by lengthen and that means we always get to hear the end of the end of the sample
when this is set. Another thing we can do
is set the store Turner. And so what this is
going to do is going to play backwards and forwards, backwards and forwards,
backwards or forwards inside that loop
section like this. So in this particular sound that sounds a bit
daft to be honest. But actually that's
pretty useful if you're creating pad sounds
actually the, it can add some variety
inside your loops. So for example, something like a violin, a bowed instruments. If you choose a loop section
that is just a kind of steadily bowed violin
and you're not getting that beginning byte of the bow or the tail
off at the end, then actually it sounds exactly the same as
foreigners and reverse. So you could just
add a little bit of variety inside your loop. In our instance, we're going
to just keep a for loop. And as I say, this means that whenever I
hold a note down, it's going to continuously play that loop until I
let go of the key. And then because I've
got this thing set to say Play to end on release. It will play the
end of the notes. Okay, So that's pretty good. It's quite a realistic
sounding instrument. But it is always playing to the n. So perhaps with them on that, if I uncheck that, it's just going to play
out for the rest of the ADSR envelope
somewhere around here. Okay, and just to
finish this off, just because we can, Let's add some effects to this again, I'll go for the supermassive and we'll just choose
a preset from here. So let's go and have a look.
It's like a median reverb, bright room. That's
probably okay. Okay. Really simple, very
badly played ukulele. We've got really quiet. I wouldn't even call that use y. So that was a really
quite a nice sound. So just by adding some looping and adding a
bit of reverb to that. We've got to the
kind of instrument that would be
incredibly difficult, if not almost impossible
to create just using a normal kind of
analog synthesizer. Okay, so that's it for,
for quick sampler. In the next section
we're going to look at the logic sampler
used to record EXS24. But now called logic sample, it's an overall in
the last year or so. So we'll dive into
that and we'll see the extra features
of that Scott to enable us to create even more realistic
and complex sounds.
14. Noise reduction: So we finished with
quick sampler for now. What we're going to look at in this section is
the logic sampler. Now, logic samplers are much
more sophisticated sampler. And it's a similar system inside things like Ableton Live, which has got the simpler
and the sampler. In logic. It's the quick sampler.
And the sampler sampler used to be called EXS24. As I mentioned previously, it's now just called Sampler, which makes it a
little bit confusing. But we will see
that it's got many, many more features which
allow us to create much more realistic and
varied instruments. Things like being able to
play different audio files, different audio faster,
different keys on the keyboard. To be able to play things
like round robins, and be able to look
at velocity layer. So playing different
samples depending on how hard we hit the keys or
how fast we hit the keys. So we're going to start
with some samples. Now what I've done is I
have recorded my guitar. And all I've done is I've recorded six notes
of the guitar here, and I've just played
every open string. I just plugged the guitar directly into my
audio interface. And so we have a sample file which sounds a bit like this. So as I said, played
every open string and I've let every street, every string just
kind of bring out until it decayed
away to nothing. Okay, That's repeated
across all the strings. Haven't bothered to
play them all to you. But very simple,
very clean sounding guitar effects or
anything like that on it. So sampler works slightly
differently and that we, what we really
want to do is load multiple audio files
into the sampler. So the first thing that we'll
need to do is we'll need to chop up the audio
file that we've got. Now, logics got a few
things built into it as have other doors. But before we do that, there's something that we
just need to deal with that is this noise. Now, if you're
wearing headphones, you're here, there's much
better than if you're not. But right at the
beginning of sample, in-between, everything is, there is noise which just simply
comes from the guitar. It's a, a pretty
low static noises. You can hardly
hear it right now. But one of the
challenges we have with sampling is with noise. So although when I
play a single note, you're hardly hear
the noise at all. As I start to build up and play more and more notes
on my keyboard, that noise are really,
really start to build up. Because it's not
just a note that's playing, It's the noise as well. Now there are a few
solutions to this. There's various bits
of software available that will help us to
reduce that noise. I'm going to show you
a few of those now. So the first of these
is completely free. It's a program called Audacity, and this is a really, really full featured
wave table editor. Now this is quite a bit of a learning curve to
it, but it is free. And it will allow you to really go and edit
in some details. Any audio file. You can go and get that from
our Udacity team to org. There's a slightly
more advanced version from Adobe cord, Adobe Audition. It's a very similar thing
as a wave table editor. You can, again, you can
do lots and lots of things in this waveform
editor, if you like. You can do lots of,
lots of things. Sid all derby audition the
same as you can with Audacity. One of the features
being noise reduction. There is some specifics offers as well that's available
for noise reduction. One of those are very popular. One is called RxNorm by isotope. This is a piece of
software specifically designed to remove noise, background noise from audio. Very sophisticated software. And again, a bit of
a learning curve. For this course. I'm only be using one by cord, browse free by clever grand, I didn't get down
cleft ground.com. This is a really simple
Noise Reduction tool, is really, really easy to use. That's what we're
going to use to remove the noise from the
audio file that we got. So again, it's really
important that you do this and pay attention to it because
the more notes you play, the more noise you're hearing it build up and it'll become
really very noticeable. So back in logic them,
to use bias-free, I will just make sure that I've selected the audio
file I wanted to work on. And I will just select a little bit of noise at
the beginning of the file. So let's, let's just open up the wave editor here and just make sure that
we've got a bit of looping noise
at the beginning. So this is just going
to loop round and round and round on
that, on that noise. Hopefully you can hear that. Like I say, if you've
got headphones on, I'm sure you will. So I'm just going to add it
as a virtual instruments. So I'm just going to
add this effect here. I'm just gonna go
down and choose cleft ground from
here plus three rows. Friday, I'm not quite
sure how you say it. This is so simple to use. So all I do is just
play the noise and just press this
button and hold it. And what frost-free
will do, it will, it will learn the
noise and it will remove it from the
rest of the track. So just hold this in
for a few seconds. Let it loop around
a couple of times. They will learn the noise. And the noise has been
removed from the track. Okay, so let's
stop playing that. Let's take it out of loop mode. The next thing we need
to do is we need to chop up these six nodes here. I'm going to chop them up into
into separate audio files.
15. Chopping audio: So there's a few ways
we could do this. We could use the snipping
tool to go do this. So I could go and
choose the scissors. And by holding down
the command key, my cursor will turn into a pair of scissors
and I can go through, and I can chop this wave
form up into separate files. There are some tools
that can help us with this inside, inside logic. And as I say, there
are similar tools inside whatever
DAW you're using. If I dropped down, this
function has menu here. I can go to remove silence. It's going to pop up
this window here. It's already done a
pretty, pretty good job. You'll notice
there's 30 regions. Don't worry about that
too much right now, but I'll come and I'll explain what these other
regions are later on. But in here, the most
important two things are the pre attack
time and a threshold. So by adjusting the
threshold, just says, how quiet should it
be before it starts to before chops off up. So you can see that
increase the decibel. It is going to make these
shorter and shorter. What I want to do is adjust this so that it's picking up the, the sounds that I
want and cut inside. So anything inside the blue
box is going to be kept. Anything outside of a blue
box is gonna be removed. So 41 seems about right. That's looks to be chopping
things up correctly. It's non-destructive
so you can still drag the edges of the audio file. It will recover that. I'm also going to set
the pre attack time. So I'm going to set
this to around 2.5th. So let's go and let's
just type this 0.5. What this is going to
do is it's going to find where it thinks the
beginning of the audio file is. And it's going to leave 2.5th at the beginning
of the audio file. Now, this is actually
really important because it is the
very start of a, of a sound which is
called the transient, which can make a
real big difference to the sound you want. So what we're gonna do is we're gonna leave 2.5th
and they get in them, they're going to adjust
that to bite it to suit. At the beginning of
each clip within, within sampler, that will
become clear a bit later on. So let's press Okay on
this and you'll see that it will chop my audio files up. And now I just
need to go through and delete any bits
that I don't want. I can just highlight
them and delete them. So there's some little
slices here where it's not pick those
up quite right.
16. Preparing and exporting samples: Okay, so once we've
reduced the noise and we've chopped all
the samples up. The final thing that we're
going to want to do is to rename each of these, each of these sections. So the way we do that in logic
is to press Shift and N. And that will now allow us
to rename each section. Now, try to give these
sensible name so I could just export them
all with guitar dash, roar, underscore 1, whatever. In each side, each one. However, if you rename your
sections with sensible names, then you will find it much, much easier later on inside the sample engine to be able
to identify which file, which audio files should
be mapped to, which key. Not so bad right now we're
going to have six audio files. We know which ones are the highest pitch or which
one is the lowest pitch. But as we come on later to look at things like round robins
and velocity layers. Or if you're working with many, many, many more sample files, it's not uncommon for very
large sample files to perhaps even have a
separate audio file for every single key
of the keyboard. You will find that
naming these sections, although it's quite tedious and actually can be automated
in things like Reaper. But although it's quite tedious, will save you hours
and Alice later on, if things don't work quite
according to plan inside your, inside your sample engine. So anyway, all I'm gonna do is I'm going to name these
with the name of the notes. So this is the highest
pitch note here. Now this maps to a E3. So I'm just going to
call this e1, E3. The next string down on a guitar is renamed them all select them all highlighted
the next one down. So just shift them. And again, this one is going to be a BTU of B is the second highest
string on a guitar. Hit Enter, hit the right
hand arrow, shift. And again, to rename this one, the next string down is
then a G and this is a G2. Hit Enter, right again. I'm going to do a D string, so this is going to be shifting. This can be a D2
and then hit Enter. And then we're going to have a. So this is gonna be A2
and A1 rather, sorry. Right hand arrow again. And the final one then
is going to be what? Okay, So what I, all I need to do that is just
highlight all these files. So let's just zoom
a little bit here. I can just drag, highlight all of those Right-click
Export as audio files. And I just go and
choose a folder. And you'll see that the region
named forms the file name. So I'll, what I'll
end up with is a bunch of files with
the current farming. So I'm just going to put
them into a new folder. Click Export, and all my
files will be exported. Okay, so once we're
done with that, we can we'll mute this track for now and just collapse it a little bit there. It's time to bring those
samples into our sample engine.
17. Our third instrument: Logic Sampler: So what we're gonna do is
we'll move to track one. And we're just
gonna, we're gonna load the sampler instruments. So you'll find it in here.
In this section here. You'll see it's called
sampler multi-sample. Not the greatest name,
but it is what it is. So this will load
up the sampler. You'll see this looks
fairly familiar. Now one thing I'm gonna
do is sometimes it can store some
information in there, some settings from,
from previous session. So I'm just gonna make
sure I just got to here and just click on
this record default. And that will make sure
that everything is set back to the factory default settings. Let me just zoom in
here a little bit. Hopefully you'll be able to see that a little bit more clearly. Okay, there we are. So this is the sampler. It's made of various sections. We'll go through each of them over the course of
the next few minutes. But each section is you can, you can toggle them on or off. So just by hitting these
yellow buttons here. So let's just collapse them
all apart from the synth. So you can see in
the symptom we've got a number of
controls in here. So we've got the, the pitch, either tuning the course, tuning in the fine-tuning. We've got two filters. Interestingly, in
the filters that we can have the filters
run in series, I apply filter one
and then filter two. Or we can run them
in parallel and then blend between
the two filters. So that's, that's a pretty
interesting feature. We've then got the amplifier
controls that you'd expect. The balance or the
pan for moving the sound to the left and right. We've got the volume control. It this bottom section here, which we can switch on or off
using this Details button, we've got a bunch
of other controls. Seems like the number of voices that we want
to play any one time. This is the polyphony. The glide, the pitch bend I, how many semitones we want to pitch bend by when we
use the pitch wheel on our, on our keyboard and various other level
controls inside there. Let's switch that off for now because the first
section we're going to look at is the
mapping session. This is the section
that allows us to take those audio files that we've created and we've
chopped up a map, those two particular
keys on the keyboard.
18. Mapping samples: Let's have a look at
the mapping section. This will open up this view here and we've got a
keyboard across the bottom, and this is where we're
going to drop our file. So the easiest way to do
this is to go and grab the audio files that you've
created from, from finder. And go and just drop
these into here. And just, you'll
notice they get bigger and smaller as you move up and down as
you're dropping them in. Just make them a
reasonable size. Just covering one or
two notes like this. And this will allow us to move
things around as we need. Now. There are a number of auto mapping tools that you
can use inside sampler. I have had mixed
results with them. So if you want to try them, you can go into here and
you can go to Auto Map. And one that works reasonably well is auto ultimate
museum pitch detection. If I click that, you'll see that that is done a
reasonable job for us. The other way to do that is to just pick these up
and drag them around. So what this has
done is it's taken, are, let me just zoom
out a little bit. So it's taken our sample files and a stretch them across
the whole keyboard. So if I play a note
in this section here, you can see that any notes I play between SN2 and E2 is
going to play this sample. And you know, I played
between G1 and b1 is going to play the a one-sample
and it's going to obviously pitch shifted
to the right pitch. Anyone between F2
and H2 is going to play the G2 sample, etc. And then anything that is below an F sharp one is going
to play the E one sample. And anything that's above a D3, it's going to play
the E three sample. Now, you'll have noticed
across the bottom here, if I zoom in a little
bit so we can see this. As I click these samples, it highlights a sample, but it also highlights
a note on the keyboard. And this is really important. This is called the root key. This is why we take
the time to name our audio files,
our sample files. So you need to tell the sampler what nodes the sample was
originally recorded at a, what's the original
pitch of the sample? And this allows it to then pitch correct
in either direction. If I play either
side of that note. This is set using
the root key here. So I can go and change this
to be whatever I want. But as I say, I want to
just go through and make sure that y1 root key is E1. For the A1 sample, the Ricky's, A1, D2, D2, etc. If that's not right, it
will sound very strange. You can see actually
that my guitar was slightly off pitch because the auto tune tool is
actually pitched it down. Naught point, naught, $0.06. Okay, so now we have the, the samples mapped across the entire keyboard
and I can play them. So that works pretty well. But one thing that
you will definitely notice is there is
a bit of a lag. When I hit again. You can
see when I hit the key. So there's a bit of a lag between when I hit
the key and when I, when I actually hear the
sound or when you hear sound. Now, this is, this is because of the delay
that we put at the start. So when we chopped
up the audio files, we allowed 2.5th at the
start of the audio file, and that'll become clear now, the way we just need to go
and adjust the waveform, whether the sample
starts to play. We do this inside this
section here called the zone, and this is our waveform
editor, if you like. So let's just try and make
this a little bit bigger. If we can do that, drag
it from the bottom. Okay, so we can see that if
I zoom in, we can see that. Just scroll on here. Okay? So if I look at the
stars of this preform, I can't seem to struggle with the zoom control a little
bit, but we'll get there. We'll get there. Okay, So you can see that the sample
actually starts playing here. And if I play something
down here to activate this, you can see that's
where the leg is. So all I need to do
is just drag this in to somewhere near the start. Now, you can see that if I'd let it just chop at the
beginning of the sample, I may well have losses, little bit of information
that the star, and that is actually
the sound of the The string being
hit by the pick. And it really adds a lot
of realism to the sound. If you sample a piano, you can actually hear
the there's a very, very, this is a tiny
amount of time. There's a very small lag
between you hit Enter key on a piano and then the hammer coming up and actually
hitting the string. Now, a lot of, a lot of sample
libraries that I've used over lost some realism by really chopping the front
of that off that little bit of transient
at the beginning. By including that,
certainly add some realism. But you do lose a bit of immediacy when
you hit the notes. So there is always, this is why it needs
to be done by you and this is why we leave a big gap. Because you need to
adjust this by it because I can actually see that it
probably starts around here. Definitely feel that it's not very responsive when
I hit the notes. So I probably just want to
cut into this a little bit, but I want to make sure
that I leave some. What I've done there is kind of, it's a balancing act between the responsiveness of
the instrument and the, and the realism of the sound. So I'm going to leave
it about there. I'll just need to go and do the same across all the other, all the other samples.
So here's y1. I'll drag it around there. It's just a matter of fiddling and play in the play in them. We've already done this one
until it sounds about right. So again, we want to just
drag this in to bit too much. So I'm bad. Okay. G2, this quite a
long, transient. Lot of information here, but
it's not very responsive. And same for B2 is quite short transit
on this one anyway. And finally on E3 again. So you get the right compromise. And it really is a compromise, the right compromise between the realism of the
sound and capturing that first bit of
information and having it being responsive
enough to play. There we are. So that's how we, how we adjust our
waveforms for each sample. If I just scroll back up, we can see on here, we can see we have our guitar
mapped across the keyboard. Now. You'll see that
those are vast amounts of keyboard being covered
by a single sample here and at the top
and the bottom. And certainly a better thing to do would be to record
many, many more nodes. So I just recorded
the open strings just to keep it nice and
simple for this course, if you are going to actually produce a sample library which you are planning to perhaps sell or pass on to friends or
even using your own tracks. I would definitely recommend recording many,
many more samples. It's not always
necessary to record a sample for every single note. But probably, maybe
to go up in fifths or something like that and just make sure that
you've got many, many more samples if
you're planning to play a particularly high
or particularly low. Now in this case, for a guitar, it's actually not
very realistic to play below an E1, right? Because that is the lowest
possible tone on a guitar. We'll leave it there for now. But again, it's the, a bit of thought
that you put into the Realism could really
make a big difference. So this is how it sounds now.
19. Modulators: Okay, so another thing that
we can do is to look at the, the modulators and see how we can use that to add a
little bit of realism. I mentioned before that quite often string
players in particular, we'll add some vibrato
a little bit later. So they will play
the, play the note, that note ring for, for a short while and
then add some vibrato. So let's see if we can do that within using the modulators. So here we have LFO one, so we will use an LFO for this. Just want to do that. While I'm here in this modulator section, you'll notice that I
take my finger off the key, finishes very abruptly. So probably we want to
just drag and release a little bit, maybe
a little bit more. Okay, so back to the,
back to the vibrato. So we're just going to
add a little bit of vibrato using LFO one here. So we're going to make
this a, a sine wave. Will, we will, we will
set the rate to around, That's probably fine around the forehead spark,
something like that. And that is just four
cycles a second. We're going to set a
little bit of free time. And so we're going to let
the note ring for about, about a 2.5th,
something like that. Before the vibrato
starts to take effect. Now, if I play something now, we're having no effect at all. And that's because we haven't assigned the LFO to anything. The way we do that
within the sampler is through the mod matrix. So in here is just
a simple table of all of the sources of
modulation that we have. And we can continue to add those and we can add more LFOs. We can have more
envelopes over here. But what we didn't need to
do is we need to assign the, the LFO to a particular target. So we're going to set the
target is pitches fine. But we don't need to do
it by the mod wheel. We're just going to
have nothing there. So we can have an LFO affect their pitch and we are
going to affect the pitch. Bye, bye small,
about five to $0.10. I mean by that. So now
if you listen carefully, you'll hear that
when I hit a note, the will have about a 2.5th
are exactly a second half. Actually. After I hit the note, the pitch will start
to wobble slightly to simulate vibrato.
Let's listen to that. Okay, so that covers that. So that's our basic
first instrument. We've seen everything
within here. So we've looked at the synth and the things that
we can do in that. We have looked at the, the mod matrix to set our LFO. Lfo itself. As I say, you can add more
LFOs and envelopes here, we adjusted the
amplifier envelope and we just had the LFO. We had a look at the map, and this is how we've
mapped our sample files into across the keyboard. And we at the, the zone or the waveform editor. There's our first instrument
using the sampler. It's still a fairly basic
instrument and something that we probably could have got somewhere near achieving
with the quick sampler. But obviously, with
the quick sampler, we would've had to use
a single audio file, a map that across all the key. So this does make it slightly better,
slightly more realistic. But there's lots more
that we can do yet to really make our
instruments realistic. So the next thing we're gonna do is we're going to look at a thing called round robins.
20. Round robins: Okay, So as I mentioned, there are a number of
ways that we can use the sample engine to
make our insurance that little bit more realistic. We looked at adjusting
the sample length before and Anika a little
bit of a brighter. So I'm making sure that
we kept a little bit of the transient at
the beginning of the beginning of the note, without compromising
the responsiveness. And adding a little bit of a
fake vibrato using an LFO. There are another couple of
things that we're going to look at and these are velocity, velocity layers
and round robins. So the first of those we're going to
look at is round robins. But basically we're
going to create an instrument with both. A round robin is at
the moment when, when we created the
last instrument, every time we press a
G2, G2 sample place. And it's the same
sample every time. Round robin allows us to switch that sample out and play a different
sample each time. And adds a little bit of
realism because every time you play a note
on a piano or player, a string on a hop, you play it slightly
differently. Even the best player
in the world, even the most consistent
plays in the world. Well, it will sound slightly different
each time you play it. Round robins tries to
help us emulate that. So let's start off with
a blank instruments, so I've just restore it
back to factory settings. This time I'm going
to drag in some, some samples and you'll
see that it's exactly the same sound as before, but I've named them
slightly differently. And you'll see that as
I as I bring them in. So I'm just going to bring the, bring the samples in here. So again, it's
just open strings. But you'll see that they've been named slightly differently. So we're going to
look at round robins, that we're going to look
at velocity layers. So that's what the R and
the Beast and force. So this is gonna be
round robin one. So this will all become
much clearer as we go through and build
this instrument out. Now, many of the commercial
site sample libraries that you buy will have
many velocity layers, many round robins, and many, many different audio files. We're just going to create
a cut down version. So we're going to
stick with these six open strings of the guitar. We're going to create
three round robins, are going to create
two velocity layers. Let's start with round robin. I just, we've done this before. I've just dragged the items in. I'm just gonna go to
zone just to be quick. Although I could go and drag these things
around so I can, I could maybe get the
Y1 and I could drag it down to two here. So at the root key to E1 there. Now, one thing, I
don't really know why, but one thing I
have noticed that the sample sound
better pitch down, that they do pitched
up something if I'm really going
to spend my time and I really take my time
to do something. I'm going to set the root note as the highest
possible note here, and everything below
it we pitch down. So for A1, I would
set my root node to be root node to be
a, sorry, a one. And that'll be the highest
note that I could play. And I would pitch down
from there. For now. Just for simplicity, I am
going to use the automatic, I'm going to Automatic using pitch detection that
will spread it out. It's exactly the
same as we saw in the previous, the
previous lesson. So I just need to go
through each one now and just do my sample chopping. So again, I'm going to
retract down from the bottom. Let me make that a bit bigger. Try zooming in again. I'm actually successful. I don't. So I'm just going to drag my star
across to the transient. So let's try and
get the high about. There. Seems fine. Next sample strike that to
you about that seems fine. Again, just trimming
this beginning of you could do this when
you chop the samples up. But I find that if I didn't
do that work anyway, I'd rather do it in
the sample engine because it gives me
a little bit more, a bit more choice. Well, if I chop them
up in in the door, create audio files, I can go and extend that transient
if I fear it needs it. So I prefer just to leave
this gap at the beginning. Just do that work in the engine. Okay, so let's
close that down and go back to the good back
to the mapping editor. Okay, so there's my samples
match across the keyboard. Again, I will just
be sure to go into the modulators and just
add a bit of room. Okay, so let's close that again. Now. Although this sounds
quite realistic. Similarly for something that's
recorded fairly quickly, the what you'll notice is that every time I press a
key, if I keep progressing, progressing the same
key, I get, yes, a very realistic sounding note, but I get exactly
the same every time. If this is particularly
noticeable, if I keep repeating it. Because it doesn't sound like some of them actually
playing guitar. Because if I was to hit the same node over and
over again on a guitar, I would get a slightly
different sound each time. So the way that we solve
that is through round robin. So I'll show you how to do that using the
groups in a sampler. So over here we have
this list of groups. We're a group called
group at the moment. I'm just gonna double-click
that and rename it. And I'm going to call this
one for round robin one. So that's my round robin one. I am going to then go
and create a new group. I'm going to call this
one R, R2 for Round Robin to round robin two. And now I've got a,
another set of samples. So I'm going to bring those in. And these are exactly the same, exactly the same
notes being played. But I just recorded
them a second time. So I just played every low E string three times and let them ring
out three times. I played every other open string three times and let
them ring out three times. What this gives me is almost
identical audio files, but with a slight difference, and it's just that slight
difference in performance. The maybe hit the string in a slightly different
place or a hit, It's slightly harder
or slightly faster. So that's, that's the, the, all the different
cell B this. So I'll just drag these in. I will just automatic them
again using pitch detection. There we go. And again, I'll need
to open up the zone, go through each one of these, and just chopped
down a transient. So I'll just do this
fairly quickly for now. By i rather than by air. If you're doing it,
definitely do it by ear. But this will get us enough. You can see the transient ambiguous when
that's interesting. So I kind of what you're
hearing is both notes. So what I'll do is I
just need to go in either mute round robin or soda round robin.
I'm, I'm only here. So I think I'll probably
just going to chop that off. You can see here why I do this inside the
sampling tube rather than inside the door
because I just want to hear what feels right. I'm going to leave these others. I'll just very quickly by
ear, I buy ice or eight. Again, here's another
one with a bit of a weird transient
at the beginning. Just takes two. Okay? So what I have here is
that there's one zone. Let's choose a different
set of samples. I'm going to create a third zone because I did it three times. So I just un-solo that I'm
just going to create a, sorry, a group,
create a new group. I'll call this one or three
for round robin three. I will get the same
problem as before. I will go find my samples. So these are my round
robin three samples. After I go in and do
exactly the same again, I will go to zone map automatically
using pitch detection. There we go. And I will
just quickly scroll through these and
do the same again. Again, if you're doing this, do, do take your time
and actually play the notes and get it just right. So what we have here then
is I can close the zones. Now. We have three
separate groups. This third group of money
playing one group. Every time. What I can do is I can
highlight all three groups. I can go to group,
and I can choose, choose, Create, round robin. But this will now do is it will cycle through
these as I play a note and you'll hear that the notes sound
slightly different, much, much, much more realistic. And as I said, you can create as many round
robins as you want. One thing to be wary off
with samples though, is the more individual
samples you use, the more round robin do you
use them or velocity layers, which we're going to cover
in a second that you use. It is loading all of those
samples in to memory. So you will start
to use a lot of memory and a lot of CPU
to run these things. So just those simple,
simple notes. So I'm just looking
at the raw files, WAV files that I've created. Just that all of those
notes are somewhere around the 1.5 to
two megabyte mark. So if I took an item 88 key keyboard and did one sample for
every single one of those, and did three round
robins of that light. You can see that I'm going to start hitting
performance issue. So again, it's a compromise is a balancing act between
ultimate realism. Being able to have an instrument that you can play
this responsive. So anyway, so we've got
our three round Robinson. So just, just watch
the screen now as I start to hit this g. One of those is not quite
right. It's this one here. This one didn't
get trimmed down. So there we are. So you'll find that
occasionally the odd mistake. So as I know I've
corrected that. You can hit it on
every single night. As I play it. It's
just cycling through. Can you see on the
group list on the left? It's just cycling
through each one. Having so every time I press the notes from the,
from the next. And this just adds
realism, right? So it's exactly the same note, but just three different
performances of the notes with just
slight variations. It's just stops us having
that kind of machine gun like repetitive, effective
many times. Okay, so that's, that's one level of realism we've
added with round robins. In the next section,
we'll look at another step that we can take, and that is velocity layers.
21. Velocity layers: Okay, so velocity layers, velocity layers are related
to the notes that's played depending on how fast you hit the key
on the keyboard. So when we, if you've played
with synthesizers before, if you've played a lot
with in your door, you'll know that
most midi keyboards or velocity sensitive. This is basically is
Moody's way of knowing how hard or rather how fast a key is not to
do with how hard it is to do with how fast they
correlate pretty closely. Generally. The sample
engine knows how, how, how fast you've
hit the keyboard. And it can play a different
note depending on how fast or how slowly if
you've pressed the key. And you remember before I was
saying that if you grab one of these samples and you
start dragging up or down, it started going a bit too far. It drags out completely. So you could see that effect
happening before. And I just said just make sure
it fills the whole thing. It's actually adjusting this, these velocity figures
at the bottom there, so we can see that
it's more parties. And so these are the minimum velocity and
the maximum velocity. So just highlights
a one of your, one of the groups. If you press Command D
or you can press Shift, you can either press
Shift and press Shift and highlight all
of these or you can press Command a that
will get them all. What I've done is I've
recorded my samples. I recorded two
different velocities. So I wish I am going to
call velocity layer one, hence the V1 in the, in the title of the audio file. This is me hitting a
string relatively softly. I then went through
and record it three times on
each string again, hits and string much harder. So we can use the sample
to say, okay, well, when I hit the
keyboard quite softly, play the softer sample. When I hit the keyboard. More quickly or
harder more quickly, I have a higher velocity. Play, the louder sample. Play the sample where I hit
the string a bit harder. And again, this can
add a lot of realism. This is very true, very true
of stringed instruments, is very true of woodwind
instruments and brass as well. And also things like drums. It's not always
tonal instrument. So if I hit a snare
drum quite lightly, It's a very different sound too, if I hit it very harshly. So you can have, again, as many velocity
layers as you'd like. You could up to a 128. But most sample libraries
will have somewhere. Usually three is
a good starting. 0.5 is probably for
a very expensive, very, very detailed
sample library. Now, remember it's
not, It's not. Well, remember the fact
that all of these samples, resources from your computer and you'll start to slow
down very quickly. But the other thing to remember that the sampling
is a pretty good, they do optimize for this. But the other thing
to remember is just how many
samples you need to record and chop up and a name. So if you have, let's say, let's make
the mass nice and easy. So let's say you have 25 samples recorded
across the keyboard, and you have four round robins. So there's a 100 samples. And then you want to record
five velocity layers. There's 500 samples that you
need to not only record, but also chop up named export
was audio files dragging, adjust insight to your
inside your sampler. Mapping and adjust the zones, etc, inside your sample engine. So the numbers can get
really big, really quick. And you'll go from
having what we have now, which is at the moment, 18 files to cover are six
strings and three round robins. We're about to double that to 36 because I'm going to add
another velocity layer. But you can go from having
a sample libraries, 36 samples in it to sample
library that has hundreds, even thousands of
samples within it. It can become an extremely
time-consuming, tedious task. The amount of time it took to
just record those samples. So it took probably about
20 seconds per string, six strings, so there's two
minutes per, per run through. So I did that three times. So the little gap between
six or seven minutes per Per velocity. So for
three round robins of just six notes. So I did that twice
out as 15 minutes just hitting a string, waiting for it to ring out. Taken a pause, hit
another string, wait for it, wait
for it to ring out. So it can take quite a
long time to do these. And this is for,
as I say, a very, very small sample set, really with only
two velocity layers and three round robins. Anyway, let's, let's
create a velocity. So we're going to create
two velocity layers. So I've got everything in
round robin, one highlighted. I'm going to just drive down from the
top and I'm going to take this down to about say, 95. So this means that
if I now play a key, just so what's happening is that I'm going
through the round robin. But basically if I hit a key, that's a velocity between 095, I will play the sample
related to that key. If I play the key harder
than that at the moment, is won't play a sample, it's got nothing to play. So what I've done is I've
gone through and recorded, as I said, the same again. So three round robins with
three velocity layers. So very quickly
I'm just going to go and add those in now. So let's see, Round
Robin one velocity to, and this is why I spent a bit of time laboring the point
about naming things properly. So round robin one, velocity layer two
is this folder here. So let me grab those samples. Truck loads in round robin, one velocity layer to
dry goes in there. You'll see that the sampler actually just makes
them fit inside there. So what happens if I go to Auto Map by
pitch detection here? We are. So it's actually
been quite smart and it's spread these
out within there. So anything if I play a D2 between velocity 0
and velocity one-to-five, it's going to play file D2
round robin one velocity one. If I play a D2 between 96127, then it's going to play
a D2 round robin one. But velocity number two, and these are the notes
that I struck a bit harder. It's going to do exactly
the same for the others. So just go into each group. Into each group, select
one sample, press Control. Drag that down to 9595 I chose. Yeah. So drag those down to 95 and I'll go and
get my velocities to round robin to velocity to go ahead
and grab those samples. Tracker is in cortisone, automatic, automatic
using pitch detection. And then the same in
round robin three, highlight one, control, a, drag that down to 95. Now you'll notice that
all these match up. So what I mean by that is that also a map using
the pitch detection. So this is round robin
three velocity three. What I mean by matching up is that these line up in columns, it doesn't need to be that way. So you could have things
like like this, for example. That's that's not
a problem at all. So it can work in
different ways. Sometimes you'll
see this done where a sample is just doesn't
sound right where samples not been
recorded properly. Not such a problem if you're
recording it in your, in your home studio,
you can just go in and re-record that bit. But if you've hired
an orchestra to come and spend a day
playing samples for you. And then you get back a few
days later and you find that a particular sample is not recorded properly
for some reason is slightly out of tune or just didn't work for
some other reason. You can actually kind of fudge it as long as
it's only one or two by just Stretching other
samples a little bit more. Let's just put this one back. So this one should
be just check. So root k, V1. I just want to show the root key of A1 yet, that's all good. So again, I just need to
go through and just go through and set these. I'll speed this up
so you don't have to sit and watch me
do all this again. Okay, so you can see that just
one thing to show in here is you can play these sounds back without
hitting the keyboard. Which can be actually tricky once you've set round robins up. Because every time you hit the keys could play
different sample. One thing you can do is
play using this icon here. So if I look at my, let's take this note here. You can hear that when
this is the softer sample, so velocity layer one, that's going to ring out
if I play between 095. Okay, So it's just a softer
sample in the bottom of the string for the second. So this gives us a,
some more realism. So as I, as I play it slowly, you can see that I'm accessing. Okay. So a much more realistic
sounding instrument, not perfectly recorded
by any means, but, but much more realistic than, than anything that we can
achieve with quick sampler. And certainly more realistic
than anything that we could achieve with a
regular synthesizer. I'm certainly not
for the same effort. Okay, so again, there's a
few things we could do so before we had the nine. Okay, so we could set up a
similar thing with the LFO. So we could have a LFO just change the shape
of the LFO to be a sine wave. Because set the rate to
what do we have it before? About four seconds,
about four hertz, that fading about a 2.5th. And then again up
to the MOD matrix. And we can set our LFO one. We can remove the mod
wheel from there. You can set that to
8, $0.10 a minute. Right now I'll do $0.09. So again, just to give a
little bit of vibrato. So when we hit the notes,
it will ring out and then a little bit of
vibrato will be introduced. Okay? And again, we could, we could
add some effects to this. Again, in side logic sampler, we don't have the ability to, there's no effects built
into logic sampler, so we can just go and grab
effects as we normally would. Again, let's go again for
the Valhalla supermassive. This is a free plugin. If you've, if you've
not come across it, then go get it. So it's Valhalla, DSP.com. They have some
incredible plugins. Two or three free
plugins we to try out. Valhalla supermassive is
absolutely incredible, but it's a huge reverb. So let's just go and
pick a preset from here so we could
go. I don't know. Let's maybe try. An echo
guitar seems right. Palm mute, reverse,
eighth, eighth notes. Let's try to bring this to the front and
look at the mappings. We can see what's being played. Okay, So pretty cool
sounding instruments. I like that a lot. I think I'll sit and tweak that for a
little while longer. But definitely a playable instrument and
definitely something you could perhaps using a
composition of your own. So that's it for, for, for the sampler, we've covered every single
section in there. What I might like to have a look at is a
different sample engine. So there's another sample
engine called contact. It's by Native Instruments. It is that the sampler and quick sampler,
our logic specific. So you can only use
those inside of Logic. Although just about or
many of the other doors, Most other doors have got very similar setups and
suddenly look very familiar. Like say we haven't
been into detail on every single setting and nook
and cranny inside these, because that's not the point. The point is to learn
how sampling works, not how logic sampler works. So you see what I mean
about that confusing tape? But just to prove that
we're going to look at, we're going to look at
creating one more instrument. And we will do that
inside of contact.
22. Our fourth instrument: Introduction to Kontakt: Okay, so in this final
section we're going to look at a different
sample engine, sample engine
called contact six. You can find this over on the Native Instruments websites. Now contact is a paid-for products that don't get confused because there was a
free version as well. But the free version is
simply a player allows you to play other people's
sample libraries. But contact six in order
to actually create a sample library will need
to buy the paid-for version. But it really has become
the industry standard. So there are many others around. There's one, a particularly good one I've been using
recently called highs. But you need to be a bit of a software
engineer to be able to create the ones that you need to build
and compile yourself. But contact six has been, or contact has been around
for many, many, many years. Contract six is the
latest version. You'll see it still
looks a little dated when you compare it
to the logic sampler. But it's very, very powerful. Um, it's, it's got a bunch of additional features that
perhaps logic sample it doesn't quite have yet, including things
like the effects. But, but you'll see that it works in
exactly the same way. And all the, all the theory you've learned and all the techniques
that you've learned looking at quicksand and logic sampler can be applied to contract six or to
any other sample engine. Let's have a look at contract. Okay, so here's contact. You can see it looks very
different to the logic sampler. On the left here we've
got just a bunch of, of libraries which we can load in the sampled
instruments from. We don't need that right now,
so let's close that down. Unfortunately, the UI of
contact is a little dated. And actually this is as big
as I can make the screen. So this is why as I can make it. We'll manage. I'll
zoom in a little bit. And let's see if we can get that all on the
screen for you to see there. So to create a new
instrument in context, I simply double-click inside
this black space here. That's creating a
new instrument. And then to edit the instrument, I need to click on this little wrench icon in the
top left here. So you can see it looks
very, very different, but all the things that we
used inside logic sample, logic, sampler are all there. They're just a little hidden or in different places at least. But we will see that
all the concepts that you've learned
from logic sampler can apply to contact
or Ableton sampler or Sampras IQ based or whichever sample
engine you are using. And it's just a matter of
going through methodically and just applying
the same principles. So we know that
the first thing we need is we need a sound source, same as we would with
any other synthesisers. Um, and so the way we do that with a sample engineers through
the mapping editor. So let's click on the
mapping editor here. This is going to open up a very familiar looking screen here. Then I can drag in my samples
and put them in here. And I just need to go
and rearrange them here. Again, there are automatic
features in here. But we can fairly simply just
go through and drag things around so we can get stuff
in some sort of order. So E a D. So let's go and
drag this around. So we go to the E1, so we need to go find a E1. So let's just, just drag
it up here a little bit. So here is, let's see, C, D, E. Here is y1. We need to go and set
the E, the root key. So we'll drag that up to y1 and we can see
that starts there. We then have our a one. So we'll track the
root node to a, excuse me, a one.
And that's there. Let's just bring
up from F1 to A1. D will track down to here. We'll bring that down to D1
and set the root note to D1. G, a printer here. And we made a slight too big. We'll set the root key to G2. B to them is just here. So we'll set the root note
to B2 and then we have E3, which should go to yeah, and we'll set the root note 23. Okay, so we've got our samples mapped
across the keyboard. Will stretch these out to go either end the same
as we did before. Okay, so now I can play
this across the keyboard. Problem here already. So this is the, this is a problem. This is where I said
we need to make sure we set our root notes correctly. I was playing up the keyboard. I can hear it going higher and lower as I moved
up the keyboard. And the reason for that
is that D2 sample here, we've actually set
the root key as D1. So well done, if you spotted
that what I was doing it. So let's go through
check those. E3. Yes. B2, G2, D2, A1, and y1. And again, another
example of just spending a little bit of time
to name those regions within Logic before I export them to make sure that
the region name is in the file name because
I'm trying to find that. So we'll work that out without
being able to correlate. The two would have taken me way more time
than it did anyway. So that should be right now. This is simply an
electric guitar through some effects in, through the audio
interface and recorded, excuse me, recorded in logic. So that's a simple
note, sounds like this. Okay, so we will add a
second instrument now. And this is a kind of a
path-like sent instruments. So in order to do that, we need another group
that's exactly the same as we did in logic sampler. To get there we go
to the group editor. We will need to add a new group. So we click here to
create an empty group. So let's, let's be
sure to, to stay tidy. And we will rename our renamed, our first group to guitar, GTR. And this group is
gonna be our synth, so I'll call that one this way. And so the moment you can see that although I've got
the synth group selected, I'm still seeing the
guitar samples here. And this is a little quirk of, of, of contact rather. So that is because I have this edit or groups
buttons selected, so I seek to unselect that. And then to sort of that group, or sorry, a sudden to collect, click on selected groups only. And this will give me
just that empty group. If you're using logic. By default, I would just go and uncheck that and click
on certain groups only. It just seems much more
intuitive to me and much more in line
with the way that, with logic or the way
that logic works. So anyway, so I have
my empty group there. Let me go and grab
my pad samples. Here. I'll just drag those in. Again. This is not
strictly necessary, but just to keep things
nice and simple, I created six paired
samples which exactly match the notes of the open strings
of the guitar. Just to keep things
nice and simple, it doesn't need to
be like that at all. I could record it
any number of notes, even a single note and just
spread it across the keyboard or a different set of notes. And it would have
been completely fine, just met them differently
in this group. Let's scrub this one here. So this is A1. We can see the filename here. So let's go and drop
that onto a one. This is actually a
quicker way of doing it. You map them if you drag down and just mark them
as single notes, you can just drag them
around a little bit quicker to to edit stuff. So this one is B2. Goes here on, sorry, on B2. This one is G2. That goes here onto G2. This one is E three, so that goes here onto E3. Then we have y1. So down here to E1, I think we should be good. So then what I can do is I
can highlight these now, because of the way
that a guitar string, guitar strings are tuned, we're not the slightly
different interval for the b. But if I go and highlight
these four, for example, I can just drag all of those
down to fill that gap. And then just drag
these two out. This one, we're going to drag in both directions,
traveling all the way up. And this bottom one, we will track all the way down. So now when I, I'm so sorry, let me just solo this group. And so this is what
the synth sounds like. If you've done my
previous course on sound design
with synthesizers, then you'll recognize
this path from there. So there's a few things that
we would need to do to that. So you'll notice that
when I release the key, then that sound
stocked very suddenly. So we will need to go and
fix that to start with. So we do that through
the amplifier envelope. So in contact, you have a separate amplifier for
each voice, for each group. So we have this group
here, the guitar group. And then we have
the synth group. And you'll notice the synth is set at minus six dB and
the guitar set at 0. I'm not entirely
sure where that is. I didn't change it, but that's just, that's just the way it is. So, um, so for the synthesizer, we'll go down, we'll click
on the modulators here. We'll add a modulator,
but go to envelopes. Antsr, which stands for attack, hold, decay, sustain,
and release. Just a different
type of envelope. If you click on this
little button here, but this down arrow that will take us down to the
bottom, to the envelope, we are going to set the
attack to be a little longer and the release to be around about the 10-second
mask, something like that. So the patcher now sound
a bit, bit more potluck. And so when I release the key, that sound gently tails off. Just turn that up a little
bit. I'm not sure why it's set so low by default. And then we'll do the
same for the guitar, because I believe that the guitar will end
abruptly as well. So let's go down and set the
envelope for the guitar. So again, we will, we will, we have a envelope for the
guitar created already, and we will bring
that up to around the 10 second mark out a little bit of attack
in there as well. So this is what they
sound like when combined. So if I go and
turn the grid off, when I hit a key, now
they'll both play together. Okay, so we can really
see that kind of combination of sounds can be really powerful and
you can layer many, many sounds with each other to create a instrument that
really evolves over time. It is something that you simply couldn't pick up and
play in any other way. So let's just make a
few more adjustments. So that guitar, I think, is a little bit. So let's just turn that
down a little bit. What I might do is a couple of, a couple of extra things here. So what I might do is
detuned the guitar. So I might tunica
top-down one octave. Quite like that. I'd like to create a little
bit more movement. So what I'm gonna do
is I'm going to add. A chi do that in here. No, I think I need to do
that in this modulator. Delete that one. I need to add a modulator with
an LFO, a sine wave. And this is going to
affect the pattern. This is what I wanted to do. So I'm going to, I now have an LFO. So a low-frequency
oscillator with a sine wave. That is, I'm sorry,
it's this one here. We can delete that one. So we have an LFO that is
going to affect the pan. And what I wanna do
is just move the pan. Move the guitar slightly
left and right as we go. So let's go down
and have a look at that modulator. Little bit fast. Let's just bring that down. Again. We've got
similar things in here so we can, we can, we can fade in, fade it in a little bit. And let's just turn that frequency down
a little bit more. Then. We can see the conversation
here with thoughts. So bring that down. Let's just voted down a little bit. Let's see. Okay, so now we've got a little bit of movement left to right. If you're listening
on headphones, you'll you'll, you'll hear that. I may have to plan underneath the pec playing and
then the guitar playing an octave down, modulating left to right. I think there's a few other bits and pieces
we could do here. So inside contacts, something
that we don't have inside. The logic sampler is the ability to add effects directly inside
the sample engine. And this is a really
powerful feature of context. The reason is that of course, is that the contact is
independent of the door. In fact, it can be used
without a door at all. So a digital audio workstation at all as a standalone app. So it needs to have the effects built in because
it can't rely on them being there from the withinside logical Cubase or whatever. So we can add some
effects inside here. So perhaps we'll add
some sound effects. Again, we're on
the, on the guitar. We will add maybe
a bit of delay. Let's just sort of
it. That's awesome. You can really hear it
for the group soda. And then we can add some
reverb to the whole thing. So we can add inside this
main effects section. Then we can add some effects. We can add some reverb
and maybe choose reverbs. Fine. Let's, let's set
the time up a little bit. And that's because it's a main effect of that
apply to both groups. Let's un-solo the groups. And let's see what we got. Okay, so there we are. So we've created a path
from a combination of a pad synth patch that we could have created
in any synthesizer. And layered onto that then is a guitar that's recorded in. Both of them are
bouncing down to individual audio
files mapped using the mapping editor in
two separate groups. And then we've
applied envelopes to both some modulation
through the panning. And then finally added
some effects to create, I think, a really nice
and useful sound. So as you can see, the basic techniques and the basic concepts apply across basically all sample engines
or sampling engines, but they can be in
very different places. So I would say is that
this course has given you a great fundamental knowledge, a great foundation
onto which you can go away and create your
own sample libraries. But it's definitely,
definitely worth digging into the manual of your
specific sampler to really get the
most out of it. But I hope you've
enjoyed the course. Thank you very
much for watching. And I cannot wait to hear the, the sampler instruments
that you've made using the knowledge you've
gained from this course. So please do reach out
and share them with us. Thanks very much. Bye bye.
 Steve Lydford, Music, Sound Design and Productivity