Transcripts
1. COURSE OVERVIEW: Welcome to the
complete beginners guide to synthesis
and sound design. This course for musicians have all levels is a
comprehensive guide to using any synthesizer to design your own unique
sounds and music production. My name is Steve lipid and
I'll be your instructor. I've been creating
music electronically for over 30 years and
during that time, I've gained experience designing sounds and composing
and producing music with dozens of physical
and virtual analog and digital synthesisers. This course contains
over six hours of video lessons taken, right from the basics
of synthesis to complex sound design with in-depth and detailed
explanations. At every stage, we'll look at synthesizer architecture and how the different elements of a
synthesizer work together. Why the various wave
shapes generated by oscillators create
different sounds, how to choose the one you need, and how to use them
in combination. How to use ADSR
envelope to control the dynamics and shape the
sound of your synth patch. How to use different filters
to create the perfect tone by removing or enhancing
particular frequencies. How to add movement and depth to your sounds with
low-frequency oscillators. And how to use effects
such as Chorus distortion, delay, and reverb to make
your sounds more interesting. Towards the end of the course, we'll use what
we've learned about synthesis and sound
design to create some really high-quality
professional patches that you can either use directly or tailored to your own sound. You can follow along and
create them yourself. I've also made them available
as presets for download, along with a glossary containing explanations of all the terms
used throughout the course. But we're using the
incredible vital software synthesizer
for most of the course, which is available as
a free download and will run on any reasonably
modern Windows, Mac, or Linux computer. I'll then introduce you to three other very
different synthesisers to show you how to take what you've learned and apply
it to any sense. Whether you are brand
new to synthesis or an experienced
sound designer, beat maker or producer. This course will really help
you to understand how to construct precisely the sound you're looking for,
for your music. So join in and learn the
art of sound design for music production using synthesis to create any sounds
you can imagine.
2. INTRODUCTION: Hi there, my name is Steve lipid and in this course
we're gonna take a look at an introduction to synthesis and how we can
use synthesisers to, to create sounds for
music composition. Throughout the
course, we're going to cover a number of topics, but it really is gonna
be about the basics of synthesis and how
to take synthesizer with his basic scratch patch to really create any
sound that you want. So there's a number of
topics we're gonna cover. First of all, we're
going to look at how a synthesizer actually works on the key elements
of a synthesizer. We're going to have a look. The different
waveforms that we can use as the basis for our sound. We're going to look at
how we can use filters to affect that sound in
various different ways. And we're gonna
look at envelopes and really how we can begin to really shape how that
sound is expressed. We'll take a look at
modulation and how we can use. We can use different parts
of the synthesizer to affect different the different tones and characteristics
of the sounds that would make
it as that plate. Then we also have
a look at how we can use effects such as reverb, distortion and chorus
and things like that to really add some character to the southwest
has been created. Finally then, um, we'll have a look at how this
knowledge that we've got can be applied across different types and different
kinds of synthesisers. We'll look at some patches. So we'll create some patches of various different types of
patches and lead patches, atmospherics, pads and
some percussion sounds. Some people, it
sounds kind of piano like sounds that we can use to construct the kind of music you can hear playing
in the background now. And in fact, all of the
sounds that are being used in this music you can hear in the background the patches that will create
urine. His course.
3. GETTING THE MOST FROM THE COURSE: What are the things
that you'll need as prerequisites for this course. Well, actually you
won't need anything more than what you're
watching on now. But if you want to follow along, then the bare minimum requirement that
you'll need will be a computer of some kind. Nothing more than that. It can be Windows, it can be Linux, it
can be a Mac computer. I'll be using a Mac, but the same things will apply across all the software
that I showed you. You'll be able to use across all of those operating systems. Now, you may use a digital
audio workstation. So something like GarageBand
or Logic Cubase, ProTools, Ableton Live, any of those tools that will
be completely fine, but actually the synthesisers
that we're going to use primarily for the course. It will actually runners
his own standalone app and we'll cover that
in the next section. The other thing I would
highly recommend, if you really want to get
the most out of the course, I'm really be able to
listen to the nuances as you adjust the sounds within the synthesisers are really good quality pair of headphones. I would recommend listening on headphones if
you possibly can. Finally, although it's not
vital, it'd be really, really beneficial to you if you've got some sort
of midi controller, keyboards, piano style keyboard that you can plug in
to your computer, usually through USB, that you can play along
in the synthesized. And now the synthesized
we're going to use does allow you to achieve the
same with mouse clicks. But if you really want to
stop playing chords or complex melodies than
a midi controller, keyboard is really
going to help you. Let's move on quickly. I just want to show you
the synthesizer that we're going to be using for this course and how
you can go and get it.
4. GETTING THE VITAL SYNTH: Okay, so let's have a look
at the synthesisers that we're gonna be using for the
majority of this course. Now there are hundreds,
if not thousands, of software and
hardware synthesisers. But really this course is aimed at the basics
of synthesis. So anything that you
take during this course, you'll be able to apply
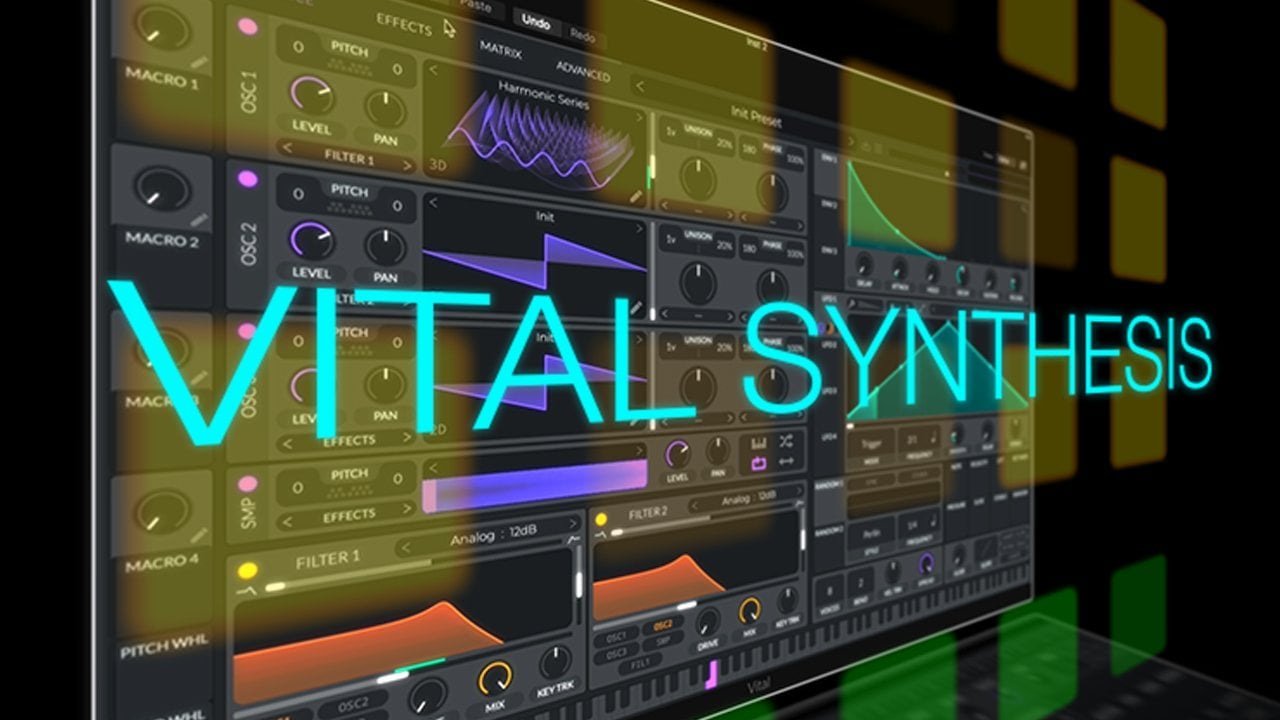
to any other synthesizer. For this course I've
chosen to use vital. You can find vital that HTTP codon for slash forward
slash vital, the audio. Why have I chosen vital? Well, the main reason
that I've chosen vital, and it is actually quite a complex synthesized and I'll
cover that in a second. But the main reason that I've
chosen vital is for It's really visual interface and
I think it's really helped to get these concepts
across to you. It has, like I say, some very, very advanced features which
you can build on later. But in this course we're
gonna focus on the basics. So what I would do or
what I would ask you is to really focus on the
basics that I'm showing. You. Don't be too tempted to
play around inside vital. Just save that for
later. Once you've got a really good understanding of the basics of
synthesis, then vital. Ready as a world-class
synthesizer. And it's got many, many advanced features that you can continue to learn
on your journey. One of the other main
reasons that I've chosen vital is it is absolutely free. If we scroll down here on
the fights or webpage, you can see that he's got lots
of very advanced features. But if we get down to
here, we can see that there is a free tier for vital. Now there are paid
tiers as well and the development mats Ital has made this
available for free, but for slightly more money for twenty-five dollars or $80, or you can subscribe
for £5 a month, $5 a month, whichever
is best for you. You do get a lot more features, a lot more presets and access to more wave tables
and various other features. But more than that, I would, I would say if you can afford to pass money onto the
developer max, I'd sell. Having been previously a
professional software developer, I can't tell you
how many, hundreds, probably thousands of hours have gone into making
this synthesizer. If you can, if you
can afford it, I would certainly recommend that you try to support
the developer. It works across every operating
system, as I said before, it doesn't matter whether
you're on Windows or Linux or MacOS. And it's relatively
easy to install. So you can find the
install from this website. There are some slides, constraints device on
that is you do need a relatively modern
graphics card. Anything in the last 567 years
will be absolutely fine. It is reinforced 64-bit
operating systems, but other than that, you should have no
problem running it. It will run in any door, whether that's pro Tools
for AX or Pro Tools, Audio units for
something like logic or GarageBand or VST instruments for just about every
other digital, digital audio
workstation or door. But there is a
standalone app as well. So when you download it
as a standalone app, and you can run it completely outside the DAW
if that's your preference.
5. INITIAL SETUP OF VITAL: So with vital, I'll be running it inside logic
throughout this course. This is just the way
that I've got the audio routed to be able
to record this course. But if you're running
a standalone app, Let's just one or two things that you should
take a look at. So it'll just run as a
standard, standard application. And I can play inside
the standalone app. If you've got a midi
controller keyboard, you need to go set up
inside the settings. If you click on the bottle
logo in the top left here, open up this window here. Inside here. You should just make
sure you've got this check for updates. The purple button is
highlighted there, and this will make
sure that you get the latest version of
vital at all times. You can sit inside here
the screen resolution. You can drag one of the
corners of the screen and drag it out to whatever size
you'd like inside here. Don't worry about
these too much. As I say, I'm
slightly strangely, yours will definitely look
different, different to this. This is just the way that I've routed the audio
for this recording. The important thing down here is usually when it's installed, your, your midi keyboard
won't be enabled. So just go down to here, find your midi keyboard
here I'm using a, actually a key step 37. So I'm just going to make
sure that that box is checked next to your keyboard. And that way you'll be
able to get sound out from your keyboard or receive signals from your
keyboard into vital, that viceroy can produce
the sounds for you. One other thing while
we're here is, by default, vital comes with a setting
for display units, which is slightly different to most synthesisers
that you'll use. For this course. I'd like you to do is just pop onto the advanced tab here. This, this display
setting down here. We would just set that
from semitones two hertz. This will mean that although semicircular is certainly very interested in way of
configuring your sounds. And perhaps a more
intuitive way of configuring your sounds
by setting it to hurts, you'll find that that
translates much better across the vast majority of other synthesisers
that you'll go on to use.
6. TYPES OF SYNTHESISER: As I mentioned previously,
there are many, many hundreds and thousands of different types of software
and hardware synthesiser. And they all work in
slightly different ways. They can be grouped into, into different categories
of synthesizer. And again, there
are many of these, but the most common ones
that you'll come across. Other ones that we see
on the screen here. This is subtractive synthesis,
additive synthesis, frequency modulation,
wave table synthesis, and physical modelling
synthesisers. And as I said, there
are many, many others. But in this course
we're going to focus on on subtractive synthesis. Now, the reason for
this is this is the most basic and common time at common type of synthesis. Now, subtractive
synthesis works by creating some initial
sound and then applying filters and various other
types of modulation and effects to alter the
harmonics most often by, by kind of, you can think
of it as starting with an initial sound and
chiseling away at that sound. And to get to the one
you create much like a sculptor takes a block of marble and chisels
away to get the, get the sculpture they
desire in the end. Additive synthesis works
in slightly different way. This is based on the
physical fact that any sound can be replicated by stacking sine waves
on top of each other. So additive synthesis
works by taking sounds, stacking them on
top of each other in order to create the
sound that we desire. Frequency Modulation works by having sound waves affect
each other in different ways. This is, this became more
popular in the late 80s, early 90s, and continues today. And there's some fantastic
hardware and software. Fm synthesizers, the most popular of those
probably be in the DX7, wait tables synthesis, subtractive and the traditional
analogue synthesisers. We didn't really have the
processing power to be able to work with
complex sound waves. So initial noise generators. So we stick with a set of basic noise generators which we're going to cover in
one of the next lessons. Table synthesizes just
take the power of modern computers and
modern processing, unable to enable us to start with more
complex wave shapes. And physical modelling is a very interesting
type of synthesis. This really works to take
a physical instrument. Often these are kind of woodwind instruments
or string-based instruments. Percussion actually really use a really complex often number of parameters to really
shape that wave. In various ways. Massively complicated,
absolutely fascinating, and certainly
something that I would highly recommend you
take a look at in the future once you've
got the handle on the initial workings
of a synthesizer. But really all these
types of synthesis off, right, in a really,
really similar Bye. They really differ in the way that they generate
the initial sound. But everything after
that is pretty common and transferable
across them all. So everything you learned in this course will apply equally, whether that is
subtractive synthesis, FM synthesis, wave
table synthesis, or any other kind.
7. SYNTHESISER ARCHITECTURE: Okay, so let's have a look
at the basic architecture of a synthesizer. We're going to look at each
of these section by section. But as an overview then we can see that we have
our initial input from a keyboard or
other instrument here, commonly a keyboard that sends a signal to
the synthesizer and it starts them oscillator. As I said, we're going
to look at each of these sections in
much more detail, but I'm just gonna give
you a quick overview here, the oscillator them or
create the initial sound. And we'll pass on that sound to filter or one
or more filters. And the filter will be really
doing the subtraction. So really helping to shape that sound by
removing some of the, some of the, some of the
sounds of the harmonics. These terms all make much more sense in a
few minutes of promise. This can be, these filters will then pass on that
signal to the amplifier, and the amplifier will then
output to your speakers, your headphones, or whatever device you're listening through. We have envelopes as well. So envelopes are
used to affect the, the amplitude or the volume
of the sound over time. We also have this
thing at the bottom here called low-frequency
oscillators. We will cover these in
much more depth later. But basically these are a way of automatically adjusting some of the characteristics of
the sound overtime, adding some movement sounds to make them more interesting.
8. INTRODUCTION TO OSCILLATORS: In this first part, we're going to look
at the oscillator. Now the oscillator is used to create the initial sound
from which we then go and go and sculpt the final sound that we want
to use in our composition. Oscillators, you'll commonly
see them referred to as different things on,
on synthesisers. Often you'll just see
the word oscillator, but sometimes you might
see the acronym VCO. Vco stands for voltage
controlled oscillator. This is, this is
kind of traditional, back to the, back to
the good old days when, before we moved into this kind
of digital realm where by the oscillators and everything
inside a synthesized, it was based very much
on analog circuitry. And it was, it was voltages
that are applied to these oscillators that created
the, created the sound. Let's pop into,
into vital and have a look at the oscillators
inside vital.
9. THE OSCILLATOR (VCO): Okay, So here I am inside vital. Like I said, there's
a lot to vital than one of the main
reasons that I chose vital is that it is really a synthesized that you can continue
to build on. So once you've finished with
this course, vital will. But there's very little that you wouldn't be able to
do inside vita was an absolutely enormous
and fantastic and fully featured professional
grade synthesizer. It's very, very visual. But like I said before, it does so much. Please don't get distracted
by drawing this course. I would definitely recommend
that Let's get the, get the fundamentals on the
about during this course. And then later on, dig into some of the more
advanced features. But this course we'll show you absolutely everything
you need to know to get the kind of sounds that you want
to have a synthesisers. We'll be able to most
importantly take the concepts you've learned in the
course and go and apply them to any
other synthesizer, whether that be software
by synthesisers, vital or perhaps a
hardware synthesiser, or an uneven onto
modular synthesis. A couple of things
that we need to do when we open up vital. You'll see at the top
here that we have this thing here says
a niche Presets. Preset. This is the
initial preset. This is a, this is how vital will look when
you first open it. I'm running it inside logic. You'll see down the, down the left-hand side here, you can see bits
of bits of logic poking through and
in the display. It doesn't need to
run inside logic. It can run stand-alone. It also doesn't
need to be logic. So if the digital audio
workstation software that you're using is different,
that's completely fine. You can just load it up like any other virtual instruments. So as I say, whether it be pro Tools,
logic, GarageBand, Reaper, Cubase, Ableton Live, which have a DAW using the workings
of vita will be identical. There are a couple
of things I would certainly advise you to do and that will try to remember
I didn't always remote. We will try to remember
to do whenever we come to this kind of initial
preset, Preset screen. So these around the
phase and the wave type. So during this course, as I say, vital can work with it, can actually work as a way
table synthesizer as well. It can work as an
FM synthesizer. We're interested in
subtractive synthesis. So the very first thing
that we're gonna do is we're just going to hit
this right arrow here. If I just pop, pop here, you'll see that
in here we have OSC one. Again, it's called something
slightly different, but OSC just simply stands for oscillator, oscillator one. And you can see
that inside vital we've got three oscillators and we will see how we can use those in combination later. But you'll see this wave shape in here in this screen here, this little panel within the user interface shows us the shape of the wave
that we are going to be. There's going to
be generated when we press a key on our keyboard. Now, the init patch comes up with this
kind of sawtooth wave. What we want to do is just
hit this right arrow once. And we'll move this
two basic shapes. And we'll scroll
through this later. We can also get to basic
shapes by clicking down here. And if we go to the factory
presets and we'll see that basic shapes is in there
in the factory presets. Ignore the rest of now. They're very interested in
great fun to play with. But for now let's stick
with the basic shapes. The other thing that we
want to change when we load up our initial
preset is over here. In this phase section over here just to the
right of the oscillator. What we want to do is we'll
talk about phase later. But by default, what you should do is just bring
these both down. So just click on
the number and drag down with your mouse and
bring them both down to 0. I believe that this is going to change in a future version of or potentially going to change it a future
version of vital. So the initial preset,
these are set to 0, but for now, just make
sure that both set to 0. Everything else is
completely fine. The way that an oscillator works in oscillator
generates a waveform, so we know that sound is
generated by it by a waveform. We've seen soundwaves. You would've seen
within your door or in other experiences, you would have seen
the shape of a wave. Now, this generates the shape of a wave and we can
see that along the, along the x-axis here, this is time from left to right. So this is right over
here at the start. On the left-hand side, this is the very beginning
of our waveform. Then on the right-hand side, this is the end of our waveform. And this waveform. For now you can just assume that this wave form will continue. Just, just loop round
and round and round and round until we release the key. The y-axis is the volume
or the amplitude, your volume and amplitude, you can pretty much use
those terms interchangeably. So this will be the amplitude. So this is how
loud the sound is. At any point.
10. BASIC WAVE SHAPES: As I said, to really get the
most out of this course, you really want to be
wearing headphones. And this will allow you to
hear the subtle changes that we're gonna make to the
sounds that we generate. I popped on a pair
of headphones and we'll take a look at
this first wave shape. Now this is called a sine wave. You'll see that it's
a very smooth curve, raising an amplitude and then, and then lowering the amplitude. As it moves across
the wave shape, it oscillates very fast. If I play a key, a
key on the keyboard, you'll hear it's a
very smooth sounding, very plain noise. And it's not something
that we use a great deal, but it's got some
very particular uses, insights synthesis. This is what a sine
wave sounds like. Okay, So you can hear
it's a very, very, very plain, smooth tool. If I bring up on a
silver scope and we'll have a look at that wave shape. We can see that's
the sort of scope. We can see exactly what's reflected that the
sound that's generated. And you'll see that
as I press a note. This same, this same wave shape is repeated over and over again. The wave shape that we
can see at the top. You'll see that as
I change notes. We further, further
down the scale. The wave gets wider and wider. So the wave wavelength
gets longer and longer. And we can, we can say that the wavelength therefore
is affecting the pitch. So the higher the pitch, the much shorter the wavelength, the lower the pitch, the
wider the wavelength. The same is true of
all all audio waves. Let's have a look
at the next one. So if I go back to
the oscillator, if I just take this slider on the right-hand side of the
oscillator wave shape here. Oh, by the way, before I forget, you can actually
oscilloscope that I use, that I think is very clear and easy to use and
playing for you to see. But there is actually an
oscilloscope built-in survival. So if I pop back out here, you'll see that if you go to the Advanced tab at the top of the screen here
and you click on that. In this analysis section
down the bottom, you'll see a very similar thing. So if I press Add Motes now, you can see inside here, this is the wave shape
that I'm generation. Anyway, back to the batch
of the oscillators. So on the right-hand side, I can move this little slider
up a couple of frames. So we'll go, we'll
go past this one, but we'll look at
perhaps this one next. This is known as
a triangle wave. And you can see that it's
very similar to a sine wave, but it's not so rounded and this is reflected in the
sound that it makes. So if I just bring up the
oscilloscope once more, where is it here? If I bring up the stereoscope, you can see that when
I play this sound, I'll see that same shape
repeated over and over again. You'll notice this time that the sound is a little harsher. You can see this in the shape, so it's not so smooth. It just sounds a little
bit harsher stories than the sine wave did before. Okay, Moving on then, the next common one that
we see is known as, let me pop back up here. The next, next common
shape that we see is known as the sawtooth wave
or the soar wave. This is used a lot. It gives a very interesting
even harsher tone than the sine or the triangle. Let's again pop up the, pop-up the oscilloscope. Let's
have a look at this one. Again, you can see
this is very much harsher than the sinewave and, and even of the triangle wave. Just by itself, it makes quite a reasonable kind
of lead sound out of your synthesizer.
Onto the next one. This is the final one that we're going to look at for now, this is called the square wave. You'll see that it's not as harsh as the, as
the triangle wave. But let's just pull
up the oscillator or the subscript rather. Zoom in on that. And
you'll see that this produces the square wave. And you can see, in fact, if I, if I pause out there, we can keep the
shape on the screen. Don't worry too much about these kind of little
spikes at the corners. But you can see that the
amplitude is up and down. There's no middle
ground between the two. It gives quite a sharp, almost aggressive sound, but, but not as sharp as
the, as the sole wave. Again, these are
incredibly useful to us in terms of our
very bass sounds. So these are the sounds. We're going to
take them again to sculpt using the other features of synthesisers that we're going to talk about
in this course. But really, this is the first decision point
that you should make is, what do I want the
sound to sound like? What's the, what's the
closest base oscillator shape that I can use to
achieve a sound. If I want a very,
very smooth sound. Once I've applied on my filters and modulators and envelopes, then probably I want to
start with something like a sine wave
or a triangle way. Perhaps. If I'm looking for
a slightly harsher sound, perhaps something closer to lead sound or a guitar
sound or a string sound. Then probably I
wanted to look at either a square wave or most
likely a sawtooth wave.
11. EXPLORING FUNDAMENTALS AND HARMONICS IN WAVE SHAPES: So the way that a sound is made, the world or what
constitutes a sound, it comes from many,
many factors to it, but two of the most important
factors are the transient, and that's the initial
attack of the sound. So that's the initial, usually a split
second of a sound that makes up the beginning
portion of a sound wave. And for something like a drum or a guitar
player with a plectrum, this will be a very, very fast attack and I've quite a harsh sound
at the start. For something that's
a bit more dreamy and pad like that transient, it will be much smoother. And the transient is where, where we move from no sound to a sound is that
first initial portion. The other part that makes up a sound or the difference
between other sounds, something called the harmonics. Let me try and
explain this to you. And I can do this
if I move down to a sine wave and I
just bring up the, this is the standard kind
of equalizer inside logic. Daw that you're
using or have an EQ. There are many that
you can go and get. Very good free ones
and some exceptionally good paid VST and AU plugins. But if I look at the
sine wave, what this is, this is a slightly
different representation of the sounds of the
one we saw before. So before we saw the shape of the way
from the oscillator, this one is going to show
us along the x-axis. These numbers along
here, going from 20 to 20 thousand,
these are frequencies. So these are, these are,
these are pictures of sound. If you're moving
from left to right. It goes from 20 to 20 K. This is the normal
range of human hearing. Human hearing. For most people, the
20 hertz is about, and this is why we've
moved two hertz instead of semitones inside vital
because a lot of the, the other instruments
and other synthesisers and other things that
we talked about within sound design operate on
hertz rather than semitones. But normal human
hearing about the lowest that most people can
hear is about 20 hertz. Some people can hear perhaps 19. As you get a little bit older, you're hearing becomes
damaged in some way, then perhaps usually
this will start to creep up a little bit so
you won't hear anything. You can pretty much
guarantee you probably won't hear much below 20 hertz. In the other end of the scale, we don't really hear much
above 20 thousand hertz. 20 thousand hertz is an
extremely high pitched noise. And this also degrades
as you get older. It's unavoidable and will certainly be can be harmed by some sort
of hearing damage. While we're talking
about hearing damage. It's just reminded me just
to just to remind you that when you're
listening on headphones, and particularly
when you are doing sound design at
either end of these, free of this frequency spectrum, just remember to
take some breaks. Don't play it too loud
and take some breaks, give your ears arrest. This will this will
help prevent damage, although certainly
can't guarantee it. But you'll also find that you're just like your eyes become fatigued when you're reading
or you're watching a screen, your ears will become
fatigued over time and you'll start to lose that
sensitivity and start to, it'll start to become
difficult for you to really identify the nuances in the designing and making them really get that perfect sound
that you're looking for. Anyway, back to this.
20 hertz is the lowest. Most humans will hear,
20 thousand hertz. So 20 kilohertz is the, is the highest frequency,
the shortlist noise. But most humans will hear
this end of the scale. It tends to mostly be
children and young adults who can hear this high and
it's used to, used to. I don't know if it's an
advantage, but it is used by certain security companies. I remember there was a
shop in my local town that used to admit this extremely high pitched around the 20 K, 20 K hertz mark, shrill noise from speakers outside the shop and this was to stop kids hanging around. I couldn't hear a thing,
but it used to drive my kids crazy. Anyway. Slight tangent. But let's, let's, let's have a look. Let's try get back to this. So along the x-axis, as I say, this is showing
us the frequency. So this is a very low pitch
noise on the left-hand side, very high-pitched noise
on the right-hand side. And on the y-axis. Then we have
amplitude or volume. This is how loud a sound is. Any one of these frequencies. I am, I'm using a sine
wave at the moment. And we'll see that when
I hit a sine wave. If I just I'm sorry if I just pause
up there for a second. You can see the
eye at the pitch. I was playing. You can see this was a relatively low
around a 130 hertz, hundred and twenty hundred
and thirty hertz mark. That's the that's the
picture I was playing. If I just remove this one and
play a higher pitched note. You can see that moves, moves up the scale and we're playing here around the 500 hertz mark. Again, if I play even higher, There's another one
about the one k. And if I go up another octave, that goes up to k. Let me just clear this and I'll show you something interesting. If I just put down some lower
octaves on my keyboard, I play this note which is a C. There's my first note. You can see that this note
that we're seeing here, that this is the
note that we played. And we refer to this
as the fundamental. So you might hear me refer
to this as the fundamental. It's the note that
we actually played. And this will
become clear why we need a word for this later on. If I move it up an octave, there I am about the 120 marks. So I've gone from about
6060 hertz to about 120. Backup here. I'm playing this note. I'm here around the
240 Hertz mark. Forgot about the four hundred, ninety five hundred
heads market. And you might be
noticing a pattern, but move up another octave. I'm the one kilo Hertz, 1000 Hertz, or move up,
this will be at two. Can you guess what the
next one is gonna be? The next one is going
to be for the next one. Next octave up will be at eight. And you say, you can
see that this is just a factor of physics that for every
octave that we move, move up in pitch. We move up, we double,
double the frequency. But again, just to remind you that the notes
that we actually play, in this case, it's a C, it's around 500 in 2530 hertz. There's actually charged.
You can go and look this up. That is known as
our fundamental. Now the reason we
need a name for that is will become very clear. Now, if I move to, let's say a, let's go to one that we use common
enemies bring that backup. If I move now to
a sawtooth wave. When I play a note,
you'll notice that they're much more appears
than just the fundamental. Fundamental still here. But it is a harsher sound, but it's at the same frequency. And the harsh sound is just, I've been dictated
by the, again, the type of wave I've
chosen, as we saw earlier. Sawtooth wave sounds
harsher than a sinewave. But why is that? Well, I've only
played one note here. It was just one note that
I pressed on my keyboard. You can see that the fundamental here is the same as
before with the sinewave, but just the nature of the
wave shape that we chose. Introduce all of these
other frequencies, even though only play one note, lots of other
frequencies sounded. You can see that these kind
of tail off in an amplitude or volume over the
higher-up they get. All of these are
called the harmonics. Now, this is not a course about music theory and perhaps I'll opportunity costs on
music theory in the future. But the, but the harmonics
that are played here determine the kind of tambour or the very big part to play in
the sound you're hearing. We can see that then we've
got these these hair which is which are from
a sawtooth wave. If I clear that. And we'll move on and we'll
look at a square wave. A square wave. Again, it's
produced a bunch of harmonics. So here's our, here's
our fundamental. Exactly the same note played. Here's our fundamental. And we produced a set of harmonics, but a lot less harmonics
than the sawtooth wave. If I go to the triangle wave,
pump this backup again. You'll see that when
I play this one, again, even less
harmonics are played. So we've got our
fundamental here, and in this case 12345
harmonics or plate. We can see from this assignment
I've had no harmonics. A triangle wave had
very few harmonics, a square wave slightly
more harmonics, and a triangle wave, the maximum amount of
harmonics that we've seen. And so therefore we can
take from this that the more harmonics we introduce, the Harsha, the tone, the more raspy the
if that's a word. But the harsher the tone, the more aggressive the tone. In fact, this is how
distortion work. So let me look at later on at the effects that we can use on
our synthesizer. We might look at our
distortion or saturation. And we'll see that,
that actually, that works by at
least in part by introducing harmonics into
the tone that we're creating. Let's just try something here. If I move this down, he's
still see that you can. So if I get rid of this, if I move to
disappear every time, if I play a sine
wave, we can see that 500 thousandths and
I'll leave that there. If I didn't move to
a triangle wave. If I play the same note. Again, we can see some more harmonics
have been introduced. If I then go to a square wave, we should see a few, few more
harmonics are introduced. And if I finish with
the sawtooth wave, a bunch of harmonics
are introduced in-between the harmonics
produced by this square wave. We'll talk a little bit
more about oscillators. But when we think about
the filters later on, we can see that the filters in particular aim atom each query called the subtractive
synthesis. So we produce all
these harmonics and then the filters
at least in part, work by adjusting
these harmonics, the fundamental, but also the harmonics
that come after it. We use filters to shape those harmonics and the
fundamental in order to tailor the sounding and get
exactly the sound that we're looking for for our composition.
12. OSCILLATOR LEVEL AND PAN: Let's close this. Let's, let's, let's stick
with a sawtooth wave. Let's talk about some of the, some of the basic functions
that we have within, within the oscillator
within vital. And these will be the same, or the majority of these
would be the same. Within any synthesized. There were lots more
advanced things that we can do inside the
oscillators in vital, but like I say, maybe opportunity costs and
that in the future. But for now, let's just focus on the common elements that you
will find across, across almost all synthesisers. So that you can take
the knowledge from this course and go to apply it to whether you've
got a hardware sit the size on your desk
or modular synthesizer, semi modular synthesizer at
different piece of software. You can, you can take
that and apply it. And I will show you how I would go about doing
that later in the course. There's a few basic operations that we can do inside
the oscillator. The first of those
being the level. The level is simply the
volume. The volume. So if I bring this right down to move anything
inside vital, it's the same as I
imagine you've seen in inside most kind of plug-ins within your
in your door itself. Just simply click on the note
that you want to turn on. Just drag up and down. And this will move
it up and down. In this case, we're affecting the level so I can
go right from, right from no volume. Let me just zoom in
a little bit here. If we write from having nothing coming out
all the way up, on, all the way down
again, let's leave it somewhere around there. If you want to. If you've
got a little lost inside the inside here
and you've changed a few knobs and you want to get them back to their default. If you just simply
double-click any of these, any of these knobs, it will reset it to its default value. Also, if you want us to enter precise values for
anything inside, inside vital, you
can right-click and choose this
enter value here. And this will allow you
just to simply just enter a new value with
your keyboard there. For now, we'll leave
it at the default. Next to the, next to the
level of the volume. You can set the pan. The pan is simply how much of this sounds you're
hearing in the, sometimes people refer
to this as balance. Certainly on my hi-fi amplifier, it is referred to as bounced
invite, so it's called pan. This is just how much you hear the sound in your left ear and how much you hear of
it in the right ear, sit in the middle here we should hear an equal amount
in the left and right. But if I move it all the
way over to this side, and this is, like I
said, this is minus 100. This is like I said, that
you weren't anybody going to hear some of these things if you're wearing headphones
or you're listening to it through good
speakers is probably not going to be so
effective for your use. Things like this
throughout the course. But it's not gonna, you're not gonna hear
it so effectively on a mobile phone speaker
or your laptop speaker. But anyway, the
sound should always, should be all the
way up to the left. Now, as I rotate this round, you'll hear the
sound move over to the right of the middle, Double-click that and send it
back to its default value, which is to play an equal amount of the sound
in the left and right ear.
13. OSCILLATOR TUNING: Okay, the next thing we can do is to look at the pitch so
we can tune the oscillator. So by default it's going to play the frequency for the key that you press on your keyboard. So for example, this is a C. But what I can do in here and there'll become much
more apparent why this is so useful later is I can
actually alter their pitch. So let me just knock it down an octave
so it's not so shrill. But if I play a C level down so you can hear me as
I'm playing that note, if I click and drag this pitch or I right-click
and enter a value, I can actually
alter the pitch of the story so I can effectively
detune this oscillator. I can go down and
these go in semitones. This is one semitone, lower, whole tone, lower. Four semitones, or a whole tone low. Sorry to whole tones. Liver. If I go down to
seven semitones below, that's now a fifth below. The important ones
to know really are there are 12
semitones in an octave. So when I hit this, see now it's still a C, but it is exactly
one octave balloon. So if I double-click
that, we can hear that. That goes, if I go to minus
12, we drop an octave. I can go in both directions. I can go down to four octaves. So four octaves below. That's gonna be
pretty hard to hear. But if I can also
go for octaves up, now, you see me scrolling
through these things. Right now. There's actually
a tip inside vital that is to hold the Shift
key when you're doing this and this will jump
then in whole octaves, 12 semitones at a time, rather than having to
scroll through from 48 semitones below and scrolling 96 semitones
up to get to the top. But if so, if I just
hold down the Shift key, it will jump to our time. Now I've gone to
four octaves up. An incredibly high
pitched noise there. Yeah, I can choose to detune the oscillator for anywhere from four octaves
below to four octaves above. Now that goes in semitones, but what I want to be able
to do also is to be able to tune in smaller
increments in a semitone. If I want to do that, I can
do that on this one here, which is kind of a fine tune. Now this is referred
to as sense CEN Ts. In this there are $0.100 within a semitone
and I can scroll, I can go in both directions. So for example, I
could play this note. And if I just turn
this down a few seven, I minus a $0.100 on now
one semitone below. And I can do the same in
a positive direction. But often you'll just need
to fine tune slightly. You can see that
that tuning is much, much finer grain and
the semitone tuning. The reason this
exists actually is because of the old
circuitry and as the old circuitry used to warm up in old oscillators
are always slightly, perhaps begin to wear out the oscillators themselves and the analog circuitry
inside them. It's like start to go
slightly out of tune. And so you'd need these kind
of tuning controls or the, certainly the
fine-tuned control on your analog synthesizer
in order to get it back into in tune with
the rest of the band. And other instruments
that would be in plate. But actually people, as
they will do musicians being musicians found interesting
creative uses for the, for the fine tune and the control within their,
within their oscillators. We will have a look at
that in, just in a second. One of those potential
creative uses.
14. OSCILLATOR UNISON AND PHASE: But I just want to
have a look on this, on this side over here. So over here we have the
unison and the face unison. You can think of
this as being like a chorus effect for an
individual oscillators. So if you've used
course Effects before, you know that it's basically, it plays multiple,
multiple voices. So you press one key, it plays a number of voices,
so it multiplies it. It plays each one
slightly out of tune. So it sounds like a
group of instruments, rather than just a
single instrument. By default, it's
set to one voice. But actually, if I just
take this and scroll it, it sounds like this, but it isn't scroll it and make this, I know ten voices. We get a much, much,
much wider sound. Ten Bosch is quite a lot, but often you'll see things
around three or four voices. Just adds a little bit
of width from that, just really quite
a thin sound wave. As I scroll up, you will
get wider and wider up to, up to 16 voices. This is the number of
voices on this side, then we have the detuned. So as I say, if we had 16 voices and
they were all playing exactly the same tune with
exactly the same wave shape. It would be
effectively the same. We might see an
increase in volume, but we wouldn't hear a difference in the
sound necessarily. What this detuned as it says y, how much do I want to detune either side of the
fundamental that I've played. So we talked about fundamentals
before, basically, any other voices
that are playing, they're gonna play either
side of that fundamental. So slightly lower in pitch, slightly higher in pitch, slightly lower in frequency, slightly higher in frequency. And this tells us
how much we should go either side of
the fundamental. So again, if I play 16 voices, we are all playing
in the same tune, so it's not detuned at all. Just sounds like a slightly, perhaps a slightly
louder sawtooth wave. However, as I
increase this number, we start to feel that real
spread and thicken it. As we get a little higher, they will start to face
against each other. So you'll hear some still
relatively thin down here. Higher we get. The more kind of out-of-phase and wider and stranger
than noise becomes. Let's set that back
to one voice for now. You can see that already
just simply with, just using an oscillator
without the filters, the envelopes that modulators, and just with a
single oscillator, we can already producing
quite interested in sounds. And of course they
sound different depending on the wave
shape that you've chosen. So if I go and choose a
sinewave, I introduce unison. Stick down to solve.
Suddenly voices. If I just simply go and choose. Let's take a triangle wave. As recently as this is. Giving us a policy is it already creates some
interesting sounds. But there's more to do still
within the oscillator. So let's reset this. I want to explain this
side and this side over here where we're
talking about phase. And we're going to
ignore these knobs and selectors underneath. These are much more
advanced feature of vital, which we're not
going to cover here. But the inside this facing, this basically tells us where on this wave
shape we want to start. When it's set at 0 is going to start on the extreme
left hand side. If I go all the way up to 360, is going to start at
this point in the wave. So when I press the key
and it's down at 0, is going to start at this point. If I set this to 90,
which is a quarter 360, I set this here on this one. Here. If I said that to
around 90, get there. We know that it's going
to start on this peak. If I sit through a 180, it's gonna start
right in the middle. And if I said it's a 360 is
going to start at the end. Now, you're not going to hear much difference really
when you're just playing a basic wave with no effects or modulation
and it filters. And a single way by itself, you're not really
going to hear it. However, if your list again can be used for
creative purposes, but if you set the face to start at a place where
the amplitude is not 0, sometimes it's going
to introduce a click. The transient phase in
that very first phase of the, the note that
you're playing. This becomes much more
interesting when we have perhaps multiple oscillations
playing at the same time. We don't want them all to
start in the same place so they can have them
face against each other. When it comes to that in a bit. This one on the right is again another percentage and this
basically goes from 0 to 100. And it just says, Okay, well, I want it to be at a 100. I want to start at 180, but I want it to be choose
a point. 39 is fine. So Thirty-nine percent
either side of this, this point that I've defined, I wanted to use to start somewhere between
there and there. So if I set this at, let's say 100%, it will start anywhere
within, within the same. But if I set it to randomly,
I set this to 50%. It's going to start my
sound either at the center, which is what I've defined
with a 180 or halfway or 50% either side. So at this point here, anywhere from 92270 back, I say to start with the defaults with this one hundred and
eighty one hundred percent. This can cause some
some clicks and pops, which you can be difficult to
go into hump down later on. So I always, when I create a new opening vital to
create a new a new sound, Holloway, set those down to 00. And then if I want to use them later than
I'll introduce him, I didn't stop with them on.
15. USING MULTIPLE OSCILLATORS: Okay, Let's have a look
at multiple oscillators. So we've got three
oscillators in in vital. As I switched them
on with this little, this little purple button
just above the oscillator. So I've got three, OS2 and OS1. Now, let's switch off
oscillator three right now. Remember that when we,
when we create a new, create a new patch that we
want to, at least for now, just click on this
right-hand arrow and move to basic shapes
and set the phase, the phase randomization
down to both, down to 0. Now if I play, if I move this basic shape to, let's put them both
at sources wave, which is a wave you're
gonna use a lot. If I play them both now, it doesn't really
sound any different. But I have two oscillators play. Now remember before we
talked about the, the tune. So let me set these
levels back the same. I could, if I wanted pan
one left and one right. Again, it won't sound
much difference. But if I, um, I just set these
back to the center, one of the things that the
multiple oscillators are often useful is to slightly de-tune them or massively teaching them. So if I want to make
this sound broader, I could set this one down, one down to one octave below. When I play one
note, I'm gonna get the fundamental note at
the picture I played. And I'm gonna get the same
note one octave below. Using, using the
second oscillator. I can introduce a third one, and I might want to
purchase one down, one down, two octaves, so 24 semitones down. Let's just put this
two basic shapes. I told you I forget every time. Let's just drop these to 0. But when I play this, I should
have my oscillator number one playing at the pitch
that I play on my keyboard, oscillate number to paying one octave below an oscillator, three playing an
octave below that. There we are. So a
really basic shape, but actually now a
really useful sound. We can see that we
are clipping up here. I'm just going to just drop
this one down a little bit. Up here on the sorry. Let me just show you
what you can see it up here on the top right there we've
got a master volume. I was playing it
here before. You can see it's turning red
is starting to clip, is far too loud
in my headphones. We can just drop it down there to a more reasonable volume. But anyway, back to
the oscillators. We can here we got, we got
three oscillators all playing the same shape,
but octaves apart. And perhaps I might want 11
octave up so I can go here. Now I've got my
fundamental pitch that I'm playing
on oscillator one, an octave below, on oscillator to an octave above
and oscillator three. I can start to play some more. So maybe I would want to use different shapes
on different oscillates. And so maybe I'll have quite common to have
your base as a sine wave. And then let's make this one
a bond may be at a triangle. If I change the shapes,
one's quite good. Let's move this
one to ultrasounds for a bit more of
a deeper by sound. Maybe let's introduce
some, some unison. We could introduce them,
use them here to maybe, maybe a bit more on
that in a bit wider, massively useful sound for me. But nevertheless,
we can play around him and we can play with all of these things within
the oscillator. I'm really now, as I said, the important thing is that we really understand what
they're going to do. We can think about it
and we can predict what effect it's going
to have on the sound. Familiar, super powerful thing. When I started playing
with synthesisers, of course, played
with a synthesizer. I play with it by pressing the keyboard and changing
knobs at random until I, until I was getting
some sounds out and I gradually learned what, what sort of thing
would happen when I, when I changed the different
knobs styles switches on my synthesizer. But having this really
real understanding of knowing why a sine wave sounds smooth and knowing why a sawtooth wave sounds harsh
because of the harmonics, knowing how unison works and how the spread of unison works in terms of the De Chu. And you'll often hear units and each unit sometimes
called units and spread. When we learn about
phases and started at different phases and how to layer these kind of different sounds from
oscillators within each other. The real understanding
of that means that you can get onto your synthesized within a sound in your head. And that's what it's
all about. It's not about playing with the knobs
and dials and switches. It's about having an idea in your head, having
some inspiration, opening your synthesizer
or working with your hardware synthesiser
and knowing how to get that sound that's
in your head out through your speakers
onto your track. Having this understanding
can really help. There's just one more
thing that I wanted to show you in a, with regards to the oscillators. So I'm just going to set
these back to the defaults. Set all three to be a sawtooth. Just doesn't really
matter that much. Some of these things
you don't hear so much in a sine wave or an, a triangle wave simply
because there are, there are less harmonics. So there's the, there's
the sound with less rich, less aggressive or raspy. It's just sometimes can be
a little easier to hear. There are few things
we could do in here, so let's go to, let's go to the
picture of this one. Let's reset this to 0. As I hear now, it
sounds like a simple, a single, a single noise. But what I can do
here is actually just pitch up a little bit. I could pick this one
up to five semi-tones. I can purchase one
up, maybe seven. It sounds like I've got
a quarter money playing. If I just go out a
little bit wider here. You can see on this keyboard
or department actually, I did mention at the start, they don't necessarily need a midi controller
keyboard to play vital. You can just use your mouse
to click notes in here. But you can see
what I'm playing. I'm playing a single note, but I'm getting a CT effects by adjusting the
semitones here I can, I can produce different types
of kind of triadic chords. Chords with three notes. Because I've got
three oscillators. You will rarely see more than three oscillators
in a honest synthesizer, but they do exist with digital. That's increasingly possible. With digital is
probably not much of a limit to the amount of
oscillators you could have, depending on the speed and
power of your computer. But certainly when these were built out of analog circuitry, it was, it was unusual to find something with more than
three oscillators. But certainly there's some
very famous synthesisers with eight or more oscillators. But three is probably
your default standard. Some will have one,
so we'll have two. Most will have two or three. The other thing I could do if I just picked all these back, sorry, if I just picture
all these back to 0. So back to us effectively
are single sawtooth wave. I told you about the
fine tune earlier in the idea of the fine
tune, as I said, was to make sure
that you can get exactly in tune with other
members of the band, with other instruments
that are being played. Sometimes because the
circuitry wasn't up to match. Sometimes because the, because the tune of the
oscillator was affected by heat. The heat on the actual
individual resistors, capacitors diodes within the, within the analog circuitry. So we have this fine
pitch control, control. And as I said, musicians, musicians will
find creative uses for anything that
can make a sound. So people started to experiment. I'm just going to
just knock off one of these oscillations for
now. But listen to this. If I just detune one
of these slightly, Can you hear that slight
phasing sound that's going on? And this is it works in both directions. It's often referred to as the oscillators beating
against each other. It's just the kind of I wanted to show to you because it's an interesting technique that you'll hear quite often on, used, particularly
back in the day with, with analogue synthesisers and they will play the oscillators
against each other. And the fact that the ball, I put this out of de-tune
and this tune here, remember is a 0 to
100 or minus 102100, but you can detune
it by a $0.100 or a 100 steps or
within one semitone. And the higher up I
go with this detune, the faster bat beating becomes start at 0 and
I'll just slowly move up. Now can make some really
interesting sounds, and particularly
if I add a third, so let's just teach you
in this one slightly. If I had a third oscillator
in D2 in different amounts, can make some really,
really interesting noises. But one thing to be
careful with this is if you've noticed
when I'm playing this, that I can put it completely
out of tune just by, just by using the fine tuned. I can push these so far
that they sound really, really out of tune. No longer, no longer
playing a C, right? So I can see if I add these in, but just with these fine tunes, I can really, I can
really knock it out. So just something
to be careful off. But fascinating
and a great way to really add some width and
some interest to adjust to a very simple wave being
generated by oscillator. Like I said, that will work
in any with any wave shaped. But the more harmonics you have, the more kind of width and
interest that those kind of detuning and course
techniques will give you.
16. THE NOISE GENERATOR: Okay, I think that's
about it for oscillators. Let's move on. Oh, I'll tell you what,
just before we go, there is one other thing
that you will have spotted down here in vital. That is this SNP. This is a sampler. It's not a waveform generator, or it's not. The
oscillators are. However, I'm showing this
to you because it is actually a very common thing, even on older analogue
synthesisers. This is a way of just being
able to play some noise. Now, the one in vital
is quite advanced. Nick can play any kind of sound that's similar in lots
of software synthesizers. But this was really common, just used with white noise, brown noise, pink noise inside. Regenerated with analog
circuitry inside synthesisers. Sounds horrible, manager ears. This is just playing
white noises is just random frequencies. It's just, it sounds awful, but we will use it
later just to add, to add a bit of depth
and a bit of interests. And there are very specific
use cases for white noise, for brown noise,
pink noise, etc. Within, within synthesis and within sound design will
come back to later. But I just thought I'd
point out here while we're in this kind of
oscillator section. But that's just quickly in here. We've got we've got the level
plan as you would expect. We can alter the pitch slightly. This is not so useful
for white noise, but like I said, with vital can bring in all sorts of waveforms
basically anyway, form into, into the
sampler so we can, we can affect the pitch of that. This one here, this little keyboard here means
that the picture will be altered based on the
key that I'm playing. This one is just playing
the bottom right one here. This kind of looped
arrow just means that the sample will loop
round and round and round. If I switched on off, I get to the end and it stops. If I, even though I've
got the key held down, if I play this one, it will play round,
round and round. If I, the top right
one here means it will start at a random
point within the sample. And you'll be able to
see this visualized. Now, if I play a note and just keep playing
the same note. You can see this kind
of visualization are just need to put
this loop on because we're getting hit in the end. But you can see that I'm slightly lighter patch
that you're seeing there, but I'm starting at different points in
the sample each time. This one here will
means that gets at the beginning of the
sample and then I'll go back in the
opposite direction. So just go backwards and
forwards inside the sample. If I click the loop
on at the same time, I'm just going to ping
pong backwards and forwards across that noise. Now that is perfectly
enough white noise for now. So we'll end it there
for oscillators. And in the next section, we're going to look
at the amplifier.
17. AMPLIFIER VOLUME AND VOICES: Okay, so back to our
diagram of the synthesiser. So in the last section, we looked at the oscillator. We saw that we generate sound waves using an oscillator or various
different types. And how we can actually create some quite interesting sounds just through the use of
the oscillator itself. The next part of
the synthesized, we're going to look at it. And remember we have this signal chain
going right through, from our keyboard through
a number of elements, all of which we're gonna cover, following this blue arrow along out to our
speaker at the end. The next one we're gonna talk
about is this final part, which is the amplifier. Let's switch over to
switchover device on and have a look at the
amplifier within vital. Here we are. Inside vital. We're going to look at
the amplifier section. Now what the amplifier
does is we've had all these separate controls for the separate oscillations, and you'll see that there
are separate controls for all the other parts of the signal chain within the,
within the synthesizer. The amplifiers sits
at the end right before the sound comes out. Effects everything
within the synthesizers. That final bit that will affect everything that the
synthesizer does. It affects all the
modulation or the filters, or the envelopes and all
the oscillators altogether. Now we've already
seen the one part of the amplifier and it's
split across two places, really inside vital or
certainly the bits of it that we're going
to look at a split across two places in vital. The first one is
at the top here, and this is the master volume. So I can just drag this little, this little white arrow
to the left and right. And you'll see that
when I play a note, this shows me how how
loud the sound is. If I drag it all the
way to the left, nothing gets emitted at all. If I drag it all the way to
the right, I won't do this. But if I drag it all
the way to the right, I'm going to get a
very, very loud sound. The visualization at the
top here will remain green, where I'm playing
the sound that's not being clipped at all. I e, where the, where the whole sound, the whole sound wave is
coming out of the amplifier. If I move it up a little bit, you can see that it turns red. This means that the
signal is being clipped, that it's too loud
to come out of the amplifier so
that the signal is being distorted has
been the top of the, of the amplitude is being cut at the top and the bottom
of the amplitude waveforms being cut. So we always want to keep this, unless we do it for
artistic reasons. We want to keep this keep this green right
here so that you can hear me at the same time
as I play the synthesizer. The other part of
the synthesizer. And remember I said that
was kind of split into two parts in vital is
down in the bottom right, down in this bottom
right section, in this section
right at the bottom. These kind of these
two boxes here, what are the things
that we consider as being part of the amplifier in that they affect everything
that they amplify does. So these are kind of
performance level effects. Now, we call an amplifier is not labeled as that in vital, and you'll often
find that it's not labeled as the amplifier
is what it is. But some synthesisers you'll see quite clearly
labeled in others, it's not labeled at all, but
you'll come to recognize the elements or the basic
elements here of the amplifier. As I say, there are others. There are others
withinside vital. But these are what we're
aiming for in his courses, this common understanding
of synthesisers so that we know generally when we
look at a synthesizer, these are the basic controls
that are common across them. All that we can expect to
go and look for within the user interface where that's hardware or software
synthesizer, so that we can take
the real understanding of the knowledge we have here. And rather than just sitting
in a new synthesizer and sort of limit all
the knobs until we find what we want to find. We can go and identify that and know what that control is gonna
do for us and how we can, how that's going to enable us to get the sound
that we want. The sounds in our head is
perfect for our track. Out of our synthesizer.
Sometimes you'll see amplifiers
labeled or unlabeled. Sometimes you'll see them
labeled as amplifier. Other times you'll see them
labeled as perhaps VCA. This is very much like the VCO, which we said was voltage
controlled oscillator. Vca. No prizes for guessing this, but it stands for
voltage-controlled amplifier. So sometimes you'll see
this labeled as a VCA. As I said, it affects
the whole synthase are a few controls in here. We've looked, we've looked
at the master volume, which is on the top rights. But we also have some
controls down here, but we'll just
work across these. The voices simply
tells us how many. Keys, we can press at the
same time and get sound. Now, sometimes it's useful to have many sounds you would think automatically
that is really, really useful to have. Be able to press all the keys and have every key make a note. While there are
certain instances such as percussion and base, where we only want one
sound played at a time. So for example, we created, we will do later create
a snare drum sound. We don't want, we don't, it's not realistic
to have a drum kit with what we got an 88
keys on our keyboard, 37 on the keyboard that
had gotten in front of me. But even 3070, we won't want 37 snare drums playing
at the same time. We might not list down to one. So what this means, this now it goes from being a sometimes referred to as
a polyphonic synthesizer. I probably find it
just means it can play many sounds to a
monophonic synthesizer. Sound. You'll see this. So there's a lot of
rates, synthesisers, a lot of the old moke
synthesizes called Roland real. Behind the real. Traditional, very expensive. If you buy them, second-hand synthesizes a monophonic
back in the day because every single voice
that needed to be added needed a whole
other set of circuitry, which is clearly very expensive. So a lot of the synthesizer sounds that we've come
to associate with MOG and these kind of seventies and early $0.80
when they were monophonic. A lot of the sounds
that we've come to recognize from there. The music that's been
generated from synthesisers, that area of the era. Actually, a lot of that comes down to the fact that they
were simply monophonic. When they only have one voice. Only one loop gets
played at a time. Even if I play two notes. You can see here
that I press this see, I press the highest, see the lowest C stops and the highest he continues when I release, then the highest see, book go back down to the lowest C. Only one voice is
played at a time. We can change this to, I don't know what
the maximum is. Vital, but it's a lot. 32 voices, same time, certainly more voices
and I've got fingers, so there's plenty in there. Let's not respect down to, back down to one by
default is set at eight. So as I said, by default in, inside vital and
they're not on most synthesizes the newest
note that played. So if I'm playing a note
and then play another, the latest key or the newest
key that I've played. We'll take that
voice inside vital. I can change this. Let me just move out to here. In fact, let's have a
look at the Advanced tab. We're not gonna spend a great deal of time
in this course in the advanced tab inside here, inside vital, I can actually tell it how I wanted to do act. So inside this bit
down here under voice, under note priority by
default, like I said, the newest note will be
the one that sounds, but I can set it to
be the oldest note, the highest note,
the lowest note. Or I can ask you to do a round robin which is just
to cycle through them, literally the newest notes, but that is there
if you wanted to go and have a play around. This is really like I said, when I'm pressing
more than one key, when I'm set into
monophonic voices, it will also apply
if I, for example, my voice is set to three and I play for
five or six notes. It will, it will use whatever set within this
note priority section here. For now we'll set this
will lead us at, at, at the newest note
being the priority.
18. PITCH BEND, SPREAD & VELOCITY TRACKING: The bend section here. On my keyboard, I have a
pitch will often on a, on a midi controller or
when an artist synthesizer, you'll have two controls
over to the left, which are to the left-hand side, usually the keyboard,
sometimes right next to it, sometimes slightly above it. They are shown here in
the user interface. Down on the bottom
left-hand corner. We have on the right
the mod wheel. We're not worried about
that so much for now. But the pitch will just does exactly as you
would expect it. It changes the
pitch of the note. If I play a note, It's
good on an octave. As I move the picture up, it will bend the pitch up. As I move the pitch fall
down, it will bend it down. I can do some interesting
effects in there. Just simply by moving
the pitcher up and down. I can, I can kind of emulate vibrato just by moving
up and down very quickly. All sorts of, all sorts of
things can be done in there. The down on the
amplifier section here on the bench just
says how many semitones? I should bend the pitch
in either direction. So by default is set to two. So this is a whole note. It moves a whole tone
up or down depending on whether I move the
pitch wheel up or down. But I can set this to
as many as I want. So for instance, for instance, if I move this up 12 semitones, this is going to move
our whole octave. When I move the pitch
wheel to the top. If I play a note,
move the patrol. Sorry, I'm even a whole, a whole octave in
either direction there. Also that binds to the next
one is velocity tracking. Velocity tracking. On
a modern keyboard. The keyboard is able to detect
how hard I press a note. Actually, it's not how
harder for us to note. This is a common misconception, but the clue's in the name. So it's actually how
fast I press a note. Not how hard a person note. The slower I press a note
down, the soft of the sound. Or the quieter the sound, the faster I press a note down, the louder the sound or the the hash of the
sound, if you'd like. At the moment, is
set to 0 by default. And it doesn't matter whether I press the
keyboard hard or soft, or fast or slow. It will always play at the same, same amplitude, same volume. Press it really softly. I can press it really hard wood, and it will always play the same if I turn the
velocity tracking up. Now when I press slowly
Anki bit too slowly, you can see that
I'm pressing a key. Then I go faster, I press harder, I press it. The louder it becomes
in its tracks. This is very much like a piano. When you're playing
a piano, if you play the keys very softly, you'll get a very soft note. And if you play
the keys harder or faster than you'll get a
much louder, brighten it. Set that back to 0. Okay. Next along we got the spread
button hour the spread knob. And the spread determines the stereo spread of the signal we've got when I play
a note right now, you're going to have both the
signal governing equally to the left of noise can be a full stereo spread
as wide as it can go. If I bring this all
the way down to 0, this is effectively
going to turn it into a, into a mono signal, out of a stereo signal,
and into a mono signal. The spread just determines the width of that stereo field. Hard to demonstrate right now, because we've already
looked at oscillators. I'm not really going to hear any difference if we're
planning right now. But something to
remember for later on. If I want a monophonic signal, I can set the spread to 0 and I will get a mono
rather than a stereo signal. Generally, we leave this
kind of sat in stereo, but we can be set at any
point from mono or stereo.
19. GLIDE: Let's move on and look at Glide. So you will often see this called glides are
sometimes referred to as slide. You'll sometimes hear
it called portmanteau, which is a slightly
nuanced version of it. But basically this is this
set or not set at the moment. Every time I play a
note, it just plays that note as soon as
I switch on glide. And this is because glide
is set to 0 seconds. Basically, this glide knob controls how long it should take to get from
one node to the other. And it plays every, every tone between the note the first night I
played and the second. This glide control
basically determines how long it should take to get
from one node to the other. This is much easier
to demonstrate. So if I set this about halfway, I play this lower see here. When I press the upper see, it will play every note between that lowest C and the upper C, and it will take no 0.78
seconds naught point naught, 0.078 seconds to get there. So listen to this. Maybe let's try that
a little bit higher. So it's going to take about
a third of a second. Now. Every note I play
is going to be, it's going to move
from one to the other. Glide. Now, you'll notice
that when I played all, perhaps you didn't notice,
but when I play this, I was sure to hold down the, the lower key when
I press the upward. If I wanted to
always glide without having to have the
original key held down, I can click on this
always guide button here. And now I can press a key. I could say, I can come
away from the keyboard, I can press another key
and it will always, it will remember the
previous note that I played and glide up from that
note up to the new one. Hands-off again. I can affect slope
of that glide. So this is how how it accelerates or
decelerates between the two. So at the moment it's
just very linear. And so in a linear
fashion it will move over the glide time from my original
wrote to the next one. But I can change the slope
so I could say it right. I want to go quite fast to
start with and then slow off. If I just increase the glide
time a little bit more. You can see this one is
accelerating into the, into the new note. And I can do the
other way round. Initially, it's not going
to change pitch very much. And as I move along this curve
from left to right and up, the pitch change
gets much faster. Double-click that to set
that back to linear. The octaves octave scale. The octave scale. It determines
the glide time based on the distance between the two notes that we
play in through midi. For example, gliding. If I was to play two notes, three octaves apart, that would
take three times as long. They either slide would
be three times longer. The glide would be three times longer in terms of time than if I was to play two
notes one octave apart. It's pretty simple. Now, legato is interesting. What legato is done. It, it means that you'll see this later
as we're coming into the course when
legato is said, that means that nothing
else is really triggered. We're not coming through
when it comes to a new note, it will continue with any, any modulations and envelopes that I've applied to my sound. And I realize these are
kind of new to you, but we'll cover it later
so that when I'm in this kind of monophonic
I a single voice mode, I go onto legato. It means that the envelope
won't be changed. So you can think of legato. Legato is often thought
about in terms of strings. If you've used any
sample libraries, you might have chromic come
across legato and some of the big MO, feature-rich
sample libraries. You can think about
a violin player. When a violin plays a note, there is a slight
attack to a violin. And there's a slight rasp when the violinist starts with a bow, there's a slight rasp at
the beginning of that note. That graph doesn't need to
happen every time because a violin can play one note
and keep pulling the bow, but actually with the
left-hand changed notes. And so we don't want that slight raspy sound at
the beginning or they can, or a guitarist could, could play a note with a
plectrum and there's an attack. But then slide their finger
up to a different note. And we don't want that
same attack again, this is a good
example of legato, and it's basically being
able to perform that slide without restarting the
sound from the beginning. So we don't necessarily have the transient or the
beginning of the sound, the attack of the sound play
again, for example, legato. This will become
much clearer when we come to use it later on. In fact, we'll be using
that for one of the bass sounds that we make towards
the end of the course. That's a quick run
through of the amplifier. As I say, the amplifier is applied to everything within,
within the synthesizer. Whether that be vital or any other synthesisers
is the last bit of the chain before the sound comes out
of the instrument and out through your
headphones or your speakers. That's the end of this section. In the next, in the next
section we're going to, we're going to
look at envelopes, which are our way of shaping the amplitude or the volume of our sound when
a note is played.
20. INTRODUCTION TO ADSR ENVELOPES: Okay, so, so far we've looked at the oscillator and we've
looked at the amplifier, which are the
beginning and end of our signal path within
the synthesizer. In this section, we're
gonna look at envelopes. Envelope is basically a way of adjusting the volume of a sound or the amplitude of a sound. You can use those terms pretty
much interchangeably here. But it's a way of adjusting the volume of a sound over time. An envelope can be
applied to a number of different items within
the, within the synthesizer. Lot of synthesisers,
we'll allow you to basically affect
anything with an envelope on our diagram here. Just to keep things simple, I've said that we would apply envelopes to both
filters into amplifiers. Right now we're going
to concentrate on applying the filters
to the amplifier. So let's have a look
at how envelopes work. Envelopes are, as I say, a way of affecting the volume or the amplitude
of a signal over time. So if we look at
this graph here, we can see that time
is moving along from left to right
and volume from, from bottom to top. So this bottom
left-hand corner here, we can see that the sound
has just been triggered. And there is there is no volume. And as we move along in time and this time is
generally very short, we can see that the
amplitude or the volume becomes loud very quickly up
to its maximum point here. This maximum point is
determined by various factors, but usually the level
of the oscillator. So the level control
within the oscillator, or the eventually the master
volume within the amplifier. Then the sound alters over time and each one of these stages has got various different names. Commonly, this is
referred to as ADSR. And I'll explain what
that means that now. But in your amplifier, these will commonly
be called envelopes. But you might often see
them simply labeled as ADSR on your, on
your synthesising. The a stands for attack. An attack is this very first
portion of the signal. So when I press a note, this is how long it takes and this is measured
in terms of time. How long it takes to get from no sound to the maximum volume. That's what the attack is.
If we want a very slow pad, dreamy, washy kind of sound, then we might want that sound to build up gradually over
time and that volume, the attack to be very slow, to take a long time to get from no sound at all item
to its maximum volume. If I want a very fast
percussive sound, I might want to
note attack at all. If you think about the, if you're trying to make
a sound that's got a physical equivalent
instrument. Say for example, a drum. When I hit a drum, as
soon as I hit that drum, the sound is produced
straightaway. And so the attack for a drum may be 0 or very, very close to 0. Like I say, for
something that's a bit more washy over time, it will kind of dreamy
or paddle-like. The attack might be quite long and different instruments
will have different attacks. And this ready. We talked earlier
about the transient. And this can be a lot to do
with transient is it's the, how the signal gets from all
how the sunlight gets from 0 to its maximum amplitude. Moving along. Then we've got, we've
got the next portion, which is this part of the
the the ADSR envelope, which is between these
two dashed lines here. This is the decay. Decay of become a little bit clearer when I talk
about the next stage. But there's decay
is how much time again, it's measured in time. How much time it gets down to, how much time it takes to get to the volume that I want
to have the notes sustained that so I have
that initial attack and then I will drop down to the level that I want
that note to wring out out for a long time for
the remainder of the notes. So examples of this may be, when I play a piano, if I hit the keys very hard, I will get the initial very
loud attack initial portion of the sound. But if I keep my same panel down or keep my fingers
on the keyboard, the sound will come out to a more sustained
sound over time, which is lower than
the initial attack. Now, again, we don't have
to have a decay at all. But we might want to do this over a long period of time or a short
period of time, depending on the
particular sound you're going to go into. Create. Decay is the amount
of time that it takes to get from its maximum
amplitude at the end of the attack down to the, down to the level that we
want to sustain it at. And that's the next part
which is the, the sustain. We have the initial attack. We then perhaps want to drop down in volume using the decay. Then the S stands for sustained, which is the only one that's not mentioned time this
is the only one of ADS and odd is measured in terms of amplitude or in volume. And so the sustained is the volume at which
you want the note to be sustained after the
initial attack and decay. Finally, we move on to the r. Again, this is
measured in terms of time when this is the release, this is how long? Once I release the note, once I take my
finger off the key, How long should it take for the for the volume
to return to 0? Again, if it's a very often
lack a very percussive sound, I should attack very quickly and released very quickly as
soon as I take my students, as soon as that happens, or
perhaps with a piano sound, do you want it to the volume to die by very quickly
when you take your, take your hands off of
the, off of the keys. For other sounds, you'll
wonder much longer really. So I take my fingers
off the sound. Just kind of tails
off over time. Again. Attack, sorry, attack it. Decay and release are
measured in terms of time. This graph here and
sustain moves up and down to determine the
volume of the sustain. Let's, let's have a
look at this in vital. And you'll see from
here, this is one of the big reasons that I
chose vital to users for this course because of
the very visual way they represents things
like envelopes.
21. DESIGNING ENVELOPES: Okay, so here we
are back in vital. The envelope section
of vital is over here in the top right-hand side, m1, m2, and m3. These are the
envelopes that we have to play within vital. Let's just zoom into
that bit and we can see that we have a number of kind of knobs down
the bottom here, which will relate to
what we've just saw. The graph of the ADSR envelope. To start with, we have
attack. So let's see. What we can do is let's, let's just play with
some of these and see if we can get a graph that looks something like the
one that we just saw. This initial portion here. And I can adjust this by either moving the
meltdown about more. I can grab these points on
the graph and move them. As I said, attack is
set in terms of time. And so this is how quickly the
sound shouldn't move from, from 0 volume to maximum volume. You can see along
the bottom here, hopefully this is showing
up on the screen recording, but certainly if you've got
vital open on your computer, you will you will see this
along the bottom here. These grid lines give us kind of a portion up
in terms of time. So this first grid
line here is 2.5th. This is 1.5 second, 1 seconds, two seconds, 2.5
seconds, three seconds. And we can, we can continue going out to longer
attack times. Let's hear just
something with a set, this kind of
something about this. So we don't have to worry
about the sustained release and older decay and release. Let's set this here. We can see I've got
two oscillators here. Just so you can see,
I've got two oscillators here that both putting out a, in fact exactly the
same sine wave. So I will just, I'll just
choose one of those done. Just gives them
more interesting. So here's our sinewaves. Looking back at the envelopes, we can see that the decay at 0 as soon as I press the key. In fact, it's more useful
for you if I see my hair, so you can see down the
bottom here, this is the key. I'll be playing. The C here. As soon as I press this
note, the note sounds. But as I increase this attack, it takes longer than from the, for the sound to get from
nothing to the full volume. So if I set the attack,
let's say over here. Now take 1 second
to get from the, we also have set it at 1 second, 1 second from the sound to get from 0 volume to its
maximum amplitude. And I can set that
to even longer. For I kinda pad sound. That might be a useful thing
for a more percussive sound. Fatty soon, Let's, let's move on and talk about the decay. So the decay is how long it should take to
get to the sustain level. So this is really hard to demonstrate without
setting a sustained level. So if I said the sustain level, to be here, I move the
attacked me a bit longer. You'll see that when
I press a note, the amplitude will rice over the first 500
milliseconds or so. Then take another 2.5th and then take another
2.5th to get down, roughly 2.5th to get down to the level at which I want
to sustain it. How it is. Since this you can see
it rises and then falls. This is the decay that controls this and I can make
this even among them. Let's set the sustained
to be a little lower. So make it a little
bit more pronounced. As long as I keep my
finger on the key, the nut sustain level is
going to be maintained. I can set this to be. Once it gets to the end, it will remain. Like I said, it's been
very, very short. Again, we can start
to really think about sound design and how we want
this instrument to react, how we want the synthesized to react to me. Let
me press a note. Sustained. We've kind
of covered there, it's very hard to
cover decay and sustained independently
of each other. But the sustained is, as I said, the only one that's mentioned
in terms of volume from the ADSR envelope that
we talked about before. This is simply the volume
at which we should sustain. If it's set very low. Replay a little bit
of a higher note, just so you can, perhaps
here that a little bit easier is still playing. But it's playing
very, very quietly. And as long as my fingers
held down on the key, or I've got the sustained
pedal pressure in my foot. That is the volume at which
side is going to be output. So if I go a little higher,
you get the points. The release is how
long it takes once I release my finger from
the key to die away to 0. If I set this at the
moment is very short. As soon as I say my
finger off the key, the sound is gone. If I set this to a bit longer, an acidic somewhere out here. You can see that when I released
my finger from the key, and if you can see this
down the bottom here, and I can say down on
the keyboard here, you can see when I released
my finger from the note, all the time that my
fingers held down. It will remain at this point. This is the sustained points. It will stay at that point until I release my
British. The key. Slowed over time or over the
time that I've determined, that note will fade
away to 0 volume. Now, in order to keep
this quite simple, I've left this order
straight lines, but actually within vital
and within a lot of, particularly within
software synthesizers, I can actually kind of shape these in different ways
to get different effects. This is going to rise very fast, very slowly to start with, and then very fast and
it sounds the attack. So I can really mess about
with these to get all sorts of very sound design
techniques to, again, further shape at all. And this is all
synthesis is all about, is starting with some
initial sound source in all cases is also latest. But we've already
briefly mentioned kind of wave table synthesizes
and FM synthesizers, other types of synthesizes, but we basically stopped
within a sound source, um, and then we reshape that to be exactly the
way we want it to be. An envelope is one step in that. As I say again, envelope
is concerned with controlling the amplitude of the volume of the
note over time. Some of you, the eagle-eyed amongst you
would have noticed that our envelope in
this case has got an additional part which we haven't played with
yet, which is whole. So let's just set this back to a more straightforward
kind of envelope. Knock the sustained down a bit. Make this a
straight line again. Released down just because
it takes $2 play notes hold. So this is fairly common. So most sense sizes will
have ADSR in front though. The vast majority
will have ADSR. They will certainly have a and usually so they
attack how fast to get to maximum volume and how slowly release that
maximum body back down to foster slow to release that maximum body back down
to 0 when I release the key. Some very simple synthesisers
may just have an A&R. Some may have. Most will have ADSR, this one. And it's not uncommon. Also has the H. If I just raise, it should become fairly
obvious what it does. Adds this extra bit
at the top here. Can you see at the
top of the attack? So as I move the hold, it brings out an extra,
extra piece here. What this is is once, how long I should remain
at the maximum amplitude before I decay is added between
the attack and the decay. So I attack, I go up from 0
to the maximum amplitude. I then add the hold and it will hold it there for
a period of time, and then decay down
to the sustain level. Hold it that until
I release the key. Then it will use the release
time to determine how fast or slow to go from the
sustain level down to 0. Let's have a look at
this. So whatever is at 0, it just dropped. This drop a little
bit more pronounced. With the whole set
to 0 or thereabouts. The sound goes, the
volume goes up and down and then dies away.
When I release the key. If I introduce a hold, it will stay at that maximum
volume before dropping off. And this is not doing anything other than
holding the ketone. I'm going to reduce the key
down through the release. You can see it's just
another attribute within, within the envelope that again allows us a little
bit more control over the the way that
the sound is generated. There is another bit
here which is delay. And you'll see that
when I increase, this just moves the whole graph to the left and the right. By default is set to 0 in
the vast majority of cases. In fact, I can't think
of a single instance in this course by this
won't be set at 0. But what it does mean is
it allows you to have some time between when you press the note and
then the attacks dot. This is quite unusual
to see actually, but very, very rarely used. But in this instance,
just to demonstrate, I'll set the decay, set the
delay to around a second. You'll see that when I press
a note and there'll be a second before the attack starts. Precedent now, as a second
before the note sounds. So again, precedent now. Then we also just
wanted to reiterate in here that they just remove the whole to
go back to our ADSR. Let's move to sustain up. In an ADSR envelope. As long as I have
to key press down, the sound will stop here. And you can see this in
the graph inside module. And again, vital so
good for this and such. Well that was a really advanced and complicated
looking synthesized. The visualization of it
makes it so suitable and so, so good for just demonstrating
these kind of techniques, no matter how elementary
or fundamental they are. You'll see that the sustain is where the note will be held. And it will be held that as
long as I hold the note down, it will remainder that
sustained volume until I release the note than the
release bit will be triggered. You can see that
guest is remaining on the sustained point
until I release the key. But what happens if I release the key before I hit the sustained note?
Let us have a look. Hopefully you can see that. But what's happening is even though I'm release
the key as I'm partway down on this kind
of slope for the decay, before I reach the
sustained point, it jumps immediately from this point on plays the release. So it plays the whole
release cycle every time.
22. USING ENVELOPES: Equivalence can be applied
to all manner of things. And then we saw that in the
diagram before we apply it into filters in our diagram. Let's just pop back there. In our, in our diagram here, we said that we would
apply filters to, sorry, envelopes to filters. And two amplifiers
were actually, of course, we can apply them
to oscillators as well, and that is what
happens by default. So by default are envelopes are applied
to the oscillator. And the way that we attach
them in vital is really good, really, really,
really, really simple. By default, envelope one will attach itself to
every single oscillator. No matter how many oscillators
I have 123 oscillators. Envelope, envelope one will
apply to that oscillator. But I have multiple envelopes. Let's just set this envelope to something that's going
to be quite distinctive. And let's set this. Maybe you have two oscillators. There's changes once
something that's very different to a, the sine wave V that
we have so that when we play a key, now, here we've got a noise or
a quite a high pitched, quite high pitch, sawtooth wave, and a sine wave at the
pitch that I'm playing. Let's, let's set the
release to be a bit longer. Now, by default, this envelope is attached
to both oscillators. But I can create
another envelope. So I could create this
envelope here which has got a much shorter release time, is still playing
an ambulant one. Hey, but I could attach
this envelope here simply by C where these kind of
circle and the four arrows, or I can grab this one
and I can attach this to the level inside here. I certainly pick
it up from here. Anyway that's
suitable as a target. Anything that can be
used as an embryo, which you can see is a lot. Anything that an
envelope can be attached to will be highlighted. And
I'll drag it over here. And this instance, I'm
going to touch it to the level inside the
second oscillator. I'm going to set that
level all the way to 0. When I hover over it. And
I've got this envelope. When I'm looking
at this envelope, you can see that underneath
the level on oscillator two, I get this little pie
chart looking thing. And you'll see that
when I hover over that just above it
on the level knob, I get a green line and as, as I drag up and down, that green line
becomes bigger and more of the pie
chart gets for them. This is how much it's
going to affect. How much is envelope
is going to affect the level for oscillates. And number two, probably the
easiest way to demonstrate. I'll set this around
somewhere around here. The easiest way to demonstrate
is to, is to play it. What I'm expecting to happen is let's move this up
a bit, a bit further. What I'm expecting to happen is for oscillator, Let's do it. It won't be just because of the nature of
this as a saw wave. It'll be, it'll be easier
to hear like this. What I'm expecting to happen now is with envelope one which is attached by default to the
level of every oscillator. But in this case, we're looking at oscillation
number one. I'm expecting to happen
is the sine wave to attack very
quickly and then to sustain a reasonable
level and then die away over 1.5 seconds when I
release the key envelope too, because I've attached it
to the level of oscillator two is now going to affect
the level of oscillator two. So I'm expecting
the sawtooth wave, the higher pitch sawtooth wave, to take a 2.5th to attack. So it can take a 2.5th to get from minimum volumes
and maximum volume. And then when I release the key is going to die away
almost immediately. Listen out for those two things. Can you hear that
so straightaway, as soon as I press
the press the sound, the sinewave attacks
straightaway and maximum volume
almost immediately. We can make that even
less. Then when I release when I release, excuse me, I'm
pressing the wrong the strategies grab
this thing here. So we're not released. It's going to release over
a long period of time. Let's just hear that. It's
attacking immediately. As soon as I goes
to the sustainable, when I release the key,
it takes a long, long, long, long time to release. If I turn on oscillator
to oscillate too, has been affected by envelope. Envelope too. Because
I've attached it. By dragging over from
here to the level of oscillator to
set the level to 0. But then I said I
wanted to affect it kind of 75 per cent in there. This is going to attack
much more slowly. But as soon as I release
the key, it's gonna, it's gonna release straightaway. Now what becomes interesting? And you can see how
this could build up into a whole bunch of
things and bear in mind how many different things
we can attach a envelope to play these two oscillators
at the same time. You'll hear that the sign by
uses its envelope and the, and the sawtooth wave uses its second envelope,
envelope number two. We can make it attach because we can have
oscillates number three with a square wave or a triangle wave and make it attach, we can either create it. So another envelope for
oscillates number three, by default is going to get the envelope number one
attached to the level. Or again, we could
take envelope number two and attach that to
the level over here. And again, because
such the envelope to a whole manner of things, for example, we might
want to attach it to the unison voices. We're gonna go
over the envelope. We're gonna go from one unison voice to 16
universe users and voices. For the square wave. If you're interested. We can attach it to an envelope, can be used to
attach to the pan. We might want to
press a note for it to move from our left
ear to our right ear or from move from right air
to stereo in the middle. Want to attach it to the pitch. Just create some different
envelope shapes. I would suggest that
you start with envelope one attached by default to the, the level of the oscillators. And just get a real
good understanding of how it impacts overtime. Create yourself a quite
a percussive sounds. So somebody with
a fast attack and fastest release create
some more padlock sounds. As I say, just play around inside the inside
the envelopes here, create some envelopes and before you attach them to a
sound, create the envelope. Really understand what that
envelope is going to do in terms of ADSR and add
some hold if you want to. Then attach it to various different
things wherever you wherever you can
find to attach it. At the moment only attach it to controls that you
know what to do. So at the moment,
we've looked at oscillators and we've
looked at the amplifier. You could attach
it to the spread, you could attach
it to the level, the pan or the oscillators, the pitch that fine tunes
the unison, the phase. So have a play around in there, create some envelopes and an attach into various
different things. See what crazy
sounds you can get up. In the next section. Then we're going to
look at the next way. We've got modifying the sound that's been generated
by the oscillator. I had to filter out
the envelope pi to it. And that's gonna be filters.
23. INTRODUCTION TO FILTERS: In the last section
that we looked at envelopes and how we can use them to shape the amplitude
or the volume of our sound. In this section, we're
going to look at the next item in our
signal path that can be used to really begin to shape the sound
that we want to hear. That is filters. Let's jump over to vital and I'll have a look
at how filters work. Filter section is down
here in the bottom left. But before we get there, I'm just going to show you
quickly how to we're still set up here from it with the envelopes that we looked
at in the last section. So rather than going reset those all back to
something sensible, there's, there is a quick
way to do this and vital. And if I click on
these little, little, little three bars
at the top here, I can left-click that and
choose initialized preset. And that will always
take me back to the initial preset
that I wanted to save. I want to start again
from a blank patch. If I want to save, if you've got some work that you want to save, you can, you can choose
here to save the preset and you can
give it a name. And then you'll
be able to go and click on Browse presets. Lay says I didn't go and
find that patch that you've created that you love and that you want to use
again in the future. There are a bunch of
presets that you can, that you can buy or find online that you can
load into vital for, for sounds that other
people have made. Depending on the basically depend on how much you paid
for vital in the first place, whether you got the
the free version, I think that comes with
about 25 different presets, right up to the kind of pro, the top end version that
would come to with, with hundreds of
different presets. That may be a banker
presets in there. When vitals installed that
you can kind of click around, but not going to look at
those in this course. We're much more interested
in in B9 to create our own sounds from scratch rather than the news and other
peoples to give our sound. And I'm using that distinctive
and unique quality. But anyway, I'm
going to click in here into initialized preset. This is gonna take us back
to our initial preset, but our basic envelopes. And we'll be back in the initial preset over
here in our oscillators. Remembering, of
course, that we need to click on this arrow here to the right to bring us into just the ones into basic shapes. And to set our phase and phase
randomization down to 0. Let's have a look at, Let's have a look at filters. Filters really used
to shape the sound. And so we've shaped the volume. And so now we're going to shape the frequencies that
are produced by ASO. And we saw that earlier
on when we looked at the let's pick up,
pick one hand, just have a look in our thing here that when I play a sound, this I can see the
shape of the wave. But when I open up my EQ, I can just create this down and bring this
back up when I play a, a sawtooth wave in this case. That I like all these harmonics. And the filters for the most part are
interested in these, in these frequencies, in the harmonics either
enhancing or, or removing some of
these harmonics and some of these frequencies
from the note that we generated with our
oscillator filters in vital, there are two of them
or two main ones, and they are found out in this bottom left-hand corner here. So I'll just zoom
in there so we can see them a bit more clearly. We've got a sine wave,
a sawtooth wave. And let's enable
the filters I need to go and click on
the little button. As with all the other
panels are going, most of the other panels are going to click on
this little button. The filter will light
up and we can see that we've got filter
one applied here. By default, this is an analog
12 decibel low-pass filter. We're going to go through
all the different types of filters that we've
got here or the basic types of filters that
we've got and what they mean, and how they affect the
sound that we've got, and how we can adjust
them in different ways. Again, vital comes with a sensible set of
defaults and that is that oscillator one will by default be routed
to filter number one. But I can change this by either clicking up here to send
it to different filters. I might want oscillator to
also to go through filter one. For example. I can go through filters. I can send it to both filters at the same time in parallel, I can send it straight to the effects which we're going to have great inside,
invite, inside vital. We're going to look at it later. Or I can send it direct out. So this is direct
from the oscillator. It won't pass through,
anything will go. The envelope will be applied, and it will go straight out, bypassing all the
filters, all the effects. Straight out to straight out, straight through
the amplifier. Let's set this back
to go to Filter one. If I turn this filter off,
this is just to remind you of the noise of you've had it
plenty of times already, but this is the sound of
a standard sawtooth wave. And as soon as I
apply this filter, we're going to get
different noise. Much smoother and less raspy,
less aggressive noise. Now this is, this is
applying a low-pass filter. So what this is saying is that all the low frequencies
can pass anything that's where the
frequency falls within this orange graph it anything, any frequencies at full down in that scale, they're composite, ie they get admitted by, then they get passed onto
the amplifier and out through headphones or speakers. Anything that's outside
of that graph gets cut. This is a low-pass filter. Sometimes you'll hear this referred to as a high cut filter here because we're cutting the, cutting the high frequencies
out from the signal. But most commonly and
within vital, certainly. This is called a
low-pass filter. Just while I'm here at one other way of doing the routing. You can do it through here. You can routing the oscillators, the sampler, and actually
the other filter. To filter one, we can say, okay, well, we're accepting
signals from, in this case, just
oscillator one. But I can switch on the other oscillators here if I wanted to. And you'll see that if
I just enabled this to make it a bit easier to see, if I look at oscillated three, I can either roots, root here or I can go and switch oscillator
three ON and OFF. Directed to the filter
from this button, it's reflected in
this oscillator. Let's switch it off and
let's talk about the, the different types
of oscillators. Sorry, the different
types of filters. Now, again, on your synthesizer, if you're planning to
use one outside of ISO, not highly recommend
that you have a look around at different
types of different types of synthesisers and whether
that be hardware or software. You'll often see them referred
to simply as filters. Sometimes. Particularly some of the older analogue synthesisers, we'll only have a low-pass
filter and high-pass filter, there'll be separate
and there'll be maybe late
labeled as lowpass. Highpass, it might be labeled
as high cut, low COP. Quite often you'll see
them referred to as LP or HP for low-pass
or high-pass, will look at the different
types of filters. Low-pass and high-pass
is in just a second. The other thing
that you might see filters labeled as is VCF. Voltage-controlled
filter, same as we had voltage controlled
oscillators. Voltage-controlled amplifier. We also might see it as a
voltage controlled filter.
24. FILTER TYPES: So as I said, we turn on the filter here
and it does make a distinct, different for Sandy already. This is because we're applying a low-pass filter and we're saying that
everything down here, it gets passed
through and all the high frequencies get cut off. So if we think
about the harmonics that we saw in the equalizer, all those little harmonics
off to the right-hand side. They've all been
removed from the signal on only the harmonics on the left-hand side and the fundamental have
been passed through. Now down the bottom here I can move this to the
left and the right. And fairly obviously this will
mean that as I move this, as I move this
further to the right, more and more high frequencies
are being allowed to pass until eventually
all the way up here. And actually you can make
some pretty cool noises just by simply what we called
a filter sweep bytes, which is where we are
just adjusting this, which is known as the
cutoff from left to right. So a filter sweep
might sound like this. We'll look at some really
fun things we can do later on. To automate this. Automate that sound
is our plane. We have a bunch of
filters inside of vital. We're going to look
at the analog ones primarily on one other. This is a low-pass filter. If I take this blend at the top here and
turn this around, you can see that
this, everything that's in orange
is going to pass. So if I go all the
way to the other end, what have I effectively made
is now a high-pass filter. So only the high-pass frequency or only the high
frequencies are going to pass through to
the amplifier and the low-frequency you can
be cut and that sounds. So a low-pass filter
sounds like this. That's somewhere in the middle. And a high pass filter. Removal of those lower sounds and just let the high one serif. So now it sounds like this. Low-pass filter is by far, by far the most common
type of filter that will apply to your,
to your sounds. This is the one that you'll see used more often
than anything else. Now, you'll notice at the
top here this is analog. And there are, if I click this, there are various different
types of filters in here. We're going to stick with
the analogue ones for now because the others are
pretty much the same, they just use a slightly
different algorithms. So once you've learned
the analog ones, y'all know what
all the rest are. And because I use a slightly
different type of algorithm, which is based on different
types of electronics. Analog one is a very
traditional sounding kind of analog filter. Latter filter for the
ladder filters for example, this is something that is a different type of
circuitry designed originally emulated as using
computer algorithms now, but this was something
that it made very popular. We have algorithms
based on purely digital from the digital
synthesizer era. Various other ones. We're going to look at some
of the others in a bit. But certainly not going
to look at all of them in something that you should
definitely explore. Once again, once you've been through this
course and you really, really understand how the
synthesizer works and how we're able to sculpt the
sound that we want, then is the time to start going through all these other
different types of filters. And really just kind
of seeing the nuances of these different kind of filter algorithms
and filter types. For now, let's stick
with the analog. And so the first one
that you'll see is, by default is analog 12 db. This sounds with decibels. This is a measure of volume. What this is saying is
that for our cutoff point, which is set to semitones, and it's just going to set
that to hertz as I suggested. The only reason
I'm doing that is because just about every other synthesising
that you'll ever use, we'll use hertz
instead of semitones is a unit of frequency. If I flip back here and I'll set this frequency to be 600 hertz. For every octave that
I go above 600 hertz. In terms of frequency,
in terms of pitch. The volume will decrease
by 12 decibels. We get this kind of, let's
just knock this down for now, but I'll explain what this
is. You see this thing here? That's the residence. I'll explain what
that is in a minute. From this cutoff point, where the volume is maximum, where everything is
getting through for every octave that
we go above that, the, the volume will be
caught by 12 decibels. This gives a relatively
shallow slope. If I change this to be
a 24 decibel slope, you'll see that the slope
gets much, much steeper. So what this says for
every frequency that's above the cutoff, for every, for every octave that the
frequency is above the cutoff, the volume will be
lowered by 24 decibels. You can see that you can
hear the difference. So you can hear that there are many more high frequencies. They're kind of the higher pitch sounds
being led through. If I change this to a 24
decibel, can you hear that? Really, really
high-pitched raspy noises? There are many more
being led through here. That slight buzzing. And this can be a really useful way when Ms.
sculpting our sound. If we are getting some
sort of some sort of bars, some high-pitched frequencies
that we don't like. We can apply a steeper, steeper curve to our filter. I apply a 24 decibel per
octave filter rather than a twelv decibel in order to cut some of those
frequencies a bit more sharply. The same the other way round. If we move to a
high-pass filter, again, the slope is the same. So we cut the low frequencies much more quickly and
much more harshly with a 2424 decibel per octave filter than we
do with a twelv decibel. Like I say, a low-pass filter
is what you're going to use more than any other type of filter when we're
doing sound design. So we'll stick with the
low-pass filter for now. Onto the next thing. I guess we can look at some
different types of filters. So we've looked at the
12 decibel filter, the 24 decibel filtering. And again, they are usually uses a low-pass or a high-pass. We have the notch blend. If I go down here and get
this where we can see it, what the notch is going to
do is not just going to, if you've used EQ before, you're gonna find this
really simple to understand. But basically everything
that's in the inside, the orange portion is
going to be allowed to pass this notch. It means that we have this, this part in the middle where those frequencies
is gonna be cut. We might have a really, really, once we've
generated our sound, we might have one particular harmonic or one frequency
which we don't like. And we can use a notch
filter out that, that one or that small band of frequencies onto the next one, which is a notch spread. And you can see that
this one then allows you to cut out a few more, a few more frequencies. I'm really just kind of as
an another shape of filter. Not massively used again, but it's useful. But
you do want to use it. Again. Really useful
sound design tool. Not a massively used
type of filter, but definitely if that's the kind of sound that
you're going for, you can play around
with that and get some really interesting
noises out. And then we have a, this filter here,
which is a BPN. It stands for band peak, notch. This is kind of a blend of
different types of filter. We can just kind of
get a really emphasize a particular band or
a particular peak. So we could, the easiest one, the easiest thing for me to play a note and use a hill with us. This enables us to pull out a particular frequency or band
of frequencies and really, really, really emphasize them having consequences
streams here. But we can put, again, like I said, these other types of
filters are useful. But I think it really just
takes some playing around. I can show you what the
graphs look like and the kind of effect that
you can get with them. But it just takes a little
bit of experimenting. So I definitely encourage
you to do that. Just start with a really
basic oscillator. We have here, just
a simple sawtooth. And just work your way through those analog filters to start with and have
a play with them.
25. RESONANCE: There's a pretty
standard looking, looking low-pass
filter cutoff here. And this is the point at
which the slope starts. So this is the point at which frequencies and
volume starts to get. The volume of frequencies
start to get cut. Now, we have this other control here on the right-hand side. And this is for resonance. And what resonance does
is basically gives it a little bit of a
boost just before the, at the cut-off point, just
before the slope starts. You can see this
in the graph. As I raise this resonance up, I get this little peak just before the, just
before the slope. This can really alter the sound. So let's with the
residents of 0. And then I can really
emphasize that point. Just gives that little
bit of a boost at the very highest frequency
before, before the cutoff. And you'll see that this is quite often used again to sweep. But we talked before also about the changes to the
effect will be greater. We talked before about
the cutoffs suite, which is a really common type of modulation that's
done for now by hand, but I'll show you something more about that later,
how to automate it. But this causal sweep. If you listen to any music
from the 70s or 80s, you will surely have heard
that the synthesized music, if I increase the resonance, that affects becomes
much more apparent. That is, resonance is just
a raise and volume of a particular band of
frequencies that is just before the cutoffs at the
beginning of the cough slip.
26. DRIVE, MIX, KEY TRACKING & ROUTING: Dr. this simply adds a
little bit of saturation is not a massive overdrive
distortion saturation effect. We'll have a look at
how we do that later. But it just adds a little
bit of drive to the filter, to the sound as it passes
through the filter. And it can be used to add some, a little bit of warmth to us. Like I said, it's not much. But it's just adding a
little bit of drive. Again, adding a little
bit of interest, a little bit of warmth, I think to the sound, the mix. This is the wet, dry mix. So if you've used any
kind of effects before, this is all the way
to the right here. This is wet. So this means that the whole signal from the filter gets passed
to the amplifier. If I move it to this site, you'll see that the, there is effectively no
filter here now. And as I move this through here, we change it through. We changed the shape of the filter to make it
more or less apparent. So here, for example, we still have our
low-pass filter. But we are allowing some of the higher frequencies
through but lesser volume. So this is effectively
giving us a wet, dry mix. So to allow more of the original sounds to
pass through the filter. Set that to here for now. The final thing is key tracking. So at the moment, the same, the same filter is applied at
exactly the same frequency, whether I play very low note
or a very, very high note. So high, you can't
hear a very high note. The cutoff for the
filter is applied exactly the same frequency. With Creek key tracking
on the filter, the filter cutoff
moves directly in relation to the key that I pressed on the
note that I've played. So if I play loner again, you can see me
moving the cutoff. That's just the cutoff moving down that frequency in
relation to where it's set. If it's originally set up here, for example, it moves
down to relative, as I say, to the, the
key that's played. If I play very high note, the cutoff actually moves
up to meet that notes relative to the key that
I'm playing on my keyboard. So that's the basic controls
of the cutoff of the filter. We have two filters. We can go, we've got a
number of options here. We could go. Because let me just
go into a bit of a wider shot here so you
can see we could send, we could have oscillator one because send that to filter one. We could have oscillated to then move to base basic shapes. And we might have a square wave coming out of oscillator two. And we might send that to filter to oscillator
one goes to filter to, we might have, let's
just be different. Let's just have a
high-pass filter on, on, on Filter number two oscillators number one is going to send its signal from the oscillator to filter number one and
then out to the amplifier. Oscillator two is going
to send its signal through filter number two and
out through the amplifier. I could choose to send
both to filter to, I can send both to filter one. I could send oscillator one to filter one
and out to the AMP. Or I can send oscillated to
two through both filters. So both filters in parallel
and then out to the AMP. I could skip the filters altogether and just
go out to the effects or just go direct out. I could say that I
want to in here, I could switch on filter
one so I can say, Okay, go from oscillator one
to filter number one, and then filter number two except a signal from
filter number one. So it goes oscillator
filter one, filter two, and then out. These are all ways.
Thinking back to our diagram or we talked
about our signal path here. These are just called,
sometimes it's called routing, sometimes it's called the
signal power, signal flow. It's just different ways
of routing the sound from always from the
original sound source, but then out through a
number of different elements within our synthesizer
and out to the amplifier, and then out to our
speakers or headphones. So that's how we can
route our filters. There's just one last type of filter that I'd
like to talk about.
27. COMB FILTERS: The last type of
filter I like to talk about is the comb filter. As I said, there are
others within here, but a comb filter is Mark. Comb filter is
markedly different. So the comb filter
looks like this. So if you just increase
this a little bit, there are different
types of comb filter, which you'll see in here. They're all slightly
different. But I'm just going to explain what we
would use one later on. We'll use one to create one of the sounds that we're going to create towards the
end of the course. But there are really
interesting thing. If you think back to
when we looked at the equalizer and we played, we played our various
different types of wave shapes through
the oscillator. So our sine wave, a square wave, a triangle wave, a sawtooth
wave, through the oscillator. We were able to see that it produced a number
of harmonics. Not the sinewave,
but the others did. It looks very similar,
so this doesn't it. So what's a comb filter can
do is to raise the harmonics. This is particularly useful
with key tracking on, and you can see that
when I moved to keep tracking it on my default. But this means that if I, excuse me, if I use this one here and
go back to a sine wave. This means that now I can
take my sine wave and I can raise particular
harmonics within the sine wave using
the comb filter. My comb filter allows assignment
to go from this kind of sound to this kind of sound. As I sweep the cuts off, cuts off matches
the fundamental, then I'll start to produce all these harmonics afterwards. It sounds much more like a square wave
from a sawtooth wave. You can just use key trucking done with key truck and switched off on this. See, I can adjust that to get
those harmonics after that. See, I don't get them
anywhere else because those harmonics already applied to Nazi because that's
where I've set the cutoff. If I put key trucking not we'll now move the cutoff
or the comb filter. Sorry. We'll move
the comb filter along relative to the keto. I've pressed that I will
pull this harmonic sound for Africa with
key tracking off. It sounds like this.
Now and again. I'll hit one minute,
sounds quite harsh. That's just coincidentally that I've hit a key that is one
of these other spikes. Instead of the fundamental. If I send the key tracking on, you'll see that the
comb filter moves. It can be quite tricky to chew. But once I've got it tuned, the cone photo moves
along with it. So it's putting, it will pull those harmonics out wherever, whenever I hit the keyboard. So that's one. Comb filter can be really, really handy for putting
out some extra harmonics, but also that with key trucking. And you can see that
that's a really good useful key tracking
needs to be able to pull that comb
filter backwards or forwards along the kind
of frequency spectrum to when it's tuned off fundamental notes to pull out those harmonics
in the way that we wanted to. Just shooting. You can use the residence
to determine the you can see on here is quite evident
that as I'm moving the, the resonance slider
is putting out. Those different
harmonics are different. They're a high
wind, low amplitude not covers the filters, but there's actually one
more interesting thing that I just want to
show you the filters. Again, the way that I'm
trying to describe this, the functioning of
a synthesisers to build block by block by block. So you can really,
really understand each block of the
time I didn't know, starts to look at how
these different blocks green interact with each other.
28. COMBINING FILTERS AND ENVELOPES: If we look back to here, let me talk to my envelopes. We said that by the filter
can affect the sari, an envelope can affect the the oscillates or the amplifier. We looked at how we can adjust the volume and pitch and
things like that given time. But actually a
filter can affect, not sorry, an envelope
can affect the filter. Back in here. And
let's go back to a filter that we know and love. So let's go back to 24 deaths about low-pass filter will
add a bit of resonance. Let's just choose what we've, what we've got here is
our pretty standard. A little bit of residents on 24 decibel low-pass filter
with a triangle wave. As we move the cutoff,
as we saw before, we get some cool and interesting
effects from the filter. Now, earlier in the course, we talked about
envelopes and we said the envelopes by default apply to the level
parameter of an oscillator. But an envelope can be used
for all sorts of things. So let's demonstrate that. Let's, let's create
an envelope here. So let's just create an implement that maybe
looks a bit like this. Let's take the envelope. And by just hovering
over the envelope. But here until we get these
kind of little light, lighter gray arrows for lighter gray arrows with
a circle in the middle. Let's drag that over here, and let's just drag it over to the main part of the graph and our filter and apply
this to the cutoff. And how to think about
what we expect to happen. I will set this a little
bit, a little bit higher. What we expect to happen is for the envelope and the graph here within the
envelopes of the attack, the decay, sustain and
release to effect now, the movement of the filter. When I press Enter, notice
it will sound like this. This can be really interesting. So it's going to be interested
with a very fast attack. This filter, all
sorts of sounds hard, but you can see it's automated in the bottom left-hand corner. Now, let's play with
this amorphous. Let's up the resonance. You can see there's residency. I can also keep track it. That's how we can use the
envelope in conjunction with the filter to adjust the way that the sound is
emitted over time. In the next section, we're going to look at
another way to do that. And that is with
low-frequency oscillators.
29. INTRODUCTION TO LOW FREQUENCY OSCILLATORS (LFOs): Okay, so, so far we've seen
how we can use oscillators to generate our noise or the sound that we're
going to begin with. How we can use envelopes
and filters to both adjust the volume pitch and various other
parameters of the sound. Finally, now we're
going to look at the last building block
of synthesis, and this is low-frequency
oscillators. You'll find these on. Synthesized are usually labeled as low-frequency oscillator, but often as LFO, which obviously stands for
low frequency oscillator. So what is a
low-frequency oscillator? What we know about
oscillators, right? So we know we've
got oscillators, they produce various
wave shapes. The difference really between
the oscillators that we, that we have used so far to, to generate a sound initially. And a low-frequency oscillator is that their
low-frequency oscillator? And the kind of
by its very name, is a oscillator that admits at such a low frequency that
we can't actually hear it. It's something that
will typically traditionally would have omit
annoys below that 20 hertz. So below that lower
level of human hearing. These days with software and
with digital synthesisers. We don't have to worry so
much about the frequency. The US is still identical, but actually nowadays it
an emit any sound at all. Not that it makes a great
deal of difference, but traditionally a analog. When it was analog
circuitry and analog low-frequency
oscillator would admit still a bit as sound, but it'd be so low-frequency that humans can
hear it nowadays, they don't admit
any sound at all, but they work in
exactly the same way. If we have low frequency
oscillators or an oscillator that emits sound so low that we can't hear it. Well, what's the,
what's the use in that? Well, you can think of a no frequency oscillator
is just a signal. It's just a signal
that's evolving over time that we can
attach very much like the attached
our envelopes and our filters to our envelopes, to different things
to change sound. Every time we get we attached a envelopes to the
level and the pitch. And we attach an envelope
to the cutoff in our, in our filter to make a
different shape of sound. We can use our low-frequency
oscillator to modulate. And that's the word that's
often used modulation as. In fact, sometimes you'll
see that on synthesisers to, there'll be a section of a
synthesizer called modulation, which will contain your
low-frequency oscillators. We can use a low-frequency
oscillator to modulate. Basically anything else
on the synthesizer. You can think of. If there is a knob,
slider or switches. You can turn slide
or switch on a, in a synthesizer, you can use a low-frequency oscillator
effectively to automate them. Let's just have a quick
scoot over to vital. Here's vital, I am going to initialize the preset
as we did before. I move that, I always
seem to click that twice. I don't know why. We'll
move that two basic shapes. And we will bring the phase and the phase
randomization down to 0. And so we have a sinewave. Let's move that up an
octave so we can hear it a bit more easily. Okay, So one of the
things that I could do in here, so for example, if I wanted a, a simple sine wave like this, we're not going to mess with
the oscillator just yet. But if I wanted a sine wave and for the sound
design that I wanted, I wanted the sine
wave that got slowly louder and quieter
again and then slowly louder and quieter again and
just went round and round, modulating its
volume up and down. But I could do it like
this, couldn't I? I could, I could bring my level down to
0 and play my notes. And you can see that
the keyboard below. Then I could, with my mouse or with my hardware controller. I could move this up and down
by hand. This would work. But it's got a few restrictions. One is that it is not accurate at all,
so it's just doing it. As I move the mouse up
and down, I can't get it. But to any particular tempo. It also has a restriction that I couldn't
do one at a time. So if I wanted while not
adjusted the level like this, and then also adjusted the pan, hope bloats and 11 up
so we can hear it. I also adjusted the pattern
from left to right. Well, I've already got
one mouse pointer. If I was focused on hardware, I could do both at once. If I wanted to note that
was to adjust in level. And at the same time,
how would I do that? I can only do that. I couldn't do one at a time because I've only got
one mouse pointer. If I've got hardware than I can possibly two knobs
at the same time. I can move to knobs
at the same time, but I can't play a
note at the same time because I've only got two hands. So we have this
kind of inaccuracy. We have this inability to change multiple parameters
at the same time. There's a limit to that. One thing that we can do using a modern door that we
couldn't do before using analogue synthesisers
is actually kind of record that in so we
can automate using our door. We could automate
through the ADCC values, perhaps some of these things. But but actually,
there's another way. And it's been around for
a long, long, long time. It's through the use of LFO. So we can actually use the
low-frequency oscillator, which goes up and down, up and down or wherever
wave shape you want. But in our instance,
up and down, up and down linearly to
control the panning. So rather than, than
sitting there yourself and adjusting the knob by
hand or with your mouse. Or perhaps if you're lucky enough to have an assistant
haven't then do it. Or an intern, you can
get the synthesis, synthesized and do that for you. It's over here in this panel.
30. USING LFOs: Let's have a look at LFO. So it's just there and it's
just underneath the envelope. This is our LFO panel. It should seem fairly familiar, follows a similar
pattern to the to the ambulance envelopes
panel above, which is here. So you can see it's a very
similar looking thing. The way that an envelope, sorry, the way that an LFO works is
that the value is adjusted. So there's the value, whatever that value
is, whether it'd be, we're going to attach
it to level or pan or, or anything else. Is represented on the y-axis. This is the value
on the y-axis and time is over the x-axis. To take our really
simple example where we want to take this note. We want to oscillate
it in level over time. We can do it by hand like this. Or we could attach
our LFO to it. What I can do is I can use an LFO to modulate anything
within my synthesizer. In our case, we're going to modulate the level. As I said. Let me just zoom out here
a little bit so we can, we can take our LFO here, which is going to overtime, is going to raise, an amplitude. Value is going to raise
until it gets to the top. And then it's gonna
come back down again. And it's gonna cycle as we've
got it set up right now. It's gonna cycle round
and round this pattern. So it's gonna go up,
down, up, down, up, down, the same way that our
wave shapes cycle overtime. I will take our LFO, we will
attach it to our level. We'll set the level all the
way down and then we'll hover over this little pie
chart thing here. Remember here, this is where
I can go and I can use my left mouse button
and drag up and down. So I'll set that and you see the green line around
the outside of the dial. I've set that to where I
want it to be as maximum. We've already said
it to his minimum, which is where it is at
the start of this wave. Now when I press the, press a key on the keyboard,
I should hit this. You can see over here in the LFOs cycling
round around this. As we go along here, we get louder until we get
to the maximum point, and then we get quieter again. We can use this to
control multiple things. We might want to also
attach it to our wireless. Let's choose the pen. That's
what we were doing before. So we're going to pan from a center and we're
going to pan it. This is going to pan it
all the way to the right. This is another useful
tip inside vital. That is, if I
right-click on this now and I can choose
make bipolar. What this means is that
at the moment, this, excuse me, this is goes from it, from its default, the value or the value
of where it's set. And I can set it all the
way up to a maximum value. Or I can set it the other way all the way down
to a minimum value. Now because this
is a pan control, this is an interesting
thing because, because it's a pan control, we want it to be go all the way here so the sound is
always in the left ear, all the way round until the sound comes in
our right ear there. Now with the with
the attachment from the LFO is it is it's only going to move it around to
the left or to the right. I want to want to do is just right-click and
choose make bipolar. And this way, when I hover
over this and drag it, you can see that it's
growing in both directions. We'll move it up to
its maximum value. So it's going all the way to the left and all the
way to the right. Now, when I, when
I play the note, the LFO is going to effects, oscillates a one level, sorry, the volume
of oscillation. And it's going to affect
the oscillator one pan. So it's going to pan
it from left to right. This isn't too that we can hear that as that
goes round and round, we are moving the sound
from one end to the other.
31. LFO SHAPES: So we can attach market, we can create multiple f
LFOs by default, they've got this triangle shape, but we can be caught
different shapes CFOs. Let's let's just remove
the pan one for now. I would just again to remove
attachment and vital. Just right-click
and choose Remove. We've still got the the volume. We can choose different
shapes for LFO. So by default we've
got a triangle. We might have a sore
down. This is going to be at maximum body
to start with. I'm just going to slide down
over the whole of the graph and then jump straight back up again to the maximum value. Given us a kind of a pink noise. That sounds like my
door open on my car. Now you know how they made that. There are various other
so we can drop this down. We've got a whole range inside. Inside vital. The most common
bonds are the ones we're going to focus on
our soil down, up. We've got a sinewave
exactly the same as the oscillation regenerated.
So listen to that. Again. Very similar to the triangle one that we had
before, the default setting. And you see that
from the oscillators when we use them as noise
generators or sound generators, the wave generators wherever
you want to call them, sinewave and a sine wave and a triangle wave are
very, very similar. Just that the, the sine
wave is a little smoother. There are others.
We've got the square, so this is maximum
volume, minimum volume. We've got a stack I stamp. We have to try and go,
which is the default. Then there are various others. Quickly fixed. Triangle and up. These are fairly common, perhaps not the
stack, I just wanted a bunch, but certainly triangle, square sine waves,
as you would expect, a fairly common and
you will find them in most, in most LFOs. These others are slightly
more specific to a vital. But you might find something
similar in different synth. Nervous grief is just a very
random sound. Anything? Posterior. Random pulses, shuffle gates, and
so on and so forth. So the bond is breaking
a concentrate sold down, so up sine, square and triangle.
32. LFO FREQUENCY: So let's go back
to the triangle. As I said, it's
affected overtime. They can affect how
how long that time is. The moment. This is sync. Sync to the door, the sink to my tempo in logic, which by default is
120 beats per minute. So this frequency
now is going to be a half note inside,
inside logic. But I can make this into, I can just drag this
up and make it into, let's say two sixteenths. Much faster. A few
seconds. 64 flips. And I can come all the way down to 30 seconds is going to
stick out a little long time. He went to wait for
the end of that one. The other thing that
we can do is if we click this little
note next to it, then we can change the frequency from the way that we calculate the frequency in
a number of different ways. So we can set it to
seconds if we wanted to get a precise number of seconds. So it's just going
to take 2.5th. Now from start to finish. I can set that to be anything
from very, very, very slow. Over two minutes, a
thousandth of a second. I can also set it to, as I say, the tempo of the door. I can send it to a
dotted eighth note. Triplets. Sorry,
dotted eighth notes. Then we have triplets.
33. MORE USES FOR LFOS: Okay, so we've
removed the volume. The NFO touches the volume, we could attach it to. We can touch it's
the pitch that such that now a variation
in the notes. Again, we can adjust this using either this pie chart here or
the one that's on the NFO, they both affect each other. You can see both moving
at the same time. We could attach it to remove it from that because
it's such it to the function. Get this kind of wobbly,
wobbly sound. Again. This will depend on the type of oscillation that you want. Again, we can adjust the
frequency that faster or slower. We can attach an allophone. It doesn't have to be
attached to an oscillator, so we remove that and let's add a triangle with a sawtooth wave. Great Filter. It
seems we did before. Out a little bit of resonance. I really find that one
tip for using LFOs is to go have a play. So go have a play and move some knobs around when you get a sound that you
think it sounds cool. Overtime. Then go
attach another photo. It, I think this
sounds quite cool. Sounds cool just to adjust the, the cutoff low-pass filter. Let's choose a triangle. It doesn't have
to be a triangle. We could use choose
a good assignment. We can take out of focus. We can attach that
to make an attach that to the cutoff here
when I play a note. Now, while I'm expecting to
see is for our cutoff to move over time following
this sine wave shape. If we drag is Donald little bit. And then make this
a little bit bigger so we can see the
little green bar. If I just take a look
at the filter as I, as I click on here
and I adjust this, you can see the green bonds. So the left-hand side
of the green bar is where is where it's
gonna be at its minimum. So they the lowest points
on the cutoff over here, on the LFO over there. At the top of the green bar is where it's gonna be when it hits its maximum value and the LFO. Let's make this quite
extreme like this. So when I hit, hit a note, then if I add a second
oscillator, every time, basic shapes, we'll
choose another, another sawtooth
wave, and we're just teaching this one a little bit. And so we get this. But the second Celsius wife here hasn't actually
been affected by filter to filter one because this is being routed
to Filter button. So for CO, from this sound,
which is the default, if I set this to also be affected by filter
one, I get this. Again. We can, we can basically assign if I click
on an LFO and I go to assign it to
something here, I can drag this in anywhere,
anywhere that's highlighted. I can I can attach my LFO to it. By that be the number of
units and voices over time. Whether it be
somebody that we can, we can even modulating
the envelope. All sorts of things that we can modulate overtime using an LFO.
34. LFO MODES: So let's have a look at some of the other
features of the LFO. Let's just switch this off
and now go back to LFO. We complete that. We'll
go back to LFA-1. On LFO one, we can
see that by default. I'd move that by mistake, but by default the the
mode is set to trigger. What happens with the mode is set to trigger on the LFO is that it starts at the
LFO, at the start. Or actually, that's
not quite true. So see this slider
underneath here. This is the phase slider. And this is, this is the same as the phase for our oscillators. So basically this
determines the start point. So wherever the slider is, that determines a start point. So if I set this a little bit
slower, so we can see it. When I you can see that in the, in the LFO there they started, starts from wherever
the start point is. So we started from here. I can start from
the middle of that, so that's just the
face start of the LFO. We'll leave that
over to the left. Let's look at the different
modes of the LFO. Again, this is very common across all kinds
of synthesisers. Let's just first attach LFO 12. Let's attach it to
the tune again, this is just a nice
obvious example. What we'll do is we'll look at these different
trigger types. The first one is basically
it takes the starts, the LFO, wherever
the face slider is. And every time the
note is played, it starts back at the
beginning and it loops around. No matter where I
finish on that curve. Next time I press the key, it will start at the beginning. I stopped around
here, but this time, but when I press a key again, it will start at the
stock in sync mode. Sigmoid starts the LFO at
wherever the slider is. Again, we'll ignore
the slide for now. We'll just leave it over
to the left-hand side. Then. Looks at the
beats per minute, beats per minute of the door
project that you're in. Wherever you are within
the beats per minute at the moment I'm in logic
120 beats per minute. Wherever I am within
that beats per minute. It will start at that
point within the face. And this is just
a way of keeping some of the modulations
within your, within your synthesizer in time in the same tempo as your, as your overall track. And this can make it just a more pleasing sounds sometimes depending on what
your modulating. An envelope, which is the
third one down this list, acts exactly like an envelope. So an envelope
works is when you, when you hit a note, it starts at transitions
through the envelope. When it gets the end, it stops exactly the same for an LFO. It goes all the way
through the cycle, gets to the end and stays
there until I release. And the sustained envelope
is slightly different in that it will modulate until the phase slider
is reached like this. The loop point is
slightly different. So what this is
gonna do is it will, it will loop all the way through on the first pass
through the LFO. Then for every point that
it goes background again, it will stop the loop
at the face slider. Again, this is one
of these things. It's much easier just to demonstrate than
it is to explain. So here we go. Okay,
so there's that. And then finally we
have a loophole. And this starts the
LFO at the beginning. And then when it reaches the phase slider, it
will start again. Okay. Let's set this back to trigger, which
is what it will be in. Quite often. You'll just
leave it in trigger mode. So this is just looping
round and round and round against the slip face
slider up there. That noise is beginning
to get on my nerves. I don't know about you
all, so let's just lower a little bit better. Let's add a noise a
little bit harsh. We know what to do
about that, right? So let's just add a filter. That's a bit, a little
bit easier to listen to. A few other controls in here. Now, there's lots that
you can do inside, inside vital with regards while always but
with regards LFOs, one of the things you
can do is you don't need to stick to these shapes. Very much like the envelope. You can drag the drug and
shapes around or to the curves. You can double-click on
the line to create a new, new point that you can move. So we might create
something that looks like I didn't know, let us create
another point here. Okay.
35. SMOOTHING, DELAY & STEREO: So along the bottom here, we've got these three dials. So this is smoothing. Smoothing or do it will kind of crossfade between the
beginning and the end. So because I'm able to
create custom shapes here, so maybe I will kinda gonna
kind of automatically do it. But what it will do is
it will allow me to, if I have a shape pretty
much like this by default, when I move the start and end, it will move them both together. And that's to ensure that
when it loops around as a kind of jarring bit. Even so, the smoothing
often still here. Those are very harsh transition. Smooth will do it will, it will cross fade
from the beginning of the loop to the end
of the audit, rather, cross fade from the end of the loop to the beginning
of the loop to try and remove some of those
kind of jarring things. So if we put ups around, we can see that we've gone
from kind of house hush, hush, finished the loop to something that's
a bit smoother. If we go all the way, we can get some very strange effects. Indeed, delay does exactly the same as the delay
for the envelope. It just, although you don't see the graph
move or it does, it doesn't stop the LFO until that whatever period
of time has passed. So you'll note, we'll
just play it here. Again, easier to demonstrate, but it will play a
role play the note exactly as you've defined
it without the LFO, and then it will start
the LFO at that point. This instance, two seconds after the after the notice started.
So this isn't to them. You can get some really
interested in fact, effect by combining the
delay and the mode. So two seconds myself. Finally the, the stereo. So this one's interesting and something that's
quite often used for kind of potluck effects
where you want the sound to really move around
from ear to ear. In the stereo field. What you'll see here, let
me just turn the delay off. The moment you've got one
line, it moves along. If I make that a
bit, you can see what kind of circle that moves away along the line and
it just follows that curve, effects whatever it is
that they are attached to. If I make this stereo, I get now is I get two
little circles on a line. One is the left ear,
when is the right ear? And they move at
different speeds. They move at the same speed, but they started
different places. And that's what this,
what this affects. This is how far apart the stereo image stock for each of the two
starting points on the, on the curve, on the
other folk curve bond for the left ear, one
for the right ear. This style here
determines how far apart, how far apart they,
when they start. Things on here that the left ear and the right arrow moving independently
of each other. And so the pitches
are raising and lowering differently in
your left ear on the right.
36. DESIGNING CUSTOM LFO SHAPES: A couple of, a couple of last
things to cover in here. One is the epilepsy to move
from a kind of a curve, drawing me from curves
to straight lines. This is just to make it
a little bit easier. You can, you can, you
can still draw curves. But by default it won't
round the corners. When I said like
this, it will kind of round when it hits, hits the nodes that you've
drawn on the graph. When you're drawing, when
you're drawing the LFO shapes. You can also change
this, this grid here. So there's a grid that
you can see behind. Let me just zoom in a little bit so you
can see a bit better. But you'll see
there's a grid behind the LFO and by default
it will snap to these points and it just
makes it a little bit easier to draw the shapes. I can affect that grid here. So at the moment, I've got
29 divisions on the x-axis. And I can make that
small aerobic edges by dragging this number up. This gives me more or less bits to kind of lines to snap to. It can also be useful
to set the y grid. So the moment there
was only one, but if we can add some in here, and this gives me lines on
the y-axis up and down. I can also snap to. Now, this is really
useful because one of the uses of an LFO is to draw, is to use it a bit like a
sequencer. We could draw. We can draw a bunch
of shapes in here. So the other thing
we can do is we could these drawing
tools here by default, it's just gonna be set to draw an and drag around as you like. But we can click on
this thing here and we can choose the shape
that we want to draw. So we could draw steps
in here instead. Let me just go
along and in fact, let's just make this
eight, nobody much easier. If I go along in here and
just draw eight steps. When I come back to here, I can raise these
steps up and down. Because I've got this grid. I could do something like this and treat
these as semitones. For example, I could say at
the beginning of the LFO, I wanted to be, I want to, if I touch this to here, what this means is that
I didn't mean semitones. What I mean is sustained
notes if you'd like. So as I play this, let me just drag
that stereotype. And then the amount
that I adjust in here will adjust the amount
that it takes offense. It effectively. I can use this in a similar way to the way that
I might use a sequencer. But I can draw a
graph like this, attach it to the pitch, and have it steps through. So that's why these grid lines can be really
useful to give you a kind of because, because we snap to it and we
can use these drawing tools. We can sorry, let me just
draw a step back in there. We can really make quite
an accurate LFO that we can use for generation. Not just a note, but
perhaps some melodies, some sequence from
the synthesizer. The final thing that I
wanted to talk about was if I right-click on the
label that says smooth, I can choose fade in. And what fading does is
it starts off with a dry on altered signal
and then gradually fades in the effect of
the LFO over time. So right now when I, when
I play a note, I get the, get the LFO right from the moment that I play
the note when I fade in, rather than just being delayed and let me solo delay earlier. Didn't do anything
and then started a failing is going to
gradually bringing overtime. That's about it for an LFO. So just remember that an LFO is, we've looked at some
of the more kind of slightly more
advanced features. When we looked at these
kind of step kind of sequencing kind of thing that we can do with an NFO inside vital. But if we go back
to its normal form, sine wave, a square wave, a sawtooth triangle,
whatever inside. I'm inside an LFO and using that to modulate various
different parts of our, of our synthesisers,
whether that be filter cutoffs, pitch pan. The tuning we can even
modulate envelopes. The what it allows us to do is to automate the
turning of a dial. That's really what an LFO does. Instead of playing a
note and having to muck about and kind of alter things as we play as part
of performance. We can use the use the
LFO to do that for us. And it's the advantages
are that it is much, much more accurate than the new turning a knob by yourself. It is much smoother,
generally, much square. I don't know what
the right word is, but it's very difficult when turning the level
knob, for example, to go from maximum to minimum in in a very short
period of time, you'd always notice some
transition with an LFO. You can go from
maximum amplitude and minimum amplitude
or maximum value, minimum amplitude in
just the next step. The other massive advantage
it has is that we can modulate many different
parameters at the same time. Whereas with our hands, we can modulate perhaps, perhaps too, as long as we figured out some way to
play notes at the same time. But we can generally,
we can only there's a finite number of knobs that we can turn
at the same time. Whereas with an LFO, we can automate it to
do as many as we like. Okay, so that's it for four LFOs for
low-frequency oscillators. Do have a play around,
create some shapes, experiment with
the drawing tools. But remember that
we're not here to talk specifically about vital. We're here to talk about
the building blocks of a synthesizer and how we, I'm able to use a
synthesizer to create exactly the sound that
we want for our track. Play with the LFOs. Experiment, how it works
with different modes, with different
frequencies and very, very fast or very slow highway. How we're able to attach it to all the different
parameters within, within the synthesizer
and within vital to really make
an interesting sound. The alters over time and
the main use of the LFO, the low-frequency oscillator
is to provide some movement to note as it
transitions over time, whether that be panning
within the stereo field, whether it's slight fluctuations in, fluctuations in pitch. Perhaps even you do something like you have
multiple oscillators. So perhaps we have a, I don't know, a triangle wave. We haven't used Triangle
waist for awhile. So we'll have a triangle
wave in one oscillator will have a sawtooth wave at a. Let me just get this
back to the default. And let's move this one down to, I didn't know, seven
semitones below. Let's remove this oscillator. Remove the, sorry, remove the attachment of the
LFO from the oscillator. We have this noise here,
but perhaps we could use an LFO to attach to the level
of just one oscillator, bring it down to 0 and set the
level to come up to there. And I set this oscillator
to be very slow. Let's do it in terms of seconds so we can copy or an idea. So we can say that every, we wanted to take four seconds, 4.5 seconds to get from one end of this
oscillator to the other. What this is going
to mean then is the triangle wave
is going to play. Then every 4.5 seconds, sawtooth wave is going to
fade in and fade out again. This. Then perhaps if we were to take that and maybe combine that with an
envelope which had a bit more of a bit more of an attack, then a bit more of a release. Perhaps we could end up with, let's just leave it
like that, that's fine. We could end up with some
interesting patterns. If we combine that with movement
within the stereo field, we can see that we can start to combine some of the the LFOs, the envelopes, the filters, all these building
blocks built on top of just those initial oscillators
create some really, really interesting
sounds that have, have width and movement. And much more interesting than just really just playing sounds that say at
the same pitch, the same amplitude, and
don't alter overtime. That's all of the fundamental
building blocks now of the main part of any synthesisers
in every synthesizer, you will always find some
sort of noise generator. In most cases, oscillators. You will always find envelopes. You were always fine filters. You will always find
low-frequency oscillators. In the next section
we will look at some additional things
which you'll often find in, often find a synthesizers
but not in everyone. And these are the effects
that can be applied to the signal chain
notes and signal path before it passes
out to the amplifier.
37. INTRODUCTION TO EFFECTS: Okay, So we've, we've seen
oscillators and filters, and envelopes and
low-frequency oscillators. And we've really got the
fundamental building blocks and we're able to construct a sound and then
send out through, through the VCA, through the amplifier using
whatever parameters we sat on that as well. But there's one final
thing that you'll find in a lot of synthesizers, not in every synthesizer button
and lots of synthesisers, they include some effects that can be added
before they get to the final bit on the signal part before
we get to the amplifier. So let's hop over divisor and see what
we've got included there. I'm just here with a
very basic sine wave. Sounds like this. By now he really got to learn what a sine
wave sounds like. Let's change that to what we've not use a square
wave for awhile. Square wave again, harsher than a sine wave or
a triangle wave, but not quite as harsh. So not quite as many
harmonics as a sawtooth wave. I've got everything set to its default values apart from
the phase which I've reset to 00 as we've been doing throughout to get to the effect. So the within vital, we need to come up to one
of these tabs at the top, which is the Effects tab. Now, effects can be rooted
in a number of ways, but affects will
always apply just before the, before
the amplifier. We can either send our
shapes or a filter. So in this instance we
might go through filter one and apply a low-pass filter. Say about there. And then that will go on to the effects and then out
through the amplifier. Or we can go direct from our oscillator and we
can skip the filters altogether and we
can go straight out to effects and then
output the amplifier. And of course, if
you want to skip effects and filters,
we can go direct out. In this instance, let's
go through the filter. Then we'll apply some
effects to them. There are a number of
effects built into, into vital and they
are good, Very good. Now, of course you can. If you're using a DAW and you have a bunch of effects
that you'd like to use props as a particular
reverb that you like or a particular chorus or, or, um, I'm set of distortion plugins that you particularly liked
to use all the time. Of course, they're
still open and used to. It's just a virtual instrument
the same as anything else. However, the ones inside
vital are very good and so definitely worth taking just a few
minutes to look at. We're not going to them in, in a, in a great
amount of detail. But we will just
flip through them. So just so you can see the kind of capabilities if you like.
38. CHORUS: Starting at the top of
this, we have them or they're just not arranged in any particular order
and you can change the order of things,
which I'll show you now. But by default they're
just arranged on this left-hand side.
In alphabet scroll. Nothing more than that. I will flip through them in that order. The first ones to
enable it again, you go and click the little
circle to switch it on. This has given us
a chorus effect. Now we've seen chorus before in the oscillator is
referred to as unison. Courses are slightly more
advanced version of that, but a very similar principle. This is a play multiple voices, slightly out of phase
with each other. I was slightly out of
tune with each other. But you can see this one's
a little bit more advanced. So by default here we've
got 16 voices and with a frequency of 41.
So watch this. We can just here, it's just
adding a bunch of voices. If I change this
template with the tempo, the level, this is
a very slow course, but I can make it
much faster too. We'll just leave it as default, but you can get some pretty
crazy sounds already. There are a bunch of controls here which we're gonna go through very quickly. Starting with some
of the easier ones. We have the mix. And this is just how much
of the core signal is, how much the core signal is
mixed with the dry signal. At the moment it's 5050. Out to the amplifier is
half of the dry signal, 1.5 of the course signal. All the way round here we are effectively turning
the chorus off. Now we're just getting
the dry signal all the way round to the right. We're getting a 100%
of the course signal, none of the original signal. By default, that's set to 5050. Over on the left. As I said, we have the number of voices that we
want in the chorus. We can go from four
voices up to 1216. We can set the frequency here. So this again can be related to the pizza per minute of the project
within your door. Or we can set it to
your number of seconds or dotted notes and triplets. We have depth and delay here. The depth is the
depth of the course. You can see this is represented, so this is kind of giving you the much tighter chorus courses, which is much
further spread out. And then we have the
feedback, feedback NOP here. And this determines how much
of the core sick course, excuse me, how much of
the chorus signal it gets fed back into the chorus. There we are. So that is the course
control is pretty basic. It works extremely well, but it's very similar to
any chorus plug-in or, or chorus pedal or hardware
unit that you've used before.
39. COMPRESSION: The compressor basically
bought a compressor does, is it adjusts the limits, the limits at certain frequency. So what it aims to do
is to try to take a, what you might be
able to do is to take a very dynamic way
for and squashes. And that's essentially
what this, what this does. We can use it in multi-band. So multiband will give
us a set of frequencies. This will control the
frequencies of the bottom. So this will bring the LOS, this will constraint
whether laws are, this will constrain the highest. This will give us a middle
set of frequencies, and this will give us the
very highest frequencies. But we can set up in
different ways so we can control the low
separately to the rest. We can control the high
separates the rest, or we can just have a
single band compressor if we want to compress, everything is same,
separating all of the high amplitude
signals down on all the low amplitude signals up across the frequency bands. It's very easily
controlled if I just go back to multiband so we can see exactly how much we're affecting
it in terms of volume. For each band. We can slide this up to basically
set that band. So let me just here we are kind of squashing
those kind of middle, middle simplification. We can squash on. So quite often,
compressors are used for very dynamic sounds which have got a lot
going on. Perhaps. Something where we really
want to accentuate. Attack and release are simply there to determine how quickly, exactly the same as the attack and release
on that envelope. Determine how quickly
the compressor act, so how quickly it
squashes sound, and how how quickly the
compressor is released once the, once the note has been released.
40. DELAY: It onto the delay. Delay just works like any delay. All these just
weren't like any kind of plug-ins that you've had
that you've used in the past. But delay basically just
repeats a note over time and each time it's repeated
against quieter and quieter. Delay might sound like this. Sometimes you'll see these
referred to as echoes. We can set the
frequency of the delay here. A slower frequency. Very fast to faster here. Again, quite often. Click and all sorts of things
quite often you'll hear. People would like to use
a dotted eighth notes for delays because the delays
come back between the beats. We have the feedback. So how much of the
delayed signal, how much of those
echoes are fed back? In? The easiest way to demonstrate
that is by turning up. This will just go on
forever because it's feeding everything back
into the academic. Just, just keep
repeating yourself. I can turn it down. But more often than
not, it's just used it to see how many, how many echoes you want. Before it fades out to 0. The mix is the same as
before, wet and dry signal. So how much of the dry signal
versus the wet signal way? How much of the dry on or unaltered original signal
is fed to the amplifier. And how much of the core signal
is fed to the amplifier. We have the same kind
of filters below. So we got, we can do a filter or band-pass
filter effectively. If you move it like
this, it becomes a high-pass or low-pass filter. But then often it can be used as a band-pass
filter in the middle. Again, all of these
can be automated. So all of these dials
controls parameters, if you'd like within the, within the effects can also be modulated by LFOs,
bye, bye envelopes. I can simply drag
an LFO and attach it to anything within
within any of the, within any of the effects. Let's just set that back
to the default there. So affects everybody
got no filter. Another thing we can do is
change the type of delay. So at the moment we
have a mono delay. Then we can go to
a stereo delay. With the stereo delay we can, we can do different ears
at different speeds, different, different years, different stereo channels,
different speeds. We could do a ping-pong. This is going to bounce the, this is going to bounce the echo from one
end to the other. Finally, we can do
a mid ping pong, which is gonna go from
one ear to the center, to the other end
and the centrum, and then back out again. Okay, So that is the delay.
41. DISTORTION: Onto distortion. The
way distortion works is there are a bunch
of algorithms, are different algorithms
here that you can use to basically shape your
waveforms in different ways. The way that you can think
of distortion is that it is adding harmonics. You remember the
harmonics that we saw for the different types of waves
that we looked at in the EQ. Distortion is basically going to add harmonic steel signal, which makes it sound much core, so much raspy are
much more distorted. So the more harmonic she add, the more distorted the
signal becomes, more. The harsher are more aggressive. The signal becomes, we saw that the difference
between, for example, the sine wave and the
triangle wave with the sinewave had
no, no harmonics. And the triangle wave
had a few harmonics. And then right up
to the sawtooth, which had loads of harmonics
and sounded much harsher. Distortion. That distortion
is very good actually. So there are withinside vital, there are various
different types of distortion from
soft clipping. I'm too hard clipping, which gives us, if I just
turn this up a little bit. So you can see with soft clipping is a much
smoother type of distortion. With hard clipping, it's a
much, much, much harsher. So let's just look at
the soft clipping. I can adjust the amount of drive from very
little distortion all the way up to quite
harsh distortion. Now it's important to remember
distortion that you can give either an actual increase in volume or a perceived
increase in volume. So just watch the top here to the master volume to make sure it's not
getting too loud. With a hot chocolate. Weren't here a lot
now, but you will hear that much more so and suddenly
my percussion with it, which is quite a harsh
percussive sound. But you can start to
play some chords. You're about to hear a
difference a bit better. So let me, let me soft clip. Slightly smoother sounds of the distortion when
it was chocolate. We have various
different types in here. We call it linear folds. Seinfeld's a slightly
different algorithm that gives us a slightly
different type of distortion. It really is just a matter
of taking your sound, applying the different the
different distortion types to it until you get one
that's pleasing for you. And then we've got a bit
crushing and downsampling, whichever type of
distortion we've got, we can adjust the amount of distortion so
that the kind of drive using the Drive knob and then the mixed is
exactly the same as before. With the other effects. This is how much dry
signal on how much, in this case, distorted sooner gets output to the amplifier. By default, all of the
distorted signal goes through. But you might get some quite, you see that is very,
very over driven. But say you might already want to send half of it through. It's just another way
of affecting the sound. Down the bottom, we got to
filter various different types of Not types of filter, but various different stages in which the filter
can be applied. So it's quite common to apply high-pass filter
before we go into a distortion. So we might want to
set this to pre. Again with this
blend knob, we can, we can change that to be a
different type of filter. So perhaps a high-pass filter. Low-pass filter,
sorry, is that is common to apply
before we go into a, into a distortion effect. Then we have, or we can apply the filter after the
distortion has happened.
42. EQ: Moving on, EQ, I'm not going to spend a huge
amount of time explaining EQ. I'm sure most of you have
come across EQ before. It's got a relatively
simple kind of three band
equalizer inside here. Again. These effects are great
and they work really well, but they are pretty basic. But you can also use your own
effects outside of vital. But this just works
exactly as you'd expect. So we have the frequencies
going from left to right. Then we've got this, we've gotten a cup, the three
bands that we can apply, and we can drag this
up to emphasize particular tones within
within our sound. If I want to cast off
all the loser's who can act very much like
a high-pass filter. Or I can do certain things, can cut the tops off. And basically I can
just kind of tweak my sound to get exactly the
tone on the I'm looking for. Now. This can be useful after distortion or after some of the other effects to remove some of that kind of things that we find less pleasant once
we've applied those effects. And the only one really to talk about here
is that the gain just affects how high each
one of these is high or low. The cutoff shows us what frequency this
starts to operate at. The resonance just determines
the width of the curve. Sometimes this might be
referred to as the q-value. One thing I should
mention I just because I've just
done it by mistake. But one thing I should
mention is that we can either completely
remove a filter months. We've added it by, by deciding
over here on the left. If I just want to
bypass it for now, I can use this one here in. The filter, will stay there. Still be displayed, but
it's just bypass for now. And this can be useful for just playing around and just switching
a particular fillStyle. For example, if you got some
tweaks that you want to do to the distortion, but there's a lot of
reverb and you'll find it very difficult to do it. You can just bypass the
rebirth for awhile. For example.
43. FILTER: The filter. The filter I'm not going to explain to you
at all because it is exactly the same as the, as the filters that we've used over in this bit down
the bottom here. So the filter is just
exactly the same. It just gives you
a third filter.
44. FLANGER AND PHASER: We have a flanger, phaser. Flanger will look
similar from the, from the comb filter. But what it does is, is it's giving it
an extra dimension was his kind of
modulating overtime so we can set the frequency and this is basically
just how fast it moves. We can, we can offset the
flanger in different ways. Basically, you know,
the frowned at Florida sound, it kind
of sounds like this. Okay, so by adjusting
the controls inside the flags
works exactly the same as at any fungi values. You can kind of just, just another strings to the
bot in terms of the effects. Phasor, similar kind of
thing, slightly different. But again, it's another effect
which modulates overtime.
45. REVERB: Then finally we have river. I use rebounded lot. But this is really useful for, particularly for Pat sounds
and things like that. But, but a little bit of reverb can be applied
to most things. Reverb basically just gives you a simulation of being
in a big open space. So not like a delay, which is just that. The same note played over
and over and over again, slightly like an echo. Reverb is just the kind of
impression of being in a wide, wider open, more open space. You can hear that tails off
there without the reverb. In fact, let's make the
reverb a little bit. You can here. Without any reverb at all. As soon as I release my
key from the figure, from the key, the sound
cuts away straightway. With reverb. It gives me a more of a tail, a few controls in
the, in the reverb. So we've got a high or low cut, which we do before the filter. And this allows us to
filter out any kind of high frequency or
low frequency bars or moneyness or just
kind of things. Because when we have reverb
that I can really build up. If you've got quite a bit of high-frequency noise
is coming from, you know, from the sound
that we've created. When we put on reverb, it hangs around for a long time. And as we play more
and more notes, those, those frequencies
can really build upon each other and
become quite unpleasant. So we have the better C2. Use a high cost, low
COP filtering here. Exactly the same as anything
you've done before. With filters inside vital. We can just adjust the gain in just the cutoff either by
using these knobs here or by dragging rounded saw
this little panel here. But the most important
things inside the brief up the size of the reverb. So you can think of
this as effectively as the size of the room
that you're in. We have the time for the river. So how long how long the breve
up should hang around for? And this can be set to
relatively short periods of time to just over a minute. Brief Abu continue. Now
for the next minute. We can say, see it's still growing if we looked
at the meatus and that's all they say that that would go, that will
go on for a long time. Mix is the same as
the other controls. So knocking it down to 0
was killed the reverb, as you can see,
because now it's only sending the dry signal. The signal in around 100% will send all of the Riva
wet signal to the amplifier.
46. STACKING EFFECTS: Quite often we want to
use more than 11 effect, and that's perfectly
possible to do. So. Let's add a little bit of sort of bit of distortion
and a bit of reverb. Perhaps let's add a
compressor as well. This is the sound just with
whatever values are in that. So this is what it's
going to sound like. Massive, massive. Let us just turn this
down a little bit. Okay? So we can add multiple effects, they are executed or the effects chain goes from top to bottom, as
you would expect. We might want to kind of we can set up our compressor
distortion now reverb, but we can change
the order of them in the way that we
change the order of them is by dragging them
into a different order. And on the left-hand side, that's the only reason I've
pulled these up really is it can make quite a difference
to your signal depending on the order
in which things happen. For example, if I was to
either know why you would put, put the reverb first, we end up clearly with a very different, very
different signals. And if we put the
ribo back where it was the same with the
move the compressor. We're getting compressed
now after the socialist happen and I can move the compressors are
after the reverb. Now we're compressing both the distortion signal
and the reverb signal. They can be put in any order. But it can have a huge effect
as to the sound that you output based on
the order in which those those things executed
do have a play around. And remember, when
you load it up, they are simply in
alphabetical order. It's not necessarily
the correct order for the sound that
you want to make. So do feel free to drag them around
and get them into the order that makes sense for the sound
that you want to make. A quick run through the
effects inside vital. Like I say, you
won't get effects in every synthesisers built-in. Lots you will. But vital gives, I think you're really nice set of
basic effects which you, which are commonly used and can be applied to your
sound. They sound very good. Saves you adding
a whole bunch of other things inside your
signal Chinese side your door. And I've used them quite a
lot and found them to be, found them to be quite good. There are instances where I want slightly more advanced
effects are slightly different sound from
some different effects. In which case I have just used another plugin applied to vital, but the majority of cases, and certainly in this course, we will be using the effects
built into Po, into vital. They're quite good. Go and
have a play with them. And that's about it.
47. WRAPPING UP: If we go back to
our picture here, we've really covered
every aspect of architecture of the
basic synthesisers. So we've started off
with our input from our keyboard or from
most cases gonna be a keyboard from whatever
midi input we have into vital or input we
have into our synthesizer. We've used oscillators to create a wafer and to alter some
parameters of that waveform. We've seen that the
different waveforms produce not only a
different shape of signal, but also a introduced different
harmonics in the signal. We saw how oscillators
we can affect the volume that the panning, the unison chorus, the
tuning of the oscillators, and how different are having. We can operate multiple
oscillations together, an alter them slightly, in order to get some very
interesting effects. For instance, slightly
detuning some oscillators to create some widths of the sounds,
interests of the sound. We then had to look at envelopes and how
envelopes are used to, in the majority of cases, are used to affect the amplitude or the volume
of a sound over time. Remember, ADSR, attack,
decay, sustain, and release. We looked at filters and
how filters can be used to shape the harmonics
of our sounds. So by that be a low-pass, high-pass band-pass
notch filter. And we looked at the
comb filter as well for, for altering the amount of harmonics pass through
to the amplifier. We looked at the
amplifier itself. So we looked at how we can alter the number of notes that can be played
at the same time, whether that's kind of a more of a mono synth up to
a polyphonic synth. We looked at how we can
glide between notes, so how we can play, we can have the synthesizer play all the notes in-between
two notes automatically. So we'd gliding
round between notes. The different ways
of achieving that. We looked at the stereo
spread and the pan. And then we looked at
low-frequency oscillators and how we can use a
low-frequency oscillator that can't be heard. The humid air, and
how that can be used to modulate other parameters
in an automated fashion. So any of the controls within
our synthesizer can be modulated from LFO with a
low-frequency oscillator. Now in vital, that's
certainly true and the vast majority
of parameters within most software synthesisers can be altered using an LFO or
modulated using an LFO. That's not always the case
in hardware synthesisers. Sometimes it's just the filter, or it's just the pitch, or it's just the volume or small subset of the parameters that we have available to us. But the idea of a low-frequency
oscillator is to, is to kind of automate, automates the changing of any parameters within our,
within our amplifier. Sorry, within our,
within our synthesizer. That really covers all
the basic building blocks of a synthesizer. Like I said, those
building blocks, so particularly filters, LFOs, envelopes amplifiers
will apply to every type of synthesized
that you use. We've looked at
subtractive synthesis. There are other types
of synthesizer, but mostly the biggest
difference between, between the types
of synthesisers, how they generate that
noise right at the staff. Whether that be
from a wavetable, some sort of physical modeling oscillators as reviews now, but they would all
have envelopes, filters, LFOs, and amplifies. Next we're going to have a
look at some specific sounds. So how to create some
specific sounds using vital, we're using an amplifier,
using a synthesizer. Then after that, we're going to just prove to you that you can take what you've
learned in this course now. Go and apply that to
any synthesisers. What we're gonna do is
we're going to look at a couple of other synthesisers
are nothing like vital. Really know that we
really understand all the basic building
blocks of those synthesizer, which means that we can take
that and we can apply that to any synthesising
that we sit down with. In the next section, we're
going to look at some of the specific sounds that we can create in order to build a palette of sounds that we can use for
music composition.
48. SOUND DESIGN: SUB BASS: Synthesized, the lesson is over or the architecture
of a synthesizer. We know what all
the individual bits of a synthesizer does. Let's have a look through,
look through building some sounds that we can
use to create a truck. So let's start off with probably
the most basic of those. So we're gonna start
off with a couple of a couple of base patches. And a patch is what
we call the kind of the collection of parameters. So once we've, we've set all
the parameters that we want to on our synthesized. That's what we
would call a patch. And we can go in and
save that if we want to invite all in, certainly in all
software synthesizes. If you're using a very old analog synthesizer
hardware synthesiser, you simply could not
save the patches. So you really kind of either have to remember
it and be able to get back to it very quickly
or keep a notebook of patches of exactly what not be changed and
what dao you change, and what value they were at. In our case, we are very
lucky and we're able to use, were able to just
save our patches. But let's build them. Build
them all from scratch. So I've started with,
I've reset vital. I've gone to basic shapes. And I have set the
phase and the phase, the randomization to 0%. Let's start off with probably
the most basic patch, and that is a sub bass. So just a very, very low base where
we play almost imperceptibly below our track
just to add some real depth and some real kind of
substance to our truck. Subbase is really,
really simple. And it's based on just
a single sine wave. What I usually prefer to do is of course, if you
want to play here, if you want to play
in lower down, you can just play lower
down on a, on a keyboard. If you've got a big
keyboard, I've only got a 37 key keyboard on my
desk in front of me. What I prefer to
do is I know that base is going to be low in
sub base is gonna be reading. I'll hold down the
Shift key and just move it down two octaves. There's my basic sub basin, you can leave it there
and many people do. I'd like to make a couple
of small alterations to it. So I'm just going to adjust
the envelope a little bit, just to give it a little bit of, little bit of an attack just
to stop any pops and clicks. So I'm going to
set that to about naught point,
naught one seconds. And I'm going to just move the sustain level
down a little bit. I'd like to give it a
little bit of release, not too much, kind of
2.5th, something like that. Again, this is really only
just to help it blend it. It's just there for adding, for adding depth and substance
to our, to our sound. I'm going to add a couple of, a couple of effects. So I'm going to add a
little bit of distortion, just a little bit soft
clipping, move it around. It's kind of again, with
all of these things, I would definitely
encourage you to sit there with a keyboard and just kind of keep playing,
adjusting these promises. You get two, you get
the thing you like. Yeah, I didn't mind that. Okay. I'll leave it that. And I might do a little bit of EQ here. Just because we're not really, perhaps just see that
monopoly on here. I call this kind of
this real strong base. Now here, you can see
this is interesting. So you can see in here, can you see those harmonics
have been introduced? If I go to cohere, we know that with a sine wave. We know that with a sine wave we just get a sine wave, right? But we know that in the EQ. Let me clear this from earlier. Within, within the EQ. We just get the fundamental. We don't get any harmonics. But look how I've
added that distortion. And as I said, distortion kind of works
by adding harmonics. We can see them. So we've had
a little bit of distortion. You're not going to
add a great amount of harmonics to assign way
through distortion. But with this, unless you use a large amount of distortion or perhaps
a different algorithm. But then we also
have added a couple of harmonic style distortion. You can point that out because I noticed that in the EQ here. But what I want to do
is just, just here, just raise this a little
bit and just change the residence little
bit and just give it a little bit more
driving the bottom. And there we are. There's our sub bass. So as I said, this is gonna be used
right at the bottom. It's not really a kind of musical feature of a
truck, if you'd like, but it's just there to give
a little bit more depth and substance and move some air. I'm in the speakers. Again to save a preset, simply go here and click on
Save Preset and we can go and give this a
name and click on Save and it will be there
next time we want to. Next time you open vital will be able to get to it just by
clicking on Browse presets, scrolling through and
finding the one you want. Next, we're gonna look at
more of a plot based on.
49. SOUND DESIGN: PLUCKED BASS: Okay, so let's try and make more of a plucked by Sandwich. Sub bass is really going
to be used a bit more musically to create a
baseline within our track. To do this, I'll
probably assign wave is quite sub bass C and it's
not really distinctive. So I probably going to choose a sawtooth for this little bit more of
an aggressive shape. Again, I'm going to, I'm going to pitch this
down a little bit. Let's go down to octaves. I think probably I'm gonna
add another oscillator. I just need to remember to
go to basic shapes again. Change the phase down to 0. And we're changes to
be a sawtooth as well. So we can hear that already. We're getting that kind
of thicker sound from having the two oscillators, they're going to purchase one down as well a little bit
because I don't like that. Hi Ross be noise. Normally pushes down on octave, but actually to make it
a little bit thicker, I'm going to pitch it
down 17 semi-solids. That's giving me that
slightly interesting kind of detuned five to it,
which I quite liked. Next, I'm going to look
at the envelope again, a very similar envelope
to the South Bay. So I just got a little bit of a tax or ink and he
clicks and pops. I am going to just
drag this down a little bit and just drag
the release out over. It. Sounds a little
bit harsh still. In. In order to do this, I'm going to add a
low-pass filter. So what I do need
to do is remember to attach both oscillators
to the filter. I'm going to, I'm going to
bring the resonance down. And I will change
this to be a bit of a steeper around here to make sure that I key truck
out a bit so that it sounded sounded pretty good. But I would like a little bit more of a pluck sound to it. I'm going to create
a second envelope. I will just create a bit
of a little bit like this. So it's just got a
little bit more of, a little bit more of a pluck. And I'm going to achieve
that by attaching the this envelope here. But the shape, maybe I'll
just make out a little, a little bit more tension, a little bit more concave, and attaches to the
cutoff filter one. That's going to give
me that plucks Ana. I can adjust the amount of plug by adjusting either
here or over here. The amounts that
the filter cutoff is affected by the envelope. We are asking me quite a,
quite a good pluck sound. I'm pleased with that. Lastly,
then I'm going to move on and just add a couple
of effects perhaps. So let's have a look
about distortion. I always, as we did
with the sub bass, but perhaps just a little bit of soft clipping distortion
just to enhance the sound. Not too much. Without just makes it a little
bit more aggressive. We also, again, we've just started off with two
very basic oscillators to a sawtooth waves. Both detune slightly, so wanted to bring it
down a couple of octaves just so I didn't
have to play down or shift the octave too
much on my keyboard, or just makes it much easier to play
with a small keyboard. The other one pitch
down as well, just to give it a little bit of just slightly out
of tune obviously, but if the other oscillator, but just pitched
down, page down there to bring that kind of
slightly wider sound. We added a filter
just to take off the high-end is a base and give it a more
aggressive sound. The envelope is fatty standard and didn't change a great deal from the default envelope,
but we did add this. This envelope here is
an interesting use of an envelope just to create the shape here to
make a plot of sample. One thing that we didn't do, which can be really handy
with a base, is two. Bring the number of
voices down to one. And this just makes sure, let's just make sure that
we didn't play to bass sounds at the same time. This gives us another
interesting opportunity because actually, because we were on
a single voice now, we can use legato and we can
add a little bit of light. Now when we are pressing individual notes and releasing them before we hit the next one, we still get that pluck sound. But if I hold a note, I don't get that
initial envelope. This is what legato does. So I don't get that
initial attack. If I'm holding down
a note and then press a note either side of it. Like that. That's all plucks out.
50. SOUND DESIGN: ATMOSPHERIC PAD: Okay, so how can we create a really sweeping
ethereal paths? And while we call the
tools that we need, so let's just get started. I think we'll start
with a basic shape. And then maybe we'll change
that up to maybe a soul wave. Again. This is our sole way. Then if I want to make the
sound a little bit richer, a little bit, a bit wider. Maybe I can add a little
bit of unison to it. So let's maybe choose five or six voices that will either unison
about 20% there. It doesn't sound
very Paddy to me, it sounds, sounds more
like a lead sound. So one of the easiest
ways to make something sound more like a pad is
to alter the envelope. What we want generally for
a pad is a much longer, much longer attack and
a much slower release. So let's move the attack over
some kind of long attacker, almost a 2.5th second,
something like that. But drop the, drop the
sustainable down a little, but not, not too much. And then we'll have a
much, much longer release. So a similar kind of length of releases we do
for the attack. We can adjust these
curves a little bit, but I quite like to adjust them a little bit
like this when it comes to the attack of a pad sandwiches kind of
rather than a linear, kind of more predictable attack, then I just like to have that curve and make it
a little bit smoother. So now that sounds like this. But the sound is still
a little bit harsh. So I am going to
low-pass filter. As I said, the
low-pass filter is by far the most common type
of filter that we use. I'll change this to a
slightly steeper slope. I'll leave a little bit of resonance there
probably won't be sounded like now. Already. See that the effect
that filter had, I think, but just adjust
the cutoff too harsh, just just around that maybe drove that
residence a little bit. To me. It still sounds a
little bit thin. I think. Probably. What I'm gonna do
is to add another oscillator. That's how I didn't
oscillate it to. Let's see what this sounds like. Definitely sounds,
definitely sounds thicker, but I think probably, which is pitches went down off to
see what it sounds like. I'm not getting that. I'm liking that. Another way that I might want
to affect it is just really looking at
the modulating overtime, given it some movement
of some kind. I think we want to use
another fo for that, right? So this is an LFO is the thing
that we would use to kind of create some movement over time independent of the
notes that you're playing. I think probably start
with the shape of an LFO, so we use that one. But probably want to use
a sine wave is kind of a smooth a thing for a Padlet
seems to make sense to me. What are we going to
modulate with the NFO? So we want some movement
savvy could modulate, modulate the level of one
of these oscillators. My work could modulate
the units are, I guess, most common use of an out-of-focus too
much in a filter. Circuit modulator every time. And in fact, if we pass also, they should choose through
filter one as well. I've got an idea, so we're
going to use LFO one, we're going to pass out to, we're going to use that too much like the cutoff of filter one. That is far too much in Fauci
fast for a soft pad sound. So let's change this to
seconds. A lot longer. Around that. I think that's modulating
lipids you want. So I'm just going to
turn, turn this down a little bit better. I think 11 final thing
that we might add a little bit more
width to it there is just to add a little bit
of stereo effect to it. So remember in the LFOs, if we use this stereo
kind of dial here, we can have the left and right channel
of the stereo start at a different point within
the, within the wave. So let's try that a
little bit there. As I play that you can
see down the left, the bottom left of the filter. You can see that because I've got the stereo channel
split out the LFO. And the LFO is affecting the cutoff of the
low-pass filter. Then you can see that
when I play a note, you can actually see it represented both of
these things in parcel. You can see that
only on the LFO, we can see that these left and right channels
separately for each other. Also filter which is
actually effective. We can see these filters
may be independent in terms getting some really
nice kind of phases. Just interested in
movement to the sound. Okay, Very cool. So let's have a look at if there's any effects that we
want to apply to it. The effects then
let's have a look. Have a look at some chorus. This does add some
more movement to. It might be a bit
too much, I think. Sometimes with the course and we can just add
too many voices. And I think we already
added, and we did, we added six voices of unison on the saw-tooth
oscillator already. Let's, let's maybe knock
that down to four voices, eight voices,
something like that. That sounds okay. Maybe
a little bit of delay. Again, these are things
like delaying course. They can really build up. So it's important if you're
creating an instrument that that is not going
to be monophonic, you're going to want to
play more than one note at a time polyphonic. Then be really, really careful with the
things that you add, which are likely to build
up things like chorus, things like delay, reverb. Be very careful about buildup in certain
frequencies as well. So if there's a particular band or a band of frequencies
that are building up. Sometimes That's a
lot of high-end, sometimes a lot of low end, sometimes it can be quite, can build up quite a
lot in the middle. Make sure you're using EQ
or filters to make sure that those dealt with so that they didn't
build up as you build. Note afternoon, afternoon,
good afternoon. Can become really quite
noticeable and distracting. Because we've dotted
eighth notes on the delay. And I think I'm going to kind of really kind of tell
us down quite a bit. So let's turn the
feedback right down. Let's turn to mix down a bit. But what I really like is the kind of stereo
spread from this. You can just tear on
the tail of the note. Okay, So very, very subtle, but definitely does add
something to our sound. Then That's how we don't
want any distortion. Eq is okay if we could
add a flanger phaser, although I think
that with the delay and chorus and the unison
on one of the oscillators. The filter cutoff
moving over time, I think to add a flanger
or phases probably going to be far too
much for the sound. Maybe we'll finish off with
just a little bit of reverb. But I say a little bit rebirth. What actually mean he's
quite a lot of rebirth. It's a pad, something
that we just wanted to smoothly
move between notes, so Biden or not reverb, it gives us a lot of time to change your different
code without, without the previous
ones still in the air. Let me, let me show
you what I mean. So let's add a bit of, let's just make it massive, and let's add 810
seconds of rebirth. But we've got ten
seconds on our LFO here. So let's say a similar amount
of time in the reverb. I'm I'll turn that mixed up. We get a good amount through into the mix and this
is what we end up with, that we are apart from me hitting the
microphone at the end of the kind of really relaxing, kind of ethereal pad sound that will fit
really nicely within a mixin and just really
add some movement to the sound rather than just being a couple of oscillators
straight out. Remember with all these sounds, these are kind of basis for
you to build on remote. Feel free to use them
as they are, but, but to really bring out
your individuality, take these sounds and go and apply some different
types of modulation. Just play around,
go into the effects and just add some effects, renew some effects out, some modulation to change my
mess about with the filters, with the wave types,
with the tunings, and just really
kind of experiment. Make the sounds your own. But like I said,
that the way that I want to demonstrate
these patches to you is Jess using the parts of a synthesizer which
could be commonly found across almost every
synthesisers. Maybe slightly different names
which we've talked about. But you should be able to take these basic building blocks of these patches and say, Okay, I know what a pad sounds like. I know how to make a pad. I probably want a
couple of oscillators. I probably want to try and split the stereo field if
I can use in unison or an LFO or something to move the sound
around with the panning. I want to, I want to
really slow attack. I want really slow release. I'm definitely going
to want some reverb, probably going up
on some course and a little bit of delay
might help as well. I can go find all those things. I can go find all those things. And to add some movement, I'm probably going to use an
LFO to maybe be done here, changed the cut-off
on a low-pass filter, or one of many, many other things that
we can do inside, inside of synthesisers service
is really about reading, knowing what the bits of
the synthesizer do and knowing the basic recipe
if you'd like for a, for a particular sound. And then being able
to take that to any synthesizer and
build that sound. Know what the basic
recipe for a paddies. Know what the basic recipe
for a plucky basis. Know what the basic
recipe for a lead or a hi-hat snare or whatever sound is that
you're trying to make. Onto the next recipe. We're going to look
at some lead sounds.
51. SOUND DESIGN: 80s LEAD: Okay. So as you can probably tell by the gray beard
and the gray hair, I remember the
eighties quite well. So what we're gonna do here
is we're gonna create that really classic 80s
lead synth sound. The kind of thing
that you'd hear on a hard fault or my attract or the soundtrack to
some crazy sci-fi movie. We will, we're going
to create a thing that's quite often called the superstore. Okay, here we go. You will definitely, definitely
recognize his sound. Super saw is called a
superstore because it's made up of a whole
bunch of soil ways. Now, in our synthesized here, we've got three oscillators.
This is pretty standard. You don't get many
with. Certainly not. Since in the eighties with
more than 33 oscillators. So there was some, but they were
unbelievably expensive. Now, even ten times more than
that to buy an original. But let's start. So we've got completely
reset patch. We know that we need
so a wave. So let's, let's create three sore ways so you know what they sound like. Let's
create another one. Again, we go into basic
shapes. Close this. I'm already doing that because I seem incapable of clicking this. Once. Every time I click it, it goes to goes onto and
a half to go back one. Anyway, perhaps it's
a bug, perhaps it's, perhaps it's user error. Anyway. So we've got three
oscillators at the moment. They are, once I've
adjusted the face, they will all be
set up identically. So it'll sound like maybe a
slightly louder saw wave. Very loud salt wavelets.
Turn that down a little bit. Let's, let's try and separate those outlet where the first little trick that
we learned much, much earlier to create
a bit of width to a sound is to slightly
de-tune the oscillators. So let's say, let's just put these down a little bit
and we don't wanna go too far off once we start
getting into double figures, mid-teens, we start to affect the actual tuning
of the instrument. So let's not go too far, but maybe let's go a
little bit of width there. Let's do the same again. Don't want to use
the same number that effectively will have the same automated
twice little bit width. The other thing we can do to add width is to add some unison. Let's add tons of unison. Now we're getting there. We're getting there. Okay, so let's let's do the same here. But too much maybe
ask them to this. I'm starting to hear that
it's just starting to detune. I think it's probably because, because we've got these
slightly out of pitch and unison and then let me
do that one as well. It was, it was slightly beginning to feel like it was going out
of tune a little bit. Which is something
you really have to watch when you start
to mess about with the detuning oscillators
that you don't actually shift the perceived tone, although still hitting,
still hitting a C. If I start to detuned
oscillators and start to use a lot of unison, which I have used
a lot of unison. Unison works by
detuning as well. So all those things combined, although I'm still here to see the perceived sound once all that detuning
has taken place, can shift and they can knock
you off by a semitone or I will leave it there. We've got quite a nice, quite a nice thick sound there, but we do need to just adjust
the envelope and quick because it's a bit, a bit blunt. So like I said, I just like to take the
attack up just a little bit, even though it's a lead sound
and something that I want to bring out as soon
as I hit the keyboard. Little bit of attack
can just remove any potential for kind
of pops and clicks. Let's move the sustained. Now that we've got a little bit of an
attack and we'll just add a little bit of, a little bit of release that Santa, pretty good. Another thing I've done
in the past is just use a triangle wave like this. And maybe a little bit, a little bit faster than that. And just use that to
to just fine tune. Again, just add a little
bit of pitch variation. One thing what this will do is it'll just add
a little bit of, a little bit of
variation to the pitch. So we'll just add it to both these oscillators
detuned already. I'll just bring one. You can see this one's
kind of round or 0.1. I'm just going to bring the
other one, the other side. So negative No.1,
something like that. Just adds like not even a if it brought on it
it's just like this. I guess it is a vibrato, but
it's kind of this kind of real subtle wobble
to the second. That is sounding
very, very 80's. What we're gonna do now is we'll just add some effects to
it, see if we can make it. Make it even nicer. Let's go to the Effects tab. And we probably don't
want to edit any course. We've got the course we need, but we might want to add
a little bit delayed. Today's cool delay.
Delay is great. And it's certainly very 80's. But can you hear that? When I, when I play one note, it sounds sounds quite good. But as I started to play
it, I kind of lead line. The delay is far, far too long and is bleeding into
all the other notes. Really is just making something
that should be carrying perhaps the main melody of a particular section
of the track. Almost. You can't
make the notes, so let's turn it right
down because I do like it, but let's just turn
it right down. Let's barely there. Too low. Okay. That's not bad. Let's just change this
to dotted eighth notes. And what we'll do is we can
play around a little bit with these kind of
stereo imaging as well. So at the moment, everything is coming straight
down the middle, straight down the middle of
the kind of stereo image. So let's just choose
one of these. Let's try the mid ping pong
and what this is gonna do, it's going to go from
one to the middle, to the other ear to the middle to the other ear to the middle, etc, etc, across your head. If you're listening to this with headphones or you've got a good set of speakers that
you're watching this on. You're definitely
notice that effect. Let's do a little bit of EQ. I think that it still
feels really quite little bit to think of a better word than
raspy in the high-end. Bit too. Saturated, that
might be a good word, saturate in the top end. I'm
going to bring that down. And actually if you look at the, if you look at the EQ here, you can see there's all one, hold it for too long
where there's a lot of, lot of very high
frequency information. I'm just going to use
the the low-pass filter without the high COP of the EQ. Go too far sampling. It sounds really muddy and loses some of its kind of grit, some of its punch, but you want enough
in there to fruit, fruit to be able to really
cut through the mix bus. But that's kind of
like fizzy noise. It's almost like it's
almost like white noise. Just because there's so much of it has such a high frequency. So without cut some of that out, again, not a massive
need for it. It's always worth if
you've got the Q out, it's always worth just having
to hunt around for kind of unpleasant,
unpleasant frequencies. You could do that just
by raising them up. I think it's around here. Again, these are, this is
entirely to your tastes. Have a muck about with the EQ yourself and kind of
get that just right. An EQ depends so much on
the rest of the track. So it depends so much on the mix of the track as to what other, what other frequencies are
being combined in there. And it kind of EQ is already
trapped by track thing, but this is getting somebody. Finally, because I
love it on everything. Let's add a bit of reverb. So let's stick in
a massive room. We're going to be
playing two arenas. And let's make it a little
bit longer than the standard. So we are, There's our lead. The 80s. You are welcome. Next we're gonna look
at some percussion.
52. SOUND DESIGN: HI-HAT: All right, So percussion,
percussion is a massive, massive area. You can go right from click into drumsticks together
to timpani drums in gangs and shakers, maracas, the full drum kit, drum kit and symbols. And we're not gonna sit here. We're not going to produce
every one of those. What we're gonna do is we're
going to produce the basics. And from there you'll
be able to experiment and develop the other
sounds from it. But I think the three
things that you must have for a drum kit, hi-hat, a kick, and snare. And from that, you can produce beats for a whole variety
of genres of music. That's what we're gonna do.
We'll start with the hi-hat. We wanted to kick and snare. And that will give you enough
of a drum kit to be able to then just take those
same techniques and produce the rest of the drinking or other types of
percussion they want to do. But you'll have the main, the main techniques nailed. We start with a, we've got an
initialized preset in here. Normally, I would go here and change this to basic shapes. Choose, choose the
waveform that I want. Make sure I turn the
phase down to 0, 0%. In this case, to make a hi-hat, we're not going to
use any oscillators. We are going to
use the sampling. Now. It's called the sampler in invite or because
it truly is a sampler, you can play any
waveform through it. But on most, most synthesisers you might see this referred to as
the noise generator. Now, most synthesisers, we'll have a noise generator going
back right to hardware, analog knobs and dials. Mo Coke wrote and synthesisers back from the
seventies and eighties. They will have a
noise generator. In the vast majority of cases. You'll be able to
choose the type of noise in a lot of cases. So white noise, brown
noise, pink noise. If it doesn't say what type of noise that noise
generator is generating, this generates in white noise, which is great because
that is the kind of noise that we're going to
use to create a hi-hat. If you don't remember, white
noise sounds like this. It's very, very unpleasant, but does sound a bit like a
bit like a hi-hat, right? We're going to use that and we'll take that
initial sound. And it certainly sounds
much more like a hi-hat then a sine wave or a square wave or
even a sawtooth wave. So this is gonna be the
great, a great base. This is the initial sound
for creating our hi-hat. Hi hat is not
terribly complicated. It's basically some
white noise with a very short envelope. To create the envelope that
all we need to do is to drag the sustained down to 0. Then we just want
to drag the decay. Almost. There. We have our hi-hat. We can make a couple
of tweaks to it. So I think it might be useful
to have it keep track. Only switches off
just by default, we don't need it because we'd never get to the end
of the loop, right? But just switch off. It might be so directly
key track. This. The only reason
being is that it, although it's white noise, that the pitcher is not
gonna change a great deal. It will give some
variation across the keyboard from one
end to the other. It means that you
will have effectively slightly differently
pitched high hats. Now, you don't need
that necessarily. Certainly drum kit doesn't
have slightly vary, slightly differently
pitched high hats. But depending on where the
drummer hits the hi-hat, whether it's in the
center, towards the edge. Um, how, how, how
close to the hi-hat? Here's how hard the
drummer stood on the pedal will give a
slight variation in pitch. So what this means is as you're programming
in your drums, you can use different keys, is spread apart and it will give a slightly different
pitch to the hi-hat. It's really useful, just adds
a little bit of realism. More than realism. It adds a little
bit more interest to the drum pattern, perhaps. Changes envelope
slightly. I'd like it to just change the shape
of this a little bit. Just to get that initial
put a bit quicker, but I'm gonna drag this in. This will take some fiddling
to double-click that. Again. If I double-click this little
magnifying glass in here, it will expand the envelope
to fill the whole window. Now instead of back
in its default when I was kind of a 2.5th
between these grid lines. Now it is 30 milliseconds or
so between these grid lines, 31 milliseconds
between grid lines. That's pretty close. All right, the only thing left to do
on here really perhaps, is perhaps it might be
worth applying a filter. The only reason I'm
saying that I don't think it's gonna make a huge
amount of difference. We'll stick with a
very simple filter, but white noises, noise
at every frequency. So we don't want any kind
of low-frequency noises and they're not really
making much difference. One thing, however, a can be good invite
on in particular. This is probably a
vital specific thing. Is too is too. I'll tell you why it wasn't
making a difference at all because I wasn't
routed to it. So you need to remember then
to route from the sampler, from the noise generated
through the filter. That makes more sense.
But one other thing, it's still my, my
point is to apply. One other thing
that we can do is we can apply a little
bit of driving it, add a little bit
more saturation. But as it is a very, very small amount of saturation
to that signal, I think that's
sounding pretty good. We might want to just add a
little bit of reverb to it. So into the effects. And add a little bit of reverb just to let it bring
out a little bit more, but we probably want
to take that down to be something a
little bit smaller. You can adjust that to taste. But there we are,
There's our hi-hat. There you go. You can hear
the slight pitch variation. Somebody actually
four notes apart, but there's very basic hi-hat. Like I said, these
are, these kind of recipes are there
for you to build on. So there's a very
basic high hat. We probably want to change. The one thing I always forget to do is
just change our voices. We don't want to play more
than one hi-hat ones. There's a basic recipe for a high hat and you can see quite easily how we can take
some white noise. That was really the
point in this patch, is to take some white noise,
apply an envelope to it, and a filter once you've
remembered to route it properly, you can use that instead
of an oscillator. And this is really the first
time you've done that, that we've used no other
oscillators at all. And then we've used
the noise generator to as the basis for our patch. Next, we will take a look
at creating a kick drum.
53. SOUND DESIGN: KICK DRUM: All right, So kick drum, not a particularly
difficult patch to create. We're going to start
with a sinewave. Clearly one thing that
we know about drums is that the suitable envelope. So we'll start by just
doing the same as we did for the hi-hat would just
drag this second marker here, which is the kind of
delay sustained marker. So it's sustained here
and delay that way. And we just strike us
down here somewhere. Maybe adjust this
curve a little bit. While we're almost there. One thing that I do know about, about kicks is that
they are very deep. So let's just
transpose this time maybe one octave to somebody. If you are not listened
to this with headphones, then you are probably not. Probably not here
in this very well. So are definitely either, if you haven't got
headphones with you just maybe even skip this and come back
to it later with a pair of headphones on or
a good pair of speakers. But this one's gonna be
very difficult to hear, particularly the
nuances of it on a mobile phone speaker
or something like that. Let's look at our filters
now we have a basic, basic shapes up there. Let's look at the, let's
look at the filters. It's definitely wants to
be a low-pass filter. This really just
adds a little bit of a little bit
to the transient. It just adds a little bit of, a bit of a knock at the start of an
interesting trends into the heart of the cuts off. The more we get. So we
can just round that out a little bit about already. That's looking like a
pretty good picture. I'm just remember to
set the voices to one. We only want one kick
drum out of time. But it feels like,
it feels like this could easily get lost
in a, in a mixed race. Perhaps we want to add a
little bit more punch to it. So one thing we
could do is we could set the we could add a
bit of white noise to it. And so white noise, we can often use it just to add
a little something to it, a little bit of grit to a sound. I think that's probably
what we need right now. Sounding better is
sounding better process. We need to just turn
it down a little bit. But it feels like.
So by default, the envelope, the envelope
one that we've got, which is controlling the
level of oscillator one. By default, that is also controlling the level
of oscillator too. But I feel that we know we've got plenty of envelopes that didn't cost anything, so we might
as well use them. And it allows us to, if we wanted to make an
adjustment to the envelope of of oscillator one. Or in this case, I want
to make an adjustment to the envelope of the sampler
of the noise generator. I can't do that without also affecting the envelope
of the oscillator. What I'll do is I will, and in fact, I'm going to take a very similar
envelope to start with. Very, very similar
looking shape. I'm going to drag
that over and I'm going to apply it to the level of the noise
generates a purchase. Turn this down. I want to do
is just can you hear that? So what I want I could hear is the white noise was just
starting a little bit early. It starting right at the others. I didn't really hear
the thump of the kick. But by making it, given
it a separate envelope, I can just adjust the
attack forward a bit. And I still feel that that is probably almost sounded
a little bit snare. So what else could we could be, could bring us down a couple
of octaves, three octaves. That is being caused
by this filter. Go to the Effects. Okay, let's, let's put
a different filters. Let's try adding a bit
of a sharper filter. This is what I thought
was happening. I thought it was
residence on the film. So it was kind of creating a tone effectively by
creating harmonics. Because of the resonance. This is coming from the song platform,
the noise generator. We can actually pull individual frequencies
out of the white noise, raise the resonance of them, and create a tone, even though it's just coming
from white noise. And this is a
technique we'll use it again later in one of the other patches. They're
in a slightly different way. Anyway, let's concentrate on the kick and getting this just right now we begin to get them. All right. I think that's as far as we are gonna get
with filters and envelopes. So let's pop into the effects. One of the things
that we can use to really bring a sound out is perhaps a compressor. So
let's have a look at that. We don't need all the bands, so let's pick a we just
want to be want to, sorry, low band compressor. Can you hear already? Without even,
without even making any adjustments just
for the default values. How already that's given that that sounds some
real extra punch. Maybe adjust this a little
bit. Pull this one down. There we go. Can you hear that?
Could you hear when you hear that
clicking that you get sometimes at the beginning
of the person the key. It's because this attack
on the envelope for the sine wave is, is set to 0. And sometimes that can cause the symptoms to kind
of create this pop. I always try and just
turn up a little bit. Just almost an entire
perceptual amount and certainly a
very small amount. Just enough so you don't
get that knock it anymore. Kind of click. Cool. All right, Back to the, back to the effect. So certainly you want
the attack to be really, really fast because it's a drum. The thing that's got the attack, that's what gives the kind
of Picasso element to it. But you don't want
that weird synthesizer kind of artifacts in the front. So just adjust the
attack a little bit. Okay, so that's sounding
better already. Let's carry on with
our compressor. We can probably turn the we want to check to be
quite fast the release less so with peaking, clip in a slightly, turn that
down with the compressor. The compressor. Okay, so take some time play about with the compressor to get
it ready to be that, to give you, give you a sound that really cut into
a mixed because before it's going to get lost, it's got a little bit
of a knock to it, which the white
noise has given us. But obviously with
a compressor on it. You may not want that much. It depends on the style of music that you're going
to create with it. Let's just add a
little bit of EQ just to make sure that we don't have too much high-frequency
noise in there. I'm just wondering
whether perhaps very good. Just because it's made without
a little bit of reverb. Just to put it in a room ready. It sounds very, very
dry, doesn't it? So we said a little bit
of reverb, not too much. I've just taken the
size down a little bit. We'll take them mixed down a little bit just
to put out a bit. Way too much. Just a little bit, just
to give it a little bit of making it a little
bit boomy, I guess. All right, so there's
our kick drum. Certainly could start in place starting point for
the kick drum. So very simple. We detuned a sinewave down
to town a couple of octaves. Again, you don't really need
to do that if you've got a massive keyboard and you can just play down the
left-hand side. But we teach you now, we did the same for
a noise generator. We applied a filter
to each separately. Just because we want to treat the two sounds independently. We've got a filter for both. We also did the same
for the envelope. So we've got slightly different shapes of
envelopes for envelope, envelope to envelope one
effecting the sinewave. Just a very fast attack, but a non-zero taxa, we remove that click and
then a very fast decay with a slight curve to it to give it just so it's not so linear. Then on envelope two, we've got a very linear, very fast attack, but slightly slower, slightly
slower than the sine wave. So we get that kind of more
interest in transient. That slips away.
Again slightly slower than the, than the sine wave. Then any effects then
we have just added, I can press on which
made a huge difference. A bit of EQ just get the balance quite right and
a little bit of reverb, just because I always feel like a kick drum and bass
drum is a boomy instrument. If, if someone was to
go into your lounge and stamp on based on
pedal, it would boom. Just add a little bit of reverb. There we go. Good
starting points. As again, again, a
massively encourage you to, hopefully you're
following along, if not, go back, follow along, belt the basic patch, save it, and then go and make it
your own by messing him out with all the things that we've seen so far in the course. One more piece of
percussion to do so we've done a hi-hat,
we've done a kick. The vital missing ingredients, if you'll forgive the pun, is the snare drum.
So that's next.
54. SOUND DESIGN: SNARE DRUM: Okay, so to finish
off our drum kit today or are very basic
rudimentary drum kit today. We're going to create a snare. We've got the kick, we've got the high hat,
now we need the snare. There's a bit of a
trick to the snare. We'll cover that now. But it starts off in a very
similar way to the kick drum. So we start off with
a basic sine wave. To that we are going to
add a noise generator. So some white noise down here, and some white noise. We don't need to worry about
any of these being on. So there we are. What
we are gonna do is, if you think about a snare drum, snare drum is a skin on top of the drum that you
hit with the drum stick, with a brush or with a stick. Underneath it is a bunch of springs are kind of
y as excuse me a bit, why is a bit like
but they're kind of like if you've got a spring
and pulled it apart. So it's a very loosely
coiled spring. There are, I don't know, maybe 201020. There's
a drummer out there. Knows the answer to
this, but they are kind of stretched across the
bottom of the snare drum. When you hit the snare drum, you get the noise from the, from this hitting the skin itself and the
residents of the drum. But also you get
the noise of these, these kind of loosely
coiled springs underneath kind of
reverberations means. And that's what gives us that
distinctive snare sound. It's quite a high pitched sound. That's the kind of resonance from the snare,
snare wires themselves. So we'll pick this one up
because it's high-pitched, but make a huge amount of difference because it's
white noise after all, but it will make some differences
we saw in the high hat. So now we have this. All right, we can see, we can see that that could,
that could become a snare. Have our envelope
here. So normally we would take the
envelope for a drum, we would take the
envelope and we would drag the k down, the sustain, or sorry, the sustaining
the decay across and set them all to 0 and basically just have that
very short envelope that we saw both for the kick and
for the, for the hi-hat. But in this case,
I am going to use LFOs as envelopes. As
a reason for this. When I am using an envelope, I can only use Attack hold,
decay, sustain release. And in most cases, the vast
majority of synthesisers, it's ADSR, attack, decay, sustain, and release. That's it. I need to use more
points than that to make a snare and that will
become very obvious later. So for some of these things
on your use LFO for, you could use an envelope. But actually I'm
going to use LFOs for all and just prove to you that you don't
actually need an envelope. You can use an LFO. And in some cases it can
be advantageous to do so. First we're going to
do is, is envelope. One of course is
currently modulating, controlling the amplitude
of the level of both the oscillator and of the sampler, the
noise generator. But I'm going to want to
use those separately the same as I did for the kick drum. Lfo one is going
to go to the level of the oscillator one. I'm going to drag
that down to 0, which actually is probably more sensible to me
before hand drag, drag, drag out level down to 0. So I know that. And then I'm going to
set this to around 70%. Around, if I look at
oscillator to there, I can see that there's
a default value, which is, which is it around
that two o'clock point. So I'm going to just make my goat to around
about the same point, something like that,
something like that. I don't switch off oscillator
2's, we don't want it. I know that my LFO when
it's at its lowest point, I'm not going to hear a
sine wave is highest value. I am going to hear that kind of default values around
the 70% volume Mark. I am going to want a slightly different
shape for this one. So I'm going to drag this up here and I'm gonna create another point by
double-clicking. I'm going to drag
this one up here. And I'm going to
divide this into, just to make this a bit easier to snap with these grid lines. This is a little long, but they tend to
snap to grid lines. So I am going to, it is possible to
have them not start to realize what they
will do that by default. So I'm gonna make this into
a grid of about eight. And I am going to make
this look a bit like this. I'm going to drag
this down there. So I end up with is a
B at full amplitude, amplitude for the first, for the first portion, I hit this and I'm going
to drop down to 0. Now I need to remember to make this an envelope because I only want us to
play through once. I'm gonna set the frequency
to a fourth quarter. It's a percussion, so we don't
want to smooth anything. Percussion should be
Loudon and an aggressive. We could end up with this. If I remove, if I just switch the white noise
or for a second, you can hit my drum. You can imagine that. Let's say I've paid good money for keyboards with drums, that sounds like that. So that is the just
the sine wave. What I want to do for the
the pitch of assignment, what I'd like to do
is want to hear the pitch to change slightly. So I'm going to take, sorry for LFO T2,
so oscillator one, I would like the pitch of
oscillator wanted to change slightly when I hit the drum. This is quite common in a drum noise. I
didn't drum sounds. So I am going to take
this shape here and I'm going to create another
and other points on it here. And I'm going to bring
it down to around kind of the same kind of point, roughly the same point
where it hits 0 here. I'm just going to add a little
bit of a curve to that. Just to make it a
little bit smoother. I am going to attach
this to the pitch. Now I get this
perhaps a little bit, a little bit too high. So I'm going to I need to remember to
change this to an envelope. I didn't like that way faster. That pitch shift is happening
really, really fast. Remember to remove the
smoothing is happening really, really fast, but it's just
adding some incident. If I didn't make an, a transient in a bit more interested, given it a bit more,
a bit more punch. If I add in the white
noise generator again, white noise is still
going on far too long. So I'm going to create,
use another LFO. I am going to just
drag this across here. And I'm going to
double-click here. I'm going to drag us
down to quite a short. I just want a little bit of the white noise
at the beginning, but it's going on too long. That should do it. I need to, again make it an envelope. Make this a little bit quicker. I'm going to add it to the level of the noise generator
of the sampler. I'm going to make that control the level kind of a, a 1000%. That's quite an interesting,
interesting sound. But I said that there
was a trick to snares. This is the trick.
So I'm going to double-click this line here. And I'm gonna drag a line
up from here to about here. And all of a sudden
I'm going to have a snare drum out there. But just doing this and adding this out in this line in here. And it's given us this. So we get this first
kind of decrease in, so we get an initial hit. And then it's kind of
like we hear the string, this nanowires
rattle afterwards. Now we've got, now
we've got a snare drum. Turn oscillator one down a little bit until
we get what we want. Now let's have a look
at some effects. First of all, there's a
little bit of EQ to do so. What are some of the low end? So let's put the EQ on first. I'm going to leave
a little bit this, we could do this with a filter. We can do with the EQ
here, that's fine. And that just a
little bit there. Then. This is where this peak here is wherever getting the getting assignment like this, I might be in there. It's good because one
of the snare drum, you do get some tone
from the scenario itself and you actually have
to tune snare drums. Want to just cut a
little bit about out. I'm just going to hit this one. Just turned us turn this down
a little bit. Maybe bring Okay, then I can
see there's a lot of buildup on the spectrum as you'd expect, because we
are generating white noise. So I'm just gonna call it little better there for a reason, but we just want to cut
that out a little bit. We'll add a
compressor. Again, the remember when you
add these things that come in alphabetical order, but actually we want
to do the EQ first. So let's do that. It doesn't make a
huge difference, but it's the way it's
done in the past. So we're gonna use a high band because we want to separate this out slightly. Again. We're going to not
make adjustments to it, but we're just
gonna keep playing the snare until we get
a sound that we liked. Maybe I should just turn
this down a little bit. What I've done
there is I've just started playing
an octave low and I do prefer the sound. So maybe I'll just put
this down an octave. All right. I think another thing
that I'm gonna do is I'm just going to still has a bit too much of a title on it. There we go. So just play with that. I know it's an LFO. What we're using is an envelope just
needs to play them with a little bit and it's really worthwhile spending some time. Just don't, don't sell, just go in and really
work on everything. And just kind of if there's something that you
don't like about, you synthesize, you know, what? Everything in a
synthesize it does. Now, we've been through it in great detail over a
long period of time. You know, absolutely everything
that is synthesized, it does all the basic functions or the building blocks
and architectures. You know, how to go
and change your sound. I was sat there and this was it was it was
just not quite right. It was just something about the tail of that white
noise I didn't like. So he went and
created just added another point in here
and just brought that down because we know
what that's gonna do. It means that it's going to
be at 0 volume sooner, right? So this means that from here to here it's
trading down in volume, so it's effectively the release. So you can think about that as like a release
of an envelope. And like I said, this
is the main reason that using LFOs
instead of envelopes, because I can't make that shape. And an LFO company, they're
shaping an envelope, but that portion effectively becomes a release. The
release was too long. What do we do? We just shortened release. Now we've got a
real, real punchy snare combined with that kind of lower octave on the,
on the oscillator. So we've got that lovely
tone from a drum, and we've got that snare
from the snare wise. It's like it, I like it.
Without compression. Compression again,
compression just really, just bringing those kind
of amplitude together, just really squashing
things and making a real much tighter sound. Then of course we'll add some reverb as we
always had to regroup. And you shouldn't always prefer. I like ribo, just really again, just to put it in a room. I liked the sound of
it. Adjust to taste. That's a lot of reverb. So maybe let's just bring
that down a little bit. See, it just brings
it from quite a really, really dry sound. Now, if you're gonna add reverb
late when you're mixing, you've got push reverb or a favorite reverb
that you'd like to use. And that's completely fine. But using the volume vital, it just adds a lot. Really makes it into an array. And I sound so I think again, but run through it very quickly. So we started with a sinewave, which gives us the tone
of the drum itself. And then we've got a reuse of white noise generator again. Just really to give
us a percussive hit, that kind of crunchy noise. We didn't use envelopes this time because we couldn't
get the shape you want. So with an envelope,
so we've used LFO one to give us this shape. So quite an initial hit. And then dropping down to, dropping down to
nothing very quickly. But NF2. In that same period
of time that we come across and then go down to nothing and that
same period of time, we're using this to detune. So going from very
high to very low, just to kind of
emulate that kind of slight resonance detuning
you get when you hit a drum. The noise generator, the sampler
is controlled with this, this LFO, this is
controlling the level. So effectively being an
absolute amplitude envelope. But this is really
the one where we couldn't create this
with an envelope. So we use an LFO. And this shape here is
just a bit of a trick. It gives some initial white
noise, which dives down to 0. And then it gives
you a second burst, which is the reverberation of the springs underneath
the snare drum itself. The effects, we did a bit of EQ, just really cut out any unwanted frequencies
at either end of the spectrum and just lower the effect of that sine
wave a little bit. We did some quite
heavy compression, but it's really give a
punchy sound and you'll often find compressors
use a lot on drums. And then we added
some reverb just to put it in a room and make
it sound a bit more lovely. So there is our final snare
sound, that's our drum kits. We are done. One final patch to
make before we have all the things that we need
to really make a track. Although certainly there's
enough there already. But I just like to show you
how to create something. I guess you would call it key. So something a bit like a
kind of electric piano.
55. SOUND DESIGN: KEYS (SYNTH PIANO): In this patch, I want to do is create something that's piano, like not an emulation
of a piano, but something that is kind
of recognizable as being a piano type instrument and
electric piano or something, something of that
kind of the same kind of characteristics as a piano. It is perfectly possible
using synthesis. There are some amazing piano
synthesized out there. There's some great
sampled instruments, but actually there were
some great sample, sorry, synthesized piano
sounds out there using things like physical modelling and things were not going
to go that far. We are going to use a vital and, and the things that we've seen
in this course up to now, to create a quite a
good piano sound. I hope you'll think it's
good. I'm usually we are. When you think of a piano sign, anything but quite warm, rounded sound, bit
of a plucky sound. So maybe we would
choose a fast envelope. And, or reasonably fast. I'm not percussive fast, but similar to what we did
with the base block maybe, and maybe a sine wave or a triangle wave is not a
soul wave kind of sound. Actually make it into a throw
a bit of a curve ball here. And we're gonna
start with noise. We're not gonna use any
oscillators at all. The time you've done this
before was to create a hi-hat. Actually, piano is a
percussive instrument. The habit inside the workings
inside a piano is very similar to the way that kicked around works
with a kick drum. A beta comes forward, a hammer comes forward and
hits the skin of a big drum. Piano does the same thing,
but it hits strings are not a drum skin is kind of a percussive instrument.
Kind of loosely. This makes some sense. Let's start off with, let's
start with some white noise and sounds like this. As you well know. Now remember when we talked about resonance earlier and we talked
about the very, very early on, if you
remember that long ago. Much earlier today we talked about harmonics and how that's
when we had a sine wave. He pulled a single
harmonic out of a. It was a single harmonic or which we call the fundamental, excuse me, which we
call the fundamental. And then as we looked at
different types of waves, you are adding more and
more harmonics. Kind of. If we have white noise, we take a filter and we make a bandpass filter, add
some resonance to it. Sorry, root it correctly. I've left, I'm going
to leave that left that mistaken on purpose just because I always do it and I'm sure that some
of you may do so. If somebody is not
working as expected, it's not because you don't
know what you're doing. Often. It is because it's a
simple thing like routing. I mean, there's been
a few times over this course in playing with a filter and realize
that it's not been rooted. I've just done it. Again. It's an easy mistake. Anyway. So I've created
this band pass filter. I've raised the residents, residents up to a
100% on this filter. And I can even about that. And if I turn on key tracking, now somebody's, sounds like something that's someone playing a very old keyboard over
a very bad radio set. But you can see
that even without the filter from white noise, using a filter, we can, by raising the residence of a frequency or a
band of frequencies, or a set of frequencies, we can create sound. Now, this is exactly how
a comb filter works. We looked at them
very briefly before, and I promise you that we'd
go and have a look at them in more detail. A comb filter. You can see it's very similar
to what we've just seen is we've pulled out
lots of frequencies. We can use this band spread comb here from the white noise and we pulled out a
bunch of harmonics. The resonance has an effect
on how much they bring out. Then we can use this blend here to kind of determine, determine how much is there. So the next thing
to do then is to. Just remove some of the hashes before we start to really
sculpt with sounds. So the way we remove harshness, again, it's fine frequencies. By now, I'm sure, you know, we're going to add
a low-pass filter, will add quite a harsh
low-pass filter, a 24 decibel low-pass filter. We need to make sure that
we're actually reaching it. So we're going to route
this from filter one. So we're gonna go from the noise generator
into the filter, into the filter and the comb
filter than infiltrating. We've got a much, a
much nicer assume. So. We're getting, we're getting
closer to a piano like Sam. Okay. A couple of
things we're gonna do. We are going to have a little bit of a
talk about the quirks of what kind of photos do they add a lot of residence resonance to a lot
of frequencies? The envelope one that is
there by default in sorry, is that in an invite or by default when
affect everything, anything that we haven't
attached to another ambulatory, which means that
the envelope also affects the output of the
residence of the comb filter. If I don't want that white
noise playing all the time. So what I'm gonna do
is I'm going to create a separate envelope to control the level
of the white noise, which was still let
the resonance come out from the comb filter. So as I said, it's quite the customer
instrument instrument. And I set this down
to 0. I'm going to create a percussion
type of envelope, which we know looks
something like this. I will attach that to the level of the level of the
noise generator. Okay? Although this, although
we can see that this envelope is going
all the way through, the sound is still running out, and that's because
the sound is storing out through eminent one. This is sounding better already. One thing I don't like, it doesn't matter whether
you use this nukes on rough, but I switch off with I'm not using it identifies just habit. One thing I don't like is it's beginning to get that
machine gun effect. So every time I play a note, sounds exactly the same. So one thing I'm gonna do
is I am going to switch on. The round robin now won't make a great deal of
difference when you use them white
noise because it's pretty similar frequencies
all the way along. You can see it begins to make
some kind of difference. Another thing that I'm
going to do here is just a bit of a play
with this cutoff. We're getting a Keys
type of instrument. One thing I'm going to
try, so inside vital, and you won't get this
in every synthesizer, but inside vital, you don't necessarily need
to do this off white noise. Now it works perfectly well off white noise and we'll get into a noise that we
could, we could use. But actually in the software
it doesn't need to be borne. Noise is white noise, brown noise, pink noise. And you'll see these
commonly on a, on a lot of things. But one thing we do have in here is various
different months. So these are various
different Waves that you can kind of scroll through and just find
the ones you want. Now, if depending on
the level of again, how much money you paid for for vital,
whether that's free. For free, it comes with
a few wave tables here. Few samples here for the
highest Ej get many more. But we've got more
noisy instrument you can make some
interesting, interested in. Notice. Now without the comb filter, there's just sounds like a wave. If I started from his thought. Bypass Assembler, I'll do a lot of undoing a lot of work here, but it just sounds like the way it is. Just a sample of a wave. Brown noise, sounds like this. Pink noise by this
white noise we open, we know all about bonds. I'm not sure what
that stands for, but it sounds like that box fan. Grinder, an 8-track two
units or academic unit. Jackhammer, River. And I think we've
background to waves. So you can see that
there's just with, if I just reapply
these envelopes just undo or redo all
the wet logs on, so on bypass that
switches filter back on. We can make some really
interesting sounding instruments by applying comb filter. So the white is one
isn't particularly good. And I'll tell you why,
because I wanted to use the random for the round robin. But you can see that
the amplitude is very different throughout
the, throughout the wave. It just makes the notes
sound too different. So let's scroll through. Brown, light brown noise,
the same brown eyes, you get some very low
points in very high points. Pink noise might be
better. White noise, white noise sounds quite plucky. I wanted to synthesize
a guitar using this, I might start with some noise. You see that? You see that one box
fan doesn't sound bad. Grinder sounds a bit
distant paycheck in it. Okay. That's not bad, is it? Residents a little bit. I'm going to get
the residents high, so we've got a nice ring out, but if we set the residents
to a 100, it doesn't go away. It's like when I hold the key
down a sustained forever. So we just drop it down. A nice level to a
reasonable level like that. Okay, so let's have
a quick look at this low-pass filter and see what difference we
can make with this. That sounds much brighter. I'm not sure it sounds better. You can a little
bit of resonance. Now, one thing I have
noticed as I'm playing this, I didn't have any sensitivity
in the keys at all. No matter how hard or
softly or faster, slow, as velocity says, I
hit the keys anyway, it makes no difference to the sound that comes
out is always the same. Velocity tracking up. It
doesn't need to be up all the way up all the way. It makes it really, really, really sensitive
and can actually mean that if you hit it to
Sophie hidden, no, not at all. So I usually set it
around right here, kind of sixty-five,
seventy percent Mach, But that seems to work
quite well for me. But again, it really depends on your style of
playing keyboards. Now, this is because we were
relying on resonance here. This is quite quiet, so
I'm just going to use my master switch,
attend this up. It doesn't matter if I
turn it all the way to top as long as I'm not clipping, that's fine, but not enough. Instead it down. But it's not the
position of this, this kind of volume slider
that I'm interested in. The output serves as
hard as I hit the keys, particularly if velocity tread, turn it on so the
maximum impact or the fastest I can hit the keys, as long as I'm not
turning red than them. I'm happy. That sounds pretty
good. So I think a couple of things I
would like to try. I know that when I
played the piano and I didn't play the piano
very often all very well. But when I do play the piano, I know that the the lower notes are on
the left-hand side. The highlights on the right-hand side, that's fairly obvious. However, I also know
that the strings that are being hit by that
hammers inside the piano. The lower note, lower tone munch on the left and the
height are ones on the right. And that means that
that's where the sound comes from so that
I know that I can expect to hear the
deeper tones in more than my left ear and the higher tones more
in my right ear. And we can do the
same here. We have a thing we haven't
looked at this before. This is the only bit of any of these patches that we've
never looked at before. But there is the facility
inside, inside vital. This is not in
every synthesized, but it's quite, quite fun and it's quite nice.
Let's do it while we're here. I'm basically this
one tells us how, how high up the notice. So you can see on
the left-hand side, this is kind of
little indicator. See if we can zoom
in to see that. So you can see that if I
apply a very low note, the indicators down here, the little green lights down
here play very high note. As much higher up. We can use that to perhaps
attach that to the pan of the noise generator. That when I play a low note, pans to the left slightly, I'm going to play
a high note your pants the right slope,
right slightly. Now of course, you don't
want to pan all the way because you do hear some of the high notes in your left ear
and the low notes. But we're planning a
little bit of the way. So What we're gonna
do then is we are going to take the notes. We're going to assign
it to the pan of the track unit of a sampler. We want to make this bipolar so that it moves in both
directions away from 0, the same as we've
done previously. And we just want to
pan a little bit, not too far right about there. This will mean that now when
I play very high notes, they appear, they appear to
me to be in the right ear. They sound, they sound in
the right stereo channel. I went to probably lower notes
further over to the left. This is completely unnecessary,
completely unnecessary. But it is quite fun. Of course. It will make a difference. It will make a difference in the mix because it will translate through
into your track. But it's much more, I would say, be careful with it. It's a bit of a trick,
is quite good fun. But remember that's only really the person
playing the piano. Here's the high notes to the right and the
low notes to the left. An audience member, or if someone farther away from
the piano doesn't hear that, it doesn't hear it
like that at all. So if you're writing, if you're using this piano, It's quite an intimate piece, then come up quite well. But yeah, just be a little
bit careful with that, but they kind of
with the gimmicks. Okay, so I think that's
sounded quite good. Now, Let's just add a couple of effects. Might be able to
stop and look if you want to add some effects as just the final finishing touch. Double chorus. Let's have a try little
bit of distortion. Interesting. Actually
clicking on it. Particularly when he distortion and they cannot quite a lot of extra fall semester again, that's probably a bit
too much. Let's try. Without much. Let's add some reverb he knew that was
coming next, right? Probably we can leave this about stock is pretty sensible. Okay. We also instrument in the
spirit of a piano, at least if, even if it's not a fully accurate representation,
but certainly, certainly good fun, a
different technique and something that's worth
just kind of exploring. And again, playing
around with and you couldn't have, you can make, you can hugely affect the
sound using just kind of adjusting the field says
and play with some effects. So that's the end
of this section. There is, at least for now. So I plan to add some more
patches in the future. So please do let
me know if there's a particular sound or after. I will happily create those, record them and add
them to the course. The very last section. Now
what I want to do is just open up a couple of
other synthesizes. I'm only going to spend a
couple of minutes with each, but I just want to open
them up and just to reassure you that everything that you've learned
in this course. Because we've really looked
at the fundamentals, that kind of underlying
architecture in the way that
synthesisers work. How you now have the ability to take that
knowledge and apply it, not just invite or which
is a great synthesizer and certainly a much deeper than we've looked
at in this course. But, but, but to be able to take that
knowledge and apply that to any other
synthesising that you come and sit down,
sit down with. Without further ado. Let's go and have a look at
on the synthesizer.
56. SYNTH 1: TAL NOISEMAKER: Okay, So this is the first couple of synthesizes
we're gonna look at. This is another free one, and it is a great synthesizer. This is called noisemaker. You can get it from the URL that's on the screen right now. And like I said, is
free of charge thing. It's available as a
plug-in for doors. But it looks really
different to vital. Right? So completely different. So let's go through it step-by-step and think about
the building blocks of synthesisers of the way
that we know and see how we can easily look
at this and say, okay, well we
recognize the bits. Now we know how to use them to make the sound that we want to. Once again, when we think about synthesizing
the first thing, either end, we think
about the oscillators. They might say,
oscillator might say VCO. In this case, it says the
same as it does in vital. It says I was C1 and C2
oscillate one oscillator too. If I look at oscillator one, I can see that I have some
tuning and fine tuning. I have a, the face where
whereabouts in the, in the wave, where I start. I can choose a wave
type here, right? So this has a bit more
limited the vital, I've got a sawtooth wave and
a square wave, some noise. So I recognize all
of these things. This is just white noise. Then over here we've got oscillator to this
has got tuning, fine tune phase the
same as the others. Just set those down to
zeros are never BR. Frequency modulation, which
we haven't covered this, but I've got more choices in ways like I can see I've
got a triangle wave and a, and a sine wave. So maybe pick that. What do we get? What we
would expect, right? So we're effectively
getting a wave. I'm not hearing much
of the sinewave. I can't see where the
levels are set here. So I know that perhaps there's an
amplifier section where these are sets, so I don't see a
VCA or amplify it, or do you see an
amplified down here? But this looks like an envelope. This is ADSR, so this is perhaps the amplifier envelope, okay? But I can see that over
here I've got oscillator. Want an oscillator
to oscillate at one oscillator two is not. So if I turn off oscillator two, here's my, here's my sine wave. So I'm going to shooting up, I'm going to, I've got a sub. So you'll see this
on some synthesizes. There is this third oscillator. Know, it looks like we've
only got two oscillators, but actually there is a
third is called the SOP, only comes with a level. And basically what
this is gonna do is he's going to play a sine wave, Probably two octaves below, where you're playing
on the keyboard. Let's just stop by
swatch on that down. Much more like the noise
that I would expect from a kind of middle C being played on a soil wave
and the sine wave. Okay, so I've got porter here. This is probably the slide pulls them off, so let's put it on. This is a bit like
the Gothic thing and it's got an
overall master volume. Then I get how the
oscillations are working. The next things we looked
at where envelopes, I believe this to be
the amplifier envelope. What we see here is ADSR. This is how we know
it's an envelope because I've got AD SNR. Now remember that a, the attack, the decay and the release
are all in terms of time. So the lower down the attack and the decay and the release are the faster that will happen. And sustain is in terms of
volume when compared to the maximum volume which is achieved at the
top of the attack. So here we've got no, no attack, no decay,
sustain and release. Simply a on my keyboard, just an on-off switch. I can ask them attacker
should expect, or should expect the
sounds of brown pups lay out a bit of release. Maybe not so much. Maybe I'll add a short decay. Now begin to get
more of a pat on the triangle wave sound
and really harsher. So I'm going to try squarely. I'm also going to untuned that. I'm gonna go the other way. Filters. I want a, we recognize all these. So the low-pass filters, high-pass filters, band-pass
filters, notch filters. We recognize all these sets
have a low-pass filter. The cutoff is set to the top, which is going to be set
at probably around 20 K. This is gonna be
effectively no filter. So let's, let's just revisit this ADSR here is an envelope which is
attached to the filter, maybe use this also
shows the past. One thing that's not
obvious here is an LFO. Up the top here.
Every synthesized will be laid out in
a different way. So we've got a sine wave, LFO. It's, we want this to affect. I don't know, let's
just pick something. So let's effect the
effect the filter cutoff. Let's turn the write
up. The mountain. We can hear loud,
effective, effectively. Let's just switch
off for a second. Effectively the Mercedes
during that really fast. So we know that that is LFO one is now affecting
the filter cutoff. We are, we've found
the oscillators, we find the amplifier, we found the filters. We have found the low-frequency
oscillators, LFOs. The only thing left at finding the effects change
is the effects. Now not every synthesized
will come to the effect, but I can see a few words
I recognized down here. So here's some course. Crashes, probably
like a big crusher. It sounded pretty cool. Reverb, like a bit of reverb. These are high-pass
and low-pass filters. There's some delay. That'd be awesome. That
is tau noisemaker. Again. Go download it. It's free of charge and it
makes them cool noises. Alright, Let's just let me know. With that. That's one
synthesizer and you can see that it looks
completely different, completely different to
device will yet, actually, when we sat there and
looked at the interface, we could recognize all or most of the pattern
at enough that we could make a strange base paths
out. Let's look at one more.
57. SYNTH 2: LOGIC RETRO SYNTH: This is one that is built
into just one of the stock. Since for logic, I've chosen this one because I've
had logic for a long time. And I have never used the synth. I knew it was there, and I
have never played with it. So we're gonna go through this
together. Let's think So. The first thing I want
to think about it is by Howard generated by wave. So my oscillators, so I can see that I have oscillators
here on the left. So it looks like I can
pick from a square wave, a sawtooth wave, and
this is probably noise. Yeah, it sounds
like that's noise. Then it looks like I can have slightly different variations
of the square wave. Just basically moving the shape of the
square wave into it, more of a kind of
pulse wave there. What want to do this time
is kind of try and create if something is a bit
more like synth bass. Here's my second oscillator. Like I said, not every, every cell has the same
number of oscillators. We've got two on this one.
This looks like it's churning. Yeah, absolutely. That's tuning. This is sentence. Okay. This is detuned the
bottom oscillator. I would think we can prove this by changing
this one's a noise. So there's no need to teach you both oscillators
is what one's going to stay at the right pitch and mom is gonna be detuned. This is probably given some
mix between between the two. I kind of balance, if you like, between
the two oscillators. It looks like we have the ability to
modulate the shape of the wave using LFOs and
filters as we'd expect. Let's look at the
next thing we've got. So we've got an amp and this is, this is labeled as I'm
pair, so the amplifier, so this is simply the
volume and the sign level. This is similar to the the sub that we
saw on the last one. This appears to be
adding a sinewave. Wanted two octaves lower than the pitch we're playing that. So it's just kind of maybe it's I think a small dip below. So let's have a look
at the envelope. Looks like it's the
amplifier envelope. This is the envelope
that's going to, or the amplitude envelope. This is the, how we originally
saw envelopes in vital Is being able to kind of
modulate the effect, the volume over time. This looks fairly simple. Adsr, we know what they mean. Maybe if I just drag this up, I can make the the
attack longer. I don't want that for
my deep bass sound. So that's the decay,
sustain and release. This is just given us a very, this is going to be very simple and unrecognizable
display for the, for the envelope,
they've got the LFO. At the moment. The LFO is the LFO is a triangle wave. Okay, so we have this
low-pass filter here. If we can, we get the LFO. Effective filter cutoff. Maybe. I've got a filter working. Nfo is baffling me. It is because this seems
to me intuitively, this seems the
opposite way around. So we have the NFO which is going to affect
the filter cutoff. Is this slider. I thought
that this was going to be at output units
maximum to the filter. But actually an
operating on the filter to the maximum ability is actually the other
way, other way around. Okay? Yeah, so some of these things
can be a little quirky, take a little bit
of getting used to. And then we have this
filter envelope. So we have an envelope that can directly affect the felt so
sodas and see what that does. We can see that without,
with a longer attack, it takes longer for that
filter to take effect. So there's our bass sounds. Perhaps a little bit. We are, now we're
getting somewhere. That's not playing
with that. So you can see that as again, it took a little while
to get through this. Well, I've never seen
that that particular use, that particular
synthesizer before. But just methodically
going through it. Here are my oscillators. Here's my filters, here's
my envelope, Here's my LFO. There are some effects here.
I can see on the right looks like we've got a chorus
or a flanger there as well. A very simple
sense, but laid out completely differently to
what we've seen before. And it just takes a little time, but we recognize all
the words we know. Most importantly, when we, there's something
wrong with the sound, we know the kind of
thinking that we control, that we're looking for, the
kind of control we're looking forward to go and alter it. Also that we can
predict before we move, before we move our control. In most cases, apart
from this one down here, which I got very
confused whether it still seems backwards to me. We can predict what's
going to happen to the sound when we move
one of the parameters. Let's look at one final synth. I was adding a new YouTube, but I'm really enjoying myself.
58. SYNTH 3: CHERRY AUDIO MEMORYMODE (MOOG MEMORYMOOG): All right, this one was
quite intimidating. So this is the memory mode, so this is by cherry audio. And again, this is a
paid for synthesising, although I believe that there is a trial and it's actually
not too expensive. But there's a free trial
period. I believe. You can go and have a look at. I have just bought it. I enjoy doing the retro Synth. Not just seeing some new. You said that I have
not played with before. And what I wanted to do is it's like there was fair
enough with the retro since there's only a few dials and it doesn't look
too intimidating. And apart from a
bit of weird UI, which I didn't quite
get, how we're able to get the Sami
wants it pretty quickly. What I thought I would do
is go and find a much more intimidating
synthesized already is one that looks
more intimidating. This one is the memory mode. It is based on a
classic synthesizer called the memory MOQ. Moq synthesizer from
back in the seventies. I believe. It looks wildly
more intimidating. There is a lot more
knobs and buttons and we've seen on the other two, both on noisemaker,
on the, on the, the logic, retro, retro Synth. So let's have a look. I can see already that
has got much more, got many more of the kind
of traditional things. So I can see in here that
it talks about LFOs. It talks about voltage
controlled fields, filters, voltage
controlled amplifiers. So this is good. This is originally
where those, as I said, where these acronyms came
from, VCA, VCO, VCF. The first thing
I'm looking for is the oscillators handily. They
are right in the middle. There appears to be
three oscillators, 123. I can see that I can chew
needs at different octaves. This is interested in, so these are measured
in terms of feet. So 16 foot, eight foot
forefoot and two for this is both the
length of the white, but also actually works
out to be the length of the pipe required in
a, in a church organ. But anyway, so I've
got three oscillators. I've got, looks like
they've all got square. Sorry. It's getting really like a square sawtooth
and a triangle. So this is the default noise. We're getting something from. It looks like with oscillator. I can teach you nuts slightly
against your classic kind of detuned sawtooth wave
or teaching soil wave. Again, I can do the same
on oscillator three. Interesting. This is how I turn all the
oscillators on and off. I can I can, I can kind of mix
the oscillators. I can mix a sawtooth
and a triangle, for example, all within
the same oscillator. That's really cool.
That's really cool. So I got various combinations. It's way too late for
me to start doing the math to work out by
lots of combinations or different
oscillators I can use. I can teach you in them So I
understand the oscillators. I haven't gotten to switch. This is just my octaves is just the US during
the course detune the sense the tune that they're kind of the minor tuning
we were doing before. And vitals here, switch on
a couple of sawtooth waves. Next thing I might look for,
it might be the amplify. This is where I am
to the major stuff. So as I said here, over here we've got the the outputs and
the master volume. We have got some
tuning, like I said, back in, back in the day, we've got this kind
of master tuning, so we can tune two through five semi-tones
in either direction. But back in the day
things the electrons used to drift out a little bit
and you can end up eat, especially if you're playing
to synthesizes together, maybe slightly out of tune. So we've got this kind of this
drift functionality here, which will tune the
whole synthesizer. Imagine. Notice is how much it drifts in tune as your actual plague. Then this is obviously the duty or actual tuning that back to some
of my near-zero. Okay. I've noticed on
here as well we've got some controls which
may be related to the, what we consider the amplifier. So we have the envelope
of the amplifier. Over here. We've got some
other bits and pieces. So we've got the glide, the gloves and on,
but we can switch. Let's go into mono mode. Back in polyphonic mode. On the glider.
Interestingly, this is one of the first polyphonic
synthesizers are most incisor, and this time we
monitor the sizes. We've got some unison, so we can switch on 16
voices of using noise. Goodbye, something. It looks like we've got a pen
depth which will affect how much the pitch will
affects the bend. We can shoot up and
down an octave here. We've got an arpeggiator. That's cool. Phasor. Again, these are kind of
effects, right? So reverb echo ensemble. Over here, we've got the, we've seen the oscillators, we've seen the effects
because I just spotted them and I
couldn't resist. But we've seen the amplifier. The two things that we haven't, haven't seen is the first
being the envelope. And I believe the envelope is the three things
we have seen, envelope, filter and elephant. The envelope I believe is
this attack decay, sustain, release and velocity amount. This is probably to do with this velocity amount is how much it should react to me playing softly
or loud U on the keyboard. So 0 doesn't matter how
fast or slow or play a key, it plays the same note. Whereas if I turn this up
by playing very quietly, faster I play, it gets louder. So this is, we use this
in the piano Demeter, just make it a little bit
more natural sounding. We've got ADSR, so, so a slower attack. We've got the decay. So how, how long in seconds it takes to get
down to the sustain level, sustain a set of ten at the moment and says that
the maximum amplitude, but we might not
get down and let's knock it down to five
so we can see that. Then we have the
release of the moment. When I release the key, it takes approximately two
seconds to get from the sustained volume
down to 0 volume. Two things left to figure out. One is the filter. So it looks like when you see a filter that's not very clear what it is
on a synthesizer. It's usually a low-pass filter. They are used more than
any other type of filter. Filter here, it
looks like we've got a envelope which ADSR attack
decay, sustain release. An envelope which can
affect that filter. So how quickly that
filter is applied and then what happens to it throughout the lifetime of
the note, if you'd like. But let's just have a look
at the filter itself. So it's probably a
low-pass filter. You can see when
it's set down here, we already learned that when the cutoff is lower in Latin, the very low-frequency. Notice as we go up, emphasis isn't just
tend to something away. Emphasis sounds like it's what we've been calling
resonance. The keyboard track. This again, this will
be very much like the keyboard tracking
the key trucking in vital in that it relates to the key that you've
played on your keyboard. So it's shift the
cutoff up and down. Finally then we can look at LFO. Isn't it really
interested in that? We're looking at this, this is, I've never used this before. It is pretty
complicated looking, pretty complicated
looking synth. And yet we're just
going through it. We're just going
through it using all the terminology
and understanding the beginning of the course
just to really go through it bit by bit systematically
go, Oh, that's cool. That runs through
this. That must be this behavior in an exactly
the way that we would expect. May have spoken too soon. Let's have a look at the LFO. This looks a little
bit more complicated. So we haven't LFO, let's set it looks
like we can choose a different, different
styles here. So let's, let's choose
a triangle wave. I would like to do is
what I would like to do is that's true. Okay, so what we can do is
we can set our LFO up here. This is the, how, how much the LFO should affect
whatever we're modulating. This is, this will sync
it with your door, but this is the rate of
the LFO. This is in hertz. Again, this is why we set
vital to be in hertz, not because I think
that vital is a bad thing with ISIL
to be in semitones. It's just that every other
synthesizer uses hertz. So it's much easier to take that knowledge and apply
it elsewhere. Now we're getting cool. I'm excited. I'm really, really glad I bought
this in size. We can see this is
affecting the field. So this row here
is saying, okay, So we understand
that if I was right, it's just a low-frequency
oscillator. We set the frequency,
we set the amount. Now underneath here
it looks like we can just press the buttons for
what we wanted to effect. So if whenever we see we
cannot effect a filter, we know it's gonna
be the cutoff. This is let me just,
this is the cutoff. So let's attach the
LFO to the filter. Exactly what we were doing. But we could have much faster. I'm just changing the
wave, waveform there. But we can set it
to other things. So we could set it
to the API flat. Maybe take it off the filter. This filter. I bet we can also set
it to the oscillation. This is likely to, it
changed the pitch, I think I could all day. But anyway, that's
set up a reverb. That's even too much
rebirth for me. I bet you couldn't do
that on the hardware. They have echo, this would
be the same as the lake. Let's just turn the VCR for now. The LFO, so we can
hear the echo. Maybe turn the
attack down a bit. There we are, so we can hear
the echo work in there. Now. Turn the LFO by hoax. I love it. If Subway
we played with before, it's gone a bit. Weird course. The kind of thing I think
phasor we know about, and there's an
arpeggiator in here, which will allow you to play multiple keys
on your keyboard. And instead of
playing like a code, it will play them in order. At least that is how
arpeggiate his work. I've never tried this one.
Okay, this is very cool. Alright, so very, very
complicated. We synthesizer. But actually everything
we turned on there, we understood everything,
everything we saw that we understood
this must do this. When we're able to say
this must do this. This means we have a real
fundamental understanding of how the synthesizer works or
how any synthesizer works. I just want to show you
through those synthesizes. I spent a bit more
time on it than I planned, but I was having fun. So thank you for
bearing with me. Just really to prove that even though we've used
vital, the very modern, very capable, very
visual synthesizer, the knowledge you have can
be applied everywhere else. Hope you take this away and I hope you have lots
of fun with it. I hope you make some
fantastic music. Remember the basics. If you forget something,
please go back. Just, just view that
section of the course. Remind yourself and I'm
sure we'd be aware again, if there's anything that
you think I've missed. If you've got any feedback
for me, could hold bad, then please do please do get in touch and let
me know how that is. I'll keep an eye on
the on the Q&A and the comments in the various
sections on the platform. Go away, makes the music,
makes some sounds. Share your patches with people. Share your music with
people, most of all. Above everything else. Have some fun with it. Thank you all very
much for watching. And I will see you in the next course.
Thanks a lot. Bye bye.
 Steve Lydford, Music, Sound Design and Productivity