Transcripts
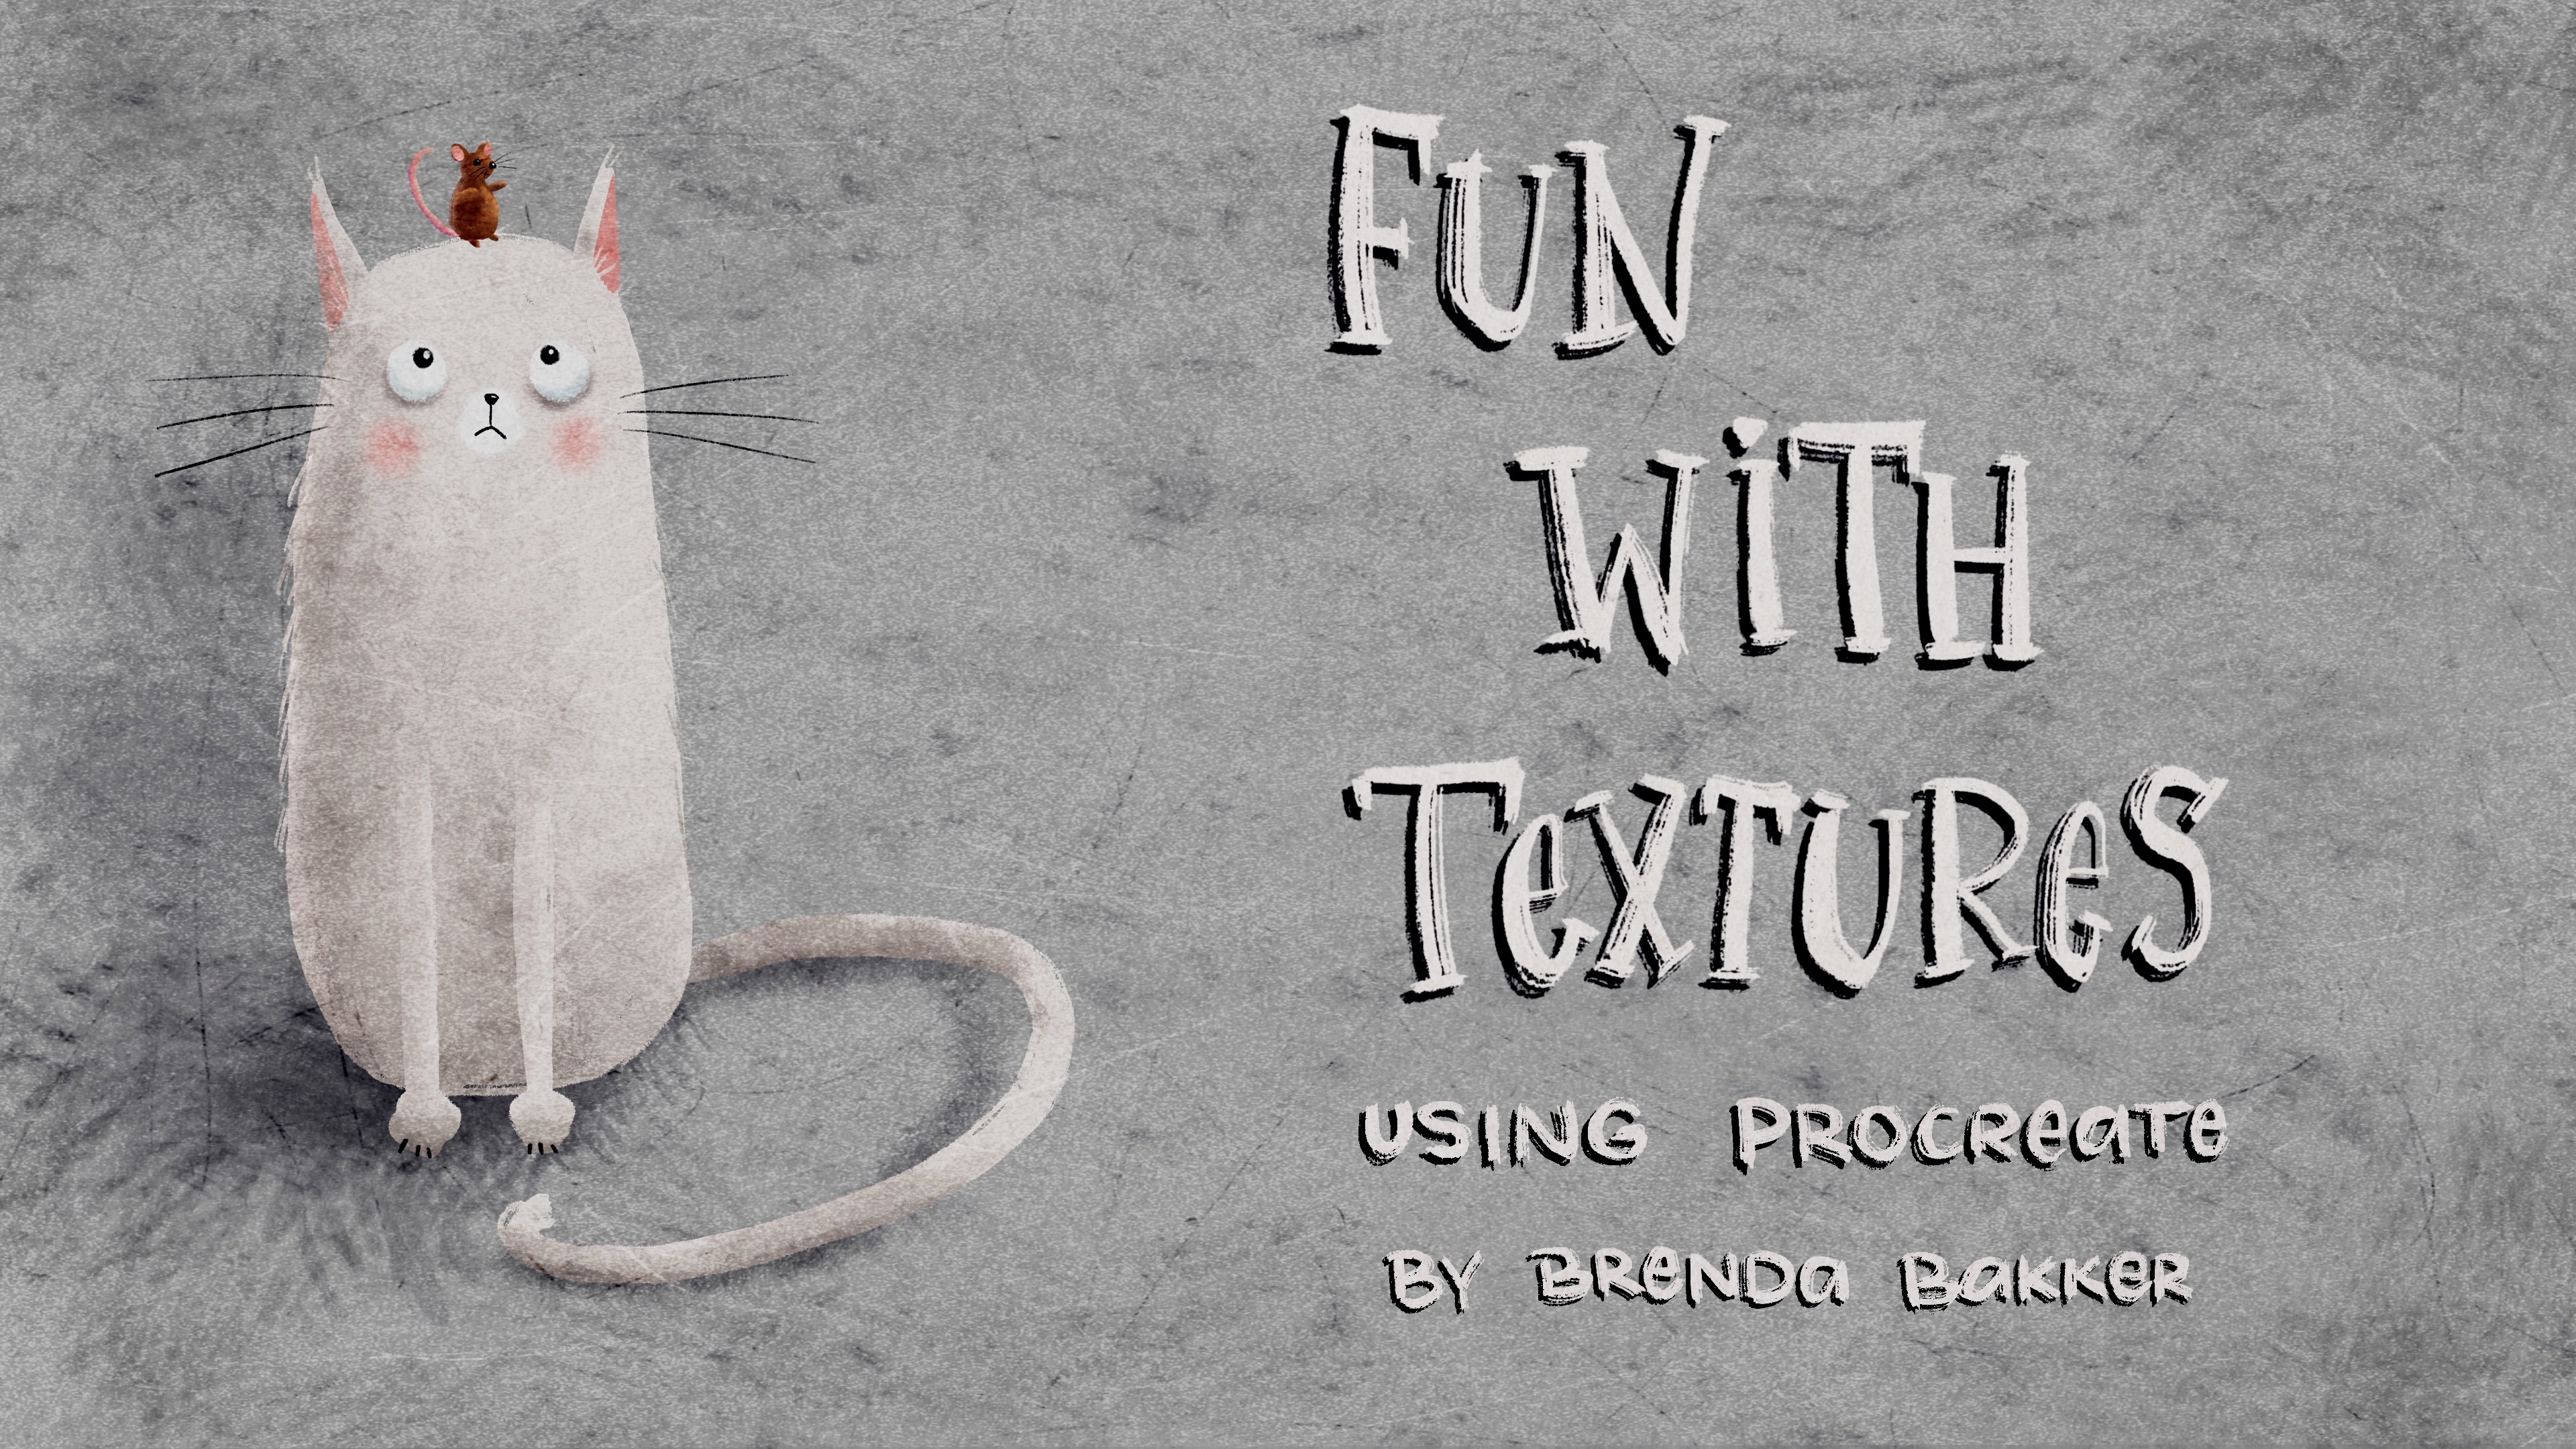
1. Intro: Hi and welcome to my
new Skillshare class. My name is Brenda Bucher. I'm an artist and teacher
based in the Netherlands. In this class, I'll be
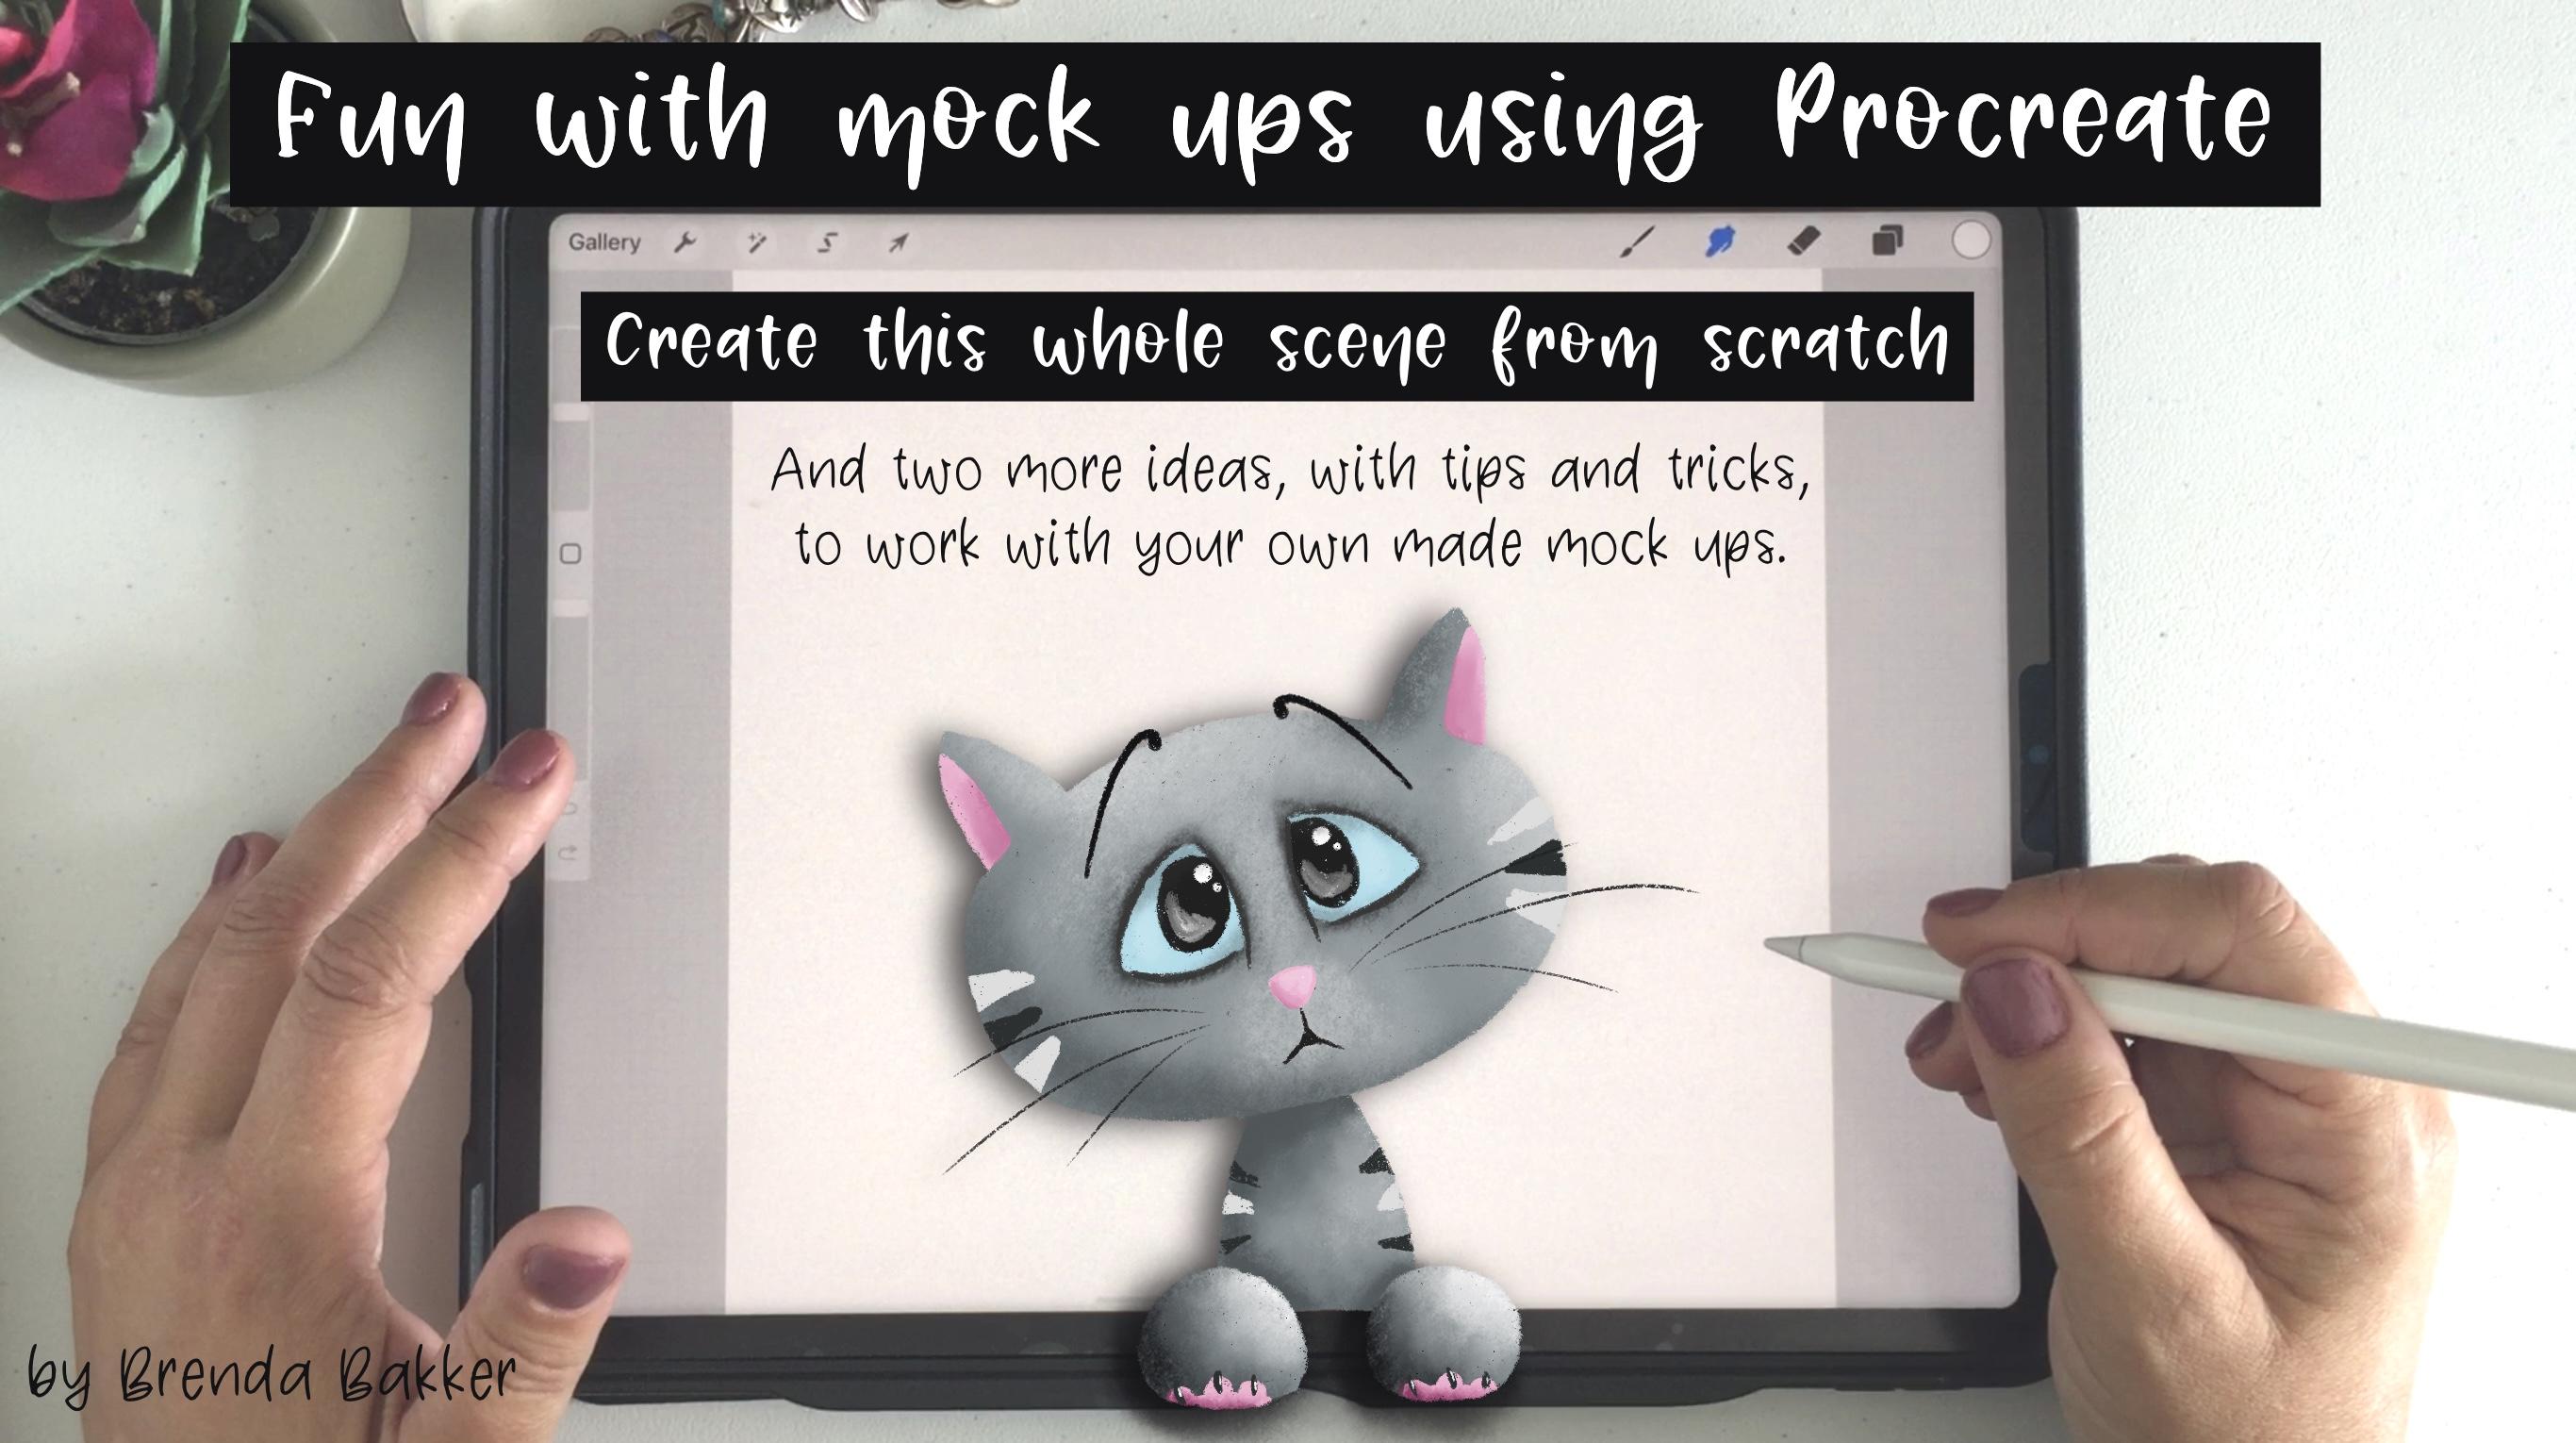
showing you everything about creating a mock-up for
our use of Procreate. I will tell you
everything about how I do my setup, how to record, showing my hands on screen, also everything, how
to fix your photos, ready to get started. And after we created
our mockups, we're going to do, of course, some fun things with it. The first thing we
weren't going to do is to draw directly
on the photo. I will draw a kit and it will look like the cat is
coming out of the picture. And the second thing
we're going to do is to import a ready-made
drawing into the mock-up. But then what if your hand is in the way that I've got
a solution for it. So if you want to know everything
about that and want to have some fun with creating
mockups on Procreate, then you're in the right spot. So let's hop in and
let's get started.
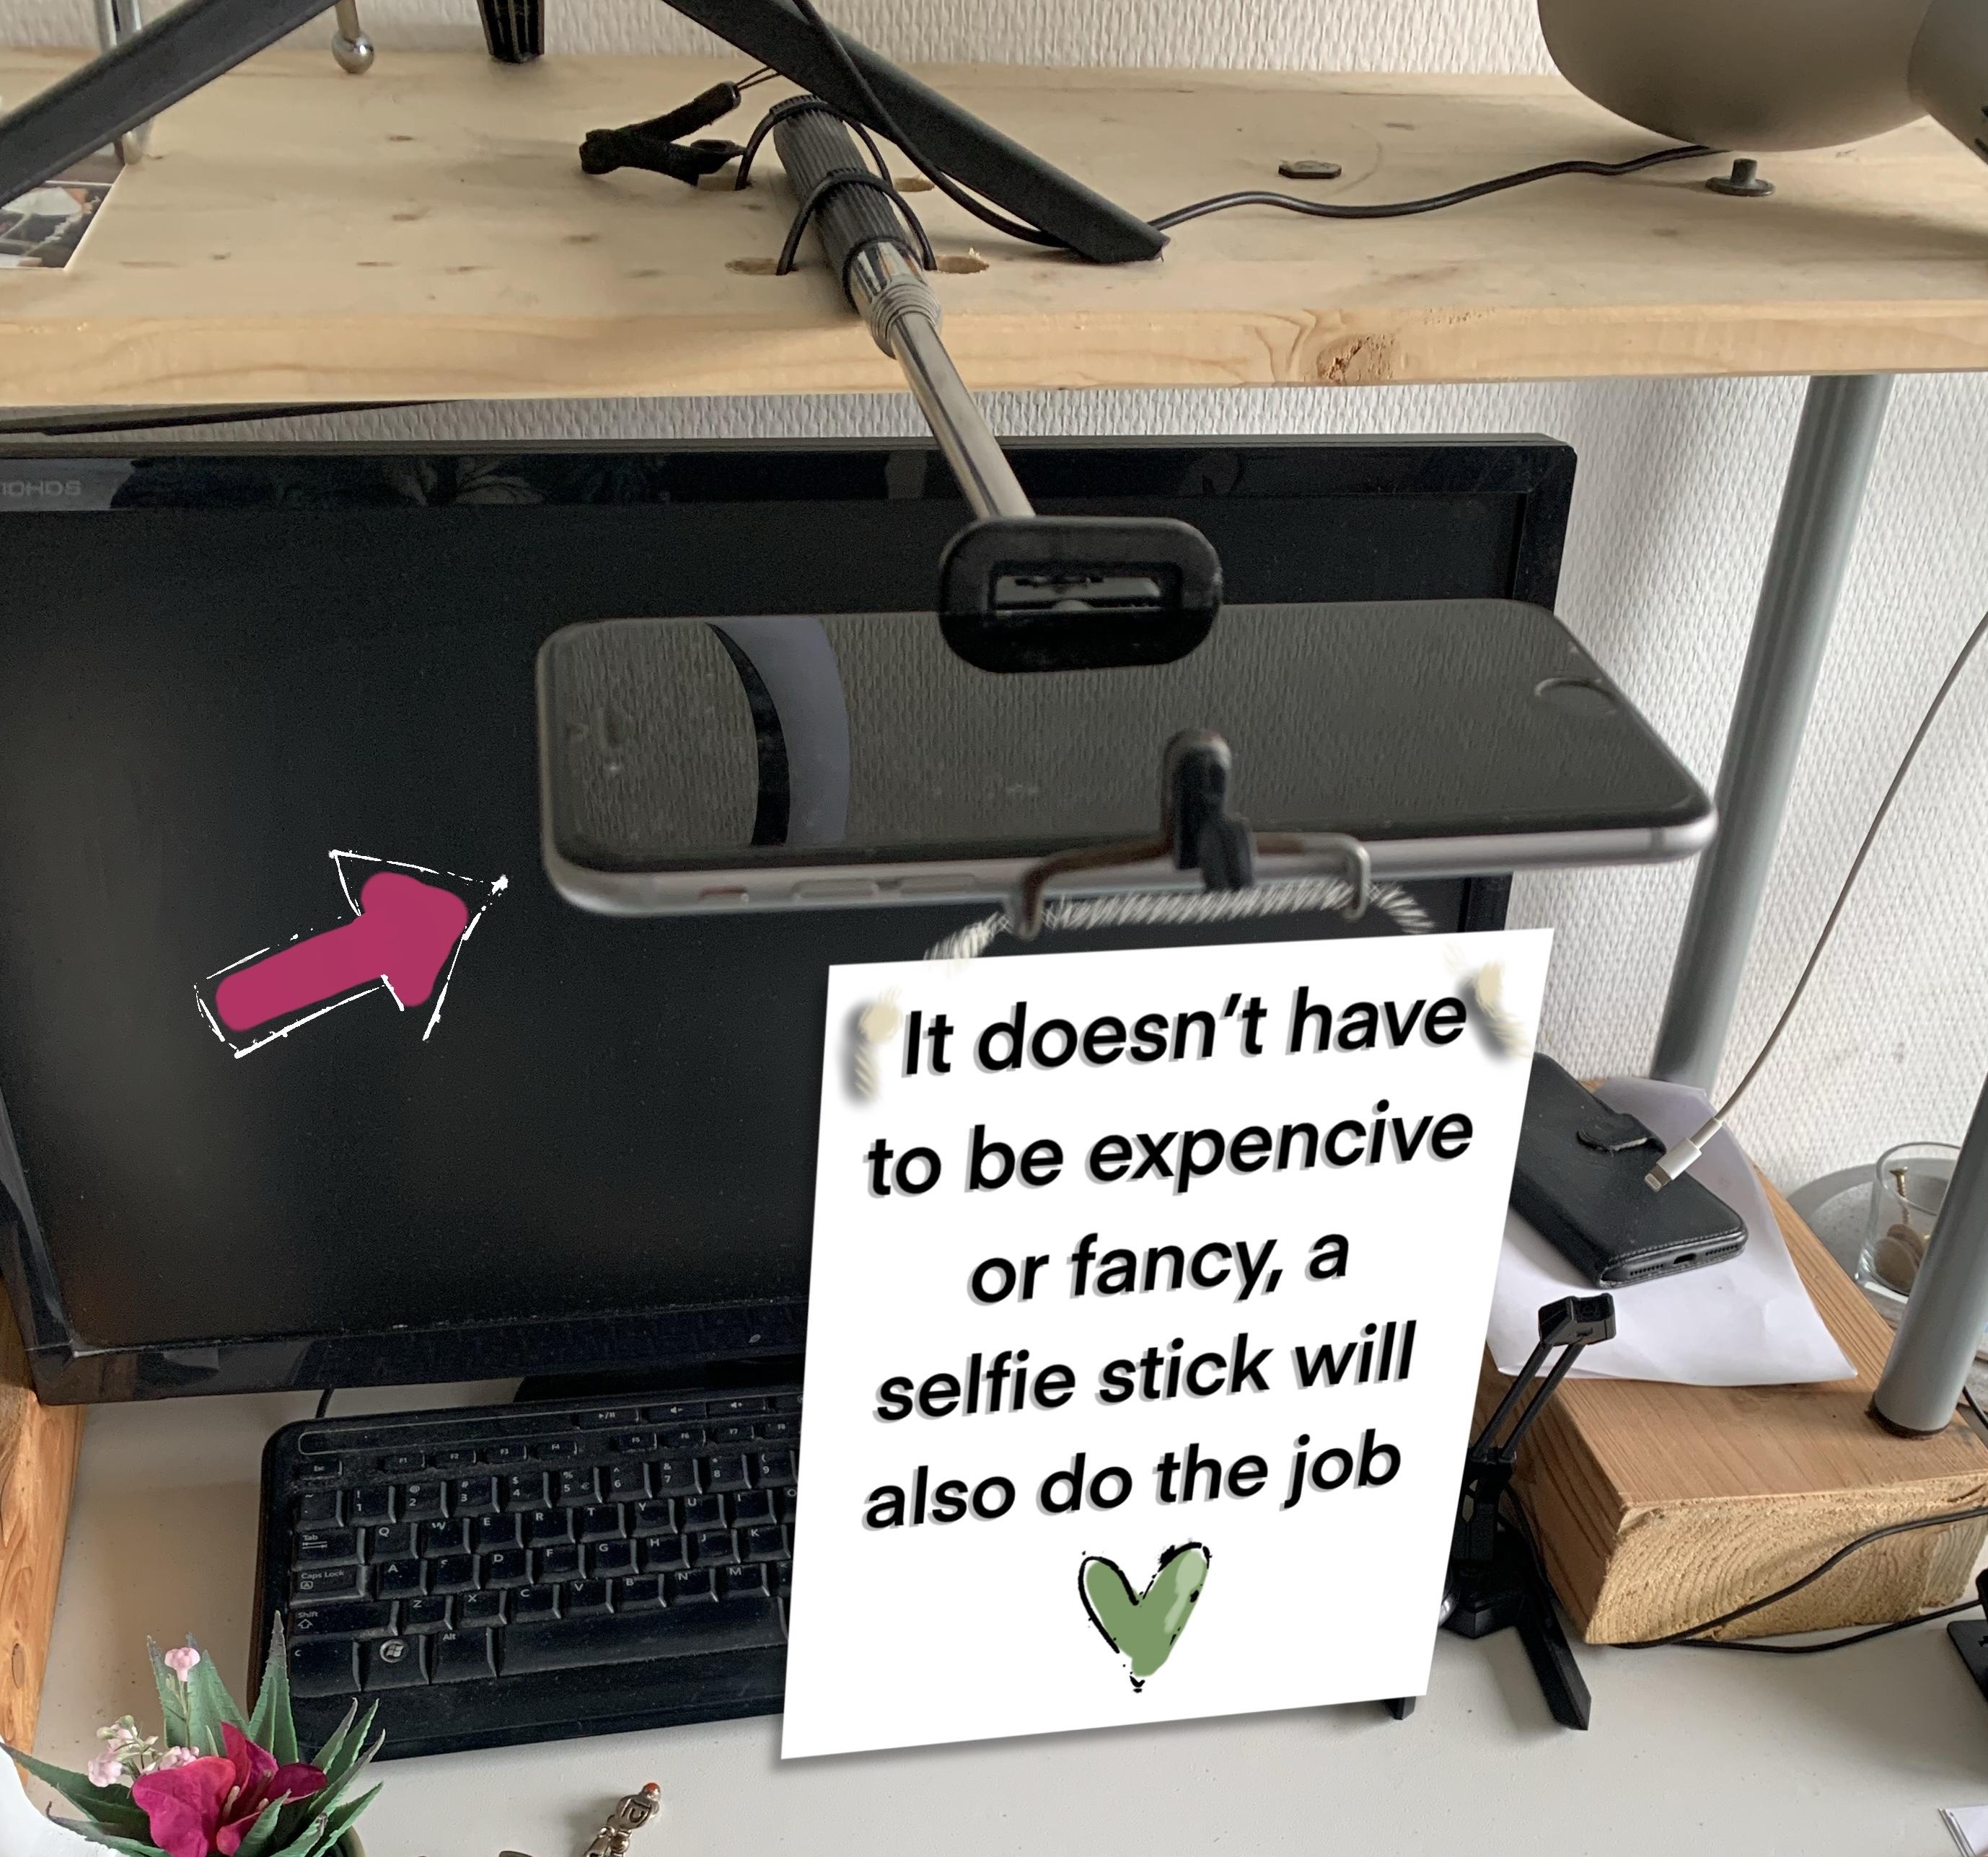
2. Showing you my set up: So this is just a recording with my handheld phone for
just a couple of seconds. I just want to make
sure that you know, how my setup is placed. So I've got a flight
layer made of my iPad, my pencil, my lucky
charm bracelets. I've got a nice little
blend in the corner. And because my light is coming from that area on the right, I have put down some
white curtain in my case, but you can use anything wild like a cardboard, anything else? So you get some reflecting
light on this side as well. Um, I can't avoid
all the shadow here, but without the screen promised, I, this is way darker normally. On top of my iPad, I've got my phone, which I'm going to record with. So you can see my setup for
everything you can see. Here. I'm going to make a short video from which
I take my screenshots later to create some fun
mockups with my hands on it, because everybody wants
to know how I get to create a picture in my
head in the video as well. So you can see just a little bit off the
plant in the corner, my lucky bracelet,
just to touch. Not too much. I'm changing my hands right now because I want to
show you something. When I tap on my screen, I can choose lightening
a little bit so I can play a little bit
with light and dark. Don't do it too much because
you can always fixed video later and well,
let's get started. So I'm going to turn
off this device. I'm going to record
with this one here. And we go from there. See you in the next chapter.
3. Recording poses for Mock-Up: Hi. Now I've put up this camera on top and I'm going to
create some flood lights. And I'm just simply recording some things
with my hands now. I'm going to move them. I can point at something
in the picture and I can create like this
just by tapping on it. Has my hands on the side. I have my pencil on top, my pencil next to it. Let's leave it there for
a couple of seconds. I can find just a short video and I keeping my hands
quiet for quite short time. And I'm also going
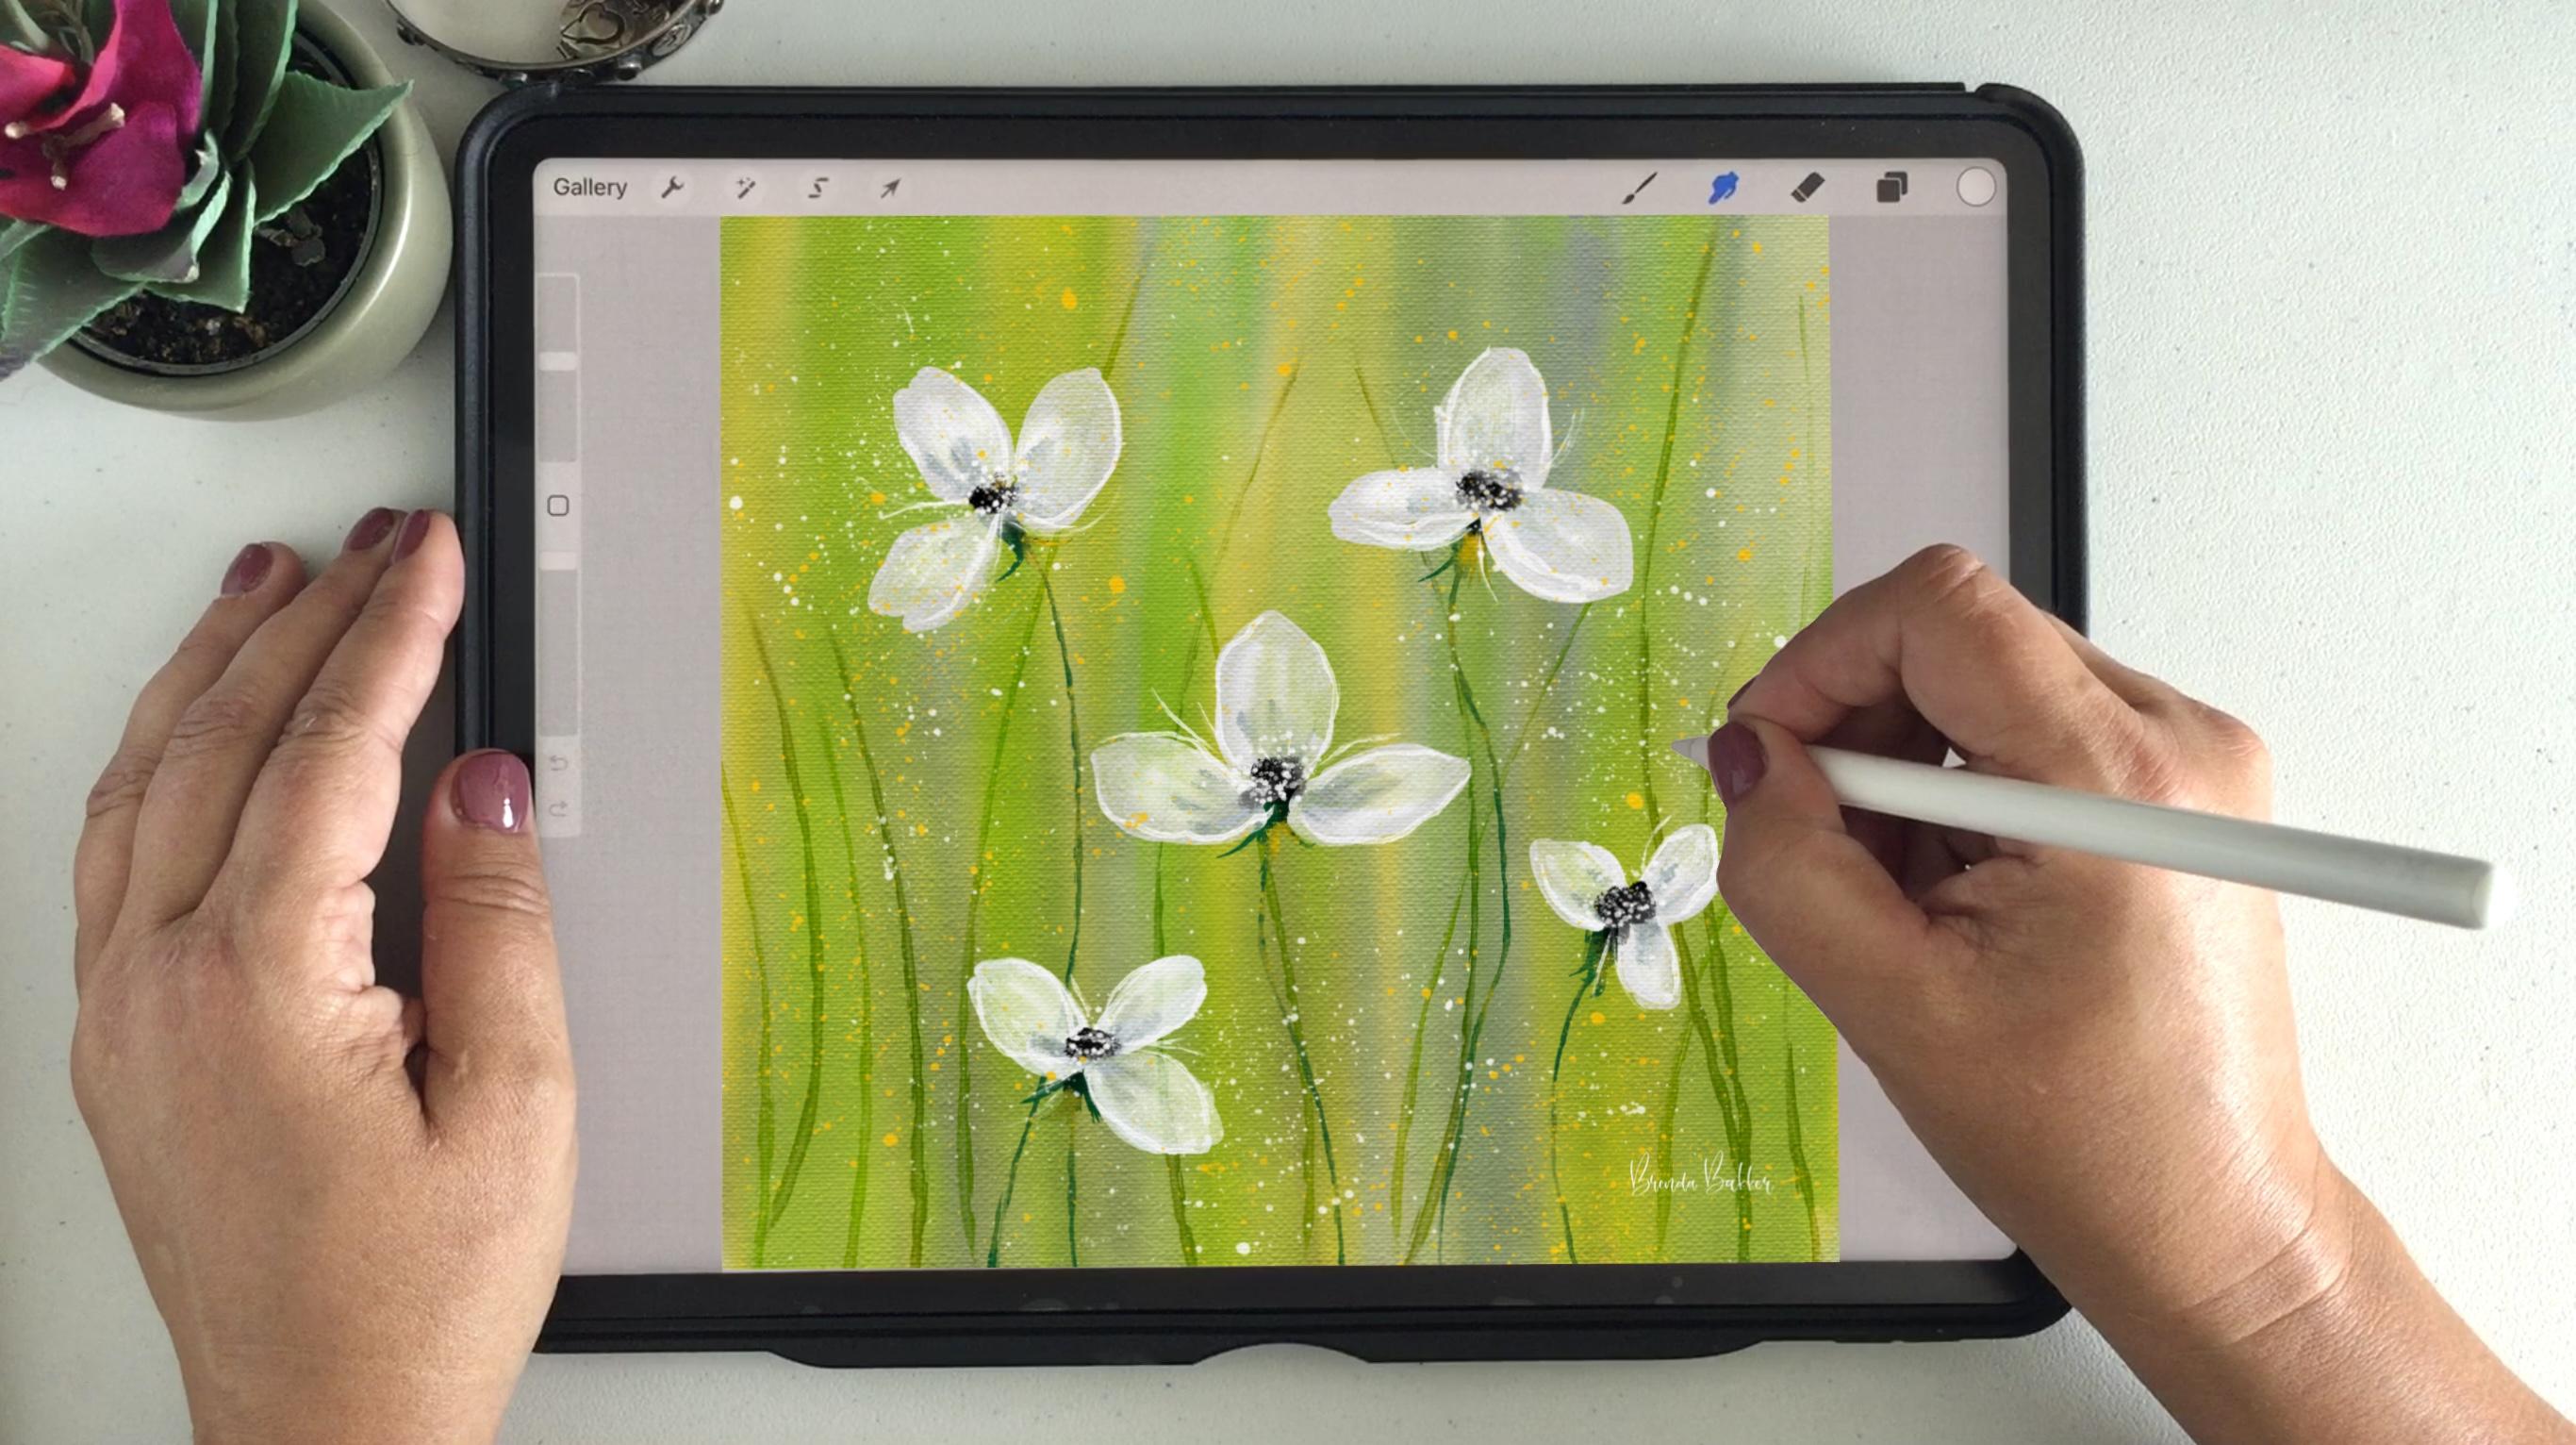
to do this with a new screen, screen size. So I can put down any picture
I like in any painting. Just create some
mockups with my hands. Mostly I left my hands lay
easy resting on the table. Of course, I've got
a light interface, but if you want
something different, go to your wrench
tool preferences to put down light interface. And then you've got
a black interface as well to create
something different, or perhaps it's better
for your colors. You can also change that back to your square canvas and
create some lovely mockups. With your hands on it, the pencil on it do
as you're drawing, drawing on the side. So I think you quite know
what I mean by this. So I'm going to put down this camera again and go
back to my other camera.
4. Export recording to iPad and taking screen shots: So here I am back to my camera. Here's my video I just recorded. I showed you. I'm
going to tap on this video and you'll see
this sharing icon here. It's a little well note with
an arrow pointing outwards. So for exporting, hit on that. It's selected here. I choose next. Right here. I'm seeing several
items of mine in well, I can see my husband
is also here. I'm hoping for my iPhone and now you can see it moving
directly to them. Sorry, I'm moving it
to my iPad below. And it's now going down
to my iPad's below. And yes, debits, yolks. That is automatically done. So let's get over
to this iPad again. I'm going to record
again from this angle. So hi and welcome back into
my recording from this one. Again, this angle. I can see my video. I still in the first spot here, but I can show you later
on how we can rid of that. Again, also in Procreate. What I'm going to
do next is take some screenshots of this video, preferably when I
hold my hands still. So I'm going to run
this on my device. I can take a screenshot just by hitting the on-off
button and the louder. And what is it? The plus button? Yes, the plus button at the
same time. That's the point. I can take screenshots. So I'm going to run
this Mophie and take several screens,
screenshots from that. So let's play. And here we go. I just do a couple
of screenshots. Getting rid of deaths. When it goes too slow, I can see my next angle. Just find something nice. I think this one is also nice when I'm drawing
directly on it. Here, I've removed it. I saw that in the picture, but I can show you shortly
how I did the other part. So this is a nice angle. I was too slow for that, so I'm going to hold that. Go back. Maybe you can leave
your pencil a little bit longer than I did. Yes. Just fix it
in just in time. Binding. And I just pick the
ones I liked the most. Yes, here we are creating, we don't even background. And creating some parts
with darker ground. Darker interface. Snapshot, screenshot. I want that's even better
when I'm in the middle. And I think I have quiet enough right now
we can play with. So see you in the next chapter.
5. Clean up and preparing the photo: The thing I want to
do first is go to my gallery and find the picture I want to
show you the first. So with this box. So I'm going to teach you right away how we get rid of this one. But before we do that, I want
to change it and get rid of these small bars on
top and at the bottom. So I'm going to change it. I'm going to resize it
by pressing this arrow, bringing the top-down
and bottom-up. And I choose this
size because it's screen sized for my videos, but you can choose any size
you like for your mockups. You can also look for
a square if you want. So let me check. Let me show you how we
get rid of this 1 first. So it's okay. And now I'm going to import
that into procreate. Now I'm going to
import that photo. So I choose photo. I take the first one. And here we have
it in Procreate. I'm going to switch to my light interface because I'm
used to working with that. I like that more. So I want to get
rid of this piece. What I'm going to
do for that is go directly to layer
which the photo is in. And I'm going to, my magic one's going to clone
import of increased size, getting it right next to it. And then let me see
what brush do I have? Doesn't matter. Something which is quite
opaque would be nice. So what I'm going to do is
I'm going to draw over this. And it's copying the
area, it's here. So when I erased it or blended, I could get a different angle or a different kind of texture
in it and I don't like that. So that's what I want to do. These little spots
are in my table because this is not
a normal white desk. So I think those are fine
for having it there. So this is what I
did to the photo and nothing else is going
to be done to the photo. I'm going to lock this layer. What this mock-up, we
can do several things. And I'm going to show you
this in the next chapter. But first, this, I also create a couple of mock-ups
without my hand on it. And that's what I also like. I see here. I have adult, which I
won't like as well. So we're going to get
rid of this as well. First thing we want to do is to change the picture
because I want to get rid of the part on the
top and the bottom. So I'm going to
choose the square. I can drag this down, just up till here and move
this one upwards up to here. Yes, it's correct. I made sure I kept
a little bit of free area around the iPad. I also going to change some lightning here I want to get is a
little bit lighter. So I'm going to check on
my lighting a little bit. Right? Nets and light here as well. Maybe you can change
it a little bit. Yes, I think that's great. Darkness contrast, clarity. A little bit up again. Yes. I think it's correct. I'm still going to
get rid of that bark, but I think for now, this one is free to
go into my Procreate. So I go to Procreate and I'm
going to import a photo. I've made one here before
with my hands on it, but this is one I like. So I'm going to import a
photo and a is this one. This is the one we just created with no hands on it
because we're going to do some fun things with drawing something that comes
out of the iPad first. That's the first thing
we're going to draw. It's also quite fun, right? So I'm going to get rid
of this part first. Again by going to my magic wand, going to clone, dragging
this area here. Mostly, this is the part in the circle which
you'll go into clones. So get it next to the part
you're wanting to get rid of. Let me show you. It's automatically
choosing the brush and I choose a brush which has an opaque
part of drawing. I'm going over this
and it's not visible. Make sure that like
when I've got it here you see black and white and I'm going to clone that one. You see it's perfectly
going to clone this piece. So that's makes sure
you're going to choose an area which is fairly next to the part
you want to clone. Because when I did
it right here, you see two darker color. It instantly gets darker
color right here also. So make sure you have
everything in the right spot. So I think this
picture is good to go.
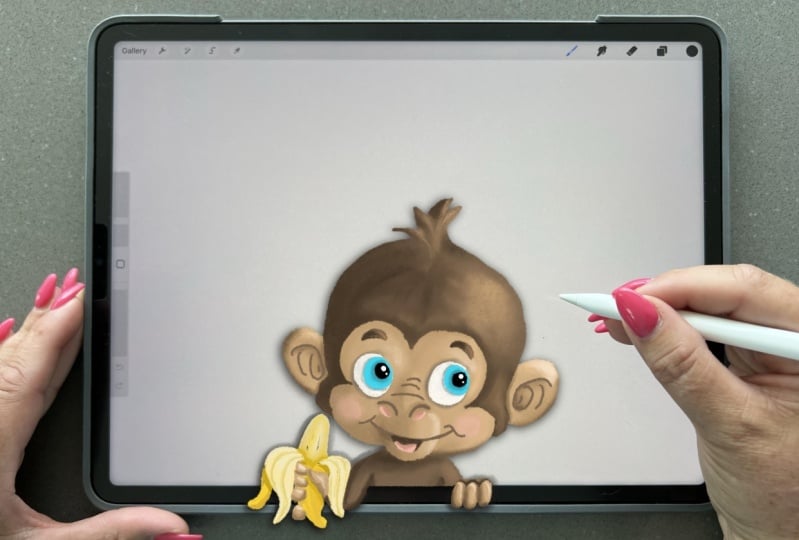
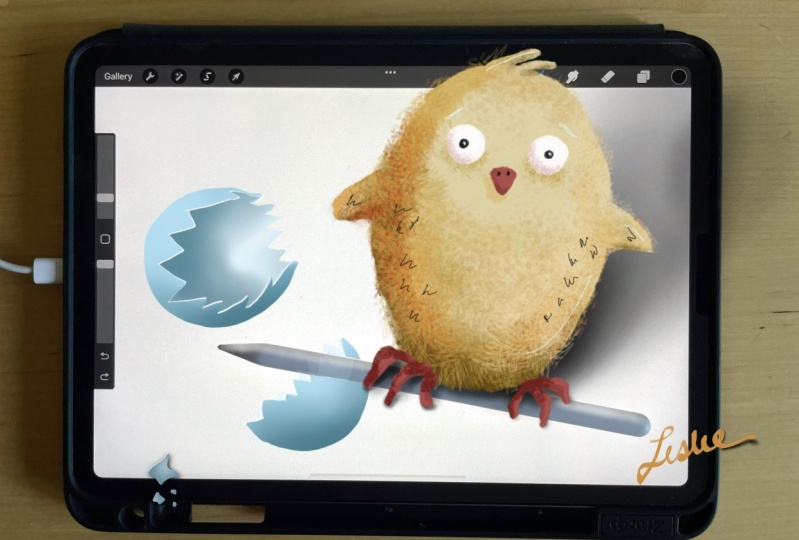
6. Drawing the Sketch: A creative person can
change your mind, right? So I have to choose for one with my hands
on it after all. And this is the one we're
going to play with. I'm going to lock the
screen so I don't get to draw unintentionally
on my picture. So let's get started. So let's create a new layer
on top of the background, because we are now
going to use this as our background and we're only going to draw on top of that. So we started out with
a sketch for this. I'm going to use my six
B pencil and black. You can choose
whatever you like. And I'm just using
it as my playground. I want to draw a
little font gets. So I'm going to draw a circle, like an oval shape. This is just a rough sketch, so don't bother too much. We can actually see
it's hand-drawn because that will make
it more fun when you are going to create your
painting in it, your drawing. And this is a fun kids
with lovely sweet eyes. And remind yourself, Well, I'm not a picture
perfect painter, but I like it. If you can see it's not perfect. So it's actually hand-drawn and not a painting or a
photos of just a sketch. Create a little snout is nose and just a
sweet little mouth. So whiskers. Maybe tilt his
head a little bit. Like so increasing the size. We're in the middle. Yes. I'm getting
distracted by this line, so I'm going to remove it. We just want to give
him a little buddy, small bodies, small cats. And just to having
him pop out of the, I bet we're going to
create some lovely little false just outside the pipette. Some ovalis, circles
approximately the same size. Maybe this one can be a little
bit more towards this one. Yes. So it has to pop up on
top of that a little bit, maybe a little bit more. We can also do that by liquefy. So we're just popping
in higher for this one. Yes. Maybe shape a little
bit more like this. So it's false will be look
like they're more inward. I think that looks lovely. Are ready for our
primary sketch. It's going to be looking for it. Certainly. It's
lovely and fun kits. So we sweet ice. Some white in it. Just for the sketch. So we can see it more clearly. So I think our sketch is ready. I hope you can see it because the screen was
now a little bit smaller, but I hope it was
feasible for you as well. Yeah, and I wanted to
see the whole picture. That's why I zoomed
out a little bit, but I hope you can
see it from here. So this is our rough
sketch we're going to create a drawing with. So I put this on multiplying
and lower the opacity. And now we can draw on top of it and we can create
our little kits.
7. Drawing base with flat colors: Okay, so we've got the
sketch on top and we've got the locked photo
layer of the bottom. We're going to
create a new layer in-between that we're going to choose a grayish blue
with the dry ink brush. Every going to draw the cat. First make the outlines. Doesn't have to be perfect. I'm not perfect either. And neither does my kids. If I were to drop fail, like this, it will be completely filled and you only have two
textures on the outside. I won't like that. So I'm going
to do everything by hand. Just a couple of
seconds. Nothing hard. Nothing really. It's worth it, I think, and it's more fun
when your pet is actually looking like
it's hand-drawn. Because we're going to make an illusion with a
hand drawn drawing. So that's way more fun. If you think you have got
way too much open gaps, just lift your pencil
and go over them again. Just make sure you're leaving some gaps in there and nuts, removing all the textures
out of your drawing. Once you have the
shape of the head, you can create a layer with
the body and you will do it behind or underneath the head. We're going to create this one. I'm going to draw until
the end of the paper. And I've went over it a
little bit, but that's okay. I can always erase that part. Always make sure when you erase you do it with the
same pencil so you're keeping the textures
fitting to your drawing. Otherwise it will be
looking very smoothly. Well, actually in this case, it could have been because you're at the
border of the iPad. So that will be okay
if it was like that. So not erasing, just getting
rid of a little bit more texture on a new
layer. All the way up. At the top I want to do is pause because the body would come. And then in front of the body, it will be his hat and bars
will be all the way on top. So that's what
we're going to do. All new layer. I think it
would look lovely like this. A little bit flattened
at the bottom. Let's get rid of the drawing for a second and see if it fits. I think this would fit lovely. Just making sure
my texture will be a little bit more, right? So we've got a floodlight
of the get's ready. Let's do it on for the shadows and let's bring some
color into the cat, will be doing that
in the next chapter.
8. Drawing the face: So I want to give him a
lovely face for that. I'm going to take some light blue keeping still on dry ink and I
would color in his eyes. Make sure I'm on a new layer. Maybe a layer on top of the
head that will be easy. Maybe I would group them later. So when I think their head
is too big or too small, I can group them and, um, change them at once. It's always welcome to have
them all in the same area. So just coloring those
lovely, cute eyes. Maybe getting rid of
the sketch for awhile. So you can see the
shape of the eyes if there are to your liking. Maybe turn it upside down. Sometimes you can
see it's easily like so shape is to your liking. Again, it doesn't
have to be perfect, but we want a lovely drawing 13. So I'm going to draw a
black pupil, blackish. I'll be doing this
on a clipping mask. And we have the sketch
layer on again. I'm going to draw in
his little lovely eyes. And I want it to be searched. Some pools in boats
kind of eyes. He's begging you for
something lovely. It is one is too big, so I'm going to yeah, I could I could have
duplicated it, but, you know, then it will be too perfect and I don't like it. It's too symmetrical. I'd rather be imperfect
than symmetrical also with my drawings test to be kind of working,
not exactly working. That's okay. I can create some light dots again
on those as well. My neighbors starting to
drill again in his garden. And maybe some lighter
reflection at the bottom. And smudge that a little bit. So big. And he instantly has
killed her eyes. So let me get rid
of the drawing. I think this would
look lovely already. So I'm going to create some outlines for the eyes and I will do that
on top of the eyes. Just some lovely lines that
won't go all the way through. Just don't close
them all the way. Let me see if
that's what I like. And we can always zoom in and zoom out every once in awhile. So make sure you do that too, because when I'm
zoomed in too much, I can't see how it's looking. So yes, I think
that's looking great. Maybe behind that,
I want some shadow, so I'm going to go behind the blue eyes and I'm going
to choose willow charcoal. And maybe what size? Not too big. Let me check
what it looks like. Maybe even smaller. Creating some shadow
like his eyes would lay deeper in his face. That's why we can, we can use the shapes to close
it a little bit, but not too hard. The lines. I think it would look
sweet like this. Maybe a little bit like so it's like he's raising his eyebrow. Don't like it there. I just go with the flow rate and erase the parts you
don't like it's okay. And go to my dry ink brush
again for the one on top. And I would like to be for this one to get
it even more out. Like so it will
make his eyes look more sweet and little
bit more begging. And I think we're going to create some little
shadows in his eyes. So I'm going to this part on top of pupils and go create
a new clipping mask. So it will be all the
way only on the blue. And I'm going to create
a little shadow part. So I'm going with my
willow charcoal again, small, small size because my
picture isn't that large. And I'm going to create
a little shadow at the top and a little bit
in the corner of his eye. And I'm going to
lower the opacity. Just a little glimpse. And it would make his
eyes more shiny. Then. Maybe take the blue and
put it on lighter part. Lighter and creates
a lovely whitish, more light blue, bluish color to brighten it
also a little bit. So I think he would already
have a lovely eyes. And let's go over
to his little nose. And for that, I want to
choose a little bit more pink. Let me see. A soft pink, pinkish, reddish. I'm going to use
that same color, so make sure you will be using a new color
palette for that. So I'll go to my Palettes, create a new one. And I'm going to save that pink. And I'll be using
the same part for his ears and the little
cushions on his boss. So I want to play with
that color again. Go to my dry ink and create a small little soft,
roundish triangle. And create with a
little bit of white. Let me check this one. Light pink or white. It's okay. A little bit. And blend that as well. A little bit into color. And maybe darken it a
little bit for this side. And blend that as well. Yeah, I think that
would look lovely. Now, his little mouth. I did it without the sketch. Okay. It's okay. I'm not always says
sticking to plan and that this was a little bit
out of its way also. So I'm a messy painter. Those those of you who
know me know that by now. So a little bit like so. Oh nice looking sad, sad, sad, but lovely. Yes, I think this is lovely. I also going to give him
some whiskers as well. I think I can do that on the
same layer as his nose is. Like from here, some little
Katie, Katie, Katie strikes. And I think his facial
expression is ready.
9. Finishing the head, shadows, highlights and details: Now we're going to give him some more depth because now
it's still a flat color. I want to give him
some more roundness. So I'm going to all the
way on top of his head, create new layer, put
that on clipping mask. And I'm going to the same color, gray by picking the color. Put in a little darker. And my own willow charcoal? Yes. I'm on willow charcoal, maybe a little bit bigger. And I'm going to give him
a little bit of shadow. Just pick up the brush
every once in awhile. Create a little bit
more roundness. In his eyes. A little bit more shadow
on this side was ear. Little bit also here. And I think we're done
with the shadow part. We're also going to
give him some lights. So picking up this color again, let me put it down here as well. And this was the
color for the shadow. So let me pick that one again. For the shadow part. I'm going to pick this one
also with a highlighter now. And I do that on the same layer. You can use any brush you like, but I want to have everybody
have the same brushes. If you have a noise brush, that's also fine. Noise brushes, awesome. To do this. I created my original with brushes from the pigeon letters. I think the gouache brushes, but not everybody has those. So that's why I do this with all Procreate
native brushes. So everybody can
play with those. And procreate brushes
are awesome themselves. So also a little bit on a snout. More to this side, a little bit less to that side. Yes. I think it would be lovely as if he had
some stripes as well. So I'm going to an
even lighter gray. Go to my dry ink again. Do this on a new layer. And will I do that below? Yes, I will do that
below the shadow, a lighting because
the colors will also be in shadow and light for him. So I create a new layer
underneath the shadow related, but on top in the
clipping mask of a face. So I'm able to draw. No, I can see it's
hardly visible. So I have to play
with that as well. I won't keep those here as well. And making a lot
of darker color, even a little bit darker. Save it for you as well. And they are not feasible enough because they're
underneath that layer. So I'm going to put them on top. Yeah. I think that's okay. Clean it up more. And I think he will
need some pink ears. So we've saved that
color. Luckily. We can also do this on
a clipping mask on top using the same brush for eraser. And I will be doing a little
bit more shadows in the ear. And I will do it with
a willow charcoal. Smaller. Blended as well with
willow charcoal. Soften it a little bit. Again, I'm not that precise, but I don't want the
pink to be outside, so I'm going to erase that
with my dry ink brush. I think he will be looking
lovely like this already. So we're going to
do the same thing with his body and his pulse. See you in the next chapter.
10. Finishing the body, shadows, highlights and details: So for his buddy, we're going to create a
new layer on top of that. And we're going to set
that as a clipping mask. We're taking shadow part, willow charcoal. On willow charcoal. I'm going to create
a shadow below his face and that's a little bit harder shadow
because there is way darker. Maybe this is a
little bit too much. Again. We can play with that. Smart cheated a little bit. But it has to be really dark. In order to see the
difference between his hat and his body. Also going to
create a little bit of shadow around divorce. And some highlights. This part. And his belly going to
smash that a little bit smaller than it. Then we already have a little
bit of a rounded body. Important are the shadows
around his false clause, clause pose, pose.
I think it's false. And maybe a little bit
more of a darker color. So they really stick out. Going to do the stripes again, we do it on a
clipping mask on top, like we learned from the head. Clipping mask, go to my
dry ink brush again. Did I use that color, right? Yes. And he would get some lovely
stripes on his buddy. Don't make it too
hard on yourself. Just some fancy
little stripes there. And I think the body is ready. So let's move on to its. Paul's going to do a new clipping mask
on top of the paws. I'm going to keep
calling them boss from now on. Let's do it. We're going to use some shadow and some highlights as well. Willow charcoal for dense. And I'm going to use the lighter color on the right side because my
light is coming from up here. Maybe they can't
leave a little bit bigger and a darker color on the left
and the bottom side. And I'm going to blend
them a little bit. A little bit of
typing and dabbing. It must look furry. Says for ripples. On top of those, I'm going to create
a new clipping mask. And I'm going to do with
the pinkish a little bit with dry ink brush
again of its cushions. So they are something
like this For me. It's my cat, my design I can
choose however it will be. And perhaps it's not
anatomically correct, but I don't mind my art, my garden, my anatomy. This is bothering me
because also it here still has a little bit of
a gap from the iPad, but I come to that later. I'm going to choose
a darker color. Luckily, I still had
it in my history. I'm going to choose a willow
charcoal. Every small. And for the darker color
I'm using at the bottom. I think it would
look lovely already. And maybe, maybe he's going
to have some fingernails. Paul Neal's then a
class outside of class. Oh, I don't know. Oh,
I'm not good at English. I'm sorry. I'm sorry. Bleeding dry ink and black for me it could be blackish and just some little gloss and maybe a little bit
of white highlights. What is my whites? Whites. I always mostly have a black and white
somewhere. It's right. So I have the right
amount of whiteness in. It's very small. Little highlights on
her nails as well. Highlight. We have to
be doing it with white. Now there are Polish snails.
11. Extra Pop Out effect: Most importantly, one thing
that's very important for this kid kitty cats is it
should have shadow around. It's false to make
them more pop out. So we're going to do something. You never must forget
when you're drawing something outside of your
iPad into the real-world. So we're going to do layer, the bottom layer where
your picture is, create a new layer on top. And that's where we're going
to create another shadow. So we're taking
the darker color, going to take the
willow charcoal, and we're going to create
a shadow next to it. Darker tends to be
darker because it tends to be darker
than this area here. So maybe all the way
almost blackish. And that's where the magic
of the illusion of something going out of the
iPad is coming from. This is too rough. I'm going to smash
it a little bit. So this shadow is really important for your
drawing to get it right. Otherwise it won't
be popping out. But the cat itself
also needs a shadow. So what I'm going to do is get rid of the
background layer. Get rid of this layer for now. I'm going to get rid of
the background as well. So we only have to cut
out the shape of the cut. And now we're going to do a three finger swipe
down, copy all. And then I do a paste, create a new layer. And another layer I
do with three fingers swipe down and I do paste. So now I have the whole
kits behind the kits, I'm going to put
everything on again. And the cat is still there. I'm going to select this
one and choose black. I fill the whole layer
of the cat black. Now I have the whole
cat shape in black. I can really put it a
little bit here, like so. I'm going to do a
Gaussian blur for debts. So I go to my magic wand for Gaussian Blur and look
what Gaussian blur does. It's going to create a little shadow behind
the gut as well. So now it's looking
like the cat is also coming off from the paper. And you may choose
to your own liking. Mostly it's at its
height at ten per cent. Check what you want to do. And because it's too
hard of a color, we're going to lower
the opacity a bit. So it's just the
touch of a shadow. For the final details, I'm going to create a
new layer on top and create lovely eyebrows with
dry ink brush as well. And air coming off of his head. So maybe a little bit thicker. And those are really
hard for me to get the same amounts and
the same shape twice. So I'm going to
duplicate this one. And I'm going to
flip horizontally. And of course change
the angle a bit. So a little bit like here. Like so. And maybe he can have a little
bit more shadow on this side of its poles. I think that's possible. I can put this one together. So I go back to this pose. Let me see out error
all the way up here. And I create a new
layer so I can always remove that layer when
I'm not happy with that. Popping more out, maybe a little bit more
shadow on it's false as well. I'm creating a clipping
mask on top of this one. So I took the dark pink, maybe a little bit darker, smaller size, maybe even darker, maybe even lighter up here. Perhaps I choose
white for this one. Go on top of this. I do this now in
different layers because I'm not sure if I'm
will be liking it. So just playing around with all the colors and
things I want to do. The more darker light you give
it the more they pop out. So that's why I did that. And I think his head could
also have more lightness now. So I'm turning back to that layer off the head
with a lighter shadow. So I'm going to
create a new layer. Also using white. Now. That's a little bit, maybe now I lead the shadows behind the
cats a little bit darker. You can change the
Gaussian blur, but you still can change and
play with the opacity a bit. So this was part
one of this class. Let an animal pop
out of your iPads.
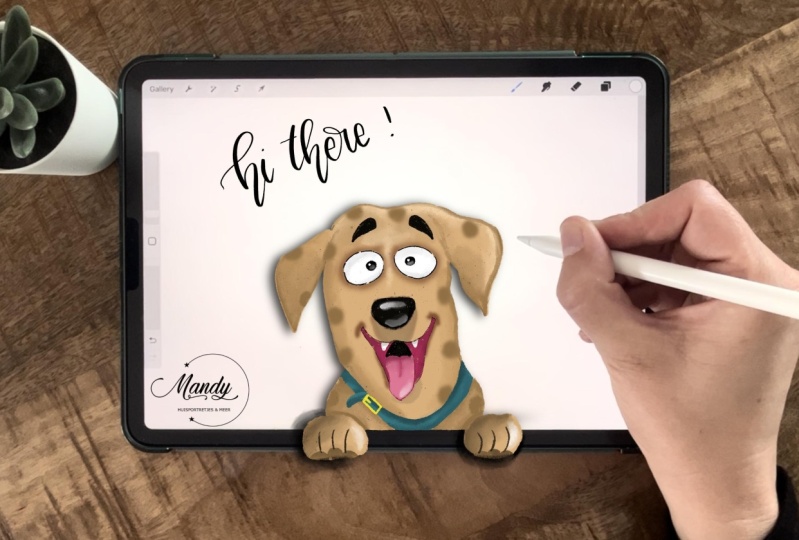
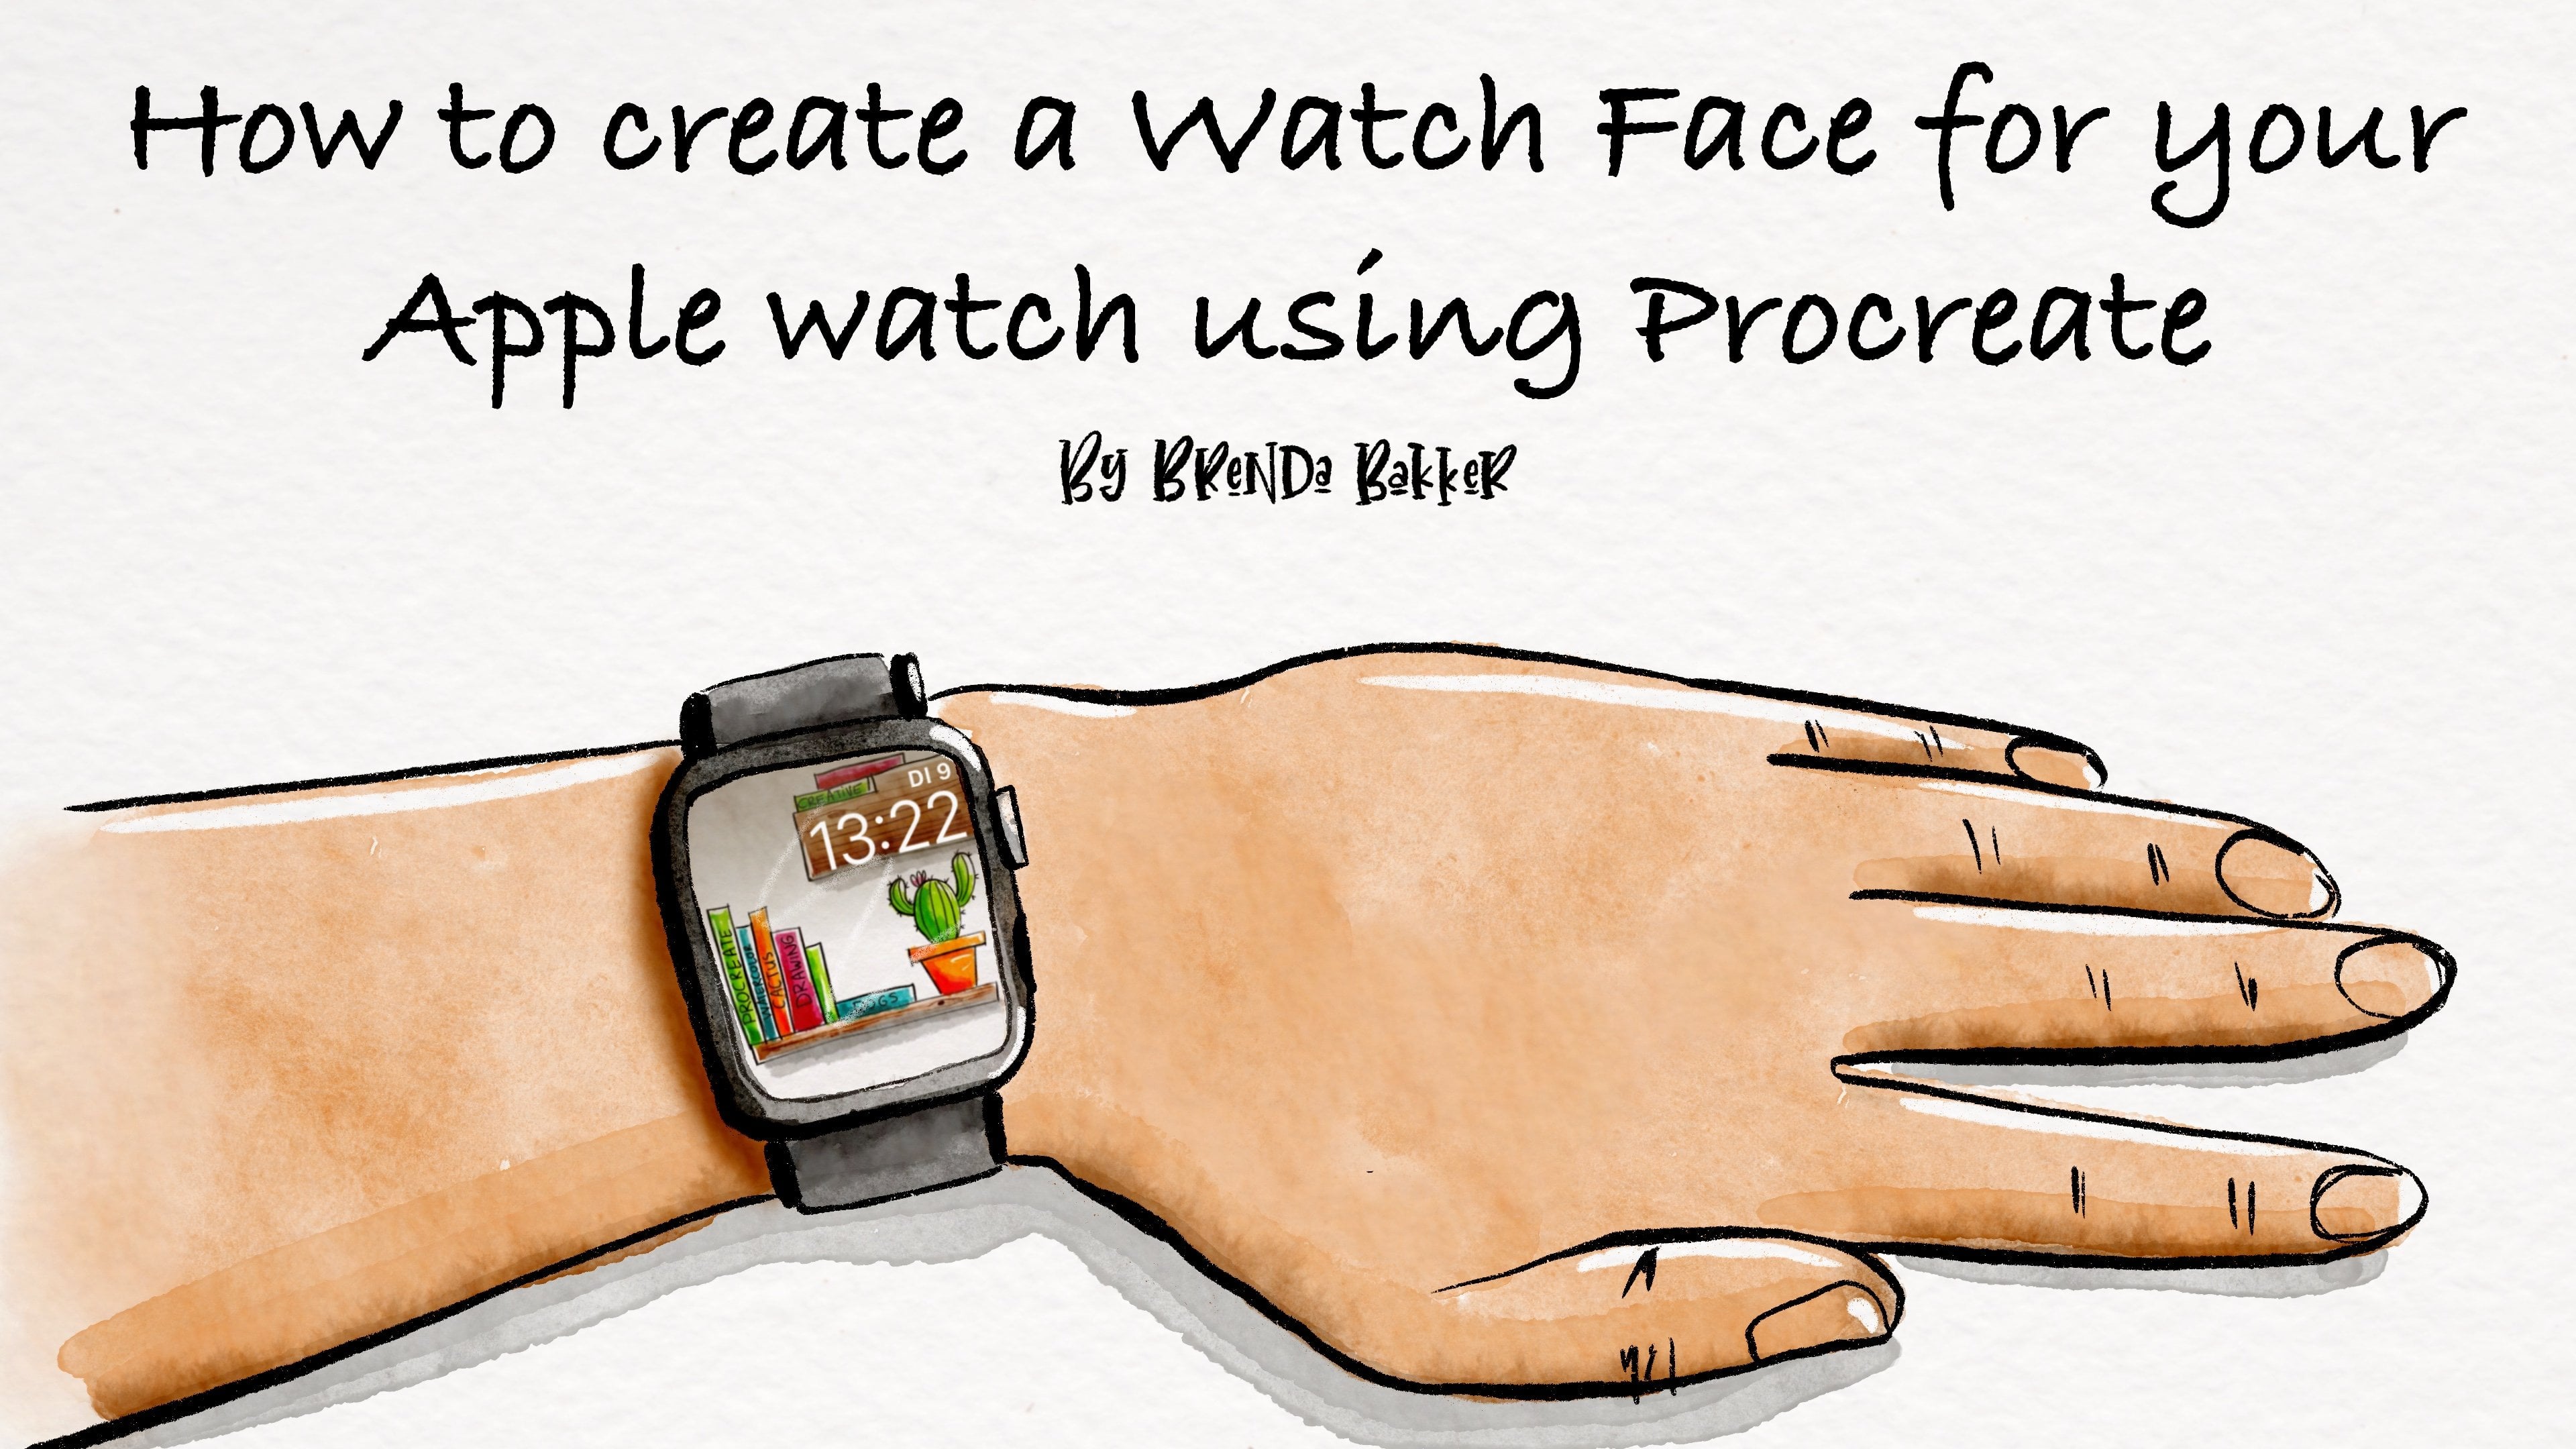
12. Importing a finished art work and using layer mask: But what if I have a
mock-up like this? I want to use with both my hands on it and it looks
like I'm drawing, but I have already
made my drawing. That's easy. And I'm going to show you how
this just a little trick. I'm going to search for a photo. I'm going to add,
insert a photo. I've chosen this one for this
because it's fully colored. So I can show you
exactly what I mean. This is now on a new layer and I'm going to
resize this a bit. Maybe I lower the opacity
a little bit first so I can have a little
bit of a see-through. And I can choose to
resize it to about, approximately the size
I need for my iPad. And you will see it doesn't fit because well the
sizes are different. So I can distort
this a little bit. I can drag this to the corners. And then it would fit. Almost. Make it fits. We make it fit. So I think this will be looking. Okay, so let's get to
see how it looks here. It doesn't completely
look okay here. Maybe one more fit. Yeah, I think we can
do with it for now. But now my finger is
underneath it and that is not correctly because
now it's just a picture. Put on a picture. This is where we can
use a layer mask. And the layer mask
is often asked me, what is a layer mask? For me, a layer mask, I can explain it
the most simply. It's an eraser. But it's a temporary
eraser because when I make a mistake or I want to make some changes afterwards, I can still redo that without painting the
whole picture again. This is what I'm going to do. I'm going to use this as a mask. So I click mask and you
can see it pops up here. And my color is also mostly changing to black or
white or something ray. Mostly we will be
working with black. You see, now the whole picture is feasible and
this is all white. When I'm going to draw
with black on this layer, it will temporary erased area
you'll see in the painting. So for the easy work, I'm going to lower the
opacity so I can see my hand because my hint
is going to be on top. So I have to erase this part in order to get
my hand visible again. But I want to use it
as a temporary razor. Why do I not permanently erased? Because maybe when I want to change the size or something, I can easily get it back
with withdrawing with white. Again, I'm going to
draw with black. And I'm going to use
a mono line brush for this one because I want it to be opaque and no texture
at all because my fingers are real and
half now I have wrinkles. That's my only texture. But otherwise, my hand isn't having any
texture on it himself. It's not drawn. Well, just my hint. So I'm choosing a mono line
or for debts at a small size. Yeah, Like this, a little
bit of controllable. And I'm going to
draw on this layer, the mosque layered, That's
the dark black blue. So I'm going with black, tracing a little bit
with my fingers. My nails just do the
outline, the pencil. And when I did the outline, I can increase the
size. So it's easy. I don't have a lot of patients, so I want to go with
ECS as fast as I can. Now. I can bump up the size again and again. And when I create a
full opacity again, It's now as I've been drawing
on top of the painting, so I can fit any
painting I already pre-made and put it in
here, thanks to a mosque. When I made a mistake,
like for instance, if I went too far out
of the lines like this, all I have to do is change
to white again, pure white. And go over it
again and instantly reveals again what's
lying underneath there. So that's why we won't erase. But just use a mosque
for this piece. I don't use a mosque often, but it's so easy to know how it works because
sometimes you do need it. Here I can see I missed a spot. So I hope you liked
this small bonus. Use overlay layer mask is very easy once you understand
how it works. In this class, I've
only shown you how you can make a
mock-up of your iPads. But you can make
mockups of everything. For instance, you can make a mock-up of a front
picture of a plant. Well, this is actually fake because of my plants
will dry out. But you can create done, you're painting on a bot
or anything you like. Or you can use a mockup from
your phone or your well, almost anything you like, you can use that as a mock-up. After all, it should be fun and you can explore everything, so have fun with everything
you learned in class. So I want you for a
project for this class. I actually, I want you to make two projects for this class. One with a little drawing
that pops out of your iPads. One like this, where you have been forced to
using a layer mask. So I hope you liked it. I hope you will
post your projects in the project section
below this class because I end every other
students would love to see what you created out of this course after you
follow this class, I hope you liked it. I hope you have as much fun as I am out of this
one because I love to show this off on my Instagram
and you can do as well. And please do tag me in your Instagram post
so I can see it as well.
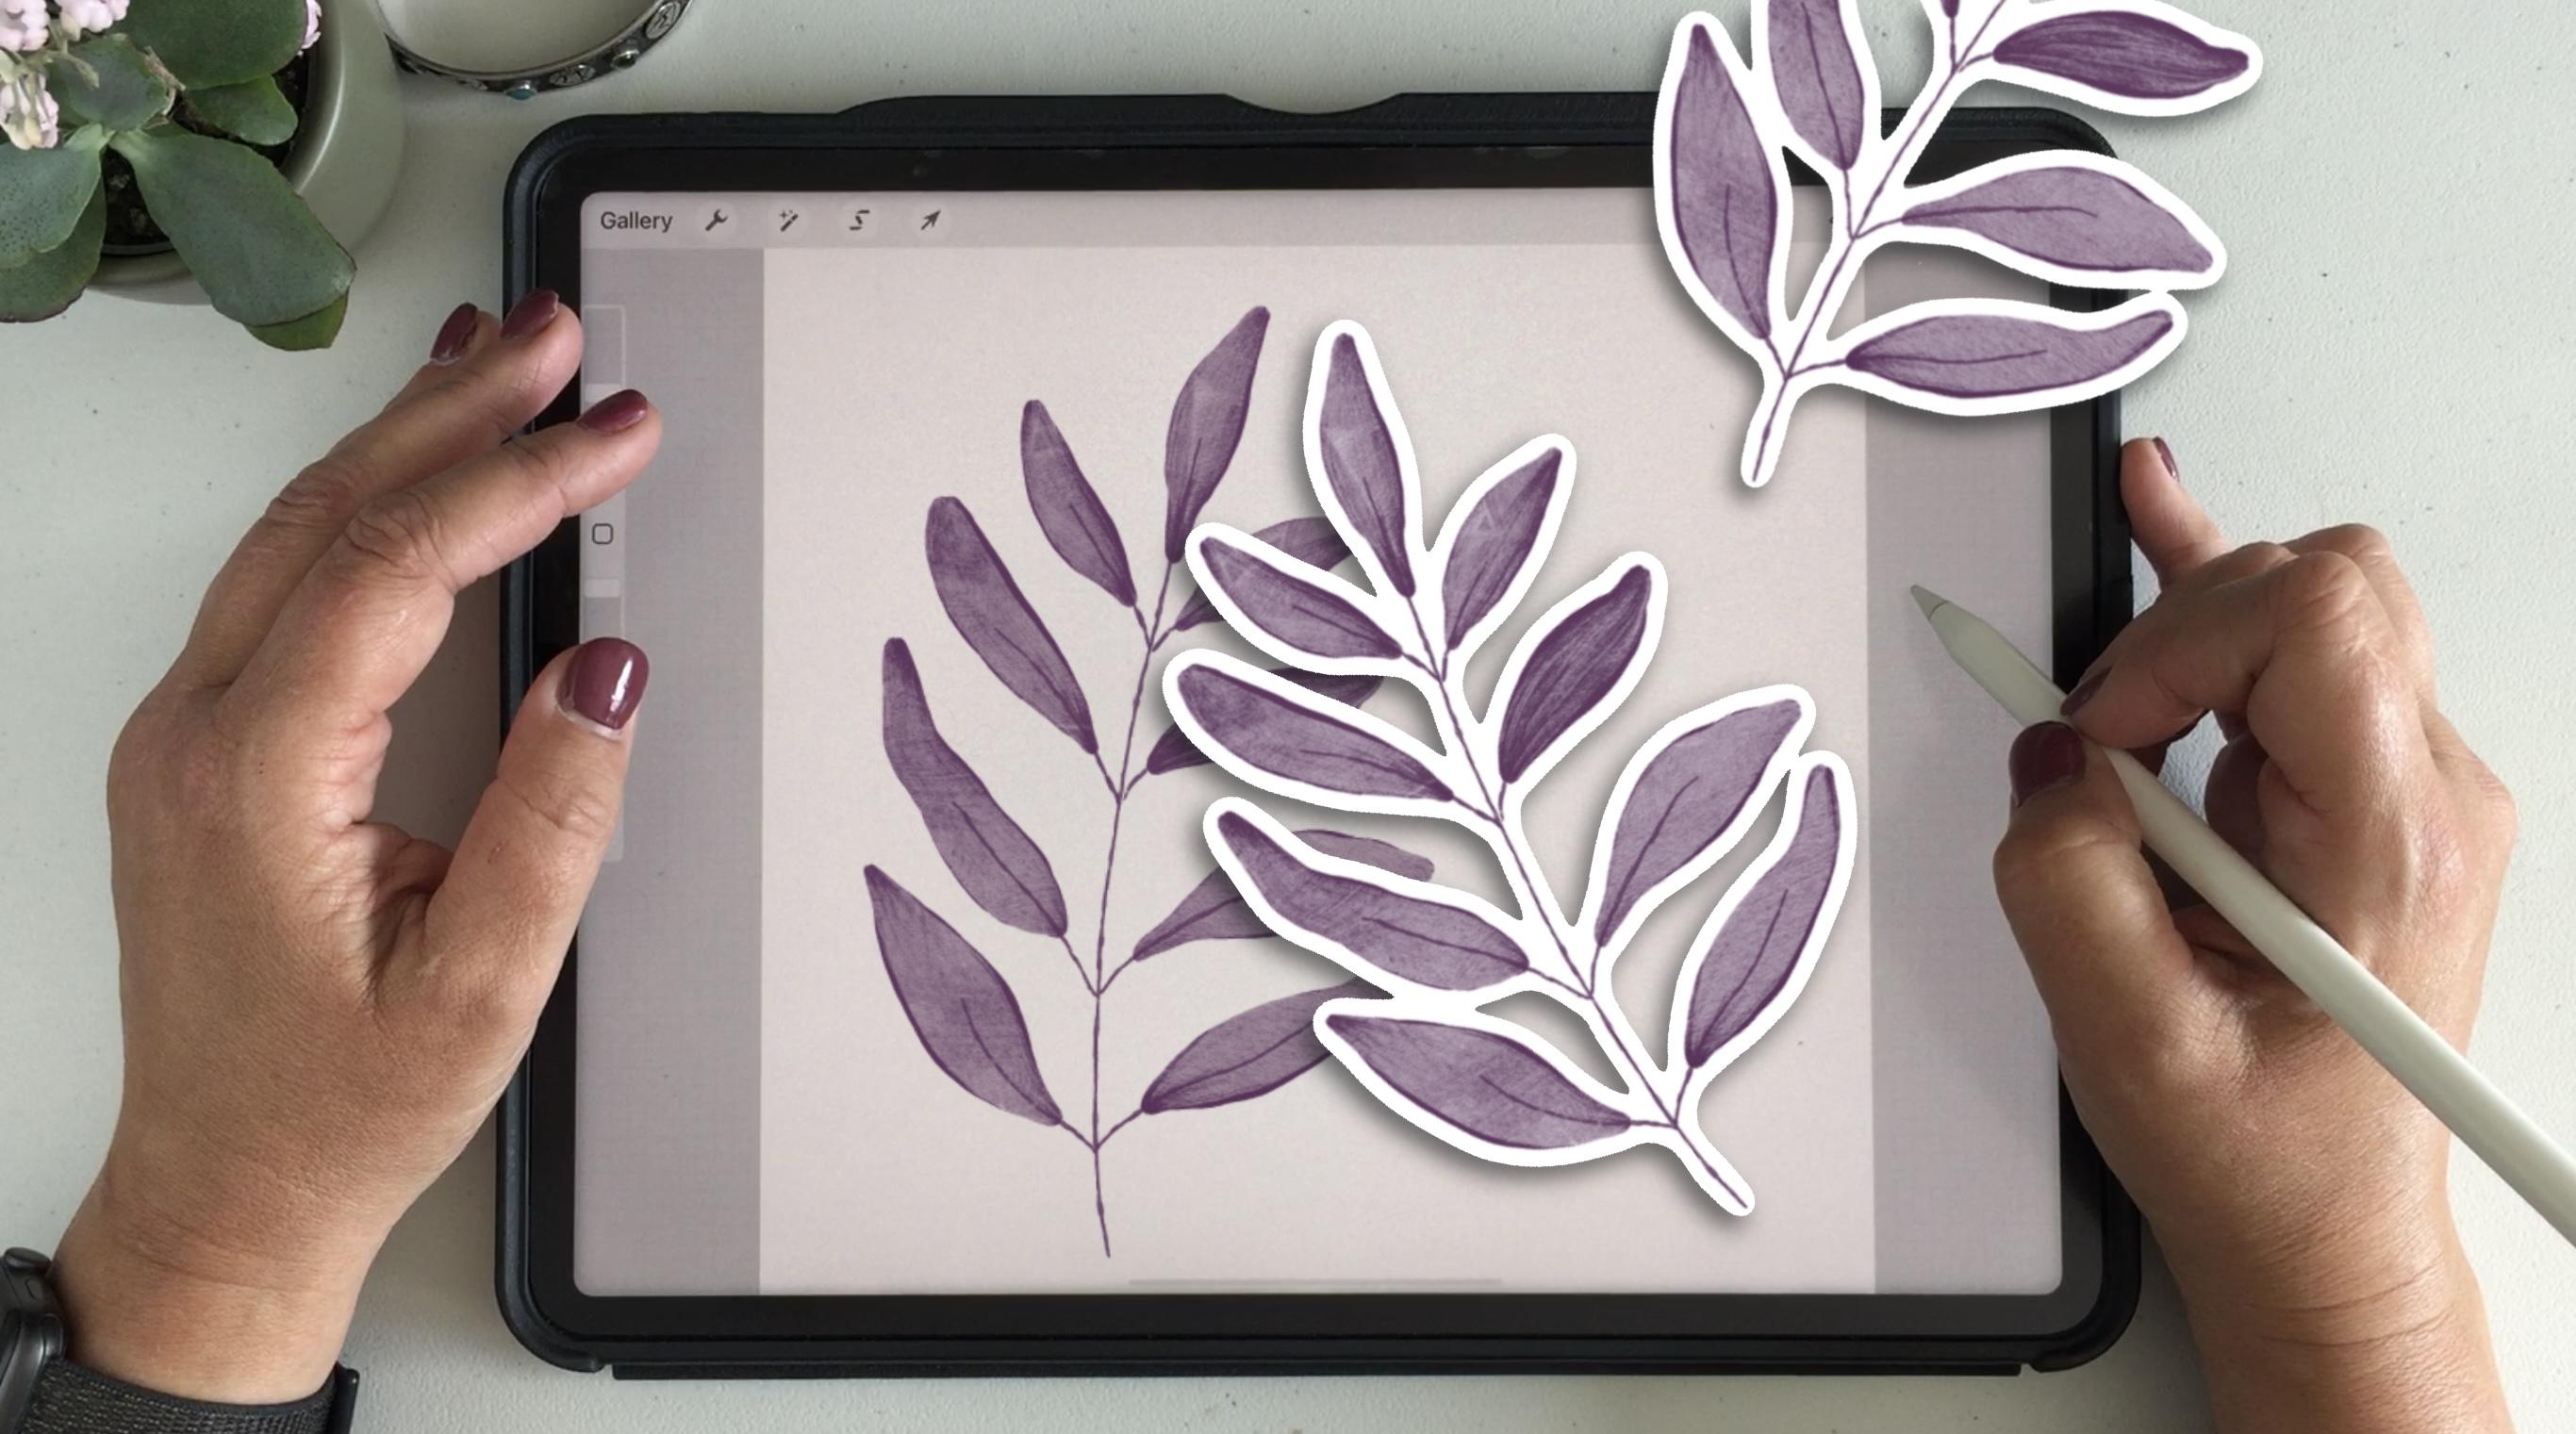
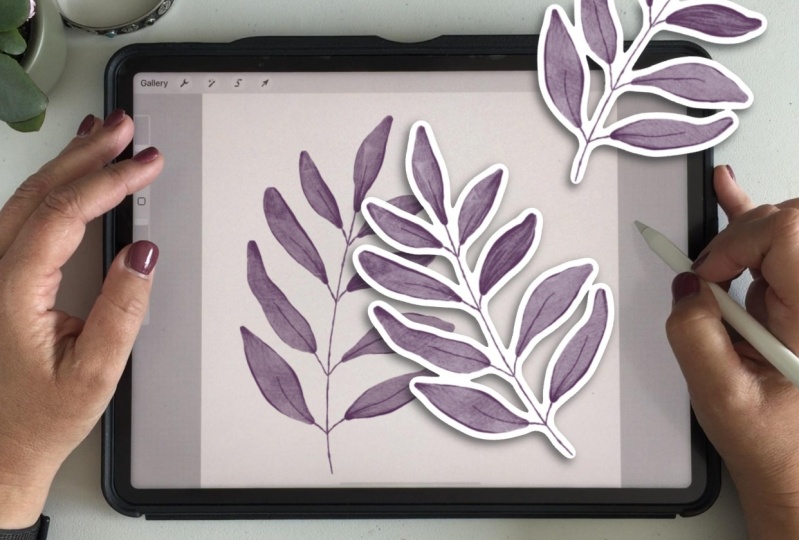
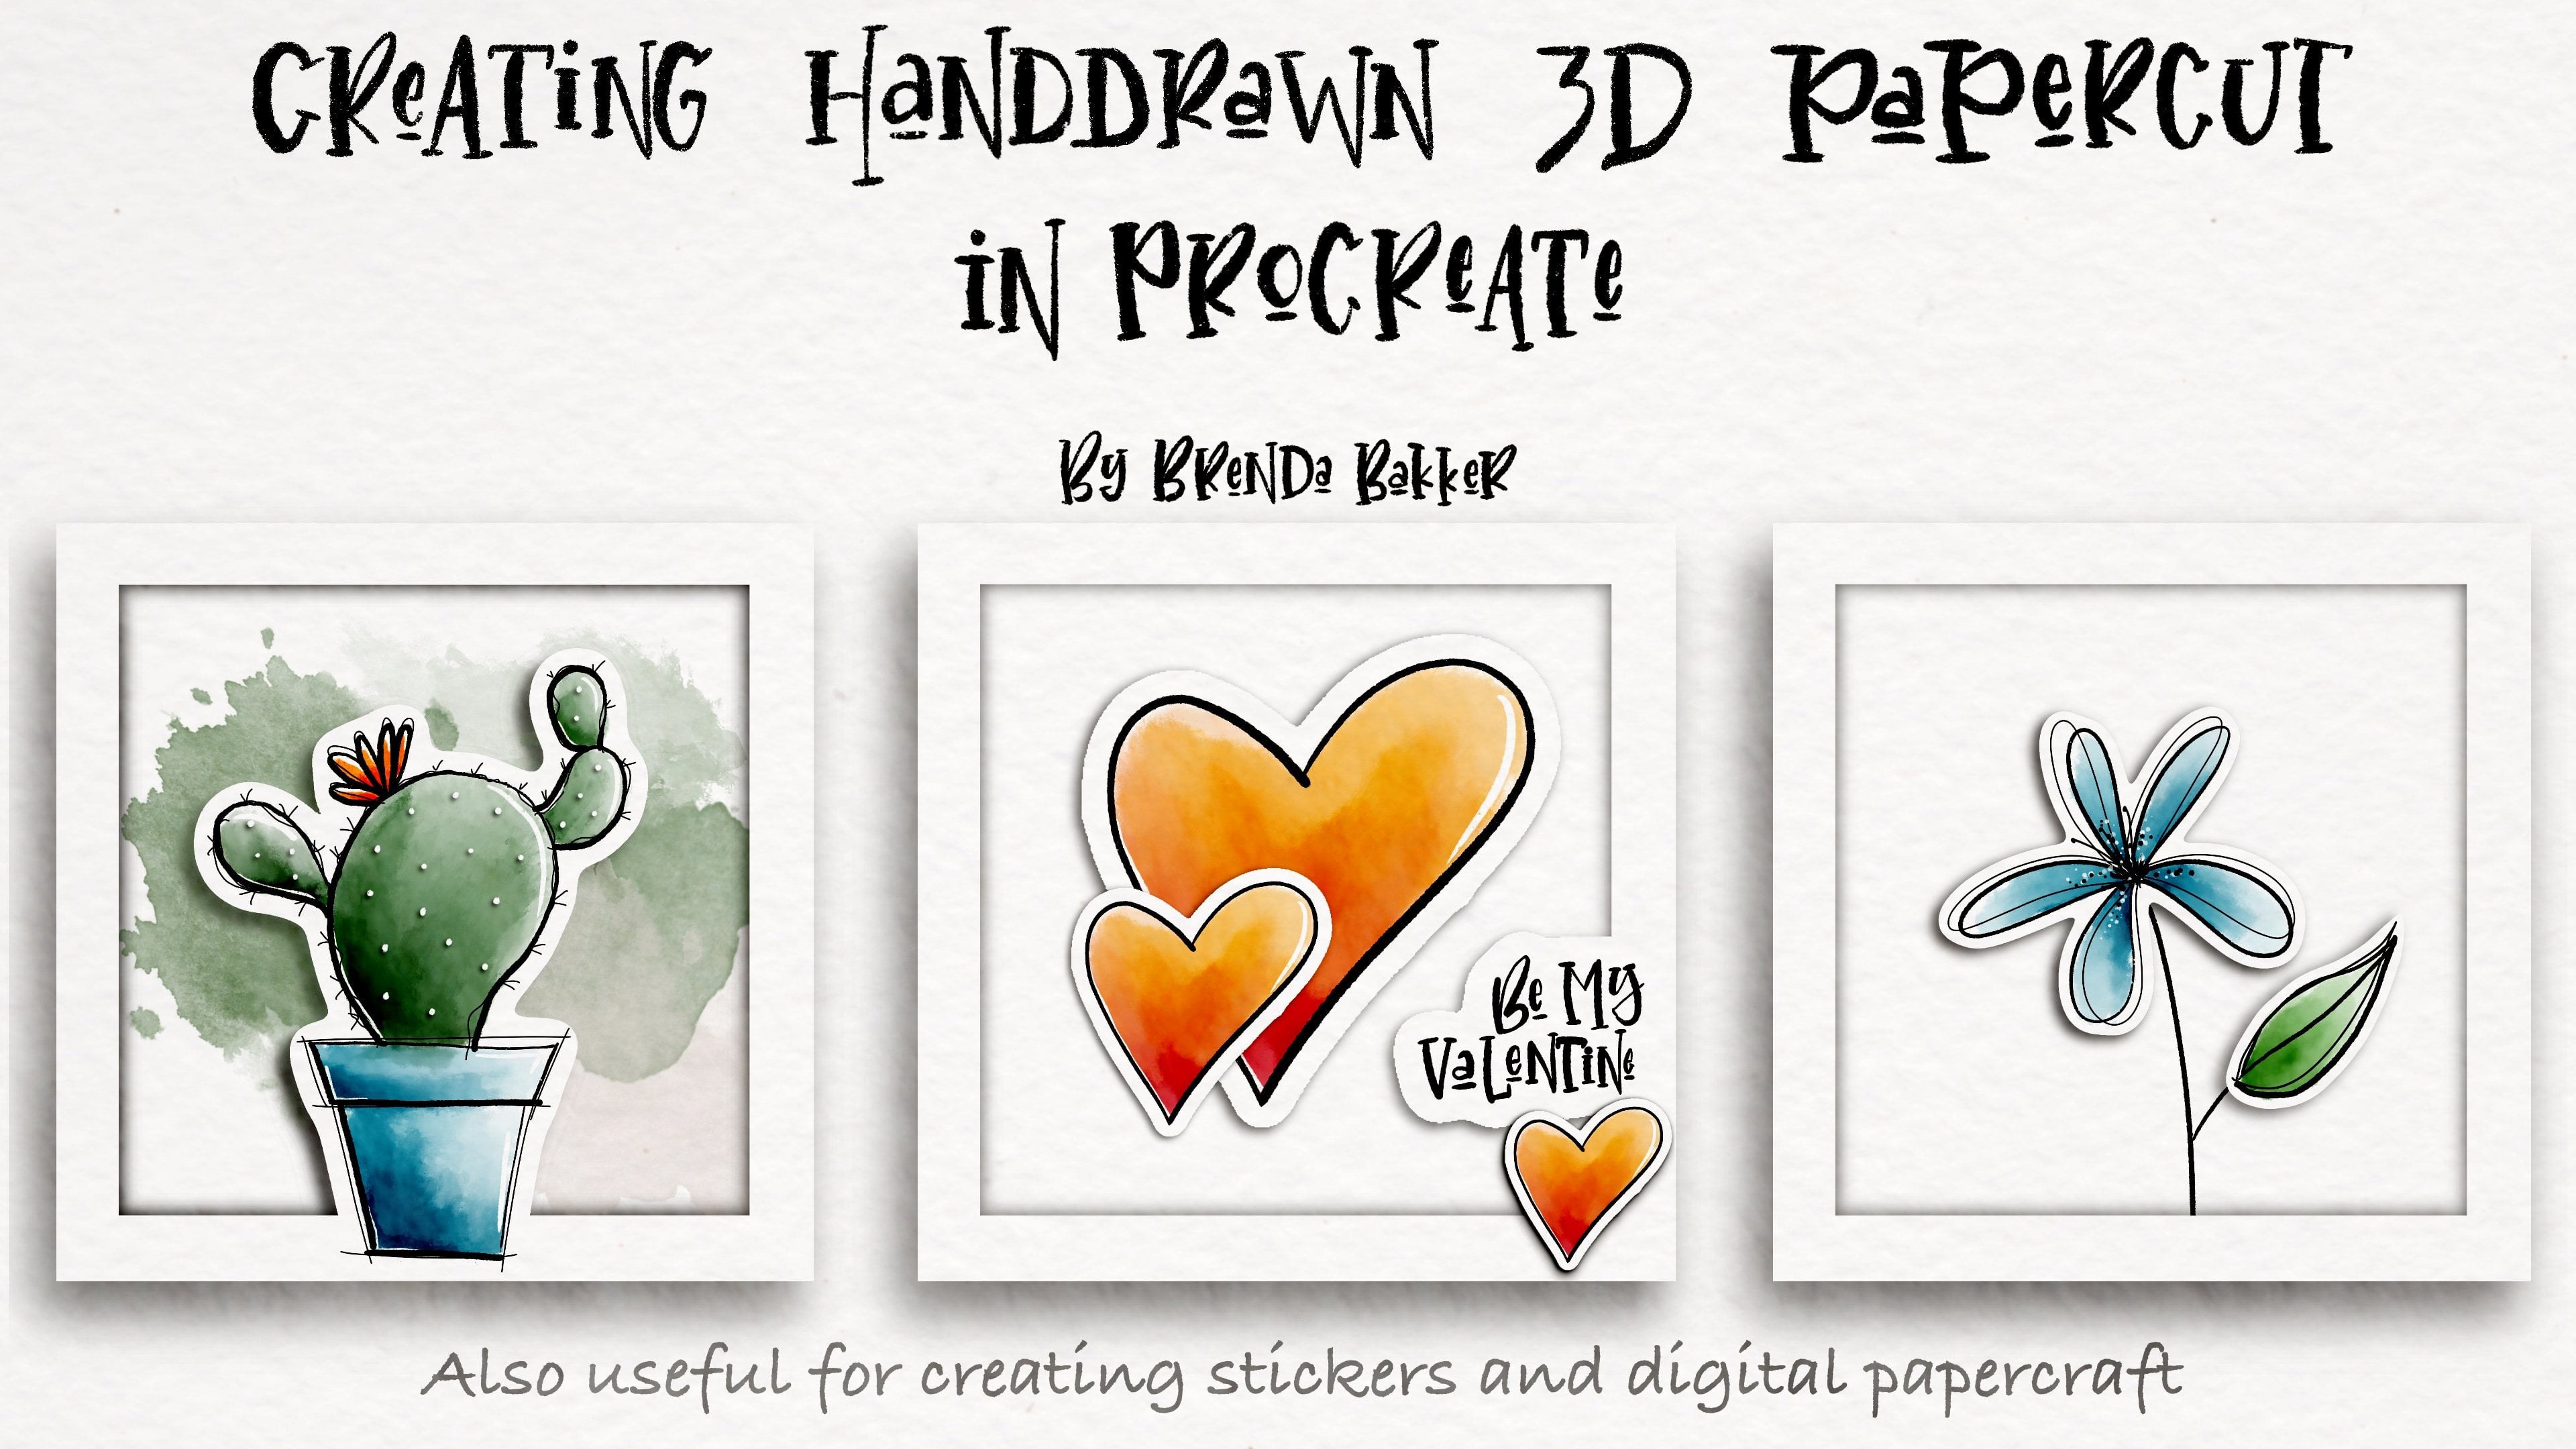
13. Mock up drawn sticker effect: I wanted to give you
another fun bonus. For this one, I took a
different mockup and I already created a drawing
of watercolor leaf. And you can draw any
shape, anything you like. The fun part is we're going to create stickers
out of this one, and then we're going to put
them outside of the iPad. So first, I'm going
to duplicate it twice because I'm going to
do two different parts. So for one, I'm going to put off and we're going to
work with this one. So for this one, I'm going to move it. We can see more clearly
what we are doing. So for this one, what I'm going to do is I'm
going to take selection automatic to outside
of the leaf. I'm going to invert it. So it's selected
everything outside. I'm going to feather
that a little bit. And now you see a blue line. And now I want to
give him a shape. Like if it could be a
white outline in there, that's what you can think of. Like it will be a sticker. So then I'm going to
choose my color white. I'm going to a layer below
that one we're working with. And I'm choosing Fill layer. Now you see a soft, smooth edge around it, but I want it to be more heart. So what I'm going to do now
is do the selection again, automatically go outside, tip on these ones because there are some open space that
was hidden behind it. I'm going to invert it again. And I'm choosing Fill Layer. And now it's got a
heart white outline. I didn't need this
one because I'm going to copy this
group right away. This is what I want to use. I'm going to get
rid of this one. So this is my spare one here. So that will be remaining
as a drawing on my iPad. This is the one
I'm going to move. But first, I'm going to group these so I can move the
whole group at once. So I want it to look
like a loose sticker. So now I can have snapping on That's not very
convenient for this. I want to move it
like I want to. So one is laying on
top of this one. Maybe like so using the same I have to keep
him at the same size. So I'm just going to move
it outside like this. So but now it needs shadow. So what I'm going to do is
I'm duplicating this one. Selecting the one at the
bottom, choosing black. Select this one and
choose Fill layer. Now I've got a black
background underneath it. Now I can move
that a little bit. Tough to Gaussian blur and slide it a little bit so
it will be slightly fake. You can see the difference
that it makes by just sliding outside of this one and it's
got to be believable on top. So remember this is 7% because we're going
to use that again. This is what I like, maybe a little bit of opacity. So I can see a little
bit of shadow, but not too much. It must be believable. So we've got to 7% of the Gaussian Blur and I'm
going to do the opacity at 59. I hope I can remember it. I write it down for myself. 759% opacity. The reason why I
want to do that, because I'm going to
duplicate this group now. I have two of these, and this is the one we just did. I'm moving it a
little bit smaller, so I'm working with this one. And now I can move the whole group while the
whole group is selected. Now, I can move this
one a little bit. But now as I'm
changing the angle, you can see my shadow
is no longer fitting because my light will
come from a pair and now my shadows will
be on the outside. So I won't, I don't want to
move the cheddar with me. So I'm going to put this off. I will keep it there. But it's not feasible right now. And I'm going to move
this one this way, not changing the size. I'm just letting this
pop out of the screen so it will be conveniently
lying outside. And now I'm going to
duplicate this one again. I'm doing the same thing, but I'm moving the shadow
to the same size and the same amount what we did with the one below
with this piece. So I'm going to select
this one again, select Fill layer with black. Moving it a little
bit to this part. And remember the seven
percentage of Gaussian Blur? And that's only because I did the other one
with seven per cent. And the opacity was at 59. So I'm changing that as well. So here we have a
believable sticker mock-up. I felt this is so much fun
to not share it with you so you can do any
drawing you like, but I already made this. So keep it simple. If you have an open shapes here, you can see with the
sticker, it's close. And that's why we had to open these extra gaps by the
selection, we just did. So I hope you had fun with this short bonus class
and have fun creating.
14. Thank you: So thank you for watching this
class until the very end. I hope you had fun and I hope
you have learned something. We've been using a clone tool, we've been using layer mask. Now you can create
your own mockup for your paintings in Procreate. And so you have a
fun picture to show. Please do leave me a review
on the end of this class, so me and other students will know what you think
about this class. Also, don't forget
to post your project in the projects and resources
section of this class. Everybody would like to
see what you made of it. And if you're on Instagram, please tag me because I would love to see what you
make out of this class. And perhaps I can show it in my stories on Instagram for others to see what
you've created. So thanks again for watching and hope to see you next time. Bye.
 Brenda Bakker, Sharing my skills is sharing my joy