Transcripts
1. Class Intro: Hi there creative friends. Welcome to class. I'm Sarah. I'm an artist and designer,
and in this class, I'll show you one of
the easiest ways to create plaid patterns
in the Procreate App. So grab your iPad and
let's get started.
2. Class Download: I'm going to show you how to download the class
color palette. And something important to know is that you
will need to be on a web browser and not the Skillshare app to
access the class download. So right below this video, you will go to the Project
and Resources tab. You will scroll down
to your swatches file. Now I will tap on my Winter
plat swatch file, save. And you can save it here on your files or your Google Drive. I'm going to save
it to my files. Now I will tap
open in and select Procreate and it will automatically import
into the Procreate app. I usually places the
palette at the very bottom, so we can just tap
on the palette and drag it all the way
up to the very top. Now that we have our palette, we are ready to begin.
3. Create A Plaid Pattern: So we're going to
start off by creating a canvas that is 12 " by 12 ". And I'll just make
sure my DPI is at 300 and our color profile RGB, and we can just
tap on the check. So I've included a color palette if you'd like to follow along, but please feel free to use any colors you'd
like for your plats. I'm going to start
off by prepping my canvas and we'll just
turn on some drawing guides. So under your actions
in the Canvas, we will just turn on
our drawing guides, and then I'm going
to edit my grid. I want it to be a little bigger. Now, there's no
set size on this. I just want it a little
bigger because I'll be using my grid as a guide. Something like this and then
we can tap on the check. And something I have found
very helpful when creating these plats is turning
on drawing a cyst. And the reason I like drawing a cyst is that when
you're drawing, you don't have to
drag down a line, tap it till it snaps to
make it be straight. With drawing a cyst, it doesn't matter what way you try to draw. It will always keep your lines
vertically and horizontal, which is so nice and easy
for these plait patterns. So I'll just clear that.
And for this project, we'll be using the
monoline brush, and that is under
the calligraphy tab, and it comes with
the Procreate app. And I'm going to have pen
my brush size at MAX. So now that we have
everything set up, we have our palette, our
brush, and our drawing guides. We can begin creating our plat. Our first layer will be
our background color. I'm going to just use
this light cream color, and I will drag and drop the
color in to fill the canvas. I'm going to create
a new layer for each color so then it's
easy to recolor later. For our first color, I'll create a new layer. Again, I'm going to make
sure my drawing assist is turned on for this color, I'm going to use this
darker navy blue color. So now I will begin by
drawing some lines, and just keep in mind that
the more lines you draw, the busier your plat will be. So if you want a plat that has a lot of lines and
it's very dense, keep creating more lines. If you want something that's
cleaner and less busy, just keep in mind that you
will want to use less lines. So that's my first line. I want a thicker stripe, so I created two lines, and I'm going to
just fill that in. And then I want a thinner
line on this side. I think that's all I'm going
to do for the navy blue. Now I'll create a new
layer for my second color. Again, I'm just going to
turn on drawing a cyst. For this layer, I think I will pick this light
icy blue color. Now we can just add
in some more lines. I think we'll add a
thinner one here, and then one right here. And I'm going to stop
right here and test it, and I can always come
back and add more lines. That's why we created two
separate layers for our colors. So then it's easy to
come back if we want to add more for one
particular color. So I'll just make sure
that both of my lines are grouped because we're going to create this plat by creating vertical and horizontal lines. So these will be
our vertical lines, and we're going to duplicate our group to create
the horizontal lines. So now that we have
our two line groups, I'm going to grab the top layer, the top group with
the two layers in it, and I'm going to rotate that
vertically, horizontally. So I will select it, and I'm
going to rotate 452 times. So it's perfectly
now horizontal. And for this step, we're
going to make sure our snapping and
magnetics are turned on. And you can place we'll make sure we're
centered in the middle. But you can place these
lines high up on top, lower at the bottom, or
right in the center. That's totally up to you. And you can try different
variations to see how it looks. For this project, I'm going to put it right in the center. I will deselect so that
right there is our plat. But now I want to play
with adding some textures. You can see where
they cross over. It's just very solid and
there's really no depth to it. So I will only be playing
with my horizontal lines to change the opacity and we can either use opacity or
our blending modes. I'm going to start
with my navy blue. And for the navy blue,
I think I'm just going to bring down the
opacity on this one. And you can try it and see kind of where
you're liking it. So I think I'm going
to make that at 80%. And as you can see, there is now some variation to our stripes. And now for the light blue, I think I'm going to try
one of the blending modes, and there are a lot of blending modes you can try out and see which ones you like. One of my favorites is multiply. There's all kinds of fun ones. We'll stick with multiply,
and I really liking that. We can see if we want to
play with the opacity a bit. And I think I'll
put that at 96%. And as you can see, now there's some beautiful color variation that's happening here and
different tones and tints. So I really like that. I think I'm going
to stick with this. We can test it, and we can always come back
later if we don't like a color or the blending
mode and change it. So I'm going to make sure
I'm on my very top layer. And with three fingers,
I'm going to swipe down, copy all three fingers, swipe down and paste. Now it has given us one flattened seamless repeating
tile that we can test. So I'm going to change
my drawing guides so it's a quadrant, so we can easily snap
them into place. I'll just select quadrant and now we can test our
repeating pattern tile. So we'll select
the entire thing. I'll grab little node and bring it all the way until
it snaps in place. And then we will just duplicate that tile to fill in
the entire canvas. This is where we will
see if we want to make any changes and also see if this pattern
repeats seamlessly. I will just merge all my
test swatches together and I'll turn off my guides
just to make sure there are no weird hairlines
or gaps anywhere. That looks great. As you can see, I'm not seeing any weird hairlines
or irregularities. This pattern repeats seamlessly. I think that's such a
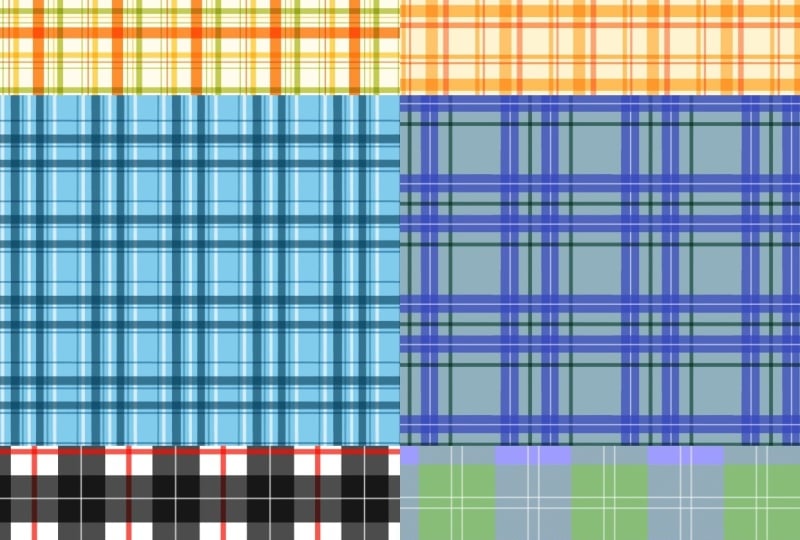
beautiful plait pattern. That, my friends, is one of the easiest and quickest ways to create plait patterns
in the Procreate app.
4. More Plaids Patterns: In this next lesson, we will create some varieties of plats. So we will begin the same way. We will create a new canvas
12 " by 12 " at 300 DPI, and our color
profile will be RGB. We're going to do the
exact same thing. But in this lesson,
we're just going to have fun trying different styles. So the neat thing
about these plats is that they never really
come out the same. They're always unique
and different, since you place lines in different spots and you can try different blending modes
and color palettes. So it's so fun to just get one color palette and create
a whole collection of plats from just that one palette and variation of where
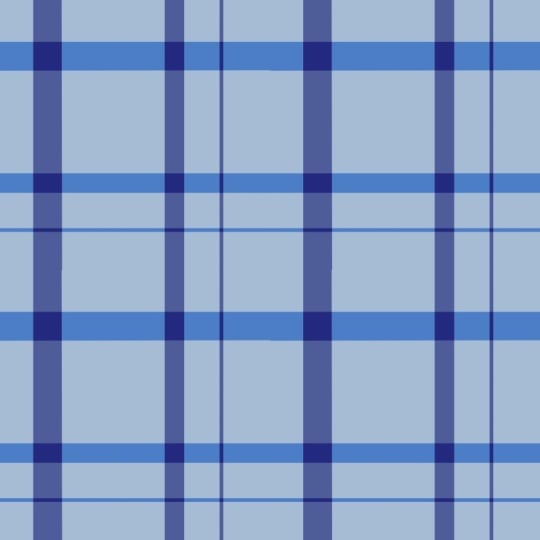
you place your lines. So for this plaid, I think we'll try
a dark background. I'll just make sure
I'm on a new layer. I'll fill in my background, and then I will
create a new layer. Again, we'll turn on
our drawing assist. Now we can just
start by drawing in some lines and just try it out. Remember, the more
stripes you add in, the busier it will be. For this one, maybe we can try something a
little more busy. The last thing we did was
a little more minimal. And just have fun with
this and play with the different color variations. So I'm always going to create a new layer for a new color. So that was my light blue. Now I'm going to
add a cream color, so I'll make sure
I get a new layer, turn on drawing assist, and now we can continue
adding our lines. And make sure you
start at the very top and bring it all the
way down because you don't want there to be any gaps or it will not
repeat seamlessly. So the line has to stretch all the way from the
top to the bottom. And since it's one solid line, you don't need to worry about blending it in to
create a seamless. It already is seamless because the lines are just straight. So let's try this and
see how it looks. So again, I will
group my two lines, my two vertical line groups, and we will duplicate that. And now we will
rotate at 45 degrees. Make sure our snapping
and magnetics are turned on so we can snap
it right in the middle. But this time, I'm going to
bring it up a bit and see how that looks. So
that looks good. And now, again, I'm going to
play with the color modes. And this time, I'm going to use multiply for my light blue. I'm really liking that
effect it's giving. And for my cream color, I think I'll just bring the
opacity down a little bit. I'll put it at 80. Now it's the best part, we get
to test our plaid pattern. So again, I'm going to
make sure I'm at the top. The fingers down, swipe down, copy all, three fingers
swipe down and paste. And again, I will
turn on my quadrant guides just so we know we're right, snapping
it in the middle. I will grab the
little note and just bring it all the way
till it snaps in place. And now we'll just
fill our canvas. And that looks great. We can turn off our guides, make sure everything
is repeating seamlessly and
everything looks great. So now we have our
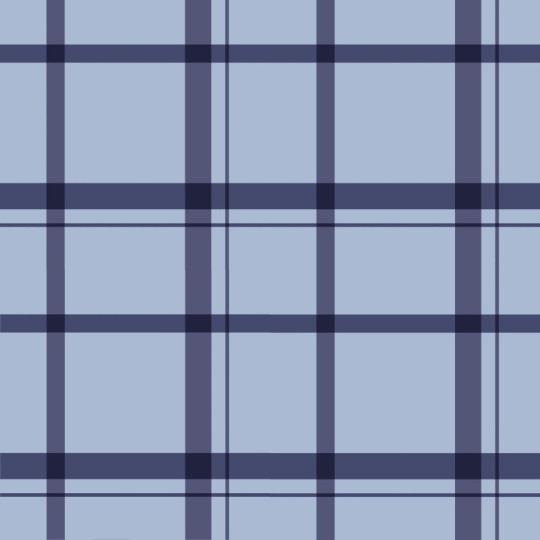
second plaid pattern. And we'll create one
more, and this time, let's create more
of a monochromatic. So again, we will
create our Canvas at 12 " by 12 ", 300 DPI. Going to turn my guides on For the background
on this one, I think I'm going
to pick this light, icy blue color,
or drag and drop, and then I'll create a brand new layer and we will turn on our drawing assist I'm going
to be using for these lines, I'm only going to
be using the navy blue because I
want it to be very monochromatic and I'll bring variation in with
the blending modes. So I will just start
creating some lines, make sure you bring them all the way from the top
and drag them in. I want this one
not to be as busy. I want it to be more
simple and clean. So I'm going to leave it at
that and see where we are. Now I will just duplicate it, rotate it 45 degrees twice, and this one I'm going to
snap right in the middle. I'll deselect it. Now I can play with we can try
seeing how it looks with blending mode
and with the opacity. I'm going to just
bring down the opacity and see how that looks. That looks good. Now let me
try putting it on multiply. I think I'm liking
multiply a little better, but maybe putting a multiply and bringing down the
opacity to about 90%. And I think that's where
I'm happy with it. So now we get to test it. Make sure we're on the
layer right at the top, three fingers wiped down, copy all, three fingers
wiped down, and paste. I will turn on my
quadrant guides. And we will just
test our pattern. Now turn off my guides, make sure there's no
weird gaps or anything. And that looks so beautiful. This would be so beautiful on a furry minky throw blanket. So that is how you create
plaid patterns in Procreate. And just remember
to play around with the color palettes and line and where you
want your lines, line thicknesses, where you place your horizontal
stripes higher up, lower down in the middle,
and just have fun with it. Challenge yourself and pick one palette and see
how many plaids you can create from just
that one color palette. In the next lesson,
I'll show you some examples of how you can
use your plaid patterns.
5. Pattern File Uses: This lesson, I will
show you how to save your pattern file and
some of the things you can create with
your plaid designs. So now that we have our seamless
repeating pattern tile, we can save it. So we will go to
our actions panel, tap on Share, and here are all the file types
you can save it as. My favorite is JPG, so I will tap on JPG. And here's where you can save
it in many different ways. You can send it to your dropbox. You can airdrop it to your
laptop or just save it to your image library
here on the iPad. That's my personal favorite one. Once you have it saved, you can upload directly to your sites like print
on demand sites, spoon flower or print it out to create all
kinds of fun projects. I want to show you here
some of the things you can create using
your plaid designs. The possibilities
are truly endless. So here is just some
beautiful fabric. You can also create my
personal favorite wallpapers, and I would love seeing this
in a baby nursery room. You can also create all kinds of stationary and notebook covers. It's just amazing all
the things you can create using one
seamless pattern file. The possibilities
truly are endless.
6. Final Thoughts : Thank you so much for
joining me in this class. I hope you have fun creating
all kinds of plaid patterns. Be sure to share your work
in the project gallery. I absolutely love seeing all
your beautiful projects. If you have any questions, feel free to reach out
in the discussions tab. I'm always happy to help. And if you enjoyed the class, I'd be so grateful if
you left a kind review. Your feedback
supports my work and helps other students
discover the class. Thanks again for joining me. I can't wait to see
what you create.
 Sarah Raquel, Artist & Designer