Transcripts
1. Welcome to Class!: In a world of digital content, social media, email, and text, greeting cards may feel
like a thing of the past, but I'm here to tell you
they're must definitely not. In fact, I would argue they
are even more important and more meaningful
now than ever. Handwritten greeting
cards are not only a special thoughtful way to show your loved ones you're
thinking about them, they're also a product that
will always be in demand for holidays and special
occasions throughout the year. Whether you want to launch
a successful online shop or simply learn how to
make greeting cards to give to your
family and friends, you're in the right class. My name is Priya from Petals by Priya
Watercolor Designs, and I'm a full-time artist
based in Honolulu, Hawaii. In addition to teaching
classes like this one, I also run an online
paper goods shop where I sell art prints,
greeting cards, stickers, and wholesale my products to
retail stores around the US. My online shop
started pretty small when I was just selling
fine art prints from the beginning. But when I added greeting
cards to my product line, that's when my business
really started to take off. In over the years, I've
sold thousands of cards to individual customers
and retailers. I won't lie, it took me
quite a while to fine tune my process for designing and
printing cards in-house. But now I have an organized
streamlined process and that's what I'll be sharing
with you inside the class. The class will cover
everything you need to know to start creating greeting
cards on your own, including a thorough
supply list, card planning and preparation, designing a backside that
represents your brand, designing a
captivating front side including artwork
creation and selection, using mockups to visualize
your greeting card design, setting up your print files and printer settings
in two formats depending on your
printers capabilities, test printing and making
color adjustments, scoring and trimming your card, choosing envelopes and
packaging for selling online, organizing your files for efficient card making
down the road, and tips for setting
up an online shop and getting into wholesale. By the time you're
done with this class, you'll be able to
design, prints, and package custom
greeting cards all from the comfort of
your own home or studio, and you'll be ready to
set up an online shop or wholesale catalog
if your end goal is to be able to sell
your greeting cards. It's a lot to cover, but I'll be going
through everything step-by-step in real-time so you can follow
along at your own pace and feel confident
every step of the way. One important note
before we get started. This class is focused primarily on the file
setup, printing, and execution of the
greeting cards with less of an emphasis on the actual
artwork and design aspect. A basic understanding of Photoshop functions
is recommended. If you're new to Photoshop, you can learn all the
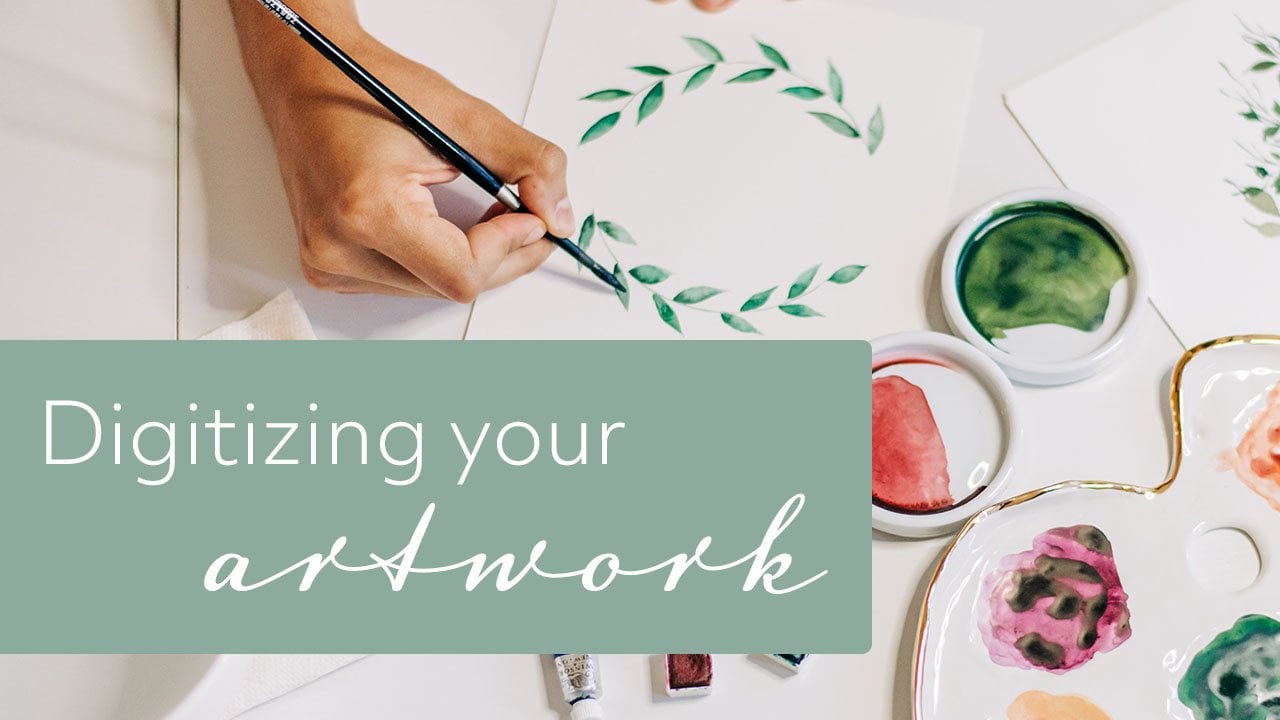
beginner skills in my other class called
digitizing your artwork. Before we jump into the class, if you want to learn more
or connect on social media, you could find me on
Instagram @petals.by.priya, on my website,
petalsbypriya.com, or on YouTube
@PetalsbyPriyaWatercolor. If you're ready to become
a greeting card expert, let's get started.
2. Class Project: The final project for
this class will be your very own greeting card
made start to finish by you. As I mentioned in the
introductory video, we'll be going over every step of the greeting card process from start to finish so you can follow along
at your own pace. If you have questions or
challenges along the way, you're welcome to post those
in the Discussion tab below. That's a great place
to share insights, build the community, and
learn from each other. Keep in mind, every printer
is different and some of the settings and
adjustments will vary depending on what supplies, paper, printer, and
ink you're using. You might have to do some
fine tuning on your end. But in general, you'll
learn at my tried and true process and workflow
for creating custom, beautiful greeting
cards from home. At the end of class,
please remember to upload your project in the Project
and Resources tab below. I'd love to see
your final results. I went ahead and uploaded mine first and I hope to
see yours there soon. In the next lesson we'll go over all the supplies you
need to get started.
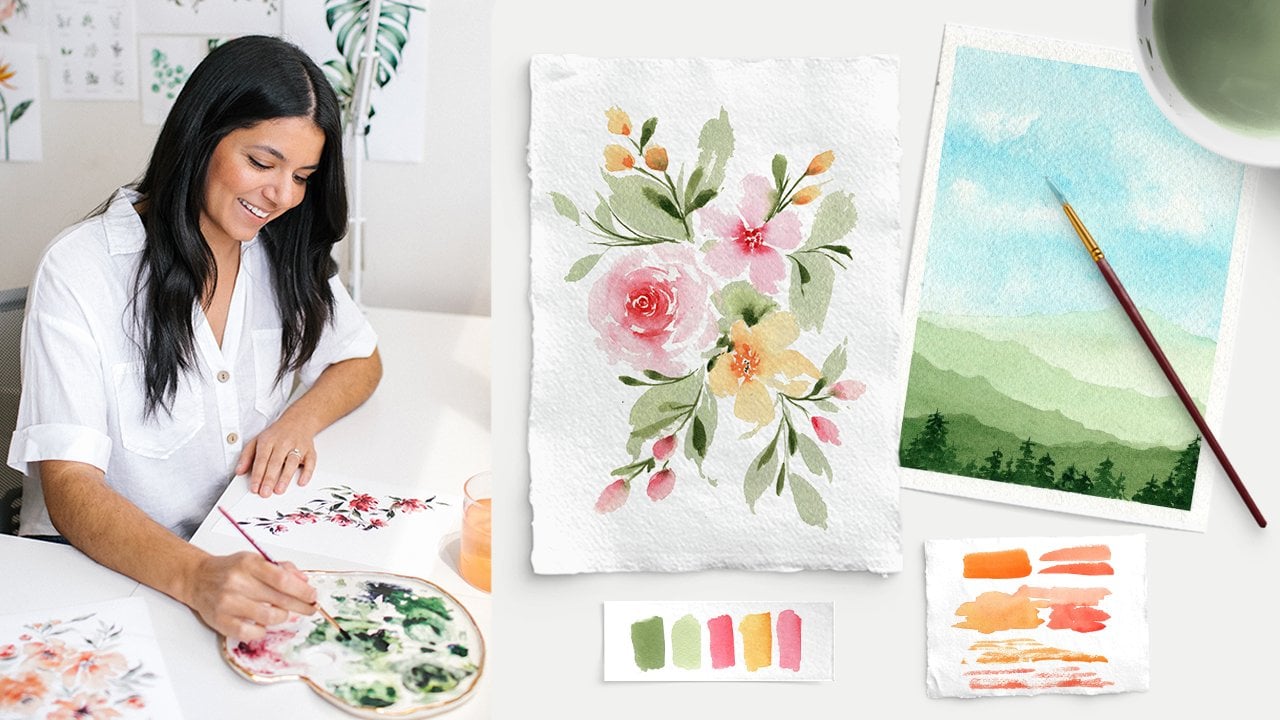
3. Supplies: Let's talk about the supplies
you'll need for this class. First step, you'll need to
have your artwork digitized and ready to go for
your card design. If you're not sure
how to do this, I have a whole other
class that covers that topic called
digitizing your artwork. Or if you create
digital artwork, like in Procreate or
Adobe Illustrator, then you're already good to go. Next up, you'll need
Adobe Photoshop. I included a link for the
seven-day free trial below. A general understanding
of basic photoshop skills is also recommended as I won't be going into
detail in this class. You will also need
an inkjet printer for printing out
the greeting cards. I use the canon PIXMA
iX6820 printer. But there are tons of
other newer models out there to choose from. For the greeting cards, you'll need high-quality
thick paper. I use 130-pound
ultra-thick card stock because I prefer my cards to feel luxurious
and heavyweight, but I recommend
looking for paper that's at least
110-pound thickness. Anything below that
just feels too flimsy to be a greeting card. You'll also need a scoring board and paper trimmer
for the final steps of the greeting card process. I'll go over those
in more detail when we get to that section. Finally, you'll need envelopes and either clear
sleeves or class for the packaging lesson, but those are optional if you don't plan on selling
your greeting cards. When you've gathered
your supplies, I'll see you in the
next video to start planning out our
greeting card designs.
4. Card Planning & Preparation: There are a few main
things to keep in mind when you're planning out
your greeting card designs. The first and most important
piece is the artwork that you'll be using
for your card. For the example that I'll be
walking you through today, I'm going to be creating this tropical hibiscus
thank you card. So I know that I'll be using my hibiscus watercolor painting that I'll be placing repeatedly
on the front of the card. So for this case I'm going
with more of a pattern design. But lots of my other cards
have individual artwork, like other tropical plants, seascapes, florals,
you get the idea. So it's up to you and
your vision for the card and what artwork you
have available to use. This will also depend on if you plan to create artwork
specifically for the card versus repurposing artwork
that you already have. In my case, I typically create artwork first for
fine art and prints. Then if I think it could also
make a cute card design, I'll do that next. For example, I painted
this Monstera piece with just the artwork in mind. First focused on creating
art prints like this one. But I also knew this
could make a simple but beautiful every
day greeting card. So I designed that next using the exact same piece of
artwork that I had digitized. You could also see I use
that same Monstera element and another thank
you card as well, that continues the
tropical plant theme. On the other hand, some
artists and designers create artwork with the end product
of a greeting card in mind. In some ways this can be better because you can start to paint or draw using
specific dimensions right from the very beginning. There's no right way to do this. Either way is fine. You'll just have to
experiment a bit and figure out which
way works best for you. The next thing you'll
want to consider is the purpose of your card. Is it a thank you
card, a birthday card, an everyday greeting card, do you want to include a message or just let the
artwork stand alone? You'll also need to decide
whether you want your card to be portrait or
landscape orientation. This usually depends on what type of artwork
you plan to use. For example, for my
Monstera leaf card, I designed it in portrait style because the leaf
is more vertical. But for my aloha card, I created it
horizontally because the texts design can
be displayed much better in a landscape
orientation. Finally, you'll need to decide what size your card will be. Now, two of the most common
sizes are A7 and A2 cards. A7 are the larger five
by seven inch cards that you often see in the
stationary aisle in stores. The A2 cards are smaller, but also a very common size used by stationery shops
and designers. All of the cards I
sell in my online shop and wholesale catalog are A2, which is 4.25 inches
by 5.5 inches folded. So that's the example I'll be using
throughout this class. To recap, the things you'll want to think about as you start planning out your card
include the artwork, whether you have existing
work you want to use or you're creating new work
specifically for the card, the purpose or occasion for
the card, the orientation, whether portrait or landscape, and the Size A7 or A2, which we'll be
using in the class. Take a few minutes to plan
out the vision for your card. When you're ready, meet
me in the next lesson to start designing the backside
of your greeting card.
5. Back of Card Design: It's time to design
a greeting card and I want to start
with a backside because whatever you
choose for the backside can be used across all
your different cards. You only have to
set this up once and you'll be good to go. The dimensions for this will
be 4.25 inches by 5.5 inches or 5.5 by 4.25, depending on if you're designing a portrait or landscape
orientation card. Go ahead and open up Photoshop and create a new file
using those dimensions. You'll also want to make
sure that you're working in at least 300 DPI or higher
for best resolution. Now, the backside of
your card is typically where you'll place your branding
elements like your logo, website and any other
relevant information. For example, on my
cards I have my logo, website, email address, Instagram handle, and a
short message that says, designed and packaged
in Honolulu, Hawaii. You can choose to
include as much or as little information
on there as you'd like. I just recommend using no more than five
elements or lines. Otherwise, it'll start to
get too busy and crowded. Remember you can hop on
over to my digitizing class if you want to learn the
basics of Photoshop. Start playing around with
different design options for the backside of your card
and once you're happy, make sure to save it. I encourage you to
create a folder with all of your
greeting card templates to help keep things organized. As an example,
I've saved mine as a greeting card
backside vertical. If you want to keep
your options open for creating a landscape
orientation card as well, you can create another
version and save it as a greeting card
backside horizontal, and that way you can easily access that for future designs. When you're ready,
we'll move on to the front side of the
card in the next lesson.
6. Front of Card Design: Now we can start the
fun part which is designing the front side
of your greeting card. The front side is where
you'll have a chance to showcase your artwork
add a message if you'd like and really put your
design skills to use. The file setup in
Photoshop is easy. You'll use the exact
same dimensions as you did in the previous
lesson for the backside. For me, that will be
4.25 by 5.5 inches. Starting with the
artwork design make sure to import your
digitized artwork. I'll be designing the
hibiscus thank you card. I've imported my watercolor
hibiscus element into my Photoshop working file. From there, you can fine-tune
your design as you'd like, whether you're simply
placing a single element or creating a pattern
like I am for my card. You can also add a
message if you'd like, and test out different fonts and colors to complement
your artwork. It can sometimes be
hard to visualize what an actual greeting
card would look like just from a flat file like this. One thing I like to do is place my design into a
card mock-up file as I work to get a
feel for what it would look like
as a real product without having to actually
print it out a bunch of times and waste my paper and ink. There are tons of ways to
create mock-ups like this, but my go-to is to purchase
them from Creative Market. There are tons of
options on there that are really easy to use using smart objects
in Photoshop. I also use these mock-up
files for my product listing photos on my website
and wholesale catalog is a great way to
efficiently upload new products and keep the look and feel consistent without
having to worry about product photography and editing every time
you create a new design. Now, seeing your
artwork come to life on mock-ups can be
super exciting. It's part of the reason why I love using realistic
mock-ups like this one. But one thing I urge
you to be cautious of is something I'm definitely
guilty of is falling in love with the very first
design you see. Once you see it on a mock-up, it can be tempting to do this, but I encourage you
to give yourself at least a few different
design iterations before you settle on one. Some of my personal favorite card designs have come after. I've given myself plenty of
time to be pushed creatively and try new design layouts that I didn't
originally think of. Once you're happy
with your design, head on over to the next lesson and we'll start talking
about printing options.
7. Borderless vs. Border Printing: Here's where things can start to get a little bit confusing, but stick with me and I'll try to explain
everything clearly and show you real life examples to help explain the concepts. The first thing to know is there are two main ways
to print cards from home and your method will depend on your printer's capabilities, whether it supports
borderless printing or not. Let's get into it. Borderless printing, also known as full
bleed printing, basically means your
printer can print ink onto the entirety of your page without a white border
around the sides. If you haven't gotten
a printer yet, I highly suggest
looking for one that supports borderless printing because you'll be able
to use your paper a lot more efficiently by creating two greeting cards
per one sheet of paper. It'll end up saving you
your supplies and money. Because A2 greeting cards
are 4.25 by 5.5 inches, if you double that, it equals a standard 8.5
by 11 inch sheet of paper, meaning you can print two cards using only one sheet of paper because it can print all
the way to the edge. Now, if your printer doesn't
support borderless printing, that's fine, you can still
create greeting cards. You'll just have to
use one sheet of paper for every card you print. You'll go through
your paper faster but you can still do it. If you go this route, you'll need to insert trim
lines into your print file so you know where to cut when it's time to
create the card. Don't worry, I'll show you
how to do that step-by-step. Fun fact, I created my greeting
cards for my shop this way for six months before
I realized that my printer did support
borderless printing. When you own your own
creative business, you're constantly
learning new things and improving your processes. There's a lot of trial,
error and frustration, but I'm hoping to spare you from having to go through
all that by teaching you everything I've learned in my three years selling
greeting cards. Before we move on,
let's do a quick recap. There are two printing methods,
borderless and bordered. Your method will depend on
your printer's capabilities. Borderless prints go all the way to the edge of the
paper allowing for two greeting cards
per one sheet of paper, so it's more efficient. Bordered printing is
still totally doable, but a little bit less efficient. In the next video, we'll start setting up our
file for borderless printing.
8. File Setup: Borderless: If your printer supports
borderless printing, we'll go through the entire file setup process in this lesson. If your printer does not
support borderless printing, you can move on to
the next lesson. Start by opening up
Photoshop and creating a file that is 8.5 by 11 inches, so a standard paper size. Remember to work in
at least 300 DPI to ensure high-quality
resolution. The first thing we want
to do is setup guidelines so we can place our
files accurately. To do that we're
going to hit "View", "Guides", "New guide", and we'll insert a vertical
one at 4.25 inches, so exactly halfway across. We'll do that same
process again, but instead we will insert a horizontal guide at 5.5 inches which again is
exactly halfway down. Now that our guys are in place we can place our design files. I'm going to click "File", place embedded, and select the vertical
front of the card. I'll drag it into place
in the bottom right quadrant and hit "Enter"
when it's in place. Now I'll do the same for
the back side of the card, and I'll place that one in
the bottom left quadrant. Now you can start to visualize that the vertical guideline is where the card
will be scored and folded once it's printed out. Now go ahead and select both of those layers from
the layer panel. You can do that by
holding down Shift while you click on them, and then hit "Control"
"G" to group the layers. That will group both
layers together, which is not crucial but
it's an extra step I like to take to keep things organized
for later down the road. I'm going to double-click on the group name and
rename it to bottom. That's because I want to
know that these layers are in the bottom
section of this file. Next, I'm going to
select the group again and hit "Control" "J", and what that does is
duplicate the group. The second group I
want to drag it up into the top section
because again, with borderless printing you
can print two cards at once. Hit "Control" "T" and a little trick to
make sure it stays perfectly aligned while
you drag it is to hold down the Shift key
while you move it up. That will help keep
the layers in line even if your hand moves
while you're dragging it. Once it's in place,
I'll double-click the name again and name it top, so now our file is
nice and organized. This is what your final
file will look like once you're ready to print. There will be a few more steps in the test printing session, but just to help you visualize the final file
format, this is it. If the guidelines bother you, you can clear them once
your designs are placed, but they won't actually
show up when you print is just to help with
the designing process, so I like to just
leave them there. Now, I'll show you how to do this process for a
horizontal card. I'll just clear these designs for the purpose
of demonstration. I'll be using a
different Aloha design to demonstrate the
landscape style. Again, you'll hit
"File", place embedded, and select the horizontal
front of the card. Since this orientation
will be landscape, you'll need to rotate the design 90 degrees counterclockwise and make sure to hold down
the Shift key as you do this, so it rotates an
equal increments. Once it's rotated, drag it
into the bottom-right corner and hit "Enter" to finalize
the transformation. Now, do the same
for the backside, but rotate it clockwise instead. Because if you visualize how the card will look
when it's folded, you want the text to
be facing downwards, so in this file it'll need to be opposite the
front of the card. Don't worry if
it's a little hard to visualize at this point, it'll be easier to see once
you start printing it out. Now, just like we did with
a portrait style card, you'll select both
layers and hit "Control" "G" to group them. Again, double-click that group
and rename it to bottom. Then with the group selected, hit "Control" "J"
to duplicate it, and drag that group up to the
top holding the Shift key while you do so to keep
it lined up perfectly. Once that's in place, I'll double-click the group
name and rename it to top. This is what your final
file will look like when you're making a
landscape orientation card. Let's go over the steps again. We'll start by
creating a new file that's 8.5 by 11 inches. Then insert your vertical
and horizontal guides and embed the front
and back side of the cards in their
respective quadrants. Select the layers group
and name them before finally duplicating that group and shifting the second
group up to the top. Now, we'll get to
the actual printing and the printer settings lesson, so don't print it out just yet.
9. File Setup: Border: If your printer does not support borderless printing,
no need to worry. I'll walk you through
the entire file setup process in this lesson. Start by opening up Photoshop and creating a file
that's 8.5 by 11 inches, so a standard paper size. Remember to work in
at least 300 DPI to ensure high
quality resolution. The first thing we want
to do is set up guides, so we can place our
files accurately. To do that we're
going to hit "View", "Guides", "New Guide", and we'll enter a vertical
one at 4.25 inches, so exactly halfway across. We'll do that same
process again, but instead we'll insert a horizontal guide
at 5.5 inches, again, exactly halfway down. Now we're going to
create a rectangle to outline where the card
will be placed on the paper and to display where we'll
need to trim the card after we print it out. This is where the
process differentiates from the borderless version we went through in
the previous lesson. Start by navigating
over to the line tool, right-clicking on it, and selecting the rectangle tool if it's not already on that. I just start by dragging
out a random size rectangle and then the shape
tools will pop up on the right side and that's
where we'll edit it. First under the
transform section, you'll need to make the
rectangle 5.5 inch width and 8.5 inch height, which is the size of
the greeting card when it's not folded yet. Next, if it's currently
being filled by a color, you'll want to hit "Fill"
and select "No Fill". Finally, go over to stroke, which basically means the
outline of the shape, and make sure it's
black or dark colored. Now go back to your layers panel and hit "Control"
"T" to transform it and center it on the page. Your guidelines
will help make sure it's directly centered. You'll see the guides turn
pink once it's centered. Now you can see the
outline of the card and we'll be placing
our designs next. Now that our outline
is in place, it's time to embed the
front and back designs. Let's start with a
vertical orientation card. I'm going to click
File, place embedded, and select the
vertical front design, and turn it 90
degrees clockwise. While I'm turning
it, I'm holding down the "Shift" key to make sure it rotates an equal increments. Once it's turned 90 degrees, I'm placing it in the bottom
half of the rectangle. Now do the same
with the backside, so File, place embedded, select the vertical
backside design, and rotate it 90
degrees clockwise and drag it into
place at the top. Now if your designs cover
up the rectangle outline, just drag that
rectangle layer backup to the top so you can see it. This is what your final
file will look like. There will be a few more steps in the test printing session, but we'll get to that later. Now I'll show you
how to do this for a horizontal format card too. I'll just clear these designs for the purpose
of demonstration, because all we're using a
different Aloha card design for the horizontal version. Again, click "File",
place Embedded, and select the
horizontal front design, and place that down in the bottom section
of the rectangle. For the backside, you'll
hit "File", place embedded, but for this you'll need
to rotate it 180 degrees so it shows up upside
down on your file. Because once it's
printed unfolded, that's how it will
show up correctly. Don't worry if it's
hard to visualize now, it'll be easier to see once
the card is printed out, and that's what your final
file will look like. Let's recap those steps again. First, open a new file
that's 8.5 by 11 inches. Insert your vertical and
horizontal guides and create a rectangle outline
that's 5.5 by 8.5 inches. Make sure it's centered. Finally, you'll embed
the front and back side of the cards in their
respective sections. We'll get to the actual printing and the printer settings lesson, so don't print it out just yet.
10. Printer Settings: Now our print file
is ready to go, but we first need to review the printer settings
in this lesson, which I know is
the boring stuff, but it's important we set
everything up correctly now so that in the future all
you have to do is swap out your new greeting card
design and that's it. You won't have to go
through these setup panes every single time. I want to reiterate though all printers are different
and the printer, supplies, ink, and paper you're using is probably different
than the ones I'm using. My exact printer settings
may not be perfect for you, but I'll explain all
the different options and what they mean so that you can choose the printer setting combination that
works best for you. First step, go ahead
and hit "Control" "P" or file print to bring
up your print settings. Select your printer. For me, that will be the
Canon iX6800 series, then hit "Print" Settings. Here's what things
might look different depending on your printer
and print settings. But I'll show you
what I personally use starting from top to bottom. First, select "Photo Printing" and check the
borderless printing box if you're going the
borderless route. If not, you can leave
that box unchecked. Then hit the Color matching
box and a pop up will appear with advanced settings
for your color adjustment. Select the matching
tab and hit "None". We want to disable
this because we want photoshop to manage the
colors, not the printer. I'll go over this
again in a minute. Then choose your paper type. I select matte photo paper, but you can use glossy if
that's what you're using. Select the paper size 8.5 by 11 and print quality
should be set too high, then you can hit, "Okay." In photoshop, under
color management, there are two options
to choose from. Either printer manages color
or photoshop manages color. You'll want to select
the option that says Photoshop manages color because that will allow for more
advanced color settings where you can set up profiles
for your specific printer, paper, and ink combination. However, if you
choose this option, you must remember to disable the printer color
matching option, which is what we
just did earlier because you don't want to
accidentally have the printer and photoshop trying
to manage the colors. For the printer profile, this is again where things
can get a little complicated. Choose the setting that's closest to the
paper you're using. A lot of paper
brands will tell you which setting to select based on the paper type you
purchased especially if you purchase paper from the
same brand as your printer. If yours doesn't, choose
the closest option. For example, I select MP2 because that stands for photo
paper with a matte finish, which is closest to the
card stock paper I use. You can also experiment
with glossy-coated paper if you want your cards to have a glossy finish
instead of matte. If you do, make sure
you're printing on the correct side so the
exterior is glossy, that the inside is still
uncoated to allow for a smooth riding surface when
someone's using the card. I included a link down below
to an article from Adobe that I found helpful
when I was first researching printer
and color settings. It talks about everything
I've mentioned in this lesson in greater detail. If you're interested
in learning more, before you press "Print", please watch the
next video first because we'll go through
the test printing process and make some slight changes
to your printing file before we print the final thing. Head on over to that lesson
and I'll meet you there.
11. Testing & Color Adjustments: At this point your print
file is ready to go and we can start
our test printing and making color
adjustments as needed. When I first started printing greeting cards for
my own studio, it would usually take me
between 4-6 testing sessions before I was happy with
the final results. Now that I know my printer and I'm more familiar with the types of
adjustments I need, I can usually finalize the
design in 1-2 test prints. The most important
thing we're looking for in this testing session is how the colors come
out on paper as it can look pretty different to
what you see on your screen. Because I've done this
so many times before, I already know I'm going to have to adjust the brightness, contrast and vibrancy but let's just test one
out to see how it looks. Just a quick note here, if you are using the
borderless print file, I suggest hiding one group during the test printing session because we really only
need to see one example to know what we need to adjust. Anything beyond that is
just wasting your ink. To hide one group, just click on the eyeball
next to that layer group My first test print is ready and I can tell that the colors look too dull, muted, and dark. So now we can go
back into our layer, duplicate it by
hitting "Control" "J" and make color adjustments
on that duplicated layer, not the original layer. This is called a
non-destructive editing because if we end
up making an edit we don't like or we want to
go back to the original, we can do that easily
by just deleting or hiding that specific layer. Whereas if we make these
edits on the original, you won't be able to
go back as easily. The specific edits
you make will be dependent on what
your card needs. You'll likely need to
adjust brightness, contrast but you can also experiment
by altering the vibrancy, color balance, or other edits. So I'll just show you what
my layers look like here. You can see I've made
three rounds of edits and I make sure to name
each adjustment layer, so I can keep track
of things easily. Now, with all of my
adjustment layers turned on, you'll notice that my
card design looks pretty overexposed and a bit
washed out on my screen, but when it's printed, it comes out spot on with my intended vision for the
card so let's take a look. All right, that's
looking much better. Now, once your edits are final and you're happy with how
the test print looks, you can finish
setting up your file. If you're going the
bordered route, you can go ahead and
print your file now. If you're going the
borderless route, go ahead and delete the
hidden layer because we haven't applied any of the
adjustments to that group, so it doesn't matter. Instead, duplicate
the adjusted group and drag the duplicated
group up to the top. Now our whole file includes the color adjustments and
we can go ahead and print. To recap, you can expect at
least 1-2 rounds of testing to allow for color adjustments when you create a new design. Remember, if you're doing
borderless printing to hide or delete one
group when you print so you don't waste
ink during testing. As you make adjustments, make sure to
duplicate the layers and name them to keep
your edits organized. Once you're happy
with the edits, you'll just duplicate
your layer group and finalize the print file. Now you can breathe
a sigh of relief because the hardest
part is over. In the next lesson, we'll go over the trimming
and scoring process for both bordered and
borderless cards.
12. Trimming & Scoring: Trimming and scoring
the greeting cards is my favorite part
of the whole process because you finally
get to see your vision come to life in a
real life product. There are a couple of
things to think of before we start trimming
and scoring our cards. Number 1, the process will
be slightly different depending on if you went the borderless are
bordered route, but I'll go over both. Number 2, make sure you have
a heavy duty paper trimmer. Because greeting card
paper is thick and sturdy, you want to make sure
your trimmer can handle the thickness and
make clean cut lines. I recommend using a
guillotine-style trimmer instead of a slider, because in my experience, the guillotine trimmers
are much sturdier and can handle thicker paper. There are heavy duty
sliders out there, but at a much
higher price point. I was able to find this
guillotine one for around $25 at my local craft store and it's hold up
just fine for years. Number 3, you'll want to
hold your paper down firmly while you trim so it doesn't
move and cause misalignment when your card gets folded. Also, make sure your
hands are clean or wear gloves so you
don't get dust or oil on the surface of the
card when you do this. Now we'll move on to
the scoring process, and you might be wondering, why do you even need to score your cards in the first place. There are a couple
of reasons why. Number 1, it makes the
fold line more accurate and there's less of a chance
of error or misalignment than if you just tried
to fold it yourself. Number 2, greeting card
paper is very thick, so it's difficult to get a clean fold line
without creasing. Number 3, it makes
the whole card making process so much easier
and more efficient, especially if you're making
several cards at once. Sometimes I get wholesale orders for hundreds of cards at once, and it just makes the whole
process way more efficient. For trimming, you'll be making two total cuts right
next to each other. Now theoretically you could just make one cut right
down the middle, but it's difficult
to make your cuts 100 percent precisely
down the middle, so I just do it
twice to make sure each card is trimmed correctly. Now take your unfolded
greeting card and line it up at the corner
of the scoring board. In the middle should line
up right at 4.25 inches. Now we can start scoring. Go ahead and square it
right down the line, being mindful not to use
the very tip of the tool, so it doesn't poke
all the way through. But far enough
towards the tip that you can still get
a nice clean line. Once it's scored,
you can finalize the fold and repeat the
process on the second card. There you have it, your
beautiful final greeting cards. For the bordered version, we'll start with scoring
first and then trimming. Just the opposite of
what we did before. First, line up your
paper and score it right down the middle
at 5.5 inches. Finalize your fold and
now we can trim it along the trim lines we
set up in our print file. There you have it. Obviously the borderless
version is preferred. It's more efficient and you get two cards out
of one sheet of paper, but still totally doable if your printer doesn't
allow for that. Let's recap. For trimming, it's best to use a heavy-duty
guillotine-style trimmer. Make sure to hold it steadily
in place while you cut. Scoring helps create clean, precise fold lines and
increases efficiency when you're making
several cards at once. Score towards the
tip of the tool, but not the very tip, because that could
cause tearing. We've made it a long way as for there are still
a few last steps which include envelopes
and packaging. We'll get to that
in the next lesson.
13. Envelopes & Packaging: At this point, you have
your beautiful card printed, trimmed,
scored, folded, and ready to go so
what's the next step? Choosing your envelopes
and packaging. Let's start with the envelopes. In my shop, I use
these craft envelopes with a self-sealing flap. I personally chose to
use these envelopes because they complimented
my car designs well and they were in
general a bit sturdier than some of the white
envelopes I got samples of. If you prefer to use white or other colored envelopes,
that's great too. I just recommend
getting some samples and testing them out
with your cards first to make sure they
aren't too see-through. That was the problem
I experienced when I first used white
envelopes in my shop. Also, this is very important, you need to make sure
your greeting cards fit easily into the envelopes, especially if you
plan on selling them. Some envelopes can be tricky to get the cards in and out of, which makes for a bad
experience for your customers. Play around with
different styles and brands and try
trimming your card down a bit if it doesn't
fit very easily and then out of the envelopes
that you end up liking. Now if your end goal is just
to give you a greeting cards to your family and friends,
then you're all set. But if you eventually want to
start selling them online, then you'll need to start
thinking about your packaging. In my experience, there are two main ways to package
your greeting cards; in a clear sleeve or by using
a card clasp or sticker. There are pros and cons to
both so let's talk about it. If you use a clear
sleeve like this one, it provides great
protection of your product, especially for our shipping or if people will be touching
them at an event or market but they are definitely
less eco-friendly, which is a major consideration
to keep in mind. If you do go this route, you'll want to choose a brand that offers biodegradable ones to help lessen the environmental
impact but even so, you'll still have plastic waste so that's why I'm
moving to using card clasps as soon as I run out of my current supply
of these clear bags. Now card clasp are great
eco-friendly alternatives to plastic sleeves but obviously they provide a little
less protection. If you're attending a market
where there might be rain or other things
like food or drinks that will be around
your greeting cards, you'll just need to
be mindful of that and make sure you
have other measures in place to protect
your products. The biggest plus side to
using a clasp is that there's a much better
opportunity for branding. For example, you can include your logo or another
design element that represents your brand and maybe a cute little message
on the back if there's room. Since card clasps are still
pretty new at this point, it can be harder to
find good options, but there are
businesses out there who will make them for you, you can also make them yourself so don't be afraid to do a
little digging, experimentation and just find an option that works best for
you and your business. Either way, you'll want
to package your cards by putting the envelope inside
of the greeting card. That way the customer can
still see the envelope, but your branding will also be displayed prominently
on the back. Again, for envelope selection, order samples and try
different brands. Test for transparency
and sturdiness and make sure your
card fits easily into and out of the envelope. That's the most important
thing to remember. For packaging, you can use a clear sleeve or a card clasp. Sleeves offer better protection, but they're typically
more expensive and they come with
plastic waste. The card clasp has a great
branding opportunity, and they're more eco-friendly, but they do provide
less protection, and right now they're
harder to find but it's still doable, especially as they become
more and more popular. In the next lesson, we'll
talk about organizing and duplicating our
files to make for efficient card making
down the road.
14. File Organization: In this lesson,
we'll talk about how and why to duplicate
and organize your greeting card files to make for smooth sailing
down the road. Since my shop has been up and running for a few years now, I found several ways to
increase the efficiency and decrease frustration
in my process. One of those has been to
organize my files well and duplicate them
for easy card making. I have six file
templates in total, one for the horizontal
backside of the greeting card
and one vertical, one for the
horizontal front side of the greeting card
and one vertical, and one for the horizontal
print file and one vertical. Basically a front, back, and print file for both
horizontal and vertical cards. When it's time to
create a new card, I can simply drag my new
design into the template file and save it as a new project. From there, the only thing
I need to do is make any minor color adjustments
as needed and I'm good to go. You only have to go through
the setup panes once and that's what we've done
together in this class. From there you can create
hundreds of designs with ease. In the next and final video, I'll share some more resources
that will be helpful to you and we'll wrap up the class.
15. Selling Cards & Final Thoughts: You made it to the
end of the class. I know that was a lot to learn. But being able to create greeting cards with
your own hands as such, a rewarding and
useful skill to have. I personally haven't bought
a card from the store in years because it's
so fun to make my own, to not only sell in my shop, but also to give away
to family and friends. Along with all the topics
we've learned in class today, There's one more thing I want
you to remember and that is dealing with printers can
be extremely frustrating. Sometimes you may feel like tossing your printer
out the window. Trust me, I've
been there before. I know how that goes, but please try to
be patient with yourself and your printer and know that once
you put in the work upfront to figure
it all out now, it will be worth it in the
end when you're able to print beautiful
customized greeting cards that showcase your
artwork all from the comfort of your
own home or studio. Not to mention the money
you'll save from not having to order your cards
from a third-party site. So now that you're on your way, what are the next steps? If your end goal is to sell
greeting cards online, you're now ready to
set up your shop. And whether you start on Etsy or host your own shop website, just know that
greeting cards will always be a hot product. People always need cards for holidays and special occasions. And because it doesn't cost
you too much to make them, your profit margins
can be pretty great. There are lots of
options out there for setting up your online shop. I personally use Squarespace and I've had a great
experience with it. But there are several
other platforms to choose from, like Shopify, which is another popular choice for creative business owners, have included links to
these platforms below, so you can check them
out and get started. I also highly
recommend setting up a wholesale line to get your
products into retail shops. That's been a huge part of my business over the past year. And it's super easy
and simple to set up on a wholesale
marketplace like fair. Fair is basically like Etsy, but for wholesale lines, and I've received lots
of orders on there and my cards are now being sold
in shops across the US, which still feels a bit surreal. If you wanna get
started selling unfair. I included the link to get started in the class
description below. And just a reminder, I'd love to see photos of your final greeting cards up in the project section
of the class. Again, any questions you have, you can also post in the
discussion tab below, and I'll be sure to answer
as quickly as I can. I want to thank you again for
joining me in class today. And if you found any of
the information helpful, please remember to leave a quick review so I can
read your feedback. Thanks again and happy
creating for me to you.
 Petals by Priya Watercolor, Watercolor Artist & Teacher