Transcripts
1. introduction: Hi everyone, Welcome back
to Hannah crochet design. Thank you for joining
my class today. In today's video, I'm going
to share with you how to get up and a
template in Procreate. I will show you how I designed a template in Procreate app. And I'll also provide you
the template in PNG format, which you can download when
you sign up for this class. This is how the
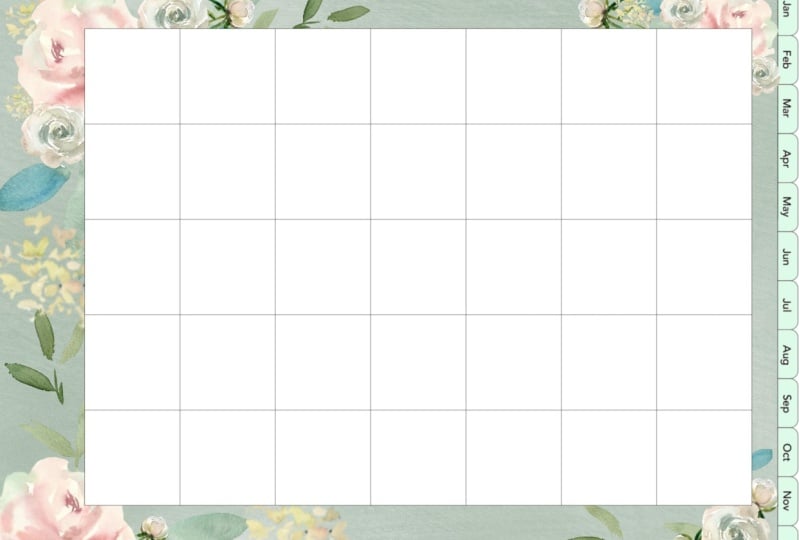
template looks like. You can open it in
Procreate apps. You can adjust the size. And this is the fun part. I'm going to show you
how I sketch and color my floral theme background
in Procreate apps. I'm going to share what
brush that I'm using, how I edit details to my flower. And I will also share some
procreate tips in the lesson. These are the three pamphlets that we're going to
make in the lesson. After you've finished designing the template in Procreate apps, we're going to add
hyperlinks in keynotes. Apps for the hyperlink does, is when you tap on
the monthly tabs, it will bring you to the
specific page in your primer. So this is how the
hyperlink works. When you tap on the monthly, perhaps it will take you
to the designated page. I will also share with
you how I decorate my monthly spread
in GoodNotes, apps. The tools and materials
that you're going to need to create this
planner is just, I bet that Apple pencil. If you're interested to design
your own digital planner, go to the next video
to find out the tools and also the software that
you need to make this.
2. tools and materials: Thank you everyone
for signing up. I'm very excited that
you're here with me. We're going to create a
digital planner together. So the tools and materials that you're
going to need to create this planner is just
iPad and Apple pencil. The drawing apps that I
use is Procreate apps. This is where we're going to
design the planner template. I think most of you are
familiar with Procreate. It has everything you
need in one place. You can experiment with
different type of brush. You can work in layers, which makes painting
much easier. You can sketch an EPC color. It's almost like Photoshop. And to add hyperlinks, I'm using keynotes apps. This is a free apps which you can download from App Store. Hyperlinks are clickable links. So when you tap on a monthly
perhaps on your planner, it will take you to
the specific page. The last apps that you're
going to need is good notes. Apps. Goodnotes is a note-taking apps you're able to write
with Apple pencil. You can even draw on that apps. You can highlight your notes. It's basically like a
notebook in your iPad. Before you start,
don't forget to download the digital
panel templates, which are available in the
class project and resources. You can save those
files in your iPad. That's it. Those are all you need to design your own digital planner. Watch my next video
to see how I designed a floral theme border
in Procreate apps.
3. how to design digital planner template in Procreate - Part 1: In this lesson, I'm going to
share with you how to design your digital panel
templates in Procreate app. I'm using iPad Air two
and Apple Pencil here. And I'm going to open
my Procreate apps. We're going to
create a new canvas. You can tap on the plus
icon right over here, then tap on this black
square icon on top. I'm going to change the
unit two centimeter, which is gonna be 21 centimeter and the height is going
to be 16 centimeter. And for the DPI, I'm going to
leave it as it is, 300 DPI. And with this canvas size, you'll be able to
create 53 layers. Once you're done with
this, tap on Create. Okay, for the next
step, I'm going to import the template. By the way, the template will be given once you sign
up for this class, click on the tool icon
at the left corner, and then at the top
panel, select, Add. Alright, It depends on
where you saved the file. I saved it in my photo album, so I'm going to choose
Insert a photo. So the first template
that I'm going to import is the digital planner main template which has all the monthly perhaps at a site. And I'm going to rename
that layer with template. The next template and
we're going to import is the table for the
base and the dates. Okay, For this table
you can resize. I'm just going to move
it a little bit more to the corner so I can have more
space to design the border. And I'm going to rename
the layer with dates. Alright, now, this
is the fun part. We're going to design the
digital planner template. I'm going to create
new layer for that. And I'm going to
bring the new layer down just above the background. For the brush, I'm using
this gouache brush. It will give you beautiful
texture for the background, the brush will not give
you a solid color. It's a bit transparent. So when you build up that color, you can see the brush texture, and that's the texture that
I want for my background. As you can see, I color
outside the template, so I'm going to erase that. I select the Lasso tool
from the top panel and then I choose rectangle
and select Eraser. And then you can easily
erase the selected part. Select the Lasso tool again, and then select the
rectangle shape. Choose the eraser icon
at the top right corner, and then erase the
selected part. Alright, I've colored my
background and now we're going to design the template
width floral theme. For that, let's rename this green background
with background. And I'm going to
create a new layer for the flower and for the brush. I'm going to use
this dry ink brush. This is the standard
Procreate brush. And using white color, I'm just drawing some petals. And for the center
part of the flower, I'm using this grad. And I'm going to add another
color around that dark red. I'm thinking to use
this pale orange. Now let's add some
details to the petals. I'm going to bring down
the opacity of my brush, which you can find
at a left panel. And with the same pale orange, I will start adding the
details to my flower. I'm just adding a little
bit shadow on my path. So it has more volume. For the next flower, I'm using this peach color, a very pale peach,
almost like white. Alright, the color looks quite nice against the background. So I'm going to use it. And I'm going to draw for small petals. And let's draw another one
slightly above that flower. This time I'm going to
draw five small petals. And for the center
part of the flower, I'm just going to use
the same dark red for the next petal. Let's use bright color. I'm using this red color
almost like dark pink. And using the same pale orange, I'm going to draw a small
petal insight that flower, and for the center
part of the flower, I will also use the
same dark gray. Now I'm going to select
the colors that I'm using for my petal
in the color panel. I'm going to drag it
to the lighter shade. And I will start adding
the details on my petals. The details can be just
a simple line like this to imitate the
texture of the petal. Of course, you can
add shading to the petals to give
it more dimension. And using the same red sheet, I'm going to draw
more flowers below. Just play around with
the petal shape. It doesn't have to
be exactly the same. And using the same pale orange, I'm going to draw the smaller
petal inside the flower. Alright, now let's add
some details on the petal. Select the petals color
and the color panel. I'm going to bring it
to the lighter shade. Using dry ink brush, I'm gonna draw some lines on my petals when adding the
details on your petals, you can experiment with the brush size and also you can play around
with the opacity. Draw some lines in the same
direction on the petal. Sometimes can be longer, sometimes can be shorter. You also can play around
with the thickness of the lines by adjusting
the size of your brush. Now I'm going to
draw some leaves for my flower and I'm going to
create a new layer for that. And I'm going to use this dark green shade
for the leaves. I usually do the
color tests against the background to find
the perfect shade. I'll start by drawing
the flowers time. Then after that
we're going to add some leaves around the flower. I'm going to keep the shape of the leaves as
simple as possible. It's just like an oval
with a pointy end. And at this point,
I'm not going to add any patterns on my leaves. Maybe I'll do that at the end. So far, these red flowers, I'm just going to
use the same shade of green for the leaves. For the white flower above, I'm going to use a darker green. I select a green
sheet that we're using for the leaps
in the color panel. I'm going to drag it
to the darker shade. Alright, so this is how our
template looks like so far. We're gonna fill in the
rest of empty space with more flowers and leaves. For the next flower design, I'm going to draw something
like bell flower. I'm using the very
pale pink shade, almost like white, but you still can see the color
against the background. I'm going to draw the
flower shape first, and then we're going to
add the detail later on. I'm going to draw
another flower below. You can draw slightly
on top of the table, but try not to cover it too much because you're going to need that Squarespace
for your planner. With the same pink shade
in the color panel. I'm going to drag it
to the darker shade, our outline, my flower
and add some details. And I'm going to draw the
petals using this darker shade. And I'm going to select
the light pink shade that I used for the bell flower. And I'm going to drag it to the lighter shade,
almost like white. And for the brush, we will
try with a gouache brush. I'm gonna play around with the opacity and also
the size of the brush. And we're going to add the
details on the flower. By adding gets highlight, it will give more
dimension to your flower. Alright, let's add the leaves. Now, I'm going to
create a new layer for that just in case if I
don't like the design, then I can just delete
it for the brush. I'm just gonna go
back to dry ink brush because I want solid
color for my leaves. So what is flips?
I'm just going to use a lighter shade of green, lighter than the
background color. And I think I need to add more
details to my bell flower. Select a darker shade of pink, and then bring the
opacity down and I start adding
shadows to my flower. I'm going to focus
more adding the shadow in between the sample
and the flower. I'm still using the dry
ink brush for the shading. Just play around with the opacity and also
the size of your brush. Alright, so this is how my flower border
looks like so far. Now we're going to fill in
more flowers at the top bar. I'm going to duplicate
the red flowers that we drew earlier. To do that, I'm going to
select the layer and then I'm going to slide it to the
right and click on Duplicate. Then after that, we're
going to rotate and erase the bell flower
and a white flower. And with the Lasso tool, which is located
at the top panel, select Freehand option and with your pen,
select the flower. And then tap on the arrow
at the top panel and I'm going to move the flower
slightly above the table. You can resize the flower, make it a little bit bigger or flip horizontally or vertically. Because we duplicate
this flower, you don't want this
flower to look exactly the same as
the previous flowers. And let's add some leaves around this flower using the
same green shape. I'm going to draw my leaves
on the leaves layer. You don't have to follow
exactly what I'm doing here. Just fill in those empty space with more leaves and flowers. And I'm going to draw the same
white flowers at the top. And I'm going to duplicate that white flower rotated
a little bit and I'm going to place it next to it to make the flower a
little bit different. You can flip horizontally
or vertically, or you can rotate
it a little bit. Alright, so this is how my
design looks like so far. We still have some empty space. I'm just going to
draw a bunch of small flowers in that space. I'm using this very pale yellow. Then to add dimension
to your flower, I'm going to use darker
shade of yellow. I'm just using that to
fill in the empty space in between the flower and for the
center part of the flower, I'm going to use dark brown. I'm going to add
small leaves around my flower using this pale green. The right corner here,
it's still a bit empty. So I decided to duplicate
a white flower again. And I draw the same leaf shape with the same green
shade around it. Now I'm going to fill
in the empty space around the flower with the same small flower that
we draw in pale yellow. Alright, now I'm gonna go
back to my Bell Flower design and I'm going to add small
flowers in pink shade. I'm not going to draw a
very detailed petal shape. I'm just going to draw
a very small circle around the flower. The bottom part is
still a bit empty, so I'm going to draw
more flowers over there. This time I'm going
to use light purple. I'm going to test the color
against the background. I think we should
make it lighter. Alright, for this one, I'm just going to draw
a simple flower shape. I will start with the petal. I'm going to draw three
flowers with 45 petals. For the middle part,
I'm going to use lighter shade of purple,
almost like white. And I will draw a small petal in the center of that flower. And let's just use darker red for the center part
of the flower. I'm going to select
the purple sheet that we use for the petal. And in the color panel, I'm going to drag it
to the darker shade. And I will start
adding some lines and some details on my petals. What is empty space at
a site if you want, you can duplicate some
flowers and make it smaller. I duplicate my red flowers and I'm going to add
some leaves around it. I'm going to add some
simple patterns on my lips. I'm going to create a
new layer for that. And I'm just going to
place the new layer on top of the leaves
layer for the brush, I'm just going to use dry ink. Let's start with these leaves. I'm going to select
the green sheet that I used for the leaves. And then at the color panel, I'm going to drag it
to the lighter shade. Then I'm just going to draw a simple patterns on
that leaves one-by-one. I will also add some
patterns for these leaves. I'm going to select
a green shade that I used for the leaves
and the color panel. I'm just going to drag a
shade to the lighter shade. Now, let's call it a
site taps template. I'm thinking two years, pale green. Something like this. Maybe we should go
one sheet like this. This one looks much better. And that's it. This is how
our template looks like. Next, I'm going to
show you how to make the notes and the todo page. And then after that,
we are ready to save this file as a JPEG. And we're going to
add hyperlinks for the tabs in keynotes apps.
4. how to design digital planner template in Procreate - Part 2: In this lesson,
we're going to make an edit template for
our digital planner. So we have then the
monthly spread. Now I'm going to share
with you how to create the notes template and also
the to-do list template. Let's go back to the gallery. And then at the top
panel, tap on Select. Then I'm going to tap on
the digital pen or template file and back to the top petal
again and tap Duplicate. And next I'm going to open
the duplicate that file. And we're going to
change the template to the notes template, tap on the tool icon at the top left and select, insert a photo. I'm going to select on
my notes templates. And in the layer panel, just delete the dates table. We're not going to use that. Then I'm going to
create new layer just below the notes templates. Select the Lasso tool at the top panel and then
choose rectangle. And with the Apple pencil, I'm going to draw a rectangle and drag and drop the
color to that rectangle. For the background color, I'm going to use something
like you can choose pale green or pale
yellow or even white. I decided to use pale
yellow for my background. And this is how it looks like. I'm going to go back to
the gallery and I'm gonna duplicate another file
for the to-do list. For this file I'm going to
import to the list template, tap on the tool icon at the
top laugh. Insert photo. And I'm going to insert the
template for the to-do list. Alright, so this is
how it looks like. We have done three templates
for the digital planner. Now I'm going to transfer all these three files
to my computer. Alright, I finished designing
my template in Procreate. Next, I'm going to transfer
all the files to my computer, hyperlinks in keynotes steps. Let's go back to the gallery. And at the top panel,
tap on select. And I'm going to select
those three files. Select, Share, and for the
image format, choose JPEG. I'm going to add drop
this to my computer. And after that,
we're going to add a hyperlink on the
keynotes apps. In the next lesson, I'm
going to share with you how to add hyperlinks
in keynotes apps. So when you tap on the monthly
taps in GoodNotes apps, it will take you to
the designated page.
5. how to add hyperlinks: After you finish the
design in Procreate apps, we're going to add
hyperlinks in Keynote apps. What a hyperlink does is when you click on the monthly taps, it will bring you to
the designated beach. This is my computer screen. I'm going to open
the keynotes apps. I'm going to click on file at the top panel and select New. And I'm going to choose
the first template. This is just a white empty
template and click on Create. And I'm just going
to delete this and then go to the top panel
and select Document. And go to the slide
size and click on Custom slight size
for the width, I'm going to change
it though, 595. And for the height, let's
type four or five tree. Now I'm going to import
our first template, go to the top panel
and select media. Then select, choose. Then I'm going to select
a file that I just import from my iPad Air. So I'm going to import
these notes template, select that and click Insert. And we're going to
add some slides. You can go to the top panel, click slide and use light. Then I'm just going
to erase this. Or you can click on Add Slide
button at the top panel. I'm just going to choose
white blank template. Let's click on the
second slide and we're going to
import the template, go to the top panel and
click on Media, select, Choose, and I'm going to select another digital pen or template. This time, I'm going to choose
the to-do list template. For the third
slide. I'm going to choose the notes templates. And next I'm going to add 12 slides for the monthly paths. Go to the top panel and
click on Add Slide button, choose the blank template. Repeat the steps until you have 12 slides for the monthly,
perhaps the debt. I'm gonna go back to
the slide number four, and we're going to
import the template for the monthly planner. Go to the top panel and
click on Media and select, Choose, then select
the monthly template. And you're going to import this monthly template for
the rest of the slides. Alright, we're done
with this slide. Next I'm gonna go back
to my first slide and we're going to add
hyperlinks to all the tabs. I'm gonna go to the top panel and click on the shape icon, just a square shape. And let's resize this square
so it can fit the tab. And let's copy this rectangle for the other two tabs on top. And did the same thing for the 12th monthly perhaps
at the right side. Let's remove the blue
color on that rectangle. To do that, select
all the rectangles. Go to the top-right panel
and click on Format, tap on the arrow under
the field options and we're going to tap
on No Fill button. Now let's add one by one. Alright, so this first slide is slide number one is
for the stickers tab. Click on a rectangle on
top of the stickers tab. Go to the ethylene
and select slide. And go to the slide. You're going to type slight
number one over there. So when you click on
the stickers tab, it will bring you to
the slide number one. I'm going to click
on the rectangle on top of the notes tab. The slide that's
gonna be linked for that Notes tab is
slide number three. I'm going to click
on that rectangle and then go to the ethylene. Just slide, go to
the last option and I'm going to type slide
number three over there. So when you click on that
arrow on top of the notes tab, it will bring you to
the slide number three. Alright, let's go back to the
first slide and we're going to add hyperlinks
for all the tabs. Click on a rectangle on
top of the two tabs. And we're going to
link the second slide for these two tabs. So I'm going to type slight
number two in that box. Alright, now let's check. Click on that arrow button. And then yes, after
you click on that, it will bring you to
the second slide. Alright, we have done all
the three types on top. Next, we're going to add
hyperlinks for those 12 months. At the right side, I'm going
to select the first tab, which is January tab. And we're going to link that
tap to slide number four, like a rectangle on top
of the January tab. And then go to ethylene
and choose slide. Go to the last option and type number four
on the slide box. If you click on
the green arrow on the January tab and
click on Go to slide. It will bring you to
the slide number four. Let's go back to the slide
number one and we're going to add hyperlinks for
all the monthly, perhaps for the February tab. I'm going to link it
to slide number five. So I'm going to type number
five on that slide box. For much tab. We're going to
link it to slide number six. For April tab. We're going to link it
to slide number seven. Next tab is May. We're going to link it
to slide number eight. For June. We're going to link it
to slide number nine. I'm going to lean July, tap those slides number ten. August tap will be linked
to slide number 11. September tab will be
linked to slide number 12. October will be linked
to slide number 13. November we'll building
to slide number 14. Last tab December will be
linked to slide number 15. Alright, once you have added all the hyperlinks
on all the tabs, are going to copy and paste these hyperlinks on every slide. I'm going to select
all the hyperlinks. Go to the top panel and
click Edit and select Copy. Now click on the second slide. Go to the top panel
and click Edit. And we're going to paste all the hyperlinks that we just created. And you're going to
do the same steps. You're going to copy and paste all the hyperlinks
on every slide. I actually designed to
cover for this planner. So if you want to add a cover, go to the top panel and
click Add Slide button. Just choose blank
template for this. And I'm going to move that
new slide to the top. And I'm going to
import the image. I'm gonna go to the
top panel and click on Media and select, Choose. And I'm going to select
the planet cover file. Then click Insert. Independent cover. You
can see those tabs, those manly steps and stickers, nodes and two tabs on top. So don't forget
to copy and paste the hyperlinks on
this slide too. If you want, you can put your
name on the playing space. Now I'm going to export
this file to PDF format. So to do that, I'm gonna
go to the top panel, click on File, and then go
to Export and select PDF. For image quality,
you're going to choose Bess and then click on Next. And I'm going to name this
file as digital planner, and I'm going to save
it in my computer. And this is how the
PDF file looks like. Let's test the hyperlinks
gonna stickers tab. It will bring you to
the sticker page. If you click on the nodes, it will bring it to the
notes page for the monthly, perhaps when you
click on each month, it is actually linked
to the different page, but you can really
see it now since I haven't written
anything on that slide, this file is ready. Now I'm going to send
this file back to my iPad and we can open
this in GoodNotes apps. In the next lesson, I'm going
to share with you how I decorate my monthly spread
in GoodNotes, apps.
6. decorate digital planner in Goodnote: In this lesson, I'm going
to share with you how they use the digital planner
in GoodNotes x. The first thing I'm gonna
do is I'm going to import back the PDF file
back to my iPad. Then after that you can open
the file in GoodNotes apps. So this is how the planet
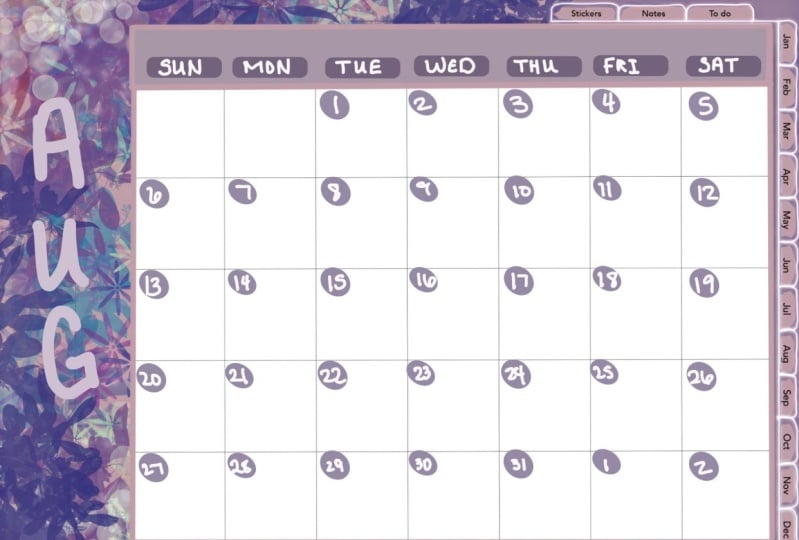
looks like in GoodNotes apps, and this is how the
hyperlink works. For the monthly
planner, I usually start with the days
and the dates. I started by making
a line on top of the box with light
green highlighter. And then for the text, I'm
using 0.3 millimeter pen size and I'm using darker
green for the dates. I'm using dark
green highlighter. I adjusted the size and I just thought on each
box for the dates, you just have to do one
row and then copy and paste a circle for
the rest of the rows. For the text, I'm
using white color with 0.3 m m pen size. Of the I wrote all the dates. I started highlighting
some important dates. For example, the first
day of school holiday, the day when my family
arrive in Singapore. The piano recording
day for my students. Sometimes I included photos in my planner or it can be
a photo of your museum, the cat, or any other
important things that you want to remember. I also like to include some
drawing in my planner. You can use 0.3 m m
pen size to draw. But honestly, drawing
in GoodNotes apps is not as easy as drawing
in Procreate apps. So just keep your drawing
as simple as possible. Alright, that's it. That's how I create my
monthly planners bread. Thank you everyone for
joining my class today. I hope you're having fun creating your own digital
planner template. And if you would
like to see how I decorate my digital
planner in good notes, apps, you can check
out my YouTube video. I will provide the link in
the description box below. Thank you everyone for
joining me and see you in my next video. Bye.
 Hanacrochetdesign Eva Widjaja, hanacrochetdesign