Transcripts
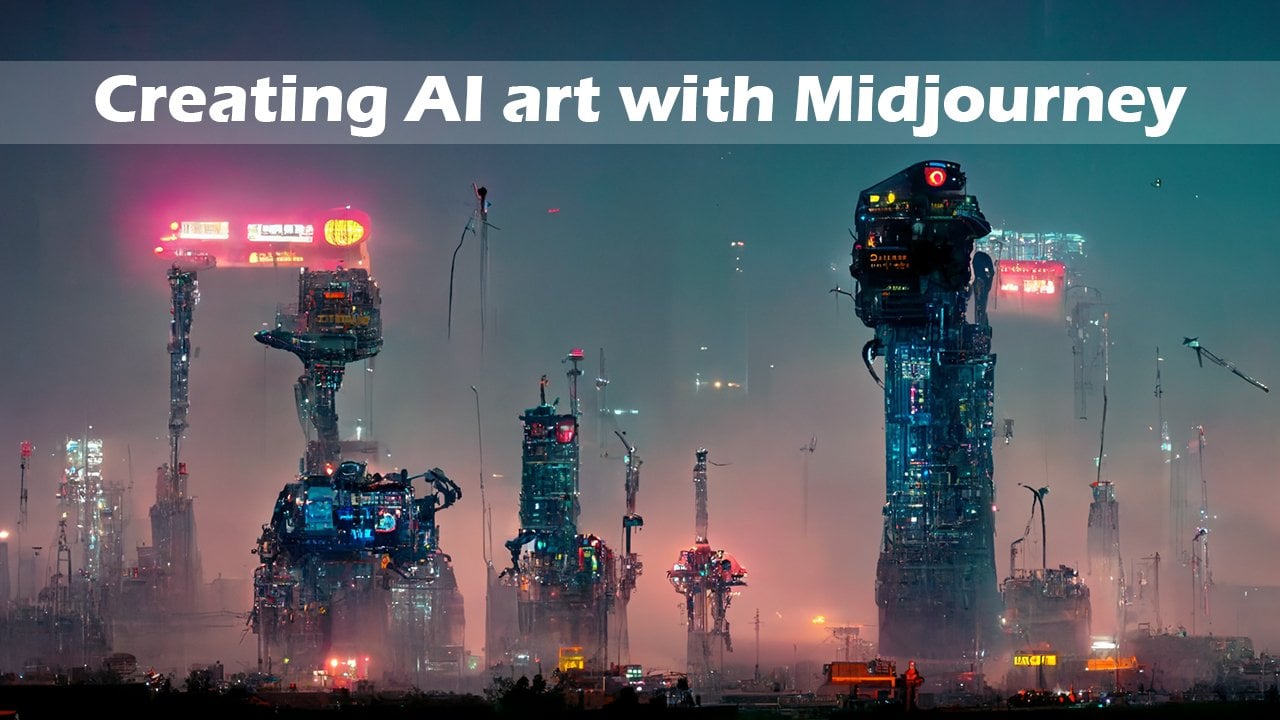
1. Course Intro: Hi guys, welcome to this course, creating AIR with
discrete diffusion. So what is this weird
fusion sounds a bit funky. Well, it's one of
many programs out there that you can
use to create AIR. How do you do that? Well, this course we'll be going into it and a lot more detail. But essentially you
can take a line of text or input a line of text to create some
unimaginable crazy artwork. This course is going
to, first of all, take a look at some of
the work has already been made with disk diffusion. Then we're going to actually get into the nitty-gritty and look at how we use the program. All you need to use this
fusion is a Google account. So as long as you've got
that you are ready to go. We'll finish off the
course by looking at a few tips and tricks and also a project assignment
at the end where we will all create different
art work and share it. So I hope you'll join
me on this adventure and I'm looking forward to
seeing you guys in the course.
2. Lesson One – Existing work made with Disco Diffusion: Hi folks. I thought in the first
lesson it would be great to start off by
looking at some work which has been created with disco diffusion
just so we can kind of give up and get ready and see the potential
in this software. So I'm gonna spend
two minutes going through stuff that
other people have created and then I'll reveal at the end what I've
created with it so far. So as a few articles here, and what I'll do is
I'll link these in a Word document or
Notepad document, just so you can have a look
at these links as well. But if we scroll through here, it has been used
descriptive fusion. Now you may notice it says
disk diffusion 4.1 or 4.2. Basically there's many
iterations as time. So that says 5.2. So that's
quite recent one actually. And it just gets
updated all the time. 5.4, I think, is the one that
we're using at the moment. So anyway, this is a bit
of a run-through on it. Here's some images PER here, so that's a bit of a mad one. And don't think there's
too many in here actually, but let's have a look.
This was a good link. So this artist,
Theodore McKenzie, created a range of
different Roman villas. So we gave it some text prompts. And I mean, that's a
bit of a weird one. You got some stuff
float in there, but still pretty cool. A lot of Fargo, I reckon that you would have used fog
is one of the keywords, but a range of lovely, lovely images created with that. Then we've got over
here on Reddit 17 images generated
with disk diffusion. They've used enough
another AI pieces, piece of another way
I program called swim IR to upscale
the images as well. So you can see
obviously a different style that this artist, that this person has gone for. And this will be due
to some of the texts prompts that the guy gave. So I think there's
some more over here. Yes. So you've got some more sort of environment stuff over here again created with Dischord
of fusion. There we go. Um, so yeah, I have
a scroll through. I'll send you the links
for all of these. Now let's have a look
at what I've created. So I'm going to start off by talking
through some of these, this one really,
really didn't work. I said something along the lines of my text prompt
for this was something along the lines of Yellow
Submarine, psychedelic, Savile, civilised and really trying to get something like
The Beatles album cover, but really didn't work that one. Then I'm gone for ice. I think I've put
a colony on Mars, Red Planet, futuristic city, those kind of text prompts. And this is the
kind of stuff we've got really, really lovely. I think I put concept art
and digital art as well. So this is really, really nice. I love some of this stuff,
particularly this one. Then for this one, I put in and we look
at prompts later. But I've put in something like slimy insect monster
and Cyberpunk, I think. So you can see
attempts on some of the sliminess here, some wings, they're from insect and so
cyber punk, it's all in there. So that kinda got me some
quite interesting stuff. Yeah, slimy insect, cyber punk, monster kind of stuff. Yeah. I try putting into words like Pandora and Avatar environment. So I want you to get an
avatar kind of thing. Some of us a little bit messy, but some of it is quite nice. One that I did find
that really worked was the name Simon style and HOG that worked in
the text prompt. And it got me some
stunning stuff. So just to have a look
through some of these, I think I'll put like
futuristic cyber punk city in the style of Simon style, style and hard, which is
one of my favorite artists. And just look at
just the detail. Look at the detail in
that it's just stunning. And gave me some
really nice images. I'm just loving this. I mean, the reflections here, reflections aren't
actually totally accurate. But still it doesn't matter. Just look at this
composition of that. So these are some
of the results. I mean, that one,
again, just lovely. As things get further
away into the distance, you can see the haze, atmospheric haze coming in. So quite realistic as well. These are just some
of the examples which you can go
ahead and create. I've got some other stuff in here as well, which I
kind of went through. It doesn't really like faces, but I did put this
in the style of an artist who does do sort
of weird obscure faces. And I put the word
psychedelic in there as well. But yeah, I mean,
I've got spaceship, spaceship crash landed
in a desert with some of these ones But here and
kind of mixed reviews. But particularly the Simon, Simon style and hogs stuff
here was just honestly unreal. So what I'm gonna do
is I'm going to finish this little less than that. But there, again,
this just looking at this on screen is mad to think that this
is created by AI. But I add the only
thing I gave it was a sentence of texts and just
look at how stunning assist. Yeah, cool. I'm going to leave it there. And what we'll do in the next lesson is we
will start actually taken a look at how the Colab
notebook disk diffusion works. What we need to do, and
I'll get you started. So I'll see you in
the next session.
3. Lesson Two – How to use Disco Diffusion: Okay, so here we are. I mean, disco diffusion 5.4. Now I'm going to provide
a link to this however, or you can just copy this, but I will provide
a link as well. You will want to take note, I'm recording this on
the 23rd of June 2022. There's new versions
being given all the time, so you'll want to check that. Now this looks pretty confusing, but I really don't want you to kinda get overwhelmed by it. Okay? First thing I'm gonna do is just this little
drop-down over here. I'm going to click this.
And then I'm going to click the one on number
one and number two. And I'm going to click
that one and number three, number four, and
number five, right, so we've got a little
bit more basic setup. We're gonna go through
each of them one by one. In the setup. I don't need you to do
anything with that. You can leave that what will happen is we're
going to run this. We're going to go up to runtime and we're going to
click something. And it's going to
run through each of these little 1.11.21.3. So the notebook is
going to install an important dependencies
and set up runtime devices. Then it's going to define
the Midas functions. I don't even know what that is. The beauty of this. I'm not a programmer, but you can use this Google
Colab to do this for you. So we're going to
come into number two. We're going to start to
come down and I'm going to go through a few
important things. You don't need to do
anything in this one. And in fact, I think let's just come into
custom model settings. Note number two, you
can actually leave. So yeah, that's all good. Number three is the one
we want to come into. Number three. Okay. First of all, batch name. I've always left this to time to disco and arguably I should
probably change it. But if I go to my Google Drive, you'll notice that
when it connects, it'll do the AI folder, disk diffusion and images out, and time to disco. It's your project name. Okay. I'm a little bit messy and I've left all of these Kelvin there, but probably shouldn't do that. So you can give
that a folder name. Let's just do what
should I call it? Skill Share? Skillshare lesson. Okay. I'm going to put an
underscore instead of space because I
don't like spaces. Steps. This is how many iterations
that goes through. And I'll explain that. Well, if I go into
my time to just go and go into partials, what you'll notice is, let's scroll down iterations
as double-click this. First of all, let's start
off with a bunch of noise on screen and
then step-by-step. And I asked you to
do it in step to 25. It gradually gets rid of
that noise and starts to reveal and build
detail into an image. Now the reason I
save out all these partially done one
zone may think, actually, I like this. I just like it quite
blurry and Bland is. So you've got, you've got every 25 iterations
I get it to save. Now, what we're going
to specify over here is how many steps
we wanted to do. 250 is a probably a
definitely a good start. It depends how
detailed you want it. Now, let's come
to the final one. Let's say, for example, I'm getting to here and I'm
like, Whoa, as too detailed. Well, I'd always argue, give more steps than
you need because you can always go back and take one of those partials out. However, the more steps you do, the longer it takes. So as a rule of thumb, I normally go for 450. Okay. It takes a little
bit longer, but it gives you more detail on it. It goes through these, you can see, starts noisy and gets better
and better and better. That's just how it works. Okay? Width, height. What you need to know
about this is this needs to be a multiple of 64. So if I get my calculator out, just to illustrate that, let's bring this
onto the screen. 80 divided by 64, some like 20. Yeah, there we go. Quick maths. And then 768 divided
by 64 is 12th. Okay? So I, this ratio,
1287768 is widescreen. So if I just type in
1280 by 768 bits, you should hopefully get an image of what
that looks like. It's saying that that's a
wallpaper of that resolution. Let's just type in resolution. And you're going to see that Twelfth Night
or less put ratio. So I'll show you the
aspect ratio then. That's gonna be a
ratio of 15 by nine. What I do basically
is I up this, I put this generally to 1344, so I add an extra,
I add an extra 64. Now, you don't have to, but if you do adjust these, the final image,
width and height, they've gotta be
multiples of 64. You could do 640 by
640 if you want to, to, to get a proper square. The rest of the stuff and you
don't need to worry about. So it's just these three. So let's just scroll
down this bit down here. You can give it
an initial image, but it doesn't work nearly
as, anywhere near as good. So we're not going
to look at that. Don't worry about
animation settings. Let's have a look
at extra settings. Now, intermediate
saves. So above, I told you we're gonna do
450 steps, 450 iterations. Now, if I take this to 0, it's going to save
out these steps which I've gotten
here, these partials. It's going to save none of them. But I may say, or what
I normally do is say, save an image every
25 iterations. Just going to do 450 iterations, but it's going to save
an image every 25 and intermediate in sub
folder. It's already ticked. Perfect. Advanced settings. We don't need any of this. Don't need any of that. You can, if you want to. You can turn on symmetry. If you turn on vertical
symmetry, it will make your, it will make your final image
have a certain level of vertical symmetry or
horizontal symmetry. I don't tend to do it. I'm not going to
bother button lock. This is all about playing
around and having a go and seeing what
works and what doesn't. Then we need to come
down to prompts. Now, I'm going to
put in something like so let's delete or less. You want to keep the
colon's each side. You can go ahead and just
use this if you want. But I'm going to go a war torn city in the future. I'm going to put by
Simon style and hog, again, one of my
favorite artists. So Simon style and hug. If you have a look at his
stuff, it's just stunning. I love love his stuff. Okay, So let's come back. A war-torn city in the
future by style and solid style and hog dusk. Let's just put dusk by here. And I'm also going to put
trending on Park Station. I'm going to go to
rendered in Unreal Engine. Now, there's a
particular reason why I'm going into these
specific prompts. Now that will come
in the next lesson where I give you
some tips and hints. And I'm also going to link
you to some YouTube videos which can go through it in more detail because the more information
you have the better. So I'll leave it at that. I'm just going to do that. So a war-torn city
in the future. Let's put in the distant
future at dusk by Simon, start by Simon Stone hug
or in the distant future with nebulae in the sky by Simon style hog training on art station that
may throw it off. I don't know what
this is all about. Folks. This is a 100%
experimentation. So what we wanna do is
prompt to Dan and all that. So once you've done that prompts your little intermediate
saved and your stuff up here. To be honest, you can
minimize settings. And the next thing we
wanna do is diffuse. Now, just have a
quick look in here. Display rate. Remember I said you've
got 450 iterations and we're going to save
out an image every 25. You can also show how often
it's going to display it. So I'm gonna put a display as, as it's doing it
every 25 as well. I normally keep those
numbers, the same number of batches. Click at 50. Now, because I'm
on a free version, it'll never normally
see the 15th through. It will normally timeout
by the time it does that. So I'll always keep
it to 50 and I'll get as many as I can if we
just have a quick look. Normally I tend to get around. So
12345678910123456712345612312345123456. So January around six
seems to be the average. Again, it depends on time
of day and how busy it is. You can get more by
updating to I'm going to cancel that by updating
to Google Colab Pro. I haven't done that
because I don't need that. If you do update it,
you just go faster and you get unlimited resources
and stuff like that. But I'm not in a position
where I don't need it. And so what I'm gonna do now, that's all set to 2550. And don't need the video
of stuff for this. So what I'm gonna do is
scroll back up to the top. I'm going to click one time. And then I'm just going
to click Run all. Okay? And what it's gonna do is come up with a few things. First of all, is
can say this was not authorized by Google. It's been loaded from GitHub. Do trust it and all that stuff. And I'm just like, yeah, run it. Then it's going to ask you
the notebooks, awesome. Hi Rambo of largest click. Okay. And then it's going to wait
probably about 1020 seconds. And it's going to ask you to
connect your Google Drive. I think it'll do it with mine. It may have or may
already be linked up, but I'm pretty sure that it
will ask me there we go, connect to Google Drive and
I'll just click, Yeah, cool. And allow. And then what's going to happen now is you're
going to leave it. You're going to see
each one of these. I'm not going to leave it
recording. It'll take a while. You'll see each one of
these will kind of go through where it's got the dotted line circling
it, it's waiting. Now it's executing
all these commands. Just tick that one is
now preparing folders. So it's saving folders, making folders in
your Google Drive. And I wonder now if I
go back to My Drive, ai disk diffusion images out, hasn't created those
ones yet. Asked by. Now, doing installing
an important stuff. And basically it's going to
work through all of them. Now what you'll wanna
do is when it gets, it'll go through 123 in
about four or five minutes. And then what you'll wanna
do is come into diffuse. And as it starts executing this, your image will pop up just by here as it starts going through. So what I'll do is I'll come
back to the recording in a minute once mind starts going through
all the iterations. Okay, So if we have
a look at mine, number one's done too is done. Custom models done, three
is done for its active. Okay, so if I scroll
down, I have to wait. It was active and I had to
wait about a minute or two. And if I scroll down, I can now see, boom. So this is the first, it's sort of 2% of the way through and it's
saying it's going to take about 38 minutes, 42 minutes to do one. Okay? So you'll see batches
0 per cent, 0 to 50. So it's gonna be doing 50
images and it won't get there. But it's saying that it's
prep to do 50 images, which is what we set earlier. And it's saying that it's
done iteration 15 out of four hundred and forty
four fifty, I think so. I don't know why
he's kinda gone with that google Colab notebook. It can be buggy. But what you'll notice
is when we get to 25, I've asked her to
save out an image every 25 iterations and also
update every 25 images. Remember we did that earlier. We'll likely see this when
it gets to 25 out of 440, will likely see this update. So let's just have a look
and see if it does that. Hopefully should update. And if it doesn't, well, it's not the
end of the world. I don't know why. Again, it can be a bit
buggy and maybe it's just gonna do it in a second
now, or maybe they are. There we go. Perfect to it. Waited a
couple of iterations, but it has updated,
so that's good. I'm really glad that worked. You've got to do now is
you've gotta leave it. Now. Time is gonna take, will
go up, it will go down. It depends on how
many people are using the GPUs and the servers. Now you can go and update a goat Colab Pro or Colab ProPlus. For me, it's not worth it. I don't mind waiting. I can leave this one
as I do other things. Okay. So what I'll do is
I'm gonna leave this go. It's ten to ten. And now I'll probably recall this tomorrow
morning because normally I get about four
hours worth of GPU time. So what I'll do is I'll revisit all these images tomorrow
morning with you. Then I'll also record
a lesson on prompts. And then I'll set
you a final task, which I'm really excited about. So cool. Hi guys. So I'll just show
you the results now from disk diffusion. So you'll see I've
got my AI folder. If I double-click and go to
disk diffusion images out, you'll notice I've now got that additional folder
Skillshare lesson. So if I double-click in there, you'll see that I only let
it do fall are snakes ago to about 12 o'clock and
I want you to go to bed and didn't really
have a computer on. So first of all,
we had this run. So let's have a look at this. So this is quite a nice one. I like that as a little bit
of weirdness or over there. But for the most
part that's really, really nice and a lot of
detail in there, I love that. Then we've got this one. Again. It's a bit
weird that you've got that on the floor
and then this up there, but you can see what it was
trying to do and still looks, regardless of it
being quite surreal, it's still looked very nice. You've got this one, which is I think one of my favorites. Again, lot of that plumped
really coming into work there. And then we've got
this one as well, which is similar
to the first one. I may have actually had a fifth. If I go into partials, I may have not let it complete. So we come all the way down. You can see we've got
all these partials and this was the last one. I really I didn't let
it go all the way, but I really like that one. That one's probably
actually my favorite. So you can, if you were to know Simon style and the parts work, you can really see some of his, some of his kind of influence
coming across into this. So yeah, those are my results. So like I said in the
next lesson now we'll go on to look at some prompts
and some tips on that. Yeah, I look forward to seeing
you in the next lesson. Cheers.
4. Lesson Three – Prompt Tips: Okay, So I'm going to go
through a little bit of a lesson on prompts
with you right now. Okay, so first of all, what I'm going for
something like sci-fi and fantasy and concept
art or anything really which is kind of coming
up in here along the top, are generally like to put in
a trending on art station because art station is the home of concept art and just
look at this stuff. So if these are the things
that are currently trending, then it's going to be
looking at this and trying to replicate it
in some of these styles. So I really like this. Another one which I
used to use is 500 px. Now, that's generally a bit of a photography one these days. But what you could do is
if you knew a website. So Deviant Art could
be another one. I don't use Deviant Art anymore. But if you, if you use or you could look
at topics in here to help generate ideas. You could put in
anime and manga, you could put in and throw
or artisan craft or comics, or Fan Art or fantasy,
fanfiction fractal. You could use this as a prompt
generator to be honest. Pixel art, I never
thought of trying that. Street photography, science
fiction, traditional art. That actually, I think I'm just stumbled
across quite a good one. Quite coincidentally,
putting in 3D is quite nice. So using trend in on art station or trending
on Deviant Art, or finding a style in
here which you like. Really, really good idea. Also, I've done another course on something called Night Cafe. Okay, so go and
check that one out, because this is
quite a nice one. But also if you just go ahead
and come to the website, go to Google type
of the income year. You can obviously go through and click where I've just
clicked and typing prompt. But you've got all of these, all of these styles. So synth wave, cyber punk,
heavenly, surreal horror. So you can use them as keywords. Let's go and type into Google
just randomly, art styles. All of a sudden,
I've gotten that most famous art movements and styles come and
look through here. Art Nouveau, avant-garde, constructivism, conceptual
art, catechism, data, digital arts, Futurism, neon arches have a look at that. I mean, yeah. You may want
something like that. Pop out. You may want
something that kinda looks like that
post-impressionism. Use these. Again, if you don't
know what Rococo is, which I don't even know if
I've just said that right. But I may use this as just see what
it kinda comes up with. Surrealism. I like, again, if you've
interior severe autism, just go Surrealism. Artists. Salvador Dali, obviously it
comes up and you could start, but obviously I put in for my one which is
still going but here, look still going quite nice. I put in by Simon style and hard because
he's an artist that I like. So you can go and find
an artist that you like. What I found because I like
the 3D things is if I put renders in Unreal Engine, if I can actually spell it. Click this. I know that this
gives you a sort of photo-realistic or can give
you a photo realistic style. I'll often chuck that in
there with my problems. Now I did put it in here. So we'll see how photorealistic
ends up becoming. But that's another thing
that I like to add. And then there's
two other things which I was going
to share with you. As well as using sort of like websites, finding art styles, finding artists add in Unreal
Engine or photo-realistic. Or if you wanted something
that looks like a photo, type in something like
shot on DSLR. Why not? The other thing is short
prompts versus complicated, or short prompts versus non
short prompts, I guess. Let's just make a new
Word document for second. You could go as abstract
as the wind by Van Gough. The wind that is very abstract. Or you could go a countryside field of sunflowers with
clouds in the sky. Right? Oh, let's go more. A family in a countryside
field of yellow. Because you can have
different colored sunflowers. I think maybe not. Yellow sunflowers with dark no, with white fluffy
clouds in the sky. And some green trees
in the distance. Then in the style of golf. So you can see, I think it's always
worth trying both. This one is weird,
short prompts. You can get some
really funky like, Oh my gosh, I wasn't ever
expected in that kind of stuff. Sometimes they can just be like a little bit like
what am I looking at, but you can really
surprise you sometimes, sometimes being too descriptive
and giving it too much, it may just get like
really, really busy. So for example, I've
done this before where it would be a countryside
and it's a field. But the sunflowers
Look all puffy like the clouds and stuff like that. So sometimes it can
be a bit too much. So again, it's about
trying both but try, try both different things. Another thing, one
final tip that I do, like using is I'll often
add a time of day. I know as a photographer that shooting at
the golden hour. Let me just show you
what a golden hours, I'm sure most of you know, but I'm shooting at
the golden hour. It gives you some stunning. It's when a sudden
setting or just rising where the
sun is so lower, interact with a lot
of the atmospherics and creates a really golden
sort of vibe like that. A lot of Netflix
stuff shot around about the golden hour because it just makes it
look more cinematic. So I'll often put
either golden hour, golden hour, or I'll
put at dawn or dusk. Dusk in the one which
has generated now. So yeah, that's that's that's
what I'll leave you with. So let's bullet point that artists search for artists
twitchy like styles, websites like art station, trending on Deviant
Art, stuff like that. Unreal Engine. I like to use shots on DSLR if I wanted to
look forward to a real or just add the
word photo real. And yeah, short versus
short versus long prompts. Try and see what you get. And so we're going
to leave it there. That is my short little
advice on prompts. And I'm uploading quite a few of these AI
generated tutorials. Each will have a less non prompt and each will probably be slightly different
and more updated because this is growing fast. So yeah, cool. I hope you found that
useful and I'll see you in the final lesson next, where I will set you
your little project, which again, I'm
super excited to see.
5. Project Task (Assignment): Hi guys, welcome to the class
assignment for this course. So all I want you to do for this class assignment is I
want you to create two pieces of AIR funnily enough using disk diffusion,
which we've just learned. Now. Two pieces though I
want you to create. The first one, I want it
to be an environment. Never can be any environment you want to go wild, be creative. The second piece,
I want it to be either a character or object,
completely up to you. But what I want you
to do once you've created these pieces of AIR, I want it load them
into the class project, but I want you to upload them with the prompt that
you used back way. We can all see what prompts
get different results. And it can become a
little bit of a gallery, a little bit of a
source of inspiration. So battle and ask him to pieces of artwork
more if you like. But I want to see at
least one environment and one character or object. So go while to show me
what you're made of. And the only thing
that's left to say is thank you very much
for taking this course. I really hope you guys enjoyed. So I hope to see you again soon. Cheers.
 Jonathon Parker, Passionate MoGraph and VFX Lectu