Transcripts
1. Introduction: Hello, my name is
Charlie and welcome to getting started with Shopify. If you knew the e-commerce and looking for a
straightforward, easy to follow cause to introduce you to the
world of online selling, then you come to
the right place. Shopify is an
incredibly powerful and user-friendly
platform that will make it simple for you to create and manage your store over time. This course is designed specifically for
beginners looking at, cut through all the mess, and just get started
with an online store. So we're not looking at
all the elaborate things of apps and different
integrations. We're really looking to just
get your websites set up in the foundation there so you
can build on it over time. My goal is to provide you
with the essential set of tools and knowledge
to launch your store. As not to overwhelm you and make things more confusing
than it needs to be, especially when you're
first getting started. And it's not necessary to have all the complex apps integrated
right out of the gate. However, in saying that once
you've mastered the basics, you can look forward
to an upcoming course where we'll dive deeper
into the realm of Shopify and say you can take your store to the next level
once you're ready for it. In this introductory course, we're gonna be
covering the topics of picking a theme,
customizing your store, setting up products,
collections, internal content pages, and also setting up your shipping
payments and policies. But last but not least, we'll also be
launching your store. Remember, this is
just the beginning of the e-commerce journey. There's so much you'll
learn along the way. However, let's get started
with Shopify and take your first steps to setting up your successful online business.
2. E-Commerce Framework Worksheet: Now I'm just going
to hold you there. Before we get started
with Shopify, I'm going to introduce you to a little document
that's called the e-commerce website
framework document. And we're going to
be building this out before we get started
with Shopify. Just to provide you with a
little bit more direction. Just to bring your
thoughts together before you try to just
put it all into Shopify, which can get a
little bit confusing, especially when it comes
to building the website. As we all know, you can get lost in the kind of customizations and
creative side of it. But if we can go into it
with a bit of direction, an idea of who we are catering to and what we're trying
to get out of that. That'll be an amazing
help in just use, spending less time tinkering away and can let you just have a bit more fun with having a direction to follow
from the very beginning. Now the purpose or the e-commerce website
framework document is that it'll help you
identify your branded entity, your target audience, your
unique selling proposition, or point of difference. You still structure and also the products
you'd be selling. Now, this isn't essential. However, if you're serious about setting up your online
store right away, then this will provide
a clear road map for you and just help you
reflect on it throughout the process as
you're customizing your store will just help
with that decision-making. So you don't just make things
based on what you like. You will be reflecting
on the actual brand and the target audience when
making those changes. But without further ado, I'll leave you to fill in the e-commerce
framework document, and I'll see you in
the next video to get started with creating
your Shopify account.
3. Creating a Shopify Account: Another kick off,
a Shopify journey will need to start off
by creating an account. Now if you have one, feel
free to skip forward. Otherwise, let's
just walk through the early steps of
creating your account. Now if you need to
create a Shopify count using the link in
the description, you'll be able to get started on an extended trial period where you'll get the first
three days three, and then for the
first three months, you pay $1 per month. So we're just going
to start off by interior email address and then selecting to
start a free trial. Now, feel free to
answer these questions. You can also skip through
these if you like. So we can just skip
through all of these. Now if you don't have a name,
feel free to skip this one. But for today's purpose, we're just going to name this
one the organic soap bar. Click Next. Now, currently
located in Australia, feel free to select
whichever country you're located in. Next. Now, as already, have an account created abusing that one today. Although if you don't have one, feel free to select, Add
account and follow the steps.
4. Selecting a Shopify Theme: So once you're
into your Shopify, can you start off on
the Home dashboard? Now from here, we want to
navigate to online store. If this isn't here for you, you might just need to use the search bar to
navigate there. To do so, just searching online
store themes will pop up. Now that's where
we're wanting to go. So let's click themes. As you can see, it starts
off with the dawn theme. Now this is the free sort of
skeleton theme for Shopify. Dawn theme does have its place, although for today's purposes, we're going to be downloading. Another one is Shopify
is free themes. So to do that, we're
gonna be scrolling down and clicking
visit Theme Store. Once that's loaded,
we can see there's a range of free and paid themes. Feel free to take a look through all of them and see if any might stand out and reflect
your branding or less. Sometimes he's
paid themes can be quite an investment when
you're first getting started and you might not find they have as
much functionality or customization as they appear
to have from the outside. Suggest starting off with a free theme when first
getting started with Shopify. And it also helps you to
understand how components work. So then you can see
how the paid themes might translate across. Then when you do a free
trial of the pay theme, you'll start to see if
that theme does have as much customization as
you'd like it to have. Or if you might be better
off actually adding customization on top
of that free theme, as it might still
be cheaper than paying the extra 350 US. So as we'll be going
with a free theme, we're just going to select
the filter here for free. Then from this range, we can see there's a few
different options here. But I think for the style
will be going for today. We're just going to
select the sense theme. So once you've
selected the theme that you'd like to go with, you can see there's
two options to try the theme and
view demo store. Feel free to select View Demisto as that'll give you an idea of the store when it's
completely mocked up with content and
imagery in there. Although we're just
going to jump straight in and select try theme. And this is going to install the theme onto our
Shopify account. So now that that's
done downloading, we're going to select
Publish as this is going to replace the current
theme, which is Dawn. Nephi do have an existing
Shopify account with a website that's running with
customers making purchases, I would suggest leaving this
theme is unpublished for now and making changes
from the unpublished view. Then once you're done
making those changes, you can select a publish and replace that store
just so you don't make any confusion
for your customers when they're trying to
purchase any of your products.
5. Customising your Store: So now that we're made
this the current theme, we're just going to
select Customize. So we're now inside
the Visual customizer, which will allow you
to edit the website. So the visual editor. So starting at the top, we
can see the drop-down here. This will allow us to
navigate to all of the internal pages or other pages that will be
building out later on. Although we'll just be sticking
to the homepage for now. So if we go across
this desktop icon, we can see there's three options here when we click inside. So we can go fullscreen
desktop or mobile. Now if you're on a smaller
laptop screen, for instance, you might want to opt for full screen when
previewing your changes. As this side menu will pop out and take up a good
portion of your screen. If you don't have that
real estate to work with. And then mobile, this
will allow us to see what the website will look
like on a mobile device. Great thing about these
free Shopify themes. They're often all optimized for mobile without you having
to do too much work. So you might not actually
have to touch anything there. Well, there for now, we're just going to stick to desktop. So we're gonna go back and
just select desktop view. Now if we head over
to the side here, we can see our
different components. Now the template layout
will always have a header at the top and
a footer at the bottom. Now a Shopify has
recently introduced the option to add
sections into the footer, which that will
apply universally throughout your website. So as you can see, the theme has the email sign-up already
is the component. And we're just going
to leave that there because we will like to use that and collect people's emails as they navigate
through the website. Now, in-between the header
and the footer sections, we've got the template
body sections. So this is where
we'll be spending most of our time shortly, although we're just
going to leave this for now and focus on getting the header and the
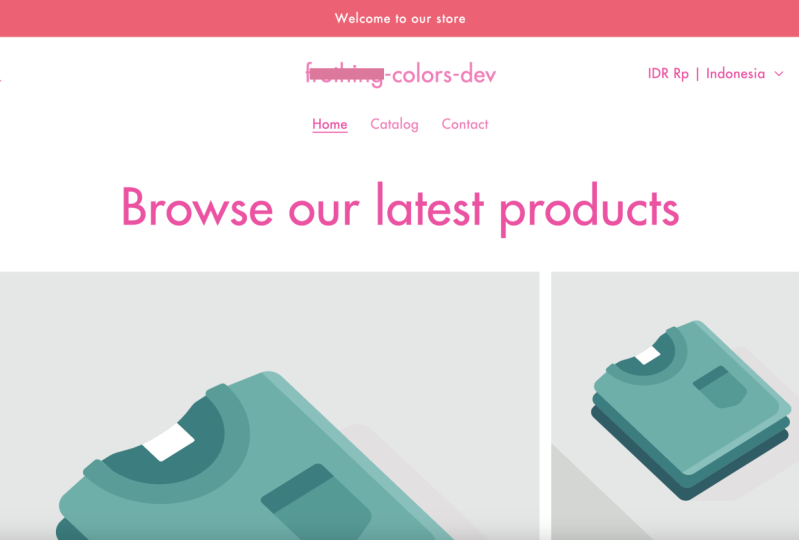
announcement bar ready to go. So if we start off by
selecting announcement bar, will see this drops
down and we actually have the Welcome to
our store texts there. So we're just going to
select that for now. And we're going to
replace welcome to our store with just
our promotional texts, which this will be
different for everyone. Although for today's purpose, we're gonna be putting
promotional texts, which will be a discount
code for first-time order. So once you've
added that texting, we're going to need to change the color of the background. Now, as you can see, the theme has an option
to select a color scheme. So we can select
from background to background one and so forth. However, none of these colors actually match our
branding just yeah. So what we're gonna
do is jump into the theme settings and start
applying our brand colors. If we head on over to
the far left-hand side, we'll see there's a paintbrush. And this is for theme settings. We want to select that one. Once you've done
that, we're going to navigate to colors
to start with. Now within colors, we can say there's a few
different options here. Each of these apply to
different elements of the page. For instance, we can
see the background here is the background
gradients and background to. Now the background to
which is the non gradient, is actually a fallback. If a browser is unable to
interpret the gradient styling, it'll just fall back to the flat coloring
of background too. And similar for background one gradient and background one. Background too. We're just gonna be
adding in one of the branded colors for this one. So I'll just copy
this hex code in. Although if you're
just getting started and still experimenting
with coloring, this is a great time to see how the different colors
might influence the look and feel of your website and also what colors go
with your imagery. Now, once we've added
in background too, we're actually not
going to be using the radio gradient for
this website today. So we're just going to
be clicking on this and selecting Remove gradient. We can also now do the
same for background one. We can just remove
this gradient as well. Now we can see background
one is applied to the background of the
body of the website. And we're actually just
wanting that to be wide. So we're just going
to click into there, and we're just going
to drag the color selector all the way
to the top-left. And we'll see that go white. And therefore the texts
would just can actually change this to the
branded green. So again, just going to
copy across that hex code. I'm just going to say that
changeover now for the accent, similar thing, we're going to be applying the grain for the Axin. So now that we've added that, we'll see that the recently
selected colors appear. And we can simply just select
those colors from there. So now that our announcement
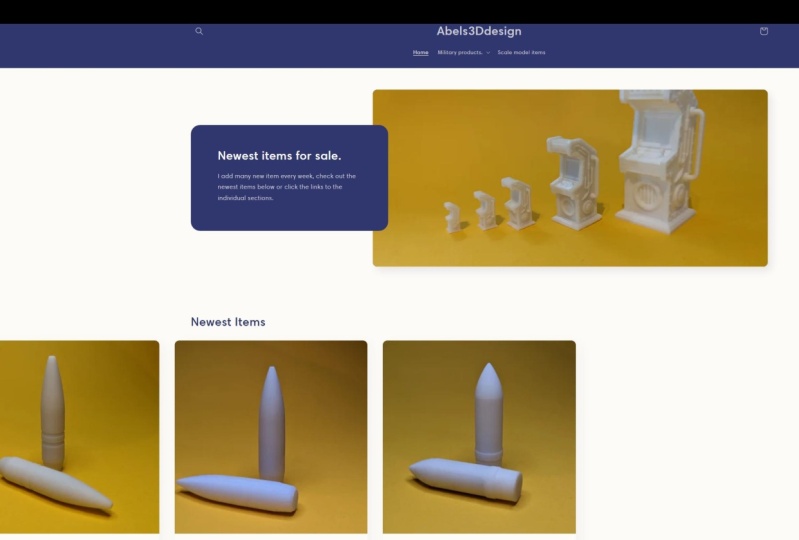
bar is looking good, we can move on to the header. Inside of the header, we can see the store name is
being pulled through. But we do want to add the logo. So we're just going to select
within theme settings logo. Then here you can
see we can select image or you can
drag an image in. So we're actually just going
to drag this image in. Now. Once you've added it, you can see the logo
is quite small, so we're just going to
increase the logo width. Perfect. And then
for the favicon, while we're here, we'll
add this as well. Now, if you don't have one at this stage, that's
completely fine. You can always come back and add the logo or the
favicon in at anytime. So now that we've
added those in, we can see that the
logo is getting a little bit lost in
the background. So I'm just going to
select on the header. Once the head is
settings have appeared, we can see the color scheme
is set to background one. Which background one is
the color we're using for the background of
the body, which is what? We're actually going to want
to change this to the green. Now inverse is taking the
color of the background and the color of the font and
simply inverting those. Once you've got the
color scheme you like, we're then going to adjust
the logo positioning and we're just going to
change that to middle. Center, will leave the
menu as is for now, and also leave it as
drop-down for now. So moving on to sticky header. Currently it's set
to on scroll up, which this just
means it will only appear when you go to scroll up. Personally, I'd rather
set this to always show and just reduce
the logo size. So when you scroll, it just takes up a little
bit less space. So if we give that a go now, we'll see that the
header does stay there, but the logos shrinks slightly, so it's still there,
but just slightly less visible in your face as it is when you first
land on the page. Now, I think we're
done with the header and we can move on to the template body sections to introduce you to
template sections. The key functions of
days before we dive into the individual
sections is we can drag these around using the little toggle
on the side here. We can hide these. So you might want to have
a section appear for a campaign and then hide it for a few days
and bring it back. You might be best
just to hide that rather than remove
it completely. If however, you don't want
to keep that component, you can either
select the component and then go to
remove it down here. Or you can also remove at the bottom of this
section settings. So we can remove section. Now if you don't want
to remove a section and actually want
to duplicate it, you can also do that to select the section in the
top right-hand corner of this section settings, you see the three dots. These three dots, we just click that and we can
select Duplicate. I don't think we quite need to feature collections
at this stage, so we'll just remove
one of those for now. And then we'll also
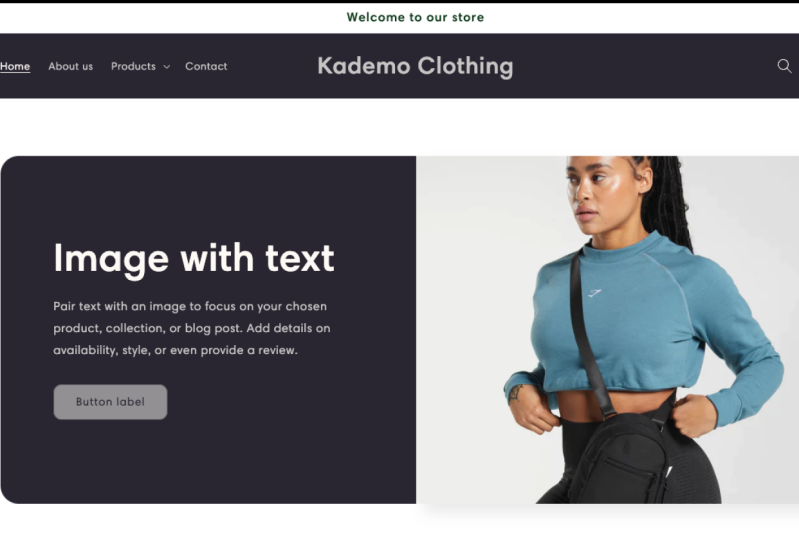
be adding back in a section for the hero. So the very first thing that people will see on the website, this will consist of an image, texts, and a call to action. So for this, we're best to use either the image with texts, image banner, or
slideshow components. Now, I'll be using the
imagery texts today. Although feel free to use
either of the others. We're going to need
to move that above the featured
collection as we want this to be the hero section. So we're just going
to click here and drag up and take
that to the top. Now the first thing to
do is to add the image. So again, we can either select
the image or drag this in. I'm just gonna be dragging
in an image here. Perfect, So we can
see that's loaded in. So to get started with the
image with text section, we can drag an image
in or select Image. I'm just going to
drag an image in. Once that's added,
I'm going to change the image height to
medium, the desktop width. I'm gonna change this to large. We're going to switch the
image to actually be second. We're going to change the
content position to middle, and we're going to change the
content layout to overlap. The last thing here
is the color scheme. This will also be changed
the background too, as we want to give it
that branded touch. We don't want to
go the harshness of the dark green for instance. So now that we've got
the layout sorted, we can start editing the text. So we're just going to go
into the heading texts here. Now I'm just going
to copy across some texts that I've prepared
earlier while there. Feel free to add
whatever you like it or leave it as
placeholder for now. And you can always come back
and change this later on. As we can see, the
text is a little bit too big for this space. So we're actually
going to change the heading size too small, and that just fits perfectly
inside that space. And now we're just going to
add a little bit more text in that the last block to
work with is the button. As you can see, it's
currently grayed out, but it's just because it's
missing a button link. So we're just going to
change this to shop now. And then we're also
just going to make this an old products page. Once you've done
that, click Save. Now before we move on
to the next section, one thing to think about
when you're taking your product imagery
is to think about where it will also be
going on your website. Many people take
their product imagery and they put the product
front and center. Although they missed
the point that the rich text around
that image sometimes, or it might be used on other platforms like
Instagram or Facebook ads. And you might need
a little bit of leeway to have
texts to the left, to the right, or in the
center of that frame. So that's one thing
to keep in mind when taking your
product imagery. As that'll play a crucial role in make sure that imagery fits seamlessly on the website and everything doesn't
look out of place. So now that we're finished
with the hero section, we're going to scroll down and work on the featured collection. So if we click into
Featured Collection, we can start off by
changing the heading here. So again, just going to
change this one over, discover our new range. And then we'll leave
the heading size is small and you can add a
description if you like. Although we're going to
leave this blank for now, now currently we don't
have any products. So what we're going to
quickly do is we're going to jump out and we're going
to add a few products in. And then we'll come back
to this editor shortly. So before we do that, we're just going to click Save. And then we're going
to want to open up the Shopify admin page
just in a new tab. So you can do that is
we can go up to the top left here and
don't click exit. But we're going to
right-click and go open link in new tab. And then we've got the
new tab open here.
6. Creating your First Product: So now we're going
to navigate to that new tab on the
left-hand navigation, we're going to select products. Now we're going to
select, Add your product. Once you've opened this page, you can now see all the
content fields that we have to work with when it comes
to adding in a product. So we've got the product
title, product description, we got the product imagery for pricing will be working
with this input for now. That can pay at
price is what we'll use when it comes
to a sale item, which we can get to shortly. We'll then want to add
in a quantity of stock. So we're just going
to put ten for now, make sure that this number
is actually reflective of your stock quantities and you don't just make this number up. Then we've got variants. So this won't actually
applied to the products will be putting in as
placeholders for today, but we will be
adding a variant in. So you can see how to set
those up and the different settings that Shopify
makes available to you. So we're just going
to start off by adding the product title. Now you don't have to use real product information
at this stage, although I would
suggest still mocking up a place holder
product for now. Just so you get the feel
for how Shopify works. So we're just kinda get started by adding the product Tidal. Now, even if you don't
have products just yet, I would still suggest doing this process will just help you get familiar with Shopify
as products setup process, and also get you
familiar with how these inputs will link
through to the theme itself. And then we'll add the
product description. And then going down to the media where you can
either select these from your computer or
just drag these in. So we're just going to
drag one of these in for now and set the price. If it's just a place
holder product, feel free to set this to
whatever you like for now, but still leave the Compare
at price for this one. But we'll come back
to that shortly. Feel free to add
the cost per item, although it's not a requisite. Now we'll keep this
dot quantity at ten just for testing purposes. We don't want to
continue selling when out-of-stock this product
has a skew or barcode. Now I would suggest having
a skew setup for each of your products from
the very beginning and have that
framework in place. So if you have any questions,
please just let me know. I'm happy to discuss
it with you. Now for the physical
product weight, we're just going to leave
this as zero for now, let's do feel free to add in your shipping way as this can help when it comes to the shipping calculations
for variance, we're just going to leave
this as is for now, and we're actually just
going to select Save. Now that that's done,
we can say that's publishing across our online
and point-of-sale channels. Obviously, we don't have
a point-of-sale setup, so it would just be visible
on an online store. So you can also select
to schedule a product to publish at a certain
date or time. So this is something
to think about if you have a certain
release coming up or if you might
just not be able to be by your computer
when that time comes, this can take care of
that step for you. So now that we've got our
first product set up, now we're just going
to create a few more products while we're here. So there's two ways you
can go about doing this. One way is duplicating
your product. If your product is very
similar in nature, but just as a few
slight variances, this can be a great way
to speed things up. Otherwise, we can also just
go back and go Add product. So this time we're
just going to add a product and use a
few more of the fields shopify provides to us just to see how those different
fields will influence the theme and how the
product page will actually appear when viewing
the different products. So let's add those in now. For this one, we're
just going to be adding in another product title. Now we're just going to use the same description
just for time sake. Now for the media, just drag that in. Now for the price. This time we're going
to set it up price. So this means the product will
appear like it's on sale. So the way this works is
that say we normally have this set to $50 when you want
to put the product on sale, this will actually change
to the sale price. So let's say we
change that to $30. The compare app price
will then be $50. So now the $30 will
be compared to 50. So we'll have that $20 discount. And we're just going
to keep going down. We're going to set
quantity again. We'll just set that
to ten for now. I would suggest setting a skew, but we'll just leave that
blank for the time being. I'm just going to create
a variant as well. And this one, we're just
going to set the size. Let's just pretend the oil
has two different sizes. So we can set this to 50
mil or we can also set this to 150 mil option
and select Done. We're just going to
change the price of the 150 mil option to $45
and then just click Save. So now that we've saved that, Shopify is detected
as variance and it's actually removed a few of the
options that we had before. One of those key options
being the price block. So now that the price
block is moved, we need to edit the
pricing and the Compare at pricing within the
individual variance. So once we're inside
this variant, we can select Edit. And then we can see
the Compare at price, which this is defaulted to
what we had set previously. Although as this is the
more expensive option, we're actually just going
to increase that to $70. Therefore, the
variance, you can also have separate imagery
for each variant. So if you do have images of the different bottle sizes
are the different colors, you can import a different image for each of those variants here. So feel free to do so and
you can see how that'll interact once you change this variance on
the product page. So we're now just going
to exit out of here. And then I'm going to
add a few more products and be back in a second.
7. Creating your First Collection: So now that we're done
adding our products, we're now going to create
our first collections. So we're just going to select collections from the
left-hand navigation here. We're going to remove
the homepage collection. Then we're going to
select Create Collection. Now, you can call this
collection what have you like? We're just going to call
this natural essence. You can then add your
collection description and then also add an image in. So we're just going to
add in an image here. Now that we've taken care of
the creative side of things, we'll now need to configure the collection itself so we can either select a manual or
an automatic collection. Now Manual, pretty
straightforward. You have to manually
add, remove, and arrange the products
within that collection. Or we can use an
automated collection. We can use filtering to
just automatically add and remove those products based on the product attributes
themselves. So in this case, we're
going to select any product with a tag natural essence. You can go save. Once we've done that, we can go back to our products, are we're going to
select a natural essence bars and we're going to add in the tag natural essence. Now that we've done
that, we'll click Save. And if we give that a refresh, we will see now that this has been auto added to the collection natural essence. So you can now do
the same thing for the other products
and collections. So now just going to add
one more collection here. It's going to hit
Create collection that we're going
to call this one. Handmade bars can add in
the collection description. We're then going
to add an image. And we're going to make
the product tag equal to hand made to save another
difference with this one, we're going to add the
tag to multiple products. So if we head back to products, now this time we're
going to select all, we're going to select
the little checkbox here to select all of them. They can just select
individually if you like. So you could just go through
and select the one-to-one. We're going to
select all of those. Then we're going to go
down to the three dots, click that, and we're
going to say add tags. Now, we're going to
add the tag and made them make sure that
this is spelled correctly as it is
case-sensitive. So we're going to select,
Add and then save. Now if we go back
to the collections, we should say handmade bars with four products and
we're all done. So I'm just going to add
one or two more collections just for mockup purposes. And then we'll get back into it.
8. Customising your Theme | Part II: Now that we have our full
collections ready to go, we're going to head back
to the themes customizer. So we just kinda go back to that tab that we
had opened before. So now that we're back on
the themes customizer, we can say that the products
are now populating. As we have a few
different collections, we can actually select which
collection will appear here. So if we click
into this section, we can then see it's
currently set to show all. If we change this, for
instance, to natural essence, we're gonna say it's
only going to pull the one product through
from that collection. Although obviously you want
to show all of our new range. So instead, we're going to
show handmade bars for now. We're going to select
handmade bars for now and click Select. Now that we've got our
feature collection in there, we can now go in to
add a new section. The next section
we're going to add is a customer testimonial. So this is gonna be
a rich text blocks. We're going to
select a rich text, and then we're going to see
an option here where we have the rich text section with a few individual
blocks underneath. These blocks works similar
to sections where they can also be rearranged by
the drag-and-drop. And we can also add
different blocks in. So in this case we won't
be needing the buttons, so we can select those and click Remove for the testimonial, just going to select
the heading and we're going to add our
testimonial in here. So just copy and paste that over or you can type
it in if you like. Now obviously that's looking
a little bit too big. So we're going to change
the heading size, too small, much better
than inside of the texts. We're going to add
the testimonial name or feel free to
leave that blank. And you could also just
have the rich text block. Now, it looks a little bit boring going from
white to white. So we're actually
going to just select the rich text section. Can do so by clicking or
selecting rich texts. Are we going to change that
background to background too? So that'll just break it up
that as we scroll through, it'll break up the page and we're going to
continue adding sections between here and the subscribe to
our email section. So now that we've finished
with the rich text block, we're going to add
a new section. This time we're going
to add a color section. So as you can see, the College section has
multiple blocks within it. So we have image
product collection and there's also an
option for video as well, but you can only have a maximum of three blocks at a time. For this one, we're only
going to use the product. So we're just going to
remove the collection block. And we're also going to
remove the image block. Now that we've just
got the product block, we're going to
select that product, and we're going to
go select product. Let's make this one. The
natural essence bars go select. And I'm going to add another
block which we have product. And we can make this
one the central bundle. And we'll add one more, which we can make this
one the nourishing tree. Snake can see how it
creates the collage effect. So we have three
different products for different image sizing. And that is what
influences the sizing of that collage or
the aspect ratio. So that's just something
to keep in mind as well. And you can also
rearrange these to see how that look if you
mixed it up a little bit. So think after playing around, we'll put those back in the original order and
we'll leave it as is. Now, one last touch is we're actually just
going to remove this multimedia collage title and we'll just leave
this heading is blank, is I don't think it
needs a heading. Now one thing that you
do want to include on your website is
the main features of benefits as shopping
with your store. So what we can do is we can
add another section which we can select multi column.
In the multi column. Each column can feature
in image heading, description and also a link. So this can also act as a click through to an internal
page where you might have more information about that certain feature or benefit. So in this case, we
can just start off by editing the section itself. So again, remove the
heading for this one. We're going to include
four components. So we'll have four columns. We're going to want to
central line these. We don't want any background
on the age column, so remove that and we also won't have a button
for this section. So once we're done
making those changes, we can now edit each
column individually. So we're now going to
select the first column. As you can see, we have the
image heading description. So we can add each of
those in individually now. So we're going to start off
by adding the first icon at the heading and also
add the description. We can do the same
thing for the next one. Now just to add the last column, we just go back to the section here and select Add Column. And we can see
that appear there. And then you can
add the information again that we have all
four of those in there. So we're just going
to remove the heading from this
section as well. And this section is all done. Now next we're just going to
add one last section here. And this one's just going
to be a collection list. So we're just going to feature a list of our
collections basically. So in this section, you can see the blocks are
all collections. So we're just going to click
on this collection and then add in one from the list. And we're just gonna do
the same for the others. They might just
add one more here. They can see that obviously
that doesn't look ideal. How drops to a new line. So what we can do if we select collection list as the section, we can then adjust the setting here for the number of columns. So we could always
change this to four, although as you can see, doesn't quite do the trick either. Or we could change the two, which two-by-two can be great. Well, that is quite
large and I don't think it's quite
fitting for after, we might actually just hide or remove one of these
sections for now. And you can always
switch these around. Just put that back
to three for now. And we'll leave it as square. And we also would just get
rid of the heading for this. Now one thing to flag here
is that we can see there's quite nice padding between
these two sections. Although underneath
this section here, it goes straight to the
subscribe to our emails. So we just want to add a little bit of bottom
padding on this one. So if we just drag
this slider up, we'll see the padding
start to increase. So once you let go,
that'll refresh itself that the recurrent need that
much right about there, do the trip, and then you
can obviously refine that. But I think that'll
do the job for now.
9. Footer Customisations: So now moving on to the
newsletter section. So this is one of the
photos sections here. So this will be applied
across the website to all pages as it's attached
to the photo itself. So within the e-mail section, we have these different blocks. So we can rearrange
these if we like. So for instance, if
you wanted to have a disclaimer beneath
the sign-up, you could put that
additional contexts there, although I don't think
it will be named to do so for this instance, instead, we're just going
to change this text. We're going to change this to get 10% off your first order. Now, obviously these are
just dummy promotions. Well, it's always great
to think about how your customers are gonna be
shipping your product range and see if these promotions can help increase your
average order value or just increase
that conversion rate on your website for
first-time visitors. Now, we'll just leave
that as is for now, because it does what we need. You might have more that
you'd like to add in there. You could also apply the
different color schemes, the different Becker
and gradients if you like to have that in mind, but we'll just leave
that as it is for now. So now the footer, we can see that there's
no blocks here. So we're going to need
to add our first block. So we're going to
select Add block and we're going to start
off with an image. And this image, I
envision being the logo. So we're going to
drag that file in. There we go. And we just send
to probably make that a little bit bigger. Perfect alignment. We're probably going to
set this to left align. Now, we're going to
add another block, which is going to be a menu. Now we haven't created the
footer menu is just yet, but we'll leave this as
just a place holder. We can then add our own
unique navigation in shortly. Now we're going to add
one more nav here. We just have that.
It's contact us. Yeah, one more,
which is just text. So let's start off
with this texts. We're just going to add the
texts and now we're going to type Australian made. Then we're going to just add
in another paragraph texts. And there we go. Now, if we go back
to the footer, we can see that it's quite tight against the new site of block. So we're just going to add a
little bit of padding there. So we're going to click on
footer and then we're going to scroll down and we're going
to select top padding. Now the reason we
want to use padding instead of margin is margin will add spacing
outside of the section. And what I mean by that
is if we add the margin, you're going to see
it's adding it outside, which means we're not seeing the background color be
included in that gap. However, padding is
within the border. So it means when we
add this padding in, it's going to keep the
background color there and just add spacing from
within this section. Increase that slightly
perfect. There we go. Now, you are also a few
settings here inside the photo section
which we can utilize. So for instance, if you're
wanting to include the email sign-up inside of the footer
instead of its own section. You can toggle this option
where it will appear here. There's also a few
other options here. One of the key ones will include
show social media icons, and we'll also go
show payment icons. Now these won't be all added until you've added these
to the store settings, which we'll get to
in just a second. Another one is policy links. Now, we can add
these through here. We could also add these
via the menus themselves. We'll see what it looks like
and we'll get to that in a second once we've actually
created the policy pages. Now inside of here
we're going to add just placeholder links for now, just so you can see the styling. So this will just
trick the theme to thinking that you
have a link in there. Make sure that on your own
website you do put the link. So now that we've
added those in, can now see what
the social icons look like inside of the theme. Now that we've done that,
we're going to click Save. And what we need to work
on now is navigations for both the header navigation and also the two
footed navigations. And also the policy pages.
10. Creating Store Policies: So we'll start off
doing is we'll start on the policy pages where we
did the same thing before. You can either click
policy settings here or we can go back to the
tab we had opened before, where we got there
by right-clicking on exit and opening the
link in a new tab. Now inside of this tab, if we go to Settings, now inside of settings, if
we go down to policies, which is right at
the bottom here, we can then create a refund
policy, privacy policy, and terms of service all
through a template and also kickstart our
contact information with the template as well. Now this is more so important if you are inside the
European Union, but we can touch on that anyway. So going back to the
top, we can create our first refund policy
using their template. So what we'll do is
create from template. Now this auto populates
a template policy for you where you notice you can
fill in a few of the blanks. Basically, for instance, insert the return address so you
can enter the address there. And if you go down, you'll
also see there's a few fields that might not always apply
to you or your business. So it is important
to remember that these are just a template and then not 100% perfect
based on your exact needs. So do take the time
to review these and make sure they are
applicable in all areas. Now we're going
to go down and do the same thing for
privacy policy. So as you can see, we now have quite a detailed template
for the privacy policy. As mentioned before,
this is just a template. So make sure you do update any of the fill in
the blank sections. And also adding any
additional information that you might require. Going down to the terms
of service would just do the same thing again here
we can auto populate this. As you can see, it does complete certain sections with
your store name already. So if you have entered a dummy store name or
haven't entered one yet, do keep in mind that
you might need to update this or correct
it when you're ready. When it comes to
shipping policy, it is best to
recreate this as it will be dependent
on the logistics and where you'll
be thinking about your handling time and
shipping providers. Now as contact information
is required on the website for European
Union purposes, we will create it from
the template for this. And again, it's
nothing too crazy, but it's just enough
to tick the boxes. So make sure you fill this
in and don't leave any of the gaps like so now
that we've done that, we're going to click Save.
11. Setting up your Navigation: Once that's saved, we go into exit out of the policy settings. We're going to need to click on the top
right-hand corner. This will take us back
to our dashboard. Now, we can click
into navigation, which is under online store, then click on footer menu. We will add another
menu shortly, and then we currently
have searched, so we can just delete this one. Then we can go to
add a menu item. Inside of the menu item, we will be adding this
to the Quick Links. So we could feature things
like your about page, FAQs, catalog or collection if we were to go out
in your About page. But then we'll find we don't actually have an About page yet. So what we're going to need to do is we'll exit out of here, hit save for now. We're just going to
quickly go to Pages. Now, we can currently
see that we have one contact page created, but we might just
add an L story page. Save that. We're going to
select, create another page. Let me might also
add an FAQs page. Now that we've done that,
we'll head back to navigation. Footer menu, Add menu
item will say our story. Type that in again. You guys, we select that link. Go Add. Now at another one,
we'll do FAQs. We can type in
FAQs at that page. And then we'll also
add a link to shop all where here you can see through the
nav drop down here, we have a few different options. And one of them will
be, if we got products, we can go all products. So we didn't add that
in and go add one more. We'll add it in for blog. Blogs and news. So this could change once
you start uploading blogs. But for now, this is just e.g. purposes and we'll have another video diving into the blog component
of things shortly. Now, we might want to rearrange these so you don't have
to delete to rearrange. We can similar to the sections, drag these around, just move FAQs down to the very bottom. And then once we're
done with that, we'll go to Save Menu. Now we're going to
exit out of this menu and we're going to
add a new menu. Now this will be Footer
Menu number two. Now you can call this
whatever you like. It really doesn't matter. But I think just for this case, it is the second photo menu. So we'll keep it
nice and simple. Now, select, Add menu
item and I'll type in contact and we'll navigate
to the contact page. So we'll add that. Now, add another menu item. Now this is where we can
create a custom link. So you might, for instance, want to link to a mobile number. So maybe you don't
need everyone to go to Contact page and maybe you'd rather than call you directly. This is more so common for brick-and-mortar store that
also has an online store. So it could be something
that you'll need. So what we'll do is just
add the number in here, and this would just be a dummy Australian mobile
number for instance. Obviously you want this to link to your actual mobile number. And then this is where
it's slightly different as we'll be now
adding a custom link. So this won't be a selection
from one of these links, will actually be creating
the link ourselves. So we'll be tapping T, E L colon, and then you'd be tapping
in the mobile number. Now once you've
typed in the number, you'll have to click this link
before you can click Add. Otherwise, this will just go blank and you won't be
able to add the link. So we'll click this
and then click Add. Now we're going, now we're going to do a similar
thing for the email. So we'll add the
e-mail in and then we're going to type in mail to colon at the e-mail address you'll be using afterwards. Remember, we use have to
click here and then add. So now we can save
this menu and go back. The last menu we
have to edit here is the main menu we can
click into here. Now, it's up to you if
you'd like to include home, it's quite common to remove the home link from navigation. So feel free to delete this one. And we'll also delete catalog. Now, depending on your store, you might like to
have the navigation set up a little bit differently. As I mentioned before, if you're a brick-and-mortar store with
an online store attached, you might be slightly
different in how you set up your navigation compared to
a full e-commerce store, for instance, as your customers
might be more inclined to read different information based on the different
shopping experiences. So for this example, we'll include a little bit
of both and we'll add in our story go pages,
our story ad. But we'll also add in shop where this one will just link
to products, all products. But we're also going
to do is include sub items underneath sharp. So what we'll do
is add menu item. And if we click into link, we can go collections
and we're going to select handmade bars. So you can see, once
we select that, it auto populates the
name here and we can go add now to make this
a sub menu item, we select the drag icon here, and we just slide
it over and let go. Now you can see we've got
the drop-down for me. Now we're going to add
another menu item to show. Again, go collections. The next one down. And we'll just repeat this for all four. So now that that's done, we can click save menu. And we are now
going to head back to our theme customized tab. So I'll click back on that one. Let the Theme refresh, and then we can see already that these are
started populating. So we just want to
change the navigation that's being added
underneath contact us. So if we click on the Contact Us block,
then click Change, change menu, footer menu to
select. And there we go. So now you can say
we have a logo, Quick Links Contact Us
and a little bit about the business so we can
click Save. There we go. Now, if we also look at
the header navigation, you can see we have the contact, our story, and a
sharp drop down. Now we're just about done
with the homepage so we can scroll to the top and just make sure everything looks okay. That's just one thing there, that if we scroll back down, it's just looking at the padding here that we can see the padding is slightly off from
the bottom to the top. So we're just going to click
into the rich text block, and we're just going to add a little bit of
padding to the top there to give that a little bit of balance in space that out. Now that that's
done, click Save. And then just for
the section above, the feature collection, we're actually just
going to bring down the section padding for
this one on the bottom. So we drag that down. Maybe a little bit more. Perfect. There we go. And now it
just matches on all sides. So now click Save again. We're going to now head
over to the product page.
12. Customising your Product Page: Using the navigation
at the top here, we'll click products,
default product. And we can now see the
product information we entered appear on the page. So straight off the bat, we've got quite a good
product page here. We've got the product
information and imagery. Scroll down. We have a you may
also like section, continue going down and it
goes through our foot up. So for a small store, this is quite sufficient. What we can say is a bit of an issue here with
the image height. So we will just need
to change that. We could do this quickly
by selecting the section. And then we can see
here product card, and we just want to change
the image ratio to square. So now that's done.
We can head back up to the product section
and focus on this. There's not too much we'll
need to change here, although we will do is
go through the options. So you can see the first option enables sticky
content on desktop. As you can see as we
scroll down the page, you'll notice the image
is sticking with us. Now up to you as
that's preference. I don't mind that effect, so we'll keep that
there for now. You can also adjust the
desktop media width so we could go large, it will shrink everything in. We will just need to adjust the sizing of the heading
if we were to do that. But I think I'm happy with
it being at medium for now. And as we continue
scrolling down, you can see a few
other options here, but nothing that's
currently applicable to us. We don't have a video, so don't
need to worry about that. Now, on the actual
product itself, we can see this, the share. Let's get rid of that
for now so we can head over to the product
information section, click on the Share block, and we'll just remove this one. Now that's removed, we can look at what other blocks
we could add in here. So as you can see, you can add things
like icon with texts, complimentary products,
product rating, pop-up collapse will row
a few others as well. Now, one of the key ones here is you might
be looking to add eventually product
writing after you get a few Store reviews
or collapsible row, that collapsible row
is a great way to add additional information
to the product page without cluttering the page. So we'll put one in e.g. purposes for now so we
can go collapsible row. We probably just want
to get rid of that icon because it's not really
feeling the style. So we'll click on the row, then go to the icon here, and we'll just say none. And once you've done that, you might find this as a good place to add anything to do with
your shipping and returns. Size guides any
policy information or religious additional
context about the product. What we'll just say
for now is we'll go shipping and returns. This is where the shipping and returns content will
go, for instance. And we can then click the drop-down and
you'll see that appear. Once you've done
that, we'll click Save and you're all done. So as you know, we also did
add products with Compare at price and also ones
with the variant. So what we can do to preview
those products is if we head over to the left here
and we click Next to preview, if we select Change will then say the
other products appear. Once those products appear. If we then select the product
with the discounting, which was essential bundle, we can click that one. And we can now see this one has a little
bit more going on. So it has on sale price, the sale tag, and also
the variance selectors. So as you can see,
the various selectors have a few different
styling options. Has a drop-down or
it has the pills. Now, I would suggest
when you have minimal options like this,
particularly for sizing, the pills are a
great way to display this information and for customers to toggle
between the variance. Well, you can see here
is the 50 mille is in stock and the 150
mil is out-of-stock. So that's what the two
different startups will look like when it's in stock
and out-of-stock. Now when we look at
the pricing section, if we click into there, you can see that there's
no actual settings available to make any changes. However, if we click into
product information, so the parent section, and we scroll down
to theme settings. We can then see the
sale badge color scheme and the salt out
bad color scheme. You can select, for instance, change this to background too. Although, as you can see, that doesn't work too well. So I think we'll keep this
just accent too for now. You also have the option to show or hide the currency codes. So depending on if you're still selling in multiple currencies, this might not be applicable. However, something to keep in mind and a great option to have. Now that we're done
with the product page, we can also check to see what this will look like a mobile. So if we got to the desktop
icon and we select Mobile, we can then scroll through this page and you'll see
what this looks like. Now. This, you may also like
section, if we click into here, what we can see is
there's an option for mobile layout and what we can do is change this to one color. And this way the
customer will get a full-page experience and that layout where it looks odd, but you have to up the top
and one down the bottom. So now that we've done
that, we'll click Save and we'll just change
this now back to desktop. And now we can just head over
to one of the collections.
13. Customising your Collection Page: So we'll click collections,
default collection. And this is how
the products will appear on the
collection page itself. So if we scroll down, the first thing you will
notice is the ladder, the images is all
over the place. So the first thing we
would like to fix it, we select product grid. We will want to change the
image ratio to square. And there we go.
That's now fixed. It looks so much better
when that's all even. Now when it comes to
sorting and filtering, it might depend on how
many products you have in your collections that will influence whether or
not it's necessary. So you can always select a high days and it gives
it a very clean look. Although the sorting and filtering can be
quite efficient for the customers to use and navigate through
your collections. So that's just something
to keep in mind. Now this team does also offer
variant filtering layouts. So you could select vertical
or you can select Journal, which the draw is a draw card. But I think we're best to leave that just as
horizontal for now. Another option here is you can
enable a Quick Add button. So what that allows
people to do is add the product directly from
the collection page. Now again, this
is very dependent on the products you sell. Sometimes it's better to give the customer the
experience that they've landed on your product page and can view everything there. Otherwise, if it's a very
quick to add product, this can be a great
option to feature. So we'll just hide this for now. But there's definitely nothing wrong with having
those included. If your products
do have a lot of information inside of this
section here, for instance, if they have long
product titles, you might find it more
suitable to change this to a three grid across,
or even two. So this could also
be dependent on the product inventory and also how many products you have, but you do have the flexibility to adjust that accordingly. Sometimes for a collection page, it's best to not have too
much clutter up the top. However, in this context, I think this is quite
fitting if you like. You can also hide the
collection image, which helps reduce that space, or also hide the
collection description, which takes away even more. And if you really don't like it, you can also hide that header. However, I would likely advise against that as you
do still want to provide enough context so customers know which
collection there on. Now, I'm just going
to add these back in because I think I like the
look of these for now. And we'll click save. And there we have it. That's
a collection page or done.
14. Customising Content Pages: Now that we've done
with the product and the collection page, we can now navigate to pages and then head over
to our default pages. Now the default pages
where we'll have our FAQs. And if we click up here to
navigate to the about page, we can go preview,
change our story. And you can see this
would be the same thing for this page,
this page section. You can actually add the
content directly in here. It's all poultry automatically
from the same S. So what we can do is head
over to the other tab. We can go Pages, click into our story. And then just inside of here, you would just want to
add a little bit of texts about the brand. This is where you can also add in subheadings or
anything alike. So, for instance, to do that, which is adding a
subheading here. And once you've added
that in, but just wanted to change
the font format. So we'll go up
here, select the a, and then we'll make
this a heading two. So what you can see
is if we were to copy this and you changed
this to a heading three, you will see this
gradually gets smaller as you go from heading
one through six. But we won't be needing
that for this one. So we'll just remove that. Once you're done, click Save. Then if we head back
to the Customize tab and we refresh this page. So as you can see, the
copies now populated. And it has the subheading, which is adds a little bit of structure format into the page. So you can continue
adding those and breaking down the
content as you like, as it will help to break up the content and make it
a bit more consumable. Now if you were wanting to make your story page or about page
a little bit more unique. We will get to that
in another video as we will be exploring, creating a new template which is unique to
the pages needs. So we'll leave the story
page as is for now. For the FAQs page, you can create that using
the same method as this one. But for the contact page, we'll just have to jump
through two pages, contact. So we can see here is the contact page has
the page section. So similar thing where if
you add the content to the page that will appear
underneath contact here. But it also has
the contact form. So we can say here you
have the name, email, phone number comment, which is perfect for the
general inquiries. If you were wanting to
make changes to the form, this would require
few code changes or you'd have to be
looking at getting a plugin to help
facilitate the form. But we'll keep this
nice and simple. And I think this does
the job for now. So there's two things we
want to do here is one, adjust the spacing and then to just add a little bit of
texts underneath contact. In the same method we use
for the Our Story page. So let's adjust
the padding first. If we click on the contact form, we just want to add a bit
of padding underneath. Let's just drag that up to 64. Yep, that works. Then for the heading section. Happy to leave that as is, but we just want to now
add that text underneath. So let's click Save. And then we're
going to head back to the other tab we have open will click pages, contact. And once you got into contact with these two similar thing, where we'll put in some copy
for the Contact Us page. Once it's entered, click Save. Now we'll just head
back to the other tab where if we refresh this, we can see that that
content is now appearing on the page and we'll just wanted to fix a little bit
of padding here. So we'll just reduce
that bottom padding. Bring that in. Or you might just have
to do a similar thing to the section below. And I think that'll
do just fine. So now that that's done, we'll click Save again. And last thing we'll
just be checking here is the cart page.
15. Customising your Cart Page: So if we click on the drop-down, we'll go down to cart
and select that. So as you can see,
the cart is empty. So we're just going
to head back to the homepage and we'll click
into one of these products. Let's just go Add to Cart. Now, we can head to the cart
by selecting the icon here. Now we can see what the
cart page looks like. So I think straight off the bat, you've got quite a
nice layout here. You've got the special
instructions and also all product information
shown nice and clear. But they can also
edit quantities from within the card view. So I think you can be
pretty happy with that. Nothing that wraps up
the beginner's guide to the theme customizations.
16. Home Page Mobile Layouts: So we're just going to head
back to the homepage just to give it one last check and make sure it looks good on mobile. So we can scroll through here. We can see that we can
flick through this. Now, I might just
change this quickly. I thought I might
like the carousel, but I'm not too sure
about it in this view. So we're just going to
change this and just say, We don't want to enable
swipe on mobile. But I think we can be happy leaving it as
a two-by-two them. So we'll leave it
at two columns. Keep scrolling through. I think that looks great. Feel free to continue
adding any customizations. But for now, we're just
going to click Save.
17. Setting up Payment Options: Once that's done,
we're just going to head back to our other tab. So we'll click on that one. And once we're here,
but we just want to do is click into settings. And if you navigate to
payments from within payments, you want to select
Activate Shopify payments. So you might want to get started by activating Shopify payments. And you can do so by
completing the setup process. There's also other
supported payment methods. For instance, PayPal. If you don't want
to include PayPal, you can always like
to manage and then deactivate PayPal
Express Checkout. And this will just remove
these PayPal from the store. There's also a vast range
of other payment methods. So if we select Add Payment
methods searched by provider, and then we'll just select this. We can start to scroll through
all the different options. But depending on the location of your customers,
Afterpay, for instance, is a very popular
one in Australia as it's one of the buy now
pay later payment methods. So feel free to go
through those and see what might be the best
option for your store. Once you've gone through those, we can head back out and
look at shipping options.
18. Setting up Shipping Options: So inside of shipping
and delivery, so you can see that
Shopify is automatically created a right for domestic and a right
for international. So let's click Manage. So within this shipping profile, you can see that we have
our shipping origins. So the shop location
being Australia, then we have a domestic
shipping options and we have international. Not to keep this simple. What we're going to do is delete all the shipping options except for the express
at $0 and up at $15. But you might want to change this and we can go edit, right? For this case, we just
change this to zero for now, which remain all
domestic shipping will be expressed at $0. So you can go done. However, if you are wanting, you can also adjust this. So if we head back
to Edit, right, you can see that we
can add conditions. And you can start
to set conditions based on the order price, for instance, so it has
to be orders over $100. Or you can also set a limit just to make sure the
oldest aren't too big. And for orders of those size, you might rather
than make an inquiry before this be out of place
the order, for instance. And then for
international shipping, I think we'll leave this as is the standard
international at $20. Now, obviously the transit time, this will be something to
change and the rate itself, depending on locations
you're shipping, you may find it
suitable to break this down into further
shipping zones. However, for now, we'll leave
it as just a flat rate. So once we've done in
here, we'll click Save. Once that's done,
we can head back up and we'll head
over to domains.
19. Buying a Custom Domain: Now, as you can see, we currently working off the my Shopify domain will all
have one of these domains. Just the prefix beforehand will be unique to
everyone store. So you can always operate
your store of this domain. However, it's definitely
suggested to buy a new domain or connect to the domain that you've
already purchased. So you can do so by
selecting binding domain. For instance, we can
type in organic soap bars.com and we can see organic
soap bars.com is taken. So we can change that
up a little bit. You can also play on the
different URL extensions. For instance, we could use.co
and purchases right here. So if this is the
domain you're after, you can now select buy, you can buy this directly within Shopify and all will
be connected for you. Now, if you weren't
eating to connect to an existing domain that's
outside of Shopify. I will be making a
separate video on this. Or you can select
Connect existing domain. You type your domain in. Click Next and Shopify will take you through
the steps to adding the different DNS records
to then configure this domain and sync it
with the new Shopify store. As mentioned, I will be
making another video on this. If you do have any questions
in the meantime, please do. Just let me know.
20. Setting up Store Preferences: Once you've connected
your domain, which is going to exit out of here, underneath online store. We're going to go
down to Preferences. And now you're just
going to need to add in a few more details
regarding the website. So for instance,
the homepage title, you can add in the
meta-description. So you can make this
whatever you like and also optimize it for SEO if you wish. This is again, just
a mockup purposes, feel free to add in an
image for social sharing. For now, we're just going to add in the same image we use for the favicon just to keep it simple and then it'll take
care of the rest for you. I do highly suggest setting up your Google Analytics
account and also, if you are running Facebook ads or have a Facebook
business account, make sure you connect this
with your Facebook pixel. If you have any
questions on these, please do just let me know. Similar to the policy templates
that we've been using, we do just have to make
sure that we review all of these privacy settings
to make sure that they do reflect the
policies that we've put together and also the
actual practices. Now, click Save. There we head back
to online store.
21. Selecting a Plan & Going Live!: New theme is just one step
away from being ready to share with the customers and start selling products online. So you just need to select a plan by clicking pick a plan. And as you can see, with
the extended trial, you have access to all
three membership tears at just $1 a month for
the first three months. So do check through
which features your require and which are most suitable
for your business. If you're just getting started, That's a great chance you
only need the basic plan. Or if you are an existing
business that has a few more requirements or an existing customer database
that you're selling to, then Shopify or advanced
might be more suitable. Once you've done that,
you'll be able to head back to online store, manage password,
uncheck this box, and you still will be
accessible to the public. So if we head over
to online store, click this little icon, which is video store online, we can see exactly
how that will look.
22. Your Website is now Complete: That wraps up the beginner's
guide to Shopify. I hope that's helped
you get started on your e-commerce journey and
also start to get to know the ins and outs of
Shopify as an art can all be a little bit confusing
when you first get started. Although now you've got
a beautiful website or ready to go and start selling
your products online. So hopefully, that's kickstart
your e-commerce journey. Congratulations and look
forward to seeing you all soon.
23. Creating discount codes in Shopify: So once you made your way
to your Shopify dashboard, we're just going to
never get over to the left here and
select discounts. And then we're going to
click Create discount. We're going to have a
range of options here, pop up for the discount type. So the first one being
amount of products. This is when you apply
the discount to an item or a product, amount of order. So this applies a
discount to the customers entire order or
card. Buy x get Y. This will be for
offers like buy x, get Y at a discounted price, or buy x and get Y for free. And lastly, free shipping, this will apply the
discount to the customers shipping that's calculated
at the checkout stage. For this video
today, we're going to be selecting amount of order. So if we make our way to the top here, we can see the method. There's both discount code
and automatic discount. So discount code is when you
want the customer to enter the discount code manually at checkout and automatic discount, which this will apply the
discount automatically to the customer's card once I've met that criteria
that we set below. We're going to be going with
discount code for this one. And then now we can actually set the discount code and
what we want to call it. You can generate a code that
Shove fi provides for you. But as you can see,
it's not very appealing and not a very easy one to
remember for the customer. Instead, we're going
to remove that, and we're actually just going to come up with our own name. Instead, we're going to
remove the generated code, and we're going to enter
our own name here, and we're just going to
call this one Launch 15. So you obviously
don't need to call this launch 15 on
your own store, but this is just for
today's example. If you're not sure what to
call your discount code, feel free to ask
and happy to help. So we've entered that in here. So as we make down
to value here. We can see we have both
percentage and fixed amount. Fixed amount is just if you
want to apply only $10, $15, $50, whatever fixed
amount dollar value off your customers order. S percentage is in relation to the discount percentage that will be applied to
the customers card. And we're going to
be using that today and as it's launched 15, this is going to be 15% off. So as we make our way down to minimum purchase requirements, this is where we
can start to think about how the discount
codes can be used, or how we actually
want the customer to use the discount code. So if we look at no minimum
requirements, obviously, this will allow the
customer to apply the discount code on any order. It doesn't matter how many
products of purchase, what the order size is, it'll just be applied without
any minimum requirements. We what you might want to do is actually look at having a
minimum purchase amount, or a minimum quantity of items. In most cases, you might look to have a minimum
purchase amount, where in this case,
we're going to have a minimum purchase
amount of $100. This can be used as get 15% off your first order
of $100 or more. It's also something
to think about when you have fixed amount discounts, that if you have a fixed
amount discount of $50, for instance, you might be incentivizing people to
make a bigger purchase. It might be over $250 or $500, whereas you want to be
careful if you have no mineral requirements on a fixed amount discount of $50, and someone buys a $50 product, well, you can see how
that will turn out. We're going to leave that there with a minimum
purchase amount of $100 and make our way down
to customer eligibility. Within here, we can see we can select specific
customer segments. If we click on that one, we can then see we can search
by customer segments. We're going to click brows, and we're going to see the few
different options here. As we can see from Shubfi
preset segments here, we have a few different options. The first one being
we can look at either target customers who haven't made a purchase before. We can look to target
customers who are already in our funnel or in
our customer database, and we want them to come
back and retain them. As you can see from Schopfi
preset segments here, there's a few different
options you can use, whether you're looking to target customers who have never
made a purchasro before, maybe lifelong customers that have purchased several times, the band and checkouts, people inside your
subscriber list, or people who have made
that one purchase, and you want to retain them
as a lifelong customer. For this example,
we won't be using any of those so we
can click cancel. One of the other options
is specific customers. This might be if you're
wanting to create a discount code for
a specific person, where there's been
an issue with their order or you're providing with a credit for a future purchase.
This might be for you. Although in this case, we're going to select all customers. Now heading down to
maximum discount uses. As before we're setting the minimum purchase
requirements, now we can actually limit
how the discount is used. In this case, we want
to limit the use of the discount code to
be once per customer. The first option here is
if you might only want to offer a discount code to
the first 50 customers, for instance, you can click
into here and then enter 50, and that means the
discount code is going to be used
50 times in total. Now if you want that to
be 50 unique customers, we can also select limit
to one use per customer. So that'll then mean it's 50 unique customers that'll be able to use that
discount code. But in our case,
we're just going to uncheck that first option, and we're just
going to set it to limit to one use per customer. As we make our way
down to combinations. Here is where if you have
pre existing discount codes or offers in place, you can create combinations. This will allow, for instance, if you have a free shipping
for orders over $100, and also the launch
15 discount code, the customer can
have both of those applied to their
order at checkout. Although in this case, we're just going
to leave it as is. Now heading down to
active start dates. This is where we can
set the discount codes active dates to be aligned with the campaign, for instance. If you're creating
a discount code for a campaign that has a specific start
date or end date, it's where you can
enter these here. A use case for
this, for instance, could be that you want to run a January campaign that has for the first 50
customers in January, you will receive a
15% off discount. But you might want
to make sure that that's limited to January only. You can also enter that end
date and end time here. Although for this
one, we're just going to deactivate that
and leave it as is. Now we've entered all of the
discount code details here. Going to go up here, and
we can see sales channels. Within sales channels. If you have multiple sales channels, this can be Instagram, Facebook,
or other marketplaces, and this will allow
you to control if you want this discount code to be visible or accessible
via those sales channels. Although we currently don't
have any of those connected, so we're just going to leave
that as blank for now. And before we head
up to Click Save, we can now review
our discount code. In just a simple terms here, so we can see the discount
code is for the online store. It will apply 15%
off an entire order. The customer must spend
a minimum of $100. All customers can use
this discount code, but can only use it once, and they can't combine it with
any other discount codes. So now that we're
happy with that, we're just going to
go up and click Save. Now that we've
created the discount, we just want to test
that it is working. We're going to head over
to view our Online Store. You can do this by going
underneath sales channels, hovering over Online Store, and just click the little C on there to go view
your Online Store. Once that's loaded,
we're just going to be finding a product
here to test it on. We're going to click
into this one here. Then we're just
going to add this to cart. Click Checkout. Now we're just going to enter the discount code
that we created, so that is Launch 15. Click Apply. And there we go. We can see that now the Launch 15 discount code is
being applied and that 15% discount is being applied to the
customers card total. So that's it for
today's tutorial. If you have any other
questions about creating a discount code or
Shopify in general, please let me know below,
and I'll be happy to discuss it with you and look forward to seeing
you in the next one.
24. Setting up & Managing Products in Shopify: And welcome to today's
tutorial in setting up and managing your
products and variance inside of your Shopify store. I'm going to be walking
through the process of setting up your
first product, managing your product variance, and publishing it to your store. First, we're going to be adding a new product to your store. On the left hand
side of Shopify, you're going to go to products. And then once it's sloded, you're going to head to
the top right corner and select Add product. Once it's sloaded,
we're going to go through step by
step of each input. So first, the title. This is just the
name of the product. You can be slightly
descriptive in this too. So let's take an example
of classic it T shirt. Now, in the description, you want to be very
detailed with this. So whether it's certain
things about the quality, the way it's made, the fit. Anything like that, you want to make sure this information is added here unless you have other dropdowns on
the product page. Now, for this, I'm going to be showing you how to
use the Shop fight AI feature for this as we artist making up a
product in this case, but do feel free to add in
your own description and make sure it is in your tone of voice that aligns
with your brand. So to do this with AI, I'm going to click on the
Generate text button here. I'm going to add in
the product name and just click Generate. And once it's generated, I'm going to keep this
from the description. We're going to head down
to the media section. Now, in your media section, you're going to
want to feature the product in a few different ways. So whether that be
your studio photos, more lifestyle photos, or up closed product
detail photos. Now it depends what
the product is, but I'd suggest having a mix of these because
you want to make sure the customer sees these in all different ts or angles. So they get a good idea of
the product, it's quality, or the way their logo might be embroided on there or the
stitching, anything like that. Each product will be different, but make sure your images do showcase each
of these elements. So once you've got your images, you're just going to drag
these in to add media there. And these images are just from unsplash for this reference. I don't have all the
different close ups and everything for this case. But once the images
are loaded in, you can then drag these around. It depends on the order,
and you'll often want to keep the order consistent
across all of your products. As this looks great
when you're viewing the products in a collection
feed, for instance, you can have the
same consistency of whether it's a
studio image first, a close up, then a
life style picture, and you want to make
sure it's consistent. So let's just take
this image here, and you can see how we
can then drag that over, and we can reorder
with Dragon drop. Once you've got
those sorted, we're going to head down to pricing. So inside of pricing, we have our price and
compare at price. Now, your price is going
to be ordinary price. So let's just say we sell
this T shirt for $22. Now, the compare at price
is when we have a sale. So if we want this
product to be on sale, and let's say we
want to charge $18, we're then going
to take the price, put that in the compare price, and then put 18 in there. Now it will show $22 being the compare at price
with the line through it, and then 18 being the
updated product price. So it's a little
bit confusing or weird to do it that
way because you would think you could just put
in the sale price instead, but that's not
quite how it works. So just make sure you have that correct when you're working through your products
if you put them on sale or at a
discounted price. Now, inside of pricing, you can also manage
international pricing so that
could be different based on each currency or
international location, plus you also have
the cost per item. So if you want to
manage your margins with in Shopify and
the analytics there, we can add in the margins. Lets you say the cost per
item was $8 in this case, it's going to help
us to calculate the profit and the
margin that we have, and that'll just
be very clear on your reporting and your
breakdown of sales. Now, heading down to inventory, you can see the first option
here is track quantity. So we do want to in this
case, track quantity here, as it is important that we don't oversell our stock,
and we want to have, whether a preorder in
place if we do sell out of our stock or just for it not to be sold because it might
be a limited release, and we don't want the endless customer support emas
coming through saying, Hey, I bought this
item where is it and you're having to
apologize the whole time. Within your settings, you can
have different locations, so you might have different
warehouse locations based on countries or cities, or you can have a
store inventory, and you can have your
warehouse inventory. So there's a few options here, but we're just going
to go with a shop inventory location for now, and we're just going to
add 100 stock units. And then here, we don't want to continue in
selling out of stock. We want to make sure
there is a hard limit. We're going to keep
that as a strict selling point of 100. Then the skew, so this is
the unique identifier. Now many small
business owners don't worry about this at
the early stages, but it is something
I would suggest doing at the early
stages, no matter what, and just get used to having
it there as it is super important for reporting and
tracking as time goes on. So in this case, I'm just going to stick
to a simple skew, and as it's a classic
white T shirt, so then you can see
there's a bit of a structure to these
abbreviations here. So for this one, being the
classic white T shirt, we're going to go CWT 001. Now, Averroe has a different
structure for this, and there's so many
ways you can go about arranging your skews, but this is a clear
example for now, and that can be another video. We can dive into how
to set that up and manage it for your business
and your product ranges. Heading down to shipping, one of the things here
is you can have shipping calculated based on the actual weight
of the product. Now, sometimes in these
case with clothing, it's not quite as important
as all fitted into satchels. But depending on your
product, it might be. But in this case, we're just
going to add it in anyway. And for this, we're just
going to say, 0.25 kilo. Now, I'm not actually too
sure what this one weighs, but don't take my example. Make sure it actually is
applicable to your product, and don't just make
up the number. Now we're going to
jump in a variance, and a lot of people
think variants are very tricky or
difficult to manage, but they don't need to be. So let's just click, add
options like size or color. And then in this case, we're
going to select sized. Now you can see
the option values already has medium in there. But we're going to
start off with small, then we're going to go medium, and then we're
going to go large. So we're going to click Done. And then we can see we now have variants for small, medium, and large, and you can see how they populate within
the variants here. And you can see the
skews have updated too to have different
skews for each variant. You can change these variant
es to be more applicable. You could have S included
for small M for medium, L for large, and that can go on. Or you can keep a
number structure to it and do it that way. Now, another popular
use case is color. So as this is a
classic white T shirt, we don't need multiple colors. Although what you can
do is always have just classic T
shirt and then have multiple variants within
this one product. So we could go color and then
go white, black, and blue. Then if you were to
click Done, this will add all of
those variants too. And these will now show up as the different toggle
options or drop downs, depends on your theme for the customer select and to
choose a different variant. So then this would
be small to medium. So then this will
show up a little b differently as well
on the back end. So in this case, I'm going to add these in just
for the example, and we're going to see
how that changes how you might manage inventory
and those sort of things. Now, beneath this, you can
now see that the variance, there's quite a
bit going on here. So we have small
with three variants, and the same for
medium and large. We're going to click Expand all, and now we can see all of
the potential variants here. So obviously, if we had
100 originally in stock, it might not be the
case for each variant because when we're ordering
different products, there's going to be a
different number of each size. So depending on the location that you're managing
the inventory, you're just going to select
that from this drop down. And although yours might not
be called shop location, that's just what Min is
called on this setup store. Now, within here, you can
see it's added in 100 of the small white because
that's what it's given this que for this variant. Although we're going
to change this, and each one of these is
just going to have ten. So we're going to
add in ten for this. But then for the mediums, we actually only got eight, so we're just going to add in the different number
for these ones. And then large, we did
get eight for the white, but then we only got six
for the other colors here. So we're going to add
those in two. There we go. Now we've added in the inventory for
each of the variants. We can just go ahead and
save that while we're here. So now we've got the product set up with all of its
variants in there, and each variant now has its individual inventory
and skew as well. Now you might be wondering,
I want to make sure there's a different
image for that variant. So what you can do is add
images on a variant level. So when you change the variant, most things will give
you the option to have the product gallery
on the product page, that when you select
the different variant, it'll change that
first featured image to that variant image. So you can just do that by clicking here or
dragging the image in, and that's going to add an image that's going to be attributed
to that particular skew. Now you're going to have
to do that for each one. If you do set up colors first, you can add that
variant image in there, and then once you set up sizes, it's going to apply
to all of them. But as we did the
other way around, we do have to do this step
by step or individually. So, feel free to go
ahead and do that for your product imagery as it can be a great way just
to make it a little bit easier and a little bitless
confusing for customers. As if they select black, we want them to see black, we don't necessarily want
them to have to click through all the different images to see all those different
variant colorings, or if it be different materials
or anything like that. Now, if you did have them, this is where you can
also add metafeld. So you might have
different metafd for size charts or to do
with size and fit, where you might have the model description,
anything like that. You can set up metafds here
and have those added in. But in this case, we
don't have those, we're keeping it quite simple. And then at the bottom
here, you have SEO. So this is how it'll
appear on Google. So if you click Edit,
we can see that there's a classic white T shirt being pulled through for
the page title, and this is how it will appear. And then you have
the meta description that is pulling through from
the description itself, and then the URL handle. Now, if you're focus on SEO or just general kind
of good practice, I would making sure the
meta description is unique, and also the URL handle doesn't have things like
copy or anything like that. Because when you
duplicate a product, you'll often see on an EC store, they've included in the URL, you'll see copy or new
or anything like that. And that's just because when they've duplicated a product, they haven't actually
updated the URL handle. To be honest, it
looks really bad. So you want to make sure
you don't have this. And if in the page title, you could add a little
bit more detail and go men's white T shirt. Then that way, you
just have a little bit more keyword optimization. But that again is
sort of another video because there's a lot to that and depending if
you want to go for a long tail keyword or
a short tail keyword. Moving on from the SEO. One of the last few things here is within the product
organization. So what we need to look at
here is a product category, which for now, it fits into shirts and tops,
so that's great. B can see Shopper Fi provides a whole list of different
categories to choose from. Previously, this
was super minimal, and there wasn't so
many categories, so I was hard to actually
fit into one of these, but they have updated this, so there's a lot
more to choose from, and you'll more than
likely fit into one. So make sure you select
this one as it is good for things like Google Shopping and
those sort of things. Then product type.
So in this case, we're going to add T shirt. And this can be your own. So we want to make sure you
select product types that can be used in things like
collections and filtering. So that is quite important and keep that consistent
across your products so you don't have 1
billion different T shirt product types or
different spelling. Now, the vendor, we're
going to change it to white T shirt maker. This is just an
example, of course, but it can be if you
have different vendors for each of your products. This is where you can
put the vendor or the brand name in. Collections. For now, we're
going to add it to the home page collection. And then tags, although
I would suggest working more soft dynamic collections
or automatic collections, where the actual collections have different
criteria field that automatically pull
through the products rather than manually
managing these, because that's a small
scale that's fine. But once your products
to over 100 or thousand, it gets very tricky or just time consuming
to manage that, and you want to do it based
on different criteria. Now, one of the great
ways to do that, besides using product type
or vendor is using tags. So you can see here in some of the other example
products I have. You can have things like sport, winter, accessory,
premium, snow. On this case, we're going to add in the color, which is white. We can go T shirt, even though you can also
use a product type value, we're just going to
add that in anyway. And then you can
also do things like summer fit because you might have a collection
for summer fit. But then you might
also have a collection for things like basics, or maybe sort of minimal two. And then you can see that once you start creating
the collections with a different dynamic field or automated or automatic criteria, T shirt, and then you can
filter by white as well. So there's a few things here, depending on also your
filter plug in or setup, you could use, but that also does depend on
things that you're filtering. Although, when you
go into filtering, that does depend on how you have that setup as each sort of plug in or setup
has different ways of pulling through
product information. But again, that's
probably another video to comment or let me know if you have any
questions about that. Just for the
collections, this is sort of the fundamentals of what you would need to be able to structure these in
a nice way and have that automated
approach rather than that sort of manually adding
these in to each collection. Now, that's basically it
for setting up and managing your product and variance
inside of Shopify. So we're just going
to click Save here. And then once you've done that, we can click preview, and that's going to open up the preview,
which we can now see. We have the product image. We have all the variants here
that we can click between, and we have the product
description being pulled through. Managing the design
of the product page, I'll save for another video. Although this is all
about just setting up and managing your products and
variances inside a Shopify. So if you have any
questions as you work through or any issues
you stumble across, please let me know and I'm
more than happy to help you. Please subscribe if you
want to see more of these videos and
comment if there's anything in particular
you need help with. And I look forward to
chatting with you.
25. Creating & Managing Shopify Collections: Welcome to today's
tutorial on creating and managing collections inside
of your shop off I store. In this video, we're going to
walk through the process of organizing your products into collections, which as we know, is essential for making it
easy for customers to find your products and the better the navigation
around your website, the more likely it
is we're going to convert those
visitors into sales. So let's get started. We know, collections
are groups of items that are based
on certain criteria. Shopify offers two
options for this, one being manual collections, and the other being automated. Now, manual being as it sounds, it is simply you manually
selected products in that collection and automated being based on the
different sets of criteria. So whether that's the
product type, tags, price, sale, all
those sort of things. And we're going to start off by creating a manual collection. So as I mentioned, manual
collections let you hand pick the products
that are going to be featured inside of
this collection. So to create one, we're going
to head over to products, Then go down to collections. Once it's sloded,
you're going to head to the top right corner and
select Create collection. For this one, we're going
to call it staff picks. This is a great example of
when you will use a more of a manual approach as it might be a very
limited collection, you might not have it
there for so long, or it might only
be a few products that is actually easier to just mainly select rather
than having more of that dynamic or
automated functionality. Then for each collection, you can also create
a description. Now it's not necessary, but sometimes you
might use this for SEO or to provide
further context. We're just going to add a
little bit of context here. For this example, I'm just going to enter a
simple description. Now for this example, it's not a very detailed description, but you might have context as to a certain team member or
if it's SEO optimize, it can be relating to
the key search terms for that specific
product collection. Then heading down to
the collection type, we need to make sure it is
a manual that is selected. Now this is usually
selected by default, but we're just going to
double check that here. Then once you've
done that, we're not going to add the
products just yet, but we're going to come back
to that in just a second. Now inside of the collection, you also have further
SEO settings. If we click edit, you
can then scroll down, you're going to see
we have an SEO title, SEO description, and
then the handle. Now, not every
collection is going to be an SEO optimized collection, but you will have some
that you may want to target to rank
higher on Google. Now, for this one,
the SEO title is not so relevant because
it is going to be a niche collection where
we're going to be referring to it from a EDM or Email
marketing campaign, not necessarily that
people are going to be organically searching
this on Google. But if you were, this is where you can add a
little bit more context. Let's just say it
was relating to our summer picks for our
favorite dresses, for instance. We can then go staff picks, summer dresses on sale. Now this is obviously
a very lose example, but it just gives
you an idea that you might have summer
dresses on sale, or you could also
have another one of top dresses for the summer. Let's say the collection
is referring to the staff picks for the top ten favorite candles, for instance, you could then say ten
must have candles for ter. Just give you an idea of
a longer tail keyword, but we will be doing
another video on optimizing your
collections for SEO, so we can dive into that
a little bit more then. Then for SEO
description, same thing, you can expand on this and
it's a little meta description that shows up underneath the
search listing on Google. If you'd like to add this
in, please refer to do so. Then for the handle. Now usually you'll see on smaller
E comi stores, the URL handle for collections can often be a little bit funny. They often might
include things like new or copy or those things. Usually that's
because when they've duplicated collection, it carries that handle
over with the extension. Don't want that,
we want to keep it nice and clean and simple. Here you can see staff picks. We're just going to leave
it as staff dash picks for our handle because one, we don't need to be
SE optimized and two, we just want it to be
clean and simple and to look nice inside of
the search bar there. We're then going
to head back up. The last two things here
before we add products to the collection is one
being that you can add an image or a featured
image to the collection. Depending on your theme and
how you display collections, you can add an image in here. Then the other being if you
have different templates for the collections
inside your theme. Now, not often many people have this when first sunny out, but you might have a
few different layouts for different collections. This is just where you can
select from this drop down, if you've created those within your theme customized view. But most importantly,
we're going to now add products to
this collection. You can see we've
selected manual and we're just going
to click Save. Now once you click Save, this has now created
the collection. We're going to scroll
down and we can see we can now search products. You go to search products,
you can now search for any of your products inside
of your Shopify store. We're just going to
search for snowboard, and we can see we have a few
different snowboards here. I'm just going to select
this one, that one, and this one here, and
we're going to add. Now we can see these RO dummy products on
the Shopify store, so don't overthink
the product names or anything like that. But we can now see that
those three products we selected are now visible
within this collection. Let's say you want to
change the order of these. Through the default
sorting options, we can select a few
different ways how we have these polls are display
on the collections page. We're going to do best selling
in alphabetical order, price, newest,
oldest, and manually. Let's just say we want
to do this manually. Click that one, and then we'll be able to see that we
can drag these around. This is how you sort
your collection, and how you can easily
structure these based on the exact order that
you want them to be in. But sometimes you might keep it more dynamic and just
have best selling. Although usually if you have
a collection like this, which is quite
small and specific, I would suggest you
probably do manually for this and you can
easily just order these. But if you have
too many products, this can get a bit annoying, so maybe stick to best
selling, for instance. Then once you move those around, this automatically saved. So we can see that
the products being reordered and it's
already saved. We don't have to do
anything else here. Even if we added
another product, so let's just go here,
and go one more. We can see the products get updated and automatically
saves for you. Don't stress if you can't click save, it's already
saved for you. Now that we've got the manual
collection out of the way, we're going to go on to
automated collections. Now the benefit of
automated collections is it saves you one heck of a lot of time when you're managing products
at a bigger scale, and you have a lot of different
collections going on. Is due to their dynamic nature. You can include tags inside of the products,
for instance, for sale or winter collection or summer, anything like that. You can also reference
other pieces of the product metadata, but that allows the collections
to be dynamically built, and always updating based on the different criteria
conditions that you've preset within
the collection. This means that as you add new products or
remove old products, it's automatically going to
update these collections. You don't have to go
in and one by one like the manual collection and have to edit or
move those around. We're going to head
back to collections, in the top right select
Create collection. Then for this one, we're
going to call it sale. In this case, you
might have the sale always live on the website. Whether or not you
want a description to explain that,
that's up to you. But this can also be again, where people will use SEO
because there are often collection pages
that people optimize for some addresses on sale or if you're
stocking other brands, you can use their brand
name sale, for instance. That can be a great way
to attract traffic, but again, different
video for that one. But in this case, we're just going to leave
this blank because it's not too necessary for what
we're trying to achieve here. Then again, on the
right side here, you have the image and
theme template to choose, and also the search engine listing SEO settings
down the bottom. But since we've already
run through that, we're just going
to go to actually creating the collection itself. Now, under collection
type, click automated. Now that we click that, you can see where a few more
options to choose from. From these options, you
can see you can have all conditions must be met or
any condition must be met. Now this just depends on how specific you need the
collection to be. One example when you could
use all conditions would be you have a collection
with a specific criteria, and that could be
all summer items and all items under $150. Now that collection would
be summer items under $150. That would then populate all of the items that have summer as a tag and a price
point under $150. Then for any
conditions, you can set this up to have a much
broader criteria. This lets you
create collections. An example of what this
can help you to create is, let's say you have a broad mix of products
that you don't have specific tags for that are relevant to the collection
you're wanting to make. He he could do this is let's
say you want to create a summer collection and you don't have products
tagged with summer. You could then set the
criteria to include all products that have the
product type of bikini, the other being
product type singlets, and one more being
product type hats. Now, based on that criteria, it'll pull through any products that have one of
those criterias. Then you have a merged
collection that now has all of your summer items pulled through into
the one place. There's a lot of different
options you could do here. Another use case for any condition is let's
say you've made a few spelling mistakes
in your tagging and you have some that say
sale with a capital S, others that say sale
with a lower case. Now it is sensitive to capitals. If you have made that
mistake, it's okay. We can set the criteria here, that you could have product
tag is equal to sale with a capital S or you could
do sale with a lower case. Let's just say you had one
more that previously you had collections with
the tag on sale. That's going to pull
through any product that has one of these tags. Doesn't matter which
one, as long as a product has one of
these, it'll pull through. Let's start with this and
for our sale collection, we're going to have any
condition that as long as a product has one of these tags, it's going to be pulled through. Once you've added
these conditions in, go up to the top right
and click, save. Then once that's
loaded, we're going to scroll down and underneath
collection type, you'll see your products
being pulled through. Here we can see the three
products that are being pulled through that include
one of these sale tags. Now, similar to the
manual collection, you can again sort the collections
here however you like. We're going to leave
this as best selling, but you can go manually
again if you wanted to move these around or select from one of
the other options. Now that's how an automated
collection works. But what I'm just
going to do is go to one more collection
and just show you all of the different
options that you have. I'm just going to click
create another collection. For this, I'm just going
to type in showcase, as I'm going to be
showing you what the automated
collection options are. Then going down to automated We can now see that on the
other automated collection, we only reference a product tag. Although if we click
on product tag, we can then see there's a lot more options
to choose from. Go through the list, you can see there's
a few options here. Now, product title and
variant title is where you can use the text within the
product name or variant name. If we select product title, you can see then the filtering
options is contains, does not contain, ends
with starts with, is not equal to or is equal to. Now contains is a great one. If you've set up your
product really badly, let's be honest,
we've all been there. But you know you have all of the products that have
the word T shirt. We can just type in that
product title contains T shirt. Now that's going to pull
through all products that have T shirt contained
within their product title. Now, let's see have
a few different spellings and you made the mistake of typing T shirt with the dash in there and then other
times without. You can then go select any condition and go
add another condition. Then again, we're going
to have product title contains and then T
shirt with no dash. Now, we can then create a
collection of all T shirts. Even if you have really bad
product tags or metadata, you can still find a way around it with these
dynamic collections. Then looking at the
other options here, you obviously have
variance title, which is similar and you can use that more text based filtering. Inventory stock, you might
have limit to stock left, or you might have lots of
stock of certain products, and you can then create
collections based on that. Weight compare at price price, so often the compare
at price and price can be great
additional collections for great fines under
$150 or under $50, whatever price point may. That's a great filtering option. Product tag with covered
vendor category and type. Now, these all work a
little bit similar. As on the product page itself, you have the dropdown
options to choose there. And then for vendor, you can type in the brand name itself. You want to see a video
that goes through managing each of these fields on
the product page itself. I do have a video that
walk through editing and managing products on
your shop office store, and that'll help give
you an understanding of how to manage
the product type, category, vendor,
tags, et cetera. So if you have any questions,
comment below, otherwise, that video should
be able to help you run through each
of these components. Now, one of the
last things we're going to need to do is add your collection to
your navigation so your customers can access it. To quickly do that,
you're going to head over to Online Store. Then underneath Online Store, you're going to
click Navigation. Then inside navigation,
you're going to select a menu that you have set up
for your theme currently. In this case, I'm going
to click into Main Menu. And then inside the Main Menu, I'm going to click Ad Menu item. To call this sale, and then you can either search or manually select the
collection itself. I'm going to click collections. Then I can see my collections
being pulled through, and I'm going to click sale, and then add that to my menu. I'm going to add one more,
which will be the Staff picks. I'm going to type
in staff picks. Then I'm going to go to
collections picks add. Once I've done that, just
click Save Menu and then now your collection is
going to be accessible via your navigation
on your website. So I'll then suggest previewing
your website to make sure one being the collections are being featured
in your navigation, two the collections are pulling through the
products as you'd like to. So once you've done
that, you can feel more confident in sending out
that e mail campaign with that featured
collection or letting your customers find the
collection on your website. So that's it for today's tutorial on
creating and managing automated and manual collections inside of your shop of by store. If you have any questions,
please let me know below, and I'm more than happy to help
26. How to setup shopify paymets: Welcome to today's video
where we're going to be setting up Shopify payments
on your Shu fi store, and we're also going
to be touching on a few additional Shub
fi payment options that you can use to help either incentivize customers
to purchase with you or just to make
things a little bit easier for customers
when checking out. Let's dive into it. First off, we're going to load up
your shop fi account. If you haven't already log into your sho fi account and make
your way to the Admin page. Once you're on your
Shop fi dashboard, we're going to head down to
the bottom left hand corner, and we're going to
click on to settings. Once that's loaded,
we're now going to head to payments on the
left hand side here. Then first thing you can see here is I have a little warning saying development stores can
only process test payments. Now you won't need to
worry about this as you'll have an actual
Shopify account. Although as this is
a test environment, I just have that warning.
Feel free to ignore that. It's not wrong that you don't see that. You don't
want to be seeing that. No worries at all there.
Now once you get into here, you're going to see
often two things. You can see Shopify payments
and paypal added in there. Both of these
obviously need to be activated before you
can accept payments, so it knows where to send the money and if
you actually have an account to accept that money from customers checking out. The most part, most
of you will be using Shopify payments
on your ECO store. We're going to set
that one up now. What we're going to do is
click, complete account setup. Then we're going
to see the list of details that we
need to provide to be able to verify the account and to begin accepting payments. Make sure you read
through this and collect all that
information you're going to need as it's probably easier to just get this done
in one sitting. We then going to
click Submit details. Then we're going to select what structure you have
for your business. Now, it does have an individual. Although this isn't
what you would normally think which
is Sul Trader, as SL trader does still fall
under a registered business. Individual, I guess
is if you have a hobby business or if you're
starting to sell something, Augh I think most of you will be falling under a
registered business, and we're going to be
selecting that one for today. Then once you select a
registered business, you will see select
business type, which S Trader, corporation, Partnership, and public company. For most of you
just starting out, you might be a sole
trader or partnership, or you might already be
registered as a company. Let's just select
corporation for this one, and we're going to click next. Now, once you've select
your business type, we can then begin filling
in all the details. Hopefully you have
all that in front of you and we can begin
filling all this in. I'm going to be using
a bit of dummy content just to work through
this with you. Although, make sure you don't put dummy content
in and actually use your correct information as this is information that one, you won't be accepted
for payments if this is incorrect or invalid data that doesn't match
with other records. Two, you don't want this to be flagged or banned or suspended. Because there are
some businesses that do get flagged or
suspended from payments, and you don't want
to be one of those. Usually, it's when they're
in certain industries. So you should be more
than okay with that unless you are one of
those types of businesses. Although just make sure you
get this information correct. It's a bit like the
tax department. You don't want to
mess around with them just because you want
to make sure that you can get your
money and process money as you wish and
not have any issues. Now, go ahead and fill in all
the details on this page. Then once you fill all that in, we're going to click next, and now you're going to
select the industry type. Now this is usually
where you want to make sure you
know you don't pick the wrong thing
because this can be where they suspend you based
on your industry type. Usually this might be
more so if you fall under tobacco or medicinal
drugs or anything like that. They're the ones that
usually have the issues. You should be okay,
and we're just going to select your
industry type now. For this one, I'm going to click clothing and accessories and then also other clothing
and accessories. Then once you've selected that, make sure you do fill in
the store phone number as the number you
want people to see on the invoices and to be
able to contact you on. Just because sometimes
people fill this in with their personal number and
then after time goes by, they realize their
personal number is on all of the invoices, and that's not what
they actually wanted. Again, make sure
this is relevant to the store's information and
not just your personal one. Then once you've done that,
we're going to click next. You might have already
filled in form similar to this on other tax applications
or anything like that. Although now you're going
to need to fill in about the account representative and how you currently
sit in the business. This will be different
for everyone to take your time to
go through this. Although you will just need to select what position
you currently have. If you're fill in on
behalf of someone, just select the
correct one for them. In this case, I'd say this
person is director and sits on the company's
governing board, like that. This person executive
in the company, and this person owns 25%
or more in the business. But make sure you do select the correct items and I
know I keep saying it. But many people don't. Keep it easy and you
don't want to be correcting all this later if you can get it
right the first time. Just go through and fill
the rest of this in. Now one thing to keep in mind is that this is for
personal information, not the business as such. Make sure when you do fill
in the date of birth, it's actually the
person's date of birth, not the company's
start a launch date. Same thing for the
residential address, personal residential
address, not the companies. Then you can see here
as I selected that I was a 100% owner
of the company, it has 100% equity listed here. Although if that's not the case, make sure you have
corrected that and you've got the right equity
breakdown listed. Then click next. Then we can see again that we've
got the director. I'm the only director here, so we don't need to
add anyone else. But if you do have
other directors, you can add that easily there. Once we go through to review
all of this information, just take one look
through before you do look to take
any further steps. Again, better safe than sorry, take your time, look
through everything, and we then just need to upload a document to support the
business verification. S, this is any document that will include things
like the business name, ABN, address, phone
number, those things. Any business name
registration or tax registration documents
are great for this. Upload one of those
and that should do more than enough to get
yourself verified for payment. Then once you've done
that, click confirm. Once you confirm
the business side, you just need to confirm the
personal information that's been entered to and
similar thing here. Just include some
verification that shows the identity and address of the people or person that you filled in the
information for. Then once you've done
that, just click confirm, and then you'll be able to
submit for verification. Now once you submit
for verification, this shouldn't usually
take too long. Usually it would be
done almost right away. Although this cans take a
little bit of time and they'll usually advise on any processing
times after submitting. Then click submit and
then we're going to head back to payments
inside of settings. Go ahead and do that, and
I'll say you in a second. Now we're back in the
payment section here, you should have a
different screen as I do, although as it was just dummy
content and on development. So I won't actually be submitting
that for verification. Although what we can see here is there is an
option just below shopifi payments that if you are looking to use a different
payment provider, you can select, see all
other providers here. Then once that's loaded,
we're going to see a list of all third party
payment providers that you can utilize
on the store. You can see the first one
here being Bogus gateway, that is just for development
testing purposes. But then beneath that, you're going to see all
the other options. Usually, if you're
just signing out, you're not going to be
worried about any of these. Although for bigger
enterprises or companies, they might have deals
or partnerships with certain payment gateways, they might be wanting to prefer and utilize those over others. Just something for reference. You don't need to
worry about this, feel free to ignore it,
but just in case you do, that's how you get to
that section there. Heading back. We can
see just below there, we have additional
payment methods. You can see PayPal is already there as an
additional payment method. You do have to still
activate that, where you can do here by
selecting activate PayPal. Then you just connect
your paypal account or set one up if you don't
already have one. Then we can also see just
below that add payment method. If you click on that,
we're then going to see the other options
for payment methods. You can go in here and search by payment method or provider. Let's just say you want
to add another provider and that could be
LnA, for instance. You can search Lner,
add that in, so we can and then we can go install. Now once you click install, it'll probably take
you to install the application for
that payment provider. Once you click install, it's going to likely
prompt you to install the application or plug in
for that payment method. Each of these, particularly for the Afterpay Klan Zip
pay, anything like that, they're going to need an app, that will also allow you
to have the little widgets on your website that have
the payment in installment. I'll break down the price
for you of that product, so it might be purchased with four installments
of X amount. That's why you need to
install the app as well, and then they'll also
require you to set up a separate account with each
of the providers there. They'll also they'll also
require you similar to pay power for instance to set up an account to whether
that's lana after pay, et cetera, they're all going to need their own account for you to have and for
you to connect that between the store and then
the app for instance. Just keep that in mind, it
doesn't take too long and there's no harm in
really installing these. They do inject a
little bits of code, but usually it's very small, and I there are any issues, simply reach out to their support or let
me know and I'll be happy to guide you on how to
remove that from your theme. Once have injected those
little bits of code in If we click install on this one, we can then just see it then prompts you into the
merchant portal, which once you get there, this is where again, you'll log in or
create an account, and then you'll be able to
connect all of that there. Then once that's all connected, you'll simply be
able to head back to payments inside of
your shopify settings, and then you'll see the
additional payment methods continue to appear within
this section here. You can add as many payment
methods as you want. Now, a few of the
additional payment methods, I'll definitely recommend you
have set up on the store is PayPal, Afterpay, and Klana. Now these do service
different areas of the globe. Localized business
you might only need what's relevant to the local
customer base you have. T hough if you're in Europe, ln is are very popular
one after pay extremely popular in Australia and then pay international. These are a few ones to
keep in mind and they can build a lot of trust
with the customer, particularly first time buyers, that some people won't
purchase with you unless you have things
that ln, for instance, as lana does give the buyer a little bit more protection when
purchasing from you. Sometimes you might lose out a little bit on the
transaction fee. Although for the benefits
that it does provide you, I would probably suggest
it's worthwhile exploring these extra payment methods and including them on your store for customers to be
about to purchase. Lastly, just beneath
these sections here, we can see there's a little
bit more information on this payment settings. These aren't usually the
most relevant settings when starting up your ECM store unless you have very
specific business cases that you need to apply them to. Or the one being when you
want to capture the payment, whether that's
automatically a checkout, automatically when the entire orders for field or manually. Now, if you maybe B to B, you might go with manually or fulfilled as that way it can just save you processing those beer wholesale orders
or anything like that. Although for the most
part, you're going to want to for the most part, you're going to uh
for the most part, you're going to want
to be capturing that payment directly
at checkout. I'll leave that first
option selected. If you're not sure, again, let me know and I'll
discuss it with you and see if you do have a use
case for one of the others. Although if you're
not aware of it and just selling direct consumer, I'll definitely recommend
keeping that first option selected there and just
collecting payment at checkout. There's no real other reason why you shouldn't be doing it. If you do select manually, you can see beneath there is an additional option to add
in manual payment methods. This will be things like
your bank account details. If you have a BSB and account number
that you need someone to transact into or a BPA
code or anything like that, this is where you'll add
that into this section here. You can see by going
manual payment method and then within that
you have bank deposit, money order, or
cash on delivery. Those will be the options
that customer can then select when they get to the
checkout of your store. You could have one
of those or provide all of them as an option to. Completely up to you, and again, every business is different to see what is relevant
for yourself. The last thing we do have here, payment method
customization apps that Shovef I has
on the app store, and you can install
that on your store to customize that process. Usually, this is more
so for those B to B or alternate payment
collection methods, which again, for
the most of you, you'll be selecting
automatically a check out. But if for instance,
you do have one of the others or a
unique business case, there may be an app that
will help you with that. You can see here a
small collection of apps that will help you to
customize that process, whether it's be the cash
and delivery method or payment after purchase. Anything like that,
a few options here. Feel free to explore those. Usually, if you have an issue with a certain
business case, someone else probably
has as well. But if not, you might be
in to create an app that could do quite well as
well. Never rule that out. You could be creating
an app for the Shop Fi HAP store and have many people benefit from you creating a solution
for that problem. Keep that in mind,
but there should likely be something
for you already here. If not, then again, let me know and I'll be
happy to see if I have any solution for you or if there's a work around
that can be implemented. One thing to keep in mind as you grow your e commerce
business is that the different shopify plans do entail different
transaction fees. You'll see that when you get
started on the basic plan, which is guarded towards sol entrepreneurs or
people just starting out, you're going to see slightly
higher transaction fees. Just a quick summary of
this, you'll see that the card rates on the
basic plan start at 1.75% plus $0.30 per
online transaction. Then you have 1.95% for in person transactions or 2% for every third party
payment provider. If you go to the next plan,
which is called Shopify, you can then see it goes to 1.6% plus $0.30 per
online transaction, and then only 1% for every
third party payment provider. Then moving to advanced, it goes to 1.4% plus $0.30
per online transaction, and then 0.6% for the third
party payment providers. Then if you go to shop f plus, that's a different
ball game, but for now we'll focus on
these first three. It's just something to
keep in mind is when you look to pay for
the certain plan, you might look at that
middle plan or advance, for instance, think, h, that's a lot of money to pay per month. I don't want to spend that much. Although businesses will
get to the point where depending how much revenue
you're doing per month, It could actually be a viable financial option to
upgrade the plan, as you might actually
be saving more than the difference between
each of the plans costs. Definitely keep that in
mind and just have it in the back of your mind
or keep track of it as you might find that as you scale to a certain
level of revenue and depending what
payment provider or methods people are using. You might be in the position that's
definitely worth while upgrading your plan that
you get those better rates. As Although you'll be spending more money
on the monthly plan, you'll be saving a
lot in the long run on those transaction fees. That's all for today's
video and setting up shopify payments on
your Shopify store. If you have any
questions, please let me know and I'll be more
than happy to help, and I look forward
to seeing you soon.
 Charlie Sweeney, Let's grow your e-commerce business!