Transcripts
1. Introduction: Hello and welcome to the
classroom. I'm Christopher Dodd. I'm a top teacher here on Skillshare.com and
Shopify Expert, working with the
platform since 2019. What you're about to watch is
a crash course on Shopify. We're together, we'll go
through the various parts of a Shopify store and learn how each part works
together to deliver a beautiful and robust
e commerce website. While the Shopify platform
has undergone a lot of improvements since 2019
and continues to do so, the core structure of the
Shopify platform is still a robust system that elegantly balances flexibility
and ease of use. A platform that
allows merchants to get started selling
instantly with a simple but powerful
checkout for accepting payments for any
product that you can think of. With Shoaf, you can create a product page and start
selling in less than an hour. In the class, we'll go through the core essentials you need to understand about the
Sho Fi platform. We'll start with an overview of the shove commerce structure
and then take a look at the various
pieces that make up a shove store like
products and variants, custom pages and navigation
themes and apps. As well as creating your
own data so that you can easily extend the
platform to suit your needs. A developer working on
the platform, since 2019, I've seen tens of stores using Shopify to power a
simple online store. All the way up to multi million dollar e
commerce businesses using various
customization options. While Shopify makes E commerce
as simple as possible. There are a few things you need to know about the platform. If you're interested
in selling products, a chobe fi or like me, helping businesses that use Shopify with their
website requirements. So if you're interested
in learning how the Shopify platform works, keep watching and I'll
see you on the inside.
2. Class Project: For your class
project, I want you to come up with a plan
for a Shopify store. I recommend opening
up a document now. And while you go
through each lesson, come up with your own
example of how you would fit an aspect of your store
into each category. If you're in the
process of creating a real store, then even better, you can apply what
you've learned in the following lessons to
your actual store needs. But if not, you could look
at other stores on the web, whether they are on
shopper file or not. And figure out, for example, what products you will
add to your store, what combination
of those products will be part of a collection, and what additional fields
you might need to showcase. Images, for instance,
below the fold. Or to showcase something like specifications or
ingredients list that we can use custom data, IE. Metafieldsp. If you prefer to do this at the end of
the class, it's up to you. But maybe you'll need
to go back and review some of the lessons to
confirm your understanding. Once you're done with your plan, be sure to share it with the rest of the
class by posting it in the class projects section
of this skillshare class. You can do this
in any format you like and even
anonymously if need be. It's just a good idea to
have some homework in order to solidify the
knowledge that you will gain throughout this class. Of course, if you
have any questions, feel free to comment on any of the lessons or within
your class project. Otherwise, let's get started.
3. Creating a Free Development Store: All right, so to follow
along in this class, you're going to need
a Shopify store. And as I talk about
in my other videos, the easiest way to get
started with Shopify if you don't already
have a Shopify store, is to create a free
development store through your Shop Fi
Partners account. And if you don't have a
Shop Fi Partners account, you can easily join for free. There's no application process. You don't have to have any credentials in order to have a Shop Fi partners account. It's all free for people like us trying to learn
the platform, right? So I've talked about
this in numerous videos before and I've created
development stores in the past, but I'm going to create
a new one in this video. If you have already got
a development store or have got any kind of shop
store to follow along with, then you can feel free
to skip this video. But if you need to create
a shop a fi store, you don't have one
already, definitely follow along this video. Now the first thing
you're going to need to do is sign up for a
partner's account. If you don't already, I'm not going to go
through that process. It should be pretty simple. Pretty straightforward.
I did it years ago and I don't remember
it being an issue. I already have an
account. So what I'm going to do is just hit log in and it's going to take
me to my partner's account. Then I'm going to
go over to stores. Just keep in mind, guys, that the UI could
change at any point. So just look for the
menu item called stores. It might not be in this exact position by the time you're
watching this though. All right, so all
we have to do is go over to this button
right here to add store. And you can request access to a client's store if you're working on somebody
else's store. But for our purposes,
we're just going to click here to create a
development store. And it's going to ask whether this is something
that we're going to transfer ownership over
to a client later. Or we're creating a
store to test and build, or in this case, learn. So we're going to click
the second option, and I'm going to call
this Shopify Store class. No, that's not available. I'll give it something
a bit more unique. Chris Development store
set up. All right, cool. That's a bit of a ***** name, but it got through in the end because it has to
obviously be a unique name. To get through here, we can use the latest build
or a developer preview. This right here allows us to preview features
that are coming out. So we can click here and look at the features that are
coming out soon on Subi, so we can test those out. I'm going to go with
latest build for now. And then this one, which wasn't around when I first started
creating development stores, which is super handy to
start with test data. If we start with an empty store, we're going to have to create all these different resources, which is kind of annoying. We still will have
to probably create some dummy data in our development store
throughout this class. But let's definitely start
with some test data. I'll click here to create
the development store. Unexpected era creating shop. Okay, let me try this again. The store name can't
contain Schober Fire. Maybe that's what
the problem is. I'll just call it Chris
Development Store, for course. All right. So yeah, I will keep those other options the same
and hopefully it works now. All right, so there we go. We've got our development store, and now we can continue
with the rest of the class.
4. Shopify Store Architecture: Before we dive into
each important piece of the Shop Fi platform, we need to take a high
level look at where each part fits into the overall architecture
of the platform. Shop Fi is a fully featured
e commerce platform. You might think of
it as just a place to build an online store, but in reality, Shop Fi allows you to sell in many
different sales channels. Whether it be through
point of sale, through existing
online platforms, or through your own storefront. Using the storefront
ABI, of course, most users will operate primarily through the
online store sales channel. If you log into your
Shopify account and look at the
navigation on the left, you'll likely find a link to Online Store underneath the
heading Sales Channels. Click on that link and the
menu will expand to show you the various parts of your
store that Shoppe Fi provides. Notice the first
link reads Themes. A Theme allows you to control the look and to some extent, the functionality of
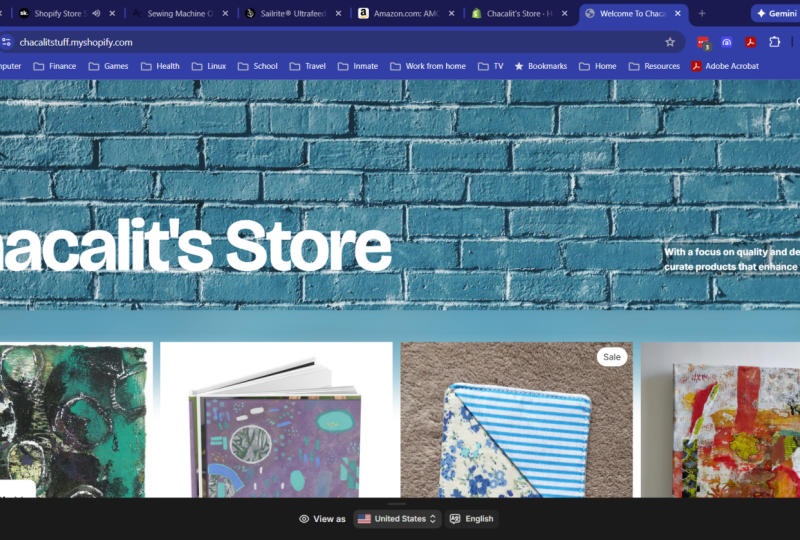
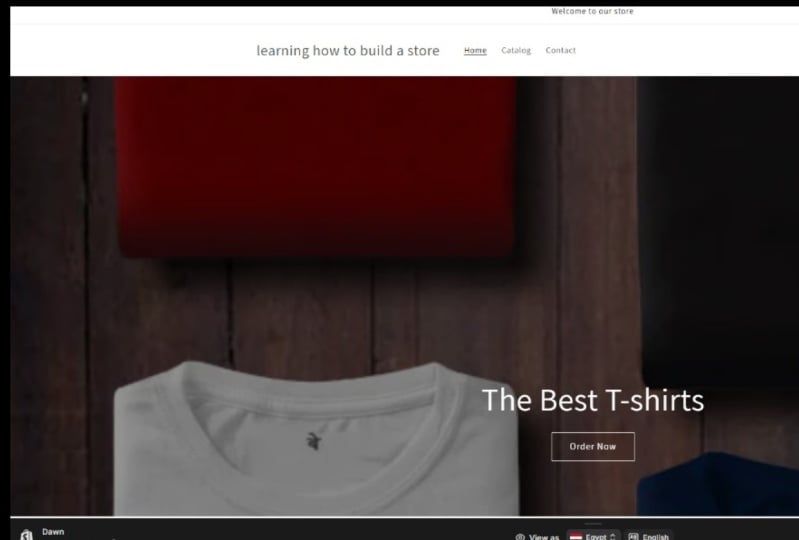
your online store front. The best way to demonstrate
what a theme does and doesn't do is to switch between the different themes
on the same store. Here you can see that the menus and the products
largely stay the same, but the layout and look of your online
store front changes. See how when I click between
these different themes, the content and menus
are largely the same, but the presentation
is quite different. This is what your theme does, its stoppies way of allowing you to customize your store front. When I say content and
menus are largely the same, that is because a lot of
this is stored either inside the online store sales
channel or outside the online store sales channel
in the case of products, for instance, let's
take a step back. Cross out your sales
channels here for a moment. Which for most people is
just the one sales channel, the online store sales channel. And let's look at what content
is central to your store, regardless of what
the sales channels are that you're running on it. These include orders, products, customers, and discounts.
Think about it. Regardless of whether you
were to sell in person through an online store or through an app or social media, you would need to take
orders of certain products from certain customers
at certain prices. This is Core Commerce
functionality. This is why these sections
are independent of the sales channels you have installed on your
Shopper I store. Now let's dig back into the sales channel
section and look at what pieces exist within the online store sales channel. These are themes, blog posts,
pages, and navigation. Remember a moment
ago when we took a look at our store through
a few different themes. The content that
stayed the same, regardless of what theme
we were looking at, included these resources within our online store sales channel. For example, if we head to the blog post section and
create a new blog post, this will apply to the
whole sales channel, not to any particular theme. We can also create a page to add to our online
store sales channel, as well as set up
menu that we can include in our themes
at various points. We'll dive deeper into all of
this throughout the class, but for now I'm
just demonstrating where these options
sit in your store. Before we summarize what
we've learned so far, let's quickly talk
about the theme editor. Within each theme, you can access what's called
the theme editor. Here you can customize certain
aspects of your theme. And when you hit
save, that data gets instantly saved to the
specific theme you're editing. It's important to note here that the data for this
editor gets stored on the specific theme and each theme has its
own set of data. For these options, this is
different to what we just discussed with blog posts,
pages, and navigation. An example to illustrate where
theme data and store data diverge might be a menu field
in your theme settings. The menu itself is set up in your navigation section and is available for use by
all of your themes. But the selection of
the specific menu is specific to the theme and
therefore stored within it. Again, we're going to go a lot deeper into all of
this in this class. For now, I'm just
making you aware, you might want to refer back to this video once you've
completed the class. But for now, let's
summarize what we learned in this lesson. So as you can see here, I've broken up the three
different places where data gets stored and how
they are independent from each other on
Shopify stores. So you've got your Core
Commerce functionality here. Products variance, orders,
customers and discounts. These represent core
e commerce data. Independent of what sales channels you might
be selling in. Of course, for the
majority of users, you're going to just be using the online store sales channel, which comes default
with Shop Offi. It's what most people think of when they think of
a shop offi store. And so things like themes,
blog posts, pages, navigations are going to be specific to that online
store sales channel. And then inside your online
store sales channel, you can customize
the look and feel of your website through
various themes and any of the settings that you set
up in the theme editor are going to be
specific to that theme. So it's not going to apply to other themes in your online
store sales channel. But again, we're going to cover this in greater depth
throughout the class. This is just the
high level overview. Once again, you might
want to refer back to this once you've gone
throughout the class, but for now, that is the
high level overview. And in the next video, we
will dive into some of this core functionality
including products, variants, orders, and customers.
5. Products and Variants: In this video,
we're going to talk mainly about products
and variance, but we're also going to talk about orders and
customers briefly. At the end, obviously
running an e commerce store, products sit at the
center of the platform. Products should be pretty
simple to understand, but where it can start to
get a little complicated is when we break down each
product into variance. Variants are super important
because they represent the actual product
that gets ordered and delivered to the
customer. Let me explain. Let's look at the
snowboard examples that come with our
development store. The hydrogen snowboard
here is a single product, but it comes in a
range of options. If we scroll down to
the variant section, we can see the list of options
and possible values for each which in turn produce
this table of variants. Each combination of options
produces a single variant. If we have just one
option parameter with, let's say size here, with three different sizes, then we'll have just
three different variants, one variant for each size. But if we have more than
one option parameter here, the list compounds with
three option parameters, each with three possible
values for the first, two for the second, and
eight for the last. As in this example right here, we get a total of 48
different variants, or 48 different combinations of all the options above The
formula for this simple, it's just the number
of possible values for each multiplied together. So three times two times eight, producing 48 different
combinations or 48 different variants. So when I say the variant is the actual product that gets ordered and delivered
to the customer, that's because if
a customer orders a carbon fiber snowboard with a classic bolt
pattern in size 160, and they were to receive a
fiberglass snowboard with an R SC binding
mount in size 154. Then that's not the
product that they ordered. This is an important concept to understand as while products
have their own pages, it's the variant or
the variance under the product that
is actually what gets selected and
ordered by the customer. For this reason, a product always contains at
least one variant, even if there are no options
available for the product. Let's zoom out for a
second and take a look at the process of ordering
something on a Shopify store. First, the customer navigates
to a product page and whether this product
is available in different options or not. When the customer clicks
the Add to Cart button, a variant will get
added to the card. If the customer navigates
to the checkout page, the variants in that
cart get carried across. And when the customer
pays, two things happen. A customer is created in the
back end and the card gets converted into an order that is then attached
to that customer. Now for a regular admin user, the distinction
between products and variant isn't super
important to understand. All you really need
to be concerned about is that the customer's
selection was captured successfully and
that they received the product with the combination of options that they selected. However, for more
technical users who plan on coding
Shopify Themes, functions or apps, it's important that you
are aware of this. We can view the data that gets
stored within a variant by clicking the edit button
on any one of these rows. As each variant is technically
a separate product, it should have its own
SKU, quantity and price. The price could be the same between variant or different if a certain combination is in higher demand or more
expensive to produce. As the customer buys a
variant and not a product, the stock level of
each combination is stored at the
variant level here. If the variant represents the actual product that
the customer is ordering, what can be said about the product that we
see in the admin? You can think of this
product as the page on which we display the
product details and images. A single page that groups
all the variants together. Variants don't have their
own pages and can only be grouped together by the
product that they belong to. Products on the other
hand, can exist in multiple collections and
each have their own page. We can view the product page for any particular product by clicking the view
button up here. Here we can see the
details that we set in the Ammon applying
to our front end. Most of these are quite
simple to understand such as the title
description and images. But I want to draw
your attention to one little drop down, right here under theme template. We'll talk more in depth about templates once we
get into themes. But for now, understand
that each product page will look similar if they are
using the same template, which in Shopify is
usually the case. We can see at present
that all the products in our store are using the
one default template, the code of which is
stored within the theme. When we click View
here on the product, we are viewing the
default template on the currently live theme. Again, this is jumping
ahead a little, but we'll get to templates
in a later video. To finish off this
video, however, let's briefly talk about
orders and customers which, as previously mentioned,
are generated whenever a customer checks
out on our website. In our customer's section, here we can view the
details of users who have previously submitted
orders with our store. But not every user here is
necessarily a paying customer. A customer can
also be a user who voluntarily submits
their information to us without having
to buy anything. The most common
example of this is a newsletter sign
up where we might offer something to the
prospective customer in exchange for their
contact information. Our orders section here,
pretty self explanatory. When a user checks
out on the store, it creates an order
for us to view within the admin Here,
orders, of course, contain the products slash variance that the
customer has ordered, as well as the
customer's information so that the order
can be fulfilled. Pretty simple. So a bit
of meat in this lesson, but basically this covers the main core of the
Shopify E Commerce system. To recap, you can set up pages to display various
products in your store, each with their own list of possible combinations
known as variants. When a user visits your store, they evaluate the
product and select what variant they would
like via the product page, Add that product to the cut, and then check out creating a new customer order in the system for the
merchant to fulfill. In the next video, we'll
cover a section here on the product page that we
breezed over in this video. But is very important
product organization, so important that it
deserves its own video.
6. Product Organisation: In this video,
we'll cover how to organize your
products in Shopifi. This is an area
where Shopifi might differ considerably
to other platforms. One thing that might confuse
users is that there is no such concept as a
category in Chopifi. Instead, the main ways
to organize products in shopifi are
collections and tags. Let's head into the
collection section of our admin and click to
create a new collection. You can set a
title, description, and image for your
collection here, but the real magic happens
here in this section. Here, under the collection type, you can specify
manual or automated. Manual is pretty simple. If you create the collection
with a type of manual, then you can manually specify which products you would
like in that collection. If we add a few
products here and click to view the collection
on the front end, you'll see our
collection delivered through the collection
template of the theme, which given the nature
of collections, should feature a product
list of products in the collection with some sort of options for filtering
and sorting the list. Just like a product,
a collection is an object in Shopify that
each has its own page. And we can customize the presentation of the
collection by switching themes or by selecting the collection to display
via an alternative template. If we have that set up
in our theme, again, we'll discuss
alternative templates once we get into themes. But for now, all
you need to know is that all collections
have a page, a page in which users can view the list of products
within that collection. So getting back to the concept
of product organization in Chopifi collections are very flexible in the sense that a product can exist
in many collections. The downside of this is that we can't trace a product back to a single collection and therefore there can
be a lot of overlap. A further limitation is collections can't link
to other collections. In other words, there
is no such thing as a collection being a subset
of another collection. In Chopifi, I've found
that merchants who have a large range of products are
often frustrated by this, as they like too often arrange their products in a
tree like structure, which doesn't really fit this flexible products
collections model in Chopifi. Before we talk about
automated collections, let me explain a little
bit more about tags and Chopifi heading to the product that we were looking at before. We can see the
section for tags at the bottom of the product
organization section. Tags are simply single lines of text that we can add to the
product to categorize it. We can then create rules around products
with certain tags, either in the code
of our themes or in automated chop
fi collections. Which brings me back to the
collection admin page here. If we create a new
collection and this time we select
automated collection, we can set the list of
products in the collection to automatically populate based
on certain conditions, the most common of
which is to use tags. So for example, if we created a collection page to list
all of our sale products, we could create
the collection as a manual collection and
update the products manually over time
by coming back to the collection each time
we want to make a change. Or as an alternative, we could set a rule here that the sale collection will include all products with
the tag of sale. And then at the product level, we can simply add and remove
the sale tag whenever we want that product to be included in the sale collection or not. The benefit of this second
way is that given we know at the product level that the product is a sale product, we can use that information in a number of other ways as well. For example, in this
sale tag example, maybe we code it up in the
theme to show a label on the product grid reading sale
if the sale tag is present. One more thing about tags
is that Shopify provides a native way to filter deeper into collections based on tags. So let's say for instance, you have a shoes
collection with some of the products inside
tagged as men's. You can simply append
a slash and then add the tag to the
end of the URL in order to filter out any products that don't have that tag
within that collection. Heading back to the conditions within automated collections, tags are one of the options, but you can also create
automated collections based on a range of other
attributes like product type, price, or stock level. You'll notice here that there is an option for product category, which you might
think contradicts my earlier statement on categories not being a
concept in Schabifi. While something called
a product category does exist in Schabifi. Now it's provided there's
a way to categorize products for tax reasons when selling in
the United States. Unfortunately, it's not a method of product organization
in Schubifi, at least at the time of
recording, unless, of course, you were to categorize
a product and then use it as a condition
on a collection. But in that case,
you're still relying on a collection to
display this category. Previous to 2021, we could also filter collections based on
product type and vendor. But since 2021, Hope Pi now uses something called
storefront filtering. Which includes not
only the vendor and product type as
filtering options, but a range of other attributes
like price availability and even custom
fields that you set yourself, known as metaphields. To go deeper into
what attributes are available for filtering, check out the page on
Chobe Pi's documentation for storefront filtering. Okay, So we've covered
quite a bit in this video, but here's a high
level summary number. One, collections are
Shabifi's native way of organizing lists of products. Two, we can create
a collection with a product list that we
manually specify or via a set of rules that
enable dynamic population of the product list via
different attributes like tags, product type, or vendor. Three, each collection
gets its own page, which can be customized via the collection template
within the theme. And finally, we can filter further down on
collection pages, fire tags and other
product attributes. But we cannot natively link
one collection to another. Essentially, collections
sit at the heart of product organization
in Shabifi. If you want to display a
list of products that fit together in some
sort of category, creating a collection
is how you do it. So that covers the main core
of the Shop Fied platform. In this next video,
we'll move into the online store sales channel and look at creating pages, navigation, and blog posts.
7. Pages, Blog Posts and Navigation: In this video, we're going
to talk about the parts that make up the online
store sales channel, which is the sales channel
that comes defold and Shopify. And the one that
probably comes to mind when you think of
a Shopify store. At the top of the
list is themes, which we'll visit a little
later on because themes are a giant topic and
something I talk about in depth in
my other classes. For now, let's simply look at pages, navigation and blogs. First up, pages
are the easiest to understand while products and collections have
their own pages. In shopifi, creating
a page here in the online store
sales channel is for any other pages you might need that don't fall into the
previous categories. For instance, a contact page about page or a terms
and conditions. Page pages are quite basic
by default in Schubifi. The only default fields
here are title and content, allowing you to create a simple
text based content page. But again, we have
this theme template dropped down here that allows us to run the page through
a custom template here. The possibilities
are near infinite. But the big difference between
pages created here and other pages in subi Fi that are based on collections
or products, for instance, is that
there is no data besides this title and content field
that is associated with it. Technically, you could
create a page for a specific collection or product using one
of these pages, but you would miss out on the
native filtering options. In the case of collections
and for products, sure, you could showcase a
product on one of these pages. It would just show
up with a different URL structure and you'd have to somehow specify what
product you wish to show. Simply put, while pages
here are flexible, it's best to run collections and products through their
own templates and only use pages for any pages that don't fall into
other categories. Similar to a page
is a blog post. In order to create
a blog post though, we need to create a blog first. In Chabavai, you can have
multiple different blogs. Therefore, you can think of
blogs here as collections. But for blog posts, the blog post page and the Ammon looks a lot
like the one for page. The two big differences
here though is that a blog post is always associated
with a specific blog. And that the published date is recorded so that it can be
displayed on the front end. And so that blog
post can be arranged by published date as
you would normally expect from a blog
note here that blogs can also run through
alternative templates, which we'll get to in
the video on themes. Finally, we have
navigation here. This is where we set up the link lists for our
store within the admin. However, Shubafi call them menus as a more
user friendly name. Most of the time you will use these link lists as
menus, which makes sense. But it's a flexible enough system that you can use these to set up any other list of
links you might require. Heading into one of these
link lists or menu, we can create a
list of links that are at maximum
three levels deep. Each link is simply
two fields, one, the text of the link and to the address that the
link should link to. Then we can create a tree like structure by dragging a
link under another link. We can have a link
within a link, within a link creating
up to three layers. But unfortunately, any
menu structure that is more than three layers deep
cannot be created here. In Shopifi, like products, collections, pages,
and blog posts, linklets are just
another object in Shopifi that we can
reference in our code or link to certain sections
within our theme through the theme editor,
without further ado. Now let's look at themes and
templates in more depth.
8. Themes and Templates: So I've mentioned a few things about themes throughout
this class so far, but now we're going to
go over what you need to understand about
themes in this video. Themes are super important in Shop Fi because they represent
the template code that all of your store
data runs through within your online
store sales channel. When we populate things in Shop Fi like products
and collections, we're essentially creating
data on our Shop Fi store. Then if we're using the
online store sales channel, which is the case the
majority of the time, we display that data in a
certain way to the end user. If we look at the
theme section of our online store sales channel, we can see a list
of themes here. The one at the top is the
currently live theme, and the others are all
themes that we can work on and publish at a later date or simply used for
testing without making any changes
live to the end user. Each theme is
essentially a folder with a bunch of code
files in them which we can view and edit right
here within the admin by clicking on the dots and
then clicking Edit Code. Now, this might look
a bit intimidating, but let's attempt to
simplify this a little bit. In my other courses
on theme development, I go more in depth
into theme code. But at a higher level, there are just three folders I want to talk about
in this video. And they are configure
templates and sections. All three of these folders typically contain
files that will be affected by changes that we make in what's called
the theme editor. If I click on the three dots
here and click to customize, it will bring up
the theme editor. Formerly known as the
theme customizer. Here is essentially
a user interface to customize our
front end and at a high level add and customize list of sections within
certain templates. If we click the dropdown
at the top of the editor, we can select which
template we'd like to edit. You can see here that links to collections, products pages, blogs and blog posts, each carry through
to another menu. Because each of these
templates can have just one default template or multiple
alternative templates. This relates to what
we saw earlier in the theme template dropdown of all these pages in the admin. So for instance, if we wanted
to run a particular product through an alternative
template, in other words, a template different to the
default product template, we could do so by creating
an alternate template here. And then navigating to
that product within our admin and updating the drop down to link
to that new template. When it comes to
Jason templates, which is the new
standard in Shopify, all templates are simply lists
of what's called sections. Each section can
contain settings for customization as well as blocks which are like subsections that each have their
own settings as well. A few things to note here. Number one, both blocks
and sections can be re, arranged in the
theme editor two, the sections listed under
the heading template relate to the specific template
you're currently editing. Three, the sections
listed above and below it are stored on
the overall layout, which is typically going to be the same for every template. The sections here are typically the header
and the footer, as well as any other
section that needs to be included on every page, no matter what the template is. Finally, through the drop down, you can see what
number of objects, in other words,
products, collections, et cetera, are assigned
to the template. And here you can click to view a different object
through the template. You also have a
few other options here on the far left to update your overall theme
settings as well as turn on and off certain app
functionality on the theme. Overall, the theme
editor is simply a user friendly interface
for updating theme code. All of these settings
are programmed into the theme code itself and
utilized using Shopify, Liquid, the coding language
of Hopi Fi themes. If we go back into
the theme files, the available options in the theme editor as well as the values stored
for each option, are all located inside
the theme code. The four different files I'll draw your attention to here are, one, the section files where the code for each
section is stored. Two, the template
files where the list of sections and their
settings are stored. And finally, the two files in the config folder for
the overall theme. Settings, Settings
underscore schema, Jason is the file that
stores the list of fields, whilst settings
underscore data Jason is the file that stores the values set for
each of those fields. This data syncs directly
with the theme editor. So if we change a value
in our code here, it will be reflected
in the code editor, just like if we change a
value in the theme editor, it will also be
reflected in the code. When it comes to sections
and templates though, the schema, in other
words the list of available
customization options, are stored at the bottom of the section file under
the liquid code that uses it as sections can be included multiple times
across multiple templates. The values for these fields are set separately in
the template file, along with the setting values of all the other sections
in that template, as well as the order in
which the sections appear. For default templates, the
file name is just the name of the object followed
by the file extension. Usually do Jason. For alternative templates, the file name starts with
the name of the object, but then is followed
by a dot and then the name of the
alternative template ending. Once again, here with
the extension of either do Jason or dot liquid. For the sections that are
included outside of templates, we can find hard
coded references to them here in
the layout files. The recorded values
for these sections sit alongside the values
for the theme settings. Inside the settings
underscored Dasein file. There is one exception to this called section
groups which are a less common feature
in Happi that you can think of as a mini
template that sits on the layout file and lets you re order sections outside
of the template. If you'd like to learn
more about section groups, I have a dedicated video
on my Youtube channel. Just search for Happi section groups and it should show up towards
the top of the list, if not, the first result. All right, so just
to recap here, as I've thrown a lot
of information at you. Number one,
everything you see in the theme editor is determined by code in the theme folder. Number two, each section is stored in its own section file. If you know how
to code sections, you can create a new section
file here and use it as a building block within your
theme Editor number three, each template is stored
in its own template file. Products, collections,
pages, blogs and blog posts all have
a default template. But you can create
alternative templates for each of these if you want
certain objects to have a different look and layout Number four sections
that are included on your overall theme layout
file are static and any changes to their settings will be applied
across templates. The value of these settings are stored in the settings
underscore data, Json file, and
finally the schema. In other words, the
list of options for your overall theme. Settings are defined in the settings underscore
schema Jason file, and the stored values
of each are also stored in the settings
underscore data Jason file. If you're simply using
this course to understand the shove fire admin and you're not looking to program themes, then you don't need
to worry about where exactly the code is
stored in the theme code. The most important thing to note here is that any
values you said in the theme editor will be stored in that specific theme
that you're working on. So for instance, if I
was to duplicate one of my themes and then head into the theme editor
of the duplicate, change a value and
then hit Save. The data between
these two themes will now be out of date. The change I just made only applies to the theme
on which I made it. This is different to say if I change something outside
the theme editor, like if I change the title of a product or the
content of a blog post. Like I said, there is a
lot to cover with themes. But specifically for the
topic of this class, I just want to bring
your attention back to the architecture we discussed
in the earlier video. A reminder here
that you only have one core Hove fi store and you can only have one online
store sales channel, but you can have
multiple themes. So just understand that
whatever you set in the theme editor is exclusive
to one of your themes. Whereas all of this
other data that doesn't change based on the
theme that you're looking at. If you want to dive deeper into themes and how they are coded, I have a few other
classes here on skill share that discuss theme
development specifically. So if you'd like to
learn more about themes, check out those classes.
9. Custom Data - Metafields & Metaobjects: In this video, we'll cover
how to add new objects, as well as how to
add new fields to existing objects in
your Shuba Fi store. If we take a product
as an example here we can see some of the default fields on the product object, like the title, the description, the tags, and the vendor. But if we want to create some custom fields for
the product object, then we can do that
by creating something in Shubifi called a metaphield. Metapields used to be hard
to work with in Shuba Fi, so there's actually
a bunch of apps still on the app store
for managing metafields. But nowadays you don't
need an app at all to create and update
metafields in Shubifi. To create a new
metafield definition, you simply head two settings and then click on Custom Data. Here you can see the list of objects that you can
create metaphields for. This list includes products, collections, pages,
and blog posts. At the top of the
list is products. So if we click here, we can actually add extra
definitions here. You can see here that there are already two that came
standard with our store. So let's just have
a look at those. Now, if we go back to our
snowboard product here, you can see the metafields
are at the bottom. So the definitions are the
list of available metafields. And then what we have down
here is a place to set the value of these metapields
on a particular product. So let's go back to
Settings Custom Data and create our own metaphield. If we go into products
here we've got snowboard length
snowboard binding mount. Maybe we want to add
in a another field. Here we have the
list of options. There's quite a few
different options. We can create a single
line text field, a multi line text field, put in numbers in the form
of integers or decimals, link to a certain product, link to a certain file, which gives us the option
of linking to any file, or specifically to images, or to videos or both, which is really
cool and flexible. We can add in a date and time
dimensions, volume weights. There's a lot of options here. We can make reference to other objects in Shopify
like collections, product variance, and
even meta objects, which we'll get to
a little later. We can make it a
true or false value. Color rating, all
sorts of stuff. So let's do rating, and I'll call this
product rating. And I will say, I don't know. It's pretty self explanatory, so I probably won't
put a description there. Minimum rating one. Maximum rating five. Okay. I'll hit save on that. And now that that's created
any product page we go into. Now if I scroll down, you'll see there
is an extra field here and I can set
a product rating somewhere 1-5 So let's
say 2.5 out of five. I'll hit Save, and that value is now stored then on
our product page itself. So let me grab the
URL for this page. Open it up. In a new tab, we could program somewhere into the theme where
that data shows up. We could program it to
show a certain number of stars based on the star
rating right here. So maybe I'll run through
that example right now. If I head into the online store. We actually can do this without having to
code up anything. We can use what's
called dynamic linking. So I'll go into the theme editor for the product template
that's running that product. It's actually using the
alternative template. So I will go into
products alternative. Now instead of snowboard
vendor I can change this, get rid of that, and insert
a different dynamic source. Well, let's put in
the product rating. And then we can say out of five. And then we just need to put a space in there and let's just say rating right now, for something more
sophisticated, we might actually put
in star icons and calculate how many of the icons show up based on
this rating right here. But for this basic example, you can see that the
value is coming across. And if I was to run another product
through this template, it would show up with
a different rating if the rating is set. The risk here that we have. So if I go into, let's just say this one and I change this two
alternative as well. If I don't have a value
for product rating, then we'll start to see a
bit of a different result. So we'll go down here, see if I can grab the URL. I can't. That's annoying. I'll just hit Preview on that. And here you can
see, because there is no value for product rating, I still get the
surrounding text, but I don't get the
value inside here. So how we usually
fix for that is either we need to make sure there's a rating on
every single product. Or program it into
the theme so that it only shows if there
is a set value. But I'll get into a
better example of this at the end of this lesson. For now, I want to
show you how we can create completely
new objects in choi. So what we saw just
then were Metafields, Metafields allow us
to add new fields to existing objects like products,
collections, customers. But what if we wanted to create
a completely new object? Well, we can go
into content here and create a meta object
definition for this. So this is basically
creating our own object. So if I go into here, let's just say it's a designer. This is a typical example, because in Shopper Fire, there's no such
thing as a designer. Or if you had a
bookstore, an author. And then you can go
down here and say, you know full name,
make this required. And then we can do a
little bit of a bio, all right, maybe put in, so we go file for
image and then we only accept images in the
accepted file types this image, we can either do one value
or a list of values. So we can do images and
switch this to list of files. I'll just do one. Now that
we've created our design, I'll hit Save and we can
now start adding entries. So let's just say for
our snowboard example, let's say it's the founder
of Shopifi, Tobias Lutke. I'm pretty sure this is
how you spell his name. Founder of Shopifi and creator
of snowboards. All right. As the bio, I'll just upload an image of Tobias that I have already
procured. All right. And then I'll hit save on that. And now we've got a designer
in our list of designers, which is a definition
that we set up. So now we've got this
designer object in addition to the existing objects within Shopify like products, customers, collections,
et cetera. And the cool thing about meta objects is we
can link them to other objects in our store using meta fields. So
let's do that right now. Let's say, for instance, that we want to assign this designer, or any other designer to specific products
that they designed. So let's create a
field for that. We'll go into custom data, go into products here,
add a definition. And I will call this designer. All right, then I'll
go here and what I can do is select meta
object as the type. And then it'll allow me to choose what type of meta object, like what custom object that we created we want to use
which is designer. If it's designed by
multiple people, you can change this
to a list entry, but I'm just going
to do one entry. All right, and now let's head back to one of our snowboards, let's say the
ultimate snowboard. And if we scroll down, we can select one
of the designers. And we only have one
which is to bias. So I'll hit Save on that. And then we can use that
data within our theme. So now that we've
created a meta object and some meta fields, you might be wondering
how we might use this in our Shopify theme. Well, there's two ways
we can use it in themes. The first one, which we
won't cover in this video, is using it in Shopify Liquid. That is more of a Shopify
theme programming topic. But the other one which
I showed you just before is dynamic linking. Rather than spending a whole
bunch of time setting up meta fields and meta objects
and programming our theme, I'll show you an example
from a current client store. So this right here is a draft
product template that will eventually be run on a few different
templates on this store. And there's a lot of
dynamic data here, so for instance, these dots
right here are dynamic. For each product, we're going to need a different blurb here. We're going to need a
different call out here, some more blurbs here. Coming down to here. This information
needs to be dynamic. This information
needs to be dynamic. These values need
to be dynamic here, meaning that it needs to be
specific to the product, so it can't just be
stored on the template. So what I did for that was I created meta objects
and metafields. If we go into that product page, obviously you've got all
the normal fields up here. But if we scroll down, we've got a ton of other metafields. For instance, accent color
and background color. So this background color
is set in a metafield. This accent color is set
in a metafield so that it can change based on the product that the
customer is looking at. I've got these above
the fold USP's, so the natural energy, weight loss, and keto support. Because each of these has both an icon and text component. I've stored that in a
meta object and then this field is a
meta object list. All right, so if I go
down to content here, let's open that up in a new tab. And if I go to icon text combinations
and go to Natural Energy, you can see the icon
and the text here. This is also recycled for these blurbs right here
where there is an icon, a main text, and
then a body text. So if we go looking
for that in here, fuel for the body, you'll see that that information
is right here. And then we link these different
icon text combinations right here in the metafields. This is a bit more of
an advanced example, but essentially you can see
here that the values we set in our metafields are coming through
on the front end, so these macronutrient amounts. If we go down to here, this template has been
programmed to show these values. So this right here is
an example of how we can use custom data to create dynamic data that
we can insert into our template dependent on what product the
customer is looking at. If you'd like to
learn more about Shopify Metafields
and metal objects, I have a range of videos for
free on my Youtube channel, so you can search for Shopify
Metafields on my channel. It looks like this is also bringing up meta
objects as well. So you can learn
about meta objects in more length metafields. And I cover the different
ways you can use metafields, including the old way, which used to be
the case before the recent updates a few years ago. Metafields are a way for us to extend our Shopify
store front and apply to both objects in the core and the online
store sales channel. So that's it for this lesson. In the next video, we're
going to cover discounts.
10. Discounts: In this video we're
going to cover how to do discounts in hopi fi. Discounts can be provided in a few different ways in
schubifi and can get pretty complicated depending on
the discount conditions for common discounts like
buy one, get one free. We can easily set these up in the discount section
of our admin here. There are two types of discounts that we can set up
in this section. We can either set the
discount to trigger if the customer applies a certain
discount code checkout. Or automatically, meaning that
the customer doesn't need to do anything other than meet the conditions for the
discount to apply. This is quite simple
if you'd like your discount to follow
the below rules. But if you'd like a discount to apply outside of these rules, that's where things can
get a little complicated. If you're watching this
video before August 13, 2024, and your store is on the highest tier of
chopifi known as chopifil. Then you can use an app
called the Script Editor, which allows developers
to write Ruby code to enable discounts based on
more complicated conditions. For years, this has
been the only way to program more complex
discounts in Shopifi. But after August 13, 2024, all stores that are using Shopify scripts will have needed to cross over to something
called Hub Fi functions. Similar to scripts,
Shopify functions allow developers to create more
complex discount formulas. But unlike scripts, these
discounts can be added alongside regular automatic
discounts and discount codes. Obviously, programming
Hopi fi functions is outside the scope
of this class. Like scripts, you need to be on the highest tier of
shopify to use them. But the good news
is that you don't need to be on Shuba Fi to leverage the most
complex discount rules available within
Shobifi functions. All stores are able to install discount apps that
leverage Sofi functions. These apps provide their own user interface for
merchants to create discounts that aren't usually possible using the
regular settings. So to demonstrate how one of these apps that leverages shop Fi functions plugs into our
regular discount section. Here, let's go in install one
of them to see an example. All right, so if I click here, it'll open up my search
box here at the top, M filter to apps, it'll show me my installed apps. But if I search for the app I'm looking for is
called Discount Hub. You can see here we don't have any app in our
store by that name. But we can click
here to search for Discount Hub in the
Shop Fi app store. So I'll click on that and that'll open it up in a new tab. And you can see here, Discount Hub Unique Discounts
is the one I'm looking for. So I'll click on that and
then I'll click on In. That'll take us to this page, which is the standard app
installation page on Schubifi. It's just telling us
that we are agreeing to let this app access some of our information,
which is totally cool. I'll click install app to
finalize this process. Now you can see we are within
this discounts hub app. Now there's two ways we
can set up discounts. We can do it from
within the app. But what I want to show
you is now if we click our discount section here
and I click Create Discount, you've got our regular
options up here. But now since we
installed an app that utilizes Hub Fi functions, you can see that we can also
add a whole other list of different chobe fi discounts below that are pre
programmed by this app. Okay, so one of them which
I thought was interesting, is we can offer a discount to only certain customers that
have a certain E mail. I believe this is called the
employee e mail discount. So we'll click on here and
one thing you'll notice is this takes us to the app
to create our discount. We don't get the same
user interface as if we're creating a normal
discount in Shubifi. So it depends on what
app you're using, but it'll be a different user interface to the normal one. But it should be pretty
simple because we still have access to choose whether we want it to be discount
code or automatic. And for this one I'm
going to call it half off for Chris
the freelancer, and you'll see why
in just a second. I'll go down here and I'll limit this to only my e mail address, and I will give a 50% discount. All of these other things
can stay the same. I'll hit Save on that.
Now you can see that that discount gets added to our list of discounts in
our discount section. And if I scroll over here, you can see under type, it'll list the app that
I used to create it. And you can see here we are using this app to
power this discount, which differs to the other ones. There's no drop down
for these other ones because they're just
in native Shopify. Let's now test
whether this works. I'll click this button
to view my online store. And let's navigate to a
product, any product. Add it to cart. Check out when I put in my e mail and click
Continue to shipping. You'll see that I get the
discount as soon as shop Fi recognizes that I'm
using this contact e mail. So I get the 50% discount that I set in the admin
for this product. So this is the latest
system in Shubifi. It's a way that we can
use apps to plug in to the existing discounts
section here in Chobafi, like I mentioned at the
start of the video. Previous to this, we
used a separate app and wrote Ruby code in order
to program discounts. And that was only available
to stores on schobfil, which is the highest
tier of schubifi. So now if we are on shop, we can write our
own functions and deliver our own custom apps. But for the rest of us
we can simply leverage apps that leverage the
shop Fi functions API. And we can use the user interface
of these apps to create functions that we
can't otherwise create in this
discounts section.
11. Apps: In the last video, we installed
our first Shopify app in order to extend the
discount functionality of our Shopify store. In this video, we'll
talk about how apps plug into your store and in
general, how to use them. So as we saw before, the apps section of
our Shopify store currently sits right here
under the sales channels. Clicking the menu item for apps. The list of installed
apps will appear in the drop down at
the top of the window. Clicking on any one of
these installed apps here takes us to the
page for that app. And also temporarily adds the app menu under
Apps on the left here. If we'd like the app menu to sit in this section permanently, we can simply click
this button to pin it, and it will stay there if
we navigate off this page. Given we've only just
started this store, we only have a couple
of apps installed. So to install more, we can click on apps again
and in the drop down, use the search bar to search
the Shop Pi app store. This button will
direct us off of our Shop Fi store and onto
the official shop App store. From here, we can
browse, search, and choose from over
8,000 different apps, all of which have passed through Shopify's app store
requirements. As we saw in the
previous example, we can click to install
one of these apps, approve the required
permissions, and start using the
app straight away. But what do these apps
do and how do they work? Well, technically, a Shopify
app is any software that plugs into your hopi fi
store via the admin API. These apps are all
third party pieces of software that live externally to your Shopify store itself. Literally, the only
thing that defines a Shopify app is that it leverages the API that
Shop Fi provides. In less technical terms, all I'm really saying is, is that while apps can fit nicely here in your
menu structure, these apps are not part of
the shopified platform. Instead, they simply plug
into the hopi fied platform. The reason why I say this
is to make the point that each app works entirely by
their own set of rules. If I were to head into any
section of my Shopify store, you'll notice that the user
interface stays consistent. Because this is all part of the one shop fi admin and
follows a single design system. Apps, on the other hand, can mimic the look and feel of the shop fi admin, but
it's not required. Therefore, what you see in
each app differs considerably. There is no one way to use
an app for this reason. There's no way to
explain apps in a way that applies to
all 8,000 of them. Again, the only similarity
between apps is the admin API. The API that allows it to
plug into the Shobifi store. If you are more of
a technical user, you can head to the official documentation to read more about the admin API and what
possibilities are available. But for most of
you, how you will interact with apps
is by searching for solutions to problems
in Shopifi that are not able to be easily solved
by the platform itself. For instance, implementing
a product review system, a customer loyalty program, or a system for signing up customers for
subscription payments. These are all examples of functionality that shopper
find might not be able to provide the database
or use the interface for anything that is
purely front end though, definitely check your theme
first and see if it can be achieved by simply
editing your theme code. There are a bunch
of apps that simply modify your front end
using external software, where you could
have just updated some theme code and
gotten the same result. Given that each app plays
by their own rules, I'll end the lesson here. If there's a particular app
you want to learn though, let me know in the comments, and I can possibly create a separate learning resource
specifically on that app.
12. Conclusion: Congratulations, You've
now reached the end of this class on Shopify
store set up. Remember, if you
haven't already posted your Shopify store plan in the class project section
of this Skillshare class, please do so now. And if you want any
feedback on it, just leave some questions with it and I'll check them out. If you'd like to dive
deeper into Shopify, you can check out my full
range of courses at Chris the Freelancer.com
slash courses. I also have a few theme
customization classes right here on Skillshare
for you to check out if you want to
learn how to gain a greater level of control
over your Shopify store front. So check out those two
if you're interested. As always, if you
have any questions or concerns on what we
covered in today's class, leave a comment in the
discussion box below. And I'll do my best to point
you in the right direction. Thanks as always for watching, and I hope to see you again
on some of my other classes.
 Christopher Dodd, Shopify Web Developer & Educator