Transcripts
1. Introduction to Stamp Making : Hi, My name is Wendy, and today I'm going to teach you how to make a perfect rubber stamp for Valentine's Day cards. This class really is designed for someone who has never made a stamp before or someone who's really quite a beginner in in carving on rubber. it's a fun class for anyone, but you'll really get a lot out of it. If this is your first time making a stamp, and at the end of it, you will have a really, really sweet stamp that you can use on Valentine's Day cards. if you are a beginner, this is the class for you. And if you learn the skills and the steps to make a stamp from this video, then you will be able to make more intricate designs and more intricate stamps in the future. So in the next video, we'll talk about tools that you'll need to complete this project
2. Tools and Supplies: Let's talk about tools that you'll need to complete this project. All of these you can get from Hobby Lobby, but then one is also one you can find right in your kitchen, so the tools are not complicated. The first and most important tool is probably the carving tool, and you can see here I have a Speedball carving tool. You can find that at Hobby Lobby or Michael's Craft Store, and this is perfect. It comes with all of the little carving knives that you'll need for this project and probably any projects you do in the beginner phase. If you later on decide you want to do really intricate rubber stamps or intricate designs for prints, you could go for different ones. For this, really is everything you'll need. And all of the blades are in the handle here. The next thing you'll need is a rubber block, and you can find this a swell at Hobby Lobby or Michael's or wherever you get your crafts. it's just a little rubber block. I had a big piece, and I cut it down to this almost two by two size, but I get the pink speedball because it seems to work best and last the longest. But if you're not worried about that, you can pay a little bit less. And there is a blue block as well, which works just just fine. And I really recommend not spending a ton of money, in with your first stamps, because it's really just for practice and just have fun with it. Next thing, you will need a spoon. When we transfer the design from the paper to the rubber and to your design, you'll need a piece of paper and also a pencil, because the graphite is what we're going to use to transfer the prince the design over to the river. If you have all those tools, then you are ready to go. Like I said before, this is a great class for beginners because we're gonna go through the steps and following the steps every single time is what's gonna make your stamp most successful. In the next video, we're gonna talk about designing your stamp.
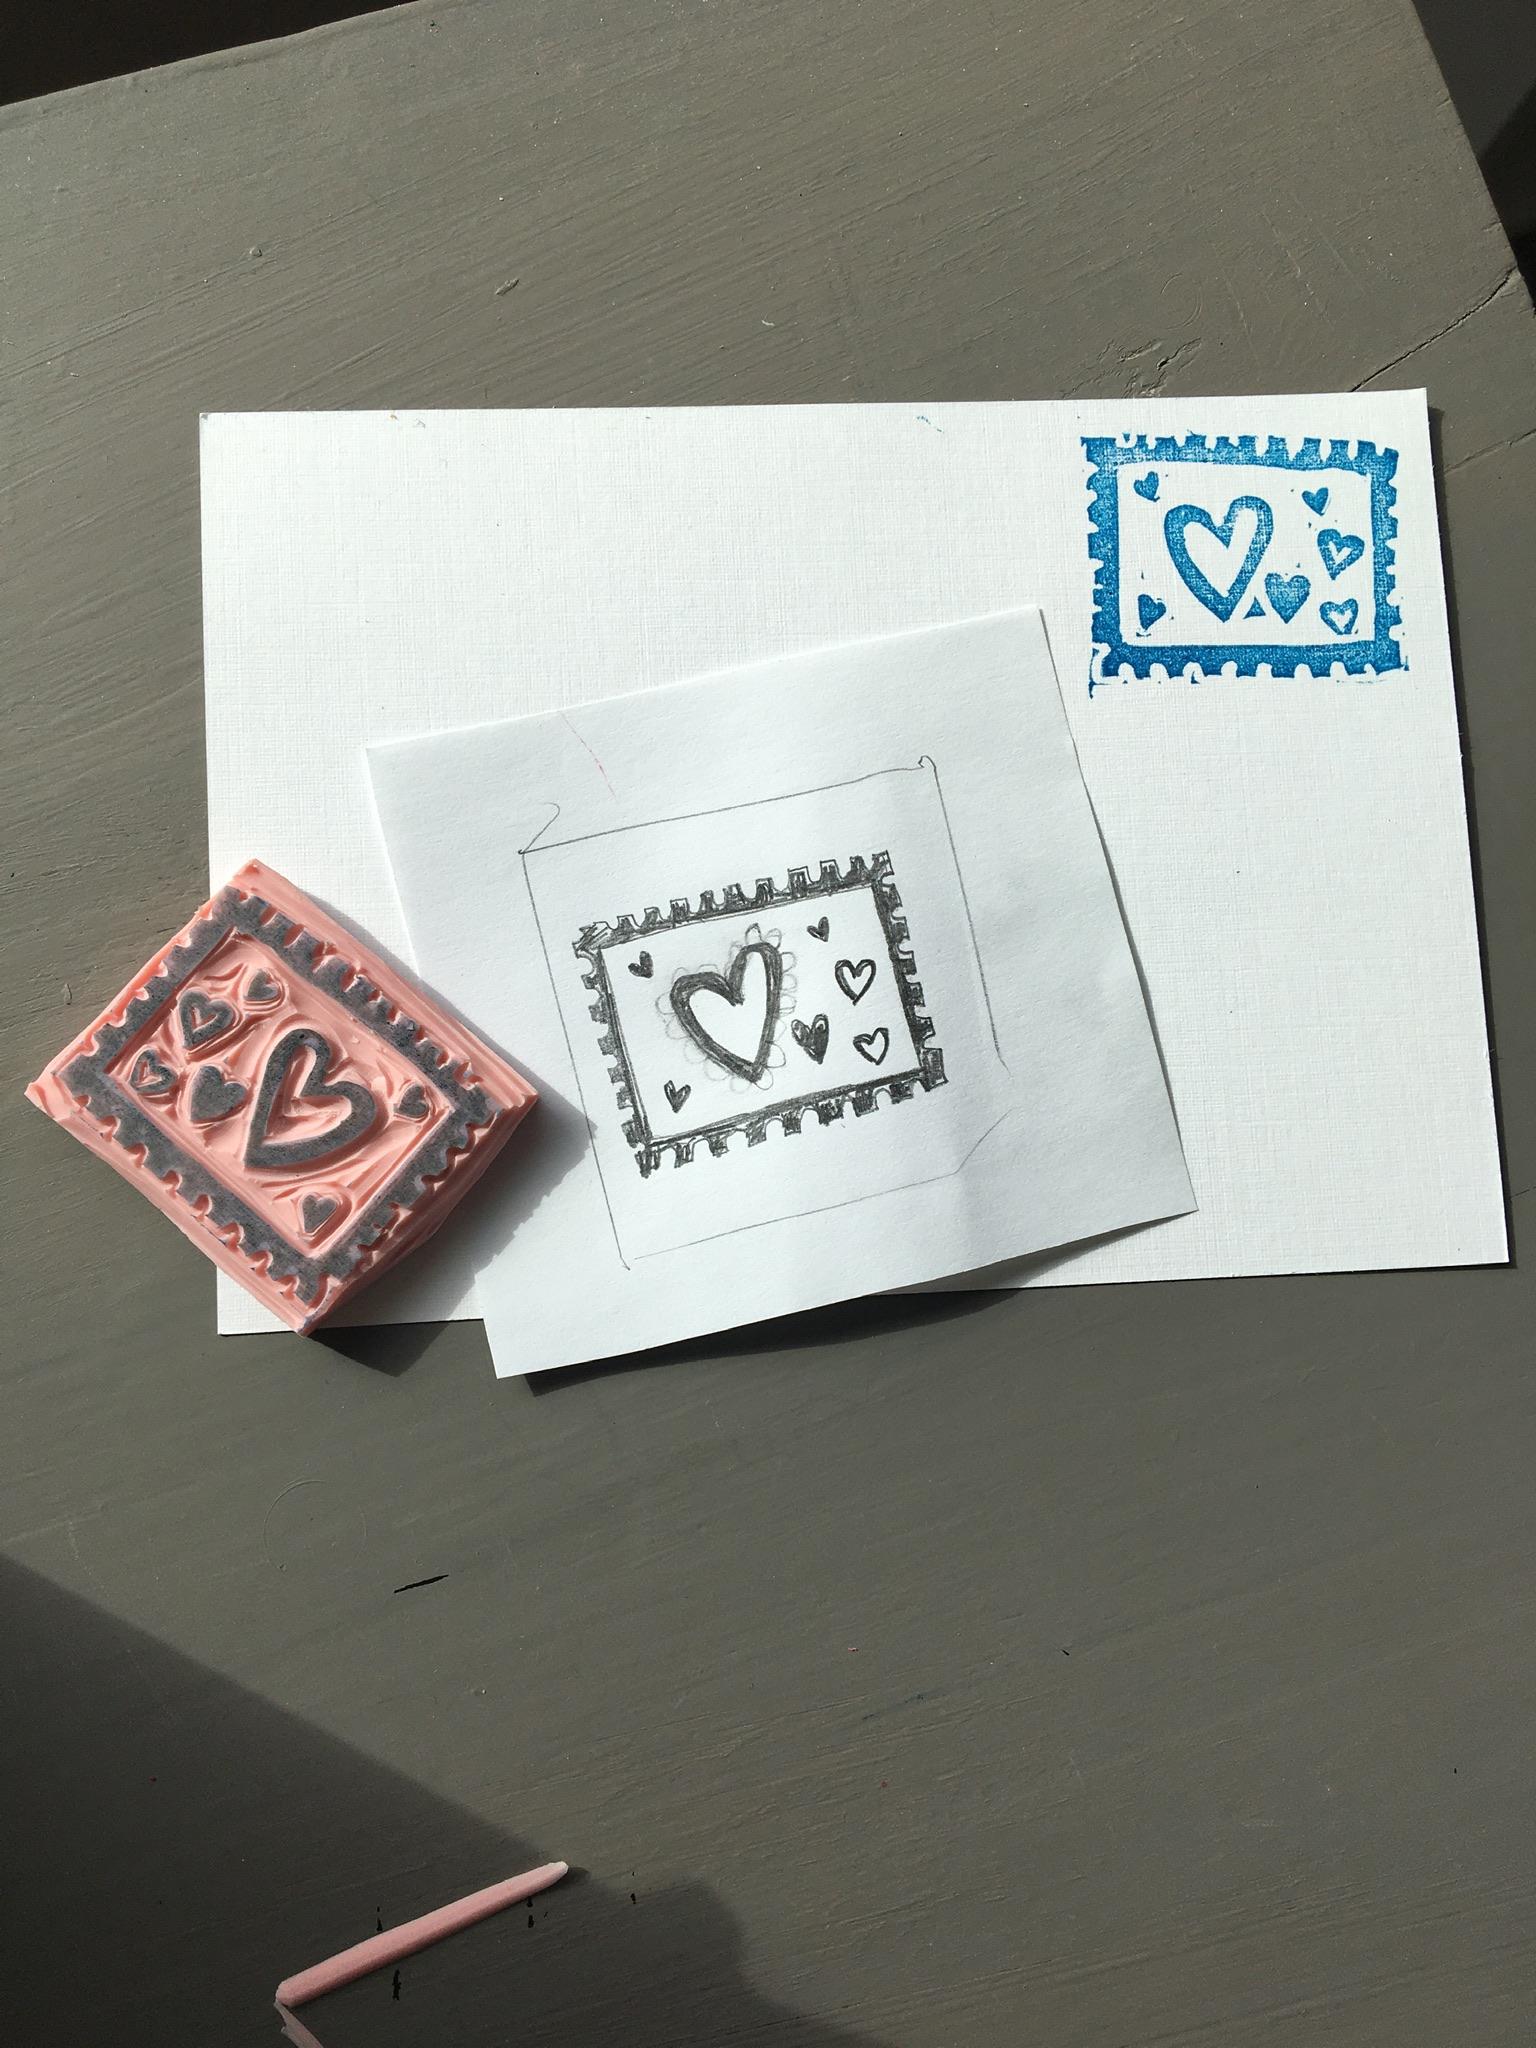
3. Designing Your Stamp: Let's talk about designing stamps. It's really important when you're making a stamp to make details that are not going to get lost in the carving. We're carving with a blade like this, so this is the smallest one. So you don't want your details to be so small and intricate that they were sloppy or that you accidentally carved piece out. So especially for this first design, I want you to do kind of bigger, bulkier details that that way, when you are finished with your stamp, you'll have a beautiful stamped that you're very proud of. So let's look at how to make a design so you can see here. I have all the tools and supplies I need to complete this project. We have carving tools. We have the rubber block, have a piece of paper, a spoon and a pencil. It's important that you use a pencil because we will be transferring the design from this piece of paper to this rubber block. So the first thing I'm going to do is mark out where I'm going to draw the design. I don't like to waste rubber blocks, so this one is described piece that I have. And, um, so I'm just gonna dried out here, so I know how big the space I have to make my stamp. Next. What I'm gonna make is a a stamp stamp, a stamp of a stamp. So me show you what I mean, Gonna make a stamp like you would find on a card making a stamp. A very simple picture of this tan is easy. You just make a little line, and then a little you align into you lying in you. Now this is handmade. It does not have to be perfect. Don't worry about that. The more the more imperfections might we say, the more character is going to have notice that I'm not taking a lot of time making this design because I really love toe. Have that look of, um, have it looked like it was made by hand later on, if you really like perfection and you like a less hand drawn look, you can print thes off from your computer and do the same process Onley from something you've printed off. Okay, so I have this night, um, going to do this side because I want it just a little bit different, and that's OK. All right, So here's my cute little stamp, and what I'm gonna do is shade in this area. The next thing I want to put in is it's a Valentine's Day stamps, so I'm gonna put in a little heart with a little laced around it. But you can be creative. You can make a heart. You could make a piece of chocolate. You could make a little candy box, but just keep in mind. It needs to be a bold, a bold print because you don't want who make it too hard to carve out. Noticed how these lines are not really thin. If they're too thin, they won't carve out very easily. And you risk cutting a piece out. So go a little thicker on the line. Remember, what is shaded in is what you're going to leave, which was what will show up on the paper when you print Finally. Okay, this part might be a little too delicate, but I'm going to try it. So here's the design I'm going to have on my stamp. In the next video, we will talk about how to transfer onto the block
4. Image Transfer: Okay, We're back here ready to transfer the design to the rubber. And as you can tell, I took off the little lace edge that I had on there. I looked at it. I didn't love it, so I adjusted it. Look at your picture. Make sure you think it's what you want and adjust it if you need. Teoh, I had one more little heart here. Okay? So you have your design, and we're gonna print it onto here. You might wonder, why can't I just draw the design on here? Because if you just draw the design on here after you carve it out, you will print it, and then it will be backwards. So you really want to go through this step of printing from the paper? The exact designing went to the river. I have done this before. I made a beautiful thank you card, drew it out here, carved it and then went to print it, and it was completely backwards. So go through this step. It is worth it. Okay, So take your design now and you're just going to put it over gently on your rubber block, graphite side down. And you want to make sure it's fully on there. Okay, so you have the paper on the graphic on the rubber block, and the graphite is going to be transferred to the rubber block with a spoon. Use the bottom side of the spoon and just rub it and try to get all the sights. And it's going to transfer that to your forever block. You can always peek under there really carefully. Make sure this piece of paper stays in place, but you can peek under there and make sure everything's transferring. Okay, Okay. So you can see it's transferred pretty well. I'm just gonna peak. Make sure got all this whole spots all the details because the more the more precise your design is on your rubber block, the better the prince to. The better the carving, the easier the carving is going to be. Because you have to trust your line. Okay. All right. So there you go. We've got the transfer design on the rubber block and in the next video, and I'm gonna clean up this little spot here so that I know my lines. Because if you can trust your lines, the carving is easy. In the next video, we're going to begin carving
5. Carving the Image: Okay, guys, we are on to the final one of the final steps. We're going to get our carving tool. Don't need pencils anymore. I don't need the spoon. We really don't even need. The designs. Will put that to the side. We just need are carving tool and our design on the rubber block and we're going to start with. Well, let's talk about this for a minute. Whatever is black and out with the graphite, you're goingto leave. You're not going to carve that. If it's pink, you're going to carve that out. Four beginning projects I would recommend getting a see. Look at all those getting the's size five, which is kind of a flat scoop getting this one and getting some of the big pink out of the way. What? We show you what? I mean? Watch what I do first before you get started on yours. Okay, so I have a lot of pink around the edge here and just to kind of get rid of it, I'm just gonna go lightly into the block, but I don't want to pick up any of the grab any of the part that I want to stay right, but because it's a rectangle, I'm just gonna cut out that piece around it so that I can start carving away. An important thing to remember when you're getting started is to when reading started with making stamps is to go slowly. Don't rush this process. I might seem to be going quickly right now, but if this is your first stamp, take your time. Take your time so you can see here. I don't precedent at this single. Okay? I don't do it flat either, but it's just right in there and just cuts it out. If you do it too much like this, it's gonna go too deep and it breaks the rubber. If you go too much this way, it's not gonna pick it up. But with practice, you'll you'll know what it should feel like. And that's why we do this activity. That, and to have a really cool stamp, huh? Okay, so can see. Here I have this this rectangle cut out, and you don't have to do this, but I'm going to just because I like to save this rubber. I like to use it for another project. I'm just gonna exacto knife it out of there. So now we're gonna get started on the inside. I'm going to switch because these are a little bit smaller detail. I'm gonna again go after a lot of pink, but I'm going to use a little bit different tool This one, A little bit different. Carving blade. This is the three, and it's got more of an angle so you can get some of those details. I'm gonna go after this big heart, Remember, don't carve out the part with graphite on it. Okay? Take it slow so you don't accidentally make something. For example, just all of that line. And if you make a little mistake, it's not a huge deal. It's not a huge deal, right? This is practice, and it's a fun Valentine's Day activity. Always point the blade away from yourself. If you're going this way, you could hurt yourself. First of all, um, but also, you have more control. When you're going away from yourself as you go along, you're gonna find some shortcuts, and I'm going to carve out these little use, and I'm going to find a blade that might just take a little bit right out That This is a number two. So you could just slowly go through those or because it's kind of the shape of a you just gonna go through like this?
6. Final Product: okay. Now for the best part, we're going to stamp our stamp for the first time, and it may look just what you want it to be, or you may have to go back and re touched a little bit. But let's go ahead and try this one out. So I just have a regular stand pat here. I think it up, and then I can write somebody's name here and make it all cute sea and send it to them for Valentine's Day. But I would love to see your Guiza's projects. So go ahead and post pictures in the comments, or if you have any questions, let me know. And in the future I will do with some more on how to make more intricate designs. But for now, just keep practicing with this kind of fun stamp. Great job
 Wendi Horvat, What will I learn today?