Transcripts
1. Travel Video Intro: Hi, my name is Greg Kong. I'm a Canadian content creator, digonomad travel videographer
of over a decade. I started my working
holiday in Taiwan in 2013, but before that, I
started traveling in 2011 with a Cannon SOR. As time went on, I
accumulated gear from drones, action cameras, 360
cameras, you name it. So I'm going to introduce you
to different gear to help you get high production
quality video, but we're also going to
introduce you to other gear like microphones that
will help you level up your entire production game. As well as being able to
produce high quality content, we also want to help
you produce content for social media or whether it's to monetize
on your travel videos. I'm going to share my experience of over a decade
on how to do that. We're also going to help
you take that footage from your camera over into the
computer into post production. And introduce you to
different programs that you can process that footage for short form content,
whether it's Instagram, Facebook stories or longer form content that's going
to live on YouTube, or even if you want
to monetize on your footage using a stock
footage agency model, or maybe you want
to sell direct. Look forward to teaching
you in the course, if any of this interests you.
2. Travel video Essential Accessories: Okay, so accessories, part two. So these are actually essential accessories
as a digital nomad, as a travel
videographer that are going to make your
life a lot easier. Things like having
a SD card reader. There's a lot of laptops these days that don't
have enough ports. So having a memory card reader, a USB three Hub or USBC
to USBA converter, these are all great to give you more ports for more devices. I also like to travel with
several external hard drives. Currently, I have the four, five terabyte USB three
external hard drives. So these are large capacity, not too expensive and fast
enough to video edit from. And recently, they've got the newer SSD
external hard drives. I have one by Samsung T seven. So this is a 500 gig hard drive that's more higher performance. If I want to video
edit four K footage directly from that
SSD, that is okay. So that's a really
essential accessory. You've also got accessories like ND filters for your
camera lenses. If you want to shoot during
really bright conditions, those can be useful as well. Every digital nomad
needs to have a Power bank to
power your devices, whether it's your smartphone, whether it's your
headphones, et cetera. So definitely pack
in a Power bank. It's good to have
a charging plug that you can just connect any USB type of
cable and charge up. Another great accessory to
have is an HDMI cables. So you can connect your
laptop to a monitor to make it easier to work or a TV, which uses an HDMI
connection if you want to work from there
or watch the movies, et cetera, is a really
handy accessory. A couple of other
important accessories I like to travel with
include a mouse pad, just really useful for
getting your mouse to work. It doesn't work on all services. Having a mouse and a
keyboard is also useful because if you're
video editing and if you ever use a
track pad on a laptop, it's look I just strains your fingers after
using it for a while, and you're more
productive using a mouse. Same goes with the keyboard. Me comfortable to type on. You can type faster rather than using
the laptop keyboard. So hope these
accessories give you some ideas of some additional
gear you can travel with. And I also will include
my travel video gear PDF, a long list of
gear that I travel with to make me productive
while I'm traveling.
3. Travel video gear: About ten years ago, SLR cameras like the
Cannon five D Mark three, and then eventually Canon five D Mark four were the
popular cameras all the time. But technology improves,
and then we entered the Merles camera era that could take great videos
as well as great photos. They were a slightly
smaller form factor. They offered improved technology like four k resolution
with higher frame lights, the ability to use an
electronic viewfinder. So in bright conditions, you were able to expose
your composition or your subject proper and technology is going to
continue to improve. Right now, we have cameras
like the Sony A seven S three. A lot of YouTubers and
vogers and content creators like myself are still using
the Panasonic GH five. So cameras are going to
continue to improve. So it's important to keep up with your camera
body technology, whatever your primary
camera is going to be. Now, the advantage of
having these types of camera bodies is that you can attach various types of lenses. So lenses are very important to get a very
different type of look. Right now, I'm using
a wide lens that's a Sigma 18 to 35 F 1.8, and you can attach various
accessories to the lenses. I have a Voltrox lens adapter. To my sigma lens that
allows me to use it for a Panasonic camera
body because it's actually designed for
a cannon camera body. So these types of lens accessories will allow
you to get more light into the camera
that allows you to film during lower light
conditions at nighttime. And when you're filming
in the daytime, it can help you
get more bouquet, which is the depth of field, the blurry background, the
desired cinematic look. So it's important to not only
focus on the camera body, but also the lenses. It's good to have
various types of lenses for different
types of situations. Wide lenses like 18 to 35 are great for getting landscape, if you want to get
mountains or a wide scene. But if you're going to be
filming wildlife close up or flowers or animals, maybe you want a telephoto lens, those longer lenses, which are
good for those situations. Personally, myself, I like
to have a mid range lens, which is great for
just traveling. You don't have to
take your lens off. But sometimes you
want a prime lens, which is usually a lens that's
just a fixed focal length, but usually the
advantage of that is that you can get
lower aperture, which is a lower F number, like a 30 mil F 1.4. So those types of lenses
are really great for getting a very low aperture and nice look to your subject. The 50 millimeter
lens is the most popular 50 F 1.4 F 1.8. Those are great for kind of a popular portrait focal link. So we got the camera body. We have the lenses, and then you also need to focus on
audio if your goal is to create logs for YouTube or maybe even YouTube videos
like this, for example. So there's various
types of microphones. Right now, I'm using a road go, which is a wireless microphone. The quality of the
audio is good, but you can get better
five microphone, which is a bit more bulk here. You've also got people that use shock on microphones,
which are good. Road is a company that
makes some really good lavalier and
shotgun microphones. Now, the problem with shock
on microphones is that you need to have shotgun mic
really close to your mouth. The advantage of the
mic that I'm using, which is a wireless live is I've got the
freedom of movement. It's wireless, and
it's great for logging and just having
freedom of movement. Another element you may want to consider is having
additional lighting. So if you're in dark or low light situations
wherever you are, it's good to pack a LED
light in your backpack, or you can even just
use the flashlight on your smartphone to give you
an additional light source. So there's a lot of different
factors to consider. I'm going to put a list to some camera gear you want to consider just note this is
always going to change. And in the next video,
we'll talk about other types of cameras like
drones and action cameras, 360 cameras that you may
want to consider to add additional video content to your channel or social
media platform.
4. Travel video secondary camera's (drones, Action Cams): Okay, so we spoke about primary cameras and
lenses and audio. In the last lesson,
we're going to be talking about secondary cameras. So secondary cameras can function as their
primary camera. But we're referring to
cameras like drones, action cameras like GPs or 360
cameras like GoPro fusion, or maybe it's a
Samsung 360 camera. These cameras are good
at one particular thing. LG Ps, they're good
for their durability. They're small size. You can bring them underwater. And typically these cameras have a weakness because
they have a wider lens. You don't have an
attachable lens, so it's hard to really
crop in and zoom in. The audio is also not that great because they used to be
put in external case. So the audio just sounded
horrible with them. That's slowly changing as
GoPro is removing the case. They've added a durable body. So the audios getting
slightly better. You can attach some
accessories to that. But I find that cameras
like Go Ps are good for particular scenes like maybe if you're doing some dirt biking or you're going speedboating, or you're going underwater. Let's talk about 360 cameras. So obviously, these cameras
can capture a 360 experience. And to the viewer, if you're watching on Facebook or YouTube, the viewer can change which way they're looking
at within the video, which is super cool. But it's really hard to get a proper talking video
if you want to do a vlog style type of scenario, but it's good for maybe
Instagram if you just want to show something
in a different way. The other type of accessory
camera is the drone which has really become popular in
the past five or six years. You've got DGI, which
is leading the pack. They started off with the
larger phantom models, and as time has gone on, they've built the Mavic
drones like Mavic Air, now Mavic Mini, which are
getting smaller and smaller. And the fly time, the
battery, the technology, the camera sensors
are getting better. But alone with the drone, it's not enough if
you want to have a flog style video because these cameras are going to be flying from the air. The audio is not
going to be great. And there's limited
capability for these cameras to zoom
in right now anyways. But they're a good complement
to a primary camera, like a mirrorless camera, Panasonic GH five, where you
can get different angles. So that's my perspective
on these types of cameras, action cameras, 316 drones. These are great
for supplementing your primary camera to
get different angles, a second angle or
capture a certain scene.
5. Tripods and Gimbals: Alright, let's talk about
tripods and gimbals, specifically with travel videos. I think it's useful
to have a tripod, especially if you're doing a video and you
want to just talk, and you don't have someone
to hold the camera. It's just great to sit the
camera on top of the tripod, and you can do your thing. You can talk. Um you can teach, et cetera. Gimbles are in your
type of accessory. You've got different models. You got gimbles
with tripod legs, which are also useful. They can function as a tripod. But the gimbals, you
can walk around with, and they give you
stabilized moving video, which is super cool. So you can get gimbals
for your smartphone, which are super convenient because you can get
higher quality video, and you have the
advantage of having that video on your phone ready
to share to social media. So we've also got Gibbles for our SLR and mirrorless cameras for a higher production quality. It takes more time
to get them out to the Internet because you have to process them and edit
them on a computer. But they can give you
really high quality video. They are a bit heavy to carry and a bit
more inconvenient. But I myself, I use the Digi Ronan S for
my Panasonic GH five. And these allow you to get different types of videos
that we didn't have before. For example, walking
tours or virtual tours, where people basically
they just walk around and they just
record the background, sounds, and noises of whichever city and
country they're going to. And some of these videos are doing really well on
certain YouTube channels. So you definitely
want to consider a Gimble or tripod depending on the type of video or channel that you're
trying to create. I experimented with a small size gimble for the
phone, for social media. They also have the
larger gimble. Usually, you can use these
for events, corporate events, which are very popular like weddings or maybe at
some type of event where you want to get
a more exciting type of video than just putting
it on a tripod. Back a decade ago, I put my camera on a tripod
every single time, but that takes time to
mount and set it up. It takes up a lot of space. And the video that you
get from a tripod can be pretty boring after just
looking at it for a while. But a tripod definitely
has a place for talking hat videos
or time lapses, et cetera, or even
motion lapses.
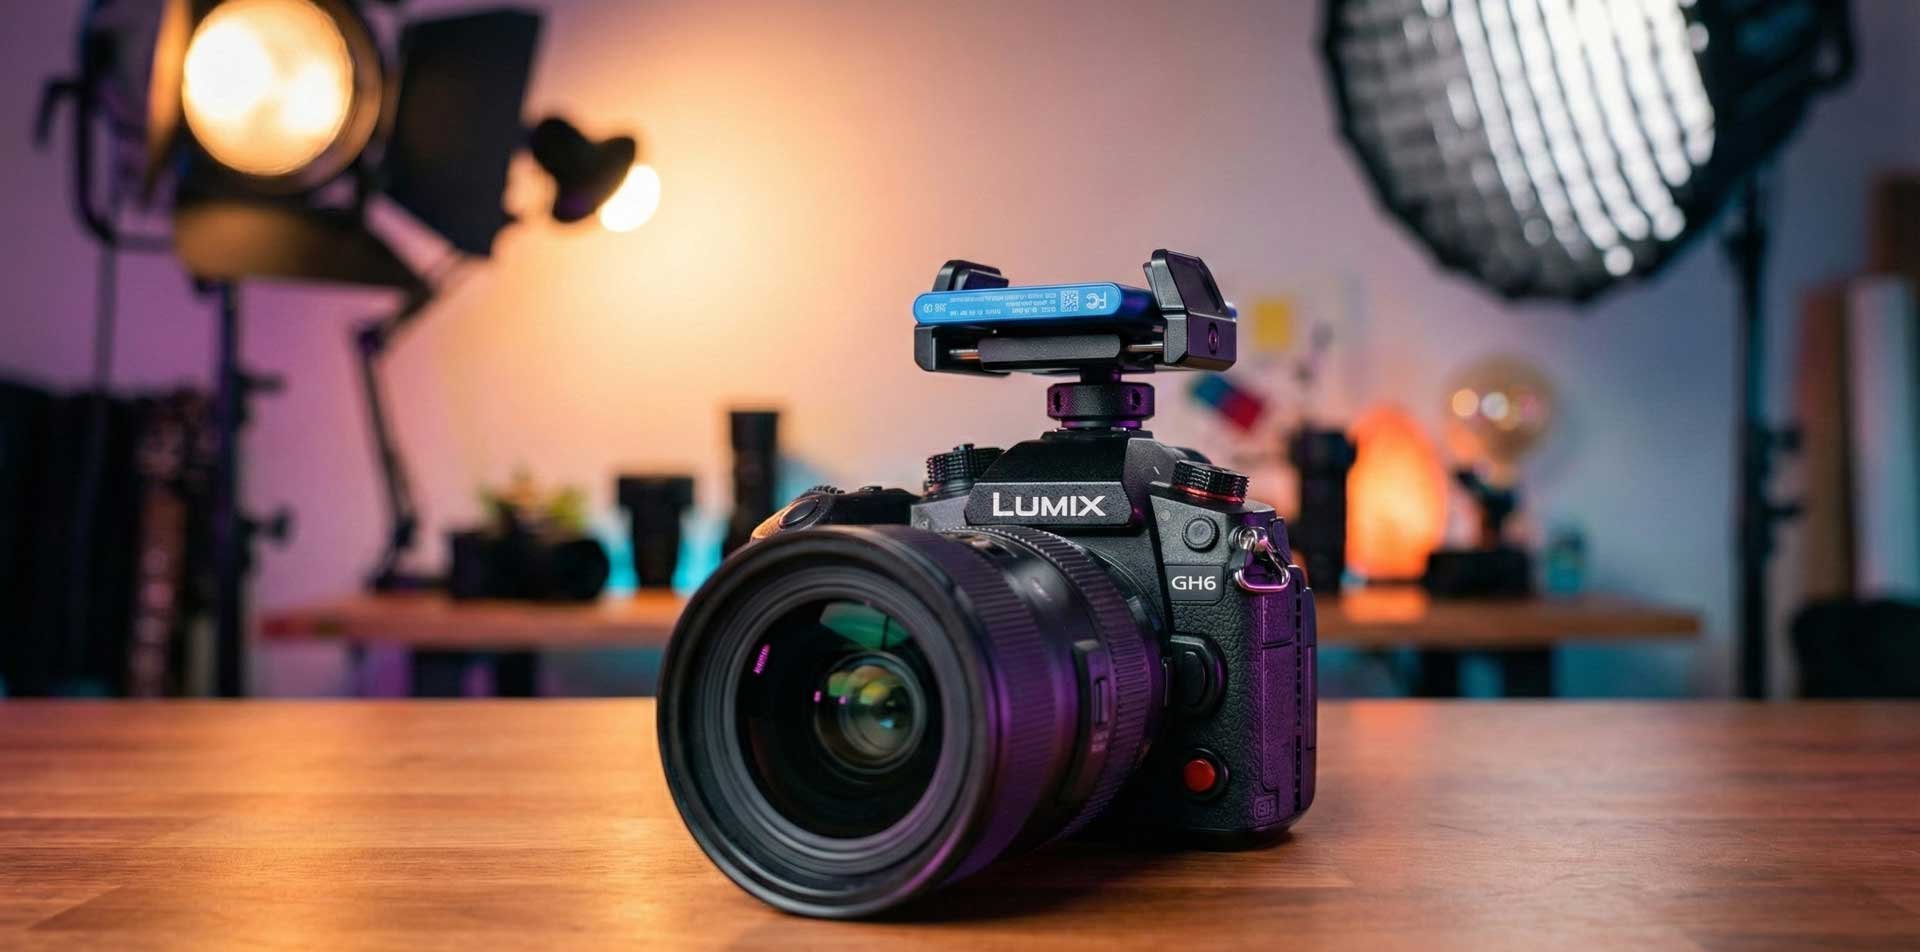
6. Why I upgraded from the Panasonic GH5 to the GH6: So one of the reasons
why I upgraded to the GH six was because it's been
five years since 2017, and I believe that
is a lot of time in a tech focused product for a lot of innovations
and new technology. And I wanted that
extra visual quality when it comes to my online
courses and my YouTube videos. So I'm actually filming
with the GH six now because before I was
filming with the GH five, showing my GH six camera. So hopefully, you'll be able to see the visual
quality difference, some of the dynamic
range behind me. You should be capturing a
bit more of the highlights, the detail from behind me. I've noticed
sometimes with the GH five that a background
will be blown out. Especially if it was Blet. So what are some of
the direct competitors and the technical
specs that I left out. So I'm actually
going to refer to it because we're going to get
pretty technical here. The Panasonic GH six has a 25 megapixel sensor with parallel readouts for
improved dynamic range. I mentioned the built in fan
for unlimited recording and a stabilization system
rated to 7.5 EV. It also has full sensor
anamorphic shooting. And let's look at some of the direct competitors
to the GH six. Of course, we have the Sony A seven S three, which
is full frame. It's more expensive, and it has a whole different type
of lens ecosystem. So the GH five s two features no dual native ISO or
dynamic range boost mode. And no ProRes or no
5.7 K, no cooling fan. And, you know, for the price, if it's 1,500 to 1,700 US, you might as well
pay a little bit more to have a new product. Some other competitors
to the GH six include the black
magic pocket camera, six K P. This has a larger super 35
millimeter sensor that can capture six K
video in raw format. However, it lacks auto focus, image stabilization
and weather sealing. The Sony FX three is
another competitor. It's a compact full
frame cinema camera that can shoot four
K up to 120 frames, similar to the GH six. It has fast auto focus,
image stabilization, and a cooling system. However, it does not have an electronic viewfinder like the GH six or dual card slots. Another competitor to the
GH six is the Fuji X H two. It's an APSC hybrid
camera that can shoot AK up to 30
frames, four K, up to 24, 240 frames, fast auto focus
image stabilization. However, it doesn't have internal raw recording
or full size HDMI ports. So there you go. Those are some of
the competitors. The GH six is, I would say, generally, it's a very value
conscious product, meaning that it's
a good quality. It offers a lot of features, and I believe it still punches
above its weight class, just like the GH
five did in 2017.
7. Key Rig & Accessories for the GH6 Camera: Alright, we're going to
take a look at some of the accessories that we
have for the GH six. So first off is
the lens adapter. I've got the Voltrox
mount adapter, EFM 2.71. So this allows me to connect this cannon lens. To the GH six. Okay. You can also get metabnes. This lens is made for cannon, but this lens adapter
is a must have. Okay, next, we have
this LED light. I love it because
it provides light, but it also has three
hot shoe mounts on left and right
side and the top. And what that allows me to
do is put additional things. So I'm just going to
show you an example. I'm actually using
this road right now to record the sound, but
just so you can see, we can attach it on the
side here, just like that. Yeah. So now you can see that we've got
the road on the side, and then we can also
put this external SSD. So this here is actually a rig. That holds the SSD. So this rig you can
purchase on Amazon. It's made by a company called
Small Rig. There we go. I can see it more clearly. Here it is. This is a small rig. So this uses a Ha
he mount as well. And this is designed
to hold this SSD. Otherwise, the SSD is just going to it's not going to be
anywhere for it to be fixed. So this is kind
of my custom rig. This is how I'm going to
shoot out in the field. I might not need
to have the audio, and I might not need the light. But if I'm just
shooting stock footage, I might just shoot, like, with the SSD on top. But if I'm doing a
video in the studio, I definitely use the
light and the sound. But for vlogging, I tell
you this is pretty heavy. Okay, so those are the
accessories that I have. Again, the LED, which has the hot shoe mounts that
I use for the road, and I've also got
the rig for the SSD. And so if I'm shooting
stock footage, I'll probably just have the SSD, which would allow me to record
two PRs direct to the SSD. Speaking of which, this is where we're going to
go out to the field, experiment and shoot
different resolutions. With this SSD on the GH six.
8. Essential Software for Travel Videographers: Alright. Software is
really important for a digital nomad and a
travel videographer. We've got Cloud software
to help us do our task. So we have Final Cup
Pro and I Movie, if you want to video
edit on a Mac, Adobe Premiere for
either system. Personally, I use both
Premiere Pro and Final Cup Pro for video editing,
sometimes I Movie. Now, there's new
programs that Adobe has introduced like Adobe Spark, which is great for
creating thumbnails and different types of graphics for different
social media platforms. You can even take templates
and remix them so you can put out really high quality
graphics really quickly, whether it's for
social media or even creating a course or
an Amazon book cover. They've also got programs
like Adobe Rush. If you're new to video editing
and you want to create short videos and you're
not that experienced, so it's great that they've
got some new products that help people that are
new to video editing. On the photography side, we have Adobe Lightroom
and Adobe Photoshop. So Lightroom is great because you can use
it on your phone. It's great for just quick edits on your photos to really help it stand out
above other people. Adobe Photoshop can
do a whole lot more, but it can do most of what
Adobe light room C. Now I've got separate courses on each of these pieces of software
that I use to create. There's a whole lot of
other software tools that I use for my business
from email marketing, I use ConvertKit,
for live streaming. I use stream yard. And for podcasting,
I use Anchor FM and Libson and I've also got a PDF of all the
software that I use, if you want to reference
the entire list. So just know that
there's a lot of different software as well as hardware that will
allow you to run your business while you're
traveling and on the road. And yes, they do
come with the cost, but they also help you be
more productive and produce. Lastly, I will mention a screen recorder
which is important if you want to
create tutorials to capture and record
things, I use it so much. So for Windows, I use ice
cream screen recorder, paid software, not too
expensive, very functional. So I can actually display my webcam feed and my microphone and record
screen very useful. And for a MAC, I use
QuickTime Player, but there's also companies like Camtasia that will
allow you to do that. And Ice Cream screen recorder
can also function on a Mac.
9. An Introduction to The Stock Footage Business Model: So the GH six has access to
a lot of recording formats, and you can shoot
High Resolution, you can shoot really
high quality formats with ProRes 422 HQ. And this is a great
opportunity for you to license your footage using the stock
footage business model. So what does that mean? As video editors, we
know that sometimes we need additional
footage to maybe mask, hide or just to show something
visually that we're talking about as B roll. So there's sites
like Story Blocks, Shutterstock and Pawn five that license out this footage for
you on their marketplace. So you can put some stock
footage clips, maybe. It could be someone
eating some Ramen, or maybe you could
just show it close up of a particular type of food. It could be travel
related footage. Let's just say you're at Bangkok and you're
combing the skyline. I've shot and sold clips
of all these types. And the Panasonic GH six, because it has these cutting edge resolutions
and frame rates, it's naturally it's going to give you an advantage
to be able to shoot things that may have been already shot and uploaded, but they're not in this
type of resolution quality that previous generations of cameras didn't have access to. So you may want to
take a look at it. A good way to get started is you can look at
platforms like Pawn five, Shatter Stock, take a look
at their requirements, how to become a contributor. If you want to take
a deeper dive, you can take a
look at my course, just to give you an idea. You can put clips up on
these platforms for, say, $50-100 US maybe even more, if it's a drone clip and
you can license them, you can keep potentially
50% of the net earnings. So it is a nice side income, and it does have a
long shelf life. The videos that you shoot may be still selling five
or ten years from now. I have videos that
I shot in 2012, 2013, on a cannon ALR in HD, and I'm still amazed
that they still sell, even though that type of video format is a little
bit outdated in 2023.
10. Adobe Premiere Pro - New York Behind the Scenes Edit: Hey, what's up, everyone?
It's Greg Hung here. I'm going to share with you
a behind the scenes look at a video I've shot in New York, and consists of footage shot
from the Panasonic GH six, a Drone, Go Pro 11. So a mixture of footage
here in Premiere Pro. And I'll just point
out some things that went behind this video here. So I'm not sure why this
is showing like this, but this is my panel that
connects to story blocks. So this is a subscription
based service. And through here, I
can actually look for footage that additional
footage that I can browse for music. It looks like it's
malfunctioning right now, but when it does work, it is super convenient
because I can just look for
additional footage to add to my video straight
from Premiere Pro. Okay, now it's working, so
I'll just show you an example. So if I need additional
footage for New York, I can search for video, and you can see here, Wow, look at this amazing clip
of Statue of Liberty. I can even get a ProRes version. I can get a nice drone clip. So just adding a few of these clips at the beginning
or within my video, if I didn't have time, and add additional production value. So you can see here. I'll
just show you the timeline, point your attention
to the timeline. Well, before I do that, I
just want to show you we can also search
for other things. Audio, music, sound effects, so I'm just going to go music. If I want to find some hip hop, do a search, so I can also I can also add music
straight into my project. So those clips, those assets get populated in the project panel. So let's just expand that first. So you just get a sense of what type of assets
I have in my video. So these GX files, these are GOP clips shot in a variety of different frame rates
and resolutions. So these are five K. You can
see here 53 12 times 29 88. So I think we're
living in a world now. There's a lot of different
resolutions and frame rates, but I've decided on a
project that's UHD, which is 38 40 times 21 60. So this is a lower
version of four K. And I think that's a good
future proof resolution to be creating your videos. YouTube does support them, and there's a lot of four
K monitors and TVs now. So I think it's time to shoot in high resolutions in HD and also create
your projects, at least in UHD minimum. Here are some four K clips, full four K shot from
the pass on a GH six. You can even see some
five K clips, 5.7 K, because I'm using a lower
resolution project like UHD, that means I can
actually zoom in, crop in a little bit on these clips and have
some room to play with. Here are the clips
from story blocks. You can tell these are in HD. That's the one thing when you're using stock footage
companies like story Blocks, you got to make sure that
you're getting clips in four K if you're going to be using them
in a four K project. That's actually something
that I didn't account for when I downloaded it. That could actually
limit your options. Not everyone has four
K. See this here. It's from story Blocks. There's a four K
version, and ProRes, so if I shoot PRs
clips with my GH six, I would actually just
incorporate them in the project. But it doesn't matter if,
you know, eventually, I have to create a h264
compress video project for YouTube because it's going
to get compressed anyways. I'm using my PRs HQ clips for stock footage because that's where I think I
would actually get the value from
shooting those clips. So anyways, let's look
at the media browser. So here's a look at
my video project. You can see I've got an audio
track on the bottom there, and let me just mute that so
it doesn't hurt your ears. I've got an adjustment
layer here. So this adjustment
layer applies my lot, my color correction
overall for the project, so I don't have to color
grade every single clip. And yeah, from there, it's basically just
laying down the clips. I got some transitions, use a mixture of footage
from different cameras, try to keep things exciting. Each camera has their strengths. The GH six has a 120
frames per second, four K. So I think I've got
some of that in this video. The GoPro is awesome
for hyperlapses. And then I've also got
some drone clips in here. So yeah, I mean, every video projects
going to be unique. But some common elements. I have adjustment layer. I try to overlay my main
video layer with B role, as you can see here on V two. V one is where I just have the, you know, the main clips
with some transitions. And then I like to add a video project with
a call to action, likes to scribe, fade out, dip to black, and always
good to have a title. So there you go. That's behind the scenes of a Premiere Pro project in 2023, using footage from the GH six, Go Pro 11 and a Deji
Mini two drone. Hope you found that helpful. De. Wow
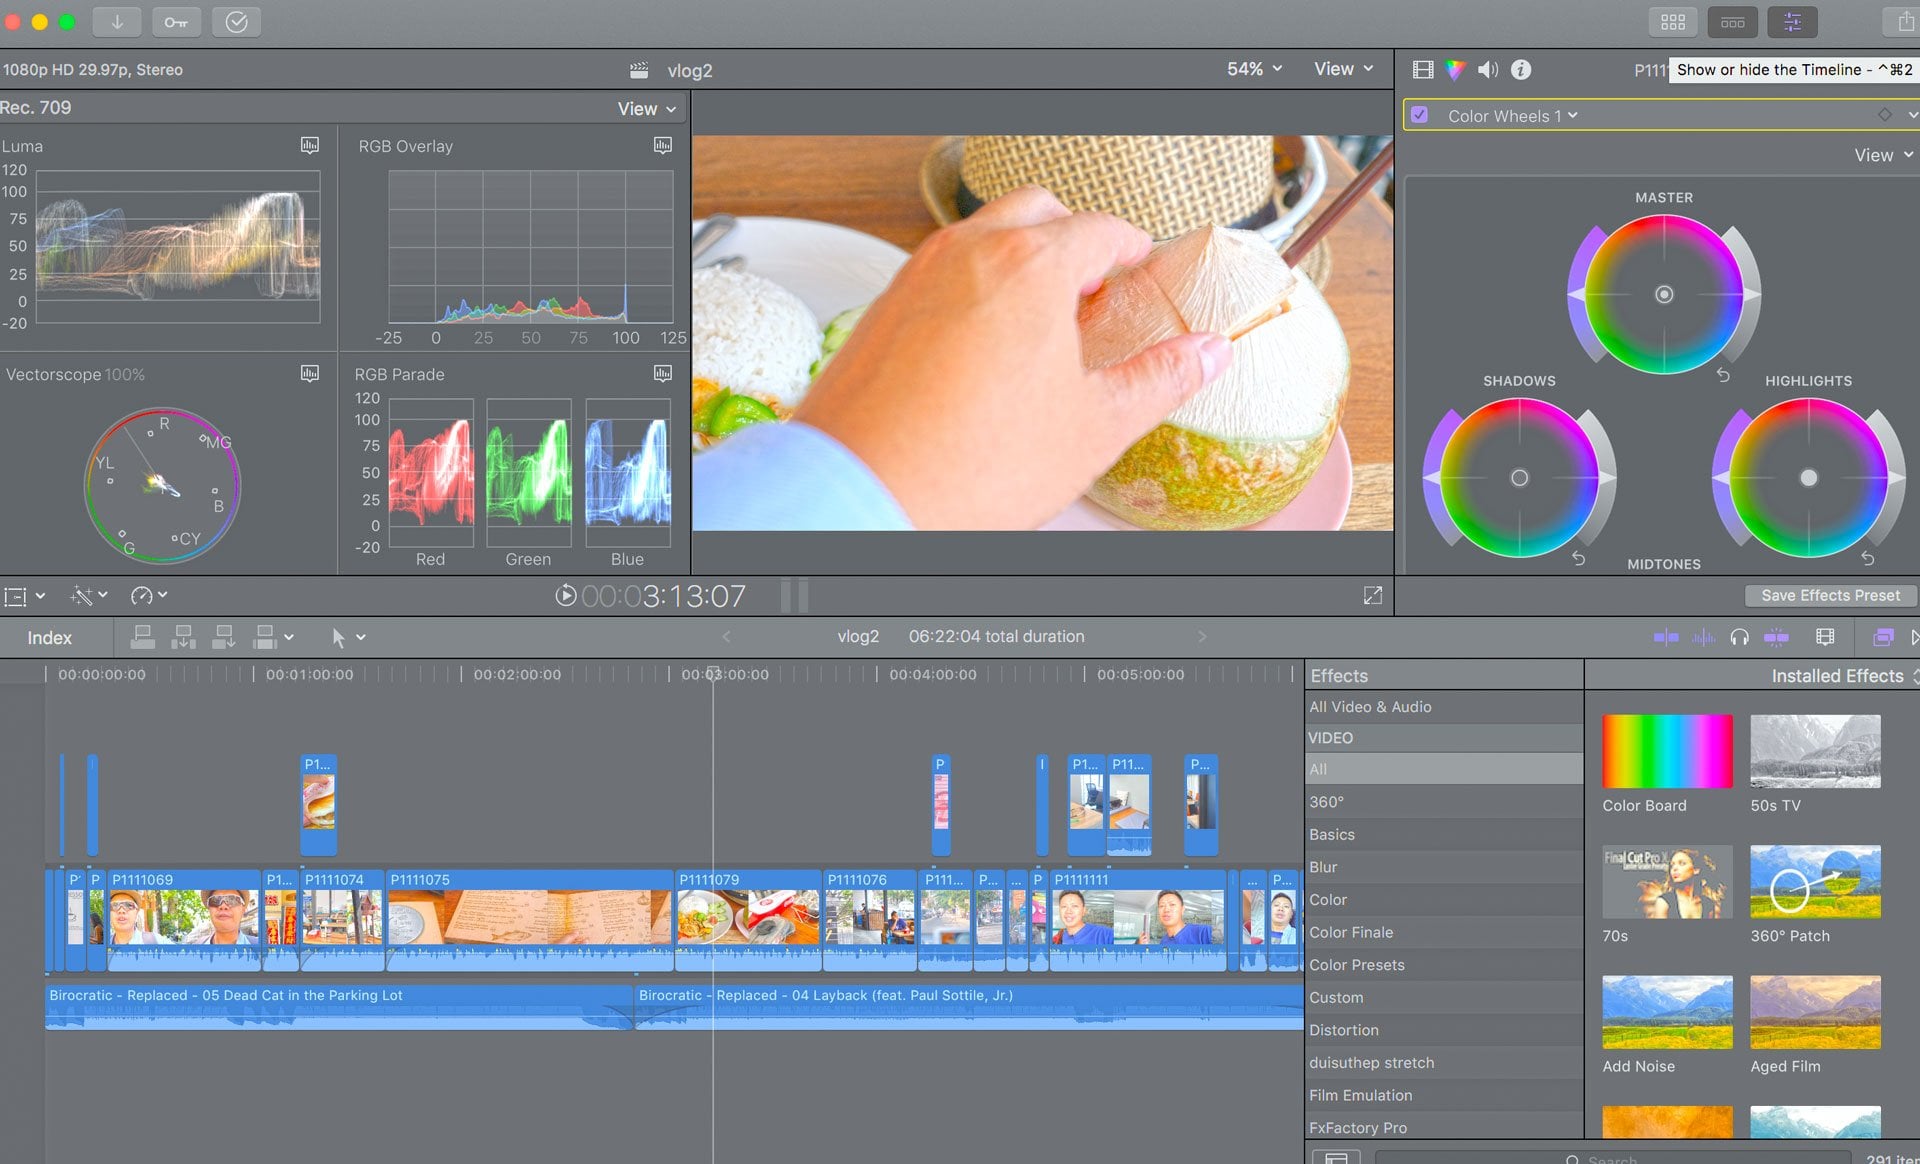
11. Summary & Behind the Scenes Final Cut Pro Edit: Okay, guys, I'm going to
take you through one of my current video edits
on Final Cup Pro, and I'm going to show you behind the scenes to wrap
up this course. So definitely check
out that video. So thanks for taking the course. There is a lot into becoming an effective travel videographer and digital nomad
from the camera gear, learning how to use the gear. There's a software and
everything between the accessories and the
whole travel side of things. So I hope you enjoyed this
course if you want to deep dive into some of the
software that I mentioned, whether it's video
editing on Fino Cap Pro, Premiere Pro, or the
photography side like Adobe Photoshop or social media graphics
using Adobe Spark, I have courses for that. Thanks for taking the course, and I hope you enjoyed it. Hey, what's up,
everyone, Greg here, and I'm going to try to go
through a video edit in Final Cup Pro for YouTube
in under 10 minutes. So I've prep things
to save some time. I've downloaded the
Live Stream I've done on Elon Musk's birthday, and I've created a new event. And in this event, I
have the video file. I've got some music and B roll, and I've actually
just downloaded some additional
music and B roll, which I am going to bring I'm going to
bring into the video. So let's go for it. So there's more than
one way to do this, but this is just the way that I personally prefer for
a light speed edit. Okay, so I've dragged
in all the assets. Now, I got to start the video, so I'm going to
right clicks like New Project Elon
Edit. It's ten ADP. Okay, so before I start, if you want to deep
dive in the final cut, you need to take a course. But this is going to be
a quick demonstration of behind the
scenes, if you will. So this is our timeline here. And if I want to speed through, one tip is I use L to speed
through the scrubbing. Okay, so I use L to speed
through the playback. So that's a time saver. Okay. So I'm just
going to trim that. I'm going to put the birthday
candles laid over top. Happy birthday. All right. So I'm going to
use a quick title. I'm going to use social. I'm going to do that beginning? Okay. Okay. So key dates. Alright. Here we go. Crunch is on. We actually already put music in the stream, so I'm not going to add music. So I'm going to go
back to my menia. Okay, call the action there, so I want to add a
and subscribe there. The world to pull that and then start in the US series. Okay, so I don't want to
go too long with that adding some B roll that I
got from storyblocks.com. Series of company gaming company
Tesla, elect car company. You see the nicker
there, $703 per share. He's one of the lgest
people in the world. He has started PSC to face Missions to moon and working on doing
Mars. Games for that. He's also doing thing on Earth like I'm just simply overlaying B roll on top. I'm placing the B roll
where it's appropriate. The humanoid box so called fusses they
gave you this year, and trying to take a
look at the litter. So those, how can any one person manage all those
companies that donate it. So let's take a look.
He's start with the box. So let's take a look all those So that's a good
break to cut using B. Skip out on your pauses. I'm going to put
more B roll to cover up the transition
to the other clip. They do humanoid robot and Omar. The robot is this
path I think he didn't hear you talking a
little bit about how it came about the design and
won't build any human. Five foot inches
tall five pounds, we carry a maim of five
pounds down 5,000 screen or. This is important here. He said, you believe
that Optimus is going to be more d plus than Tessa. Okay, so I'm actually going to actually just
thought of an idea. I want to do multi
screen here to compare So I'm going
to make a break. Okay. So I need a break using
the Blade tool B. And so I'm going
to highlight that. I need to select a source. This could actually function as a good thumbnail. All right. So this one We have to apply. Okay, we actually have
to select it over here. Apply. So we got the top right. This is going to be the
killer transition here. Top left. We want the robot. Let's see if we can get
the satellite there. And then one more with
a robot. There we go. Here. Let's make this longer. This is important. All right, so I can actually
save this as a frame that I may use for a thumbnail. So I'm just gonna
save it to downloads. O Free up space by
taking transitions away. Okay, let's skip forward. Okay, that's a good break. Go to press Ata select and
then delete it. All right. I'm going to select
the transition D goodies in Latin America and those two countries
in Latin America, Hi. Okay. The most attention as
human running less. So let's actually, I think
we can skip right to there. I'm familiar with the
contents, so I'm a bit faster. And I'm going to place
that transition there. Okay. Doing a soft another
one tell me I'm. Okay. Let's skip forward here. Okay, so a child must often dream veins to
his parents and often hearing often dream so as a child's muscle another
cut and add transition. Birthday. Dentists to maintain. The relationship married. Okay, we had a break
in the stream, so I'm going to cover
this up with some B roll. That is part as well. Relationships also
married to actress. We're going to skip forward because we have
time constraints. He also married Africa 17, temp California. Okay, so let's get
the B roll of Tesla. I wish it was a longer one. Tezla California Texas Okay, so I'm just going to
skip forward here. Enzinga rap. God enjoy. I like my feet is frozen. The s describe and see
you in this next one. Bye. We take a
look at 50 Zip two these Senter white mouse and these are
onlineors So 370 and that can take a look at this un 51 pot of
gera that's a wrap. Why join us. Go enjoy. Okay. I'm Canada we going to US. I hope you enjoyed my now. Let's hope you join us. Okay, let's just cut
off that remark. That's my holding. Let's t and see you later. Bye. Okay. And now I'm
gonna go transitions. I'm gonna look for the fade. Fade out. First, I want to fade the audio out and
then bring that over. I sscribe and it looks
like my over now. Okay. Now we're going to put a and subscribe
there next one. Bye. All right, so we got title.
We have call to action. We got some B roll,
some transitions, and now it's time
to cut the video. This is a timely video. This is something I don't
want to spend a whole day on. So I'm going to go to
file, export file. Create a name. It's going to be 1.38 gigs, video and audio, Codec h264, Nick, and save. So that's it. That is our behind the scenes edit for
a YouTube video. We don't need to do
any fancy stuff like color adjustment because
this is a more timely video. If it was a drone video, I'd spend more time on
the color saturation, the filters, contrasts,
all that stuff.
 Greg Hung, Travel Videographer