Transcripts
1. Introduction: Learning how to animate may seem like a daunting challenge, but Procreate makes it simple
for anyone to animate. When I first started learning to animate, I was overwhelmed. I don't think I
attempted it again for awhile and that is
why in this class, I want to help you overcome
the barrier of learning to animate by making it simple and laying out the
steps easily for you. In this class, I will break down
the steps to create simple animations which
includes animating, illustrations,
lettering and stamps. You will learn how to use Animation Assist to make
your illustrations smooth, how to easily create
but letterings and how does it's common mistakes as you
draw in Procreate. You will get five free
cloud stamp brushes and the color palette
for the class. This class is perfect
for beginners and intermediate learners who
are looking to explore the world of animation
through Procreate. Now if you already
know how to use Animation Assist
this class is still great for you to pick up a new ways to improve
your workflow. This class is
designed and broken down in a way that
will help you see and understand the
different ways to animate so that you can adopt the one that
will work for you. With this class, you
will be able to make your own illustrations come
to life by making them move. You can use it for
your own social media, your email or a website content, or just to brighten
up someone's day. All you need is your iPad, your Apple Pencil,
and Procreate, and not forgetting
a can do attitude. Hi, my name is Voni and
I'm The Pupil of Stuff, I'm a freelance illustrator
and course creator. I am passionate about learning a new skill and
breaking it down in a simple and relatable
manner so that I can help others like you pick up a new skill without
feeling overwhelmed. Join me in this class to kick start your
love for animation. Let's get to class.
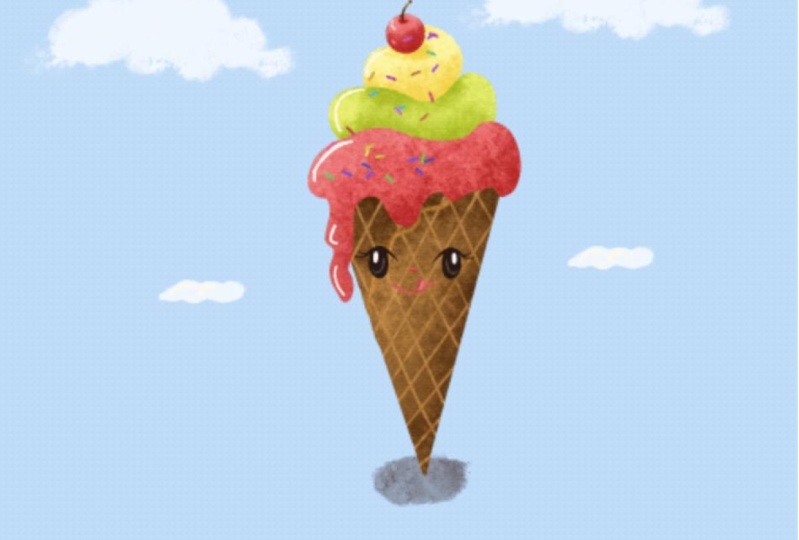
2. Class Project: For your class project, you will recreate the animation that I have created
in this class. What I like to see is how
you make the ice cream melt, how you make the letters move, and how you make the
clouds shift away. By all means, feel free to add
your own creativity to it. You can choose own
color palette, you can pick your own
Cloud stamp brush, or even literate
different phrase. Completing this class project
will help you understand the best method to
animate that will suit your own style
and your own work. Now it may seem a little
tedious in the beginning, but all progress takes time, effort, and practice.
Don't give up. Be patient and it
will be worth it once you can see here
illustration come to life. Once you're done, do upload your work in a class
project gallery. I would love to see them. Let's get started.
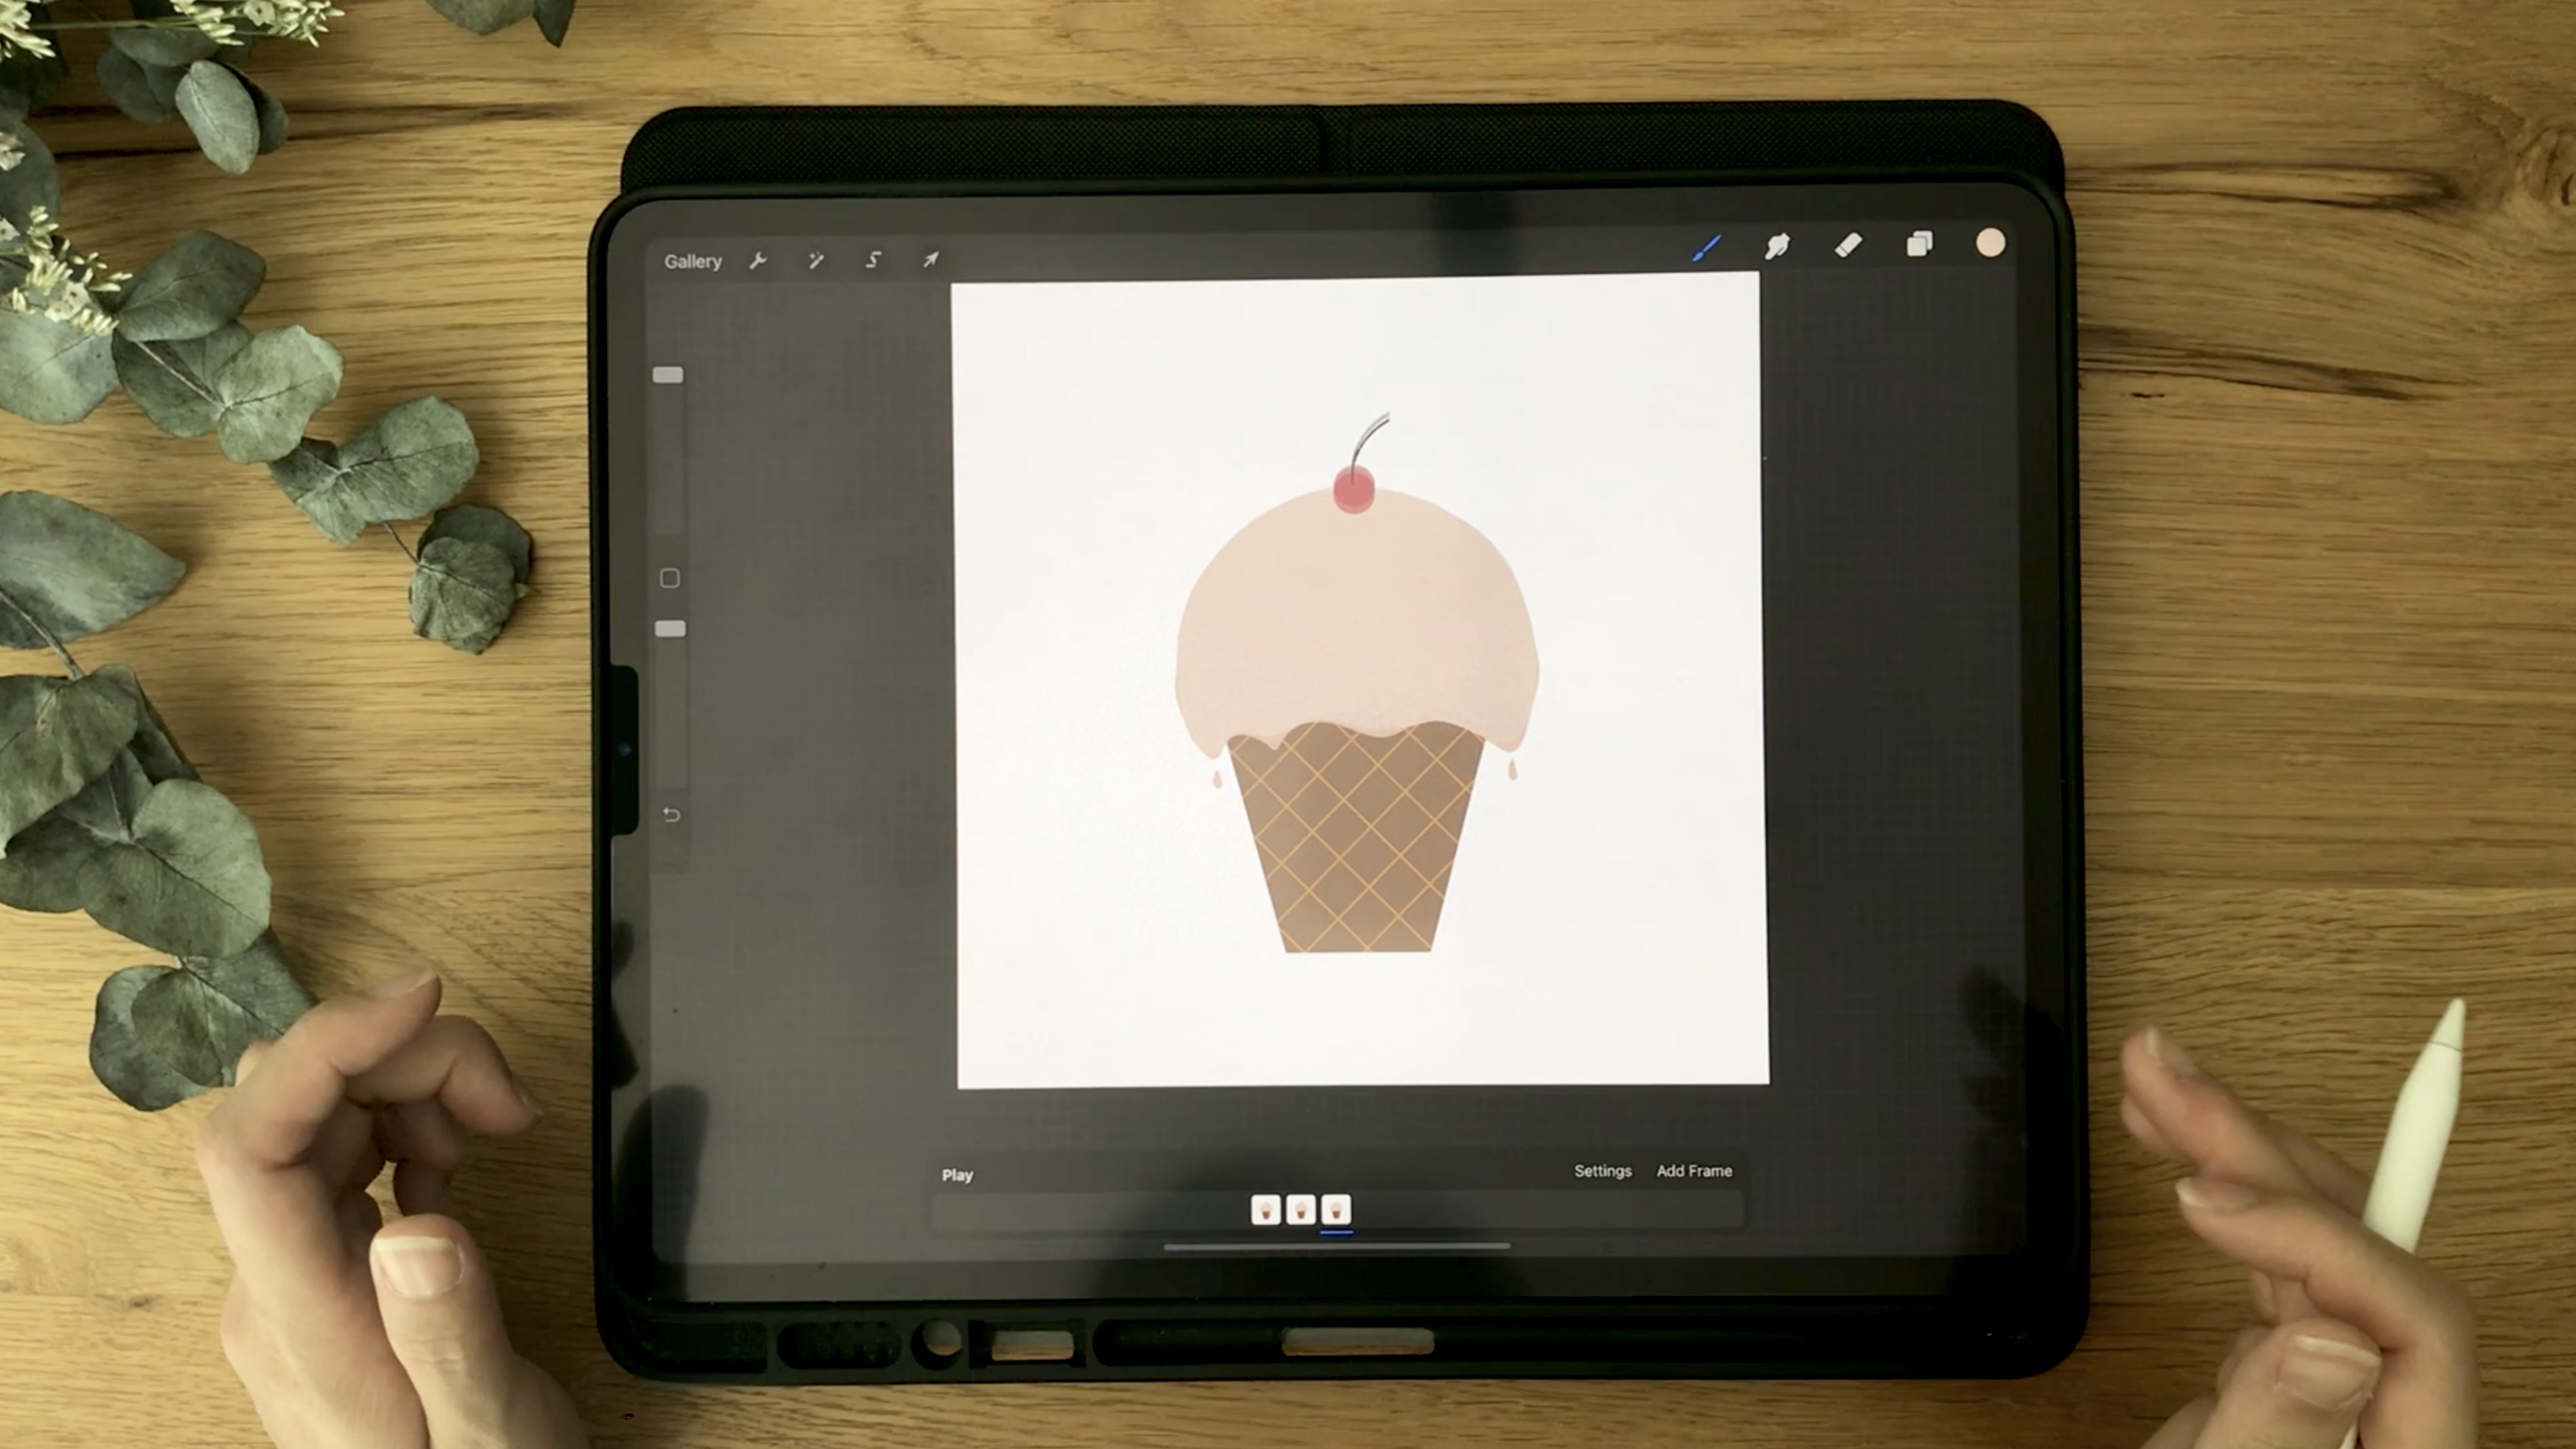
3. Drawing the Ice Cream: [MUSIC] We're going
to be creating a melting ice cream
cone with a cute face and just a little bit of background animation
with some text. Let's get started with creating our canvas and
drawing the ice cream cone. For this class, we're just
going to open a canvas of 2,000 times 2,000 pixels. This is big enough for you to create the animation
and to post it online and it will give you ample amount of
layers to work on. This is just a square canvas. You can also use 1,920 times 1,080-pixel ones if you
want that landscape mode. That is fine. It is up to
you, but for this one, I'm just going to do a
square one so that I can focus my drawing on the
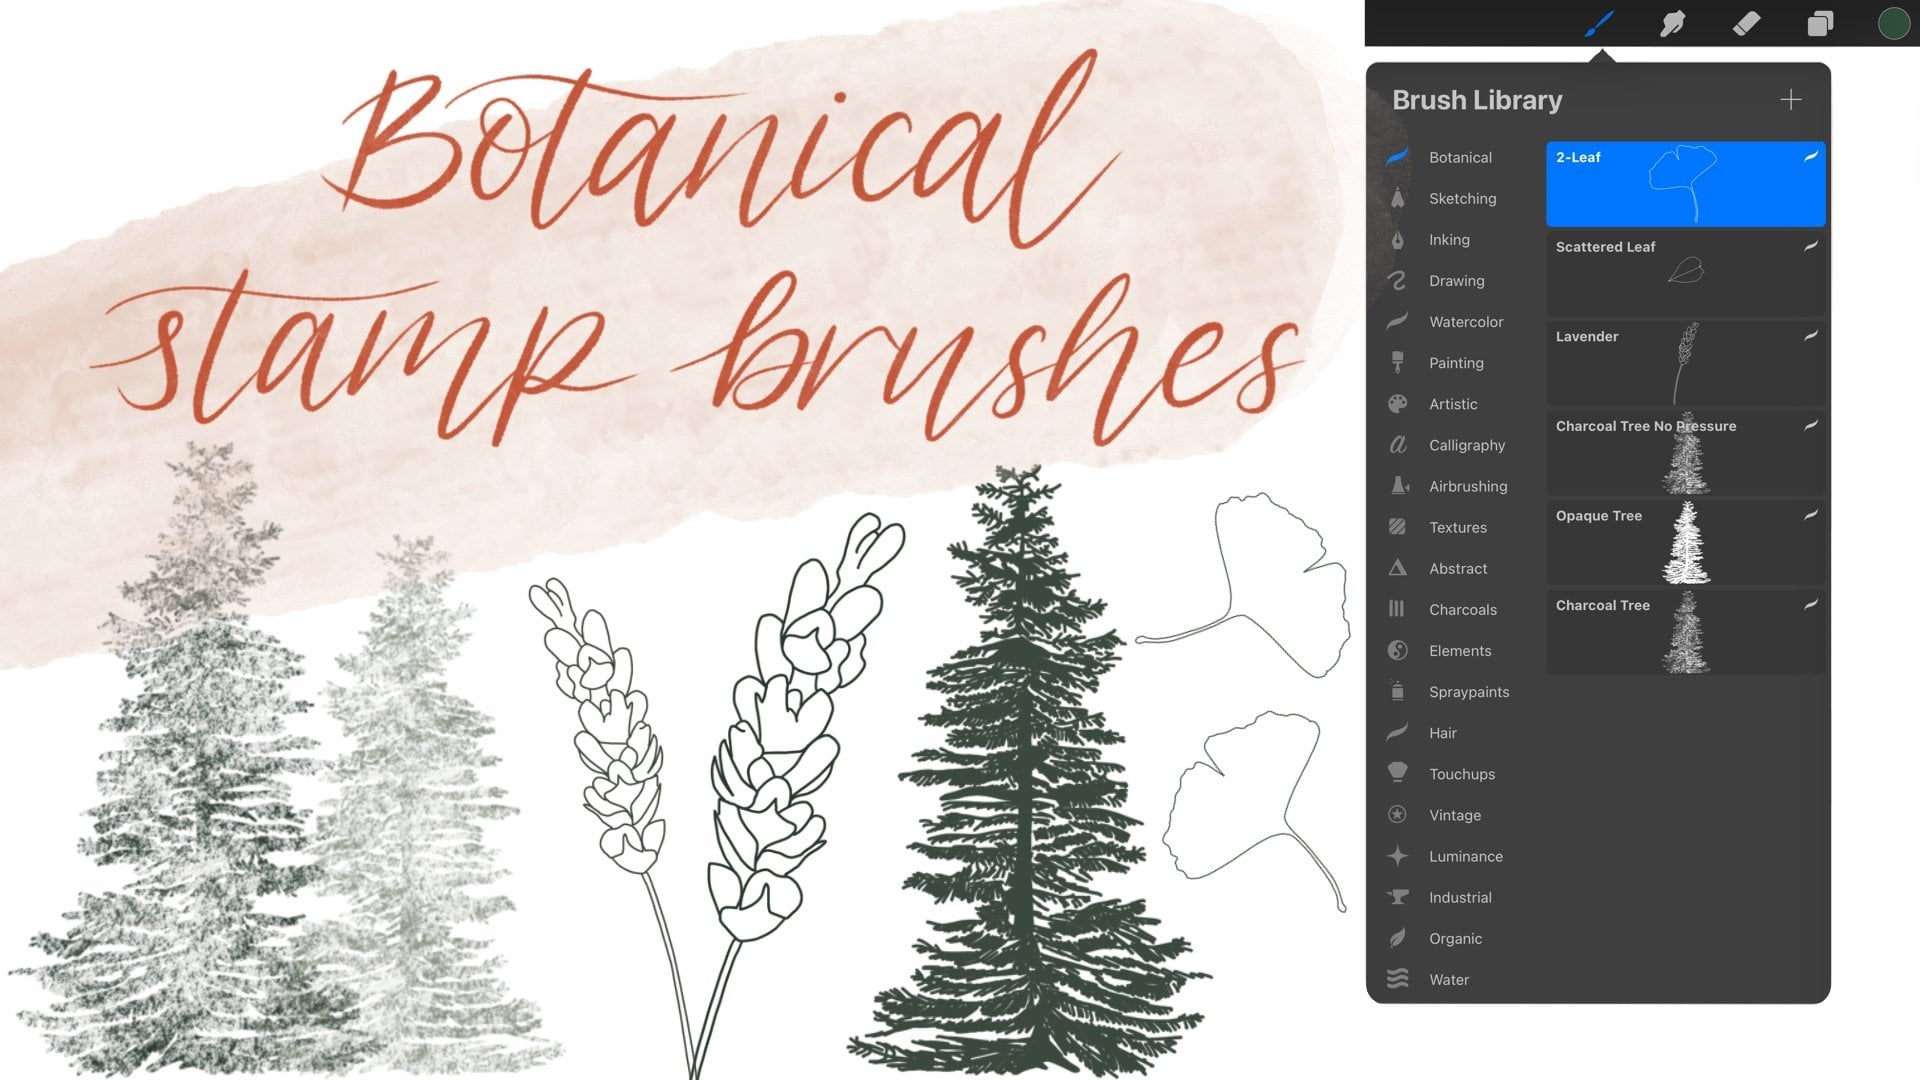
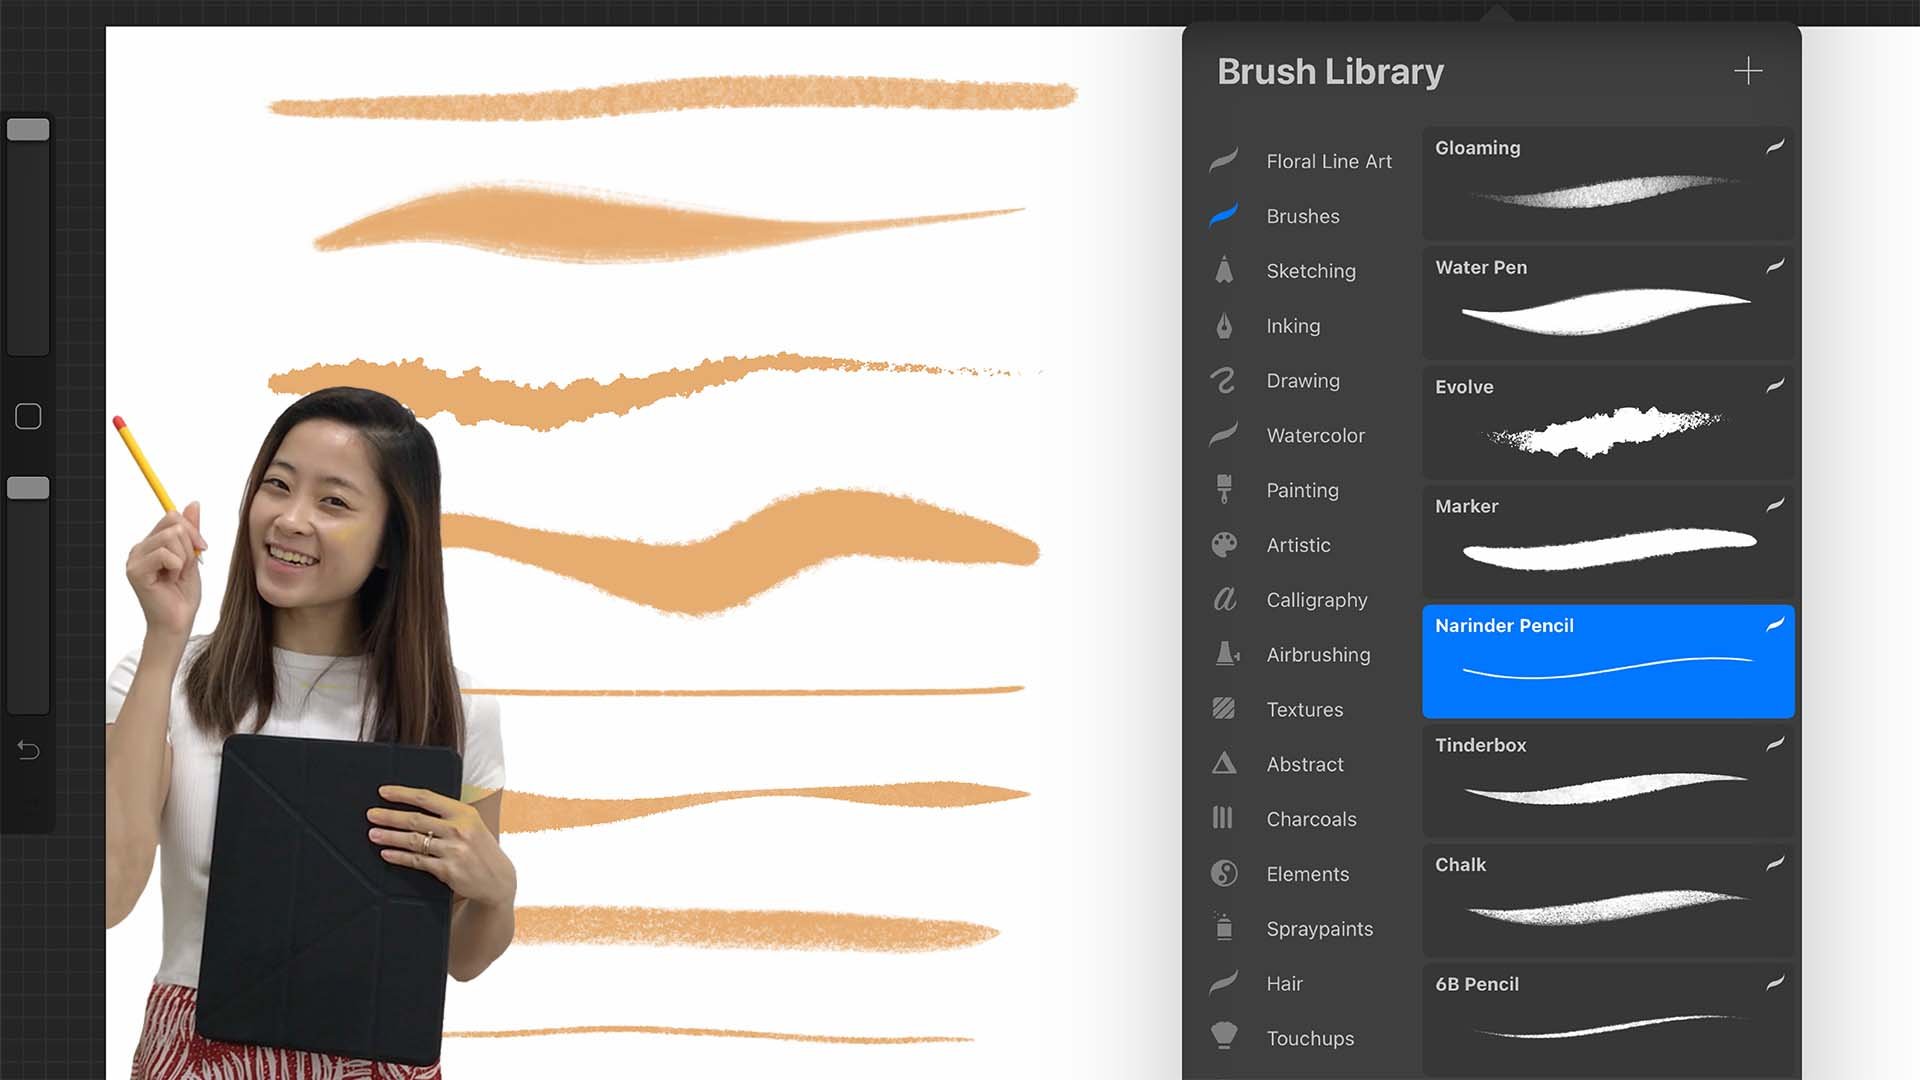
middle of the script. What we want to do
here now is draw a cute little ice cream
cone with a textured brush, which my favorite is
the Narinder pencil. It is under sketching. My streamline is all the
way up to about 93 percent. You can go all the way to
100 percent if you want. But if you don't want the
help of the streamline, then just move it down. What the streamline does is, it helps you have a bit more of control in your
brush to make smooth lines. You see I just dropped
my streamline down and every crooked jaggedy
stroke will be seen, but if I move it all the way up, I can actually create smooth lines with the help
of the streamline function. Just a little bit
of streamline tip. Let's just clear this canvas. With three fingers, you can swipe left and right
to clear the entire canvas. Now, select your brush, and let's set up our drawing guide to have
asymmetry help here. Click on "Symmetry"
and make sure it's on "Vertical" and
"Assisted drawing. " What this does is, it helps you to draw symmetry
on the left and right. What you draw on the right
will reflect on the left, what you draw on the left
will reflect on the right. Let's just draw a
cute cone here. You see, what I'm
going to do first, is draw the angle side. If you hold it
down a little bit, you can see that the
line goes straight and if you tap on it, it will help you lock
at a certain angle. I am going to maybe
lock it right here and then draw another
line to connect here. Hold it down so that it locks the straight
line and I'm going to tap so that I know it
is definitely straight. I'm missing a little bit here, so I'm just going
to color that in. Now let's do the top. Make sure it's straight, make sure it's touching
in the middle. Now, I'm just going to drop
my color to color drop it. If this doesn't work for
you, this could happen. Hold it in and you can see this color drop threshold
is all the way up. You can adjust it to fill
what threshold you want. I'm just going to show you
I'll put it all the way down. I'm going to drop it. I'm
going to show you again. You can see that there's this white line gap over here
when the threshold is down. Move it all the way up just
right so that you do not see that white
line. Look at that. What I want to do is
just to hold it in and move it slightly
up just to adjust it. It's not so perfect yet, so I'm just going to
undo put it in again, go all the way and yeah,
I think it's good now. Let's add waffle lines
in our ice cream cone. To turn on Alpha lock, you can either tap on the
Layer and click "Alpha Lock" or what you can do is use
two fingers and swipe, swipe the layer to
turn it on and off. For this, let's change
our color here. I'm just going to use
this lighter brown and create straight
diagonal lines. Oops. Now I have on both sides, so I want to remember
to turn it off because this is our drawing
and our symmetry is on. Let's double-tap to undo and click on "Drawing
assist off. " Let's go ahead and do this. Remember when I said earlier, you want to hold
down the pencil, wait for the line
to be straight, and then tap on it so that
it's all at a certain angle. Just adjust the distance
between your lines. Now, this is a little bit
too far from these two, so I'm just going to undo
with two fingers and keep going until I've filled
up the entire cone. Then I'm just going
to go this way. [MUSIC] You see now, this is too thin
compared to this two, so just to redo and do it again. This is a cute ice cream cone. Now let's draw our
ice cream cone. For that, I'm going to draw
it on a different layer so that I can easily click
it later for the animation. Open up a new layer and
select the color of your ice cream if you want strawberry pink or
chocolate brown, or I don't know, or sorbet color, it is
entirely up to you. I'm just going to use
this vanilla cream color. You can use the same color
palettes that I have. I will share it with you
under the "Resource tab" that you can just download
under Resource in this class. If not, just use whatever
color that you like. Now, Animation Assist is not on, but I have this
line in the middle. It's just a guide so it's fine. Let's go ahead and draw a round bulb with a little bit of drippings
right at the corners. Let's do our color drop just
to make sure it's filled. Okay. This is a pretty cute
ice cream ball on top. I'm just going to make it
slightly rounded on the top. Now, I'm going to add a
little red cherry on the top. Open a new layer and just
draw a circle, hold it, so that it turns into an
ellipse created here and tap to make it a perfect circle
and then color fill. You see, I have created each element
on a different layer, so I can easily just move it using this cursor
button right here. Make sure you're on uniform
or free form and move it. I'm going to move it
right in the center. Looks like a little cupcake. Now, I'm going to add the
little stem for a cherry. If you hold the curve
line it becomes an ark. This is quite cute. Now, let's turn off our
guideline and see how it looks. Now, I just want
to make sure it's right in the middle
of the square. What I'm going to do is
select all the layers, just swipe all the layers
and it's highlighted, click on this cursor and move it until you see those
yellow lines. If your snapping is not on, you might not see
the yellow line, so make sure snapping is on. Now let's start animating. [MUSIC]
4. Animation Assist Basics: How animation in
Procreate works, it is literally
like a flip book. You have a bunch of
pages and you're flipping the book and
each page has a drawing. Each page is drawn slightly different and
it keeps going on. When you flip, it gives that motion design,
that motion illusion. In Procreate, that is
literally what we're doing. But each page is now one layer. Each layer has to be a
little bit different, slightly different so that when you are
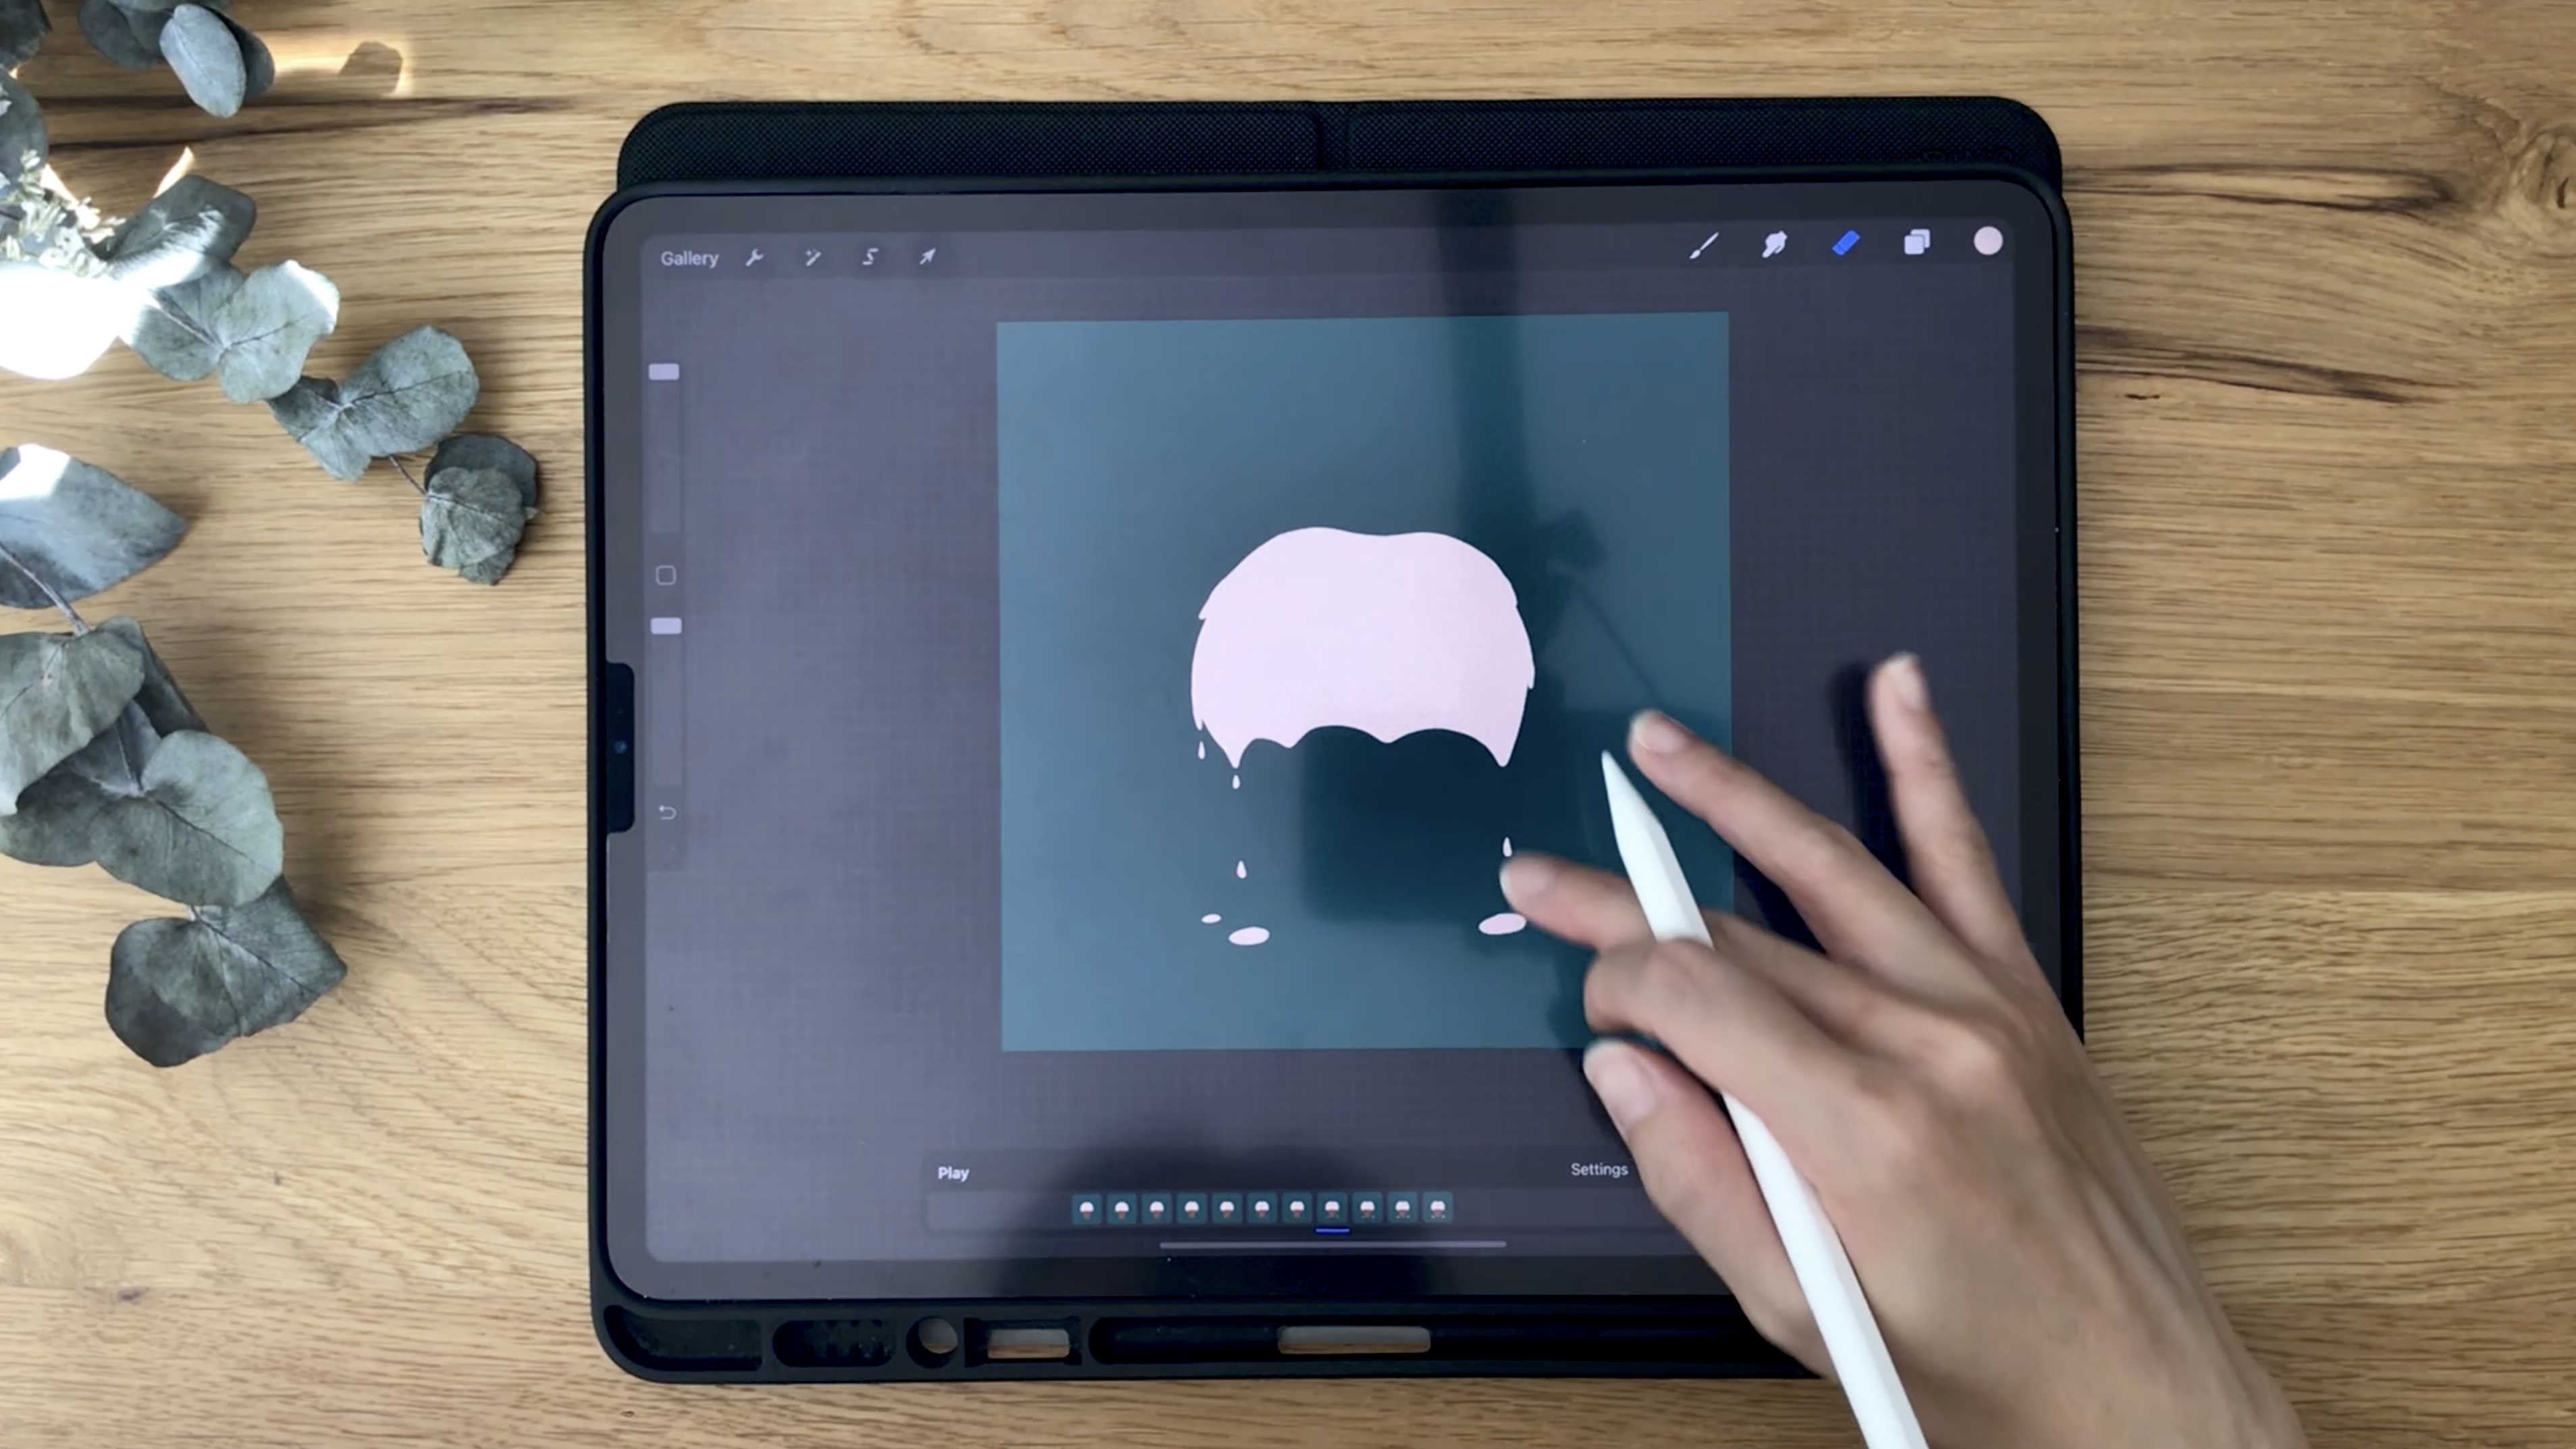
flipping each layer, it will move your illustration. What we're going
to do now is that we are going to animate
this ice cream melting. Like I said, each layer has
to move just a slight bit. You don't want to make too
much of a difference because then it will cause your
animation to be jumpy. What we're going to do is, we're going to move all
these layers and group it. When you turn on
Animation Assist, which is right here under the
spanner, Animation Assist, you will have this
dock right here that helps you animate your drawings. If you have multiple layers
and you do not group it, it's going to be
each single layer. You're going to animate
it individually. Let me undo. I'm going
to show you what I mean. Now it's on each
individual layer. I'm going to turn on the
Animation Assist and if I hit, "Play" it's going to animate each layer, and
this is not what we want. We want the ice
cream to be whole. I'm going to just turn
it off, group it. Now I'm turning it on. You can see that this
is just one layer. Now, I'm going to keep
Animation Assist on because I have this
onion skin opacity on so that when I change the ice cream a little bit
for the next layer and so on, I can see a little bit of the opacity of
the previous layer. What we're going to do
is we're just going to swipe left, duplicate the group. I want to duplicate
the entire group. This is what we're going to
do on this ice cream layer, we are going to
change the ice cream just a tiny bit to make it
slowly look like it's melting. Go back to your color
of the ice cream color. Now, you see that I'm
on the second frame. I'm going to draw it to
melt a little bit more. You can just color
it in if you want. I'm just going to drop
my color and make sure it's all in and this side, I'm just going to do to same. What you can do is, I have all these bumps here. You can make it lower. Here too just make it
slightly dip a bit more, like how an ice
cream would melt. What you can do is also
start bringing the top-down. You can erase. Your eraser can be on
Narendra pencil as well or the monoline
is fine. Either one. I'm just going to make it
move a little bit more. I'm just going to
move my cherry down. I'm on my cherry layer, select your cherry layer
and hit this cursor, this moving selection
cursor button and just move it slightly down. You can use your finger to tap down so you can see the
onion skin at the back. That is where the first
frame position is. Now I can see that it is moved away from the
original position. That's fine. Just a
slight bit is fine. Now, what are we going to do next is we
continue doing this until we see many
different frames where your cone is melting. Let's duplicate this frame. You can close it if you think there's too
many layers going on just to make it more organized. Let's go to our ice cream, and draw on your melting parts. For this part, what you
can start doing is you can add a drop of ice cream melting. As you make it sharper, you can add a drop of
cream coming down. Now I'm liking this
more and more. You see, what I mean
by it is a flip book. Now, let's go to the cherry, move it down a little bit. I just want to make the
top here slowly dip. You can also draw the sides
here changing a little bit. It's not being a
perfect circle anymore. Now you have three frames, so what you want to
do is keep going. Keep duplicating, keep changing, and keep adding more
melting elements, and changing the shape of
what you want to animate. Let's make this peak
a little bit more. You want to make these
droplets drop all the way down and you have this melted
cream puddle over here, but you do not have
to erase and redraw. I just erased something.
Use this third icon and on freehand just go
over, select it. It's like you're cutting it out, and click on the fourth icon, and just drag it
down a little bit like this and deselect. You have moved it. Do
the same for this one, just move it down. Use your finger to
tap and move it just slightly if you
can't control it. I'm just going to continue changing the way my ice cream looks so that it looks
like it's melting, so what I want to share
with you a tip here. For me it's a really
big tip which is a mistake that I used to do or at least
I'm still prone to do, is wanting to make too big
of a change because I'm lazy to create frames and do more and more frames to make
my animation look smoother. If I'm lazy at a time, I would possibly just create five frames with
very big movement. This drop might be
all the way down here and all the way here, and maybe my cone will be changing such a big
shape in just one frame. I think if that's
the look that you want you can go for it, but it's just going to make your animation look very jumpy. What you want to do
is, take your time, be patient to make small
changes in your illustration. Even though you feel
like you cannot see it and it's taking too long trust me it
will be worth it, so just take your time to do it. You can even make these
erases a little bit just to change the
structure of it because when an ice cream is melting
it's completely different. You feel like, "No, my ice cream is melting, I need to eat it really quick," especially on a hot summer day. I'm going to move my
cherry down a little bit. You can also turn it, adjust its angles, slightly with this green dot here just so it will look like it's slowly
falling and turning, and turning, and
falling, and dropping. Let's continue doing this. I'm probably going to
fast-forward but you can watch how I continue doing this, and I will stop
periodically just to give you some tips on the different things
that I'm doing. I'm going to start adding
small droplet right here just to show that this
drop has hit the ground. In the next few
frames we're going to make these droplets
bigger and bigger. Keep doing until you've seen at least the ice cream
really changing shape. Nine to 12 frames would be good. You will definitely see
a significant change with around nine frames, that will look really nice. You can't really see the back because you have
so many layers going on, and that is fine. What we're going to
do is you can add a background color
if it helps you see. So let's go back here, I'm going to add a green color to see whether it helps me see. At least I can see the
different layers here. I have about seven frames, so let's just play
and see how it looks. There you go. It
is really melting, but I see something wrong here. I did not erase my
ice cream properly, so I'm going to have
to find where that is and just erase it properly.
5. How to Find and Fix Errors: Now what we can do is, I'm just going to pause and find that frame just to
erase it properly. I think it's on this layer. I'm just going to use
my eraser and make sure it's completely
gone. Let's play. No, it's still there. I think it might be this one. I'm just going to fix it. There's one more here. If this happens to you and it's going to
be a bit difficult for you to find which
layer it is on, what you can do is
deselect every layer and open up only that layer
just to see that layer. To do that, you're
just going to hold on any of the layers and that would just isolate
that layer to show. For example, now I can
see that this part here is not erased properly. Now I can go back and
this select again, go to the next group. Now I can see that
this layer is here. What we can do is just
open up the others, but I'm just going to
keep doing what I just told you. Let's try. Let's just double-check and see if any other layer is gone. Now there's this here
which I want to fix. What this does is, it's good that you
can just go ahead and fix things just to make sure your animation is
smooth on each layer. Yeah, there we go. It's good to play your animation time and
time again periodically, just check-in before
you actually finish everything just to
see how it looks. Let's do that again. I think I've pretty
much fixed it. I'm just going to play it again just to see
where it's better. This part here is not so smooth, so I'm going to do
something with it. I think it's because I
erased it just too much just now. No, it's not. I am going to find
where that is. I think it's right here. See, I erased it just now. I'm just going to draw it back, because there's not going
to be a bit of crookedness in an angle in a
melted ice cream cone. Let's turn it back on. Let's play. [NOISE] Now, let's keep going so that the ice cream
melts even more and there's a huge
puddle on the floor. Let's go ahead and duplicate. [MUSIC]
6. Completing the Melt: [MUSIC] I'm going to continue
moving the droplets. Let's go ahead and just
make the puddle bigger. It really is up to
your creativity. You can even make this start dropping and create
another puddle at the back here or over here. Now you can start connecting
these two puddle. I think I'm just going
to make this drop down and create a small
puddle right here. Just going to make it drop down, have a droplet right here and make a small tiny
puddle right here. Let's make our cherry
fall a little bit more, turn it to the side, and add more melting
parts right here. You can even start to add
a new droplet right here. Let's see how that looks. Oh, yes. Let's keep going. We have about eight frames now. Oh, no. I drew it on a different layer. This is what happens
when you're not concentrating. That is fine. Now I'm going to teach
you a trick on how you don't have to erase
this and redraw again. You can just copy, paste, and cut it. What we're going to
do on this layer, you hit this button,
the third icon. We're going to select the entire parts that we
drew on a different layer. I'm just going to go
ahead and do all this, and I'm going to
click Copy and Paste, and it will copy and
paste on a new layer. What we're going to
do is move this down, merge it with this. Use two fingers
and just swipe it together and now for this, I'm going to erase it. I'm going to use
another brush just to make it quicker like
the monoline brush, because the size
would be much bigger. I'm just going to erase it. Obviously, you cannot
see what I'm erasing, but that is fine. Let's see. I've
erased everything. Now, let's go ahead and
duplicate and continue this. But before that, I'm just
going to play it again just to see if I did
something wrong. Yeah, it's looking good. Let's go ahead and do it again. You can start
changing the shape of your droplets on
the floor as well, so that's not a perfect oval or a circle. I'm going to add a new
droplet right here. I just make it bit sharper. Add a new droplet. [NOISE] I think I'm just
going to do this maybe two more times. Let's see. What you want to make sure is try to avoid this touching this, because it will just
make it harder for you to anime or edit the
way it looks later. If for the next frame
this is already touching, you will need to erase
it and redraw it. But not to say it's
a hard and fast rule that you shouldn't touch it, it's just a tip to make
things easier for you. I have 1, 2, 3, 4, 5, 6, 7, 8, 9, 10 frames now. Let me do a last one. Now, I'm going to erase this because it
has touched the bottom. I can move this down. I'm going to erase this too, move this down, make your puddle bigger. Let's see how this looks. Oh, yes. This is
going really nice. But you see I have a
little defect here again, so I'm going to find for that. I'm sure it's right here. Yeah, it is. This happen because my eraser
is on streamline as well. It was helping me
create a smooth line. You can choose to turn off the streamline for the eraser or just choose a
different eraser. Yeah. So many, oh , no. Let's see how this looks. Nice. Let's play it again. Oh, yes.
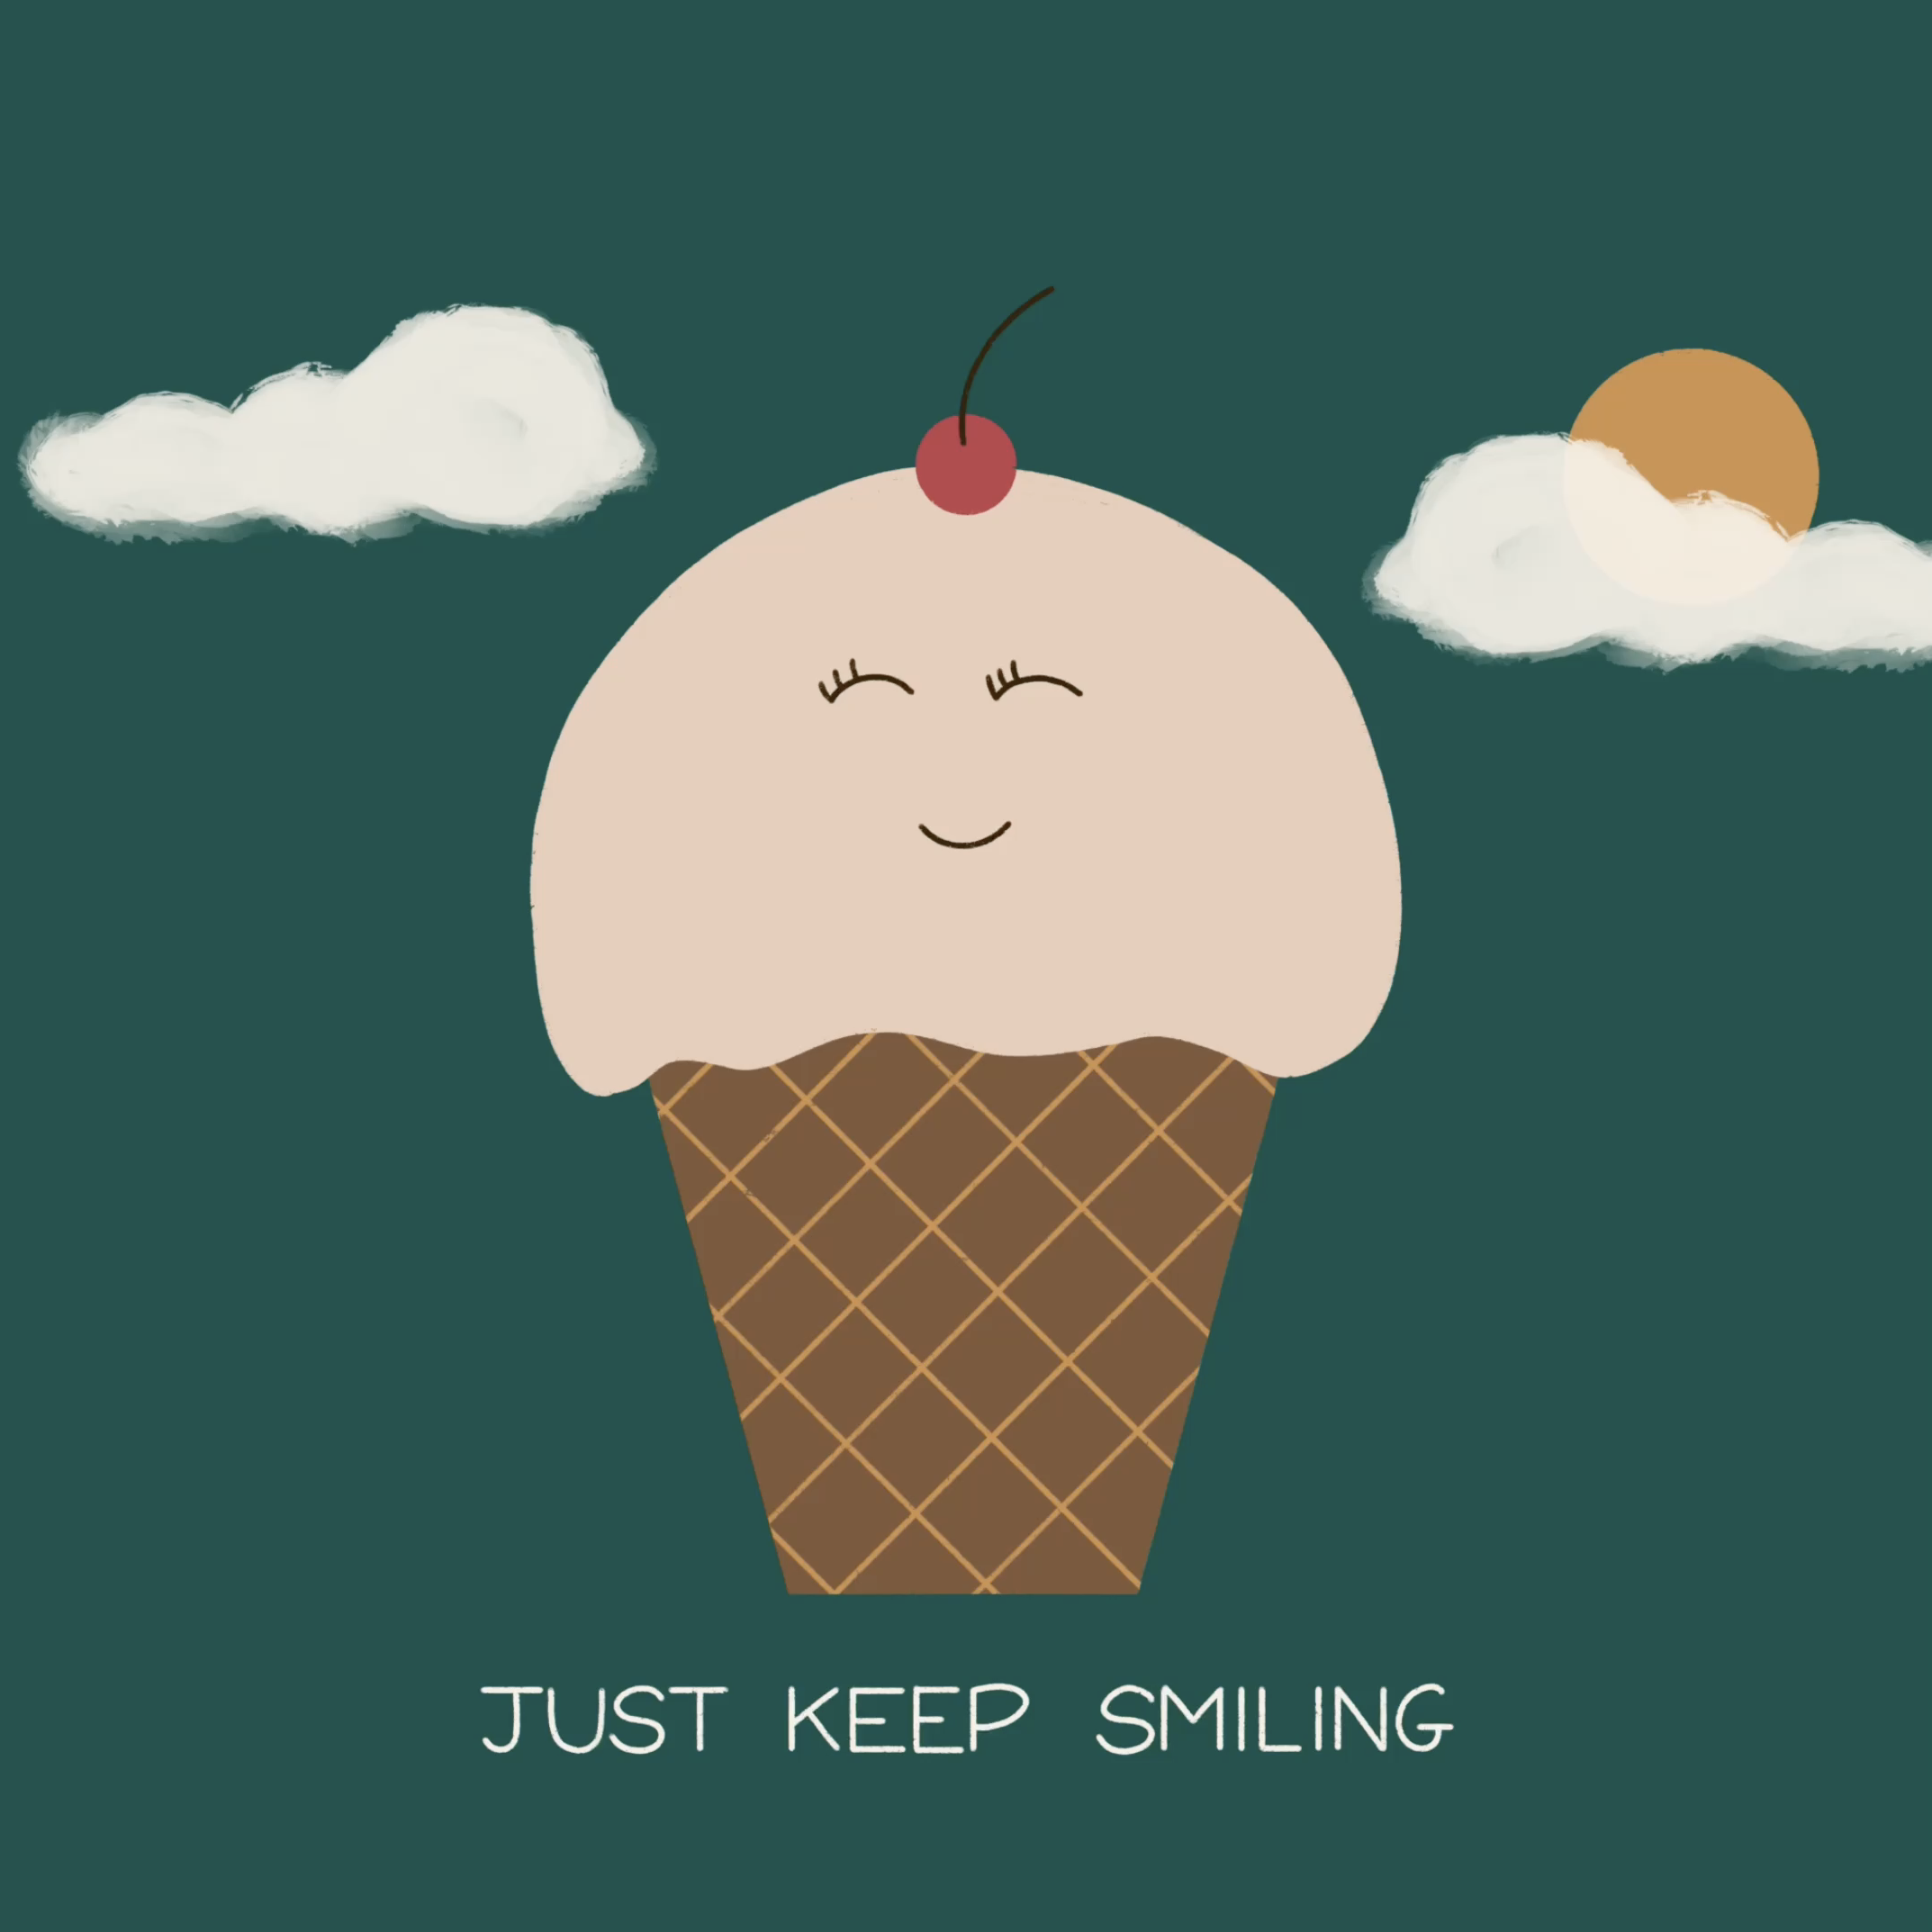
7. Add A Cute Face: [MUSIC] Now, let's make this even cuter by adding some small face here
on the ice cream cone. If you have already a plan on what you want to animate
that would be best. For now, I'm just showing you what you can do just
by a simple drawing. Just by a simple drawing, you can animate a
melting ice cream cone. But if you want to
keep adding more, that's what these
layers are for. If you don't have
all these layers, it's going to be
hard for you to add elements to keep changing it. What we're going to do now
to add on the face is, just go into your group. I'm going to add a new
layer above the ice cream. I'm going to use this brown and just add a smiling face here. [MUSIC] I'm going to turn on my drawing guide just to
see where's the middle. Add a smiling face. Cute. I'm going to
add some lashes. Very cute. Now I want to animate this face. I'm going to move the
face up a little bit because I want it to
be in the middle of the cone and as this
ice cream melts, the face will slowly
fall down as well. Here it is. Let's
see how it looks. Just on this layer. I'm going to make it lightly down a little bit. This is good. Now I'm going to
duplicate this layer. Move it on top,
turn everything on. Let's move the
face a little bit. Firstly, I'm going to move
it down a few pixels. I'm going to select this side, turn it this way. Select this side,
turn it this way as well and keep repeating that. Duplicate, move this up. Now I'm going to turn it back and move the smiling up. Let's duplicate this. Go on top. From the get-go if you already
know that you want a face just add it in on a separate layer and
animate it as you go along. Make sure you are also selecting the entire
face and moving it down because you have to remember that your ice
cream cone is melting. [MUSIC] If you notice, because Procreate is
not vectors on pixels, every time you
rotate your drawing, it will get pixel-wise. If you don't want that to happen or if you don't like
the way it looks, because it's too pixel-wise, just redraw it again. I'll duplicate this. What I mean by redraw is
that I'm going to open a new layer so I know
where this is and I'm going to just draw it again. If it's easier for you to
draw every layer again, that is totally fine. You don't have to
duplicate and rotate it. This is just a
simpler way to do it. I have three more frames.
Let's keep going. What you can do as
well is instead of rotating each layer, what you could do is
just use one layer, rotate one side
and then duplicate the original one so that
doesn't look so pixelized. For example, I know
this is going this way, so I'm just going to
duplicate this one, skip a frame and move it all
the way to this one up here. For this one, I'm going
to duplicate this, move it here and move it back
to the original position. You get what I mean? [MUSIC] I just want to make sure
I move it all the way down because the ice
cream is melting. Let's see how this
looks. So cute. This is really going down. Now, what are these here? Settings. You can
make it go slower. Frames per second. You
can make it Ping-Pong. Ping-Pong meaning
it will reverse, like go back and forth. Then goes back up again,
ping, pong, pong, pong, melt and then
go back up again. Melt and go back up again. Loop is just looping the entire, from beginning to end, beginning to end,
beginning to end. Of course, if it goes faster, you can see that just
melting really fast. I would like to
keep it around 11. I think this is a nice speed. How about slower? Slower then you can't really see the face. I'm just going to move
it up a little bit. Maybe 12. 12 is a bit fast, so I'm going to keep
it at nine or ten. Let's see. [MUSIC]
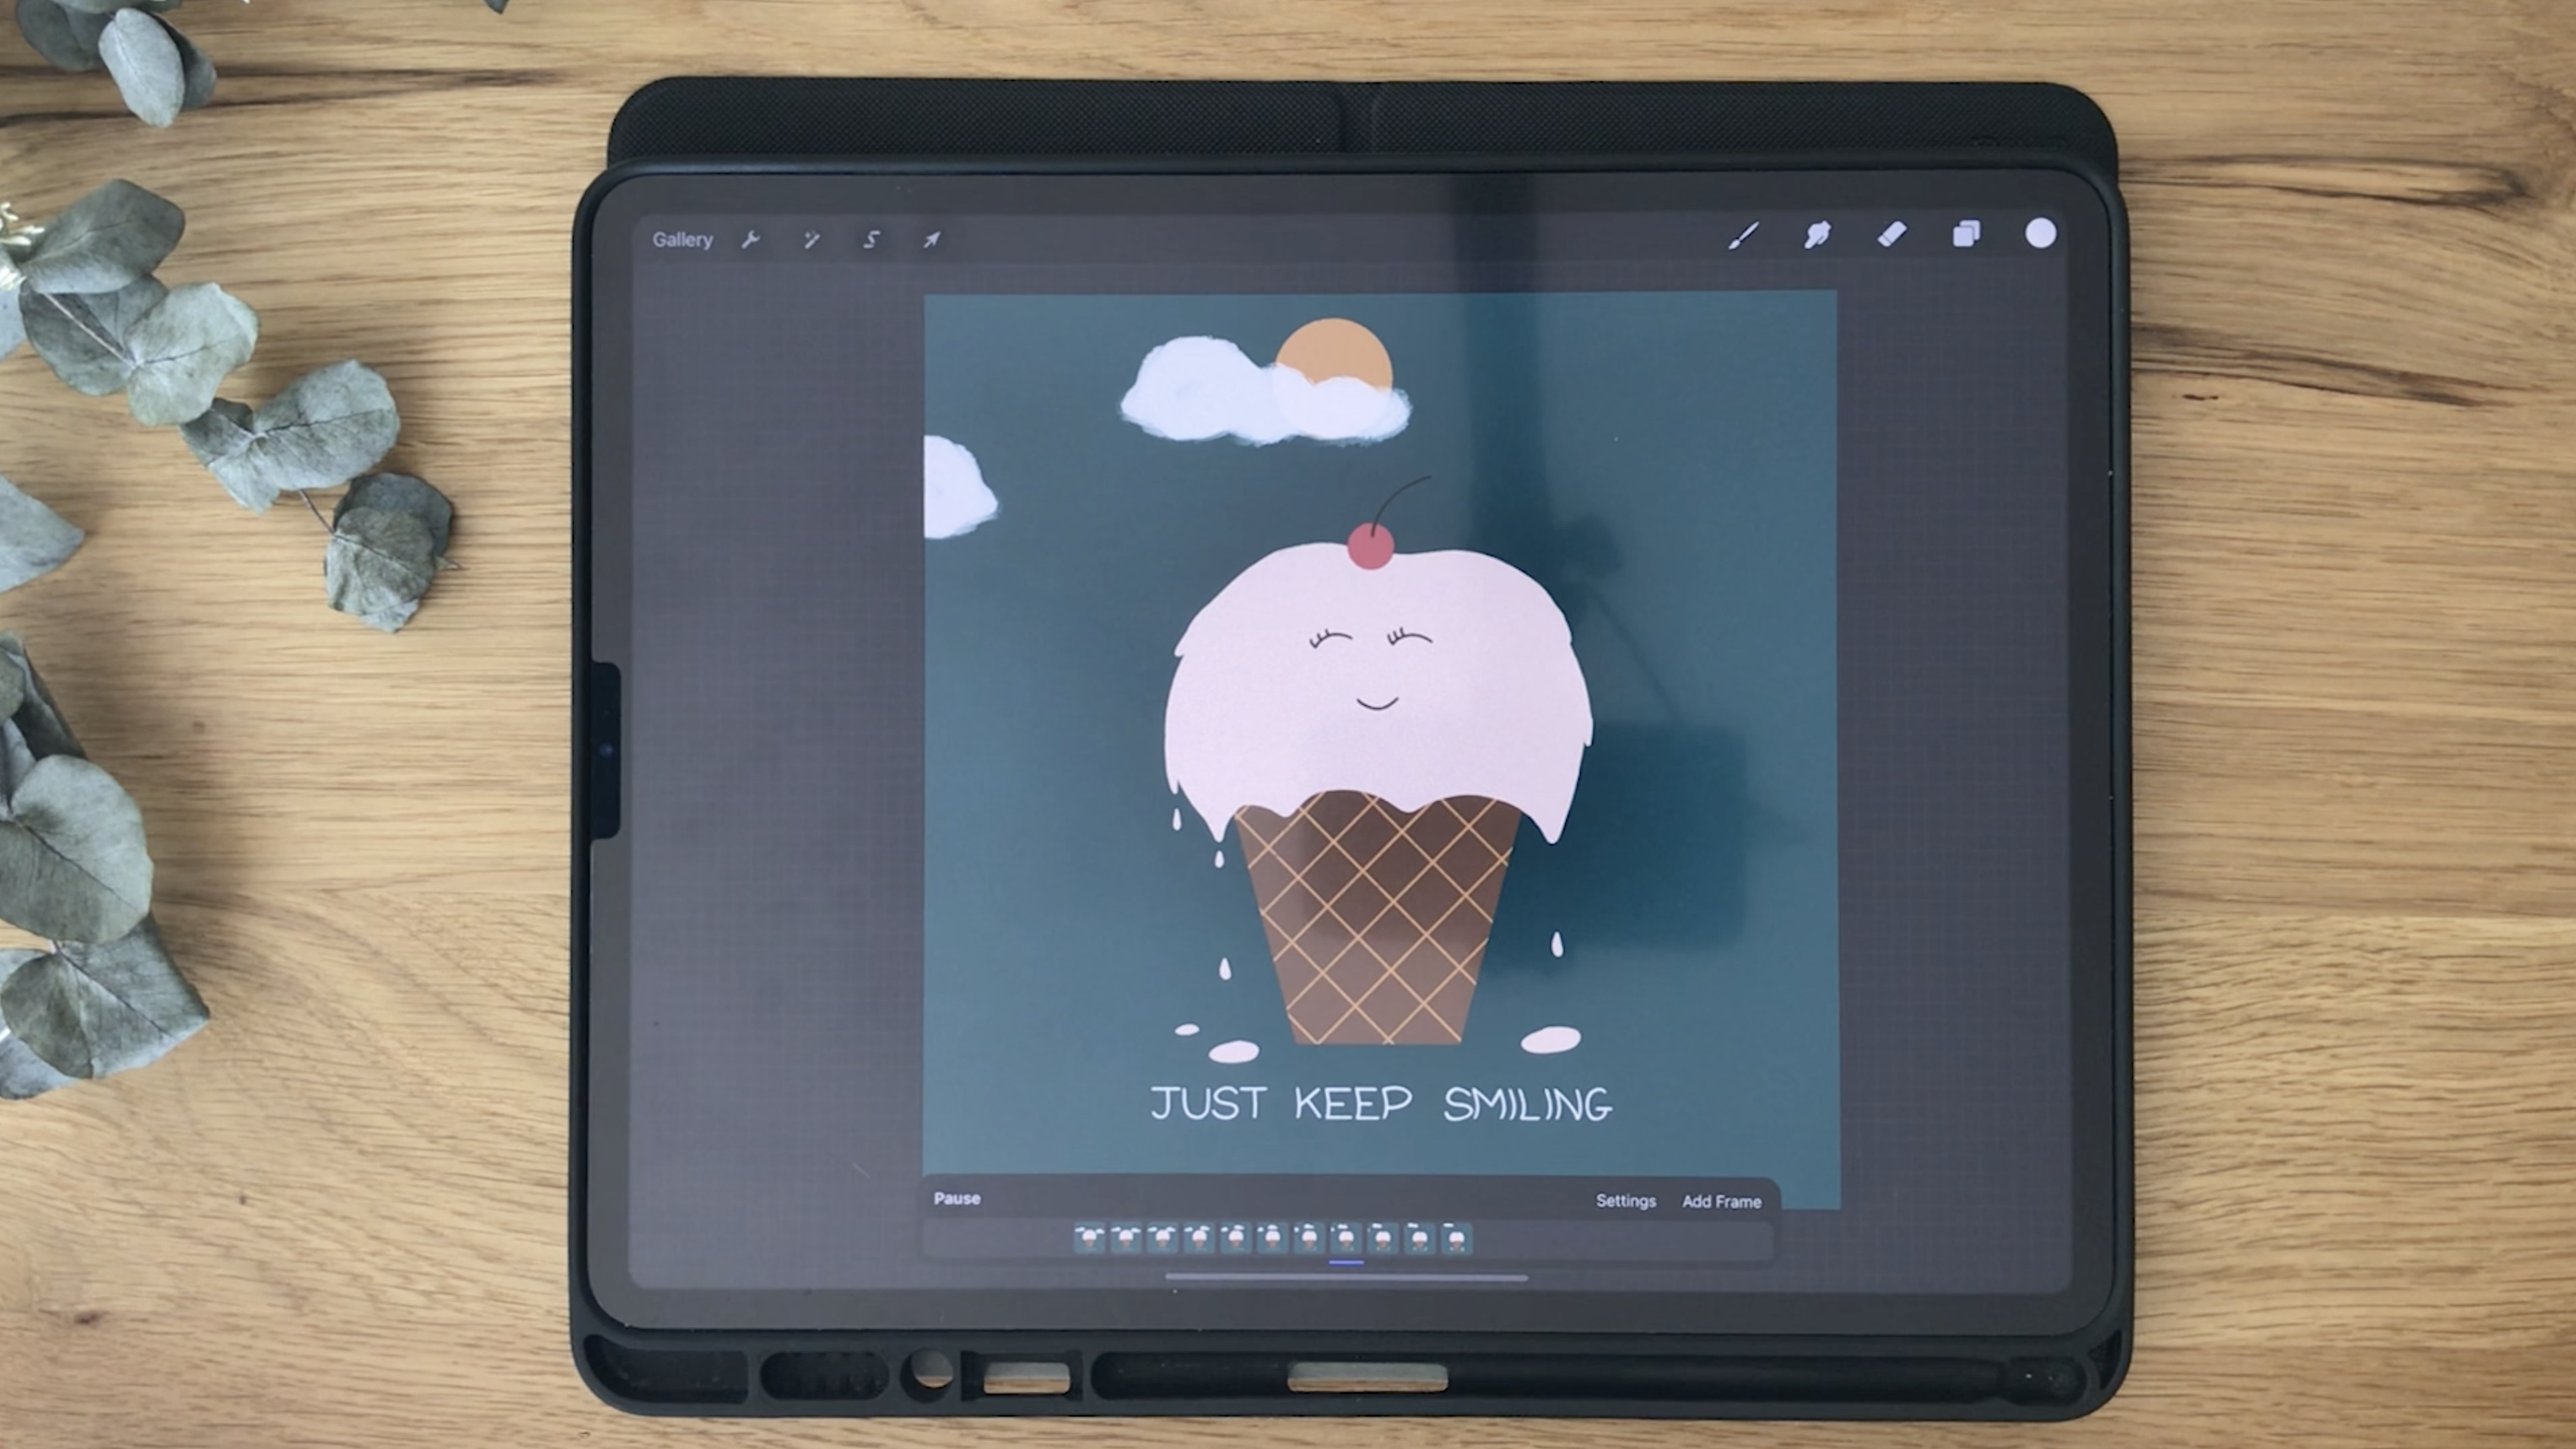
8. Easy Block Lettering: [MUSIC] Now what I want to do next is at a cute
little texts on the bottom. [MUSIC] Just to make this animation more
lively or ironic. I'm going to add, just keep
smiling at the bottom. Even though it is ice cream is melting, just keep smiling. Let's go ahead and let me show you what I mean by
duplicating the original one, just moving it slightly
and then duplicating it. What I want to do is
I'm just going to actually select all the layers. That's because I want to make all my illustrations
in the center. See, it moved because I
obviously added more stuff. Now, it's in a center. I'm just going to add, just keep smiling, right down here. Now, de-select, add a new layer, doesn't matter where
it is because it's not going to be blocking
anything else. I'm going to use a whitish color and I'm going to change
my drawing guide. I'm going to use 2D, 63 pixels is okay. I'm just going to show you another tip on how
you can easily letter something really cool. Turn on Drawing Assist. We're going to use the help of Drawing Assist to
make straight lines. I'm going to make
a block letters. This Drawing Assist
really helps because it helps you create straight
lines really easily. I'm just going to write,
just see when drawing assist on it just go straight for you. Some good point just using, but then you cannot curve. What's going to happen is you have to tap Drawing
Assist on and off. But it might take a
long time for you to. It's a little bit tedious
for you to keep going to the layers and turning
it on and off. What are you going to do is, you can actually
make a shortcut. Go to the Spanner icon
here, go to Preference. I have already said
this actually. Go to Gesture controls and
under Assisted Drawing, turn on this first one. Tap this square, which
actually if it's not on, you use it to open
up the eyedropper. Let me turn it off
and let me show you. You can always zoom and I'm dragging my pencil
around a layer, the Canvas. I can select my eyedropper. But I want to use this to toggle Assisted
Drawing on and off. Just go to preference again, Gesture controls, Assisted
Drawing and turn this on. You can actually change all
the settings right here. It is really,
really cool to make your procreate customized to how you work. Let's hit ''Done''. If I turn on my layer,
let me show you. Assisted on, Assisted off, Assisted on, Assisted off. Great. Now let's go ahead
and just letter our words. Now it is on. Sorry, I'm on green. I want it to go on white. I am going to turn it off for the letters
that have curves. Sorry, I just need
to concentrate. [LAUGHTER]. I'm
just going to make my block letters myself using
the guide of the square. You see just because
of one letter, without the Assisted Drawing on, I took so long just to do a U. See, S is fairly simple. But wait till I show
you the other ones. Now I'm going to turn it on. I'm going to do T so quick. Let me redo it again. Just K, enough. This is too long. Just
keep turning it on. It's really quick. Make this a bit
longer. Turn it off. S, smiling. Turn it on. I'll do the ones that
are straight first, so that you don't
have to toggle on and off too much like that. SMILING. Like the N. Then I toggle it off. Do the diagonal one. Oops, is on. G, so cool. Now let's make it
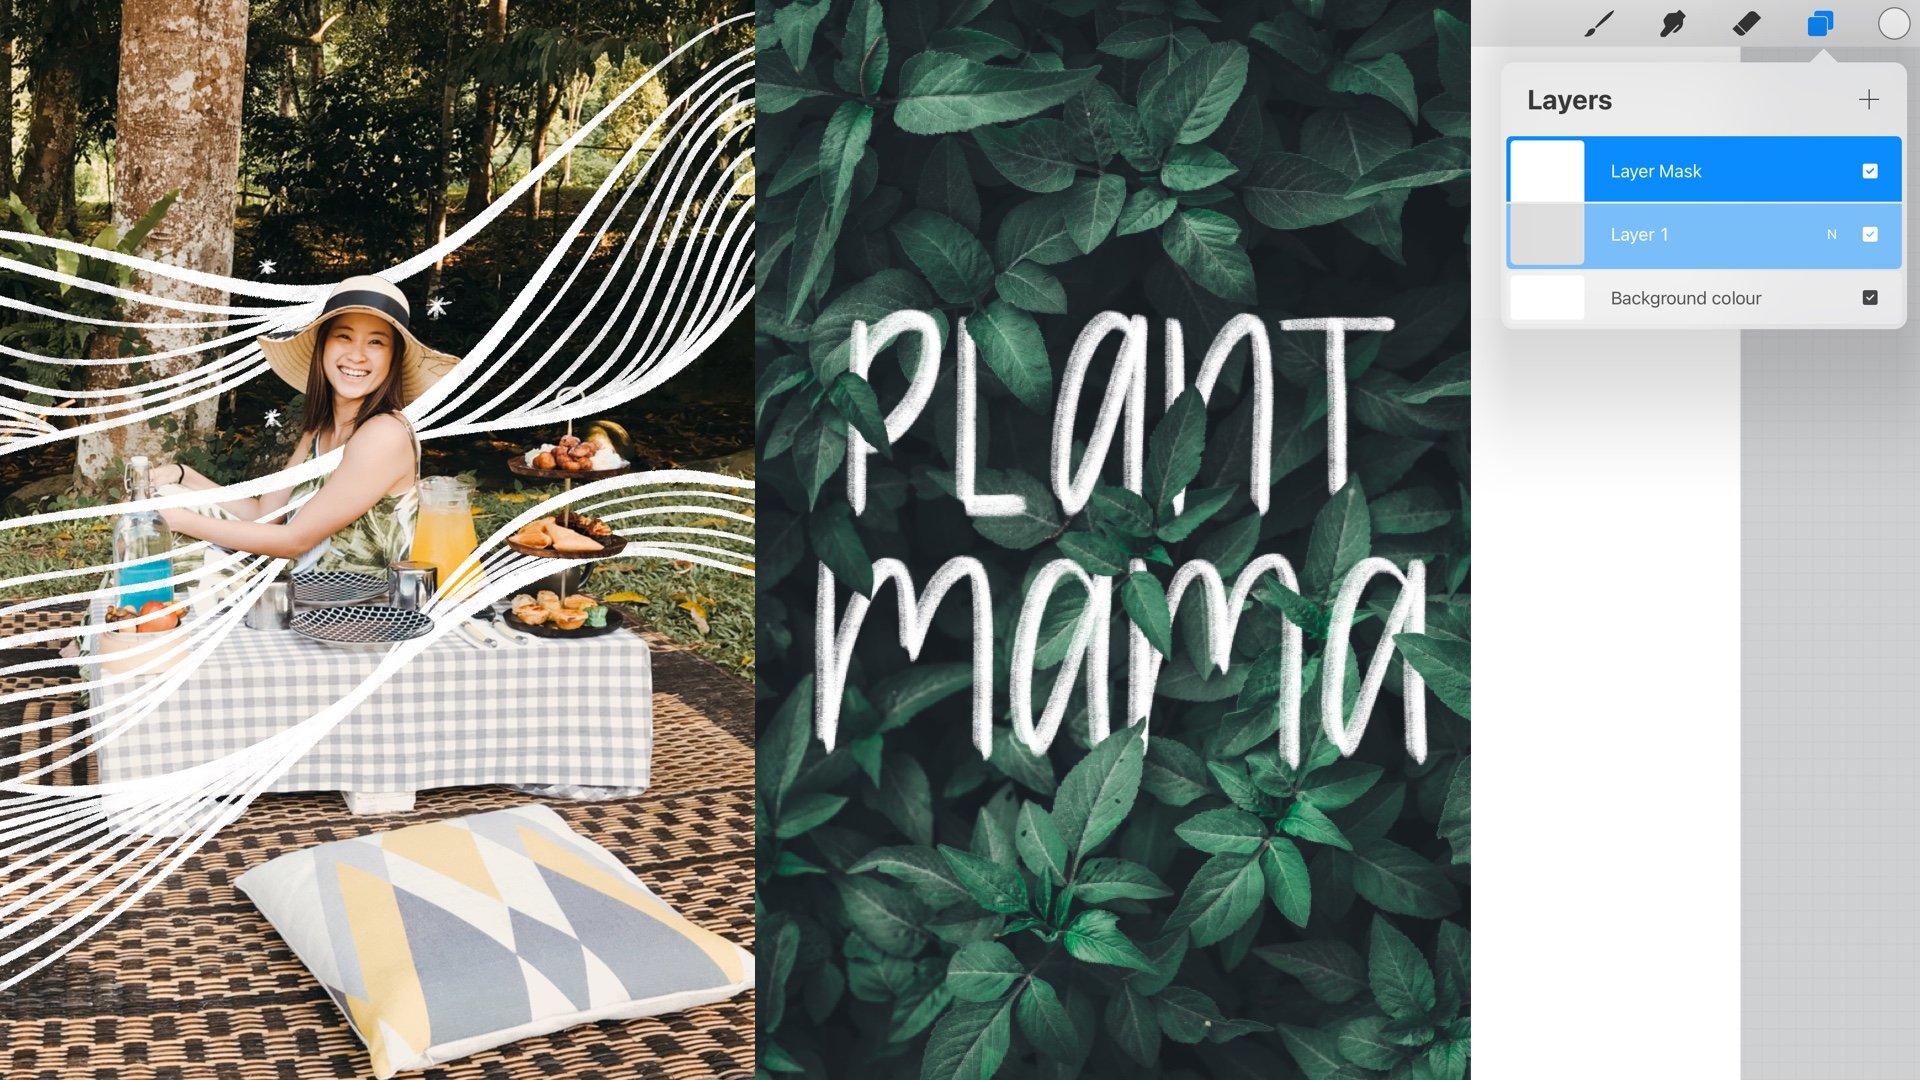
centerized to our cone. JUST KEEP SMILING. Now what we're going to do is we're going to animate
it just to move slightly to the
right and the left. I'm going to duplicate this. Move it to the next layer, to the next group. Hit the fourth icon, and I'm going to warp it. Just move slightly like this. I'm going to duplicate
the original one to the next group, the next frame. Warp it the other
way just slightly. This is just to maintain
the sharpness so that it doesn't pixelise so much because what I did
with the eyes, it will continue to be
more pixelated as I keep adjusting and changing its dimensions
and the way it looks. Now, I know that this is
original layer where straight, this one goes to the right, this one goes to the left. Then I want it to come
back street again. I'm just going to duplicate
this original one. Go all the way to
the next layer, and probably close this one so that I can see
what's happening. Duplicate and continue. You want to continue
duplicating and making sure you are on the right layer and you're
duplicating the right layer. It helps to just close to the
last group that you are on. Now, something went wrong. You see my text layer
is not in the group. That is because I did
not put it in a group. You have to make sure
when you put it in, it is right in the group. Now this group does not
have the text layer. I'm just going to hold
it and put it in, hold it and put it in. It helps if you put it in-between any of the layers
instead of the last layer. [MUSIC]. I'm done. Let's see
how this looks. [MUSIC]. This is moving slightly. If you want to make
it go even more, you can actually shift
the entire thing. Now it's like just blinking. [MUSIC]
9. BONUS: 5 FREE Cloud Stamp Brushes: [MUSIC] Now you can actually be done with this if you're satisfied
with this animation. But for this class, I want to give you
a bonus session, and that is to give you some
free cloud stamp brushes. We can add some
cloud elements into the background and a Sun rising, so it's like the Sun is causing
this ice cream to melt. You can download the
brush pack under resources along with
the color palettes. What we're going to do is the same thing where we're
going to add a new layer, but this time you
do not have to draw the clouds yourself
because I'm giving you this free stamp
brushes where you can just stamp on the cloud. Go to the first frame, go to the first layer, I want the cloud to be
behind the ice cream cone, so I'm just going
to create a layer. I'm not going to draw the cloud below this part right here. What are we going to do is go to your brush library and you
have your brushes right here. You've downloaded it and
installed it into Procreate, and you have five
different types of clouds right here which you can pick and choose
according to your own style. I've created five
different types here and what I'm going to do is just try and stamp
it on like you see. This is way too big. Adjust your cloud
size and what you can even do is you
can rotate it, flip it if you like. You see, super easy.
Let's see Cloud 5. I actually like Cloud 5
for my illustration here. I'm going to use Cloud 5, I'm going to test
the size first, make it a little bit bigger. I'm going to tap one
here and the Sun is going to come up this way and it will move
along with the cloud. This cloud right here, I'm going to flip it. I'm going to make
this move this way. Let's open a new layer, move this layer down, and let's draw our sun. Go back to your now
under brush, go tap it. Let's make it in this
position. Looking good. What you're going to do now is to just duplicate your circle. Put it in this group,
close this group, open this group, and
open a new layer, and because you have seen, you know where this is, you don't have to move it
because once you move it, this portion is cut off, so you can just use
this brush pack and stamp a new position like this. Now I move it up, so it's
going to be over here. This is going to
slowly go this way. What you can do
because I flipped it, I'm just going to
open a new layer for it so that I can flip it easily like this
and just move it. You can merge it
if you want just to keep the layers organized. Now let's duplicate our Sun. Keep doing this until you see the Sun move this way and the
clouds shifting this way, so the wind is blowing
everything this way. [MUSIC] Just make sure that you are not giving too much
differences in the position. [MUSIC] For the next layer, the left cloud will
be gone already, so I'm just going to
do one more cloud. [MUSIC] Let's see how this looks. Perfect. There you go. You have a cute animation
done entirely in Procreate. [MUSIC]
10. Export: [MUSIC] Now let's
just export this, so that we can
keep in our phone, share with friends, put them on Instagram. Hit on the Spanner icon. You have all these
buttons as actions here. Hit Share, and you want
to share animated MP4. Export, and I'm just
going to save it into my video. Save
it to your album. Now, open iMovie. It's a free app on your iPad. You can use any other free video editing
software if you have, but for this class, I will just quickly
show you how to create your little animation
video on iMovie. Open a new project, create a new movie, and select your footage
from your photo album. Here you can see that my
animation is only 1.1 second. What we need to do is
we need to loop it. I'm just going to select it and duplicate it a few times
until the preferred time, say, about six to seven seconds. Let me just try five frames. It's looking pretty good. But I think I'll duplicate two more times just to
make it a bit longer. Let's see how it
looks right now. Once you're satisfied, click on Done and you can
rename your project. I'm just going to rename
it just keep smiling. Now, we want to save our video. It will be saved into
your photo library. You can save it
anywhere you want. Now let's go check it
out in our photo album. It's looking really good. You can go ahead and share with your friends or post it on Instagram or just show it off. [MUSIC]
11. Wrap Up: [MUSIC] Now that you've
completed the entire class, I hope you've learned
and understood how Animation Assist works, and maybe you've
even come up with your own ideas of what
you can do with it. Let's just do a quick recap of what we've learned
in this class. Animation Assist works like a flipbook to creating motion. Each layer becomes a frame when Animation
Assist is turned on. If you have multiple
elements and want to keep them
on separate layers, just group them altogether. One group is one frame when Animation Assist is turned on. This helps you make
changes when you need to. Make appropriate changes to each frame so that you don't
create too big changes, that the animation
becomes too jumpy. You want a smooth
flow when it plays. This requires patience,
but it will be worth it. Always check which layer you're drawing on, but don't fret. If you mistakenly draw
on the wrong layer, use the tips I've shown you to retrace where the error was. For instance, holding
down the checkbox of that layer to activate that
layer only and hide the rest. Or cut out what you drew and copy-paste to a new layer and merge with the
correct layer. Try to avoid rotating an element too much or too many times. Watch out if it
gets too pixelized. If it's a round-shaped element, it won't pixelize no matter
how much you rotate. But if it's cornered or any
other shape it will pixelize. You can redraw or duplicate
the original one instead of changing the layer that
has already pixelated. Keep these tips in
mind when you're working on your
own class project. Once you're done, do remember to upload it in the
class project gallery, I would love to see them. If you have any
questions at all, feel free to start a
discussion, and let's chat. If you're on Instagram, do tag me at the pupil of stuff. See you in the next class. [MUSIC]
 Voni Lim, The Pupil of Stuff