Transcripts
1. 01 Introduction: Thank you for taking this class. In this class, I will teach you how to make
these antibodies. First, I will teach you
how to bake the dope. I will teach you how to prepare the dove for
the first tries. And then we will let it rise. After the first rise, we will punch the
toe down and then formed the funds and
let them rise again. After they have resonance. I will show you how to bake
them while they are baking. I will teach you how
to make the glaze. After the effect, we will put the glaze on the honey
buns and let them cool. I am a self taught
and cake decorator. Many years ago, I
decided I wanted to open up my own bakery. So I took some classes, read some books,
watch some videos. And of course, did
a lot of practice until I felt like my
cake decorating skills. We're at the level
that I could make cakes for other people,
for special occasions. I then opened up
my own homepage. And I had this business
for several years. Part of this business
was to go to farmers markets and
other festivals. How many bonds is
an excellent thing to sell at farmers markets? I had this business for
several years until my husband got a job offer across the country
in New York City. We felt like this was
a good move for us. And so I close down my business and we move
to cross the country. Now here in New York City, I do not want to go through the steps to open up
into the homepage. But I still love baking and as retired teacher,
I love teaching. So I have decided to share my skills with you
on Skillshare. This class is for the
baker that would like to learn how to make yeast rolls. And I am excited to teach you
the skills in this class. Let's move on to lesson
number one, making the dough
2. 02 Making The Dough: We're ready to start
making our standard mixer. We're going to add
our flour and salt. And we're going to turn this
in, this microwave bowl. Microwave the milk for 30 s, just to make it one. That's the timer. If his microwave. What 30 s. We're now
going to add our yeast. So we need two teaspoons
and forth to teaspoon. And then we're going to add
our honey or melted butter. And we're going to add our eggs. But I do want to break that
up first before I add it. Now we're going to
this altogether. With this list together, we now want to put into
our standard mixer for that Oliver flower into the mix. We're going to start with this
and see how this is done. We will add a little
bit more clouds. As you can see, that DO is still very wet. When I looked at the recipe, it looked like that was not
going to be enough flour. So I want to add about
a half a cup of flour at a time until it's
the right consistency. It says it wants
to sticky dough, but you don't want
to so sticky that it won't go down. That flour mixture,
flowing mixture. Let's see how It's almost there. There's still a little bit
not mixed in and it still looks a little bit wetter
than I want it to look. But I want to get
all this really dry, mixing with the web
before I add more flour. Because it's really dry, may make it all moist enough. I'm trying to get this really
dry in with the really wet. That's enough to do it. Scanning their home. We really were not
combining like this. You'll notice they combine and now separated
from the middle. We're now going to
put the lid on it. And we're going to
need this for 10 min. We'll be back in 10 min
after this meeting.
3. 03 First Rise: This has been dating for 10 min. You can see it's a little bit
sticky, but it is a dough. I have a bowl here and
I want to just spray the ball down. Oil. Now I'm going to
take the meeting, grab the dough and
put it in my bot. I'm then going to just quickly, sorry my dog down. And with this non-linear tau, I'm going to cover it
and let it rise till at least an hour to 2 h. So we will be back once
this cyst doubled in size
4. 04 Forming The Buns: Do has doubled in bulk. So we're ready now to
roll out the honey buns. My math is not 16 "
long, it's only 12. So I'm going to be rolling
my dough about two tons. I want to start by sprinkling a little bit
of flour on my mat. And then I'm going
to take my toe. And I want to divide it in
half. Now with this hand. I'm going to roll it out. I want it to be
about 6 " by 8 ". A little bit on there
to pick this up. Flip it over. If I picked this, Here's my eight by ten. Well, I'm going to
start this right here. I want this to be six 8 " here. It's actually more
than 8 " and 6 ". This is a by six. I just want to kind
of push my dough out so that it's all there. I started with a rolling this since I want it
all to be kind of doesn't have to be exact. Now I'm going to take my cinnamon and this I'm also
not going to make exact. And I want to just sprinkle
it on top of the dome. And then I want to rotate this. Now the recipe says, to wet this down. I don't actually like
to wet the dough down. I like to just pinch it shut. So that's what I'm doing and I want to make it nice and smooth. You want to wet it
down, you could. This is kind of a dry dough. I decided to get a little bit of water because it was
just a little bit dry. I'm just going to wet and
pinch so that it stays shut. And I can kind of feel when
it's starting to get too dry. Then I just add a
little bit more water. Now, what I want to do is
I'm going to take my pal. I'm pretty sure I'm gonna
be using the two towns. I'm going to take
this first Pam. And I want to just
quickly write it down. Then I'm going to
take a pizza cutter and I want to align this up. It says to about one half inch. So when I line
this up like this, I can see where the
one-half inches and I'm just going to cut
that long gate, put it on there. And then I'm all about that same size and
put them on here. Water sealed was not ceiling. You see it starting to open up. Just use a little bit of water. Seal that because
you do want that. So I'm just quickly going and cutting them out and then putting
them on the pen. This is half of it, one PAM. Now I'm going to
do the other half. I just put this
there in the center. One at about six by eight. And it doesn't have to be exact. Let's do want to
try to get it as close to rectangle as possible. I like kinda straightening
out the edges where I can sprinkle it again. My cinnamon. Roll it up. Water to wet this
down. To stick. Pinch that once it's wet down and do the same
with other Pam down. Cutting this. I always seem to get
like his loving that on. This one's a little bit
bigger than the others. With my two pans full. I want to spread
the top my head. And then I'm going to
cover my honey buns again. We're now going to let these
dry for at least 30 min. We want them to be
double in size. So maybe more than 30 min, but it's going to
be at least 30 min. We'll be back at that time.
5. 05 Second Rise and Baking: Are you ready to
go into the oven? They have race took Dublin bulk. It actually took us
about an hour because I have two hands are
going to use to read. One in the center there. We're going to cook these
for 15 min to begin. Wow, those are kicking. We're gonna do our next lesson, which is making the glaze
6. 06 Making The Glaze: We're going to start by putting this butter in the
microwave and melting it. So we're going to put it in for about a half a
minute at 50% power, the better cook for about 30
s. It was actually about 45 s. I'm going to stir it to try
to get the butter to melt. If it doesn't don't
melt with history, I can always melt at some more. This one piece here that's
bigger than the best. I want the feather
to be completely melted because I don't want
any chance in like legs. So we're stirring it hoping we can get a completely
melted if we can't, we can't give it more time, but it looks like it's
going to completely melt. Right. Now. We want to add one
to spirit of vanilla. One tablespoon of
honey, scrape them out. Or powdered sugar. I'm going to switch to a whisk and it says three to
five tablespoons. So I'm going to
start with three. And then if we need
to thin it down, we cam so 123. And now we just want a
whisk this together. And if it's not thin enough, we can always add more milk. It is thin enough to
be good with this. I think we need at
least one more. I'm going to add one more. Then we'll decide
if we need to last. Now we're going to let this sit until the honey
buttons are done cooking
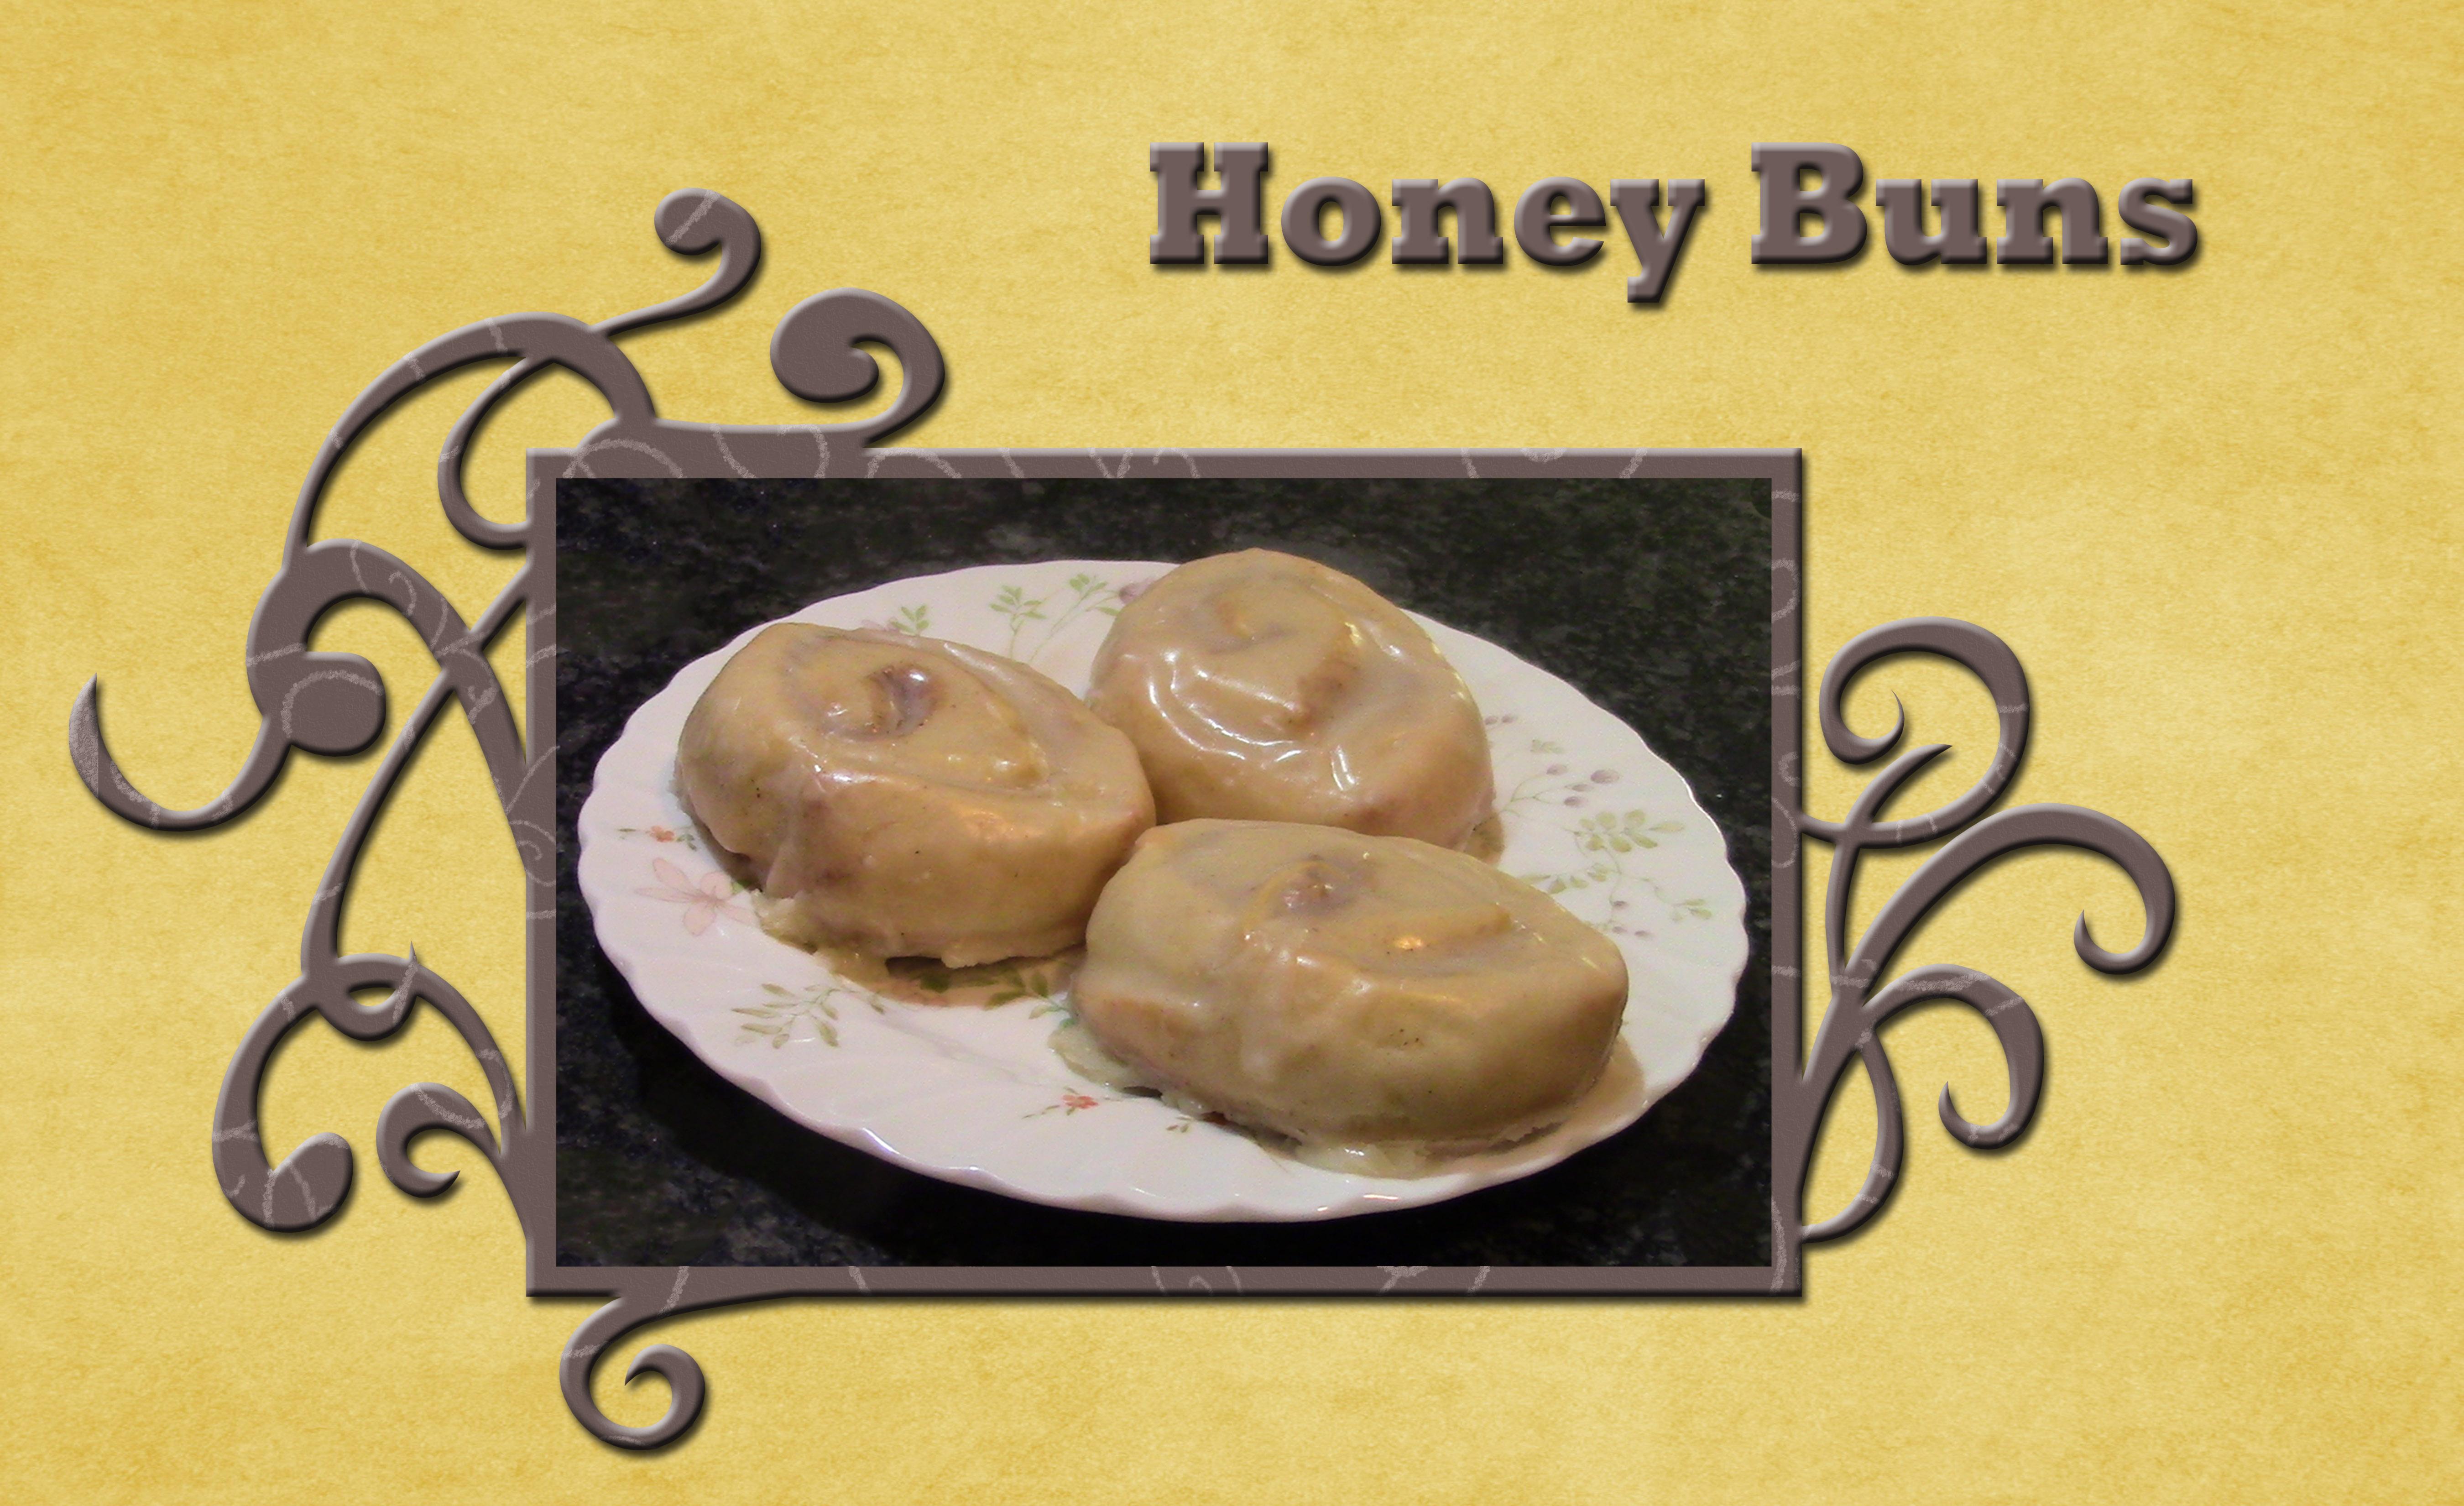
7. 07 Spreding The Glaze: Honey buns are about
done with the 15 min. We're going to check it. If it's starting to
turn golden brown on the edges, will pull him out. If not, we'll give it
another few minutes. You can see that
turning golden brown. So now I'm gonna take my place. I really want to spread all
over the top. Make it nice. Yummy. I'm doing this while it's hot. Right after bringing
that out of the oven. So you're going to go ahead and glaciers like I'm glazing mind. Then we're going to let
them completely cool. Now, you've probably seen those honey bunch of the store
and they're much bigger. If you want to
make yours bigger, you could, you wouldn't
get as many honey buns. But with this size, I'm just going to chew
of them instead of one, which would be the equivalent
of making them bigger. So I'm going to continue
during this time. You do yours and we'll be back where these are completely cool to
show you the finished
8. 08 Final Thoughts: Thank you for taking this class. We had fun making art. We first learned how
to make the dough. We then prepare the dough
for the first dries. And then after the dove has
had risen to double limbo, we punched it down
and then rolled it out to form our handy button, putting them on the pan,
they would bake them. We then covered them and let
them rise a second time. After the second rise, we take them while
they were baking, we made the glaze
for these tiny buds. While they were still hot. Fresh out of the oven. We spread the glaze
onto our tiny birds. I hope your funds
turned out the way. Your project for this
class is to make sense. Please make sure to post
a picture of them on our project page and tell us how I look forward to hearing from my kitchen to your
kitchen. Happy baking
 Nadine Thomas