Transcripts
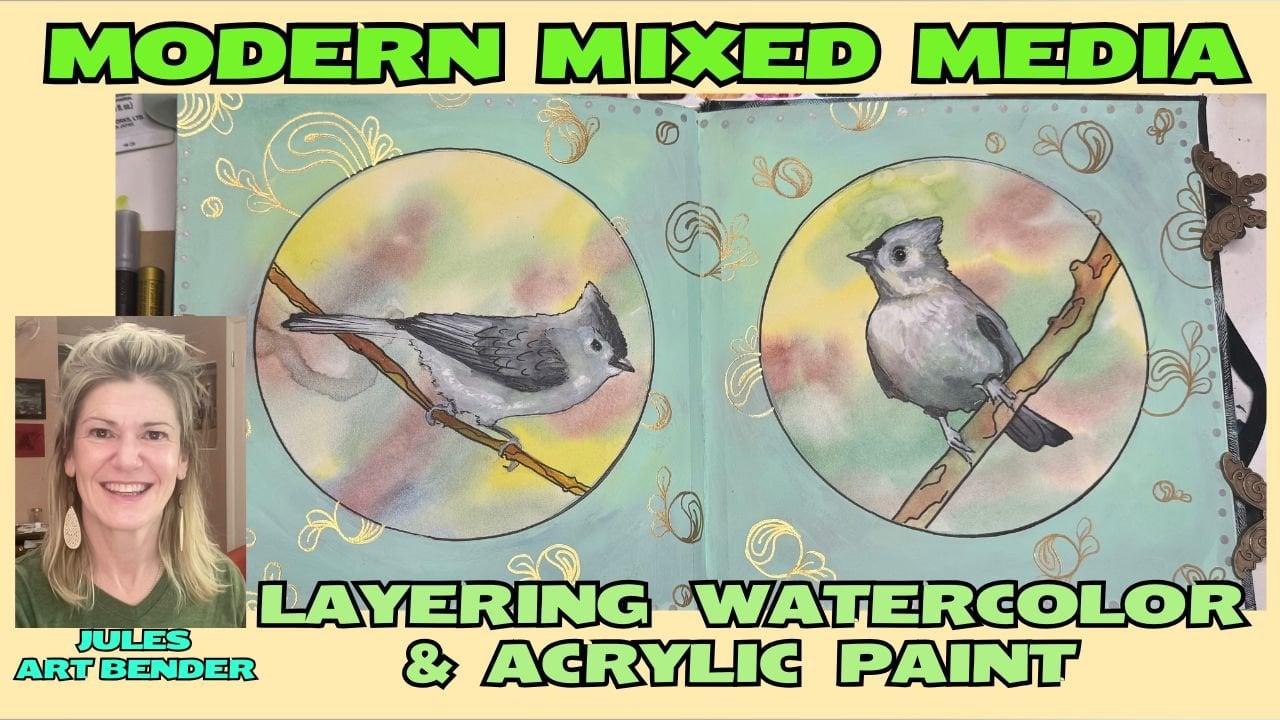
1. Winter Watercolor Village Intro: Get ready to turn blank cards
into many masterpieces. In this class, we are painting a glowing Christmas
village that's going to be perfect for
spreading holiday cheer. Or keeping for yourself because they're
gonna be that good. We're gonna start with
a silhouette transfer, and then we're gonna dive into a moody midnight watercolor sky, glowing windows and snowflakes
and gold and white. And I've got a few sneaky
trips up my sleeve to make your buildings look like
they are lit from within. 'Cause by the end,
you're gonna have two magical cards
because let's face it, painting one is never
enough. Stick around. I'm Jules. And this is the holiday art vendor you
didn't know you needed. Let's make some
festive art together.
2. Materials Needed: M, let's go over the materials
necessary to complete these beautiful watercolor,
snowy midnight cards. Okay, first, we're going
to need the actual cards. So I've got some
watercolor paper cards that I had ordered
off at Amazon, and I usually do two
at a time because, well, by the time I
get to the second one, I've already perfected
what I'm doing. So actually, the second one's a lot easier than the first one. And it's nice to get
two done at a time. Okay, you also need
some scrap paper. I've just got two pieces of just paper laying around the studio that I
don't need anymore. I've got a piece
of graphite paper. If you do not have
graphite paper, you can simply get a sheet of white computer printout paper
and get a number two pencil and just take it and go on the side all
over as big as your image, and this can be your
graphite paper. Okay? And then we're going to need
our printout of our design. So the design I supplied for you will be able to be printed
out at 6 " by 4 ". And you just put
in this dimension in when you go to print
out the photograph. So it'll say custom size or or something else
like that where you can enter in the
actual dimensions of the photograph that
you want to print out. So if you bought 3 " by 5 " for your Christmas cards or six
by four or five by seven, that's how big you
would print this out. Okay, what else do we need? I have got some gel pens. I've got a white and a gold. And then I also have, like, a micron. This is a uni pen. It's got pigment ink in it, so it does not smear or bleed when it gets
wet. I have a 0.3. Then I've got two round
paint brushes and two flat ones just because I like options
of different sizes. Okay, I've got an eraser, some washi tape, and
some painter's tape. I've got rags. I just cut up old
sheets and cut them into these rectangles and use
them over and over again. I've got two things of
water, a spray bottle, which I spray down
my palette with, and I've got these watercolors. So I've got a couple
idscent colors, a bronze and a gold. This is a yellow ochre, ultramarine blue.
Turquoise blue. Indigo, neutral tint, and
then a aqua green pho color. So I think that's
going to do it for us, so grab your supplies, and let's get going
on our image trace.
3. Image Transfer: M. Okay, welcome you guys. I just want to remind
all before we start that imperfection
is not your enemy. It's where we are
unique and interesting. I have to tell myself
this all the time. I have to push through
the missing middle. I have to push through
the messy middle to come out the other side to see a beautiful
piece of artwork. So I want you to
trust my process. It's a lot of layering and blotting, layering and blotting. It's the same thing
over and over again. I promise it's easy, even if you're a beginner, this is for every skill level
because, you know what? I decided a long time ago. It's just like playing golf. And that if you want
to be a better golfer, you need to hang out
with better golfers. So even if you think this class
is a little over the top, please stick around, learn
some new techniques. This is where the magic happens. So let's embrace the
process and have fun and let's paint these beautiful watercolor holiday
cards together. Okay, this is where we're
going to set up our workspace, and I just want to show
you what I've done so far. So I have taken my
two watercolor cards and put it oriented
it on my desktop. And then I have taped with painter's tape down on the
backside of both of them. Okay, so I've taped
both of them down, and now I'm taking those two
pieces of scrap paper and laying it down on top of
the backside of my cards. The reason I do this
is because I am messy. And I admit this,
so I accept it, and I have to set my place
up so that I don't have unexpected little
blobs and spills on the back side of the card where I want to clean and white. So I've begun to tape down
my one card with washi tape. And this washi tape actually
is not very sticky, so you'll see me over and over again keep pushing it down
throughout these videos. So I'm going to tape
up this second card. And I just want to let you guys know throughout these videos, because I'm doing two cards, I'll do one card, like in real time,
and then I'll speed the next one up just so
that you can see it again, like the process a second time. I don't want to waste your
time in these videos, but I also want to be thorough, and I want you guys
to learn something. Alright, so let's line up where
we want our design to be. I want to make sure I've got at least three quarters of an inch to an inch
maybe at the bottom. Where the bottom of
the buildings are to the bottom of where my
design is going to be. So that's why it's
sitting up a little bit. I'm orienting my graphite
paper with the dark side down. And if you made your own,
you'd put that dark side down. And I'm going to take my
ballpoint pen and just start tracing around the
entire image that I see. So I'm not sweating things. Like, I'm not sweating the
small details on this. I'm not going through, like, the panes of glass and doing
all the cross hatching. I really am only
getting the outside of the windows because that's all that's necessary right now. These are just placeholders, and something that I think
beginners get wrong is that they spend too much time doing details when they're just going to end up
painting over it. So it simple, do
yourself a favor and don't spend energy on stuff that's going to
be covered up anyway. So these are just placeholders. So I've sped the video up because really that's
all I'm doing is tracing over the lines that
I see and getting that graphite down
onto the paper. And there it is.
It's very light, but I can see it enough
that it will give me some guidelines to when I'm painting with the watercolors,
I know what I'm doing. So here we go with
the second one. Again, if you don't
have graphite paper, take a pencil like I'm
doing, lay it on its side, and fill the entire sheet, then you would take the
sheet and just flip it over to where the graphite is down and keep
tracing like we are. But anyway, so reposition
the second one. I have about half, two, three fourths of
an inch at the bottom. Below the buildings, I'm
putting my graphite paper down, and I'm gonna begin
tracing again. Super fast. Super
fast. Super fast. Okay. Not sweating it, getting the outlines,
getting the placement. That is all. Do not
sweat the details. Cool. The details are just
there for you for later. You can always use this
image as reference. And also, like you
just saw me do there, I'm adding another window. I'm flipping up the
original image, making sure everything is
down on the substrate. And if I see
something is missing, I'll go ahead and
transfer it over before I pull up the image like that. So that's about it. You
guys complete this portion, and we will meet back in
the next video where we're gonna begin building
this midnight sky. Make sure you press down
your washi tape and get it all very fixed for this
next lesson. See there.
4. Midnight Sky: Yep. Alright, let's get going on this glowing
Christmas village. We are going to start
with our midnight sky. So I want you to grab
your fluffy round brush. I have a Dugato squirrel
hair number zero, and I'm just going
through and wetting the sky above our Cloudline. And then I'm getting just
a little bit of indigo, building our first layer. I would rather go
lighter than darker because I don't want to put down too much pigment
to begin with. I'm getting some
ultramarine blue and mixing it in
with the indigo. And I'm going to stay above our cloud line with
the dark pigment. I'm making sure that I have
plenty of water on my brush. You can see how things
are freely moving around, and then I want to
get a lot of water on my brush and come in from the light area
to the dark area. Lifting up through
the dark area. And what happens is, as
you can see, as I do that, the dark pigment then
comes down and runs into the area of lightness where the water
is that we put down. So it creates more
of an ethereal, kind of wispy, very airy look. So I want you guys to start
with me and start doing this. I've tried to leave my pigments in the frame and my water in the frame so you can see just exactly how much
of what I'm using. I'm now bringing down
some of the water with the really light areas down
in between the buildings. Okay, so now I'm doing the second layer of
darkness in the clouds. I'm slowly dropping in just the slightest more pigment above that cloud line
that we first put in, bringing it down into the
little folds of each cloud. So I'm bringing it down
into that little valley, and I'm not filling it all in. I do want to leave some
lighter areas in the sky. I want to make sure
I've got a lot of light and a lot of dark that
it's not all uniform. So I'm going to continue going around these shapes that
we initially put in, and you can see that
outline right there, rinsing my brush, and
then I'm going to go from light and pull
in some of the dark. So I'm just staying
in the light area, and when I feel
like I've got too much pigment on my brush, I just go back over
and rinse my brush. I'm going from the
light to the dark, lifting up and now that I've got a
little more pigment on my brush from lifting up, I brought it back down toward
the building just to give another little
gradation of color. Okay, and I'm just
slowly working it. You know, I'm just
responding to what I see. I'm responding to the way the water is moving
around on the page. Just slowly making choices,
you know, as I go. Alright, so I'm
going to let that sit and move and
see what happens, and I'm going to start
on the other card. So like I said before, I'm
going to speed it up some. I'm getting the area
above the clouds wet. I'm getting more ultramarine
blue with the indigo, and I'm going to start
building in this first layer. Now, I'm going to be a
little more confident on this second card because
I just did the first one. So you already see that
I put down initially a little bit more pigment
than I did on the first card. And now I'm building
in the same way. I'm loading my brush up
with a lot of water. I'm starting in the light area, and I'm moving in
towards the darker area. And then I've got more
water on my brush, and I'm just bringing down those lines in between
the buildings. Okay, so now the second layer
on this card on the right, dropping it down in
the same patterns, and then coming in
with a wet brush from the light area
into the dark area. And you see I'm kind
of rounding out the shape as I'm bringing
it into the dark area. And then I'm going
to grab my rag, and I'm going to
twist it up into kind of like a jelly roll, cinnamon roll pattern at the end of it and just
lightly blot all over it. Okay, so now I'm doing
the same thing again. See, I do the same thing
over and over again. Really, this should
build your confidence because it just takes
a little bit of time, and then it takes
just repetition. Okay? So I'm bringing down just a little more pigment
in between the buildings. I do want to make sure
I have that line of light to dark where
the cloud line is. Okay. So I'm taking my rag
again, blotting away excess. And when I use that
little jelly roll pattern on the bottom of my rag, it actually creates
interesting shapes of where it lifts off the paint. So I like that. I like
when it does that. I don't want to just blot my rag with a side
that is uniform. I want it to be undulated. I want it to be irregular. Alright, so now I'm reloading
up my brush, and this time, I'm going to do the indigo, and I'm adding in
some neutral tint. This is Daniel
Smith neutral tint. I love this color because
it does not muddy colors. It strictly deepens the
value of the color. And you see all I'm
doing right now is I'm hitting the
darkest spots. Okay, and when I'm hitting
the darkest spots, there's only three or
four spots on each one. And then I'm coming
back around with a very wet brush and just kind of bleeding the edges
slightest just a little bit. Okay, moving it around, just softening the edge of where I put all
that dark picnic. Okay, and more water on
my brush a little bit. And I'm gonna come down by the buildings and just build in. I'm gonna leave the
whitest white next to that dark cloud line where
we first drew our line. And because I'm using the
neutral tint right there, it's actually making
it a little bit more cool rather than warm. As it gets down
to the buildings. And again, I like that, too. So this is the last layer, which is going to be
the darkest layer. I've really loaded
the pigment up on my brush as far as pigment
to water ratio goes, and I'm just dropping in a few more really,
really dark areas. And I know that because
the paper is wet, it's still going to bleed. It's still going to move
around a little bit. And I'm remembering my
initial cloud line kind of dropping in
some darker colors where the clouds come together. Okay, so I've now
repeated the process. I got more water on my brush, and I'm just going
in and softening the edges just a little bit. A little bit more water there, letting it bleed
around a little bit. And wherever I think there's
an edge that's too sharp, that's where I go in and
drop a little bit of water. Yeah. I think that's
looking pretty good. Yeah, so just take the time and let the pigments
move around. If they get too uniform, blah, blah, blot. Use your rag. It's your friend. And just
keep slowly like you saw, I did four layers here. And up there in the top corners, I feel like it's getting
a little too uniform, so I just blotted it, so it's not the same amount of
pigment everywhere. I'm going to take my heat
gun and dry this area, and I think it's
drying beautifully. I'm pretty happy with this. We might go in and add a little
bit more color later on, but I think this is a
great base for what we want to build in our
midnight snowy sky. So you'll take the
time to do this, and I'll meet you
in the next lesson where we start our buildings.
5. Buildings: First Layers of Watercolor: Okay, this is where everything
starts popping out. This is so much fun.
We're gonna take our yellow ochre
and our flat brush. I've got a what is it? A flat brush number
eight by Princeton. I'm gonna get my
yellow ochre out. I'll go ahead and pull a
few other colors out, too. Let's see. The ultramarian blue. And let's see. The bronze and the gold. Yeah. So that's the gold. Here's the bronze. Okay,
let's start there. Alright. So more yellow ochre, a little bit water, and I'm
going to start in the middle. Okay, so I'm just going on the front facades
of the building. And if you'll notice, I only
went to the well one time, and I'm pulling all
of this pigment down. I'm getting more
water on my brush. And now I'm going to use this
middle building as my well. So those buildings
in the middle, those first three
buildings in the middle, whenever I need more pigment, that's where I go to
draw my pigment from. So those buildings will
get a little lighter. And as I use the
pigment from there, can pull it over to
another building. See how it deposited more pigment right
there on those others. So use that to your advantage, and then I just got a bunch
of water right there, and I'm just smoothing
out the bottom, grabbing my rag, making sure the bottom
where I'm pressing down is kind of all balled up and has
different textures on it. So right here, if you can't get some pigment
off of the paper, just re wet the area. So I'm going to put a lot
of water on my brush. Put that there. Press.
Press, water, press, press. See how it lightened it
up just a little bit. Alright, great. That looks good. Okay, so speeding up on the
second one. Same thing. I've got pigment
and right there, reloading different textures, different amounts of pigment,
and now I'm blotting. All right, perfect. Moving on. Okay. So now we are going to
go to the ultramarine blue. Put it with some indigo. And neutral tint. Okay, pretty dark, so
I'm going to spread some water on it to lighten it up just a little
bit, get it flowy. Okay, and then I'm
going to start on the roofs of the buildings. So I'm going to
start on the edge. And I know the
ones on the edges, I want to be darker. So I'm very confident that with the amount of
pigment I've got on my brush, I can put that over
there on the side. So I'm going to do the second
one that's underneath it. And I'm using the shape of my brush to really help
me pull in these edges, pull in the shapes, and
then just bringing it down. Okay, and now I'm going to go to this little cone silo
looking building and using, again, the shape of
my brush to help me pulling down
that dark pigment. And right now, I'm
thinking to myself, Okay, it's closer to the middle. It should not be this dark. Okay, but I'm going to put
my brush in the water, and I'm gonna blot a little
bit and put some more water down on the body of
this and lift it up. Okay, so that's a little light. So I'm going to go on
to this other building, and I'm just pulling down pigment that I already
had from the roof. Okay, little bit of water
and smooth that down. Same thing with this building. And now I'm going
back to the cone, and I'm gonna drop down the
shadow on the left side. Okay, so now we need
to make a decision. There's a building back behind those two buildings we just did, and we need to decide
what color to make it. So because the roofs of
the buildings that we just did are so dark and
the background, the white white is so white, we need to do a middle tone so that it will stand out, okay? So right here, I've got a mid tone between the
white and the darkest dark, and I'm just going to
pull down that mid tone and see how you can still tell
that there's a roof there. I can distinguish it
from the background, and I can distinguish it from the two buildings that
are in front of it, okay? Alright, so now I'm going to
work on the front facade, and I'm just going to come
down right underneath the roof line to maintain
that little line of yellow. I think that's a nice
little highlight that's automatically built in. So why make it
hard on ourselves? And then I just got some water
again, and I'm blotting. Blotting, blotting. I love the blot. You'll
see this over and over, guys, and see, I didn't
rinse my brush right there. I just moved down
the pigment again. I'm gonna blot again, move
around somewhere pigment, wherever I need
to bring it down. Hey, little more uptop. So I like that that's all dark in front of
that other building. And then possibly
the other building can get darker at the bottom, but we'll explore
that in a minute. So I'm going to move on
to this roof line using the shape of my brush
again to help us out. And I'm making this roof
line a little bit quirky. It's not regular. I've got to do this little
bendy thing on the left side, and I'm also going to make the left wall of the
building a little wonky. It's going to come
out at an angle, but that just kind
of will contribute to the quirkiness
of the entire area. So here we go with
the front facade. I've left that white line
just under the roof line. I've got some water and
I'm smoothing it out. And then I'm going to
come in with a rag. Blot a little bit, soften
that edge, come back in. There's that off
center line I was talking about just to keep
your eye moving around, and I'm going to start working
some of these shadows. And I'm going to
keep all my shadows more on the left side. So underneath the roof lines and on the left side
of the buildings. So that means our light source would be coming from the left. I think that is correct. So when it's shining, no,
it would be from the right. I don't know. It doesn't
matter. It doesn't matter. Just pick one side.
Pick one side that your shadows
are gonna be on. I'm picking my left. And so I'm going to make
sure I've got the bottom of the windows and the
shadows on the left. Anyway, you'll see
what I'm saying. So paint, paint, paint,
blot, blot, blot. Going back to the pigment and getting the
top of this cone. We're going to put a
little cross on top of this cone later to make it
like a church steeply thing. Okay, bringing down the lines of the sides of the building. I think it's a little
skinny right now. Let's just wet our brush and bring in the pigment
on each side. Okay. I think I'm gonna
widen this building a little later on the left. It just seems a little
skinny to me. Alright. A little more pigment. Me. Alright, let's move on. When in doubt, like, right there, I'm
not happy with it. So when in doubt, move on. I can come back to it later. I'm gonna let it dry.
I'm gonna let it go. Let it go and let it dry. Let it dry and let it go. Okay. So I did the roof, and
then I just pulled down a little bit of the
pigment after wetting my brush and more pigment
for the last roof line. Again, using the shape of my
flat brush to help me out, get those nice crisp lines and see how I made the roof line a little curvy
on the right. So that adds to the
quirkiness, as well. I'm realizing I didn't put
in any of the chimneys, so I'm gonna drop in a
few of those right now. Oh, the whole roof of
this one is missing. Hello. So let's
put that in there. Okay. I'm just using whatever
pigment was on my brush. I like this mid
tone for this one, and I'm leaving a little bit of white underneath the roofline, again, just to maintain
that color of lightness. And I'm gonna start
dropping in some shadow, like I talked about
earlier, on the left. So shadows on the left. That means our light source
is coming from the right. I think I got it
right that time. Okay, so all that shadow
on the left side. Left side of this little cone, left side of the facade
of this building. I'm starting to think
about the windows that are there and building this out. So see how I left
a little bit of a line from the roof down to
the front of this building 'cause I'm anticipating
section sectioning section Yeah, that word. You know, quarantining it off. So right there, I'm blocking
out some of the windows. I'm actually doing so
on this building pretty dark because I feel like this building is a
little closer to us, whether it is or
not, I do want to make this building with
a little bit of detail. At least more so detail
than the other buildings. And you'll see what
I'm saying later. Okay, so little
shadow on the left, underneath the roof on the left, more pigment, indigo,
and Alright, yeah. I'm going to start
thinking about the roof lines in front
of these buildings. So this is going to
change our perspective from down in front of
it to up and down. So I'm pulling in a little
chimney right there, the rest of that roof. So now we're more like, you know, standing on
a roof looking over. I'm gonna pull in
another one right here. I feel like the buildings
are nice and congested. They're close together, so
I can play off of that. I think that looks nice. And they're gonna
be pretty dark. We're going to add some shadow to them a little bit later, so I am blotting them, but see how they
retained their pigment. So dropping in a
little more pigment, and I'm going to let this
pigment sit a little bit, and then I'm going
to come back and move it around a
little bit later. Okay, so let's see. Some of these other rooftops, we need to block in some shadow. So I'm coming in with
that same pigment. Getting the left side of the chimney and keeping it on
the left side of the roof. So I am making it
kind of blocky, which makes it more cartoony. But in a don't know. Maybe a fantastical
surreal sort of way, because of the shape
of the shadows, because of the chunkiness
of the shadows. So I'm just keeping
in this rhythm, turning my brush to make
it do what I want it to, and it's just slowly dropping in these nice shadows for us. Which gives it almost a fairy tale kind of feel also, right? So on this one, here we go. I'm going to bring
down the darkness, and I'm glad I left, you know, the center of
that cone building light. And now I'm dropping in that darkness and the midtones in between the two buildings. And I think that
really looks nice. That way, it doesn't
look like a jumble mess. I hope that helps you out. I think that something like
that's really important to the way we read the art. So I just lifted up a little triangle in
front of that building, but you see I left it dark
around the building behind it. Okay. Alright, so let's see. Okay. So we're going to let
this dry, I guess, and see what we can do
with this next one. Alright, so I'm going to slowly bring down
a little bit of shadow slowly, but slowly. I started on the roofs
on the other one. I'm starting on the
fronts on this one. Doing things a little
bit differently, but you can see how
they can shape up in the same way pulling in those tones on the left
side for the shadow. Smoothing out the
edges with some water, and now I'm starting to
drop in the rooftops. I can already tell this card on the right is going to have a little bit lighter
tones than the one on the left, and that's okay. I like the different
fluctuations of colors. So, as opposed to
the one on the left, where we had a dark roof on the left and mid tones on
the building behind it, this time, we're going
to make the building behind go dark all the way. And the building on the left, that front facade is
going to stay light. So what a cool concept. We can do it either way. Alright, here I am
pulling down some more of those strange little
rooftops that are kind of quirky and magical and
surreal and fairy landish, whatever. This last one. Okay, then I need
to drop in another, another all these chimneys
that I forget. Here we go. And now our shadows, keeping them a little quirky, keeping them on the
left hand side, though, using the shape of our brush to keep
in those same shapes. Adding another building down in the bottom right that I
had forgotten earlier. So there we go. That looks
good. A little bit more there. Yeah, and check
out the difference between the two buildings right there where we
looked at earlier, the one on the right is darker, the building behind
on left is lighter. I love how you can handle the same situation
two different ways. So nothing is wrong. You guys complete this
part of the project, and I will see you in the
next section where we work on shadows and
windows and highlights.
6. Buildings: Watercolor Shadows: Okay, before we get
going, I am noticing, as I'm looking at these, that the sky does not have
enough color in it. So I'm going to get back out my ultramarine blue and
put some water in it, get a nice consistency, like a mid pigment consistency. And I'm going to start
dropping in some blue next to the
darkest darks, okay? And I know if I touch it
very lightly and then blot I will not move the pigment that has
already dried on there. So working quickly, again,
not massaging anything, just dropping it in
in a liquid state, and I can get just
that little bit of a pigment to retain itself. I'm gonna get some of that. Oh, what's that color? Turquoise blue. Some of
that turquoise blew out, and I'm going to
do the same thing. Next to the darkest
darks here and there, not around the entirety of it, dropping it in in, you know, three areas or so, two, three, four areas right there,
blah, blah, blah. And that is looking pretty good. Okay, now we can move
on to the buildings. So what I want to do
with the buildings is get out an even
smaller flat brush. I'm going to take it, and
let's see what number is it? It is a four. It is a four
flat shader by Princeton. Okay? And so I'm going to get a nice consistency of pigment, and I'm going to
start pulling around shadows around the windows. So I'm just envisioning
or I'm looking back at our reference photo what
windows are on the buildings. Okay, so I'm also going to take care to maybe leave
a little bit of that gold area in between
the windows and the roof. And I'm also going
to take care to blot in between after
I do each building. So you don't want to get
too many buildings ahead. So right there, I've
added some water, and now I'm going to blot. If you get too many
buildings ahead, you're just going
to have to re wet more pigment to get
it to lift off. So right there, that's a
nice gradation of color. It's a nice ombre effect. I want to keep the buildings lighter at the bottom, so, like, the street below it is glowing and all the
windows are glowing, too. This is going to help
with that effect. So this building that's
behind the cone building, it's good that I'm
making the wall darker because the lower portion
of the cone is lighter, so I'm doing it the
opposite of the roof line. So I'm pulling down
some of that shadow, picking where the windows are. And you can follow
the template or not. It really doesn't matter if
you want to put in doors or just all windows or however
you want to handle it. Just just decide. It really doesn't matter.
Okay, here we go. Got more water, more pigment coming down below that
white white line that we made and just using the shape of the brush as I'm going down the front
of the building. I'm going to make three windows going across on this level. And look, it doesn't matter
that they're irregular. It doesn't matter
that they're not perfect because I'm going
to come back and blot out, and then I can always
repaint another shape. Again, it really doesn't matter. I want you guys to get in the mindset that you're
putting a layer down. You're going to let it dry and you're gonna forget
about it, okay? So less pigment is easier to manipulate
than more pigment, and you can always add another
layer with more pigment. So right there, I've added some more water,
and I'm blotting. Awesome. Okay, next
building, same thing. Coming down under the roof line, and I'm picturing or I'm looking at the reference photo of
where I want the windows. I've got two on this level, and I'll put two on this level. And maybe a door at the
bottom. Blah, blah. Okay, a little bit
more shadow here. I'm noticing it's a little light compared to all the others. I do want to maintain
that shadow on the left. So as you're doing this, it's always good to look back over what you've already done. And if you know the amount
of pigment on your brush, you can then go back and supplement areas
that you need to. A little more water right there. Lifting off paint in the bottom right corner
of that building. Okay, and now on to the silo. I want to paint two
walls of this silo. I'm going to see the
side of it, also. So the side on the right, I know this is different. Shouldn't be in shadow, but that's exactly
what I'm doing. I'm doing it opposite
I'm making it quirky. So if you want it all
anatomically correct, so to speak, you know,
do what you got to do. I just like to be different. So I think I'm going
to make the wall on the right darker than
the wall on the left. Okay, leaving a little bit
of white space there at the bottom for the
line of the wall. And I'm gonna build
out this line like I said I was going to
earlier and maybe move this line of that building over just to fill in those in
between areas a little bit. Okay. And on this one, I'm
going to make sure that I leave white just
underneath the reef line. I'm going to come around all
these windows and make it a nice midtone and blot. Nice. And here comes one more. All right, I'm going
to do a set of windows all on one level. So here's one, two, three, and part of four. Okay. Bring that down.
Blah, blah, blah. See how it just
makes a suggestion. It makes it very light. It makes it look like
there's not a lot of light out because we can't
see detail very well. So I think it adds
to the night sky. I adds to the shadowiness. I'm just popping in some shadows on the left side of
that building again. They're also a little bit
of that turquoise blue. And I'm just gonna pop a little bit more shadow around some of these windows and the roof line. Just adding in a
little bit more color, being a little bit more bold
with my pigment amount. Dropping it in slowly, but slowly, slowly, but slowly. Alright, I like it. A little bit more blue. In the shadows, I'm just kind of looking
around and seeing where I think it might need it where it needs a little
bit more variation. I'm going to smooth some of this out the lines are
a little harsh, so I got some water on my brush. Okay. I think that's
looking pretty good. Yeah, I think I want to add one more roof line right here. It's looking a little white
right there in the middle, so I want to remedy that. So I'm just gonna drop in a shallow suggestion and a smaller chimney than the
other chimney on the right. That looks pretty
good. Okay. So let's quickly move through
this next one. I'm going to do the same series
of things trying to bring down shadows around the
windows, adding water. Then on blotting. It's the same thing over
and over again, right? Y'all are starting to get the
pattern of my work process. It's actually pretty easy. You just again, patience
and repetition. That's the name of the game. Okay, so just picking a different pattern of
windows this time because I like variation Alright, making three sets on this one. Using the shape of
my brush to help me, making that wonky
wall on the left. And I'm blotting. And I'm blotting. Okay, there's the wall,
making the windows facing us and then making the
windows looking away. And there's a little bit of
shadow around those windows. And then I'm going back and I'm looking over
the entire thing, and I'm gonna see
where I need to add just a little bit more shadows on the left side of things. Okay, so as I finish up, I want you to as well, and we will meet back here, and we are gonna start
on these windows. See you soon. Okay.
7. Windows and Highlights: M. Hey. Now let's go for the gold. Alright, we're gonna
spray down our gold, and we're going to start
working on these windows. So, very simple. I'm just gonna go over each
window with a blob of gold. So I'm just gonna
fill in the square. I'm not gonna sweat it if I don't fill in
the entire square, 'cause sometimes that's good to leave some light around it. Gonna fill in all the windows. Not hard, all one color. It's really just paint
by number right now. Don't be perfect about it. Notice I'm leaving
color around the gold. And doesn't that look cool. I mean, with the way we did the shadows on the
fronts of the buildings, it makes it look like it's catching the light
that much more. This paint's pretty thick
'cause I do want it on there. I want it to really
catch the light. Now I'm going to do the cone and getting the side windows
and the front windows. And getting this row. This almost looks like
a guard tower to me. I hate saying it, but there
it is. The guard tower. Okay, and getting this
front window here, a little bit of an oval to it. And the last one. Awesome. Okay, let's quickly go
through this next one. All the same thing,
filling in the windows. See, isn't this easy? I told y'all it
wasn't gonna be hard. I mean, I think the hardest
part is over, quite honestly. You didn't even know you did
the hardest part already. Right? Okay. So there's
the gold on the windows. Alright. Now I push
down that washy tape. It's starting to come
up a little bit. Now, I think, let's see. Let's put some gold on the
front of the buildings. So what I'm doing is
I'm getting a very, very thin film of
that iridescent gold. You could do the iridescent
bronze if you wanted to. You could do whatever
color you wanted. But I'm just making sure
that it's very liquidy, very fluid, and I'm just
putting it down in the bottom, like quarter of the building, so it looks like maybe
there's some light shining off of the
street that's below it. Okay, I'm just going around
smoothing the edges. If I see a rough edge
or edge that's sharp, I'm just smoothing it
out just a little bit. And this is a lot less pigment than we put in the
windows, okay? So I'm gonna do
this one more time. Blot, if you need to.
Just a little bit film of that gold coming
up from the bottoms. Just enough to catch the light. Alright, that looks pretty
good. Red some my brush. Okay, now we're going to Okay, we're working
on these windows. So I'm going to think about
the panes of the windows, and I'm really
just hitting them, but I'm also anticipating
that I'm going to blot, also, because this is
coming out really dark. Okay. So I'm going along,
following these lines, trying to figure out
how I want it to look. I think it looks a
little too tight, so I'm just going to
wet the lines and blot them just so it blurs
the lines a little bit. So it's more of a suggestion
around the windows and a suggestion around the buildings. I
think I like that. So as I go, you'll see I changed my mind and I kind
of feel my way through it, and if something's not
working, then I stop. So right there, I had the paint really thick on
the windows on the left, but now I've loosened up with more water so that when I
blot it, it's not as harsh. So, yes, my lines are thicker right now because
I have more water on my brush. And that is okay. I'm going in the bottom
left hand corner of the windows,
where the shadow is. And now I'm gonna blot and see
how it took away probably, I don't know, two
thirds of the pigment, which I think looks good. I'm just gonna hit
a little bit more. And if I need to
blot again, I can. But that's the process. I'm
gonna hit in that bottom, left corner of the window. Coming back. Okay. And then
maybe some cross hairs, bottom left, the sides
of the building. Make it pop out just
a little bit more, get that shadow.
And I'm gonna blot. And see I blotted off
just enough off of the windows so that
it's not 100% regular. It's not uniform
all the way around. Okay, so now I'm catching the bottom left hand side
of those windows again. Bottom left, bottom,
left, bottom left. Yep. And I'm gonna
go cross, cross. Just kind of filling
in the space because I know I'm gonna blot and
it's not gonna be crisp. I want it just to
be a suggestion. And if you do it too
light, that's okay. You can put another layer on it. Okay, let's do the other one. Let's speed through this,
bottom left corners. See how that makes the pop. That makes the
windows pop so much. A little bit of
shadow on that one. And then all the crosses. And I've learned to control
how much pigment I want now, and I don't really have
to blot on that one. I think it looks pretty good. Alright. Now let's
catch some highlights. We're going to catch
highlights on the roof of the building with
the white gelpin. This white gelpens really going to make some
lines pop out. It's going to make things crisp. So where we left a little bit of light
underneath the rooftops, we can hit so that it looks
like it is glowing from underneath so that
the light is coming from the street
underneath the building. And right there. Okay. I'll do the other one. Very nice. Now it's time to start thinking about the highlights
on the windows. So I'm loading my brush up
with the white watercolor, and I'm going to come in on the right hand side of
the window this time. So I put the shadow on
the left and the bottom, and now I'm just
adding a little bit of a highlight on the right
side of these items. But just a little bit. Just the suggestion all the way. All these beautiful windows, see how they're
really popping out. Wow. Love it. Just
that little line. And okay, so now I'm just getting a little bit of
water on my brush, and any edge that I
feel like is too sharp, I'm just cleaning
up the edge with a little bit of
water on my brush. Just looking around
the whole piece and around the rooftops, too, if I feel it's too
chiky in one area, I can just hit it
with a little bit of that water to knock it back. Alright. Alright, now I've got
out my gold gel pen, and I'm just gonna
start bringing down the lines on the
sides of the building just to give it another
little level of sheen when it catches
in the light. It's really starting to
tie things together, give it another layer
of gilded gold. And right there on
the guard tower, and then we're gonna
do the other one. I love watching it
fast 'cause you can really see it
transform in front of you. So awesome. Okay, so get your shadows and highlights on the
building, your windows in. And in the next lesson, we are going to start
adding the snowflakes to our winter wonderland
watercolor. Glowing Christmas village.
8. Snowflakes & Windows: Okay, now it's time
to start adding these beautiful snowflakes to our midnight snowy evenings. So I have gotten some of
my white watercolor out, and I'm just going to start
in the upper left corner with a six spoke snowflake and just start putting these
little arrow heads at the end of each spoke. So I'm just going
to take the time. This is kind of zen like, kind of zentangle
meditative, whatever. It doesn't matter how you do it. Each snoplake is different, so your imagination can
really take shape here. I'm just going to put a little
dot at the end of each one of these because
I think it makes it look a little dainty. And if the white isn't as dark as you
would like it to be, just go over that
area a second time. Okay. So now I'm going
to pick another area, and I'm going to go just
off center to the right. And I'm going to put
another snowflake about the same size, maybe a little smaller. And this time, I'm
going to do what is it? Eight spokes instead of six. And I'm going to do circles
at the end of them. So you see, I'm just
kind of randomly choosing different
ideas, different shapes. This one, I can tell I'm kind
of running out of pigment, so I will have to go over
it a couple of times, but I really just want to
get the template down. So I try to go as
far as I can with whatever pigment I
have on the brush. And as you just see,
I'm twirling the brush against the pigment so that I can make a point
at the end of the brush. So you can manipulate your brush in this way to get
a finer point on the edge. And then I'm just going
to come through with some of those little arrows. I'm going to put
two on each spoke. Take the time to do that. And again, this is real time. I haven't slowed
this down at all. It's a slow process, but it's quite fun and quite satisfying when you
look up and you're like, Oh, what a beautiful snowflake. I love it. So I'm going to
put one more snowflake. So odd numbers are great. So I'm going to put
a third one right here in the upper
right hand corner, and I'm going to
make it smaller. So just a small little
six spoke snowflake and putting little
dots at the end. And then I'm just going to do one little tiny
arrow on each spoke. Or on every other spoke, rather. Putting a circle in the
middle of this one, just kind of going
over the lines again. And now I'm going to put
three on this other card. So I'm just going
to mimic what I did because it worked so
well on the first card. Going through,
putting a few arrows on each one, adding my dots, going just off
center for this one, making eight spokes,
putting circles, and pulling the arrows. One more. Putting the
smaller one and little dots. Perfect. All right. So yeah, let's turn
our attention maybe to some of this gold
or bronze color, whichever one you
want to choose. And we're just gonna start
putting gold circles. And this will mimic
just big snowflakes. We're just going
to put a few dots. We're only working in
the sky right now. We're gonna come down in front of the buildings
in a little bit, but I want to do this in
two separate sections. I'm just sort of randomly
placing these dots around where it seems appropriate and where
it seems random. So I don't want it to
be regularly spaced. Maybe you do, and
that's okay, too. That would add to the
fairy tale cartoony, like, nature of it, as well, if everything was evenly spaced. But I kind of like
it off center. I like things irregular. And then I'm just
going to start adding maybe little six
spoked snowflakes. And see how when I put it on one of those really dark areas? Wow, does it shine?
It really pops out. I think that's lovely. Just
like how the white snowflakes really shine out on top
of that dark pigment. A little bit more pigment. Twirling my brush to
get a point on it. And I'm gonna build out a
few more little star shapes. And getting some white, and now I'm just gonna
put little tiny dots. And again, I'm just up
in the sky right now. Dot, dot, dot, all over. Oh, that looks so
nice. I love it. Cool. So now I need to
start thinking about where to place the snowflakes in
front of the buildings. So I want to begin
looking at areas that are really dark that I know that the white snowflake is
gonna stand out on top of. So probably on top of a roof, maybe right here,
just a small one. And as long as I don't go over over the lines over
and over again, that dark pigment underneath this white won't show through. It'll the white will
just float on top. So pulling out my
little star shapes, my little arrows and
deciding on another spot, I'm going to put one right here, and I'm going to make it pretty big that'll make
it look like some of those big ones are falling on top of the buildings as well. A building out my little arrows, and I'm loving how this is
gonna fall off the page. See how I'm painting on
top of my washi tape, so I know part of
it's gonna come off, but it's gonna make
it look, you know, like there's other
things going on outside of the frame of
the piece of art. Alright, so that looks pretty good as far as pigment goes, little bit more to put little
dots. I love the dots. I think that really
finishes it off nicely. Cool. Okay, maybe
one or two more. I think since we've got five
white snowflakes right now, I do want to add two more, so we'll make seven total. So I reload my brush, til it up to get a point, and pick two other spots. So maybe over here, where
part of it's catching this roof 'cause I like how the black shows
behind the snowflake. And I'll just put
little dots in between. Okay. And then one more. It's got to be on this
left side somewhere. Make it look random right here. I like it. Add some dots. And a few little arrows. Yeah, that's looking
great. Okay, so seven big snowflakes in total. Three in the sky and
four on the buildings. I think that looks
really, really nice. It keeps your eye moving around. So let's grab some
of the gold, again, or the bronze, and we're
gonna pull down some of those big circles,
those big flakes. Put a few of them on
top of the buildings. And I didn't want to
put those down on the buildings earlier until
I had the white snowflakes, and I didn't want to put the
white snowflakes until I had the upper sky done just so I could see the whole
thing altogether. So I'm just sort of adding
these randomly here and there. So on top of the buildings, some off, some half
on, some half off. And then I'm going to
slowly start adding the other tiny white flakes and the other four
larger white snowflakes. So I'm just going to quickly
go through this and add the white dots randomly
here and there. But you see how just that
little bit of white snow Oh, wow, it really ties
the room together. I love it. However many you want. If you want a blizzard,
go for a blizzard. If you don't, that's fine, too. Alright, so now I'm
gonna start adding these other white
flakes in quick time. One over here. One on the roof. Just and one on the
other of over here. And then more snow to tie
it all together. Yeah. A Love it, love it. Love it. Okay, now it's time
to get our fine liner out. So this is my NIPen. It's a 0.3 with pigment ink
so that when it gets wet, it's not gonna bleed. I am just pulling down
the lines on the sides of the buildings where we
put that the gold gelpin. And then I'm also
going to go, like, around the edges of
the roof and whatnot. And you're going to start
really seeing things pop out. So I'm making sure look
at that right under that highlight it really
sharpens everything up, so I'm just going to go
around all these roof lines. And let's see. Start over here. Ma sharpen up the lines on the cone on the top of
this roof and watch this. Boom, right there. Look how
that just pops out now. Hit that line right
there with the roof. You can sharpen up any of
them that you want to. And if you feel like
something's white, you can always go around it, like the edge of this chimney. That really sharpened them up, pull the rest of this line. Yeah. Yeah. I hope this is satisfying for you guys.
This part's really awesome. I love it when everything
starts really coming together. And you don't even realize that you've pushed
through the middle. You don't even realize that
you did the hardest part. It's just all starting
to take shape. Very rewarding. Oh. And my washi tapes coming
up again, but that's okay. So now I'm going to
start hitting the bottom left corner just in a little
L on all of these windows. And see what that's doing, it's just giving it more of
a three dimensional quality. It's making it pop out so much. Just that little bit. Wow. Okay, let's do this one, too. I'm gonna do the roof lines. H. All of those up underneath,
hit the windows. Ooh, I'm loving it. Hold
these other lines down. Put the cross on the steeple. All right. Okay, so now I am going
to go around and I'm not I'm not hitting every single one of these panes of glass around
each one of them. I am just randomly
making little hatches here and there just to give the suggestion
of the windows. But look what that's doing. It is just Wow, it's making it like the
light is shining off of it in different angles so that you can't
see all the details. And that is such a good key. You just need to make a
suggestion of things. Your brain's going to sew the rest of it together for you. So just hitting in the
rest of these shadows in the windows, how beautiful. Just those little details
they add so much. Sitting on the bottom of the
windows a little bit more. Just anywhere I
feel like it needs more detail or a
little crispness. Just use your artistic eye. Oops, right there. I went
over that snowflake. I'll have to fix it with
some white white paint. Right there. Yeah. Okay, so finish up
your snowflakes, put some shadows on the windows, meet back here, and we
are gonna finish this up. But
9. Color Shift & Final Details: Good. Okay, let's wrap
this project up. I am going to start taking
off the washi tape, but not the painter's tape. I really still want
these cards to be down because I just
want to take a look at them and see how it
all changes with that bit of purple washi tape
out from around the edges. I want to see those
crisp blinds now. And, wow, that looks beautiful. Wow, we did such a good job. I have noticed, though, I'm not quite as pleased as I
want to be with the colors. I think I want to make things
a little bit more blue. So I'm going to grab a little bit more color
and put it in the sky, just like we did earlier. I'm just putting a little
bit, and I'm blotting. I'm just adding a
suggestion just going in these lighter areas now and adjacent to the dark
ones like we did before. But if you feel like you need a color shift and you want
things a little bit brighter, add some aquamarine, add
some turquoise blue, whatever you want, and just sort of drop it in
there and blot it out. And, of course, you
don't need to add much. It's just a suggestion. But even that little bit
look what that did in the sky again. I love it. All right. Okay, so next on the agenda, let's color shift the
buildings as well. I think I want them a
little more green tinted. So I'm getting some of that aquamarine like
Thalo green, blue, and I'm going to start
the buildings on the side of the card, and I'm dropping in some
of the green shadows, like where we put
the shadows before. So on the left side of the buildings and
underneath the roofs. And look how that just
kind of brightened it up. I think I actually
really, really like that. So I'm going to put
some on this side, too. Especially in this
house on the front, it might be a little more
brighter than the other ones. Oh, I love that green. I think that kind of
makes it glow, as well. So you've got the glow of
the gold in the windows. You've got the green reflecting, the blue reflecting
from the sky, pulling down that little bit. So you're really just putting
a sheen over the top. It's not a lot of pigment
and it's not a lot of water. And you see I'm not reloading my brush a whole lot either. I'm just using whatever pigment I have on my brush. Oh, no. Okay. I got some on the
white, but don't panic. I'm gonna clean my brush off, try it off real good. Clean it. Okay, then I'm getting a little bit
of water on my brush, and I'm just going
to scrub right there, and then I'm gonna blot. And look, it disappeared. Isn't that fantastic?
Oh, I love it. Okay. Moving on. So I'm gonna continue putting the green shadow in
these buildings. Like I said, especially
this one in the front, I think it can stand to be a little more brighter
than the others. And I think that looks lovely. Just casting a bit of green on the front
of these buildings. It's not gonna take much at all. If you need to
lighten something up, Yep, just put some
water on it and bought. Okay, let's do some
of these other ones. Go around the windows, try
to go around the snow. You don't want to
paint the snow. But again, these colors and the little details
we're doing now, they don't have
to go everywhere. They just have to be
a little suggestion. So let's get this
building right here. Yeah, I like that color. Then I'm gonna blot.
Maybe I'm not. Okay, a little bit more. Actually, I do like that
color on the left a lot. And I'll bring a little bit of it into these buildings
in the middle. And see how I said before, the card on the left
is a little bit darker than the card on the
right, but that's okay. They're both unique, but
they both look beautiful. They're both capturing that night sky that we wanted to see. Now, also, if you want to you can always add a little
bit more in the windows. You can take your
white paint pen and just put little
dots if you want, like a little
reflection of light. If you want to add
a little bit more yellow or anything in the
windows, you could, too. But I think this is looking
really, really nice. The only thing that's
bothering me now is I think after we
finish this screen, this aquamarine tint is
I think I'm going to sharpen up some of these snowflakes that are
on top of the building. I think they're getting
lost just a little bit, so we're going to use the fine
liner and clean those up. So as you see here,
I'm just going to kind of color
around the snowflake. And again, I'm not tracing
around the entire object. I'm just hitting certain
areas here or there, as you see, not hitting
every single spoke. But just the suggestion
and see how that makes it stand out from the building
and the card on the left, which I already did, that
little bit really helps. So I can go around to the
other snowflakes as well. And if I find that they're
jumbly in the middle, I can just pull in a dark line and sharpen them
up a little bit. And I think that's
what I'm going to do after I'm done with this snowflake a
little bit more. Okay. Alright, so let's see. Yeah, here, I'm going to
go into the middle and just kind of pull those
spokes in a little bit. And because it's on
top of that roof, I'm able to do that with
the dark background. So I'm just pulling in to sharpen those shapes
just a little bit, and just doing those
little tiny details like we did on the windows and like we're doing
on the snowflakes, like we did
underneath the roofs, that's what really
makes things stand out. Y'all, I hope you really
enjoyed this process. I hope you've picked
up a few tips of the trade here or there,
and most importantly, I hope you've created two beautiful glowing Christmas
village Christmas cards that you can share with
family and friends.
 Jules Art Bender, Artist and Art Educator