Transcripts
1. 1. Introduction: Let's start this course
with a question. If someone was asked
to describe you based only on your handwriting,
what do you think? They will say? I asked myself this
question sometime ago and I didn't really
like the answer. So I went through exactly the same
process I will be guiding you through
in this class. And I gave my handwriting
a total make over. And then this class I will be showing you how
you can do it too. Hi, my name is Garcia. I'm a photographer
and filmmaker. Big fan of creativity
in general, beautiful handwriting is
something very elegant, sophisticated,
especially nowadays in the digital age, a
beautiful trend. Handwriting can really help you stand out from the
crowd if you feel like your handwriting has evolved
in a certain way and it doesn't really match how
you have evolved as a person. This course is for you. This is exactly
the feeling I had. I will show you how I am
working on my handwriting and what are the biggest game
changers has been for me. But you might ask yourself, why should I bother? Why hands, right? Well, as it turns out, our brains love it when
we are handwriting. Handwriting and boosts
the brain activity and it improves our
motoric skills. It is also great for memory and learning are not
the only benefits. Handwriting has been proven
to promote relaxation. It has a soothing, calming effect and
it can be also seen as a form of meditation. So if you feel like you're
up for the challenge, Let's get to work. In the following six lessons, I will be talking about the tools and
techniques that will help you improve your
handwriting dramatically. I will explain how to
troubleshoot your own handwriting and where to look for inspiration for your
new handwriting style. We will go through several
exercises that help relax the hand and improve
the writing precision. You will be able to create your own dream handwriting
model and then practice it so that it becomes
automatic if you are excited to see how amazing your
handwriting can become. Let's get started. In the next lesson, we will be talking about
the class project. I will see you there.
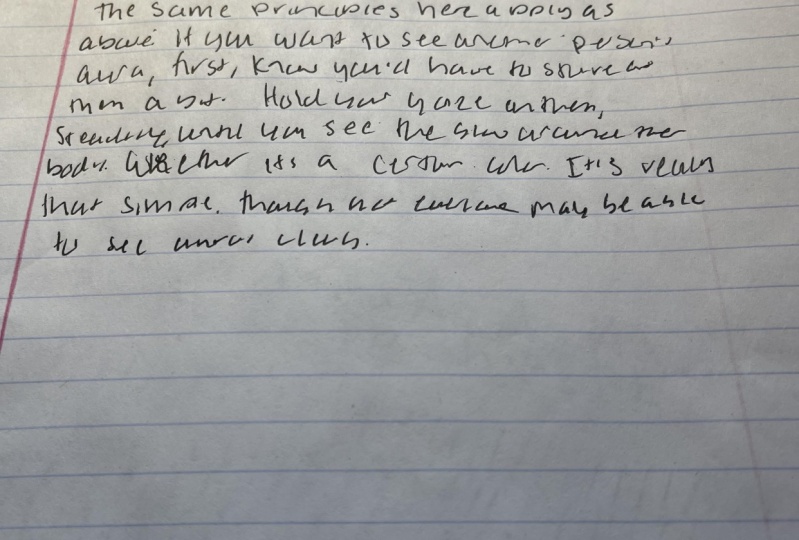
2. 2. The Class Project: The first thing I want
you to do and starting this class is taking a sample of your
current handwriting. Just take a notebook
or a piece of paper. It doesn't really matter. Ago sits in a place where
you would normally see to a new handwrite and take the pen that you
would normally use. Don't do anything fancy. I just want you to record it how it is now at the beginning, then hopefully at the
end of this class, you will be able
to compare it with your new handwriting
and see the difference. I want you to pick a book. It can be your favorite book. It can be any book
that you have at hand. I have here, one
that I really laugh. It's Rebecca by Dafna do Maria. I especially love the color. It's so pretty. So I will be writing down the first page of the first
chapter of this book. But you really can
choose anything. I'm shopping, you
know, be creative. But this doesn't
actually matter. Just find a piece of text
that can fill a page. So at the end of the course, I will ask you to do the
same thing after you had some time to do the exercises. And then we will compare how your handwriting has changed. And then I will ask you to
take a picture of both pages, put them next to each other, like a snapshot,
and send it to me. I'm so curious to see
what you have created. In the next lesson,
I will be showing you how you can analyze your current handwriting
and how you can choose what it is that
you would like to change. So I will see you there.
3. 3. Analysing Your Current Handwriting: In this lesson, I want to show you how to analyze the
handwriting you have right now and how to create
a handwriting model for your exercises if you
want to go deeper and really work on
improving your handwriting, first of all, you need to
know what the current status. You need to make a list
of things that need to change and then work
on improving them. So let's go to work. Let's see where we are at. At the moment. For this exercise, we
will use the patients who had filled already with
your current handwriting. In the previous lesson, we will have a look
at certain elements and we'll see what
can be changed or improved in your handwriting to make it more
beautiful and more legible and to get it closer to your dream
handwriting, Let's do it. First of all, let's
have a look at the distance between
the letters. Are they really
close to each other? Maybe too close, or are
they too stressed out? Make a note for yourself if there's something you would
like to change about this. The second thing to
look at is the slams. The letters lean to one
side or are they straight? Or maybe some
letters are leaning forward and some are
leaning backwards. Take a good look at it. Is it what you want to be? Or maybe you want to
change it a little bit. My letters were really straight. It was okay. I didn't
really dislike it, but I had my dream
handwriting in mind. I wanted my handwriting
to lean a bit forward so that it
would be more romantic, a bit more classic. So that's what I started doing. Instead of just
writing straight. I moved my page a
little bit and I tried to make all letters
lean forward a bit more. Now, another thing I
want you to notice is if you use an antibiotic
elements in your handwriting, if you do, do you like them? Don't you like them? Or maybe there are some
elements that you would like to introduce to your handwriting
that you don't use right? Now, think about it
and write it down. One very important question is your handwriting legible
isn't difficult to read? Is this an issue? If you are using your
handwriting only to write in a journal and its nobody else needs to read it
and understand it. And you can read it. It doesn't really matter
if it is very legible. But if you want to write letters and have
people read them, it's better than what? They can do it without
an effort, right? So be honest with yourself, is your handwriting legible? If not, what are the most
disturbing elements? Just make a circle
around them or write it down on a separate
piece of paper. Have a look at your letters
and think about their size. Are they too big? Are they too small? I do want to change
something about it. In my case, I wanted the
ascenders and descenders to be longer and the letters
themselves to be a bit smaller. So I wanted to create an
imbalance in my writing. Now, let's ask question that's maybe a bit more difficult to answer until you find
your handwriting mature. Or maybe it looks a
little bit childish. Maybe you learned
a certain way of handwriting at school and he's just continue
writing like that. Do you like it? Do you want it to
look more mature? This were the basics. I hope you'll make some notes. Now, let's go to the fun part. The next step will be
reinventing your handwriting. I want you to ask yourself
one important question. If someone looking
at your handwriting was asked to describe
the person behind it, what would you like them to say? This is a very
important question and a leading question
in this course. So please pause the lesson, take your notebook and
think for a moment, I really love this
question because it goes a bit deeper than just
the technicalities. It requires us to think about how we want to be perceived to help you with this question, I will tell you what
it looked like for me. I'm not finished
with the process of the creation of my
dream handwriting, but I'm working on it every day and I already see
really big changes. My handwriting was
not bad at all. It was really legible,
it was clear. But I also thought that it
didn't express my personality. It was a little bit boring, not very creative, nothing
really to remember about it. I gave it a thought and
I decided that I wanted my handwriting to be more
creative, more bold, modern, with a classic
touch and also maybe a little bit
playful and extravagance. I wanted it to look like a handwriting of a mature,
sophisticated person. So what does it look
like for you all? Please pause the video and write down what comes to mind for you. Alright, now that we have a clear vision of what it
is that we want to achieve. Well, let's have some fun
and look for inspiration. This is what we'll be
doing in the next lesson. I will show you my favorite
inspiration sources and which keywords and phrases you can use to find really beautiful
handwriting and examples. So let's go to the next lesson. I will see you there.
4. 4. Finding Inspiration: In this lesson, we will
be looking online for inspiration in creating
our dream handwriting. Let's have a look at my
first inspiration source. It's a Pinterest. I'm sure you now Pinterest
very well already. Interest is an amazing tool to look for beautiful
handwriting examples. So let's dive in. And here we are in Pinterest. As you can see, I
have already typed in my first keyword,
beautiful handwriting. Pinterest automatically
has shown me many different keywords, suggestions related
to my keyword. Alright, let's go through
some examples and let's see what we could add to
our inspiration board. As you can see, when you open
an example that you like, Pinterest will directly
show you related pins. I really like to go
through them and this is a great way to
discover something new. I love this one, I will say it's to my
inspiration board. This is also quite an
extravagant handwriting example. I kind of like it, so I will save it. Sometimes it can just
be a small pieces. In this case, I
really like how they are rounding the
letter Y at the end. Let's save this one. This also looks nice. Here are some
connections between the letters are
quite interesting. It's always good to
have a look and try to specify what elements you like about a certain
handwriting style. And you can try to introduce
them in your own practice. Let's go back a little bit. This is pretty good. That's
maybe a little bit to the Karate for an
everyday handwriting. I think I'll do my search them. I will check one of the
suggestions of Pinterest. If I don't see anything
really interesting, I just go back one step. This is maybe a bit
too extravagant. Save this one. I will try a different keywords. Now, let's say
elegans handwriting. I think it's good to
be selective with your pins so that you have fuel. But really helpful examples. I'm handwriting style seems
to be a nice keyword. Easy L and M handwriting
would also be equal to one. Here we have other suggestions. This is pretty
handwriting cursive, like this one quite a lot. Let's save it. As you can see, some suggestions come
also between Europeans. Handwriting styles. Let's see that one. Here, there are a
lot of examples. Another great keyword
is handwriting fonts. As you can see, we
already have a lot of nice font examples. It's also great to see how
they construct their letters. Like this one is really pretty. Maybe you can start practicing
to rise your b like this are a little
bit like this one. This one looks nice as well. This is quite a
striking modern forms. I really like it. As you can see, the possibilities
are really endless. This is my own beautiful
handwriting inspiration board. Let's go through
the examples and I will show you what I have saved. There is also a whole alphabet. I find it's a little bit
to the corrosive material. There is always something
you can find inspiring, even if it's just a
piece of one letter. Here are some beautiful
handwriting fonts. I love this T's and the same
if you'll just one pin, you can always go down
the rabbit hole of the examples that Pinterest
is showing to you. So you can spend
hours like this. This would meet for Pinterest. I will share with
you in the course notes a link to my
Pinterest board, as well as my favorite keywords. Now let's do the same
search with it in Pinterest button this
time in Google images, you can use exactly
the same keywords and see what comes up
for you in Google, but start with
beautiful handwriting. As you can see, Google
also directly gives you some other suggestions
you can check out. Let's see beautiful
handwriting cursive. Now, beautiful
handwriting, easy. If you see something you like, you can add this image
to your favorites. As you can see,
Google also offers a lot of wonderful examples. So in Google you can also
use the same keywords, or at least we were
using for Pinterest and it will be added to
your course materials. Let's try one more. Maybe handles writing. This one seems to be great. And also have a lot
of suggestions. Let's try one more writing. I am sure that you will find some wonderful examples here. And now let's check out our last inspiration
source, Instagram. I have opened Instagram and I have chosen the first hashtag. The first one I will
be checking out is again, beautiful handwriting. Let's see what
Instagram shows us. This is really amazing. What is also great
about Instagram is that you can go to the
profile of the person who's post you like and
find more inspiration on their profile. How amazing. Let's say that this
one is also very pretty there as opposed to like. You can also check which
hashtags the person is using and then use one of these cash tax to look
for your examples. Let's go with handwritten preclude fellowship is also a great one. Instagram offers a different way of looking for inspiration, but it is also very
nice because you can find people
that inspire you. You will find the list of my favorite hashtags in the
course materials as well. Now let's talk about my
favorite inspiration source. This is not an obvious one, but it is amazing. I am talking here
about all documents. My grandmother was showing me some old handwritten documents
from the 1940s, 1950s. I was so amazed at how beautiful the
handwriting used to be. It was really an art form. That moment I
decided that it was something I wanted
to work on as well. It amazed me how elaborate and beautiful people's handwriting
used to be in the past. Now not everybody has
access to all documents. I also don't have any at hand, but it is very easy to find them online nowadays and
just type in Google, all documents
handwritten and you will see a lot of beautiful
examples saved, the ones that you
particularly like and analyze what makes
them so special, grave. Now that we have finished
looking for examples, It's time for a little analysis. Gather your examples and ask
yourself some questions. Ask yourself what it is
that you especially like, write it all down, I will tell you
what it was for me. So for the general
characteristics of my dream handwriting, I knew I wanted the
letters to be slanted, to be leaning forward. I also knew I wanted to change the proportions of my letters. I also knew I didn't
want to include too many the correlative
elements to keep the handwriting modern
and elegance in general. I also noticed that I'm more
attracted to styles that feel more relaxed
than elaborates. I knew that I would
have to work on my capital letters to make a bit more of a statement because
they were a bit boring. Now, I invite you to go
on a little adventure and visit all the inspiration
places I was talking about. Make a list of
handwriting styles and things and details You are the most attracted
to and who knows, maybe you will find another
amazing inspiration source, which I did not mention. If yes, Be sure to share
it with us in the course. In the next lesson,
we will be talking about upgrading your
writing materials, your environments, and
also the correct posture. So I will see you there.
5. 5. Writing Tools and Materials: Hi there my creative friends. Welcome to lesson five. In this lesson, we will
be talking about choosing the best writing tools
and materials for you. About the correct
writing posture, and also about the ideal
writing environment. Because believe me,
this is also important. So let's dive in. Step one, collect all
the writing materials you can find in your
house and try them out. You will quickly notice
that some of them have to pinpoint,
some too thick. Some are maybe Perfect. That's some lead to your
handwriting flow easily. And someone take a
piece of paper and write down awards with
all of your bands, right? Award, and then continue
with a line and do the same exercise with the same word with
all your friends. The brand new like the mouse, and use it for all the
exercises in this course. And if you are not able
to pick one sweeter between firms to see
which one suits you best. Now, if you have not found anytime that you actually
enjoy writing with, I would advise you
to take a trip to specialized stationary store. I am sure you will find
your favorite there. My advice for you is just to
take a notebook with you. They normally provide a piece of paper to try out the pens. But having your own
notebook will give you the advantage of
being able to write down the names of the
pens you are trying out. This will really help you
make the best choice. Once you find the pen,
you'll really laugh. You will automatically start paying more attention
to the writing process. You will try to write
more beautifully. And let's not forget if
it's a beautiful plan. You will also feel so
much more sophisticated. One of the pens I
started using recently is this one, Lamy Safari pen. It's really affordable. I liked the design and it
has an ergonomic grip. So it's wonderful for beginners if you don't
want to invest too much in inexpensive pan and you are not sure
if you'll be using it. This one is really great. It's affordable. Try it out and see if you, if you like writing
with a fountain pen. If not, of course, there are
also many other options. This is a ball, Ben, pilots friction, Bolton. I really enjoy writing
with this one. It's maybe not the
most elegant one, but I enjoy using it. You'll find the link
to my favorite bands in the course materials as well. Now let's talk about the
paper you're right on. First of all, the notebooks. I really loved
beautiful notebooks. I think that they are
great motivation to keep, keep at your practice. And they really make this
moment feel special. Here is a black leather one. Here I have a bit more fun. One. Another option is
just as simple writing, but this one doesn't
have any lines, so it's good to decide
in the beginning if you want to use a
lined notebook or not. For the beginners, I recommend using lines notebooks
like this one. They are much easier to write in and they let you
concentrate on the form of your letters instead
of having to look at your alliance and checking
if they are straight or not. Alright, now that we spoke about our fans and our notebooks, Let's talk about the
writing posture. The next point I would like to mention is the correct posture. Now, I love to write
in my journal, I am sitting in the sulfur, are lying in bed. But if you really want to work on the form of
your handwriting, it's important to sit at a
desk when you are doing it. Make sure that your desk is
not too high or too low, and that you are able to rest your arms comfortably on it. Before you start your
handwriting exercises, do a little body scammed
and cross your legs. If they are crossed. If your shoulders and your arms are relaxed, relax your neck. Relax your face,
relax your hands. And to finish our
bodies can close your eyes and take
a few deep breaths. Now that we have checked
in with ourselves and we have relaxed our body. Let's talk about
the right position of the paper on your desk. You should pay attention to what position of paper
is optimal for you. Though it's when you
are handwriting. You'll notice the moments when it feels the
most comfortable. Maybe, you know, at
the end of the page, it feels a bit awkward. You feel it's not flowing
the way it should, then it's a sign. You should place your paper
more to one or another side. Just experiment with it. Place your paper a
little bit to the left. Try placing it's
more to the right. Maybe at a slant. See what works best for you. Another thing to pay
attention to is the grip. Don't hold your pen too tight. Remember to keep your
hands and fingers relaxed before you start
doing your exercises. There's one more thing
I would like you to pay attention to your environment. So what is your
environment like? Try to tie the their
own DID or desk. And you will see that
you will directly feel better about the
whole experience. I know this may seem trivial, but it's really
not. Try to do it. And you will see the difference. Here is a little bonus tip.
You don't have to do it. It will feel
uncomfortable at first, but it makes a big difference. Here's a little bonus tip. You don't have to do it to
go through the exercises. It feels a bit
uncomfortable at first, but it can make a
huge difference. Try switching your pen hold. I used to write holding
my pen like this, holding the pen between my
thumb and my index finger. But I noticed that as I was
going through the exercises, I put more and more pressure on the pen and it was difficult
for me to relax my hands. Afterwards I switched to
a different pen hold. Now I hold my pen between my
index and my middle finger. It felt Really stretch at
the beginning and I didn't have too much control
over the pen. But as I was doing
the exercises, that control came back and I was able to
start from scratch. I was able to forget all
the forms that I used to use and create a totally
new handwriting like this. So I really recommend it. Try switching your grip
and see how it goes. And this is all I wanted to
talk about in this lesson. In the next one,
we will be talking about something really exciting. Creating your own dream
handwriting model.
6. 6. Create Your Dream Handwriting: Welcome to lesson six. In this lesson, I
want you to create your own dream
handwriting model. I want you to go back to
your examples and coffee, the letters that
you liked mouse, I don't encourage you to copy someone else's
handwriting just to look for what inspires
you the most, tried to copy all the letters you like the mouse in one place, and then we will make
our own dream alphabets. Others can be divided into
groups based on their shapes. Write letters from each group
in many different ways, and see which one
they liked the most. Keeping in mind
that it took years to shape your
current handwriting. So just keep practicing
and be patient with it. Go a little bit deeper. Separate the shape from
the letter like I do here, and practice the
shape as a pattern. Don't think about
it as a letter, just see it as a, as a form
that you are perfecting. After you have worked on
the shape on the farm. Incorporate this letter in several different towards and
try writing it like this. Do It also several times so that it becomes
automatic for you. I hope you haven't
been able to create your dream handwriting model
with the help of this class. Now that we know
what our goal is, we can talk about the practice. This is what the next lesson we'll be talking about.
I will see you there.
7. 7. The Daily Practice: Hi, Welcome to lesson seven. Now that we have our
dream handwriting model, we will talk about the practice. We will go through several
exercises which will help you make your new
handwriting automatic. Repeat this exercise is
daily and do not give up. And also try to stick to your new handwriting model every time you are
writing something down. So let's dive in. This first exercise is
one I called the lines. Just start making lines. Row of lines in your notebook. Do not rush through this. You'll see that in the beginning your hand is not yet relaxed. You're not yet in the rhythm. So they will not
all look the same. As exercise progresses,
you will gone down and it will
become automatic. Try to do at least five
lines on this exercise. The second exercise
also consists of lines. This time they are horizontal. Try to keep the length and the distance between
lines the same. Again, do not rush through it. You can see it as a
kind of meditation. I find it really relaxing. The following exercise and
make like a brown shade. Try to make all three
bars the shape the same. So these practices are different hand movement
than the previous one. So on them. The other direction. Feel awkward at first. Your hand will get to always move your notebook so that it's
comfortable for you. For the last exercise, we will combine the two
directions while I'm facing right and
one facing left. Another great exercise to
relax your hand is this one. Just try to make the shape
as regular as possible. Why do you feel that your
shape is not working the way you want it to
try to take a break, relax your hand, and
I'll get back to it. Now. Let's pretend
we are writing the letter M and continue with the shape
for the rest of the batch. Let's turn this pattern
upside down a bit. Okay? So these are
the basics exercises. You can repeat them every day. You can do as many of these
as you would like to. They were really helped me
with the control of the pan. Especially if you have changed
your grip to the one where the pen is resting between your index finger and
your middle finger, then it can feel a bit
weird in the beginning. But if you do this
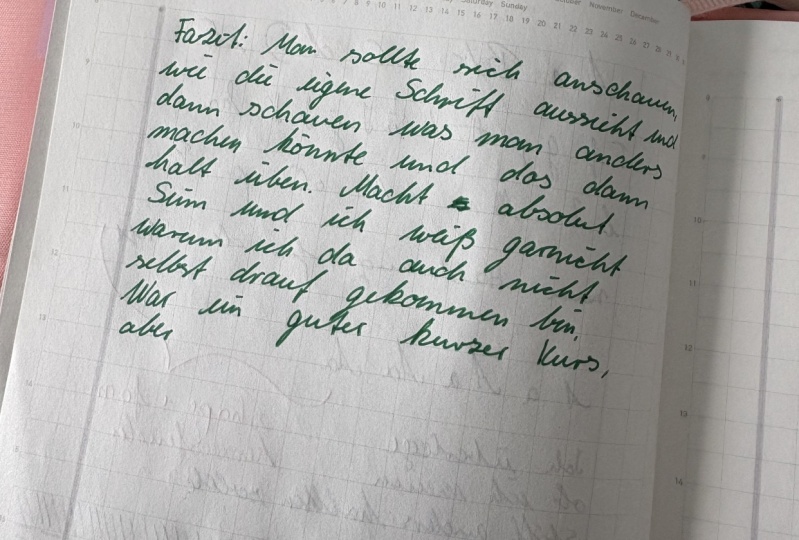
exercise this a few times, it will feel normal. Again. I will show you what my regular practice
notebook looks like. This is one of my notebook, so let's just calculate. As you can see, I do a lot
of repeating exercises. Here I was practicing,
award some shapes. Here again, the basic exercises. Here. I was practicing the l and h, which are most similar letters. Then I go move to a ward. In this case it was there. So this practice is kind
of an improvisation. You now start with
some basic exercises. Then you can take a passage, um, which you like, write it
down and separate one word, choose one word from it. And Practice Award. And you can also practice
a specific letter that travels you're more than the others that
you want to improve. Now we'll take a book and we will start writing the
first chapter them again. As you can see, I decided to pause the copying all the texts and focus on, on one letter. I had a bit of a problem
with my b and my S. So I will first
focus on the shape. They want to have. My letters S. I
wants to keep them already the same
in all the wars. Also, any combinations of letters that you
find more difficult. You can practice
them separately. Apart from this
practical exercises, I also want you to
do two more things. I want you to take
up journaling, Journal daily, write
down your thoughts, your reflections, your
plans for the day. And also while
you're doing this, try to focus a little bit on the form and see how
your handwriting is evolving and how
it's getting closer to your handwriting model
that you have in mind. Another thing I
want you to do is writing down passages from book. I also recommend that
you do it daily. It doesn't have
to be five pages. Just do as much as you
feel like at the moment, but don't give up for me. This is almost
like a meditation. It gives me a lot of joy and it also helps me improve
my handwriting. You can use philosophy,
books, poems, I recommend any sort of
inspirational content. And to summarize, please remember that this
process takes time. Do not try to rush through it. It is so much better to do
just ten minutes a day, but do it daily then to do two hours a day and
give up after a week. I am still not aware. I would like to be
with my handwriting, but I really see it's
changing and evolving. And so will you
remember that you will have to
practice quite a lot before your new dream
handwriting becomes automatic. So don't be a perfectionist. Have fun with it. In the
next and the last lesson, we will summarize
everything that we have learned in this course. And I will give you one
extra tip that will help you stick to your
handwriting practice. I will see you there.
8. 8. Course Summary: Hello there, my
creative friends. I am so happy that you've
completed this course. I hope that you enjoyed it
and that you started to see handwriting as a form
of creative expression. By now, you should know how
to diagnose your handwriting and how to decide what
you want to change. You should also know where
you can look for inspiration. And I hope you already have your favorite pen and
your favorite notebook. I hope you know what exercises you should start doing today and continue doing every day to make your
handwriting awesome. And here's my bonus tip for you. Make handwriting a part of your morning or your
evening routine. I really liked the
journal in the morning. It's a part of my morning
routine together with exercise, with meditation and
other elements. And it's really helped
me plan my day. It helps me to live a more conscious life and
I really recommend it. And now let's circle back to the beginning to
our class projects. Once you have been doing
these exercises for awhile, let's say a week or two. See how your handwriting
has changed already. Write down the same
passage you did in the beginning and place
them next to each other. Please submit your
projects to Skillshare. I'm really so curious to see
what it was like for you. Do not treat it as a
definitive version. Just see it as a step
in the right direction. I encourage you to do the same exercise
every two or three weeks and record the challenges and the progress you are making. If you enjoyed this class, please leave a review below. It will help others find it. Thank you so much
for watching and I will see you in
the next class.
 Jimmy & Kasia, A Couple of Compulsive Creators