Transcripts
1. Introduction: Hi, everyone, and welcome. Today, we're diving into one of the most exciting and
transformative stages of making pottery glazing. It's where your pieces
truly come alive with color, texture,
and personality. We're going to journey through the whole
process together. We'll start with the absolute basics like understanding when your pieces are
ready for glaze and why bisque firing is so crucial. Then we'll tackle the fun challenge of
choosing your glaze. With so many options out there, we'll break down
what you need to consider from firing
temperatures and how glazes work in different kiln
atmospheres to the look that you're aiming for and whether your piece needs
to be food safe. After that, we'll really
get practical and look at how to apply those brush
on glazes step by step. We'll cover everything
from prepping your piece and stirring your glaze to getting those
coats just right, and super importantly,
making sure your piece is ready for
the kiln without sticking. I'll share my tips on
keeping track of coats and why taking notes will become
your best friend in pottery. Finally, we'll touch
on how you can start to experiment and really
play with glazes, because that's where so
much of the magic happens. It might seem like
a lot to take in, but I'll guide you through it. So let's get ready to explore
the wonderful world of glazing and give you
amazing creations that perfect finishing touch.
2. When to glaze your pieces: The crucial stage for glazing pottery pieces is after
they have been biscfired. This initial firing transforms
the fragile raw clay or greenware into a more durable porous ceramic state
known as biscuare. Bisk firing is carried out at a lower temperature than the
subsequent glaze firing, and it serves several
important purposes. Firstly, it makes your
piece much stronger so you can actually handle it for glazing without
it crumbling. Secondly, this bisc firing
makes the clay porous. It's kind of like a sponge. This is perfect because when
you apply the liquid glaze, the bist pot will soak up
the water and the glaze will stick to the surface
really nicely and evenly. If you tried to put
glaze on raw clay, it could just get too
wet and fall apart. That first firing also burns off any organic stuff in the clay and gets rid of
chemically bound water. This stops gases from
forming later and messing up your beautiful glaze
with bubbles or other flaws during the
final hotter glaze firing. Most of the shrinking
of your clay is going to happen
during this biscu fire, which helps prevent the glaze
from cracking later on. So once your piece has been biscfired and has
cooled down completely, that's when it's
ready for glazing. Before you start, though,
just give your bisqare a quick wipe with a damp
sponge or a soft brush. You want to get rid
of any dust or oils because those can stop the
glaze from sticking properly. If you've used
water to clean it, make sure it's totally dry
before you put on any glaze. You also want to make
sure you have clean, dry hands free of moisturizer or oil because if these
transfer to your bisquere, they can cause spots
that resist the glaze. The exception to needing
your pieces to be biscfied is if you're
using underglazs. I like to think of
these more like paint and are often
for detailed designs. You can even apply these when
the clay is still green, either leather hard or bone
dry before it's biscfied. I personally like to apply the underglaze when
my piece has been biscfied so it's easy to
wipe off any mistakes, and you don't need to
think about how much water is going back into your clay. However, there are
some techniques like graffito that need to be done
at the leather heart stage. Generally, once biscfed,
you'll then apply a clear glaze over
the underglaze to make it glossy and seal it.
3. Choosing a glaze: Choosing a glaze for your
pottery can seem overwhelming, but it's one of the most
exciting parts of pottery. Let's simplify it so
that you can pick the perfect glaze
for your project and create a stunning finish. First things first,
and this is a big one. What temperature or cone are
you firing your clay to? Your glaze has to match the
firing range of your clay. If you put a low fire
glaze on a high fire clay, it could run right
off your piece. Or if it's the other way around, it might not melt properly
and look dull or rough. So check your clay details, check your glaze details, and make sure that
they are compatible. That's rule number
one. Your glaze will also look
completely different, whether it's fired in a
reduction or oxidization kiln. When purchasing a glaze, the jar will usually detail what conditions the
picture on the front is fired under or check with your pottery
supplier for advice. Before I've even
started making a piece, I think about how I'm
going to glaze it. Of course, I often change
my mind along the way, but it's good to start with
a plan that might influence how much texture or what
finish you add to a piece. Next, think about what kind
of look you're going for. There is a whole rainbow of
color options out there. Do you want something bright and bold or subtle and earthy? Are you after something
super shiny and glossy or maybe a smooth,
modern matte finish? There's also satin, which is
a little bit of in between. Some glazes even
have cool textures, like a crawl or a volcanic look, but I'd suggest
playing with these once you've mastered the basics. Opacity also plays a role. Do you want the color of your clay or underglaze
to show through? Then you look for a transparent
or a translucent glaze. If you want a solid color that covers the clay completely, you'll need an opaque glaze. Then you need to think about the function of
what you've made. If it's something
you're going to eat or drink from like a mug or a bowl, you must choose a glaze
that is food safe. This is super important
for health reasons, and manufacturers will usually state clearly if a glaze
is dinnerware safe. If it's a sculptural
or decorative piece, then you can experiment with more textual or
decorative glazes that aren't
necessarily food safe. There are so many different
ways to apply glazers, but I recommend starting
with brush on glazers. These are formulated
to be painted on, which makes it super easy
for a home pottery setup. But there are also glazers
made for dipping or spraying, which might give
different effects and could be better for
covering larger areas quickly. If you have the setup, that is. Also consider your clay body. Some glazers just behave better
on certain types of clay. For example, a glaze might look fantastic on a white stoneware, but completely different or even problematic on a dark clay. I also really recommend testing your glaze before applying it straight to your masterpiece. You'll notice that most glazes
look wildly different in the jar compared to what they look like when
they've been fired. They can also look
different depending on your specific clay in
your specific kiln, compared to the
pictures that you see online or on the packaging. So make some small
test tiles or use a little pot or trinket
dish that you are not too attached to and
see how it comes out. This step will save you so
much potential heartache. If I rolled out a slab
for a project and still have a fair bit left
after cutting out my pieces, I find this is a good time to use the excess to
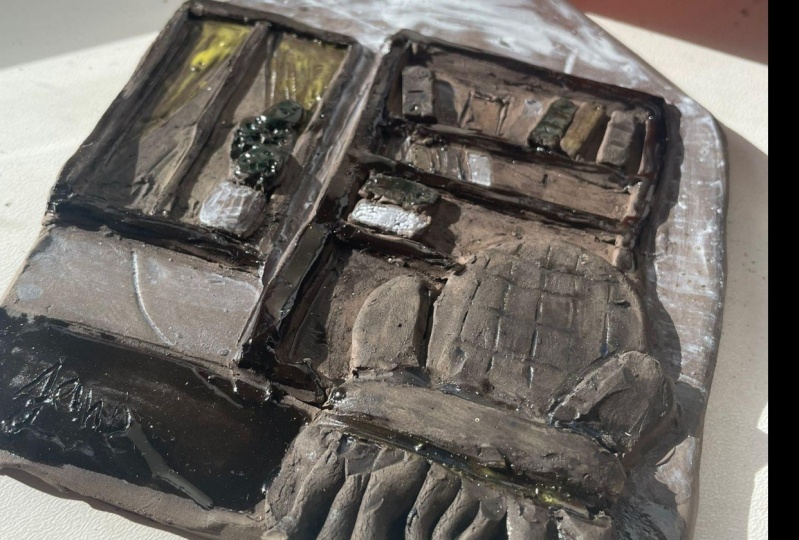
make test tiles. I've got a few examples here of different test tiles for
you to have a look at. I like to make these quite large test tiles that
stand up on their own in the kiln to show the way the glaze can
move in the kiln. I have some texture
added to show how the glaze breaks over
the texture as well. And then on the
back, I like to test out how the glaze looks
with a dark flux, a light flux, and a texturizer. I'll explain what these
are a little bit later on. I've included a template
and instructions on how to make my test tiles
in the resources section, if you'd like to make your own the same way that I make mine. Finally, don't be
afraid to ask for advice at your local
pottery supply shop. They often have a wealth of
knowledge and can point you in the right direction based on what you're
trying to achieve.
4. Preparing to glaze: Once you pick your glaze, we're almost ready to
start applying it. There are a few steps to
take before you do apply your glaze and a few tips that will help you
along the way. A super important step
is to take notes. There is nothing
worse than getting something amazing
out of the kiln and then not being able
to replicate it later because you didn't
write down what you did. I like to use a
digital notebook, but you can also just
keep a paper one handy and write down what
you do for each piece. Take notes of what
glazers you used, how many coats, and where. My next tip is to take a
note of what coat you're up to as you're glazing and
on what part of the piece. For example, if I
was glazing a vas, I would write inside and put a mark next to it each
time I put a coat on, then the same process
with outside. I can't tell you
how many times I thought I'd remember how
many coats and where I'd place them only to get
distracted or walk away for a few minutes while it dried and then totally forget
where I'm up to. Okay, let's talk about something super important
when you're glazing, how your piece is
going to sit in the kiln during that
fiery transformation. When you're putting
glaze on your pottery, you absolutely must
think about where it's going to make contact
with the kiln shelf. The bottom of your
piece, the part that actually sits on the shelf, needs to be completely
free of glaze. Why is this so critical? Well, imagine what the glaze is. It's essentially going
to melt and turn into a type of glass in
the heat of the kiln. If there's glaze on the
bottom of your pot, it will melt and fuse your beautiful piece down
directly to the kiln shelf. It's like super gluing it down. Trying to tear it off
usually means that your piece will break
and it will be ruined. Not only that, but you'll also
damage the killing shelf. Importantly, it's not just about the exact spot
where it touches. You want to leave a little
bit extra unglazed space just above the bottom edge to. Think of it as a safety margin, maybe about a quarter of an inch or five to 6 millimeters
up from the base. We need to do this
because glazers can move. Some glazers are more
runny than others, especially when they
get really hot. If you've applied
the glaze a bit too thickly or the glaze
itself is quite fluid, it can drip or run down the sides of your pot
during the firing. If you've only left the
very, very bottom bare, any run could easily go over that little edge and still
glue your piece to the shelf. That little unglazed
buffer zone gives any adventurous glaze a place to stop before it causes
major problems. So how do you make sure the bottom of your
piece stays clean? This is a much simpler
process with brush glazes, and you have a few options depending on what
works best for you. I like to use a lead
pencil to mark the space around the bottom of the piece that I want to avoid with glaze. This gives you a nice even
line you can work to, and it burns out in the kiln, so you won't see it once
your piece is fired. To do this, lay your pencil
down on your work surface. A standard pencil creates
a perfect height line. Hold it against your piece, and then turn your
piece around or move the pencil until you have a line around the whole
bottom of your piece. Once you have this
guide in place, you can either just carefully
brush on your glaze, avoiding the line at the
bottom or use wax resist. Many potters paint
or dip a layer of liquid wax resist
on the bottom of their biscfed pots before
they start glazing. The glaze won't stick
to the wax area. So after you've dipped
or brush your glaze on, you can just wipe any beads of glaze off the wax part easily. If you do get some glaze
where you don't want it, let the glaze dry a bit and
then take a damp sponge or cloth and very carefully
wipe off the excess.
5. Glazing your piece: Now we are ready to get glazing. You'll need a few things
as well as your brush on glaze that you've chosen.
You'll need a paintbrush. Different sizes do come in handy for large or small areas. These are a few of my
favorite brushes for glazing. Basically, anything that takes up quite a bit of the
glaze at one time, so you don't need to keep
dipping your brush back in. You'll need a container
of clean water for rinsing brushes if you
are switching colors. You'll also need a sponge or a wet cloth for wiping
and cleaning up. A bending wheel like a lazy
Susan is not essential, but it does really
help with glazing. Once you've gathered
everything you need, the first step is to stir
your glaze really well. This is a really important step, as the colorants and
glassy bits in the glazes are heavy and they settle at the bottom of the jar over time. If you don't mix it thoroughly, your glaze color and
consistency will be way off. You can use a clean
stir to mix it up or just give your jar
a really good shake. Now you can start
applying your glaze. You'll want to load
up your brush by dipping your brush
into the glaze, getting a good amount on it, but not so much
that it's dripping everywhere before you
even get to your piece. Then apply a smooth, even coat to your piece. Try to brush in one
direction if you can, say horizontally around the pot. Don't worry if it looks a bit streaky or not fully
covered at this stage. That's normal for
the first coat. Then you want to let it dry. And this is key. You need to let that first coat dry before
you apply it to the next. It'll go from looking wet
and shiny to dull and mat. This usually doesn't
take too long, maybe five to 15 minutes
depending on the glaze, how thick you put it
on, and the humidity. If you try to put the
next coat on too soon, you'll just drag the first
layer around and make a mess. Once the first coat is dry,
apply your second coat. This time, it's a good idea to brush in a different
direction to the first coat. So if you went horizontally before, go vertically this time. This helps you get really even coverage and minimizes brush
strokes. Dry it again. Yep, let it completely
dry just like before. And then usually you'll
need a third coat. Most brush on glazers
are formulated for three coats to get their
true color and finish. So apply your third coat again, ideally in a different
direction to the second one. EG back to horizontal. Always read the label
on your specific glaze. Some might only need two coats. Some might suggest four
for particular effects. The manufacturer knows
their glaze best. Things to keep in mind
while you're brushing, make sure you leave that spot bare at the bottom
of your piece. For the inside of vessels, you can either
carefully brush it, making sure to get
even coverage, or you can pour a
little glaze inside, swish it around to coat, pour the excess
back into the jar, and then you can touch
it up with a brush. Avoid drips and runs. Try not to let the
glaze get too thick in any one spot as this can lead to drips or run during firing. Smooth, even coats are the goal. After you finish glazing, give your piece a once over. Look for any miss spots, areas that look too thin, or any glaze on the bottom
that needs cleaning up. Then you want to let the
glazed piece dry thoroughly. This could take several
hours or even overnight. It needs to be bone dry
before it goes into the kiln. Dry glaze can be a bit
powdery or fragile, so handle your piece
carefully to avoid chipping or smudging
your lovely glaze job. And that's pretty much it. Take your time,
enjoy the process, and have fun watching how your brushed on glazes
transform in the kiln.
6. Creating different effects: Now that you've got the basics
of using a brush on glaze, you could really start
to play and experiment. Test sills come in real
handy here as you can test out combinations without
affecting your whole piece. Think about combining glazers. You can layer
different colors on top of one another or color different sections
with different glazes and let them bleed
into each other. A search on Google or Pinterest is a great
way to see what other potters have
been doing and what combinations they have
been experimenting with. Mako brush on glazers are my
personal favorite to use, as I find them so
consistent and reliable, they have a whole section on their website that
shows you what different combinations look like and tells you how
they achieved it. Another way that
you can play with your brush on glazers
is to add a flux. Flux interacts
with other glazers to create movement and texture, bringing about hidden
colors and visual texture. The order in which you
apply flux above or beneath another glaze
impacts the fired result. And variables that
influence the movement include the fluidity of
the companion glaze, application methods, thickness and orientation
of application, number of coats, firing
temperature, and the program. Another way I like to
play with my brush on glazes is to use this
Amoco texturizer. It creates such a change
to your glazed surface, and textures vary depending on what type of
base glaze you use. Gloss, mat or textured. It really broadens the
glaze palette tremendously. I hope this helps you start
to see the many ways you can achieve different results
with your brush on glazes. Really, the key is
experimentation, having fun. You never know what's going
to come out of the kiln, and that's the fun and
exciting part of pottery.
7. Conclusion: So there you have it a
pretty comprehensive journey through the world of glazing, from that crucial
bisque fire right through to getting creative
with different effects. We've covered why Bisk
firing is your best friend, how to navigate all those
exciting glazed choices, thinking about temperature, the look you're after,
and what you're making, and, of course, the
nitty gritty of applying those brush on
glazes step by step. Just remember those
key takeaways. Always start with
clean biscuare, match your glaze to your
clay firing temperature, keep those bottoms clean, and give yourself that
little margin for the kiln. That one is super important. And please get into the habit of testing your glazes and
taking really good notes. Your future self will
definitely thank you for this. It might seem like a lot
to remember at first, but like anything in pottery, each step becomes more familiar and intuitive
with practice. The most wonderful part about
glazing is the room for experimentation and
the sheer magic of seeing those
transformations in the kiln. So my biggest encouragement is for you to have fun with it. Don't be afraid to
try new combinations, layer things up, and really
explore what's possible. That's where the
unique beauty of your pottery will
truly start to shine. Thanks for sticking
with me through all of that and happy glazing. I hope you create some pieces
that you absolutely love. Make sure to share
your glazing in the project gallery so
I can see what you've created or tag me
on social media at Mgmakst me and
leave me a review. If you're interested
in pottery templates, check out my website, Meg Make stop me all my other Skillshare classes in
order to learn more. And most importantly,
happy potting.
 Megan Clark, Pottery Templates & Tutorials