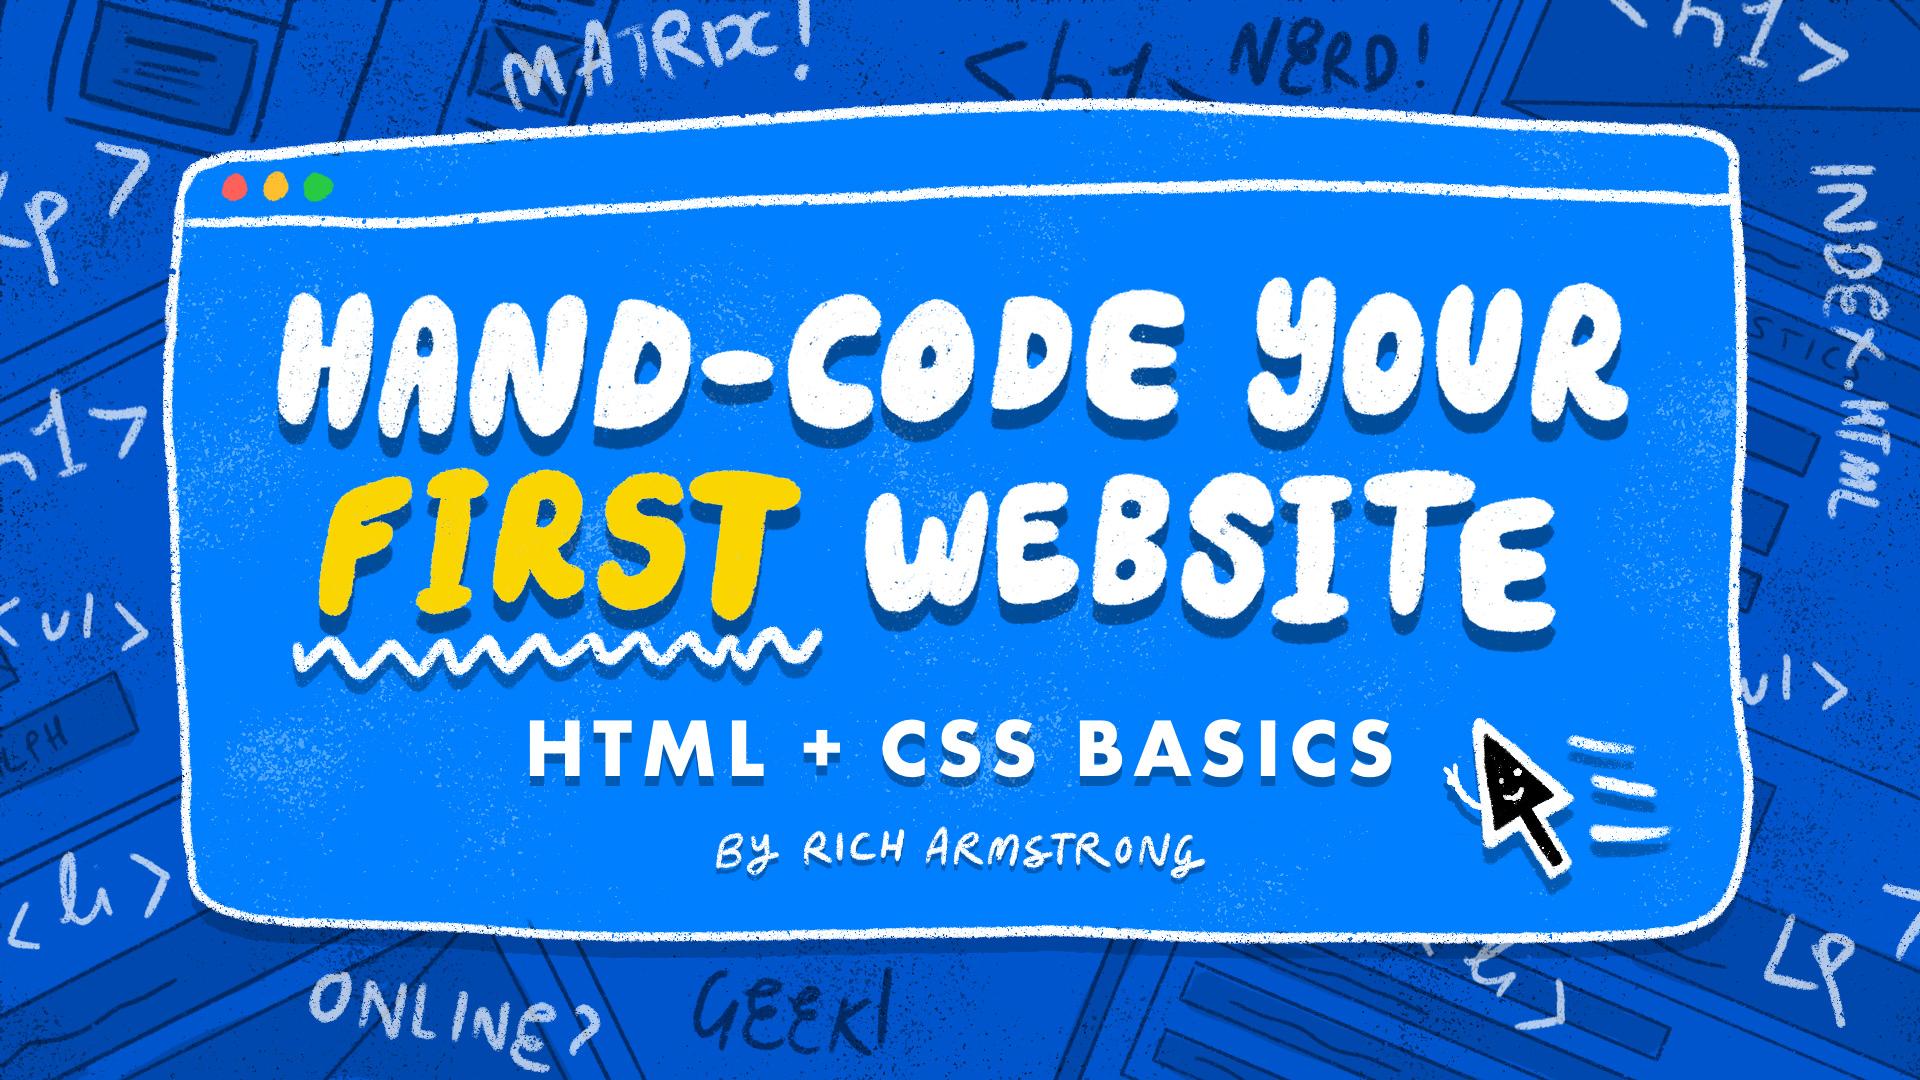
Transcripts
1. Class Intro: Hey, my name is Rich Armstrong
from Tap Tap Kaboom. And I've been designing and
building websites since 2007. And in this course, I'm going to show you how to hand code your first website from
scratch using HTML and CSS. For me, being able to write my own HTML and CSS is
more than just coding. It's a modern way
of creating and expressing myself
in a digital way. A website is a real
thing that hundreds of people can visit and
use and interact with. Being able to code it by yourself gives you an
incredible advantage. You don't have to rely on
other people, hack templates, hope AI gets it right or try using complex apps to
bring your ideas to life. Knowing how to code is
super fun and rewarding. And when you do
use templates and content management systems and AI to help you
create your website, knowing how to code will make everything
easier to understand. It's like a superpower. During the course, I'll take
you step by step through creating a simple website
for your favorite cartoon, hero, or movie character. I explain everything in an approachable way and leave out the stuff you
don't need to know. By the end of the
course, you'll have made your first website that you
can share with the world. You'll know the basics
of HTML and CSS. Your friends will be jealous. Your mom will be super proud, and you'll have a solid
foundation to build on top of. So whether you're an absolute
novice or have dabbled in some web design
and development before, come take the course. All you need is a computer
and an Internet connection. Okay. I'll see you
in the next video.
2. Welcome: Hello. My name is Rich
from Tap Tap Kaboom. During this course, I'm
going to take you step by step through creating
a simple website for your favorite cartoon hero, or movie character
or series character. I explain everything in
an approachable way, and I leave out the stuff
you do not need to know. By the end of the
course, you'll have made your first website that you
can share with the world. You'll know the basics
of HTML and CSS. Your friends will
be super jealous. Your mom will be super proud. And you'll be ready to learn
a whole bunch more stuff because you'll have
a solid foundation to build on top of. We'll start by getting you all the right apps to get coding. Then we'll start coding, like just jump straight into it. And then I'll add in
theory and more practice. Finally, we'll know
enough to create a website for our favorite cartoon hero or movie character. So, let's get into it.
3. What to Download: To make coding way easier, you'll need to download
and install a few things. A code editor, a
development browser, and a way to back up your code
and publish your website. The first thing you'll
need is a code editor. They make suggestions,
complete your code, and make parts of
your code different colors so that
it's easy to read. Basically, they help
you code quicker and with fewer mistakes,
which is just awesome. One of the most
popular code editors is called Visual Studio Code, or VS code for short. It's made by Microsoft and
it's free, which is perfect. You can download
it from this URL. The second thing you need is
a good development browser. Every browser has a bunch of tools that will help
you create websites. But Google Chrome is the
best, in my opinion. With it, we can spot errors, understand why certain things are happening or
are not happening, and we can tweak our code for instant updates in the browser. You can download
it from this URL. If you already have
Google Chrome, you can just skip the step. The third thing you need
is a way to back up your code so that if your cat
walks across your keyboard, you can easily restore
a previous version. This is where something
called Git comes in. Git keeps track of
all the changes you make to your
files. It's powerful. And with Git Hub, we can back up all of those
changes online so that if your cat decides to push your computer right
out of the window, all is not lost. Also, GitHub allows you to publish simple websites
using the code you send it, which is going to come
in super handy later on. I like using an app
called Git Hub Desktop to work with Git and GitHub
rather than the terminal. It makes the whole
backing up thing a lot easier and a
lot more visual. So, create an account at github.com and download
GitHub desktop from this URL. Once you've
downloaded, installed and signed into VS
Code, Google Chrome, Gitub and Github desktop, you'll have what you need
to develop like a Ninda. And so then you can just skip to the next lesson and begin
making your first website. If you need more step
by step instruction, I'll spend the rest
of this lesson showing you how to download, install and sign into VS Code, Google Chrome, GetSub
and Gitub desktop. Okay, so the first thing I
need is Visual Studio code. So I'm going to
open up a Safari. You can open up your
browser of choice and search for VS code or
Visual Studio Code. Siri is suggesting this
one, Visual Studio code. So there we go
code.visualstudio.com. Download for your
operating system, Tada. And there we go.
It is downloading, so I'm going to go
back to Finder, and there we go. I'm going to drag this into my applications folder. So Baa. Now I'll go to my
applications folder and just tap on VS on my keyboard and got pretty
close, got to weather. Maybe I did that wrong.
Visual Studio code. I'm going to double tap on that, open it up. Needs to verify. It's an app that I download
from the Internet. Am I sure that I
want to open it? Yes, open. Okay. There
we go. It is done. It is open, fantastic. You can choose your theme here. I prefer this dark, modern kind of theme, the kind of default
that it ships with, but you can choose
what you like. There are a bunch of
ways to customize this, but I'm not going to cover
this in this course. Okay, next thing we need to do is go and download
Google Chrome. If you already use it,
skip on to the next step. Okay, let's go for
Google Chrome. Here we go. Google Chrome. Serious suggest this one. And Okay. The browser built to
be fast and safe. And yours. Great. Okay, download Chrome. Thanks for downloading. Okay, let's go to Finder. Let's go back to Downloads. Google Chrome needs
to be installed. Conscious like dragon drop. So let's drag this into
our Applications folder. Pretty quick
installation process. Alright. Then we can go
back to applications, and I'll go for GO for Google Chrome and
then double tap that. Dip, dip dip dip.
Okay. Yep, it's also downloaded
from the Internet. Open that. Google Chrome is ready to complete
your installation. Do you want to set Google
Chrome as your default browser? I do. I'm going to check that. Help make Google
Chrome better by automatically sending usage
statistics and crash reports. I like doing that. I like Google Chrome and other
apps being better. So if I can help them
be better, then great. Okay. Start Google Chrome, and then notifications may include alerts sounds
and icon badges. I'm going to allow that. Okay. So now at this
point, you can sign in. If you have a Google account, maybe have on with
your business, maybe you have a personal
one, you can sign in. I'm not going to
sign in for now. I don't need to, so I'm going
to tap on Don't sign in. Okay, default search engine. I'm going to go for Google. Fantastic. Set as default. Tone on add privacy feature. No, thanks. Whew. Lots of things that we need
to go through. Other add privacy
features now available. I got it. Thanks. Okay, so we've got Chrome.
We've got VS code. Now, in Google Chrome, we can search for github.com. But I'm going to right
click on Safari and quit it. Don't
need that anymore. Okay, let's go and search for GitHub C. Ta da, da, da. Okay. This may look different
from time to time, like, this looks pretty cool, in my opinion, sign up for Github. Okay, into your email. I already have an account. So just go through this
process with your account. I'm going to sign up with
a test account right now. So I'm going to go
for test or Rich plus test at Tap Tap kaboom.com. Sign up for Github.
Welcome to Github. Let's begin the adventure. Enter your email, yes, continue. Create a password. I use one password for a
lot of my stuff, but right now, I'm just going to use something really simple. Wow. I think I can remember that. Alright. Continue.
Enter a username. I'm just gonna say Rich. Alright, go Dutch,
Rich, tap, tap, boom. Test. Alright, and continue. Okay, verify my account. Okay, let's solve this puzzle. Use the arrows to
rotate the object to face in the
direction of the hand. Yeah, I think that's good. Alright. Okay, save my password. Uh, yeah, let's save that. Then I don't have
to remember it. Again, I use one password to remember and create
my fancy passwords, but right now I'm not using
it, so let's save that. Okay. You're almost done. We sent a launch code to Rich at test at taptapkaboom.com. I'm just going to check
that on my phone. Quickly, quickly, quickly. Let's go and open
up the Gmail app. So you should get
an email sent to this email address that
you just supplied it. And let's go for
Rich taptapkaboom. Okay, my Github
launch code is 058, two, five, two, one, two. There we go. Okay, username
or email address, Rich. I think it was like Rich plus
test at taptapkaboom.com, my password, it has remembered
it for me. Sign in. Safe password.
Yeah, safe. Got it. How would you describe yourself? You can probably tap on student. How many team members
will be working with you? You can fill this out more
accurately if you want, but for now, just me. And, okay, continue. You can also skip this
personalization part if you want. Top two things you want to do with Github,
start a new project. Okay. Continue. Okay, learn
to ship software like a pro. Just go for free. But a
bar, continue for free. Whew. Lots of steps to go through. Okay. Set up. We've got Github. We have got Chrome. So let's move Chrome
next to Safari. Let's ditch Safari. Cheers, got VS code here. And then GitHub. We've got github.com. Now we need GitHub desktop. So let's search for Git Hub. Desktop. Okay, I
accept all of this. Okay, desktop.github.com.
Download for MacOS, you download for your
operating system. Patta. Okay. Let's go to Finder. Let's go to Downloads. Let's open up this one. Okay, drag it into applications.
Go to applications. Type on GIF GitHub desktop, and then double tap
that, open it up. Yes, it's from the Internet.
I want to open it. Fantastic. Okay, welcome
to GitHub desktop. Sign in to github.com. Sad a Yes. Signed in as Rich Tap Tap
Kaboom test. Continue. What you're doing here
is you're giving GitHub desktop permission to
access your GitHub account. Authorized desktop. Okay, open GitHub desktop
app. I'm gonna check. Always allow that
open GitHub desktop. Yes. Okay. Configure Git. This is to use. This is used to identify
commits you create. Anyone will be able to see this information if
you publish commits. Use my GitHub account
name and email address. Yes. Name, email, finish. Whoo. Okay. You've got what you need to rock and roll
or to develop like a ninja. In the next lesson, you'll make your first website.
I'll see you there.
4. Make Your First Website: Before we jump into theory, let's get our hands dirty
and make our first website. And this for me is the best
way to learn by doing first. I won't explain too much
theory during the lesson, that'll come after this lesson. Okay, let's code our
very first website. What I want you to do is open
up Github desktop, tada. And if you aren't
signed in already, let's go to the
settings up here, sign in to github.com,
continue with browser. And if you are signed in here in your browser,
you can tap on Continue. If you aren't, then
you need to sign in. You may need to reauthenticate
you may need to fill in a password or a key
or something like that. Then press Continue. Okay, authorized GitHub desktop. Yes. Okay. There
we go. We're in. If you want to double
check that you're in, go again to settings, and then you should see
your username here and an option to sign
out of github.com. Alright, save. Now what I want to do is create a
new repository. So I can create a new repository on
your local drive here, or I can go file new
repository or press Command N or Control N. So
let's go for a new repository. And because this is
our first website, I'm going to say my first
websites and spot it correctly, it's going to say
will be created as my dash first dash website. That's because it
doesn't like spaces. And so what I would recommend
is also not using spaces, but using dashes
instead of spaces. And let me check something here. That's okay. If you
want to use capitals, you can, but I prefer not to. I prefer using no capitals all lowercase and dashes
instead of spaces. This is called Kebab case, and I'll show you
a couple of other options later in the course. Okay, so my first website, the description is this
is my very first Website, the local path, I'm going
to choose Downloads. I already have a
repositories folder, which has a whole bunch
of websites in it. So the downloads is really easy to use for
me in this course, but you can choose wherever
makes sense for you. I do not want to initialize this repository with a read me, gets ignored, none
license, none. Let's create this repository. Okay. And now you'll be like, Okay, what happened?
Well, check this out. Inside the Finder, we now
have my first website. It is a folder with
nothing in it. Uh huh. But there is a
secret hidden file in it. So let's drag this into VS
code or Visual Studio code. This is the first
time you're opening it, you will see a little bar. You'll then have to
say yes, open it. Come on. Yeah, cool. And then, do you
trust the authors of the files in this
folder? Yes, I do. But also maybe check this. Trust the authors of all files in the parent folder downloads. Yes, I trust the authors. Okay, themes, let's
not worry about that over here. Get attributes. This is your hidden file, which has to do with Git and managing all of your commits, all of the changes,
everything like that. You do not need to
worry about this. It's hidden for a reason. What I want you to do here is to tap on this little button, which is a new file or go here and say file new text file. So let's go for this one.
Bam, and I'm going to call this one my first
webpage dot HTO. And you see, as we change that, this little icon on
the left changed to these orange braces. Okay. My first webpage,
we've got that open. I'm gonna double tap over here, so it gives us some more space, and I'm gonna press
Command plus. So now you guys can see what
I'm actually writing here. So what I'm going
to do here is go for a less than symbol. There will be a whole bunch
of options that pop up, but I'm just going
to go for H one, which is a heading
one, the biggest, coolest heading, and then
a greater than symbol. There we go. And what it
should do is it should create the closing
tag of this element. So you've got your opening tag, and you've got your closing tag. Fantastic. And inside, you
can say, my first website. Okay. Then at the end, we're going to press Return
or Enter, do the same thing. So less than P greater than. And this is a paragraph tag, a paragraph element, and
we're going to say, Hey, how cool is this my
very first website. And then Command or File Save. Okay, you'll see that there's something
happening over here. This is source control, basically Github, saying, Hey, things have changed,
so let's go over here. Who, there's a bunch of really
cool stuff happening here. Great, but I still want to use GitHub desktop for a reason because it's just a lot
easier to visually see. And when we start using
github.com to host our webpages, it all works really well. Okay, let's go back to the Explorer and
go down to Finder. And we'll now see my first
webpage dot HTML is there. Double tap on that. Whoo. My first website.
Hey, how cool is this? My very first website. Can close this tab. There we go. You've just created
your first website, your first webpage. It doesn't look like much. Sure, and only you can see
it on your local computer. Sure. But still, this
is an epic first step. What I want you to do now
is go to Github desktop, and you'll see here changes. One change file, my first
webpage, you've added it. Okay. Here, it wants you to
give this change a title. So we can say created the
repo and created First file. You will have to do this if you're creating
more than one file. But if I just cut all of this, you can just go create my
first webpage dot HTML. It's like, Yeah, that's cool. So I'm going to just
paste that back. Description. Honestly, you don't have to describe
everything that you do. But hey, this is going
to be our first commit. So let's go four. Hm.
First commit. Yeah. And then commit to Maine. We only have Maine and
Maine is a branch. And we go, Bam. Commit to Maine. Which is cool, right?
Yeah, it is cool. Now, this is just on
your local computer. We will get on to
shipping this off to the online version and viewing it online later in this course. You just created your
first website. Sure. It only has one webpage, and only you can access it, but that doesn't discount
it as a website. Congratulations. You should be proud of yourself, seriously. In the next lesson,
I'm going to tell you what a website actually is.
5. What Is a Website?: So what is a website? It's basically a
folder that contains one or more webpages that are often related
to each other. By entering in a
domain name like taptapkaboom.com
into your browser, you'll get taken to that folder. And in that folder,
there will be one or more web pages
that you can access. Most of the time, you'll be
shown the default webpage if you don't specify which
page you'd like to view. Now, what is a webpage? A webpage is a text document that's written in a way that
browsers can understand. That way is called HTML. And based on the HTML
inside a webpage, a browser then knows
what to display, how to make your page look, how to respond to
user interactions, what information to show search engines and a whole
bunch of other stuff. In the next lesson,
we'll cover more of what HTML is. I'll
see you there.
6. What is HTML?: What is HTML? It stands for hypertext
markup language, but that's not helpful, is it? So I like to think of HTML as the primary language we use to tell the browser what to do. The building blocks of this
language are HTML elements. A webpage is made up
of HTML elements. For each type of
element, the browser does something different. This is a heading one element. The browsers like, Oh, the most important
heading on the page. This is the heading
text. I'll make it big. I got it. Don't worry. This is a bold element. The browsers like, I will display this in a
fatter fon style. I'll make it stand
out. Don't you worry. And this is a link element
or an anchor element. The browsers like, It's a link. I'll make it blue, and
I'll underline it. And when someone clicks it, I'll take them to
the URL found here. Awesome. And this is
an image element. And the browser is like, I
will display this as an image, and the image I'll
use is located here. Specific HTML elements tell the browser to do
specific things. Mostly these HTML
elements instruct the browser to display
information in different ways, like lists or headings and
paragraphs and images. But there are other uses, too, like telling the
browser how to style the page with CSS or
telling the browser how to respond to user
interactions with JavaScript or telling
the browser what the page title is for
search engines or what image to use when someone
bookmarks your webpage. There are tons of
different HTML elements, and don't worry,
we're not going to go through all of
them in this course. If you do want to find them out, go Google them or ask Chat GPT. The next lesson, I'm going
to explain HTML box theory, which is an easy way to understand how HTML
elements work.
7. HTML Box Theory: I like to visualize
HTML elements as boxes. In most webpages, there are boxes inside of boxes
inside of boxes, and the box that contains the other boxes is
our browser window. This is what I call
HTML box theory. Inside each box, there can
either be one or more boxes, text, a combination
of text and boxes, or nothing at all. By default, most
boxes are as high as their contents and as wide as
the box they're inside of. Other boxes are as high and
as wide as their contents, and most boxes sit
as far to the left of the page and as far to the top of the page as they can. And of course, there are boxes that behave completely
differently, like some boxes are
invisible to humans. And then, of course,
you can change all of this when styling
your boxes with CSS. But I'll cover that later on. In the next lesson, I'll
show you how to write HTML.
8. How To Write HTML: So how do we write or
code an HTML element? Well, most HTML elements have an opening tag and
a closing tag. An opening tag is comprised
of a less than symbol, the tag name, and a
greater than symbol. A closing tag is comprised
of a less than symbol, a forward slash, the tag name, and a greater than symbol. In between these two tags, you can put one or
more HTML elements, text, a combination of elements and text
or leave it blank. The whole HTML element then is made up of
the opening tag, the contents, and
the closing tag. And by default, a
browser will display HTML elements from the top of the document towards the bottom, just as they are
in your HTML file. But how your browser displays
an element and the elements inside of it depends on
what type of element it is. Is this all you may be
asking? Well, not quite. There's one more thing
HTML attributes. HTML attributes are important
extra details added to HML elements that
tell the browser how to display it and what
functionality to add. We use attributes
to style elements to tell the browser where to
go when you click on a link, what file and image element should display, and plenty more. An attribute is
made up of a name, an equal symbol, and a value, which is wrapped in
single or double quotes. You'll use them all the
time when writing HTML. Okay, now you understand
HTML in theory. In the next lesson, you'll start writing it with a little bit
more knowledge than before. I'll see you there. Um
9. Writing HTML: Okay, let's start
writing some HTML. This time, with a
better understanding of what's actually going on, we're going to create
a new repository so that you become
comfortable with the process, and we'll also start doing
some fun stuff in Chrome. Alright, let's go
into Github desktop. And you've got your
current repository. But now we want to
create a new repository. Check out the new
accessibility settings. Okay, thanks. Let's go
File, New repository. And we're going to
create a new one because we want to get into the hang
of actually doing this. Let's call this one experiment. There we go. We don't
need a description. Local path downloads. The rest is great.
Create repository. Fantastic. Let's
go back to Finder, drag experiments into
Visual Studio code. Okay, it's all big again. I'll create a new file, and I'll call it
test HTL, Return. Okay, now we know
a little bit more, you know, about what's going on. So, less than H
one greater than, and we say heading one. Okay. I'm going to
press Less done, P, press return here,
and then press the greater down, and
then paragraph. Okay. So at heading,
a paragraph. What I want to do next is a link that links
somewhere else. So instead of paragraph,
let me say, Hey, this is a cool item. And cool item, I want
to link that somewhere. So greater than or less than. And I'm going to go
for A for anchor. So it's not a link.
It's an anchor, and then greater than, and I'm going to select
this and cut it. So Command X and put
it after that parod. But before this closing
tag of my P element, and then this doesn't
really do much. It's just an anchor element until we have an
attribute which is HRF, which is where we
want this link to go. So it begins to populate some options here. I'm
going to go for HRF. It should then go equals with two little quotation
marks and HRf Let's go for HTTP colon slash google.com. Okay, this is a cool item. We can update this fairly soon. And then Command S.
Let's go to our Finder. Inside Experiments. Double
click on test. Heading one. Hey, this is a cool item. Okay. And if you
tap on that one, it takes you to google.com. Ooh. So what's
happening here is that there is an element
inside of this P element. And inside of this P element, there is also some text. Pretty cool, right? Yeah,
I think it's pretty cool. Next, what I want to do is put an image tag or
an image element. So I am G, going to press Return. And then here, SRC for source
and then we need an image. And then this is
actually a special one. It doesn't need another tag, so I'm just going to go for that or I'm going to go for slash
and this greater an sign. It is a single tag. You can't put anything inside of an image tag
or an image element. Okay, so source, we
need an image of sorts. So let's go to Chrome. And, hey, we're in
Google already, so I'm going to search
for cat cats are great. Let's go for images. Okay. National Geographic cat. Hmm. This one's yawning. What about this little
cutie. Alright. So right now, I'm
gonna right click and see if I can save
this. It is a link. Save Image As. There we go. So Save Image As. Let's go for downloads. Okay, let's name it
that weird name. Let's go to downloads. Put it into experiments. Okay, and call it cat dot JPEG. You could right click and tap on Rename or just press
Return on Mac anyway. So we've got CAT JPEG. That means in source, we can go for cat dot JPEG
or we could go dot slash, which means, hey,
look in this folder, this very current
folder that this file is in for cat dot JPEG. Okay, Command S, let's
go back to Chrome. And hey. Let's go. B, B, B, B. Refresh. Not needed because our
Catimage is there. Wow. Alright. That looks cool. So that's one way of giving your image element
a source attribute. Another one is, let's
go and do this again. Cat. Let's go look for images. Let's choose, this one,
this green one, yes. I'm going to tap on
that. Right click your Copy Image address. Alright, I'm going
to go for a new tab and then I'm going
to paste it in here. And press Enter. And you see
it takes me to an image. Now, we could download this
again or we could just use this very URL that it gave us and create a
new image element, source, and we put the
whole thing in there. Alright. Command S. So we've
got this local cat image, and then we've got this CAT
image which exists online. Now, the benefits of having
something locally is that, well, we're in control of it, so we don't just remove it. The benefits of this one online
is that we don't need to store that image on our
server or our file system. But if they want to remove it, it's gone. So save that. If we haven't already,
let's go to Chrome. Let's open up our test
dot HTM again. All right. We have two images, great of cats, nonetheless. Now, if something goes wrong, so maybe instead of cat, we search for Doug. I'm
going to save that. Let's go back to
Chrome, refresh. You'll see that you get this
little broken image icon. It's because it can't find
what it's looking for. So you might want to be
like, Okay, cat, great. If you go for a
JPEG, for example, and here I'm just
going to press Command R. Again, that won't work. So what you need to do here is make sure that you're
spelling it correctly. Command S. Okay. Command R here, little cute
cat is back. Same thing here. If I remove the dash
from Felv and CAT, Command S, let's go
to Chrome refresh. You'll get this broken
image icon again. Okay, so beware of that. Okay, Command Z. Let's go back safe. Let's see if
everything's working. It is fantastic. Now, let's create another
paragraph do it over here. P, and I'm going to say, Wow, these cats
are so super cute. And so I want to be bold or maybe cats.
I want to be bold. So I can either use the B element which is bold.
And I'll just cut that. Ooh, where do the cats go? These cats are so super cute. Or what I can do
is change this to strong and make sure that you change the
closing tag, too. Strong is more fancy, but bold also works. So while these cats
are super cute, I want to italicize
this or emphasize it. So let's go for EM for emphasis. Cat this. Alright. Command S. Let's go back to
Chrome, refresh. And here we go. Wow, these
cats are so super cute. Now, check this out. I'm going to right
click in Chrome, and I'm gonna say inspect. And it might pop up on the right if it does, and
you're cool with that. Great. Otherwise, I like to tap on these three dots and
make it appear at the bottom. Also, let's maybe double
tap on this bar here, and it'll make
everything bigger. Okay, so here you can
begin to see the elements. I'm going to press
Command plus to make this a little bit bigger
so you can see it. Okay. And you might
be like, Whoa, HTML head, body, what
is all of this stuff? Yeah, well, Chrome does
some really fancy stuff. Although we haven't
written that, it's putting it there because it assumes that this is
what we wanted to do. So what's really cool about
this element inspector here is that as you
hover over each element, it then highlights it on the page above, which
is really cool. You can also then, right click
it and then edit as HTML. So we could then just remove that dish again
and then click out. And then poop, it
goes away. Hmm. We could then press Command
Z or Z, and it comes back. If you don't want
to right click on something and say inspect, you can also use this
little button over here. If I hover over this, then says, select an element in the page
to inspect it or Command Shift C. And then you just hover over stuff
and you can be like, Okay, inspect this one. All right, so strong. Let's see if bold works, right click Edit as HTMO
change this to B Alright. That didn't seem to
change anything. Maybe let's change it to EM. You can also just double tap. Okay, these cats are super cute. Whew. So what's happening
here is that you're just changing the local version that the browser is giving you. You're not actually changing anything on your file system. Now, you can also do this on
any website in the world. You can edit what the
browser is giving you. You're not changing anything.
You're not hacking. You're not going to go to FBI
prison, nothing like that. Totally loud, totally legal. It's just really powerful. So when you refresher, it's all going to go
back to what it was. You can also delete
elements, like, let's tap on this
image over here, and I'm just going
to press backspace. Oop. It's gone. So it's a really
powerful and visual way to code and see
what you're coding, see what your code looks like. I mean, even here, you can drag this emphasis above there. So, wow, these super
cats are so cute, which kind of makes
sense, supercats. But, yeah, you can even drag this strong element outside
of this P tag or P element. Cool. That looks great, right? Yeah. The other thing
that Chrome has done is it's actually put
a lot more code in here. So if we right click
and view page source, you'll see here H one, P, P, image, image. Great. Fantastic. But how did it actually do all of this
kind of stuff, HTML head, body, all that kind of stuff,
I'll tell you more about, but these are going to make
sense for an HTML page. So let's go write them in. Let's go to Visual Studio code. And all of this stuff actually
goes inside our body. The first thing that
we're going to go and want to put is HTML. There we go and
put it at the end. Now, when a bunch of elements
are inside another element, it's really helpful to just press tab and
then it indent it. It just makes reading
it a lot easier, and then we want to put
our head element here. Inside the head element
goes a bunch of invisible or hidden kind of
elements like the title, the little icon that appears in your sight,
stuff like that. And then inside of
your body element, all of your visual
code appears. Like so. All right, so quickly
before I save here, here, this is just called
test dot HTML, and back in Visual Studio code. Let's call this one. I'm going to put a
title element here. Let's call it Test page. Okay. Safe. Let's go back
to Chrome and refresh. You've got a test page now
inside your head element, you've got a test page
with a title element. Fantastic. One more thing that Chrome hasn't
actually done is given us a Duc type
and you may have seen that a couple of times as I've
been trying to write this. If I start writing here, it says Duc type. There we go. Duc type, HTML. You
don't really need this, but it just makes
some older browsers realize that this
is actually HTML. So there we go. Let's save that. Let's go to GitHub desktop. And here we need a
summary because we've got at least two files that
we need to commit. So we'll just say initial
commit and commit to main. Now, at any point in
time, if you're like, Oh, I want to add something,
yeah, go add it. So maybe somewhere over
here, like heading one, I actually want that
to be two lines, but I don't want to create
a whole 'nother element. I just want a new line.
How do I do that? Well, if you're not sure
about anything, go to Chrome, open up a new tab and be like, How do I create a
new line in HTML? And here to create
a new line HML, you can use the BR tag. Okay. There'll be a bunch of links that you can check out. Sometimes they're
on stack overflow. You can even use Chat
GPT if you want. So let's copy that
or we can just write it and you go back to
Visual Studio code, and then BR Alright. Heading one, Command S.
Let's check that out. Alright, creates a nice
little line break. Fantastic. Okay. No, you go back to
Gitybe desktop and be like, added line break in Heading. Commit to main. Okay, so as
you start to change things, just get into the habit of
being like, Yes, looks good. Commit. You want to make
sure that each, like, significant change
gets its own mit. It's the best practice. It means that if
your cat walks over your computer or swipes
your computer, you know, outside your window or you spill your ginger beer
over your keyboard, you haven't lost a
whole bunch of stuff. Maybe you've only lost, like, two lines of code or, you know, a slight change to an image element or
something like that. So you've just written a whole bunch of
different HTML elements. I suggest you fist pump the
air or let out a whoop. Whoa poop. Celebrate somehow.
In the next lesson, I'm going to show
you how to share your website with the world, which is pretty
exciting. See you there.
10. Share Your Website: Luckily, for us, GitHub makes it really easy
to use the web pages it keeps track of to create simple websites from.
Let's get into it. Okay, so how do we
get this online for other people to see now? Well, let's go to
GitHub Desktop. And we have this published
repository button, either at the top here or in the middle of
the screen here. So, publish repository. Github.com name experiment. You can name it something else. You can give it a description.
Keep this code private. You don't have to do that.
If you do want to share it, I would then recommend
unchecking this. So don't keep this code private. Especially if you
want my help or somebody else's help looking at your code or
checking out your code. Yeah, just uncheck that. Publish repository. Boom. Now, what's great about this is that if your computer, spontaneously combusts,
it's on fire. You can't access it anymore. Your code is now online. It also means that if you
have another three computers, you can access the same
code from those computers, and you can synchronize
them using github.com. Who. That's great. Okay, now what? It's
done its thing. Yes. Okay. Let's go to
github.com in our browser. And you'll see over here. This will be your username
slash Experiments or whatever you call your repo. Let's tap on that. Okay. So this is
Github, which is great. This is where your
code is stored. You can see CTJPEG test HTML, and you can even do
some editing here. But what we want to do
is publish our code, our website for
the world to see. So let's go to settings. And then pages on the left. This may look different
from time to time. Alright, Deploy from a branch. Yes, classic pages
experience. GitHub actions. No, best for using
frameworks and customizing your build process,
complicated stuff. So deploy from a branch. Fantastic. Okay, GitHub
pages is currently disabled. Select a source below to enable GitHub pages
for this repository. Yeah. Okay, none. We only have one
branch, which is great. Main, selected
root, great. Save. Okay. Your GitHub page site or Pages site is currently being built from the
main branch. Okay. GitHub Pages sauce saved. I'm going to refresh this
to see if anything changes. Okay. I think that is good. Okay. So now we need
to copy our username, so command T. I'm
going to go past that there dot github dot IO, slash, and then we're
going to go to Experiment. I'm going to copy that. And then let's go back to
our code base here. We've got test dot HTML. So slash test dot HTML. Whoa. There it is. It is online for the world to see,
ladies and gentlemen. Sometimes it takes a little
bit of time to actually, you know, get everywhere
around the world. Sometimes you're
there refreshing, refreshing, refreshing. But if you're like,
Okay, this is not working after 10 minutes, you may want to go
back to settings, and then back to pages. And then just have a look under the build and deployment
section over here. It should be pretty simple. And even over here, it says, Your site is live at here we go. So we're going to
go, Bam, visit site. This will happen if we
don't have an index file. So that's why we would need
to then put in test dot HTML. Okay, so let's try this now. I want to update my
page a little bit. I want to get a
little fave icon, and I also want to
change this link, so when I press it, it doesn't
load on the same page. Okay, so how do we do this? Well, let's do some research, and I want to get you
into the habit of researching because
everything is out there. So I want icon four HTML page. Fav icon, how do I create
icon for HTML page? To insert an icon add the
name of the icon class to any inline HTML element that
really doesn't seem like it. Uh tab icon. Tabicon. Yeah. Okay,
let's check this out. Okay, except the cookies. There are two ways to add a fav icon to a
website, 13 answers. Simply add the following
code to the head element. Okay, let's copy that. Let's go to Visual Studio. Okay. Icon. I want my cat one to be the fave
icon. Let's do that. Command S. But it
said there were two ways, PNG favicons favicons. That's what it's
called I supported by most browsers except
for IE ten and lower. You can also use ICO favicons. Don't have to proceed an
icon and roll attribute with shortcut anymore,
blah, blah, blah. All modern browsers
will always request a favicon dot ICO unless you've specified a
shortcut via a link. This is actually a link element, different from an
anchor element. Okay. So fa icon dot ICO. Now, I don't actually
know how to make an ICO, so I'm just going to keep
with my JPEG or PNG. Let's test if this works. This is the online one. This is the local one.
So let's refresh. Oh, there it is. You
can see it. Fantastic. So on Gita desktop, let's say, uh, updated fav icon. There we go. Commit to Min. Now, this first Commit to Min is only to your
local computer. But if you then push origin, this pushes to the online
version of your website. Okay. And we can check
this out by going to code in github.com, and test dot HTML is it here. There it is. The CatJPEG as the real icon
or the link icon, the Fav icon to refresh her. Then come up, refresh again. Doesn't seem to be working at the moment, may
take some time. What I want to show
you in the meantime is if we edit this a little bit, so edit this file. Let's go for heading Who? Maybe we can talk about.
Cats are really cool. And then commit to changes, update test HML
with new heading. Commit directly to
the main branch, crew, yep, yep.
Commit to changes. Okay. So now I've actually
made a change online, but locally, that
doesn't reflect. So let's go back
to GitHub desktop. And what we want to do
here is go fetch origin. And it says, Hey, pull one
Commit from Origin remote. So this is really handy
if you do work on multiple computers, or
there are, you know, people who work on the
same project as you all commit in code to that one, you know, source of
truth repository online. So then you tap on pull Origin. And that will then update
your local version. So let's go check this out. Cats are really cool.
Fantastic. There we go. Let's test if this one now has a little updated
favicon. It does. Fantastic. Okay. Now,
the final thing I want to do here is
where it says HRF. How do I get this to
open in a new tab? So again, let's do a
little bit of research. How do I code core
to open in new tab. Can obviously, of
course, ask hatiPT. But here, adding the
target blank attribute. Okay. Okay, okay. So, I know that this works, but if it doesn't work for you, just try something else. So let's go here.
Target. Okay, that's a good sign when it starts
to autopopulate return. It's got a couple
of options here. So let's go for
blank. There we go. Command S. Let's go back
to Chrome and refresher. Okay? Nothing should
change visually, but let's tap on cool item. And it opens Google in
a new tab. Whoo hoo. That is great. Okay, so let's
go back to Github desktop and made the link
open in new tab. Commit to Maine,
which is, again, still on our computer
and then push Origin. And in a little while, our websites online should
then be updated, too. You've just published your first site for the world to see, and it's securely
synchronized with Github. Now, every time you push
your code to Github, your site will update. Also, if you have more
than one computer, you can use the repo on Github as your ultimate
source of truth. You can push changes
to Github and fetch changes from
Github really easily. Now you're on your way to
taking over the Internet. But before we jump
into styling websites, I want to go over folders, file parts, and file naming. I know it sounds boring, but this is the cause of many bugs and errors
and headaches. If you understand these things, everything is gonna be so much easier. I'll see you
in the next video.
11. Naming, Folders & File paths: Okay, let's cover a few
things that will make your life a whole bunch easier
once you understand them. The first is to do
with case sensitivity. Most of the time on
your local computer, the one you're coding on, does not care if
you use uppercase, lowercase, or a
combination of the two. You can test if it cares by changing the case of
an image file name, either in the file
system or in your HTML. If things break when
the case changes, then your computer
is case sensitive. Why this matters is that
most computers and servers online do care about
what case you use. They are case sensitive. Why this matters is that
everything may look awesome on your local computer but messed up and broken when
you see it online. On your computer, accessing cat dot JPG may work
because cat dot JPG and cat dot JPG are seen
as the same thing because your computer's file
system is case insensitive. But Gitub servers see them as separate files because
Github is case sensitive. So check the actual file and folder names
versus the one you've written in your HTL and CSS if things like
this begin to happen. To prevent this from
happening, though, choose a standard way of naming your files
and stick to it. I prefer naming everything in lowercase and using
dashes instead of spaces. This is called Kebab case. Other popular options are
camel case and snake case. The second thing
that's going to make your life easier
is using folders. Folders make your
project neater. This is especially useful when your project grows in size. Sure. You can change
your code and create folders and put files
in them as you code, but this takes time and
often leads to errors. So I try to stay
organized from the start. I have an IMG folder for images. I have a CSS folder
for CSS files. If I have my own custom fonts, I have a fonts file, and if
I have JavaScript files, I have a JS folder. All I want in the main folder
are HTML files and folders. You can create your
folders in VS code or in your file system. The third thing that's
going to make your life so much easier is
understanding file paths. Since we're using folders
and files within folders, how do we tell the
browser where a file is? When writing out the file name, we let the browser know where
to find the file by using a combination of instructions before getting to
the file's name. The first instruction you can
use is to tell the browser to look in the same folder that this file is currently in. Use a period followed
by a forward slash. The second instruction is
to look inside a folder. Use the folder's name
followed by a forward slash. The third is to go up
to the pair and folder. Use two periods and
a forward slash. The fourth is to start at the root folder or
the main folder. You type a single forward slash. This may not work as expected
on your local computer because your project folder may actually be inside
several other folders. So when you instruct a browser
to go to the root folder, it goes all the way to the
beginning of the folder tree. But online, where there is a
Urol, it works wonderfully. You can also, of course, start with a domain or UROle
with a forward slash at the end like taptapkaboom.com
forwardslash. And what's great about these
instructions is that you can combine them like start on the folder that
this file is in, then go up to the parent folder, then go into the image folder, and inside that folder, there's an image
called cat dot JPEG. Okay, those are the three things that are going to help a lot. Let's refresh quickly. K sensitivity is important. Use folders from the
start to stay organized, and we use file path to tell
the browser where files are. Next up is learning
how to change how our HTML elements look with CSS, and this is where things
begin to get super fun.
12. What is CSS?: So we've written some HTML, but it doesn't look pretty. This is where CSS comes in. The CSS we write makes
our HTML look good by overriding the
boring default styles provided by the browser. We write CSS to tell the browser how HTML
elements should look. To do this, we write a property
name and a value pair, separated by a colon with
a semicolon at the end. We can style an element with as many property
pairs as we like. And there are tons of
properties you can write to change how an element
looks and feels and works. Properties like height,
background color, fun family, font size,
and a whole bunch more. Now, there are two
methods of writing CSS. The first is by
using inline styles, where we style an element using an HTML attribute called style. The second is by
using rule sets, where we select
elements to style, followed by the CSS properties and values for those elements. We'll cover both options and a few other important CSS
things in the next few lessons.
13. Inline CSS: In this lesson, we'll
get practical and start writing CSS
with inline styles, which we write in
an HTML attribute. Now, please note, everything is spelled the American way
when writing HTML and CSS. Yeah, so what we're
going to do here is create some inline styles. Who hoo hoo. So let's drag experiments into
Visual Studio code. And yep, it looks pretty big. Can close this welcome tab. So we've got test HTML. What I want to do here
is create a new file. And call it inline style dot HTML or
inline styles dot HTML. All right. Press for tone. And here you'll see, Oh, do we have to do this all again? Yeah, we have to do this
all again, but that's okay. So let's go for A, Doc type. There we go. Then I'm
going to do HTML. And then head. Yeah. Okay. And then here, we've got a title, and the title should be
inline styles. That's great. And then we've got a body. Okay. That looks good. So you can get, you know, really used to doing that,
practice doing that, writing the HTML head, body, stuff like that. Now, let's write an H one. And here, if you don't want to, you don't have to
write the opening tie. You can just type H one, and it should, you know, give you some options here. And this is called
an ET abbreviation, and I'm just going
to press Return, and it should go for H
one tag on the left, H one on the right, and then my cursor should
be in the middle. If it doesn't do that, then you're going to
have to, you know, write out your entire tag in the beginning and at
the end or your element. Okay, H one. So let's
go for heading one. I'm going to do this four times. And then what I'm
going to change here is go for heading two, three, four, and let's change this to heading two, three, and four. Okay. That looks pretty good. And then I'm going to
duplicate this again. And then Command S or save that. You can go to File and then
Save or Save as if you want, but Command S or Controls
if you're on Windows. And then let's go
back to Finder. We've got inline styles dot HML. Let's double tap on that to open it. And this is what you get. Heading one, two, three, four, they're all different sizes, which makes sense
because there are different levels of heading. Okay, cool. So let's go to
studio code or VS code. And we're going to create
an attribute called style. And here, I'm going to go for font size font size and
change this to 30 pixels. There we go. That looks good. I'm going to copy
and paste that. Ooh. Lots of copying
and pasting. And then these ones, I'll go for 20 pixels. And I'm gonna save
that. Okay. Let's go to chrome and refresher. And you'll see that
our first bunch of headings are all
the same fun size. The next bunch of headings
are also the same fun size. Whew. Pretty cool, right? Yeah. So you can make things look the same, even though they're
not the same. Okay. We can keep on adding
more properties here, so let's go for color. This is text color, not
super intuitive, I know. There's a bunch of ways
that you can do color. You can go for hex code, so it can be like, hash, ff00 00, which is red, or you could just
write red like that. But when you write the word red, there's not that many
variations of red. So if you wanted
something like that, well, there isn't a word
for that, I don't think. So let's save that.
Let's go for color here, not counter, whatever that was. Color has to be
American, remember? And here we can go for Alice
Blue. Is that a thing? Let's see. So Alice blue. And the reason why it's
complaining is because we don't have a colon or a
semicolon at the end. So let's try this again. Color, there we go. Alice blue is kind
of like a white. What about aquamarine?
There we go. Cool. And you should
see the colors appear just before
the actual value too. Okay, color here.
Let's go for red. Okay. And then finally,
this one here. Color, let's go down, using my arrow keys
on my keyboard. Crimson is pretty cool. What about a dark golden rud? Whoo. What a color name. Okay. Save that. So
you can see here, if you want all of these
to have this color, you can just copy
it and paste it. But then if you wanted
to change them all, you might be like, Oh, okay. Let's go for something else now. What about RGB relative? Hmm, I don't even know what
that is, to be honest. But RGP or RGBA,
we could do that. So red. Let's go for
255, green value. Let's go for 120, and a blue
value, let's go for 100. These are values 0-255, and then an Alpha value,
let's go for 0.5. So it's kind of opaque, semitransparent in the middle. So there you're going
for a number 0-1. It's normally a fraction. So you could say 0.5. Oh, and here look at this, comes up with a nice
little color picker. Ooh. Fair fancy.
So, look at that. Okay. Cool. So what I was saying earlier is that if you wanted to then
change all of these colors, you'd have to then
copy and then paste, paste, paste, which can get
a little bit irritating. You can have two
semicolons at the end, but it's not necessary. Okay, let's say
that. Let's go back to chrome and refresh. Okay, so you can see these bottom four
have the same color. You've got some different
colors at the top here. Fantastic. Now, what's
really interesting is that when you start changing stuff inside of an element. So
let's go for heading one. I'm going to put
this on a new line, which shouldn't change anything. And then I'll change this
number one to a letter one. And I just want to show you
that nothing really changes. It's a refresher, just the text. And this one, I also want
to change its color. So the way I do
that is by putting a span element around it, and then we can put
a style attribute in there and change
the color to blue. Okay. I'm gonna save
that and then refresh. So unless you actually
specify the color, it should inherit the color
of its parent element. So if I write Cliqre
and I say inspect, you see that this
span has a color of blue and its parent has a
color of that ready color. Okay, if you want to
change this really easily, you just select this color, and then here should say styles, and it should show you where all of the styles
are coming from. So inherited from H
one is the color red. So if I unchecked blue, then the color red or this ready color from its
parent element comes through. M Okay. What I want to
show you now is if you give an element multiple
properties of the same name. So check this out. Let's
go to Visual Studio code. And let's add
another color here. Let's go for some kind of
yellow green. Looks good. Okay. And then maybe
for heading two, we change this to color, and we go for a dark,
slate blue. Okay. Now, maybe you know what's
going to happen already, maybe you don't
while we're at it, I don't really like
it when Things just carry on and on
towards the right. So how do I change this? Well, I want to go for
some kind of settings. So I think it's
command and comma. There we go, or you go
for code and settings, and then you just tap
on settings over there. Now, what I want to do is
search for rap, word wrap. Line should wrap, and
I want that to be on. So let's see if that wraps. Yes. That means it doesn't carry on and on and
on towards the right. It just wraps quite nicely. So this is my age two, and
it's all still on line 14. Okay, thank you. Let's say that. Command S, and Command
R for refresh. Okay. So heading over here, let's have a look. Hmm. So you'll see that
the property color, the one that was added last is the one that the browser applies, and you can
see it over here. It's color red, that red, and then it goes
color yellow green, it's crossed out this one because we've put
that property last. The same thing for heading
number two over here. So if we inspect this
one, the color dark, slate blue takes precedence over this other RGBA color
because it was written last. But this span with the color blue still has the color blue because
it's its own element, and the color that it
was inheriting from this H one gets overwritten
by its color blue, especially because
it's an inline style. Now, what else can we do? Well, check this out. If I just tap on one of these property values
and I press Return, I can then start
entering another one. So let's go for background. Let's go for color. And then here, what is Azure? Let's go for Azure. It doesn't really show up. So maybe for light
golden rod yellow. A really doesn't
show up very well. How about we just go for, like, a dark red, Indian red. There we go. It's pretty cool. And again, if you refresh here, that style is not
going to persist. It's not going to get
saved into your file. You're just trying things
out in this version that the browser is sending
to you right here. Okay, so let's go in and put a couple of
background colors in. So visual studio code. Well, let's go for
background color. Okay, let's go for a
green Gray, greens cool. Make sure that you have your semicolon
between properties. So background color here, but what happened to the font
size kind of disappeared. So let's go for font size, and for some reason, it just
wipes out that 30 pixels. So even though it's
autofilling things for you, just double check
what it's doing. And then we can copy and paste this over here and
maybe over here. Okay. This one, let's go
for background color. Whoa. An Indigo. Okay. If some of these things
that pop up get irritating, you can turn them
off in settings. You might just need to search what they're called
or, you know, just generally go
through the settings and change some things
to your preference. Like, all of these things
like, Gus, come on. I'm just trying to
write stuff here. Indigo, Indigo, Indigo. And you can see how, like, really confusing
this is getting. Like, Where is my text? Where are my styles? Like, Whoa. And this is all leading us up
to the next lesson. Don't worry. This is why we're
going to progress. Okay, let's go for Google
Chrome, refresher. Okay, everything now
has a background color. Fantastic. And if we
were to change this, we'd have to change
every single line. So, one, two, three, four, five lines for the purple one, one, two, three, for the greens. Wow. Okay, now let's go
to Github Desktop. We've got a new
inline styles file, so create inline
styles called HTML. Commit to Maine, and
then push Origin. What's really
important now is that if you need my
help for anything, I would like you to push it up to your GitHub account
so that you can say, Hey, things aren't working. Here's my link, please. H, me. And then you can send me a URL. So you can be like, Okay, let's go to GitHub. Dot com, and you can go
to your Experiments repo. You can then go
to your settings. You can go to your pages, and then you can go to your
site as Live over here. And then because
we've been working on inline styles dot HTML, you can then share
this page with me, and then I can have a good
look at it, you know? I hope you're starting
to see how fun and cool and powerful this is. You can make things look epic
and awesome pretty easily, but you may have noticed that this could get mercy
and that it could take a long time to change the CSS for multiple elements that
you want to look the same. So in the next lesson, I'm going to show you how to use CSS rule sets and tell you why they're
often better to use.
14. CSS Rulesets: With the CSS rule set, you specify which elements
you want to style, and then you write
the property names and values inside
the curly braces. Let me tell you
the official names of all the parts of a rule set. It'll make everything easier to explain and understand
going forward. The part where you specify
which HTR elements you want to style is called a selector
or selector statement. It's where you select
which elements to style. This selector is targeting
all H one elements. This one is targeting
all image elements. We'll cover more
complex examples of selector statements
later on in the course. The part inside the curly braces is called a declaration block. It contains one or
more declarations separated by semicolons, and a property value pair
is called a declaration. At the end of a declaration, you put a semi colon. So what this rule set says
is select all heading one elements and make
their text color red and their font size 50 pixels. Using RuleSets makes your HTML files much neater
and easier to read. And you can do some powerful
things with selectors, which I'll get onto
later in this course. Okay, let's start writing
some rule set based CSS. So instead of writing
and whole new HTML file with the head and
the body elements, I'm just going to
duplicate this one. So right click and duplicate, and then I'll press Raton or right click and
then tap on rename. And I'll call it RuleSet. RuleSet styles dot HTML. Okay. And then inside
of Visual Studio code, I'll open up Rul set styles. And you'll see that it's
green because it's new. So that's like saying,
Hey, it's new. So let's go in here. Let's
change to RuleSet styles. Okay. And then inside
of your head element, we're going to create a
style element like that. So opening and closing tag, and inside of your
style element, we're going to write some CSS. So I want to change
all H one elements. H one, when I press
opening brace, it should create a closing
brace for me like that. You can also put a space in between. I Qui
like doing that. Makes it a little
bit easier to read. And then when press tab, so puts my cursor over here. And then I want to change the let's go for the
background color. So background color.
Well, let's go for black because that's
just really cool, right? So Command S. Now, let's go to Google Chrome, and we don't have that open. So double tap on
rule set styles. And nothing here has changed. Interesting. So if we inspect this because
this is going to happen, you write something, you
expect something to happen, and then it doesn't change. So we have a look at this
H one, okay? Interesting. The background color is black, but it's been stricken out, and the yellow green
one has been applied. That's color, but
the background color of green has been applied. Hmm. So what's going
on here is that the more specific a
property and a value is, the more the browser is
going to favor that. It's going to choose
that one over something that's
not as specific. So we're saying,
Hey, all H ones, I want you to have a
background color of black. Was this element
style is saying, Hey, this very specific element, I want you to have a
background color of green. So if we had to uncheck
background color here, ah, it then becomes black,
which is really cool. So let's go back to
visual studio code. Let's take out background color, background color of
all of these things. P. P. And you can see
how much time this takes to do any kind of
editing of CSS values. Poof. Okay, this looks a little
bit more manageable now. So I'm going to
save that. Let's go back to chrome and refresh. Okay, so now just your
heading one elements have this black background,
which is great. Let's try something else here. Let's go back here
and say H ones, comma, H twos, H three, H fours. So you're basically saying here, Anything that is an H one,
an H two, an H three, or an H four, I want to apply this CSS property to you
or these CSS properties. So command S, let's
go back to Chrome. And now they all have
that black background. Okay, let's go back to Visual Studio code
here. That looks great. Fantastic. Now I want to change the colors
of just H ones. So instead of putting a color
value and property in here, I'm going to go for H one, and let's go for color. And what kind of maybe a coral. Coral. Yeah. Awesome. And again, here, it's
probably not going to work because there's already
inline color styles. So let's go to chrome, refresh. Nothing should change.
Gotcha, gotcha, gotcha. So let's remove the
color properties. Okay. All of these. Goodbye. Although that
was quite a cool color. So what I'm going to do is
I'm going to put it up here, but I want to just, you know, make it invisible,
but I still want to see it. So how do I do that? Well,
it's called a comment. So you select a bunch of text, and then you press Command
and forward slash, and that creates a
comment for you. You could also write your
own comment by going forward slash Asterix
and at the end, Asterix and forward slash. The browser doesn't read this. Pretty cool. Okay, let's
take out those colors. Okay. That looks pretty
good. A lot more manageable. So let's save that.
Okay. Let's go back to chrome refresh. Okay, so Heading one,
Heading one, grates. The rest of them have
a color of black. Okay, so let's go back
to Visual Studio code. Let's put a default color
in for H one, H 2h3h4. Let's go for a green of sorts. Let's go for green. Okay, save. So what should happen here
is that H one, H 2h3h4, they should have
a color of green, and then H one should
get a color of coral because it overwrites
this style over here. And because this one
was written last, the browser should
then pick that one over the one that
was not written last. Okay. Refresh. There we go. That works. So, heading one. Let's inspect. Color
of coral is applied. There we go because of the color green that
is applied to H one, H two, H three, H four. Okay. There we go. Now, span still has a color of blue because it
still has an inline style. Great. Okay. Back to
Visual Studio code. What about the font sizes? Well, okay, let's
change some stuff here. Let's go for a font
size of 30 pixels. And then what we can do here
is remove all of these. Wow. Such a lot of work dealing
with inline styles. But you can make use
of them if you want. Okay. Might complain
about these things here, so let's take them out. Okay. The only inline style we have is on the
span. Save there. Now, everything looks
exactly the same, or the background color. Most of the colors, the font
size is a little bit more like spacing around this H four or the H three or
something like that. So what we can do is
we go to this H one, h2h3, h four, and I'm going
to change the margin to zero. Who. There we go. That's, you know, switched everything
to exactly the same. There's no margin
now. Everything is like heterogeneous, the same. Except for the color, of course. Okay, so if you wanted to
change that, you could. Yeah, that looks pretty good. Now what we have to do is go to Github desktop and create
rule set styles with HTML, commit to Maine and push. Alright. So that's the basics
of using CSS rule sets. They're superior to inline
styles for a few reasons. Firstly, your CSS
is easier to read. Secondly, it's
easier to change how a bunch of elements look
using the same code. Copying and pasting
between style attributes is a huge waste of time
and prone to error. Thirdly, that selector
statement can be powerful. We'll get on to this
in the next lesson.
15. CSS Selector Statements: While CSS rule sets make everything neater
and easier to read, we've lost the ability to change individual
elements styles. This is where the power of
selector statements shine, especially when using class and ID attributes on
your HTML elements. You can view selector
statements as a teacher selecting which
students should stand up. Here are some examples. Can
all girls please stand up? Can all boys older than
11-years-old stand up? Can all girls with blue eyes who are younger than
11-years-old stand up? Can all students who play
a musical instrument, but not the guitar stand up? Can all girls called
Susan stand up? Can the student
with student number 876221 please stand up. You can see how generic or specific these
statements can be. They either include or exclude. And that's what a CSS
selector statement does. Here are some examples
of what you can select all heading types, links while they're hovered, paragraphs that come
after heading ones, images inside of paragraphs, anchor elements directly
inside of NAV elements. Selector statements
are particularly useful when you want to change how elements with the same name look in different
parts of your website, like the links in your NAV bar versus the links in your
article paragraphs, or the image in your side bar versus the images
in the rest of the site. To make this even easier, you can use class
and ID attributes. On any HTML element, you can add a class
and an ID attribute. An ID attribute needs to
be unique on a webpage. You can't have more
than one element with the same ID attribute. Otherwise, things
perform unpredictably. An ID attribute can't
have any spaces. If you want an ID attribute to be made up of several words, use kebab case, camel
case, or snake case. Once an element has an ID, you can select it in CSS using the hash symbol followed by the value of the ID attribute, like select all elements
with the ID of hero banner. This should just be one element. Now, a class attribute is a way of grouping elements
or classing them. Think of things like eye
color, gender and age. You class HTML elements
by giving them one or more class names
in their class attribute. A class name has no spaces because a space signifies
another class name. Like an ID attribute, if you want a class name to
be made up of several words, use kebab case or camel
case or snake case. Once an element
has a class name, you can select it in CSS using the period symbol
followed by the class name. Like, select all elements with the class name of
blue background or select all paragraph
elements with the class name of caption
and blue background. Now, let's play around with our new knowledge
of classes and IDs. So this is what we
got, but now I've lost that kind of way to say to
a specific element, Hey, I want you to be red or
I want you to be blue, or I want you to be a yellow
green or a green yellow. How do we do that
with classes and IDs? Well, let's get into it. So in VS code, go to change this
background color from black to nothing right now. So let's save that. Let's go back to
chrome and refresh. It looks a lot more fresh. Looks a lot easier to
read, which is great. And then, yeah, for
a couple of these, I actually want
to make them red. So let's go in here. And what we'll do is
we'll say anything with a class of red or important. Let's give it a background
color or maybe a color of red, very red. There we go. So this is dot Important. It is a class. Okay, cool. So then how do we
write a class in HTML? We do it as an attribute, and we give it a
class of important. There we go. I'm
going to copy that, put it on H four, H one, H three. Okay. I'm going to save that. Let's go to chrome
and refresher. Okay. So a couple
of our headings now are red because they have
this class of important, and that comes from this
important CSS class. We could also change this to something like
orange, orange, red. What about an orchid
color? There we go. And you can see how quickly
this updates everything. It's so much easier to change a whole bunch of HTML styles. So let's put that in there
or kid Orchid or kid. Not quite sure how to say that. Okay. That looks good. Or what about this color
that we had in a comment? Also, you might be
like, How do I do an HTML comment? 'Cause
it's not the same? Well, if you wanted
to comment on HTML, select the text that you
want to comment out, press Command or Control
and forward slash, and it does an HTML comment, which is a less than symbol. It's a exclamation mark, and it's two dashes
at the start. And then at the end
of the comment, you go dash, dash, greater than. And you can also toggle
this really easy just by going Command
and forward slash. Same with the CSS comment. Okay. In this case, it's pretty simple to read that this color is actually
going to overwrite. This color, it's a
very simple conflict. So we can let that happen. So Command S, let's
see what happens here. Okay, so that changed
very slightly, just because we inspect it. There we go. That
coral color gets overwritten by this nicer color. I don't even know what
kind of a color this is. The one with a little
bit of an opacity. Okay. Now, let's go
back to VS code. We've got some classes here. What happens if on this case, you've got your orchid, but
I also put a green on it, like H one, H two,
h three, h four. Well, if it's a class
and there's a conflict, then it overwrites the one
that is not as specific. So classes are more specific
than just element names. But what's pretty cool
is that we can also put a background color on here. Let's go for dark golden
rod or dark orange. There we go. And we can
see what that looks like. It's probably going to
look pretty disgusting. And what this does
is it will put a dark orange on the important
ones, which is great. But what I really wanted to show you here is that if you put this background color
onto these h1h2 h38 fours and save that it
puts them on everything. And so when you have a color
property or declaration, it doesn't overwrite the entire bunch of
previous declarations. It adds to it. Only if
there is a conflict, does it then go, Okay, which
one are we going to choose? We need to make a
choice here. Now, we still have this blue inline
style. Let's get rid of that. And instead of a class,
we can use a class. We can put an ID in here
and we can say, the one. I like using kebab case. You could do something
like the one, that's camelcase. Let's
use that for now. And how do you know, do an ID in CSS. We do a hash symbol, and then we'll put the one and then put in our CSS over here. And the color was
blue. There we go. And so this is a
really nice way to separate your styles
from your HTML. So Command S refresher. Nothing should change because
if we inspect this one, that comes from this CSS
declaration of the one. Okay. What we can do is we can also add multiple
classes, two elements. So check this out. We
go to VS code here. And for a couple of these, we're going to go for
class and upper case. And I'm going to copy
that. And so for this heading two and
this heading three, I'm going to put an
additional class here, and you see that
there's a space. A space in this class attribute
means it's another class. And we've got Important, which has a color of orchid. And then we've got a
class of uppercase, and we can say text transform and go for uppercase, like so. So Command S, and then
refresh and Google Chrome. Okay. So heading
one is uppercase. Heading two is uppercase.
That's really cool. Yeah. And you can also just make this super
confusing for yourself. So uppercase could just have
a textransform of uppercase, but it could also have a color of what color is
just really easy. Hot pink. Let's go for that. And maybe a background
color of black. So maybe the idea here behind the uppercase class is to
make it really easy to read. So Command S. Let's
go back here. Okay. There we go. So if we look at heading three, we'll see that it has a couple
of things happening here. It's got this H one, h2h3, H four, bunch of CSS. The only thing that it
keeps from there is the font size of 30 pixels. The color and the
background color gets overwritten
by other styles. It also has an important class, so it has that color of orchid, but it also gets overwritten by this uppercase class because it comes last in
the style element. So if we change this, so put that first and
important last and save there, then the color should
change to orchid again. So it's refresher,
and so it does. So that's heading
three, inspect. Because important is now
lower down in the file, comes later, the
browser says, cool, we'll use that color instead of the color found in the
uppercase declaration. Then finally, check this
out on heading three, if we had to add an idea
here of saying, Mr. Jones. I can't really come up with a better ID name.
And let's copy that. And say, Mr. Jones, what are we gonna do for you? Gonna give you a color of maybe let's go for
a brown Burly wood? Let's go for Burly wood. Okay. And even if Mr.
Jones is right at the top of your style element, and you save that, what should happen is that it should apply. So inspect your you
see that Mr. Jones, because it is an ID, because
it is super specific, gets this color of burly wood. Huh. It even overwrites
the important, even overrits the
uppercase classes, and it certainly
overwrites the H one, H 2h3h4 declaration. Okay. But I guess, finally, because this has a Mr. Jones ID, what can still overwrite
this is an inline style. So if we say style, color, let's go for a No, but a blue violet. Here we go. Save that. You'll see over here,
and now is blue violet. Because the element
style is blue violet. So that takes precedence
over all other things. Now, the only other thing
that can overrit this heading three inline style is
an important word. So let me show you
how to write that. I don't really
advise doing this, but sometimes you need
to know how to do it. So this has an important
and uppercase class. It also has a Mr. Jones ID. So on the ID of Burly wood, what we can do is then put a
exclamation mark and write important and let's save
this and refresher, and you see that the Burley wood color CSS property
comes through. The same thing could be done
on perhaps the H one color, the H three color, the apricase. Let's go for hot pink. Okay, I'm gonna save
that refresh here. So the hot pink comes through. That means that the blue violet, the burly wood, the orchid
did not come through. Hot pink. Be it has that important keyword,
it comes through. Now, you could also put
important onto this color value, this color value or
that color value. And then because of where it is, the browser would be like, Yes, I'll choose that one instead of this one on the
uppercase class. Let's try it out. So let's go up here and go for Important and save that and then back
down to Chrome and refresh. So now back at Burywood because it has that ID
on it of Mr. Jones, and that's where
it's coming from. And it's also got that
important keyword. And it will overwrite this important keyword
in the upper case class. So things can get really
complicated here. I do not suggest using
the important keyword, but it can be helpful when you're working with
other people's code, or you're working with
CSS from some other team, some other service,
and especially if they're using
important keywords. Now, there are a lot more ways of writing selective statements, and they can get
complex and confusing. But if you keep your website
simple and well structured, you shouldn't need to get
into the complex stuff. In the next lesson, I'll
cover CSS conflicts and which declarations
get preference and why. This will prevent so many
headaches, I promise.
16. CSS Conflict Theory: By default, a browser applies
all styles that target an element from all the
different rule sets with different selected statements
and inline styles. But what happens when an element has several conflicting
styles applied to it, like color blue
from this rule set, color red from that rule set, and color green yellow
from an inline style? Does the browser
know which color to make the text
of this element? CSS stands for
cascading style sheet. The idea behind cascading
is to determine which styles are applied to an element when there are
conflicting declarations. Cascading refers to
the way CSS rule sets cascade down
from the top to the bottom of a page and
how they interact with each other to create the
final style for an element. So, how does the browser
decide which style to apply? There are three things
the browser looks for. In general, the first is
which style was written last. The last one is generally
the one applied. Secondly, the more
specific a declaration, the bigger chance
the browser will choose it over
other declarations. A declaration within
a rule set applied to all anchor elements
isn't as specific as one selecting all anchors
inside of list items inside of unordered lists
inside of NIV elements. And that's not as specific as a declaration inside a rule set, applied to all elements
with an ID of special link. And even more specific
is an inline style. Inline styles are
the most specific. ID selectors are the
next most specific. Class selectors are the
next most specific, and element selectors
are the least specific. Of course, conflicting
selector statements can include all of these. So my advice is to keep things simple and when something
isn't working as expected, have a look at how specific
your selector statements are. Thirdly, the important
keyword can be added to a CSS declaration to give it the highest priority, overriding all the
other declarations, regardless of how specific
the selector statement is, or the order of declarations. And if there are multiple
conflicting declarations with the important keyword, the browser goes back to order and how specific
a declaration is. Okay, this stuff is
important to know, because when your elements aren't looking like you
coded them to look, this is often the first
place to begin looking. This is even more
important if you ever deal with
someone else's code, maybe a team member's code or some template code that
you might be modifying. In the next lesson, I'll go over moving your CSS to
a separate file, which makes everything
easier to read and write with a few
additional benefits.
17. Separate CSS Files: Even though HTML and CSS love each other and work
super well with each other, there's good reasons to separate them into their own files. The first reason is
because it makes everything neater and
easier to read and write. You benefit. You don't
need to scroll up and down when switching between
writing HTML and CSS. You can even spit your
code editor to view the CSS file in one window
and the HTML in another. The second reason
is that if you have multiple webpages that you
want to look the same, you don't want to have
to copy and paste the CSS from file
to file to file. Especially not every time
you make a small change. This is time consuming
and prone to error. Having your CSS in
separate files allows multiple HTML files
to use the same CSS. Now, how do we actually do this? Step one is creating a CSS file. Save it with a dot
CSS file extension. You can either leave
it in the main folder or put it into a folder. I like putting my CSS files
into a folder named CSS. Step two is either
moving your CSS from your HTML file or writing your
CSS in this new CSS file. Step three is telling
your HTML file that you'd actually like to use this CSS
file to style your webpage. We do that by adding
a line like this, ink with a roll attribute of style sheet and an HRF attribute of where that CSS file is. And while we can
add it anywhere, the best place to put it is inside the head element
of your webpage. This means the browser
knows how to display your web page before it's processed what it
needs to display. It's an actual link element, not an anchor element. The role attribute tells the browser that this
is a style sheet, and the HF attribute, like with the anchor element, tells the browser where
to find the CSS file. If you need a refresher on
how to write paths to files, watch the naming, folders, and file paths lesson. And remember that
case matters online, and that spelling and typos are the biggest cause
of bugs and errors. Let's get practical about this. Shall we? So things are
looking interesting. I wouldn't necessarily
code a website like this, but hopefully you're getting to understand what's possible, how things work, especially
using all of these colors, background colors,
things like that. Oh, I want to clean
things up a little bit. I'm going to stop using
the important keywords because it just makes things
confusing, irritating. And yeah. We can keep that there
just to showcase that. Okay. But now, you know, you've seen what
I've been doing. I've got my HTML here. I've got my styles up here. I have to keep on
scrolling between them. And yes, there are
ways to open up the same file in two different tabs or have a split screen, stuff like that. But there's an easier way. So let's go and
create a new file, call it style dot
css. There we go. Should have this little
blue hash as an icon, okay? And here. Let's cut. All of these declarations and
put it into this file here. Okay, and save that. And then we'll save this
one, rule set styles, go back to Chrome and refresh, and it's all gone. Why? Because we haven't linked this HTML file to the CSS file. So how do we do that?
Well, if you're like, Oh, I don't know,
just Google it. So how to link HTML
file to CSS file. Linking CS files to HML the
ultimate tutorial for you. What about W three
Schools, HML? All right. Let's try that. What is CSS? Ta ta, ta, internal CSS. We've already covered
that external CSS. Here we go. Link RL stylesheet
href styles dot CSS. Okay. So I'm going to copy this. Going to go back to VS code. And instead of a style element, I'm going to say Rl stylesheet. Cool in this link element. And we've covered a
link for a fav icon. Now this is something a
little bit different. It's using the same element,
but it's different. And because we're saying it's
a style sheet and the HF, where do we find
this styles dot CSS. Als is called style dot CSS. So let's rename
it style dot CSS. Command S. Let's
go back to Chrome. Refresh, and we're
back in business. Awesome. Thank you so much, Google and W three Schools, which is generally a
pretty good resource. Okay, now, what I want to show you is that it's really easy
to deal with your HTML here. Even have a team
member do the HTML, and then your styles exist
in a separate style sheet. You could even have
multiple style sheets. But what I want to show you is, create a new file here, and let's call it rule set two. Dot styles dot Html. And inside here, we'll write our Duc type or just type Duck. Ooh. Look at that. So
if you have this, that would be really helpful. Want me to cover that again? Yeah, just type Duck for
Duc type or document. And if you have Emmet
abbreviation installed, which I think you should do, then you just press Return, and it creates a whole
bunch of stuff for you. We haven't covered
this meta car set. We haven't covered
this viewport thing. So if you want to you
can take those out, and it comes up with
a title document. So maybe you can just
say Rule set two. And then we put in
our ink Linkage. There we go. Roll
style sheets already, and then we'll say
style dot css. And inside our body, let's go for an H one. Great. Hey there. And
I'm just going to save. Let's double check
that this works. And I'll copy this.
I'll paste this. We'll set two styles. Alright, it works. So you can see how
powerful this is. It means that I can create
multiple HTML files and just have one CSS file
that then controls all of the styles on those
HTML files so that it means if we want to change from CSS across
the whole site, well, then we can just
say background color. Let's go for a purple. We go back to Chrome, refresh, changes on this page, and it also changes on this
page. Really, really cool. And we can also add a
couple more in here. So let's go for age two.
Wow, this is this is this, this, this is cool. And age three,
this is important. And remember, we can
say class Important. And then finally age four. This is uppercase. And maybe for uppercase, we can put this in
a span element. Okay, let's save this. Now we go back to rule set two. Okay, this is uppercase. Did that change anything? Interesting. Let's have a look. No, because we didn't
put the class on it. Uh huh. So let's put
a class of Uppercase. There we go. It's really
important to test out your code
before you ship it. There we go. This is uppercase. Okay, now, finally, we do actually need to
commit our files. So let's go to Github
desktop and did a bunch of set writing and commit to
Maine and then push Origin. Fantastic. Now, that
should be online in just a few seconds
or a few minutes. And now one more thing that
I do want to show you is adding another CSS
file to an HTML file. In Visual Studio,
this is rule set two. Well, let's add another one. So link Roll style sheets, and let's go for style red CSS. Okay, we'll save that,
then we'll create a new style red dot CSS. And you see what I did here? I said Res. So it's
probably really good to copy and paste. So style red. I'm going to copy that.
And then I'll just double tap on this or press Return. There we go. Style red. You want to copy and
paste so that even if you do have the wrong name
or you've misspelled it, it'll be the same
here and there. If you start typing
things multiple times, it leads to more errors. Okay, so style red. What I want to do is
I want to say body. Let's make you
background color red, or that's going to really
be sore for our eyes. What about a salmon? Salmon should be
good. Okay, Command S. Let's go back to chrome. Rule s two. Okay, rule set. Styles. It doesn't have it because it's not including
that new CSS file. Okay. So that becomes pretty cool and means that
for particular pages, you can include
different styles. So we've got the general styles, and then we've got the
style red dot CSS. But now in style at CSS,
if at the top here, we put in a body selector and then change the background
color to a yellow green, what will happen here? You probably know the
answer. So let's save. Let's go to chrome
and refresher. Rule set two styles,
have the salmon color. Rule set styles, they should
have the green color. Okay. But if we go to rule set two styles and
change the order of the style sheets,
what's going to happen? Okay, rule set styles, that remains the same
because it only has one style sheet that
it's including. Rule set two, it's
green. And why is this? Let's go have a
look at the body. It's because style red is first, style at CSS is second. So it says, The yellow
green came last, so I'm going to use that.
There is a conflict. I'm going to use the one
that was written last. And now let's go and
commit this all. Add a new style sheet. Yeah, that's great.
Okay, commute to Maine. Push to origin. There we go. Now you can create as many HTML files as you like that all use
the same styles. This is powerful. And you can add multiple
CSS files to an HTML page. Sometimes one page needs
additional styles, or you need to link to a style
sheet that exists online. When you do link multiple
CSS files to your HTML file, the order you write
them in will be important if there are
any style conflicts. Now, you know a whole
bunch about CSS and HTML and how they
smush together to make awesome websites.
It's time for dance. Oh, whoo. Okay, in the rest of the course, we're going to be
creating a real website, one that looks cool and one that makes sense when you
share it with the world.
18. Comments: Before we create a website, I want to show you how to write code that the browser ignores. This means you can leave
yourself notes or comments and also hide a bunch of code that you don't want
the browser to read. This feature is available
in all coding languages, but it looks different
in each one. So in HTML, you write
a comment like this. That's a less than symbol,
an exclamation mark, two dashes, the comment, followed by two dashes and
a greater than symbol. To toggle a comment on and off for a whole line in VS code, press command forward slash on Mac and Control forward
slash on Windows. I also prefer leaving
a space before and after the comment so
that it's easier to read. Now, in CSS, you create
a comment like this. That's a forward
slash and asterix, the comment followed by another asterix and
a forward slash. Again, to toggle
a comment on and off for a whole line in VS Code, press Command forward slash on Mac and Control forward
slash on Windows. Okay, now that you
understand comments, let's get on too
making our website.
19. Lets Make a Website: Over the next few lessons, I'll be coding a website for my favorite cartoon
character, Reckitt Ralph. I want you to do the
same and follow along, except with your
fictional character, maybe from a movie, a cartoon, a series, a comic, or a book. You can even make
your own one up. So start by picking a character
to code a website for. As we go through
creating the website, feel free to veer off, play, experiment, and try
things when you want. I want you to make
this website your own. And when you make mistakes
and then figure them out, you gain so much
valuable experience. So let's get going. And the next lesson,
I'll show you how to plan the code
for your website. Yeah, it sounds boring, but it's gonna help you
become a coding ninja.
20. Planning Your Website: I know you don't
want to hear this, but planning makes coding websites a lot
easier and quicker. Even with a simple website, planning helps so much. For me, planning
is like looking at a maze from above and
sketching a root. It's a map, and coding is like running through that
maze following the map. It's possible without a map, but so much easier with one. Seriously, without a plan, we could be coding unnecessarily for days, we don't want that. So if you haven't already, pick a character to make
a simple website for. I'll be making a website
for Record Rolf. No matter what website I'm
creating and no matter if I'm doing the design only or
both the design and coning, I sketch a few options of what
a website could look like. I do this quickly and
leave out details. Whiteboards, journals, and
paper pads are great for this. Next, based on the
sketches I did earlier, I create what I call
a box wireframe. It's where I draw the
HTML elements as boxes, give them names and indicate which boxes go inside
of other boxes. I don't try plan
everything all in one go, and I often draw an arrow from a box and fill in the
details later on, on a separate part of the
page or even on a new page. Again, whiteboards, paper, and journals
are great for this. You can use an app on your computer or your
iPad if you like. All you need is text fields,
rectangles and circles. Creating your box
wireframe digitally will allow you to adapt
your planning as you go, which is helpful when
you're a beginner, but don't get distracted with
the details at this stage. We need a rough map, not a pixel perfect design. We'll actually be
designing our website in the browser while we
code in this course. We'll choose the
colors, the fonts, the sizes, et cetera,
while we're coding. Okay, let me take you through
my box wireframe planning. Okay, let's start planning. I'm going to use
some markers here. I've got a red one.
I've got a black one. What you use doesn't
really matter. But start with kind of the broad kind of
planning of the website. Going to have a header, go to have the main part,
and then the footer. Let me do it like this. Header. Who's up. Main. And then that's
all going to be inside the main body element. Alright? Okay, now,
inside of each of these, what is gonna be what? So header. Let's
do this one first. Let's go for a header. And I want, like an avatar or a profile picture
here of Rece Ralph. And then I want an H one. That's gonna be
where his name is. Okay. So what we can
do here is you know, kind of broadly speaking, this one goes into more
specific details here. So this can be a div
with a background image, or it could be an image. I'll cover both
of those options. This is going to be an
H one with his name. Profile picture. Okay. I might need to
shake that a little bit. Then the main section, this could be, maybe an H two. It says about Ralph. Then we've got, like,
a paragraph about him. Then we can put an image maybe with him and his friends or maybe a nice one by himself. Then we've got
another H two here. Maybe that can be
his characteristics, then a couple of items, you know, like characteristics. Next, age two with his friends. Also a list. Okay, and all of this goes
inside of the main element. Okay, so we've got H two about This can be a paragraph
about an image. H two, Character dis.
Wow, what a long word. This could be an unordered
list or an ordered list. I'm gonna go for an ordered list just because it's different
to an unordered list, and there will be
list items in there and H two, friends. And this can be an ordered list with I items or list
items in there, plus anchors so that
we can link to them. Okay. Next is the footer. So think that needs
to be particularly difficult or complex. Oh, let's put like a
paragraph tag in there. So the footer element and
then this can just be P plus anchor tags
or anchor elements. Okay, so we've got our body. Then we've got header, main footer inside the body. Inside the header,
there's going to be a dove or an image on H one. Got our main elements.
There's quite a few things inside the main element. Then we've got the footer,
and inside the footer, there's just a P tag with some A's in there
or anchor elements. Okay, so that is my planning. You could clean this up. You
could do this digitally. You can see how I went from
broad to specific details, and it's not a very
complicated site. There aren't that many elements inside of elements
inside of elements. The most elements inside of elements we're going to
get to is around here when there are a bunch of
anchor elements inside of list elements inside of
unordered list elements. But there will just be one
unordered list element there. If we wanted to, we could
separate each one of these sections into a dove or a section element, but
we really don't need to. The other thing
that I may want to add is just a little
caption over here, so we could go weep and just
put that there and P dot. Caption. So a paragraph
with a class of caption, and there might be things
that we add as we go along, but this is our rough planning. We know what we need to
do. It's pretty clear.
21. Setup Your Basic Website: Let's get nerdy and set
up our repo and write the basic HTML and CSS code
for our character's website. You can refer to the common HTML elements PDF when writing your HTML and the
common CSS properties PDF when writing your CSS. And I'll go over all
the code as I write it. But if you want,
you can ask Google or ask something like
Chat EPT for help. Okay, so I'm going to
set up my website. The first thing that I
want to do is open up Github desktop and go
File New repository. I'm going to type in Ralph
for Rect Ralph description, Reck E Ralph's websites. The path is going to
be in the downloads. Don't want to read me, get
ignore, no, license, no. So let's go and create
that repository. Now what I want to do is
open this up in VS code, so we could drag this
folder into VSCode, or we could go to repository and Show in Finder and
then drag it from there, or we could go repository and then open
in Visual Studio Code. A. Pretty cool, right? Now, the first
thing I want to do is to create a new file, and I'll call it index dot HTML. The reason why I'm going for an index dot HTML
file is because if the browser gets to our
website and we haven't specified which
HTML file to load, it looks for an
index dot HTML file. You could also name
a default dot HTML, but index dot HTML
is pretty standard. Okay. Then I'm going to
type Doc or doc type. There we go. HTML, and then
I'm going to type in Doc and then use this IT abbreviation to get all of this
kind of stuff. The HTML tags. I then got the head tags, and I've also got the body tags. You don't really
need to worry about this language EN because
you may not speak English, so we could actually
take that out. Doesn't make too much
of a difference. This car set UTF eight doesn't make too much
of a difference right now, but I'm going to leave
that in this might be useful when we start doing some responsive stuff
later in the course. The title, I'm going
to go for Racket. Ralph. Then I'm going to put in a link but
instead of style sheets, I'm going to go for
an icon, and the HRF. Well, I haven't actually got
any files or folders yet. So let's go into Finder. Inside the Ralph folder. Let's go for a new folder.
Let's call it IMG. If you don't want to create
them in your finder, you can also create
them inside a VS code. And I'm going to create
another one called CSS. And here, I'm going to say inside this current
folder that we are in, which is the main root folder, and then go inside
the IMG folder. I want to find Rolf
icon dot PNG, maybe. Not sure. We'll have to
check that out. Let's go. Find something. I
am saving as I go. By the way, you should, too. It's really, really
helpful just in case you press close or something
and you haven't saved. Okay, in Google Chrome, I'm going to search
for Reck it Rolf Cool. Let's go for images. This one's pretty cool.
Alright, let's go for this one. I'm going to right click, and then I could actually
use this as is. So I could say
copy link address, but I actually want it
to be a fave icon or an icon in my file
or folder structure. So let's go Copy Link address or Copy Image
address. There we go. I want to paste that and then Command S,
save to download. Fantastic. And then let's put
that into the image folder. Okay, it's a JPEG,
and then I'll rename this what do I call it, Rolf icon dot JPG. So I'm just going to
copy all of that, go back to VS code,
and then paste that. Okay, so we have the icon. Let's double check
that that works. I'm going to save
go into Chrome, go into Finder, actually, and then double click
on index dot HTML. And there we go. It is here. Whoa. Over there. Fantastic. Now, the next
thing we need to do is add some CSS and start getting
our website setup. So let's go to VS code again. Let's put another link in here. It has a roll of style sheet and then HRF, this
current folder. Then look inside the CSS folder. Then look for style dot CSS. Fantastic. Save that. Let's go to the CSS folder here, create a new file
called style dot CSS. And here, what I
want to do is go for my body and just double check that this
is actually working. Let's go for a background
color of chocolate. Cool. Save that. Then inside Chrome. Let's refresh. Fantastic. The chocolate
color comes through. That means the CSS is working. Now, back in the index file, I'm going to go to my body because we need to add
a few things here. Then I'm going to add a comment. I'm going to say this is
where I want my header. This is where I want
my main element, and this is where I
want my footer element. This helps us just set
things up really nicely. I can then also write
in my header element. I'll add a few spaces
in there or new lines. I'll then put my
main element here. I can get a write write. And then Puta Okay, so that looks pretty good. I'm going to command
S, save that, then go to Github desktop, and then I'm going to
say initial Commit. And then perhaps for
the description, I can say setting, CSS, Images and basic h2m up. Okay. Commit to main and
then publish the repository. Okay, here is where it says, keep this code private
or not because this is where we're
posting it to github.com. I'm going to keep this checked
just in case you check it. But if possible, uncheck this. You don't want this
code to be private, you want it to be public
because we want to turn this repository into
a pages experience that anybody can access. Okay, but I'm going to check this just in case you do and
you want to know what to do. Okay, publish repository. Okay. Great. Now what? Now we go to Google Chrome. We open up a new tab,
type in gitab.com, and then here you will see your username slash your
cartoon character, your movie character, whoever you've decided to
make a website for. So let's tap on that.
Let's go to settings. And here, go down to pages. And here. Ooh, upgrade or make this repository
public to enable pages. So if you have checked, I want to keep my code private, you have two choices now. You can either upgrade,
which means you have to pay, or you need to make
this repository public. Hmm. Okay. So how
do we do this if we don't want to pay or we
go to general, the top here. Scroll down down down all
the way to Danger Zone, and then change
repository visibility. Let's change to public. There's quite a few
things you need to step through or hoops you need
to jump through here. So yes, I want to do that. Okay. I understand. Make this repository public. Okay. Once you've done that, if you did make your
repository private or if you didn't,
then go to pages. And then here,
deploy from branch. That's exactly what
we want. And then the branch that we're
going to deploy is main. Okay, save. Now, this will take a little
bit of time, maybe a minute. So every now and
then just refresh. I know that you want things
to be right now instant, but just be patient. Okay, let's try refresh. Let's see what happens here. Okay, it's still currently being built from
the main branch. Hoof hoof. Okay, let's refresh. Mmm Okay, let's give
it a few more seconds. Let fresh. Okay, there it is. Your site is live at HTTPS, Colon forward slash
forwardslash, your username dot github dot IO slash your character's
repository name. Okay, so I'm going to
tap on Visit Site. And there we go. Everything
should be working. You have your little fav icon. The background is also orange. Now at this point,
you can start to see if things are or
are not working. If your background color isn't the one that
you specified, then you have a CSS problem. If you can't see your fave icon, you might have a
file path problem or a case sensitivity problem. Now, there could be a couple of things that begin
to happen here. So let's go into VS code.
Let's going to style. Let's change this
background color to Brown, or let's go for green
or green yellow. It's quite different
from chocolate. Save. And now I'll go
back to Github desktop. Update style at CSS. Great. Commit to
main, push origin. Okay, let's go back to Chrome. And then inside of Github, inside of your repository,
let's go to the code. Let's go to CSS. Let's go to style CSS. Okay, so that has updated.
It is green yellow. Now, if you come to your page and you refresh and it
is not green yellow, hmm this could be a few things. The first thing is that it could just take some time
to actually refresh. It shouldn't take that long. It shouldn't take
more than a minute. So what you might need
to do is you might need to right click and
then tap on inspect. You can also press Command
Alt I or Command Option I. Once you've got your element and spector up, you
can then refresh. That may help because
what may have happened is that your browser may have cached your CSS file, so it doesn't believe that
there's any new changes. So it's basically just loading an old version of your CSS file. So let's refresh this once more. Nope. So then what we're
going to do is go into the head type on tap
on css dot style, and right click open a new tab. So that still says
chocolate. So let's refresh. Ooh, green, yellow. Interesting. So if we go
back here and refresh, hm, that still doesn't work. So what we may need to do
is double tap in here, put a question mark, type in V equals one or another number if you've already used V equals one and
then press Return. There we go. Now this is
exactly what it is doing. It is caching your CSS file. So if you really want your CSS to update,
and it's not updating, when you're coding
in your HTML file, you may need to put a
question mark and V equals another number after
that V equals. And this will mean that
it's always going to get the latest version of the
file. So let's save that. Let's go to style, and
let's change this too. Let's go for a green green or a gray or golden rod.
Let's go for Goldenrod. Save this. Let's go to Get up
Desktop and we can type in testing caching or
browser caching. And then push to
origin. Cool. Let's go back to not that one. Not that one, this one. So let's refresh here. So the CSS says Goldenrod. Let's go to record Rolf.
Let's refresh here. Okay. So this still
says style dot CSS. And I guess what's
happening is it's actually caching the index file. Be over here, well, it still says style dot CSS. There is no V equals. So let's go to our code here, let's go to index dot HTML. And it does say V
equals two, right? Yeah. So refresh here again. If this is still happening,
Okay, it's updated. But if this was still happening, what we could do is type
in index dot HTML and go, Question mark V equals two. And then it should bring about your latest index dot HTML page. Okay, so that was quite a lot of extra stuff about caching, and sometimes it's
really frustrating when you just want to test if
something's working online, and it's not, and it should be. That's probably why. He. Now that you've written the basic structure
of your website, we can begin coding
sections of the website. For each section, I'll
write the HTML first and then the CSS and then
go back and forth between the HTML and the CSS until it's just right before moving
on to the next section. And of course, I'll refer to
my box wireframe as I go. In the next few lessons, we'll write the code
for the header, the main section, and the
footer of our website. As we go, we'll
update the code that affects all the parts
of the website, too. So let's get on to
the next lesson, where we'll write the code
for our header element.
22. The Website’s Header: Okay, let's write the HTML and CSS for the header
of our website. It's a pretty simple header, and we've already got our
header tags in place. There are some
tricky bots, sure, but nothing we can't handle, especially with the
Internet at our fingertips. Okay, let's do the
HTML and CSS code for our header element
and the elements inside. So inside of Visual Studio code, let's go down to
header here and I'm going to write IMG for image, give it a source of dot slash. So look inside this folder
and go for the image folder, and then we'll go for
Rolf icon dot JPEG. But we probably need
something else. I don't want the icon to be the same as this profile picture. And then the lt, what an lt is is that if somebody
is visually impaired, the browser likes to provide a description for the image just because if
they can't see it, then they can kind of understand by reading it or
listening to it. Okay, so we can say, Ralph or racket Ralph's
profile picture. Let's change that to a
normal kind of apostrophe. Racket Rolf'sPfile
picture. Pigure. There we go. If you want to put in a double quotation here,
it's going to complain. So there are special
ways of doing double quotations when
you're trying to put them inside of an attribute. If we do a quick
Google for that, let's look for double
quotes in HTML, how to code double
quotes via HTML. Okay, friendly code,
numerical code hex code. So try and quote like that to
copy that. Put it in there. Okay, Rick Ralph's
profile picture. Okay. Then let's go
to Google Chrome. Let's refresh this page. You'll see that if we inspect this comes up with a
quotation mark. Pretty cool. All right. And if you
had single quotes here, how would you do a single
quote? Good question. So let's do A, single
quotes in H TO. There we go. Let's try that one. So copy that and put that in
over there. So command S. Okay, Record Rolfes
profile picture. Cool. Okay, let's go back
to Visual Studio code. And here I want to put an
H one and say wreck it. Ralph. Okay, let's save that. Let's go to our
browser and refresh. Fantastic. Now, I want this
to be in the middle, please. So let's go to VSC. Let's go to style dot CSS. And then we'll go for header. We'll then say text
Aline center Yep, save that then refresh. Perfect. Now, I want to give this
a background color. So let's go to VS code again. Background color. I want some kind of a blue, but not just a normal blue, so I'm going to go for RGB. I'm going to press Enter red. It's a value 0-255. But right now, I'm just going
to go for zero type zero, type zero, and then I'm going to tap on this and then VS
code will bring this up. Then I'll select a nice
blue. That looks good. Okay. Command S. Let's go
to not VS code, but Chrome. Okay. That looks good. But there's this weird
like border around it. And so what this is is it's either on the HTML or the body. So what we can do is in VS code, let's put this as
a HTML comma body. We'll set the margin, which sets the top, right, bottom and
left margin to zero. We'll also then set the padding to zero for HTML and body. So Command S, let's
go back to Chrome. There we go. It's gone. So some browsers
have it on the HTML, some browsers have it on buddy, but there's normally
some kind of margin or padding on HTML or buddy, and I always remove it. Okay, now I want to
make this guy circular and maybe put a little bit of spacing at the
top and the bottom. So let's go back to VS code. Header, let's go for a
little bit of padding. And instead of going
padding top, padding left, padding bottom, pattern
right, stuff like that. I'm just going to
go for padding. And here I'll go for 20 pixels, and that does the
padding for everything. Okay, that looks
good, and then I want the image to be round. But this is also
the same image that we're using for our
little icon at the top. So let's have a look for
Record Ralph Images. I want to square one,
but I also want to show you what to do if you
can't find a square one. So this one over
here is pretty cool. It's definitely not square. So what I'm going to do is
right click Save Image As. It's a WebP image, two, 241. Not the biggest fan
of WebP images. I mean, I know they're
a little bit faster. The file size is smaller,
they're compressed. It's all amazing, but
not so easy to edit. So what I would do normally is just open up and Photoshop, resize it, crop it, make it how I want, and
then save it again. But if you don't have
Photoshop, how do you do this? So let's just go and search
for a image resizer. Resize multiple images at once. Image resizer, simple
image resizer. I don't know which
one is the best, but maybe let's try this
simple image resizer. Okay, accept the cookies,
select the images. Or maybe we can
actually search for image resizor and Cropper. Pick resize. Let's try this. Okay, let's go for a web P. Okay, see, it doesn't
like WebP images. Let's go back here
and search for web P. Simple image resizero, select image, web P.
Okay, this is great. Well, it looks like
it's going to be great. Let's go for
something like this. 500 by 500. Okay, maybe a little bit bigger. Okay, let's care for 600 by 600. Okay. That's great. Whoop. Okay, Crop Image. Okay, and download. Thanks, ad. Okay. So that was a quick
and dirty way to do that. Now I can pop this
into Ralph Image. And we can call it Ralph
PFP profile picture. So I'm going to
copy all of that. And then let's go into VS code, and let's pop it into. Command S. Okay, let's
go back to Chrome. Let's close that.
Can close that. Refresh. Okay, so it's
a little bit big now. But now let's have a look
at how we can change this. So I'm gonna go for a width of, let's say, 400 pixels. Yeah, maybe I'm gonna
press Shift and down. Maybe 300 is pretty cool. I'd still like to add a border. So let's go for a height
of 300 pixels two. And then I'm going
to say border. And border is a shortcut
for border width, border style, and border color. So here I'm going to go for
let's go for 20 pixels, solid, which is the style, and then the color,
I'm going to go for FF zero, which is like a yellow. But we can change that
again in VS code. And then I'm going to go
for a border radius of 50%. Okay, so that looks pretty good. I want to
change the color. So I'm going to
copy all of that, go to VS code, and then header, I am G. So this is saying all images inside of all header elements, or these are the properties
that you should have. Okay, this, let's go for an orange or
something like that. Well, it looks pretty
good. Command S. Let's go back to
chrome and refresh. Okay, that looks pretty cool. Now, reek E Rolf. I want to change the font. There are a couple
of ways to do this, but the most fun is
going to Google Funt. Free fonts, free Awesome fonts. So Google Fonts. Here we go. Okay, I want a pixel font. There's a bunch of
ways to do this. You can filter,
feeling appearance. Oh, so many. So what I want to do is
just search for Pixel. Alright. Anything standing out? Whoa, that's crazy. Something that's quite bold. Maybe that one. Pixel Phi scans. Maybe this one,
Josie 15, Josie 20. We go for Josie 20. Okay.
Then you say get font. This may change or the UI
might change from time to time and then get embed code. Okay, there are a couple
of ways to do this. But what I like to do is
use the import statement. And so I'm just going to copy that and go to
Visual Studio code. At the top of my style file, I will paste that, but I don't want the style tags. I just want this
import statement. Okay, great. Then over here, I'm going
to copy this copy code, although I don't need the
actual Jozy 20 regular. So what I'm going to do is paste this and just cut
this, remove that. And then header H one. Basically, I'm
selecting all H ones inside of all headers. We only have one header,
and we only have H one or one H one at the
moment. I'll paste that. Okay, I'm going to save. Let's go back to Chrome here. Refresh. Okay, ec it Ralph. There we go. Let's inspect this. Let's change the font size. Let's go for something
big, for 50 pixels. Still little bit small. I'm
going to shift up, shift up. 70 pixels looks pretty good. But I want the space
between here to drop a bit. Okay, thank you very much. You may be able to read
this and be like, Yes, that's helpful, but I'm trying to do stuff,
so just don't show. Go away. Okay, fun size, 70
pixels. The margin. Again, instead of going for
margin top and margin right, bottom, and left, I'm just
going to use the shortcut. So margin. I'm going to
go for top of ten pixels. So that reduces it a little bit on the left and the right. It's going to be zero, and
then at the bottom, 20 pixels. So here I don't
necessarily have to put the left value zero,
but I can if I want. And then maybe we
can make it the same color as the border. So let's copy that. Bring it in here, paste
that, and then go for color. It's not text color, not
background color, it's color. And then we can copy
and paste this value. Let's save that and refresh,
see what it looks like. Yeah. It's a little
bit hard to read. So let's change this to white. Yeah, white looks a lot better. So you can see that
we're like, designing while we're going
while we're coding. I like this a lot. Okay,
let's go for white. Okay. So that looks pretty good. We've got our header sorted. You can change a
bunch of things here. You could make the background this blue background into
an image or a tiled image. You can research
that if you want. And let's go to Github desktop. And we can say then the header. Okay, commit to
Maine. Push Origin.
23. Header Side Quest (Optional): Lesson, we're going to refactor some of our header code to get the profile picture
to work using a DIV element instead
of an image element. The benefits of this approach
is that you can manage images in CSS rather
than in HTML, and you can manipulate
background images powerfully with CSS. I'll also show you how to create a new branch with Github
and then how to merge that branch back into your
main branch so that you can work on something new without affecting your current website. This lesson is a side quest and it's a little
bit more complex. So if you feel like skipping
it, that's fine, too. There will only be minor
differences going forward. And if you feel like
coming back to it, once you finish the
whole class, you two. Now, in my planning,
I did say this could be a div or an image. Right now, we've
got it as an image. So I want to show you how
to make this into a div. But what we're going
to do is because it's a little bit more complex is actually create a new
branch to work with. And we're going to create
a new branch because sometimes we're going to change the site,
and it might break. And if we want to
commit our code, then we're going to
commit, you know, code that doesn't
work to our project or to the central
repository on github.com. So let's go to GitHub desktop, and we're going to go
branch, new branch. And we're going to call this
div PFP, create branch. Okay. We don't have to publish the branch right now because we haven't
really done anything, but you can change between
the current branch over here, so it main and Dv PFP. And I'll show you what this
does in just a moment. So let's go to Visual Studio
code. Let's go to index. And now instead of this image, what we're going to do is div and we're going to
give it a class of PFP. And inside of it, we're
not going to put anything. Okay. So let's save that. Let's go to Chrome and
refresh. No more image. Okay. But inside
of Github desktop, if we change the branch to main, says, You have changes
on this branch. What would you like
to do with them? Leave my changes on DIV PFP. Your in progress
work will be stashed on this branch for you
to return to later. So what we should have done is we should have actually
committed those. So let's go to counsel, and
we're just going to say changed PFP from
image to dive in HTL. So it's commit that and
then change the branch. Okay. Now if we refresh, the image is back and
inside of our code, you'll see that it is
now back to the image. Interesting. Back
in Github desktop, let's change this to
Dv PFP and you'll see that the code changes
back. Pretty cool. Now inside of style dot CSS, we've got a class of PFP
that we can work with. Instead of an image, we go for dot PFP and
with height border, that is all great border
radius of 50 pixels. Now we just need a
background image, which we go for URL, and we put in single quotes
or double quotes here. And now we're going from
the style CSS file. So we're inside the CSS folder. So dot slash dot dot slash, which brings us into
the Ralf folder, and then IMG, and then
we're going to go for Rolf PFP dot web P.
That looks good, so we've got the
background image. Now what I need to do is say background Repeat is no repeat, and background position
is center and center, that's an XY value. You could also use pixels, and then background size, we can go for cover, and this covers the whole area. Okay, Command S. Okay, let's go to Google
Chrome. Refresh. Okay, that's great, but
now it's on the left. Textaine center does not really apply to it
because it's not text. So what we can do is
change its margin. Margin to zero and auto. This means that the
top and the bottom are zero and the left and
the right are Auto. Command S and this
should center it. There we go. Now, why I like
this a lot better is that it means that
we can change our image in the CSS and don't
have to switch to HTO just to change the
image and check this out. I'm going to go to my finder. Remember that we
use this 2241 dot we P to do the cropping. Well, let's put that
into Rolf images. And we'll just call it
Rolf with vanilla pear. I do not know how to
spell vanilla pear. Okay, there we go. Thank you. Okay, I'm going to
copy all of that. And now, instead of Rolf PFP, I'm going to do Rolf
with Vanlop. Okay. And then let's go to
Chrome again, refresh. And now ha we have a
circular square or a square circular
div that's using a non square image as its
background image. Hmm. Pretty cool, right? But now there's still that
little vanlopi there. What are we going
to do about her? Don't have to do anything. But what if we change the
background size to 100%? Let's go up a little bit. Okay, so 210%. Let's copy that and
put it in here. So background sizes
cover, 200% or 210%. And then the background
position, let's change that. Let's go back to chrome. Okay. Oh, man, I'll
just retype it. Background position.
So the position, let's go for maybe 20 pixels. Let's go for a negative value. Okay, -170, and then
zero for your Y value, or maybe There we go. Minus 170 -40 pixels. Okay. Okay. Okay, okay, okay. So it looks pretty good. And if we go back
to Github desktop, we can say now using image or PFP
Images in CSS. Fantastic. And then if we go to the main branch and refresher, it's slightly different, right? That's okay. Oh, this one. Okay, so I'm going
to go for this one. But now, how do we
get our new branch back into our main branch?
So check this out. We want to publish
the branch first, so this pushes it
to Gitub online, and then we want to
create a pull request. So we're going to preview
the pull request. And there shouldn't be too
much stuff that's going on. Basically, it's telling you what you've removed and
what you've added. And then you say, create
the pull request. This opens up github.com. Okay. Div PFP. So maybe we say made the PFP Div instead
of an IMG element. You could add a more
descriptive description and then create
the pull request. Okay, checking for ability
to merge automatically. This should just
work amazingly well. If you've done some
complex stuff and then changed stuff
in your main branch, while you've been working
in the new branch, things get complicated. But then we're
going to say merge, pull request, confirm, merge. Pull Request successfully
merged and closed. Then I'm going to
delete the branch. We don't need that
branch anymore. Okay. Now, back in Github desktop, I'm going to say fetch origin. Then here, I can then
go back to main branch, and we still have this one. What we can do is to go
branch and then delete. Yes, delete. Now we have main and refresh. If we inspect this, it should be a div
with a class of PFP. Okay, so that was quite a
lot just for our header. If you wanted to keep it simple, you could just stick
with the image as your profile picture. But making use of background images is
super, super powerful. So if you wanted to
test this out and create a new branch and change this background from blue to
an image or tiling images, for example, test it out, or you could just, you know, do it all in the main
branch if you wanted to.
24. Design With CSS: Okay, a quick break
from writing code. I want to talk about designing
a website while coding it. The reason I like
coding while designing, especially after the
planning we've done, is because we can see
how it looks and feels. Oftentimes, a website gets
designed in a design app, but it doesn't translate
well in the browser. Being able to change
the design in HTML and CSS often
makes it more usable because you're actually
viewing and using the website in the browser
and not in a design app. And being able to
design using HTML and CSS often speeds up the combined design
and development time. However, if there are clients
and signed off designs and distinctions between
designers and coders and you're
part of a team, this makes changing things while coding a little bit
more complicated. But that's not the case here. We get to be
designers and coders. Now, what's amazing about
CSS is that you can make the same bunch of HTML
look very different. So try and make your
character's website match their personality. Now, let's get back to coding.
25. The Website’s Main Section: Now for the main section,
which is pretty standard, so it shouldn't take too long, considering most of
the structure and some of the CSS is
already in place. Let's get started with our
main section of our website. So in VS code, we've
done the header. And if you didn't
do the side crest, then you might be like, What
is this div class PFP thing? Well, instead of an image, we're using a div
with a class of PFP and then styling that div with CSS to kind of get the same
effect as using an image, and you can see it over there. Okay, now let's do some HT mulling inside
of our main element. There we go. I'm going to
refer to my planning here. So I'm going to go for an H two, and this is going to
be about Ralph and P, let's say, Ralph
is a video game, bad guy wanting to
save the Arcade. Something like that, he meets some cool characters
along the way. And becomes a good guy. Okay, that looks
good. So we've got H two, the About paragraph. Now let's put an image in here and let's go for the same folder that we're in inside of images. And let's go have a look inside. Google for a Ralph image
rect Ralph Images. So it's an about image. Yeah, I quite like
that. Cool, cool. So let's Copy image address. Let's open a new tab,
let's paste it there, and then Command S, going to save that to download. Let's bring it into
the image folder. I'll call it about dot JPEG
or Ralph about dot JPG. Okay, now back in VS code. We'll put that in there.
There. And the out, we can say about Ralph. Maybe we also say he also
likes cool glitchy girls. He also likes the friending. It's as ball friend?
Yeah. Befriending, cool, glitchy girls. Okay. So we've got the image. Now I want a little bit of a caption. So let's go for a P tag
and a class of caption. If you wanted to
write that pretty quick with this thing called, to go p dot caption, which kind of looks like CSS, and then press Return. There we go. And the caption
is Ralph and Vanlop. Let's type Vanilla
pear font Schwez. Okay. That's how you
spell vanlaPeFon Schwez. Gonna copy that. Go
back to VS code. Okay. Next is H two again. Ralph's characters
characteristics. That looks good. Again, it might not like this. Some older browsers may be like, what is this thing and you
may get a little square with a little cross through it
or some weird character. So we could just
use a single quote, or again, we could research
what that thing is. So single apostrophe HTML Okay, let's try that and a pos. Okay, on. There we go. Ralph's characteristics. Gonna save that. Let's go back to Chrome and check it out. Okay, about Ralph.
Ralph is a video game. Blah, blah blah blah la Leach, girls. Okay, Ralph's
characteristics. I want it to be like
a kind of curvy one. This one. Yes. Okay.
Let's paste that there. Save that. Yeah. That looks a bunch better. Okay. There are some
things that I'm like, Okay, definitely need to change these things,
but we'll get there. Let's finish the HTML first. Okay. Here, Ralph's
characteristics, I said I wanted to
use an ordered list. So an OL is an ordered list, and inside an OL and a UL, which is an unordered list, we still have list items. So list item, he's strong. Okay, let's put that in there. He's strong. And he's kind. He he's big. He likes glitchy girls
and takes no nonsense. Alright. So that's the ordered
list. Let's save that. And you'll see
that if I refresh. There's one, two, three, four. That means it's an ordered list. Cool. Okay. The next
thing is an H two, and that is gonna
be Ralph friends. And then here, we're going
to go for an unordered list. And inside the unordered list, we're going to go
for a list item. And here we're gonna go for vanilla P fonchoez
Okay, there we go. But now we want to link
to some other page here. So let's Google this quickly. Let's go for VanlaPeFon Schwez. And you can choose any
kind of page that kind of gives a little bit more
information about a character. Let's accept all there.
Okay, this is good. So I'm going to copy this URL. So many adverts here. Wow. Okay, Vanilla Pe Fon
Schwez and I'm going to put VanlaPFon Schwez inside an A tag or an anchor element.
So let's go for A. And then the HRF. There we go, paste that and put the trailing A tag over there. Okay, who else is
Ralph's friends? If you're like, I don't know who those characters friends are. Well, should be your
favorite character, but if you don't can be
like, Reque Ralph's friends. Who are Rick l's friends, Shigas Sergeant
Tamura Jane Culhorn. Okay. And let's create
a new tab there, and there we go. Okay, let's copy that. Felix would also be a good one. So I'm just going to paste
that there and go for LI A, and then we'll cut that, paste it there, and we'll copy
Sergeant Culhorn Alright. Let's save that and
double check that. This is all working.
Okay, refresh. Okay, so we've got Venlope Von
Schwiz and Sergeant Cohor. But when I tap on one of these, I want it to open in a new tab. Okay. So do you remember
how to do that? It is with target attribute, and we set it to blank. Fantastic. Target blank. And let's go for one more Li A, and we go to Felix here. So let's type in Felix and save. Hmm. Rocker Rolf, here is duty. Here we go. Let's go. Fix it
Felix. So let's copy this. Let's go to Visual Studio code. Fix a Felix and paste. Okay. Command S. Let's
remove the extra space there and chrome refresher. So we've got three
friends. Great. And yeah, that's pretty much
all the HTML that we need. What I want to do is make
this all look very nice. So the first thing I want
to do is put this in the middle and maybe make
this image not so big. So make the image
smaller basically. Inside of CSS, we've got a
bunch of header stuff here. Let's put some main
styles in here. I'm going to say width,
let's go for 800 pixels, and then a margin. I'm going to go for
zero at the top and bottom and auto on
the left and right. Let's save that refresh. Okay. That looks good. Except that image is huge. So let's say main image. So all images in the main
tag or main element. Let's say width or
max width is 100%. So if it's smaller, that's fine. If it's bigger, it will then
fit to its parent element. So let's save that
refresh. Okay. So that's looking really nice. Not the biggest fan
of this kind of font. This is a serapont, not very racket Rolf, and the headings are
also seraph just boring. So let's go into perhaps we don't need
to say header H one. We can maybe just say all H ones can have this font
and font style. We say all H twos. You can pretty much do the
same thing except color. I'm just going to keep
that black margin. We'll keep that the
same. 70 pixels. Let's go for 50 pixels. All right. So let's save that. Okay. That looks good. Maybe a little bit more
margining at the top. So let's go forward
20 pixels there, and we can make it like so, so 20 pixels at the top and the bottom and zero pixels
on the left and right. Refresh. Yeah, looks cool. Now, the rest of this, what kind of font do we want? Well, let's go for, you know, some usual ones, maybe. So on the body, let's set this or the
HTML and the body, but body should be fine. But yeah, we're probably going to take out golden
rod in a little bit. Maybe we can take it out now and we'll go for font family. There's a lot of
stuff to choose from. And the reason why there are so many fonts to
choose from is that if you specify a font and somebody doesn't
have that font, it needs to know
what to do then. Now, with our Google font, we're actually saying, load
this font and use this font. All the browsers can't do that. New modern browsers, fantastic. So we could do the
same thing and import a font from Google Fonts. But for right now, let's
pick something default. So Kuriau if you
know your fonts, you might be able to figure
your way around this. Times New Roman is
typically a sera font, one of the little
things at the bottom. Something that doesn't
have things at the bottom is called a San serfont and something like aerial Helvetica SAS serf is
what we're going to go for. So here, you're
going to say, Hey, I want it to be aerial. If you don't have aerial, let's go for Helvetica and
if you don't have Helvetica, just use any SANS serfont. Okay, so Command S. Let's go to Google
Chrome and refresh. Okay, the background
color is default now, and this looks a lot better, but I want to change
the font size. Let's go font size
to say 20 pixels, save Okay, that looks good. What about the space
in between them? So let's go for line height. Maybe let's go for 24
pixels and save there. Way back to Chrome.
Maybe a little bit more. You can see some of the other
things have changed now. Interesting. It's
changing it on the body, which means it's changing it for all of its
children elements, so maybe we don't do that. Let's cut this then let's
go and apply it for paragraph tags and UL
and OL tags or elements. Font size 20 line height to
24 pixels. Let's check this. Okay. That looks pretty good. Maybe a little bit more. So inspection. Let's up it a bit 30 pixels. Cool. Happy with 30 pixels. Okay, save there. Refresh. Okay. That looks pretty good.
I like it. I like it. Rolfe and Vanlope Von Schwez I want that to look
like a caption. So over here, we've got this
P with a class of caption. So P dot caption. We can set the font size to
something like 16 pixels. We can set the color to a gray. Maybe we want a
specific kind of gray. Mm. Something like that. All right. And then maybe
want it to be italicized or emphasized so we
can go font style, either italic or oblique. I like oblique. So
save that refresh. Okay, I want to be a
little bit closer. So let's inspect. Let's go for margin top. Let's change that to zero. Yeah. That looks good. And then I guess we can
change the margin bottom too. Let's see what zero
all around looks like. That's great. Okay. So margin zero. You could say zero pixels, but zero is great. Okay, so things are
looking pretty good here. Ralph's characteristics,
he's strong. He's kind he's big. He likes glitchy girls
and takes no nonsense. Ralph's friends. Okay, so
this is looking pretty good. Maybe I want this
one, two, three, four to be slightly to the left to kind of line up with
Ralph and Ralph's friends. So let's have a look
at this. The OL, there's got this,
like, green bit there. What is that green bit? So I'm going to go
over to computed. If you don't see computed, tap on these little arrows, and then it should be over here. So it's actually got some
padding on the left, 40 pixels of padding
on the left. So let's set it's
padding left to zero. Hmm. That's also not
really what I want. So what we could then
do is say, what is it? List list position inside. Yeah. That looks
pretty good. Okay. So padding left and
list position inside. Let's go for padding
in total, also zero. Okay. That's cool. I'm going to copy that.
And this is for an OL. Maybe we tried for OLs and is. So we're doing this
for P, UL and OL. Let's go for ULs and OL. Unordered lists and order
lists and paces in here. Command S and refresh. Okay. That looks pretty good. Now, these are links or anchors. Let's try some stuff out here. So inside of Ps, ULs, and OLs. That's what I want to address or the anchors inside of them. So I'm going to copy this
line up here and say, all PAs or maybe we
just use A's, right? There might be a
whole bunch easier. So all A anchor tags, let's change the color to a red. And let's go for
something like that. That's a little
bit more playful. Okay? That looks good. Come on S. And Chrome,
we can refresher. Okay. Now what's pretty
cool with these? Let's double check that this
opens in a new tab, it does. What's pretty cool with these, you have these pseudo
classes that you can apply. So we'll go for a Ha and we'll say color or maybe we'll copy and paste this and change
it to a blue or something. Like a blue. That looks good. And you can also say pressed I think that doesn't look good. I'm
just going to copy that. Let's go to Chrome,
create a new tab, a pressed. A pressed HTML. How to style a click button, Hover. Oh, there we go. Okay, visited Active. There it is. Active, visited. Alright. So let's go
back to studio code. Let's go for active. Cool. Copy and paste the color. Okay, we can change
this to maybe a purple. It's probably is not going to look that nice,
but let's see. And then you can also say, A, visited, which means that
you have actually been here. We'll paste this here again. And we'll make it gray. I want to show you
what this looks like. So Command S. It's got
a chrome, a refresher. It's visited all
of these things. So perhaps if we change
the URL just slightly, you'll then see
something different. I'm just going to
put a question mark, V equals one and Command S. Now the URL
should be different, so let's refresh, and it is. But now once we've tapped on it, and it's got the V equals one, it's now gray, which
is pretty cool. Not many people actually
make use of this anymore. So I'm going to go back to Visual Studio code and just remove that because I
quite like the red, or what I could do is keep it in there and just make it the same as A and A visited. So instead of having two
separate declarations or declaration blocks, I'm
going to combine it. So A and A visited, you can be the same color and then hover and active
are different colors. So let's say that refresh. And as I hover, you'll see that these change color to blue. And if I tap and hold
down, it's purple. Now you can also change all kinds of things
like the font size or the height or the
background color or the opacity or
a bunch of things. But for links, like, sometimes a bit irritating
if things change too much. Okay, for some reason, there's a pop up blocked, maybe because I hold down
too long on it. There we go. Okay. So
we've got some nice links. So even a Po, could say, Ralph is a video game
bad guy from a movie, maybe we can include that, and then we can
link to the movie. So Ralph is a video game, bad guy, from a movie, and from a movie we'll put into an anchor element
give it an HRF, give it a target of Blank. And then let's go
search for Rice Rolf O. Is there an IMDB or
Rotten Tomatoes. There we go. Or we could
link it to Wikipedia, but let's go for IMDB. Is it just a first movie, sure. Okay. Let's put it in there. Okay. Let's save that. Let's go back to Chrome.
Let's close that. We can probably close
all of these tabs. Otherwise, there's just a lot. Okay, thanks. Make Chrome faster. Just close that for
now and refresher. Okay, so you can see that it's
also red, which is great. From a movie, opens
up that IMDB link. Okay. So that is pretty much our main element done or
our main section done. Perhaps we can match this
red with this orange. So let's do that quickly. Inside of our style here. Let's go for this red. I'm going to copy that and
then go down to our header. The PFP has this
color over here, so I'm going to
paste over there. Maybe just need that
color, actually. Undo. There we go. And then put a colon at the
end, semicolon at the end. Okay. Refresh air. Yeah, then matches
the rest of the site. There's some nice reds in the
image, all ties together. Okay. That's it. Now, let's
go to Github desktop. I want to say created
the main section. Okay. Commit to Maine and push origin. And again, in a
little bit of time, maybe a minute, your GitubPage
site will be updated. Okay, the website is
progressing really nicely. Now, what's left is the photo. So we'll finish this
off in the next lesson.
26. The Website’s Footer: Alrighty. Let's finish
off our website. We've just got the footer left. So we've got really good
looking website so far. Let's create the footer. So inside of Visual Studio
code inside of index dot HTML. Inside the footer, I'm
going to put a P tag. You can make a footer, like, as complicated as you like, but this is such a simple site. So what we're going to
say is this website was made during a tap tap kaboom. Plus, and we want to do a
copyright symbol, 2025. Well, that would be crazy. 2025 and hm Yeah, made by Rich Armstrong. And then copyright 2025. So let's go have a look
for a copyright symbol. So coop right symbol HTML. There we go. Let's
just copy that. Cool. Really helpful
when Google just, like, puts it up there for you. Okay. Here we go. So let's save that. Let's
go to Chrome and refresher. Okay, tap tap kaboom and
Rich Armstrong want to make those links or encores. So let's put a anchor taka, tap tap kaboom. There we go. H RF equals HTTPS colon slash
slash tap, tap kaboom.com. Could even put a WWW
there. Fantastic. And then the same thing
made by Rich Armstrong. And here you can
put your own name. Actually, you can put
whatever you want in your footer. Rich Armstrong. Href equals HTTPS colon
slaAswww dot IH armstrong.net. Alright. And then we can also
give it a target of blank. Sometimes blank
targets are great. Other times, they're
really frustrating because then you end up
having like 47 tabs open. I probably do that
by default anyway. But if it goes to
the same sites, I try to, you know, not have it open as a new
tab, you know, general rule. Okay, target blank. Okay. So let's save that. Let's go to chrome and refresh. So that looks quite nice. It looks like the
rest of the site. Now I want to put
this in the middle, much like the main section, and then also give it a
color background color. So let's do that in our CSS. And oftentimes we
can re use CSS. So Footer let's go for Width margin zero auto,
something like that. And let's give it a
background color. It's gonna go for
blue right now, and let's change that
up a little bit. Hmm. There was the blue from the
header that was quite nice. Let's use that
again, so copy that. Paste that and save. Margin zero auto. Let's
see what that looks like. Okay, so not really what I want. It's like, no, I want this
whole thing to be blue. Okay. So inside of visual studio code, there are a few ways
to go about this, but I think the most flexible is to put a div inside
of our footer. So let's go for a div with a
class of content like that. And we can paste that over there and then
just type that in. So it all looks neat
and tidy, okay? And then we've got
Potter dot content. We could even make
content its own thing. Might do that later,
but we'll take that and put that into content. Margin zero and Auto, we'll put that into content too. Background color,
we'll keep that there. And then let's save and
see what happens here. That looks great. Okay. Next thing I want to
add maybe some padding. Let's right click on the footer. Let's add a little
bit of padding. Let's go for 40 pixels,
something like that. Yeah. That looks great. Okay. Padding. Let's
go 440 pixels. That's going to be at
the top, the bottom, the left and the right. Fantastic. Let's save that. And then the only
thing that I'd like to change is these because
as you hover over them, they go this blue color, and this red is also
pretty intense. So maybe we can make a white, and as you hover over them, they turn to a yellow. Okay. So let's go for anchor
tags within the footer, we'll say color white. And then we'll copy
that and say footer A, hover. We'll change it to. Let's go up here
and copy and paste. Visited hober Let's copy that. But then let's change
it to, like, a yellow. Maybe so that it just keeps a
little bit of the same kind of hue or saturation
like in the same place. Okay, so we've got the hover. Let's save that refresh. Okay, that's interesting that it does one and not the other. So that's because
it's visited, right? We've already visited that one. Hm. So let's copy that. Comma paste, like that. I'll say visited. Yeah, you can put them on two separate lines if
it makes it easier. You can also give us space there if it makes
it easier to read. Okay, save that refresh. There we go. So the hover
being yellow is really nice. And if you then press it, nothing is applied
because you've already got that hover applied. So what was the active
pseudoclass, that purple? So let's then paste that. Okay. Refresher. Okay, that doesn't
look too good, so I'm actually just
going to remove that. You can see how these
footer styles for anchors are overwriting
the earlier anchor styles. One, because it comes later in the file and two because
it's more specific. Okay, so save that. Let's go back to
chrome and refresh. Okay. Now I want to actually
put this in a separate line, and there are a couple of
ways that we can do that. So we could make each one of these a P tag or put
them in a P element, or we could just add a BR tag, which is a line break.
So I'm going to do that. I'm going to go for BR, like so. And save and then go back to not Visual
Studio, but Chrome. Alright. That's great. But now I want to put
it in the middle. Let's go to VS code and style. And we could either do
it in the content or the footer or in
the footer P tag. So let's try text a line, center, Command S, Chrome. Okay. That looks really good. So,
made by Rich Armstrong, we double check that that works. Yeah, fantastic.
Taped up Kaboom, double check that that
works. Fantastic. Okay. So, that all
looks really cool. I think there could be a
little bit of space here between the footer and
the main elements. So let's go for either
footer or main. But because we're
dealing with a footer, let's put a margin top
of, say, 20 pixels. Would that do anything, 40, 60? 80? 60 look pretty good. Okay, a margin top of 60. So I'm just gonna copy
that. And paste it. Save that.Rfreshy. Okay, rect Ralph, about Ralph, Ralph's
characteristics, Ralph's friends. Yeah. Awesome. Now the only thing that we need to do is to go to Github desktop and say,
added Photo element. Commit that to
Maine. Push Origin. Okay, our website is done. High five yourself,
do a little dance, fist pump the air. Good job. You'll see that each
section had its challenges, and that sometimes what
we did in one section of the website affected other
areas of the website. And now in the next lesson, I'll show you the
basics of making our websites look
good on mobile, which is really
cool because we use our mobile devices a lot. I'll see there.
27. Make It Mobile-Friendly: We've done a great
job of designing and coding a website
for our character, but we haven't thought
about how it may look or work on
phones or tablets. So that's what we're going
to do in this lesson. Making a website work
for mobile is often called making it responsive
or responsive design. And there are a
bunch of things that designers and developers
do to make websites look good and work well
on different devices and screen sizes. Here
are a few options. The first thing we can do is use flexible units and layouts. For example, we could use
a maximum width and use a relative measurement unit like percentage values
instead of pixel values. This means that as a
screen gets smaller, our content will fit, and as it gets bigger, the max width keeps
the design in check. The second thing we can
use is CSS logic to change element styles based on things like width and
height of the browser. This is called media queries, and it goes something like this. If the width is smaller
than 600 pixels, make the font size 16 pixels, make the Avatar
images with 100%, and remove the rounded corners. Thirdly, we can
change what images are shown based on the
size of the browser. We can do this in HTML by using picture elements with nested
source elements that have media attributes
or by using source set and sizes attributes
on our image elements. Another way to change
what images are shown is to use
background images on elements and then use media queries to change
those images, all in CSS. We're not going to cover these three options
during this course, but it's helpful to
know they exist. Luckily, in our case, our website is fairly simple, so we'll focus on making
our website as flexible as possible and using
CSS media queries to change a few declarations. Now, what I show you in this lesson will just be
scratching the surface, but I want to show
you the basics. So while our website
looks pretty good on a desktop or
on a computer screen, how do we know what it looks
like and what it feels like on mobile or
different screen sizes? So I want you to right, click on your website and either go for inspect or go view developer
and developer tools. Like so, if your element
inspector is at the bottom, I want you to move
it to the right just for this part, at least. So tap on these three
dots and then tap on this dot to the right button, or you could dot to left. I just find that a little
bit weird. So there we go. And like this, you can
resize it left and right. And this is the main
thing that I'm concerned with is the width of my screen because a web page can be infinitely long
and that should be fine. It's the width that
I'm concerned about. So we can change the
width pretty easily. And yeah, you might be like, but how why should I
be concerned about? Well, check this out. There's
this little button here. Which then gives you
the dimensions of your phone or various
different phones, iPhone XR, perhaps an iPad Pro, and you can change
your Zoom in Ns. So this is 50%.
This would be 100%, which is a bunch bigger. So you can just have
a really good look at what your website looks like with different
phones or mobile devices. I have an iPhone SE, so this is something
that I'm always aware of because I have such
a small form factor. I've always had a smaller phone, so I often go for a width of 320 as the minimum that
I will design for. Now, this looks weird, and yours may not
look like this. Sometimes when you refresh, it's actually zoomed in
pretty close like it is here. So if we refresh again, that may work, may not. If you, you know, give us
a little bit more room, there's also this flip button, which makes it into landscape
or back into portrait. Okay, so you can see
there's a bunch of things that look
really weird here. One of them is that the text
is still centered here, but there's this blue
bar and that blue bar. So that's actually how
wide our screen is. But because this image is
extended all the way out, it's kind of making
the website that big. So let's focus on a
few things first. What I want to do is go
back to Visual Studio code. And you may have seen me put in this line of code
earlier in the class, and this was done with
an ET abbreviation, and I said, We maybe get
to it later in the class. So if you're like, but
what does this mean? Anything, you can just copy. And if you go to Chrome and you open up chat GPT
or something similar, let's go to chitchpt.com
and you paste this here. You can say, What does this
mean? Something like that. And it gives you a whole
bunch of information, which is really, really helpful. Now, what I want to do here is I want to add something
to do with the user. I don't want the user
to be able to scale it. So I could say, I
don't want the user to be able to scale on a phone. What do I need to add? User scalable equals no. So maximum scalable one. User scalable, equals no. So let's copy that. Let's go back to
visual studio code. Paste that in there, put a
comma, use a scalable no. I'm going to save that,
go back to Chrome, go back to RecaRf and refresh, and you'll see now that it
is actually that full width. And this is really helpful
for when you're developing, when you're debugging,
trying to make things work for mobile. Okay. That looks good. Well, it looks
better than earlier. But now we have a
whole bunch of issues. I'm going to like scroll to the right or
drag to the right. Hm. So the first thing I want to do is address this image. And so I'll right click
here and inspect. And you'll see that
this has a width of 800 still because Main has
a width of 800 pixels. So what we can do here is set
a max width of 800 pixels, and that should sort
a lot of stuff out. We still got quite a bit of
space on the right hand side. Okay, so let's go to
Visual Studio code. Let's go to our main. And instead of width,
we'll use max width. And the image has a
max width of 100%. So it's always going
to be 100% maximum of this main elements
width. Okay, cool. So the Foo content also
has a width of 800 pixels, so let's use max width there again. I think that
should be okay. So Command S. Let's go back
to Chrome, a refresher. Okay, that's looking
a lot better. Now, the next thing that
I want to address here is that all of the text
is touching the left and, you know, possibly
even the right. So what to do about
that? Well, again, this is in the main section. So what I could do here
is put some padding. So let's go for zero
at the top and bottom and say 20 pixels on
the left and right. Okay, that looks really good. Okay. And perhaps we can
do the same at the bottom. Okay. Scroll down here. Let's go for Well, padding. We'll go for zero at the top and bottom and 20 pixels
left and right. Save that and then
maybe we can copy that and put her on the
footer content too. Okay, I'm gonna save that.
Refresh. This website was made during a
atop kaboom class made by Rich Armstrong 2025. That text looks a bit strange. Maybe I can make it a bit
smaller or let's have a look at what's going on
here, inspect this footer. The footer already has
some padding of 40 pixels, so the content probably doesn't
need this extra padding. Cool. Let's go back to VS code. You can take that off because the footer already has
some padding of 40 pixels, but maybe 40 pixels is a
little bit too much on mobile. So what I'm going to do
here is use a media query. Where you put your media
queries is up to you. Maybe you want to do it directly after this Footer set of styles. So maybe we can add a comment
here and say, Footer. And here we do a media
query by saying act and then media and I'm just
going to press Return here. And then embraces. Let's go for max width of let's just go
for 600 pixels for now. And then inside of here, I'm going to say footer
or the footer P. Let's choose a Font
size of 16 pixels. Okay. And in Chrome,
let's refresher. Okay. Anything that is
600 pixels or less, it's going to change the
font size to 16 pixels. We can double check that cha. This is still pretty big. Then at this point
of 600 pixels, it goes pop and gets
a little bit smaller. That just means it'll
fit quite nicely. Even at 320 pixels or
so. Yeah, that's great. Although it does look like
this is a little bit bigger, so I'm going to inspect that. I'm going to go to computed, and then down here,
font size 16 pixels. Maybe it's just
because it's white. Okay. That looks pretty good. Maybe we can change the rest
of the font size as well, although 20 pixels
looks pretty good. What about the H twos? Maybe we can change the H twos. So let's go to VS code. Let's type out that
media query again. So H two, let's go at media. There's a bunch of
other things that you can do with a media query, but I'm just keeping
it basic now. So max width of 600 pixels, and you can change
the 600 pixels to whatever you feel like
based on your design. So let's go for a
fun size of 40. And this is a mistake that
I make a lot of the time, but I see it all over the show. It's like you're thinking
this is an H two, so you want to put the H
two declaration over here, but this is not really
saying anything to anyone. There's no H two
declaration block. This is just font size
in the middle of nowhere when there's a max
width of 600 pixels. So you actually
need to put this H two declaration block in here, and then put that font size
declaration inside the block. Okay, let's save there,
go back to chrome, refresh, and that makes it
just a little bit better. Even that fits in,
which is really nice. So let's double check
what that looks like. Yeah. That looks cool. Maybe we can make this
a little bit smaller, I'm going to inspect
wrong button. Going to inspect here. This is a class or a div
with a class of PFP. Yours might be an image, but the same scenario applies. Let's go to styles here. The width is 300,
the height is 300. If we change this to say 220, that looks pretty good. 220, and then he's not
really in the middle. Is he anymore,
Background position. It looks pretty good. And then. That looks cool. I like that. So we've just changed
the background position and then the width
and the height. So 220 pixels. Okay. That looks great. And our record Ralph
is on two lines. So perhaps we can change
this to 50 or so. Yeah, I like that. So let's
go into Visual Studio code. And here we can actually
pot this H one inside this media query right here and we'll go for
phone size of 50. You could put this media
query all the way at the bottom of your
file and put all of your select your statements and declaration blocks inside of one media query as long
as it's the same size. It just depends
on where you want to put your media query code. Okay, so let's save that. Let's go to Chrome and refresh. Okay. So that looks really cool. Let's change this to responsive. Okay, so at the top here, let's see at 600, it changes the font size. Now, you can have a lot of
fun with media queries. You can change the colors.
You can change images. You can change
font sizes, fonts, all kinds of things just based on the width
of the screen. But there are also a
lot of other things that happen in media aquaries
that you can check out. But right now, our website
looks really good on mobile, it looks really good on desktop, it's ready to share
with the family. And one more thing, we
need to commit our code. So let's go to Gitub
Desktop and type in a website RS Bonv There we go. Let's commit to Maine.
Let's push Origin. Awesome. Fantastic. So again, in a few minutes, that's
going to be updated online, and you can share it
with your family. Okay, now we're ready to share our website in that
family Whatsapp group. It should work on
everybody's phones at computers. I
should look great. But maybe before we
actually share it, how about we add another two characters web
pages to our website? Let's do them in
the next lesson.
28. Add a Character: Okay, we've got an awesome
website for our character. I matches our character's style. It's responsive, but it's
just a single webpage. So let's make at
least one more page for another character
or maybe even two. Then we can call it a proper
website with three pages. The good news here is that
we can do this really simply by duplicating our index
dot HTML file twice, changing the text and images, and adding a few lines of new CSS to make each page
feel slightly unique. Okay, now it's time to add one or two more characters
to the website. This is going to be fun, and
it shouldn't take too long. So of course, Rolf needs a vanilla Pe on schoez
page. So let's do it. I'm going to tap on
this button over here, which I don't want
the device tuba, and then I'm going to move
this to the bottom again. Fantastic. Okay.
Inside of VS code, I'm going to right
click on this and he Copy and right click paste. And then press
return to rename it. And I'll say, man, Vanlope. Oh, do I not know
how to spell this? So I'm just gonna
copy that. Let's go to visual studio again. I guess we could call it Van. And I'll make sure
it's lowercase. So Vanlope and then the
title will be Vanlope Von, Schwez. There we go. I have to change the Rolf icon, this one will be the same. Okay, so let's go
for a vanlaPe icon. So a new tab. VanlapeF Schwez. Let's go for images. Okay, this one
looks pretty good. Just want her face. So I'm going to right
click and Save Image As. Yeah, that looks
good, and find her. I'm going to put this inside
of Ralph inside of images. Okay. Op. Okay. Now I want to
resize Resize Image. Here we go. Did we use this one earlier?
I can't remember. Let's try it. With an height. Let's crop it. Yeah,
that looks good. Okay. That looks good. Crop, download image. All right. All right.
Download Image. Fantastic. Let's go and put Nlope icon into
Ralph into image. Oop. There we go. Go to copy all of that. Let's go to VS code.
Pop it in there. Okay. That looks good. We can then copy and paste that. Vanellope font schwez
about vanlope. Okay, I don't know too much
about Venlope right now, so let me just copy and
paste a few things. VenlopFon Schwez'
female protagonist. Okay, let's copy that. Paste it in there. We need
an about image for Vanlope. Let's go have a look at
some more images here. Yeah, that one's pretty cool. Yeah. Let's save image as I'm slowly getting
this Vanlop big, then we'll pop
Vanlope big in there, rename that and just
copy all of that. So that when we're in VS code,
you can pop it in there. About vanlope Vanlopes
characteristic. Okay, let's go
forward. She's strong, she's kind. She's big. Okay. She's small. She's glitchy. She's got attitude and She's 9-years-old. Okay. Let's go for
VanlaPesFriends. Well, here, we've
got rect Ralph. Okay. And now we can actually
link to our Index page. So dot slash. We'll go for index dot
HL or just dot slash. J goes to the root
directly, basically. Okay, Rece Rolf, that means I'm going to save
that inside of Index, which is Rolf's
page down here for Vanlope instead of going
to this external URL, what we can do is to
go to dot slash same directly, but Vanpt HTML. And I don't want to
target of blank, so I'll take that
off, save that. Let's go to Vanlope. We'll take off the
target blank here too. Okay. That is great. Let's go to Google Chrome, go to the ekifPage
and refresher. We'll tap on Vanilla
Pe on Schwez then it takes us to
Vanilla Pe on Schetz. Besides that image, it looks
pretty good, a Vanlope. Let's close this. All
right. That's great. And you can see how quick
it is to create a new page, a whole new page because we've already got
our CSS set up. And then we click on Recker Rf, and this goes to dot slash. Now online, this would work. But here, it's not working
because this is not a server. This is like a file
or a folder system. So let's go back to
Visual Studio code, and let's go and start HTML. Let's save that.
Let's go to Chrome. Let's go back and refresh.
Okay, Rick a Rolf. There we go, goes to
the index file rather than the Rolf folder,
which is that. Okay, so that is great. Let's go back to Vanlope
and change this image. If you've still got
an image over here, so inside a VS code at the top here for your PFP if you're using an image and you
didn't do the side quest, where we changed that image PFP into a div with
a class of PFP, it would be pretty
easy to change. But now we've got PFP
and I want to add a a class of vanlopi
on top of this. PFP vanlope. Let's save that. Let's go to style that's CSS. Where is the PFP. I'm going to copy
that, paste that here it's got a class of
Dt PFP and Vanp. This is how you say I'm going to select all the elements
with the class of PFP and vanlop inside
of the header element. Okay, so here we've just got a background image that
I'm going to change. Then perhaps the
background position and the background size will
also need to be changed. Okay, so I think let's have a look at what
images we have. Phenelope icon, Penelope JPEG. That's probably a
really good one, so I'm going to copy all of
that and paste it in there. Background position. I'm just going to set that
to zero and zero finale and background size to 100%. Or maybe I'll use something like cover. So I'm
going to save that. Let's go back to
Chrome and refresh. Okay. Yeah. That looks
really, really good. I like it. Fantastic. And
if we go back to Rece Rolf, his is still the same
because his is the default. His doesn't have the Vanlope
class on that PFP as well. Now we're going to
Vanlope again. Hers does. We could even change the
color of her border. Yeah, let's do that quickly. So let's right click Inspect. Or maybe let's do it
in Visual Studio code because we have a
color picker there. So background position,
background size. Let's go for border color. And let's go for red. But what color is Vanelope? Vanelope is this kind of
like turquoise color. Yeah, so let's do
that and save. Okay. There we go. There are a bunch of ways that we
could actually do this. Like we could give
the body a class of vanlope and then change
everything based on that. But at the moment, this is the only thing
that's changing. Okay. So now you can
do this with one, two, three, four pages, however many pages you want. Now your website has
multiple webpages. It's actually a website and
not just one single webpage. And the last thing that
we need to do is go to Github desktop and
commit this code. Add on another page. Commit to Maine, push
Origin. There we go. If you do see something like
this in GitHub Desktop, an updated version
of Gitup Desktop is available and will be
installed at the next launch, you can actually just tap
on Restart Gitup desktop, and it should pop up in a
matter of seconds or minutes. Mm hmm. There we go. There we go. Now I have another
page on my website. I'd love you to do the same. Maybe add two,
three, four, more, however many you want.
Okay, there we go. If you want to make
each character page even more unique,
then go for it. I love to see how you do this.
29. Challenge: Alternative CSS: Now, if you're up
for a challenge, I want you to make one
or two more versions of your character's webpage
using the exact same HTML, but using different CSS files. Here's an example of
two different webpages with the exact same
HTML, but different CSS. You'll begin to understand how powerful CSS is
with this exercise. Okay, so you can choose
which character you want to make a new version for. I'm going to go for
Ralph, so I'll go back. And I'm going to be making a
duplicate of this page and then changing the CSS file that it loads and then
creating a new CSS file too. Let's go into VS code. I'm going to right click
copy, right click Paste. And then return, I'll go for Ralph two. You can
call it what you like. Then my style, I'm going
to right click copy, right click and paste on
CSS, right click Paste. Instead of style Copy, I'm just going to say
style two. There we go. Inside of Rolf two, the style sheet that
we're going to go for is style two dot CSS, and you can say V two
or whatever you like. Let's save that. Now inside of style two, we can
do some changes. But I want to go to
Google Chrome and just go to Ralph to dot HTML. There shouldn't be any
differences there. But right now we can
start making differences. We can start making changes. So let's do the header. Let's change this color. Let's maybe go for
a really dark blue, and let's save that and
double check that it's working. There we go. And so just like this,
you can begin to change the whole site or the whole webpage using
this other CSS file. And it's really fun
because the HTML will not change,
but the CSS will. So have fun with this, try
some new things, experiment. Yeah, it's going to be fun. And then, of course, when you're ready and
when you're done, go back to Git upb
desktop and say, added a new or
alternative version of Ralph's web page. Okay. And then commit
and then push origin. Okay, there we go.
Have fun with that.
30. Share Your Website: Okay. Rick Rolls
website looks smashing. I think it fits
them really well, and I'm hoping that your website looks awesome and fits
your character, too. What's awesome is
that every time you commit and synchronize
your code with github.com, your page will update,
which is amazing. Now, if you're feeling up to it, share your character's
website with the world. Tell your mom, your friends,
the guys you work with, it should make everyone really
proud or insanely jealous. They'll probably start
treating you like a Ninja and asking you to code
all sorts of things, and maybe they'll even
ask you to, like, fix printers and stuff,
which is kind of weird. Anyway, I would love to see
your character's website. So post it where I can see it. You can mention at
taptapkaboom on All socials, or you can email me. My email is rich at
taptapkaboom.com. Now, at this point, you can
be pretty proud of yourself. You've just coded a website
for your favorite character. There are three pages.
It's responsive. It's awesome. So I reckon you should give
yourself a high five now, like that, and maybe
even do a little dance. Like, Wo Whoo. Something like that. Well done.
31. Debugging Common Errors: Guys, no matter who you are, even if you're a
super ninja coda, you will make mistakes
when you code. They're called bugs, and
they are frustrating. So how do you deal with them? Here are some tips to remember. The first tip is
to know that bugs happen to every type of coder.
It's just what happens. We're human. Even
AI makes mistakes. It's not a question of if,
it's a question of when. The second tip is that the
browser is not out to get you. It's just following
your instructions. Tip three is that most of the time the problems
are really small and the solutions really
simple spelling errors, typos, not using a period in front
of a class name in CSS, using a period in front of
an element name in CSS, using a period instead of a hash symbol when trying
to select an element by ID. Another small problem is
using different cases in your code compared to
your files and folders. If your images aren't
coming through or there's no CSS when you
view your site online, there's a good chance
it's because you're trying to access a file
that doesn't exist. Or just one where the file path or file name has
a different case. The fourth tip is that there is a logical reason
why it's not working. You just need to
find out what it is. Bugs are simple to
see in hindsight. Tip five is to keep things neat, tidy and consistent in
your HTML and CSS files. Indent your code so it's easy to scan and notice
irregularities. Use the same naming and
case conventions like use camel case or kebab case
throughout your project. Tip six is to copy and paste instead of
rewrite where possible. This means even if
there are misspellings, they'll be wrong everywhere, but the same
everywhere. Tip seven. When something isn't
working as expected, explain what should be happening and then what
is actually happening. You can talk to yourself, write it down, or even
explain it to someone else. Even if that someone else
doesn't code, it can help. Dogs and cats make
brilliant coding partners. Tip eight, join a
community and get yourself access to a mentor or someone
more experienced than you, especially if you're trying to do more complex kind of things. Tip nine is to ask Google or
something like Chat chPT. There's not a single
answer I've asked that someone hasn't already asked and found a decent answer to. Tip ten take a break. Go for a walk, look
out the window, do some breathing or just
sleep on the problem. Let your unconsciousness
work on it. Seriously, the amount of time
I figured out what's wrong while I'm in the shower or in the middle of
the night is crazy. You're going to spend a
lot of time debugging. The good news is that
the more you code, the quicker you'll get at
spotting and fixing these bugs, you'll be like, Ah,
I've seen this before. So, good luck with your coding, Good luck with your debugging. See it as part of the process.
32. Help Me Help You: I will always encourage you
to debug your own code and to figure stuff out for yourself because you gain
experience this way. But sometimes you just can't
get it right and you want to quit or throw your computer out the window or at your cat. So I'd rather all
that not happen. So, in these kind of
instances, I'd like to help. But I need you to
help me help you. So this is what I need from you if you're going to
ask for my help. I want you to commit your code and synchronize it
with github.com. Two, tell me what your
Github user name is. Three, send through a link to
the webpage with the issue. Four, if you're stuck on a
specific lesson in the course, tell me what lesson. Five, describe what
should be happening. Six, describe what is happening. Then I'll try help you out. So please don't say things
like, My website doesn't work. Please help. I can't help
you here. Help me help you. So try this format.
Get user name and then put your username, the URL, put your URL where there is an
issue. Lesson number. For example, put number 16, the one about writing
CSS in separate files. Sometimes I can't remember
what 16 is about. What should be happening,
the text color for heading three
should be blue. What is happening,
the text color for heading three is
not changing color. I'll either leave you
a written explanation, video explanation, or I'll
schedule a call with you.
33. Whats Next?: Okay, this is the
end of the course, but hopefully it's
just the beginning of your coding journey. I
hope you've had fun. I hope you've learned a lot, and I hope you'll embrace more of that nerdy side from now on. What this course
has given you is a foundation on which to
learn more on top of. There's tons more to learn, and it can be really fun making websites and apps for yourself, your friends, and for clients. Now, if you haven't already, you need to celebrate. You've just created a website. Hi five yourself, let out
a whoop. Whoop whoop. Dance, jump up and down, run around like crazy. Well done. And now, could you do me a favor? Can you please
review this course? It would mean the
world to me and help other people decide
whether or not to take it? Seriously, doing this
would mean a lot. So while this is
the final video, I'll add more videos to this
course where it makes sense, and of course, I'll be creating other courses and
YouTube videos. So join the taptap
Kaboom newsletter and subscribe to the YouTube
channel. Bye for now.