Transcripts
1. Welcome to Hand Lettering: [MUSIC] Hi, my name is Tanya and I'm a professional illustrator from Germany. Since 2017, I have been working freelance with different clients, mostly tutorial jobs. Since I love making typography, I just decided to learn brush lettering since it became a trend. If you are an illustrator, it gets more and more important that you can do lettering for your illustration jobs. In this class, I'm going to show you how to make a lettering with more than three words and make art of it. I am going to teach you how to compose a big lettering, how to use different lettering styles, and how to deal with decorations if needed. As a result, you will have a social media post that you are comfortable sharing. This class is for beginners, but if you are a bloody beginner, you can start with my first-class, hand lettering for total beginners, to start at the very important basics. When I started on designing and working as a professional illustrator, I was deeply need of workflow and comfortable with. Some steps I can take, no matter the subject, that brings me to one goal, a good working illustration. I will show you my workflow and how I have fun with everything I am designing. I'm giving you some control methods and some design basic to improve your playful work, and you are going to design a hand lettered quote for your social media accounts.
2. Project: [MUSIC] Your project is a social media post that you are comfortable sharing. Take a clue, not longer than 10 words. Make an art out of it and share it with the world. You are going to make your best work if you have fun with it. Because the joy you're having designing something, jumps out of the paycheck into the viewer's soul. I'll show you a way to have fun with your mark and make it even better with some design rules and control methods. Learn about the brush lettering technique and styles you can use with work and inspiration sheets to your own artistic category, then post a picture. Some simple design guidelines to make art of your lettering. Play for ideas on control to make them better. Use some simple control methods to lift your artwork to a new level. Decorations or not, and how to use them. I'm super curious about, what amazing artwork you are going to use. Feel free to share any stuff that's you're making. If you need any help or have questions, just post it. I'm happy to help you. Make it and tell everybody, I'm happy to see you in class.
3. Materials: Choose a pen that is suited for your project. Beginner-suited brush pens are Fudenosuke from Tombow, the Brush Sign Pen from Pentel in different colors, or the brush pen from Stabilo. For big lettering, I use the Brushmarkers Pro from Karin. These pens are filled with liquid ink. Also, the Tombow ABT dual brush. They have two tips. I use black fine liners that have pigment ink or Archival Ink or water and fat resistant ink. They're dry water-resistant, and even after working on your lettering, you can still choose to draw in some extra effects without smudging the lettering. By the way, you can get the Brush Sign Pen from Pentel with Archival Ink now. Ink and brush. If you use acrylic ink or Indian ink, it will be water-resistant too. I like the roughness that the brush can create. If you want to buy paper, you can get overwhelmed by all the options. I use different kinds of paper for different stages of my design process. Copy paper's cheap and gives you room for a lot of sketches. You get the financial freedom to try out more because you won't get the feeling of wasting fancy paper. For analog sketching, I use transparency or tracing paper. In my case, sandwich paper. Again, because it's cheap, and this gives me more options for trial and error. Whatever comes to my mind, I'll try and see where it goes. It can be perfectly used to trace your sketches and to define them. For practicing the brush lettering technique, I advise you to get laser copy paper because it has a smooth surface and your brush pens will slide over the paper and you can practice the technique much better. Normal copy paper dissolves under your brush pen. The pen gets stuck more often on the paper and the curves flourishes will look rougher than on a smooth surface. Your brush pen loses its quality much faster if you use it on standard paper. Bristol paper or lettering paper is super smooth and has a gliding surface, but it is expensive, and just practicing on this paper is just too much money. Also, this paper does not have any more qualities than a smooth surface. If you want to try any effects on this paper, it may disappoint you, because it only takes a couple of layers of ink to make the paper crumble. Use laser paper for practicing and suit your fancy paper to the material, the project you want to do, because hand lettering can be made on everything. I am using watercolor paper with a certain surface. With that paper, I can do whatever I want, and it's especially suited for color gradient techniques with my brush pen and, of course, watercolor effects. The economical way of sketching is using a graphics tablet, or in my case, an iPad. It is much faster, I'm not wasting any paper, and I can play with a composition really quick. I can try out anything I like. Save copies of first versions. That gives me room to play and keeps the frustration level low. If something looks not the way I want it, I can just go some steps back and try again. I am going to show you both sketching ways in this course. Let's start learning now. In the next three lessons, brush lettering calligraphy, use the changing font-weight, and write fluently. I'm going to introduce you to the brush lettering technique. If you are already trained in brush lettering or want to start with sketching and lettering, you can jump to lesson number 7, inspiration, where I show you how to stay inspired.
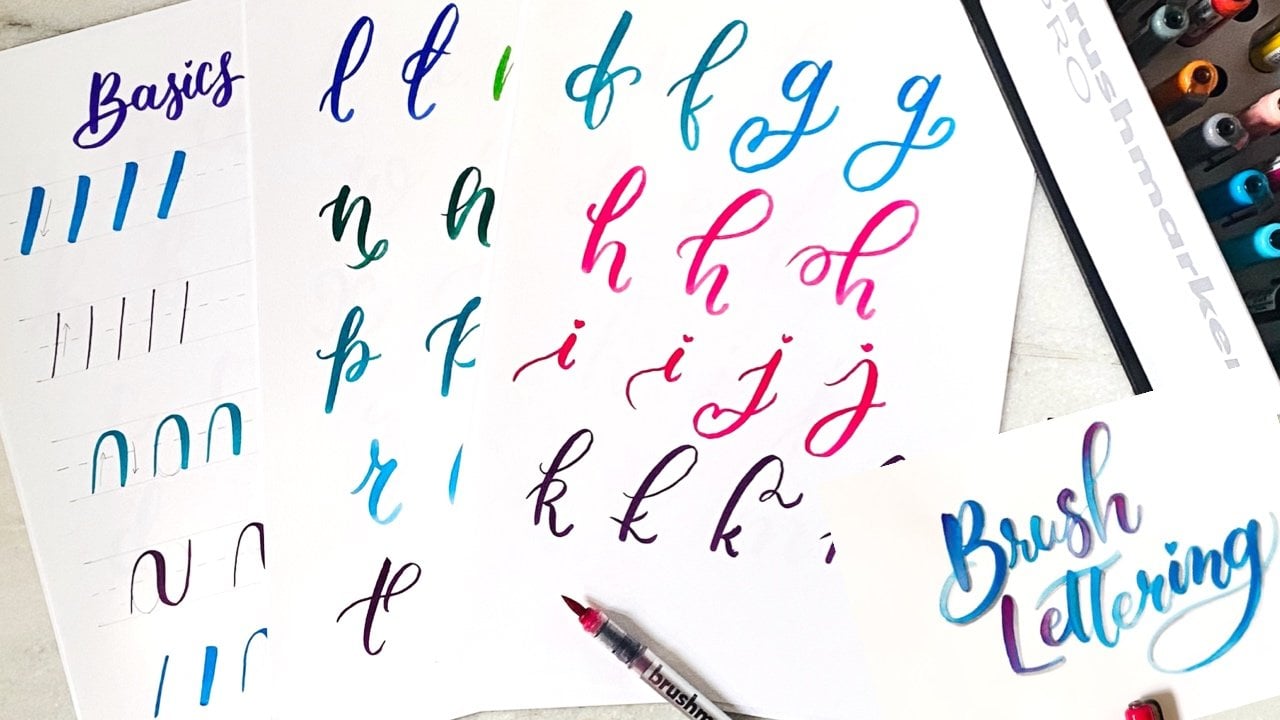
4. Brushlettering Technique: [MUSIC] If you want to create this calligraphy looking typeface, you need to keep one simple rule in mind, thin up and thick down. That means if you are following the writing flow of a letter, every time you make an upstroke it will be thin, and the downstroke must be thick. Calligraphy is traditionally made with a pen. Those pens have a slit in the middle, which helps the ink flowing down evenly on the paper. If you put the pen under pressure, the two parts of the tips spread apart, which makes it possible to draw an even thicker stroke. It is always easy to put the pen under pressure and drag it towards you or to make a downstroke. It is easy as well to make an upstroke without pressure. What is not comfortable to make, and feels like destroying paper and pen, is making an upstroke under pressure, things seem to explode. The basic rule to create the changing font-weight is thin up and thick down. You'll find all the worksheets in the download section. You can print them out to follow me along the exercises. In the brush lettering technique, we can also use the pressure of the brush pen to create a changing font-weight. Training this technique in the right way is super important so you can avoid bad habits. I'll advise you to do it slow and right in the beginning. I'm using a simple brush pen for small letterings on the practice sheet, and I'm going to show you the technique for right and left-handed people. The angle at which you write with your pen has a great influence on the look of your lettering. The hand position makes the difference here. If I hold the pen at an angle of 180 degrees and apply pressure, you can see almost no difference between the thick and the thin stroke. If I write from the side and pay attention to an angle that is more in the direction of 90 degrees, I can use the full broad side of the brush pen and create a really thick line with it. That way you can really create difference between the up and the downstroke, and that is the most important thing in brush lettering, to create a clear difference because it's called a changing font-weight. The same hand position actually applies to left-handed people only in the mirrored version. No matter if you're a lefty or righty, keep attention to the angle of your pen to use the broad side of it. That way you can really create difference between the up and the downstroke. That is the most important thing in brush lettering, to create a clear difference because it's called the changing font-weight. Start practicing up and downstrokes. Light up 100 percent pressure, down, light and pressure. Only when the movement is really down, I put pressure on the pen and draw a thick line. The devil sits in the transition from thin to thick. The highest and the lowest point of the curve gives you the signal to increase the pressure or to slowly decrease it. With this board, you start with no pressure and exactly on the highest point, you slowly increase it up to 100 percent pressure, up, no pressure, slowly increasing it and down with the 100. Up, no pressure, and slowly down with 100 percent. Do it slow even if your thin upstroke looks a little curvy in the beginning. It is more important to practice the part where the font-weight is changing. Later, you will be faster and this will stabilize your line work. Don't get too fast. If you miss practicing this part, you will train yourself a bad habit. Do it in your own pace until the curve looks smooth. After the arches, you can try to use. Here you start with 100 percent pressure and slowly release the pressure in the deepest part of the curve. Then your pen moves upwards without pressure. Here, the lowest part of the curve is the important part, but the font weight is changing. So 100 percent pressure, slowly decrease it up to no pressure. Creating all kinds of curves with changing font-weight is the challenge in brush lettering. The last two rows on our practice sheet are the most difficult ones because there seems to be no break for you. But you can always take a break if you want to. Just find a good spot, for example, in the upstroke. I always take breaks in my works, and I'm going to show you why in lesson number 6, write fluently. This curve is a combination of our arch and the U. It combines two movements. I think it is a lot to practice, have fun with it. It is super important that you train yourself to take pauses because you'll find it more difficult to focus on the technique and to move your hand to the right at the same time. I'm going to show you some tricks to handle this in a whole word later. You can do this worksheet as often as you like. If you feel you can do more now, you can switch over to practicing letters. I created a whole alphabet for you to practice the changing font-weight. You can start with the letter A and always keep in mind, thin up, thick down. Let's start with that one. Thick down and the thin up, and down, thick. If there is a horizontal line, neither up nor down, make it thin too. With these exercises, you can just focus on training of the technique and your muscle memory, so one day you will do this moves without thinking. Left and right-handers will have the difficulties with different letters. Basically, whenever someone has to put pressure on a pen and push it at the same time. For right-handed people, for example, the C is such a nemesis because you have to push the pen under pressure when you draw the big curve. For the left-handers, for example, a capital letter D is such a nerve wrecking letter. It has basically the same exploiting feeling when I pushed the pen and the ink over the paper earlier. It was just not so comfortable, but with the brush pen, it's easier than with the traditional pen. Left-handed people, for example, find the C quite easy to make because they can pull on the pressure. This is a much more comfortable feeling than pushing under pressure. Right-handed of people have to push under pressure while drawing the C and this is more difficult. But left-handed people push with the D. See everyone has some letters they need to practice even more. Because of this difficulty, sometimes your letters will get little bumps in the highest point of the changing font-weight. You can either practice so much that this won't happen, or cheat a little and level the bump with your pen. Have fun with all the letters and dive into brush lettering. In the next lesson, I'm going to show you a simple method to use the changing font-weight to create more type faces in a super easy way.
5. Changing Font Weight: [MUSIC] I hope you had fun with the last worksheets because I prepared some more for you. If you know how to create the changing font-weight with your brush pen, you can create more type faces in a simple, and easy way. That will bring you more diversity to your letterings. What's better than that? We are adjusting the technique to other fonts that are easy for us to make. For example, I assume you can write neat capital letters in your own handwriting. Apply the changing font-weight to these easy made typefaces, and you'll get a simple but wonderful looking font, you can combine with the script fonts. Take some inspiration out of your computer. Try out serif fonts. This serif fonts with all the small decoration lines in the end of the letter. Now draw them with a brush pen in changing font-weight. Voila, you'll get more and more options to explore the world of hand lettering, by practicing on existing fonts like this one, you'll fast internalize the logic of the changing font-weight. If you are doing this a lot, you can create these letters without thinking. In the next lesson, I'm going to show you a super relaxing method to letter fluently.
6. How to Write Fluently: We learned the brush lettering technique in the last two lessons. I'm going to show you how to write fluently. Most of the people think that hand lettering art is put the pen down and write a word in one piece because everything goes so quick. But that is a lie. If you watch closely, you will see the difference. I want you to compare your words and letters to Lego bricks. A word is a construction made out of many Legos simply put together and not just the word but every single letter is a small building. Let's take the word hand lettering as an example. The H is a downstroke. Another downstroke and the horizontal stroke. The A is like a bubble Lego and an I Lego. The N has a small stroke and the wave. You can observe that the letters are touching. I'm drawing them piece by piece really slow. After every Lego, I can take a break. I can realign my hand and with all the time in the world, I can build up my word. To create the appearance of a script font, the only thing I need is a connection, a small line from the previous letter. This connection just touches my next letter. This brings us to the illusion of a one-line lettering. For consistency in my letters, I'm drawing all the basic forms in the same way. For example, I can find the bubble Lego in the A, the D, and the E, and in the G. My letters all match each other in this lettering because I basically use the same shapes, the same Legos to draw them. If you are lettering in a consistent way, things will look much smoother. I already mentioned the small connection line from your previous letter. If you take a really close look now, you can find a sort of an i shape in the end of a lot of those letters. This connection between the letters affects the spacing between the letters. If you keep an i, I'm drawing this connection always in the same way your letters will have the same space between each other which again, brings a lot of stability in your work. If you come across letters that are not so easy to connect, just research hand lettering from other artists to get inspiration and see how they did it. I have a slightly boring practice for you. Try drawing a lot of connected I's to train your muscle memory. You can also train to connect random letters with the same connection stroke. Of course, this brush pen and changing font-weight. But it's also healthy to train yourself this technique of building your letters and words with every pen because again, things will look much smoother. I have a second example of another rhythm, a different looking connection stroke. Look at how I letter the word ocean. By using a different form of connection between the letters, the word gets another rhythm and another character. My connection stroke is the same between every letter. You can study those rhythms and work of other artists and train yourself to draw a connection line that you really like. Let's go to the next lesson and get inspired to make a great lettering.
7. Get Inspired: [MUSIC] You can find inspiration everywhere. Keep your eye open to typography that gets your intention. I like collecting illustration books, for example. There are so much different letterings that inspire me and especially in combination with illustration. In this book, you saw work by Christoph Kienzle, Rinah Lang, and Ivan Solbes. In magazines, you'll find at some products with inspiring typography, photography, and illustrations. [MUSIC] On Pinterest, I like to collect great letterings from other artists of vintage arts and toy design. I collect illustrations with great color palettes to push myself out of my comfort zone. Let's start and analyze some letterings to take closer look on design rules and how to use them in the next lesson.
8. Design Rules: Grouping, Hierarchy and Contrast: Let's talk about some design rules of grouping, hierarchy, and contrast. I'm going to show you some examples of my work and some of other artists, and I'm going to tell you everything about the use of these three elements and how to adjust them to your lettering to make your work even better from the start. If you look at the first lettering, you'll see I wrote home and anchor, big and black, so they seem more important because of their size and the contrast. All the words are close to each other, and I used a background stain to make an even stronger group feeling on the pitch. This is a really classical version of grouping because I chose to letter in circle. You have to understand that you don't have to fill all the white spaces of your paper. A group, just in the middle of the paper, is most of the time, just enough. You can choose a form and start designing your lettering into the form. In this one, I used a bigger background and a high contrast. My quote is quite short, but by emphasizing my keywords, tough and you, you can get the message really quick. Take a good look at your quote and filter out the keywords. It can help with starting your composition. The next one is again lettered in a circle form. I pushed all the words nicely together so they are so close to each other that they can form a group. Imagine a family on the table. They sit close to each other, but they don't touch. All the words belong together. Sometimes I'm crossing some flourishes, but by keeping the words close but not touching each other, I keep my lettering readable, and that is a highly important thing. Sometimes it fits the project that words are not immediately legible, but keep in mind your lettering needs to fit the project. This is an artwork made by Lauren Hom. She makes a lot of beautiful digital letterings. She used a monochromatic background. You can see that the whole lettering is made in a strong form. She highlighted the keywords, travel, thing you can buy, richer with a complementary contrast, and with size. Make the words fancy, make them big, colorful, and group them together. This is work by Amanda Arneill, and it is again a circled lettering, but there is no hierarchy in it at all. Sometimes, the quote is so short that highlighting a word with size or color would look super unbalanced and weird, of course, you can always choose to use just one font. You don't have to put all the design elements into your lettering. Sometimes the simple way is the best one. What she did perfectly, is grouping the lettering. Look how the flourishes fill the gaps, and extra things she did, she used symbols and repeated them to create a background pattern which works exactly like the background stain from the beginning. It makes the group feeling even stronger. This is also a great lettering by artist Alix Northrup, and what you can see here, she emphasized the keywords in big, pink letters and the side information is in a greenish color. Again, complementary contrasts, size, and fancy letters were used to let the keywords pop. The decoration and side information seem to frame the lettering, which makes it even more appealing to watch. All the flourishes include the side infos and hold them close to the group. It is amazing how she created space for the side info and formed a proper group on the paper. Let's go to the next lesson and start sketching ourselves.
9. Starting to Sketch: [MUSIC] Let me be clear. Size matters in pictures composition wise, not what you are thinking, duh. If I want to make a lettering, the first thing I do is put the quote somewhere on the paper because I am always focused on what I draw and not what I write, and I totally forget whole letters or even words if I'm not careful, so keeping the original quote in front of me is the memo to myself. I start with some smaller sketches in the same ratio that my finished lettering would have. For a social media post, my worksheet would be a square. Then I start putting my words in the spaces I've created. The first compositions won't look exactly good, but by putting the words loose on the worksheet, you'll get a better feeling about the space your words need. Use the designing rules, grouping, hierarchy and contrast, and start sketching. Grouping, push the words nice together. Remember, no social distancing for your words. Hierarchy and contrast, mark the keywords that you want to emphasize. You can even create different letterings with another hierarchy. Let's have a look at my quote. Which words do I want to emphasize first? Working hard matters even more, and yourself seems fine. At first, I am composing really rough. I choose an angle or a form I want to write in and just take some trial and errors. I'm using my own handwriting in capital letters first. Sometimes I draw over the edges of my worksheet, no big deal. I either erase it or I try a new version. It is super important that you try things no matter what you assume would happen. Because assuming is not knowing and you only know and learn, if you put every idea in the paper that pops into your mind. If it doesn't fit, try again. If you are in the beginning of something, don't focus on the details yet. It is too soon, because your composition, your group, and the hierarchy is not yet settled. Nice fonts and decorations follow after you've created a good room, a composition they fit in. I'm going to draw the what and the where first and then I'll go over to more details. The third version does have something interesting, and this is what happens if you just try and don't judge. Let's take a look at my sketching flow on the iPad. On the iPad, I do basically the same as on paper. I use Procreate to sketch. At first I choose a ratio and then I choose some forms, and I try to fit the words in nicely. With a new layer, I can create another version of my lettering in the same document. If I have the idea of using a script font later, I already put in a quick script font. Nothing fancy, but as a place holder. In the process, I'm getting more secure with all the elements because I know the words now and I know exactly how much space they need. This way of sketching is super effective for me. In the end, I can put the sketches next to each other. Emphasize some words really quickly, and compare them. This is how I could make a choice with which one I like to work further.
10. Design Rules: Less is More : [MUSIC] What I am going to do if I choose a composition, I start putting in some type faces. Actually, I would always tell you to try out everything you want but there's some truth and the Don Dropper quote, "Make it simple but significant." Look at my iPad time lapse. As you can see, I am using all different fonts that came into my head and in the AMP dispersion looks really chaotic. Still not wrong if it fits the message and different type faces could do a good job. But it has nothing to do with my Harry Potter quote. Let's do this again. In the second version, I am going to use two fonts, a script font, and handwritten capital letters. As you can see immediately, this version has more stability and feels much calmer than the former version. Sometimes you'd have to clear your drawings and use only one or two of all the amazing fonts and in the world. Of course, you can sketch the analog way. With my tablet, I'm always using a new layer to sketch over the former version of my lettering. If you are walking analog, you can use the same trick with tracing paper, in my case, with sandwich paper. The tracing paper comes in handy because you can move it so you get the best composition. In that way, you can move single words to another place. This is how you can create more versions out of your lettering and compare them to each other. With tracing paper, you have the freedom to try things because you can easily go back to your former design. In the next lesson, we will bring your lettering one step further by filling the gaps.
11. Mind the Gaps: Filling the gaps is one important thing to keep in mind when you want your lettering to be a solid group on paper. First, I'm using the beautiful lettering of Alix Northrup to show you how she created a group by filling gaps in a super smart way. As you can see, without the flourishes, her lettering gets unrecognizable. She uses the flourishes to A, fill the gaps. But B, also created gaps so the side information could fill the space. What is important to know by flourishes, use elements of a letter that are already there, like the crossbar of the A or the T. Second thing, to make a flourish, use letters that are already flourished and just make it bigger or more fancy, like the loop of the G in strong, for example. What you also can do to fill the gaps is using whole words or letters to fit in. The word strong bends around the word the. Look how everything fits together, just like a puzzle. The capital letter S in the beginning is just super big to fill the gap on the left side. Capital letters on the beginning of a word always give some room for flourishes, like in the W. If there's nothing else to use, you can choose letters and put on some flourishes, like in the M of women, which fills the gap between women and life and also includes the word, my. Genius. You can fill gaps with flourishes, letters, or words if nothing else works, and you need a one more decorations. Let's have a look at my lettering. I have a printed version of my iPad sketch. What I do now is searching for gaps and mark them on the paper. In this way, I can get a really good feeling of how my lettering looks when I add more elements. This is what I will work on. I looked for the gaps and now I tried to fill them with letters or words, flourishes, or decorations. Just one last tip about decorations. Don't use too many different elements. Just repeat them. It makes your lettering much calmer. Use decorations as last option. First, try around with letters and flourishes. You can follow my process on the iPad and I'll explain you what I did. Again, you can do this the analog way too, so first, look at the gaps. Look how I use the H and the D to fill the gaps at the beginning and the end. I choose another form of the R to have another flourish in the middle. There is something gets a little bigger to fill in all the space. The G in the end is perfect to fill the space with a flourish. I keep what I like so the black bubble in the lettering stays. I can stylize the Es in the beginning and the end of even more, to look like wave and to fill a space. In the end, I can add some declarations if I want to. I placed them in there as a placeholder because in the next lesson, we are trying to achieve balance on our lettering, which probably is the most vague and difficult adjustment to your artwork.
12. How to Achieve Balance : [MUSIC] What is balance? Balance is not only physically weighed, but also visually to achieve. A balanced artwork feels complete, good, nothing is missing, nothing is too much. To visualize balance, I'd like to explain it with the Yin and Yang symbol, the symbol of perfect balance. It tells us if we have one design element on one side of the picture, we need at least a little of that design element on the other side of the picture to balance it out. Let me explain this by playing with the two dots in the Yin and Yang symbol. If I just forget to draw the black dot, it feels like something is missing? Look at the symbol without any dots, totally boring, isn't it? [MUSIC] Let's give you some examples of balanced and unbalanced artwork. This is a really balanced artwork. As we learn in the section with Yin and Yang, if you are using a design element, we need at least a little of that element on the other side of the picture. In your lettering, you can work in diagonals. Look at the flourish from the V up here. I used a second flourish, which is mirrored diagonal on the lettering, this is why these flourishes work. [MUSIC] Also, the word falling, it has one flourish in the beginning and one in the end of the word, which again is balanced. I used all the decorations, leaves, and the same colors evenly spread around the lettering, so nothing is too much at one part of the picture and nothing is missing. Let me give you an example with another of my letterings, and I'll show you how things will get out of balance or boring. You remember this one from earlier. It is a good balanced lettering. Not only the lettering itself, but the whole picture is balanced. Let's look at the decorations right now. As you can see, the elements are different ones. A shield on the right corner, and the flower and the left corner. But what they have in common are the colors. I use a lot of yellow for the flower and a little yellow for the shield. Red and green is also repeated. I didn't use the same amount of colors, remember Yin and Yang. If I'm using a lot of yellow, for example, on one side of the picture, I need at least a little of that on the other side, this is how you achieve balance. Let me show you what is going to happen if I'm leaving out the flourishes. As you can see, it is the same lettering without the flourishes and has a lot of gaps, so it doesn't feel like a good group. However, it is balanced because everything is centered. But it looks totally boring. Now, I put in some more flourishes only on the right side of the picture. What feeling do you get with this? I bet more and unfinished and something is missing feeling than a, "Yeah, that's it." I filled the gaps over here, but I left a gap open on the left side. Now on the right side of the picture, you can find the designed element of flourishes, and on the other side you don't. This is why I decided to put in more flourishes in the m. Every time I am using them, I do it really careful. I'm always watching the whole balance of the picture. If I'm going on with filling gaps, I think I need more flourishes. If I decide to put a flourish somewhere, I take a good look at the diagonal part of the lettering to try to achieve balance. The lettering looks okay now, but on the top of the lettering, there are more flourishes than on the bottom. Let's just fill in some more. Now, we have a group. A circle, which I can make even stronger by repeating decorations. With the decorations as the last option, I think this is totally balanced now. Let's have a look at my lettering project for this course and balance it out. I am going to show you my process on the iPad. At first, I take a good look and mark all the places where something seems missing, and then I start designing my flourishes. When I looked at the bottom of the picture, words in yourself seem way too small compared to the top of the lettering. First, I try a fat flourish. [MUSIC] This isn't working, kill your darlings and try something new. Let's make the whole word yourself bigger. I think this will fit better to the composition. Because of all the crossing lines with the loop of the y and the f, this needs a little fine tuning. [MUSIC] I like it more when it's not crossing at all. [MUSIC] I see another unbalanced part in the middle of the picture. Let's suggest the flourishes. [MUSIC] Now I am satisfied. I get that designing flourishes can be a challenge itself. There is so much to learn in the hand lettering world. If you are interested in that topic, leave me a comment and I'll make sure to put it in the next class. For now, I put some explaining worksheets in the resources, the download section of the class. This might help you a little. Let's go to the next lesson and I'll show you how to get from your design version to an artwork. [MUSIC]
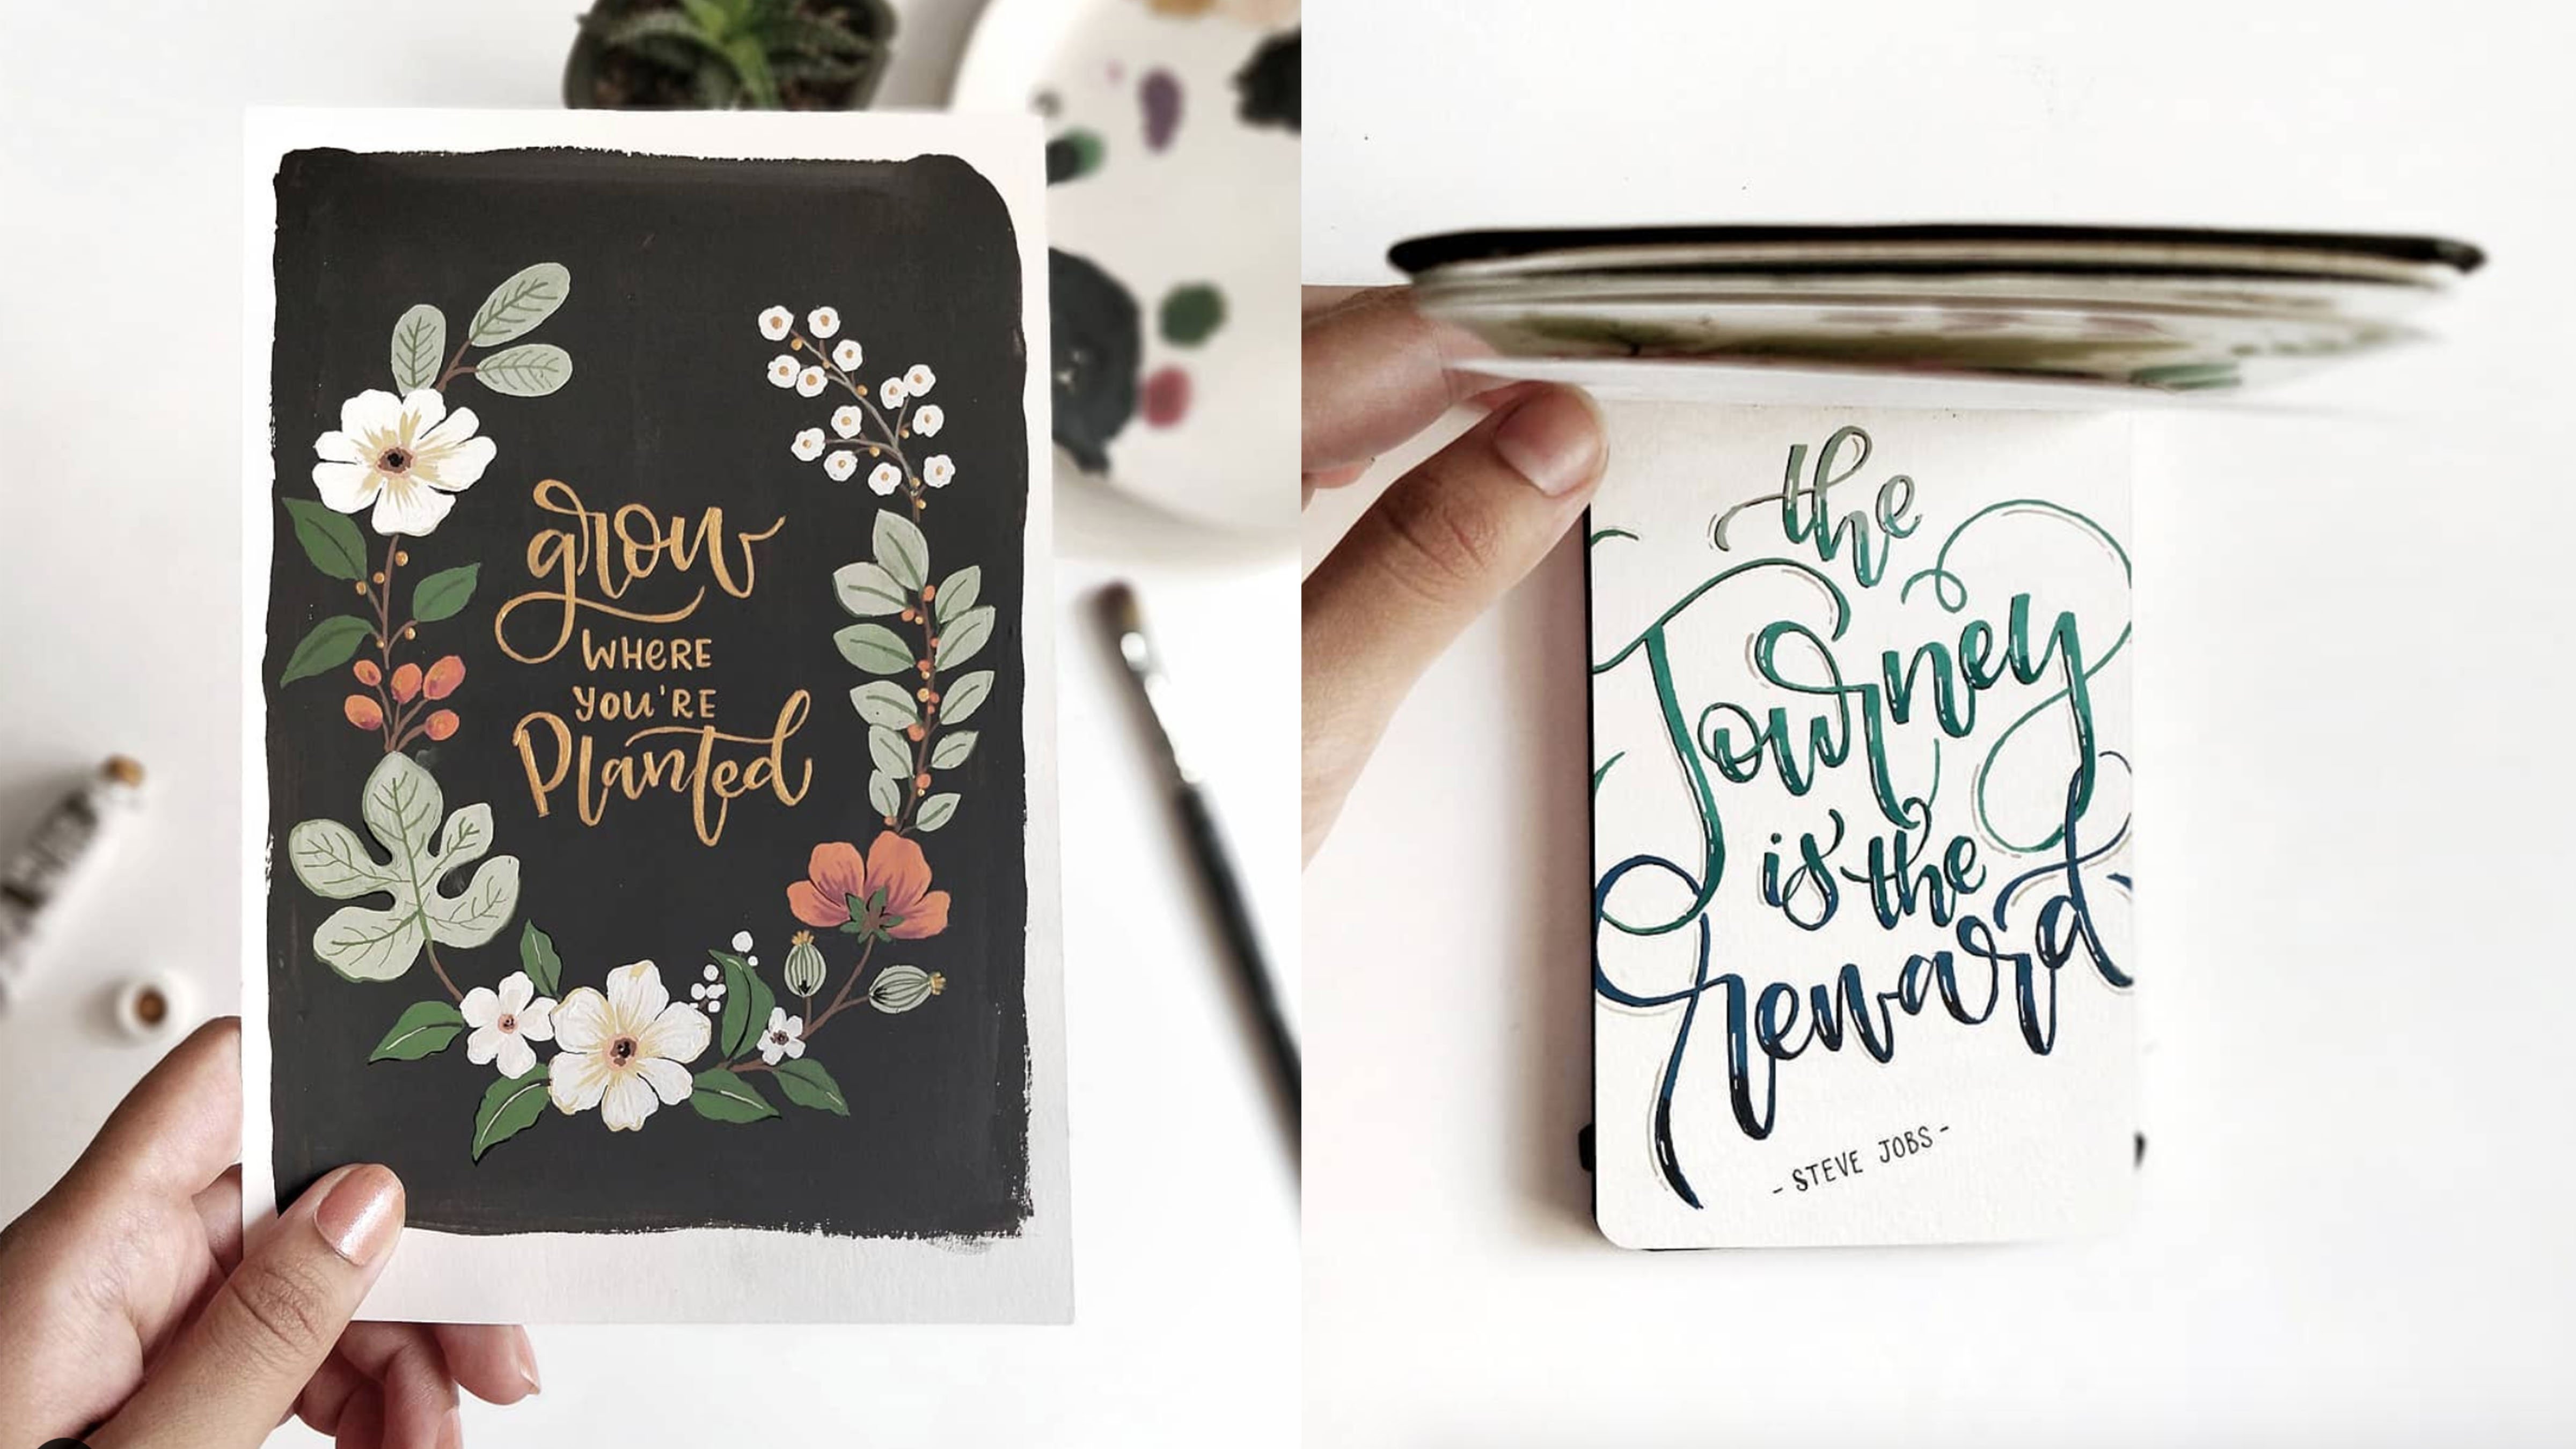
13. Finish: [MUSIC] Whenever you've finished your design layout, you can go on and trace it to fancy paper and work it out, because the creative part does not have to come to an end. You can trace your design with daylight on the window, with an LED trace pad if you half one. If you're a night owl and don't own a trace pad, you can use the pencil trick. You need a printed version of the final analog sketch of your lettering design and a pencil. Now, you are going to make your own carbon paper that comes in handy because you can trace your design more than one time to experiment with the techniques to work it out. First, turn around your design and draw a rough layer of pencil at the back of the lettering, exactly where the lettering is placed. Tip, if you have transparency paper in front of you, trace your lettering on the front side first with a black pen. This should be just enough pencil. It is a perfect method to put your lettering on fancy paper if you don't have any other option to trace it. Now, put the lettering on your fancy paper exactly where it needs to be. Then for security reasons, fix it with some tape. Now, you can trace the lines of your lettering, and the pencil on the backside of your DIY carbon paper leaves a trace on the paper. You get a perfect version of your sketch without erasing so your fancy paper is in the perfect condition to work it out. Yay. Now, you can start the fun. I personally like using watercolors for my final versions, but of course you can try other stuff, like one uncolored paper for example. If you have one, you can even use your graphics tablet. Most important, have fun with it. See you in the next lesson where I show you some simple Photoshop actions to digitize your artwork.
14. Easy Digitizing: [MUSIC] Let me show you really quick how to scan your artwork and to make just some adjustments on Photoshop to have a really great digitized version of your work. If you want to digitize your analogue artwork, it is not that difficult. Open your scanner program. I use a normal all-in-one home printer combination. [BACKGROUND] [MUSIC] The only important thing is that you use a resolution of 300 DPI dots per inch. This is exactly the resolution you need for printmaking. In that case, you'll have the possibility to reproduce a lettering. Choose a path, you want to save it and click ''Scan.'' Open it in Photoshop, most normal scanners don't pick the colors as bright as they are on your original version. That's why we make some adjustments on Photoshop. What I always get on those scans are some light scanning shadows because paper-pencil needle from the wet watercolors. But I want my background to be completely white. [MUSIC] [OVERLAPPING] First, I'll correct the levels with Image Adjustments, Levels, or Command plus L. [MUSIC] [BACKGROUND] You can find three color pickers in white, gray and black. I use the white one to define my white background to make everything white, that should be white. With the white color picker, I'm searching for the light scanning shadows, and I'm just clicking in there. You can see how the image gets a little lighter. I have a good look at all the white spaces now and see if I can find any gray shadows in there that I don't want. If the white color picker is not doing the whole job, the second option to adjust the levels is to play with the level bar on the right side and can adjust the whites, the highlights of the pictures in the middle, the middle tones, and on the left side, the darker tones. See how the image gets a little more saturated when I address the darker tones. I play with it until I think it's fine. If you still want it more saturated, you can go to Image Adjustments, Hue and Saturation, and play with the Saturation. [MUSIC] This is how I leave it now, and I just clean up some dust with the Spot Healing Brush. After that, you can save it and share it with the world. [MUSIC]
15. Final Words : I hope you got motivated to play at this camera the new lands of hand lettering. I am so excited for you that you can dive in and design some cool stuff. I'd love to see your projects. Remember, if you post anything on social media, which is a goal of this whole project that you are going to make, don't forget the hashtag Skillshare Letters With Tanya. Show everything you like in the project section. If you want feedback, use the project section or the discussions to ask the questions and I will be happy to help you. You can follow me for more illustration and lettering classes. Thank you for watching.
 Tanja Meyer, Illustrator and Lettering Artist