Transcripts
1. Welcome: Well, hi, everyone. Fellow
friends and artists, welcome on into my studio. My name's Carrie Sanders, and I'm an artist here
in beautiful Utah. Today, I have for you the
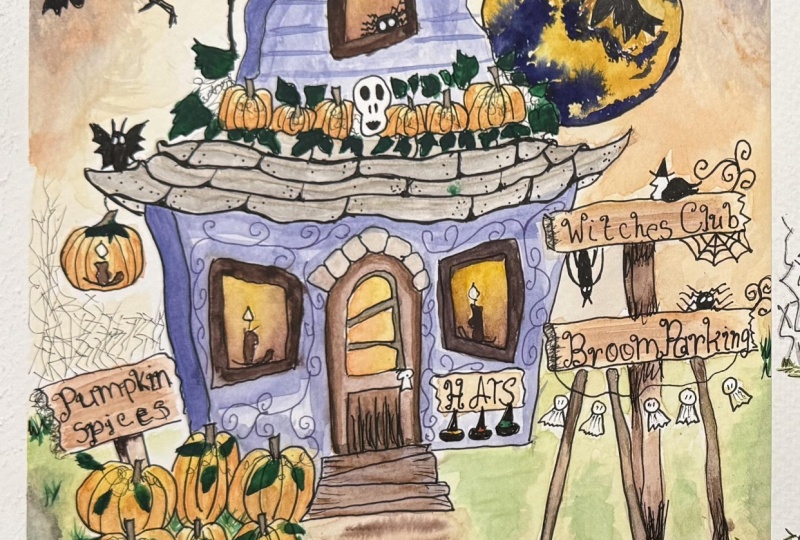
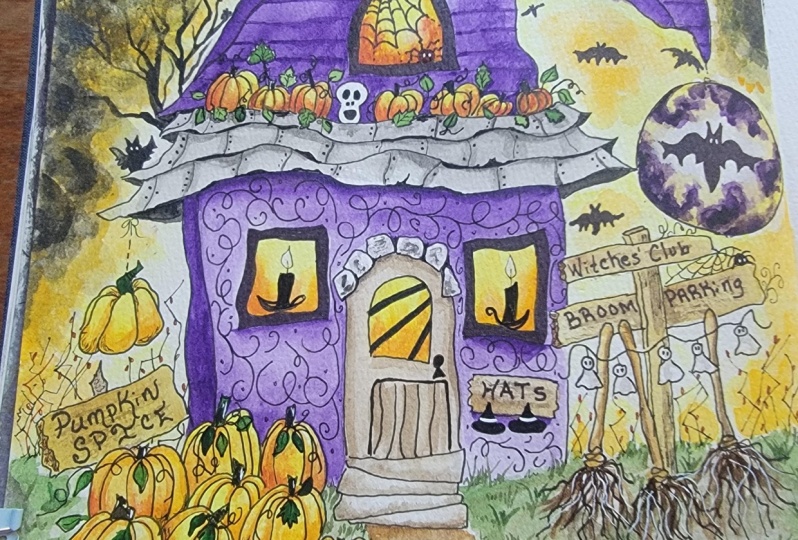
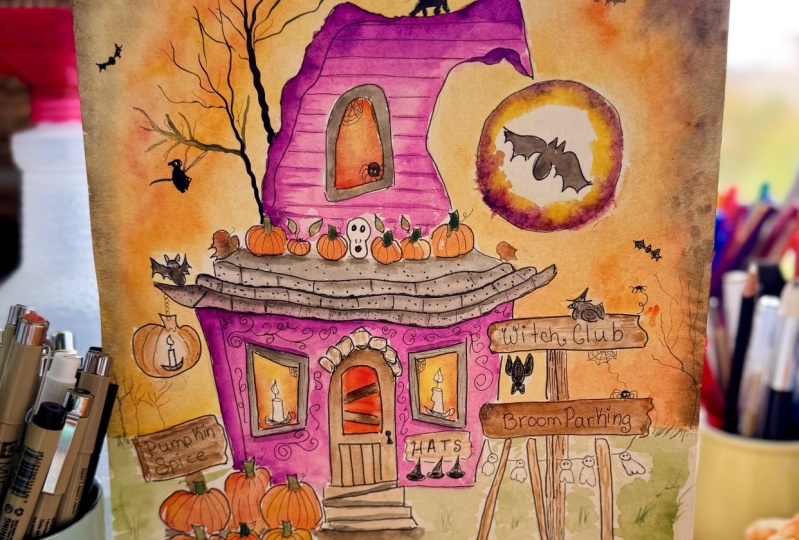
cutest Halloween witch's house. I'll get you in the mood
for Halloween, for sure. This is done in
watercolor and ink, and if you haven't
done watercolor and ink yet, you're
in for a treat. This is great for beginners
who have never tried it, as well as more
experienced painters who want to have a fun
piece to relax with. And we will be doing
some skills such as wet on wet, washing
in, highlighting, we'll be taking out highlights, lifting them out,
and, of course, we'll be doing
lots of shading as well as inking and even
some freehand doodling. So there's a little bit of everything involved
in this piece. And my goal as a teacher, I've taught thousands of
students over the years, but my goal is to teach
you something new. Or if you know things, then to help you sharpen the skills that
you have and to do it in a relaxed,
friendly, fun atmosphere. You know, I have taught
for many, many years. I have published an art book. I have pattern packets that
went out across the nation. And I just really have a love for instilling
art in others. So I'm so happy that you
landed on my page today. If you would like to see some of the other classes that
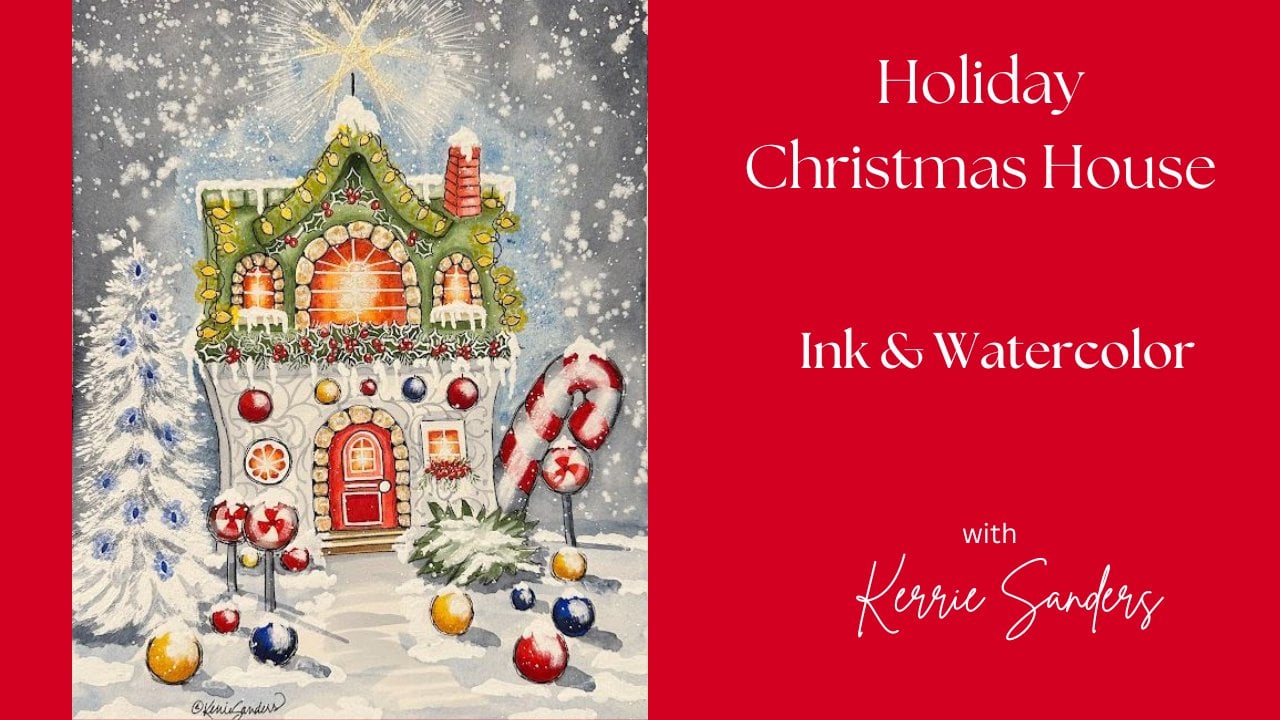
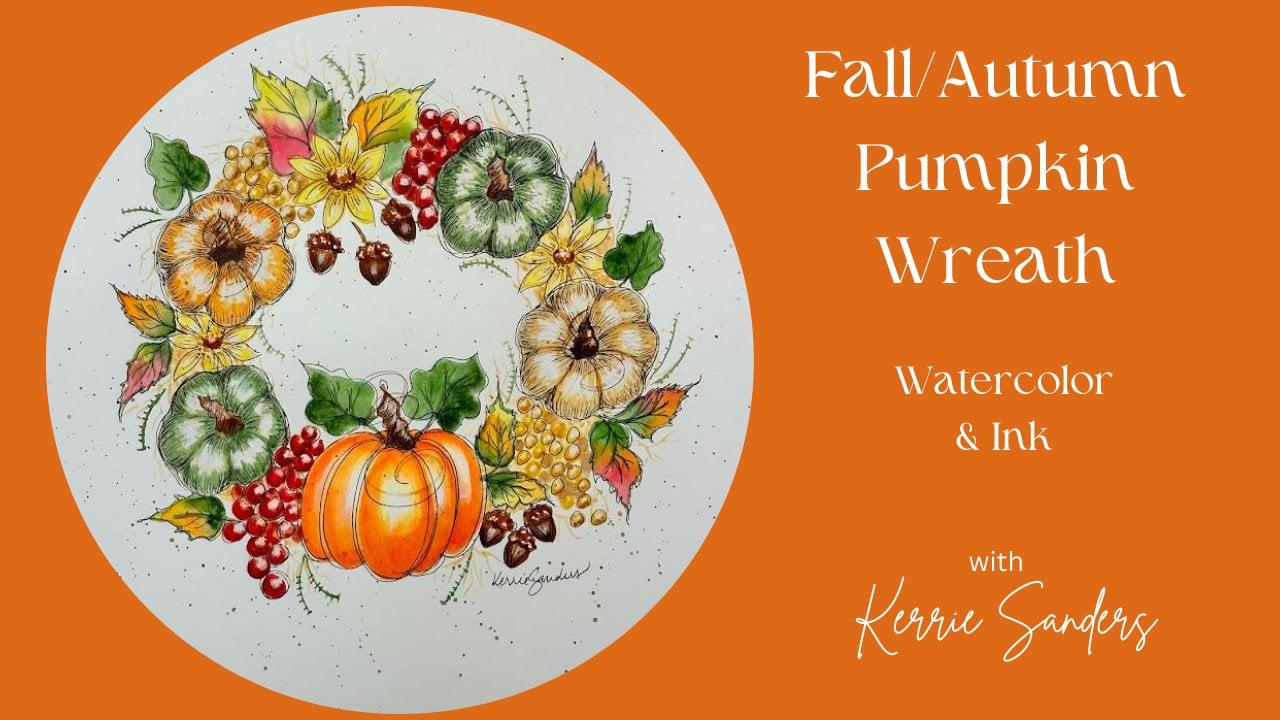
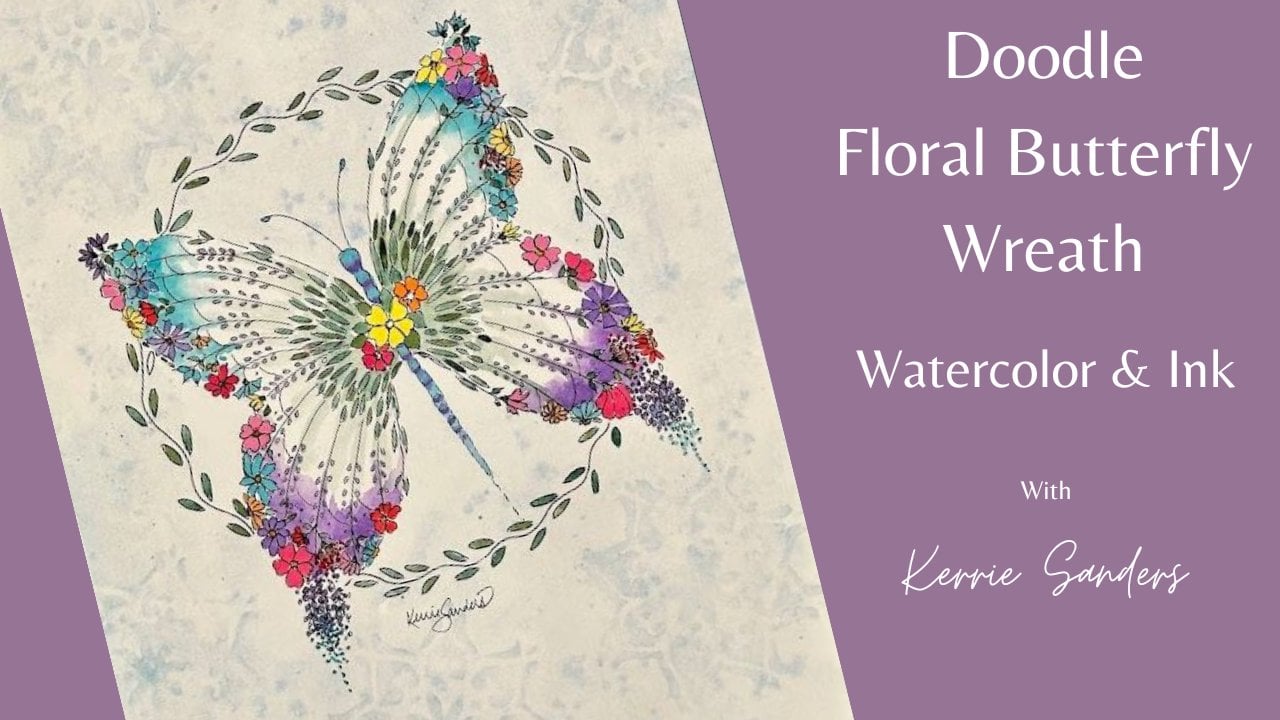
I have available, well, I've posted a few of my fall classes here so
you can have a sneak peek. But all you need to do
is go to the top of this page to the search bar and type in my name
Carrie Sanders. And everything I have
here on Skillshare will populate for you and
you can scroll through, maybe something would
be of interest to you and you'd like to
spend more time with me. Also, if you would like to
click the follow button, then you'll just get
a little notification whenever I populate a new class, and you can take a
look at that, as well. Alright, but if
you would like to take this class with me now, then let's go ahead
and move on to the next video and
get started together.
2. Class Project: Okay, my fellow
friends and artists, your class project
is to complete one Halloween witch's house
in watercolor and ink. And when you have finished, if you could please snap a pick of that and upload that
into our class gallery, all you need to do is look for this button that's on
this page of Skillshare. They make it real easy for you. But what that does
is it sends me a notification so that I can then go in and make
comments on your piece. And also, it's so fun to see what each other has
accomplished in each class and make comments and click that
little heart button. Nothing but love,
no judgment here, just great support for
one another. I love that. So please let me see what you've accomplished and let me
make comments on it. It's also a great place for us to communicate
back and forth. If you have any
questions or concerns, you can reach me there, as well. Alright, guys, I'll see
you in the next video.
3. Supplies & Pattern Application: Let's go ahead and
review our list of supplies for our haunted
house before we get started. First, let's go over the palette
that we're going to use. We'll be using lemon yellow, orange, transparent orange, and you can see there's
quite a difference. It's really gonna make
your pumpkins pop. Naples yellow, yellow
ochre, burnt umber, sepia, light green, hooker's green, violet Windsor, and ivory black. So just a few colors. Oh, it's so fun to have
a Halloween palette. I'm so excited to do
this piece with you. Let's talk about
our brushes here. Just a small number of
brushes that we'll be using a variety of flats. So according to what
you're comfortable with, but I am using a number ten, a number two, a number six, and then a variety of rounds on number ten, this
will be for background. You can see how
nice and big it is. And then for smaller areas,
this is a well loved one. Number six, my
handy number four, you know, that's my favorite. You will need a rigor
or a long liner brush. This is a number of
the three ought. But anything that is very
small on the top, but long. So it holds a lot of paint, and then more of a liner
small detailed brush. This is a five ought, so you can see how small
the tip is on that. And then you will need a
kind of a an old ky brush, so to speak, something
that's kind of frayed, that you don't care if it
gets abused a little bit, probably a flat would
be good because we are going to be using
some drawing gum. This prevents paint from
going wherever we place this, so we'll be doing that together
in a couple of places. And I forgot to mention
with our paint, we will be using some
bleedproof white. And as far as the inking goes, I'll be using two
different sizes today. I'll be using stdler, which is one of my
favorite liners for ink because it's
absolutely waterproof. So whatever you choose
to use is fine. Just make sure that
you test it on paper, put some paint over it
and make sure it does not bleed because
we're going to ink, and then we'll paint, and then we'll do a touch of more inking. So it's really important
that you test it, make sure it will
not smear on you. I will be using a 0.2 and a 0.5. So fairly thin lines
on both of those. And then, of course, you're
going to be needing a palette to put your paint on,
some water dishes. I like to use a sponge or a paper towel or
something or both. And always, I like to use
my handy dandy tissues, one of my favorite water
tools, and a pencil. You'll probably need a pencil
for a couple of things. This one's been well loved, as you can see, but my favorite pencil
always is a black wing. If you haven't treated
yourself to a nice pencil, a nice artist pencil, guys, I highly recommend
the black wing. All right, gather your supplies, and we'll go ahead
to the next phase. Okay, let's do a quick
review of the paper and applying our pattern for those of you that
might be beginners. So I provided for you on this
page of Skillshare a PDF. You'll just need
to print that out. That will give us the
pattern to begin with, but you do need to take
a piece of tracing paper and just trace that
out on your tracing paper, and that will give
you something to work with on your
watercolor paper. And once you have that, then we are going to
slide underneath there. A piece of your trace down. Now, I use trace down paper. It's a sheet of graphite, but it is wax free, which is awesome because
it not only erases easily, but it comes off when you put your watercolor
paint on top of it. So you don't have to worry about all those lines showing
if you miss something, so that's what I'll be using. So the paper that I'm
going to be using today's in a block, meaning it's all glued around, so I don't have to tape
it down onto a board, but you don't have to.
You can just use a sheet. But the important thing
is that I'm going to be using 140 pound paper. I always recommend using
at least 140 pound or better and it reacts with your paint and your water expands and attracts
as it should. And it'll give you a
much better result. I am going to speed
up the camera as I apply the pattern
because let's face it. That's kind of boring. So you can apply your pattern.
I'll apply mine. I will be using a stylus to
apply the pattern as I go around on my lines just
so that I can reuse I like to save my patterns and I can reuse them over and over. Alright, let's go ahead
and apply our pattern. And Before we can start inking, one of the things we're
going to want to do is apply the circle for our moon. And I'm using it's about one and three
quarter inch stencil. You can just, you know, trace a jar, whatever you have handy. But that's about the size
I wanted my moon around. It's kind of a moon that's
being tight held by a string. Go ahead and put
your moon around your bat and we'll go ahead and get started
with our inking.
4. First Inking: Okay, my artist friends, so I'm going to be using a five, a 0.5 and a 0.2. This is a 0.5. And here is a 0.2, just so you can see
the difference. There's quite a
difference, actually. And this will be for
just tighter areas. And I'll be sure
and let you know when I switch to
a different size, and you can choose to do
whatever you would like to do. Alright, so we're going to
go ahead and get started, and you will notice
we're not going to outline every little detail
right from the beginning. We'll do some basics. We'll do some
painting, we'll come back in and do some finishing
touches with our inking. Let's go ahead and get started. I'm going to start
with a number five. And one thing to
note on this is, you can't go wrong, guys. I tried to stay away from straight lines when I was
designing this piece. Sorry, I got to get with
a number five here. I intentionally avoided
straight lines. I wanted it to look crooked and Halloween and witchy.
And, guess what? I discovered that made
it really easy to line and paint because there wasn't anything I had to be
worried about being exact. If your hand slips or if you're
having a shaky day or you had three cups of coffee
instead of one. It's okay. It doesn't matter.
You can shake. You can jiggle, you can wiggle, and it's all gonna be fine,
so don't worry about it. Just have fun with it
and enjoy the process. No, I'm not gonna put
details on my leaves. I'm not gonna do details
on the pumpkins, either. Skeleton. Do you notice I am leaving a
space for the stem. And actually, you could let's just put the stem in that'll
be easier. How about that? Okay, great. This is one place the outer
edge of the moon. I'm gonna be a little bit more careful, a little more mindful. Sometimes I stop and pick up my pen just because it helps me. And it's okay to
turn your paper. We do a lot of this in my
Christmas ornaments classes. Take a look at those.
They're coming up for the holiday season. And circles don't
have to be hard. They can be easy, so Wonderful. Okay. Of course, you don't
have to follow where I put these leaves. They're just random. Put them wherever your heart takes you. Alright, now, it's Just find it easier to do
this outer edge first. It helps me remember
to wrap it around, wrap around, wrap around. Top layer just goes under
that layer of leaves. And the second layer. And again, we don't want
this to be straight or even. How refreshing is that? Indian fat. That's what we want ki and fat. Sounds like me on my diets. This is our lantern. Now, this is a flame. I'm gonna switch to
smaller number two for the flame 'cause it's
smaller like that. In fact, while I
have it in my hands, this one and this one as well. Back to my number five. Again, don't do a straight line. Make yourself jiggle it if you are inclined to do a
straight line all the time. There we make that
look dimensional. Same with these signposts, it's really hard not
to do a straight line, but make yourself
wiggle it a little bit. How often do we get to embrace imperfection? Ray. How you doing? Having fun. It's gonna be
hang up your hat sign. We're gonna paint this in, so I'm just going to
use my number two. Uh, I don't have to be very detailed because
these are in the distance. Back to my number five. Get this side of
the house in here. Man just want my
grass line here so I can see can help me with
the rest of the piece. Cute little itch bird. Cute little hanging
upside down vampire. This is gonna be a spider. We're gonna do a web here. Oh, I'm missing a window.
I need to put that in. Ah. Now, I like to make sure we
have these layers properly. So our ghost is the
most towards us. So let's do our ghost first. That will help us know
what we put behind it. And they're going to be
hanging from the string. And the next layer will
be our broom handles. So we can go ahead and again, you don't want your broom
handle to be a straight stick. Yeah, that's about as
many as you want there because we're going to
paint and add more in. All right. Now, lastly, we can bring down this post. You can keep it tucked
behind your ghost and tucked behind your broom.
And we're good to go. Alright. And then last. Same thing as above.
We're just going to do the stem and the outline. Little grassy edge.
I'll come put more in, but this will just help
me when we're painting. I want my sidewalk
to go down this way. Lead them on a path. That looks good. And I'm going to come in and
put my window in. There we go. You probably already did yours,
and that's just fine. Okay, I am going to find a ruler and put in some lines over here. I just made a little
indicator here. Every quarter of an inch, you can make your lines as close or as far
apart as you want. There is so much going
on with this piece, especially when we
get the background going that I didn't want to have too big of a difference
in the width of my shingles. It would have just
been overkill for me. I can only take so much chaos. You measure your amount of chaos and that's great,
whatever you want to do. I'm going to just add a light
pencil line along here. And then when I ink them in, I am going to jiggle my hand and make them look a
little haphazard, just not too far off.
You know what I mean? So super light pencil because I'll just be coming in and
erasing what I don't ink over. I guess this is the little
bit of perfectionism that had to just burst
through here and there. Mmm. Et's call it organized,
not perfectionism. I don't consider myself
a perfectionist. Do you? Are you a perfectionist? I just like a little
order here and there. That's all. Okay.
That feels good. So I am going to use
that number two. Remember how I said I wanted
it to be quite light? Because we do come in, and we're gonna add quite
a bit of shading. Alright, that is great.
5. Yellow & Orange Sky: M we're ready to move
on to the next step, which is going to be with our drawing gum and
our kind of cky brush. But before we do that, we want to make sure that
we have eliminated any pencil lines or
any of the lines leftover from our
pattern application. So whenever you have a need
to erase on watercolor paper, make sure that
you're using either a soft needed eraser or a soft gum eraser because these will preserve the integrity
of the surface of your paper. It's really important. But we
want to remove these lines because once you watercolor over the pencil, you
won't be able to re we're going to apply
our drawing gum. And for those of you that
have never used this before, you're in for a
great experience. You're going to get
your brush tip wet, and then you're going
to take some soap. You can use a liquid
soap like I'm using, or you can rub it
onto a bar of soap. It doesn't matter,
but you want to go ahead and get the
tip of that brush, nice and soapy, liberally soapy. That's going to save your brush. It's still kind of hard
on your brush tip, so that's why I say
use a crappy brush. But if you don't use soap, it's the gum will stick
to it and it will be completely ruined. There
will be no help for it. We're going to start
with the moon, really, we're not going to
fill in the whole moon, we just want to prevent
this outer edge from getting the seepage from the background that
we're going to paint in. We're going to use
our flatbush and get a nice crisp edge around
the edge of that moon. Now, if you've never used
this before, you know, I would test it out a
little bit on a piece of scrap paper because what I have found is you kind of have to
make friends with it, guys. Get to know it and play with it a bit and become
friends with your gum. If you put too much on, it can literally rip the surface of your paper
when you take it off. If you don't get enough on, it's pretty hard to rub off when you're
ready to remove it. So you have to find
this happy medium, and I'm the first to say, after all my gazillion
years of painting, there are still times that
I don't get it right. I still wonder sometimes
if humidity in the air has any impact and the
different types of paper, smooth surface, rough
surface, 100% cotton, knot, all different things may
impact the result you get. Don't let that scare
you because it's still an amazing tool for watercolor and something you should definitely
learn how to use. So we're going to go ahead
and just let that dry. So that's all you need to do. We're protecting
that outer edge. And if it's not
perfect, remember, that's okay because this
piece calls for imperfection. So it's perfectly imperfect. Now, the other area
that we want to do is our three little flames. I'm just going to
use this same brush. I'm just going to use
this tippy corner right there and cover
those little flames. And again, if they're not
perfect, that's okay. Actually, we could come
in with white paint. It's just that we've
already painted already put in our inking here. So it'd just be nice if we could preserve the white of the paper. That would be
ideal. There we go. Then lastly, we're going to
do our cute little ghosts. Go ahead and dip in for our
ghosts. And same thing. I'm going to use the corner
up here on the head, and then I can use
the flat part. Now, this will have to be 100% dry before we
can start to paint. I don't recommend using a hair dryer to make
it dry faster. Now, you might be
asking, why don't we do something like this that's
poking into the background? That's because we're going
to paint those black black is going to go right over what we're doing in the background. As far as these leaves go, we don't need to worry about
those because we're putting green over basically
a very light light, pale yellow, which is perfect. It's a great undercoat
for our green leaves, so we don't need to
worry about those either. So let's let those dry. Now, as far as your brush goes, this is a good time
to go to the sink, wash it out really
good with soapy water, and it should be good to
go for the next go around. Who is ready to paint? Me. Okay, we're going to start by
doing everything you see in the background as
far as the yellow, transitioning orange,
transitioning to black, not the foreground right now. So here we go. And yes, this is upside
down on purpose. So turn your paper upside down. It will just help you keep perspective on the
areas that we're actually trying to
work on right now. I'm using my largest size round, which is number ten today, and I'm just going
to wet my paper. We're going to do
this in sections, so I'm just going to go ahead. I'm not getting
this on the house. I am getting it on the
lantern, and that's okay. We're trying not to
get it on the house. Remember, in watercolor, the paint flows wherever
the water goes. So if we don't get any water on our house,
then we're safe. And that's what we're
trying to do is keep the water off
the house for now. It's not the end of the world, but we don't want
to have to worry about purple on top of yellow. We're going to be
a little careful. It's okay to go over these
leaves right there, remember? And I'm just skipping
everything else there. I like using this tin round. It has a nice tip
on it, you can see, and it lets me stay
right close to that edge without worrying
about going over. A flat gives you the same edge. So a flat would be just fine. And you can tell
from the shine on your paper where you've
gone with the water. I'm not soaking the paper. I'm just getting it
a little bit wet, and it will absorb. All right. So let's go ahead and pick
up a little bit of our lemon yellow and I'm going to
tell you ratios throughout. So this is literally going to be about 2% paint and 98% water. So very, very watered down
and go ahead and just give it a nice wash. We're just going
to wash in this beautiful, soft, soft I love lemon yellow, 'cause it can be both really
strong if you need it to be and super soft
when you don't. And it's okay to go over that because we're going
to use black. We're gonna go over that leaf
because that green leaf has a yellow base anyway.
Just wash that in. Our main concern right now is right up
against that house. We want the house to have a whitish glow just
a touch of yellow. Now that we have this washed in, let's go ahead and
use our tissue and just gently blot
around the house. Can you see how
it picks that up? And this is why I love
painting with tissue. People make fun, but
it works so great. I like it better
than paper towels, and it gives you
a nice soft edge because we already
have water there. And this soft little gentle
glow around our house. Lovely. Alright, let's
move to the next section, picking up some more
water on our big brush, whether you're using a flat or around and just getting
the whole area wet? This is why I don't want to
do too big of a section, I want to keep my paper wet. And it helps me have a
nice soft edge where I connect with the former area. Hey, again, we're gonna
have that 98 to two, 98% water, 2% paint,
throw it in there. Again, you don't have
to be super careful, guys. We're gonna put orange. We're gonna put black. We're
gonna put more yellow. So don't be holding your breath. Take a deep breath.
Don't be worried. It's gonna be in. This is the fun stuff,
just to have fun with it. I love Halloween pieces 'cause
you can just really relax and you don't have to be
precise on anything, really. Yes. I love it. Okay. And we're moving
on. Water Water wonder. And this is why now
you can see why we protected the
edge of our moon. That would have been a
little bit miserable. Now, we want a little
glow around our moon, as well as the house, so give our moon a little glow. Far. Go right over that spider, go right over your post, but maybe not over the sign. Not the end of the
world if you do, but go right over your
vampire, your little bat. I'm going to keep it
a little more yellow. Good. I'm just gonna leave that. I'm not even going
to take any off. All right. How'd
you do? All right, we're ready for Cadman orange, and we're going to stick
with our large brush, and let's go ahead and
pick up some of this. And for this, we're going to
water it down quite a bit, as well. So same thing. About 98% water and 2% paint. It's got a lot of pigment in it. Working it into my brush. You notice I'm not
just dabbing the tip, I'm working it in. I
want to feel my brush. Feel the tip fill it up
with water. All right. And we are going to be leaving leave that beautiful
yellow white ring, and we're going to dab in
some of the orange around it. So make sure that you
have your tissue handy. You're definitely going to
want to be using it for this. And let's go ahead and start
over here where it just feels kind of
comfortable and safe. And you can just kind of
get your feel for things, just kind of start
working it in, and you're like, Ah, I
don't want it that strong. Nope, you don't
go ahead and have a clean water brush
and just come over it. You notice I'm just kind
of dabbing up and down. I'm just going to
work it a little bit. And then I'm going to take
my tissue and soften. I'm softening the inner
edge next to the yellow, and I'm leaving it strong on the outer edge where I want
it to remain stronger. And remember, we're gonna come
on top of that with black. So we have this nice fade. We've got this whitish,
yellowish, orangish. That's a lot of ish going on. Alright, let's keep on going. So don't be afraid of it. Remember, in watercolor, everything dries
one value lighter, which sometimes is a
great saving grace. A. Oh, that's fun. Isn't this fun? Yeah, this is the fourth
time I've painted it. Whenever I'm preparing a class, I paint it quite a
few times so that I can get it just the way I
want it to be for you guys. But every time this background just turns out a
little bit different. There's just no getting
around it when you are doing a wet on wet
technique like this, and I love it. Make sure you leave a little
glowy around that lantern. I just need it a little
bit more over here. Once it's dry, then you can take a good assessment and see
how you want it to be. Yeah, I like that better.
6. Sky and Windows: Alright. Before you
start with black, make sure your paper
is completely dry. You don't want
that to bleed into your beautiful light colors. I have switched to my next size round that I've shown you. I think this is number
six. Yep, number six round just because I want to have more control over
what area my black goes into. Black is not gonna lift off as easily as your yellow
and orange, obviously. You'll also notice I put it
down in the bottom corner of my palette because
it doesn't like to play friends with any
of your other colors. And here we go. Alright, so I'm going to start up
here in the corner. I like to start in my darkest
area when I'm using black, so I want my corner
to be really dark, and then I'm going
to add some water. So sorry, that is
probably a 98 and 2%, same as the others, but it
has a lot of pigment in it. Now, I'm doing a lot of dabbing because I don't want it
to be like a schmear. I want it to look really,
like, cloudy and billowing. And as I bring it down, I'm just you see I'm
just wiping off, but I still have
black on my brush. It's got all that
pigment still in it. So I'm just going
to bring it down. I have control because I've
got this smaller brush, and then I'm still going
to use my tissue a bit. So I'm going to come in gently. I'm gonna pick up
more of this 982. I took too much offer. And I'm going to bring it
all the way across. And don't worry. We're
going to come in and emphasize some orange
and some yellows. Oh, that looks so
fun, doesn't it? Alright. Notice my
up and down motion. Notice I'm holding the brush at the back end so I can really
get some movement in there. I'm not holding it
down here like a pen. Hold your brush on the
back end for this. And now let's start picking
up just some water. I think I'll leave this
section here with the yellow. But I'm gonna bring
some down here. It's kind of reaching
fingers towards the moon. 'cause we've got the
moon captured, right? We've got it captured and tied up those sneaky little witches. Awesome. This is a
great first layer. Alright, let's let that dry. Coming back to my number
ten and make sure you have a really clean
brush, very, very clean. I'm going to come
back to yellow, lemon yellow, back to that 982. And now we see that
you see how dry it is, it dried to value lighter. So you have a really good
idea of how the glow around your house looks
and where you want to emphasize some of the yellow. So for example, I'm going to add some more
yellow over here. I'm giving I'm not putting a straight line of
glow around the house, as you can see, I'm going
in and out and in and out. But adding more yellow gives depth and
dimension to your piece, and it also enhances the
glow around the house. It doesn't hurt the black. It doesn't hurt anything to take your yellow as
far out as you want to. You can see I didn't clean
out my brush good enough. So make sure your brush is
really clean every time. Yeah, I'm This is almost white, so I'm gonna go ahead
and add some yellow here staying between the house and the moon 'cause
they're both shining. I do want to get
under these leaves. It really adds something
to that green. As we get away from the moon, we get stronger, stronger. Great. Okay, let's let that dry and then we'll
come in with our orange. So I'm coming into the
orange again with the 982 and my large
brush to number six. Sorry, number ten. And I'm going to kind of stay away from this
area here again. But now I can just play with having some dark
and light orange. I like it coming in and out. Remember, we're
gonna have a tree that comes up here,
a black tree. I'll soften a little
bit here and there. Okay, great. Bringing
out my flat. It's a number ten flat. We're gonna put in these
windows while we have all these colors out
that we're using. And we can go ahead and just start with our
yellow lemon yellow. And this can be I would
say this is a 9010, 90% water, 10% paint. I rinsed out my brush. I'm picking up a little bit
of yellow just on the corner. And we're just going to do the
outer edge of the lantern. I flipped my brush over, so I'm just using
the outer edge, that same outer edge. Leaving it white in
the center. Okay? Now, we can pick up our
orange and same thing. We're going to just
pick up a little bit on that corner edge. Work it on your brush
just a little bit so that water gets
to work with it. And then I'm not going to
go all the way to the top, maybe three quarters
of the way to the top. Notice the angle of my
brush. I'm not this way. I'm angled up a little bit, just because I have
such a big brush. I'm coming down and
I'm going to flip my brush and come
down the other side. Good. And we're gonna come
across the bottom. Now I'm going to go
across the whole brush, and I'm just going to
pat in a little bit more of this orange. Notice I tipped it up
on its chisel edge so I can just use that corner. I just don't want it to
look like straight across. I want it to look
lumpy, bumpy like that. So I'm just gonna strengthen
it here and there. Good. All right. Let's do the next one picking up on the corner
that corner edge. Work it on your palette back
in the toll painting days, we just call it floating. You're floating one
half of your brush with water and the other
half with paint. I'm showing my age. Oh, I come down that side, and now I'm flipping my brush so that the paint's
on the outer edge. And see how I went
into my window edge. Who cares, right? Because we're that's gonna be
covered with black. Ever so small. This is where we don't want
a whole bunch of paint, guys this is our glowy lantern. Just like that. Just the
teeniest amount of orange. If you need to size down and
use a smaller brush, do it. Or if you need to, you can use water to pull
lift some off real fast. That's fine. Beautiful. See
how we have a nice glow. Good job, guys. And our last window, I love flat brushes because
you can paint this way. And you can also do up
on the chisel ledge. You can do on the corner. They're just very
versatile brushes.
7. Moon and Wash In House: I've switched to my favorite
brush, my number four round, and I've picked up some of
our transparent orange, about a 98% water, 2% paint. This has a lot of pigment
in it. A lot a lot. And we're just going to
add a bit of shading, but I wanted to dab it in. I don't really want
to. Well, I'm going to start by stroking
around the outer edge. But then I'm just notice I'm just on the
bottom half, okay? From here, I'm just
gonna dab it in. This is looking
inside the window, so I don't want to shape it. I just want to make
it look kind of mottled and mysterious, I guess. Now I've just got
water on my brush. I'm just gonna
soften a teeny bit. And Now, I'm not going to do
any on my lantern. To me, that's it's just
would make it too dark. We're gonna go ahead and
remove our dum at least this, maybe not the candles yet. But you can either start
it by rubbing with your finger or if
that's being stubborn, then you can rub with your rubber eraser and you can see how that
starts taking it off. I would just say,
take your time and go nice and slow because you don't want
to rip your paper. Now, if by chance, you rip a little
piece of your paper, it's not the end of the world. Okay, as you can see, I had a little bit of trouble getting my release on the paper there. I think it's because
I used a hair dryer, and so it really made
it adhere too much. So lesson learned, don't
use a hair dryer when you're going around that gum. So that's okay. It's
gonna be just fine. Let's go ahead and pick up
some of our lemon yellow. I'm using my flat, my number
ten flat, and 98% water, 2% paint, and I'm going to just go around the
edge of our moon. And I'm just going to try to
leave the very center white, or I might go over it with a
really light light yellow. Now, I'm just coming in
with water on my brush, and I'm just going to soften
this edge a little bit. I'm bringing it in here and
there, kind of jugging it. Technical term, jug. Yeah. I'm gonna leave just a tiny
bit of the white tiny. And then I'm going to pick up my number four
number four round. I'm gonna pick up
some of the violet. Now, violet is another
really strong color. All these Halloween
colors are so strong, which makes them
really fun to work with, but we do
have to be careful. So this is going to
be more of 99% water, 1% paint, just the
tiniest amount. And I'm really see
how I'm pushing down on the palette I'm really
working it into the brush. And and then I'm gonna
touch my tissue to pull a lot of that water
off so that I have control. And I'm going to
start by going to the I'm gonna go to these dark areas here. I kind of want
to cover those up. And the yellow should still be a little bit wet,
which is great. We're gonna do a little
bit of wet on wet. And we want it to just
kind of spread out. Now, I wouldn't get
too carried away until you see how
far they spread. And then you can determine how many more you want to place. Also, we're gonna let it dry, and then we'll probably come in with a few more on top of it. So fun. Now, if you're saying, Carrie, it's not
spreading on me. It's just stopped. That means your yellow
was dry already. That's okay. Just
take your brush, use a water brush and just touch water on
top of the purple, and it will start to spread. So no worries. Okay, I'm going to stop there. All right, we're going
to come into our violet, and this is going to be
coming back to our 982, 98% water, 2% paint. So we're just going to wash in. And then I'm going to pick up
some water, lighten it up. This is going to be
more of a 99 and one. While that's still wet. It's soften that edge now. All right, then I'm not
gonna worry about that edging because remember
that. It's gonna be black. Coming up on the chisel edge so I don't go out of my lines. Now, be careful going
around your skull. Now we're going to do the
same thing for the house. We're gonna start a
little bit darker. So let's go 982. Just on this side here. This
is the side of the house. That's the shade. And then we're going to go
thin it down a 99 and a one. I'm going to start on this
side over here so that can dry over there a little bit. Now notice where I'm
holding my brush. Now I'm holding it more like
a pencil so that I have a little more control navigating
all these little edges. I turned my brush up
on a chisel edge here. I don't really care
about the window ledge, but I don't want to
get it on my sign. I don't want to get
it on the door. I can get it on the
hats, that's okay. I don't really want to get on the hat band. You
see what I'm saying? Secret here is to just
move a little bit fast. Remember it's going to
dry one value lighter. Oh, it looks so cute. When the purple goes in, it's starting to take a life. So we actually want a little
shadow around the rock, so it can be darker
around those rocks. Darker underneath our
windows and above them. Again, you don't have
to be careful like we normally have to be
careful, so enjoy it. Enjoy the moment. I'm going a little bit
darker right underneath the roof line. All right.
8. Shading House and Wash In Roof: Switching back to my
number four round. I'm picking up more
of the purple, and I'm intentionally using a four round instead of a flat. And we're going to just put a little shading
on these lines. This is a 982. I'm
adding a lot of water. But I don't want it to look
like I shaded them equally. Can you see how uneven
the shading is? It just enhances the
character of the house. So I'm just using a
really light touch, using the tip of the brush.
Notice where my hand is. It's kind of in between
the top and the bottom, but closer to the bottom, so that I have a bit of control, and I've planted my pinky finger down so that I have
a lot of control. And I can just do a little light touch just kind
of going along that line. Fat and thin, start and stop. And if it looks too perfect, I got to go back and
make it lumpy bumpy. No straight lines. Harder. Let me think. Alright. Well, we've got this, probably a 95% water 5% paint. I'm just gonna paint this
little shaded area underneath. I'm down here, do
the same thing. Now, could you use your flat? Yes, it's just I've already
gotten my round out, so it's just such a small area. Awesome. Now, if if you're happy with your shading around your windows, leave it. I am not. So I'm gonna add some. This was wet, so I actually
didn't even do it over here. I'm just gonna do a
little above and below. I can't do it along the
side of the house here because that's still wet
and it'll just blossom. It'll just bloom out. But I
can go underneath the roof. All right. Well, I'll
come back to that side. And now that this is dry, we can go ahead and oh If you still have white spots that you
want to get rid of, if you like the white
spots, leave them. Not gonna do too much under
because that's the roof line. Okay, that side's dry. If the other side's dry, you can go ahead and add a
little shadow over there. All right. Let's move on poking up my larger flat,
my number ten flat. And this is going to
be this is the black, 99% water, 1% paint, and we're just going to
wash in A one value on the roof except not that upper layer
underneath the leaves. Leave that white for now. Yeah, while that's drying, let's come over to
our next size flat, number six and pick up some
of his maples yellow 955. Yeah, we're gonna do our signs. Oh Keep going. We're gonna do the
posts with it. Co with that one more sign. You come over that room. It doesn't matter. Let's come into our lemon yellow while
we have a flat in our hands. Through this door window. Let's go ahead and do our
pumpkins up top there. Now, while we're up here,
take a look at your moon, see if you're fine with
the color that it dried. I'm going to just a
touch, I think. Yep. I just want to deepen that. Oh, I like that better. So see where you're
at, with your yellow. We'll do the same
thing with the violet in a little bit when
we come back to it. I'm still gonna leave
just a touch of that white glow in the center. But I like that better. So if you want to add yellow, do it. In fact, if you
want to add yellow anywhere else on your
other windows, do it. Let's go ahead and add yellow
on our lower pumpkins. Notice I'm just going
right over the stems. Doesn't matter. Okay. I pick up a little bit of orange now. And we'll round the window
here, just like we did before. Water it down a little
bit. 99 and one here and the corner of my brush and
just kind of soften that. I'm gonna bring it
up a little higher. Now, the doors not
gonna be black, so I'm trying to stay off
the edge of the door. I pick up a little
bit of a transparent. And I'm just using the
corner of my brush, and it's still wet
from the orange. Okay, using a number two, I'm coming into our orange
and a 98 and a two mixture. And I'm just going to
start on a chiseled edge. And it may look kind of stripy, kind of funny, but it won't once we get
the inking in there. Now, this is water on my brush. I'm just softening that edge, so I'm keeping the
glow of the yellow. And I'm softening orange. This time I'm just gonna go hoses before I start softening. It's so dry here in Utah. Sometimes it just dries
almost instantly. Sweater on my brush here. We are going to come
in with some of that transparent orange
and make it darker.
9. Leaves and Inking Pumpkins: Okay, guys, having done two of these without the
pumpkin lines in, I've decided we
should probably stop and just add these
pumpkin lines in. It'll make it easier for us to go ahead and add
the shading in. So I'm picking up
my smaller ink. It's a number two, a 0.2. And let's just go ahead and we'll add them in on
all of our pumpkins. Sometimes I like to add
just a little nod to the one going backwards because then it makes it look
dimensional and not flat, so down here is where you can
really see clearly when I add that little teeny
bit behind the stem, it makes it look dimensional
going backwards. Why don't we just do this
one while we're here? And this is our lantern, so I'm not going to
go over our light. All right, so coming back in, I'm using my number two flap, coming back in with our orange. Hopefully that feels a little bit easier, a little
more comfortable. I want this piece to be just fun and relaxing for everyone. And I can rinse out, just water on my brush, soften it up just a little bit. You can leave as
much or little of that yellow showing
through as you would like. This so's kind of shadows. Do it a little bit darker. Tuck. Now, if it goes too
dark like that, all you have to do
is touch it with your tissue and it
lifts right off. If you do that while
it's still wet, or you can rewet it
with your brush. All right. Let's go ahead and
do the ones that are up on the top of the roof now
since we're on a roll, These I'm not being
quite as careful with as you can tell because
they're smaller, and so they're gonna be
a little bit darker. They're compacted in with all these leaves and everything. Yeah, we're still gonna come in with some transparent orange. Don't forget, so I don't have to spend a
ton of time on them. Alright, we're gonna let
those dry really well. Let's get some green out. I'm switching to
my favorite brush, my number four round, and I've pulled out
some light green. Okay. Now, I don't know
if you notice this. Watch my fingers. I'm
rolling my brush as I lift, and that just pulls
it to a nice tip, a nice point because
as I drop this in, I don't want to go out of lines. I'm going to be a little bit careful on a couple
of these leaves. You won't have to be as
careful on some others, but These two, yeah. Now, these, if you go outside
the line a little bit, it's not the end of
the world, right? We've got a lot going on here. You can even do a little touch up with your marker
if you need to. Knees out here. I'm
gonna be careful, and I'm rolling my brush, pulling it to a nice tip again. Okay. Let's do our
stem over here. For our leaves here, I just free handed those in. I've pulled out my number
five, which is the larger. And I'm just going to put in I'm just going to add
some leaves here and there, maybe two or three, depending on how big the pumpkin is
or where it's located. Okay, that's probably
a good enough amount. You can always add more, but
you can't take them off. Um, Okay, now step back six
feet, look at it. See if you want to add more leaves if it
needs additional help. Like, I can see some of my
need a little second coat. I added too much water. So do any touch ups that
you need to with your green now
before we move on.
10. Grass and Brooms: Alright, we're going to
leave the green now, and I'm going to come
into the violet, and we're just going
to put finishing touches on our moon. So I'm coming back to 98% water, 2% paint, going to touch a
little bit here and there. It's dry, so I'll
have to come in with a little bit of water
here and there, I think. But first, I want to
get that intensity. I want some intense color
value on that outer edge. Now I'm going to come in
with just some water. That's the look I want. And
I'm gonna do it over here. I'm not gonna do it everywhere. Remember paint flows
where the water goes, and so wherever you're
touching it with your water brush is where
it's gonna spread out. And now a little
water. Isn't this fun? And you can see this
literally adds another layer. You've got dark, medium, light, Good. Okay, Let's go ahead and add a bit here on
our lower half now. I picked up my number ten
flat and some yellow ochre, and we're coming in with
a 98% water, 2% paint. We're just going to do a light
wash of our ground cover. M so you can see we're just going to float in some areas that
can be sketchy. You don't need to do
every inch of it. We're going to come
in with a couple more layers on top of it, here's our pathway, same thing. We've still got our ghosts protected, so we're good there. We go right over the brooms. Okay, great. Using our
number ten again and using some Bert number
and a 98 and a two. And let's do a light coat
on our broom handle. Just using the chisel edge. And I'm switching to
my number four round. This is more of a 95%, and I'm rolling that
to a tip again with my fingers and I'm just
going to push out. Now on the outer edges, I'm going to go make them kind wiggly. Good. Okay. I just double
checked my equipment, and it didn't record me doing
this door, so I apologize, but all I did was pick up a 98%, 2% mix on the burnt umber, and I just floated in
all one value, the door. And then I picked up some of that and just
used the corner of my brush and just tapped a little bit on each
one of those stones, leaving some white
showing, and that's it. So, oh, no, and one more thing. And then I picked up some 982, and I just did a
little line here and there on the signs
just to indicate, like, a little board showing. So now you're up to where I was. I do apologize for
that little skip. I've picked up some
Hooker's green. I'm using my number ten flat. We're gonna use a 99% water, 1% paint, so super thin. Okay. And what we're just
going to do is float a little And we don't want it everywhere. We still want to have some of this underpainting show through. And this, this I'm going to
be a little more careful. I don't want to go over my
broom handle or the post. I want some of it to go right
up to the broom handle. Now, I am going to
just use the corner of my brush and tap some in
between some of these pumpkins. You can see I'm coming
in darker here. This will be more of that
95% water and 5% paint. This is where I'm going to
have a little bit of a shadow. Awesome. Okay. Coming back to my number four round and we're sticking with
our Booker's green. And this is about, I'd
say 955 mix on this. I'm rolling it to a nice tip, take off a little excess. And we're just going
to add a little hint of brass here and there,
so just pull some up. I'm going every which way, not all the same direction. Okay. You can always add
more if you want to. I'm going to add
just a few streaks. I've got my number six flat, and I've pulled out some sepia, and this is such a fun color. It's kind of grainy and
it's this darkish brownish. I love using Sepia. So I'm using a 982 mix on this quite light because
we're going to just add some dimension to
our door to start with. Just be loose with this.
I didn't try to make it straight or look
a certain way. Just throw some on there in
a haphazard kind of way. And then go ahead and pick
some up on the corner of your brush and just tap
some in on these rocks. Great. And I'm going to pick up a little just to add a little dimension
on the side of these signs. I'm not going all
the way up just maybe three quarters
of the way just to add a little dimension,
little variety. And then we are
going to actually, I'm going to switch to my round. I'm still working with a 982, and I'm using my
number four round. I'm just going to go down a little bit on
the broom handle. This is just water now. Just going to blend
that a teeny bit. I'm going to leave light spots, dark spots and add a little here and there
on this roundish part. And then this is more of a
probably 80 20, 80% water, 20% paint, rolling it to a tip, and so using light
I'm anchoring with my little finger and using
just the tip of the brush. Ah. And now I'm gonna take it down to a 982
with some water. And just water on my brush. Super fun. Okay,
while we've got this there you can see
how that just pops, gives it that dimension
right off the bat. And now we can take
that down to 982. I think I'm going to
add just a little bit on the steps while we're here. Good. All right.
11. Black Shading and Edges: Okay, I'm using my
number four round. I'm picking up ivory black, and this is 80% water, 20% paint, so pretty
heavy on the black, given how pigmented it is. You could actually even use your marker if you wanted to if you're more
comfortable that way. But because we don't have to
have super straight lines, and this is kind of a wide area, I just prefer to
use a paint brush. Nothing is straight on
this, which is awesome. Okay. Now let's
fill in our spider. Man, let's come over to
our bat. Same thing. If you're more comfortable
using a marker, do that. If you want to use a
paintbrush, do that. And we're going to fill
in this cute little guy. Mm. Okay. And I'll probably hit those very tips with my
marker once it's dry. And let's go ahead and
add some eyeballs. Now remember, do they
don't have to be equal. They don't have to
be the same shape, the same size, and that's
why I didn't draw them in. Okay. And now let's
water this down. Let's take it to 991. There. Perfect. Okay. Now, let's add
some shade lines. And just like we
did at the roof, I'm using a round so that I
don't have perfect lines. It's going to add a
little shadow underneath. Okay. We'll come
back. We need that to dry before we can do the
next step with that. So let's come back and pick
up some pretty strong black. And if you want to step
to a smaller brush like your smaller finer
brush, you can. I'm just going to stick
with my number four. Let's put our candlesticks in. And put this in on the window. And what's come over to
our cute little bird. You can leave him
all black. I got. Or if you want, you
can use a waterbrush and pull some off of part of
his body. So he's two toned. Like, I'm going to
pull some off of his head and pull some
off of his chest. So to lift off, you just use a water brush and touch and
then touch your tissue, and you can see it
pulls it right off. So now he'll be kind of
two toned and let's stew our little vampire here. And I'm going to do
the same thing here. I'm going to actually leave his body dark and just pull
a little off the wings. Now, let's come back
to the 991 mix. And let's add some deeper shadow underneath and tuck it up a
little bit into those rocks. And then down that
outer edge of the door. I'm just going to go
on the line, like, right over our incline
and with our steps. Okay, I'm gonna
switch to medium. This is my number six round. Okay, let's take this
and do our hats. I'm gonna come in with
This is my five ought. Let's see it there.
Heavy black, so 80 20. And we're going to do
our little witches hats. We're almost done, guys. It's just going so fast. Now, I left room for a
little colored band. You don't have to, but I just wanted a little
splash of color. Great. And let's get
our spider up here. Okay, using my number six flat. And coming back to
the 991 mixture. And I just going to add a little more shading on
the bottom of this broom. Okay. Now I'm going
to use my finer ones. You can see this is the fact. It's probably a 955 mix. And I'm just gonna
add a few more. The black will take
over, so don't let it. There. I like that better. Okay. I'm going to add a touch more depth to
the shadow down here. H Okeydoke. Okay, let's come in and we're going to make
our roof lines, and that will give
us the guide that we need to finish our
shading on the roof. And I'm going to make
them pretty far apart. And I don't just
make a line, guys. I kind of bring it up. I think I picked up
the wrong marker. Yep. Let's go with a five. I'm using my number five. And then here and
there, like when it looped up a little bit, I just did a little
shadow underneath it. And again, you want these
to look kind of rickety, so kind of bring them
up here and there. Don't make it look too smooth. Oh, Okay. I'm just going to
emphasize this curve around the house that gives it dimension, makes
it look round, right? Great. That looks good. Okay. And, you know, it's kind of fun
too to just kind of just add, like, some dots. Great.
12. Trees and Bats: Alright, I'm using my
smaller flat number six, and I'm picking up
a 991 on a black. And we're just gonna
basically touch our seams just to give them
a little bit of shadow. Great. And then if you see anywhere else
that you want to add, you know, you can just, like, use the corner of your brush. You can just touch a little here and there if you want to. Just kind of make it your
own. Do you want to do. That's good enough for me. Alright, let's pick
up our smaller. I'm going to use my
number two flat, and this is going
to be like 80 20, 80% pain, 20% water. Keep my hand out of the camera. I know I used my round when
we did the one up here, but I wanted you to have the
experience of using a flat. Alright, now I did that straight across 'cause I have
a flat in my hands. So I'm gonna make it lumpy. I'm gonna come back in and go, lumpy. There we go. Now, it looks a little more in keeping with the
rest of our piece. Yeah, let's do this one. See how I'm using
the chiseled edge. I'm using this
upper chiseled edge of my brush on the edge, and then I can come
in and use the flat when I'm pulling
and filling in. Flats are very, very versatile. You know, some universities
will have you do, like, an entire project only
allowing you to use a flat brush just to give
you that expertise using it. Good to be friends
with your flat brush. I don't know if you've noticed, but I always start
in the middle, and then I push the
paint to the outer edge. That helps me from going
too far outside of the line and push the paint
to the line gradually. And now I want to make it look lumpy bumpy because
it's too straight. Okay. Ooh. Doesn't that make a difference just having
those dark frames in? Alright, I have
pulled out my rigor. This is a three ought.
It says script liner. Same thing. And
we're going to put the tree in I'm going
to put this tree in. And the nice thing
about this brush is it does all the work for you
because the trick to having a tree branch that looks real is to use the proper brush because
you can't force it. So let's practice. If you haven't
done these before, let's do a little practice. I'm probably using
a 9010 mix here. So I load up the brush I load up the brush and I'm going to roll it
just a little bit. The brush is already
a nice fine tip. And as I pull up, I'm
going to flick it. So here's the bottom
of the trunk, which I'm pressing,
and then I lift, lift, lift, and then
I'm going to flick. And then I'm going
to come somewhere on the trunk and lick, lick. Okay. So practice that a bit
till you're comfortable. But again, this is just the
perfect piece to learn things with because it doesn't
matter. You're gonna be okay. Now, we're not really going to do a trunk that
starts down here. We're gonna start
up here. Now, I can see that my
windows are still wet. So I'm gonna wait just a minute. If you need to wait,
you wait as well. But don't want to
smear our windows. Alright, I've loaded
my breast really well. And I'm going to start
with the first one right about this leaf here, and I'm just gonna
touch and press. I'm gonna start to flick it. Boom. And I'll probably have another one
come up about here. So I'm gonna start with my
two main trunks. There. And I want it to stay on the back of the
roof. There we go. And from there, it's
easy to start building, so I'm just gonna wear I
have a natural Y shape. I'm gonna go for it. Same here.
I have a little bit here. And if it skips, that's okay. Guess what? I'm just gonna put
one over here. All right, so step back. Don't get carried
away because it can take over and you got
to remember we're going to be adding bats around. I'm not going to
add too much more. I'm just going to
pull this trunk down. And now at this point, I would be a little
bit selective. All right. We're done with tree. Okay. I've got my
detail brush out. We're going to add the
color on the hat bands. I'm going to use yellow
orange and green. You can use whatever
colors you want, whatever we've got on the
palette that you like. And I'm just gonna
add a touch of color. But Okay, I think we're ready
to remove our Well, those are still wet, so
let's start over here. Remove the gum on our flames. Now, I'm gonna leave mine white because it stands out nicely against
our backgrounds. If you want to do a
pale yellow, you could. Okay, let's get our marker out. I'm going to start
with the number five. Basically, I'm gonna start at the top and we'll work our way down and we'll be
finished. Oh, my goodness. I'm going to move the palette
out of the way for now. So as far as placement
of the little bats go. You know, sometimes
I like to place a little idea where
I want them to be. I'm gonna start with those two. And this one's far away, so he's almost just like a
little stick, really, and then I'll put
maybe two ears on him and not much detail 'cause
he's so far away, right? This one I'm going to make
it a little bit closer up. B to see if these are dry. I don't want to smear. I'm gonna make a teeny tiny one over here. I'm gonna put one over here
that's pretty small, I think. I think I want a bigger
wing over here, maybe. You notice I always
start with the body. To me, that's easier. And then I bring the wings out, I try to match the
top of the wing, and then one, two, three, one, two, three. Obviously, you can put as many
in as you want or as few, doesn't matter, it's
your, this is your piece. Three, four, five, six, a state with odd numbers. Lord or How'd you do? Alrighty. Now, we've
got this all done. Let's go ahead and use our um, I'm gonna stick with
the five, actually. Let's do our spider web. So first, we're going to
start with just a long one. We're gonna start in
that upper corner. This will be our longest one. Actually, it's going to end
up in a squiggly little web. Let's put our
spider legs on. Yo. Alright, we'll put some eyeballs on
it when we get to our white. Now, from there,
we're gonna start. We always start up at the top
the same spot, basically. And these each one gets
a little bit shorter. Perfect. Very cute.
13. Inking Leaves, Scrolls and Signs: Okay, I picked up my number two, and we're going to do
our leaves up here. So first of all, I'm just going to connect it. And then if you want to, you can add some scrollies These bottom ones.
I'm not taking it on top of the pumpkin. I'm just connecting
it underneath, like it's sitting on
top of the leaves. All right. And if you want, you can add a little bit of
lack brass, so to speak. And while I had the finer tip, I did just clean up a little
bit on my cute little bats. All right. Let's just
keep moving down. I think we're fine on the roof. The candle looks good, the lantern, but it
it's hanging suspended. So I'm just going to add a little chain that.
And this looks good. I just have a couple
little white spots. It's just hard for me to see
under these studio lights, so I'm just going to fill
those in. That looks great. And I just want to
add a little depth by filling in a little dark spot between my rocks here and there. Okay. Switching to
the number five. Just go to add our
little spider web here. Now, on this one, we want
to leave room for our web, so I'm gonna put
that in first, then I kind of know where to stop. And, um that's gonna be
my first line, actually. Cute. And let's add our legs. I know spiders have eight
legs, but I'm only doing six. Okay, we'll come to the
lettering in just a minute. Yeah, let's add
some of this some, like, dead sticks back here. So just like we did
with our brush, you're going to start at the base and kind of flick it up. You're welcome to add
a little more grass. Okay. Deepen that shadow there. Great. We are about ready
to do some littering. I'm just going to
add a few lines here and there on the steps. Good. I think I'm going
to add a little bit here. Cute. Hey. Now our little ghosts. I'm going to use a smaller.
It's my number two. You need to add some eyes and maybe a little dimension
to their cape. Adi what do you call it? Okay, we finished our ghost. Let's come over to
our pumpkin patch now and just add the
vein and attach it. Maybe some scrolls,
little vines. And, um, you decide
how many you want. I added too many little vines
on one of my iterations, so I'm gonna be a little
more careful this time and not get
too carried away. That's just about right for me. Okay, so that is done. And let's go ahead and do our
scroll work on the house. I'm gonna stick with
the number two. And I want you to
feel free with this. Like, don't feel like you have
to do it in pencil first. I'll tell you the
secret with this is to just keep your hand moving. And then just
attach something to your previous just attach
to your previous line. I'm not sure it
needs anything on that side of the wind now. I'm gonna leave it off the nail. Isn't that fun? I can
do scrolls all day. That's just fun. I'm
gonna throw one up here. Well, I am gonna put some here. Great. How'd you
do? Isn't that fun? Before we do lettering
or anything, let's just add a couple more. I just think it'd be fun
to add a couple here. But oom, boom. Okay. All right. Who is ready for lettering? We need to do lettering
and we need to add some darker black, but we're almost there, guys. So I'm going to do I'm going to put my lettering
in pencil first. You can either trace
it from the pattern or free hand it in and then
we'll get our markers out. I'm going to use my number two. You can see that I've
just lightly put it in with pencil and I didn't worry
about all the curly cues. I was just more
concerned about space. So let's just start at the
top and work our way down. You can do any kind of
lettering that you like to do. Cute. Oh, one more
one more sign. Awesome.
14. Pumpkin Shading and Black Corners: Alright, I picked
up my number four, and I'm going to come
into transparent orange. We're going to add some
shading on our pumpkins. This is a 982, 98%
water, 2% pink. And I'm just going to add a little bit towards the bottom, and I'm going to bring
it up a little bit. This will overtake your pumpkins if you let it win the battle. H. Compare those to
those, you can just see how it adds some richness, some contours, some depth. And I'm gonna leave it
rather streaky looking. See the points that I'm making there with my
number four brush. This is such a fun
color to paint with because it just packs a punch. Follow the contour of the
shape of your pumpkin. Notice I'm holding my
brush like a pencil. I want complete control. Just go right over that grass. It doesn't matter. Beautiful. Good job, guys. Coming in with my
number six round and ivory black at a 991. But mostly water. We're going to deepen our wash in the corner and add it down
here at the bottom. So let's start at the top
where we've already worked it. We're just going to
enhance it a little bit. Notice where I'm
holding my brush, and we're just
going to dab it in. Pick up some water. Soften the edge. You can
go right over your back. It's not gonna matter.
I like leaving that little peekaboo of yellow there that I have, so
I'm gonna leave it. And then I'm gonna
just kind of touch it with my tissue to help
soften that edge. Yeah. Oh, I like that. I like
that one little mark there. We'll bring that down
there, too. I like that. Wow, that adds a mood, doesn't it? Love it. Okay, let's add it down
here at the bottom. Now, don't get
carried away here. I'll just add a little bit. I would rather add two layers
than get carried away. You can't remove black,
totally. Remember that? So go easy. Kind of touch that a little bit. Beautiful. And I'm going to
add a little bit of this wash to the bottom of the broom because I don't want any white showing through. I want it to look
nice and thick. Remember, it's going to
dry one value lighter. So I'm not super worried. Now I'm using the
tip of my brush. I'm just fanning it down a
little bit, little whiskies. Ooh. Didn't that add a nice mood? We're finishing it off, guys. Oh, now I'm coming in
with a second layer here. I might want to add a touch here just because it's
so minus so light. I don't want it to be
that light, so I'm gonna touch of that wash. Be careful of your ghost. A just a touch over here, too. Okay, let's let it dry. Step back, take a look. With black, it makes a big difference once it's
dry. So I let it dry. I stood back six feet, and I did come in and add one
more wash. On the corners. I like it really
dark in my corners. So we're finished
with our black now. In fact, we're finished
with everything except the white. So here we go. I like to use bleedproof white. You can use white
guash, if you prefer. And if you've never
used bleedproof white, it's very opaque, and
that's why I like it. And it can be quite thick. In fact, the older
it gets in your jar, the thicker it gets,
and that's okay. Just add some water, and
you'll be just fine. Add some water on your
brush, and once in a while, I'll just give it a
little sprig inside of my inside the jar here. So I'm just going
to put a little bit I usually just put a little bit on the jar lid because I'm
never using very much. It's not often you really
just paint with it. So I'm using my little
fine detail brush, and we're going to just add some highlights and some eyes. So pick up a little bit here and let's add some
eyes on our wider. And if you want to, you can
add some on the big bat. I kind of want to. They'd
look cool and red, too, but maybe kind of scary. I don't know. All right. And this is where if you have
a little goof somewhere, you can touch it up with white on your skeleton or whatever. Or let's say you want to
add a little highlight, you can just just
touch here and there. You can add just
little sparkles, kind of little see how it just adds a little touch of highlight, little
sparkle there. And I think this little guy
definitely needs some eyes. Yeah. Cute. Okay. If for some reason you messed up your
little flames, you could just paint
it in with white. That would be fine. I'm gonna add just
a little highlight on this little stem, I think. And I'm gonna give
this guy a little I. And this one as well. If you'd rather use a
stylist to apply your dots, that's a safer way. Okay? The ghosts all look good. Like if you needed to touch up a ghost, then you could there. I'm going to add a few
highlights on these pumpkins. Just doing a little ama stroke with some dots here and there. Make sure that you curve them
so that they fall in line with the contour
of your pumpkin. That one's pretty dark
there. That's okay. And I'm not going to do
anything to the hats. Let me thin it down
just to touch. Water will thin down
this bleu proof white. And I want to just put some
highlights on this portion of the broom. Okay. To my three out
script liner rigger, whatever you want to call it. And I've thinned down
the white quite a bit. I've added some water to it. See how it makes it pop, though. It's as if some of the
moonlight were catching. Just a touch, a
touch. All right. I like that. Speaking
of moonlight, if you wanted to pick up
just a touch of the white, you could dry brush some in. So dry brushing is
picking up paint, wiping 99% of it off. So your brush is quite dry, and then I don't want
to get my sleeve in it. Then you can just pull out
a little bit of shine, a little bit of white around
the bat or on the lantern, if you wanted to add some there. Mine's pretty white, so it's
not gonna show up a lot. Let's see if we've missed.
Yep, we still need to do. Eyes on our spider here. We coming. We'll keep
looking down here. Gosh, guys, I think we're done. So let's step back again, take a look at it from six feet, make sure we don't want to
add anything else to it. And if we're good to go, we will sign our name together. Okay, my friends, I want
you to know how proud I am of you for accomplishing
this intricate piece. It was fun. It was exciting. But there's actually
so many layers to it. It's a little bit
tricky here and there. And so I'm very proud of you and so happy that
you took this class. I hope you can look
in the mirror and understand how talented
and creative you are. Not everyone can pick
up a pen and a stack of paint brushes and put together a fun, beautiful
piece like this. And so I'm really proud of you for sticking with it and
accomplishing your piece. Always sign your name
to your artwork. Always claim your artwork and be really proud of what
you've accomplished. Let's go ahead and sign
our name together. Here we go. This
is the fun part. Great job. Okay. I'll see you in the next video where
we will wrap up.
15. Congratulations: Well, congratulations.
You did it. You have finished
our class together. I'm so proud of you guys. Thank you for spending
your time with me. I know there's lots of fabulous teachers here on Skillshare, and so it really meant a lot to me that you
were here today. You know, if you would take
just a moment to snap a pick and upload that by
following this button here, then that would give
me a notification that you have done so and I can hop on and make some
comments on your piece. But it's also fun for
us to support one another as artists and
nothing but love here, guys. No judgments, lots of love. So I would love to see what
you have accomplished today. Also, if you wouldn't mind
clicking the follow button, then you'll just get
a little notification whenever I pop out a new class, and you can take a peek and see if something's of
interest to you. You can also go to
that search bar at the top of this page
and type in my name, Carrie Sanders and
see if something there is fun that you
would like to do with me. Lots of holiday
classes coming up. And also if you felt like
this class was a benefit to you and you learned
something new or you sharpened some
skills that you had, and you know somebody else
that might benefit from it, all you need to do is look for this link on this
page of Skillshare. Share the link with your friend, and both of you
will benefit from Skillshare, which is
a pretty cool thing. Alright, guys, thanks again. I'll see you in the next video. Take care. Bye bye.
 Kerrie Sanders, Artist, Teacher, Creator.