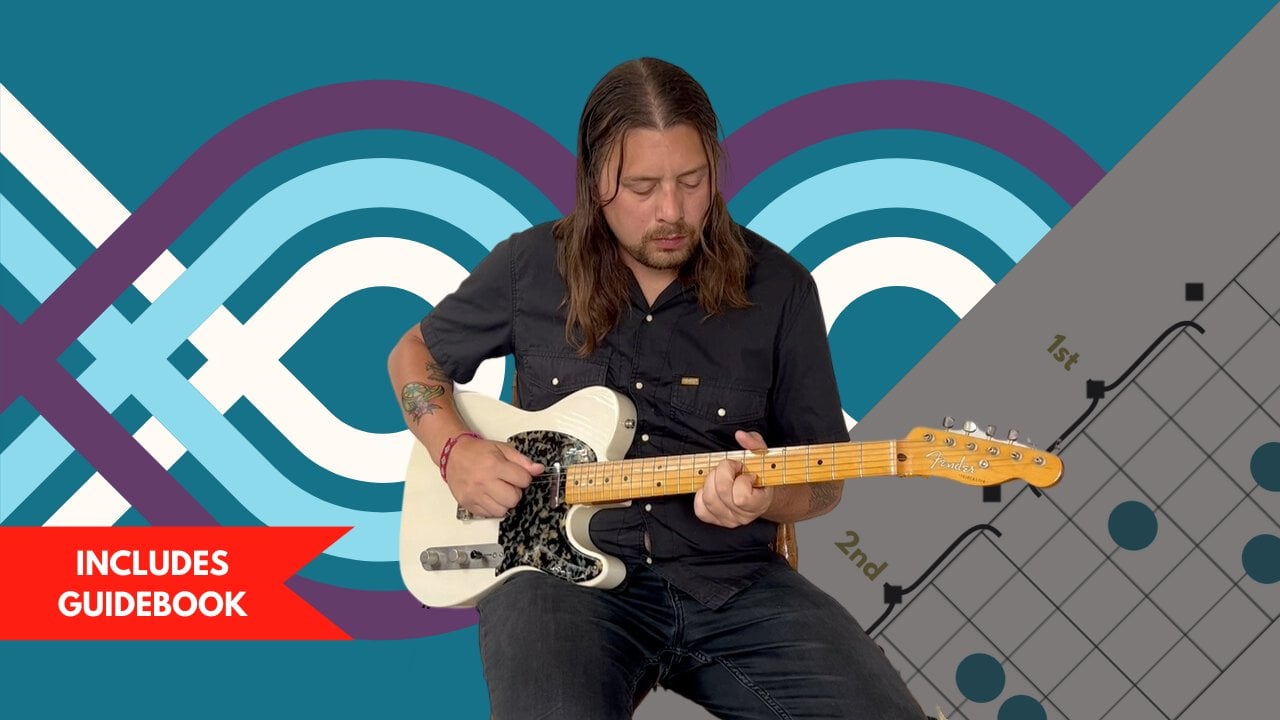
Transcripts
1. Introduction: When I was getting
my start on guitar, I was very surprised to learn
how many songs you could play with only knowing a
few basic chord shapes. It's amazing how much power and emotion can be
heard and felt, and once you got them
down, it really opens up the possibilities that
the guitar has to offer. I'm Lancelot Houston, a
musician producer and teacher. In this class, you'll learn the most important chord
shapes on the guitar, starting with open chords. Open chords are shapes that
incorporate open strings. These shapes are
where most beginners start and are crucial in
building a foundation. As a guitarist, you'll
learn how to play power chords and the importance they play in guitar. Music Power chords are
simple, versatile, and fun to play and a
favorite among guitarists. We'll also cover how
to play bar chords. Bar chords are closed
shapes that can be placed anywhere on the guitar neck and offer many harmonic
possibilities. You'll also learn various
rhythmic patterns that will challenge and
refine your dexterity. This class is
designed to meet you at your skill level
and take you further. By the end, you'll have
gained a new confidence in both the plan and theory
of chords on the guitar. So grab your guitar
and let's get started.
2. Class Orientation: Today you're going to learn how to play chords
on the guitar. By the end of this class, you'll have learned the
shapes that will serve as a foundation to all aspects of your
guitar playing. In my project, I'll be
demonstrating how to play four chords and I'll put them together to create a
chord progression. Then I'll show you how to play the same chords but in different ways around
the guitar neck, using open chords, power
chords, and bar chords. All you'll need is a
guitar to get started. Here's what I'll be looking
for in your class project. Playing through the
chord shapes seamlessly, using a metronome to keep time, and playing through
different rhythmic patterns. You can submit your
project by recording yourself on your phone or
another recording device. Next, we'll take a look at the basics of chords and
the theory behind them.
3. Foundation: What are Chords? : Before we get into
how to play chords, let's build a foundation of
understanding by covering some basics of music theory
and how chords are built. What are chords? A chord is when multiple notes are played
and heard simultaneously. In order to best
understand this concept, I think it'll be helpful to
move over to the keyboard. First, some basics. There are 12 different notes. This is known as a
chromatic scale. Here we're looking at all
the notes from C to C, going from a low to a high sea, this is called an octave. The notes in between consist of both black and white keys. The white keys of the
piano are A, B, C, D, E, F, and G. The black
keys are notes in between. You may know them
as sharps or flats. When a note is sharp,
the pitch moves up or to the right by one key. The black key to the right
of C becomes C sharp. When a note is flat, the pitch moves down or to the
left by one key. C sharp could also be
looked at as D flat. It's important to note that
there are no sharps or flats between the
notes E and F, and B, and C. Now I want to
look at the scale. Scales are notes that are grouped together
within an octave. This is important in understanding
how chords are built. In this class, we'll
be focusing on the most basic form
of known as a triad. Triads take the first, third, and fifth notes of the scale,
and when played together, you have A in the case of the, the 13.5 are the E and G. We're also going to take
a look at power chords, also known as five chords. Power chords are simpler than triads because they only
have two unique notes. With power chords will
eliminate the third, leaving only the
root and the fifth. In the next lesson, I'm going to show you the basics
of navigating the guitar and
you'll be one step closer to learning
some basic shapes.
4. Foundation: Guitar Navigation Basics: In order to play guitar
chord seamlessly, you'll need to learn some basic navigation of the guitar neck. It's important to know the
names of the guitar strings. We'll start with the first
string known as high E, which is indicated by the
small E on this diagram. The second string
is the third string is the fourth string is D, fifth is A, and
the sixth string, or the lowest string is another E. You'll most likely have fretboard indicators
on your guitar as well. In this diagram you'll see
single diamonds on the frets, 357.9 and a double diamond
on the 12th Threat. The 12th fret is
important because it indicates an octave
above the open strings. The notes played open are the same notes
at the 12th Threat. Next, let's go over how I'll be referring to your fingers
In your fretting hand, your pointer or
index finger is one, the middle finger is two, your ring finger is three, and your pinky finger is four. Now that you know the ropes, let's move on to learning
some chord shapes, starting with open chords.
5. Open Chords: Now I want to review some
basic open chord shapes. These shapes are known as open chords because they
contain strings that are played open when fretting these shapes remember to apply pressure behind the fret as close as possible without touching
the fret directly. This ensures that the
note will come through. Clearly, if the note
is not coming through, make sure to check the
positioning of your fingers. Make sure that you're
not touching or muting the other strings with
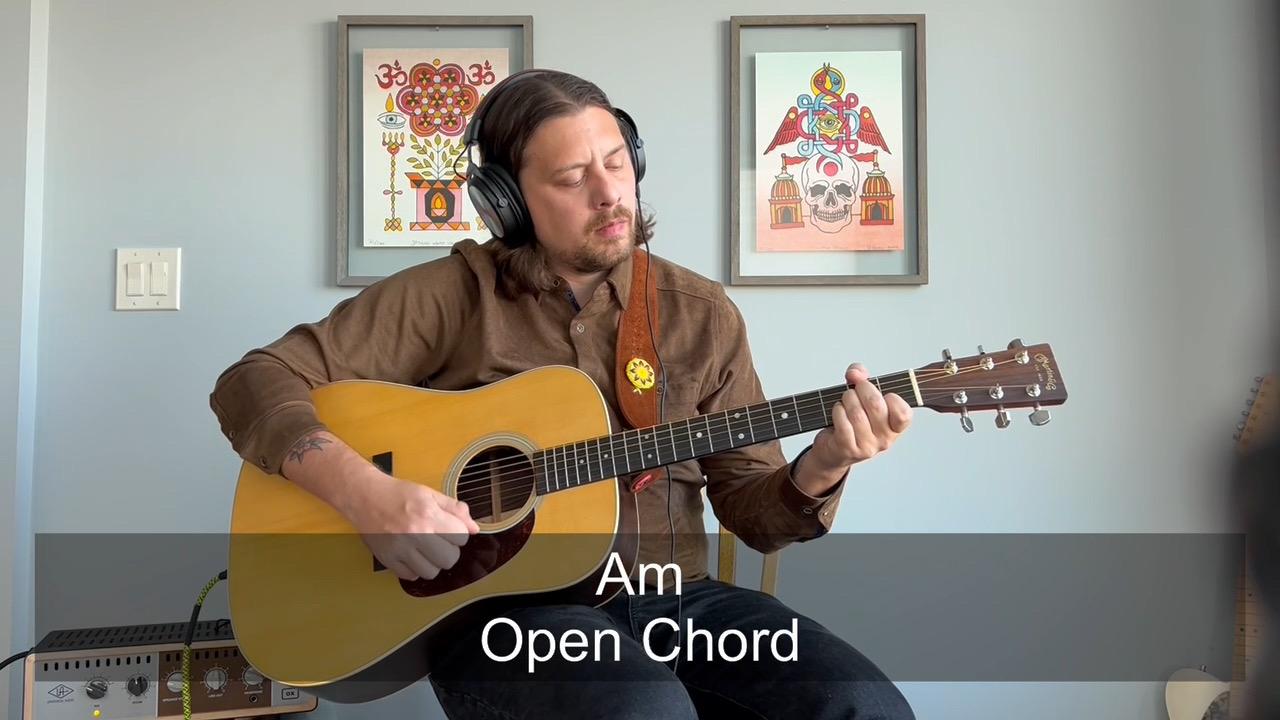
any of your other fingers. First, let's start with
the E minor chord. I want to start with the
E minor chord because it's the easiest one of
the basic shapes to play. You'll begin with the
low string played open. The A string is fretted at the second fret with
your one finger. The D string is played at the second fret with
your two finger, and the rest of the strings
will be played open. Next, I want to cover
the major chord, similar to E minor, the low string is played open. Let's use your two finger on the string and your three finger on the string played
on the second fret, different from the
E minor shape, the string is played on the first fret with
your one finger. The B and strings
will be played open next, the Ad with the chord, you won't want to
play the low string. We're going to start
with our open A string. Let's position our fingers to play the second fret of the D, G, and B strings. You could do this by
using your 12.3 fingers, or you could use one finger to play all three
of those strings. You'll want to be sure to
keep the high E string open. Next we'll look at playing
the A minor chord. The only difference
in this shape from the A chord is that you'll play the string on the first
fret rather than the second. You may also notice that this chord shape is very
similar to the E major. But all of your
fingers are moved over a string to go
through it string by, You'll use your two finger to
play the second fret of the D. Use your three finger to play the second
fret of the G string. And use your one finger on the first fret of the B string. You'll want to leave the
A and high strings open. Let's move on to the
C. The C shape is very similar to A minor as
far as finger positions. The difference here is
we're going to move our three finger to the
third fret of the A string. The two finger will play the
second fret of the D string. Your one finger will play the
first fret of the B string. The G and High strings
will be played open. Now let's take a look
at the cord shape. With the cord, you're
not going to play the low or the strings. The D string will
be played open. The string is played on the second fret with
your one finger. The string is played on the third fret with
your three finger. The high string is played on the second fret
with your two finger. Finally, let's take
a look at the, The low string is played with your two finger on
the third fret, the string will be played at the second fret with
your one finger. The G and B strings
are all played open. Finally, the three finger plays the string at the third fret. I also want to include
my preferred version of playing the most of the
fingers remain the same, except here the three finger is going to play the
third fret of the B. Now I want to use our F and that's going to
the third fret of the high practice these shapes to the point where you are able to switch between
them with ease. When practicing, pay
attention to the fingers that remain in the same
position between shapes. Let me give you some examples. Let's take a look at the Ds and D When playing from A to A, You'll see that the three
finger remains the same, at least in the second
version of that I showed you. Let's take a look at
another set of cords. In this example, I'm
going to switch from the A minor to a
C. In this case, you'll only need to
move your three F while your 1.2 fingers will remain
anchored to their current. And strings follow this approach to all the chords
reviewed in this lesson. And I promise you'll be playing through chord
progressions in no time. Now that you've
conquered the open chord shapes of the guitar, let's move on to power chords, a staple in guitar. Music
6. Power Chords: Power chords are simple shapes that can be placed anywhere
on the guitar nic. The ease of playability
combined with the powerful sound that they provide will be sure
to get you excited. I want to start our look
into power chords by revisiting the E minor chord that you learned in
the previous lesson. When playing E minor, you strummed all six
strings of the guitar with the power chord.
We're only going to play the root
note and the fifth. This is the reason why power chords are
notated as five chords. To turn our E minor chord
into an E five chord, we're only going to play the low A and D strings by
only strumming the strings, we've omitted the third of the, leaving the root fifth and
an octave above the root. Now let's prepare to turn this shape into a movable
power cord shape. The first step is to
practice this shape by using different sets
of fretting fingers. Most likely you're playing this shape with
your 1.2 fingers, but I want you to get
comfortable using your 2.3 fingers and your 3.4 fingers
in the case of power cords. Getting used to using
your 3.4 fingers is particularly once you get comfortable using
your 3.4 fingers, I want you to slide your fretting fingers
up to the seventh fret. Your three finger will play the A string at
the seventh fret, and your four finger will play the D string at the
seventh threat. Now take your one
finger and place it on the fifth fret
of the low E string. Now you have a closed
shape which is movable anywhere on the low E, A, and D strings. That's all there is
to it. In this case, we're playing an
five power chord. And here's how that's
going to sound. I want you to practice
this by playing this shape both up and
down the guitar neck. Once you get
comfortable with this, let's move the same shape
over to the D and G strings. When making this move, you'll still want this to
be a closed shape, so try and avoid playing
the low E string. I often find myself using my thumb to mute
the low E strings. When playing power cords on the D and G strings
played in this position, you're playing a D
five power cord. And here's what
that sounds like, just like you did before, let's take this shape and
move it up and down the neck. Let's take it a step
further by moving the power cord back
and forth from the low A and D strings
to the D and G strings. If you want to learn a song
or a riff using power chords, I recommend starting with Smells Like Teen
Spirit by Nirvana. This song incorporates
power chords by moving the shape between different
sets of strings to play it. You'll start with the
power cord placed on the first fret of
the low E string, and your 3.4 fingers
will be playing the third fret of
A and D strings. Next, move everything over
to the D and G strings, still on the first fret. After that, move back to
the low E and D strings, but move the shape up
to the fourth fret. Here you'll both be moving over string and to a
different fret position. For the last chord,
you'll want to stay in the same position
on the fourth fret, but move the shape over
again to the D and G strings to play the intro rift to smells
like teen spirit. Just repeat this pattern. Take your time and
try it out first by playing one chord at a time. And then once you get
more comfortable, try incorporating the
rhythmic elements. Another technique that
goes hand in hand with power chords is
called palm muting. Palm muting is using the palm of your hand to partially
mute the strings. It'll take a little bit of experimenting to
get the feel of it. To give you an example of how
palm muting should sound, I'm going to
demonstrate by playing a bit of the Green
Day song basket case, congrats on learning the
basics of power cords. Next, we're going to take
the concept of a power cord and build upon it by
diving into bar cords.
7. Barre Chords: Bar chords are the
most difficult shape that I'll be covering
in this class, but probably the most important in breaking
through on guitar, you'll be using a lot of the knowledge from power
chords and building upon it to build more complex and
versatile chord voicings. Let's start by once again
making the five power chord. On the fifth fret of
the low E string. It's important to use your
one finger on the fifth fret and your 3.4 fingers
on the seventh fret, keeping your second finger free. Now I want you to take your first finger and lay it across the fret
board at first. This is going to be
difficult to play, but don't be discouraged. The more you play, the stronger
your hand will become, and it'll eventually
get a bit easier by laying this bar
down and fretting. What were the open strings, which are now closed
at the fifth position, you'll have made an A minor. Here's what that's
going to sound like. Another way to look at this
shape is that it's the same as the open chord
version of E minor, but moved up the neck to
the fifth position with the open strings replaced by the bar created by
your one finger. The reason bar chords are so
useful is that they provide a standard shape
which can be changed to create almost
any chord voicing. For this class, we're
only looking at triads. For now, we're just
going to be focusing on learning the major
and minor voicing. We just learned the minor. Now let's take a look
at the major here. You'll take your second
finger and place it on the sixth of the string. Again, we could look
at this as mimicking the E major open chord shape. And sliding it up and
closing it off with the bar. Let's take both of these shapes and move them up and
down the guitar neck. Now let's do it again, but move the shapes over
to the D and G strings, just like you did
with the power cord. You'll move off the low E, you'll want to
mute, or just not. That string played on these strings is basically
the open A minor, but moved up the neck and closed by the bar, in
this case at the fifth. This is a minor. And here's what
that'll sound like. Now let's look at how to turn this shape into a major chord. You'll want to either
form a bar across the D, G, and B strings or
fret them individually. My preferred method is to use your three finger
to make this bar, but I've seen players use their fret the strings
with your 23.4 fingers. This shape is similar to
the open A major shape, but moved up the neck
and closed by the bar. In this case, we're
playing a major chord. And here's what that's
going to sound like. Let's practice these bar
chord shapes up and down the neck on the D and G strings. Practice switching between all of these different
bar chord shapes. Here's an example that
incorporates all four of the shapes that we went over in this lesson using the chords A, D, F sharp minor, and B minor. Thank congrats on making it through this
lesson on bar chords. Next up, you're going to learn
how to incorporate rhythm into all of the chords that you've learned
so far in this class.
8. Alternate Picking + Rhythm: Now that you have a good handle of how to play some coords, I want to show you how to
incorporate different rhythms, alternate picking and strumming, in order to get the most
out of these chords. Once you get comfortable
with some chord shapes, start trying to subdivide your strumming to
incorporate quarter notes, eighth notes, triplets,
and 16th notes. Using a metronome will
help you keep time and increase the accuracy of the
subdivision of your notes. I want you to try this exercise using alternate
picking and strumming. This is simply the
practice of switching between upstrokes
and downstrokes. When using this technique, try to focus on moving just your wrist rather
than your whole. I'm going to demonstrate
by switching back and forth between
the chords and A. Let's refer to this as
using quarter notes. When you got that down, play
through some chords again. But now subdivide
using eighth notes. In other words, we're going
to keep the same tempo, bestrum each chord twice. Next, move on to
subdividing by three, also known as triplets. Finally, try keeping
the same tempo, but subdivide into four, known as 16th notes. Now let's put it all together, and I'm going to
demonstrate this technique along with some chords that
we've covered in this class, in my class project.
9. Class Project: Now it's time for
me to demonstrate some of these chords
in my class project. I'm going to choose
four chords and put them together to
create a progression. I'm going to play through these
chords using open chords, power chords, and bar chords. The chords I'll be using
are A minor and D, and I'll incorporate
different rhythms.
10. Conclusion: Congrats on making it to
the end of this class. By now, you should have
a solid understanding of how to play some
chords on the guitar. Remember, practice
makes perfect, so keep poning in those skills. Be sure to post your
final project in the project gallery and post any questions you may have
in the discussion section. I hope you've enjoyed this
class and I hope to see you in some of my classes in the
future. I'll see you next time.
 Lancelot Hueston, Musician - Producer