Transcripts
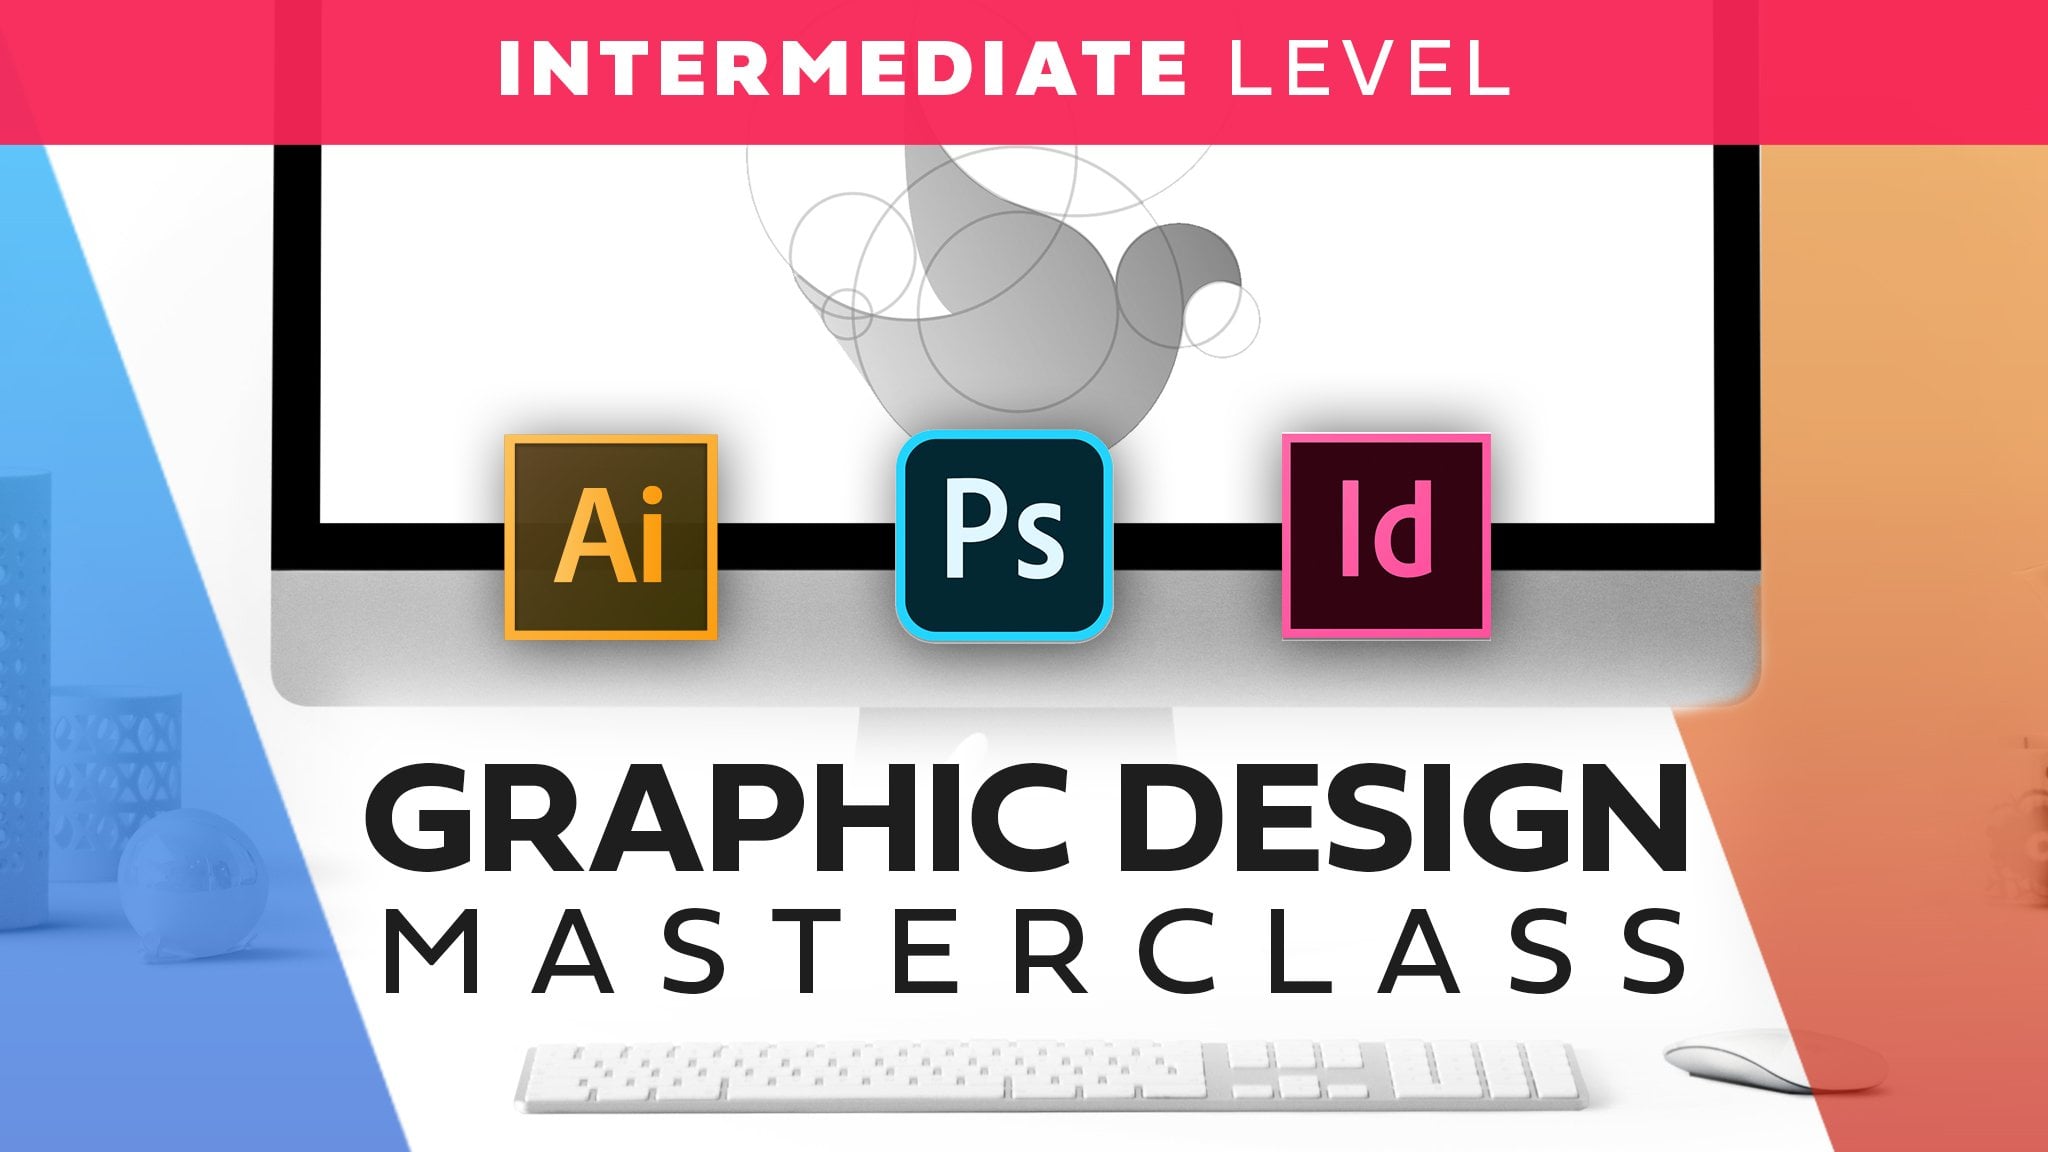
1. Class Preview: Do you want to learn
all the skills and techniques you need to
create incredible designs? Do you want to know
the process of how to create logos and
branding packages? Are you intimidated by
learning Adobe Photoshop, Illustrator and End Design? And want to learn from
practical real world projects than this class is for you. We will extensively review graphic design theory
including typography, color and layout theory. You'll understand
proper type hierarchy and balance to create
stunning layouts. We will review how to crop
and edit photos and design. Understanding
different type styles, how to work with headlines. Larger blocks of copy. Understanding the
emotions of color, how to make color
choices and layout and blocking to create
effective layouts that engage the viewer. We will cover a huge variety
of topics and projects, including photo manipulations,
magazine layouts, branding and logo design
projects, just to name a few. We will learn the basics
of Adobe Photoshop, Illustrator and End design. And complete projects with
real world applications. Every designer needs
to know how to master these programs
in this course, make sure you have
the essential tools and software to power through and create amazing
designs in Photoshop. We'll start with the basic tools and we'll eventually cover photo editing and
manipulation techniques like non destructive editing, duotones, Liquefy tool, the many ways to isolate and
cut out objects laying mass. And the amazing
content aware tool, we'll work through
several projects to practice and fine tune
our newly learned skills, including a full
book cover design and a Youtube thumbnail. Next, we'll learn Adobe Illustrator from
the very beginning. With a new interactive
way of learning, we will work through a seven page Vector tracing worksheet together and be able
to create all of the icons and symbol
you see here. With our newly learned skills, we will feel very
comfortable using the Pin tool and other
tools to cut out objects, draw complex illustrations, and even create this
detailed graphic. By the end of the section,
we will also dive deep into learning about logo design and what makes a
solid logo design. And we'll even create
our own logo and brand package using
Adobe Illustrator. There's also lessons along
the way that show you solid examples and the why
behind what makes them work. Next up, we'll learn
Adobe in Design, where we learn the
basic tools and tricks by creating
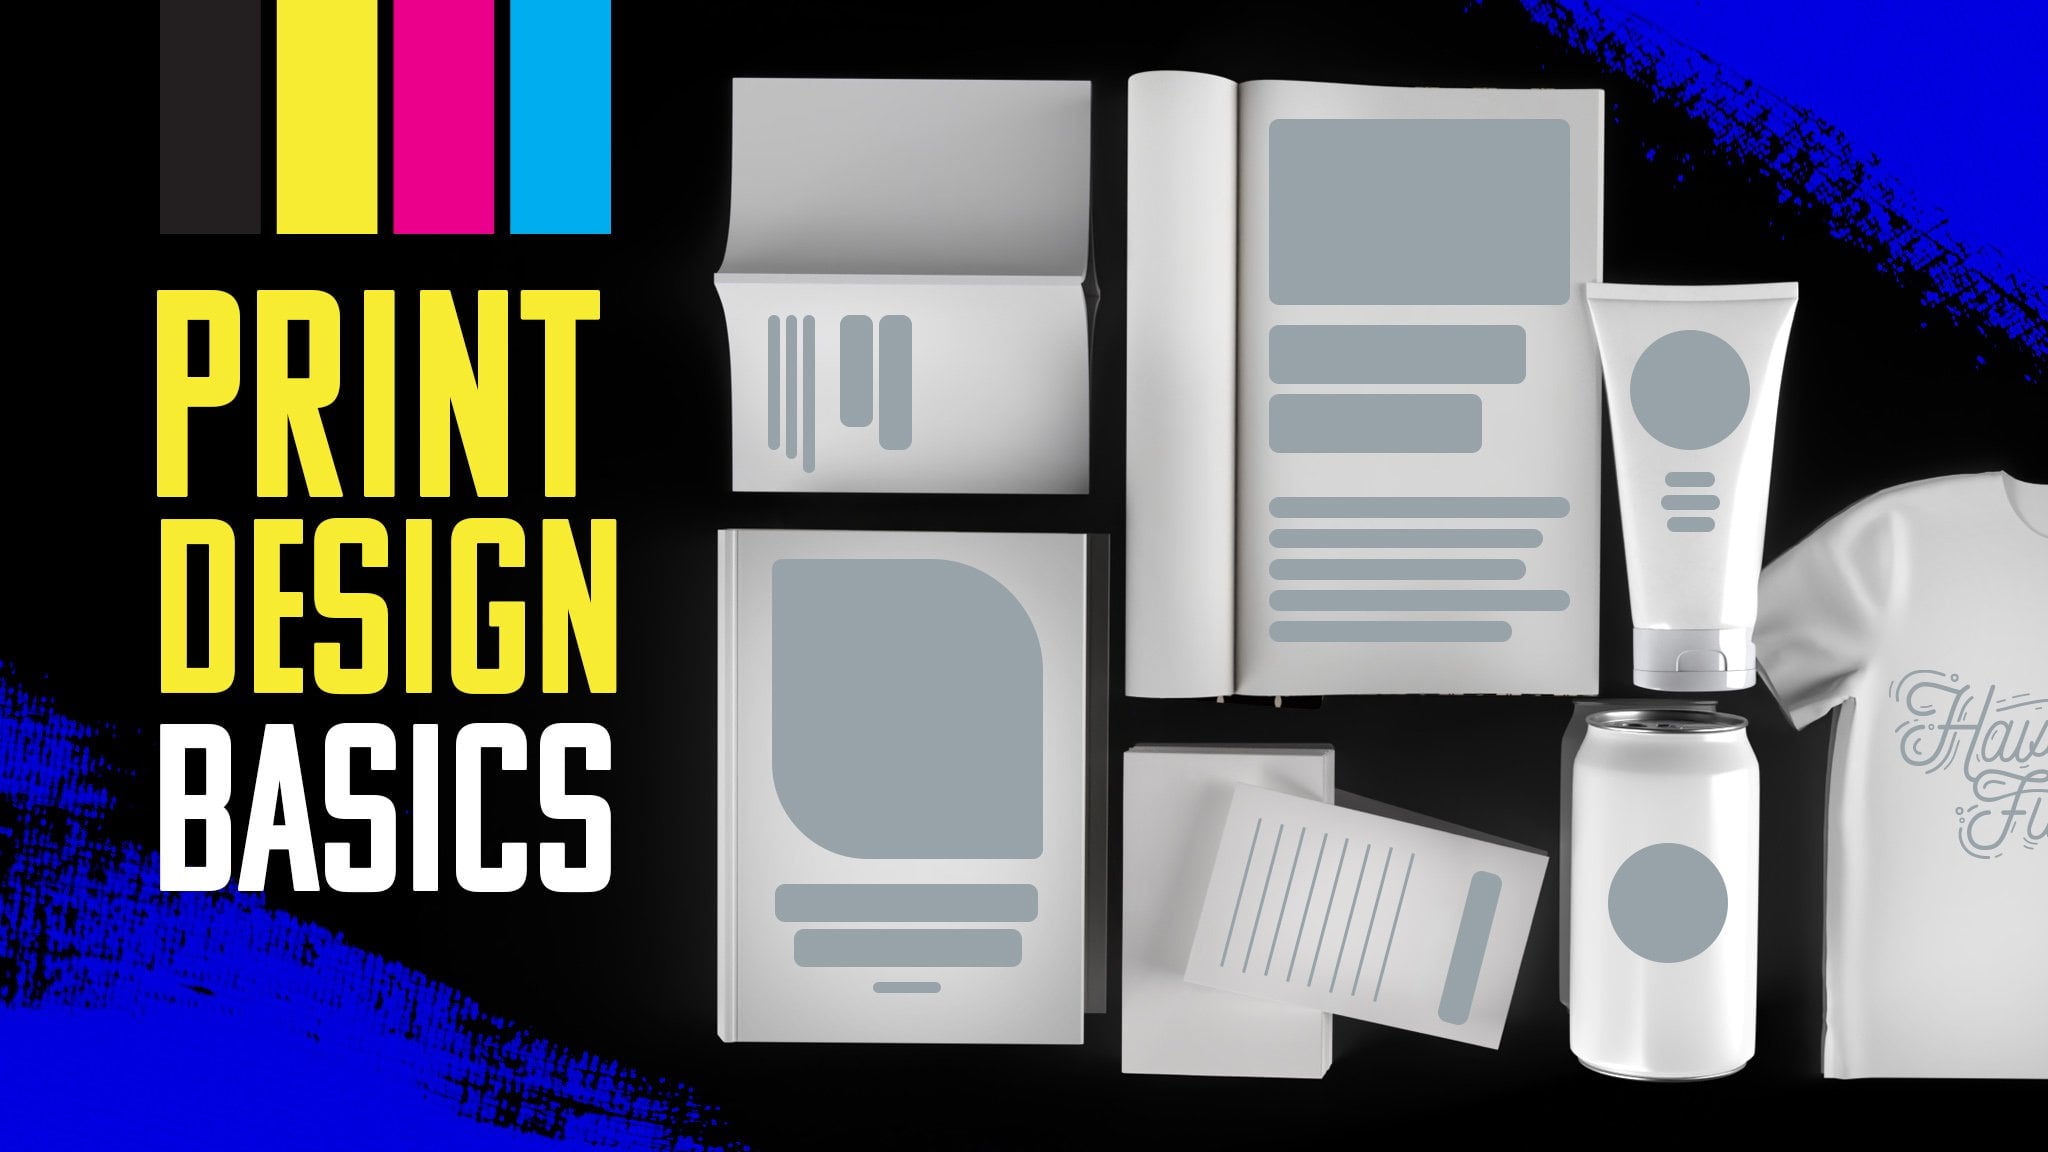
several mini projects, including several pages
of editorial content, including a full
editorial spread. We will learn master pages, character in paragraph styles, and global color
swatches to quickly speed up your workflow and
multiple page documents. We will then take our
newly learned skills and create a cookbook cover and several inside recipe spreads to create something
professional and compelling. There are tons of extra valuable content
sections in this course. It includes a section on the most up to date design trends, so you can be
knowledgeable about what's hot in the
design world right now. There's a really great
newly added section in this course called Finding
Your Design Niche. This section walks through a lot of the top design niches, including logo design,
editorial design, U, XI design, and a few more. By the end of the
section, you'll have confidence in knowing where you fit in the world of design. And have confidence in knowing where your next
focus should lie. There are tons of great downloadable resources
in this course, including a brand new 11
page guide to using grids, a color theory sheet, an anatomy of typography poster, a font pairing guide, and a wonderful graphic
design resource PDF, that contains all of my
favorite free and paid tools, resources, and places to
find design inspiration. Newly added to the course is the portfolio building template. After the end design section, you'll be able to fully customize this portfolio
tiplet to create fantastic portfolios using a wide variety
of effective layouts. This class is dynamic and new content is added frequently. I have an active community of
fellow students that I hold monthly design challenges to continually sharpen your
new found design skills. So I look forward
to having you as a student and let's
learn together. With over 300,000 students
who have taken these courses, it has changed many
students lives. Not many programs cover so many topics in a
wonderful structured order. I'm incredibly excited about
teaching you how to tap into your creativity and start pursuing an exciting new
career in graphic design. I'll see you in
the first lesson.
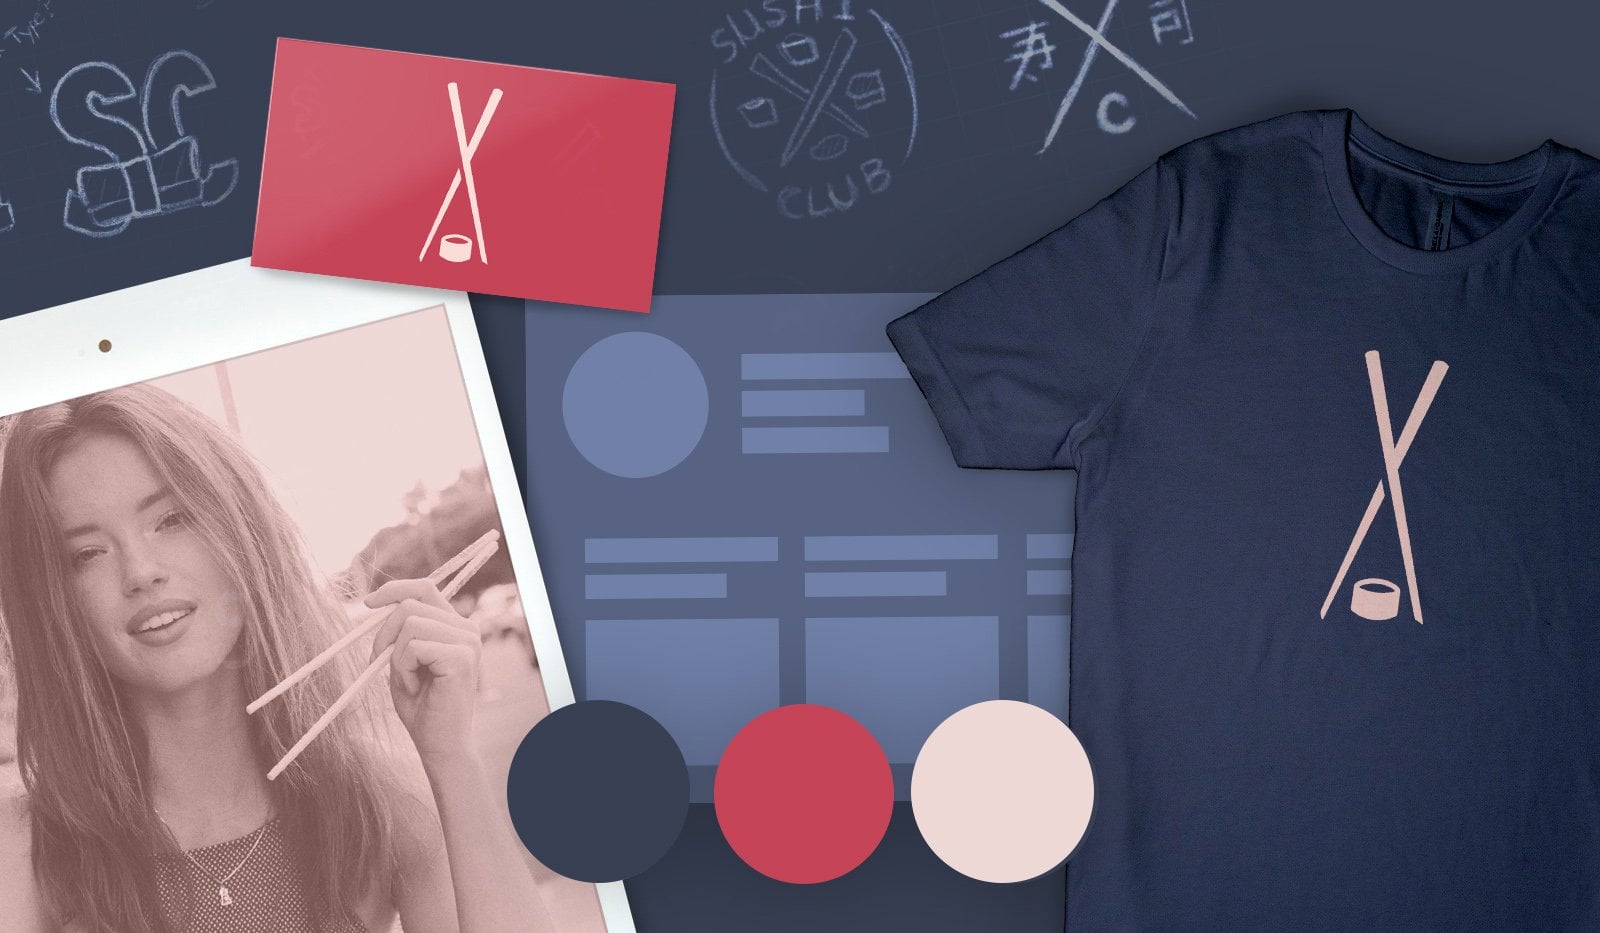
2. IMPORTANT! The Course Guide & Resources: first of all, welcome to the course. I'm glad you decided to join me for this creative journey. And I hope this course provides you with all the knowledge you need to feel confident in graphic design theory, practical application and creating real world design projects. Thean tro was a great overview of all the different sections in this class by wanting to break everything down and guide you through the sections. So you know the best way to go through this course on skill share to download the project files and re sources for this class head on over to the project tab and on the bottom right of that page, you will see a ZIP file that will contain all the files organized by folder and by class section. Make sure to check out the Course Resource Guide folder, which will contain the Resource Guide for Graphic Designers, which provides a full list of resource is for this class like my favorite place to find photos, fonts and vector files. There's also a second word document called the Project Files Document, and this contains all of the links to the photos and vector fouls. I use my project examples in the class. This list is great for those who like to follow along by doing instead of just by watching . I went this course to be taken at your own pace. There is some order to the overall sections, but if you feel like the pacing is too slow or too fast in a certain area, feel free to skip a lesson or re watch a lesson to and find the right pacing for your skill level. Not all lessons are dependent on prior lessons, but it is suggested that you move in order of role, especially for the project sections. The first section of this course focuses solely on graphic design theory. We will cover typography photos, layout on more. Take the section at your own pace. I decided to put most of the theory lessons in the beginning of the course so you could build that foundation for future practical projects that will come later in the course. I frequently add new lessons, especially theory lessons, as the course evolves. If the lesson has knew at the beginning of the title, that means it's a brand new lesson for you to enjoy our one that has been updated recently to help make this course more updated and rich with new content. As always, reach out to me any time throughout the course. If we have any questions, or if you have an additional lesson idea, that would be great additions to the course. After the design theory section, we dive headfirst into Adobe Photo Shop. I start off slow for those at the beginner level in the program, but and move along to the practical projects and applications. Toward the end of this section, I moved next into Adobe Illustrator. We start off by using the pin tool and focus on tracing several examples where she'll get you used to this essential tool. Where were then, move into the practical projects section that helps us use it, practice our pin tool and other basics we reviewed. Once that section is over, there's a logo and branding section logo and branding or one of the most frequently requested projects for me as a designer. So I made sure we focused a lot on this topic in this course. After a few logo and branding theory classes, we hop right into a practical application were week to complete an entire logo and branding project together. The last section is in design, where we do a practical real world project. Why we learned the essential tools and functions of in design at the same time will apply our typography and layout knowledge that we learned in the first graphic design theory section. Toward the end, you'll be challenged to create a few student projects. I would love to see these projects and give feedback when I can. Also, there's a student Facebook group exclusive Onley for students of my courses, where you can post projects and get feedback and personally message me. There's a video explaining how to join in section three of this course, and I look forward to seeing you there. So now that we've reviewed the course outline, are you ready to start learning? Let's learn together.
3. Design Theory - The Anatomy of Typography: typography has a special place in the world of design, and it could dramatically impact the way a design feels it could make a design look busy or clean. It might even be the design itself through understanding the anatomy and structure of typography. It goes a long way in deepening your understanding of design. This is a serif font. We know this because of the little brackets at the end of the characters, and each letter of this word is called a character. If you were to draw a line that hugs the bottom of each letter, not including the little tales, which are called the dissenters, this line would be called your baseline. You can also draw a line across the top of these characters, which does not include what's called the Ace Enders are this little area right here, and then you can draw your second baseline. What are between these two lines is the very core of your word or character, and this could help you find balance and your type. You may find you have more a sending than decent and characters, and this revelation can help you decide how to balance this type and a headline or a logo, for example, the line that can be drawn at the top on the tip top of your ace enders is called the Ascent Line. The line that could be drawn across the bottom of your D senders is called the Descent line , so hopefully that could be easy to remember. With the really good fun, you'll be able to draw these nice, ascending and descending lines across the top in the bottoms. But not all fonts or typefaces work that way. Script bonds like this one don't always follow this nice line pattern. Now let's go over some basic typography vocabulary. The tail is the very tip of the character. The dissenter area, which we now know, takes up the bottom half the tail is just the very tip of the character. This is an example of the stem of the character years or anything that expands outside of the character, like in this example of the G. Fortunately, you'll notice a lot of typography. Terms are named after human anatomy, So as you can guess, this H is a great example of a shoulder. Bloops are common and certain fought characters, anything that's completely closed. Inside, a character is called a closed counter. This is an example of a character leg crossbars joined to stems together. For example. In this A. There are hundreds of different terms and vocabulary words for describing typography. Anatomy not gonna learn them all, and you don't have to know them all. But it's great to be familiar with some of the basic vocabulary. That means knowing some of the basics is fantastic. But don't feel like you have to know every single term and memorize it. What's most important and studying how type feels, looks and behaves with other characters, words and colors and designs to make our overall pieces cohesive and balanced, I'll go for a few terms that are must know terms in the world of graphic design. Many of these phrases in terms air thrown around inclined emails and professional feedback you may receive turning is the manual created space between each character. Each type has a natural koning added to it. When you manually reduce or expand the space in between the characters using software like will use in the class, you'll get the term Kern ING and local design. For example, I always try to manually current type characters because even just light adjustments can make a big impact on how it looks. The default spacing on fonts is not always perfect. Also, Kernan can help balance the logo by increasing or decreasing the space created between characters. Tucking that letter in to reduce that extra white space can elevate your type in your design. I love to experiment with different font options when doing logos and headlines. Some fonts work really well for my desired look. Beautiful. Sarah ifs tales and loops. But take, for instance, these fonts notice how they look pretty similar at first glance, but they vary quite a bit when you zoom in and you look for the little details. The spacing between sentences or phrases is called letting. The amount of letting between sentences and a larger paragraph can really change the look and feel of a block of type. Larger spacing are letting between sentences can look very clean. Tighter spacing can feel pretty cramped when you are learning intermediate or advanced design techniques. You'll need to know how to mainly space and balance logos, headlines and custom lettering. When working on headlines are type, I'd like to tighten the spacing between characters or words. I try to find opportunities to put words and characters, and nice white space is almost like a puzzle piece, and it seems to work really well. That way, when I do that, we can do this easily. In Adobe Illustrator, I'm taking a simple three word headline and finding the right spacing between the characters and the words. You'll notice a big difference. Using the default spacing in the font and then using my own custom spacing seems to be a big difference when I really start to play in noodle around with it. Sometimes your main headline and phrase is the biggest focus of your design. And having a nice, custom tailored look to your typography goes a long way in making it look professional. That's also good practice to combine different font types and styles in the same headline. So in this case, taking are less important words and making them smaller and in italics and pairing it with a nice script font and combining that together and also using the san Serif font. It really works to quell together, also tucking in words and reducing large amounts of white space between the characters and letters makes, it seems more like a cohesive design. Custom lettering is very important in local design and branding. In this case, I'm taking to script bonds and combining them together to make one unique word. Script fonts can be tricky If you don't like how a script font looks with the first capital letter, you can always take another script font and use that as the first capital letter. If you like how that looks a little bit better. So in this case, switching out that first letter makes it more readable. You can take a typical font and use it as your base font. From there, you can add something unique or distinct to make it your own type and make it unique to your brain. I have a wonderful downloadable resource that goes along with this lesson that contains an anatomy of typography poster that goes over a lot of the terms we went over in this lesson and more
4. Design Theory -Type Styles: typography and design. There's two main different types of type styles. One syrup and one in san syrup. Arabs have these little tails at the end that helped to accentuate the letter R character tariffs air helpful when there's a large amount of text that smaller, the Sarah OFWs act as accents on the character and helps the reader distinguish the letters much easier. San's syrups lack these little accents because they lack those accents and huge amount of detail. They could make pretty solid, clean headlines and help headlines really stand out. 1/3 category, two fonts, is gripped bonds, and they are everywhere. Script fonts have their own special use in design, and they can help at a more natural look with their smooth lines and lack of strict angles . And you gotta be careful script fonts because they can easily overwhelm a design piece if he used to. Many you'll notice in this example, these fonts pair very well together, probably because one is a Sand Saref and the other one as a Sarah font, rarely to two different Serra fonts look good together. The same thing goes with Cera fonts. If you have two very similar styles, they tend to compete with each other quite a bit. It's also a good idea to experiment with your font mixing. In this case, a script want works really well with a Sarah font, but it also works really well. The Sand Sarah Farm font weights come in two basic sizes. There's usually lightweights, and they're also bowled weights. And some forints have everything in between, from thin light, medium bold, a heavy railways, an excellent font that has a wide variety of font weights available. Helvetica is another fine example of a font that has a wide variety of weights available, and it gives you lots of options and flexibility when you're creating your design. That's why Helvetica is used so much and design and Gil Sands is another great example. You'll notice when you use two different weights in the same pot family. You notice they pair very well together and provide a balance to your typography. Spacing makes all the difference. There's defaults, basing what you're seeing right here, which is the default spacing between the characters. If you widen the gaps between the characters, you'll notice it starts to take on a different characteristic in this case, it can take on a more elegant look with those wider gaps. There's also tight spacing, which has its own use and design. If you want to be loud and bold, it could really get your attention, and you start to tighten that spacing. Some bonds do not work well with certain spacing. Take, for instance, lower case letters. Wide spacing can make it a little bit tough to read, and it feels a little disconnected. Opposite is true for upper case letters. They're a little bit stronger, so the wider spacing between the characters they remain strong and easy to read. I would avoid using wide gaps between script fonts. They're meant to stay at the default spacing. When it comes to spacing and graphic design. You'll notice the's three different terms quite frequently, and the terminology earning as when you set the spacing between the characters all on your own tracking is letting the computer set the spacing between the characters. And spacing is just a general term. You'll see designers used interchangeably with the above two metallics could be very useful , and they could make wonderful accents. A tallix work really well when you have multiple headlines, and you really want to have a highlight or a hyper focus on one particular word phrase, and breaking up the monotony is a goal and graphic design. Lower case letters have a softer, more gentle feeling to them and this Congar oh, along with the emotions you wanna bring out to the viewer when they look at your design piece. All capital letters can look really good on headlines, but they tend to have a more stronger feeling to them. In some cases, this may not be what you want your viewer to feel, and sometimes it's necessary for grabbing one's attention. And as you'll find with everything, a design balance is key. And having a mix of lower case uppercase and different font styles really helps to bring everything together. Find ways to shake up your typography usage by using a wonderful combination of serif and sans serif fonts together using a mix of capital and lower case. This insurers or designs interesting, unique and diverse
5. Design Theory - Serif Fonts: I hope to give you some inside on some commonly used typefaces that you can add to your font collection to help make picking fonts much easier for your design projects the one time and over 1000 different fonts installed I use only a small handful on, I suggest to keep a special list of 20 to 30 hand picked commonly use fonts you can use on projects. Not only will it help you be consistent, but also help picking those fonts out for the next project a lot easier for you and the syrup typeface category. There are several wonderful choices, obviously, times New Roman is the default Sarah Font that you see on most programs like Microsoft Word , for example. But have you heard of died Dot Baker's Ville Gary Monde. What is the difference between all of these? And how do I know when to use which one and a particular project? To better understand this, we need to go back way in time to the first uses of Sarah Fonts as we know them. Today, there are four main categories of Sarah thoughts. Old style transitional died own and slabs tariffs. These air listed in order. And when they were first used in history, Old style was used a long time ago when publishing was really just getting started. Italian printers were interested in creating a type that was easy to read for book printing , old style typefaces, air, very easy to read and printed form. And that's because there's not a large difference. In contrast, and the thickness of the lines are strokes thumb great examples of old style Fonds, our gear, Ammand Berkeley Minion and Palin Tino. The next evolutionary steps tariffs made was a move into transitional. Transitional was established in the mid 18th century, and there between old style and modern pots, therefore the name transitional. The contrast or the difference between the thickness of the lines and the characters are more dramatic with transitional syrups. Instead of harsh endings, transitional funds tend to end with ball terminals. Ball terminals are the rounded ends of the type stems as opposed to the rough end. As in this example. Times New Roman is a classic example of a transitional farm. Died own are the modern. Sarah is the next step in its history. These air, characterized by even more dramatic contrast between the thickness and thinness of the lines and the typeface die. Dot is a common and readily used example of a die down. Our modern Sarah Bondo knee is another wonderful example, and it's commonly found in design programs as a default option. Take, for instance, Camba. It has a spon available as a default selection. Died. Owns or modern syrups are highly stylized, and it's no wonder they're commonly found in high end fashion brands. Because there is a high contrast between the thickness and thinness of the lines, you could put more dramatic spacing between the characters to create a dramatic effect. Ah, lot of major brands used iDot as their typeface of choice, such as Vogue and also CBS, which is a major broadcasting company. I personally tend to pick a modern Serra font when working for high end clients, as his thinner lines seem to add a more beautiful elegance that's hard to achieve with an old style Sarah font. They can also be good for dramatic poster headlines with simple, solid backgrounds. Blast stop in the history of Sarah Fonts is thes lab serif. Very different from its predecessors, this font was originally designed to demand one's attention on poster designs. They have very thick, bold lines, with almost zero contrast Chunky, taken bold. They certainly grabbed our attention throughout the years. They even use labs Arabs on wanted posters back in the Old West to make sure you took notice. And designers use labs Arabs for the same reason we have a political statement. A slab serif might be a good way to command one's attention. Rockwell is a great example of a slab serif. The IBM logo uses a custom font very close to Rockwell Archer, an Archer Pro are both slaps Arabs commonly used in my design projects, and you could see a similar font being used by a large bank. Call Wells Fargo read a wonderful dive into sehr of typefaces. Now let's check out sans serif typefaces. Make sure you download the downloadable resource in this lesson that includes some of my favorite picks. Her certain types of styles with typography. Of course, collect your own list and make your own so that you can always have a list to go to when you're doing client projects.
6. Design Theory - Sans-Serif Fonts: San Serif fonts have a special place in design, the word sands and French means without syrups. And the past 20 years, Sarah Flaunts have taken a back seat to San Serif Fonts. San Serif fonts Tinto having more modern, clean and sleek appearance, but they can sometimes lack the subtle elegance or charm needed in a particular situation. But if you want a modern clean look than a Sancerre might become your best friend. San Serif fonts Farfan set like Sarah or tails or acting to end of characters clean and simple, these can have benefits over Sarah fonts. In many situations, they can convey a sense of modernism and minimalism. San Serif fonts originated at a much later date than its predecessor. That's because the use of digital and computer screens required a more clean and simple font. Back when computers had a low resolution display, the small details and Sarah fonts were lost, and thus the need for a more simple sans serif font. San serif fonts are fantastic for big, bold headlines. Take, for instance, is poster design. A Sarah font just does not have the high impact modern design. I'm going for the San Serif font lives perfectly and matches the overall theme of the poster. San tariffs work great for headlines, but for small body copy that comes in large blocks of text, they can sometimes get lost their great for websites and digital mediums. And that's what they're designed for. But for print projects that require large blocks of text, sometimes a Sarah font works a little better. But it depends on the mood and style you're going for. It's hard not to mention a Sand Saref, without mentioning Helvetica. A san serif like Helvetica works well with tight spaces, all sands Arabs, especially when lower case work very well with tight spacing or gaps between the characters . Madura is a geometric style of San Sarah. They tend to be mathematically precise, with its perfect round curves in circles. The Google logo is very close to for tour, although they added their own flair. Of course, don't say and Gabbana used for tour a day. My bold as their tight face of choice avant garde is a font you may have seen several times in your lifetime as you use that all lower case for the Adidas logo. Also notice that it's all lower case, and they're using tight spacing. And this looks nice and works really well. Many companies that try to reinvent themselves in the modern era will sometimes switch their front from the Sarah to a San Sarah to show an adaptation to the digital modern world . Google is a great example of this in action. I remember seeing the old Google Flint in the early days of the Internet, with its old style serif font. Of course, after a recent rebrand, they switched to a sans serif font, and it really helps to make the Lobo feel more sleek, fresh and revitalized. Now that we know some of the basic typefaces and some of their uses in design, we're ready to learn about how to space them, learn what Kern ing is and how thought weights come dramatically impacted, designs mood and feel
7. Design Theory - Using Type in Layout and Design: which alignment looks better to you? The tax using center alignment left alignment. We're right alignment. Each has their own place in layout and design. How do we determine which one to use in this layout, we have our subject matter, the woman off to the left. When designing layouts, it's best to follow. The subject matters direction. We can align to the left against the model. All of our text omits. This is going with the flow of design and makes for a compelling layout. In this example, I'm using center alignment for all of the text elements, including the website. You will notice this nice block of white space to get breathing room in between the different elements. Notice that the design commits to a nice clear alignment throughout the piece, striking a nice bounce that is pleasing to the eye. When you have a bold photo or subject matter in your design, it is wise to embrace that image and highlighted by placing the main headline text over subject matter. It is all about playing around with what feels right. This is where being subjective as a designer is really rewarded. It's not until I flipped the shoe in reverse and have the shoe tucked perfectly in the front to the left that I feel like the layout really starts to work. You will notice the shoe overlapping the E in life as the text and the photo become one. This is an extreme example of this in action, you'll notice the main subject matter almost jumping through the text and interacting with it in a dramatic way. Text and photos do not have to fight each other, but can blend to become one unified layout and design. We do not always have access to the perfect photo, but with proper fonts and typography design, we can make a design relevant and still have impact. Using color metallics to highlight words helps the type become the design it stealth, instead of having to rely on graphics and photos. 100% of the time bite space is so important. Do not underestimate its impact on the viewer's mood. Seeing a design piece, this is a great example of white space. Next one struggles to breathe, and their ward struggles to make the viewer Philip peace with beautiful guitar behind it. I'm taking this poster design and scaling back the font size to give more breathing room in white space between elements. It's already starting to feel better. I dare say that photography is one of the most important element of design today.
8. Design Theory - Font Pairing : font pairing is critical in finding the right balance between fund choices and by the end of the lesson will pair together several far types to find nice harmonies between our type . Some fonts tend to pair very well together. San Serif and serif fonts tend to work well is appearing. The reasoning behind this is when you pair two very similar fonts together in this example , Helvetica and Open Sands, which are both Sand Saref. So it's hard for someone to tell the difference between the two. But there's just enough difference where the fewer wonders why there's not more consistency between the two pots. A great rule to follow. Impairing bonds is making sure the Florence and you pair have enough contrast between them . Try pairing a san serif with a Sarah parent, All Capital Word with a lower case word. Try pairing a script font with an all bold, sans serif font. Dry pairing a script bond with a slab Sarah font Paring to script lawns together can be tough, but there are times when a particular headline or design piece can get away with it. But you have to be careful. Foreign pairing is like a dance, and it could take a little time to find the right pairing. It also depends on the length of the phrase or headline with headlines. It could be more playful and flexible with your font options, body copy and longer blocks of copy. You have to be careful not to overwhelm the viewer with too many five pairings. I like to keep fought pairings toe only 2 to 3 total. In a design piece, I try to pick a good headline font, a simple body copy font and 1/3 complementary font for variety. Make sure you check out the downloadable resource in this lesson for the font pairing guide , where I show you a couple of great examples of what pairing in action.
9. Design Theory - Working With Typography : I'm in Adobe Illustrator, And I wanted to show you a live version of how I work with typography and design, especially multiple word phrases or sentences. So have three simple words here, typography and design. And at what I want to do is kind of play around with the type a little bit and see if there's any really nice white space areas where I can tuck certain characters within each other. So I have this kind of nice place to put the ampersand here. And I'm gonna pick up font that I think really is gonna work. And I think a Sarah font, it's gonna work for this particular piece. So I'm gonna have a little bit of balance with these three words. So I'm gonna make certain ones bigger. I don't really want to emphasize the and as much. So I'm gonna make typography and design a little bit bigger and notice that little spacing right there where the P drops down and there's a little bit of spacing between the D and the I, some kind of tuck in those together so it looks like it. It's like a puzzle piece. The same thing with this ampersand of kind of finding a nice wayto almost put these together. Like I said, a puzzle piece. It feels like they belong together, nestled together. So I feel like I like the font choice. I like the overall look of how everything is talking together. I'm just gonna put this behind a simple maybe a purple background kind of find the right shade. Right color course. I gotta play around a little bit with the shade to make sure I like it. And the great thing about putting on a background you could really start to play with color as a way toe. Also diversify your type a little bit and bring out certain words over others. So now I feel like I can play around with that ampersand a little bit with the color. I'm gonna actually just taken my eyedropper tool and highlighting the purple shade I created. And I'm actually going to just make a little bit of a lighter shade of the background shades, so it has more of a subtle appearance. It's not harsh, and so it kind of fades in the background a little bit, but it's still very readable. So let's play around with a much longer headliner phrase. So I went ahead and found a quote by Dr Seuss. Don't cry because it's over smile, because it just happened. I love this little quote, and I think it's nice and long and will be able to create a really nice stacked design quote design and really help us practice our typography skills. We just learned when you have a much longer phrase like this and you need to make it all readable, large and in a nice designed headline, I usually like to start with the beginning few words, and I cut and paste different words out so I can create different lines. So in this case, I'm gonna start with Don't I feel like that's a nice word to stand on its own. And so Alcoa Head and Copy and Paste don't in its phone, um, kind of area. So I'm trying out a different bold font. I want to do a mixture of sand. Sarah and Sarah fonts also want to make sure I mix my bold fonts and counter that with Cem lighter fonds. So we're gonna be doing that throughout this entire, um, little lesson we're doing here, so I don't really like this apostrophe. So I'm changing that apostrophe out toe one. I think it will be a little bit smoother or nicer with what look we're trying to go for. So I'm gonna grab the because word and create a separate line for that. And we're gonna continue to create separate lions until the entire phrase is created. And the reason I do that is because I am going to shake it out. But bold and light and metallics and I wanna have all this is separate text boxes so I can have greater control over that. So right now I'm speeding up the process by three times the normal speed that this was filmed in just so I can show. It's a very tedious process of cutting and pasting words out of the main phrase that I think will go well together. So I put Don't cry because and then it's over on its own line. And right now I'm playing with the word smile trying to find the right spot. I really wanted to accentuate this because I think that was that. That's the main attraction to this quote is the word smile So now you're starting to see the quote come together as a nice, blocked out design. So I have everything kind of separate. I can start to play around with the font types a little bit now that they're all separated . It's not one big block of text. So good to see me continually play around with this. I've actually spent this up Teoh another fast, three times the normal speed because it does take a little while to play around. And I'm kind of adjusting the because a little bit there's two because words have made them lighter. So that counters all that bold font and you notice I'm trying to experiment. Actually separated. Don't cry in two separate words, so I could try to maybe have instead of having it a big block. Gonna having this nice slow from left to right toe left to right as it goes down the page and actually made cry the same type as smile. And that gave me more opportunity and more white space created by that negative space. I'm able to kind of took some of those other words inside. So if you notice between the why and the I to the left. I'm able to put because it's over in that nice little space and that that really works well , so I'm gonna keep going with that. So I spent another 15 minutes finalizing this. And this is the final version that I came up with, and I ended up actually doing a two toned so I can have it more readable. So I did the don't cry because it's over white in the smile because it happened a little bit darker color. That kind of match is the orange assisted darker shade. So I felt like all of that kind of red Better I tucked in, of course, are Dr Seuss here at the bottom, right. And everything seems to flow from the top left all the way down to the bottom. Right? So hopefully this little project, it didn't about 15 to 20 minutes, just taking one kind of longer sentence and kind of creating this little quote box. This is the kind of stuff that you'll learn how to do over over practice and time. And because you could have a solid foundation of typography, you're gonna be able to kind of put this all together nicely
10. Design Theory - Large Blocks Of Text: women in design right now. And ah, wonderful program. Of all the three programs, illustrator photo shop and is designed in design gives you the most control or large, lots of texts. That's why men in designed today. And so we're gonna kind of go over. How do we, uh, manage such a large block of text and has a designer? You're gonna be given way more text than you really need to have. And your job is to make all this text readable, look, pleasurable toe look at and well crafted it designed hyphenation. Zehr important me A very narrow Collins of text. But most of the time, clients do not like to see hyphenation unless they're absolutely necessary. So one of the first things I do and I have a big block of text like that is I just unjust. The hyphenate box. When a large block of text stretches across the entire page, it could be hard to read. You do not want the reader to have to shift their eyes such long distances from left to right, it gets tiring. This is when the use of Collins is very wise. Having the proper alignment is everything it could make a big impact on how your block of text looks Right now. These two columns air set toe left alignment only. But if you play around with your text alignment options and select justify all lines specifically justify with last line line left, the text will be flushed down the left and right sides. Let's go to remove that jagged appearance the right side that the left alignment option has . This could really polish your design and layout, so use this type of alignment often. And when he had more than one column, just make sure your columns at the bottom line evenly. Using headlines to break your big block of text up is a no brainer. Balancing this block of text with larger text blocks not only adds the variety of element but makes it visually interesting and more likely to be read. But more important is adding sub lines or bylines. Toe add additional divisions to the text blocks. This helps the brain break down the text box into much more manageable blocks of information, and therefore they're not overwhelm you will notice. I'm constantly adjusting the leading, which we learned about earlier, so I could have the right amount of spacing between headlines, sub lines and paragraph blocks. I always see headlines with too much leading in, and there appears less cohesive and polished. Find additional ways to break up your text box visually, but I like to do is find important quotes or crazes in my block of copy and make them a bold waiter. Talents. Make sure that your paragraphs are never too long. One way to break them up is to do a pull quote. This adds another visual element without having to use a photo notice the generous, even white space on either side of the document. This not only is important for publication requirements, but it also helps the overall page breathe and feel open. For the majority of my design career, I've had managed large blocks of text given to me by clients. I cannot talk him out of cutting copy. It's my job to make it look great anyway, and sometimes it's a tough job to do so. Understand basic text layout principles so essentially
11. Design Theory - Color Wheel & Harmony: This is the color wheel, and you may already be familiar with it from seeing it before. But we're going to work through all the terms, phrases and different ways to God arise. Color and graphic design So you know the difference between Hughes tones, tents and shades. There is a downloadable cheat sheet that lists all the terms we use in this lesson, so you could study it and more detail later on. First of all, color can either be warm or cool, depending on where it falls on the color wheel, with warmer colors being your orange yellows and reds and cooler colors being your greens, blues and purples. The three primary colors are red, yellow and blue, and you can use these three colors to create what are called secondary colors, which your orange, purple and green, for instance, mixing red and blue together make up purple and yellow and blue together. Make green, so the term color this term is used to describe any color we see whether it's a hue, shade, tone, her tent. So what is a hue? This is a general color family are color belongs to, and you'll notice the absence of grays, blacks and whites. This only includes color. He was coming a few main categories. Yellow, orange, red, violet, blue and green. If you're looking at a maroon color, for example, you would say it has a red hue, and this color, for instance, has both a yellow and a green hue. You may have heard the term tent along with the term shade. A tent is the presence of a hue in this example, a green hue with Onley white added to it. The more tent or white you add to the Hugh Greene, the lighter it becomes, and shade is just the opposite. With the addition of just black to a single huge, in this case were increasing the shade of purple to get a richer, darker looking purple color. A large amount of shade or black added to a color could make it look almost black, but could still maintain its base. You like, in this example of this rich, blacking looking color with a little hint of the hue blue. And lastly, not to overwhelm me with new terms. But there's something called a tone as well. A tone is the same thing as a tent are shade, but it's with any hue, and the color gray added to it, as graphic designers color harmony as what we can really find useful for helping us find color combinations that work well for our designs. Now that we know what tense shades and tones and hues are, we could talk a little bit more in detail about how to create different color harmonies. Here are the main color harmonies. First off, there's analogous colors these air colors that are closest together on the color wheel, and since they're so close together on the wheel, they tend to have less contrast and be less dramatic and appearance, giving the color palette a nice, calm feeling. Take, for instance, this nice sunset color palette. They're all fairly close together on the wheel, spanning from red to orange. Complimentary is the next one, and you may have heard of this one before. These Hughes exist on the opposite side of the color wheel, and these colors have the highest amount of contrast to each other, making it tricky to use at times. The most commonly seen complementary color is green and red, most often associated with Christmas time and another one. It's purple and gold, a popular color combo for sports teams, and it demands one's attention. Split, complementary or some use the term compound harmony is the same as complementary colors, but with one huge splitting into two nearby colors instead. What this does is make one color less dramatic, giving you an easier color palette toe work with with a little bit less contrast than pure complementary colors. The next color harmony we're going to review is monochromatic. Monochromatic colors are a single Hugh on the color wheel but contain different shades intense of that same you tense and shades or the addition of white and black to a huer base color. In this case, we can see monochromatic color palette for a hue of the color blue and notice how some of the colors are darker with the addition of black and others at a wider, lighter color to the blue. Monochromatic colors work really well because of this, and they all contain just one. He were based color, and that means this is a very flexible color harmony as you don't have to worry about multiple color hues. Next up is the triad harmony, this harmony contains three colors that are evenly spaced around the color wheel. This is the most vibrant, strong color harmony of the bunch, and they could be tough to use of. All three colors compete with each other. I find this vibrant color option or color harmony more useful for designs that need a more youthful, energetic option like a Children's event. And not all three colors with this harmony have to be pure Hughes. You can add a little bit of shade, which is black, or tent, which is white, or tone, which is grey to one or two of these colors to tone it down and to make the colors a little less vibrant. The key to this color harmony is toe. Let one or two colors lead the way and make the third color less strong when choosing colors for a brand local or design. Finding out which color harmony works best is a great way to get started, and there's a great website called color dot adobe dot com, which has been featured throughout this lesson, and it's a free place to find. Try to find out what color harmony might be right for your next project. you can explore different color trends, and you also have the ability to upload a photo and find the perfect color palette by using that photo as an inspiration.
12. Design Theory Intermission : You've had the chance
to work through several typography
theory lessons, but I wanted to
take a quick pause to let you know your options. If you're enjoying the
design theory section, I would encourage you to keep moving through
this section. There are some really
great color theory and layout lessons
that lie ahead. There's even a new grid
guide resource that you do not want to miss for
those students who are feeling a little
more eager and you're ready to step
into some software and start doing some
projects and learn our first software in the
course, Adobe Photoshop. Those students can feel free at this time to skip to that
section of the course. If you do decide to
start diving into the software about now
and the project sections, I still encourage
you to come back at a later date and
finish up the rest of the design theory lessons as they really help build
that design foundation. When we start to put together more complex projects toward the middle and end
of the course. If you have a moment, I would love it if you left a review. Reviews help keep me going. I also feel free to reach
out anytime with suggestions you might have now that you
have your popcorn ready. Let's keep going.
13. Design Theory - The Psychology of Color: But I think psychology of color and design. There is power to color and design and their emotions. That air sparked when we view certain colors and colors can give you a sense of calmness. They can move or spark on motions of happiness and joy. Colors can remind us of something simple from childhood or make us feel hungry. How we pick and choose. The colors we use in design are greatly influenced by the type of emotions you want to bring about in your viewer. I created Stan Livable Resource called the Psychology of Color Chart. It list common emotions associated with colors, So taking a look at this chart your warm colors, reds, yellows and oranges are going to bring more energy and vibrance to your design, with reds being especially powerful. This is why warmer colors seem to be harder to use on large area designs. Because of this energy and draw it has especially reds. There could be a good reason to draw your eyes to a design to gain the attention among the crowds. Red is a great color to use to draw that attention and increase alertness. Red is commonly used on buttons and called actions toe. Pull your eye toward that area. Redd's can easily be overused. Used too much in a can drown a design in too much attention. Redd's tend to increase your appetite, so there's a good reason why fast food restaurants tend to favor red in their logos and adds Read should be used intentionally and with a purpose. Reds can also evoke a response of anger and fear a swell. So keep that in mind when considering using this attention grabbing color. As we move along the color wheel, we run into oranges. Oranges keep some of the enthusiasm and excitements of red, but also starts to combine the energy of yellow. Since they take a little bit of the edge off of red, you can find more ways to use orange and your designs, but also keep that same bright energy. Oranges work wonderfully with cooler colors like blue. They tend to be compliments on the color wheel, and it shows as you see orange being that bright highlight in the sea of cool colors. This balance works well in design because it provides a sense of contrast now, as we continue to move along the warm colors into yellows. The energy is undeniable with yellows, but it can also be one of its biggest weaknesses. Along with pinks, yellow is the least use color and design because it could easily be overused. But it could be a great compliment color alongside other colors where the Ellard other colors feed off the brightness of yellow. The only downside is yellow can be hard to see and read when printed, so I try to avoid using it with type, unless it's very intentional and very readable. Yellow does have a place in design, but wield it carefully and sparingly. This color can evoke happiness and give off a youthful vibe, and it might be why you commonly see it used in Children's products. Yellows can evoke anxieties as well, and it might be why you don't see a lot of yellow used in the health care industry. It's now time for green. We start to move toward the cooler colors, and there's a reason why green is the color of choice. For many cleaning industries, Green equals clean and fresh, but also reminds us of nature. It reminds us of fresh spring days when this bright green leaves start to bloom on the trees after a long, dark might winner. Green can also be used heavily by the financial industry to show positive gains on wealth and status. We see the stock market highlighted in green. We know it was a good positive day on the market, and there's no wonder why banks common lose green in their branding. Why not remind viewers of those positive increasing stock market days? There's no wonder that alongside Blue Green is one of the most commonly used color palette choices and design Scion as a unique color, not as commonly used to some other colors, like green and blue. But it combines greens organic, clean feeling with blues, calm feeling to create its own unique blend of the two. And you may commonly see biotech startups use science to show optimism. Blue is most commonly used color for brands worldwide, and there are many reasons why, because it evokes emotions like stability and calmness, and banks love to use the color blue for that reason, especially banks losing trust since the 2008 recession. You also see it used by industrials and those in the manufacturing industry, and you see it. Also in the health care industry, Blue is a great color to use for large areas of the design, like a background, for example, especially ones that have shades of blue. Blue can easily stand on its own, with less of a need to depend on other colors to tame it down. Blues chill nature makes it one of the most versatile colors on the color wheel. Next, we move into purple Purple mixes, a bit of stability and calmness of blue. With the compassion and vibrance of pink, it starts to take on a bit of warm tones, giving it a little to kick. Purple is commonly associated with royalty and sophistication. It's also commonly used in the hospitality industry for that very reason, they want you to feel like royalty. We also see used by the health care industry as well has a sense of love and passion that mixes with this ability and trust of blue. Purple is another color that can easily be used in larger areas of the design, yet add a little bit of that energy from the warmer tones. Purple is a rich, it's silky X is luscious, and when used right in a design, it can feel wonderful. Purples air Having a bitter renaissance in the design world with a huge resurgence of its use in youthful, vibrant brands. You see purple used as duo tones or Grady INTs and as overlays on photos giving photos a richer retro vibe, purple and vibrant yellows or compliments on the color wheel. And you can see that combination of energy happening every time you see these two colors together, purple can take up more space in your design more than the yellows, and your yellow should always just play. Ah, highlighting role. Being used a little less often toe highlight certain areas of the design. Pinks are a bit tough to use because of their strong past association with femininity, but don't count them out too soon. As that stereotype is slowly evolving and changing, pinks can remind us of romance and love. They can also remind us of a simpler time when no one was afraid of wearing pink like my favorite decade, the eighties pinks air similar to yellows, and that they can be hard to use in large areas of the design. Lighter versions of pink tend to do better with this than those hot, bright pinks, which have the same problem, is yellow because they're too strong. Pinks work best in tandem with calm encounter colors. Take, for instance, this example where the pink draws your eye, but the CAA cooler color calms it down just enough to take it all in, and now we come full circle back to reds. Feel free to download. This resource is a guide when thinking about how the emotions of color affect your color. Picking decisions when doing logos and creating brand color palettes. This should come in handy outside of typography. Color can move mountains when it used right and designed. It could change your design from dull to inspiring. With a few clicks of a button, use colors wisely and carefully and with intention as designers, it takes time to find the right color combos, and the best way to practice this is by creating your own color combos. Try creating a series of your own color combinations. Try just combining two simple colors, then try three and then work your way up to four. Think about how the colors you put together and make you feel Remember that contrast and color can work well with a cooler color and a warmer color together. But also analogous, or colors that are similar in you can create a common harmonious effect. What emotions do you want to evoke with your design? How does changing a color and your design change how you feel about the design?
14. Design Theory - Photos and Design: one of the most impactful elements of design is the use of photography. Photography sets the tone for a design piece the way Lee Cropper images can change. The viewers focus as well as changing our moods. A photo with unique angles and subject matters could make opportunities to use that to our advantage, with headlines that seem to interact with their photos. Photos that draw your eye toward a call of action or headliner wants to look out for voters that seem to work together with typography and headlines work really well in advertising your design. This example. Using top down photography gives us a chance to use the white or blank space inside the photo as a way to draw the viewers eyes onto the important content in text. It also provides unique areas to place our content that would otherwise be playing or boring. A vivid and colorful photo can have so much to a dull design. Going from full color to black and white can have its own dramatic effect. Changing the tone from typical too intense. Adding a single tone or do tone color could increase his dramatic effect. This popular effect is often seen an instagram filtered. This is a great example of this effect in action. The full page ad a designed using that purple single tone shade against this bluish green really adds a nice contrast between the design and the photo. A full color photo used in this case might distract the user from another wise, more powerful product photo we want the user focus on. We want our photos to give the user an emotional response. Either be a positive negative. Calming are energizing your photo choice. Makes a huge difference on whether the overall emotional impact of your design will work with your desired purpose for your design, to see a product or to motivate a call to action. If a strong emotional response is required, then profit and help us achieve that response. Simply zooming in close on a human face can change the way we interpret that subject. Our photo choice contain what would be an ordinary image and make it much more extraordinary. Attention grabbing we confined collar inspirations and the photos we choose for our design , setting the tone for a nice color, Palin harmony or design, branding and even logos. So how will you use photography in your future designs
15. Design Theory - Layout & Blocking: How do you create a nice energy between font photos and design elements? What makes a compelling layout? I created a quick flyer, her gym with some generic promotions. What makes this layout work well? First off, it starts with a large, obvious headline or main attention grabber. It is a nice, clean Santerre bomb with a little spacing between the characters to add a little breathing room. It is obviously the main, and she'll draw of the flyers. It is white, so it has the highest contrast color against the dark background of the entire ad. Try to make sure your headlines air not too long. It's nice to break them up and put the remaining not as important part of the headline in a smaller sub line text. I brought out the green to connect it with the bottom of the piece. So it seems like there's one consistent color scheme. A powerful photo always works wonders. In this case, it's more of a dramatic black and white photo with a little bit of a three. You filter once again to tie in our colors. It is not larger than the headline, so it provides a nice balance for the layout. We have a good bit of information to deal with one small flyer. It is best to have a way to divide up that information, so it's not overwhelming. You're busy. I highlighted some of the text with Green that I thought was more important anyway, to help the viewer break down. A lot of information will help dramatically with the overall feeling of the design, and color is a way to do that. We have an obvious called action. It is their main theme color of green, with a nice high contrast black their spacing between the lettering. So as a chance to stretch further across the bar and have some breathing room, I have now shown the viewer where to go for their next steps. You do not come up with this kind of layout on your first shot. It takes him playing around with the main graphic elements. To find out what seems to click, I struggle with the right headline flaunt and placement for a while until I figured out that it was the photo that needed modified. Once I kind of tweak the the photo a little bit. The headlines seemed to really fall in place. This is another mock up advertisement for a local college notice, the nice, readable headline that seems to pop out on the white bar. I made sure the photos in the collage all had balance. Using the right combination, people shot on object shots, tight shots and wide shots and even use color to add contrast to certain things, too. Notice the even white spacing between the elements. I use the font from the college logo in the headline to provide a nice font things and to provide consistency throughout the advertisement. Also, as I mentioned, the typography lessons raised a strong fair. Fox compared it with sand. Sarah for contact information for those lines did not compete with each other. In the end, I decided to add a little angle to peace, to shake it up a little bit and make it a little extraordinary. The white space provided for the local on the bottom is really nice and helps accentuate the colleges name. In the end, this is the design that I would send my client. It also helps if I spell the word college correctly. I may be a good designer, but I am not a good speller or a copywriter. So run this stuff by someone else, always. Finally, I am showing you the process I went through to break this layout. As you could see, I really struggled with the right placement. On balance for the headline. I ended up making the headlines smaller, so it ended up not repeating with photos.
16. Design Theory - Layout & Design: lay out and design. What is the experience when you view a design piece? Are you overwhelmed over joyed excited, calmed may be turned off are not sure what to make of it. Often, the layout of design makes the first impression on the viewer. It can decide whether designs worth exploring more for a few additional precious seconds, or whether it should be ignored completely. As a person in charge of communicating a large amount of information to the viewer, your job is to organize it in the manageable, digestible way. You could prioritize certain parts of the layout simply by its position and composition of elements. Do we want a Prioritize the photo? Are we selling a product then? Yes, the photo might become the mainstay of the design. Do we want to deliver a strong stop in your tracks? Message, maybe with a straightforward call to action than the way we lay out. Our type. Without photos might make that message more clear. We see bad examples of lay out all the time. These mostly consists of poorly place photos. Too many photos are awkward, photo cropping, thes bad Examples can also include too much information for the viewer to read, often discouraging them from reading more. What we need to do is entice and lead the viewer on a journey through our design in a planned order. Take, for example, this concert flyer. We want to set the mood and tone for the peace by having the right photo. We also want the photo to be the first thing they see. Next, the band name would be pretty important. So this needs to be the next thing in the priority list in terms of layout. There is no point in the viewer reading this fire if they cannot attend on the concert date . So having that be the next prominent item in the layout is key and showing them what they want to see. So they say, Where do I buy tickets? Let's see right after the date. There is key information there. It is easy to find two. Because of the highlighted box. There is some smaller text that is not so important, but they can still find and read it if they are still missing. Information they're curious about. Layout can communicate emotions just like photos and typography. Having a layout that is uniform and rigid with perfect alignment can communicate a sense of professionalism, cleanliness and tidiness. Perfect for a professional organization or bang, for example, white spaces. The spacing between elements having a large amount of white space can continue this feeling of openness and express a feeling of calm. White space that is tied can spark emotions of anxiety or entice of sense of anger. Urgency. It generally does not work to have a little white space to run your elements. Take, for instance, is graphic. With enough white space, the design has a chance to breathe. It just feels much better when I see a design work that needs to be tweaked to revised most of the time. It's because there's not enough white space or breathing room around the margins of the peace or the outer edges and print design. It's always safe to keep text and important information inside the margin area that goes around a given design peace not only for it to be printed properly before to feel clean and professional. The balance or overall composition of the design is very important and maintaining these emotional responses if the balance of a design is off, it may not evoke your desired response, and that's why it's important to maintain the right balance between photos, type and other design elements. This is known as composition. Take, for example, this poster design. The layout contains five photos and a few lines of type, but I seem a little bit lost trying to find the focal point of the design. Where should my I look? Where should it focus? Which photo is more important, it seems to lack a sense of purpose and meaning and seems disorganized. But with a few tweaks, we can change the design from confusing too simple and striking. With one or two photos, we can change the entire feeling of the design. Now. It's simple, precise, with a clear focal point. It communicates a clear message without overwhelming the viewer. Focal point is an important aspect in the layout of a design maintain one clear focal point . Having two competing focal points makes it hard to digest the information as the viewer does not know which focal point to draw their eye on first. So what makes an effective lay out? How do I know when to make a simple layout simple or complex? How do I know which of motioning to look? We're going to discover that the next lesson, so stay tuned.
17. Design Theory -Effective Layouts: the good, the bad and the awful. Sometimes it's easier to learn designed by studying why bad examples or bad than looking at good design? Sometimes. But why is this? Because when we sit down in front of a bad layout or design, we start to discover what we don't like about it. This, in turn, helps us find out what not to do in her own designs. We started developed a viewer empathy. I'm gonna take this disordered, lay out and let you look at it for one minute after viewing it for a little while. What suggestions do you have to make it better? From your perspective, having empathy toward the viewer is highly sought out trait. In a designer, there is a science beyond good layout and look over some of those techniques in the next lesson, like using grids and the golden ratio. But there's also a feeling that you develop on whether layout works or not, and being able to hone that ability. It takes time, and it takes practice, trying out and experimenting with lots of different layout options. For a typical client project, I might develop two or three totally different layouts. I'll then pick to layouts that I think have the strongest potential and send that to the client for review. Giving yourself and the client different layout options helps to spark new ideas. Sometimes the layout that's chosen by the client is one of the later layouts that I developed. After spending an hour or two with the design, it takes time to work out where elements should go. It's a complex puzzle. In your job is to place all the pieces together in the most compelling manner, while still maintaining readability and delivering information. That is the art of design, not the science. So let's take our bad example of the layout design and make it better. First of all, the three dinner courses air divided in this layout, we want to make sure everything that could be grouped together in a logical fashion is grouped together. Also, there's just too much information going on here, and I'm not sure where my I should focus. This needs a clear focal point. Perhaps the use of a photo may help here if we can organize the Texan a better layout and may leave us more room for a photo and right Now there's zero room, the font choices air all over the place, and I don't mind having a San Serif on The Sarah fought in the same design, but these seem to be random and haphazardly chosen. The join us and the fourth to remember lines seem to be competing with each other. I think join us may not need to be, is large and could be a bit smaller, maybe even a part of the four to remember phrasing. So combining those two into one headline and making join us smaller will really help clean this up and give us more room for a photo. The social media icons are an eyesore here. Everyone knows companies have a Facebook page, or at least they should. So let's make the social icons on the same line with the other contact info and make them much smaller. Anyway, we can reduce the focus on so many different elements the better. The dividing bar here does not seem to be doing too much as it's already a solid blue box dividing these content columns, so removing extra stuff like this will be critical to simplifying the design. There's no type hierarchy, no single headliner area of body copy. So we need to make sure we add some type hierarchy while we redo the layout of the poster to add a nice sense of structure. And lastly, there's too many stars competing with the other layout elements. Let's reduce the amount of stars but still have some remaining to go with our Fourth of July theme. Now that we adjust her lay out quite a bit, let's see how the changes have affected the final result. First of all, the courses air Now in Order and Reedus such notice the newly added type hierarchy There is now larger font size for the course number and even smaller size for the course name and the smallest but still readable size for the course descriptions. I noticed the dividing lines between the three courses. This helps break up that large single blue box into different sections. Also notice how the lines air not too thick or too white to take away from the text elements around it. The combining of the two original headlines into one has really helped us give us room for a photo, but has also made those elements the main focal point of the design instead of having so many different focal points. Lastly, the contact and social media icons are all together in one line, making them visible but not taking away from the main theme and call the action of the design.
18. Design Theory - Intro to Grids: Oh, Grid's air amazing guides for designers, and they can come in many different shapes and sizes. They allow us to set up even spacing between elements. Take, for instance, he's three boxes lining them up with my I I can get kind of close, but lighting it up on the grid system really helps make them look concise and structure. Humans love order. It's oddly satisfying. There are thousands of videos on YouTube that show this is a real reality. There are countless memes and videos on YouTube that outlined the fact there's just one thing of out of order. It just shakes us to the core disorder does not seem to resonate or provide a sense of balance, which we humans often create because their own disordered lives. So how can I, as a designer, help provide this wonderful sense of balance structure and satisfy this craving for perfection? Will grids, Of course I do often what is called blocking. When I try to find the right layout for design, I will turn content into blocks. Then I will roughly arrange those on a canvas of the right size. Take, for instance, is poster. I need to have three blocks of information, each with its own header. I also need to have a website and a call to action somewhere toward the bottom. Most of this content I received from a client, so it's required information that cannot be changed. It's my job to show this all in some sort of nice and pleasing order and structure. I also need to be able to entice people to read this content. I'm going to need a larger headline type, perhaps a photo to I place this rough blocked out design on the grid, and I start to play around with spacing. I make sure there's even spacing between the two columns of information. Also, make sure certain spacing it's consistent throughout the design, including similar spacing between the elements of design. You could see what it looks like before and after the after looks much better, thanks to being able to block this out, using grids and blocking out my design. First blocking is such a helpful tool when creating your layouts. There's also something called the golden ratio in layout design. The golden ratio will be talked about a little bit later in this course in more detail but it's the ratio of 0.6182 point 382 meaning if I had a one inch or one centimeter square and I applied their golden ratio to it, the top portion will be 0.618 and the bottom 0.382 inches centimeters. Whatever measurement you want to use or I can flip these blocks around as long as it maintains that ratio of division, the golden ratio is naturally pleasing to the eye, and it could be seen and echoed throughout nature. Take, for instance, this layout if we apply the golden ratio made the top portion of the design with the photography and headline 0.618 of the total height of the design and the bottom portion 0.38 to the height of the total design. It seems to be a natural and pleasing balance of elements. We could take this a step further still on Replicator ratio to create the classic spiral you see when you Google or research the golden ratio. The spiral is made up of larger and larger rectangles containing the same ratio. We can apply the golden ratio spiral toe layout, designs and place our focal points in our designs and the more densely populated parts of the spiral, the inner spiral portion, and leave less important stuff toward the outside of the spiral. The golden ratio applied. The layout design is pretty neat to study. It's something I use a little less often in my practical real world projects. But I wanted to show you this so you can have just another tool you can use and basis for understanding of why certain layouts work over others.
19. Design Theory - Guide to Grids: this lesson is dedicated to going into more detail about using grids in layout design. You can download the 11 page grid guide. Pdf resource that contains all of the content will be going over in this lesson and more. Let's first talk about the basic anatomy of a layout grid. First of all, margin. It's the thick border that runs along the outside of a greater document. Wider margins provide more breathing room for edges, bins and folds and provides a nice white space for the overall content. Columns run vertically downwards from the top of the margin to the bottom. These were very helpful and magazine and editorial layouts to find placements for paragraphs. Headlines and text rose contain the areas that run horizontally across the page gutters or areas between the columns and rows. It is nice to keep these the same with throughout to maintain consistency in your design. A more less known term flow lines, flow lines or lines that run horizontally across the grid, and they can help the reader follow. Content. Modules are the boxes or areas created by the vertical and horizontal lines of the grid. You can have big module boxes and have a big loose, open grid. Or it can have very tight module boxes and have a lot of them and have a very tight grid. Spatial zones consist of several modules to create blocks and content areas to give you a guide on placing photos and blocks of text. This could be large or small, depending on the content, so grids come in many different varieties and flavors and will review four of the most popular grid categories. A manuscript grid is great for books and long, continuous placement of text. Manuscript layouts consist of one centre block that divides up the page and creates a clear margin and text area header and footer. This is the most basic form of a grid, and it's found in many word processing documents as basic guides for creating margins. Column Grids are perfect for magazine layouts and spreads, or anything that has a mixture of photos, quotes and text column Grids allow you to create places to break up the type and photos. These could be 234 or even 12 columns, depending on the complexity of your layout. Modular grids The most flexible grid available. Modular grids allow for lots of mixing of type photos and design elements. You can have a lot of variety with which modules air chosen for element placement, these air great for posters and fliers, magazine covers and designs that require more creative arrangements. They can even be used for arranging a list of items and photos that need the same spacing or have the same order. Hi arterial grids. These air mostly used for the Web where fixed grid layouts will not work. The gutters and margins can change in size throughout, depending on the space of the browser. Higher career old comes from the word hierarchy, meaning order. These grids follow in order of importance, with the most important items larger and toward the top, with less important items further below and smaller a perfect fit for a website layout or mobile app design, where the most important items need to be shown higher in the layout. So what are some tips and tricks to properly using a grid and layout design? Well, first of all, headlines use grids to find placement for headlines and design elements. Also make sure to use the margin. Remember to feel free to extend unimportant items off the margins, like parts of photos and non text design elements. This will help the peace feel a little less boxy and feel more alive and make sure that vital tech stays out of the margin. Remember, you can go vertical, and you can go vertical with text to add contrast with other horizontal elements, and you can use the grid as a guide for placement. You can break up large bodies of text. Try adding a quote to break up large text areas. You can also use more contrast to your type by creating smaller headlines at the start of these larger areas and use the grid to find the right placements. Feel free to play around with overlapping elements. Another way to break up a boxy layout is to overlap elements using the grid like this quote box, overlapping the yellow photo. And remember, layout design extends to digital stuff as well, including Social Media Post. So this is a simple social media graphic, and it's a simple modular grid with some margins. I'm using the grid not only to find out where to place the elements, but where to frame certain parts. The elements, like the central part of this logo or the person's face, as seen in this example and beyond. Layout design grids can be applied when you're doing low. Good sign, and we'll be doing lots of this later in the course and in future lessons. It can help you find the right spacing between the symbol and the text. It can help you find the right balance between the text and the symbol, and grits can also be used in branding. Wider margins can create an elegant, ample whitespace, giving the design a very modern, structured look. And grids can be used for brand materials to make sure there's consistent spacing throughout. It could also help with placement and spacing between text and elements. And since we're talking about how to use grids in all aspects of design, we can ignore Web design and grids for Web above. You'll see a classic 12 column grid layout with a small gutter in between each column. This is traditionally seen and desktop website layouts, and this grid is a default grid and the adobe app called Adobe X'd, which is commonly used for website and mobile app, layout design and a slowly replacing Photoshopped as the app of choice. For this task to the left, you'll see a common four grid layout for a mobile APP design. These columns can help guide placement of the beginning and ends of elements, photos and even buttons. They can even assist in helping you know the placement of multiple columns of information like in this example to the right. Remember that grids can be turned diagonally. Who says grids have to be perfect left, right up and down? What about turning him diagonally and creating an interesting spin on the grid? I'll have several lessons later on editorial design layouts, but you can also use it when creating these layouts. Not only do they help keep both sides of the spread of a magazine article, for example, cohesive, they also help keep even spaces between the gutters and provide a professional organization of large amounts of information. Lastly, remember, grids are not a requirement for having a strong layout design, but they can really be helpful in guiding your layout decisions. Make sure to download the grid guy to see helpful examples of grids and action. The projects we work on later will use grids of all types for logo design and layout design . And yes, they'll even be projects that break the grid are not used. The griddle. Remember, these are all just tools to help you make design decisions, but the best decision maker of all is you.
20. NEW! Design Trends in 2026!: Welcome back, everyone.
Today, we're going to talk about 20:26 design trends. I've been talking about this
for many years in a row, and we covered some fantastic
trends over the years, and 2026 is absolutely
no different. It's gonna be probably one of the most biggest years
in the design world, as our industry gets
gobbled up by AI, and we try to counter it. So what will be
different this year? What will be the big
themes and styles? So first, I'm going
to cover some of the styles that
might be popular in the coming year and
then shift towards some overall industry changes
and trends that I see. So the company Kittle has a
2026 design trend report, and I'm going to use
that as a little inspiration for talking about some of the styles that are
going to be popular in 2026. So the first one
we're going to talk about is naive design. So think about children's
drawings, doodles. Something that's naive
is something that's very innocent and youthful
and childlike. And this one surprised me a bit. As a professional designer, one might be taking
aback by using childlike drawings in your work, Typography and illustrations. It's our job to make things look really good
and professional, and doing childlike drawings and doodles doesn't seem
very professional to me. It was a surprise that this
was a 2026 design trend, but naive design embraces in perfection,
awkward proportions, and visible human
error as a way to reintroduce warmth and
individuality into design work, something that's
kind of lacking in today's super polished
brand visuals. It's a counter movement.
And in years past, we talked about
counter movements. This is a history of the dominant style movements
in graphic design, and it's like this swinging pendulum from one
extreme to another. And this is just
one of those swings we had something super polished. Now we're going to do
something completely opposite, just because that previous polished trend was
being overused. We want to counter that
because it's too saturated. Humans love do things to say, Hey, I want to be different,
I want to stand out. So we're constantly trying to
stand out from one another. And that means we swing back
and forth between this. Naive childlike designs is a trend to counter a response to that severe rigidity that modern polished brands have
leaned on for too long. This playfulness will be ways
brands can remain authentic and relatable moving forward and not being this super big, popular multibillion
dollar brand, maybe you're showing
a little bit more of your human side. Another trend on this report
is a punk grunge return. And, yes, the 90s are back
in the best way possible. And I was a teenager in the 90s, so I kind of I was
there for it all. The 80s, they had their time. They had their comeback
in the last decade or so. So now it's time to move up to the next decade
in the timeline. I do notice that we tend
to relive past decades, about 30 years after
they happened. Think about bell
bottoms coming back. Well, that was
like 30 years ago. So this is due to previous
generations coming of age and wanting to rekindle
their past nostalgias. So think about a resurgence
in retro video games. And I see now Playstation, like the original
Playstation that was popular in the 90s
is now coming back. In vogue, just kind of that
retro early 90s style. And so I think that's
going to also be echoed in our graphic
design styles. So once again, there's a theme. I believe we see this
trend push forward as a pushback to over curated,
overproduced visuals. So authenticity over perfection. So you're seeing that
theme over and over, is this pushback away from
rigidity and polished work. That means grit,
noise, rebellion, and the visual
tension of brokenness to reclaim authorship,
voice, and personality. That was a mouthful, saying, We're rebelling.
We're countering. We're being punk rock punks and just trying to just mess up a design on purpose to bring a layered
authenticity to it. So it's messy, it's loud, busy. I think the keyword is layered. So you're going to have like
an 80 layer Photoshop file that's probably going
to be normal with this. Lots of texture, newspaper, ripped kind of corners. And so everything in 2026 design needs to
feel alive again. Now let's talk about
distorted portraits. And it lets designers
express anxiety, conflict, trauma,
and multiplicity. Something a clean portrait
that's unedited cannot. So distortion becomes
a visual language for complexity and critique. It's perfect for 2026 is
cultural climate where division shows up everywhere in politics,
our visuals, everything. So design has always
reflected the times. In the early 2020s, we chased realism from
three D renders to cinematic lighting and AI
generated photorealism. Everything was polished
to a mirror shen, but as AI image
generation became mainstream and it's continuing
to become mainstream, that level of perfection
stopped feeling aspirational. It started feeling,
well, sterile. A warped face doesn't
just look cool. It feels. It represents fragmentation
and emotion and technology. It's humanity showing up in the glitch and trying to
look beyond the chaos. A few years ago, I studied the popular glass
morphism effects and my 2020 design
trends class I did, and that became popular due to three D programs like blender
becoming more accessible. I can see something like
glass morphism evolving with this trend to produce distortion through see through
textures and glass. Of course. I know you're probably sick of
me talking about it, but AI will be a big theme. So AI assisted in
hybrid workflows. Yes, even if we don't like it, AI is coming to our software programs one update at a time. As of writing this, the 2026 Photoshop update
has not been announced, although they usually did
that in late October. But you bet it's
gonna be full of those freakin' AI updates. Why? Because the world is
spending billions of billions, if not, maybe trillions
at some point, on getting AI out to every
software imaginable. And graphic designers, we're
stuck in the middle of it. Adobe is already adding Google's nano Banana AI
image generation tool inside Adobe Fireflies tools. It'll just be a matter of
time before it comes to Photoshop as a non plug
in update. So native. I hate to say it, but Adobe
Fireflies model really struggles to generate
useful images. I hate it. So with them using nano banana, it kind of makes Photoshop
a tiny bit more useful. Google's nano Banana is the first AI image
generation tool I really feel like followed my prompts and kept image integrity each time I did a prompt
update to the image. I wrote a little bit of an
article about that here, and that could be
a separate video where I talk about
the differences, but it's quite fascinating. And Google nanobnana really
hits the nail on the head. I was working on a
branding project the other day and I was
stuck on some sketches. I simply uploaded my
sketches to Chat GBT, and it helped my
brain get unstuck and gave me a push toward
the direction I needed. I started the creativity. It just helped me keep
the ball rolling, and I think that
will be the type of workflow help AI will lend
us in the coming year. It's not going to do
all the work for us, but it is going to help
with our creative stuckness and blank page syndrome. With my sketches, I really just needed to see
it finished with smooth finished edges
without having to go into Adobe Photoshop and
vectorize the work. After seeing some options, I realized there's a
good opportunity for the Ampersand to fit like a
glove above the O and the U. Something I was not figuring
out in my sketches. It needed a lot more
work than this. So I went back into Photoshop
to tweak this idea further. I am tired of seeing
AI slop everywhere, and I do believe
it's time to mesh our own sketches and ideas
with what AI can do. Instead of just handing it
all of our creative power. 2026 will be about
how to balance that out and use these tools to
keep our originality intact. And this all leads
to the next trend. More organic and
imperfect human touch. So what does that mean? That means adding more intentional mistakes
to our design. Because AI slop is flooding
the visual markets, I believe this will be countered
by more human elements. This means more
intentional mistakes, hand drawn marks,
texture overlays, think grain, paper,
subtle noise, rough edges, ink bleeds,
imperfect linework. Similar to some of
the style trends we've talked about before. Remember when the
EM dash was seen as a sign someone used
something from Chat GPT. There are things I
have written and hat GPT that helped me edit, and it loves to put these EM dashes just
about everywhere. I remember trying
to delete them and replace them with commas instead to make it
feel more human. And yes, that's not
very correct grammar, but I did it anyway. There was almost
an embarrassment, I felt just using AI to help me. So much so I even
deliberately left misspellings in my writing just to prove it was really me. And yes, I'm terrible
at spelling. So if I misspell something,
you can tell it's me. I believe designers will want to echo this in their
design elements, too, maybe putting an element
or two in what seems to be an imperfect place or having more hand drawn
elements and signatures, think human fingerprints
and even photo prints. This AI is getting so good, it can emulate some
of these hand drawn, uniquely human looking elements. That might lead to further
design style shifts in 2027 and beyond, as we constantly, as designers, try to keep up with
AI and counter it and do something the
opposite of what it's doing, just to remain relevant,
interesting, and unique. Lastly, another trend is fighting AI slop
with maximalism, which is super
layered compositions. So this would be a
rich layering of graphic elements,
overlap, collage, textures, chaotic, but
with intelligent grids. We're still using grid systems and intelligently
laying stuff out, but we're just
adding rich layers. So what is one weakness of AI, especially with layout design? It sucks at it. It's terrible. And it doesn't
really do good with a nuanced layered complexity
we humans take for granted. What is something we could do as designers to stand
out from AI slop? It's to punch it right
in its weak spot. Style maximalist layouts will
really stand out in 2026. There are harder aspects of
design to replicate by AI, the better, and this
means many, many, many layers of text, movement, grit, pixels, objects,
pen marks, grain. The list goes on. AI has a hard time with
the finer details, the type of details designers love to create at 800% Zoom. You know who you are. This is
exactly the eye for design. We spent years fine tuning, and it will be to our advantage as designers moving forward. It's the little texturing
and the background and the imbalance of elements
that create design tension, and AI can only replicate, but it can't
organically produce it. So I gave Chat GPT an assignment to emulate this
style in a poster format, and I gave it lots of ideas, uploaded lots of prior designs,
and let's see how it did. It has layers check. It has textures, has
ripped paper, check. It has proper balance
and hierarchy check. This is really not as terrible
as I was anticipating. It's missing something, though. Why, technically, it
checks all the boxes, it still looks generic. There is nothing eye
catching with this piece. The originality
factor is missing. The expressive design style you saw earlier in this
video is just not there. In the past, I handcrafted
the numbers for each year's trends for my
blog and video cover photos. I would use Adobe Photoshop, three D programs like
Adobe Dimensions, but this year, it was
a little different. Because so many of the
2026 trends are heavily influenced by AI
or countering AI, I decided to create
this year's design using just hat GBT. Ironic, huh? So how does it compare to my handmade
work from the past? It took just as much effort. I still spent over an hour in photoshop cleaning things up, and I went through 20 plus prompt variations before I
actually got something usable. I like doing
experience like this, not to support or be
a champion of AI. I'm still neutral, but curious. But to understand how
it's changing our game, the process wasn't
glamorous, either. The early renders were
rough, random glitches, strange artifacts,
and at one point, the number six looked like
it was made of human skin. Terrifying. Originality
will still win, but we need to talk about what
that means for the future. I hope you enjoy this deep
dive into 2026 design trends. Please sub like follow
and share this video. I really hope you enjoyed
it and more to come.
21. Design Theory - Design Themes: So far, we've talked mostly about one side to design pieces. Ah, Flyer, A poster of Social Media Post. But what about a design piece that has different sides? Panels? What about a design for a front and back of a T shirt? We cannot see both sides of the same time. It is essential to have a unifying theme throughout your design piece. Even when that transcend sides or exist on multiple panels, Try folds are great examples to use here. The trifled has a color and design theme on the front that we can carry through on her layout on the inside. This is also a theme we can apply to the back of the trifled as well. It feels like one unified design piece that has consistency and branding throughout. These banner seemed to flow together, even though they do not have the same photo or lay out their consistent and the design style and do not feel like two separate design pieces. But actus, one unifying theme booklet, brochure and flip book designs of the same way you went, the cover and the inside spreads to all look like one design noticed the same bonds used throughout, this piece noticed the same color scheme used in different creative ways. Notice how the cropping of the photos is similar. Notice that there's a bar across the top that maintains a theme throughout the different spreads is the header. If the design is for a client, they will demand this consistency in your designs, especially when it comes to sticking with branding guidelines or requirements. They may require certain fonts to be used, and they may request you to use a certain design element or a color scheme throughout, creating themes across panels and editorial spreads, brochures and layouts. And something will dive into in the next lesson while you get to sit alongside me, creating one for a health magazine, so stay tuned for more.
22. Design Theory - Let Get Technical: let's study some technical terms and requirements you need to know to start working in design. There are two main types of files you'll be creating. The biggest decision you make would starting your file creation journey as whether that will be a digital or a print. Documents Print documents could be anything physically printed out, including flyers, posters, T shirts, embroidery, stickers and pins, digital documents or anything that will exist on the Web or on a digital device. Elektronik billboards, Facebook ads and website graphics. Each one of these two different files setups will need their own color modes. There are two main color modes when creating documents. C, M, y que and RGB. Almost all print documents need to be in C and like a color mode. C M Y K stands for science. Magenta, Yellow and K stands for black. These are the four basic in colors printer names to mix and create all the colors available for printing. When you send your document, let's say the poster off to the online printer. They will take your document and make four metal plates. Each blade will print Inc from only one of the favorite colors, all four plates will be strained printed on your poster, and all those colors will mix to create the combination of millions of colors. This is why you're print documents should be and see him like a. But check your specs to find out the color requirements before sending a violin. Some printer sees what's called digital printing, and they'll print your see him like a similar to an office printer you may find in your home or office. This way, they don't have to create the four separate metal plates to create your document, and it's much cheaper this way, and it's most will use for small print amounts. For example, if you're printing only 200 posters, digital printing does not look as nice as the other. I noticed the digital printing seems to make all of my colors a little sharper than I expected, So color is a huge part of your design. Talk to your printer to see what method they use their some exceptions, but a good rule of follow is if it's gonna be printed out, keep it and seem like a RJB is your other color mode option. This is to be used for anything purely put screen. If you're doing a Web ad, for example, the following environments will always be in RGB mode. Computer screens have three lights are nodes on each pit, Forker screen each pixel. We either have a red pixels, the green pixel, the blue pixel, and there's finally just a plain white pics on the combinations of those pixels together creates millions of colors you see on your screen. Anything that will end up being viewed on your screen will most likely need to be an RGB mode. See him like a, which we learned just preserve for printed items cannot be viewed in the correct colors on a computer screen. So sending out a pdf that will be viewed on a Web page and see him like a may render the colors funky. Now that we'll know whether our document will be a digital or print documents and we know what color mode to use, The next big question is the size and what type of size unit I use when I create my doctor . There are two main units of measuring using design. The two that I use the most are pixels and inches. If use the metric system or centimeters. If use the international system of units measurement. All digital documents, which we just learned will be an RGB mode will also need to be in pixel measurement. Print documents will need to be in inches or centimetres. Measurements bleed is only used for print documents. Lead is an extra amount of space that is required around the print document files. This extra amount, usually the same around all the edges, is needed when a final document, for example, are poster is printed and we want the ink to go all the way out to the edge. Anything outside of this red line or bleed area will just be trimmed off without this extra amount. On the end, the poster will not be able to be printed with the going off the side of the page toe. Have a flushed look. You can always look up How much bleed is required by looking at the Prince. Becks Online are requesting the in the email from whatever company or working with to print the items. When setting up your print documents, you'll be asked to set the amount of bleed a standard believe measurement in the United States has 1/8 of an inch, but I need to put that in decimal terms. So 0.1 to 5 this an eighth of an inch. So I put that on each side of my document. This could be a little tricky, and it takes a little time to master some prince. Specs will say the document requires 1/4 of an inch of bleed. I will need to convert that to decimal so I could be able to set that up in Illustrator. So I'll take my fraction one divided by four and comes out 2.25 So now we'll be able to put that in, Adobe Illustrator said. I bleed. Once your document is finished, you'll want to bleed all the colors and photos all the way to the red line. This part will be trimmed off in the printing process, but we do need to have continuity in that trim part, just in case the printer does not trim perfectly. Of course, do not put any text or vital parts of photos in that bleed area as that will not be shown, will be cut off on your final printed piece. Resolution matters one of the biggest problems were working with graphics are graphics with too low of a resolution. Resolution is the amount of picks is or dots per square inch. The more pixels per square inch, the better the resolution. Digital images and documents can be 72 d p I. R dots per square inch. The computer and phone springs displays pixels at 72 DP. I'd That's why it seems like a random number. But that's just how much the screen displays. This is where it gets a little complicated with retina screens. The fancy name for Apple's high resolution screens are starting to become the standard resolution on mobile phones and high end laptops. That means that the DP I required for images toe look Christmas smooth on digital screens. Let me be higher than 72 now. That's why usually create dot digital documents with 300 DP I it seems like overkill, but it's better to have a higher resolution that is too high than one that is not high enough. The only thing you have to be careful with this file size, the higher the DP i, the higher the file size with digital documents Sometimes there's file size restrictions, so you really don't need to do anything higher than 300 d. P. I. Let's practice opening up both a digital and a print project so we could feel comfortable setting upper files and reading are spec information.
23. Design Theory - Small Details Matter : Small details matter and design. It's what separates the professional from the amateur or the way we treat drop shadows with subtlety and Grace. How we use layers to create depth and dimension, and how we cultivate textures to add realism and richness to our designs are all small details that add up to a Polish looking design. Drop shadows used incorrectly can look plain awful, or they can look realistic. Being able to mess with a distance, amount of blur. The opacity of drop shadows can make them look more professional and sleek. Drop shadows are a great way to add more dimension and layers to an otherwise flat design. But you have to be careful using drop shadows on text. There were a few simple rules to follow. Never use a drop shadow with a similar color text and background and just looks obvious. The less drop shadows or noticeable, the better. Manually created drop shadows can have different bends and curves to them to create a shadow that looks more three-dimensional. Take for instance, this photograph, I'm using the pen tool and Adobe Illustrator to hand draw a shadow underneath. Textures can be a designer's best spread. The best use of a texture is to fill the void of a solid colored space. If you feel the space just needs a little something, then screen back a texture by changing the blending mode or opacity that you can make the texture feel like it belongs there. Textures can be tricky, like most of these small design details, subtlety is the name of the game. Make sure your texture does not overpower a design piece. Being too strong or the wrong color can make a once clean design very busy. Make sure you reduce the opacity enough or play around with your different blending modes to find the right combination. You could do some pretty cool things with topography by adding a texture over top of it. It can help a topography only designed stand on its own. Patterns can spice up that plain background as well. Creating your own patterns is fun and Adobe Illustrator, geometric shapes work well with modern clean flat design. Try to use only one style of pattern per design. If you decide to use two different kinds of patterns, make sure one is more prominent. To avoid competing of the two different patterns. Add layers to your design. One way to do this as the add drop shadow to different overlapping elements, or took one side of an element under another while leaving another element on top. This type of layering adds complexity to your design. Paying attention to all these small design details ends up making a big impact on the quality of your designs.
24. NEW! Artificial Intelligence in Graphic Design - AN Overview: I wanted to talk about
artificial intelligence and how that might affect the design and
creative industries. I get so many questions
from students about how this will affect them and what they need to know about it. With artificial intelligence, graphic designers
can breathe easy, but illustrators, you should
be shaking in your boots. I think the biggest question I get asked about the rise of AI or artificial intelligence
programs like mid Journey, Cat GPT, or Adobe's Firefly is will designers and creatives get replaced by these programs? There's a lot of fear with
the emergence of software and algorithms taking over our design industry,
and rightfully so. Some of the artwork and illustrative work coming from
mid journey, for example, is outright surreal
and stunning with artwork that could
have taken days or weeks for a human to produce. And while there's
some incredible digital art being created using AI image generation tools
like doll or Mid Journey, it still has this AI look. It's not human after all
and can have a hard time with backgrounds and details
and facial features. Take a look at
this amazing image created from mid journey. The main character
looks flawless. But a quick lance into the background will
reveal a building that has a chopped up looking appearance
without definition. The little girl's forehead area seems a little bit
disproportionate. But a human
illustrator can easily tweak and change those things. A AI bot only knows
what it's fed. Still, for most people,
it's a beautiful image that can easily be mistaken
for a real painting. This can lead to an
almost distorted reality like you're staring
right into an acid trip, a surreal dream, or a nightmare. AI image bots have no clue
what ice cream tastes like or the joy you
feel when you lick a cold popsicle on a hot day. It has no clue what to do with the emotions except
to take what it has learned from studying
other photos on the Internet and then are tagged with that emotion and produce what it
thinks is reality. This can lead to a
disconnect between human created visuals
and artificial ones. Illustrators still at least
have that to lean on. The last two years has
seen some wonderful AI led technological advancements in
image and text generation. You might have
heard that Chat GPT took over Twitter
and YouTube Universe over the last year with people finding really interesting
ways to write books, plays, courses using the
text generation AI tool. I even got to do a YouTube
video where I asked a bunch of burning questions
I had about graphic design, like, how to make $1 million
as a graphic designer. I also asked it to generate design prompts for me so I can build my portfolio with a
realistic mock client work, which can be super supportive
and helpful as a designer. So it's a very awesome tool. So where does this
leave creatives? When am I going to be
replaced again, exactly? First, let's look at what
is currently out there. How does AI tools stack up
against real human designers? What better way to test
this out than to try to use AI to generate a
finished logo design? I'm happy to report
that logo design is best saved for real
humans and not bots. I typed in a few
really good keywords in this logo generator, popped out some very
undesirable results. Most I don't connect
with at all. The one on the bottom left doesn't even look like I tried. Well, I didn't try. It's digital, not human. How could it possibly take my
name and a few keywords and truly understand my uniqueness as a creative and a designer. I never had a chance to
review my portfolio, asked me my favorite designers, or ask how I treat my
clients differently. Right now, there's no way to communicate that
to this algorithm. Let's try the more
popular AI tool called Mid Journey to see
how it handles logos. We will take a look at writing
prompts a bit later on, but I instructed it
to create a logo for my personal brand and that it must include the
words Lindsey Marsh. I also put a few other keywords in there like branding
and creativity. You could see the results below. I see a few letters in my name, but I also see that it's struggling with
typography and text. Typography, text, a huge
issue for AI generators. And I wanted to talk a little
bit more about mid journey. Mid Journey is one of the most popular image generation
AI tools out there. It used to have a free
trial, but unfortunately, a free trial no longer
exists and now requires a monthly subscription to gain access to its image
generation tool. I'm also not the only
one with this issue, as I located several
other logo designs where the typography never quite fell in line with
what was requested. This might be because the
tool specializes in compiling images and not trained with composing and
arranging typography, letters, or human languages. Since the cornerstone of logo
design is its typography, these image generation tools
may not be the answer yet. While the illustrations
for a logo can look really nice using
an AI image generator. Typography is best
left up to us humans. The experts, us. So logo design and
branding is not going to be taken away from
us anytime soon, so we can celebrate. So we'll hang around
a little bit longer, but what about other
aspects of design. Illustration is
where I keep seeing more opportunities for
AI to kind of take over. Pattern design is big business, and licensing
pattern designs and selling them on Etz can
be very profitable. There have been
creators who found ways to use mid journey to create really nice looking
seamless pattern designs for iPhone cases, blankets, puzzles, and more. The applications are endless. My prediction is that
writing prompts for AI generators will be an
entire job in itself. How AI bots and image generators work is the user has
to input a prompt. This directs the bot
what to produce and in what quality, style,
resolution, size. It can also be told which images to draw inspiration from. It just takes an
hour or two to get the very basics of
prompt writing down. After generating a few images without the desired results, you can quickly see how it
takes a full time study to really create really nicely well done prompts that
generate what you want. I do believe that one day
soon full time jobs will be prompt writing for
larger companies looking to utilize AI tools. In fact, I just came across
one today on nd.com. I'm not going to
detail how to do prompt writing in
this class per se. There's so much there to learn it could be a class into itself. So this is how a basic prompt on mid journey is broken down. So you'll see it's broken down in a couple of
different parts. First is the image prompts. If you have any,
they're not required, but it's just sample
imagery to give the AI bot an example of kind of something
you want to replicate. Then you describe what
you're looking for, and you could just
have a description. I want a bunny
hopping in a pit lava or a mountain with a
singing fairy on top. And lastly, what's
called the parameters, and there could be
hundreds of these things if you really want to
get very detailed. It allows you to create different styles of the
image and resolutions. You could type in four
K, three D looks, and other popular keywords for generating
different image styles. Once again, all AI
tools will require some basic understanding
of prompt writing, not just mid journey or Dolly or other alternatives,
but all of them, including the ones we'll be
learning in the class like photoshops new generative
fill capabilities, which will require learning
and understanding how to write prompts for AI to generate what you
really, really want. And for writing that amazing,
effective AI prompt, it's all about finding effective
and detailed keywords. I can type in boat, for an example, and it'll
generate a picture of a boat. But the more detailed I
become with my prompt, the more specific and
accurate that image becomes. Let's say I want a
wooden boat that looks painted in
the style of Mont. It will much more likely I will get the specific boat
type I was looking for. Within propt writing,
you could start off with broad keywords and topics by stating your main
subject matter. Theyn't get more detail, describing what that subject
matter will look like. You can explain
the style in which that subject matter is
drawn or illustrated with. You can drill this
down even further by explaining the emotions that are behind the subject matter. I created an AI prompt writing keyword cheat sheet that
shows kind of this in action. We have some broad large art movements you
could start off with. So let's say I have that boat, and I want to do a boat
that is using surrealism. So you can say I have a wooden
boat in a surrealism style in the style of reembrant
and then you can go, I want this to be
hyper realistic. So you have these detailed
styles and techniques. So you can have a B cell animate art realistic three D render. You could do all these different
styles and techniques. And you can layer all these
on top of each other to make a really accurate description
of what you're looking for. Because when you
look at how people write these really long
descriptive prompts, you get a really good
idea of what makes a good AI prompt is by
studying other examples. But here's some emotions
like imagination, amazement, freedom, liberation, contentment,
satisfaction, nostalgia. All these keywords I
wouldn't have thought of, I would just think of happy, angry, sad as emotions, but there's thousands of
words that can describe emotions that will all generate different images in your prompt. So where does AI source its photos to create
such masterpieces? It's hard not to talk about
the elephant in the room. As we discussed
before, mid Journey, Doli and other AI
photogeneration tools took a huge swath of photos from the entire Internet to train its AI bots to generate images. That means that copyrighted
photos, illustrations, and graphics were
compiled together to teach the bot what the
user might want to see. There's an interesting
article that claims that one of the founders
of Mid Journey knew this was the case and admitted to not knowing
what to do about giving proper copyright
ownership to the artists of the images this
AI bought uses. When creating AI art, you can also add reference images to help the bought further detail
what you're looking for. There's no way to
prevent users from uploading copyrighted work from Google search into the prompts. That means if you're using
images that do not have a creative commons zero license or a public domain license, you could be opening up
yourself to being sued for driving artwork from
copyrighted images. So does that mean AI tools have infringed on
creators rights? This was going to come
to a head at some point. Several artists have banded
together to sue M journey in other art portfolio
websites like Deviant Art for
allowing copyrighted, derived AI work to be posted without giving proper
credits to the authors. And it's going to be a
very tricky court case. On one hand, AI tools
have been trained by absorbing data from
most of the Internet, which is a gigantic
source of data. It could be hard to prove individual copyright
infringement from images derived from
such a large dataset. On the other hand,
there have been cases where individual
artists can type the name of an AI
prompt and clearly see how their artwork was used
to formulate the results. Albeit, it's not
ever an exact copy, but you could see
the inspiration. Who owns the work created
by AI image generators. If I put in a prompt into an
AI text or image generator. Do I own the prompt to create the image or the image itself. It's a complex legal issue, but it's always worth
reading more about this. A human element
has to be present for any copyright
claim to take place. That means AI tech cannot
claim ownership of images. AI artwork does not really have an owner based on
current copyright laws. But according to the terms of use of some of the programs, it does assign the
ownership of an image to the creator or prompt writer. But can you hold that
copyright claim in the court of law would
be the next question as nothing can stop third party
companies from taking you to court for using
their brand image in your AI generated photo. We are truly living in a
new digital Wild West. So what do you do
if you want to take the safe and high
road and protect a real artists work and make sure they get
the proper credits. Well, first of all, I
would avoid putting in a specific artist
names into AI prompts. It's okay to use historic
names like Leonardo Da vinci. He's been dead for many years, but I wouldn't put any new
artists that are still alive and still have
a legacy to build. Another thing you can do
is to make sure you use AI image generator tools that
are from official companies that make sure the library of photos they use to
train their bots and to generate images are given permission by the
people who own them. Back in spring of 2023, Adobe announced that
it will release a new AI image generation
tool into Beta. It was called Firefly. And
I I signed up for the Beta when it came out and I was super excited to be able
to test it out. And it claims on its
website that it uses only legal artist approved
photos to generate its images. The current Firefly
generative AI model is trained on a dataset
of Adobe stock, along with openly
licensed work and public domain content where
copyright has expired. So it's using public
domain images, creative common zero licenses, where there's no copyright
claimed on the images. So as the Firefly
program evolves, Adobe is exploring ways for
creators to be able to train the machine learning model
with their own assets so they can create content that matches their unique style, branding, design
language without the influence of other
creators content. So that would be fantastic. And of course, I played
around with Firefly, and it does not give the
same results as some of the more powerful AI generation
tools like mid journey. Mid Journey uses the
entire Internet as their source of inspiration for photos to train its AI bots. But Adobe uses a much
more limited library. So it is not as brilliant or
effective as Mid Journey, but at least it's
going to be legal. So I don't think that AI
is going to be taking over graphic designers
jobs anytime soon, Logo design, typography
texts layout. There's not really an
AI tool yet to do that. But the future is interesting. And I think and I'm glad
that Adobe is developing tools to let AI increase our ability
to be more productive. So we don't have to focus on all these tedious
tasks as designers. We just get to create. I think that's how
we need to think of AI is not a threat but a help. It's going to help us in the future to create
things easier. So in the end, graphic designers finally get to move from being just pixel pushers to real big picture thinkers
in the visual space. At least that's how I'm going to think about it moving forward. Graphic design cannot remain
how it is today forever. Even tools like Canva are slowly eroding opportunities
in social media poster and stationary design
work by making it so easy to create
layouts, Heplets. If graphic designers just use fear to hide from
learning new things, we can never lift above our titles and command more
attention from businesses, and we'll just fade
into a relevance. What if the very tools
we fear can be learned, mastered, and utilized to make our designs ten times
better for clients. The only way to
move past fears and worries is to head
right into the storm. Take some time to explore some of the more popular AI bots, tools, filters, and expand your design
processes and workflows. So be afraid or adventurous,
it's your choice.
25. INTRO to the Adobe Creative Cloud!: if you haven't heard of it already. There's a group of software programs called the Adobe Creative Suite, and it's the number one professional choice of designers worldwide. The Adobe Creative Suite subscription includes access to the following software the three programs will be studying. In this class will be Adobe Photo Shop Illustrator and in Design. You can download and access these programs by signing up for the Adobe Creative Cloud, which gives you access to these programs for a monthly fee. This we can be heavily discounted. If you're a student at a university or a teacher, make sure to explore your options and see if you qualify for any discounts. Once I have access to these three programmes, how do I know which one to use? Photo shop is the king of photos, and I used photo shop whenever I need to do any photo editing, cropping or retouching work. Voter Shop has a wide array of filters for photos and images. I also like to use photo shop and work with digital images that are sized in pixels like Facebook ads and social media ads. All three Adobe creative suite programs use what's called the layering system, you can have hundreds of layers to make up in image. These layers give you minute control over health things air cropped and how images behave. Photo shop is called a raster program. It works with photos by editing them and manipulating the pixels. That means if I open up a small photo and photo shop and I try to blow up the image to a large size used tend to see it get blurry. That's because it stretches those little pixels larger, so the resolution deteriorates as it gets bigger. That's why photo shop is great for working with photos and raster images. But when you're wanting to develop logos or things that need to remain in Vector, I like to switch over to Adobe Illustrator. That's because of the Vector program. That program draws lines and circles and shapes using equations. So that means if I make the circle really large for a very large banner or poster size, it doesn't lose any of the quality or its resolution. I love illustrator between the three main design programs I use. I spend the majority of fine design time using Adobe Illustrator, and that's because of its vector environment. I do all of my local design work an illustrator as well. I could take my logo and make it large or small without any resolution issues. Also the powerful pin tool and illustrator, I'm able to create custom, intricate shapes that are essential for logo design and any other symbol or icon design. I also do a lot of my print pieces and illustrator as well as it's easy to export with Bleed and all the extra things that printers like to see in large format printing like banners, flyers, posters and more. Really, the only imitation of Adobe Illustrator is its lack of photo editing support. But that's why we have our trusty photo shop, which I can use to edit photos and photo shop and simply import them to illustrator when I'm ready to use them. So what about Adobe in design? Whenever you have multiple page documents, maybe four pages of more, I suggest creating a document and in design and design is used mostly to build publications like flip books, magazines, digital pdf documents and Mawr, and it gives you more control over paragraphs and larger blocks of copy. It also has something called master pages, which can help you apply the same basic design to all pages, even hundreds of pages at a time. So could be a huge time saver for designer. There are projects where use all three programs. For example, I may need to edit a magazine cover and photo shop. Then I import that magazine, cover into in design and build out the layout I could have been bringing in a vector illustration. I do an illustrator and two in design to bring it all together. It takes a little bit of time to master all three programs, but once you do, there's not one single graphic design job you cannot get done.
26. Adobe Photoshop - Basic Setup: Welcome to Adobe Photoshop. As you can see, this is the latest version available on the Adobe Creative Cloud. Updates to the software are free each year for those who have a subscription to the Adobe Creative Cloud. For those students who do not have an Adobe subscription, I could ask this question like, can I use older versions of the software for this class? And my short answer is absolutely, there's no reason that having software that's a little older should stop you from creating wonderful design work and projects. The next few lessons of this course are for those who are brand new to Photoshop. Or maybe you've only opened it a few times and played around with it. Or those who want to start at the very basic level. For those already a little comfortable with the basic interface in tools of Photoshop, feel free to move through these lessons quickly or skip them. They're going to be some really awesome up-to-date tools that may not be available to you if you have older versions. And I'll try to mention those throughout this course, what those tools might be. All versions of Photoshop have the same basic elements. So let's go ahead and get started by opening up a new document and learning those basic tools. We are in Adobe Photoshop. And I had some lessons here last year and I wanted to take a moment to take some student feedback and rework the whole first hour of the Photoshop section. And we're gonna make sure I went slow enough for those who have never been in Adobe Photoshop before. So we're going to spend a few extra lessons, a few extra minutes talking about some very vital tools like how layer's work, how the type tool works, and just getting more familiar with the overall workspace. If you're brand new to Adobe Photoshop, I highly encourage you to watch the next couple lessons as we set up our workspace. So here we are at the very beginning home screen. We're gonna go ahead and open up a basic document and get started getting to know some of the tools. So I'm gonna go down to create new, just going to click on create new document. And you're going to always have this new document box pop up and it's going to be able to give you a chance to input the sizes. You can do inches, pixels, centimeters, millimeters. There's a lot of different measurements you can use depending on where you are in the world. I'm in the United States. I use inches a lot for printed documents, and I use pixels for digital documents. So let's just say for example, I'm just going to do a little social media posts. That's a digital graphic. I want to do that in pixels, and I am want to do 1080 and width and 1080 and heights. So just putting in my basic dimensions, you can change your orientation to landscape or portrait size, but in this case it's the same size. So it's just going to be a square format. And you can input your resolution, which really matters a lot more when you do printed documents, you went to always kinda have a nice 300 resolution for anything that's going to end up being printed. Since this is a digital document, what matters the most is the pixel sizes and making sure they're there appropriate sizes depending on where you're going to post it and everywhere you post, there's going to be different. Pixel requirements. There's also color mode, and we're going to stick with RGB, which is going to be great for digital as we learned in the design theory lessons. And CMYK is great for print. So we're not going to really worry about bitmap or grayscale right now we're just gonna do RGB color. You can start off with a transparent background, so nothing on your canvas at all. I like to start off with a white background because sometimes I like to just go ahead and have a background set. It's really up to you. Default is white, so we're just going to keep it on white. Okay? We're not going to worry about any of the advanced options. So we're just gonna go ahead and click Create. So now we have a document that is 1080 by 1080 pixels in size. So perfect for a quick little Instagram post. So the focus of this course is graphic design, graphic design projects. And so when I'm teaching Photoshop is going to be a little bit different. If you're gonna take a tutorial learning Photoshop for photographers are learning Photoshop for web designers. This is going to have a heavy focus on graphic design tools and the type of work that you're gonna do as a graphic designer. So we're, there's so many tools to Adobe Photoshop. You're not going to be able to learn all of them in a month or all of them sometimes even a year. I'm still learning new tools and I've been in Photoshop for over 20 years. They're constantly coming out with new updates. What we're going to focus on in this course is specifically graphic design tools and things I use very often in graphic design projects. There's been a lot of things that have changed over the last couple of years, but Photoshop has really stayed, all the basics have really stayed the same. So as you're working through this, you may have some different options or maybe it's configured a little bit differently. But overall the basic stuff, tools and windows are in the same place. So what we're gonna do is kinda get used to the overall format of Adobe Photoshop. On the left you have your tool bar right down the side, just kind of your basic tools. There's the Brush Tools. This is how you get your type tool, that you have, your shape tools, we can build shapes. This is your basic building block tools to create things on your canvas. And up at the top you'll notice even more options. And we're gonna go over this, especially when we do photo editing. You're gonna have a lot of your adjustments, you know, changing the brightness, the saturation, the exposure, the vibrance of a photo will be done in some of these top options. There's also select Options. There's filters that you can apply. A lot of the filters that you see in Photoshop is accessed in this top menu system. There's all sorts of other extra stuff as well like 3D and plugins. And then over to the right you have your panel system. This is, we're going to be able to kind of change a lot of the settings on the tools, change the color of a lot of eye objects. This is by default, this is a default workspace and I'll show you kinda how to get yours to match mine, although you don't have to match mine completely. Once you get comfortable with customizing your right panels, you'll be able to get what you like to have well out there and you don't have to match my settings. So these are little panels that can be dragged out and you can put these close to your documents so you can be very close to certain options and settings with your panels. And these can drag right back and click right into here. And you can customize this any way you want. You can put, it, can even create a new window. Let's say you want to have all your color options. And one which is by default have my swatches, gradients, and color all in one nice handy panel and say I want to take patterns and I want to drag patterns down to here. You just kinda drag and click and you'll be able to pop it right in there. And if you want to take it out, you just drag it out and press the X if you don't want that panel open anymore. So let's say I have color. This is a very important panel to have. Let's say I accidentally, when I'm customizing it, I click off and I go, oh no, I lost color. Where's my color? It's gone. I press the X close key and I can't, I can't open it again. What you could do is you can go up to window at the very top. You'll be able to load all the panel options here. So let's go down to color. Click on color, and there it is, it's back again. I can drag it back in place. If I ever open a panel that you don't see on the right side, simply go to Window and you'll be able to adjust and add any of the windows are panels and I'm talking about, so let's say I'm talking about brushes and for some reason it's not open. It's click on brushes and then you can have all these brush options that can be added. There's also this extra overflow extendable little toolbar here that you can expand. You'd click on these little double arrows is kind of an extra toolbar. So let's say I want to have something that's really important. You can just drag color in here and you can access color here and it could fly out of that panel. So it's kind of an overflow. If you run out of room over here on the main panels, you can have kind of this overflow option and it can just drag it right back. It's fully customizable. So let's talk about getting a default workspace. Some of you guys might have been playing around in Photoshop, you rearranged windows, you kinda like what are, what's kind of a good basic default setting for me to get back to normal. And there's something called workspaces that you can load, which will load different kinds of panels according to what you're doing. If you go up to a window and they go down to Workspace, you'll see several different workspaces loaded. So if you're doing a 3D workspace, load that if you're doing painting, digital painting, or if you're doing photo editing, and then graphic and web, I kind of like to stick to the default and customize it. So that's what we're gonna do, is we're going to just make sure it's set on essentials. And if it's already honest essentials, you can go all the way down here to reset essentials. It'll bring it back to the default space. So let me just click on Reset ascents essentials. It's gonna break all my panels back to the default essentials workspace. And you can change that workspace at anytime. You can even save your workspace. So I can go to workspace down here and let's say I had it perfect. I've spent 30 minutes customizing it and adding the panels that I like. I can always save it by going to new workspace and doing my workspace. And you can even save toolbar settings and we'll get to that a little bit later. So now I can go up and load my workspace. And I'm going to go to back to essentials just so we kinda have similar looking screens, doesn't have to match exactly. So just gotta reset essentials. So there's some really important stuff will go over this one panel at a time. There's layers. Layers are going to be a big deal in Adobe Photoshop. It's what makes photoshop. Photoshop is being able to arrange different layer so certain items are on top of others. And if you ever need to change any preferences, you can go up to Photoshop, up here at the top, go to Preferences, click on General, and it's going to load a lot of different default options. And I just wanted to take just a minute or two to show you what I have, have to match mine. You're going to develop your own preferences for things as you get comfortable with the software. So you can change the color of the interface. You can make it white if that appeals a little bit more to you, or you can make it black, which can show up really good if you're working on really light documents. And then if you're working on really dark documents, sometimes having a white workspace works really well. I kind of like the in-between darker, gray. I just that's the default menace. Feel comfortable with that. But whatever you would like, this is where you would kind of change those settings. Everything else I'm leaving as default. However, I opened it up.
27. Adobe Photoshop - Student Worksheet - part 1: Hopefully you're not overwhelmed. We're gonna be going over all these tools and panels over and over and over again as we work on projects throughout the course, you're going to don't feel like you have to master each thing I go over here in a minute. Just take your time and we're gonna go over it. I'm going to repeat a lot of things just to kind of be able to help you slowly move through everything and learn it. So what I've done is I've developed something a little bit new to teach photoshop. I have not taught Photoshop this way before, but I do teach Adobe Illustrator, which is the next software we're going to learn using a worksheet. We're going to have certain shapes. We're going to recreate. We're gonna recreate lots of different things using this worksheet. It's a great practice test run so that you can do everything along with me. And he can feel like you can do it step-by-step. So I developed this Photoshop document. You can download it right here in the Photoshop section or the Photoshop folder of the downloadable resources. And you'll be able to open it up and see what you're seeing right now. I've opened up the Photoshop student worksheet dot PTSD, and PSD is the file name that is used for any Photoshop file. So go ahead and double-click that, open it up. We're going to start in the upper left-hand corner and slowly work our way through the document. So I want to zoom in. There's no way I can read some of this text. I really wanna zoom in. I have a laptop that has a trackpad, and I can take my two fingers and easily zoom in and out. But some of you guys don't have trackpads. But if you do have a trackpad, you can zoom in and out by pinching your two fingers in and out. It's very helpful, but if you just have a mouse and keyboard, you can always go right down here to this section where you can manually type in and zoom in. So right now it's at 54% view. If I were to type in a 100%, this would show a 100% view the document, this is just like Microsoft Word and other programs. I think 100% works really well. What's great about this bottom area, as you can see, the document size as well. If you look down here, it's a 4 thousand pixels by 5 thousand pixels document at a 300 resolution. So it's kinda nice to be able to glance and see how big a photo is when you open it when he looked down in this area. So now that I have it typed in, just typed into a 100 and press enter, I was able to zoom in. So let's go ahead and start and go all the way up at the top. You can either, I'm using my trackpad to kind of move around. But if you just had a mouse and a keyboard, you can just slide this up and down our slide this across to be able to kind of find an orient your position in the document. So using basic shape tools. So we're gonna go to our toolbar for this. We're gonna go all the way down here. You see a little kind of square. You're gonna go ahead and click anything that has this little triangle at the bottom right, you gotta go ahead and click and hold. And you're gonna get a drop-down menu. You're gonna get more menu options. And we're going to go all the way down to the Ellipse Tool. And this is how you get to be able to create circles. So I have the Ellipse tool circled and some students I've noticed have problems with certain tools not showing up on their toolbar. If you ever have this issue, go down to these three little dots. Right down here at the bottom says Edit toolbar and hold and just do Edit toolbar. It's going to have this extra drop-down menu. And you can restore defaults. If he went to restore to the default somehow you accidentally moved a tool or a tool got off the toolbar and got deleted, you can just restore your defaults. So with our circle tool selected, I want to make an imperfect Oval. So that's going to be easy. I'm just going to click and drag and try to match the shape. So I'm gonna click somewhere up here, click and drag. And I'm going to be able to make an end perfect oval. And I can take these transform controls and bring it down if I want to make it match that gray area perfectly. So let's kinda make it match, kinda make sure everything is over that gray area. So we were able to recreate that simple oval. So let's say I want to move this object around. So we're gonna get what's called the Move tool, which is right up here. And there is a keyboard shortcut for this, which is v that you could press. But I like to kind of go up here when I'm first learning and click on the tool manually. So I clicked on the Move tool and now I can click on my object and I can move it around anywhere I want just clicking on the Move tool. And what I wanna do is I want to be able to see, I want to be able to transform this oval. Maybe I want to make it a little bit longer or just want to change the shape of how do I do that? I'm not seeing any kind of transform controls. So by default, Photoshop usually has us unchecked, but I love to be able to check it because it helps me out so much to be able to transform my shapes. So go up to the top and click on show Transform controls. Now all of a sudden you'll have this box with these little anchor points on it. And it's gonna give us a chance to be able to change and scale our object easier. It's also if I go to the corners, I can also rotate it as well. So this make sure when you have the Move Tool selected that you have show Transform controls checked the skin to help us when we want to make objects bigger to match the gray areas. So we have a layer year. You'll go down under a layer system. I'm gonna go ahead and bring this out. This is what we have here. If you ever want to know what is on your layer, I'd like to toggle visibility on and off seedlings little eyeball icon. If you click it on and off, you'll be able to kinda see what's on your layer. So I'm going to have that toggled back on. And I'm going to call this oval. It's really nice to be able to name your layer so you don't get lost. So that is my oval layer. So what I wanna do, if I want to create the next shape, I want to be able to create a new layer so that I can move these independently. If I didn't let say I went ahead and I wanted to create this next circle. And I create it there on the same layer now. So now if I take the Move tool, they're like connected and I can't really move them independently. And I want to be able to do that. So let's create a fresh new layer. So we're gonna go down here to create a new layer. It's going to be a little addition signs. So create a new layer. And we're going to call this circle. And now we can get our ellipse tool and be able to create a simple circle. But I want the circle to be perfect, not imperfect. So there's a little trick. So let's say I don't do the trick and I just try to match this circle. Well, I can get kinda close, but it's not perfect. So what I'm gonna do is I'm going to hold down the Shift key, click and drag. And when I hold down shift and drag, it's going to be able to scale it dimensionally. And we'll do this a lot in Adobe Illustrator as well. But we're going to be able to scale this dimensionally and click on it. So let's say I want to be able to match it perfectly. What I can do is I can make this a little bit opaque or transparent so I can see what's going on behind the shape. I'm gonna go down. I'm still in my Layers panel. I'm going to go to opacity and I'm going to reduce this a little bit so I can kind of see what's underneath. It's gonna let everything underneath through because this is now transparent. So I'm gonna take my move tool, or I can press B on my keyboard and I can move and match it. And if I need to scale it, I can use my Transform controls right here and be able to match it perfectly. Now I can go back and I can increase my opacity to full black. So we have two independent layers, we have a circle layer, we have an oval layer. So I want to move my oval, I will highlight my oval, get my move tool. I can move him independently. I can select my circle. I can move him independently. And this is how layer's work. And getting really comfortable with layers is something we're gonna do. We're gonna be creating projects that have 20 or more layers. So we're really going to get to practice layers a lot. But I find that having as many different layers helps with the flexibility. If I had these two connected and let's say I just had these two layers connected. You know, I wouldn't be able to have as much freedom and overlapping and creating designs and creating artwork. So when in doubt, create a new layer that always helps to have everything on different layers to be able to move things around with more freedom.
28. Adobe Photoshop - Student Worksheet - part 2: So let's move on in our document. So now we've created solid shapes. Now we're going to create shapes with just a stroke so it's clear on the inside and a stroke on the outside. So we're gonna take our ellipse tool. And what we're gonna do is we're going to remember to create a new layer. And we're going to type this stroke circle. And we're gonna say solid because it's going to be a solid stroke. And I want this to be a perfect circle. So I'm going to hold down the Shift key, click and drag. And I'm going to be able to get a perfectly dimensional circle. I went to reduce the opacity so I can kind of make sure I match this stroke. And I'm going to go ahead and move. This is get the Move tool and move it over. So now what I wanna do is I want to be able to make this, this is a solid fill. I want to turn it into a stroke. And there's something that's really, really important. This is a very important panel. It's called the Properties panel. And this is going to contain so many things that you can change like fonts, colors of objects, and you can even do stroke on here too. So this is the Properties panel. I'm going to bring this out so you can take a look at it. This is Properties panel. So with this selected, I have our circle selected. I'm gonna go down here to, there's a Appearance panel within this Properties panel. And it's going to have a fill which is going to change the color of our Phil. And also a stroke which is going to add a little bit of a stroke. So let's say I add a blue stroke and there's a stroke. So let me change the width or thickness of the stroke, just like that. And we'll do this again and Adobe Illustrator and the next software. This is kind of repeatable stuffs. It don't feel worried if, if you're not getting all this, we're going to repeat it over and over and over again. So now let's say okay, so I let me go ahead and make this a 100% rescinding my layers panels, making this a 100% opacity. So here we are. I went to punch orange stuff out. I want that to be clear. I just want to see the stroke. So what we're gonna do is we're gonna go to our fill, which is this orange color, whatever color I want to make it. And I can go up here to null. This is called null or no color. And we'll stripe has this little red kinda diagonal line across of whitebox. We're gonna go ahead and click that and it's going to create, basically make it nothing. So there's no Phil, No fill. And then we have a stroke. And we can just change our stroke thickness to make it match a little bit better. And that's how you create a stroke. So I can go ahead and take my Transform controls, hold down, shift and drag. Here we go. Just kinda trying to match that as best as I can. I get a press Enter. And there we go. It always get our moved tool. Move this independently and we have our stroke. So now we want to do the same thing, but we want to add these dots instead of a solid line. So what we're gonna do, I'm gonna go ahead and drag these out here so we can kind of see how more screen I'm going to duplicate this. And there's several ways to duplicate a layer. You could do the traditional kind of longer way and you can right-click. This is our layer can always toggle visibility to see which one it is. You can right-click and duplicate layer. And it'll create a duplicate is click on okay, and it created a copy. So now I have two of these floating around and I can go over here and add the dots. Or there is a couple of shortcuts. You can hold down the option key or the ALT key if you're in a windows and the option key is if you're on a Mac and you can hold down that button and then click and drag and you're able to create a duplicate. So it's this kind of a quicker way to create a duplicate. I do this over and over again. In future lessons. You're going to probably get sick of me talking about it, but it's a great extra quick way to duplicate. And instead of having to right-click and duplicate or do just a copy and paste of the layer. Let's try that again. So I'm gonna have this selected hold down Option key or alt key. If you're on a Windows, I have that selected. I'm going to click and drag and release. And I have a little duplicate here. So now that we have the duplicate, let's go back into our Properties panel and we're going to pull up Properties panel a lot. So it's nice to keep that handy. And I'm gonna go to stroke, and I'm going to go down to this extra options panel and I'm just going to make it dots instead of a solid stroke. And now I can change the size and it'll add more dots density around it. That's a pretty close match. You don't have to be perfect with this one. And we can even do our Transform controls if we need to kinda move it around a little bit, you press Enter. Let's move on. Let's go down here to the scaling shapes and using rounded corners. So anytime we create a new shape, if we want to be able to move it independently, we need to create a new layer. So I'm gonna go down here. We're gonna go ahead and click on new layer. So I have a new layer. This will be square. So let's go over here to our shapes tool. We had it on the Ellipse tool. So click hold and get a rectangle tool. And let's change the color here before. So you notice how we change it in our Properties panel and we selected an object, we can change it up here as well. And either way works. You can change your options here or you can change it in the Properties panel when you have an object selected. But we haven't created our object yet. So let's go up in the top and go ahead and set our colors. So let's say, I don't want any of these recently used colors. This'll load any colors I've used in the last couple of projects. I want to be able to pick on the hue slider, which we covered in the design theory lessons. To be able to load the hue slider, you're going to click right here on color picker. And it's going to load our little Hugh cube. So you have all of these different colors. Here's your hue, and here's your saturation. We covered this a little bit and there's lessons. So let's say I want to make it blue. So I'm going to slide my hue, slider all the way up to the blue hue. Maybe look a little more blue. Make it nice and highly saturated. And I'm going to click on OK. And it right now has a stroke. I don't want to stroke and return strokes off. So select stroke and make sure it's on null, so no stroke and a blue fill now will be able to create our rectangle. So let's go and hold down shift. And we already created our new layer. If we didn't create a new layer, it would put it on one of these other layers and we won't have them as separate objects. So now I'm going to square layer, click hold, drag, and I have a square. I'm gonna take my move tool and I can click anywhere off. Let's say I want to click on this. And I want to click anywhere off to de-select. It says click anywhere off the art board or on other objects to kinda deselect it. Let's say I want to click on something and automatically select that object I click on. If you notice that your Photoshop is not doing that, there's an option here called auto select. Make sure it's selected. If you unclicked auto select. And I tried to click on any of these layers. It's going to continue to, to, to select the layer that's selected. So you have to manually select the layer to move it. I like to be able to have auto select on to be able to click and drag and not have to select the layer and drag. But there are instances when you have a lot of things happening on your screen or turning auto select is nice because then you can move the shape anywhere you want, no matter where you click and you know, accidentally click something else. Don't worry, we'll be using that a lot in the future. So I've auto select on. So I have, I went hadn't clicked my shape. So now I can move it around. I want to hold down option and drag to create a copy. And I can scale this. So see the transformed controls is clipped. So now I have this option to scale it, do, do, do, do it. So what I'm doing is I'm just taking this transform box and moving it bigger and bigger and bigger. And that's it. Can select my move tool. I can de-select. And I can select it again if I want and or hold down option and drag or I can do it the long way. Right-click duplicate layer. When a duplicate layer, I don't have to create a new layer because it just automatically creates layer mood over here. We're just gonna slowly scale this bigger and bigger. And then hold down Option and drag again. And so now I wanna do rounded corners. So I'm gonna make this a little bit opaque. So my layers, I'm gonna go up to the corner and I'm going to be able to click and drag this corner and is gonna do all of them at the same times. Keep continuing to drag, drag, drag until it matches it. You can add anytime click these and make them bigger. Once again, we'll be going over a lot of these and Adobe Illustrator as well because it's got a very similar function. Okay, so let's say we want to have more dramatic corners. You know, go ahead and hold down Option and drag or alt if you're on a Windows. And let's say I went to match and make this circle. So let's make this a little transparent so we can see and we can click and drag. We can even make it so such rounded corners that it even turns into a circle. Look at that, just wanted to kinda show you the option of rounded corners. So we're slowly working our way through this worksheet. We're going to be talking about layers. We've already done a lot of layer work, but this'll be a good test for you just to make sure you know how to properly move and drag layers.
29. Adobe Photoshop - Student Worksheet - part 3: Let's get our triangle tools. So we'd go down to our shapes tool. Let's select the triangle tool. And let's hold down shift and click and drag to create a perfectly scaled triangle. Let's get our Move tool and move it into place. And I'm gonna go and use my Transform controls to be able to scale it. So I would like to create a duplicate. I'm gonna do it the long way this time I'm going to right-click triangle and I'm going to right-click and make a duplicate layer. And I created a duplicate layer. I have the Move Tool selected and I can drag it out. So now what I wanna do is I want to take, I want to be able to rotate this. So it's basically flipped around. So I can click on the rotate is going to give me a decrease of how many degrees I'm rotating it. So let's say I want to just rotate it right here. And let's say that's not really perfect, is it? I would really love to rotate this perfectly. So let's go back. And I can hold down the Shift key. Went before I click and drag or rotate. And it's going to click on these perfect little even numbers do due to all the way down here. So let's make these different colors so that we know kind of which one is which. So I'm here on my appearance panel. I have my Layer selected. I'm going to double-click blue and make it orange. And go ahead and click on my document to unselect. So there we go. We have two different layers. I can click and move these around. So what I'm gonna do is I'm going to take both of these. And you can also select your layers right here. You can, a trick to select more than one layer is you can click on the layer, hold down the Shift key, and highlight two layers. Or I have this one selected. I can hold down the Shift key, click up here and click, and it'll select more than one. Just kind of a little trick to be able to select more than one layer. So let me select triangle to, I guess, call this blue triangle and call this red or orange triangle. So I can select one, hold down, Shift, select two. I can duplicate these. So I can right-click and duplicate layers. Just kind of a long way to do it. That's okay. It made a copy of both with the Move Tool selected and these copy selected, I'm going to drag it down. We're gonna change it so it switched around. So the blue triangle is above the orange triangle, it's on top of the layering system. So right now the oranges on top of the blue. So all I'm gonna do is I'm going to highlight my blue triangle Layer. And I'm just gonna click and drag. And it's going to pop on top. And now it's on the top of the language system. And we can also drag it back down below. So lots of easy ways to kinda get layers on top of each other. We are back in Adobe Photoshop and we're gonna talk about the text tool. So there's a couple different ways to create text and great single line text, like for headlines. Or it can create text blocks. We're gonna do both of those with this exercise. So let's do the very basics. Let's select our type tool right down here. It's going to look like a little t. So we have that selected in our toolbar and we're just going to click once and go ahead and type in lowercase. So lowercase. And we're gonna make it a little bit bigger. We're just taking our Transform controls and the corner and just making it a little bit bigger. It looks like I have italics on so that's no big deal. And go over here to my Properties panel. I'm gonna go ahead and drag that out. And I'm using Open Sans, which you can find on Google Fonts. So if you Google Google Fonts, it'll pull up a website where you can download Open Sans. It's a free font that you can use, or you can use Helvetica, You can use Arial, all these different typefaces. It doesn't really matter, but that's what I'm using here. If you wanted to match it perfectly, but don't feel the pressure if you, if you don't feel like going and finding Open Sans on Google fonts. But I wanted to use a typeface that anybody could download and use without having to purchase any kind of typeface. But I love Open Sans. It's a nice, flexible typeface. So let's go ahead and Character panel. We can go ahead and change it. Instead of metallic, we can do light. So now it's going to match it a little bit better. You can also manually change the size of the topography here. So if we wanted to make it bigger, we can type in 30. This is going to be points, the point system. And we can drag it to make it match. It looks like it's 30 points and size. So pretty simple enough, just in character panel, just changing some basic characteristics, just like you wouldn't a work program as well. So now I'm going to make a copy, and this time I'm going to use my little shortcut. And I'm going to hold down Option or Alt and click and drag. So now I can sit here and if I wanna do all caps, I can hold down the Shift key as I type and create all caps. But that's kinda cumbersome. I want to be able to change it to all caps without having to sit there and retype it out again. And so let's say I wanna go back in my history. Let's say I did a step. And I really want to go back to how I had it before. I want to go back to the lowercase. I can then go back to my history panel, which it looks like I don't see it. I think that's history right there. It's right here in my little dropdown menu, but let's say I want to drag it out and see what it looks like. So here is our little history panel and go back steps in time. So let's say this is all the exercises, are all the activities that we've done. It keeps track of everything we've done and we can go back in our history panel to go back to a previous state. So I moved it nice set the character style, I did all these things. Let's go back to where we were. So we can click on each one of these and go back to where we were there we are. So if you ever want to go back in time, you can always go to your History panel and it remembers all the different things and activities that you did. I'm going to drag that back into my panel for later. Let's zoom in and here is how we can make it all uppercase very quickly. We're right down here into the type options. And we're going to go ahead and get the Double uppercase, all Cat icon. We're gonna go ahead and click on all caps. And it's gonna make it all caps for us. And let's type in all caps. And you could switch this off at any time. We can toggle this on and off. And it just makes it a lot easier to do headlines without having to retype everything in all caps yourself and just type it in and in all caps. Let's do some different other things happening here. So let's duplicate this. And let's make this bold and the type and bold. And I'm going to change the font weight, which is really easy because it's right here in our Character panel. Mean is go down to bold. And this is also the spacing is called tracking. It's the spacing between characters. We talked a lot about this and the theory lessons. This is where you would change it, you're tracking and we'll set it to default 0, which is the default spacing between characters. If you want to make it tighter, you can do a negative. So let's do like a negative 52, do it tighter or even tighter we can do and negative 100, this is really going to make a really compact type. Or you can make it real wide spacing and do a positive 200. You can manually type in your number. So let's say I want more than 200. You can type in 800 and it could go beyond 200. You don't, you're not stuck with just 200. You can mainly Type in much bigger numbers to get more dramatic spacing. And once again, all the stuff we're going to be doing over and over again. So don't feel like you have to master everything I'm talking about right now. Just do the basic shapes and learn. Get comfortable with layers and the shapes and the Move tool. So let's do a negative 100 or let me do a negative 75. I can take my move tool click off and there's our little Bold. Looks like I might have done this at a negative 25. That might be what I did for this, but just kinda tweaking, you don't have to match this perfectly. We're just practicing. We've already kind of done this. Next one is type and wide. And we can just make this whiles do a 100. Oh, there it is, 100 and I haven't labeled there for myself. So let's type it in manually. And now we have that matched. So that's great. You just click once and able to type and you create this great kind of headline typography. But let's say I want to create a paragraph like this. And I want to be able to easily change the shape of that paragraph. So let's say a taker type tool, I click once and let me take all caps off is going into my type options doing lowercase and getting my tracking back to 0. I am going to type right here. And let's say I want to have a line break. I would have to. I mean, nothing's gonna stop me. I could keep typing over and over and there's no box for it to go to the next line. So I have to press return or enter and just do it manually, which is fine if you're gonna do a one-sentence headline, that's okay. But I want to be able to have a bounding box for my type. So let's do that. Something a little bit different. So instead of clicking once and just typing stuff, we're just gonna do a slight tweak. And we're gonna get our type tool. We're going to click once and continue to click. So we're clicking and holding and dragging. It's all we're doing. And now we've been able to create a bounding box for our paragraph. So let's get everything back to normal. And there's kind of a nice, nice spacing and kerning and all that stuff between all of the sentences. So let's say instead of me typing in gobbledygook, I'd like to go ahead and load some default random text. There's a little trick that you can do. So what I'm gonna do is I'm going to go up to type and I'm going to do paste Lorem Ipsum. Lorem ipsum is Latin. It's just random Latin words, kind of a random paragraph that you can paste in there. So let's do Paste Lorem Ipsum. And it's gonna paste a bunch of dummy text that we can use to play with. So what we did, I've got my move tool. So now look, we created this box and what's great about this is automatically does line breaks for me and creates a bounding box. So what I can do is I can select the Type tool at the Type Tool selected selector object. And you're gonna see these dotted lines. That's going to give you a chance to expand this out, make it bigger. Let's move our Properties panel over so you can make it longer. You can make it like a short column. And it's absolutely great for being able to work and create all this without having to sit there and manually create line breaks so we can change the spacing between the lines. Right now, it's kind of a default. It looks really nice, but let's say we wanna add more spacing or when we want to contract it more. So we have our Move Tool selected. We're gonna select our tire box here. I'm going to double-click anytime you want to edit text and a newer version of Photoshop, you just have to double-click any kinda text box and I'll highlight it all. It's kinda nice. So with everything highlighted, I wanna go down to my character panel and I want to change, let's say I want to make it bigger, 16 letting. So have really wide spaces between where it can make it really tight. And we could also change your type size here so we can make it a little bit smaller, still like an even six. So lots of different ways and we'll do a lot of this a little bit later. Especially. We don't really work with large blocks of copy like this or large blocks of text at Photoshop as much, I use Photoshop mostly for photo editing and putting together some really short social media posts. So I don't really have tons and tons of text I'm working with in Photoshop. But I wanted to let you know it is possible to manage and create paragraph boxes in Photoshop, and we'll do a lot more of that in Adobe Illustrator, and even more we'll work with really large blocks of copy in Adobe InDesign, which is really designed for lots of big long paragraphs. So anytime you want to edit the size, make sure this is the trick. You can select the Move Tool and you're like, well, I can move it. I can make it bigger or smaller. But to change the actual text container, you gotta select the text type tool and then it'll give you that dotted line. That's kinda tricky. It took me a little bit of time to realize I had to do that. And there is the tricks collect, Move tool. We can de-select, click somewhere outside on our board. And we can go ahead and move on to the next one. Here's another layer challenge I missed. Let's go ahead and create these three circles. And we'll do that in the next video.
30. Adobe Photoshop - Photo Basics - Frames: Here's another quick layer challenge because she'd never practiced layers enough. Let's do this one real quick and skidding the Ellipse tool. And let's go put our Properties panel over here and let's get our Layers panel out here. You don't have to drag this out every time. I'd just like to have it close by. So let's create a new layer. Let's call this circle one. Hold down shift and drag to get a nice perfect circle. And we can duplicate this layer. Duplicate layer, have a copy and I can drag the silver, but sometimes when I just use my mouse and I drag it over, it's not like perfectly lining up. I could these little pink smart guys that are going to help me snap things and position. But if you were to do Beckett duplicate, hold down the Shift key and drag. And it will kind of put it in this line for you so you don't have to sit there and try to perfectly guess it. Let's try that one more time and then make a duplicate, right-click Duplicate Layer. And take that duplicated. I'm gonna hold down shift and drag and it's going to just keep it right in the same line. Let's make these different colors. I can select my object, have the Move tool and selecting my object, clicking on it, go over to Appearance. I can change this to read. Click over here, I can change this to yellow. So the goal of the exercise is to create three circles and move them in the layering system to create this arrangement with the center circle on top of the other two. So this is how I haven't selected C, the center is on the top. So what I wanna do is I want to find this orange one. So this is the orange one. I can label these to make it easier on myself. But it's this one right here, habits selected. I'm just going to move this on top. So that seems really simple. But what's great about this is I can have these overlap in any way imaginable. And once I label them, that makes it a lot easier. So if I have this as orange and yellow, I can go ahead and this seems really basic. But when you have 50 layers, it is so good to be able to really understand that layering system. So the next thing we're going to talk about is photos. How do we add photos in Photoshop? We're going to talk about editing photos and future videos. But right now it's just about adding and bringing in photos into Photoshop and get a lot of student questions about how do you bring photos in? And there's lots of different ways to bring in photos. One of my favorite ways to bring in photos is using the frame tool. So what the frame tool does is it creates this. Go ahead and find it over here on our tool bar. This is the frame tool. And what it does is it helps to bring in photos and a predetermined shape. So let's say I know I want to have a photo of this rectangular size. Here's what I'm gonna do. I'm gonna get the frame tool. I'm going to click and drag and go ahead and try to form a rectangle. So you'll see this little cross lines. That means that's a frame and that you can drag in photos from your computer right into the frame. It'll automatically populate in that shape and crop it right there on that shape. So let's take a photo that I've downloaded online. And I can click and drag this just right over it, just going to click it right in. It's going to automatically populate and frame it. And I could take the Move tool, I can move this around, move my frame around. Let's say I want to zoom in on her, but keep the same frame. I can double-click on the image. So I'm gonna try that again. It's going to select it, double-click on the image. And then I can take these transform controls and I can make it a little bit bigger and it still keeps the frame size, which is really nice. I can press on enter and there she is cropped. And there we're gonna create that again. So we are going to create a frame. Got our frame tool must match this rectangle right here perfectly. Well, let's go ahead and bring an image in. It could be any image. And here's the challenge. Extend the frame to cover the space and frame the photo properly and extended space. So as we studied before, we can double-click the photo and be able to crop the photo within this frame. But I want to be able to extend that frame outward. So I'm going to kinda zoom in so you can kinda see what I'm selecting here. So I'm going to click the frame. You'll see like a little blue outline. I'm going to click it again. I'm going to be able to bring it out an extended outwards press Enter. So you'll notice I extended the frame C, I extended it out, but the photos cropped right there. So what I need to do is double-click the photo and extend that out. Just like that. So that's one way to bring in photos. There's many different ways, but we could also do it with a circle. If I go up to my frame tool right here, you'll notice an extra circle option has loaded up here at the top. So we could click on circle, and then we can create a circle frame and drag it into a circle space. Could double-click the photo to move the photo around, maybe crop it with the move tool. Get this transform controls. That's how you get the Transform controls as you go to the Move tool. And I press enter. Or if I want to change the frame, I deselect the frame and bring it out. There's other ways to add photos. I'm going to show you really quickly. Go to File New. I'm just gonna create a new document. It's gonna create what we already had good down to create. I can do a File Place. So this is another way to bring in photos. You go to File, gonna go down to place embedded. And we're going to be able to place an imbedded photo. And I'll just bring it in the press enter. And we have a separate photo layer that you can make a little bit bigger. And it works really well. That's one way to do it. There's another way I like to do it. You could drag a photo right in there without a container. So let's say we're in here and I can just drag it right in. You don't have to have a frame. You do not have to have a frame. But what it's gonna do is it's going to bring it in at like a full resolution. So you just have to take it and then scale it how you like to. So a couple different ways to bring in photos. You can just drag them right in and you can drag them into a frame, whatever you'd like to do. So next thing we're gonna do is the Brush tool. We're gonna do brush tool work later on when we talk about layering masks. And that's a couple other more intermediate kind of tools. So let's go ahead and get started with the brush tool.
31. Basics - The Brush Tool: So here we are, the Brush tool. So the brush tool is found on your toolbar or right down here, it's this little icon right here was gonna select their regular brush tool. And we are going to use to skin to be very, very simple. The soft round brush. So when you go up here to the top left, you'll see an ability to make your brush eyes bigger. So we're gonna go down to our general brushes and we want to load the soft round brush. This kinda has a feathering effect to it, and I use this probably way more than any other default brush. Let's select the soft round brush, and let's go ahead and make it 100 size. I have labeled here so you can know what to make it. So a 100, this is where you change the size of your brush. You can go ahead and press enter. And now I'm gonna take my brush tool and you'll notice I have this kind of symbol. It's not let me create anything it says could not use the Brush tool because no Layer selected, I'm going to create my layer. So who's gonna go down here always gonna make sure to create my layer. And this will be the soft round brush. So now I have a layer to draw on. So let's change it. We can change it to like a grey or a, let's do blue so we can kinda paint over it and see how we do here. So we have a blue color. We're going to click and drag. So you'll notice I've tried to do my best to match it, but let's not perfect. So we can try our little hold down shift trick. So I'm gonna hold down my shift key, then click and drag and I can make it a perfect, no matter what I move here, I could make it a perfect line. So I'm going to hold down shift and drag, and I can go back over it a second time. You notice how it makes it a little bit thicker. It's almost like painting it on over and over and over. Say that. Let's do a hard round brush. So I'm gonna go up here to the top. I'm going to select hard round right below it. And I'm gonna do the same thing. I'm gonna hold down shift, click and drag and say look that nice, perfect size. If I were to not hold down shift, I'm not really that good with my mouse, so, so definitely holding down shift really helps it make nice and smooth. So let's reduce the brush size. Let's reduce it to 30 points. You can type it in manually or you can slide it. Sometimes I just like to double-click and type it in manually. Now I could do my best to match it up. I can zoom in. Click shift old. And there's the hard round brush. Very, very basic brush kind of tools. There's all sorts of things we're gonna do with it later. When we do layering masks and we paint on layering mass will do that later. So here's another little challenge with opacity. We've already kind of talked about opacity a little bit. But we're gonna do it right here. We're gonna go to our Layers panel and we're going to make sure we're on a 100% opacity, a 100% strength. And we are going to believe that's a 100 points and it doesn't have to match perfectly. We're just practicing opacity. Let's go ahead and click, shift and go down. Let's make that a different color. So I'm gonna go down here to my color, my fill right down here. Let's make it orange so we can see what we're doing. Click, hold down, shift and drag. That's a 100%. So let's do a seventy-five percent opacity. And I have my brush tool selected. So instead of just creating another line, you notice all of this is connected. So if I make this seventy-five percent is going to change both of them. I want to have individual control over everything I do. So here's what I'm gonna do. Instead. I'm gonna create a new layer. And now it's going to be independent layer that I can change. And there we go, it's all independent. Mega New Layer and definitely name yours. Sometimes it happens so many layers, it's too long and rename stuff, but I highly encourage you to name your layers if you want to take the time. Some people are lazy, like myself, that's okay. Alright, any layer, click hold, and that'll be 25. That kinda helps you remember to create a new layer with each new thing you do, especially when you're changing different opacities. You don't want them to all be connected. Sometimes you want them all to be connected. You can just keep it all in the same layer. We did the worksheet. There's only one little thing we have left is an extra challenge. And we're gonna do that next. This is the very, very, very basics of Adobe Photoshop. This is great if you're brand new to Adobe Photoshop. Hopefully you got used to the layering system and just creating basic shapes and using the type tool. We're going to take what we've learned in the last 20 to 30 minutes. And we're gonna do the challenge right here. It's a challenge. We're gonna create a simple social media posts and we're going to put a headline on top of a photo. And I'm even going to make it a little bit more complicated and throw in a couple of shapes too. It's going to really help us practice that layering system. And then after that, we're going to start to tackle some pretty cool projects and Photoshop. So we're going to be able to go over the same tools over and over again with repetition so that you don't feel afraid that you have to master this before moving on. Just keep moving through those lessons. And you're gonna get really familiar with this just through repetition and practice in time.
32. Adobe Photoshop - Practice Project: We are going to tackle the challenge. So we're going to take what we've learned and worker to create a very simple Instagram post. We're gonna, the only requirement is to have a photo and have text on top of the photo. So let's create a new document file, new. It's going to remember what we created last time, which was already an Instagram post size 1080 by 1080 pixels. You could do whatever size you want. You don't have to copy me perfectly. Go ahead and keep everything default and just click on Create. So here's our document. There's a lot of ways we can bring in our photo. And so I went to pixels.com, which I find a lot of my photos on, and I just typed in shoe. I wanted to do a quick little shoe post that said 20% offer some kind of advertising for a shoe is something we can quickly practice our layer system with saying went ahead and downloaded this photo. It's by Melvin Buso. Photographers will sometimes remove photos from pixels. This is a free website. I'd love to find a pixels.com. I loved to find photos. I gotta get really sick of me talking about because I talk about it all the time. A lot of the photos I use for projects are found on pixels. If a photographer removes a photo, try to find a different type of photo. It happens all the time. I use a photo for a project and then the photographer removes it, and then students don't have access to it. That's okay. You can use an alternative. One does type in shoe if for some reason that one's no longer available right now, it should be. You can type in and do this exercise over and over again with different photos. So I downloaded that photo, I can drag it in. So I have my downloads, I can just drag it right in and it's going to automatically populate it. You could have created a frame if you wanted to frame perfectly in the square. You could create a frame that goes over the whole document and that is a circle. We want to create a square, so it just went up there and selected square. And I can do the same thing and drag it in. So I can double-click and I can move and frame this how I want. So I get the Move tool, so I can get my transform box. That move tool is handy for that. But I mean, it really depends if you like working with frames or not. They have their benefits and they have their negatives. For this case, I think I'm just going to drag it in and not use a frame. Drag it in and not user frame because it's a pretty easy. I like to use frames when I'm using working with multiple photos. But when I have like one big background photo sometimes is dragging it in works really well too. So let's put we have our background layer, let's just say Shu photo. On our layer we have this background layer which is by default, you can unlock this. So you see how has this little lock icon. You can lock layers so that you don't accidentally move it. The Background layer is almost always locked, but you can unlock it by just selecting the lock icon. And now it's its own little white layer. But I'm gonna keep it locked. I just wanted to kind of show you locking. You can also lock the shoe photo. So let's say I have this cropped perfectly. I don't want to change it. I have it. I don't want to accidentally select it and move it. You up to this lock icon and go ahead and zoom in and could see the little lock icon, lock it. So if you ever have a hard time selecting a layer, make sure it's not locked. And now I can click and I can drag it around, kinda locks it in place. So let's create a text layer. So for Text layers, what's great about it, or type layers? And click on the Type Tool and click. What's great about it is it creates a layer for you. Yeah, it's not like an object where you have to create a new layer and then load the object. It automatically turns it into its own layer. So we could say 20% off. And we get our moved tool and get her transform control so it can make it bigger. And press Enter and we're happy with it. We can go over to our properties panel and we can change the color. And if you want to try to get the eye dropper tool and sample this yellow, because I like to bring out colors and photos and tie them all together to create a theme. So I'm going to double-click this color swatch in my Properties panel. And if I have this color picker that pops up, I can go outside of this color picker and then automatically it's going to give me an eyedropper tool to sample a color. So I'm gonna go down here and sample a yellow color. Now might be a little dark, so I have to kind of test out, make sure it's going to be visible enough. We could also sample this read because there's a lot of red also in here because that's just not going to be high contrast enough. I'm not going to be able to see that very well. So maybe just trying some different colors to sample out, see what could work. Maybe the red. So we could change the typeface to anything we want. Y Now it is having on Open Sans, I guess we can keep it with open sands. We can make it extra bold, make it nice and big and bold. And we need to have some details. So let's go ahead and create a duplicate of this text on into Disco. Right-click Duplicate Layer and have the Move Tool selected. I'm just gonna drag it down. And we type in shoes. So now we have kind of these kind of two textboxes that are independent of each other that we can use. So let's have some contrast between these two. So let's take shoes, let's make it regular. And let's bring out one of these other colors. Bring out black, click OK, ticker, Move tool, and click off. So now we have these independent layers. So now I can click and drag. Here is another great way to select multiple layers. Second, click and drag, as long as there's no other background layers in the way. And click and drag and I can select both of these to distract them down. You can just find an opportunity to place that here. So that is okay, but it really doesn't pop. We need to get maybe like a shape or something to really get something to pop off that white. So I have the Ellipse tool selected, and I'm just gonna create an ellipse tool. Let's make sure we have a new layer. Click and hold. And we have our ellipse tool. Let's drag this where the type is on top of the circle. So we're going to drag this ellipse tool below the type. So I'll just click and hold and drag it right below. Now I can kind of change the colors on here to make sure they pop. So I'm just going to color and I'm just making them white. So we can make this ellipse tool a little bit smaller. Put a right here in this open area. And maybe we can center align those two objects. And it could be that black shows it better. And it could be just have to find the right combination makes sure it's high contrast enough to be readable. So I will make this yellow that's just not popping. But if I were to change the topography to maybe this black that's in the picture. It's going to have just enough contrast to be shown a little bit better. So that's nothing too amazing or two brilliant, just kind of practicing layer system. So we have our type on the very top. We have our photo locked and on the bottom. And we have this ellipse tool that we can freely move around. And we could freely move each one of these textboxes around as well to make a headline. Let's go a little bit more detailed and do another little small image.
33. Practice Project Part 2: We're going to take the basic skills we've just learned to recreate this social media post as just a simple image. There are two text boxes here and a colored background. So this is what we're going to be creating right now. So I'm going to open up a new document, just go to File New, and just do the same old 1080 by 1080 pixels we've been doing and prior projects. So here we have our canvas. And since we have, if I go back here to the completed version, we had this photo in a frame in a particular size. And we have this nice generous margin around it, which really gives it some nice breathing room. It's just a specific kind of design layout and style that looks really nice and clean. So because this has a particular size and I would like to use frames instead of just dragging my photo in and a high resolution and sizing it up. I'm going to bring in the photo using frames this time. So let's do that. Let's get our frame tool. And let's do about kind of the same size you saw before I went to have kinda equal generous margins around. And I want to leave a little extra space to kind of show a little bit of that background color throughout. Worse, I can take the Move tool and position this. Anyway, I like when I'm happy I can drag my photo right in. Its drag it and you do not have to use this photo. This is the photo I used from pixels.com, bar Marcello shake us and you can find that photo, you can use another photo. Doesn't really matter. You don't have to use the same one. Actually like it when you use different photos than what I have. But if you want to follow along, now that happened in the frame, I'm going to click twice and I'm able to kind of crop it a little bit better. I have the Move Tool selected, so I have my Transform controls that I can kinda the right cropping for her. And I'd like to show off a little bit of that dress too, because I think I want to bring in a little bit of the green and the dress. So just trying to find the right position and a press Enter when I'm happy and click off. So I wanted to create a colored background. So by default, I have this locked background layer and I can unlock it and just use that. Or I can create a new layer and use the Rectangle tool and just create kind of a background color. So whatever you wanted to use a can have a background, you can toggle it off, deleted, or even just use that background and change the color of the background. Or you could do what I did and just bring in a rectangle tool to be your background layer doesn't really matter, however you want to do it. So now that I've created and used a rectangle tool, I have the ability to easily change the color. I'm gonna go over here to the special area where I can get my Hue cube out and I can select any color. So any of these colors are going to work. Okay, but what I like to do is find inspiration from the photos themselves. So I'm just gonna go out here, get that eyedropper tools could automatically kind of load for you. And we can select different colors. And then click OK to see, see what we think works well. So what I'd like to do is bring out, we could bring out the green like that. And so it kinda playing off the green in her shirt. We can also play off of the limbic. I'd get my color back here. Off kind of summer her skin tones as well. So kind of some medium, not highlight, not shadow but just something kind of in the middle. And it just feels like the photo in the background are kinda more together as one unit because you have a lot of the skin color and you kinda bringing that out in the background. You can do the green as well, whatever makes you feel better. And let's bring in some topography. So let's just do this really generic, simple short headline. So let's go ahead and make sure we don't have anything selected. Let's get our type tool. Let's click just down here. Let's click once we're not going to be making a paragraph box, just a simple headline. So let's do live, live life to the end. Let's put fullest on its own layer so it can make that a little bit bigger and have some contrast between our lines of type. So live life to the, lets us make a duplicate of this hold down Option or Alt and drag live life to the fullest. Let's type and fullest. And let's make this one a little bit bigger. And just kind of arrange this. What I'd like to do sometimes when I have this kind of specific design style where have these nice, generous marked margins and nice clean lines. What I also like to do is push the boundary of the topography a little bit, maybe push it outside the box. So you're kind of creating this nice, interesting tension in the design. So now what I wanna do is let's do some all caps here. Let's definitely do it to this larger one. I want to try to differentiate these two different lines of type. So they just read really well together and there's contrast and there's interesting things happening between the two lines of type. So let's go to our properties panel and sometimes you have to scroll down to find the all caps option. So all caps for that. And let's also do all caps for this one as well. We can find other ways to add contrast here by maybe changing the weight of the lived life to the fullest or live life to the, that's not as important or interesting as fullest like. That's our big where did the headline? So let's maybe lighten the font-weight here. Let's double-click this highlighted. And let's go to properties. You have to go right back up here. And let's do maybe a semi bold, perhaps. Get my move tool is kinda click off. And there we go. So we can arrange these. And I kind of like, I mean, we could do this perfect left alignment. But you know, it's always a little interesting to kind of have, kind of go down and to the right, just kinda reads really nicely. And something that can make it a little elegant as adding some spacing between the characters are changing our tracking. So let's tell right now this is default. Let's see what this is. This is 0 right over here in Properties panel. Let's maybe make that 200 and make this a little bit smaller. This adds a little spacing and interesting. Looks at that. So I'm going to press Enter here and let's say I want to nudge it right over to the edge here. I can take my arrow keys on my keyboard to just do some slight nudging of any layer. So if I want to kind of bring that e over and I don't feel like having to move it over with my mouse. I can just do my little right arrow key and it just nudges that just a little bit. That's great for making little minor adjustments is using this arrow keys on your keyboard. A little trick. And kind of a popular thing to do is kind of bringing these really big words and headlines to the very edge of the document. It's just a style thing that's popular these days. You do not have to do that. I've just noticed a lot with social media post. I did a design trends for 22021 on social media posts, which you can watch that lesson if you're a part of this course at the end of the class and we do some really cool trend work with social media posts like using outlined topography instead of the solid fill for typography that's been kind of really popular. And so we put together really cool projects toward the end of the course. So we have our topography at the very top of the layering system. If we had these at the bottom, below the background, you would not see them. But we can drive these on the very top so that they are on the top. We have a couple of layers, we have the type layers. We have a photo here within a frame. If you ever want to remove a photo from a from a frame. So this isn't a frame. We don't want the frame. We just want the full photo unframed. Click on this little thumbnail, right-click it. Remove frame from layer. So it's going to remove the frame, it's going to make it a full photo again. Or you can go back into your history panel. Go back one step to get it back to how you had it. So the kinda use the history panel if you wanna check out how something looks. And if you don't like it, you can go back in your history one step and you don't have to sit there and reframe it all over again if he didn't like how it looked. So now can unlock that and make it any other color that I'd like to make it if I want to tweak the color and maybe do the green. Super, super simple arrangement of layers. We used frames, but you don't have to use frames to bring in photos all the time. They're just really help with getting him into a predetermined size. So there we go. I really hope these lessons that I read did I reworked, I refilled. I wanted to slow everything down a little bit because I feel like with my prior lessons I went a little fast and I heard your feedback and I wanted to redo these lessons to make sure we to slow down and really understood the basic interface so that you can feel confident. Moving on to some more intermediate tasks we're gonna be doing. Some photo editing, are going to be working with some really popular tools like the liquefy tool and going to be removing objects, cutting out people. So we can really work with that layering system and put people in text and really wrap them all together to create some really cool stuff. So I can't wait to see you in the next section.
34. Extra Lesson: Smart Objects: Before we move on to the photo editing section, I wanted to address a lot of student concerns and questions about certain editing options being greyed out in the menu system. So there are a couple of ways to bring in photos, as we just talked about. And I want to talk about smart objects. So Smart Objects or special layers that retain the original photos characteristics. And what's great about this is it can scale higher resolutions up and down without blurring as it remembers the original resolutions and pixels. So there are several ways you might open up photos, as we discussed. If we were to take a photo and bring it right into Photoshop and open it. You'll get a photo here. And you'll notice that the background layers locked. That's easy. We can double-click it and click on OK. unlock that layer. Now we have the ability to edit that photo. We can go up to image adjustments and we can do all of our different adjustments layer, which is what we're gonna talk about in the next lesson. But a lot of students have had the concern that a couple of these are grayed out of and they're not able to really apply a lot of the effects and edit the photo are cut any kind of objects out. That's because they have smart objects on. And so I drag the photo in and it opened up as a regular layer. If I were to open up a new document like we were doing in the previous lessons. And I can drag a photo in. If I drag a photo into a document that's already open and I press Enter. You'll notice it is called a Smart Object. The see this little icon down here. That means that we're gonna go over this a couple more times in the course as a smart object. And so it retains everything about the photo. So I can make it really small. Press enter. And I can make the photo really big again. And it retains that high resolution. It never really loses it. It doesn't pixelate. If I were to take the image that I just opened up directly as a new image. I just went like this and drag it and I didn't put it into an already existing document, brought this into Photoshop. You'll notice it doesn't bring it in as a smart object. I'm gonna skill is really, really tiny. Press enter. And I were to blow it back up again. You'll notice it didn't remember the pixels. It doesn't retain any of the original images, dimensions, or characteristics. So it gets really blurry. So you can see why having smart objects on when you're not sure the final size of your photo is really nice. So if I go over here and I have this as a Smart Object, Smart Object, thumbnail. It can always tell because of that little icon, I go to image and will say I want to start to do some photo editing, which we're going to be talking about this, you'll notice a lot of these are grayed out. That's because some of these adjustments cannot be applied to Smart Object layers. So to fix this problem and you're happy with the final size of this photo. You can always right-click any smart object layer and you can rasterize the layer. And when you Rasterize the layer, you remove the Smart Object abilities. But this means you can have a few more options that are not greyed out. So now you notice all of a sudden when I right-clicked and Rasterize the layer and no longer made it a smart object. I can do more things to it. But smart objects have their place, especially when you're want to scale up and down images. I felt like I just wanted to include this extra lesson to kinda go through that. So you didn't get confused when I start doing photo editing and maybe you dragged her photo right into an already existing document and it made it a Smart Object. So let's say you want to make an image a smart object. So let's go ahead and practice. Let's right-click. And so Rasterize Layer, This is just a regular layer. Let's say I want to make it a Smart Object. And for some reason the photo doesn't have that little icon. It's not a smart object. I went to right-click and I want to be able to Convert to Smart Object. So now it's a smart object. I'm free to make it small, and I'm free to make it big, and it retains all that original pixel data and resolution data. So that's what smart objects are four, there's other things you can't do with smart objects. So anything that directly edits a pixel. So there are Dodge and Burn tools here. There's a couple other tools. There's a painting, there's cloning. If you ever wanted to clone a smart object. If I went over to my clone tool and don't worry, we're going to be going over this. You'll notice I have this little no sign. This little cannot do it, cannot perform operation signs I click says could not use the clone stamp because the area to clone has not been defined. So that is because it's the smart object and you can't edit the little individual pixels directly with smart objects. And that's no problem because I can right-click rasterize. Now I have the ability to lose the clone tool and I can take my sample and start to clone. And so if you ever run into any problems and might be because you have smart layers on and you can always right-click and rasterize that layer. Or you can convert it to a smart object if you want to be making, resizing lots of photos and you don't want to get it to be pixelated. So right-click rasterize and you can do a few of these things like the clone tool and a couple of the adjustment tools. But I prefer leaving an image and smart objects as long as you can, because it's nice to be able to scale it without that pixelation. So hopefully that's not confusing. If it's confusing, don't worry. I can just ask me the question and hopefully I can clear up anything for you. We're gonna be going over that again and again, like a lot of things here, so don't panic, don't stress out. This has a lot to take in. So I'll see you in the next lesson. We're going to start to do some photo editing.
35. Photo Editing Introduction: Welcome to the Photoshop editing section. So what we're gonna do now we've learned the basics and now we're going to learn how to really edit photography and photos. And as a graphic designer, you're most likely going to receive and work with photos that are not edited. And it's going to be up to you to tweak it to make it match a project. A lot of times clients will take their own photography for the restaurant or a picture of their product. And it's less than desired. And it's your job to make sure it looks excellent, sharp, bright, and matches the mood of the design. So we're going to learn some very basic things here. And the downloadable files as part of the course, you'll have four different photo assets that we're going to use in this section. The first one is a texture. The second one is the hourglass, the third one a piano, and the fourth one up plant. And these are all photos I took in my own home with a very simple iPhone X. I did 0 prior editing to these photos. These are right off my phone. And the reason I wanted to do this is when I taught this section before, I would take photos off those awesome photo websites like Pexels.com. And a lot of those were already really well done and professionally edited photos by photographers. What I wanted to do is teach you how to edit photos that are right off of a phone or right, I'll have a camera that need that final touch. The first photo, which is going to be the hourglass, we're going to just drag that right into Photoshop. As a new document. You can also go to File Open and find it that way too. You'll notice when you open it as a new document that we don't have smart objects on, like we talked about in the prior lesson. We can simply right-click and just make sure that smart objects are on Convert to Smart Object. We're going to need that when we're doing our adjustments. So now that it's a smart object and we can tell because of the icon, we are going to really dive into the adjustments panel. So remember in the first few lessons of Photoshop, we talked about how you can go up to image, go up to adjustments. And this is kind of where all of your photo editing tools live is right up here. But there's also a panel that you can pull up called adjustments, which has a lot of these same settings. They're really the same options. If you do not see the adjustments panel simply go up to window and just make sure adjustments is checked. So here's the difference. And don't worry if you get a little bit confused. It It's a little confusing because you can access it through the panel or you can access it here, but it does things a little bit differently. So when I go up to image adjustments and let's say I want to add a little bit of brightness and contrast to this photo. I can select brightness and contrast. And we're going to have some sliders here. And we can increase the brightness, which it does exactly what it says. It's going to bring out all of those highlights and make them more white or lighter. And let's say we want to add contrast. So that's going to change the difference between all the white pixels and the dark pixels. It's gonna go ahead and add more dramatic differences between the two. So it's going to make your darker pixels darker or lighter pixels lighter. So let's go ahead and increase the contrast we're going to click Okay, and this is just to demonstrate what happens if we go this route and we go to Image Adjustments. And you'll notice, because I have this as a smart layer, any adjustment that I add, it's going to add it as a smart filter. Because if you add any kind of filter adjustment on a smart layer, it's going to be a smart filter. What is amazing about this is I can toggle this on and off. So I'm just doing the visibility on and off. So that's before and after. And I can also delete it. So if I just click this smart layer and drag, I can delete that layer and I'm back to my original photo. If this wasn't a smart layer, so let's just right-click Rasterize Layer and it was just a regular layer. I can go up to image adjustments and do the same thing. Brightness contrast. Let's make it really dramatic. So we can see the difference. Click, Okay, and notice I don't have that extra smart filter. I can't delete it. Once it's done, it's over. I can't go back and change anything. I can go back in my history panel and go back one step. But let's say I've already done five other edits to it. I changed the color and sharpened it and that several things I can't, I have to go all the way back to this step. If I wanted to change, are adjusted anything. So let's go back in our history panel to right before we rasterize the layer. And now it's back as a smart object. So I can go back to Image Adjustments, brightness, contrast, make it really bright. And let's say, Oh, that's over processed. Didn't like that. Have a smart filter where I can go to select brightness and contrast. I can double-click the text brightness and contrast, and it'll pull up slider and I can bring it right back down to a normal level, maybe not quite as bad. And change the contrast and click Okay. And I can adjust it again and again and again. And I don't have to go back in my history panel. I can continue to edit this. And I can manage all sorts of smart filters. So every adjustment I can make can go back and go back and edit it again without changing everything else in the document. So let's delete this smart filter. It's gonna click and drag it into the trash can. And let's start fresh. And we're going to do most of these adjustments. And this is where it does. It gets a little complicated, but you can re-watch the video, will do lots of this practice in the future. But if you were to add a, let's say this is a smart object, I am adding brightness and contrast. And I did some kind of adjustment. And you see how it's, the main photo is apparent and the smart filter as a child. So this smart filter only applies to this layer and that's it. I can't drag this filter anywhere else to effect a second photo that was on the page. So let's drag another photo in. Just for an example, let's drag this piano photo in. So this piano photo is unaffected by the smart filter. Even if I drag it underneath, the brightness is not applied to that piano photo. But if I were to go a different route and I use the adjustments panel right here, it'll apply the same filter, smart filter, but it'll do so not dependent on that layer. So let's start fresh. We just have two images as an example. And instead we're going to use this adjustments panel. Instead of going up to image adjustments and adding it, we're going to add it to the adjustments panel. So let's do hue and saturation. And let's do kind of a pretty big shift and the hue. And let's make it highly saturated. So that made a dramatic effect on that layer. But notice that this layer is not affected, but this is now its own layer as before, it was nested as a child, and it was only affecting that one layer and I couldn't move it. This I can bring on the top and affect all the layers in the document. So now all the layers are affected by this hue and saturation. We can toggle it on and off, and I can also delete it. So there's two different ways you can add adjustments, really. If you were to add Image Adjustments, do the top image menu system. It'll do it only on that layer that you select. If you do it as a part of adjustments, it'll do its own independent layer which you can move around. So there's benefits to both methods. There's no wrong or right way to, just really depends on how you want to use the filters. If you want it to affect everything in the document, then use your adjustments panel window. If you just want it to affect that one layer and that's it, then I would go up to image and adjustments and just affect the one layer. It's a little confusing. But don't worry, this is probably one of the more difficult aspects of Photoshop.
36. Hourglass Project 1: We are back to square one and we're gonna go through all of these adjustments. So let's go ahead and zoom in and going down to zoom in, Let's try 50 percent and really get in on that. Our glasses. This is an hourglass I have on my bookshelf. And I encourage you, you can use these photos, my photos that I took with unedited from my phone, but I encourage you to take your phone and snap some pictures. They don't have to be perfect. That's the whole goal is to take imperfect pictures on your phone and really make them look a little bit more polished, edited, and refined. So I'm going to use my adjustments panel for this one. And this is going to create smart filters that can be moved around to different layers if I ever choose to do so. So let's start with brightness contrast. We've already kind of done this a little bit. When I do select brightness contrast within the panel here, the adjustments panel option. You'll also see in your Properties panel here, the sliders. So that's kind of nice to have all of this together. So in my Properties panel, if you don't see your properties panel, just make sure you go up to Window and make sure it's selected. So now I can change the brightness and contrast and make it brighter. Or I can take all of the darker pixels and make a more dark. But let's add a little bit. You don't need to kinda get 2 over processed here. Let's just do a bump it up, a little brightness here. And let's do contrast. So we want to darken the shadows and lightened the highlights at the same time to create contrast. So we're going to increase the contrast. And he notice when I increase it all the way, it almost looks artistic because you usually don't have natural occurring contrast this dramatic. So it almost looks like a digital painting. And some people, when they do digital paintings and artworks, or they take a photo and they tried to make it look like a digital painting. They'll use a lot of high contrast because it's just not as naturally dramatic in real life. And you can also lower it. So if I lower contrast is going to look a little more washed out. And there's definitely times stylistically when you want to have something more subtle. So let's just increase the contrast. You know, you can do any level, not all the way. Let's kind of do in the middle here. So it's going to do 50. And I think it kind of brings out a lot of the shadows and highlights here. And I do use brightness and contrast a lot. So that's definitely one. Some of these I don't use very often. And there's some that I use quite a bit with graphic design and brightnesses in contrast is probably something I use every time I edit a photo. Let's talk about levels. And this is not a photo editing course, it's a graphic design course. So I don't want to get super duper detailed with photo editing because you could spend 20 hours and Photoshop just on photo editing. It's a little bit more for photographers when they're taking their photos and they're selling them and they're giving them to clients. We just want a photo to look great for our design and we want to know the basics. And that's what this course is going to focus on. Not so much the super-duper details of photo editing. And this is when levels, levels can be really powerful but also pretty complex. So right here where levels, and I'm gonna go ahead and bring out my Properties panel just so you can. Kind of see what's going on a little bit better. And I'm also going to bring out my layers panel so you can customize these and anyway, so you can kind of see everything at once. What levels does is there's white points and there's black points. So white points are right here. This is all the white colors that are in the document, and then there's black points. So that's all the black dark colors in the document. And you can shift these levels around so that you reduce the amount of black or white in the photo. This is more about adjusting shadows and highlights. So what we're gonna do here is we're going to take this black point right down here. This is our black point. And we can click and drag this. And what it's gonna do is it's going to take every dark pixel and make it completely black. That's going to make it completely black. So the more I drag this in, the more all of the pixels become black or dark. And the opposite is true. If I take this white point, I click and I drag down, it's going to take all of the current lighter pixels and slowly make more and more of them. White. It's just kinda your white point so you can get almost all the way to completely white or all the way to completely dark. This is a very great natural way to add contrast. Of course, you also have brightness and contrast, which kinda does some of this for you. But this gives you complete control and this is where it does get so advanced. Only photographers will really need to know the super-duper details. And as designers is really great for us to be aware and to explore it. And these are your midtones. So this is your 50 percent gray, so it's all kind of grape midtones because you have highlights, you have shadows, and they have everything in between which is not really dark. It's not really light. It's a mid-tone, It's kind of in the middle. And you can change that point too. So let's say I wanted to add some quick contrast. I can bring a lot of those darker pixels and bring that black point higher. Ses could take all those darker pixels and make them black. And same with this, I can bring it in. So if I bring both the white and the black points together, it creates this super-duper, high contrast. Look. Maybe not go quite as far, just, just little adjustments. And what's great about, Let's go ahead and show the layers panel here. What's great about having this layer. I did it through the adjustments panel. So this layer is now its own layer. I can drag this across other photos if I wanted to. But right now all of these layers now apply to everything that's underneath. So right now it does have this photo, but both of these, the levels adjustment we made and the brightness contrast adjustment we made all apply to everything underneath. And if I were to go to Image and adjustments and do it this way, it would only be applying to the hourglass no matter how many other photos or layers I had in the document. So at anytime I can go back and edit. So let's say, Ooh, that was too much adjustment on the, on the levels. So I can highlight that and I automatically have it populated in my properties panel. And I can back it off a little bit if I felt like I went a little too overboard. That was levels. And now we're going to talk about curves. So what is the difference between curves and levels? Well, curves gives you more minute control using an S curve. And that sounds complicated, but it pretty much levels and curves do the same thing, which is take your darker pixels and make them lighter. Take your lighter pixels and make them darker. And you can also change your mid-tones as well. So let's say we're in curves and it's going to be the same thing we just talked about. And levels and levels is a much easier tool to use this as a little bit more advanced. We can just select the darker pixels, which is down here. You get to see this kind of line going up across. So this is white and this goes all the way down to black. And so this is black and this goes all the way to white. This represents the lighter and darker pixels or the tonal curve in the photo. So you can see this huge spike. So these are the darker pixels and there's definitely some darker pixels in here. Kind of your midtones are here. And then you see this big spike in this photo. And that is most likely because of all of these light, light pixels that are in the background. And each photo is going to be different. Really dark photography is going to have maybe some spikes up here and all of the darker pixels because it has more darker pixels. So let's say I wanted to take all of the darker pixels and make them a bit brighter. So I'm going to select this black, this black point and slide it across. It's going to take all it's gonna do the same things that levels did. And that's going to make all those darker pixels darker. And the same thing over here. We can take this white point and drag it and make all of those white points wider or all the white pixels wire. And the thing about levels as everything is on a curve. So I can change different points along the curve. So what I can do is I can set different points. So let's say I want these very darkest of colors to be lighter. So I'm going to click at the very bottom and bring it up. And it's going to lighten all of those dark, dark pixels. And it's going to make it much more like a lighter profile. But what's great about curves is I can take your mid-tones and instead of just making everything bright washed out, I could take the midtones and make them a little darker. You can take right here we have all of your widest pixels. And I can bring those down, or it can bring them up and make them brighter, almost white. So that's the only difference here. It's pretty much does the same thing. It makes darker pixels wider and wider pixels darker. But it does, gives you more control because you can really do as many points here and make lots of fine adjustments. We probably don't need both levels and curves. Pick the one that you feel like is easiest for you to use levels as a more simplistic version of this activity. So we can delete curves, we can keep levels, but we probably don't need both on this. So I'm just going to delete one. And anytime I want to make an adjustment, I select this and I'm able to, to go back and make an adjustment. So let's say that's gray. I really want it to be a little bit more white. I can click right here where it spikes, move it up. And then I can also click next to it and move this back down so that only those lightest pixels are affected as making them a little bit brighter. And that's it. So let's move on. I promise they're not all this complicated. I think levels and curves are probably the most complicated of all the adjustment options. Let's go ahead and move on to exposure. So the term exposure comes from photography. So when you use a traditional camera with a flash, how much was the limbs open during that time where the light was flashing? What's kinda of your exposure? How much light did that camera get a chance to soak in? And so this has a very dramatic effect. So I'm going to move this along the slider and add exposure. And it's going to do super, super big changes so you don't need to go all the way out here. It's going to look incredibly washed out, overexposed using the correct term. Or I can reduce go negative exposure. And it pretty much can go all the way to black if you don't have any light and you take a photo, you're not gonna get any picture, you just gotta get a black photo. So this is exactly what exposure does. I tend to whenever a photo is just a little dark. Sometimes I like to go to brightness and contrast and use the brightness setting. But sometimes if I need to really, really brighten the photo, sometimes I'll just do a little bit of exposure just to add a little bit of that brightness. I brought in a very kind of dark photo from Pexels.com that I found that I thought would be able to show these effects a little bit better with exposure. So I'm in my adjustments panel and I'm going to go over to exposure. So let's say I want to add just some quick brightness. So I'm just going to slide this just ever so slightly over. And it's going to brighten it up. But you notice as I do this, it gets really overexposed and processed. Just, you have this high blocks of just pure white and it doesn't look very good. So this is when you just need to add a tiny bit to bump it up. There's also offset. What offset does is it leaves the highlights alone and changes just the mid-tones and the shadows. So let's increase the offset. And you notice how it's leaving the highlights alone when I increase it. And the kind of almost adds this gray tone to it. And you can also subtract. And once again, these are to be used just very little bit. So I'm going to increase the offset. And it kinda brings notice how it's completely dark. Just nudging it a little bit, kinda makes it a little bit more of a dark gray rather than black. And gamma correction changes the midtones. So I can increase gamma correction. And you'll notice on the slider when I moved to the right, it actually decreases. It's kind of tricky because it's kind of the reverse. So now it's getting darker, but I want to make it lighter. So I'm going to add, which is moving to the left to gamma correction. It kinda brightened up those darker areas. So you notice how I didn't use a whole and not sliding this all the way to the left or right is very, very small moves. If I've ever feel like I went, I messed up and I want to go back. I can always click right down here to reset. And I can reset everything back to normal. So now I know just to maybe do a little bit of exposure, just brightens it up a little bit. Maybe add just a tiny bit of gamma correction. And all of a sudden you can kinda see a little bit of the left side of her face kinda come more into the scene. So I just wanted to change the photo. So you can kinda see that more in action.
37. Hourglass Project 2: I'm back here to my hourglass and I've already done something with levels of already kinda really change the contrast and added a lot of brightness to my photo. So when it comes to exposure, any little movement is going to really make it look over processed. So I'm just gonna do a very small adjustment and maybe a little, add a little bit of gamma. So my mid-tones can get a little lighter. And that's it. And I don't use these adjustments for every single photo. There might be just two or three that I use per photo. The next one on the list is vibrance. So we're going to click right here on vibrance. And it's going to allow us to add vibrance and saturation. So let's say we have this flower and let's go ahead and zoom in on it. And we really want to bring out more of the color. We can go to saturation and quickly add color by and more saturation to all of the hues quickly by sliding it to the right. So now it really pops out. It's highly saturated colors that does takes the original hue of a pixel and moves it all the way higher to a higher saturation. You can also desaturate something really quickly by sliding it all the way to the left, you're taken away all the saturation from every hue and every pixel. And so what this does is this saturates every pixel in the photo, just everything. So what happens if you over saturate? It can look over processed. What vibrance does is it doesn't select every single pixel, but just the ones that are already bright to begin with. So it's not going to do every single pixel in the photo, just ones that are already have a little bit of saturation to him and it just makes them more saturated. So it's more selective if I were to increase vibrance all the way, see what that looks like compared to saturation. So if I increase the saturation, it does look over processed. What it's gonna do. It's going to add saturation to every single thing. Even these that don't originally had saturation. And this will add saturation to selected things that already had a little bit of saturation. So it's more selective. It's a little bit easier to use. Just wanted to talk about the difference. A lot of times, to be honest, as a graphic designer, we have to do a lot of quick editing for projects. A lot of times you just kinda get used to what works in the past for certain things you go you just kinda do a slider real quick. Yes, I like that. Slide that a little bit. Yes, I like that. And you click Okay, there's a science to every one of these, but there's also what looks good, what is looking good to your eye? And that's kind of more of a casual way to edit. Don't get overwhelmed or burdened by choosing everything, learning all these technical behind the scenes, what's going on to the pixels? Just experiment with each one of these. Get, find your favorites, get usto kind of points that you like to slide it to. A lot of time I've done this for so many years. You end up opening a photo, you go, yes, I need to increase the vibrance. I need to maybe bring out use levels and kind of lighten it. I need to. Change the brightness and contrast a little bit and that's it. And you just kinda, you open a photo and you just kinda learn like, like exercising a muscle, you know, you kind of have muscle memory when it comes to what these things how these adjustments affects photos. All right, so we're back to our hourglass. I have vibrant selected. I really want to bring out this blue and the hourglass. I want that to become more saturated and higher rich blue color. So what I'm gonna do is I'm going to increase the saturation. And you'll notice it did every single pixel. Well, it's doing this gold and making it look a little overdone. So let's try vibrance. I just want to add a little pop to the colors. I think that looks a little bit more reasonable. So now we get to go to hue and saturation. So this is a quick way to change the hue on an entire photo. So we have a hue slider. So right now this is kind of in a neutral position, but if I were to add to the hue, kinda goes along this color scale. So it's kinda slowly changing colors. You get a pretty wide range of colors as you move it across. Same thing goes, if I go back to neutral and I do negative hue, it'll go down and do a wide range of color. So it's a great way to kinda do a very quick, dramatic shift in color. And you also have a saturation option slider here as well. And then a lightness, which we'll just kinda do an overall light or bright. This is one I use often this is a big one along with brightness and contrast that I use the most often. What's really neat about this is you can click on colorize right down here, this little box gonna go ahead and tick colorize. And what I can do is I could do a quick color change that's kind of monochromatic. So it's just all one color. And I can slide it along the hue slider. All the way to 360, which is basically the entire color wheel. So you can kind of slide it all along. It's going to do the full hue, full, full saturation, go all the way to full saturation. It's going to make it really crazy. So you don't have to do all the way full saturations do kind of a little bit in the middle. And it could do quick color change just by ticking the colorized box. So let's say I wanted to change it from kind of gold to maybe a little bit more warm tones, maybe a tiny bit more like copper. I can just slide this to the left. Just makes a small adjustment. I mean, you don't wanna go too far then it starts to look brown, but just kind of a slight move to the left. And if I don't like any of these are, I want to see what's the effect, the final effect, and go back to how I had it before. You can toggle off hitting one of these adjustment layers to kinda figure out which one do you think has a good effect or a bad effect? Now color balance. Color balance allows us to do what we did before, but do it more selectively. So we have the cyan or red budget to the green and yellow to blue. These are opposites on the color wheel. So we can slide this. So let's say I have this kind of cyan blue color. I happen to have that in my hourglass. The slide it over to red. It's going to add a little bit of red tones. I could do the opposite, and it's going to add a little bit of cyan to the whole photo. This is not at all selective, it just does the entire document. So let's say I feel like it has some yellow undertones that I don't like it. I'm going to add just a tiny bit of blue to counter that. I can go down to this yellow blue slider and I can add a little blue just a little bit. So notice how it went from. You'd have like yellow, kind of looks like too many yellow undertones. And now we can just add a little bit of blue. And what makes us a little bit more complicated is that was just mid-tones, those were all the mid-tone pixels. And the document, we also have shadows which are darker colors and highlights which are your lighter. So you can change the highlights in the same way. So I'm going to bring in another photo so I can kind of, I use this a lot and I just want to kinda show you what it looks like on a person. So I have a new photo here, and I just wanted to demonstrate color balance. So let's say there's a lot of warm tones. And I want to kind of, what's kinda been in, in the last couple of years is adding more cooler tones to photography. So what I wanna do is add a little bit of blue and I'm just right here, default on the midtones. And I'm just going to slide it to blue a little bit. And it's going to take a lot of that yellowness away. So that's kinda what it was before. This adds a little blue, very small, small change. That's kinda before and then after. And that's just mid-tones. You can also continue to do shadows in the same way. And then highlights. And some photos naturally have maybe some green undertones that aren't really good for skin. So you can kind of add a little warmth by a, by taking away green and adding a little bit of magenta. So just small changes that you can do. I can go back to my history panel, which is right over here. I can go back to before and then after. And the only thing I used was the color balance adjustments. So before and after. So back to our hourglass. We can continue to take away those yellows and add a little bit of blue mid-tones. Let's do it with highlights. Maybe not, not highlights because it's kinda changing the, the lighter pixels. And I don't want that wall to look blue, so we don't have to change that. But let's take change some of the shadows. Add a little blue, just a tiny bit. You don't want it to look super blue. Just very small changes, which is all adjustments are about are those little changes that add up. So black and white, this one's pretty self-explanatory. What's great about black and white is you have control over previously colored pixels in the image. So as the reds, yellows, greens, and science. Any pixels that used to be read, you can change them here. And what's great is it gives you individual control for all these different colors so that she can kind of do the black and white your own way. So we can make this almost look white, like white sand. And this is, this is why it's having an effect on just the sand because it was blue, it was cyan. So now we're taken away cyan and it's turns black. Were hour able to kind of isolate and select that one color. And we didn't have a whole lot of magenta. So you notice that as I slide it, you're not seeing the big changes because there were no, there wasn't a lot of magenta in this photo. So it gives you lots of controls that are just doing black and white. You can kind of make adjustments so that I think this just works a little bit better. You can even add a quick tent by ticking the box, you can add some sepia or add blues on your hue slider. So you can add a slight 10 to that if you'd like. But I don't want to do black and white for this, so I'm simply going to take my black and white and drag it in the trash. So now we're going to do photo filter. So we're going to click on photo filter, and this is a super quick way to kind of add an overall color, warmer, cooler tones to your photo. They have a bunch of built-in filters that you can click and have warming filters. They have cooling filters which is going to bring in kinda of your cooler colors. You can change the density, which is basically it changes the intensity, I guess you could say, of the effect of it. So you can have it a 100 percent go back to warming filter. It kinda had the orange color or it can have it just be a very small change. I'm going to bring in another photo to demonstrate this in action. So I downloaded this landscape image from Pexels.com. And what I really find photo filters great for is it's a quick way to make a photo look like it's possibly an evening or kind of changing the time of day. So just a quick warming filter, which is going to add kind of an orange color. You can also select the color and change it so you don't, you're not stuck with whatever is on these filters. You can do more than that. You can click on the color and adjust it, making it a different shade. So let's say I want to change the density and it'll look a little bit more like an evening shot than it does a noon shot. So just kind of adding a little bit of color here. So let's do before, let's go ahead and toggle on and off. So that's kind of looks like it's maybe taken at four o'clock or maybe in the morning. And this just kind of adds a little bit and see it's just something kind of really, really quick that you can do to a photo. To add just almost like a little filter on top in terms of color.
38. Hourglass Project 1 3: So let's talk about selective color. There is a lot of power to select a color. So I'm going to do selective color. And I, my Properties panel. It gives me access to all of the red pixels, yellow pixels, green pixels, cyan. So kinda similar to when the moon we did black and white. I have control over all of these, which is super cool. So let's say I want to change the color of just this is all cyan color, kind of a bluish cyan color. So I'm gonna go to my dropdown menu and I'm going to select my cyan colors. And what I can do is I can change the color this way. Is this going to change all of those cyan colors in the photo to whatever I like. I can add more cyan, I can take it away, I can add magenta taken away, add yellow, and then of course add black. So let's add cyan. And you notice it makes it darker. We can take it away and it makes it kind of more, a little bit more white. We can add a little magenta in there to make it darker or take it away. And we can add black to it. Or we can take it away. So we can kinda make it a little bit more rich by adding more cyan. Maybe add a little magenta. And it's a lot darker, a lot more rich, isn't it? And same thing, you might have a little blue in there too. So, so we're on blues now. And it's what I do to, to know how it's going to have an effect to see which pixels are going to be blue and which ones are going to be selected. Lot of times I'll go to black and I can quickly see what's going to be affected. And it doesn't look like there's a whole lot that will be affected. So we know there's probably going to be a lot of whites and a lot of neutrals because of this background right here, this is probably more gray than it is white. So I'm going to choose neutrals, which will kinda be your grays. And I could do my black slider to see what's going to be affected. So it's going to be all of these pixels that are going to be affected. I can now add yellow, takeaway, yellow. So I'm going to bring in another photo so I can show you this in a little more detail. But to go ahead and find selective color. And with this photo, we have all these beautiful blue butterflies and this blue Forest background. So when we go to blues, it's going to have a huge effect on all these colors. So if I were to add cyan or, or add magenta, notice how it changes all of those colors that were previously blue. I can make them darker or it can make everything a lot lighter. So that just really affects it quite a bit. So let's say if I go to reds, there's not a lot of reds in this photo. If I were to go to black and make a quick change, I don't think there's any red, so it doesn't really matter what I do because there's not a lot of red pixels in this photo, but there are blacks. There's blacks to most photos. So if I go to black and add more black, it's going to darken the black. And this will lighten the black. But you can also add undertones, like some warm undertones by adding magenta, see notice how it went from kind of kind of greenish, yellowish dirt. Kinda added a little bit magenta to it. So super powerful, super selective. And I just wanted to kind of demonstrate that with another photo. One time for a client, I had to take a picture that was once summertime and I had to take it of a vineyard and I had to turn it into fall. Somehow I had to change the seasons as CMO, really impossible, but using selective color and made it a lot easier. So I have this picture, it's obviously right in the middle of summer and we're going to make it look like it's from autumn by using selective color. So I am in my adjustments panel, I'm doing a selective color. And I'm going to select all of the greens and the yellows. And I'm going to be adding more oranges and reds. So let's start with green. And I'm going to be adding a little bit of magenta. We're adding those yellows, orange, browns colors. And then we're gonna go to yellows. And we're going to be reducing. So these are all everything that's kinda yellowish. We're going to be reducing the blue. And it's going to kind of bring out the yellows more so you can almost see it turning into autumn slowly. I'm going to add a little bit of magenta. It's gonna kinda add and make it a little more brown tones coming in. I'm going to do magenta. And you can see it's kinda bringing out oranges. We can add yellows. And when you go to our reds and anything that was read, we want to make it more red, right? We want to bring out reds. So let's add a little magenta. And there's not going to be a whole lot that changes with this one. Just a few kind of kinda see on the right there, change that to magenta. And just like that we were able to take something. I'm going to go ahead and toggle the selective color off and on. That was summertime, and we made it autumn by using selective color to emulate fall leaves. So after, before, after, before. So pretty cool stuff. So let's go back to ours. Let's see what we can do about editing those yellows. And let's also, it could be yellows, but there's also kinda reds. I know it's warm tones. Let's see what we could do with our red. How about how much that's effective? So that's gonna kinda be our table two. So we can change our table. Kind of subtract a little bit of yellow. It's all about experimentation, just like painting. You kinda see it. You know, what's right? There's not going to be a right or wrong. Just find out what looks good to you. Everyone has a different desire. Everyone has a different goal for how they want their photo to look stylistically. And there's one more we're going to go over in great detail and that is gradient map. We're going to take an image and apply a gradient map to it. We're going to do that a little bit later. I'm going to edit a few other photos. So we can go through this process one more time, a lot quicker, not going through each one, but picking out ones we think we need to use for a photo. So I have a couple more photos and that downloadable folder that we're going to go through and do some super quick edits so we can practice some of these adjustment tools. So this is our after her hourglass and we can go back to the before. And sometimes you don't realize how many changes you make until you see the original photo. And there's one thing I wanted to do, and it's one thing I like to do, especially with photos that are right from a phone. So I'd like to add a little sharpness. It just really helps to add a nice quality to most photos that were just taken on an unprofessional camera. I love to sharpen images. So I'm going to add a sharpness layer. I want to sharpen this hour glass, so I'm going to select my layer, my smart object layer right here. I'm going to go up to Filter. It's got its own sharpen category. We're going to go down to Sharpen. And we're gonna do just a quick regular sharpens. We click on sharpen. It's going to sharpen the image for us. It added it as a smart layer and I can easily remove this sharpening if I want to, if I don't like it, I can just drag it into the trash can. So this is our after we've sharpened it, we added a couple of adjustments. We didn't use every single one, but we use quite a bit. This is after and this is before. If I want to check out before and go back into my history panel, you can scroll all the way up to the top. If you click on the very top, it reverts it right back to where we started. It goes all the way back to the beginning before we did all of these different activities. So you click all the way back at the bottom to load where we were. Go all the way back up the top to see. So that's before. As you can see, it's a lot darker. It's doesn't have the high saturation, it doesn't have the bright vivid colors. You scroll all the way down here. You'll notice that we kind of added some really vibrant colors and almost looks like a digital painting instead of just a picture that I took in my house. So there's the power of editing right there. Another thing you can do that's just your history panel. Another thing you could do is you could take a group all these, so all of these adjustments that we made, I'm just going to click once at the top, hold down, shift, click at the bottom. I can just quickly select all of my adjustments. I can throw them into a folder. So this helps when you have multiple photos you're working with in the same document. It's nice to just create a folder. So it's gonna click on the folder. It's good to take everything that's highlighted and it's going to group it into a folder for me. And I can title this adjustments. And I can easily toggle off the entire folder. So I can have before and after that is just a really quick way to kinda see your before and your After Effects. So let's go ahead and work on our other photos really quickly, and I'll see you in the next lesson.
39. Plant Photo Project: I have the downloadable folder that goes with this section that has four different photos. And it we're going to go ahead and open this one right here up the plant and bring that right into Photoshop. This is another thing. This is actually my fireplace and I took it with my phone and I didn't touch it. It's a right for my phone in. It needs a lot of work. It's a little dark and I feel like the colors are not saturated enough. So we're gonna go through a very, very similar process that we went with with our glass. So one of the first things I like to do is quickly go to brightness. Contrast is the easiest and quickest way to add some contrast. So I'm going to increase the brightness just a tad is going to slide it. You don't want to do it too much or it just gets very washed out. So I just wanna do a little bit and I want to add a little bit of contrast as well. Once again, don't go overboard. That looks very over processed. You want to just do a quick adjustment. And so I can quickly go to levels which is a whole lot easier to manage than curves, doesn't give you as much options, but it's just a quick way to brighten up some of those brighter pixels. So what I wanna do is I want to make some of these lighter pixels lighter. So I'm just gonna go over to the white point, and I'm going to drag it over to the left. So you notice how it's really, of course you can make it really just too much. But it's taking some of those brighter pixels and making them brighter. I can also adjust the mid tones as well. I can make mid-tones darker, or the mid-tones brighter. I make them just a little bit brighter. And kinda leaving the black point alone. Super quick. I'm not going to use curves because if I am pretty much choose one or the other, don't need to use both. So exposure, it's already pretty bright. I probably don't need to use exposure too much in this. I think if I would, it would just instantly look over process. So I'm going to click on revert back. So I'm going to just not use exposure at all for this one. Let's do vibrance because I really want to make the green really, really rich. So I'm going to increase the vibrance and you'll notice the difference between kind of the warmer tones of the wood is coming out and also the leaves are looking very vivid. So I don't wanna go all the way. Let's kinda do something in the middle. And let's add a little saturation. And this is all just testing. You don't really know what it's going to look like until you see the preview that could look a little bit too saturated. So I have to be careful. So I just wanna do a little saturation. Once again, I can toggle this off and on. So that's before. That's after. I think that's a nice amount. And there's no perfect amount. It depends on the style that you're trying to go for. So color balance, let's say I think there's too much yellow in the walls. I can add a little bit of blue to counter some of that yellow. So I'm going to adjust the highlights, which most of this is going to be your lighter highlight pixels. And I'm going to add a little bit of blue, which is basically taking away yellow. And notice how instantly it went from kind of yellowy walls to kind of a little bit more neutral color just by adding a little bit of blue. I guess I'll also do the same for midtone and see if any of my mid-tones would benefit from blue. But then it starts to get into some of the green pixels. And putting blue with highly saturated green is good UDL the grain. So let's not worry about that. I just edited the highlights, just added a little bit of blue. That's it. I'm not gonna do anything else. I can go to selective color and I can select my green. So it can be very selective, just like the adjustment name refers to. I'm going to take my greens and I'm going to go to black. I'm going to add black, see kinda what it does. And I'm going to subtract it. And that's kind of what it's going to affect. So what I wanna do is I kinda want to lighten it. So I'm going to reduce the black on my greens. It's going to lighten it a little bit. So that's, so that's before. That's after, right? So I kinda wanna do something in the middle. And what I've noticed is this probably has more yellow than I think it does. So let's go to yellow, pretty close to green. So there's probably overlap there. I'm going to go to my black to see how much it affects and that actually it's more yellow pixels in there then green. So really what you're seeing is a mix between the yellow and green to make up these leaves as not just green. So let's add a little darkness to it, or it can add a little lightness to it. If we take away some of those yellows and subtract black, it kinda looks washed out. But what if we were to add a little black? It kinda bring some of the shadows out of leaves and it no longer looks washed out. So I feel like I'm done with this specificly. There's nothing else I want to do that. I'd be noticed that took probably three or four minutes. If I didn't explain each step, it's probably a three or four minute edit. And that's usually how long it takes to do a quick edit. For a photo, for social media or for a website. It just, you know, once you kind of learn some of the main adjustments and what they do, you'll be able to do this very, very quickly. You shouldn't be spending hours editing, doing these types of edits to photos. That's when you get into the finer details of photo editing, like a skin retouching and other types of retouching, which is a lot more specific to only certain parts of a photo. These are just wide adjustments that affect the entire photo. So we're gonna do another one really quickly. Let's do before and after. I love looking at before and after squeeze, you don't realize the impact that these small adjustments make until, till you see a before and after. Let's do a quick sharpen. This is not a smart layer yet. It's not a big deal because we still had our smart filters applied on top of it. So I'm going to right-click. I'm going to make this a smart object so I can add a smart filter as a sharpen. So I have my layer selected. I'm going to go up to filter. It already saved my last filter that I did, which was sharpen. So, but I'm going to go the longer route so you can see how I did that. Just go down to Sharpen. Go all the way down to sharpen. I'm just gonna do once you can over sharpen, do not over sharpen. So now I can take that away easily because it's now a Smart Filter. I'm going to leave it on. Let's just group everything into a folder so I can select everything, group it into a folder. And now I can toggle the visibility. So that's before. It's right from an iPhone, I did 0 adjustments. This is after just a quick couple of minutes and this is after. And a lot of times when you toggle before and after, you'll kind of start to go. Okay, I think I need to make some adjustments after this. So I think it's a little bit it's starting to get a little over processed. And it could, it's also the brightness and contrast. So I can go back to brightness and contrast. And I can reduce the brightness just a tiny bit, just a tiny bit. So now I can go back to my group. Toggle it on and off that feel a little bit better about that course is still some adjustments you can make. That's the case for any photo. So here you go. Before and after. We're going to do one more quick general photo edit. And then we're going to talk about gradient maps because I think they're really cool. And we're going to create a couple of quick social media posts to practice the gradient maps. And sometimes it's all about the cropping and how a photo is cropped. So let's say I wanted to do a quick crop of the photo. There's a crop tool right over here on the left. And you're going to see some little tabs that I can move to crop it. So what I wanna do is I want to crop out kind of where the, this part of the mantle of the fireplaces. So I'm going to bring it up and let go. And I'm going to take this adjustment and bring it down and let go. And when I'm ready, I'm going to press Enter. And I've officially cropped my photo.
40. Piano Photo Project: We're going to open up the piano JPEG. And this is a picture taken in a dark room on purpose, this is my piano. And I wanted to kind of demonstrate how to work with photos that are just too dark, that were taken without enough light, which can be challenging. And as a graphic designer, you're going to work with so many photos that are sent to you that were not taken with a proper lighting. So let's go ahead and unlock this layer. Let's go ahead and right-click lets us go ahead and make it a smart object for right now. And let's just go and do a quick sharpen filter. Sharpen hadn't sharpened it. So when we're dealing with a photo like this, sometimes when it's pretty much black and white, almost, there's pretty much no color. I like to go ahead and switch it to a pure black and white because there's still yellowness. There's yellowness to this white. And there's a little colors in here. And it kinda makes it look more dirty. So what I wanna do is I wanna do a quick black and white adjustment. And so you can kind of see before had some yellow to the white keys. And then after just kinda just quick. And then I want to go to exposure. So exposure is really good with black and white photography. It makes a big difference. So let's increase the brightness just a little bit. You can see how you can quickly overdo it. So just kind of a little, little brightness. And gamma correction I want to add to the gamma correction. So I'm bringing out some of those midtones. So all those blacks all is super dark areas. I'm going to move it and add to the gamma correction. You can see how it brings some of that out, makes it brighter. You could also go to Levels and see on this levels right here. So this is all of your darker pixels in your wider pixels. So there's a big spike right here in your lightest pixels, and that's probably from the white keys. And then you have a big spike right here from all the dark keys and this black section up here. So if I wanted to click and hold on the black point and make the darker, darker, I can do that, but that washes out all the details of the piano. Or it can take some of the lighter colors and move it to the left, which I think has the best impact here because I think it was too dark to begin with. It wasn't taken in a really good, well-lit environment. So let's some of those wider pixels, lighter, just like that. Not too much, just a little bit. You can always go to brightness and contrast and just do a general, this is kinda of your quick, easy way to make something darker or lighter or have more contrast. It's kind of your quick cheat, I guess you could say, instead of getting all into levels, this is kind of something, a way to do it a lot quicker, but you don't have as much control. But if you just wanted a quick Brighton or a quick contrast, you could do that as well. So let's group these together into a folder and toggle it on and off. So that's before, kinda had kind of a yellowish hue to the keys. And then after, so obviously brighter, I feel like I can use this photo and it doesn't look like it was taken in a basement. It kind of looks like it was taken. And a little bit more of a professional lighted scenario.
41. CameraRaw Photoshop: I wanted to go over Camera Raw Filter, and this was added to Photoshop a few years ago. But I really wanted to talk about it as a quick super way to edit your photos. So as I've taught in several lessons, we can go to adjustments. And there's all sorts of adjustments we can add to photos, brightness, contrast levels, curves. And these are the most powerful ways to individually edit photos characteristics. But if you're looking for a quick way to do a bunch of photos quickly with the same settings. This is something to really look at. So let's say I have five minutes. I just need to do a quick photo editing before I put this into a design project, I'm going to go up to Filter and do Camera Raw Filter. If you don't see this, you might have an older version of Photoshop. You will not have this, but you still have your adjustments that you can do to each individual photo. So basically what it does is it takes all these adjustments and combines it into one simple place. So Filter, camera, Raw Filter, it's a game changer, super quick to do edits. So it's going to bring up this entirely new thing. If you've ever used Photoshop Lightroom, it's kinda got some of the characteristics from the light room. So we're gonna go ahead and get started. We're not going to go over what each individual thing means, but I wanted to show you how you can take all those individual adjustments and make a much quicker here. So we can just go to Basic. We can set the temperature, cool, warm, kinda like a cool look for this tent. We can tend to it bringing a little green, but I kinda like a little magenta in there, so it's going to tend to it a little bit. These are all going to be quick slides. Let's make it a little brighter. Just do our exposure. I like a little contrast to bring out the shadows. Of course you could do highlights, bring them out, really brings out some of the lightning. Shadows. Kinda make a more dramatic or reveal more of the texture, kind of like it in the middle. Whites, a little brighter. And what are we gonna do with our blacks? We can make them brighter and we can add a little texture. So you can see that's no texture, It's very kinda blurry. And then adding texture, it's, it's a little bit like sharpness, but it just kinda does its own little thing there. So clarity, we can add clarity. So you can see what clarity max clarity. It almost looks overly textured and then reduce the clarity and dehaze. We don't have too much haze in this one, so I think we're going to be okay. So vibrance, Let's go and take a little bit of that texture downs, little bit too washed out. So vibrance that remember that brings out all the saturation and all the hues. Saturation is this more of an overall. So you can weigh overdo it, or you can make it black and white. But Let's do this. I'm actually going to take away the clarity, just make those 0. We can also punch in these manually, kinda like how it was before. Okay, So curve, you could do your curve like we did in the adjustments panel, but now we can make our shadows darker or highlights more bright, just like we did before. But now it's this right here. Easy to grab on there. We could do kinda some generic overall edits as well. Detail sharpening. We could sharpen it a little bit. Noise reduction, color noise reduction, which is the same thing but with color. Color Mixer, we can add specific colors. This is just like the adjustment that we did earlier and the adjustments panel. And it's just a quick way to do all these color grading is your shadows, mid tones and highlights. Let's say we want to mess with our mid-tones. We can take all the midtones and the photo and add a little color to it. Pretty, pretty neat. And you can study each individual. There's so much here. I could do an entire course on what each of these things mean, like luminance and blending and balance and all of this. But just kinda just doing a quick example to show you guys. So you can even do optical distortion. So in optics, you can make it kinda be convex. A vignette you can add kind of around the edges, add a vignette, you can make a bright vignette or a dark vignette. Let's do a bright one. We don't wanna, I don't want to do any distortion. You can also do manual transformation. So vertical, horizontal along a plane, like if you wanted to put this on a product or if you wanted to kind of do a perspective warp thing, you could do it here. Effects, you can add a slight grain effect, give it texture. And this is a different type of vignetting. Kinda almost adds a color on top of the photo as opposed to being a part of the photo. So there is a lot options here can be very, very, very overwhelming. You don't need to know what each one means per se. I mean, it's really good to eventually learn that, but it's also good to kind of experiment and see which one works for you. So there's kind of a quick after. There is our before and there is our after. So it can toggle between before and after. And if we like the after, we can click on OK. And there we go. So I just wanted to kind of demonstrate how quick and easy it was to use the camera raw filter if you just wanted to do some very quick edits and he wanted to have access to all the power of the adjustments panel, but a little bit more simplified so you can just quickly go through them all. I still recommend doing manual adjustments if you really want to get super into details. If you have lots of time to edit a photo, it's always better and has more power to individually edit them in the adjustments panel. But if not, the Camera Raw Filter is a great quick way to get things done.
42. Gradient Maps: We get to talk about one of my favorite adjustments and that is gradient maps. It's a quick way to add a little bit of cool to your photos. So this is a brick picture I took when I was out walking around. And I love taking photos with my phone. So I can grab textures that I can use on any type of background or design work. But it needs a little bit of work. So what I wanna do is I want to add text on top of it and put a quote. So let's say I get my text tool and I click once, and I type in a headline and just quickly typing in a little quote. And using Dido, which is a really nice serif typeface. And you can instantly tell when you have such a high contrast photo and you have type. It's kinda hard to read the type. And that's going to be the case for a lot of photography you find online. You're going to want to put a quote or a type on top of a photo. And it's going to be really, really hard to read the typography or the quote. So one thing you can do is you can lower the contrast of your background image so that the type can be more readable. And one way to do that is with gradient maps, and it's a great way to kind of demonstrate what this does. So I'm gonna go ahead and double-click and I'm going to make this text white. And I'm going to select my background image. We'll go ahead and double-click and unlock that. And I'm going to go up to my adjustments panel and I'm going to add a gradient map. So this is what a gradient map does. So I can go ahead and customize this. I can click anywhere on this gradient map area. And that's going to bring up a gradient editor. And I'm going to quickly shift to a different photo so you can see the other one is going to be a little bit harder to demonstrate gradient maps. But I'm going to use the gradient map on this photo, click on Gradient Map. And this is what a gradient map does. So these are your highlights over here and this year shadows. So everything that is a shadow in this photo, you can click right here on the color and you can change it. So instead of whatever it was before, which is black, you can actually change the color on it. So let's do a highly saturated blue. And then all of the highlight colors, you can change the colors on that. So let's do a highly saturated red. So you can see how one side is blue. All these pixels that were darker are now blue in all the pixels that were highlights are now red. You can reverse the two. So let's go ahead and reverse the two. And you can see how all the highlights are red in the shadows are blue. What makes this interesting is you can also change mid-tones to. So let's, let's kinda switch this back to how it was. That kinda this blue's kind of naturally or more shadows. The reds. What's really powerful about this? You can actually do mid-tones to and add a third color. And all your mid-tones going to be its own color. But what you can do is you can easily make this monochromatic two. So let's say these are your darker colors and these are your lighter colors. I can make all of the lighter pixels a similar blue. And it looks like he can't see anything because they're both blue now. So your highlights and shadows are all the same color. So I'm going to take the highlights, but make this a lighter color. So you can easily do this monochromatic look very quickly by using gradient maps. You can also make this darker. So make your shadows darker, such as moving along the hue picker and adding more black. And I can go over here and add more white. I can also even go up the hue slider and add maybe a little bit of purple in here. So you could do to lighter colors to make it really soft. So both of these are pretty high up and lightness. Or you can make it really dark and bring out shadow. So these, this is just fantastic to play around with. And there's a bunch of pre-made presets as well. So you have some basics which is kinda be a black and white. You have blues, which some of these are reverse. So it looks a little bit silly. So that when, for example, you have all of your highlights dark and your lights light. So it's going to look a little creepy. But that's an easy fix if you find one that has the reverse, where you have your shadows as the darkest color. So let's say for example, this one where you have kind of the darkest color here in the lightest color on the right. That makes the most sense in this situation. So let's switch back to our brick photo. We want to make this monochromatic, so we can make this background photo low contrast. So the type can be high contrast against the brick. So here we are. We can customize this. We can use some presets that they have or we can do our own, which is what we're gonna do. I'm gonna basics select black and white. So let's make it kind of this deep, rich blue brick. So we're going to select all of the shadows, all dark shadows in this photo. We're gonna go to color and let's do a highly saturated blue. Let's make it a little bit darker. And we're going to take all of our highlights. Make it a highly saturated blue, but make it lighter. And we can go back and make this a little bit darker, just to give it a little bit more of a contrast and punch, but not so much to overwhelm. So see how that type is a lot more readable. Once again, making adjustments to this. There's also mid-tones you can add. And the middle change all your mid-tones to a specific color. Which can have some really interesting effects. But let's stick with blue so it can remain monochromatic. And that just gives us ultimate control over how this looks. So you can still see the texture, but the type is the main event here. So now we can finesse this typography. I'm good on my properties panel. And I can scroll down all the way down here. Let's make it a nice center alignment. Let's also make it all caps. I'm down here and type options, making it all caps and adding a little bit more, letting our spacing between the sentences. I now it's 248. This is a pretty big document for it to be 248 because my point size for my topographies, 300, four. So this is probably a pretty large document because this is the original photo that I took. So it's probably like 4 thousand. I go down here, there, I'm right, 3000 by 4000 pixels is the size of this photo. So Let's go ahead and change that, make it a little bit bigger. So instead of 248, maybe 260. So adding a little spacing, maybe a little bit more, maybe 280. And we go Just kinda letting those lines breathe a little bit. So let's break this topography up a little bit. Type is more readable with and I'm just doing just pressing Return, just doing a physical line break type is more readable with high contrast. We can add even more spacing. Let's try 360 or maybe even 440, making it nice. Big, wide gaps. That's a little too much. It's always give or take. Trying to figure it out. It's getting my move tool on selecting. And that's great because now I can use this texture. I can show that through in the photo and still have the typography be very readable. And that was the whole point of using gradient maps. Just one way, one method you could do to use something in the background that adds an element of the design, but never takes away from the readability of the document. We can stylize this a little more. I have Dido, but what if we did an italicized Dido? So let's do a italic. Adds a little more flair of style, little more elegance. And I love contrast in my type as well. So instead of just this big block of white text, Let's take readable, which is probably the most important word. And let's do something that is a high contrast against blue on the color wheel. That's usually yellows, golds. So let's try to find a gold. So I'm right here between my yellows and oranges, kinda right in the middle. I'm going to be able to find a gold. So gold is not orange. Gold has a little bit of gray in it. So it's going to be somewhere here and the hue slider. But I want to make it bright enough to really pop out.
43. Gradient Maps 2: Let's add some more contrast by adding a little bit of a box behind the typography. I'm going to go down here to my shapes tool, going to get my rectangle tool. I'm going to sample, get my eyedropper tool. One of these darker blues, let's down here is pretty dark. So I'm going to go ahead and sample that blue. Good, a couple of rectangle tools and just create a shape. And what I'm gonna do is I'm going to select this shape and I'm just going to duplicate this. I'm just holding down option and dragging. And I'm going to hold down Shift and just make that a little bit bigger, just like what we did and the other videos to hold down Option and drag it hold down Shift so I can just adjust that one side and just keep going. This just adds a little bit of a design element but behind the topography. So now I can select all of these boxes. I can go up to alignment just to make sure all those or center aligned. I can go up here to my Alignment Panel and go ahead and do an align horizontal. It's going to align all those up for me. And I can take all of these boxes and dragging behind the typography. So I have all of this selected. I'm going to drag them all the way behind my typography. I can lock my brick layer, it's going to lock it. And I can highlight everything else. And I can kind of find a better center point for this. Could I do my smart guides till I get my little pink line there it is. Now I know that is center aligned in the document. And now I know its center aligned horizontally and vertically. So just a simple quote I was able to do by using gradient maps and my adjustments. Doing some quick topography, adding some contrast, adding some boxes, super-quick quote, we're gonna do a couple more. Next. Let's say this is a very large document. Right now. It's 3000 by 4000 pixels. That's really big. Let's say I want to scale this down and I want to do a different size. Let's say I want to post it on Instagram tomorrow. There's a couple ways we can do this. One of the best ways in my opinion, I can keep this document as is because who knows if I want to make it different sizes, keep this original document and just create a new document the size that I want it to be. So I'm going to go to File New. Let's stick with a typical Instagram posts size 1080 by 1080. So 1080 by 1080 and click on Create. So there's our Instagram. So I can go back to our brick photo that we edited. Make sure I unlock that background bricklayer. You don't want to have anything locked when he went to copy and paste content to another. Documents, everything is unlocked. So I have my move tool selected. I'm going to click up here in a blank area, click and drag. And it's going to select all of my layers for me. Or I can just click on my lowest layer, go all the way up to the top, hold down Shift and I can select it all that way as well. Either way works. I'm going to go up to Edit and I'm going to copy. Or you could do your keyboard shortcuts, so I'm going to copy it. Go to a new document. I'm going to do a quick paced. So I'm gonna go down to paste, paste it all in and you can see it's a super large size. So I'm going to have to scale this down, which is no big deal because everything's a smart object. I don't have to worry about anything messing up. So I'm just gonna go ahead and scale it down. I'm not holding down Shift. It's going to scale it nicely for me. And I'm going to fit it into this Instagram post. And this is a great way to do other types of sizes, to just kinda size it up. See, I've got my smart guides, I got my horizontal and I've got my vertical smart guides letting me know everything's nicely aligned. It'll echo. Press Enter. And now we are in a new, newly sized document. We are at 1080 by 1080 pixels. I can export this easily to be able to post it on Instagram tomorrow course, I'd want to change the topography because it's not a real quote. But at least I have a template that I can use to put a real quote in there. So let's say we want to export it. We'll talk about exporting a lot a little bit later. But I feel like I just want to let you know how to do this just in case you're excited about your project that you're working on right now and you want to post it somewhere on social media, Facebook, whatever. You just go up to File Export, Export As. So File Export, export As. You could also do a Save As. And we'll talk about the difference between the two. But let's do an export as it's really good for digital online kinda files. So we're doing an Export As. And if you ever post it to Facebook and it's like, wow, it's a lot blurry than I thought it would be. You can always change the scale of it. So right now this is 1 times. You can export it like two times the size. And as long as you have smart objects and everything that we've already done before, it should scale nicely for you. So you can always do a little bit of a higher scale if you wanted to, but you could just stick with one. That's fine. Just in case you ever had that problem. And I know it's going to be 1.3 megabytes when I export it. And that's it. I'm not going to mess with this. We'll go over more exporting options later on. Just do a quick export. And there it is, export it. So what's really good? Let's kind of switch gears. We're going to create a couple more posts practicing what we've learned with gradient maps. But what's really neat about gradient maps, as I have this gradient map right here, I can bring in any photo and I don't have to do that gradient map adjustment again, it'll automatically apply that filter to everything underneath it. So let's say I want to bring in a picture of a person. So let's say I have this woman with a mask on and I want to drag it in to Photoshop. Right now she is on top of that gradient filter layer. And I'm going to show you right here. Here's the gradient map filter. It, it's applying it to the brick. If I drag it underneath the Gradient Map, all the sudden, it'll apply to her, which is really cool. So now I don't need the brick anymore. I'm going to just do something different. I can just drag that in the trash can. So now I have her and I can adjust the type accordingly so we can go ahead and get rid of all these rectangles. And whenever you have like repetitive layers like this, like each one of these is a separate rectangle. I usually like to group things in folders because it's a little bit easier to manage than having this big long list of layers. So don't be afraid of grouping things into folders. So now I can easily delete that instead of having to select each one. So now I can kind of mess around with this text a little bit more. So let's double-click it. Let's go up and do. Let's go to our properties panel, just double-clicking our texts highlighting it. I would like to do a left alignment, so I'm in my left align and my paragraph options gonna do a left align. And also want to close the gap between the letting as well. So instead of 35, let's do 26. And this is where the fun begins because you can really mess around with photos and how they are structured. So right now it's this old gradient map right here. But I can always go back in to my Properties and change it a little bit. So let's make it a little bit brighter. So I'm in my highlights and change all the highlights to make it a little bit brighter. All across the board. Just a little bit brighter. But still low contrast enough for me to read the text. So I can move her up a little bit because we never want to have text block the eyes. And let's say make statements. Can be our typography. And let's change the typeface. So instead of a traditional serif, let's change this to, and what's great is you have this filter which we can decide. I just want to have a Slab Serif. We could do a slab serif. And let's take off all caps. It's a little strong. And let's have everything be lowercase to be softer. You can also change the coloring if you want to make it high contrast. And it also needs kinda of an anchor. So you have this kind of lowercase topography. It feels like it's kind of floating and no man's land and it needs to have some kind of design anchor. And a lot of times it's a dividing line, it's a box, it's a shape, something that helps to anchor that text to that area of the document. So it could be as easy as getting a rectangle tool and just drawing a small little rectangle. Let's make sure we make it that same color. I do something to anchor it. So this is the final that I came up with after a little bit of tweaking, I felt like she was not popping out enough, all being monochromatic. That's if I go to my Gradient Map, you can kinda see how I decided for the highlights to do a slightly different warm color, contrasted against the cooler colors, kinda adds a nice dramatic effect. So that's what I did with this gradient map. And I switch that back to white to make it really stand out. And I have that little anchor, just like some kinda little design elements are, that helps to solidify that position of the topography. It helps draw your eye down to that block of typography. So let's move on. Let's do something a little bit different.
44. Gradient Maps 3: Let's go back a couple of steps. When we had kind of our blue gradient map. Let's add a different photo from Pexels.com. I found this really neat statue photo that might look nice so you can find any other photo of your choice to use. I'm going to bring this in. And right now it's on top of the gradient filter. So I can go ahead and make that a little bit bigger and bring that underneath that gradient map filter and automatically that neat effect is applied. So now I can make it a little bit bigger, stretch all the way across, maybe bring more emphasis on the angel's face. I can even add a brightness adjustment just to do a quick brightening of that photo. A little bit of contrast. And let's edit the type. Let's do something. Let's do a just a position between the traditional angel sculpture and using a more modern typeface that might be very playful. So let's do a san serif typeface and we can go to our filter. And if we know we want to San Serif, we can go ahead and just show san serif typefaces. And there's one that I really like called co Mu. And I believe it's an Adobe font. So if you have an Adobe subscription and you have access to this font, but you can use it. It's got a condensed font, so it's very low in width. This is a very short condensed, so you can really pack a lot in a small width space. So I'm going to do this Comune a, and we work a little bit with this later and some future work. So let's go ahead and do como a. Gradient maps are cool. Let's, let's kinda tighten that spacings and this is a condensed typeface. We also want to be able to tighten it and the lettering as well. So let's change, adjust that. Maybe 24 or we're going to have to do a custom number, aren't we? Let's do 20. It's a little too tight. Let's do 22. And let's separate this. Cool. So what I'm gonna do is I'm just going to cut this cool out. So I'm just going to do Edit Cut. And I'm just going to create a separate text-box so I could have more control. Just pasting it. And now I have it as its own little layer. And let's make this a different color for contrast, Let's use the same goal that we've been using. So when we look at this photo, if we move it to the left and we have the eyes gazing to the left. We have the statue mostly kind of being more on the left. So if we also have the topography on the left, it's very left heavy. So let's provide a little bit of balance or interest in the photo by bringing the topography over here to the right. Now all of a sudden you have this upper left to lower right movement of the eye. It feels very natural. But it would be great to have a little bit of an anchor that can help me really solidify or place this topography here on the document. And you can do this in so many ways before we use the line, a divider line or a box. You could also use little small graphical elements like a little cross or a plus sign, which you see used often. So we're gonna do that right now. We're going to get the rectangle tool. And we're going to just do a little box or a little rectangle. We're gonna make this. Let's do fill, Let's do the save the color. So let's do our recently used color. So what I'm gonna do is I'm going to do a quick option drag. And I'm gonna get the Rotate tool. And I'm just going to hold down the Shift key and rotate it until it clicks into place at 90 degrees. So I can eyeball this and try to find a center point. Or I can select both of my shapes right here. And I can do a center alignment up here. So just doing a center alignment, also doing a horizontal, Vertical Align to just kinda doing aligning IT center and aligning it vertical. And we'll do lots of alignment and Adobe Illustrator later on. So now I want to make this one unit so I can merge these layers together. So instead of just being too independent shapes, this is one merged object. So I'm going to right-click and I'm going to go down to merge shapes. So with both of these layers selected, Right-click Merge Shapes, It's good to just make them one easy to use layer looks like there's some kind of stroke on there. So just go to your appearance panel and just make sure it's on null. Or you could do a little keyboard shortcut. If you ever want to quickly merge layers, you could do Command E and it's going to quickly merge layers for you. So now I have this one little element and it can kinda be our anchor. So I'm going to make it smaller and bring it right here. Use my keyboard arrows to kinda nudge it down. I can right-click duplicate layer. Or I can just hold down option and drag whatever you feel comfortable with. And I can make a second one. Down there just adds a graphical element. It's not required. You don't have to put the stuff on everything. I just think it kind of adds a small element to the design. And if you ever want to check on alignment, especially with topography and with a little shape like this. You can always go up to View and go to rulers. So this is going to show your rulers. And we go to View Rulers. All of a sudden you're gonna see your rulers on the top. And you're going to see rulers over here. Let me go ahead and move my toolbar over so you can see, and you have rulers on the left. So you can see this is a 1080 pixel document. So it starts at 0 and it goes all the way over to 1000, 1080 pixels in width. And it's also 1080 and height. So it goes all the way to 1080 and height. So what happens when I click up on the ruler on the top here, I click and drag. You're going to get a guide. And these guides are fully customizable. So let's say I want to make sure this is aligned properly. And this can be any design element. I can adjust this so it's at the top of the G. And I can just make sure everything is lined up. Use my keyboard to quickly, my keyboard arrows to quickly change it. And also I can click and make another one. So I can make sure my other one is lined up properly. You can also do it vertically as well. So I can click over on my vertical ruler, click and drag. And this is really handy for doing logo design or if you're doing a layout and you're blocking out a design, and really kind of double-check your alignment just to make sure it looks good. It also helps you know where the weight is in your design. And let's say I don't want to see these things anymore. You can click and drag them all the way out to the ruler and let go. And they are removed. So I can click and drag it off to the ruler and it just kind of goes away. Or it can toggle on your view or go down to show. And you can go down to Guides and you can just uncheck them. And you don't have to have them. And there's keyboard shortcuts to, to, toggle them on and off. So we'll, we'll go over that to every Adobe program has guides that you can do with rulers. So once you learn it in Photoshop it, we'll, we'll, we'll go over it again and illustrator. So there you haven't, you could do a quick export. You can go to File Export S, do a quick export, and just that's it. Export and you're done. Let's do one more, maybe going away from the blue and doing something a tiny bit different. I'll see you in the next lesson.
45. Gradient Maps - Final Project: For the next design, we're gonna do this one. We're going to recreate this Instagram post. You see right here. We're going to just start a fresh new document. And we're going to bring in that photo that we found. If you ever want to look up these photos on Pexels, you can always type in the text and Pexels or type in the number, and you should be able to find the photo, but please use other photos. Sometimes photographers tend to remove photos and add new ones every day. So feel free to use something kind of similar and you don't have to find the same exact photo. So I'm going to drag that photo right into the document. That'll make it a little bit easier. It also automatically makes it a smart object, which is kinda handy. So now I can kind of crop this because right now this is interesting. But I really want to, when you have an Instagram post or social media post, their seen pretty small on a phone. So you really want to have a high emotional impact and connection with the person and the action that they're doing. They're jumping there in the middle of some experience and you want to capture that. So I was going to zoom in a little bit more on the boy and click Enter. So let's add a really dynamic papa color with a gradient map. So let's go to our adjustments panel and go to Gradient Map. So we can click on Gradient Map. And of course there's a lot of different things we can do. We could do when that's mostly warm tones. And they're really going to have is it has a lot of highlights in it. So you're really going to see a lot more of an effect when we change the highlights. I wanna kinda have a little, I don't want it to be pink, but I don't want it to be red. I want it to be kind of in the middle. And that's a kind of a popular color choices, not quite pink, not quite red. There's this kind of in-between that point. Then I'm going to find here and do like a very high saturation. And I think it might help if I take this darker color and bring out some more shadows. Or even better, I can add some blue tones to this. So I'm going to keep it kind of at this darker level and bring it down to blue. And what that does is he have the warm and cool kinda together, working together. There we go. So there's my gradient map. I can always add another adjustment layer if I want to change brightness contrast, make the photo brighter or darker so I can read some texts a little bit better because member high contrast doesn't work with, with a quote or typography on top. So let's go to brightness contrast. Let's us reduce the brightness just a tad, a little contrast to add that pop. So let's add some topography. Let's take the type tool, make it a little bit bigger. And it's kinda funny because they're not popping out. Because we need to just go ahead and make this white. What's happening is the gradient map is on the top. So it's applying the same gradient map filter on top of the typography. So even though the topography is white, see right here, it's has that gradient map applied to it. So let's bring the words on the very top layer and we don't have that problem anymore. So I really liked this topography. It's called Abril text. And let's make this, these words a little bit bigger. And the S and the d are super close. And I just want to have a little bit more letting. So we're gonna go to Properties, go down and just add the tiniest bit of letting, do 26, let that breathe a little bit. So now we need to do some kind of anchoring because right now we have a great photo. We have some good typography, but we need to like a graphical element to really tie them together. So we have this person jumping. There's a lot of action. And we have this simple typography that's left or right. It's not really doing a whole lot. So we can add a small graphical element to play against him jumping kind of in a diagonal way. So what if we did diagonal rectangles to frame the typography? So what we're gonna do is we're to get a rectangle tool. Just make a simple rectangle. We're going to fill it with white. Get our move tool. Move it. Let's go ahead and make a duplicate. So I'm gonna hold down option and drag or just duplicate your layer. So now we have two of these. Let's select both of them. And let's just rotate it a little bit, just to give it an angle. Press Enter. And let's put these on either side of the typography. So all this is doing is it's bringing everything together. And once again, these graphic elements are not required for everything. It just depends on what you're using it for. There we go. We created a couple more little small quick posts using what we've learned with adjustments and typography and shapes. So hopefully you enjoyed this editing section. I just read film this to make it a lot longer and a lot more detailed. I wanted to make sure you understood each adjustment so that you can utilize that when doing design projects.
46. Photo Editing STUDENT PROJECTS: I have two student projects for you. The first one is going to practice. You're using your adjustment layers and doing some minor photo editing. I want you to take a photo from your phone or camera, and I want you to edit that photo. It could be a picture of an object, a picture of your dog, a picture of your workspace. I'd loved to see how you took a raw, unedited photo and made it a lot more polished and professional. The second project is to create a social media post similar to what we used before using a gradient map, you can use a picture of a person, an object, and uses simple quote to go along with it. I can't wait to see what you guys come up with for your projects. Of course, all projects are optional and they help you practice the tools that we learned throughout the class.
47. NEW! How to Spark and Encourage Creativity : The blank page syndrome, we have all experienced it. We don't have this grand idea or a sense of direction for a project. We start with a white canvas and we wonder where do we start? We feel overwhelmed in a sense of instant dread overtakes her brain so much so we tend to close their laptops, turn off or tablets and phones and walk away. We decide that maybe this wasn't the project for me and we continue on with something else completely different. The first thing you need to know is you are not alone. Being creative as not like a light switch where you can just turn it on when you need to. That's why sometimes I have to take a day or two to find motivation for a logo project, for example, I have to just get a pencil and paper and start to sketch out ideas. Most of the time my best ideas come from accidents are mistakes when sketching or missing around with something. Sometimes they come when watching are following other great designers on Instagram or YouTube and running across something they created that gives me a little spark or kick of inspiration of my own. It helps to know how the creative process works. I've discovered what are called inflection points in the creative process. Think of an inflection point as an ah-ha, moment of discovery. This could come from finding the right focal point for your design and building everything around that focal point. It could be the discovery of a concept when you're sketching. A line, intersects another line and instantly an idea or thought or aha moment is born. But once we find an inflection point, future creative decisions can be made. There are different variations, colors, and layouts we can try. We then find ourselves unblocked and free to explore the many avenues of possibilities. We could have multiple inflection points in the creative process. You can almost compare this to the neural network of a brain where multiple connections lead to another. One idea leads to two, which leads to four, and gives you a hundreds of wonderful options. Then you find yourself with a great problem. Which of the many great creative options do I choose from? So how do we get to that first inflection point in a project where we're no longer plagued with the question of what to do next. Of course, this is the hardest point to get to, but this lesson we'll go over a few different tips to help get you there and into the creative process. First of all, it is hard to teach someone how to be creative, but it is something that is an, every one of you tapping into that creativity can be harder for some, not all of us had people in our lives growing up to help us learn how to discover our own creativity. And some of us might even have had parents or caregivers that even discouraged creative endeavors. When I first started out and design, I would mostly do Photoshop manipulations and digital art as a way to learn the software, but to also to create something that looked really exciting when I was done. Logo design and other practical business minded design projects do not always yield exciting and results. Sometimes it was frustrating. As they say, one creative project can lead to another. Sometimes if you just pause and do something really fun, maybe a digital art piece for your social media profile, for example, it can help to foster that creativity for your business minded project, logo design, whatever you're doing for a client. This allows you to spend more time in the software and gives you a little more comfortable with it. When he have an idea but cannot make it happen like a seed in your head. Further study and the software can help to alleviate that problem. And a lot of cases, a lot of creative blocks come from not knowing the full capabilities and tools of the software you're using. I think another issue that keeps us from being creative is our tendency to be a perfectionist, to create something that is perfect. And the first attempt, not only that, we put a time limit on creating a perfect design piece in this pitch, so much pressure on us, we run away from it. Take a deep breath. Practice makes perfect. No, practice makes better. Give yourself time for your inspiration to become a completed piece of work that you're proud of. When we have a blank page, do not be afraid to experiment. It does not have to look good right away. Where you're trying to do is you're searching for that first inflection point and you're not trying to finish the design. And one sit down. For example, this digital photo composition. I tried at least 10 different poses and photos to find my main focal point. It took awhile, but once I've found it, I was able to slowly build elements that supported my main focal point. In this case, the woman. I built all the shapes around her and tried to add text and design elements that never overpowered her as the main focal point. This allowed for a smooth design process and gave me a plan to help me complete the design. Remember, every project has a purpose. It's to drive sales, gain followers, communicate a message or Spark and emotion and a viewer. Write down the main goal of your project and the sticky note, Our put it in an easily seen document on your computer so you can be reminded of that goal as you design and create, like a car battery out of juice, creativity can be hard to jumpstart. So I wanted to go over some helpful tips to prepare your mind for creativity. I'll start off with a really easy one. Take a walk, a shower, or spin time completely alone in silence. My best ideas come when I'm taking a shower, I go on a walk. There are sparks of inspiration that come by thinking of, well, thinking of nothing. I like to practice yoga night in the dark. My mind is allowed to clear itself of clutter and allows me to slowly and patiently think through creative ideas for a project. This could be a walk in the woods, are running at night for you. Take away all distractions and reduce stimulation of all of your senses, which allows you to focus on your thoughts. Do another creative task. If I need to come up with a design project, sometimes I play the piano or a draw. I do not play someone else's music, but just play what sounds nice. Or draw what I feel compelled to draw. This helps me take the pressure off to quote unquote perform right after doing a creative task, sit down to do your design task and see if it helps. This naturally leads to the next. Music is a powerful creativity igniters. And that is because music has a big impact on creativity. Let us, because we have many areas of our brain that are tied directly to the areas that process music and sound. Have you ever listened to a song and give you chills up your spine? That is because music and activate areas in the brain that are connected to emotions and creativity. My biggest aha moments have come when I've gone on a run with the music on. Watch someone else be creative. Have you ever watched a YouTube tutorial on fixing something in your house? And it seems so much easier watching someone else do it. Creativity works in the same way. Don't just study the final result of creativity. Watch others work through the creative process. This gives you ideas and methods, but also sparks other ideas of how you may do it differently or approach things differently. Practice being created. I've read hundreds of studies on the brain and creativity. So you'll have to, The one thing that continues to show up study after study is the word experience. Experience, and confidence in your ability allows you to access creativity as a subconscious activity in her brain. Think of it like a muscle memory. Anyone who has played the guitar can understand how hard it is to switch from one core to another. When you're getting used to those awkward hand positions. After years of practice, you no longer think about your hand positions in your brain canal. Focus on what chord to play next and not on how to play it. Be open to creativity striking at any moment. Inflection points can happen at anytime, whether you're in software on the screen or off. When doing big projects carry something around with you that allows you to speak or write down a stream of thoughts. I keep my phone nearby and it make audio notes when I come up with new lesson ideas for a class, for example. Creativity is a learned skill, not just the genetic jackpot. According to a study on genetics and creativity conducted by the University of Nebraska, Omaha, there are some genetic influences on creativity, but it has a limited ability to predict how a person uses that creativity. What that means is anyone can overcome creative blocks no matter what genes you're born with. This is good news for all of us who may not have had creative parents. Lastly, creativity can be exhausted. There is a point of creative exhaustion and you need to know where that point is for you. Well, we feel really frustrated, perhaps wanting to smash the keyboard a little bit. Those are good times to close down your laptop and take a break. And I've gone on long creative binges were writing new content for a course or creating a brand project for a client. And there are points where it comes emotionally exhausting. I get to the point where I want the entire project to just go away, take my money. You could take my buddy. I just want to quit. We all have deadlines, but we do build in that extra time for creative breaks in your projects. I can do a logo design in three hours, but not all the time. I have to build in at least a week before I feel ready to present it to the client. This allows me to breathe and it takes the pressure off that can steal our passion, excitement, and joy for a project. Do not be intimidated by the creative process. There is not a perfect way to be creative. You'll make mistakes, but you'll learn from them. I can provide insights from my own creative journey, but you must seek out your own unique pathway. Ultimately, I think the best way to alleviate creative block is to take the pressure off herself. Learn to enjoy the act of sparking creativity. And hopefully you can start to apply these tips to your own projects. Then hopefully find ways to navigate through that blank page syndrome to create, studying designs.
48. Photoshop - Duotone and Gradients: way. Have another photo here and we're gonna talk about two things here were to talk really about editing color with duo tones and also color transitions or filters. So one thing we want to do is we won't talk about do atones first. So let's take this really bright, colorful photo and let's really hone in on just a couple of ink colors. And so you'll see this effect everywhere, kind of done on posters and pop art, And we're gonna kind of produce our own kind of pop art style using do tens. So let's go ahead and unlock her layer here, and we're gonna go up to image mode. And of course, we could change all these so you'll notice. Duo Tone is great out. I cannot select a duo tone, and there's a reason for that. We need to be able to strip all the color away from the photo first, so we're gonna convert this photo to Gray Scale. We're gonna go ahead and discard. So now we have the instant black and white photo. Let's go back to image mode, and now all of a sudden duo tone is a selected option, so let's select duo tune, and this is where we can do more than just one in color. So this is just the only in colors that show up on this photo are these colors, and that's it. So ah, we can also do a monotone and just have one color and kind of bring in just one color here . So can almost do a gray scale, but with a hint of different color. So that couldn't have a really cool modern effect, especially when to do more washed out lighter colors that could be really good for a background for a design. So that is monotone and duo tone will do two different ink colors, so you compare. Maybe a lighter color with a darker shade to kind of bring in more of those shadows. Kind of makes a little more complex. And to add even more complexity, you could even do a tri tone and add three different colors. But let's stick with the duo tone for now, and let's try to do something dramatic, so we already have kind of a cool color. Let's see what happens when we try to bring out a warm color as well. We're gonna stick with two very similar cool colors. We have two title these So just one and two and let's go ahead and click on OK, so I kind of have her before kind of full color. We have kind of a very interesting piece when we kind of strip it down and make it a duo tone. So let's try that duo tone effect one more time on a new photo. And remember, you can have access to these photos by visiting the foot, the resource guide and being able to find the photos there, or just going to peck sal's dot com and finding your own voted to use. So let's go to image. Let's strip out all the color and make it a gray scale. And then let's go ahead and add our duo tone, and this can really add kind of a neat pop. So I'm just doing a very dark, rich blue pair with maybe a lighter blue kind of see what happens. You kind of see kind of the totally changes the entire mood and tone of the photo. So if you go back to history and we go before that was before, look great love, full color. But this just adds a really neat effect that you can overly type on top of it and create a really neat poster out of this. And what do atones and monitors do is when you strip all those hundreds of colors out of there and you simplify it and just make one or two inks, it really helps the background be a Gromit. It really helps the photo become a great background because the backgrounds not has all these rich colors. It just has very simple colors and you're able to overlay type on top of it. Ah, and the type can really stand out on top of the photo so it could be very helpful tool for graphic designers. Well, let's take the same photo of the woman and start over. And this time we're gonna do something different. We're gonna do color transitions are basically colored. Radiance were overlay that Grady int to create a really cool effect with blending modes. So what we're gonna do is we're gonna use our radiant tool. We're gonna go ahead and hold down on the paint bucket tool and you'll be able to find it as a drop down menu options ingredient tool, and we're gonna add a very basic radiant Let's just start with cut oven orange Grady int and Sisters, the default radiance that come with it. You can always double click the radiant to be ableto to change and manipulate the radiant as much as you want. You can add many points of color and double click on this little area to add as much color . Where is little color as you want? So just kind of double clicking on these and adding various tones of red and orange, and it can move these around. You could change the density between each one and make it tighter transition or a looser transition. Do you click on OK, you can load lots of different basic ones. The newer version of Photo Shop really has some really neat another benefit to having the newer version that some really neat default radiance built in. This is brand new to 2020 version of Adobe Photo Shop. You can add in some really neat default radiance thes air not available in some of the older versions of photo shop. You just have to manually create him But you have pinks. You have all sorts of different colors. I'm just gonna pick one I think would be really dynamic. So let's pit pick something pretty deep. So I'm picking this kind of pink to purple. I click on OK, and we're gonna go ahead and draw, ingredient. I'm gonna click and drag. And so the shorter you do ingredient, the quicker the transition of the Grady int. And I'm gonna do one thing before I draw the Grady int. I'm gonna go to my layers panel and I am not going to do a Grady in on top of the photo because if I did that, the photos gone. What I want to do is I want to add a new layer on top. This will be a Grady it layer. That's our Grady, it layer. I'm gonna click and drag on a new layer and do ingredient. So if I do a very short line, it's a very tight my do a very lengthy line. It's gonna get longer. Course you have different ones you could do, could do radio. And right up here in your Grady in selection area, we could do a radio which is gonna be a circle Wiccan do kind of a diamond pattern. A lot of different things we can do. Let's stick to a radio. Let's have this be kind of a radio radiant, so you kind of start at the top, and it radiates into a circle like fashion. So here's where kind of the magic happens. So for right now I have the grating as the top most layer. It's good. Bring this up. I'm gonna do what's called blending modes and blending modes air always found in your layers panel on all adobe products that will be using in this glass, and right now it's set to normal. But there's a drop down box, and it will do a live preview and show you how some of these different blending modes will affect the image. Um, so space. This is basically different ways that it lets pixels or light through the layer. So right now, a screen it's gonna let specific pixels through this layer and reveal the layer underneath . And that's why all of these air a little bit different because it the rules of which pixels that allows through are different with each one of these. So if I do screen, you can see how this looks very much like a very popular filter you would see on Social Media or INSTAGRAM. This is exactly how filters work and social media as they basically add kind of a Grady and our color two toned color on top of a photo. And then they just do blending modes toe. Let certain lights through so you can reveal the image underneath but still keep that color layer intact. So right now I'm using screen, but we can try out other ones. I really think screen are linear. Dodge works really well. The overlay has kind of let's more of the darker shadows through and exclusion who? Look at that. So you kind of getting some greens and there so all these they're gonna have different effects that could have a different effect that you're going for. But let's go ahead and stick with screen. You can, uh, have the grating layer on top. You can also, for a different effect, you can let the photo be on top. So let's put the photo on top just to kind of see what happens here. And let's take our Grady int layer and put it back to normal. And let's put our blending mode on the top layer and see how this changes things, so you'll notice how everything seems to come out a little darker with this one when the photo is on top. Traditionally, you see the photo on the bottom. You can do it either way. It's gonna be a little bit different sometimes. But normally you'll see the Grady Int or the filter on the top over the photo with the blending mode. So just that's what's kind of traditionally how you kind of see it done. What's great about this is I can add any Grady and on top, and it will change it dynamically. So let's pick a different kind of of, ah, grade in here. Let's do let's do something very vibrant. So just picking this tri colored you could double click this little tri colored radiant here. And so the click and hold on a radiant layer. It's gonna keep that blending mode on always so it's just gonna change the colors that it filters through. Now we can also double click Argh! Radiant! Here we can change one single color we wanted to. So really, the possibilities are endless with what she can create with this. Let's do one more. Let's try a blue just for the heck of it. Click and hold and I have a radio radiant going on. So that's interesting. Let's do kind of a tighter Grady int and let's go and do our drop down options and kind of scroll through some of these so hard light that would make a really great background image because it's so soft, it's not so harsh. So there you have it wouldn't go back into history and find the one that we think was the coolest one. You could do the same thing when we get to brushes, you can brush on a specific color and I'll show you really quickly here. I'm gonna go ahead and take off this Grady in right now, and we could do the same thing with brushes and we'll do that next. So I have our Grady int layer just toggled off. We're gonna do a new layer, and this is gonna be airbrush layers. We haven't done brushes yet, but we'll definitely use those throughout the course, so I'm just selecting our brush tool over here in the toolbar, and we're gonna get They have two main ones here in general brushes. There's a soft around which is feathered, and there's a heart around which is harsh. We're gonna choose a soft round brush and make it pretty big in size, so pretty much maxing it out at 5000 pixels for this particular photo. What we're gonna do is we're going to pick Let's do something dramatic like pink. So we can really see this. An action we have pink selected. We have a brush. And what we're gonna do is we're gonna go ahead and select a blending mode here. We're gonna go ahead and select the overlay blending mode. Of course, you can use anyone you want, but this is just an empty layer and we're gonna brush on pink so you can see how you can add little pops of color on one particular side of her face. And what's great about this is I can travel this off anytime I want. I could take the eraser tool right here, make that really big, and make that soft around. Take the eraser tool and kind of shave off where the pink comes in and then I can add What I like to do is I like toe layer it as much as I can. So I get at a new layer and let's do kind of a purple color and this will be purple. We're gonna get the brush tool and I'm just gonna do the other side of her face. So why don't we zoom in on this now? I'm gonna do the other side of her face. So I just clicked once and make sure our overlay blending motors on so you can kind of see , we can even reduce air brush brush size a little bit Could see how kind of you can create some pretty cool effects by kind of brushing on blending modes. You don't always have stuff to do. Ingredient. And I do this a lot of my Photoshopped editing a manipulation class. I go a little more in depth on all this kind of stuff, but for this class, we just need to kind of cover the basics. I was just bringing orange having lots of pop. Siri can even do a new layer on top and reduce the opacity here, you just get a little hint of orange and then change the blending. But so there's There's a lot of things you could do with this particular effect. Ah, this is kind of what the effect I was trying to do very quickly, and you can kind of see the final. This is just creating different layers and adding different brushes and doing the blending modes on those brushes. So now that we've reviewed some of the photo editing basics, we're now ready to move on to the next project.
49. Photoshop - Cutting Out Objects: So, as a graphic designer, one of the biggest things we're gonna be doing in Adobe Photo Shop is cutting out and isolating objects so that you can place it on specific ad campaigns or designs. And it could be one of the hardest task because some objects air really easy to isolate, and some that have more complex hair and different things could be very hard to isolate. So we're gonna talk about all the different options you have for cutting out and isolating objects out of photos so you can make your own photo compositions make your own flat lays. There's a lot of things you do you can do when you have learned toe isolate and cut out objects at a photos. So let's go ahead and get started with some of the more basic options. So with the newer versions of Photo Shop, there is something called the object selection tool. This is brand new and Adobe Photoshopped 2020 and also 2000 Nineteens version had something very similar to this. So if you have Adobe Photoshopped 2019 or higher, you're in luck. You'll have access to this tool. And don't worry, I'm gonna go over all options for all different users. So let's go over this, Really? It's one of my go twos. I like to use this first because I think it let the algorithm let the computer help us select an object. And that's exactly what this is going to do. So before, in the 2019 version, you'd go to select, it's going select our object here, our photo and our layer you would go up to select. And there's something called Subjects. So what's gonna automatically try to figure out the subject that you're picking? And it kind of did a good job if I were to Peress. Ah, delete, um, didn't really select the coffee inside, so I guess it didn't do a very good job with this particular one. It tends to do better with people, but the newer 2020 version has a brand new tool called the object selection tool. Instead of just doing it on the whole entire photo. If you could actually click and hold, and it will just isolate one particular area, so it's gonna do the select subject on one particular area, and it did a very good job. So if I were to copy his command C and Paste Command V have a brand new layer here, and I can move this over, and I just created a perfect, well cut out copy, so that's very easy. That's why sometimes updating your software can be very convenient. But it doesn't mean you can't have all these other options toe isolate as well. So let's try some of the more traditional ways to isolate objects. So my next go to is the lasso tools. We have the regular lasso tool, which you'll just have to click and hold your mouse and try the best. You can isolate an object, but usually it ends up failing miserably when you try to cut it out, because it's gonna be how good you are with the mouse. So a lot of times I'll do the quick lasso tool to quickly circle and select an object very quickly, and it doesn't have to be perfect. So there's something even better called the magnetic lasso tool, so it's gonna be the same thing as the last so tool. But it's good A actually have a magnetic kind of quality to it, and it's gonna Naturally, I'm not even press. I just pressed once and now I'm just kind of dragging my mouse around and it's going to magnetically attractive, similar pixels that you're going along. So this works really well with high contrast color. So you have this nice Big Blue with this nice dark brown and has a high contrast. This works very nicely. It does not work very good when you have colors that are very similar because the computer doesn't know what you're trying to select with the magnetic quality of the magnetic lasso tool. So gonna come back to see that circle icon. I'm gonna go ahead and click back at the original, and I have a pretty decent selection. So let's say, um, I made a little mistake and kind of move my mouse a little too much. The magnetic stuff really helps. Sometimes it doesn't always work perfectly. I want to subtract that selection. So if I want to add to a selection, you would hold down shift and you would just click and just kind of draw a circle click back to the original. You can add to a selection, but I want to subtract a selection. So I'm gonna go up here and do the subtract from selection option. And so now when I click and isolate that little bit, it will subtract that selection. So using the magnetic lasso tool, which is more of a traditional way to isolate objects, and that's available in a lot of versions of Photoshopped, you'd have to have a pretty old version of Photoshopped to not have that available. That did a pretty good job, I think, very similar. It took us a little longer to isolate it than the other option, but I think it worked really well. And there is yet another way to cut objects out. And it's great to kind of learn all these and to figure out which one is best for each situation. They're all gonna have a different way. You might have to cycle through a couple ones to find out which one is working good for a particular situation, and through time you'll learn which one works better. So the pin tools really good for complex shapes and specially shapes that have a lot of curves to them because the pin tools really good with curves. So we're gonna be talking about the pin tool. We're gonna be talking about the pin tool a lot. And adobe illustrator, we're gonna be mastering it. But a photo shop We're just gonna do the very basics. So we have the pin tool selected. And let's say we want to isolate the coffee cup, not just this easy circle, because we can just easily select it out. So we want to go around the curves of this and we want to select this little handle so that the pen tool we're gonna click right here. Click anywhere. Now we're gonna go over to a specific area and click again. And instead of releasing, we're gonna hold and pull. I was gonna kind of slowly create the curve and Adobe illustrator really good to be working with this tool a lot. It works very similar to, um Photoshopped Photo shop in illustrator Pin Tools Work have the same mechanics. So when you master one, you kind of master them all. So if you really want to take those pin to a lessons in Adobe Illustrator, they're very helpful to kind of learn. So I'm just kind of going through this selecting and it's great because I'm able to do these little curves, which is really hard sometimes to do with the like the polygon lasso tool. Sometimes the magnetic lasso tool is not an option because there's not enough contrast between the colors. Sometimes it just doesn't work as well. So it kind of selected this basic shape that any time we can select a particular anchor point. This little points that we selected are called anchor points in a one, All of that and Adobe Illustrator. And they even have more complicated options like the curvature tool, which you can select a particular anchor point and have a little bit more control over curves, which is very helpful. And on Adobe Illustrator, we're going to use a lot of these similar tools, so I would suggest you go master it in Adobe Illustrator, and when you come back to photo shop, you'll feel a lot more comfortable with it. But I wanted to talk about it as an option for isolating objects, so let's it's not perfect, but it's pretty close, were able to easily do curves. So what we're gonna do is when we already selected are shape. So when we drew a shape with our pin tool. It created what's called a path. So this is where our path kind of window comes in handy. And this is the path that we created. So what we're gonna do is we're gonna right, click our path and we're gonna go down to make a selection. Now we're gonna go ahead and click on OK, and it's gonna turn our pin tool path that we created into a selection of the object. So now we can go to go down to our original layer copy, and then there's paste it into a new layer. It's going dragger path to bath tool over there. Any time use the pinto creates a path. That's why that's handy. And here's our little isolated cup so we can always trim. I love using the pen tool for trimming certain objects I cut out. Maybe don't like how it's cut out. I could grab that pin tool again to select. Gonna trim that a little bit, and this is pretty complicated. I know we're still just getting to learn the basics of Adobe Photoshopped, so let's say I want to trim that little bit off. I could just right click and just make a selection and gone. Okay? And then I can go back to my layer, toggle my later. Make sure I got the right one selected and just delete. Press the delete button. That's a really great way to trim objects.
50. Photoshop - Cutting Out Objects - Part 2: So now we have a different photo worker toe work with toe isolate object because there's still more different ways to cut out objects. So we talked about the magnetic lasso tool, which is really easy for high contrast areas. We talked about the pin tool, which is really great for smooth shapes and lots of curves, and the quick selection tool. The select subject option, which is only available for newer versions of Photoshopped. So there's still a few more different ways to isolate and cut out objects, and it one is called the quick selection tool. It's a relatively new tool. It's been around for a couple of years, but we're gonna go ahead and try this quick selection tool. What I found is quick selection. Tool works really well for these nice, clean background areas. So what we could do is we can click and select and just drag. This is gonna automatically send similar colored pixels. And just like that, we were able to isolate that so we can delete the background and then he's isolated just like that. We just went ahead and isolated him pretty quickly. It did a good job of kind of cutting around the hair. It's not perfect. You're not gonna get every single pixel perfectly cut out. But I think that's pretty good. So that was the quick selection tool to do that one more time. Go back and you can change your brush size of your quick selection tool. This is where it's at right here. And you can make it bigger if you wanna have kind of a broader, quicker selection and you can select the inverse. So I'm just gonna go up to select in verse. And so instead of selecting this, you're gonna select the opposite so that select and verse and it's gonna keep in verse ing it. And so now I can just select him. And what's great about this is now, if I wanted to just turn him black and white, I can and keep the background color. So that's kind of nice to be able to have that option. And there's one Mauritz kind of a sister. I guess you would say to the quick selection tool is the magic wand tool. So this is going to do the same thing as quick selection, but it's gonna take a pixel sample and just do one spot. It's just like a one click type of tool. So I'm gonna click on this background. It's got mixed success, so it's not quite my favorite way to do it, unless I'm really lucky in a background a super, super clean and simple single color. So I'm gonna click on the background, and you can see how it's not quite as good as the quick selection tool. It still has some of these other ones. I can hold down the shift button and noticed when I hold down the shift button and has this little addition sign it's gonna hold down the shift and click. It will add to my selection so you get these little pixels left over. It's not quite as good. It's always nice if you're really in a jam and you just need to quickly select a background . Sometimes it's nice, but I really find that quick selection tool really kind of replacing the Magic wand Tools in the Magic Wand Tool was an older tool, and the quick selection tools kind of a little bit more updated of a tool
51. Photoshop -Content Aware Tool: clients are constantly adding me to remove objects from photos. Whether they don't like the look in the lamp. They want the girl removed because they just want the texture. They want to add their own product. There's so many different reasons why you need to eliminate a particular piece from a photo . And how do you do that? Realistically, how do I remove this lamp? What do I to put behind it? And that's a great question I hope to resolve. There's something called the content Aware Tool, which can literally we can trace around a object. And Photoshopped has an algorithm algorithm that will fill that place inside with an average of what's around. It will take an average of what's around it to create something behind it. So we're gonna do that real quickly here. So to be able to use the content aware tools, we first need to make our selection some signature. Grab the simple lasso tool, and I'm just gonna trace around the object. I'm gonna do a little bit of a border around my objects so it doesn't bring any of the shadows cast by the object. We want to go ahead and eliminate those two. So doing a really nice, generous margin around the object and you're gonna go to edit. You got to go toe, Phil. There's also content aware fill a swell, what we're gonna go to fill right now. And we have the set on content aware, and we're just going to do We're gonna have color adaptation selected. Click Okay, it's gonna magically disappear. Is gonna be fun to watch. And so it's not always perfect. What it did is it kind of took a sample of what's around it and tried to fill it in with similar texture. As you see, it kind of brought this little bit of an awkward shadow cast behind. So you almost always have to go back and kind of do a second little films kind of going over that area. Good at, uh, at it, Bill. Let's go ahead and do your content built. And then there's also things you could do to make it a little bit better by cloning using the cloning tool. So I'm gonna grab the clone tool right here. I'm going to get a nice, pretty decent sized brush. It's gonna be the soft round brush get a hold down option to take a sample, take a sample not of the blurry area, but of this nice, crisp area that is clicked and took a sample. I'm not gonna do 100% opacity cause you're going to see exactly where I'm painting the brush. So if you do a 50% opacity, it will be a little bit more subtle and it'll blend in better. And then I'll take another sample again. Drag it over. That was continue to do this Until I get more of a seamless texture and pattern, you could probably spend another 10 minutes kind of going around and doing that can also increase the capacity just a little bit to get more that stronger trying to get that blur out of there. So now we need to remove the woman from the photo. So I'm gonna do the same thing. Go ahead and do my lasso tool number two grabber lasso tool in order to trace her. Have a nice, generous margin. We're do something in a little bit different. Before we just went up to edit, we went to Phil and we just selected content will content aware, but As you can see, there's a its very own option, content aware fill here in the edit menu. We're gonna select this one, and the difference is we're gonna have a little bit more control with our selection. So as you can see here, this green part is the sample area. So the ALC algorithms gonna sample everything in this green area to create the area and the and the woman selection so it could be able to find samples of pixels to use to replace, so we can eliminate things that we don't want to be a part of the sample. So this little door here, we really don't want that to come through. We just want the blue texture. So I am just getting rid of items that I don't want it to sample. So the green is where it's gonna take that texture sample from, and I'm gonna don't go down here to output settings, and I'm just going to current layer. You can actually do a new layer and will create a new layer with what it replaces on the inside. But I'm just gonna do a current layer going click on OK, okay, so it went ahead and did. Okay, job. There's still some kind of imperfections, but I'm just gonna continue to trace around areas until I get smaller and smaller and gets a little bit better. They're going to the same thing. Go to content, aware fill, go and click on OK, and each time that's gonna get a little better and better. And they can also go back with the clone tool and did what we did before. We take large samples and we kind of pain over just kind of smooth out. There's a little bit of rough texture leftover behind after removed everything. So you go in with the clone to one kind of clean it up a little bit more time. There's also something I wanted to review, and that's the healing brush tool. You could find the healing brush tool right over here on the toolbar healing brush tool. And what's great about this is it's a brush version of the content fill content, aware. So instead of having to go up there and select, you can actually paint on where you want to change is to be so I'm gonna get a nice big brush, get a nice, big brush. And we're just gonna paint the areas that we want it to, uh, kind of replace sample here. This could kind of help us clean up our texture a little bit. Sometimes you have to use a combination of different tools to get the right effect that you're going for. So I'm just holding down to sit. It works just like the clone tool. I'm gonna hold down the option key to take a little sample of this is nice and clean up here, and I'm just painting it on. Has taken samples of nearby textures to kind of clean it up a little bit. Great.
52. Photoshop - Layering Masks: today we're gonna work on a really neat project on we're gonna be ableto we've typography or type in and out of any object in this nature shot. We're gonna do that through the use of layer mass. So we already use layer mass to make a 50% gray layer and using the Dodge and Burn tool to be able to bring out highlights and shadows on people's faces without destroying the original photo. We're gonna do something a little bit different, but we're still gonna work with layering masks. So I'm gonna do this simple project, demonstrate how this layering mass work. So I'm gonna just use the type tool. I'm gonna type out a simple word. Let's just do typography. You make it fairly big, Make sure haven't spelled correctly typography. And I was gonna double click this just kind of take a look at his as oh Sands, which is a really nice, bold typography if you don't have it in your library to use. So I'm just going to use that you can use Helvetica or any kind of san serif font or a syrup on if you like s So what I'm gonna do is I want to try to position this. And sometimes I like to go ahead and go to my layer and reduce the capacity to a little pit to kind of see how I can weave the typography in and out and kind of create a really neat, layered effect. So I'm just kind of position certain words so that very critical parts of words aren't covered up. Okay, so I'm just gonna position it right about here. Go ahead and make it a full opacity, so I can kind of see how it looks. So we're gonna use layering mass to be able to weave these people in and out without having to cut out the people in separate layers, which we would normally do would go ahead and try to sell to get our selection tools. So, like, the man out copy and paste him on a new layer or use um, a layer mask to kind of crop him. But this is a lot quicker way to kind of mask objects. So I have my layer selected, and what I'm gonna do is I'm gonna add Ah, my layer mask right down here is gonna go ahead and click it. So I add my layering mask and I'm gonna go ahead. And when you have layering mass, black is what takes it away What takes that object away or erases it and white is what adds it back in. So I have it on just pure black right now. So just pure black and I'm gonna get that paint brush tool, and I'm gonna go ahead and make it a slight transparency again. So I can kind of see where I'm cutting it out, and I'm gonna go ahead and cut out the O from this man right in this area, and so black takes it away. So that will take it away. And if I ever want to add it back, let's say I take too much away. I go ahead and flip it to white, and I added back in, So I will be adding and subtracting with black and white. So we kind of go back and switched to black. So now brush is a really important because right now I have a soft, round brush. So when I make in a race, kind of when I kind of paint it away, it kind of adds this feather to it, which can have a nice effect and make it look like it's a shadow. Or it could almost make it look like it's not fading enough, so you can do that effect if you'd like. Or if you want a sharper cut out, you could switch to hard round, maybe make a smaller brush and go in and just do a more precise cut out. It just depends on the look you're going for and what's great about layering Mass. If I mess up, I could always go back and paint with White to go back and get a little bit of the excess. I didn't take off her. I took too much off. So let's say I'm just erasing this portion due to do to do and let's say, Oh, that was a bad cut out. No problem. Just gonna switch to White, maybe get a more precise brush size zoom and and just kind of paint that back out till I get what I like. And this is where I'm doing this with the mouse. I'm gonna do it with the mouse the whole time. That's probably what you guys have access to, But if you had the wakame tablet or, you know, an iPad where you can plug in like an IPAD pro. This is where that really comes in handy because you can paint using the wakame tablet instead of just having to use your mouse, get a little bit more precision. So sometimes I like to reduce the A pastie quite a bit and darker areas that I can't see. So let me go ahead and switch. I'm on my layering mass. Go ahead, delete this area where this guy's now office and sometimes I switch between the soft, another brush and, um, kind of the more precise Ah, hard round brush. I'll switch between these two. Sometimes the feathered effect gives me a better look. Just depends, So I'm gonna go ahead, switch back. I'm gonna leave the p how it ISS So now when we go ahead and make a full capacity and kind of see how we're able to create that really cool three D effect, what? Looks like the type is going right through him. Um, we could do the same over here. We're gonna do a couple other little, but to show you kind of an example how I'm painting using layering mass and I'll be right back. So let's continue to play with this a little bit. I'm gonna reduce the restaurant. Uh, transparency. Here you go ahead and paint with my paintbrush on my mask. Make it kind of a bigger tool. And let's do a soft around kind of just do some general areas. If it takes too much, I reduce the brush size, and that gives me more precision. Once I kind of get the border erased, I could get a bigger brush and just kind of take all that away, and you could do this with anything. It doesn't have to be. Typography can be another object or an animal. It just kind of the power of layer Mass and how that works. That's a pretty need effect gives it a really nice, layered look. I can go in and add a new layer, and I can paint on shadows and kind of make it really pop out in the environment. And I can add shadows that the A would cast on her so I could have this layer underneath typography and kind of make sure you get a nice, soft round brush making a little smaller, so she would have some shadows cast here. Right? And I can reduce the opacity on that shadow layer. It's making it look a little bit more a part of the environment. Same thing with the P. I can go in here and create a new layer and just paint on the black shadows right here where the p would kind of be popping out, casting a shadow just like that. Maybe reduced capacity a little bit. So it's not too strong. Okay, so it could just create another word. This is what's so neat is you have a lot of power here and flexibility, So I just copy that. I'm going to delete this layering mass. I'm just going to right click my layering mask. We're just gonna do a new one on this word. I wanted to kind of show you an example of how you can use this to paint over a lot of different environments. So this is gonna be cold water ful, and we're gonna have it kind of go through the water. We're gonna use layering mass to kind of layer that waterfall on top. So we're gonna go ahead and creator layer mask sums going down here creating a layer mask. So now I'm gonna want to race things to make it look like it's taken over by the water. So I'm gonna have black and have my brush. I'm gonna get a nice, soft around brush. I'm gonna make it pretty big. And I'm just going to reduce the opacity quite a bit. Maybe like 25%. We just want to do different kind of techniques to make it look like it's covered by the water. And we can increase the capacity in certain areas, All right? Just creating different lines of different capacities. We could make it smaller, right? Make it look like it's only going in certain areas. So you're ending up getting a pretty cool effect. And if you ever feel like you've gone too far to switch it, Dwight and will erase it and take it away, lighten it up for you. So it looks like it's behind the waterfall. The waterfall is trickling through it and let's do another one just for fun. Go ahead and delete that layering mask and I'm just gonna title this title. It fun, and you could just put it anywhere on these rocks. You could put it down here in the rocks, or we could have a rest right here. Have a rest right here. Make it smaller. Hi. We're gonna make it a little bit transparent. We're gonna zoom in and find opportunities to cut it away to look like it's resting on the rock. Could cut it right here. See this kind of rock part of the rock that gets cut here a little bit, never ever to go back. And I'm painting with white now. I'm getting it back right here where I cut a little bit too much and just like that, I'm gonna go ahead and switch it. It looks like it's cut out of the rock once again, I could add shadows behind it. Just paint on. Let's get my nice, soft round brush, Make it nice and big pates. Um, shadows here. Go ahead and drag this layer underneath. Right. So maybe it's casting some shadows behind there, and I can always just take the eraser tool in just fine. Tune those shadows to do. Wouldn't have shadows on that and you'd have it behind it, we wouldn't have it on top. So it was kind of erasing that. That would just reduce the transparency of my shadows. Have a little bit of a shadow cast. So that was before this is after, is adding a little bit of shadow, so just kind of having fun With different environments you put on the water, you can leave it in and out just by knowing and utilizing the layering mass system.
53. Photoshop - Spot Healing Brush: Oh, we're gonna talk about one more variation of this tool. And right now, we were kind of doing the healing brush tool to kind of do a wide area to kind of blend everything. We're gonna go just north of that and select the spot healing brush tools. It's gonna look just like this icon. We have that selected and let's say is going unlock this layer. I want to remove the letters. I want to add my own letters. So I need these remove first so I could do that a lot easier By using the brush version. We don't have to sit there and trace around the are. We could just brush it away. We're gonna do a nice skinny brush, one about the thickness or a little bit thicker than the words. So, in this case, about 112 pixels, you could do whatever works for you, and I'm literally just gonna paint the are away. It's going to take samples around it to find the right selection. We don't need the to, and so you could see this is just like magic. It's really fun to do a lot easier than having to select it and then going upto editing content vill that's its took a lot easier to do a lot of fun. So now I can add my own objects in here for whatever reason I need that for. And once again, that is the spot healing brush tool very, very handy.
54. Photoshop - Changing Hair Color: way, isolate an object and change the color. So I want to take this woman's hair and make it all sorts of different colors. But I don't want to affect the color of the grass or her skin. I just want to isolate the hair. As with everything in Photoshopped, there's lots of different ways we can approach this. So as we talked about before, we painted on the brush using blending modes, we're gonna try something very similar. So we're going to add a new layer and we're gonna get our brush tool, and we're gonna get a pretty good size. Let's do maybe, Ah, 400 pixels. Now we're gonna zoom in on this woman's here and we're gonna paint. Let's pick a very bright color. I think red's probably a pretty good bright color. We're gonna paint on red on just the woman's hair, so this is a little bit more of a crude method of doing it, but it could be accurate up depending on the situation that you're in. But it's kind of your quick, wayto quickly paint on a color. It's kind of crudely painting over her hair where I see it the most dense. Where's you? Might need to make the brush a little bit smaller so you can paint around more fine areas like right down there by her years. And we could take the eraser tool and do the same thing in a race. Areas like part of her forehead that we didn't mean to do. We don't want to change the color of before, Ed. We just want to change the color of you hear? Okay, so now we're gonna zoom out, we're gonna do ballooning modes to kind of add a different kind of color effect to her. So I'm right here in my layers panel, and I'm gonna do a couple of blending mode effects. It's gonna let certain pixels through is gonna make her hair super duper red. Let's do these soft light. So you notice how it's really letting in that red. So this is if I toggle this layer off. This is just a big old painted layer that we painted and we toggle it off. You notice it's brown, and then all of a sudden it's red. So what you're gonna have to do with this method is we're gonna have to go back and kind of select her hair and kind of erase some of that read because it's starting to bleed into the grass. You could take some of your selection tools to magnetic lasso tool, and it go around her here and this, like, slowly select and then kind of delete. That's a little bit of a tedious method, but it works very quickly. It's going around certain areas. It's kind of cleaning up our kind of rough, quick selection. So let's go ahead and zoom out. We might even have to select all of the daisies and get our eraser tool and kind of make sure those air cleaned up just getting the eraser tool and removing that read on top of the daisies so that those aren't affected. That's definitely one method of doing it. Let's go ahead and zoom out and see what we have here, so we definitely has changed her color. We could do it on her eyebrows to let's do her eyebrows because not many redheads have eyebrows that air that brown they haven't kind of read write, So I'm gonna create a new layer on top. We're gonna take the same red and take a much smaller brush, and I'm using a soft round brush because it's a little more forgiving in the situation. And I'm just painting on some eyebrows. Looks really silly. We're gonna do the blending mode we did before. Let's see what blending mode we did. Soft light. So let's see what soft light looks like. And we're gonna have to go in and definitely lighten these and feather this up so it might even have to reduce the transparency. So it's not quite a strong, and we're gonna have to take the eraser tool and slowly kind of make sure we don't have any red and areas that really shouldn't be there. We could even reduce the opacity of our eraser tool so it can cut a feather. Our deletion. Just give it a more natural feathered racing. Let's zoom out. So there's our little redhead. Maybe just reduced that capacity a little bit. We just want a little tinge hint of red. We don't want super red eyebrows. We just want a little hint of red. So there you go. We're able to change her hair color. I could even go up to Image and Change or Hugh is going down to hue and saturation, and we're gonna change that red color. We can give her all sorts of different hair colors. We could do a crazy green. We could do crazy Purple who? Some of these a really interesting looking, kind of like the red, but able to stick with red but just kind of showing you how you can kind of change. It's really quickly so it can de saturated, probably make it look more natural or increase the readiness for more dramatic effect. And there you go. We have our little redhead, so this was before this was after. So that's just one way that you can change their color. Or you can change and isolate anything, not just hair but any any kind of object. You could kind of paint over or select that particular object and do a blending mode of that color to be able to change it.
55. Photoshop - Changing Dress Color: So next we're gonna try a different way to change and objects color. Let's say we want to change just her dress. So we're gonna use our selection tools to be able to make a selection of her dress. So let's just take the magnetic lasso tool and go ahead and see what we can get here. That's doing a pretty good job at making this election. As we've studied in the couple past previous lessons there so many different ways to cut objects out. Sometimes some work better than others. Some of the newer tools. I'm trying to use those a little less. So just in case you have an older version of software, you kind of have something to go with. And this is where the pin tool might be helpful and helping us find tune our selection. So we have our selection here, and this is also get help us practice selecting. We're gonna zoom in and do some fine tuned work and make sure everything is selected how we want. So we still have the magnetic lasso tool selected and notice When I hold down shift, I'm adding to a selection. I'm gonna hold down shift and I'm just clicking to add a selection. It's going around and adding anything I missed or anything at the magnetic tool missed. And sometimes the mag this is really high contrast is very easy to do. Well, slates is not selecting a particular area. I could even just get the polygon lasso tool and add at a selection that way kind of manually. So you have all these tools you can add to the selection, and you can even use the pen tool to help you. So right here in this little area, let's get the pin tool out. And let's draw kind of include all of this, this kind of round area. It was like that. We just want to kind of add that to the selection. I'm gonna right click, make a selection. I'm gonna click instead of new selection. If I were to select new selection, it would de select everything here, sir, go to add to the current selection that we already have and it and it integrates right in there. So let's say we want to subtract. So let's go like this. Rumors attract that little area right there. So I'm gonna right click and I am going to make a selection. But this time I'm going to subtract from the selection. So now I'm subtracting. So this is a little bit Take some time to get to know and to get used to. And you have lots of projects and practice time to be able to do that. That's why I love the pin tool cause I get lots of control over curves are gonna be adding to this selection to make a selection. Add to it just like that. And then you can subtract. And sometimes I like to switch between tools and I'm have the magnetic for Let's do the polygon lasso tool. I'm gonna go appear to subtract and I'm going to subtract that selection so it takes some practice. Re watch this video lots of times it's gonna help. You see that has a curve in it. So let me do my pen tool. I was taking that skin and they could always click on your pin till we have a lot of different options for adding your anchor points and changing your ankle points. Once again, we're really gonna cover this quite a bit in, um, Adobe Illustrator and subtract. So we want to subtract that out. We don't want to select the skin, and voila. So pretty decent selection here. You just have to go in and really make sure your selection is good on. Looks like around the bottom There, you can either use them quickly. Use Thea. We could also use the quick selection tool. You have lots of tools in your tool belt. We want to do the add addition, not subtraction. We're just gonna go super. Can't smooth around the bottom. Smooth selection. Looks like I might need to use the pinto for that one to get a nice, smooth curve. But that is no problem making a selection right click. The biggest thing about this is remembering and my subtracting or in my adding and sometimes it's kind of hard to remember. So I'm definitely subtracting from that selection, and there we go. We can always find Tune all this stuff very quickly. There we go. We have her dress perfectly isolated, and now we're ready to change color. So we have her dress selected. So the tempting thing to do is to go up to adjustments and do all sorts of things to color balance to change the shade of her dress. But the only problem with this is when you click away and you start doing other things and you want to change her dress color again, you're kind of stuck with what you have. You're kind of destroying the original photo. So what we want to do is we want to keep the original photo intact, just in case we ever want to change the dress again. So this is called nondestructive editing, and we're gonna do that further in the course in the next couple lessons. So what we're gonna do is we're gonna go back. There's a couple ways we can do this. We can duplicate or layer. So we're just gonna right click are layer and duplicate it. And then what we're gonna do, we still have original dress election. We're gonna add a layering mask and we're gonna cover layering mass in more detail later. So this little icon right here with a circle in it, we're gonna add a layering, ask what that's going to do. It's gonna add this layer on top of this copy. So if I were to reduce the original layer. All you have left is a dress, which is what you want. You know, we want to keep the original photo. So now it can change this layer all we want without any repercussions, because we can always toggle off the layer and have original dress back. So let's change the color. So one thing we could do is weaken. Strip all the color away very quickly by just doing a quick adjustments. De saturate. So now she has a white dress, so now we're kind of starting from scratch. So let's go ahead and do. We could do a selective color. And now that it's all light, it'll be very easy when we select the whites or maybe even the neutral. So let's see what white does. I'm definitely able to add a little bit of color hue there. Let's try our neutrals. We're able to kind of make it blue by changing brothers just one method. There's many methods to do this, like with anything, and photo shops were adding kind of some deep color. So now we made her dress quite white. Color balance is another way. We can tweet colors. We can make it a blue dress, and I'm kind of toggle ing between mid toned shadows and highlights that seems to be the most effective at this point. And so, at any time we can toggle off this layer. And while I we have a pink dress back and we have her blue dress back and we can even duplicate this layer is good, duplicate it, and we can have different colors so you could toggle that off, and then we can have different colors that we cantata between. So with this one, let's say Let's go to hue and saturation and after time you'll learn which one to go to. Which one has the most effectiveness? So now we have all these different layers with Kentucky. All that went off with a toggle that once with a blue dress, we can have a purple dress. You'll notice when you go on online websites when you're going e commerce and you're buying a T shirt or you're buying yoga pants and you're able to change the color. This is exactly how Photoshopped artist and graphic designers create these, uh, different colors. It will create a file, will have different layers where they can switch it out and export all the layers so that be able to have and show different options. This is exactly how they do it. And that is how you change address color. We can even do the same with their hair. We could do it with anything we want to.
56. Photoshop Manipulation Tools: Welcome back. In this lesson, we're going to use several different tools to really manipulate and change photograph. We're going to do three different examples. This first one, I found this on pixels.com. And you can find all sorts of great images to use. I just tried to find someone with some little imperfections that we can maybe use a Spot Healing Brush Tool and Photoshop to correct a little bit. So I'm gonna go back. I got this one right here and just downloaded it. There's several other ones you can use if this one is not available any longer, but I have this one. And although she is beautiful the way she is, some clients, Some people want you to maybe remove something from their face. It's really good to know west method for removing freckles and moles and whatnot. So I have the Spot Healing Brush Tool selected here in my toolbar. I'm gonna go ahead and select my layer and move in. I can make it a little bit bigger by increasing the brush size right up here is going to increase the brush size. I'm going to try to match this little, I guess kind of a white mole there. I'm going to increase the size until I get a good match. Right where it's a little bit past the border of the mole. So now all I'm gonna do is click once. And what it did is it took an algorithm, it's sampled nearby items as we did in the lesson before. It just replaces it automatically with nearby skin samples. And we could do the same thing with this freckle over here. And I have freckles on my face. So I would love to do this to my own scans permanently. So I'm just going around zapping some. You wanna keep original characteristics of the person's face. You never want to overdo it and have them lose who they are. So in some cases, clients request this and in some cases you want to try to keep some imperfections in there if you're doing this for social media or whatnot. So just kinda a little bit of that redness, maybe some rows Asia or some skin issues. I have the same stuff with my skin and sometimes you may need to reduce the size of the brush. If you have something smaller than, the smaller the better you don't want to have to sample too much. Because sometimes when you sample, See how it lost a little bit of the texture, say this little dimpling. And when I did that, it took nearby samples, but it didn't quite do the same texture all over. So you have to be go as small as you can in terms of the sampling just enough to cover it. If you do large areas with the Spot Healing Brush Tool, sometimes it doesn't work quite as well. So if I just do one, if I just click and hold and do this entire area and then release, you can see how it took nearby samples from up here, but that's not the skin is very different on the nose than it is on the cheek. So this is more oily and more shy, has more shine to it. So this is really just for tiny spots, just for tiny spots to zap. So this was the Spot Healing Brush Tool and action. Let's say we want to go ahead and get rid of all this redness here. One thing we could do is we can do this manually. So instead of using the little tool that they Howard automatically take samples, we could do it ourselves manually with the clone tool. So this is the clone stamp tool. So I'm going to have the clone stamp tool selected. And what I'm gonna do is I'm gonna hold down Option. And when you hold down Option and I'll show the Windows equivalent button that you need to press. We hold down option, you'll get this little sample so I can pretty much move this around and I can click anywhere I want to sample. And I like to click on the nearest skin nearby. So if have a little bit of the nose here, I'm going to want to sample right here. So I'm gonna go ahead and click ones. I'm still holding down that option key. So I took my sample. So now you can kinda see a preview of what it would look like if I started to paint with this brush. So it took a sample. So now I can go down here and I can start to kind of paint on. And you can see this little addition sign at the top that is the spot or a little crosshairs, I guess you could say that's the spot where it sampling. So they could see how it's taking an exact copy right there. And you can go back and take another sample. So if I want to take a sample of this area, and what I find with the clone tool is a lot of times you'll have to take lots of samples and fill it in almost like painting a picture. So I may want to take a sample from down here to get that color and painted on. But instead of painting a 100% so you see where they're clashing. I like to blend it a little bit. So I'm just going to go up to my opacity. And so this is basically your transparency. It's going to make it more opaque. So I'm going to cut it in half so it's not full strength. There's a little bit of transparency. And so now it'll blend a little bit better. It's going to bring some of the top and the bottom together. So I'm going to hold down option on the top. When that together make a sample on the bottom hold down Option. Gonna get my sample. It is clicked once release, and then paint. And I find this a little bit of a better method because it helps, helps kinda blended in. So you see how it's a little bit awkward down there. And this is where it really becomes an art. And some are easier than others. But this is a pretty tough picture because I didn't have a lot of samples to choose from. And Photoshop with the Spot Healing Brush Tool and some other content aware tools are becoming better with their algorithm to help you do this automatically. So this will be a thing of the past, but just in case you don't have access to the content aware tools, maybe you're using an older version of Photoshop. Are you really wanna do some fine details. You can always use the clone stamp tool. That's always an option. You can do it manually. And the next tool you can use to really change an original photo and manipulate it further is the liquefy tool, and this is an incredibly powerful and fun tool to use u, this is probably what a lot of the Instagram stars use, and sometimes they don't use it very effectively when they try to make themselves skinnier, or they make themselves bigger, or they try to change their bodies. This is what they use is called the liquefy tool. So we're gonna do it with an animal this time. So we're gonna make this animal really dramatic, almost a little bit more like a cartoon animal. So we're going to go up to get to the liquefy tool. You're going to go up to. Filter is going to be right down here in the menu system. So let's go ahead and click on liquefy, filter, liquefy. And you're going to have a lot of options here. Some of these are going to be grayed out because it's an animal. And so it's not going to automatically detect a face. It only detects human faces. So this face aware liquefy options will be grayed out. And we're gonna do one where we do a human, so don't worry, so don't even worry about that. So we're gonna just focus on the basic tools here for liquefy. We're going to go over these one at a time. So there's the Forward Warp tool. So Forward Warp, I can click and drag and it's going to bring all the pixels with me and my brush. So I can click on this i, and bring it forward. And it's going to kind of shift it all the way to kinda see everything moving as I click and click and hold. And you can change the size of your brush right here in the brush ops. And so if I only want to drag a little bit, I can drag a little bit. Or if I wanted to get a big old brush, I can drag the whole thing up just like this. See kinda the effect of a kind of drag forward. And so the pressure, if I reduce the pressure right here below size, it's only going to kinda bring it a little bit. It's going to apply a very light pressure to it. If I increase the pressure and have a heavy pressure and click and drag, it's really gonna be dramatic and it's going to bring it much higher. So in this case, we're going to go down to the pucker and blue tools. Believe it's the fifth and the sixth one down and the menu system. So let's do pucker. Pucker is going to be just like you pucker up your lips. It's gonna suck everything inwards. So if I pucker on the AI is going to bring it all in. And this is a great way to make things skinnier and smaller. So if you're doing a body, Doing this will really kinda almost suck the fat away if you're doing it to a leg. So if we're doing it to an animal that can make their eyes smaller. So I'm going to reduce the size. So I'm going to decrease the size of that brush a little bit. And see can make eyes smaller. Or if you want to do the opposite, which is what we wanna do. We wanna have a really dramatic cartoon look. We're gonna do right underneath the bloat tool, and this is gonna make everything big and blow up like a balloon. So we're gonna go over the eye and click and hold. And then click and hold. And you have this really big cartoon like i going on here. And so you'll notice when I do this, the nose is affected and I really just want the eyes to get bigger. How do I do this tool and just affect the I will? First of all, you can decrease the size and it kinda helps. But what I wanna do is block certain areas from being affected. So let's go ahead and bring that down. And there's something you can do. It's called the freeze Mask Tools right down here. We can paint on areas that we don't want to be affected by the tools up here. So let's say I don't want the nodes to be affected. I just want the eyes to be effective so I can kinda paying around here. The red indicates that it will not be affected by the tool. So I can paint around there and then I can go back with my bloat tool. I can bloat the eyes a little bit. Let's make it bigger. And I don't have to worry about everything else being affected. So this can be really handy if you're just not wanting to affect maybe the background. You don't want the background to blue t2. You just want the eyes to bloat and make it a nice big eyes and then you can unfreeze. So how you unfreeze as you go to the Fall mask tool that's right below the freeze mask tool and he can just basically click and it'll remove it. So the nose was not affected. So the nose is not worked or distorted in any way. Just the eyes are distorted. So we can try that again. We can freeze maybe the background. And we just want to maybe make the ears a little bit bigger, the body a little bit bigger. You can also isolate this from the background to so that you don't have the background involved. And all of this, that's another thing you could do. And let's, let's, there's, there's one I want to go over to. We're not going to use it as much in this case, but the twirl, this are literally click and hold. It'll just like really twisted. So that might come in handy if you just want to slightly tweak a face. But I don't use this one as much, but it can come in handy when you are doing some really cool background textures. If you have big blocks of color, you can twist them and make really cool patterns and background texture. So let's go back up to the top tool. This is the Forward Warp tool. Again, we have quite a big size on that brush. A lot of pressures. Let me just kinda have a middle of overrode pressure and kind of the middle size. We can just make adjustments, bring out that ear. And there's our little funny cartoon eyes. So that was before. And this is after, kind of making it more cartoony and kinda funny. So that is kind of the basics of the liquefy tool we're going to bring in a human face. So we can use kinda how it automatically detects a face and you can do all sorts of amazing things. So I'll see you in the next lesson.
57. Part 2: Show you how to make the cool marble background textures that I mentioned in the last video. I wanted to quickly kind of show you how I did that. So we want to make stripes of interlaced colors, just a couple of different colors and a bunch of lines. And what we're gonna do is we're going to use the liquefy tool to warp those shapes to create kind of this marble texture. So let's create kind of our various lines of color. So I could the easiest thing to do with do the Rectangle tool. And we're just going to do the rectangle tool. That's great about the rectangle tools. I can go up here, I can add a stroke, but I'm gonna make the stroke null, which means we're going to eliminate the stroke and the fill. We can change this at anytime. We can also change it down here in our appearance panel. Anytime we use the Rectangle tool or any of these shapes, they're going to be easily change. And to be able to make duplicate lines pretty quickly, we can just hold down Option, click our object and drag, then release, hold down Option click and drag. And so we can create a lot of these different bars. And we can of course go over here and change the color. So what we wanna do is we want to, we cannot say I want to select all of these and liquify them. If I were to go up to Filter, you'll notice it's all grayed out. You're like, oh, why is it all grayed out? I wanted to be able to use some of these filters. So we're just going to, so I'm going to select the very top one up here. I'm going to hold down the Shift button and click the last layer. And what that does when I hold down the Shift button, it's going to select all of them. And we're gonna do that several times throughout the course and projects, we're going to be selecting layers and you'll get really used to being able to select multiple layers. What I wanted to do is right-click and I went to convert smart object. So I'm going to Convert to Smart Object. What it's gonna do is it's gonna make it all one layer. So now it's one big layer and it's gonna give me a chance to go up to filter. And then all the sudden all of these things are now available. So I'm going to go ahead and click on liquefy. And we're gonna do the same thing we did with the monkey. But in this case, we're going to really do this twisting option here. We're going to really manipulate this quite a bit. So the twirl clockwise tool, we're going to make it pretty big and kind of manipulate, warped this. And we can make it smaller and go in. And it gets some interesting cool effects. Forward Warp tool is something that you see used in a lot of these marble textures are going to reduce the size. You can go like this kind of create every, it's gonna push everything forward being the Forward Warp tool right up here at the top. You can make it bigger, more dramatic. I mean, this is really, you can kind of draw it almost like you're taking a paintbrush and just going through mixed paint and painting it. And the more you do it, the more interesting texture becomes. And let's go back and do some twisting. And, uh, bring out your inner artist. So now I can click on okay. And we can add a color here. And if you don't like this color, that's okay. We can always add, go up to image adjustments. We can go to hue saturation. We can change this color. We don't like hot pink or anything. So let's change it is reducing the hue or changing the hue. And then I can add like a background. So I'm just double-clicking right here on this layer and I'm going to double-click right here in this kinda empty space. I'm gonna bring up this Layer Styles panel, and I'm just gonna do a quick color overlay. Just to quickly change the color. I'm going to sample a nearby color and then maybe change. Make it a little bit darker. So you can see I made this using the same method, this texture that you see here for a brand campaign, did the same exact method of courses when it came out a little bit better because I spent, you know, another 20-30 minutes kind of perfecting it, but kinda similar method, you can just use that liquify tool to make a really cool wide array of, array of patterns. Just by using solid blocks of lines. We're going to continue using the liquefy tool, but this time we're going to use one with the face so we can use some of photoshops, amazing algorithms that help to change the face for us automatically. So I went ahead and got this one from pixels.com. But you can download any face that has a nice clear front-facing face. So I'm going to bring this in, going to drag that right into Photoshop. I'm gonna go ahead and double-click my layers, unlocked that layer. So I'm going to go ahead and go up to filter and liquefy. And now instead of the face aware liquefy being grayed out, now that it detects a human face. And it's gonna give us all these options. So if there's multiple faces in a document, in this case we only have one. You'll be able to select different faces. So if you have a group of four women, or for men, or a mix of both, you can select different faces to modify it. So this is going to be how you modify the eyes. So the left is going to be the left eye and the right for options are going to be the right eye. So if I wanted to increase the size of the left eye and decrease the size the right eye, I can see you can make all sorts of crazy faces and alien creatures and all sorts of things. So I'm gonna go back to 0. Let's say I want to change them at the same time because I really don't want it to be too dramatic. I can lock it right here by clicking this little link icon and it'll lock it. So now when I move these, they'll move together. But it's not locked automatically. So you're gonna make sure you lock them if you want them to move together. So let's say we want to make really big eyes. We can lock the eye height, changed the, the eye height. And there's also width, the locket where luck all these. And then we can even tilt the eyes, tilt them in or tilt them out. And then I distance. So if you want to have those eyes slightly apart, you can and nose height. So this will change a lot of the face when you reduce or bring the nose down, that makes the face feel very long. When you have the nose higher, it makes it does feel much higher. So let's have a nice long nose. We can reduce the width of the nose. I'm just making him really crazy. Looking through a smile, can give him a smile. Isn't that amazing? You could just give someone a smile. You don't have to use the liquefy tool over here manually anymore. And that's what we had to do a few years ago. We had to manually add all this stuff. And now it automatically detects it using this face aware liquefied tool. So it just saves us so much time. You're going to see more and more of this out of Adobe as they do more of this automatic kind of stuff. Maybe change kinda where the lip lies UIC and give him a puffy, puffy lower lip. Make it really wide. He's starting to get really funny now. We could so you could change the forehead, make it wider, chin height, make it longer a skim, a nice long face. We can even make him really skinny, really kinda big. Let's make them real skinny. And face width. And maybe let's back off the lip just a little bit. It's gonna go back to lips, bring that in. So there's definitely some more intermediate and advanced option below. Maybe future lessons. I can talk about some of the more advanced stuff about masking. We're not going to touch on that. I just wanted to kinda show you the basics of how this works. So you can click on OK. Down here and of course you can toggle preview off. You can see before. After. Obviously he looks a lot more handsome before, but we're just kind of messing with the tool. Go ahead and click OK, and we have that loaded.
58. Neural Filter - Photoshop 2021: Let's talk about artificial intelligence. So in Adobe Photoshop 2021, they came out with an amazing filter called the neuro filter. And what it does is it uses artificial intelligence to automatically source different images to fill in a face. So let's say I want to make this face younger for whatever reason there could be a reason why I need to do that or I want to do an experiment with something, I can make this face younger by using this artificial intelligence neural filter. And this is available in Photoshop 2021. So if you have that version, you can go up to filter. And there'll be something called the narrow filter. So let's go ahead and select our layer. Go up to filter, go down to newer filter and this is brand new. It's still invader. They're still testing out a lot of things. So I'm just going to go over it briefly. Hopefully, if you're watching this and it's been a couple of months, they've already added and enhance this tool. So you have one thing called skin smoothing. So we're just going to click on skin smoothing and this'll be able to blur the image. So let's go ahead and bring it all the way Max blur. It's gonna add kind of a glow to it. You'll see a lot of people who in manually add this kind of glow to images and soften the skin, kinda makes the wrinkles look less apparent and freckles and things kind of go away. There's also smoothness, which does a very similar kind of action will kind of help smooth skin out. And you can always go down here to this toggle and we can preview changes so we can go before you kinda see kinda the dimples and some things on our facial age spots on her face. And you click after. And it really helped to smooth that out a little bit. So that's kind of a quick way to edit. And instead of having to get the Content Aware tools or the spot healing brush or the clone stamp tool to have to manually do all this. It kind of does some of that automatically for you. And remember, everyone is beautiful. So I just want to just make sure that I'm doing these edits, but everyone is beautiful in the beginning image. These are just little things and tweaks that I'm showing you how to demonstrate with the tools. So this is where it gets really cool. So there's style transfer. So we can turn on style transfer and we can transfer a style from a particular photo onto the image itself. So there can be a Picasso or an, a painting that she went to apply the colors or the style too. You can do that and you can click on show more of course are going to add more to this, I'm sure. So it's almost like having a whole range of filters here. You can do a Van Gogh, there's Van Gogh, all sorts of things you can apply. So let's go ahead and toggle off Style Transfer. I'm gonna go down to here, this is beta, and these are very much still being worked on. And, but there are very incredible. So this is what I think is personally my, the most impressive of this entire filter is smart portrait. We're going to turn on smart portrait and we can literally make her younger, older, happy, sad, surprised, angry. And what it does, I'm gonna go ahead and click on this because it takes a while for it to load. I am going to click on happiness and bring it a little bit higher. It's gonna make her smile. And so how does it come up with the teeth? When she smiles more her of her teeth are gonna be revealed. What it does is it cloud sources, images from all over the internet. And it helps to build a set of teeth for her from all these other images across the internet. So there it finally loaded. Look at that she has teeth now, that's incredible. There was no teeth in the photo, so it had to get those teeth from somewhere else. So it built these teeth all on its own. And that's what's so incredible about this filter, is how it was able to do that. That just really shocked me when I started the first experiment with this tool. So you can even make her SAT, so we can kind of bring down this happiness and make her sad to kinda see that negative number right here. So it's going to pull those, the mouth inward and kinda remove the teeth. But I like a good smile. So let's kind of increase the happiness. And you can decrease the facial age. So let's decrease a little bit. We could take a couple of years off of her. It's gonna go and source a bunch images. You see how the hair changed. The hair became more straight at, has more color to it. We can increase the age as well. So we can it'll increase her age and make more white hair. And this is obviously not her hair. It had to build this, but the fact that it went to other images and it knew how to properly build the hair around her. That is just amazing technology. So we can make the facial age all the way young. We can even increase hair thickness. So let's say we want to increase her hair. Let's, let's increase the hair thickness. It'll literally build hair. It'll give her hair growth and we can take it away and it's like a haircut. And it's going to source all that hair. Look at that. That's incredible. We can go up to the blur. I don't like having too much of the smoothness because it sometimes looks a little fake. So I'm going to just decrease the smoothness. I think it looks a little more realistic that way. And maybe decrease the blur. I'd like to have sharp skin. So it just kinda makes it a little bit more realistic. So that is amazing. You can change the head direction. So if I want her to look the other way, you can click on head direction in her head will just shift. Some of this is still in beta. Some, sometimes you get some really funny results, like the results I got with this one, this beautiful woman. And I made a little bit of angry and mater face a little older and it was hilarious. I can't tell you how much I laughed at this one. So you definitely have to experiment with this. You can even change the light direction. So let's say we want the light to come from the right. It'll change the light direction. So now the direction is coming from the right. I find this one is not as effective because it makes it real dark and oversaturated in certain parts. So that that's probably one they're going to have to work on a little bit. And what's really cool is they have this Retain unique details. So let's say she has a little more and I noticed this with one the one I did earlier when I was trying to get a practice test for. The lesson, See this little tiny little mark. So it's like a little skin tag or some kind of little mark on the skin. If you do retaining EQ details, it will change her as you change all these scales, but it's going to try to keep these little unique qualities to her face. So like a little mole or a pimple can be retained. You can take it off and it'll be more liberal with kind of some of the edits that it does. You can even do makeup transfer. So we can take makeup from somebody else and apply it to her. So I can go and select an image. So let's see if I have an image I have saved. So I downloaded an image of someone with makeup, so I'm going to bring that in. So I have this really dramatic makeup shot I got on pixels and it will apply some of the color to her. We can do another one, is going to apply this pink makeup, right? Two or sometimes it's not perfect. It's still kind of being worked out. It's still in beta. So eventually it'll be able to apply it much more like the image that you see here. We could always toggle that off. So there's colorized, there's a whole lot more to discover with this. You can add a haze to it. You can add warmth to the photo. And I'm not a huge fan of the haze, but kind of a way to age the photo with maybe just a little haze and a little warm so you can kind of make it look like an old photograph. And there's a couple other ones you can download their all in beta. I'm not going to touch on that. I just wanted to show you the very basics of this tool and how amazing it is. Let's try one more photo just to kinda show off this tool a little bit more. We're gonna take this man and apply the neuro filter. So it's going to filter and go to narrow filter and see what we can do here. We can also make someone look older. So let's click on small portrait and let's go to facial age. Let's make him look like an older man. So we're going to increase facial age. And they're look at added wrinkles up at the top. And an added all this gray hair weekend increase the hair thickness two, and maybe not make them quite as old. Let's back it off a little bit. And we can make them happy or we can make them sad. Just depends on whatever you wanna do. I mean, I just think this tool is just so powerful. And it's a little bit scary too, because we can change ourselves quite a bit. And these people don't really exist. I mean, this person as a new person, it's not the same person. Their their age, their tweaked, their different. And that has cut. It's kinda scary but kind of exciting the technology behind all of this. We can make them surprised and what surprised does it opens her mouth just like when you I have a surprise birthday party and you go and he kinda breathe in, it kinda opens your mouth. That's what God of all of this does. So we can kind of increase happiness, increase surprise. We can make them look younger. We can reduce the hair thickness quite a bit. Let's see what happens when we, it takes a couple minutes for the algorithm to kinda seek out all these images and put it together. So it will take some time depending on your computer. Wow, look at that. That is amazing. That is a different person before, after, and then the one before it was, was totally different. That is amazing. So if we click on OK, it's gonna save all the changes. That is amazing. And that's not even the same person. It's crazy. This technology is really incredible. I wonder where they're gonna take it next, what they're gonna do with it. It's a little bit dangerous at times because we could change people beyond who they are. But it's an interesting dive into what I think is the future of photo editing.
59. Photoshop - Non-Destructive Editing: so I wanted to do some photo editing with people so I can show you the power of nondestructive editing. And I talk about nondestructive editing and other parts of the course, or if I've already talked about it, I just want to kind of review. This will definitely explain what that is in action. So nondestructive means you never touch the original photo. You always have it there. Eso Right now I have the photo, and I'm gonna show you this of what destructive editing would be. So let's say I want to bring out highlights and shadows in this woman space. So how we do that is the Dodge and burn tools right down here. Dodge, that's brings out highlights and burned will bring out the shadows. So I'll say this like the burn tool. I have it. Let's set on mid tones, and I don't have quite as much exposure. Maybe 50% exposure. And I start to kind of bring out particular highlights or a in this case, low lights. Then I want to bring out highlights. I switch over to the Dodge Tool. It's gonna do kind of mid tone, not gonna bring out certain parts of her face and bring it out. What's bad about this is I'm editing this layer. But if I ever wanted to go back and maybe soften certain things, I did, I can't. It's stuck its honest one layer. I have no control over it. So how we dio nondestructive editing as we add another layer on top and edit it that way using blending modes so that our original layer is always intact. So now let's go ahead and create our new layer. We're gonna make this layer 50% gray, and we're gonna be able to use a blending mode to be able to get that to disappear. We're going to show you this inaction was cruelly creating a new layer, and I got to go up to edit. Bill could also do that. The quit command. For this I'm gonna do 50% gray, which is option. Here's click on 50% gray click. OK, it's going to fill the entire screen with 50% gray. So this is the trick. This is where we blending modes come in handy. So I'm gonna go ahead and access my blending modes here, and I'm gonna do overlay we're gonna go ahead and toggle this on and off and you can see that since it's 50% great, I can talk about this on and off and you cannot tell the difference. So that's good. So what we're gonna do is we're gonna be able to do dodge and burn tool on this layer, and we don't have to do dodge and burn our original layer. So it's therefore nondestructive? No, I zoomed in our model here, and we're gonna add some of those highlights and shadows here, non destructively. So I have a little layer here. It's set on overlay. You just do the Dodge and burn tools the same thing as I did before. Birth is going to be shadows, and dodge is gonna be highlights are gonna do the burn tool. And let's just do mid tones for right now. Once this kind of bring out certain items that we want to kind of add more depth and dimension, and sometimes it helps to get a small brush to get little minute details. And so we really want the eyebrows to be brought up to zoom in, and a lot of times will need to reduce exposures. You don't get anything too dramatic. We want have super dark shadows. I just want to bring out certain elements of her face to make them pop a little book more, add more definition by adding having shadows to her nose, gonna bring her nose out of my element a little bit more. So it's just not all blended in, pops out. Same thing with down here, kind, adding some shadows. I think we already kind of did her lips a little bit. I always bring out her eyelashes or certain elements here, and at any point, I think I overdid it are messed up. You can always reduce the capacity or eliminate this layer altogether and do it again. So that's what's great. I still have my original photo here. I just click on here. I can actually reduce the opacity if I think it's too much or go back so we could talk all this off and on. It's kind of our our shadows. So let's do some highlights. Click on our layer again, just a much easier way to add highlights and shadows. You don't destroy it, so just play around with range. Highlights are gonna bring out um, kind of more brighter highlights. And then the shadows were to bring out a little bit of the darker portions of the highlights to kind of play around with your shadows highlights and I a lot of times to do mid tones was kind of in the middle, a little bit of both when she doesn't need as many highlights as she needed. Low lights so we can go well, that was a little too much. Here's the original, and there's kind of the dodge and burn, but that is too, too much. So I could just reduce the A passage of 50%. Not Cantata Galan often see how I kind of brought out some of her lips and her eyes a little bit more. We could do the same thing with her hair. So with their hair, let's go ahead and bring out some of those shadows. Get a nice big brush, mid tones gonna do kind of a 50% exposure I was gonna see kind of see how it's kind of bringing out more of this little lights. I'm using the burn tool. We could make that more dramatic by increasing exposure or flipping two shadows. Bring out the shadows a little bit more in your hair, making your hair a little bit higher contrast and switching it to highlights now to do some highlights really quickly, miss photos already professionally edited. So this is really just an example. It's already really well done, so it's kind of hard to add shadow and highlight stuff, so that's already really well edited. Just doing in. See, those highlights are already a little bit too much, so not a whole lot of changes. We bring out her share a little bit more. So if you ever want to see what you painted, go ahead and toggle off your original document and you're gonna see justice gray layer and you're going to see if you go ahead and do 100% opacity. You're going to see everything that we've done you can almost see kind of where the eyes and the nose where we did kind of the highlights and the little lights. You can kind of see a little bit of a face here being painted where we're bringing out certain things. Let's stop toggle. Our original went off, so we just talk all this back and forth, and that's too much. So let's reduce the passively a little bit. We just want subtle changes before after is kind of adding just a little punch Courses is already a beautifully edited photo. Next, we're gonna do a photo that needs a little bit more work so you can kind of see what I usually do when it comes to photo editing and doing nondestructive editing to kind of bring certain photos more toe life.
60. Photoshop - Non-Destructive Editing - Part 2 - Updated: So now we have our second subject matter. This photo is pretty flat. It's a beautiful photo, but it needs a little bit more of a dynamic pop will bore highlights and shadows brought out. So I'm gonna go in and delete the layer I had before. And I'm going to do a brand new layer. And we're gonna do the same thing. We're going to go to go up to Edit Fill already do that 50% gray option right here in Contents. Click OK. And it's going to be our non-destructive layer. Of course, we need the grade kind of go away. So we just go do that with the blending mode. We go down and we do an overlay. And you can tell when you toggle on and off, it doesn't affect the image at all. So now we're gonna do our Dodge and Burn tools, but we're going to get her Burn tool. Let's see what we can bring out and what we can kind of change here. Kinda when a really dramatic, almost not necessarily scary, but maybe more depressing kind of looks I'm just kinda bringing out, I might need to make a much smaller brush and bring that exposure down. Because when a little bit kind of painting it on just like a paintbrush. And a bringing out more definition. Just changing my brush size from time to time. Keeps bringing out shadows there under her eyes. Right here under her lip where there already is Shadows. I'm just bringing this current shadows out little bit more. And also with hair, you can really see a big difference. There's increasing my exposure or my, yes, my exposure. Just kind of going around through here, bringing out particular things that are here as well. Okay? And so now we can switch over to dodge and add some highlights in particular areas. So I can go in our eyes and kind of add and highlights that way where we bring them out and see how that's really come into life. And also play around with your rage as well. You don't have to be stuck on mid tones. That's gonna bring out your highlights a little bit more. And I'm gonna go back to mid tones to do a more general painting. Just experiment, have fun with this. Take quite a bit of practice to master that can kind of see her eyes really popped out, but they almost look a little too ghostly. So what's great about this is I can always go get the eraser tool. Kind of dull that off a little bit. Back that off just a notch. Just wanted to really bring out her eyes. So let's go ahead and toggle what we've done so far. Let me do highlights. Go ahead and get my highlights. Dodge. It's gonna bring out our lips a little bit more. Alright? So now there is actor and we haven't really spent a whole lot of time with it. And let me just back off the opacity on my whole layer just a little bit because I don't want to be so high contrast. Let's go ahead and toggle what we painted. So that's kinda what we painted. You can see where we did the highlights and the little lights. And so this is before. And this is after. You've gotta be really careful to not overdo it. A lot of times I'll toggle that and realize, ooh, yeah, you know, I thought I wasn't a good place. But after toggling it, I see that maybe I I did the eyes to mature. I did the neck too much. And you can always reduce the opacity on your Layer or go back and tweak it. And that's what's great about non-destructive editing. If I don't like this, I can just start over. I still have my original image. I don't have to bring it back in and re-edit it. And you could do several different versions to just do as many layers as you want with this.
61. NEW!! Adobe Photoshop 2026 Updates!!!: Welcome back, everybody. I am excited today to go through the Photoshop 2026 updates. There's been a lot of
interesting updates this year, some including AI stuff, some non AI stuff, but we're gonna dive right to it with the very first thing. So the first thing
they updated was they really improved the
Select Subject feature. And I used to have to go up
to select and then subject, but now they have it in
your contextual tool bar, which I've had for a few years. But those who have been
learning from me from older models will now see it
here and to select subject. So I'm going to press
Select Subject, and it's going to use more sophisticated algorithms to be able to select
really small things. And the one thing I've
noticed when using this tool is it takes a long
time to select something. It used to just take
a couple of seconds. Now it can take like
a minute or two. So I'm going to kind of
fast forward through that. So now we have our
subjects selected, and you can see it did
a pretty good job. So what I'm going to do is I'm going to go ahead and mask it. I'm going down to my
masking right here, and click my masking icon right down here and
I'm going to mask it, and I'm just going
to create a red box so I can see how good
it really cut it out. Go to put that in the
lower layer and zoom in, did a really good job. I think in the past, the spokes of the bike would have
got it really confused, especially some of
the white in there. And I think it did one of the better jobs that I've
seen it do in years. So now we can select
and mask a lot better. Let's try that again,
but with hair. So this is very
complicated wispy hair. So let's see how
it does. So what we're going to do is
going to go down. We're going to click
on the mask icon. We're going to be
able to mask it, and then we're going
to create a very bright background
to see how it did. Let's do yellow this time. And put it behind her. And
I think that's pretty good. It's not going to
ever be perfect because when you
zoom in infinitely, all the way when we can't
zoom in infinitely, but when you zoom
in all the way, pixels will always it's
still just made of blocks. Pictures are just
made of pixels. So you're never going to have this smooth cut
out when you have this really wispy hair because it's got to pick
a definition somewhere. So it's only going to be
as good as it can be, and I think it's a
big improvement. Especially up here, you
can really tell it did a great job at these little
fine lines right here, did a good job of
selecting those pixels. So now we have the next problem this is kind of a small photo. Let's say you generate
a photo using AI. Let's say you use hat GPT
to generate an image, and you download it and it's
not really a good size, and you want to upscale
it four times for a print project or whatever you're working on. It
could be any photo. Maybe a client sends
you a really bad photo, and this has happened
many times in my career, and they expect it to
look amazing at print, and you can't do that
because it's too small. So now they've really upgraded
their upscaling models, and I'm going to show you how so we're going to be able
to take this image that's only 1024
pixels by 1024 pixels, and we're going to be able
to quadruple the size. So how we're going to do that is we're going to go up to image, and now there's
Generative upscale. So anytime you see Generative, it's going to be
an AI based tool. And they have different
models you can use. There's Firefly, which I am not the biggest
fan of Firefly. I feel like some of
these other models that they're starting to partner
with have better results. And I've talked to
several photographers, and they tend to like
this topaz Giga pixel the best over this
topaz Bloom model. Now this is the big upgrade is instead of just using
firefly AI models, which is Adobe's AI tool, now we can use third party ones, which really opens up the possibility of
better AI results. So we're going to
do Topaz Gigapixel and let's go ahead and click on Face recovery because it
looks like this is a face. So it recovers details
in blurry or owes faces. We're going to try
to do a four times. That's good to quadruple
our image size from 1024 to over 4,000 pixels, which would be great for print. So now we have a quadruple sized image that we
can use for print. So let's see how it did.
I'm going to zoom out to about 100%. And let's see. So this is it'll actually create an additional layer on
top of the original. So if you didn't like
the upscale version, you can try it out. So that's what it would look
like if we just stretch the image four times the
size and didn't upscale it. And this is with it upscaled. So you can see it did a
good job with the hair. I'm very happy with
how the hair looks. So that's the original
that's the upgrade, but it does smooth out her
skin a little too much. I really miss that
sharpness of the skin, and I feel like that disappears a little bit with upscaling. And you'll find
this with AI models as they love to smooth out
things they're not sure of. So let's see if we can
sharpen that up ourselves. I'm going to make
sure I have this layer clicked right here, which is the upgraded gigapixelTpaz giga pixel
layer that we did, the upscale and I'm going to go to Filter and do a
CameraRaw filter. Let's see if we
can just manually sharpen that a little better. So one way to do
that is we can go to effet and add a little
bit of texture, so you can see kind of her
skin coming back to life. Add a little clarity,
but not too much. Just kind of adjust
some of these. But I think that texture really, really adds a little
bit of that sharpness. And you can go down to detail, add a little bit of sharpness. And I think that looks
better now that I've manually edited it.
So there we go. There's before, what
it would look like if we stretched it
without upscaling, and here is after. It still has that AI look
if you look really closely. So there's just some things we just need to
figure out with that. They're just going to
improve it with each update. So let's take a look
at another example. I took this picture of a bird, and I intentionally made it bad. I shrunk it down to 400 by 400 pixels and blurred
it and saved it as a JPEG. So this is already starting
off as a really bad image. So let's see what happens
if we quadruple the size and bump it up to
1,600 by 1,600 pixels. Let's see how it does. So
we're going to go to Image. Generative upscale. And we're going to stay with
the same model. I have tried I guess I can
show you later this firefly. I didn't happy. I'm usually not happy
with the firefly, but I'm going to
try this one again, and I'm not going to worry about face recovery because there's
not really a human face. I can get to scale
this up by four times. And here is the final result. And I thought it did
a pretty good job. This is now quadruple the size, which now I can use for print, and it won't be so
bad and blurry. If you see how small
the other one is, let's go ahead and drag this in. And we can compare it. So this is the original, and this is the upscaled version. So if I were to stretch
this all the way up, and not do any upscaling,
that's how bad it would look. So the comparison is
really, really nice. So definitely an upgrade there. You can really
tell with animals, water, details like that. Human faces, you can maybe
judge a little bit more, and maybe that smoothness
is a little too smooth, but like we did before we
manually corrected it. But I want to show you
the original again. So this is the original photo I had that was
already very large, and I intentionally made it bad. But I have the original one
that's 4,000 by 4,000 pixels, and see the detail in the
feathers, I'm going to zoom in. Beautiful detail
on the feathers. So let's look at the one
that was AI upscale. And you can see it smoothed out those really fine details. And I don't really
like that as much, but I am still happy I was
able to quadruple the size, but I wish it would keep some of those finer details like it
did with the original photo. One more AI update, and then we get
to talk about one that's not an AI update, which is an update to colors. So this one is
going to be adding new models to its AI
generation options. So we have our
contextual tool bar, which has some new
options, you'll see, and we'll talk about
this adjust colors next. But right now, we're going
to talk about some of the new generative fill options. So let's go ahead and
select something. So let's say I want to use the selection brush tool and I'm going to
paint on a selection. So let's say I want to
remove this man's glasses. I'm going to try to
select just the glasses. Doesn't have to be
perfect. And let's say I just want to remove them. Go to go to Generative Fill, and I'm just going to
say remove glasses. And there's different
models now. So now we used to just
have the firefly, which is Adobe's model, and it has mixed results. If you ever used it, I used
it in previous lessons, and sometimes you get something good,
especially with nature, but with humans and people,
it's got some work to do. But now it's got two new models, and I can't believe they added Google's Gemini 2.5,
which is nano banana. I've talked a lot about
nano banana in the past. I've even compared
it to Chat GPT, and I absolutely love Google nano banana and its results. They
look really genuine. But it's not quite ready for
these small selections yet, and I'm going to show
you what I mean by that. And flux is something new
to me, and I looked it up, but I still really feel comfortable with
Google nana banana. So I would stick with
Gemini for right now. And I'm going to do
generate so, wow, that is not a very
desirable result if you're looking for a
photo manipulation maybe, but that did a terrible job. And that's why some of these
newer models that they added to their
generation tools really work better as editing the full image and not just selecting something like we did, where you can select one
little thing and change it. That's usually better
for the firefly model, and it's still a
work in progress. So let's say I really do
want to remove his glasses. What's great now
is I can go back instead of just selecting one
thing and saying remove it, I'm going to select the
whole man like this. Just select him or I can just select him even
more specifically. But I'm going to do a general select the
whole man in a box, and I'm going to go
to Generative Fill. I'm making sure I'm
using Gemini's model, the Google Model, and now I'm going to say remove glasses. And let's see what happens. Now that did a phenomenal job. I thought the eyes
look human and good and a lot better than what was when we did a
little hand selection. So when it comes to using some of the new models
that they added like the Google
Gemini and the flux, it's sometimes better
just to select the whole model and
tell them what you want to add or remove. So let's say I want
some different hair. I'm going to select
the whole model again, and I'm going to say, Add
rainbow colored unicorn hair. And sticking with
the Google model, which I'll usually
will. And there you go. What I love about Google Gemini is it keeps the
original photo intact. Doesn't change the eyes in
the past AI models really struggled to keep everything consistent from one
edit to another. So if you say change
the rainbow hair, it might edit the
eyes a little bit, or it might change the
neck or the skin color. Everything would just
tweak a little bit. And Google is very consistent
with keeping everything the same other than the changes that you desire,
which is fantastic. I'll do some more
lessons on nano banana. Google's nano Banana later
because I think it's pretty powerful for doing some
quick photo edits. It's not quite a
Photoshop killer, but it's getting close. And I'm glad Adobe decided
to add it within Photoshop. I think it knew what was coming, and Adobe needed
to add this tool. And another thing they added to the contextual
toolbar is harmonize. So I taught a little bit
about harmonize feature. It was in Beta many,
many years ago, but it's finally a part of
the real non Beta Photoshop, and it's integrated
right into the toolbar. So let's go ahead
and remove this man entirely from the photo.
We don't want him here. We want to practice
harmonization by bringing in another photo and making
it look like it belongs. So we can just either do the selection brush tool
or we could just do the Lasso tool and just draw around him so we
can get him out of here. So we're going to go
up to our tectual toolbar and press remove. Alright, now that he's gone, we can bring in another photo. So this is what
harmonization does. So we're gonna
bring in this photo of this man opening
his arms wide, and we're gonna bring
him into this photo. And it's up to us to find the right size that we think
he'll be in this photo. So I'm just going to go ahead
and reduce the opacity a little bit and try to
find the right sizing. Maybe similar to the
size of the other guy. So now I'm going to make
it back to full opacity, I'm going to remove
the background. I think this turned out pretty good, but there's a problem. So this photo was taken
in broad daylight. And this photo that
we're working on is an evening setting
where there's not going to be a ton
of bright light. So how are we going to harmonize or make sure these
two photos that have totally different
lighting structures come together and look
like they're a real photo. So that's when harmonizing
comes into play. So I'm going to click my
removed background guy, and I'm going to
go to harmonize, which is a new button
now in the toolbar. You can see it changed
the lighting and the shadows to match the photo. So you can see he doesn't have
direct light on his back. It looks kind of
dark and shadowy. But if you think
about it, that's exactly how the photo
would look like if it was taken right now with that man
actually standing there. So that's exactly
what Harmonize does, and I'm pretty impressed
with the changes. I think adding the shadows here on the feet that looks really, really good and realistic. So now let's talk about
a non AI to update because I know everyone's
kind of sick of all these AI tools coming at us. Let's talk about
something that's not AI related. Let's
talk about color. So, this one's really neat. So, this one's built into
the contextual tool bar, and it's called Adjust Colors. So let's say I have this
really brightly colored image, I can click on Adjust
Colors it's going to create an adjustment layer
right down here in my layers panel and
I'm going to be able to edit this right away. Instead of having to go up to image and going to adjustments, you have it right here in
your contextual toolbar. This is the new part right here. What it has is it's got this
color wheel which you can click and you can select instead of going all
the way over here, you now have it right here, closer to your photo. You can change the hue, the saturation,
and the lightness. And what's really cool
is it automatically detects the most
populated colors. So this is the most populated
colors in the photo. And I can select, let's say, the blue from the flowers, and I can edit just the
flowers on its own, so I can change the hue and make them bright
green if I want. So now the background
of the orange, I can select the orange color and quickly edit that, as well. So I can make that pink. And so we can quickly
isolate colors and change them right
here in the task bar. Whenever I'm done with this,
it's a separate layer. So if I want to toggle back
to my original photo, I can. This is Adobe making
sure they don't do destructive editing that they
keep that original photo. You can always go back
to your original photo. Or you can add different
adjustment layers that you want so you can
try out different colors. So I'm going to go back to my original background photo here. I'm not on the
adjustment layers. Before, I would go to image, and I still really love this selective color.
It's one of my favorites. So it's similar to
what that other new color adjustment
panel was doing. But this is a little
bit more fine tuned, and you can select each color. And what I like
about the new one is I have these very strict
colors to choose from. What the other one did is it automatically detected
the most popular colors, even the colors
that exist between these primary colors
and secondary colors, all those little
in between colors. And that's what's really nice
to be able to fine tune. But if you want to do
the general colors, you still have this
to be able to do. But I still appreciate the new adjust colors because of that automatic
color detection. So there you have it The
Photoshop updates for 2026. I think a lot of it was Adobe making the
right move and adding other AI Gen models
into Photoshop because the firefly model just had
a lot of mixed results. So it's great to see
them working with other companies and
realizing, Hey, we can use some better
AI models and bring it in so that Photoshop
can remain competitive. And what I like is it doesn't mess up with our creativity. We can add objects, take away things from objects, make collages, and still be originally creative,
even using AI. I also love the other
non AI updates as well. So I'm excited to keep
using Photoshop in 2026 and look forward
to more lessons. Make sure to subscribe. I'm coming out with a lot of cool lessons like design trends, 2026 and other updates. So make sure to follow, like subscribe and comment.
62. The Double Exposure Effect: Today we're going to learn about double exposure. Double exposure comes from traditional film, where if you were to take a picture and not load the next frame and take the next picture, they would simply overlap. You solve this and a lot of pictures in the sixties and seventies of rock bands where they have this double exposure effect. Well, a digital world, it's a lot easier to do it with the blending mode tool. You're going to be really amazed on how easy it is achieve this effect. So I'm right here in Adobe Photoshop. And let's get going. As I do with most of my photos. I'm on Pexels.com and I wanted to find a photo that had a really simple background. I'm just wanting the subject matter on this. I don't want to have a lot of a busy background stuff going on. I found this one, it was a nice clean background. So I went ahead and downloaded this one and I'm going to bring it into Photoshop. The hardest part about the double exposure effect is finding that second photo to combine. And what I think makes really strong double exposure effects is having some sort of narrative or story behind the main subject matter. So pick a main subject matter, whether it's a man or a woman and animal a thing. And then pick that secondary image that's really going to pair well with the subject matter. So if it's an animal, perhaps a picture of mountains or nature, or flowers. If it's a picture of a man longing to be a nature because he's stuck in the city. It's always nice to have some kind of narrative or story-driven idea behind a double exposures. It just adds a little bit of extra details behind your work. So I think the hardest thing is defined two really good photos to combine, and also finding ones that do work well together. So let's demonstrate the basic effect of double exposure. So I have a second image. So the story-driven narrative for this one is this man is longing to be back in nature. He's obviously staring at a wall, most likely at work. He's really bored. He is dreaming of being in the mountains. So try to find some kind of nature photo that can easily portray this narrative. So I have a picture of some trees that I found. I thought that this would be an interesting photo to use to demonstrate the basics. So I'm just bringing this right into Photoshop. So it's already going to be a smart object layer. And this is how easy it is to achieve the effect. All I'm gonna do is do a blending mode. And we talked a little bit prior about blending modes and how they allow certain pixels through behind the picture. And some let black pixels through, and some let white pixels through or lighter pixels. So what we're gonna do is we're going to go down. You'll see how these are divided up. See I have these little divider lines. These right here in this category are really good when you have light backgrounds, you're putting something on a light background. Lighten and screen are two really good ones that tend to work really well with its effect. When you switch to a dark or a black background. Some of these down here like overlay and soft light, will work really good when you have darker backgrounds. So it just depends on the photo which one might work best. So in this case, let's use green. You can see the screen mode is making the lighter colors really strong and not letting those become transparent, but it's allowing some of the darker colors to become transparent, creating this kind of interesting effect where the sky and the trees come together. So you'll see it's not really cropped at all. So this, these trees continue to go through the man's head. It doesn't feel like it's contained in any way. So that's what we're gonna do. I just wanted to demonstrate how easy it was to get this effect going. So let's prep this image a little bit. We want to isolate this man out of the green background. We want to put him on a white background or a black background. It's really going to help us achieve this effect. We're going to isolate the photo of the man. And as we learn, There's a lot of different ways to isolate them. We could do the pin tool and trace them. We can go up to Select and subject and have Photoshop automatically cut amount, which is really nice. But I'm going to show you a new way to isolate and cut out images that's going to be a little bit more detailed and gives you a lot more control. Instead of just going to select and subject, we're now going to go two steps below and do Select and Mask. This is where it can easily create a layer mask here, but instead of painting it on with black and white like we've done in prior lessons. This allows you to do it right here on this previous screen. So if I were to just click and drag and I'm making
63. Double Exposure - The Man and the Mountain Project: So we have this mountain background. Let's bring this in. Since I pasted it from another window, it's not automatically smart objects. I just need to right-click and make sure it's converted to a smart object. So let's go ahead and put on a blending mode. We could do Leitner screen. In this case, they're all a little different. I think screen is still going to be the way to go for this one. So I have screen and let's go ahead and make this bigger. So we can really see the mountains right here. Is finding the right position. When I really get the peak of the mountain, we don't want that to, to, to disappear. We're going to move this over to the right or to the left. Let's go back to our blending mode. I know we did screen, but the two that works really well on, on lighter backgrounds, a screen and lightened. I liked the way light, how lightened has a little bit more of the oranges and keeps a little bit more of the original color. So let's switch it to lighten. And you notice these combined, okay. But his eyes, anytime you have a person's eyes, are really critical areas or focal points of a subject matter. And they're kind of have lots of overlapping elements. That kinda is a distraction. So what we can do is we can mask our layer and see if we can't maybe get some of the eyes back here. So let's put a layering mask on our mountain so we want to be able to match some of that mountain away. So let's do a layering mascot or mountain. We're going to have paint on with black. When you paint with black, you're subtracting from the photo. So we're painting with black. We're going to be subtracting some of this mountain photo so we can get some of the eyeball back. We don't want to take away from his eyes. So we're just going to get the eyes and the eyebrow back. We can also do the same thing with the ear. See how this kind of awkwardly goes over his ear. But if we were to make our brush a little bit smaller and just paint away so it looks like we get our ear. It also gives it a really neat layered look, almost looks like it adds shadows without even having to add shadows. And so all I'm doing is painting with black and I'm removing or subtracting this mountain. So that reveals the man blow. Same thing with here, just, just doing some minor cleaning up those little details and touches, maybe get some more of that eyebrow back. Same thing down here on the neck that just looks busy and let's clean it up. Let's zoom out and see what we have. That looks a lot better. Let's adjust the background of this to add a little bit more of a dynamic pops. It's just not on stark white. So I'm going to double-click the rectangle here and I'm going to bring out a color in the sky. So let's bring out not just the light blue, but let's kind of bring out a little bit down here closer to the horizon. And click on OK. And you can always clean up selections to by editing your masks. So I'm right here on the mountain, on the layering mass and let me paint with black. I went to clean anything up. So now we want to add a pop to the background because right now it's just one solid color. So I found this picture of smoke that I've used in other projects and I just love the texture and the details of this. So we're going to use this smoke and we could care less about this person holding it. We're just going to mask them out, so don't worry. So let's go ahead and bring this in. You get a copy and paste it in, or you can just drag it in. And since I just copied and pasted it from another window, I will make sure I need to right-click and make it a smart object. And let's just make it bigger. So that's why we make it a smart Object so we can scale it up and down to find the right placement. So let's say right about here, and let's bring it all the way to the bottom above our color background. So what we wanna do is looks like an absolute mess right now. We are going to want to add a gradient map to this because we want to really bring in that smoke and make it a different color. So making sure our thumbnail selected and not the layer mask. We're going to go up to image adjustments and go down to Gradient Map. So let's say we want to make it a blue kinda go in with the blue sky idea and make it a light blue. Let's make it a little bit bigger. And you see all this extra stuff. And sometimes you have to toggle your layers to find out where it's coming from. So it's this picture right here. We have some excess stuff that's coming out now that it's not on a white background, it's letting the pixels through on this blue and showing up. So we're gonna go ahead and clip it. So what we wanna do is we want to clip it right to this outline we have of the man so that anything outside will just be clipped away. So I'm gonna hold down option. I'm going to show you the keyboard shortcut for windows on the screen, but I'm going to hold down option. When you go to the layer, you're going to see this little arrow down that goes down. What you can do is I can select a layer. So let's say I'm selecting right here, I'm selecting this image we have of the mountains. And I'm gonna hold down option. You're gonna get this little arrow and I'm going to click it down below. And I believe I cover this when we talk about mockups because you do this a lot when you're making your own mockups. So I'm going to click down Option and I'm going to, I'm going to go to clip it. So I'm just going to click on my mouse once and it's going to clip it down to my cutout here of my person. So you notice how now this is all clipped down. If I ever want to unclip something, hold down Option and have it has little line through it, click off and it goes back. So it's really handy if you want to kind of really crop something or clips something to a certain shape or to a layer below. So just to recap, this is a lot. So we have a layer here that's been now clipped to this bottom man cut out. We have the man that has been isolated and cut out using a layering mask. We have this smoke that has been brought in and we went hadn't used the layering mass to get rid of the man that we no longer wanted. And we have a gradient map that's applied to that layer, making it blue. And then we have a base color at the bottom, just a simple light gray color that we sampled. So we have a lot of moving parts here, but we're gonna do it a few more times so you can get really comfortable with it. It's a little bit more of a complex double exposure for your first time. I know maybe I threw a lot at you through clipping and layering mask and select and mask. You've worked with layer masks before. So hopefully it's not all new to you and it could do something very similar. So let's apply this to another project. And let's do a couple of really simple ones to kind of continue to demonstrate the double exposure effect.
64. Double Exposure - The Cat Project: So for this next double exposure, we're going to take a picture of a cat and integrate him into the forest. And the reason I'm doing this, as I posted this on my Instagram and got a huge response of people really enjoying this photo. And I wanted to walk through how I created it because it was really, really easy. It took about five to seven minutes. But yet it gained so many views and likes from you guys. I just had to share how easy it was to create and you could do the same effect too. So I have a picture of a cat and a picture of a forest. Both of these were found on Pexels. So I'm going to bring this picture in of the forest on top. Just so I don't have to create a smart object. It's already created for me. And I'm going to bring this in, press Enter. So now that the trees are on top, I'm going to try a few blending modes to see if I can get the effect that I like. And lightened color has a really good effect. And I already know ahead of time that pin light was the one I ended up going with because I used notice how it shows the trees through the eyes. It looks a little strange here, but when I added a gradient map to the images, it looked a lot better. So let's try, we could try lightened for now. So let's do lightened. And let's adjust these trees so it's not right in the cat's eyes. Move it up a little bit. I'm going to clean this up, add a layer mask. I'm going to remove selection, so I'm going to paint with black. And I'm going to remove stuff from the eyes, maybe make the brush a little bit smaller. Now I can remove items from the eyes. We don't want trees to show up in the eyes quite yet. Just cleaning up the selection. And let's crop this photo. So I'm going to get the crop tool and we're just going to bring it up a little bit. Really want to bring focus on the eyes and click Okay. So I'm gonna do my adjustments panel and I'm going to add a gradient map. I want to make it look like fire in the forest. So let's make the lighter colors orange, like a bright orange. And let's add a little bit more red to that. Right about there. Click Okay, so now the layering mask is applied to both layers. And what that does is it kind of really unifies both images because now they have kind of the same color profile on them and the same effect. So it makes him look a little bit more like there are one image. And that's pretty much it. That was a super-duper quick one. We can add the trees into the eyes. I did that using kind of a different blending mode. So if I go back to, I'm going to go ahead and toggle that so you can kinda see what's happening there. So if I go back to the trees, I have the lightened blending mode. I went ahead and I used Pin Light. I'm going to delete my layering mask on the trees so we can start over. So I'm going to delete the layer mask from the trees. And you notice on this one, it kind of brings notice how the trees are kind of still in the eyes where in screen it wasn't. It's kinda light. So let's go down to pin light and I'm going to do the same thing I did before. Add a layer mask, paint with black and clean it up. Clean it up. And let's adjust that gradient map. I'm not a 100 percent happy with that color. So we can double-click, go ahead and get our gradient map changed. And it might be we need to get three colors going. So we might need a darker. Might need to soften this and set a black wood. If we used kind of a blue, dark blue. And that lightens instead of being so dark and black with the kind of lightens it. We can have orange, Let's make it brighter. And let's for a lighter colors, Let's make it lighter. So let's do kind of a yellow. Let's do a yellow. It's add a little yellow there. There we go. Yellow light, yellow sky. I might need to tone this down just a little bit. Just adjust the sliders. And there's the gradient map. If I were to toggle this off, pin light looks a little bit strange. That's why the gradient map really helps with that particular blending mode to unite the photos together. This is the original that I did for Instagram. You can see how easy it is, just this cat image. We overlaid the forest image, had a little bit of a layering mass to kinda clean up that selection and then a gradient map on top. So notice how that's before the gradient map and that's after. It just kinda really helps to unify those images.
65. Select and Mask REVIEW: Before we moved on with any other projects, I wanted to talk about the selected mask tool a little bit more detail because I think it's a really great tool to be able to select and isolate complex objects. So one of those complex objects that has always traditionally been such a pain to isolate is curly here. Complex hair. These little small details a lot of times are really hard to isolate and select from a background object. So we have this image right here and we're just going to go up to Select and select and mask. So normally you would take the pin tool, but can you imagine tracing over all this with the pen tool? We can easily just go up to Select Subject. So let's do select subject. Does a pretty good job, but let's just get some more refinement and go to Select, select and mask. So this is the image. This is our selection right here. If we go all the way right on transparency, that is what our selection is. We haven't made a selection yet, so there's nothing. And this is the original image. So a lot of times I like to keep it somewhere in the middle so I can get see what my selection is and a little bit of what the original image is. So let's say I wanted to select the hair. We can do Select Subject. Click on refined here. And I feel like that did a pretty good job. Click on OK. really excellent job. Didn't select all the super fine details. But I can go back to my layering mask and do a layering mask. And there she is. She's isolated from the background. So I can go back to Select and Mask, and I can go down to Clear selection. So that goes back to no selection. And let's say I want to isolate just her hair. And I have the quick selection tool selected. I'm going to click and highlighter here. And it automatically did are faced by accident. So I could just do the subtract selection and see if I can't go back and do more details on then. There's also a brush tool that you can use, what you can paint it on just like just like you would with a brush tool, just like we do with the layer mask while we paint on and remove a selection with black and we add to the selection with white. I can do refine here options if that helps. Click on Okay, and now I have her hair selected and go back to Select and Mask. And I can go down to Clear selection. Or I can use the brush tool, just like we did with the other lesson where we painted on a new layer, a color. You could do that here as well. Let me get a nice big brush. And what they don't have like soft brush in hard brush like they do in the brushes, which I attend to like the method I do a little bit better. But for hardness I like to soften it and it'll kind of emulate this soft round feathered brush. And you can paint it on just like that. So just kind of showing you different ways to select things. Let's say we want to just select her white top. We have the quick select tool selected and when it went to add to the selection. And I'll just click and hold. And it looks like it did a great job with just selecting the shirt. And I can always go all the way to the right to see what it's selected. And I go all the way into the middle. So if I click and hold to get the strap, It's not really allowing me just to get the strap. But that's okay because we have other tools that we could use. So let's use the Brush tool. Make it smaller. And just draw on the strap selection. And I can feather it a little bit if I feel like my selection wasn't perfect, sometimes slight feather will help. Click. Okay, and now I've selected the top. I just wanted to show you a little bit more details on Select and Mask. I didn't want to leave that out as an option for helping you mask things and isolate objects from photos.
66. Double Exposure - The Girl and the Road Project: For our last double exposure exercise, where you take this woman and put a road in her head, she's thinking about traveling if she wants to travel. Once again, kinda like the first one, she's kinda has this side profile gazing and with kind of a sadness. So let's, and this is really good because we have this black hair. It's almost the perfect backdrop to let kind of that other second photo shine right there and this nice clean area of her hair. So let's bring in a photo of a road I found on Pexels. Risks one right here was going to bring this one right in. Click Enter. And I'm going to do a quick blending mode. Let's do screen. So right now we don't want to have all of that background in there. We just wanted to kinda be cropped around the shape of her body and her face. So let's go ahead and toggle this off for now, and let's prepare image. Let's isolate and select this. So let's go up to Select. We could just do select subject. I think it'll probably do a pretty good job. Let's do select and mask and do Select Subject. And we'll see for fine hair will help us give us a better selection. Click on OK. And now we're just going to apply a layer mask to crop or out. And what we wanna do. So if we toggle our image back on, it's still not really It's still showing these photo through. That's because we're not putting it on a white background. So let's create our white background. It's the same process as we did with the first one, was a white background. Bring it all the way to the bottom. And now we can have our screen blending mode on the road. And we can just find a really good position for it. Maybe right about here. We don't want to put it here because I think I might keep her face a little bit more clear. So let's put the road kinda little bit more on the left. And we could put a layering mask on the road and paint on with black to remove some of it from her face. Make the brush a little bit smaller. And let's toggle on white and get back some of our selection. Toggling between black and white to see what works better. That looks like. That's kind of when I did the Refine hair. I think it kind of took a chunk of her forehead out. But that's okay because I can click back on that layering mask and go back to Select and Mask and figure out that. So let's see if we can't add to the selection. Get that forehead back out on the white. Did that and click OK. And there we go, got our forehead back a little bit. So let's go out. Pick that was nice and quick. We can change the background if we want. So let's change it to blue. And we have her cropped right here with the layering mask. We also need to make sure we have this top image if we want to change the background, if we don't want to have it just be plain white, we're going to have to do this. So now we're going to have to clip it to this outline of the woman. So let's clip this top layer. Let's clip it to the shape of the woman. So we're going to hold down option. Remember this, click once. Now we're going to clip it. Now this gives us the ability to really bring another background in. There. Just kind of took a sample in this part of the road just to kind of have thematic colors. So kind of take borrowing a color from within the photo to kind of marry the background and the photo. So let's say I don't want the top of her head showing I kinda what the mountains to kind of crop her head. You can do that by getting the, selecting the layering mask of her right here. Selecting the layer mask and painting on with black to remove. So I'm going to remove a little bit of her. And also use the Magnetic Lasso Tool to make a more accurate selection. And then paint away with black. Paint it away. But I kinda like how it looked before with the little bit of the outline. But just wanted to kind of demonstrate that for you. You can put all sorts of things in the background now that SHE, this image of the road is now clipped down to the layer below. So now you have free rein to put any kind of shapes behind here. So if I want to do the Ellipse Tool, kind of frame her head a little bit and make that a different color. Maybe I can sample a color within here like the mountains. Lot of times it's nice to frame within a shape. So I'm going to create almost like a glow effect around her head. I just created a simple ellipse tool and we're just going to go up. And we're just going to blur it. And it says the shape layer must be rasterized to blur it. And that's okay. Just convert to convert to smart object. It'll be fine. It'll do it after it does the effect. And let's make this a big blow. So make it really big Gaussian blur. Click OK. Kind of added this little bit of a glow effect tour. So there you have it, the double exposure effect. It's just a combination of a select few blending modes using layering masks to really unite and fuse two different photos together to tell some kind of narrative or interesting story about what, what is the relation between the two images. To make really dynamic, compelling double exposure projects. It seems a little bit complicated at first, we did the same project pretty much twice, but with some different images. So you got to kind of see how he clipped layers and how we did the selected mask tool and some other things. So I'm really glad we got to do this project because I think we got to practice a lot of different things that we'll be using later on. And especially layer and mass, which we're going to be using a lot, layering mass or so, as you've seen, are very valuable and isolating and cutting out objects. So of course, there's going to be a student project. I'd love to see what you come up with. What kind of double exposure or two different images can you put together and make a really interesting effect? I can't wait to see your work. And I'll see you in the next couple of lessons.
67. YouTube Thumbnail Section: Oh, YouTube thumbnails. How I love Your chunky text and neon colors, your wacky photos and unrealistic scenarios, your ADH and quirky sense of humor, and of course you're overly emotional sensibilities. In this section, we're going to create three awesome YouTube thumbnails together. And we're going to practice being able to create something that's really compelling and the clickable. So what makes a YouTube thumbnail clickable? And that's really the main premise and goal of a thumbnail is to entice people and tell people the story of the video or give them a great idea of what's inside the video so that they click and they're not disappointed. So YouTube thumbnails are not very big. The original size is 1280 by 720, but when they're displayed in the YouTube feed, they're much smaller than that size. So you gotta be able to, be able to look at your design at this size and be happy with it. You can read any text that's on there. You can really understand the concept of what the video is about. And it communicates all of that at this very, very tiny thumbnail image. So in this case, this was actually one of my design lessons that I have on my YouTube channel. But you can see I have the product and have a nice clear high-contrast lettering. I can read this very well. We're going to move on and show you some other examples. Another one by Dan ski, which is another great graphic design instructor. And this is one for Puppet Warp. And he has kind of this two tone division. We kinda shows his whole concept of what's a video about its high-impact. There's people in it. We always connect with people better than objects and nice clear typography. I could read it. There's an icon that tells me it's a Photoshop tutorial, and it's very clear. The next one uses iconography and very simple, solid boxes to communicate a nice clean, clear thumbnail. So this works really well for illustrating some kind of vector line art. In this case, the little video in the background. And then you have the kind of the cyan blue bar that runs across with nice clear high-contrast white typography. Even noticed all the typography. You don't see a lot of thin waited topography. You see a lot of bold type. Because think of how small buses and so very small image. And you gotta be able to read it from a distance because not everybody reads your title. Sometimes they look at the thumbnail first. This is another one of mine. I've kind of used the diagonal line to kind of divide the image up a little bit. So you kind of have this green and then you have a white background. So they really pair well together and nice clear typography. I'm not trying to put the whole headline, all my YouTube thumbnail. You just can't do that. You put a very abbreviated, shorter version of your video title on the cover. And also if you're using any software, put the software logo on there so people know right away what you're using. And this is for if you're doing client work, if you're doing thumbnail work for a client who maybe might be a YouTube personality or someone who produces a lot of videos. You're going to need to create this, create these images very fast and very quickly because sometimes they need one every single day. So the example we're going to do in the class, we're going to try to do it in under 20 minutes. Or we tried to do it in under 20 minutes to practice trying to do a thumbnail as quick as possible, but also making a nice high impact one as well. But with Here's an example of one I did a while back just kind of showing a product design that I show how to do in the video on YouTube. And I tried to use this fading into black so that the type can really be readable. And to be honest, I can even remove the smaller type on the thumbnail if it's going to be viewed very small. So a lot of people, when they design YouTube thumbnails, they look at it at this size. But when you design, sometimes it's actually kinda nice to zoom out a little bit so you can kind of get that final perspective of what that size is really going to be. So I'd like to zoom out a lot and get that perspective and get an idea of how small this thumbnail really is going to be shown on the YouTube platform. Here's another example of the diagonal action going on. It's not just kinda of a straight down division. It's got is this diagonal line that cuts it all the way down. It kind of brings both sides together. And high impact, high contrast type on a white background and of course kinda of a duotone purple image on the top. And here's another one, just making sure if you're using any software, that logo is nice and big so people understand right away what the video and concept is about. I use this background image is not overtaking the type. It's just a background image, but it helps communicate what the video is about. And before we hop into Adobe Photoshop to create these three YouTube thumbnails, I have a couple of downloadable resources that are going to be really helpful throughout this section. So if you access those built a few different files, we have an image file that we're going to use for the very first thumbnail. We also have this prompts PDF, which contains over six different YouTube thumbnail project prompts. The first three we're going to work together in the class. And there's also access to a template that you can just double-click and you have it sized and everything is ready to go. But we're also going to be creating that together as well. So you can understand sizing and how to export your document at the end as well. So let's get started with the first prompt. This is going to be a ultimate seltzer tastes tests. So like a soda taste tests type of video is going to be a product review video. And I'm going to read the description. This video, we'll feature 30 different Celsus soda brands and the ultimate showdown for taste and overall flavor. Your goal is to create an eye-catching thumbnail that can grab yours, but also communicate the video's main premise. You can choose to focus and use the supply graphic or use your own. So in this case, we have a seltzer tastes tests. We want to really have this main focal point, this main communicate what's in the video, which is all about tasting seltzers. Let's do some seltzer cans. And what I did is I created this graphic and Adobe Dimensions for you so you don't have to sit there and worry about trying to find Seltzer. Seltzer can pictures plus you have all the rights to use this however you want in your portfolio. So I wanted to supply a graphic that she can use. So it created this in Adobe Dimensions was really neat 3D mockup program. And I even walked through the basics of it later on in the course too, which is cool and the design trends 2021 lessons. So I'm going to open up, I have a PNG which is good. It's going to be a transparent background. But I also have a Photoshop file that you can also open. Either one is fine. Let's open up the Photoshop file. So here it is. We have this background color that we can change to any color we would like. But we don't really need that right now. We just really need this layer which is going to contain the soda cans. So let's open up a new document and create a YouTube thumbnail size. So I have this template and a YouTube thumbnail size is 1280 by 720 pixels. So let's go ahead and open up a new file, file new. So 1280 by 720 resolution is not going to matter too much when you have pixels, because that means pixels are going to be pixels. You have 1280 pixels in width and 720 and height. And the resolution doesn't really matter all that much until you get to printed documents. Now when you have print documents, 300 is the goal to go for, for all print documents. But when you have pixels, it doesn't matter because the size is the pixels, it doesn't change. So for right now it's going to leave it at 300. And when we export this as a JPEG, you can also scale it up to make it high resolution if you want to make it larger too. So I would just stick with 300 resolution, 1280 by 720. And we're just gonna do horizontal orientation. Always be an RGB color if we're doing anything for digital and just click on Create. And that's pretty much it. I can go to view mixture, my rulers are on and I could create guide. So if I want to click and scroll down, kinda build some margins out. So if I don't want certain texts are vital elements to go outside of a certain margin. It kinda helps me keep the design clean and gives me a helpful guide. So I just click and drag and you can create some margins for yourself. And you have these rulers. So you can see up here like how many pixels, so that's a 100 pixels right here. This is really guides. There is no rule on YouTube about margins and, and all that stuff like there is on social media platforms. And another thing you could do is you can make it an art board. So right now this is just a regular Canvas, is not an artboard. So what you could do if you wanted to just make it an art board, when you open up a new document, you go to File New. And there's this little thing you can tick right here. It says Artboards. And it's going to create an artboard. And what's different is an art board allows you to resize it dynamically, but it allows you to create multiple different areas that you can export as separate elements. So let me go ahead and demonstrate. So I have this, I don't have this as an art board right now, but there is an Artboard tool. If I click and hold right here on the Move Tool, go right down to the Artboard Tool. And I have that selected. With that selected, I can go ahead and click and drag and just make this an airport. So you can always resize your art board in your properties. Or I can resize it right up here. And what's great about artboards is let's say I'm doing a series of YouTube video thumbnails. I can create three others. Just do the addition, sign, create another one, and then create another one. And so now I have three of them. And when I go to File and Export As and do some jpegs, I can save all three artboards and three different jpegs all at the same time. Well, we had to do years ago is we had to have a separate document for each YouTube thumbnail. So let's say we have 30 different YouTube thumbnails. We need to have 30 different Photoshop document saved. And I had open up each one to change them and then save them. And that took a lot of time. So a few years ago they added art boards to Photoshop and it has been wonderful. And I have a lot less Photoshop files around. And let's say you want to edit one particular artboard size, you just have to click right here on the name. And if you're ever have used Adobe XD before, it's very similar. So I'm going to click right here on the artboard name. And I can go up here and change the size if I wanted to make it taller than the others for whatever reason I can. And you can also click and hold and drag this around so you can kind of arrange these however you want to organize. And if I'm done with the artboard, I just have to press the delete button and it's gone. You will also notice in your layers panel that each artboard has its own kind of file system or layer system. So you have Artboard 3 here and then Artboard 1 here. And they all function almost like a different document, but it's in a different sub folder. So let's say I'm drawing on this one. Let's say I just draw a square. Let's say I draw a few shapes here. If I scroll down, you'll see these two rectangle shapes right here, an artboard 3. And then if I'm on art board 1, I can create something. So it kind of their way of handling almost different documents in a way in the same document. So let's go back to our template that's already kind of made for us. Already put some margins on here. You can toggle this off and on, you can toggle the text off. We don't really need the text, so I'm going to keep that toggled off. And right now I don't need the margins. I will talk with his on when I start bringing in some topography and finalizing everything, I'm going to toggle that off here. So let's begin. We have the seltzer thumbnail. And we want to really focus on what is the main subject matter of the video. And that's going to be the seltzer cans and multiple cans that they're going to taste. So let's bring in that PNG. So I'm just going to copy this. And you can even just make this a new thumbnail and Dragon in. I like dragging things in, but you could just copy this layer. Selecting layer is the long way to do it. Edit copy and then go down here and edit paste. Or you can just drag it right in. It's good to say the target document has a different depth than the source document. This may result in a lower than expected quality. Are you sure? Go ahead and just click yes, that is fine. That has to deal with how I rendered it in Adobe Dimensions. That don't worry about that right now. Bring it in. Okay, Here we go. So let's go ahead and make sure it is a smart object. So converting to smart object, and let's scale this down and find the right position. So we have this thumbnail and we can either feature it on the left or the right. So most people read from left to right. Not all countries, but most countries read from left to right. So the most important thing you want to have on the left and the supporting image you wouldn't have on the right. That's not an official rules is something just to kinda keep in mind. And I figured we have these cans, but they just have question marks on them. They're not actually different seltzer brands. So the only way to know if it's a seltzer taste test is in the typography. So let's go ahead and have that on the left and then have the supporting image on the right. So let's bring the topography in. So if we go back to our prompt, we can go ahead and type in the full video name. And this is already in all caps because that's how I had it on the PDF document. I didn't keep it all caps right now, so let's find a way to break this down further. We don't have to include all of the words in this headline. That is not a requirement, but it's so short that I think we will be able to do it. And I think the most important words in here or seltzer tastes test, that describes the video pretty much. And the ultimate is a supportive phrase. So let's break this up. So we have seltzer taste test on its own line. So we can just copy. Go ahead and hold down option drag and then paste. So we have the ultimate and then seltzer tastes tests can be much bigger. Will continue to just break this down into different lines.
68. Lesson 2 - Youtube Thumbnail: Now we have to figure out what font to use for this. And I love condensed typefaces I've, you've seen earlier. So let's use the one we've used in the past. Let's do Comune a, but you can use any other condensed typeface that you feel comfortable with. Just type in condensed when looking in Google fonts. And you'll be able to find a lot of different options. Let's type it in Como. So now we can make words a little bit bigger. And this ultimate is important. But we can maybe isolate this somehow with contrast. Maybe put it on a different background and kinda keep these altogether. So it reads like the ultimate and then seltzer taste test. So those are feel like they're divided. If we kept them all the same size and put the ultimate, It would just be too much, too many words. So we have to find ways to make, emphasize certain words over other words. And let's, I'm gonna go back on this. I'm going to make these all the same size. Let's make them all 50 points and see how that works. With that might read a little bit better. Be more consistent. And I have my margins that helped me. No, not to extend text too close to the edge because it starts to get really anxious, a kind of some negative tension when we have it like that, like that. Just in some cases, stylistically that is okay. But I think for readability, uh, kinda like adhering to the margins at least a little bit. So let's divide up this ultimate lists separated a tiny bit. We could do that by adding a simple rectangle tool. Drag this all the way down in the layering system. And let's make that nice and bright. High contrast white. And what's great is there's emphasis still put on the ultimate. It's not disappearing just because it's put on a different colored background. I can do that in a layering system by holding down Shift and selecting all of my text layers. Or I like to have auto select on for layers. And I just like to kinda click, hold down Shift and just click everything I want to move. So I have all that as a group and I can just shift it down. So there's something missing here. We need color, we need a background. We need something to kinda really bring this to life. So let's make the subject matter a lot bigger. Let's make it real dramatic. Make it pretty in your face. And some ways we might even be able to tuck this seltzer behind, just going to drag this down behind the r. And, and make it feel like it's more in the foreground. And sometimes you don't know it works until you dry it. Sometimes you don't always have to have this perfect plan. When you start designing, you just kind of move things around and see what feels. Feels right? So let's add a background. So there are a lot of white thumbnails on YouTube. Let's try a black thumbnail so I can add a new layer and make it white. So we could just get the rectangle tool and draw a box and make it black. We can go down here to this little black and white looking circle. Click on it. We'll go up here to solid color. Click on Solid Color. And it's going to automatically add just a solid color for us if we just wanted to have a simple background color, That's one way to do it as well. So this went down here and went to solid color. It is automatically adds this layer for us. So just drag that all the way down. Lets us take a moment to rename my layers. I don't always rename them, but sometimes I find that I have to. So I'm going to lock this background just so I don't accidentally select it. So that's locked. So let's just switch all these to white. So I'm just going to double-click both in the switch them to white. I'm just going to select the layer and switch them all to white. And of course we have to pick out some color here for this box was black, so now we have to pick a color. So what color do we choose? So as we studied in thumbnails and if you ever go to YouTube and look at some nails, super bright, super high contrast stuff is in as much attention grabbing stuff is you can get away with. That's what's done in thumbnails. Subtlety does not win and YouTube thumbnails. So let's pick this super insanely bright color to be our contrast color. So we could do this nice kind of turquoise color. We could also try this super bright yellow color. Let's go ahead and click here on fill. And let's see if we can't maybe add just a hint of orange to it to kinda complement the gold a little bit. So let's bring it down just a tiny bit. There we go. Now it's not just plain yellow there. There's another color in there, kinda mixing in their little orange. So now we need to make this black. So I thought what I do is I'd sample a little bit. This is not really black, so it's like a dark, dark, dark navy color almost. I'm just going to sample in there as much as you can sample from your subject matter or photography. The more you do that, the more cohesive everything feels. And this is where things get interesting. So we have the Celts or taste test. It's all white, it all blends together. It says one big chunk. One way we can really accentuate seltzer is to make it the same color as this high contrast yellow. So let's do that. Let's get our Eyedropper Tool and make that yellow instantly, instantly that just jumps out at you. You see the ultimate seltzer and then now you're hooked any C taste test. So that is bringing in that color has really made this a more enticing layout. I want to try something. I'm going to drag these cans. I'm not sure I'm happy with his final placement. I think the size is okay. Let's see if we can't make this more dynamic. Let's make this a little bit bigger. Let's bring it down. So that really brings it way more into the foreground. And we want to make sure that the R is not covered or doesn't look like an arm anymore. That's always really hard to cover letters. Sometimes because then it starts to become hard to read. So you just have to be super careful so that all of a sudden we don't we're not worrying about the shadows at the bottom of the cans anymore and we brought it out. We're able to make it bigger and make it feel like it's right in your face. So now we need something happening in the background. I think this is an okay basic layout, but we need more dynamic pop for YouTube thumbnail. Well, when you open up a seltzer can, what's the best thing about a can of seltzer or Canada soda is that, is that pops out on the top when you open it, it's so refreshing. And when you think of tasting that you think of the complex flavors of the bubbles when we need your ink it. So let's try to find, we're not gonna be able to find soda pictures per se that are opening, maybe we can, but water, I mean, seltzer is mostly water, It's carbonated water. So as long as we find water kind of exploding, then I think we can use that. So let's head over to Pexels.com and check it out and see what we can find.
69. Lesson 3 - Youtube Thumbnail : So let's find water. So let's just type in water and see what comes up. And we're seeing just kinda plain water, but we're not really seeing splash. I think what I need to type in now is the word splash. There we go. That's more like it. I think this is one of these is perfect. This is already on a black background, so that's helpful too. But we're going to use blending modes so it doesn't really matter what color background that's on. So let's go ahead and download this one. Free Download. Say thank you, Darius. Thank you. So let's drag this right in. I'm going to drag it right into the document and it's going to automatically make it a Smart Object. Perfect. So now I'm gonna make it big enough to look like it's exploding from the can. And press Enter and I'm going to move it to the back. So move it all the way down to the background. So now we need to find, make it look like it's exploding from the top of the can. So maybe right about there. She and we can get rid of all of this easily by doing a layering mass. So let's do a layering mask on this background splash photo. Let's get our nice soft round brush so it gives it a nice feathered look. And let's go ahead and paint with black to erase. We don't need to have lines in there. And let's say you had a different colored background in there. So let's, let's unlock, unlock this background layer. And let's say we had this a different color. Let's say it was red. Let's say I want to really blend that in. And it's got this black background and you'd have to remove the black background and that's a mess. So you can select this object and do a blending mode and have it blend right in. So maybe screen, you can have it screen back. And you don't have to sit there and remove the background. So that's kinda fun. You can have like dark blue, whatever color you want, have to be black. And we can even, this is interesting. We don't have to do this, but it's going to show you a gradient maps, which we've done a lot. We can apply a gradient map to this layer right here. So I'm going to go up to image. I'm just going to apply it to that one layer. So just going to go through adjustments and do a gradient map. And let's keep black as the shadow color. And for the highlight color, we can do any color. We can even bring out this yellow color. So that's really interesting. Of course now it's starting to look like beer or Mello Yello or something that's orange. But I just wanted to show you if you wanted to create a different color, you can easily apply a gradient map to this as well. So I feel like we're really close to being done. Let's do some final touches to the typography. So something that's kinda popular, I want to show you, you don't always have to do what's popular. You don't always have to follow trends. But I wanted to kind of discuss kind of what's been going on with drop shadows and having a look a lot like what I'm showing you here. We have these drop shadows kinda giving this layered look to the topography. That's easy to add by doing Layer Styles. So each layer has a layer style. And I can't remember if I went over this, but I'm going to go over it again. So you have this layer right here. So seltzer, This is our topography layer. I want to add a drop shadow to that. I'm going to double-click right here and the blank space of The layer system right here, you click right here on this layer. It's going to open up a Layer Style panel. And when we do the next project, which is going to be a book, we're gonna go over Layer Styles and a lot more detail at how to save them and all this great stuff. So don't worry food, this is a super-duper brief, but we're going to go in more detail later. So I want to add a simple drop shadow. I'm just going to select drop shadow. And you can change the distance of the drop shadow, the spread, and the size. So I'm going to make it a full opacity. And I want to make sure Seltzer is the top layer of the typography. So let's bring this all the way to the top. And we have sill and what we could do, we could even create a folder, select all of our typography, and put it in a folder. And that just helps me know that this is the topography kind of groups that for me and I want to sit there and hunt for it. So now I know that seltzers on the top, taste is next and test is at the bottom. And so I'm gonna do a drop shadow and seltzer. And you can kind of see it casted a little bit here on the top of the taste. So what it does, it kinda gives it a sense of placement and a sense of belonging with each other instead of this existing as separate elements, since they're casting a shadow on each other, they feel more like they're together. So I can reduce the size a little bit. That's a very tiny effect here. But I just noticed on Instagram, everybody seems to be having, doing this effects and this is before us, before it's kinda flat. And that's actor. And it's not these super-strong shadows either. They're not over, but you can easily date yourself by doing super-strong drop shadows just kinda gives it this depth. And while I'm here, I want to show you another cool thing, just if you want to do it someday. So let's say I want to put an effect on just this typography and I want to crop it like put an image on it and it only shows in through the word seltzer. What if I were to bring in this, again, this little splash? Bring it on top. And I can use clipping mask and I can clip it to just the topography, so it crops it around just the topography layer. So I have this little image right here above my seltzer right here. And I'm going to take my splash water layer. I'm going to hold down option like we did before, and this is going to create a clipping mass. So holding down option, I believe it's Alt for Windows. I'll have to double-check that. And then I'm going to click once and it's going to apply a clipping mask to that. And what's really neat is I can move this around and make it bigger. And it looks like the seltzer is the water. That might not be the right effect for what we have now, but I just wanted to show you how I can do that. You could do that with gold and glitter and all sorts of crazy textures to have that effect. If you want to unclip it, you hold down Option or Alt, and then you have the little Excel, and that is unclip it and then delete it. So for right now, I think a clean look works. I think there's one thing missing. I feel like we have lot's happening, but let's create that sense of depth again so we can put our cans on top again. So let's go ahead and bring I think it got pulled down because I put all the type into a folder. So what I need to do is bring that right above here. And we can put a little drop shadow on the cans. So it looks like I added a little drop shadow here to look like they belong together. So let me toggle that off and then toggle that on this case, see what we're doing. Okay, so we want to have a great background. I feel like the cans are in the foreground. I feel like we can add one more thing to the foreground to really add even more dramatic depth to this piece. Let's duplicate the splash layer. So I'm just going to right-click Duplicate, Duplicate. There's also a keyboard shortcut I'm ready to introduce that's Command J. So to have this splash highlighted, go to do a quick command J. And that is going to create a copy. Let's drag that all the way. In the top and the top. I want to create a splash of the foreground. So I'm going to bring this down. And this is what I'm going to use a blending mode. So let's do a blending mode that's going to allow just the splash and not the background to pop through. That's most likely going to be our lightened and screen on dark backgrounds like we studied in the double exposure lessons. So let's do lighten and we don't want to have too much splashing going on. So we can use a layering mass to delete some of this extra splash and only keep what we want. So let's do that is create a layer mask. Looks like a layering mask is already created from before. So just click right there and we're able to paint away with black. And let's make it nice and big. So it feathers it away nicely. We don't need too much splash, especially in the, near the words. We don't wanna make it too busy. We don't have to have it splash all the way over just like a little splash to bring everything together. And let's bring that down. So it's not, we're not too much. And it might be making it smaller. Maybe. What solves the issue? See, there's where it looks like it's really splashing. And we can add a little more spacing right here. I feel like it's a little tight, a tiny bit tight. So let's select both of these. I'm just doing my down arrow key, just going to tap down and then do this one and tap down to test this to give just a tiny bit more breathing room, especially when we did the drop shadow effect. We want to give some breathing room there. And we can round these corners where they're already rounded, but maybe we can make them straight. Straight corner kinda gives it a more contemporary look. Now one thing we didn't do that I really wanna do is I really want to edit this photo. This has not been edited. I think we can make this even better. Right here It says our main subject matter. Now that we're finished with the layout, we can really do our refinement and photo editing. So I think we can sharpen this image to really bring out the details of the can. So I have this subject matter selected and I'm going to just go up and do a quick sharpen. Just one sharpen you can over, over sharpen really easily. So this is before. So that was nice. But this is after sharpen, it's kinda really brings out the bubbles on the can and it really makes it feel higher resolution. Let's also bring out the color. So we have this goal that we have this kind of really dark gray color in the middle. Let's bring this colors out more or less is do a quick image adjustment. Let's go to Vibrance, see if we can't bring out more of that color. So you know this that's before and that's after it kind of adds more gold to that. We can even make it more saturated. And what I wanna do, let me go to hue and saturation. So let's add just a tiny hint of copper. So we're going to adjust this hue slider is, is just the quickest way to do it. And I'm just going to bring in a little bit to the left. It's going to almost bring it, make it like a copper look, I think that'll pair better with it. The yellow click, OK, Let's see what else can we do here? We're gonna go to image brightness contrast. If we want to bring the contrast on this higher on the cans we can that makes the difference between the highlights and shadows more, more big. So let's increase the contrast. Let's increase it all the way. So that's going to make it really pop. And then of course, that's a reduction in contrast. So let's just add a little contrast. We can make them brighter, but I think it's already a pretty good brightness. You don't want to make it too bright because then it makes that washed out looking. So let's not worry about brightness. Of course we can do a much more simple yellow background as well if we wanted to do something more simple, very easy to do with everything, you know, there's so many different variations of each one and you have to figure out which one will work the best, because you could do so many different combinations. But there you haven't. There's our first YouTube thumbnail is got a real dramatic look. We have lots of layers happening here. We have a nice background, a nice foreground, a nice high contrast color, clean typography. I think this works really, really well to grab people's attention. So now we have another thumbnail we're gonna do, we're gonna do a little bit more of a feminine soft look for a Travel Channel.
70. Lesson 4 - Youtube Thumbnail: Now it's time to do the second YouTube thumbnail. This one's going to have that software look, it's for a travel channel. And this one's going to be very basic. They're just starting the channel that's brand new. That's good. Just going to be travel hacks, very simple words. They're gonna have a much longer YouTube video name, but we're just going to call it travel hacks on the thumbnail. So let's get started is going to feature a young lady who's traveling around. She's going to have all these travel hack tips for you. So very, very simple premise. So what we need to do is head on Pexels and see if we can't find our main hero image. This will be the person that will be the star of the show. So let's go ahead and go into pixels, type and travel and see kinda what comes up, what kind of figures come up. If this was a real client situation, they'll probably supply you with images where you'd have to isolate them from the background and use them on the thumbnail. And this case, this is fictitious, so we need to find our headshot and trying to find a nice clean image, I can easily cut out. And it looks like someone who is traveling and having a good time. I'd like to see faces when it comes to YouTube thumbnails and people being persona's and their channels. It's really nice to have faces. That's the emotional connection is being able to show a face. So like this image probably wouldn't work really well because she's facing away and looking at the city. She's kinda disconnected from us as the audience and you don't want that disconnect. So I found this lovely lady right here that I'm going to go ahead and quickly isolate and bring into the YouTube thumbnail template. Let's do a selected mask. It's going to go Select selected mask. She does have hair. So we'll see what a Quick Select Subject does. That did a pretty good job. And let's go ahead and do a refined hair just in case there's some hair that needs I didn't like how that looks. Let's go ahead and zoom in and see what happened here. So took a nice chunk of her hair there. So let's go ahead. I'm just going to do a command Z. Command Z, which is going to go back one step. There we go. Let's not do refine here. We will refine it ourselves. We can always soften, maybe do a slight feather if we feel like she's going to be cut out too sharply and like a slight smooth. Notice how little I did that. Let's go ahead and masker. So let's use layering mask and masker out. So now we just have her, She's gigantic. So let's make this a little bit smaller. And let's first, as always, make sure she is a smart object. Before we start to scale her down. Now I can scale it down and bring your end. So the right placement, That's going to depend on the typography. So I like to have a person's gaze are there look to look at the topography or headline. So in this case she's kind of looking at us but also looking kinda facing the left. So I want the typography to be on the left. Or if we reflect her, we can have the topography on the right. So let's do let's reflect her. So that'll be easy by going up to Edit. You go down to transform, and you have all sorts of ways to kind of move her so we can rotate rotate clockwise. And this is one I use all the time. Flip horizontal. It's just good to have flipper around and she's going to face the other direction. So here is our main hero image. So let's go ahead and add our typography in. Next. We toggle all this off for now. So let's open up our prompt, prompt number 2. It's just gonna be traveled wax. That's pretty, pretty simple. So just travel hacks. This is whatever topography we used in the last video. Let's make this a little bit bigger. So we want this to have a softer, more feminine look. So we want to change the typography to reflect that. Let's do a nice round soft script typeface for travel. And then hacks can be also soft, but maybe do some font pairing here where they're, they're different typeface categories altogether. So let's make this kind of a straight, simple sans serif and this a nice flowy script. So let's instead a Como. So I'm going to filter and let's go down to script. So now I don't have to worry about all this other typefaces going on here. So this one's really nice. It's got some nice unique character. I don't know how readable the T is. The T and L is it a DJ? Readability is very important. Remember YouTube thumbnails, I'm going down here and I'm going to type in 25 percent. Sometimes it can be as small as let's say maybe it's 35 percent and right here, they can be as small as that. And if you can't read it from there, It's not going to be worthwhile having it. So let's go ahead and zoom back in. Let's do it on. Zoom in at a 150%. So let's try a different one. Looking for readability. They'll have their own characteristics as we studied before. So this one almost looks like it's scribbled on with a marker. Some of them are really fancy. So let me see this one right here. So this one's really traditional and fancy and that wouldn't really go super well with what they're doing. We need kinda more youth, more modern. So I went with this one. So this one's called out Fresco. That's readable yet it has some smooth kind of angles to it. And so for hacks, Let's find some font pairing here so we know we definitely want a San Serif. So let's go to San Serif. And I'd like to keep it lowercase because lower-case lettering is naturally more soft and appearance and tone than uppercase, uppercase, a super-strong. Let's keep it lowercase characters. And we don't want anything with a whole lot of personality. We want something fairly plain because we have a lot of personality already in travel. What about fat, frank? It's super chunky and it's super easy to read. There is personality here, but since it's so chunky, It's simple enough, I think to work. That's called Fat Frank course. You can use any, you don't have to use these, you may not have access to them if you don't have an Adobe Creative Cloud subscription, Most of you guys do. But if you don't, Google Fonts has all sorts of similar type faces. So now here's the hard part. We need to create a narrative. We need to create an enticing narrative as person's going to be traveling all over the world. We need to create that because right now it's just a plain background. We can make it pretty colors, but it's not going to mean anything. It's just going to be a girl in some headline. It's not going to mean anything. So let's make her a bit smaller so we can really make room for a narrative. So it's making it smaller and kinda see your hand a little bit more. And with script typefaces, it's hard to, it's hard to align these. So that would be a perfect left alignment, but that doesn't feel aligned at all. So a lot of times you just have to kinda tuck, tuck that topography into a nice natural occurring space. So maybe right about here. So that's kinda why have it a little bit off to the right. Okay, so now let's find some awesome travel photos. So travel right here. We need to figure out what images might really help to tell that story of her traveling. We can always do an airplane. You know, we can download an airplane and it's like she's traveling, but it just feels a little artificial. Just being on an airplane, but we can try it out. Drag it all the way down to the bottom. Just kinda feels artificial. We really want to put her in her place. She has a hat on, she's obviously somewhere a warm. We have this awesome Eiffel Tower photo we can download. You can even do the Statue of Liberty. That's a nice angle so that we have a couple of things downloaded we can try out. So we could try out two photos. Sometimes one photo doesn't always help to describe the whole narrative. So just drag both of those in there already, smart objects so I can move them around. This is what I originally came up with with the concept and I ended up doing something else. But this could work for you. She can split the difference between the two photos. Mover here, and there's not a whole lot of room to put that. This is just all trial and error. And you can screen that back or put a gradient map on it to have this be able to pop out. So let's say I want to add a gradient map to everything that's at a certain level. Let's go over to adjustments. Let's see where my adjustments panel is. I think there it is right here. And let's do gradient map. We can add some color to that if we want, like blue. And the shadows can be a darker blue. What's great about this gradient mapping applied with adjustments is now I can dry it's its own layer so I can drag it all the way above the other image of the Statue of Liberty. And so I'm building that narrative. And then that can make this typography white instead of gray. And we're building that narrative. We can make it even change the grid. We can add a layer mask, kind of mask out the busy background here of Eiffel Tower. Of course, you want to show the top of it. What's the point if you can't show the whole thing? So it could be that, you know, sometimes a photo just doesn't work and you want it to work really bad. But just with the topography, it might not work. Let's try something else. No big deal. Let's try, Let's keep the Statue of Liberty. I have this awesome photo here. I'm going to bring in, you can use whatever you want. This is all found on pixels. When I typed in the word travel. Let's, there's a lot of business down here where there's a car down here. Well, we could do a layering mask and just blur that out. And I'm not sure if I showed this to you yet, but I'm going to show you again. I'm going to get the gradient tool. So I'm over here my toolbar, I have the gradient tool, it's set to default, which is just black to white. That's default. So as you know, at layering mass black erases and white brings it back. So you could do the same thing. And I'm right here, I have, I'm all my layer mask on this layer. I'm going to do the same thing with a gradient. I can apply a gradient or everything that's black is going to disappear and everything that's white is going to stay there. So it's like a quick way to instantly blur or something. So instead of getting the brush and brushing the bottom, you can just get a gradient tool and just do a fade away the bottom. So let me do the opposite. There we go. Faded away. Nice gradual fade, just like that. So that really helps the typography to stand out. So we can do a few things. We can really warm this up. So right now it's blue. But what if I were to warm this up? It's a nice sunny day. She has a hat on. Let's bring out some warm colors. We can even sample some colors she has in her hat. So that's going to be our dark highlight color. So let me do this color. And let's do a dark color for shadows. Just kinda warms it up a tiny bit, bring a little bit more contrast that pops out. So that angles a bit weird. I wonder if I can reflect that. Here we go. It could be that an image doesn't work. It's okay. You tried to bring more emphasis on her and we can make that bigger in right now everything blends together because they're similar colors, but we can have that pop of contrasts that we need. We need to add that to this because it is YouTube and you just have to be high contrast. So let me create a box. Let me angle it. Something to bring her out and make her pop out of that background. And let's make that a high contrast. Let's say Purple, Purple, still soft and feminine. Like a deep purple. The other way. Let's bring that building out more or let's go to our Gradient Map. Let's put a tiny, tiny bit more contrast by, I know I say the word contrast a lot, but I'm telling you contrast is king. When it comes to design. Take you out to flying that right color. I think we can afford to make travel a little bit bigger. Something else we can try is we downloaded this map. There it is. I thought maybe this would be a neat little small texture that we can add. That's pretty neat right there, just on its own. And it already applied the gradient map to it because the gradient map just automatically is on top. So it applies that gradient map that looks really cool ad as is. We can bring more focus on that campus and have it took perfectly between the T and the L. How cool is that? That's pretty neat. This is an accident. You know, I talk about how to be creative video, how some things are happened by accident. I didn't plan that that picture is all of a sudden if you'd get really stuck with a picture, sometimes just trying another picture will give you a whole new idea. Sometimes a photo you're trying to force it and just doesn't work. But anyway, what I originally intended to do is add a little texture to this purple. So I could bring that all the way down next to this purple rectangle. I can do a clipping mask, hold on Option, clip it, and apply a blending mode. Just so just something pops out on that purple luminosity. And let's, that's a lot, There's a lot going on there. So let's reduce the opacity of that layer just went like a subtle pop of texture. And we can mess around with this thumbnail forever. There are so many different varieties. And we can come up with and just wanted to come up with something maybe a little bit softer, a little more feminine for a travel channel. We have one more thumbnail to do. And that's going to be for a graphic designer who wants to start his own YouTube channel, teaching others how to do design. Sound familiar. Well, we're going to do that for this guy right here. Bill. We're going to do that in the next lesson.
71. Lesson 5 - Youtube Thumbnail: We have one more YouTube thumbnail to do. This time is going to be for a graphic design, how to tutorial channel, which many of you, maybe in a few years we'll create your own. So here we go. It's for this guy named Phil, totally made-up character. But it's going to be master graphic design with Phil is all the necessary requirements are necessary text to put on the YouTube thumbnail. This is going to be a how-to video. And it's going to be this new graphic designer is launching a channel so he could teach others is newly learned skills. He wants to feature geometric shapes and high contrast colors, and also a headshot of themselves to build brand awareness. So we have this headshot, a fill. I found this on Pexels. You just have to type in headshot, man, profile pic headshot, you're going to fly. And so many others actually encourage you to find your own. You don't have to use the same one that I use. And I, of course, I used to provide links, but since photographers constantly put on new photos but also take him away, I no longer have active links to these because those links can easily get broken. And if a photographer, photographer or removes his photo, so please use any photo that you'd like. So this one, I'm just gonna do a select, I selected mask or I could just do Select Subject. Sometimes that makes it better. So you can see how I might need to go in and refine that map, that selection. Let's bring him in and so he's looking straight at us. So what I thought we would do instead of doing putting them on the left or the right, what if we put him in the center? And let's not zoom out so much on on that. We don't emotionally connect with them or really Sam, because remember these thumbnails are super-duper tiny. Let's maybe try to find a nice look right about here. So he's right there in the center. We can toggle all these off and we can get to work. First thing is first we went to get the basic layout planned out. So let's have him in the middle where we get to put the headline. So we need master graphic design with Phil. So with Phil may not be super big because he's needs to be super big because he's already pretty much overcoming the thumbnail. So maybe make this a little bit smaller and put it down here. Let's do master graphic design bigger. That's the main goal of the video is to master graphic design. So we can have this all perfectly left aligned straight if we wanted to know that even looks good just like this. And we made everything kind of a left alignment, put them on like a yellow background, make that thing pop. But we're going to try something a little bit different. Let's add some angled or a topography. We haven't had a chance to do that yet. So let's do that. I'm going to select all of my typography to select it held down shift and I got all of them selected. So master graphic design is now all selected. We're going to go up, this is something new I haven't taught yet. We're going to go up to edit, all the way down to transform. And we did that when we flipped the image or horizontally. But we have a few other things we can do here. So you notice that some of this is grayed out. That's because right now that's live text. Not rasterized. So there's some of these that you're not going to be able to do unless it's rasterized or it's not a smart layer. That's okay, we just need skew for now, so we're going to do skew. And this could allow us to skew the text. See this upper right transform box right here. I'm going to click and hold and just drag it and I'm able to instantly add angle to my text. I can also drag it down. I can drag it all sorts of ways. But I'm just gonna do a simple drag up. So I thought it would be neat to kinda also move these so they're not all perfectly aligned, kinda going against the grain here. And let's add a little breathing room between the topography. And we can even do outlines. So let's go ahead and double-click. Let's go ahead and have our master selected right here. Let's double-click. Let's do a stroke, stroke, stroke, stroke, their stroke. And let's make it, we have to figure out what our final colors are going to be. Lets us do kind of like a dark gray for now. Just kinda generic is I'm not sure if I want to stick with blue or not. Click Okay, and then we reduce the fill. We did this a little bit earlier in the course. And we can even double-click again back into our stroke options. And we can do instead of the outside, we can do center. It looks a little bit better and let's add a little spacing between the topography. We don't want all that to get in the way. So let's add a little spacing right here in Properties panel and a little bit of spacing. And I can go back in that might be a little too thick, little too thick. So let's do three. And let's say I want to do the same thing to design. Do I have to double-click that and add a stroke and reduce the fill all over again. No, We can save with layer styles, which we will do in the next project. I'll go over that again from scratch. Let's save this layer style so I don't have to do it over again. So I'm gonna go right here. I double-clicked into my Layer Styles panel. I'm going to click on New Style. And I'm going to type in outlined and just have everything clicked. Just note, don't even touch anything, just click OK. And now it's saved. So now I can highlight design and apply that layering style. So where do I find that layering style? How do I apply it? You have a separate panel. So we're going to go up to Windows. You make sure your libraries are selected and it saved right here in your libraries. We go right here to outline in older versions of Photoshop, there's a separate style panel right here that you can select as well. It's also in your library's panel. It's also in your styles panel. So if you open up your styles panel, you'll see it right here as well. And right, if you go down all the way down here, you should find the one that you just saved. And there it is, there's the ones is called outlines that I want to do that again. So now if I want to do the same thing with this, Let's add that same angle and it transform. Let's skew it. And there's an angle here that you can type in. If you knew the angle that that is, you could just type that in so you can match the angle. And so let's make with outlined. So they said they wanted to add geometric shapes to this. So here's the thing. It's very left heavy. Let's balance this out. Let's bring something over to the right. Let's bring over with Phil. And so it kinda reads left to right, and it balances it out a little bit. So let's add some of those geometric shapes that they requested. This will be a great lesson in creating geometric shapes in Adobe Photoshop. So ever shapes tool that's the most obvious thing to use. Triangle tool is just hold down Shift, create a simple filled in a triangle. So let's just right now stick with really high contrast primary colors of red, yellow, and blue. So let's try that blue. And let's duplicate that. It's gonna hold down option and drag, and let's make this a little bit different. First of all, let's hold down shift and go to the transform window and zoom in a little bit so you can see go ahead and transform this. So I'm gonna hold down Shift, and I'm going to rotate this and click it where it's doing the opposite direction. And instead of a fill, Let's null that out to make this a stroke and a different color, let's make it red. And increase the stroke is creating some basic geometric shapes. And let's add a sense of layering. We can put this behind them in. Drag him below the mammals, go ahead and name him and create a circle. Let's do a yellow circle. Let me get the Eclipse tool and now I can make it yellow. There's yellow. It's going to click and hold and put that behind everything. Get my move tool, move it down. So let's say I want to duplicate the circle and I want to make it smaller. And let's make it just a stroke. He's the same recently used color. Null that out. Make this thicker. And let's say I just want a piece of that to show. So let me get my Rectangle Marquee Tool. This is basically as your selection tool. I'm going to click and hold and I'm going to select what I want to show that if all I'm doing is I just made a selection. Now I'm going to go to my layer, is going to be a clips. And I sometimes have to toggle this on and off to find out what layer it is. There it is. I have it selected and now I can just click on layering mask. And it's going to take that selection and make it show just what was selected. So I'm just going to add a layer mask. Just like that. I created a cool little shape. So don't worry, we're gonna do that again. Let's do that again with a circle. Let's duplicate, Let's go ahead and duplicate this one. And I'm just going to remove, delete the layer mask. Let's do it, but do a semicircle. So I'm going to get the marquee tool. Do about halfway point. Make sure I have that layer selected and then go down to Larry mask. And boom, I got a semicircle. And I can make that semicircle red. Put it over here for balance. We want to balance color. We also want to balance shape and form. Let's go ahead and make sure I have my layer mask selected. That's why I'm like I want to select a color, I want to change the color. This is giving me layering mask options. Make sure you click back on that layer. Easy mistake to make. Glucagon red. Now we just have to find balance with everything. I want to have something kind of another thing overlapping on top of him. Let's create a little pill shape. Let's get aligned tool is getting my line tool. Click and hold. Creating a simple pill shape. I don't want to fill and I want to stroke a red stroke. Make it bigger. And I want to add some nice round caps to that. So I'm going to scroll down and it's going to give me a chance to around the cap. And what I'm gonna do instead of having to do that over again, I'm just going to drag and create a copy. And drag and create a copy. If I ever want to change this, change in the length, I can select my line tool again. And I can, it allows me to change like the length. If I want to make this next one, you get the Move tool, select this one line tool, and then it allows me to shorten it or make it longer. So I want to put one on top. Let's put that one on the bottom. Dragging this down. Just kinda looks more layered that way. Let's bring him, make him a semicircle like this. And bring that on top. There's no science to this is just what feels right, what balances outright. Let's say I want to add a drop shadow to this blue triangle and add depth. I can double-click right here in this empty area. And you'll notice just for some reason, I don't see all my options. If this ever happens to you, click down here to this fx, which is basically effects, and then just click on Show All effects. So sometimes when you save like a layer style, sometimes it'll, it'll act weird like this if you ever see this. Let's click down here and do show all effects and then you'll get it all back. So drop shadow, make this real low opacity. I don't want this super-strong. And let's put some distance in it too. If you want a nice, clean, flat design, you can always toggle off the drop shadow and see how that looks.
72. Lesson 6 - Youtube Thumbnail: To spend another five minutes just kind of changing the colors around, trying to find the right balance and also made him black and white. I just went up to adjustments, made him black and white. Or you can go up here to adjustments and just apply to black and white filter to him. What it does is it takes all the skin tone and hair color and shirt color out of the mix. And it really brings emphasis on the color of the geometric shapes and also the color on the typography. I just thought it helps simplify everything by taking all those other natural colors out of there. So let's add a sense of texture to the background. Right now it's on, it's plain white background. Let's see if I can't find a quick texture and pixels. So we can just type in texture. And there's all sorts of stuff here. We don't want anything too busy. Now this would be interesting. I think a graphic design, I think has some texture. There's also this one which is really probably what we need. Something really simple. Almost like a wall, like a texture of a wall. Let's see how those look. Let's try this one. Bring that in all the way down and layering system. There goes as little pop a texture. We can also sharpen it. We can bring in the other one we had. This one might be a bit too busy. And I'm already kinda seeing that. I mean, I like it, but it's just competing too much with all we have a lot going on here. So we don't need anything that's going to compete with what we have. So something super simple like this. So let's add a few more patterns. Let's add some patterns. So let's get a rectangle tool. Just going to draw a box that goes down here. And let's sharpen the corners, not make them rounded. We're going to add a texture to this or a pattern. We're going to go right here and double-click to get our Layer Styles panel up. And this time we're going to click on Pattern Overlay. It's going to put a pattern right on the shape. And in 2021, they updated this. And they have some horrible patterns of like trees and things that you would almost never use. I really miss the old patterns that they had in Photoshop back 2019 and prior. You can always load if you go up here it says load. I don't have it because I already loaded it. It'll be load legacy patterns. So you want to load your legacy pattern right here. Just click on here if you don't see it here. And you'll get an extra little drop-down boxes as legacy patterns and more. This could always change. So if you don't see this, you might have to download a pattern are created from scratch. But if you go down, the legacy patterns are right down here, you'd have to really dig deep into this. Let me make this bigger. You have a legacy default patterns. This is what used to just come up when he went right into the Layer Styles panel. And I miss these because some of them are pretty cool. Let's go in there and let's do, We have lots of different ones. We have a diagonal line. We have these dots as well. So let's do the diagonal line. Click, okay? And right now it's on this like white backgrounds. What patterns are basically putting an image? There. So what we wanna do is not have this white background, so we could just do a blending mode. So let's try Linear Burn. And you'll notice there's no effect. That's because we need to rasterize the layer styles on this layer first for it to kind of react. So we need to right-click on this layer. So this is this layer right here, right-click right here. In this open area, we need to not just rasterize the layer. We don't need to do that necessarily, but we need to rasterize the layer styles. So we opened up the layer styles. You're rasterizing it, you no longer making it editable again. So you're rasterizing the Layer Style and now just becomes an image, one flat image. Now I can go back and I can put on blending modes and it works. Yay. So now I can do linear burn, which I think works best for that. So now you can see the background pop and out through there. Okay, let's do that again. Let's put something down below. Now let's get another rectangle tool. Draw a rectangle, and let's double-click and add a pattern. Pattern Overlay. This time we're gonna do dots. Boom, just like that. You can also change the scale, scale it down, or scale it larger if you scale it larger. These are rasterized images, so they don't really look really great when you make it larger. So you just bring it down a little bit, just adding some texture and pattern. Click on. Okay, Let's right-click and rasterize the layer style, Layer Style panel. This is like a regular image now. Now we could do a Linear Burn and let's bring it back behind the man so that it doesn't disrupt him. And just adds a little, little bit of something. So there you have it. We're done with our YouTube thumbnails. So next we're going to talk about exporting. How do we export these? And the best way we can for YouTube? So we're ready to export our YouTube thumbnails out of here and put them on YouTube. So the best way to export them, especially if you have Artboards. If you have art boards, you want to go up to File Export, Export As File Export, Export As DO go to Save As, go to File Export, Export As is gonna do some special. And I might have gone over this before, but hey, I'm going to go over to give because it always helps to, to review things over and over. Right now we just have one artboard. So this is going to have it selected everything. We're going to leave default. And this is the best way to export. What is good about this? If I ever went to upscale or export it as a larger, nicer looking file, I can do a two or a three x. So this is going to double the size. So instead of 1280 by 720 is gonna be, it's gonna double that, which is gonna make it a nice high resolution. We really just need one x. But sometimes if you want to put it on some bigger, you could do a T2x or a3x. Just kinda let me know if you ever have anything blurry or it's just not looking really good, sometimes exporting it to x or a3x could fit whatever you're trying to do. But you know what X is default. And that's okay, export. So here's our JPEG image. Let's go ahead and zoom out, do a visibility test, which is basically testing it out on the final size. It's going to be, which is probably going to be right here. Maybe the outlined typography doesn't quite work. And that's something we'll go back and tweak from stylistically, if it's a pretty big thumbnail, I think it works well. So you just have to see see what works out. Make sure you do a visibility test is a practical does it work? Do I need to change the stroke to a fill on the master and design and the title. Now that's something that's up for debate. So let's try exporting. So File Export As let's do a one x. So I'm going to show you the difference between 10 and 20 x there is a one x, there is a T2x that we did. Let's see the difference. One of the things you'll notice is the doubling of size. We doubled the resolution basically of this photo. So now you notice when we do art board the T2x, it doubled the pixel size. So double the resolution. So 2560 by 1440. And since almost all of this was smart objects or vector type scalable shapes, we don't really lose a lot when we upscale it, which is great. If we didn't have smart objects on and it tried to upscale it to a3x, it could look like really blurry. But since most of this scales up nicely without blurring, we don't have any problem exporting it as a T2x or a a3x. This is when it gets really cool. So let's say I make multiple artboards. So I have the Artboard tool selected. I click on my artboard name and I can just click over this addition. Addition. Let's say I have different artboards. Just got my move tool. So I can select my art board one. I can select everything in art board 1. Let's go ahead and go down. Let's unlock this layer. And I can select everything we created. I'm going to do a copy paste. So Command C and go to art board 2 to selecting the name and do Command V. And it's going to paste everything in there. Or I need to paste in place, paste special paste in place, and I'll have to sit there and move it. And so let's say I keep doing this selected artboard 3. And now I can paste special paste into place and I can start to make different versions and iterations. So I can change the colors to make them blue, or shift them over to one side to see how that looks. If I can make the topography bigger, if that works. This is great when you have a client who needs to have this done quickly and he could show him a couple of quick variations. Maybe one doesn't have the pattern when he uses a different shape, yada, yada, yada. So now I can easily export all three thumbnails. This is great if you have a series. So you have a series that you have four or five videos coming up. Some YouTubers make three videos a week. You can go ahead and create three of them. And one document and just export it and you're all done for that week. Then go to File Export, Export As. And it's going to have all three art boards for us right there. And you can uncheck ones that you don't want. Let's say I already have that one. Can check them, uncheck. Scale it up if you need to. And I'm going to leave it at one X. I think that's fine. We just need 1280 by 720 and click on Export and you're done. So any yet now you have all three instantly created. And before you'd have to create a document for each one, which was really annoying. And now I have all three jpegs ready to go. So there you have it. We created three YouTube thumbnails and about an hour or less. And hopefully we've learned a couple of new tools like the Skew tool. We practice geometric shapes, patterns, layer styles, and learned a little bit more about layout and telling a story with photos. So I look forward to seeing you in the very next project where we get to do some of this over again and really, really reiterate what we've been learning.
73. Photoshop 2022 Updates! : Shop 2022, the brand new updates. I wanted to spend a few lessons going over some of the updates for 2022. There aren't huge updates, but the updates they've made to the neuro filters are game changers. They've really helped tweak their algorithm to make objects selection and doing some other amazing photo editing things much quicker than having to do a bunch of manual steps. So the very first update I want to go over is the compatibility with Illustrator and Photoshop. So right now in Photoshop, if you were to just drag a, let's just create a square and Adobe Illustrator. We bring that will just drag it right in, which is what I teach in my course. You drag it in and you don't have any kind of editing capabilities. If I wanted to round the corners, if I wanted to change the stroke, well, they've changed that in 2022 and now you can, but you have to go about it a little bit differently. We're going to be copying and pasting. So we're going to go to Adobe Illustrator and we have just a regular shape here. Let's even add a stroke because it also brings strokes over two. So I'm just going to create a stroke. So we need to bring this over into Photoshop and instead of dragging it over, we're going to copy and paste it so I can do my keyboard shortcut Command C, or I can go up to edit and just copy. And then we're going to go in back into Photoshop and we're going to paste it. And it's going to now have a dialog option. You want to click on layers this time, anything you're bringing into Illustrator, if you're pasting it, you want to do layers. If you want to retain its editing capabilities of the shape. So we're going to click on OK. It's going to paste the layers and look at this. This has never happened before. Usually you lose all edited capabilities when you drag an object from Illustrator to Photoshop, but it retains all the ability to do the stroke. I can now change the color of the stroke. I can change the thickness of the stroke, just like I wouldn't Adobe Illustrator, but I'm right here in Photoshop, stroke options. It also allows us to go ahead and click and drag and has the corner rounding ability so I can now round the corners and Adobe Photoshop and even have some Pathfinder as well. So this only works with simple shapes that Photoshop already has an its shape library. So it can do all of these shapes. It cannot do the star. So if I'm over here in Adobe Illustrator and have a star, and I want to copy and paste that star. Since Photoshop does not have a star shape, it's not going to do a whole lot. It's not going to give us the ability to change much of it, so it's going to bring it in path. So that's when you have complicated shapes, you could still drag it over. And I'll just be treated as a vector smart object and you can scale it just like it was before. That you're able to retain some paths on simple shapes when you bring them from Illustrator to Photoshop. But this one is way more fun and enjoyable. It's all the changes to the neural filters. So I have a lesson about the 2021 updates to the neural filters. And you can find that right here when you go up to Filter Neural Filters. And last year they added the ability to add a smile to somebody and do some updates to, to photographs. And now they're doing a lot of changes to landscapes and some other things. So let's check it out. Go to Filter, Neural Filters. I have this generic landscape when i'm, I'm here in the woods. And it's gonna give us the ability to change the seasons by using artificial intelligence and their library of photos. And they're going to put all that together just like they did last year with the neuro filter updates. And they're going to be able to create an entirely new scene but retain the basic landscape. So let's check it out. Filter Neural Filters, Filter Neural Filters. So it's in the filters. And there's a couple of updates I'm going to talk about. So the first one is landscape mixer. So we're gonna go ahead and toggle that on. I already have the it's almost acts like a plug-in, have to install it. So if you go to landscape filter and it asks you to update it or download, go ahead and download it. It's about 200 megabytes, so it's a nice chunk aside. So make sure you clear out some space on your hard drive. But once you install it, it will now be available and you just toggle it on. And what it does, it, Let's go ahead and click on this winter scene. So these are different preloaded options. There's some are spring, summer, summer, summer, winter. And it's going to go ahead and adapt that winter scene to my landscape. But it's not going to change where the trees are located, but it's going to change maybe the texture and kinda what's shown. So it takes a couple of minutes to work. So you can see processing on the device. Good. Take a little bit of time for it to get all those extra photos and try to figure out how to make this a winter scene. And I haven't got a 100 percent strength and you'll have to have it all the way on super strength, that's going to change it a lot when you do higher strength and when you back off the string, it'll do the effect just a little bit and you'll see what I mean. So wow, That is such a big change. See how all the trees remain in place. Yet it added snow. That is artificial intelligence at work. And there's, did they took a bunch, probably thousands of other photos to figure out how to snow look compared to how the landscape is presented. And they pop snow on there. And this is just as incredible and amazing as last year filters with, with portraits. So we can also back off the strength. So let's just do 50 percent. We can add a little sunset in there. You can add other seasons. So that is at 50 percent strength. You can kind of see it looks a little bit more wintery, but it doesn't have all the snow on there. So you have a full strength winter and then maybe not quite as crazy winter. So they took a while to really find a photo where this effect did a great job. And this is the photo I found some photos. You're gonna have mixed results. And they're going to be slowly improving the algorithm through time. So now it's going to be mixed results. You're just going to have to experiment with different ones to see what happens. You can also bring in your own image if you wanted to select an image from your computer. And instead of all the presets that they have available, filter is still a little buggy. I had a crash a few times on my brand new laptop, Mac laptop. So yeah, it's going to struggle a little bit. It's going to take some time to work, but the results are worth the wait. And you've got to work through some of those bugs. Sometimes it just says, I'm not going to work right now and you just restart and bring it back up and hopefully it'll work again for you. Let's do another season. Let's ratchet up spring and we have full strength. So let's see what happens With spring. So there's spring, you see kind of some new trees blooming. And somehow it just knew that those are trees that are blooming in, bushes that are blooming and spring. That's all the algorithms work. So to be able to do this by hand would have taken a long time. So this is just a great, neat way to change seasons. I've actually had client work where they wanted me to change something from spring to fall. And I did it manually by using the Color Mixer and changing the color. And this would be a lot easier to do and probably be even more realistic with some of the foliage and plants that have also changed in this that would have taken hours and hours of work. So really cool tool.
74. Photoshop 2022 Updates! part 2: For the next update, its updates to the object selection tool. They now lets you automatically select individual objects in the picture. So this is a great example of a picture where it would work well with. This is a flat lay photography where you have kind of a top-down look in lots of different objects here. Being able to isolate and cut these out manually would be very, very difficult. So now they've changed and updated the object selection tool before this came out, I believe two years ago, the objects selection tool, you would click and drag over an object and it would find the main subject matter and automatically isolated for you. So we've already known that. Now it's got something a little bit more automatic that happens. So you're gonna have this little wheel that's gonna kinda start to click and refresh and what it's gonna do, it's gonna manually find every single object that's already in here, so you don't have to isolate it anymore. So it takes a few seconds, but now it can hover over and look at that. It's already isolated all of the objects. It's not perfect. It's definitely not perfect. So you can see right here, it doesn't know that that chord is connected to the hard drive. So those are two objects. But that's okay because I can click and it'll go ahead and select it. I can hold down the Shift, hold down Shift and click will add to the selection. Now I have both of those selected. I can go down here and do a layering mask and kinda isolate that. Or I can do Command J. And what it does is it does a separate layer. So now I have, still have my original layer and I have this isolated. Just need to make sure I make that a smart object if I want to make it bigger or smaller. So that's kind of neat how it does it. Let's do one more time. So let's go ahead and click back on objects selection tool. And when I say it's not perfect, it doesn't always select everything. So there's that little portion then it didn't select. So you'd have to click on this and then kind of click and drag, I'm holding down shift. And so now it was able to select all of it. And this is the reason why I continually teach how to do manual selection tool. So the polygon lasso tool, magnetic lasso tool, all of these manual selection tools are really important because these automatic selection tools, sometimes they're not perfect and you're going to have to manually maybe correct a selection or to manually as well. So let's do that. Let's do an example of it not working perfectly. So you don't run into this situation where like, Hey, that didn't work, didn't isolate the object is nice as I'd like. So this plant for instance, let's select it. It didn't do a fabulous job finding every portion of the plant. But I can also add to it, can get either a lasso tool or a magnetic lasso tool. And I'm holding down Shift and then selecting so it'll add to my selection and you know, you discount to manually add some things. So yes, sometimes you have to manually do it. And sometimes these tools and click and drag here too, and it might automatically selected. I'm right back here on the object selection tool, so I'm holding down shift anytime I want to add a selection. And I continue to draw a box, Dropbox, dropbox. And it's being real picky about it. Whenever it's getting really picking, it's not selecting it. Let's go back to a manual selection tools. There's nothing wrong with using it at a subtract that out. And that is why learning all those manual selection tools is super handy. Going to mask that out and look at that. Got it isolated with this little boy jumping with his rocket. And we're going to get the object selection tool right here. And it's going to work a little bit in a tiny, anytime you see the spinning wheel, it's working on trying to figure out how to cut the object out for you. So there we go. We can see how an isolated him and the rocket separately, which is nice if you ever wanted to just select the rocket and isolate the rocket from the boy, or if you wanted to select both, you can. And then just like that and you do layering mask and he's already isolated. So that's fantastic. You can see it tries to select the trees, but it's not going to be able to be perfect because it's just not that sensitive to be able to cut all that out. So there's still some manual things you have to do here when it comes to people, when it comes to hair, I find it still better. It does an okay job selecting basic objects. But when he get detailed hair, it's still better to do this Select and Mask. So let me show you an example. So we have this woman's hair and there's lots of fine details. So if I do this automatic objects selection tool, that's going to take a minute to select her. You can see it didn't do really good with the details, really kinda more chunky selections. So it's still going to be better with hair and really fine details to do the select and mask. So we're gonna do select subject and refine hair. And he could see it's a much more superior selection. Let's get our objects selection tool. And this one is doing a great job selecting each bottle cap. Let's say I just want these four and I don't want anything else. I can click once. Hold down Shift, select that one. Just holding down Shift and selecting these four. And done. He needed to go to Select and Mask from this area to do a better, finer details, you can click on Select and Mask. And it's going to go ahead and select it and you can add a radius. You could smooth out the selection more, you can feather it, you can paint on a better selection. So we're gonna click on OK. And there we go. We have a great selection and do layering mask and voila.
75. Photoshop 2022 Updates! part 3: I'm going to talk about my favorite Photoshop 2020 to update. And that's gonna be harmonization. So harmonization is being able to take a photo that was taken with different lighting and a different tone and a different color space and be able to bring it into another photo and adapt it to make it look like that subject matter belongs in the photo. And then lots of photo manipulation lessons and courses I've taught over the years. A lot of this can be done manually by using all of your adjustments are using Camera Raw Filter to find a way to get the lighting to match and adjust your levels and curves. And there's just a lot of things that you can do to manually do this. But the fact that there's now a neural filter that allows you to do it automatically for you. Wow, it's amazing and one click, I can do what took me 20 minutes of all these different adjustments that I had to do. So let's go ahead and isolate our subject. So this filter will require us to bring another subject matter into a background. So we're going to isolate this woman jumping. And we could do our new tool that we just developed. We can do that, that does a pretty good selection, but I didn't like it. You just do select and mask. And we're going to go ahead and isolate her. We went ahead and did a layering mask. And I'm going to bring her into this background of the sky, maybe make her a little bit bigger. Okay, and so now normally I would probably go to adjustments and do brightness and contrast and layers and try to get her to match this much more darker, more cool toned background. So we're going to now go to Filter, Neural Filters. And we're gonna go to harmonization and make sure you might have to install it to get it to work. And it's going to ask for a reference image. So we're going to select our background that we already have. And we could do a full strength to get a more dramatic effect. And you can manually adjust the colors as well, but we're just going to keep it as is. And look at that. That is amazing. So I'm going to click on, Okay. So what it did is added its own layer. So this is actually a separate layer now. So if I wanted to go back to my original layer before I did the filter, I can just toggle it right off. But look at the difference. So that's before very warm and after very cool, it looks like she belongs in that photo to me. That is incredible. The before and after changes that they did, they really brought out the shadows more because it could have more shadows cast and adult light like a evening sky or a night sky. This brilliant. So that's one of my favorite ones. It's super quick to do and you get some really neat results. Let's do one more example. So we have this boy and we went to put them in a frosty mountain background, like he's jumping up at this rocket and a dream. So we have this. Let's go ahead and isolate our subject. We can do select subject of that simple if they have hair and complex things to select, Let's do select and mask. Do a Select Subject. We don't have a lot of hair to refines. I'm just going to click Okay? So we have our objects selected, isolated. We're going to copy, paste them right into this background, going to put them down like he's jumping into the sky. So right now you can tell these two photos are totally different, not taken with the same lighting and time of day and everything. So let's see what neuro filters does to this. I'm just gonna do a quick sharpen. I like to go to filter and just sharpen. Since this is such a sharp background, wanna make sure my boy is also sharp as well. So now let's go up to Filter. Do our neural filter, and let's check out harmonization. And we've got to make sure we select our background layer and go down. I wanna do full strength. You'll have to do full strength, but just want to have a dramatic change. And there it is, there it is. And you can also add a little brightness if you feel like he's too dark, at a little brightness, you can take away saturation if you want to kind of take away the skin tone against that snowy background. And this is what can be different. So down here it says Output. What we did last time was it created a new layer, totally separate layer. This time, we can make it a smart filter and click on Smart Filter. And it'll be just like an adjustment layer right here. So it's underneath, it's kinda nested in our main layer. And what's neat about this is I can toggle that off and on. So that's before. That's after. And what's great about that as it can easily delete it, disable it, and it's still within the layer. I could do a couple of different ones to and figure out which, which kind of effect. I like a little bit more, but he looks like he belongs a little bit more in the photo. It looks like the sun is behind him. So it kinda casts a little bit more shadow than I would like on his face. But that's just this photo. You can bring in a different photo that has the sun more facing toward the subject. And you can get all sorts of different variations and different backgrounds and just a few clicks. There are also several other Neural Filters. A new one is color transfer, which allows you to take the color kind of filters. It works a lot like an Instagram filter where it takes some of the color characteristics of a chosen photo or a custom one and adapts it to the image. So just kinda cycling through some of these. Let's say we have a sunset, it'll kinda almost apply a filter to it. This is a little bit different than the harmonization, because on Harmonization it required a subject matter to be cut out and brought into a photo and that be adapted. This is just bringing a photo in and having that one photo kind of be adapted to a specific color space. So let's click on this yellow. You can click on preserve luminance, which you'll try to preserve the original highlights and shadows. But there's definitely some others to check out if you have some time, super zoom is really neat. If you have a low resolution image when you zoom in, you can use super zoom and it will sharpen the image and it makes up for lower resolution images. So it will take, make it pixelated and it'll make it really smooth. It'll just kinda use an algorithm to be able to patch up those rough pixels. If you ever heard of upscaling before. This is basically kind of a crude version of upscaling hold Super Zoom that was added last year, but it's definitely something to check out. All of these require lots of hard drive space and processing power. So don't get frustrated if it happens to fail and you have to restart, It's still a little bit on the buggy side. A lot of this is still in beta right now as I'm talking. So hopefully they'll improve it over time and make these newer filters game changers. So those are the updates that I wanted to talk about for Photoshop 2020 too.
76. PROJECT! RomanceBookCover Lesson1 DiscoveringYourConcept: Welcome to Adobe Photo Shop, where we're gonna create this book cover. You see right here the Garden of Secrets, which is really a romance novel. And the reason for this is I want you to get used to doing different project types because you're never gonna get a signed or have a client project or client work. That's gonna be the same each time. They're always gonna request a totally different style. And as a designer, you need to be prepared for any type of style they request. We're going to start off with this one. First, we're gonna do our romance novel. It's gonna actually be almost entirely in photo shop is gonna be a lot of photo editing and manipulation with this one, and we're gonna learn a lot of tricks and tools along the way. First things first, we need to go ahead and find the right size for our romance novel, and I'm gonna go ahead and post and the Resource Guide, which you should have been able to download in the first lesson of the course. Just in case you have that, we'll have links to everything we're using throughout the course in terms of photos, But there's a really great block article that I'm gonna be able to post and has some standard book sizes. Of course, this is for the United States. So if you're in Europe, that might be a little bit different. You might have to google this, but the standard novella kind of romance novel size is five by eight. So that's exactly what we're gonna do as our test size. Of course, the publisher you work with will supply you with the final sizing where the client will supply you with the final sizing in a real project. So for this, we're going to five by age. So we're just gonna open up a new document and do a simple five by eight size. We're gonna switch this down two inches. Since that, sizes and inches, we could do five by eight. We're gonna do a vertical orientation or portrait size, and we're going to make sure we're at 300 resolution. That's incredibly appoint important. Don't do 72. That's for digital Stuff. 300 is for print. We want to keep that at 300 or higher and let's go ahead. Go to color mode. We're gonna have this in CM like a color mode, since it's going to be printed professionally. We always want to have it in C n y Que and RGB will be great for digital, So white background with his keep it white. We have some advanced options that is totally fine. That's a great profile to use, and we're off to the races. So here's our basic size. We need to go and hunt down a photo for our romance novel, which will be about the secret garden. Ah, so we need to find garden photos, flower photos and a lot of times when I'm looking for photos, I like to feature peop people. But sometimes when a character is not the main function of a book cover, you kind of want to find a photo that could be a little bit enticing. And so when it comes to book cover designs, the concept is everything. So you really want to take some time to think about a strong concept, because when you look at a book cover, what draws people in is the photo and how you have chosen the photo and the people that are in it and these front cover images are chosen with a large amount of intentionality. There's a reason behind these photo choices, and it's all about a strong concept that will draw the viewer into reading your book. And there's hence about the book. You got to really know the book, read the book, or at least ask the client what is inside the book to kind of get to know the characters. What's the unique story here? How can I bring that to the front without giving away any really good hints that that the author doesn't want to give away? So I'm going to show you lots of different examples. I went to my local bookstore and I took photos of what I thought were really strong covers that really drew me in from among all the other covers. And here's an example. The ungrateful refugee I love how we're gonna be doing this in this project. I love how this photo interacts with the typography. It looks very strong. Um, and I'm also able to clearly read the type, and I'm very interested in why the roots of this flowers exposed. That's very unique and interesting. Ah, the ungrateful refugee so I just kind of wonder what that means. And I want to kind of read a little bit more. It seems intriguing. Ah, this photo photos can be bright and colorful, so the limitless mind learned lead and live without barriers. So this is kind of talking about how how much you could expand your knowledge and how you know how your mind is more powerful than you think. And think of this huge thing exploding of color in how you think about creativity with this huge explosion of color. So this absolutely drew me and I love the colors used here. I love the simple typography. It's nice and clean. There's wonderful type hierarchy. So you have this nice, bold headline. You have the sub line and then you have a very clear author name. And when it comes to author names, we'll get to that in a little bit. It needs to be pretty prominent. That's the big part of the book, is who the author is. So here's another one that uses a little bit of some illustration. It's not just a photo they kind of hand drew. Some of these little twine are I guess, you would call them something that makes this parade and see how it goes through the and behind the age. It just seems like it's really interacting with the typography. And it's nice, simple and clean. And we're gonna do that in our third book cover. We're going to be illustrating a little bit to kind of emulate something very similar to this, and there's all sorts of effects you can apply to book covers. This is a bevel effect, so kind of devils out you can actually feel it with your finger. When you run your hand across the book, you could feel the texture of the bevel, and this also has a little bit of gold foil stamping on it. So it has a shine to it, so it actually shines the ink itself. Ah, so that's something we're gonna probably apply to one of our books. Maybe our romance novel can have some gold bevel typography that also has a tactile feeling to it. And it has this gold gold foil stamping. This is also had this object was separated, an illustrator or whoever you know, whatever program they used to illustrate this book or put this book cover together. This was done as a separate layer and carved out cause you could tell there's a bevel effect, and so you need to isolate that layer. So the printer knows where to apply all these Bev ALS. And so we'll get to that a little bit later, and this one uses illustration as well on. I thought this was really interesting. You have this woman, you have a building there, kind of setting the scene for the book itself with the cover. So they're kind of knowing that she lives in the building. She's introspective, She's sad. She's thinking about something, you know, there's something not quite right with her. She's kind of doesn't seem super happy. So you're kind of setting up the novel here, and I like how they did that with this really clean look. It's not super detailed. Is this a nice illustration? And once again, that gold foil stamping has applied here on these little lines. All these little lines that wrap around this type has his gold shine actually has a gold foil stamping to it, and it really stands out at the bookstore when you see all these flat designs And then you see something shining from the light lights above, and the story kind of see that gold shining. This has a really nice effect. These effects are expensive, so it's going to depend on how much you could spend when you do your book cover. But they do add a lot to the costs. They just have to think about that. All these little extra Bev ALS and M bossing and all these little effects do cost money. I thought this was interesting. The high of mind. You actually kind of have this busy repeat pattern going on, but it adds a lot because think about the hive mind. It's there's a lot going on in the mind. So they're kind of communicating a sense of dizziness, but also a sense of order. So busy nous with a sense of order. They really had a strong concept here. They're really kind of explaining with the books about with their use of illustration here . And here's the use of photo. So we haven't seen a lot that use just pure photos. This one. Once again, this is a big theme. Is the type of our the title of the book Interacting with the type are with the photo. So the photo and type or kind of weaving in and out You see how her face is kind of covering over the A and it's interacting in this wonderful layer format. It doesn't interfere with me reading the book title Girls With Sharp Sticks. I have no problem reading it, even though part of the letters are covered. So that's important. You have a very strong author name here that's a different color than the title. So there's contrast there. They don't all blend together. And this one was kind of my inspiration for the second health care book that we're gonna be doing together with a pill. But I like the way they use photography. They used flat lay photography, which is top down photography, so they have cut of the the the table here as kind of what you're looking at. And then the pills scattered about. Once again, you're seeing that same theme of the photo overtaking the type and looking like they're one thing. And I thought this was a wonderful use of custom made typography. They didn't use a computerized font choice. They actually hand drew some illustrations and brought that in and digitized it to be able to put on the book. I thought this was a wonderful, custom raw kind of type that looks really good and really custom and hand drawn. And I really like this one. So this is a simple, you know, photo. This is kind of a very traditional, tenable cover, you know? So you have kind of your type. Here you have this extra big sky, which, of course, they probably photoshopped a little bit of that, cause photography almost never goes that wide. So just like a little photo shop here to get that to extend out. Ah, but wonderful type usage. Here. You have a nice title. You have kind of the best seller in a different color out here. See how that contracts works. Really nice. Have a nice, big, um, author name here that goes right here in this nice space. I think overall, this this works dicey have this character here, but they're not so big that it's interfering with e the name. And lastly, this one disappearing earth. I thought this was neat because it kind of had this entire photo that took over the book cover and he had these little characters here. They're just small enough for you to wonder who they are, what they're doing. Why are they in this big mountain? What's happening here? I'm intrigued. So brain maker, this is a clever kind of approach. So you're taking what looks like a brain shaped but getting this broccoli and shaping it up , And they either took a photo of this or they took a real broccoli, ended some photo shop work where I'm not quite sure which way they did it. It looks like a real photo, but you could do a lot in Photoshopped to make that look like the shape of a brain. But I thought this was a very clever, simple way to do it. They have this nice white typeface over the photo, which contrasts against all the black type elsewhere. And I thought this was another kind of clever approach. So the man who couldn't stop well, they repeated over and over and over the man who couldn't stop the man. So it kind of talks about the whole book with how they did their typography. And I thought this was very clever. And since it repeats itself, it sure stuck out to me and that sharp yellow highlighter color. I had to grab this book and and see what it was about. So it's talks about O C D. Which is, uh, you know, kind of you repeat things over and over and they repeated that on the book. Super duper thoughtful. This was a very thoughtful book cover, and I thought this was great. Um, kind of a design system or when you have multiple books, toe have a similar theme. So I can tell these belong together in the same Siri's. But yet they're different because of the different color usage. But I thought this was great to show you what a design system looks like, Which is how you apply things. Two different versions or different books. Ah, but have the same system. So it looks like they belong together. They look branded, they look thematic, and this is just a highly illustrative one. And this is for those who really love to illustrate. I have a lot of students who are very talented and illustration. I personally am not. I'm not illustrator. I probably hire someone to work with me to create a book quite like this, but I think this was this really good and just kind of showing off some of those high, highly illustrated options he could do for books. So this is another really good example of how to use photography and book cover design and how to interlaced the headline with it as well. So I like how they use the book spines, and they were able to stack the entire title and even the author within the books. I thought it was a really clever way to mix that headline or title and photography. I thought this was really neat because of the simplicity of it. It's not complex, and it's a very simple illustration and illustration. You could probably even do with Vector or an adobe illustrator. You don't have to have to be this amazing illustrator to do something like this. This is very simple shapes. You can totally do this. You have all the tools and skills to do an illustrated cover like this, even if you don't feel like you're an illustrator. I thought the use of texture here was brilliant. Um, it's just this very strong intriguing texture. And it goes, Ah, Tana French faithful place. So just there's something about this texture and the color that really drew me into this this book. It was kind of sitting along other books that were just all white. And to have this colored subtle background texture, it definitely made me want to pick it up and kind of touch it and flip it over and read more about it. So there we go. That's kind of my little dive into book covers and kind of what to think about. When you're thinking about the concepts, we're gonna be thinking about a concept for our 1st 1 So now that we're able to see great ideas from riel examples, I thought we die right into our first book right now.
77. RomanceBookCover Lesson2 CoverIdea: so the title for a book cover is the Garden of Secrets. So when you're talking about the Garden of Secrets, you're talking about secrecy. There's lots of things going on between couples. It's kind of this romance type novel that's based in maybe the 19th century. So a little bit in the past, when people really have these big gardens and big homes. So you want to do this big kind of grand garden. So I thought about doing a wide shot where you got to see in a big garden out there. But I thought, you know, that's been done before. This is about secrets. It's about getting close to somebody's ear and whispering. So I thought, What if we did this really close, intimate shot of some flowers in a garden? And then we darkened everything around it to look like you know it's night time, and it's worth telling secrets. So trying to play with the theme of the book with the photo itself. So that's what we're That's how kind of I came up with this concept. So I found this photo. You can have a link to it. It's frump exel's dot com. I get a lot of my photos there. But please, if you can't find this one or it gets taken off remove. Sometimes that happens. But it's there right now. Please feel free to use a very similar photo to work alongside me. And when you do your own book cover, definitely, you know, do something different. Find a different photo to work with. But if you want to go step by, step with me, feel free to get this photo. So have this photo. So what we're gonna do and I have our, um, size the size that we went ahead and set up. I'm gonna go and take this and drag it in. It's gonna already be zoomed in quite a bit because this is a pretty high resolution photo . So now it's all about cropping. So I'm gonna zoom out, try to find what I think is the right cropping for this. What I thought would be really neat is to put the title just like we saw with all those examples having the title interact with a photo. So maybe having a little bit of the flower petals going over the words kind of like a secret were hiding something. So I thought if we hit a few of the letters, that might further make our concept stronger. So I'd like to maybe position this where I can put the title somewhere up here in the top half and have it be covered by one of the flowers. So I'm just kind of trying to get the right cropping here. And we're gonna be using the brush tool to dark in a lot of this photo because right now it's a little too bright. There's a lot going on here. I settled for this kind of cropping of a photo because I thought this could be a great it's right there in the middle. We could put the title, maybe sandwich somewhere right around here. It can kind of go behind this flower and maybe go a little bit behind this flower. And then we can have plenty of nice open space to put the author where Newton good need to put the author somewhere. So one thing we can do is go ahead and add our headline in so we can know how best toe kind of put the photo and headline together. We're just gonna get the type tool right down here and get our type tool. We're gonna type in the and I'm gonna go over to character. And I'm just making sure all caps are turned off. That was on from another project. So the just couldn't duplicate the layer and then just type in all our whole title all on separate text boxes. All right, so here's our main title. Now. We need to kind of work this in to where we need to have it. Go ahead and make these a little bit larger and the end of our not very important words. So we're naturally gonna make those smaller. So now that gives us a chance to make our main title words a little bit bigger. And now let's go ahead and find some really good fought choices. And then we can start to figure out how to make these interact with the photo. So terms of font choices We have a very feminine romance novel. 19th century. So it's back in the 18 hundreds, you know, let's do kind of a traditional typeface, and serif typefaces tend to be very traditional, so let's see what we can do when finding one. So let's see what we have here with type. Gonna go ahead and maybe ship. This oversight can come see the live type loading. So let's see, We have a couple of sand, Sarah. See, this would just be you know, that's not a horrible choice, but it's almost two sixties. Ah, little bit to mid century for 20th century. Um, this kind of has a sixties looks. We gotta be very careful. It's go super duper traditional with our font choices. You know, we have this, but that's kind of more of the twenties. So it's great to kind of know the history of type and kind of No, you know what style was in? This is the block kind of, um, slabs era kind of Sarah. And that was really popular, like the twenties and the thirties. So that would be a little bit after the time of this book. You push that. That would look way to modern, right? That doesn't That doesn't work. I think there's one I already have in mind, which is a brill fat face. So if you can't find it, uh, foreigners type it in here. You kind of know the name. There it is. Ah, Brill. Fat face regular. I thought this was a wonderful type choice because it's thick, you know. So as we saw with all those examples of book covers, a lot of the type was thick, so it can be easily seen on the bookshelf. So it's nice, thick and chunky, and it's got these little details that are very nice and very traditional yet chalky. So what I want to do is I want to close the spacing a little bit between, uh, the lettering. So it's gonna go like this anytime I want to do any kind of edits to typography. I want to go down here to my character panel, and I'm gonna make sure I change the item right here. It looks like it was set to 25. Let's go and set it to negative 10. I think that looks a little bit better, just a little bit tighter together. It's not touching, but it's tight enough to make him feel more together. So what I'm gonna do is I'm gonna go ahead and elite secrets. This will be easier to just duplicate this type, and I'm holding down option instead of having to go up here and duplicate the layer, he's a little short cut. I'm gonna hold down the option key and it selected hold down the option key and drag down. And I could go ahead and duplicate my layer. I could do that really quickly. Do do do just like that and I'm gonna go ahead and do secret. So now I don't have to change the type for the spacing on this one. So great. I feel happy with kind of how this is looking, but this type needs to change. So we have this kind of Sarah tight face. This is gonna be a little bit of fought pairing. So let's do a different, more traditional script font to kind of get that nice 19th century 18 hundreds kind of look to it. So let's find a nice script typeface. Let's see what we confined here. So we have this one, which is very, very traditional. No, that would be definitely time, period focus and actually really like that Quite a bit. So that's an option. This is a ah adorn palm ender. Sure, I know how to pronounce that. Always an option. This artifact is when I've used in the past. This is more of a casual script, which could be good if this is all secret stuff. We're writing things very fast, right? Were writing letters fast. This is not something we have time to do. This is things were secrets and things we got to do quickly. Let's do a nice casual script, so let's stick with this one. I speak a little bit smaller, and you noticed how the is kind of parked nicely in this little natural space here. I thought that was kind of interesting. So let's do that with this one artifact and with script type, you want to make sure the leading are the spacing here, the not the letting. The tracking is set to zero with all script type. You don't want to add spacing with script tight. It's not. Not a good idea, because it looks like the characters are not joined together with one swoop with that a little bit bigger, so great in terms of size. Let's go ahead and zoom out here and kind of get an idea of size. So this is a really small book cover title from a distance. I'm not gonna be able to see that. So let's see if we can't make this a bit bigger and put it right about here. Of course we're gonna have author name. Let's go ahead and duplicate that. I'm holding down option dragging and we're gonna do the author name will just do me for now . Although I did not write the book, but I did do the book cover. Put that down below. All right, so now let's find ways to have this book interact with the photo. So right now, we need to kind of isolate some of these objects when you take a couple of these flowers and I select the objects and pasted on top so that we can kind of hide these we canoes layering mass to do some of this work. But I thought it might be easier to just go ahead and cut out a layer on top and put it on top of the words. So that's what we're gonna do. We have the main photo here, and I'm just gonna hide the type so I could just see the flower. What we're gonna do is we're gonna select and isolate this one flour and paste it on top of a new layer that's gonna be on top of the type players. Let's go ahead and select. Let's see, with a couple ways we could do this. I always like to try the magnetic lasso tool first, cause I do find that a little bit easier for selecting, especially since there's a lot of contrast between the red and the green background. So the magnetic lasso tool is a great candidate when you have, um, colors that are so different that you're selecting said Look how easy this is to select. This is very, very easy, and we can select, um, some of the leaves as well. But I'm just going to the flower for now and join it. And let's a little mistake here is gonna do the subtract, which is right up here, subtract from selection, and I'm just subtracting that little bit right there. And I guess I could go back to add appear up top and I'm gonna hold down shift. You know, so little plus sign. I'm just adding to my selection just like that. Okay, so we have a rough cut out one that I think would just hide the text. Really? Good. So what I'm gonna do is I'm gonna copy it, copy my selection, and I'm going to do paste special paste in place so it's gonna paste it in the exact spot that I copied it from just like that. So now we have our new flower layer that's gonna be here. Okay, let's call it on top Flower. Okay, We're gonna drag this above our text layers, so it's gonna be on top of our tax text. All right, let's cut out the next one. I thought this flower would be really nice flower to cover up the G and garden. Just take the polygon lasso tool. Just make sure I add the selection all the way to the edge. And I think that's a pretty good selection. For now, it's gonna copy. Go back to my layer copy and paste, and let's go ahead and do a paste in place. And there's actually a little keyboard shortcut that you could always memorize to do that as well. Drag that on the top and this will be on top flower, too. Great. So let's go ahead and bring in our type again, Just making there's all visible and let's find ways that already looks really good. How it's set. Let's find ways to tuck the letters so they're still readable. So we don't want to do that. We want to make sure that all the letters air readable find a way. I'm gonna try to see if I can get that f the tale of the f to tuck in between that nice space here just thinking of ways like if I do that, that doesn't seem like a puzzle piece being put together nicely. But that does kind of using that space. Just look for this old spaces when you're working with typography. I like the way that s is covered, and I like the way the bottom of secrets is covered. But it's not enough for me. I met. Still think it's readable? I think secrets is still readable. Maybe we can bring everything up. Just a hair, just a hair sickness. Kind of see a little bit more than he. So there it is, the garden, the secrets. I feel like a The garden is hiding something. That's the whole point of this concept, so I like the colors, but the photo needs a lot of work, and we want to make sure it looks like nighttime and secret. So we wouldn't really want to darken some of the rest of the photo and keep these two flowers really brightened, vibrant and everything else a little darkened. So you really focus on the title and you focus on the flowers. So what we're gonna do is we're gonna add a new layer, and this layer is gonna be right after the type. Or let's do it right before the type because we don't want toe dark in any of these flowers of the type. So let's do it right here. A new layer above our base background photo. We're just gonna call this black dark. Whatever you wanna call it, we're gonna grab our brush tool, which is gonna be right here. You get to get a simple brush. We're gonna go up and make it a nice, soft round brush, so it's gonna be feathered. It's gonna be We don't want a hard round brushing with a soft, round brush and let's make it rather big. It's gonna be pretty big. Let's keep making it bigger. Maybe not quite that big, maybe 1000 pixels and see how that looks
78. RomanceBookCover Lesson3 PhotoEditing: and we're gonna make this brush black just about as black as you can get gonna make it plaque. And we're going to just start to slowly, dark and everything. And right now, let's go up to a pass ity for a brush. If we did, 100% would be quite dramatic, but you could see the effect we're trying to go for really trying to focus on the title. But I still want you to see the rest of the photo. So what I might do is reduce the not the flow. I'm over the flow. Ah, the opacity. We're gonna want to reduce the opacity so that we can go back through a brush and still show hints of everything else. Let's go ahead and zoom out. Let's start to kind of dark in this. And of course you gets trial on air. So as you see it, you may want increase the the opacity of it, and it could always go back through and do it again. And it will continue to darken it in order to keep those two flowers the same. And you could even take your brush. Let's go ahead and go back and make it smaller so it can do kind of some smaller darkening might even increase the opacity a little bit more. I don't want to take completely away the background, so I'm just changing my brush size and changing the opacity to kind of get a nice blended effect. And of course, you can always sense this is its own layer. You can always toggle it on and off and start over if you're not happy, or you can take the eraser tool and do the same thing we just did with painting. But you could do it with erasing. So I have a soft round brush. If I want to go back and say, Well, I overdid it there, I could just take my eraser tool and bring back certain objects. So between the brush tool in the eraser tool, I kind of find it ways to kind of dark, dark in certain areas. But this is gonna look a lot better once we kind of edit the photo. We can always go back. We have our separate layer here. We could go back and erase certain points to make it look a little better. So what we need to do is we need to do some serious photo editing. I think these flowers in the photo look a little dull, so let's really add vibrant reds and deep greens into this. Make it look like a lush garden. So we're going to do just that. We're gonna go ahead, and I'm just selecting these top two layers. Let's do this first. I want to maybe sharpen them a little bit. So I'm just gonna go up in Sharpen is going down the filter sharpen, and I just like to do a little sharpening on a lot of photos, especially they look a little blurry, so I'm just gonna go back and sharpen those two. And let's also select both of these and go. We're going to several adjustments and let's see what we could do here for hue and saturation. Be at a little bit more saturation. Let's also do contrast. So what we're doing is we're in brightness contrast, having a little more contrast bringing that flower out and let's go to color balance. I want to add more vibrant red there, some in mid tones, under seeing what I can do here, bring out the shadows of the red, maybe the highlights. You see if I could do the same thing with the other one, so those are already looking a little bit better. So let's do the overall background photo the same thing. We'll see if we could go back. We have our item here. Let's see if we can't do some color balance. I kind of see what would look a little more vibrant. Adding A little blue kind of helped his trial and error. I mean, after a while, you kind of get used to what works. What doesn't work? The adding a little blue kind of added a lot of deep richness, toothy home, the green there go to shadow and highlights. And this will add a huge impact to how it looks. By decreasing the tone, The radius see, adding mid tones really brought out a lot of that color. So after doing some color adjustments, this is one thing we probably need to talk about. So I was an RG bar. I'm and see and white came out when doing this, and you do have limitations and photo shop with your photo editing when you're and seem like a color mode, which is great for printing. And that's what we want to end up exporting our file as. But sometimes when you're working with photo manipulations and book covers like this, you really want to have the most vibrant colors available and see him like a limits you to some of that eso, as you could see when I go up to adjustments. I have several of these things great out exposure vibrance black and white. And that's because we are in seeing why came out. So if you ever see those options great out and you really want to use those options, you cannot and see him like a So one thing I like to do is just temporarily switched this toe rgb to do kind of the photo work. And then at the very end, we're gonna make sure we export and convert it to seem like a and hopefully the colors don't shift too much, and we're gonna be happy with it. So let's go ahead and go to image RGB mode. When we go and do that against you could see that I could go to image mode and we're switching the mode. We could also do grayscale fee Want to rgb And this could ask you bunch of questions and just say, Don't flatten because that will flatten it all into one image. We don't want that. So everything has been converted back to RGB and we're gonna eventually make sure we export as seeing why can The only reason we're doing this is we really wanna have Max control over color correction and editing, and then eventually we will export as it seemed like a for printing because they're gonna need it in that mood. So now we're gonna have a little bit more options when editing our photo. I'm actually gonna toggle off our little blackened, dark areas, so I can kinda see how the photos were gonna be affected when I do the adjustments. So here, let's try this again. Let's go ahead and select the big background photo, and now we have exposure available, which is very helpful and really bringing out some of this color. So let's see if we get a decreased exposure. Increase it. Well, let's maybe reduce offset. Look at that. So, when I reduced the offset look at how all those rich colors the dark shadow colors really come out Gamma. I like that. Look how much shiny I'm gonna go back. This is how it waas and let's go ahead and see what it was after. So just a little bit more contrast there. Let's also do vibrance. We can also add a little vibrance, which is kind of like saturation. It's a little bit different than saturation, but it acts a little bit the same. So if I reduce the vibrance and then increase the vibrance, you could see how the how dramatic that effect can be. Course increasing saturation will add that rich red to it. And I'm gonna do the same thing that we just did for these individual flowers. So I'm gonna decrease that offset. Notice that Look at that. Look at that dramatic contrast there that's been developed. Because of that, we don't want to over saturate because then it starts to look all one color. We want to keep this highlights and shadows together, so we're not gonna do saturation on that one. Wow, what a difference. What a difference. What I'd like to do is make these leaves mawr. They look a little more meant. I'd like to make him kind of more green grass kind of color. We'll see what we could do here. There's something called selective color, which could be very helpful for drawing just specific colors out. So we're gonna go to adjustment. Selective color and, of course, is this will select all the reds in the photo, and it'll add at all these different ink colors to it. So with the Reds, we can, ah, increase blue or reduce it. You know, we can go through each color and see the effect, and it could be quite dramatic kind of what you could pull out. So we want to pull out either yellows or greens. We gotta figure out what color that is. It's not exactly green, so it could be the yellows or greens where we're gonna be able to affect it. So let's try Green, trying to see the effect you're not going to know until you try. And then another thing we could do is a lot of times. There's a lot of whites and grays and photos. They may look alike. Color. They may look like color, but there's a lot of neutrals. Let's try the neutrals and see, though, there it is. Okay, so we found. So there's actually a lot of gray and those leaves. So what we're gonna do is we're taking all the greys. We're gonna add a little bit of Scion. Look at that. Look at the difference. Oh, that is so much better. Oh, that's even better. You know, when we don't want to have blue right here. So let's produce that. See all that vibrant green that's coming out? Yes, that's what I want. And it's not affecting the red flowers because we're just selecting the gray and there's not a lot of gray in the flowers. So let's do the same thing for blacks. So it could even make make our photo overall little Darfur that way. Notice how just a little bit of change makes such a big difference of this photo. They're gonna go and click and Okay, so that was after that's before. So look how dull there was a lot of gray and those leaves and look at that much, much better. I feel very happy with that. We'll go back and add our little dark effect, and I may need to kind of tweak that quite a bit. Um, I actually might redo that to make it a little more fresh. So now what we need to do is one more thing. In terms of photo editing, we need to bring out pops of highlights and shadows. And what we're gonna do is we're gonna use our dodge and burn tools. Next. We're gonna do that in the next lesson.
79. RomanceBookCover Lesson4 Non DestructiveEditing: and so the Dodge and burn tools so we can use the Dodge and burn tools directly on our photo. But they call this what's called destructive editing. So if I were to add a little highlights on to the actual background photo and at highlights , that looks great. But I'm stuck. If I ever want to go back and I'm further it down on the project, I can't go back and change it. So we're gonna do something called nondestructive editing. And if you already know how to do this Great, go ahead and skip the next three minutes we're gonna do nondestructive edit where we're going to create a new layer on top, and we're gonna do all our dodge and burn on that layer so we don't actually destroy this photo layer. We're just doing a layer on top. So what we're gonna do is we're gonna create a new layer that will go above the photo. We want to add the highlights and shadows, too. We're gonna call this dodge and burn. It could be a dodge and burn layer. And here's the trick. You just have to memorize this. You're gonna go up. We're gonna fill it with a 50% gray, and you're gonna understand kind of what's gonna happen in a little bit. So we're gonna go up to edit, go down to this little option that says Phil, and where there's gonna be a selection and the contents, it's gonna be called 50% gray, and it's gonna add a 50% gray over the whole layer. You're just gonna click on OK, and there's our 50% gray. Let's go ahead. Bring this over the flowers as well, cause I think I want to edit the flowers as well. So now that it's the top layer dodge and burn, so that doesn't make sense. How is that gonna help me? What we need to do is we need to change the blending mode on this layer, and we'll talk about blending modes a lot later on. But blending modes could be accessed in your layers panel, and here's all the different blending modes is gonna let certain light in certain pixels through. So we're gonna do the overlay and you're just gonna have toe memorize this. They can pause this rewind. It kind of go through this process a few times So he made a 50% Phil layer, and then we went to the overlay blending mode, which is right here in your layers panel, and now you don't see any effect. So what this does is now I'm able to do dot We're not going to do the Dutch and burn tools . We could do something a little different to get the same effect. We're actually gonna use the traditional brush tools. And right now we have pure black selected not gonna show you, kind of what's gonna happen to do 100% opacity. So you could see. So this is the dodge and burn. I'm on the Dodge and burn layer. I'm brushing on with the brush tool black, and I'm gonna be able to add shadows using black, just like it have the same effect as dodge and burn now. But what's great about this is let's actually do highlight. So I'm switching this to pure white. So white is highlights, and black is shadows. So now I'm painting with white, and it's gonna add highlights just like it would with the Dodge tool. So I'm able to add this, but what's great? Let's say I overdo it. Woops accident. Now I can toggle this layer off and I still have my original photo layer untouched. So this is called nondestructive editing. Because you're not destroying any of the photo on top. You're just adding a new layer in editing the photo that way through a layer on top. So let me go ahead and kind of go back in time. Here is cold in command Z and going back in history. And let's take it serious. Let's do some highlights. But let's maybe reduce the opacity and kind of produced the brush size. Now we're gonna pay, not a little. Bring out little highlights here. It's really gonna make the photo pop. So it is bringing out these highlights and you gotta always either have your history panel ready or your command z go back and go back. One step ready, cause sometimes you'll overdo it and the U S Do command z and you just go back and try again. And once again, you know, make sure you mess with capacity. I was bringing out highlights of certain leaves that I want to bring attention to and also flip this to black if you want to add shadows. So this will be just like using the Dodge Tool. If I want to add shadows to anything and then any time. If I'm not happy, I can toggle it off or can use the eraser tool race. It's just over much better, more efficient way, toe toe ad highlights and shadows and use the Dodge and burn. Not actually using the Dodgers burn tool, but you're getting the same effect by using the brush tool and having this 50% gray layer. So make sure you save your document. We haven't even saved it in the last 30 minutes. So definitely save it, cause Photoshopped crashes even on the best of computers. Just a little reminder to me that So I went ahead and added another just paint brush tool was paid in black over certain areas. Added that back in I'm feeling kind of happy with how things are looking. You could see how the photo looked like before, and you could see kind of some of the edits that we made to it. So now we're gonna do, like, little fine tune, little small stuff that's really gonna help. So now this is on another layer. A little flower here, and you may need this dodge and burn layer you may need. Teoh, go ahead and lock that. So you wanna lock this dodge and burn layer so that we don't accidentally touch it? So we're gonna lock that Susan the lock so that doesn't get accidentally selected. We're trying to do all this work, So I'm gonna take this floating flower here. We're gonna add a little drop shadow to it to add a little bit of pop and dimension to our photo. So it's gonna go down the drop shadow. We're gonna increase the opacity quite a bit. We're gonna increase the distance. We also want increase the angle. So look how it's casting a do a nice distance. It's casting south. We want to cast up here on the type so it's gonna go down here to the angle, go all the way down to do the opposite of where the angle is. So the shadows air to be now cast up top. So now let's size. Let's increases basically size feathers. So we're gonna feather that. We're gonna reduce the distance and reduce the opacity. So it just adds a little bit of shadowing to the type, so it looks like the flower is on top of secrets. It gives a little more dimension, just kind of adjusting certain layers quick. Okay, we're gonna do the same thing to the second flower, do a little drop shadow. And it remembered all the settings from previous. So that looks great. So once again, adding a little dimension, a little pop, let's add even more dimension to our type. So right now we have flat type. There's no bevel and bossing. There's nothing fancy going on here. I think with a very traditional book, we can get away with more traditional treatments, maybe some golds and beveling, some fancy type. So we're gonna work with layering styles next, or layer styles and layer styles could be super powerful if you know how to use the tools effectively. So we're gonna start with garden. We're gonna go ahead to get layer styles. We're gonna double click this little extra area to the right of garden stubble. Click it. We have our layer styles panel here, and you're gonna be able to see all the dramatic effects we can apply. So what we want to do is we won at a little bit of the devil to it. So go to click on bevel on the boss. So what we're gonna do is we're gonna changes technique from smooth to chisel hard. We're gonna have chisel hard, and that's going to make a big difference. So once again reduced that soften and increase the size, it couldn't see how it kind of adds a really cool effect here. So let's increase that to 40. And that looks fantastic. Let's do 700 the very traditional looking and almost looks three d in some ways. So we're gonna go ahead and we need to kind of adjust the color cause it's a little dark right now, I'm going to shading and I'm not gonna change any of these settings. But I'm just gonna change this white highlight. Its gonna change it to like a gold and also just kind of let you know these settings or something called Gloss Contour. And right now, this is kind of a straight traditional contour. You could actually change this. It'll actually have quite a big effect on how the lighting kind of hits the bevel. So it's really about lighting and kind of how it how It's kind of reacting. So there could be one here that you like more than another. So there's where it waas and this kind of has a little. I think this has better lighting. I think you know, just just kind of go cycle through these. Find out which one you think would have the best lighting. So it's between that and that. I think that could have better lighting. We'll see. You could change the opacity on that as well. So that's bevel in. Ah, Boss, kind of look at these settings. If you wanna replicate those settings, you could take a screenshot. But we're gonna go down to a couple things another way we could change. Color is going to Grady in overlay, and we can add kind of a golden Grady into this to give it more dynamic color. So we're gonna take kind of this is a default radiant. You can load your Grady INTs by default. There's on the tax medals won, So I'm just going over to this hole settings icon and calling up our medals. I think that's the same thing, so I could take this orange kind of color and I'm gonna double click this Grady int and we're gonna be changing this. I don't like this yellow. I kind of like more of a dull gold. So I'm just gonna make some changes to some of these colors. All right, so it kind of tweak the grainy it and made it lowliest, less yellow. And I'm still not happy with how this color is coming to fruition. So let's go back to our bevel in, Boss and let's take a look at our highlight mode and shadow. Let's changes back Toe White. I think I needed to change the Shadow Boat instead. So we're gonna click on Shadow, and I'm just gonna be putting in kind of a gold color and that helps quite a bit. So I'm gonna continue to mess with this little section to see who can get the right color. Increasing that shadow tends to really help quite a bit, so that will add kind of that white highlight to see that added more of the white highlights. And when I reduced the shadow, it reduces the shadows. So let's continue to tweet this. Okay, let's add a little bit of drop shadows. So we're just going to drop shadow and we're gonna just increase the distance. Or maybe feather it out, which is the size and increasing capacity. So I'm happy with that. So let's go ahead and click on, OK, And let's say I want to save that layering style S o. I don't wanna have toe do that over and over to secrets. I have to do the same. I want to do the same thing to secrets. I'm gonna double click this again. Call out, are layering style, and we're gonna save it. See this whole thing called New Style where you click on new style, we're gonna title it gold type. We're gonna include layering effects. Uh, don't have to do blending modes because we didn't use any and add to my current library click. OK, so now how do I call this up? So I'm gonna go down the secrets and I'm gonna apply everything we just did with our little style we saved. So there's something called styles. There's a style panel and he could go up to a window and find it that way, or I already haven't pulled up right here. So we're gonna go ahead and recall the one we just saved, which is right here. And look how quickly I was able to call that out. So now that we have this nice gold kind of effect, let's do a little something different. So I'm gonna put strokes over here and let's see if we can make this type white because the orange was just there by default. That wasn't really anything we wanted to do intentionally. Let's also do a drop shadow to This is, well, just a little one. And then the same thing with this. Let's make this white. I had a tiny drop shadow to this as well. So here we have it. We're getting pretty close here, So let's zoom out and let's say I want to apply the same effect to my name. I could just go down the styles, click on the gold and voila! I have the drop shadow applied to. I don't have to do anything. I'm already done with that. It's let's do Mountain, get an idea of what we think about the book cover so far. This is kind of what I feel like would be a final, you could do little tweaks. Like we could maybe nudge this up just a little bit. If we didn't want so much of the type covered, we could slide it in and out, just depending on what we think would be a good cover. So there we have it. So that's the front cover. We still actually have a lot to do. We need to do the spine, and we need to see if we could maybe do a back and see how we would export this to a printer if this was a real project.
80. RomanceBookCover Lesson5 SpineBleedExporting: way we need to add a spine. And just like we did with the package design usually go to the left when it comes toe things that are printed and folded around a product. So with the book, it's the same way the cover will be on the right. The spine will be in the middle and the back will be on the left side. So we're gonna expand our, um, art board here. A lot of times I'd like to set this up in Adobe illustrator and worker to be doing this with the next to book covers. But with this one, I'm just gonna stay in photo shopped for getting the file ready because there's gonna be a lot more photo editing we're gonna have to do for the spine. So I'm gonna go ahead and expand the canvas size we're going to image, and this isn't go to expand the canvas size. So here's what we need to think about. How thick is the spine gonna be? This is not something you're gonna know right away. The publisher or whoever is writing the book, they're gonna need to know how many pages there are in here. So This is something that you're not gonna have to come up with. Its gonna be something that they're gonna send you. They're going to say it's gonna be two inches wide is gonna be happened half an inch wide. So we're gonna try to do a one inch maybe a 1.5 inch wide spine. So let's just do the spine and then we'll we'll expand the campus again and then we'll add the back, Um, or we can add them both at the same time. I'm trying to think out. Think through what would be easier to kind of show you. Let's add both of them and at the same time, So right now we have a width of five. So right now, the back would also have a width of five. So to add the back, we would make double it and make it 10 to 5 inches for the front five inches for the back. But we also want to have a 1.5 inch spine. So let's add five, which would be 10. And let's add our spine, which will be another 1.5 at it. So 11.5 we're gonna go ahead and click, OK, What we're gonna do this is where it expands. So if you do appear, it's could expand the canvas. That way we're gonna click over to this right center box because we wanted to expand out that way where the arrow was found the opposite of what you would think. But it's going click on this right box, Click OK, And there we go. We have a spine added, and we have the back have it. So this is gonna be your spine, and we're gonna put a little indication that's gonna indicate where the spine is. You can always open a new document. If let's say I didn't have this nice indication of where the spine waas I could go to new and I can create a 1.5 by 10 inch document. Just give me 1.5 inches and I can add any color. So this is just helps me with sizing. So this is an exact 1.5 inches, so that would probably where my spine is. You could just create a new this a lot easier to do an illustrator setting this up, but we're gonna be in photo shop for this particular book. So I'm going to do 55 is hell. Um Why the back is five inches. So we're just dragging this over, and that would be our back. So there's kind of line up just like that. So that's a pretty thick spine. Probably don't need to have a spine. Why? It is thick, but we're just gonna go ahead and roll with it. All right? So I'm just gonna go ahead and change this so that we know that is the spine changing it different colors. This is how you would send the pdf to the printer course. There could be bleed that will need to be added to, which is very common with book covers. Is adding a little bit of extra around. That'll be trimmed off. You won't even see it. But the preacher needs to have it. Let's go ahead and add that in before we get too deep into this and we're gonna go back into campus size. We're gonna add a little bleak. An illustrator. It's even easier to add, But a photo shop we're just gonna add bleed all around both sides. Let's say we want a traditional 1/8 bleed around all the sides. So what we're gonna do is with you, could actually double that. So instead of 18 it's going to be 1/4 of an inch. And of course, it's a decimal. So instead of 1/4 it doesn't use fractions. Ah, fourth of an inch is 0.25 and decimals. We're gonna be adding 0.25 to this. So instead of 11.5 and wit, we're gonna add 0.75 That's gonna add an eighth of an inch to the left and an eighth of an inch to the right, which is 0.25 inches and decimal and 0.25 inches and decimal on the right could be a bit confusing. It took me years to learn this. We're gonna do this over and over in the course, so don't feel like you have to get it right away. Same thing here. Good at 0.25 that allowed eighth of an inch to the top eighth. Eventually, bottom Want to equally go out across the canvas, We're gonna click on OK, it's good. A kind of add a little bit of that lead and I'm gonna put a little indication for me to know where that bleed is. That's gonna be trimmed off. Anything outside of that line is gonna be trimmed off, so it's not gonna be anything too exciting. So I'm just gonna do read is a nice indication line. Were basically setting up her own template here. Where a book. So that's all gonna be extra. So we need to need to extend everything out to that edge. It needs to be nice and streamlined, and that will be easy for some of the other things we haven't done yet. So yeah, let's go up to bleed. Toggle that on and off. Anything outside of that red line is gonna be cut, so I'm gonna keep it on. So the red is bleed. That's the spine. This is the back. So let's do the spine. We're gonna spine in the next video. So for the spine, we could do a couple things. We can continue the same flowers over, you know, and maybe fade this photo out or I was thinking of just doing an all black. It's getting a little eyedropper tool and let's go ahead and copy is copping or title on this. Bring it all the way to the top layer and let's go ahead and rotate this So I'm just going to edit transform. We're going to rotate, We want to rotate it clockwise. We're gonna make a little bit smaller and all we're doing is we're gonna have our title going down the spine just like this. This is a very thick book. You may not have a whole lot of room on your spine. I think with the test, I do all my designs before I doing with you guys. I do em all ahead of time. Just kind of get an idea of the direction I want to go in. So you could see how I made the spine a little bit smaller on my first version. But we're just gonna have an extra big spine with this one. Kind of line it up a little bit an illustrator. It makes it even easier. We can use guides as well to help you and to get guides to work, we need to have our ruler set up, which is really nice when we're working with sizes right now. So let's go to view and we're gonna make sure our rulers are set toe on. And so now we have a rulers we could tell the width of everything, which is really helpful. And here's how you get guides to come up, Make ahead, get all the set up here. So to get guys to come up, you're just gonna grab the ruler. You're gonna click and hold, and there's gonna be this little guide. It's a little line that's gonna come out that's gonna kind of help us gauge where things are. So now we know that that's the spine, and it could pull down this side. It could even do where the bleed is, which is kind of nice. You know, I'm gonna bring it out. This is very helpful in setting a lot of things, especially with digital website design guides. Air incredibly helpful. So I have to do is make sure your rulers air on and then you just drag and you're you're done with guides. Of course, you toggle your guides off, you could just go to show, and then you talked him off, but I kind of like him. So believe them on. And we could We don't not need this little red indication anymore. That's already kind of been decided here for us. Go and extend that out past the bleed. So what we want to do is add something interesting to the spine, like just a little hint of what's to come in the book. So I thought I would take this flower. We could duplicate that and bring it on the spines. Let's go ahead and bring it up a little bit and just have, like, a little hint of a flower. And maybe it even covers up part of the title, like, maybe discovers up the S right there just kind of happened there. So we need to go ahead and crop this because we don't want the flower to come over to the front.
81. RomanceBookCover Lesson6 Exporting: So to add a layering mask, I'm gonna go right down here, this little icon. And to go ahead and click add layering mask. And there you go. There we have it. And what's great about layering mass as I have it cropped, but I can always delete my layering mask and get my original photo back. And so that's why I like using Larry mask. So all I had to do is this is how ADL every mass will do that several times here in the future. Went ahead and changed the position of flour a little bit so it didn't kinda, but up to this one. Exactly. So we have our spine, we have our author name, we have our title. We basically have our template completely setup. And now we need to do the back. So we're not gonna do a complete design for the back. We're just gonna kinda emulated. So I'm just gonna make that black. You can start to add everything in here type. A lot of times I like to do blocked paragraphs of type. I like to do that in Illustrator, but in this case we already have everything set up. We of course bring a character in. We could bring all this kind of thing. A little bit about the author, a little idea about the book. And we're going to definitely be doing this in the future. But let's kinda keep it that we have two other great book covers that we want to design, but we have all the setup perfectly. So now if we ever have to do a book of this size, we already have it set up. Of course we're going to do it in Illustrator next time so I could show you how to do it and another program. So there we have it. So what we're gonna do is we're going to be able to, the guides are not going to be exported, so we don't have to worry about getting rid of those. So let's do this. Let's go to view. We're going to take off the guides. So we're just gonna go tick off the guides and there's a little shortcut you could do. And now we're gonna go around and make sure everything looks okay. There's nothing jumping from the cover to the spine like this little area right here is we need to make sure that we cover that up. And we'll areas. You could always toggle or guides if we want to know exactly where the bleed is. So that looks good. I think we're ready to export this. It has bleed already added to it. And we're gonna go to File Save As. We're gonna save it as a PDF. There it is, Photoshop PDF, export it. So one thing we're going to have to do in this kinda reminds me is we did all the checks that we needed to, we need to convert this back to CMYK. So we're gonna do that right now. We're gonna go to mode and there's gotta be some slight color changes. So just be aware. So we're just going to mode and we're switching back at the CMYK mode. That's the mode they're gonna request to have the book cover. And we can go ahead and flatten because we're done. But I'm not going to flatten just, just in case. Click on OK. So you could see how there's been significant color changes to the point where it kind of ruins the book. So we're gonna go back to where we were before we converted. So that's where we were. There's something we can do to avoid some of that. So we're going to try to convert it back to CMYK. And we're gonna try flattening it. And sometimes that helps. So we flattened it, basically taking all the layers and bringing it until one flat image. That's basically what you're doing now we just have one image, which is fine because we're getting ready to export this. So that preserved a lot of our colors. It converted a lot better when we flattened it. So that's just like a little trick if you convert it back to CMYK and you're very unhappy with the colors, you could flatten it. Okay, so now we're going to do our save as pdf again. And let's see what happens, okay, the settings you chose and save. Okay, that's okay. So we're gonna go down to press quality. That's going to be a default option. And we are going to unclick preserve Photoshop editing capabilities because that'll make the size super file size, super big. Compression 300. That's great. Maximum quality. Output that is great. It's CMYK mode, that's all that all of us as default, pretty much ready to go. We don't need to add bleed because we already have it. Let's say PDF. So it's saving it. It's gonna take a while because it's a pretty big document. It's kinda see what it looks like here. Let's see what our PDF looks like. So there's our PDF. We'd said that the printer shouldn't have any problem. You let them know there's already bleed that has been added. If there is Bleed that's required. So here we are, our final book cover, export it in PDF form and we have kind of a final design here. We have a spine, will eventually, you know, we could do the back later on if we have extra time. But you kinda know the basics of how it's set up, how we export, how to add bleed, how to think about color, how to think about doing some of the concept of the cover, and thinking about how to do type and layer styles. So we've learned a lot in this. I personally prefer doing any Print Project in Illustrator. We kept it in Photoshop just because this was so photo editing had heavy of a project. We decided to keep it in Photoshop, but I do prefer illustrator when it comes to more simple book designs and getting tight and in the back, that kind of stuff done.
82. Movie Poster - Student Project Challenge : Are you ready for your next student design challenge This time is to create a movie poster . Ah, hotly demanded project. I wanted to challenge you to create a full movie poster complete with movie credits. Title movie posters help sell a movie. They could be dramatic, bold are very, very subtle. They could be super clean and sleek are ultra honor and simplistic goal of any movie poster is two fold. First of all, it helps Celtic and get people excited about the upcoming movie. Movie posters helped to pre sell a movie by giving the viewer just a little taste of the movie plot characters or genre without giving the story away. It's an interesting challenge is a graphic designer. Movie posters usually have one main focal point, even if they have multiple photos or subject. Within that focal point, there was that one spot on the poster that draws your eye and attention. The goal of this project is to practice layout design. I want to see you balancing the size of the movie title with your main visual focal point. I also want the layout of the movie credits to be in a pleasing way with proper fought pairing practices for the actor's name, proper spacing and size. The requirements for this project is for you to include the following elements and your movie poster. The main title of the movie, some sort of visual of photos not required, just some sort of visual to promote the movie topic or genre, the main actors names. And lastly, as a bonus, it's not required. But if you wanted to work in a few lines of extra credits that they include the head of sound, the director, the producer, etcetera, that be nice to see, I want you to first choose a genre of the movie, whether it's horror, action, romance. But whatever you choose, I think you need to explore poster design further on websites like Be hands dot com by typing in movie poster in seeing the wide variety of design styles represented. Lastly, I want to see you plan out your layout in concept of your movie poster, sketching out on paper, digital sketching, app or just roughly laid out on a design program. Lastly, I want to see your finished product that represents the genre well, the movie plot and grabs the user's eyes to check out the poster war. I have two options for students, depending on how you best learn and how you best want to tackle this project. First of all, you can decide to redo a current movie poster in a different style, or take that movie poster and reinvent how it's presented, perhaps taken older movie and make it a modern update. Or take a popular movie and make the poster more contemporary or simplistic. It's all up to you or number two. You can create your own movie title, plot an idea and create a custom movie poster that's unique to you. This is an extra challenge for those who want to expand their creative skills into concept development. Good luck. And I want this to be an incredibly fun project for you that will help boost your layout and typography skills, perhaps even give you some photo retouching composition experience. I cannot wait to see your movie posters, so let the show begin
83. How to Give And Receive Feedback: I would say the one thing that creative struggle to learn when first starting out in this field is how to receive negative feedback. Positive feedback is easy. Great, Wonderful. Bravo, That's LET hands down my favorite year. The best is comments seem empty at first, but it's these type of comments that we seek out in the first place when we post our work. Feedback like this offers us validation for our hard work and study. This validation leads to more learning and exploration and hopefully better results and improved work. But we cannot expect 100% positive feedback all the time. It can lead to overconfidence, arrogance, and we never really know exactly what we need to study next to improve ourselves. On the other hand, overly negative feedback can absolutely destroy a new student's competence and discourage them from pursuing their passions altogether. Negative feedback can come from teachers, fellow colleagues, students, or clients. And knowing how to deal with overly negative feedback can help you stay your course and remain professional at all times. Creatives where their heart, when an accountant is wrong, well, they're wrong. Numbers only add up in specific ways. And there are formulas that they need to follow. As a creative, a lot of our work is subjective, meaning it depends on the viewer and their situation, how it is interpreted. That means someone can rip the work you once thought was destined for greatness. You take this personally. And not only is that person critiquing the work, they're critiquing your heart, your soul, your being. You can easily see why creative struggle every day with receiving negative feedback. Here are some examples of negative feedback that can not just ruin a creative stay, but can prevent them from continuing to strive for better results. Unfortunately, these examples are modeled off real-world example seen on social media comments. This looks like Word Art. My five-year-old can do better than this. This post is a waste of my time. Your content sucks. Please stop trying. This made me laugh so bad. What do all these overly negative comments have in common? They never really list a Y or list ways for a person to improve their work. In fact, these are not critiques at all, just slander, in my opinion. That means they no longer need to be taken seriously without giving a reason. They are just hate mangers and attention seekers and have issues with their own self competence. To correctly critique of creative work is to take the time to analyze the work and then provide specific steps for improvement. There is no improvement they can make, which is rare. Then list a reason why they think it's good. For it to be a proper critique, they must answer two questions. The first one is, why? Why is it bad? Why is it good? You must also follow up with the question, how, how can this work be improved? What are some actionable steps that we can evaluate that will elevate the design and meet its goal and be effective. For example, to critique badly done photo edits. You can critique it by first properly reviewing the design. Ask yourself, will it properly be seen by its intended audience? If so, how will it be received? Analyze its use of basic design theory foundations like balance, hierarchy, color, theme, and repetition. If it breaks these rules than does it break it intentionally and with purpose to drive a reaction from the viewer? Lastly, what is the goal of the design? And is it meeting that goal? Once you analyze the design, you are now ready to answer two questions of why and how. Let's review the y while we answer the why, we are also giving advice on how to make it better based on design foundations. In theory, it lacks proper contrast. Nothing is standing out as a focal point. The most important thing is the 50 percent off of the sale, making that a color that contrast well against the purple might work best. Maybe a compliment color, like a warm color. A similar font weight is being used by all typography elements. Once again, there is a loss of contrast with the design and nothing seems to stand out as important. Making at least one of the typography elements, bold or italic, can help add differentiation. In terms of appealing to human emotions. I personally find the woman off putting with an almost unhappy gaze when shopping for a sale, I get this elated feeling. Perhaps finding a different photo could help change the tone for the better. This is a pretty good critique. They took the time to list the reasons why they thought it could use some improvement, but also offered some action items to the designer so they can follow up and improve on these issues. But there is just one thing missing from this critique. Encouragement. How well do people take step-by-step critiques and advice depends on their openness when reading it. Starting off with a long laundry list of improvements could make them wonder if there was any redeeming qualities at all to their design. And if they should have just not even bothered. Encouragement is everything I almost always lead with something positive before launching into feedback and critique. It could even be that you're just glad they are trying something out and appreciate their effort in trying to get better. Most of the time you can find at least one redeeming quality or positive to focus on. We've all talked about how to write a great critique. But what about receiving 1? First of all, when we're viewing a properly done critique, we must think of several things. Number one, you are learning and growing and almost everyone has something they can improve upon. After 20 years of graphic design, I still make mistakes. After creating a design. A may go back just one week later and make a vital tweaks that can change it for the better. No amount of training will make you perfect. That naturally leads to the second thing. Being humble is a skill. Humility is present with some of the most respected authors, painters, and creators ever day. Humility leads us to always want to learn more because we're never masters. But just masters and training. Humility can be hard in some countries, or being the best is favored over being humbled. My country, the United States, for example, is very much an exhibitionist type country where your net worth and how many followers you have is seen as him. Important status symbol. Number 3. People are not always mature and the way they handle their emotions, people get angry, violent. They may not always have had positive instances in their life to look upon. They may struggle with mental health issues and they may be grieving the loss of a loved one. We never know what people are going through. They can easily take this out on you when you post your project. Make it a practice to only take seriously those who properly answered questions of why and how and giving feedback. And you can tell they took the time to give you a proper critique. Everything else, especially hate. It's just noise. Number four, never be afraid to post your work or send it to a client. Being a little nervous is healthy, but being afraid is not never fear. Negative critiques. Be open to how they can make your work better. Above all else be professional in your response. I could write a lesson on just this point alone. How we respond to negative feedback is critical. Always take an hour, sometimes even a day break before responding to a common or client email that got you a little bit angry or sad inside professional and taking the high road, especially with client work, is a sign that you're mature and ready to take on more complex projects, tasks, and even manage others. I can tell you the story of how I emailed back a client in haste after receiving a lackluster response where my new brand design, I spent ten hours coming up with just one concept. And I thought it was strong and well-suited for the company. I expected a few praises and maybe a few exclamation marks with the words allow. What I got was almost nothing. I got. This looks nice, but not really feeling it. Let's explore other options. What other options? I explained in my head, I started to write back the client in a fast pace. Do your client this is my best option. I've spent time curating what I think is the direction I think this company needs to go in. I believe my concept deserves another look. Asking the client to take another look at a concept is not a bad idea. But the Kurt and quick manner in which I almost demanded a second look is not professional and it could've lost me that job. Thank goodness. I never sent it. I went and got a cup of coffee, talk to my partner, and decided to meet with them again to discuss different direction. In the end, that client pushed me to create something I was really proud of and that made them happy. Did you some elements from the design that they did not like but incorporated entirely new ones I would have not considered before unless I was humble enough and allowed my client to have some feedback and some back-and-forth conversation with me about it with over 300 thousand students over the last few years. I've had some time in the public eye. I get messages often with some pretty negative critiques. I once received one about how my Facebook group cover photo looked immature for someone who had so many students and they were disappointed in it. I have to say I was not professional in my response that day. And I replied with a very sarcastic short message. They were a bit shocked and wanted to know why I responded to it so unprofessionally. A day later, I was totally mortified. I could have handled that a lot better. I let my first response and emotions take over. Time always helps when responding to negative feedback, especially when we take it personally at first. Remember, we are all part of a greater business process, whether we're selling our art, working with clients, or working at a company. There is time to be personal and there's time to understand that what we do as part of business, it's hard for a creative to separate their passions from their business, but it's something we all must do at times to be able to be open to professional responses, move forward and have feedback. I hope you enjoyed this lesson on receiving and giving feedback and have a rather large student Facebook proof. And in this group, some people have based unnecessary and improper critiques and feedback. The good news is most of the interactions have been incredibly rewarding, valuable, helpful, and encouraging. And a lot of design degree curriculum giving critiques as part of the program. And a lot of design degree curriculum giving and receiving feedback is part of the program. I wanted you guys to understand the basics of positive constructive critiques. So you can help others, but also help yourself to be more open to improvement in growth without ever feeling inadequate.
84. BONUS: How to work with Photoshop Mockups! Jacket Project: You can find all sorts of free Photoshop mockups online. All you have to do is Google it. But I've downloaded the sweater one from graphic burger.com and we're gonna work with this one. And I'm going to show you kind of how they're put together. So when we create our own from scratch, we'll have a good idea of the basic working components of mock-up. So whenever you open up a Photoshop mockup that you download online, you can scroll through all of these different layers. And there's usually a layer that has this red highlight to it. Not always, but it seems to be a very standard marker. The layers that you can double-click and add your own graphic to it. And a lot of times when I look at mockups to kinda see how they're built are constructed. I like to toggle on my visibility to kinda see what component it is that that layer is affecting. So I can go ahead and toggle through these and find out what exactly that layer is pertaining to. So if I go down to the hoodie and toggle that on and off, it has the hoodie layer or shadow. Sometimes they're labeled correctly and sometimes they're not. So you can always as toggle and you can notice the shadow toggles on and off. So you could see how these mockups are built with lots of different layers. Some are very simple and some could have 20 or 30 layers to them depending on the customer, customer ability of each mockup. So let's go ahead and do something very simple. We're gonna replace this graphic with a logo that I already have. So when you're ready to replace one of these layers, let's say, let's toggle this one off. This is called the kangaroo pocket. Right here. Let's say we want to change that color. We're gonna go ahead and click right here on the Smart Object thumbnail right in this left side is double-click. It will open it up in a brand new window. And this is where we can edit that area and then we'll close it and save it. And it will automatically populate on the final mockup. So we want to change the color of this pocket so we can double-click this and just do a color overlay. Or we could do something a little easier and to a rectangle tool and draw over top. And what's great about using the rectangle tool is I can double-click this and be able to change it much easier than going into doing a color overlay. So what color do I choose? I want to create a sweater for a fake Museum. And I have a handy file for you. It's a vector file and it's got a bunch of fake logos on there and brands that you can use. So you can practice when you create your own mockups or we move throughout the course. You have kind of some logos to already to slap on there. And you don't have to sit there and create your own logo for everything. And so for this, I want to create it for this marsh Museum of Modern Art, just kind of a fake museum brand I came up with, and I have some brand colors. So let's get a popup color. This is kind of how the color of the sweater will be kinda blew with these bright neon colors. So what would be a really good accent pocket color? So I'm thinking maybe this bright orange, we can just give it a try. And so I'm going to double-click the swatch I'm in Adobe Illustrator, By the way, and double-click this watch. And I have this hex code. So I find hex codes really easy to cut, bring back and forth between illustrator and Photoshop and tried to do color matching. So I'm just going to sample that hex code and just pop it right down here. See right here in this area and click OK. And so now when I closed down the window, I'm just going to close it. And it's going to ask me if I want to save. And you're gonna say yes and it's going to automatically populate and change that pocket. So now that pocket is orange and I could do the same thing, go back and change the color, and it will automatically populate, close the window. And just like that. So let's see what other objects that can change here. So let's toggle the other red layer and that's going to be the entire sweater. So let's double-click on this Smart Object, thumbnail. And it's going to populate with what is on the entire sweater. So this is what we wanna do, and this is your safe area which is really handy that they included this. This is where it's going to actually show up on the hoodie. So it's going to show you all this stuff is not even going to show up on the hoodie, just the part within the safe area. So that gives us a good idea of where to place the logo. So let's bring in some of our assets. We can take a sample of our blue color. And we could just do a rectangle tool and just paste that same color in there. And bring that below so you can kinda see the safe area. So now we need to place our logo on top of here. So we already have this prepared. Let's do a vertical logo ethic that would fit better on the sweater than a horizontal logo. So now we have to think about placement. And this was a big deal. We don't ever want to put an object too big on a sweater. It overwhelms, especially with logos. You don't want to have it so small that it gets drowned out by the sweater. So you want to have something a nice in-between size are right about here. Of course, we can always go back and easily adjust this. So let's go ahead and close this tab and it's going to ask us to save, and we're gonna save, and it's going to automatically pop onto the mockup. And there we go. And I'm going ahead and popped onto the mock-up. What we can do is we can go back in and lower it a little bit. It's gonna go sometimes you have to go back and adjust. Let's go ahead and toggle off the safe area because I believe it's populating with the safe area on. So let's turn that off. And let's put this logo down, just a hair. Let's see how that looks. And it looks like it needs to be shifted over to the left a little bit and there was a little error that came up. And some mockups have errors like that. But sometimes if you ignore those errors, it continues to do it well, so I'm going to shift it over to the left. When I close this, I went to save. And it does say could not update smart object file because the file was not found. I believe it has to deal with maybe this file not being available, but that's okay because we're replacing in any way. So I would just kind of ignore that for the sometimes you'll run into those errors with ones you download online and that's okay because you can still push through and work it out. So now that we have our logo positioned and we have the color we like, we can continue to modify this. So there looks to be another layer that we can modify, which is the sleeves and the bottom here. So let's see what layer that is. Sometimes if they don't lair it, it's sometimes hard to find. Let's go ahead and locate that. There it is, cuffs color. So we can simply double-click this anytime you kind of see this presentation with the color slider and this icon. It means you can double-click and go ahead and change the color. So let's find the complimentary color. So perhaps pink might look really good as a compliment because we already have kind of this bright yellow as the pocket. And so the pink will kind of bring out those two colors and logo. And it seems very thematic like a theme or sticking with some very simple color palettes here we're not trying to use too many colors out of the brand. And I think it works really well on the sweater. And so now we get to kinda zoom in here and see what other little details we can modify. And this is what's great about downloading Photoshop mockups online is once you understand how mock-ups are created, you can change a lot of things about it and make it as unique as you'd like. So let's go ahead and look at toggle on some layers and see what we have here. So we have the hoodie here, and here's a shadow layer. And we're gonna talk a lot about how to hand draw shadows. And this is exactly what the mockup Creator did here. See the how they kind of hand drew the shadows using a brush tool. And we're going to be able to do that with our own mockups. And that will usually be on its own layer that you can toggle on and off. Background texture looks like I can change this background texture by dragging in any texture I'd like. Or I can toggle it off and have it be on a simple background, which we can do. And then you have your background layer. So what I'm gonna do is I'm going to add my own background layer in there. I'm going to do some colors here. So let's do the rectangle tombs could create a new layer by doing this. And I'm going to double-click the object here. And we can make it blue to kind of make it blend in, and we can make it a little bit darker to make those colors pop out a little bit more. So I made it the same color. They kind of compete and it's hard to see the border of the object and the background. But if I make it a little darker, you're sticking with the brand colors. Yet you're also providing just a little more contrast between your object and the background. So this is where we can customize it. We can make it a brighter color. We can put kind of a watermark and the background, we can provide our own texture that might be a part of our brand. So let's go revisit our colors. Ooh, look at this bright orange. Let's see if I can't find out the hex code for that. So just double-click the swatch over here, get a copy and get my hex code. And let's see if I can't change his color super-quick pasted in there. And we now we have a really bright orange to kind of really be high contrast with the object. So let's add a little bit of a branded element here. So let's take a little small component of our logo. So maybe these little arches here. See if I need to ungroup that. Let's drag it all the way in here. I'm just making kind of like a watermark and the background to make them mock-up feel more custom. So I'm just kinda dragging this bigger, just making a little watermark element. And I can always double-click this and make that a colour overlay the students double-clicked this area right here, the vector smart object right here in the text just to bring up the Layer Style panel on this could do a simple color overlay. And we can click on the background color and make it a little darker to add a branded element there. And there we go to so simple watermark to bring out the brand in the center, but also have something in the background to tie it all together as a branded presentation. So that was pretty simple. Let's see what else we can customize. And that was as adding our own things at the bottom and the background here. We've been just toggle that background texture off. And let's see if we have this texture. I wonder if we could do a blending mode, which we'll talk about a lot in this class. There are an essential part mock-up creation under go ahead and select this background texture and here's how you access your blending modes right here in your Layers panel. Right now it's normal, but we can let certain pixels behind it through to create different effects. And we'll go over this even more so you can see how a little bit of that texture comes through, but yet the color still remains. And that is the power of blending Modes. And I talk a lot about that in my courses. If you've taken some of my other design courses, you'll be right at home with that just adds a little bit of pizzazz and texture to that. You can bring in your own texture and do a different blending mode to bring in texture to that flat background. But let's say we'll toggle that off for now. I just wanted to kinda demonstrate that. So it looks like we have, this is very highly customizable. So you'll see a couple of components about this. So this is a, a changeable color, changeable shape color, just like we've been changing before, we can change the color. Who can even make that orange? How cool is that? And click off. And this is a layering mask. And once again, layering masks are a big part of kind of cropping certain parts out so that if I change this color, it only changes the color on that specific shape. And we're going to be doing a lot of that when we create our own mock-ups. So I thought that was neat to add a little orange on the inner hoodie. And it looks like there's draw strings that you can change. That's the shadow of the jaw strings. And this is the actual string chords. I'm assuming you could probably modify this any way you want and change the color. You can. Wonderful. So if I make those yellow, that would be really, really interesting. So there we go. It's our first mockup that we created for a sweater for a museum. And so you can see the original mockup and you could see how we kinda changed it up a little bit to make it our own. And I think the background makes a big difference and making it unique to our brand doesn't have the default background. We've really kind of changed more than just the sweater and made it an overall presentation. So this was the very, very simple first project. We're gonna do one more already made mockup of a book cover and we're going to take a book cover we've already designed. We design this in a previous design class, but you can take any book design or any pictures and we're gonna work through this. So we can get to know how mockups or setup before we start to create our own from scratch.
85. BONUS: How to work with Photoshop Mockups! Book Mockup: Now we are going to do a book cover mockup. So this is one I found on graphic burger.com. I can supply the link or you can find it by just typing in book when you go to the mockup section in that website. And this is a very simple one. We're not gonna be able to customize this one quite as much. But I have a couple of book designs I created that we can test out on this. And so just like we did with the previous design, there's certain layers. There's one that has a little red toggle on and off. And you can toggle it on and off to find out where that, what that layer changes. And so this changes the front cover right over here and it looks like there might be another one. So here's a folder cover and here's a folder spine. And so this one will probably change the spine of the book. So let's go ahead and go into cover. And what's going to find that red layer and toggle that off just to make sure. And let's double-click on this Smart Object thumbnail and it's going to open up that separate window. So this is where we can go ahead and add our book cover. So let's try it with the first book cover example. I have this as a book cover that I designed in a graphic design masterclass. So I'm going to use this one as an example. So this is already laid out as a final printable file with the spine, the front cover, and back cover. So this is how a printer or a publisher will want to have your final cover of your book. So how do we adapt this to a mock-up? There's a couple of things we can do. We can isolate the spine and isolate the front cover as a separate file and export it as a JPEG and then bring it into this extra window and save it. That's an option. We can even grab the elements we have right here in the book and just pop it over. I'm just copying and pasting it in here. And we can line it up. And the things with mock-ups you have to be aware of as most mock-ups are done using the metric system. So if you're in the United States and you're used to inches, you're gonna notice that the sizes are more European sizes. They might be a little bit taller and dimensions, so you have to kind of, these are mock-ups that you use online. So you just have to kinda get used to maybe a slight change of dimension. So if you're used to six by nine inch book cover, they are going to use maybe a different sizing for that. It's not going to be a dramatic difference, but you might need to adjust the height of your design or the width to match the European size presentation. But when he learned to create your own, you can create it using your own sizes. So we're going to scale this down to kinda get a nice look. It's all about presentation. Doesn't have to be exact because it's not going to be printed. So it's this as long as it looks good, it could be slightly off in terms of width, as long as it's as realistic as possible. So, and let's go ahead and close out this window. We're going to click X and it's gonna ask us to save. Yes, we're gonna save it and it's going to automatically apply this to the book cover. So there it goes, it automatically populated. We can always go back, double-click and change the size if we want to bring in more of the outside. So now let's do the spine. So I think they have a separate folder. They really organize this mock-up really nicely. So here's the red layer. This is go ahead and toggle it on and off to find it. So let's double-click on the Smart Object thumbnail. And now we have the spine. So you can craft and create the spine right on this layer and say that. Or if we already have a book cover saved, we could just take this layer. It's going to copy and paste. Right in here. You could just save a jpeg of your book and do the same thing. Or in this case, to make it a little easier since it's got like all these different layers here, what I could do is I can just use the crop tool. I'm just going to crop my spine. And sometimes spines on mockups can be thinner than your actual spine. And so that's when you might have to go in and increase your spine size to match the mockup. Mockups aren't gonna be perfectly sized if you're getting them online, they're going to be those specific size. So what I can do now that I've cropped that I can save this as a.jpeg. And just, just another way to do it. So here's just a simple JPEG. I can do the same thing I did before and just drag it over or copy and paste it right in here. And we can go ahead and right-click this. And we're gonna make this a smart object. Anytime I have photos I bring in. I like to make them smart objects because when you make it a Smart Object, you're basically making it scalable. And so I can make this. So I'm gonna go ahead and Convert to Smart Object, this little photo that I brought in. And I can make it really small and adjust it and press enter. But then the great thing about making it a Smart Object is I can go ahead and make it bigger. Press enter and it doesn't pixelate and doesn't blur. And that's the power of Smart Objects, which is pretty much all we're going to use or making mock-ups. So all I did was I right-clicked and I just went ahead and made that a smart object so that I didn't have any pixelation cuz I didn't need to size this quite a bit. And it's not going to match the spine perfectly. The spine looks to be a little bit thinner. So sometimes you have to rework your texts just for the presentation purposes because the mockups not gonna fit perfectly. And that's okay. So let's close our window, click Save and it automatically populated the mock-up on the spine. So you'll notice this mock-up has this really heavy linen kinda texture on top of it, which I'd like to have a more slick looking book. So now that we're learning how mockups who are created, we can find that layer and eliminate it to make it our own. So let's go ahead and find that layer. Let's go in toggle off and maybe we can find something that says texture. There it is, overlay texture. We can toggle it on and off and we can find that that is where that is located. We can go up and we can reduce the opacity. So it's still there, but not as strong. So you can see that it looks, I think a little bit better with that reduced. And so let's zoom out and see what some of these other layers do. So there's your book cover, there's your shadow right over here. So we talked a lot about how shadows are cast. So I'm going to toggle this on and off right here, shadow. So you can see how much of a difference that makes. So this is a soft light shadow, so it's taken inside or taken in a light box. It's not like a direct lighting source. This is an indirect lighting source, so it's nice and soft and blurred out. So let's go ahead and toggle this on and off. So big difference and adding that shadow. And so we have a background, so change the background color. So I'm just double-clicking right here on the swatch change background color. And let's see if we can't bring in any colors we think would look really good. So the green looks really nice. When I use red. That looks great. But you don't want to overpower the red and the flowers. You want this read to remain the main focal point. So using red looks really great, but it also competes with the main focal point of the book. So I think sticking with a green might work best for this book, or even a gold. The gold looks really nice. So I mean, it doesn't matter which one, as long as you're not competing with that red. So there's the table right there, I guess it all they did was draw a rectangle. And with when they drew the shadows and made everything look a lot more realistic. That is just a simple rectangle that they added. And when they painted on and hand drew the shadows and made it look three-dimensional. So let's go ahead and collapse as folder. And we have this other folder called spine that we're gonna uncollapsed. And let's see other little details that we can modify here. So it looks like there's a texture also on top of this. And so you could see they added a little bit of highlights on this layer and that's what we're going to be creating ourselves a little bit later on. But you'll notice the difference and that is flat. And when you add just a little bit of highlights to coming in from the right side, it adds so much realism and richness to the spine. So we can also reduce this texture just like we did over here. We can just reduce it maybe instead of 25%, reduce the opacity just a little bit. We like to have a little bit of that in there, but maybe not as strong. And I think that's about what we can customize here. They're just playing around with a background a little bit to see what we can do c, that works okay, because it's not as red is not as strong. So that could work too. So just whatever you can do to find the right background just like that. This would normally take about, you know, a minute or two to add everything to just get a JPEG, you bring it into the to the window and you save it or you can edit it right on here. This is just like any old photoshop layer. So when you save it, it will automatically populate on the mockup. So hopefully this get this getting you excited about creating your own. Now that we understand the very basics of how some of these layers and smart objects work. Have you ever wanted to learn how to create those awesome mock-ups you see everywhere these days. You want to present your design work or product designs and the best, most professional way possible, making them both unique and polished. Do you want to create stunning presentations for your portfolio? Then this class is meant for you. This course is massive spanning multiple projects and software. We will first learn basic mock-up theory, how to best lay out our mock-ups. We will then talk about proper shadows and highlights and crafting wonderful rich mock-up experiences. We then teach you how to set up your own studio to take photos for mock-ups including t-shirts, iPads, bottles, and more. Learning lighting techniques and photo editing techniques to make your mock-ups truly custom and unique. We will go over the basics of pre-made mockups and how to customize those extensively. Next, we'll learn how to adapt our designs and graphics to any photo imaginable. Even free stock photos will give you the foundations needed to place graphics on t-shirts, apparel, mugs, boxes, and more. We will learn how to apply graphics that have perspective and use warping tools to warp objects along curves to create product label presentations. We tackle a presentation for a branding project. So you can find ways to best customize and develop a mock-up that adheres to the brand style and making it a stunning portfolios centerpiece. We will create a 3D box from scratch and learn how to layer in shadows and highlights in details to create any Bach style needed for any presentation. There is even a whole section dedicated to using 3D software like Adobe dimensions and blender to create fully 3D product mock-ups that are hyper realistic. No prior experience needed in the 3D software's. We'll be taught from scratch. What makes this course truly unique is it gives you multiple software options for learning mock-up variation. I, Lindsay marsh will be walking you through projects using Adobe Photoshop and Adobe dimensions. And Jeremy Hazel will walk you through similar projects using affinity products, including Affinity Photo, but also free 3D software option called blender. So no matter your software choice, This course is tailored to you. Also included as a wide array of finished, fully customizable lockup templates compatible with both affinity and Adobe products. This includes branding presentations, t-shirt templates, and more. There are project files included along the way so you can work side-by-side with us without the hassle of creating your own designs first, giving you time to learn the overall process. This course does assume you know the very basics of Adobe Photoshop or affinity software. But only the very basic knowledge is required to take this course. It's gentle enough for most learners to follow along. So you want to step up your presentation game and produce some killer custom mockups. And let's get started.
86. Illustrator - Introduction and Basic Setup: welcome to Adobe Illustrator, my favorite and most used adobe design program that I have. So what we're gonna do is we're gonna do something really neat. We're gonna be doing a complete five page tracing worksheet, but we're gonna be able to work through this entire worksheet and be able to produce all the icons and symbols and graphics you're seeing right here. I thought this would be a really neat, engaging way to learn because you could work with me in the class with the worksheet along with me or kind of learn on your own. So what we're gonna do is we're OK. It our dashboard set up, and we're gonna get all of our setting set up. So we kind of have a similar workspace. So we're just gonna open up a new document. This is the 2020 Adobe Illustrator version, so it might look a little different if you're using an older version. But don't worry for using an older version, I'll talk about what things you might not have or what things you may have available to you . So we're gonna open up a standard Web 8.5 by 11. Document nothing too exciting because we're gonna be setting up there's gonna be setting up our workspace. So for used to adobe photo shop or adobe in design or any other doobie product you're gonna feel right at home because you're tool bars could be right here on the left. Your panel system is going to be on the right and you have some additional options on the top. So everything is set up very similar. So it's gonna be a lot easier to learn and get comfortable with this program in terms the basic dashboard. So just like photo shop, we're gonna be able to go to a workspace and be able to reset that workspace to defaults so we could have some similar windows. And if you have a different version, there's some small minor tweaks, but everything's is, but it's gonna be pretty close. So we're gonna go up to window, go over toe workspace, and one of my favorite ones to use or or one that's really good for a graphic designer is the layout options. We're gonna go ahead and click on layout and already have that selected, So I'm gonna go down, and I'm just gonna reset this workspace so it goes right back to the default settings, and I'm just gonna go ahead and move all my panel's back to default and some of these panels I'm gonna use more than others. Course you could collapse this in and out and customizes just like Photoshopped. So there's gonna be certain panels that I'm gonna use a lot more than others. Character and paragraph, Of course, Very important for a graphic designer because we're gonna be working with typography and logo design, So typography is gonna be very important. And there's some new options and other things that we're gonna go over to, like open type eventually in the class character styles is air great to have if you want to be able to save particular styles and call them out when we can go over that a little bit later, there's certain things you may not need right away links and asset export if there's anything you feel like you're not gonna be using and this may be helpful for later projects , but for right now, where does simplifying our workspace? So we're just gonna get rid of the assets and the links and If you want to move and consolidate this until one column, you can just depends on how you like to work. I kind of like to have one simple and set up having this call out. I like to kind of have one simple column tour with, even though the tab, they're kind of close him. I might need to kind of rearrange this working through. You do not have to have the same settings that I have and the character styles and the character of paragraph panels we're not gonna be using for the first hour and 1/2 the class . But if you ever need to recall a window, you can always go the window and find any of the windows that you're gonna need. But one of the most important ones is stroke Grady Int art boards, Layers, character and paragraph A line. There should be a properties panel. You don't see that even good. And call that out. Properties is a great way toe change, any drop shadows or anything, any effects that you have on the layer. That's when the properties panel is good. So right now it's kind of a random arrangement of Windows but you'll be able to slowly sort through these and figure out what is the priority for you. These air just windows that I tend to use a lot, but you may use other tools and other windows and you'll find your own kind of workspace that you feel comfortable with. But just know you have full custom ability of this window. He couldn't go back out and make the call out panel. So I have this. Let's say I want to move swatches and have that be in the pullout panel. So I'm gonna click and drag until you see this little blue line We're gonna go and Dragon and they're now it's simple. Call it and it could build all these by icons and they'll just people pullouts. So however you like to do it, you don't have to match me perfectly. So here's your tool bar Over here is gonna be all your basic tools. We're gonna go over pretty much, I would say, 80% of the tools of the ones that I use most frequently as a graphic designer doing graphic design work such as lay out flyers logo design, social media, we're gonna be doing all that icon design, and we're gonna go over the ones that I use most frequently in design. There's hundreds and thousands of different tools and options. We're gonna go over the ones that I think are the most important to completing. There's kind of design projects that you're looking to complete Arco freelance in. So you have your options appear. We're gonna go for each one of those as we work through the project. So that's all the time we're going to spend on the basic dashboard. We're gonna learn Adobe Illustrator pretty quickly in about an hour and 1/2. I hope that we work through this entire tracing worksheet together. I think it's a great, interesting new wayto learn so that you can feel like you're tracing and moving along with me instead of just doing one project after one project on a blank canvas, you feel like there's some kind of order until learning the tools. So let me know what you think of this kind of new way. I'm teaching
87. Illustrator - Basic Shapes: So I want you to download this vector practice worksheet. It's a dot ai file or illustrator file Double click that it'll automatically open for you. I'm going to save two different version one that is gonna be in a modern version and one that's gonna be in a legacy format, since it's gonna be one big window for those who have really older virgins of Adobe illustrator, make sure you open up the one that says new if you have a adobe creative cloud version from the last couple of years. So I just wanted to do one that for people who have a 10 year old version or something really old that I at least have a legacy kind of file for you. But most of you guys are gonna be able to open the new document, and it's gonna be in art board. So we have six different art boards. There's even a little bonus art board that were sugar to do some work with grids. If we have a little time left over, we're gonna be able to work through that together. But I hope to work through this and just a quick our half. We're gonna go at a nice, steady pace. We're gonna start with simple shapes. We're gonna move into complex shapes. We're gonna do some pin tool introduction and pin tool practice course. The pin tool is great paired with the curvature tools, or we will be learning those together. They were gonna do a little pin tool practice by tracing some simple, simple shapes and then much more complex shapes that we're gonna learn the shape, builder, tool. And we're gonna be able to do all these little icons and graphics. We're gonna work with a with tool, which is really handy for local design and the offset path tool. We're gonna be using that in several instances not only with shapes but also with typography. And we're gonna just do some overall practice. We have two different logo designs. No one. That's kind of complex, I guess. More of a symbol or an illustration than the logo design. We're gonna do this cute little illustration. It's gonna require us to use all the tools that we've learned in the worksheet prior. And then lastly, if we have a chance, I would love to get to grids, even have some fun pixel art weaken due just kind of learning how to use the snap to grid and grid future to create some geometric shapes. So now that you have your sheet open, I want to go and talk about the layering system. It's gonna work like any other layering system and adobe. So if you're used to Photoshopped, you're gonna be right at home with the layering system. So this layer and you can go ahead and toggle off her visibility. This layer is the base layer and it's locked. So this is what we're gonna be tracing over. So this is locked so you don't accidentally shipped around a shape and it gets all over the place. So this is gonna be the student layer. This is where you're gonna be drawing. You're gonna be doing your tracing, so make sure your student layers selected, marketed to start with the Ellipse tool. So this is very, very basic stuff. Ellipse tool. That's a simple shape, just like in photo shop or any other adobe program. We're gonna just cold down on the rectangle tool and we're gonna go down to the lips tool. And so there's a little thing an adobe illustrator. So if you hold down the shift button and click and drag, you can create a perfectly dimensional circle. And right now you can go right down to this area and there's two things we need to talk about. There's a stroke and a fill, and we just need to make sure we click this little button and we switch it to a Phil so we can switch it to stroke, which is gonna be this whole stroke here. Or we can instead of a stroke, we can do a feel. So it is good. Let's do a simple Phil and and you notice how it's kind of snapping. It's not very smooth. Can't tends to be snapping any time. You kind of have that. You don't feel like you have perfect control over where it is being placed. Just make sure you go up to view and make sure your, uh, snap to grid and snap the pixel are checked off, especially when it comes to doing these complex shapes. We're gonna use that later, but for right now, just make sure snapped, agreed is turned off and usually by default of this. So now you see how smooth it is. I'm able to place it anywhere on the art board. We're gonna place over that and we can pick kind of a shade when go do purple would be our complete color. So whatever we're tracing, we could do a nice, solid color over there. So if I don't hold the shift button on a shape, I can kind of not skill dimensionally, but I can kind of have more control over the dimensions of the shape. So I'm gonna grab our move tool right here, and we're gonna be going over keyboard shortcuts and a little bit, so if you want to learn, those keyboard shortcuts were going to do that a little bit later. But for right now, I'm just getting the move tool, and it's being able to shift the surround and stretch it out. So I didn't hold shift and then held ship for that ellipse tool. So simple enough very basic tools. We're gonna go over here, and now we're gonna do the rectangle tool. Cem's gonna hold down, shift and drags. I want a perfect square, and I want to be able to rotate this, so I'm gonna go over to the corner, just like photo shop. And I'm gonna be able to move it all the way to 45 degrees and it's gonna drag it over. I'm gonna hold down shift second scale dimensionally. If I didn't hold down shift, it's gonna go all over the place. That is gonna make sure I trace right now right over what we have here and has created a simple diamond. We started off simple. And each step we do. Each page we do is gonna get increasingly a little bit more complicated as we move through this tracing sheet. So now we're gonna get a polygon tools, same thing in the same care category, and now I'm gonna be practicing strokes. So this is a fill. So let's go and do our toggle. And let's travel this to a stroke. And let's do varying stroke with wits are thicknesses. So we're gonna get our stroke tool right here. And let's kind of match the thickness to make it a little thicker just like that. And we're gonna copy this. We're gonna hold down the option and drag for a quick copy. Or you could just do command C command v for copy and Paste, where he can do it the long way and go to edit copy and paste. However, you feel comfortable making a duplicate. But I like to hold down, option and drags. It really speeds up my workflow. So now this is gonna be a lot skinnier. So let's reduce the stroke. Wait, I'm in my stroke panel. If you don't see a stroke panel, just make sure you go up to a window and you can call it out. So let's make a do. Let's make sure it matches pretty close. Doesn't have to be perfect. We're really just practicing here. Let's hold down, option and drag again and make this a little bit thicker. So just practicing with strokes and making him thicker and thinner. And also we want to practice the align tool because right now it's pretty close. But there's not equal alignment among all three strokes, so let's select all three, so I'm gonna select the middle one, hold down the shift button, click and select the 2nd 1 I have continuing to hold down the shift key, and I'm gonna select all three and I'm gonna go up to our alignment panel and you may have your own panel over here, or you can also access the align panel up top. So whatever you feel comfortable with, what I'm gonna do is I'm gonna do center align all the way across. So this is a horizontal line center. I'm doing all the central lines vertical line center, vertical distribute, center and horizontal distribute since having all the center alignments. And now we know that all three shapes are perfectly and center vertically, horizontally and always so. Now we have all that together. So let's talk about rounded corners. Rounded corners was introduced as a new, newer tool Ah, couple of years ago, I believe three or four years ago, so maybe 2016 and beyond those versions will have this nice, built in rounded corner feature. We're gonna do the star tool. Next is going down the line. The list of basic shapes. Let's flip that to a Phil. We're to try to match the corners here, so you notice how it has nice rounded corners. What we're gonna do is we're gonna select our direct selection tool. There's also a keyboard shortcut A which would don't worry about keyboard shortcuts right now is going to select the tools manually. This is called the direct Selection Tool. We're gonna be able to directly select what are called anchor points. So these are all little anchor points that we can click and maneuver with a direct selection tool. So when we do this will have access to these little corners. And if you have a very old version of illustrator, you may not have this. It's a very handy tool that they've updated. What we're gonna do is we're just gonna click on any of them just once and drag and you notice how all the corners go together just like that. They all do it at the same time. Just click and release. And we have kind of around its star. Of course, we can reduce the size to match it up. Didn't have to be perfect. Now this is just for practice and let's try to do it, but only do a few corners at the time, So we're gonna get a rectangle tool in order to kind of get this basic shape. It's an acting kind of shifted over so I can kind of see what the original shape waas so I can click and hold on these corners, and it's gonna do a complete round on all sides. Or if I click twice once and then once again, you'll notice it kind of has this little icon there. So now I'm gonna be able to access just one point at a time. Sounds good. Do one corner and then I'm gonna click click again and you notice that little icon comes up . Now I have access to just one corner at a time instead of having to do all of them. So that's how you use a rounded corners. They need to probably around that a little more. They're gonna get my direct selection tool, click, hold, click and hold to match it up. It's pretty close and looks like this one got accidentally, uh, done so I could click once, Wait till I get that icon. And then I could just sharp in that corner blood that happens and now can practice little more. But to us like that, So now we created a to corner to rounded corners into sharp corners
88. Illustrator - Complex Shapes - Updated: are you now? Ready for some even more complex shapes we're gonna do. A couple of these neat badges are things you can make into a seal logo or a for sale badge . There's a lot of things you can do with this type of rounded, pointed edged seal. So how we're gonna do this is we're gonna do a simple lips tool, click and drag and holding, holding down shift, and we're gonna go up to effect distort, transform, zigzag. So this is where I'm going to start to access some over drop down menus here. We're going to effect going down to distort and transform, and we're gonna go down to zigzag. We're going to do zigzag for both of these. So I'm gonna go this just kind of something you'll have to memorize in terms of how to find it. Right? Click on preview, and you can create all sorts of different stars and badges and seals and all sorts of neat things. So we're gonna have a pretty tight size. We're gonna make it kind of small and ridges. Percent segments are gonna increase the amount of ridges and notice how it sharp we want to be able to have a smooth corner, so I'm gonna select smooth. And just like that, we went ahead and created a cool shape. And then let's say my teeth don't line up. I might need to add one or two T through one or two ridges. If I want to edit this, I can go to my properties panel Any time you apply. In effect, like a drop shadow or zigzag or distort, you can go to your properties panel and easily modify that by going down here. FX there's your effects. You can click and delete it, or you can click right here to edit the effects of just kind of a short way to go in and edit that effect. So I'm gonna edit the effect, and I'm just gonna probably add, Let's see how many need to add. Now that's pretty close. So we're just going to stick with that. It's pretty darn close. I just want to show you how you edit in effect after you do it, so I don't have to go back and do it all over again. So let's try that again with the lips tool. But let's see how many ridges air here. This has 10 ridges. So now we know that ahead of time. Let's go toe effect, distort and transform and go down to zigzag. And let's see if we can't create this shape. Let's do a smooth corner and let's decrease the size quite a bit. That's pretty darn close. So ridges per segment. I did four and then, ah size. It'd 0.7 once again. It doesn't have to be exact as long as you get pretty close and you're able to kind of practice the basic tools. So it's gonna make that a little bigger and match it up. And you could see how you could put stroke circles in here and you can create a wide array of badges. This is kind of a badge project I did for my project based class, where we kind of really go and more depth about creating seal graphics. So there's a lot of things you could do with these type of shapes. So just effect destroyed, transform, distort and transform and zigzag next object. We're gonna click and hold. We're gonna talk about the line segment tool some people when they want to draw a line. They want to use the pin tool, and that's fine. But the line segment tool is just is easy to draw a simple stroked line so I could do the line segment tool. And there's a little neat trick when you click in and hold. We can, you know, create a line and let's make sure it's on a stroke, so the stroke is gonna be this bottom one. Let's go ahead and do the Eyedropper tool right here, and we're going to sample this blue and this. Make sure it's toggled on two stroke and let's make it a little bit thicker. So just gonna get our stroke panel and make it a little figure. So how do I do straight lines very easily. So if I go back, I can get pretty close, click and hold pretty close to even. But it's not super duper perfectly straight, so I'm gonna hold down, shift and click. I'm gonna hold down, shift, click and drag, and it's good. Even if I move the mouse up and down, it stays pretty straight. We're able to create some pretty good straight lines here is doing one after the other, just practicing It's clicking. I'm holding down shift. If I didn't hold down shift, you could go any direction he'd like. So you'll notice the difference here. So this has thes nice rounded edges, pill shape. And this has this kind of sharp edge. How do we get the pill shaped pretty easily. We're going to select all four of these strokes. We're to go over to our stroke panel and you have something called a cap and we're gonna do around cap. So the caps or the end of your strokes, we're gonna make that nice and round by just clicking on round cap. So now we have some nice lines. We can click on all four holding down shift. Why? I'm selecting them. Go up to a line and I'm just gonna do this horizontal line. Left it kind of diesel lines help hint at which way it's gonna help you align. So that's gonna line everything on the bottom a line, everything on the top since good doing horizontal align left so that everything is aligned to the left and we can, of course, shift these down. Probably make the stroke a little bit bigger to help help it match. So, yeah, let's make it a little bit thicker. Stroke, maybe just four points to make it match pretty close. And let's say we had the lines off a little bit. So let's say we had this line down here and this line down here. We want to make sure there's even spaces between all of these lines. We want them all to be perfectly spaced in between horizontally, so there's in a line option for that. So let's select all for go up to a line again, and there's something called vertical Distribute Center, and it's gonna line everything in between has an equal space. So I'm gonna go ahead and click this and everything kind of There's equal spacing between each one is kind of a nice way toe kind of organize multiple shapes. If you want the same spacing between Look what we just did and about what 15 minutes were ableto kind of Learn simple shapes. Learn how to do strokes. We talked about rounded corners. We talked about complex shapes, and we even learn used the line segment tool and had a draw nice even lines and put even spaces between them. Now comes the hard part. So let's toggle offer grids. There's a little keyboard shortcut you can learn, which is command quotation. You can kind of toggle him on and off. But if you're still not comfortable with the shortcuts, that's okay. You're still learning. Go to view and just turn off the grid. You could just hide the grid and then also, we're gonna take off snap to grid most. We just use it for that one example cause we were using the grid. Now we're gonna go ahead and take that off. So snapped A great is off and we're ready for one of the hardest and challenging tools to learn. And Adobe Illustrator. But one of the most powerful tools the pin tool is at the heart and soul of every graphic designer and every local designer. It's gonna be able to give us the key to illustrate to do all sorts of stuff in Adobe Illustrator. So let's go ahead and do this next
89. Illustrator - The Pen Tool: So the pen tool you can access the pin tool right here, guys. Probably already for a little bit familiar with it. If you've taken the photo shop section or a photo shop course, they also have the pin tool. So you kind of understand the basics, but we're going to start at the beginning. We're gonna do even lines. We're gonna click once and notice how it's kind of hard to find the perfect point. Worst could hold down shift. It's got a kind of snap into position, going straight, and we're gonna make a straight line just like we did with the line segment tool. It's gonna work exactly the same, and we're gonna bump the stroke up a little bit to match the line. So now let's do or let's continue to do this, but with different angles. So let's get that grid showing again. We're gonna really be practicing this. I'm gonna use my little keyboard shortcut command quotation, and I could just toggle that on and off very easily. And I'm gonna go to view and I'm gonna snap to grid again. So we're just practicing toggling between that on and off. Let's get the pin tool are gonna hold down shift click at any point, and I'm gonna make an octagon pretty easily, cause now it's snapping to the grid and I'm holding down shift and I'm able to make an octagon. I don't have to guess I could just go right to it, and it's right there. Squint. Increased the stroke size. We need to adjust the match. We can go ahead, take snap to grid off. You could do some more custom adjustments. Let's tackle that great off. So we're able to kind of make a quick octagon very easily. So now we're going to learn how to kind of edit anchor points. We're going to the zigzag pattern. Let's get our pin tool again and we'll talk about shortcuts. You can always this press the p button. Teoh, go ahead and toggle the pin tool. I'm gonna click at the bottom point. This one's gonna be easy. We have snapping to grid off, so we're just kind of kind of really practice doing this by hand. Try to be as accurate as possible. Let's say I kind of mess up and I don't do it perfectly, and I mess up again up. See? So now what we're gonna do is we're going to cut it. Correct. These anchor points are adjust some of these wrong anchor points by getting the direct selection tool. So I'm gonna get the direct selection tool. That's gonna be this little white arrow right here. This is how you to be able to access and edit all anchor points and a shape or a line. Go and click on that. So you'll notice. Have access to all these anchor points. And then, of course, there rounded option. I was gonna click once and drag it down. Gotta click once and drag it up, then corrected. And I could do that with any of these. I feel like they're not perfect. I was dragging all of those up and you'll notice another thing here, so you'll notice these. They're pointing and this is nice and round and you notice the caps are rounded, but the points aren't so. There's another thing in your stroke panel, and it's called the round joined corner. So round join, and that's going to make corners that air in the middle of a shape round. Not just the caps, but everything in the middle, so I'm just going to click on that. It's gonna add a nice rounded point in the middle shape. And just like that, we were able to do a little zigzag pattern, and we are able to manipulate that. So any time you need to change an anchor point that direct selection tool, go ahead to select on that and then you'll be able to access all the anchor point. So the direct selection tool is incredibly valuable, so straight lines are pretty. No pun intended straight forward. But what about these curvy lines? That's one of the most difficult parts to master about? The pin tool is being able to accurately draw nice, smooth shapes and corners, especially when it comes to rounded shapes. So we're gonna get the pen tool again. I'm going to start here at the bottom, and here's what we're going to do. Let's go and zoom in so we can really see what we're doing. Ah, lot of times would have occurred like this. What I'll do is I'll go to the apex of the curve so right at the top and you click and I'm gonna hold. So I'm not releasing I'm clicking and holding. I'm able to kind of change. See this little handle that call it'll handle And I'm able to kind of move it around, kind of match it up and I'm just gonna go all the way down. You notice it kind of naturally does kind of Ah, a circle kind of shape was clicking, and this is gonna take some time to master. You're not gonna be able to master this in the day. This is something that's gonna take weeks of practice. And it took me months to kind of really get comfortable doing nice, smooth curves. And we're gonna learn all about the curvature tool and the direct selection tool to be able to go back and perfect or our corners that we're making some just clicking and holding and when in doubt, make a new anchor point. So if you feel like you don't I click up here and try to make that shape? I'm not gonna be able to make it perfectly. So it's gonna take to anchor points. I'm gonna click here, do occur just kind of doing curb. And then I'm able to come back kind of do match the shape a little better, so you'll see how many anchor points that I created with us. I'm gonna get the direct selection tool right here. We can just press a And so it took what? 1234567 you could see took about 10 anchor points to make that shape. But now that I'm looking at it, unlike you know, that's not very smooth, it could be a lot better. So that's why we have a couple of tools that we can use, like the curvature tool and the direct selection tool to fine tune our curves after we created them. So whenever you have the direct selection tool, it'll give you access to the anchor points. But it also gives you access if you have a curve to the handles so you can go back and kind of adjust the handles by clicking on an anchor point and slowly changing those handles, moving them around could move them around. You can also just the handles to try to get a better match, and that's doing a pretty good job trying to find a little bit better. Smooth curves. Sometimes you have to pull it down and out to get a good curve. So right here, sometimes it's nice toe have at an anchor point. So what I'm gonna do is I'm gonna add an anchor point, cause I feel like if I add anchor point there, I can get another handle and I can get more control in this little area, so I'm adding an anchor point. You can do that right here at an anchor point. Or you could just plus press the addition sign to Babel. Call it up. So we're doing it. Adding an anchor point. We're gonna click right here in the middle. We added an anchor point, and now we're gonna get to our direct selection tool right up here, or we can toggle a We could just move that up. So now I have a little bit more control case of another anchor point there to give me more control. I could do the same thing here. Was pressing the addition sign? Well, we talked about the courage to Will you also be able to use that in this case to kind of help with your curves? Okay, so it took a little longer than we want, but it takes a while to do those kind of curves and shapes in Adobe Illustrator. So we're gonna talk about the curvature tool. It's gonna help us create those smoother curves a little bit easier, then just the pin tools. Kind of. It goes really well with the pen tool, so I'll switch between the pen tool, creating anchor points, and I'll use the curvature tool when I have one. I want to make perfectly round circular type curves, so the curvature tool, What we're gonna do is working to convert this polygon to a circle and kind of show you how to use the coverage tool. So let's get the polygon shape out and draw a simple polygon. Look that Bill and let's see what we have here. So we have this. So let's see if we can't convert that to a circle, let's make it bigger and let's get our curvature tool out. So this is our coverage or tools right next to the pen tool for a reason, because these pair together and I switch between these two very often. So here's the curvature tool. What I'm gonna do is I'm going to double click on an anchor point just double click, and it's couldn't convert it to a around a corner. If I double click it again, it'll convert back to a sharp corner so you can see how this is gonna be very valuable when you're creating shapes and you need to have a rounded corner or you wanna have kind of a sharp edge. I'm going to double click on each one of these and comfort each point from a sharp point to around eight point and voila! We have ourselves a circle just like that. So let's do that again right here. We're gonna transform an oval to a leaf. So let's draw an oval. We're gonna get our lips tool. We're not gonna hold down shift. We're gonna just drag and created a kind of our own mole shape or a little oval. And let's go ahead and flip this two stroke so we can see what is underneath. So now what I'm gonna do is I'm gonna go birth, ease bottom and top anchor points to sharp corners. They're gonna get that curvature tool, get a double click converted to a sharp edge, double click converted to a sharp edge, and I can always click and adjust our relief. And just like that, we created a leaf so very easy to conflict this two stroke or flip this to fill and we created a leaf shaped just like that. So let's do something a little more complex. We're gonna be creating a little Popsicle shape you might have recognizes from some instagram posts in my affinity designer class. I did. I did a similar full color illustration with this, but we're just gonna do the basic shapes here to learn and practice the curvature tool. So what we're gonna do is I'm gonna get a rectangle tool to do a simple rectangle about the size of the Popsicle. Maybe you're right about there. And let's do a stroke so we can kind of see what's underneath and what we're gonna do. Let's go ahead and drag this all the way down to this corner. We're going to take the curvature tool and we're gonna bring this line and make it a curve all way up to the top. It's gonna be very easy to create curves this way. I'm gonna click right here in the middle. Just drag it up. Creates a new point. And just like that, we have ourselves a nice rounded point. So let's do our corner tools. So we're gonna get are direct selection tool out. It's gonna give us access to our anchor points, but also to our any kind of rounded corners. If you have a newer version of Illustrator, you'll be able to have access to these just mated round rounded corners on all sides. It's kind of rounding everything up in making it nice. So now we're gonna create the little shape the rectangle rounded corner shapes. So that's gonna be easy because all we have to do is go to the rounded rectangle tool, click and hold. It's gonna have built in rounded corners and let's change those corners. We go right up here to shape and we're gonna be able to change, See how it's linked. When I change it, it changes it on all sides. So we're just gonna change it, too. We might have to mainly do This may be a 0.1 to get the right size, and what I'm gonna do is I'm gonna click and drag just hold down option and drag and make copy right next door. I'm gonna select both of these, and I'm just doing just in a line, just aligning to the top to make sure they're aligned. And just like that, we have kind of the center of her Popsicle. Let's go down and make this part of the Popsicle. That'll be easy because we have the rabid rectangle tool and that just automatically makes life easy for us. And we can put this in the back. So right now this is in the front layer. We're gonna be talking about layers a lot moving forward. But we want this in the back. We want this layer to cover up that layer. So I'm just going to right, click arrange, and I'm just sending it to the back. And of course, this isn't a fill yet, so you can't really tell. So let's toggle that to a Phil. Let's also make this Let's make these two shapes a little bit lighter. So I'm just double clicking my color and it pulls up. Our color picker picker was gonna make it slightly lighter to make sure that's a fill. So now a little stick is covered up. Make sure that's pulled up so Now that's in the back. We'll talk. We'll talk more about this as we do more and more projects. Let's do a little bit of a shadow. Let's do just a simple rectangle. Tours could do a little shadow in here. Let's make battle, Phil. And let's make this darker. So just double clicking or Swatch. We're gonna make a little darker and we're gonna send this to the back so you can right click and do a range, and you can send things backwards or forwards in the layering system or you could do it. Ah, keyboard shortcut. I really want you guys to memorize this because I use it so much I can't imagine having to go to the layers system and collapsing this and trying to drag all these shapes. It's just ridiculous. So what she could do is use this keyboard shortcut its command left bracket to send things backwards or hold down command right bracket to bring things for. So I'm just holding down command and I'm just gonna press left bracket and it's gonna slowly send its way to the back. So now I'm gonna toggle this to fill, and I think we just made her popsicles. Just like that, we made a really cool Popsicle, using some very basic shapes and using our rounded corners and our coverage tool.
90. Illustrator - Pen Tool Practice: practice, practice practice with the pen tool. I have a little bit more complicated, curvy shapes that we're going to do here next to really practice together. And there's also some helpful keyboard shortcuts, So I'm gonna start using a little more keyboard shortcuts here. Ta going between the pin tool and subtract pin tool were of subtracting anchor points. So I got to be kind of doing a few more quicker keyboard shortcuts that to start these air really important ones to go ahead and memorize and just practice. But don't feel like you have to know keyboard shortcuts right away. You're still just learning design. You're still just learning the basics of the program. Don't overwhelm yourself with keyboard shortcuts. Don't put that pressure on yourself. It took me years to finally incorporate keyboard shortcuts, and I'm still working on it. So let's do this first. It's kind. I guess you call it a dog kind of symbol. Logo graphic. I thought I created this and I thought, I want to create something with a lot of curves because that's the most challenging part about using the pen tool is getting those curves right, so I'm gonna click and a lot of people go. Where do you start when you go to trace the pin tool? And a lot of times I like to start at really sharp points or edges because they just seem like more logical places to start. And this seems like a nice curve. It's not too dramatic of a curve. It's a nice slow curve. So I think I can do this all in one. Uh, anchor points. I'm gonna click here, click up at the top here and just could click and hold, see if I can't match that shape. They did that pretty good. Let's go ahead and flip to a stroke so it can see her outline. So now I could see it's going all over the place. This is the challenging part of the pin tool, so it looks like it wants to do this crazy curve. Well, how I get that to go away, I'm gonna click back on this anchor point and you'll see that little pointy shape, little kind of pie or pointy shape. I'm going click on that once, and it kind of resets everything, so it's no longer trying to do this crazy angle again. So I just click back on the original point out starts over, and I can click and do this curve right here just like that. So now I'm gonna click into occurs, and I'm gonna work with the curves as long as they kind of go along the path that I like. Now, whenever they kind of go a little wonky, I can click back on that point I just made, and it kind of resets that crazy curve going around. The dog is clicking, holding, clicking. We need to click and hold. There's a little bit of a curve there, and you'll notice I try to go as far as I can. But sometimes there's just curves that aren't perfectly curved, is kind of more complex, going to click. So notice how it's not quite. Give me the curve that I want. I'm gonna click back on that original anchor point and I get it's kind of resets. This is something that's probably one of the hardest parts, and some curves aren't as easy, and they take multiple anchor points. See how it took a couple anchor points to kind of go up the ear to match it perfectly. That's totally fine. Click and hold and you'll get used to wear to place the anchor points, which where to place the next one. That's probably what is so challenging about the pin tool is where do I place the next one ? And that's just for practice. Comes into play and you learned where it's easier to do it. So let's do Mountain Dew, some bigger ones. There's no way I think I can click and make the perfect shape there. Maybe I can. That's not too bad. I went pretty far. But I think with this curve, if I try to complete the shape, I don't think I'm gonna be able to match that. Maybe I can't look how far I'm having to drag my mouse over to the left to get that to match. But in this case, I think I might just have to do halfway, do a curve and then halfway to a curve. So there is our dog shape, so now we need to go back and we can get our direct selection tool. Go ahead selector, object and now we have access to all the anchor points and handles and let's see if we can't kind of smooth everything out. Let's zoom out a little bit. So you're not seeing you could see a more detail. It was kind of smoothing out her shape, clicking on the handles so that doesn't match up. So just gonna matchup. So when I brought that down, so you'll notice I brought this anchor point down here kind of shifts that as well. So I just need to go back and adjust and adjust. And this is where sometimes it's nice if you need to add another anchor point. So I'm gonna just go up here. Of course, there's a keyboard shortcut for this at an anchor point and click somewhere in the middle here. And then it's good. Give me another anchor point of control where I got to go back to the direct selection tools and go back and edit this point. I was gonna click in Change it. Don't be afraid of subtracting. Anchor points are adding anchor points to get better control over your curve. This looks a little wonky right here. I don't really like how that looks. And if I have the corner tool right here, I could just clicking around that off and make it look a little better. I can get the curvature tool and double click and turn that into a rounded shape. But you noticed how it kind of changed everything around it. So double click kind of changes a little too much. So let me do that. Rounded quarter tool. I got the direct selection tool selected, click and hold. This is a lot to learn. So you can redo this a few times. We're gonna be doing this way more. We got a lot more to do. So don't feel like you have to get this when I'm doing this one project. We're going to do lots of projects together to practice this. This is really kind of a demonstration. Straighten that up. I just didn't like how that looked to get really picky. When you do this a lot, what that curves to be nice and smooth and okay, there might be an extra There's to anchor points there for whatever reason. You know, I may not need both, so I can always just go up here the lead anchor point. If I feel like there's an extra ankle point, I don't need you know why. Use it. Let's try to do the most simple shapes we can. So let's flip this to from a stroke. Oh, it looks like that's around a point. I think I did the corner tool on all of them. So I just gonna need to make sure I click twice and I just want to do this one corner straight. There we go. So let's go ahead and flip that to a stroke and see how he did. That's pretty darn close. If I say so myself. That was great to be ableto practice the rounding and creating of the shape. So now we're gonna do a complex M shape. It just looks complex, but it's actually really simple shapes. We have a couple of rectangles, couple of triangles that emulate shading, and I used a couple different shades of gray to look like It's kind of a folded piece of paper, and it looks like it's three d, so this will be a little bit more simple than it looks at first. So we're gonna get that pin tool because that's what this is all about. This practicing with the pin tool and we're gonna do a stroke so we can kind of see what is happening underneath. We're just doing a simple rectangle, so that's a rank tackle shape. We're gonna switch that to Phylis. We go along, let's do the next one. We can use our keyboard shortcuts. Now I'm going to toggle on the move tools or the selection tool right here to get a press V and click off. So that helps me kind of click off to the next shape. Then I can toggle p for pin tool and I don't have to go over here if I don't want to. Although I definitely would suggest if you're a beginner, to not not stress out about those shortcuts. So now the second shape and I'm gonna go double click, and I'm gonna make it just slightly darker. It's going down on my color picker and just going a little darker, and I'm gonna move this back in the Larry system. So I'm gonna do my layering system command shortcut and do command left bracket to send it backwards. So let's draw a little triangle to add a little bit of shading. We're gonna do our pin tool to do that. I was going to do a little bit of a shadow or just do this on our own. Just make a triangle and we're gonna make this. This is the shadow. So it's gonna be even darker than the other darker color just like that. And let's drawl or other shapes so p for pin and go back over here and just simplify that and what I'm to do. Command left brackets and it backwards in the layering system. So this layer is over that layer, and we're gonna keep going. Pretty simple. Let's make this the darkest color. Of course, you could make this whatever color, you don't have to do it blue. And then I'm gonna get my pen tool again to click on P. Actually, I want to do the V for the selection tools. I can select this and move it backwards a little bit. And then now I can click off P for Penn. Let's do a little triangle of shade here, so this is gonna be even darker because it is in the shade. So that is the M shape. Mostly we want to add some rounded corners here. Let's get a direct selection tool. We could just click once and then just round the one corner and click once we can round them all. I guess at the same time, it's depends. I'm just trying to think what would look best. So I'm doing all those one at the time. But let me do all of them at the same time with this one. We're just doing very, very small, small settle corners. Same thing with this small, small, rounded corners stealing all around the corners there. I think the trying over here needs around the corners of the direct selection tool and rounded corners. So that should be it. That is a pretty darn good replica. Get are direct selection tool. Go ahead and select all of these. I'm gonna right click and group so that a right click once you group something kind of shifted all together and you never have toe select each one again. You can always right click and on group at any time. That's a that's a pretty good replica of that shape
91. Illustrator - Pen Tool Practice part 2: Are you guys ready for a true challenge? This is a lot of curbs. This is pretty much as complex as a gift gets when it comes to trying to do curves. So that's why one hand shows this because I think you guys can handle it with a little bit of practice. We're gonna get the pen tool. We're just gonna start anywhere. There's three shapes, actually, four shapes involved. We have the swan s shape, this shaped like an s for a reason, because it's this little swan logo and we have kind of these three feathers that come out. We're going to each one a little bit at a time, So let's start with the point of the beak. I like starting with points. For some reason, the click right here kind of see that as a natural curve here. So now I'm not clicking on anything, and when we going to flip it to a stroke and notice how it's not given, we have a curve I like. Whenever that happens, I gotta click back on the point, and then it gets to start all over when gives me a fresh new point. So it was clicking and holding these curves don't seem too bad right now. Clicking and holding, you can always go back with a direct selection tool in our coverage or tools. Add new maker points. Adjust the handles to get better curves later so it doesn't have to be perfect. So this is gonna be one of those points running to release it, and it may not give me the curve I like. It's not giving me the curve naturally alike. I'm gonna click back on the original anchor point and start over with a new kind of curved arc that is the most challenging thing about the pen tools. When do I start over and click on a point? When do I keep doing the curve? It gives me, Naturally, that took me a while to kind of figure out this is kind of an interesting bend. The earth's gonna be a little bit complicated. This is when you get to start to need to do more anchor points. So you see how that looks a little strange, just doesn't look good. Just do command Z or basically edit undo. But Command Z is kind of a quick little way to go back. We're gonna be using that a lot with the pen tool. That might be a case where we need to get the curvature tool and, uh, get a better curve there later. So don't worry if it's not perfect, we're just getting the basic shape. Could always go back and fix it later. Clicking and holding, clicking and holding. And don't worry where I'm not gonna painfully go through this entire swan step by step. I'm gonna speed it up here soon. I just want to give you an idea of how he's doing the curves. So you noticed there when I did that? That that curve doesn't look very good Kind of goes here and bends. It's not smooth. So I'm just do good to do Command Z and see if I can't fix that issue. And that might be issue I need to solve later with the coverage or tool or with the direct selection tool. So I'm gonna resolve that later. Click and hold who can hold And this is where Where do I where do I select what? What's gonna be next? That's that's the practice that you'll learn as you do more and more of these. It's really hard to teach that cause sometimes you just kind of intuitive, like I just know, like right here is a really good point to go because I know kind of how I kind of know that natural curve that pin tools do you just learned that through time and through practice, Let's do the beak and let's flip this to Let's not do feel yet. Let's go in and see if we can't make this a skin your stroke so it can really see the exact lines here. And this is where we're gonna have to go back and find to enter selections or just gonna click are anchor points. I have the direct selection tool selected, and right here is a good point right here. So let me add a anchor point. So I'm just gonna press the addition sign at Anchor point, and then you depress the direct selection tool, which is gonna be a and just kind of move it and adjust the handles. There's also times when the curvature tool can really help to let me see if I can't find kind of a point where that would be helpful. So right here. So I have the direct selection to when I can try to straighten this out a little bit and that works pretty good and right here, kind of a sharp point. That's probably one of those points that I had to start over with my curve and I click back on the original anchor point, and since we added another anchor point, I have a little bit more control. I was able to kind of slowly smooth it out and I don't have. I don't think these are gonna give me these handles or really good adjust. So I just this notice how it a just down the line, we don't want that. So let's go back. Let's add Anchor Point had an anchor point, and then now I couldn't kind of good at the direct selection tool and kind of have a little bit more control over the curves. So you noticed how it's slowly getting to be matched. It's taken time and it's taken us adding anchor points or right here. What's at anchor point? Click and get are direct selection tool or do our keyboard shortcuts whatever you feel comfortable with and notice how we were able to match that. Same with this at Anchor Point. Switch back to my keyboard shortcut this time Direct selection tool V R direct selection tool A click and hold. So sometimes it takes Look how many anchor points it took to kind of get that smooth neck. Took a couple extra ones to get it on. So I'm gonna go and do the rest of this kind of get all that straight, cause right here it's a little wonky that doesn't look good at all. So what we could do is I can add lots of anchor points here. So at anchor point there, click on a So let me do a time lapse so you don't have to sit there and be absolutely bored out of your mind with this pen tool stuff. I think you have lots of practice to do here saying so. I'm gonna go ahead and speed it up. Enjoy the ride. So don't forget about your curvature tool. It takes a lot of separate curvature, points to kind of get that curve and have maximum control. So have the coverage or tool, and I'm just creating new points and the more points I'm creating, the more control I have over our curve. So these are all little curvature points I use with the curvature tool. And it just helps you get that more rounded look as opposed to adding an anchor point. So just go between adding anchor points and courage of points is depending on what is working for you. So all that was his creating different curvature points with the curvature tool. So here we are. I'm gonna flip this to fill, and that is pretty pretty close. We can always adjust a few things that looks a little wonky up there. Let's change that. It might be adding a few of these guys little, uh, girl, Total points. It takes a couple of kind of rain in the wild curves it creates. That's gonna take a lot of points because, you know, notice how it changes other sides, and that's why it takes a lot of different points to really rein in that coverage tool, go and see kind of the difference. See him side by side. It's a pretty close rendition. What's going and do this little these little feathers here real quick with the pin tool this If you can master the pin tool. You are a rock star at Adobe Illustrator. This is the hardest part about graphic design is the pin tool. So I want to create, like, a nice shape there and click right here, the apex of the curve, do a nice curve and then come back and match it and addressed my little handle. So here we are. Swan number one and the original Swan. I think we did a pretty good job there. Took some time? Probably What, about 10 minutes in total to trace that That's about normal. Completed a lot already. Look at what we've done. We've done three whole sheets of work. Look at all the tools that we've learned. And, of course, feel free to watch these lessons a couple of times because we discovered a lot and we're halfway through the tracing sheet that promise it gets really fun. We're gonna be doing some really practical symbols riel life symbols that you might be making for a local design or flyer poster. Instagram post all these air things and shapes that your that have real world applications were getting to that soon, and we're gonna be doing that next. So let's go and learn about the shape builder tool
92. Illustrator - Shape Builder Tool: shape builder tools. One of my favorite tools. The pin tools, probably the hardest to master. The shape color tool is one of the easiest ones to master. It's very easy to use, so we're gonna learn through examples. If you do not have the shape older too, and it looks just like this, here's the shape. A little icon. If you don't have access to this, then you have a fairly older version of Illustrator. I believe it came out in 5.5 versions, so if you have one older than that, you'll have to use the Pathfinder tool. So the Pathfinder tool. We could find that in your window, and we're gonna be doing this later. But you would be using the Pathfinder tool. He's right here, and you're gonna be able to cut and isolate and divide objects that way using Pathfinder. But we're gonna be sticking with the shape color tool for this particular exercise, so we're gonna create some ellipses. It's too simple circles and hold down shift and make a copy drag. So I want to join these two together because right now they're two separate items and I want them to be one joined unit and it makes for more simplified icons. You don't want to have too many intersecting lines. You won't have lots of nice, solid combined shapes. It just makes working with the vector shape easier later on. So have the shape builder tool. And I can I'm not even pressing anything. I just have the sheet. I have the object selected first. So let's go back. I have object selected. Then I'm gonna get the shape builder tool. And I'm just gonna see little addition Sign. I'm gonna click and drag select all these elements. You could select all the elements available and it's gonna join together. So that was fairly simple. So let's subtract a shape. So we do the same thing at the Ellipse tool, and we are going to create a copy. We're gonna have kind of cement. See, the intersecting lines There were gonna kind of create a moon shape here, but we could always make this a different color. So you can kind of see the object that we're gonna be subtracting. That's we're gonna select both of these objects. But now where we grab the shape of the shape builder tool, we're gonna be holding down the option key, so you notice how it switches from a plus sign to a negative sign when I hold down. Option. Of course, Windows users, you have different key to press when hold down option. It's subtract so I could subtract any of these. I could strip track that one that could subtract that one, and I'm left with the cool little moon shape. It's not perfect, but it's pretty pretty close. Pretty close. Oh, would be holding down all appear Windows User. So that's kind of the other key if you're a Windows person, so let's keep practicing with that. That was really simple. Let's do like a really application. We're gonna go little iPhone against. This is an older iPhone because you still have the button. But let's do a around a rectangle tool kind of get a rounded rectangle. Let's do a stroke so could see what's going on. Let's get are direct selection tool. Let's push this out so it's not quite as rounded just like that, and we're gonna get the rectangle tool, hold down the rectangle tool and draw a rectangle and then draw a ellipse. We're a circle whatever you wanna call it. And so now what we want to do is right now it's which all that to fill. So here's the issue. Let's make that a different Let's make that white. So this we want this to be transparent. So we want this to be punched out, as they say, Just wanted knocked out, punched out. I want to be able to make this a different color and send that to the back. And I want to be able to see Corinne through there. I wanted to be transparent. So we're gonna do that using the shape builder till we're gonna select all the objects available. We're gonna get the shape of the tool work to be subtracting. So that means we have to hold out. Hold down, option or hold down. Ault, if you are a Windows user, so I got the subtraction sign and punch it out. Punch it out. Now look, we have a transparent icon just like that, and then you're to use that a lot of logo design when you're trying to knock out or punch out shapes so that they don't have a white in color that transparent that's gonna be used a lot in logo design, so it's gonna be very helpful to have so pretty close, not exact. But that's okay. It's pretty darn close. So this shape kind of your little pin point on a map shape that would you would use as a user interface icon for a map or for a website? There's a couple of creative and clever ways we could do this. We could take the hard way, would be to take the pin tool and draw all the way around this thing, and that's that's possible. Don't see anything wrong with doing that, but it's not going to be precise. It's gonna be a little different on one side than the other, cause the anchor points are perfectly equalized with each other. Let's do it in a better way. Let's take the Ellipse tool. Let's do an oval. Most looked stroke get the direct selection tool. Are the selection tool the regular selection tool? Let's try to match us up a little bit and let's see what we can do about getting that curvature tool and double clicking down here to make it a sharp point. You were making a sharp point Let's see if we can't adapt this. And I'm just taking these no points. And I'm just trying to use the curvature tool to get pretty darn close to the shape. This could take a couple of points. I just thought this was a little easier to do than the pin tool because it's so curvy. Any time you got a lot of curves that curvature tools gonna be your best buddy and notice how they're kind of equal to each other. The they're kind of on each side just so I could have the same curves. Okay, I could live with that. So how do we make this kind of doughnut hold a punch out? What? We can create two shapes who could do a circle than punch it out. We could do something even easier and do a stroke. Let's do a fat stroke. So we're gonna get our stroke panel, you know, stroke Panelists make it super fat. Let's try to match it. Match Thea fatness. I guess you could say we have kind of an instant doughnut shape. Okay, so here's the problem. This is great. Using a stroke, as I feel like I could just do one shape instead of drawing two circles. Ah, when I do the shape pillar tool, it's gonna act a little different. So let's make this a different color so it can see the doughnut and make that a bill. So I want to be able to punch this out. I will make that white and transparent when I have a stroke. So since an active stroke that I can change the size on and I do the shape color tool, it's not gonna work exactly the way I wanted to. I'm gonna need to outline this stroke so I don't want to make it live anymore. I want to make it like a regular object, like a lips tool. So I'm going to go upto object path and this something you're going to do a lot in logo designed to just kind of memorize this object path. We're gonna go to outline strokes or to outline the stroke. And now, instead of being a path in the center, it is just a regular old doughnut shape. So now I can select both of these objects, get our shape builder tool and let's punch it out. Let's hold down the option key. I got the negative sign. Punch it out. And just like that, we're done. So now if I put a different background here, send this all the way to the back, We now know it's transparent and it's a perfect, transparent icon. So there's a lot of ways to approach this. We could around the corner here. I don't think that's rounded on my sample, but I think a little rounded corner on just this corner might look a little small, sleek and interesting. So there's that. So now we're gonna do a kind of a complex icon here, a little eyeglass tool. We're gonna do that next. I do this eyeglass in another class and I thought, Hey, this is pretty neat cause there's a lot of complex little curves and and things here which we use the shape builder, tool toe all unify together is one object. So this is angled. So what I'm gonna do is I'm gonna get over the layers. We get to practice layers a little bit here, I'm gonna unlock this layer from getting a little dangerous. Here I have this layer selected. I have this original shape. I have the selection tool, and I am just going to the straightness a little bit. Just so. I think it's easier to do it when it's straight, and we can always change it later. Just it's just kind of changing that flipping back to my student layer. Let's see if we can't replicate this so it looks like I could probably just do a rounded rectangle tool for this shape. And let's do different color stew are blue. He's taking the eyedropper tool sampling and let's get the direct selection tool. Push this out a little bit. I don't think the corners need to be quite as rounded and let's build this little stem. So we're just gonna do that with a series of rounded rectangle tools with varying corners getting a direct selection tool. Pushing this corners out can. The next shape just looks like a regular rectangle tool without corners, and this next one looks like a rounded rectangle tool with very big, big corners just like that, or we do the same thing we did before. The best way to kind of create this doughnut shape is to do a stroke, so a lips tool stroke and let's increase it kind of matched the thickness and try to match over top of it. So look how quickly we made this. And if we want to do this shape, older tool, make this one unified shape, we need to go to object path, and we need to outline that stroke. So now it becomes an object, like just like everything else. So let's make sure everything is center aligned. So I'm gonna select everything, go to my align panel. I could do here, here, but I'm gonna do a horizontal line center to such a simplistic a horse. It's gonna horizontally aligned everything. So click some minor adjustments there. So now get a unified this. I want to make this all one shape because right now they're all just a bunch of squares and rectangles. We're gonna get the shape, pillar tool it's gonna click. That's gonna select all the little shapes for me and select that shape and voila! We just created that icons super duper Quickly we go back here, we can angle it again, go back to Original Layer because we just needed that as a guide. We didn't have to do that, but I just really wanted to a nice, helpful guide. So there we are. Go lock that layer again so I don't mess with it. And wall. Uh, so exciting. This fun almost feels like adult coloring book where you get toe, have fun and trace. So I thought this would be a little bit more fun than just going. One lesson, one tool at a time. I thought this would be more interactive. So let me know if you're enjoying this new kind of new way of teaching vector based tools. So the width tool, This is kind of a tool that I ignored for a large part of my career, but I think it would have been helpful in creating certain shapes. So we're not going to spend a ton of time on it. But I'll show you demonstrated, and you could find clever ways to incorporate it in your designs. So we're gonna take the pin, duel on just to kind of a curve shape. It's to a stroke with less points. So we have the pen tool, listens to two points. Let's just do a quick curve just like that and let's get the with tool. I'm gonna click on the middle one and expand it out. So that's a little bit easier to dio what I just did. Two points. So it's not perfectly aligning, but that's OK because we have the direct selection tool never handles. We can get it to match. Great. So let's try that again. Let's do it with a circle. Here's your circle. Very, very simple. And here's another thing with the width tool, it can only be used with strokes. This is about changing the width of certain parts of stroke. So it's not gonna work with solid objects. It's not even gonna be an option. So this is a stroke and we're gonna get the with tool. We're gonna click at any point here that we want to click on. So let's say we want toe widen the stroke just on this side. So I'm gonna click and hold gonna create this really interesting shape. Course I can click and hold here and make that big too, so you could see kind of a wide range of objects that you might be able to create using this. You know what I'm thinking about symbols and icons, so it's not a tool I use a whole lot. But it sure is kind of handy to have for doing certain shapes a little bit easier, especially shapes that are wide in a certain point and very skinny. In another point, that's when this couldn't really come in handy.
93. Illustrator - Offset Path Tool: so the offset path tool. This one's really fun because it's super easy to learn, so we're gonna create thes interesting set of objects. So I wanted to talk about something, something that's brand new to Adobe Illustrator 2020 and your private like, Yes, it's something exciting. It is for me, but maybe not for you, but I think it's awesome. So you see kind of how there's almost like a spell check here. It looks like maybe even this word spelt wrong, but I think it's felt right, but it's just on a separate line. There is now spell check and Adobe Illustrator. As someone who's horrible at spelling, this is a gift. I'm so glad that the filing integrated spellcheck and Adobe illustrator If it's bothering you or you want to turn it off and on, just go up to go up to edit, go down to spelling and go ahead and click it off. So if you like it, go to edit spelling. If you if you hate it or if it's bothering you, go ahead and toggle off. Auto spellcheck and all this little read underlying lines will disappear. So that's something brand new to adobe illustrator 2020 that I'm super duper excited about . It doesn't seem very exciting. But for someone who spells things wrong on flyers and posters all the time, it is a life saver. So the offset path to also we're gonna be able to get this by going toe object path offset path. So here's what we're gonna do. We're gonna draw a simple circle. All right, so let's draw the first circle. It's gonna trace over the first circle on Let's make this kind of our color. So here's what we're gonna dio on. Offset Path is gonna take her path. So you see kind of our path, which is right here all the way around it's gonna offset it. A certain points we're gonna be able offset it. It's gonna expand. And he could also subtract as well. So let's do the 1st 1 as accent examples. You can kind of see it in action. Let's go to object path and you're gonna offset path. When I click on preview, it's gonna offset the path. Let's change this to be a little bigger. Maybe point to too many point there was trying to match what we have before. Ah, case of 0.0.0.24 for me on fireman inches. So you might be in centimetres, so you might need to kind of do urine sizing. I'm gonna click on. OK, so what is going to do? Is it created it? Expanded it out, that many that that size. So now I can make this a little different color. It's making a little bit lighter, making a little bit lighter. You can kind of see how it create some pretty cool stuff this way. So now I'm going to select the bigger circle and do it again. Path offset Path Click out Preview. It's gonna save what we had before. It's making a little bit lighter this time, and we could just keep going. Let's do it one more time. So path offset path. We did it one last time, and you could create some really neat patterns that way. So let's say we don't like our color, So let's say we did Blue is copy and paste it, putting it right over here. There's kind of a neat trick. We haven't talked about color a whole lot yet, but we're gonna be slowly introducing that. So you can change the color on multiple objects. Kind of a little hack, I guess you could say so. Let's say I don't want to have to select each one and go to the eyedropper tool and change it all to read. Let's say so. I'm gonna select all the objects we're gonna go to, edit, edit, color and go to adjust color balance. And what this is going to do is we're gonna be able to adjust the color balance on all of them at the same time. So I'm gonna go and click on preview. And let's kind of change the color here. It's kind of toggle ing between these different color options kind of orange just trying to find the right combination. There's a red click. OK? And while I instead of having to go one circle at a time, I could change them all. Just a little fun thing. I wanted to show you his edit color and adjust color. Balance is kind of a neat way to kind of change color very quickly. So let's build a little rainbow. And since we know the shape older tool, it's gonna be very easy. So I got a copy and paste what we already have before. And I'm gonna work right over here. This blank space, I don't have a whole lot of space to work with, and I'm going to just do a rectangle tool about at the halfway point. Now. What I want to do is I want to select all of these objects so it easy way to cut all that on the bottom off is getting the shape builder tool, and it's holding down option and getting my subtraction and clicking. And it's slowly deleting all of these just like that. I can even delete the middle if I want to. I kind of have this instant rainbow. I can go in my color panel, so let's go to color. We go to swatches and easily select some color so we can selected that way or wouldn't go to our color panel and be able to select some color. I'm going to click out show options. I could get more minute details over colors so we could start with the red and kind of work are way too yellow to green. The blue doesn't have to be exact, so just kind of doing a little bit of color picking there, using our color picker. There's a little rainbow kind of like the one I did just now a little better and make that a little bit smaller. So now we're gonna do one more thing with offset path tool in terms of shapes. So what we want to do is we want to create this target. So let's get the blue one copy and paste it. We're gonna make it a little bit smaller. So here's what we're gonna do. So we have all of the these items selected. I'm gonna get the shape over to what? I'm gonna be punching every other one out, so I'm gonna be holding down options. I have a little subjective tool. Ham's gonna do this one, and then I'm going to do that one. And just like that, I have a little target made. I got a right click group that together so I don't have to worry about selecting all those elements again. And I'm just gonna match it up with what we have. So let's make sure these air all in line, so I'm gonna on group of again, select him all I need to make sure I do that step. Go up to my line panel. I'm just like we did before. You do all the center lines. So now I know they're all center aligned. It's like that we have our target sign. We did a target, a rainbow. Kind of an interesting It's election here. I wanted to go over one more thing here. Let's go ahead and just do a simple circle for his copy and paste this copy and paste this bigger one. I just want to kind of demonstrate how you can actually do an offset path, but do it negatively so I could go toe object path offset path If I were to put a subtraction sign in front of offset instead of going outward on the path, it'll go inward on the path. So I'm gonna do a negative sign, that's all. I'm doing it a preview it and notice how it kind of shrunk it down so I could do the opposite and go toe object path. Offset path. Keep it as negative sign and I can just keep going just like that. So I wanted to let you know you could put a negative sign there if you want to expand the stroke inward instead of outward. So typography We haven't talked about typographer yet, but we will definitely get there in way more detail. But I wanted to go with talk about offset path with type because you could do some really neat details using the offset path tool. We're gonna do that next.
94. Illustrator - Offset Path with Text: so I'm going to be using a Brill fat face and this is available. If you have an adobe subscription, it's available on adobe fonts. But you can use whatever font you want. If you don't have the adobe subscription, you don't have to have that. You can use whatever Sarah of typeface he wants. So I'm gonna type in fantastic. And I'm gonna make sure I have a Brill fat face on. So I'm just gonna go up to my character panel and do a Brill, and all I did is I selected are type tool to go ahead and start typing. So selecting the type tool go over this way more detail a little bit later. It looks like the spacing between my characters is a little off from another project. But this is great because I get to kind of show you the character panel a little bit. Look over this in more detail. I'm gonna be changing the spacing of the tracking between the lines back down to default, which is zero. Let's go ahead and make this a little bit bigger and we are going to emulate this. Look here. So we're gonna kind of create this border. So if I were to at a stroke to this, So let's add a stroke and I were to make it bigger, and maybe I put it on the outside. It's not really looking to good. It's not looking the same as below. So what I'm gonna do is I'm gonna do something called outlining the type because right now it's good removed stroke. I can't do a whole lot to the type in terms of adding borders and doing a path outlying path. So we really want to turn this typography into an object just like a circle, just like we did with some of the other things where we just want to have it be a shape. So we're gonna right click, Never do it's call create outlines for creating outlines. So now it's no longer live creditable type. It's just like a regular symbol. So now what we're gonna do as we're going to go up to and now we're gonna go up and do it offset paths. We're gonna go path offset path. We want to expand it. So we want to remove that subtraction sign preview, and we're gonna definitely bring that down a notch less 2.1. Let's do 0.5 and you'll notice that it has these sharp edges. And if you want that effect, great. But if you want a smooth kind of a smooth border disco tout down to join and do around so it'll kind of rounded off. Were you were gonna go ahead and click, OK, and it's gonna create two different layers. We have this background layer going on. I was gonna make this this color. We also have these letters going on, so let's go ahead on group. This is right. Click on group. You ever can't access something trying to right click and on group it and I'm just gonna try to get those letters together. And I'm just going to kind of sample that color so you could see how you can create a great border. And the thing about this is thes overlap and kind of wanted to look like below where it looks like it's one almost a sticker on the back. So what we could do here now we have total control over this so it can move these in and out and see how this tea are this eyes in front of the tea, We'll get his take all the borders. This is the border. Selecting all was holding down shift, selecting all the borders. And I'm gonna send all this to the back. Right? So now all the type is in the front and the border is all in the back. No, we just replicated that pretty good. So that's kind of how we did that was Go ahead, move it in front. Here, size might be a little different, but overall, it's pretty darn close. Fantastic. No pun intended. So let's do the opposite. Let's do a subtraction. Let's do a subtract signed for this Modern. So this model is gonna be a little bit more complicated Type in modern. We want to add a little bit of the been to our type. So I just selected the type tool and is typed in modern. Let's do a bend. We're gonna go down here and emulate Spend So how do we bend and warp text? So I'm gonna go up to effect and have it all kind of spelled out right here. If you want to go back and do this on your own So we're gonna go to effect Warp and Arc. We're gonna go up to effect go down to a work and it's a lot of different warp options we can do with type like if we do a wave Glenn selector type first goto work wave and let's kind of see could see all sorts of kind of interesting things we can do with with this tool . But what we're gonna do, it's going zero all that out. Let's go down to our cause. This could have do a nice arc shape. We just got that we could do a kind of inverse are or the opposite. We just want a little bit of curve here. We don't want anything dramatic. Just a little curve click on OK, and we want to make sure we create outlines. That's the next step is right click create outlines. So now it's gonna be creditable text, and now we could be able to go to object, have offset path and we're gonna do and negative this time. So let's do a negative sign. We're gonna go inward, click on preview and then just click on OK, so now we're gonna be able to get her eyedropper tool. That sample that gold was couldn't group that inside together. So I want to be able to have access to this. But since we have this arc on, this is another little complicated step. But hang with me. So what we want to do is we created outwards, which is great, but we still have this ark that's kind of built in here. We want to be able to bake that in. We want to be able to finalize that arc. That means it's not gonna be edit herbal again, but it's gonna be created like object. So what we want to do is we'll go to object, expand appearance. So any time you do it effect like warp or flag or any of those little warp options with type. If you wanted to be baked in or finalized, you goto object, expand appearance. So now it's gonna be treated just like an object. So that arc is now baked in just like creating outlines just like outlining a path. So now I have full control over all these little elements. Now we can ungroomed pitches, right click on group, and I know this is quite complex for your 1st 2 hours in Adobe Illustrator. But I want you to be able to re watch these lessons and come back as well after you've done some other work and other projects. And so I'm just doing the eyedropper tool kind of adding that offset path, we could offset the path again. So I'm selecting just this middle highlighted area and I go to path, offset path. We could do another negative, might have to do it a lot lighter. So this may be a 0.1 point 01 is really light. You can add like 1/3 layer here, So I kind of did one color than a lighter color. And in the middle color says kind of how that happened right there. Of course, you could do it straight across. If you don't want to have the arc or the curve, you want to make it more simple and not go through quite all those steps that we had to go through to create that. That was definitely more of an intermediate kind of project. Don't feel intimidated at all by that. Okay, so let's go over. We're gonna do some overall practice and then we're gonna get to do this really cool fun illustration or start to work with color a little bit, working with the curvature tool pin tools, shaped tools, corner around tools. We could use all the tools that we have that we've learned in the last hour. We're gonna be able to create this really cool little fun illustration.
95. PROJECT - Illustrator - Vector Illustration Project: Now we're gonna do use all of our vector tools to create this cute little guy right here. We're gonna start with Straw and start with the little cup, and then we get to the hamburger, and then we're gonna create this all blawg shape and then add colored everything last. So let's break this cup down a little bit. We're gonna move. I'm gonna unlock this layer. I'm just moving him over to the right and was Could kind of started tracing was gonna kind of look at it. So what we're gonna do is we're gonna emulate this by creating a rectangle tool, and we're gonna get the curvature tool. And we're gonna add a little bit of bends to our cup because cups aren't straight across. If you look at how cups are there usually Circular. So there's gonna click in the middle, create kind of a rounded part of the cup. You could expand that out to make it not just straight up and down that has a little bit of of ah kind of natural been there. So just I got the curvature tool of is continuing to edit that Let's do a stroke of the Ellipse tool and let's draw kind of the rim of the cup. Let's go ahead and just take samples of this color, so kind of helped us out a little bit. Let's make that a stroke and make it pretty thick. So there's our rim and this could be our made cup. And let's kind of bring this in a little bit more, getting her direct selection tool bringing it in, we could even around those corners, you can kind of click and round, which could be helpful. I don't need around the top, but I knew do need around the bottom. So it's gonna click until I get that symbol in this round the two bottoms. So there's kind of the basis of her cup. Let's draw another circle in the middle to kind of be our shadow kind of background or the inside of the cup are gonna hold down Command left bracket and send it backwards and just go ahead and take a sample of that gray. Let's talk about Grady Inns. We're gonna do Grady INTs a little bit later in the course, but let's talk about the very basics of radiance to your Zerg radiant tool, right? You have a couple different options. You have a radio, which is like a circle Grady in Yeah, freeform graded, which is a brand new tool. And you have linear Grady in. I'm just gonna do a linear grainy and I want to recreate this. Where have this darker shadow would have it a little bit lighter at the bottom? It's very subtle. Some see the click and hold and get a little Grady int. And I don't need a need that green color of skin rid of that Just need a two tone Grady int just like that And we can kind of create a shadow there. So let's create this straw. So here's how we're gonna do the straw where it's gonna get the rectangle tool. It's gonna draw a rectangle. You draw another one, and I'm gonna bend it right here just like that, and I'm gonna join these together. Let's go ahead and make him the same color straw and let's get that shape builder tool. And I'm just gonna add all this together. And now we have a strong just like that, using the shape, builder tools and basic shape tools. Let's add this kind of red line here. Diagonal red lines. So we're just gonna create a couple of red lines here? It's gonna hold down, shift and duplicate this. Let's do two up here. We're gonna angle all these and we're gonna angle all these. Well, first thing, what I want to do is I want to have the same spacing between all these. So I could just go up till by a line panel and do a vertical distribute center. It's a now is gonna distribute equal spacing between those red lines. And we also want to add angle cause most of these have little angles to him since could add angle and then make these little bit bigger. So just having an angle going across, I must do angle going this way so it doesn't have to be perfect. We're gonna be training everything up. I need to select everything once again this amazing shape builder tool, hold down option and they will be able to get the subtraction sign. And I'm just trimming everything. I'm just selecting everything on the outside and releasing. Let's do it again, trimming the outside. And just like that, we have a cute little straw that we can use and bring it in. It's going group these together, so I'm gonna click it. All right. Click group. Now have the straws one grouped element. It's going to put a little angle on her straw. Put him in here and let's send them backwards in the layering system. So command left bracket sitting him back. So here's the problem that we have with this rim. We want this to be inside the Cup, but we also wanted to be show you the final. I wanted to be inside the Cup, but we don't want it to be outside the Cup, so it can't really be. We gotta have to trim this somehow. It's what we could do is break this back. So command right bracket, Let's bring it back up in front. We just need to kind of trim this up so we could do that by this drawing a shape, you know, when I do want, want to trim that up some Just take it the pin tool. I'm going to draw what I want to cut out, so I want to cut this part out so it looks like the straw is inside the cup. So I have this, like, different colored shape. I just drew with the pin tool And now we could take the shape builder tool, And we can kind of cut all that out, sold down option and cut all the items out. And just like that, we have our little straw That is kind of resting in Look up, and we want to create a little sense of shadowing here, So why don't we draw that with pin tool? I'm just gonna be creating a little bit of a shadow coming out. The straw's gonna cast a little bit of a shadow. It could use the coverage or tool to add a little bending to the shadow right here looks a little more realistic. So when we zoom out, we're gonna take the eyedropper tool. We're gonna sample that gray, and we're going to double click and just make it a little darker. It's gonna be our shadow. So when you zoom out, it looks like it's a shadow. The, uh, the straws casting a shadow on the other side. So, as you can see, it's not exactly how I did it before, but, you know, we're doing pretty quickly and pretty fast. Let's create a little bit of a highlight on the cup, just like you see on the right. So we're going to get her pin tool. It's gonna clip and just do like a short little line. Let's make this white cause It's a highlight going over to our color panel. Gonna make it white. And let's make it a stroke and make it 1/3 certain thickness. And let's make sure around Cap is on. So it's got a nice little animated, cute see feel was to a circle from top to complete the highlight. Make sure it's off Phil, and we got a little highlight going on. So let's do our cute little smile so this could be done with the pen tool. The click over here and I'm just doing a line. Let's go ahead, make it black. You get a black stroke, make sure it's got the round caps on, and instead of just drawing three points, I'm gonna take the curvature tool and easily make a smile just like pulling it down. And let's create the eyeballs. So let's do an eyeball like that. Phil and I want to create a little bit of Ah, highlight. So I'm gonna make that the same colors, the background, and I want to punch this out. So if I ever change the cup color, it's gonna change with it. So I'm gonna do the shape older tool of just punched that little middle part out. Now, let me just hold out option and then make sure those air aligned so you can kind of see this is complicated, but in the end, it it's really not too bad, just a lot of steps, but it's nothing we haven't covered yet. We've covered all these tools so far in the class. You just have to kind of practice practice practice. So here's a little smiley face. Put it in the center of the cup. So there is the basis of our cup, and so now we get to do the little hamburger guy. So what, we're gonna do this, Let me move him over and have room to do the hamburger. So we're gonna try to emulate this hamburger. So one thing we could do is we get the rounded rectangle tool. Now we're gonna do the bun for Sun's going to sample this color and get our curvature tool . And I know every bun has this kind of rounded tops pushing it up. We might be able to delete those points. Comes kind of got a weird debate there, and that's no problem, because we could distill, eat or hold down the negative sign this. Delete that anchor point. So now we have kind of a better bun. Of course, we can get the direct selection tool we could customise this anyhow, anyway, we want. So there's our hamburger bun top. So let's do our meat. So let's do the rounded rectangle tool for our meat and let's get the sample color. And I don't think we need too much of around this. We just need a little roundness. And you know how a hamburger patty is kind of has devils out on the side, so let's get our curvature tools. Add a little bit of our eldest to the side of the patty and let's send that to the back, so send it all the way to the back, so our bun is over it. So now we're gonna want to have a tomato, so let's do our tomato. Let's do a rectangle tool this time, let's do read, and we want to get our coverage tool and add a little bit of curve to this tomato, and we want to make it kind of extend past the bun. Are the meat great? So let's do another bottom bun. Let's get the rounded rectangle tool sample or color, and let's push this out a little bit. Make it a tiny bit more square. And let's round the corners on this tomato ever so slightly, some slightly rounded corners and let's draw our lettuce with the pin tool. We're just gonna kind of come out from here, do some lettuces clicking and holding and Dickinson round lettuce leaves and haven't been back here. His top part doesn't matter cause that's gonna be covered by the tomato and let's sample are green and let's in this backwards in the layering system. So command left bracket said it behind the tomato may be extended out a little bit more. Let's do our coverage or tool and bring this down. Give that a curve, too. We're getting pretty close. Let's do some highlights. Click and hold on the same type of highlight. We added before we could even get her eyedropper tool and sample the same thickness and this bun a little wonky. So let's just get her direct selection tools. See if we can't get something we're a little happier with. That might be. I need to delete that, um, anchor points and just believing this one anchor point, and I think that's gonna match the other side a little better. There we go. That's a tiny bit better. So let's add our happy face. We already did that. So we just need to copy and paste or happy face. Bring it on over. Maybe making a little smaller, the fit on top of the hamburger. Pretty close, I must say. And look, I have a little shadow here that's cast from the bun onto the meat, so let's draw that really quickly. That'll be easy, cause that's just a simple rectangle. Tool will make it the same color, but just make it a little darker. So we're gonna double, click and just move it, make it a little darker. We're going to send that back word so backwards in the layering system right about there and let's get the curvature tool at the same curve that we have with everything else. So, yeah, there's are happy hamburger. There's your happy drink. Let's integrate thes together. Let's group him together. Let's group them together. Were to start to incorporate these guys together. So let's put him here and let's put him over top and let's do our little ob long shape so we can take us. Put it in the back and we can make this all belong by getting the courage or tool Notice a theme here. How much we're using that curvature tool. This pushing things out and making it kind of a knob. Long shapes. Pretty popular kind of shape to do, especially in Web design. You xy y design. You'll see these will all belong. Not quite a circle, Not quite kind of an abstract circle. We kind of see that everywhere. So what I want to do is I want to push elements outside the circle so it looks more layered . That's what I'm doing here. So it's not gonna be the exact same circle. I'm a, but it will be pretty close, and what I want to do is I want to add a Grady in here So I'm gonna get Mike Radiant, Tool. And I'm just gonna click and hold. Let's see what I have here. Let's get ingredient pail out here and let's get our linear Grady int. Okay, so now we're gonna be able to click and hold. Let's just make it a simple two colored radiant. Okay, so we got a double click on this swatch. Now we can make it any old color we want. We could do green then that we could go here. Double click. We could take this eyedropper tool sample the green we already have, And then we could make it darker. So, uh, that's right Here. Double click that and let's switch and make it just a little darker, too. So it kind of has a sense of highlights and shadows. This is a pretty complicated project. Don't feel like you have to nail this right away. This you should be able to do a project like this after years of training. But I want to see if you guys could do this now. So we're just using a lot of tools, so don't don't ever don't want you guys to feel too intimidated. We need to create a quick shadow here. So just taken the pen tool. Where is gonna trace trace around both shapes. Kind of make. What do you think would be a shadow? And don't worry this trace over here, we're gonna be able to use a shape older tool later. Let's do a darker color green. Or actually, let's do a black Let's go door swatches and just make this a black. Let's send it backward into the layering system. Let's reduce the transparency on this so it kind of blends in a little bit better. So let's go to to trade, change the transparency on a layer. You're gonna go to transparency. So we're home. We would think I have that window up there. It is transparency years or transparency Window. This is how you do blending modes, which we went over in the photo shop section, Of course. And this is also how you do opacity. So I'm just gonna reduce the opacity, and I want to trim that off. But that's no big deal because we have the shape builder tool. So I'm gonna select this object and the object. We've been intersex. I'm gonna get the shape builder tool held zone option and subtract. It was able to kind of trim that shadow very easily. I'm gonna go and bring all my windows back over here. I think that was pretty close. We did this. What? 15 minutes? We're able to kind of reproduce this. So that's the original I did earlier. Of course, we could change our That was some sizing difference between the two with the face. But I think we did most of the main elements of this goo bringing into photo shop at a little texture to it. Do some dodge and burn and kind of gets, um, depth with this is Well, we could even draw more shadows like we have a soul. We have this little shadow here. We could keep doing shadows just like we did with the meat, but continued to draw shadows. We could make this more complex if we want to do. But we're just learning these basic tools. Look at what we did that's want to show you what we all did. We traced all of this together. That's amazing what you've done. You just some of you guys have never opened illustrator Some of you guys have played around with it for a few minutes or you maybe have even more experience than that. But you don't have extensive experience. It's kind of why you're taking this class. You can really learn all the tools and how I use them. As a professional designer, you guys did amazing doing this with me. So whether you're watching this and doing it with me or you're just watching it toe, learn first and then doing it later, let me know what you think of the tracing worksheet. If you enjoy learning this way, or if there's another way you guys went and learnt. This is a brand new section. I just filmed it updated a little different than the way I taught the class before. So let me know what you think. We got One more got a bonus. I think I'm gonna do this really quickly. Is bonus. I got some pixel art we could do kind of really using grids to make some really interesting geometric shapes were going to be using that in the local design process. Later, we're gonna be creating a geometric object there and using grids. But I just want to kind of introduce you to this real quick as kind of an extra bonus
96. Illustrator - Pixels and Grids: bonus page. We're going to grids this time. We're gonna get our grids back in Gear were to shore grids and we're going to be snapping to the grid and we can edit grids. This is the default grid, but if you see something different for some reason, goto file goto file preferences and you can change grids by going to guide to grids so we can go in and you can change the color so it doesn't have to be grey. Could be darker. Could be lighter color. You could do dots instead of lines. There's a lot of ways you can changes. So this is a grid line. Every 0.4 inches. Course he might be using centimeters has five subdivisions. You can change how many little subdivisions this is a five by five. You could change it to 10 by 10. Make it more of a detailed grid if you want. So I just wanted to go over grids that you can change your grid type. Going to grid and guides. I started to keep it is the default. I don't like it. Darkened it a little bit. Let me go back, enlightened. I don't want it to be so overwhelming that we can't see our design. Okay, so let's start off with something easy. Get the pen tool. I'm gonna go ahead and click. These are pretty easy, especially everything. We just did make it green or let's make it our purple color. Make it a stroke. We've done this A lot were experts now and now I can hold down option and we just created kind of a double arrow. Super simple. Let's get our pin tool. And this one simple. We have snapped grids. This could be a lot easier to work with through. This is gonna snap for you up, down, in, around. I'm just gonna reduce my stroke there. So this one's a little more complicated, but since we have snapped a great on, it's gonna be really easy, because we could just snap it. Let's go ahead and reduce the weight. There's going around and tracings this is this really good with practicing our skills with the mouse or whatever we're using toe click around and we do the same thing Where to make stroke a little bit smaller, it's going around. This is really just great for practice. I want you guys toe spend more time practicing this complete our shape, be making a little bit bigger. And while let's go down to this, I'm not gonna trace this whole thing in the class. But I want you to give it a try on you do the first couple ones, but this is just to practice your dexterity with the pen tool and nothing else. Now what? You go through this whole thing, and since you have snapped a great on, it's going to be fairly easy for you to find the line. So I'm not gonna do all of that, cause that would take 10 minutes alone. It's just some more practice you can do same thing with these little shapes. Just a really thick stroke. Here. I want to do something fun. Let's do some pixel art. So since we have snapped a great on when we use a rectangle tool, I say we have which is drawing tool. It's gonna automatically snap so we could snap and go very quickly to create these shapes. I must do it, Phil. So watch this. Who creating a shape were off a little bit on the grid with some of these. Let's do the sword first. It's kind of like Minecraft or like on old Nintendo game. So let me line this up on the grid real quick. Maybe just a little bit better. So everything kind of snaps. I'll be right back. So get everything kind of lined up. So let's go ahead and create this basic pixel art. It's gonna be easy cause everything's snapping, just like boom, boom, It's really easy. Things were snapping to do much smaller squares. If you want. I'm just doing very basic shapes. Got like an arrow, have kind of a sword going on here. Everything is snapping so easily. It's very, very quickly, very, very quick process to sketch this. This is not lined up perfectly. That is OK. I might have just accidentally moved it, but we're still getting the gist of everything. I think this lines up really good. Let's go down the list, see how quickly it's snapping. If I did not have snapped a great on, this would just be a mess. A ticket for ever always joined all these separate boxes together with the shape builder tool. All right, so let's do this bow and arrow now my favorite. That key reminds me so much of playing video games in the early nineties, where this is kind of what she had. He had pixels because that's the best that video games could do. Back then was this kind of stuff. But I thought it was kind of flood in This stalled Rick. To be able to do something like that was tracing pixel art. Just doing snap to grid and view Grij is kind of an extra bonus page, so feel free to explore that if you want. But here we go. There's the tracing worksheet. Congratulations. You did it all. Here is everything we did. Yea, So now that we've learned we spend about an hour and 1/2 2 hours together doing all of this , you've really learned every single tool that is valuable to creating symbols and shapes and logos and course there's a layout design. Where you gonna be working more with blocks of copy and type, and we're gonna be doing some layout projects later. So don't worry. We're going to be doing some layout projects and really focusing on type and alignment and and grids and all that stuff. We're also gonna be doing the logo design and some branding so it can practice doing some real projects. But this was great core training. We really covered a lot of tools here with covered radiance, complex shapes, simple shapes, pin tool, curvature, tool direct selection, tool ah, shape, builder tool with tool offset path tool. We practice using all of those tools. We used the grid snap to grid, so there's definitely some other tools to learn. But we'll get to that by doing practical real world design projects coming up next.
97. Lesson 1 Rocket Logo Project - Getting Started: To lift off Fonts facial. So it's now time to do
some vector artwork. So it get a lot of requests from students about how to trace a real photo and create a vector trace of that so
we can use them LogoDesign. And in this case we're
going to be creating a space batch that
looks just like this. What we're gonna do is
we're going to find a real photo of a spaceship. I'm just going to
go retro and do the old space shuttle design. So I just went to a couple of free websites you can go to. I've mentioned pexels.com a lot, so I just typed in Rocket. And you can do a lot of
different kinds of rockets. You can even do some of
the more modern rockets, but we're just gonna go for this endeavor, traditional
space shuttle. We're gonna go ahead
and download that. We're going to bring that photo right into Adobe Illustrator. Just drag it right
in or open it. Let's see what our
document size is. We're just gonna go to file documents setup and we're
going to just edit artboards. Let's see what our sizes. So right now it's an 11
inch by 8.5 inch documents, so that's perfectly fine. Or you can do an A4 if you are using a different
measurement system. I'm going to go
ahead and get this to the right position where it's all the way on the artboard. And this is on its own layer. So I'm going to lock this. So when I start to trace, I don't accidentally grab
the photo by accident. So I'm just gonna go
over here and lock it and create a new layer on top. And this is going to be where
our Design will reside. So let's zoom in and let's
get our pin tool ready. Let's do a nice dark strokes. You can see what's
happening or better yet, let's find a color that will be high contrast that we can
see our lines really good. So let's maybe add a little bit, kind of a hot pink because there's nothing
pink in this photo. And that will really stand out. And we're gonna
make it a stroke. So we're gonna flip it to
a stroke and going to take our Stroke panel
and let's make it. Let's see. One point
might be good. Yeah, let's go ahead
and switch that to one. And now we're going
to start to trace. So when it comes
to Tracing people, a lot of people trace
people and produced some vector artwork like you see right here as an example. What you wanna do is
you want to try to simplify a complex photos
as much as you can. Really keep the
main elements and tasked with this Rocket, some of the main elements I'm
seeing is the main shuttle. We also have the booster rockets and then the main Rocket here, as well as some detail. So we're not going
to be able to trace all the little details because we want to make this a
nice, flat, clean design. So you don't want to do every
single line in this one. For this case, we're
going to try to simplify this as much
as we can and choose what we think best represents
this entire symbol. So let's get her Pen tool. And what I like to
do is start out with a main subject matters. So we're going to
trace the Shuttle. In this case, it happens
to be symmetrical. So the left and right sides are just reverse of each other. So instead of having to trace
the entire outline and not having perfectly even lines
on left and right sides, we're going to trace
one-half and then reverse it and
reflect it and join those together using the
shape builder tool or keep them as separate elements
and do this two tone look, which gives it a sense of
highlight and shadows. So we're gonna go ahead
divide this in half. What I'm going to do
is I'm going to start up at the very top. I'm just going to
click where I think the center would
be the click once. And I'm gonna do that
little trick where I hold down the Shift button. So right now I can kinda
guess where the middle is. But if I click here, hold down the Shift key, I'm going to get a perfect line all the way down the center. And remember, we are
not going to get too worried about all
these little details. We are going to have to make some design decisions
when it comes to what to include and
whatnot to include. So I'm just going
to just getting this really basic outline
shape right here. So I'm going to click
here and hold and just capture that
whole bottom area. I'm going to slowly move up
the wing just like we did with their vector tracing
worksheet we did earlier. We're just slowly
tracing everything. Don't get too caught up
in those little details. Because we want this to
be a very simple shape. So it's creating a few anchor
points as I go across. Going to complete
my anchor point, click and hold and try
to see how that looks. I like to flip these
into to fill just to see how I like the the curves. If an ad go back with a Curvature tool or
if I need to go back with the direct selection
tool and make sure there's not any
weird angles going on. If you go to View, I have my smart guides on. So it kinda helps me when
it comes to snapping Things into or the right place. So it's very helpful. Once I'm happy I can
go ahead and copy this. Switch it to stroke. Go up to copy. And I can do a paste in place. It's going to paste it right? Another copyright on top. And I'm going to
go to Transform, and I'm just going to reflect. So just doing a simple
object transform reflect and get a preview here to make sure it
flips it vertically. Just like that click, Okay, now I can slide this
right in place, and since I have
smart guides on, it's going to snap a
little better for me. It's gonna kinda help me. And I can always
make sure those two are aligned perfectly
at the top. So just go to my
Alignment and do a vertical aligned top or a top alignment just to make
sure those are in place. So there we already have
our Rocket in place, and now we need to
do some details of the rocket so we can
start and do a divided. This is exactly a
reflection of each other. So let's just do the left
side again with the window. I guess this is a window. And I'm not gonna get too
wrapped up into the details. I'm going to simplify
this for the sake of keeping it a nice
simple flat vector. So I'm going to trace this, but I'm not gonna
be perfect with it. I'm going to make
some design decisions made me make the window
a little bit bigger. I can even make the window have a different contour
if I wanted to. Make it a fill and just
make sure I like the shape. So now we could do
the same thing. We could copy, paste
in place and there's a little keyboard
shortcut depending on if you're a Windows
user or a Mac user. And we're just going
to reflect it. And now we're going to
reflect and do the same. We're going to do the
same thing several times throughout this
entire document. We can select both of these, align to the top
and do a fill to see if we like how
the window looks. What are some things that really stand out about this Rocket? And you're going to have
the same thing if you do vector artwork with
a photo of a person, you're gonna have to choose
which highlights and shadows and main
portions of the face. Do I trace over with the pen tool because you
can't capture everything about a real photo because
they would just be so many little tiny
lines that it would just make it a little bit busy. What we're gonna do is zoom out. What I think we should keep is the window is
pretty important, but I also think this
top knows portion of the shuttle is a really
important indicator that it's a shadow shuttle. It's a very important graphic on it that
helps us know, hey, this little black nodes is a very important part of
identifying it as a shuttle. So let's go ahead and
take the pen tool. And this is where the
shape builder tool comes in handy because
I can trace this. I'm simplifying the line here. So instead of going up here and tracing it like
this, you can do that. But I'm gonna make it smooth, Give it a more clean look. These are just little design
decisions you can make. You do whatever
detail you'd like. I'm just going to
smooth that out. So those are those little
decisions you make when you're tracing
over a real photo. And one thing I could do
is I can go over here and redo this whole corner and
try to match that perfectly. Or I can just use the
shape builder tool. Go ahead and
complete that shape. Make that a different color and I could just cut
that corner out. What the shape builder tool, what I want to do is I want
to duplicate this bottom one. I just copied the main left side here and just pasting in
place to create another copy. This is an additional copy
to what we had before. I'm going to select
both of these and get the shape
builder tool and I'm punching that out and also punching this
bottom portion out. And so there I have a nozzle and I didn't have to
sit there and do it. So you could do either
way you'd like. And I have a little copy here underneath that I can reflect. I know that seems a
little complicated, but it's not any different than what we were doing before. Go ahead and make that
stroke so it can kinda see if we need to smooth
this out and make it one continuous line. We can stick in the
direct selection tool, just kinda
straightening that out so they kinda come together. It looks like one
smooth line across. So we have the nose, we have the window. Let's get our rockets
at the bottom. That's pretty important
part of this Rocket. So we're going to start here and we can make these
rockets are own. It doesn't have to
be a perfect copy. Just adding a little
curvature there and tracing the Rocket all
the way down here. And each time I do this, it always turns out a
little bit different. Let's make that a fill and
see if we like the shape. We can always go back with
our Direct Selection tool. If we want to make it more
simple and blocky, we can. And then we can just simply
copy and paste and reflect And make that strokes
with confederacy all the strokes that
we've created so far will eventually create Smoke a little bit
later in this project. And we also want
to add some depth. Because if we go and we'll make both of these
sides of Phil, there's not a lot of depth added to this or
highlights or shadows. If we want to add depth, you'll see like this
has a shaft here. This is where the
cockpit is appear and you have the body of the
shuttle and here the wings. So we're going to
add some definition by adding a little
bit of shadowing. So you notice there's
natural shadow here. So I want to see if
I can't simplify that shadow and trace
it using the pen tool. I'm just going to
follow the shadow here. I'm going to keep it smooth, just like I have keeping
a theme of having a smooth angles and just
kinda tracing this shadow. All the way downs. Go ahead. And since I'm ignoring, this is where the
rocket is standing, like I guess, a place
where it's being held. I'm not going to have
that in my graphic. It's gonna be flying in the air. So I'm just going to
ignore that and create, just go ahead and
extend the shadow all the way down to the bottom. This will be help us. You'll see how it
really helps it add a little bit
of 3D pop to it, little depth and dimension. I want to smooth this
out a little bit and even get the
curvature tool if you need to double-click and
make it a smooth point. And here's what I wanna do. I also want to get my
corner around Tool. So I'm gonna get direct
selection tool and just hold down and around those corners
to get a nice soft look. Same thing that we've
been doing for, for copy and reflect. You can see how easy it is when you have
something symmetrical, you don't have to do
quite as much tracing. You just have to do
half of the work. If you could add more
details to your Vector Art, if you want to have a
detailed vector version, you can add the American flag, you can add the Nasa logo. You can even come back and trace some of these little
details and lines. What I think is also distinct is this darker black
panels right here. That's something that
I think would really help it define it as a
shuttle. So let's add those. If we think it's too busy, we can always remove
this detail later. So let's just go
ahead and trace this. Instead of having to do all
that trace all the way down, I can just do a rough outside and do the same
thing we did before, and use the shape
builder to punch it out. So sometimes it gets
a little complicated. Sometimes you have to
color-code your layers. So you can kinda remember where, what is what I'm gonna
duplicate and get a copy paste in place. I'm just copying that
left, whole left side. So I can take this
duplicate right here, select this and get that
shape builder tool. Punch that part out. Might need to make
that both the fill. Okay, now I can get the
shape builder tool, hold down Option or Alt
and get subtraction. Punch out everything but
that remaining section. And this make it a
stroke. There we go. Voila, just a lot
easier to do that, having to retrace what I already traced these using that shape builder tool
to save you some time. So I'm just going to
round out some corners. So always get that direct
selection tool and just make those
fine adjustments. We need to get our handles
and make it a smoother. You don't want kind of
a jerky transition. That's kind of a jerky
angle right there. So if I click on the
Direct Selection Tool, adjust the handle outward, it'll smooth that out. I feel like we really captured the basic elements in
essence of the shuttle. And we're gonna move on
to the rockets next. And at the very
end we're going to have all of our outlines done. We can make everything a fill and start to
colorize everything. Add a sense of depth with
highlights and shadows, and we're just going
to use flat colors. We're not going to
use any crazy effects like Gradients or drop
shadows quite yet, we're just going to keep
everything flat and simple, simple single colors. But we're going to make it
look a little more complicated with our highlights
and shadow colors.
98. Lesson 2 Rocket Logo Project - Tracing: So now let's do the big
booster rocket in the center. We're gonna do the
same exact method. We're going to try to
find the center point here at the top. Hold down, shift
all the way down to the bottom or really
anywhere because it's gonna be hidden behind the shuttle. Hold down Shift to get
that straight line. Sometimes you got to make sure you find the right there it is. Uh, probably make
one angle here. So I'm just going to click and
see if I can drag this way far out and make
the angle that way. Copy and paste in place. Then I'll reverse or reflect. Pop it right over there. Now what I wanna do is see some of these jagged edges here. So you see how they come
together to a point. I want to smooth that out, but I want to keep these as two separate objects
that they want to have a highlight
and a shadow layer. So I'm going to select both of these and round out that point. We'll go ahead and kinda show
you what's happening here. Because select both of those. I'm going to go over
to my Stroke panel. I'm gonna go to the corner. I'm going to do a round join. So this is going
to really soften that edge just like that. So instead of being pointy, It's a little bit more
around to the point. Quickly do the same
thing to the rockets. We can even make this around
already just like this. So I kinda started down here instead of starting
in the middle. Click there on the middle and
then go all the way down. And we can make
these thicker if we think they're gonna be too thin. This is where we get to have
our own creative freedom. What we want to make our
rocket to look like. What's great about having
the same exact rocket is I'm going to select both of
these copy and paste. And we already have
this done because it's the same exact
copy on the other side, we have our basic outline. We're gonna be ready to
apply color to all of this. So what I'm gonna do is I'm
going to unlock this layer. I'm going to slide it out. We can kinda see the
outline we just created. We created all that
using the pen tool. And this is where
we get to make if we see any errors
for some reason, maybe it's not a straight line. We can go back and start
to correct that using the direct selection
tool and just kinda make it our own and make
all of our corrections. And I'm even going
to shift this away. I think this is really close to the rocket, the main booster. So I'm going to just put
a little spacing here, making it our own rocket. So we can also make sure
we line everything up. So I'm going to select
all of my rocket. And let's select the booster in the back and just make
sure that aligns, see how it's off a little bit from the
center of the nose. It's just line it
up that way and then make sure there's
similar spacing between the left side and the right side of the rocket doesn't
have to be perfect. We can always go back
and edit this later. So now we're ready to colorize our rocket and get some of
these shapes as a solid fill. We're gonna do this
one step at a time. So I would like to, and now we've got to think, what is our badge get
to look like is what colors do we want to have
on her badge or logo? And I would like to put this
rocket in space with stars. So I'm thinking a dark black, dark navy blue background. So I have to think about
that when I colorize this, if I want to put it
on a dark background, it's sometimes helps on this bottom layer to
go ahead and draw the desired background
you want to have it on so you can best
colorize the logo. I'm going to make this
a dark navy blue. Now we'll be able to
colorize it a lot better. Now I'm going to probably
bring, bring out, do some whites to make it
look more like the shuttle. I like to start with a top items first and then work
my way backwards. So what is the item
that's closest to me, the viewer, that
would be the shuttle. So let's do the Shuttle first. We could start with the main
left component or left side. We're going to switch
that to a fill. And then we can always use
the eyedropper tool to find inspiration from the
photos we just traced. And that's how you do it
when you're doing faces. If you're getting
certain shadows and highlights under an eye, for example, or an eyebrow. You can use the
eyedropper tool to sample different shades of skin
to be able to do that. So you can just do
the eyedropper tool and sample from the photo. I'm doing just that. I'm
selecting my elements here. That's what that one looks
like. Eyedropper tool. And this is where we're
going to want to make one side and a darker color to add a shadow half and
a highlight half. So we can decide once we commit to one being
darker than the other, we need to be consistent
throughout the rocket. So if the left side is darker, the left side of the rocket and the booster also
needs to be darker. So we need to be
consistent with where our highlights and our shadows
or cranberry coming in. So if I want to put this on a space background and let's say the sun is over here
beaming down this way. Then we want to make sure
our highlights are on the right and our
shadows are on the left. Let's make this left side maybe a little bit
of a darker gray. And let's make the right
side a pure white. And we're gonna do
that throughout. Let's, let's not make the
contrast too, too big. So let's make that
a little bit closer to a little bit of
a lighter gray. Because if we have
the contrast too big, it starts to look really harsh and it's starts to look
a little too dark. So we're just going for
a very subtle effect. Just like that. Now let's work on the nose. We can find inspiration
that's pretty much black, but it could be a dark, dark gray eyedropper tool. And let's make that lighter,
just a little lighter. To add a sense of highlight it. Let's do the same
thing with the window. We could probably
borrow the same colors, so we don't have to use
too many ink colors. Also have our side
windows here, their side, I guess that's part of the heating shield from underneath. And I probably
would just want to make that the same color as the windows so we're staying
consistent with our grays. Just try to simplify
as much as possible. We could do the rocket engines. We could do that and even
darker gray so that pops out over the gray,
it's already on. So now we have two
shades of gray. And maybe I can borrow this same gray and that'll pop
out over the white. So just kinda making
some of those decisions on you don't want to have this color works and
you're already using the color, you might as well
stay with it and just reduce the amount of total
colors you have to use. Everything else seems to be, I think there's one more element of the space shuttle left. It's this little highlight, I guess we're trying
to emulate shadows. So let's make this
a darker color than what's already on there. So just the Scooby are really small change because it's really just kinda
showing shadows. And this one just
needs to be very light gray, just like that. And so sometimes we need to put layers in front and
top of each other when we're doing this because we traced these lasts so those
are kind of overlapping. So what we could do is we can go ahead and select all of these. I can do my keyboard shortcut and put these layers
behind the shuttle, doing Command, left bracket, putting that down and
my layering system. Perfect. So you can see our little rockets
coming together. You might need to put
these rockets on top. So just putting things above
and on top of each other, making any kind of small
corrections that we need to make. There are pin tool. What I might need to do there, as I might need to look like that needs to be
straightened two or I can just highlight my pen tool here and get the delete
anchor point and just delete that because
it seems like an erroneous anchor point
that we don't need. And then we can bring
this closer together. So that kinda cleans
it up a little bit. Now that we have our
shuttle, let's go ahead and do our rockets
really quickly. And then we'll have
the main components. We need to start putting
this into the badge. So let's do our rockets. We can do our orange red rocket. We can find our inspirations. Go and put my Stroke
panel over here. Find a little inspiration
from the photo, kind of more of a rest, orange brown type color. So we want to take
the same color and just make it lighter. We can just double-click
the swatch, good or color picker and
go slightly lighter. Not too much lighter,
just really small steps. And let's say we
want to add details. I don't feel I feel like
this is really sharp. I feel like I need to round the corners on
this a little bit. So I'm gonna get the
direct selection tool and see if I can click and just isolate
that one corner. It's kinda round a
few of these corners, not all of them just click
specifically on the one. Just to do one at a time, just to kind of round corners. I can do the same thing
to the other side. Kinda makes it a
little more polished. Same goes for the wings. If I want to click on that one corner and just
round it a little bit. This kind of gives it that
nice streamlined look. Make sure you just click on that one anchor
point or it'll round all of the corners
on the entire shape. So just be sure to isolate those
99. Lesson 3 Rocket Logo Project - Typography: Our main Rocket is basically blocked out and we have
solid colors on there. We can add all sorts of
crazy effects later, but let's select
our entire Rocket, all the different items we have. Another trick that
I haven't showed you quite yet that
would be really cool to kinda show you is being able to see the
outlines because right now you can't really see all the little outlines that we made to make all
of these shapes. If you ever want to see all
of the paths and strokes that you've made or the outlines
of all of your objects. You can go up to View
and go down to outline. And there's a little
keyboard shortcut if you want to toggle
that off and on. I'm just gonna go to outline
and it's gonna be able to show you all the outlines
in your artwork. When you're doing really
complicated vector artwork, it's a really nice
to be able to switch this on and off
to be able to see all of your different lines because sometimes you may
not be able to see it. It gets, starts to
get complicated. So being able to switch on and off from that mode is great. And that's called
the outline mode. And you can access that by
going to view and outline. So once we confirmed we
like everything and it's all center aligned and everything is lining
up really nicely. Let's select all of our
objects. Go ahead and deselect. I don't need that dark
background anymore. I'm going to group this until
one main units so I can go ahead and start building
out our round seal badge. So what I wanna do is I want
to just get an ellipse tool, hold down Shift to
make a perfect circle. Now I'm going to start to
position this together. We don't want to have we're going to have a
little bit of Type around and kind of a
seal badge format. I guess you could even
consider this a logo, but mostly a decorative
flat design vector badge. We want to make
sure we have room for Typography to go around. And we also don't want to have, we wouldn't have some
good sizing and balance. We want to make sure
a Rocket is not going to overpower our Typography. And our Typography is not
going to overpower our Rocket. So we have this nice
balance between the two. And one's not too big. So we're going to do
some sizing here. And since I have
Smart Guides on, there'll be able
to snap right to the center of the object, or I can select both and just make sure I keep things
nice and center aligned. So when I thought
might be really neat is to kinda feature
a couple of circles going outward and changing the colors to go darker
as it goes outward. Kind of like in this example. Thought that would add a
nice effect without adding too much complexity to the
artwork. How do I do that? How do I make this circle
just a little bit bigger? I can copy and paste it and try to size it up and get
all center aligned. Or I could do my Offset
Path, Object Path. I'm going to offset the path. So we did this previously, gonna do a preview. Let's do an inches right now. We can just do a six
maybe, or maybe a five. So now we have that
other circle that's created and we still have
our original circle. So I can make this
a little darker. Just like that.
Let's do that again. And let's make this
bigger because I want to put our
Typography around in a sealed want to make
sure it's thick enough to have lots of breathing
room for my Typography. So let's do for this one, let's do, let's do an eight. And let's change the colors and make them a
little bit lighter. Need to have a little
bit of a thicker line on the outside for
my Typography, but that's no big
deal because I can select these inner circles, make it a little bit smaller. Select all three of the circles. If I go up to my align panel
and do a central line, do all the center lines. All the way across. It'll, it'll align it vertically and horizontally
and everything is, all the circles are aligned
like we did before. One thing I wanna do
is I'd love to have the Rocket come out
of the circle and break that circle a little bit to give it a sense of depth. What I might do is I can
either make the circles smaller or I just go ahead and make this object
a little bigger, have it punched
out of the circle. The circle doesn't
feel defining Europe, punching through the
circle and adding a sense of this depth. And I want to have room to put some smoke coming
out the bottom. Let's see if I can't
just kinda size this up. This is a big thing
about LogoDesign is finding that right
balance to strike with alignment and leaving room
for things and making sure where not overwhelming
with anyone element. So let's quickly add some Typography because
I want to be able to add that before I do anything else
to kinda see how it looks. So we're gonna do
the Space Force. I'm going to get our type tool. And how do we add
Type on a circle? So there is a way to do this. We are going to add a
just do an ellipse tool. And we're gonna do a Type on path around the ellipse tool. So whatever shape
we're going to make, the type is gonna be going to be able to go around that shape. I'm going to create a stroke
so I can kinda see where that's shape is gonna be going. And I'm gonna make
it a lighter color. And let's go ahead. And slide this in. So our
type will end up being right on the baseline of that
line all the way around. So we're gonna make it
a little bit bigger. And kinda for right now, put it right there in the
middle of that outer band. Of course, we can
center align all of our circles by
highlighting them all and just making sure they
are all aligned center. So let's go ahead and put
our type on this path. We're gonna go down
to our Type Tool. We're going to click
and hold and do the Type on path tool. We're going to click
right here where we want the type to start. Let's say we wanted
to have two words, space and then overhear force. Let's go ahead and
click right here. And go ahead and
type in Space Force. Well, it's of course, highlight
that and make it white. Let's make it much, much bigger. So I'm going to increase
the font size on this. And let's find a
really good typeface that would match a
futuristic look. We also need to probably adjust our circle Type on path here. So I'm just going
to hold down Shift and make sure
that's a little bit more inside that blue circle. We can also add a little bit of spacing between the types. I'm just going to go up to
my Character panel right here and just add a
little bit of tracking. We'll do a lot of this later
in the course as well. So let's, for now, let's type in something a
little bit bigger. We can type in any
number we want. So instead of 200, we
can go a little bit higher and just do
kind of 400 or so. Let's also do some
manual spacing here so we can divide the words
up just like this. We want to make sure they're
even so the bottom of the S and the bottom of the
E are lined up together. So I'm just going to check that out using the rectangle tool. We can also go to View. Turn on our rulers, show rulers and we can always drag. That's another
way to do it. Logo, I turn this
off. I can drag down and create a guide just to see if it is even and
it looks like it is not. So I'm just going to rotate
this until it is even. So I'm gonna go to View, I'm going to turn off my guides, just go to Guides and hide. So let's continue to
find a Type choice that's gonna kinda go with
our futuristic badge. For something
really chunky thin. We've gotta be careful about
what typeface we choose, because if we go with
something really traditional, it doesn't quite fit. I mean, it could work if you're going for a
traditional look, but with a very futuristic
name like Space Force, we might want to
find a sans serif that works really good. And maybe chunky, nice
chunky sans serif. So here's kind of a unique
one called comrade. And we're going to
use that one for right now because
it's kinda got that nice chunky typeface has got a futuristic look
to the Typography, very simple and geometric. And we can make our Type
a little bit bigger. Now that we know what type
choice we're gonna go four, we're gonna go until this a little bit more in
the LogoDesign Section. Kinda picking your typefaces and figuring out what
works for the space. I'm just going to
delete a few spaces, just sizing this out. Now that we have a good idea of her Typography and our
main subject matter, which is the spaceship. Let's add a little
bit of details. We want to add a little bit
of the smoke that comes out. So let's go ahead and
delete our main photo. We no longer need that. Let's go ahead and align
this in the center. And what we could do is
create the Smoke by combining several different objects
using the shape builder tool to build the smoke plumes. So we're gonna get
the ellipse tool and we're just going
to create a series of circles to emulate Smoke. Just Creating a couple
of circles here. And they're gonna
get bigger as they go out from the spaceship. Do the same thing here. They're gonna get
bigger as they go out from the spaceship. Let's make these a different
color so you can take a look and see the difference between
this and the background. Now we're going to take the pen tool and we're
just going to draw her jet smoke coming right
directly out of the engine. So we're really just creating a rectangle shape coming
out of each engine. And the smoke is going to kinda
come out from the engine. So I'm just kinda making some
adjustments with the Smoke. We're going to end
up combining all of these circles with the
shape builder tool to build one cohesive little Smoke blue. Now how do we trim this up? Because right now it just looks
like a series of circles. How do we make this integrated
within the badge itself? We're gonna do the
shape builder tool. I'm going to go ahead
and select all objects. You can select all my past. I'm gonna get the
shape builder tool. I'm gonna hold down
Option or Alt and just delete everything
outside of the circle. Just kinda trimming
everything up, nice and easy. Get anything leftover as well. And what we could do as well is we have all the smoke
in the background. We can bring one of
these in front and the foreground to Give
it a layered look, I'm just going to bring that forward and the layering system, I'm using a little
shortcut Command, right bracket to bring it forward and the
layering system. Or of course you
could do it within your layers. This way. I'm collapse the layer. Bring that all the way
up above that element. So we have one behind
and one below. It kinda makes it a
little more interactive
100. Lesson 4 Rocket Logo Project - Smoke Details: I just took about a minute
to adjust the Cloud plumes a little bit to
bring it down and bring the Rocket up just to kinda make it look
more dramatic. And now it's all very flat. And that's the point
of flat design. But we can still like
we did with the Rocket, and simple shapes to create highlights and
shadows and still give a sense of
depth without having to do drop shadows and
all those effects. So I want to carve out
little shadows that are cast between these different
Cloud plumes to make it look like it's layered. So here's what we're gonna do. There's a couple of
ways we can do this. We can manually draw
it with the pen tool. Tracing a little bit of a
highlight helps to make these different colors
so you can kinda see it's going to complete
that shape and make it a little bit darker to
create a highlight. So we can manually do
that or we can use Shape Builder tools and draw another circle and
cut it out that way. So let's first, let's go ahead and make all
of this white. And then the shadows that
we're gonna be adding, we can do just a slightly
dark light gray. So making our Smoke white. And sometimes it
helps us go ahead and select all of these and
add a little stroke, just a guide us to see where
we need to draw our shadows. We could do a nice thin stroke. So now we know we'd like to draw a little bit of a shadow
in the corner there. So I'm gonna get the pen tool
and I think I'm just going to mainly trace this
just like I showed you. It's going to try to
match everything. It might be easier just to
do hand-drawn little object here and make that a light
gray, super light gray. And I can just go back
and make adjustments. Let's take off the stroke
and see how that looks. That's all we're doing here. The stroke is just to give
me a guide of where to draw. To add little highlights. Or I guess in this case shadows. We're going to keep
going with that. Let's go ahead and do
the ones over here. Let's go ahead and take
off all these strokes and see what it looks like. Probably add one
right here as well. So you can see how
just adding that little tiny light gray shadow really helps to bring out
the different plumes. Kinda gives it a 3D
look in some ways, kind of gives it that highlight
and **** sense of shadows
101. Lesson 5 Rocket Logo Project - Final: So we have a Rocket done, we have our Smoke done, and we have our Typography done. And now let's do some small adjustments to make sure the
balance is correct. So I think the
Typography sizes okay, I wish I had a little more
breathing room here between the outside of the type and
the outside of the seal. So maybe we can make this
a little bit smaller. So I'm just going to
highlight all the text, make it a little bit smaller. And then rotate this. Once again, if you
just want to do a quick rectangle tool to make sure it is lining up. I just need to rotate
this just a little bit. And of course, there's always the thought that
we can make this a little bit smaller and make that outer band a
little bit bigger. Is always great to
have breathing room. Always have students, they do logos and they
definitely mean well, but they bump up Typography and other graphic elements
so close to edges, it just gives a sense of anxiety when things are really
close to the edge. So I do like to put a little
of that extra padding and you'll see me talk about
this over and over in class. And I think it's important that spacing and whitespace
and clear space and margins are really
valued because it really does help everything breathe and feel a little bit profession,
more professional. And this is when we can start to duplicate our Graphic
a few times and do some different
variations on Color and sizing just to see
what works better. So I'm just going to
create a couple of duplicates and see
if we can't tweak one and see if we can't improve on the first
Design and little ways. So one thing we can do is add a little Papa goal just to kinda see what a little
gold looks like. So we're going to
add a little bit of a gradient and we're gonna go, go and put my layer
panel back over here. Now we're going to call
out our gradients. So gradient window. I want to go up to my
swatches and I want to go to my library and there's a lot of great Default Swatches
and your library, if you go down to your
little library icon right here in your
swatches panel. And I'm going to load
some default Gradients, going to go down to
Default Swatches. I'm going to go to Gradients. And there's one called metals. And it has some
pretty good default, metallic silver and gold Gradients that we can
go ahead and use. And there's one in
here, I think it's the first one here,
just called gold. So I'm gonna go
ahead and select, go ahead and ungroup my shuttle. I'm going to select
the left sides of the booster rockets. And I'm going to go
ahead and click on gold. You gotta be really
careful with Gradients. You want to make sure
they're nice and smooth. So right now it's really tight and it looks a little bit dated. So what we could do is
select both of these, or at least select one of them. Get our gradient tool. And I'm just going
to click and hold and do a nice long gradient. So just kinda looks a little
bit more professional. If you did a really
tight gradient, you can see all the transitions of the different colors
and the gradient. And it makes it look
a little dated. So I like to kinda do nice
long smooth gradients. Kinda has a better
transition that way. You can always tweak
specific colors. I can even just drag this down and delete a color
to make it darker. Or does double-click
that particular swatch and make it darker that way. So now we're gonna do the same
thing on the other side of the Rocket and we're
going to just get the eyedropper tool and we're just going to
adapt that same gradient and get our gradient tool and
do the opposite direction. So have I have light up
here and dark down here. I wanna do dark up at the
top and light at the bottom. And it's going to give a little 3D dimensional look to it. Just like that. You do the same thing
on the other side. Gradient tool do a
nice long gradient. And they have the opposite side. The opposite. And let's drag it up to the right and
that'll do dark on the top. So that kinda gives it a
little bit of dimension. We can add, do the same
thing to our Typography. So when you add a
Gradients to a Typography, when it's live Typography, go to, go ahead and click
right here on the swatch. It's going to just
turn black because Live Typography can not
have Gradients on them. You have to right-click and create outlines on
the Typography first. So that's what we're
gonna do here. We're going to take
this live Typography, which when I say it's live, I can double-click and I can
add letters and change it. So what we're gonna
do here when we're Final with the
Typography choice. Because once you create
outlines, you can't go back. So I'm going to right-click. I'm going to create outlines, and that's going to
outline my type. And I can go ahead and
take the eyedropper tool and sample that same gradient
swatch we've been using. I'm going to take
the gradient tool and do a nice long gradient. Because if I, if I
do a tight gradient, it looks really cheap. Let's go do a little
short gradient so you can see all the
little lines there. And that could have
an added value or an added effect that
you want to go for. But let's just do a nice
long sweeping gradient. Just clicking and holding And it's going to add
that gradient for us. And we can even ungroup since we created outlines
on the Typography, we can right-click and ungroup. And now I have control
over each little letter. If I wanted to add a gradient
individually as well. It may be then another
gradient swatch my work really well like
a radial gradient. And we'll talk about that
more later in the class. So just kinda giving you
a little crash course in some Typography that will definitely review a lot more
detail a little bit later. So just adding a little
bit of gold there to that. And we can even brighten this particular, this gradient up. We can even double-click this yellow and make it
white to brighten it up. And change our dials of how
the gradient is loaded. Let's try something different
with this next one. So we're getting to practice
a lot of tools and learn some tools we haven't gone over yet by doing this project. So that's why I love to
do project-based work, is we get to use those tools in a practical
way. Good to go. Oh, that's how you use it
or that's when I use it. So with this one, Let's
get rid of the Rings. Let's just have one background. Let's get rid of the Typography. Let's just do a
Vector Art graphic. Let's add some stars. So there's, we can manually
draw stars with the pen tool. We can get a rounded rectangle
tool and draw some stars. So I'm going to create a top
and I'm going to duplicate this by holding down Option, hold down Option and drag. I'm going to show
you a cool trick if I have not shown this, if I've already
shown this before, I apologize, but it's
great to go over it. If you go up and you can
rotate this manually and it shows you the
degrees that has, depending on what version
of Illustrator you have. But if I want to do perfect 45-degree clicks all the way
around without having to sit there and try to find
45 degrees or 180 degrees. I can hold down the Shift and then get the corner and drag it. And then it's going to
automatically do 45-degree clicks, which is super-duper handy. So if I wanted to
just click it here, duplicate it, going to do a 45-degree angle
click, make it shorter. I'm just creating a little star, I guess you could say
a little twinkle star. Hold down shift, just
clicking it over. And you can create
little stars that way. Or you can cheat a little
bit and get the Star Tool. And don't worry, we're not
going to leave it like that. We're gonna do a
special effect to it. I wanted to talk about the
transform tools briefly. So if you go up to effect, you'll go down and
you'll see something called Distort and Transform. And there's a couple of
cool things you could do with several of
these options are definitely play
around with those and see the different
shapes you can create. I'll do a quick
example here for you. I'm going to create a
circle, an ellipse. Let's go ahead and make
it a different color. If I were to go to Effect down
to distort and transform, I'm gonna go down, this is just one of
them that we're going to explore is called zigzag. So we're going to
click on zigzag. I can do a preview. And you could do some
really neat things here. I'm going to reduce the
size all the way down, maybe just all the way
down at the very end. But you could create a lot
of great seal Graphics and badges that have certain
kinda smooth or sharp edges. Just like you see
here in the examples, you see all these badges. You can create all this using the zigzag tool and the
distort and transform tools. I can increase the
ridges per segment, so that's going to
add different points along the circle. I add more. You can almost get like a
RACI cup or a for sale, a sale sticker kind of thing
if you're doing a promotion. So lots of neat
things you could do with Distort and Transform. But in this case we're going
to use a different one. So we're going to
select our star. We're gonna go up to Effect,
Distort and Transform. And for this one, we're gonna do pucker and bloat. So pucker and bloat. So we're gonna do a Preview and I'm going to show
you what this does. So pucker is going
to suck some of those anchor points
inside the Graphic. And it's going to create a
cool star just like that. You could also billowed
it up and create almost a flower type Effect. That's worth exploring if you want to kinda
check that out, but we're going to just do a
little star just like that. And then we can just hold
down option and make it smaller and rotate and just
get some stars on here. If ever want to edit an effect, I've already done an effect, but I want to go
back and make it even more dramatic
or less dramatic. I can go back to my
appearance panel right here. And it's going to
list all the effects I have on a particular object. And here's the pucker and bloat. So I can go ahead
and click on that. Click on Preview
and I can go back to where my settings are and maybe make it less dramatic or even exaggerated even more. So I'm gonna do a little
bit less on this one. So each one maybe has a
different level of effect. I like to flip, randomize
these stars a little bit so it doesn't look like they are just the same star replicated
over and over. That there's some
unique qualities and arrangement of the stars. There's some stars
to our graphic. And what I'd like to do is fresh in this up
a little bit and add a gradient look
to the background. But instead of just using
a standard flat gradient, I'd like to use a new tool. It's called the
Freeform Gradient tool. And this is in Adobe
Illustrator 2020 and beyond. I actually think it is on the 2019 version off
to go back and check, but I'm pretty sure 2019, 2020 versions will have this. But you can always use
the mesh tool to create the same effect if you have an older version of
Adobe Illustrator. We're going to go to gradient. We would call out
our gradient panel. There it is. If you
have 2019 or 2020, you'll see the Freeform
Gradient tool. I'm just going to highlight, highlighted my big circle here and I'm just going to
click on a free form gradient. It's going to load some
different points here that I can drag and manipulate. And I can click on
another open area to add a point of Color. So I can double-click any of these points and add a color. And I can double-click
over here and add, let's say, a deeper color. Kind of some dip,
deep, rich navy blues. You can add as many
points as possible. So if you want to add up here, maybe a lighter blue, just make that a
little bit lighter. It just creates a
fresh dynamic color and you can expand the radius of this dot by clicking down
here on this little dot and just kinda making a little
bit bigger and smaller, just like that, kinda
adds a modern pop. If you didn't have
that, you could do the gradient mesh tool. So I'm going to highlight
this and you would just find it right here. Usually it's within your with your gradient tool
and a drop-down menu. And I would do mesh tool. And you click
anywhere around here. It's going to create a mesh, which is kind of a array of different points that you
can change the color. You can click anywhere to
create different mesh points. So the more mesh points you add, the more complex
your mesh will be. So I'm get the direct
selection tool and highlight any one of these anchor
points and change the color. And it's going to
work similar to the Freeform Gradient tool. It just a little bit
more complex of a Tool. You just get that
anchor point tool and add all sorts of
different things. And you can take the
direct selection tool. You can even take
these anchors and twist them to kinda get
a really cool effect. And we go over gradient
meshes a little bit later in the course
and more detail. So let's go ahead and
go back to what we had. I'm just doing Command Z, going back in our history and getting back to
what we had before. So that is an option. What I like to do is
put a little angle or a little spin on this because this looks
great and orderly. But if I were to
select everything and shifted just a
little bit to the right, kind of give it a little
bit of a diagonal angle. I think it adds a lot of
dynamic angles to it. And it could add something nice. We have several
different options here. Let's go and delete this to choose from some
With Typography. So I'm with Gradients, some with more of a
flat illustration, a lot of different options here. So this is what we ended up coming up with in
the short Project. We were able to
practice several tools. Feel free to re-watch this. This is a lot of tools thrown
at you at the same time, we were able to trace using our tracing worksheet and
really practice the pen tool, the shape builder tool. But hopefully here you've
really seen the value of mastering the pen tool and feeling comfortable with it. But also combining that with the shape builder tool to be able to combine
and delete shapes that you create with
the pen tool and with the Basic Shapes tool to pretty much create
anything you want. You can trace over a face
with the same method where you trace around and you're able to take the eyedropper tool, sample skin colors
and you can craft some pretty cool Illustrator Vector Art and illustrations. And of course was
vector, it's scalable. I can make this as big as I can. This could make a logo or
an emblem or assemble, or it could be just Vector
Art or Illustration. It could be a badge. A lot of different things
you can do with this. I want you to create
a student project. I want you to
attempt this Rocket. I want you to find a Rocket from one of the free
websites where you can find a photo of a rocket. You can do some of the newer
rockets that have been released by SpaceX or some of the new aerospace companies that are coming out with
the rockets of the future, you could decide to trace
any Rocket you'd like. I'd like you to make a
badge or seal Graphic, Vector Art graphic to practice a lot of the
tools we just used. I want you to be able
to trace that photo and simplify it to make a
really cool flat image, you can explore
Gradients or keep it totally flat with
single color swatches wherever you'd like to do. I want you to
experiment with this. I just to practice those
tools into really, really get comfortable
with the pen tool. Moving forward, we're going to start to get into LogoDesign. And this is such great
tools to already know. Before we start to
tackle something a little bit more complex
like LogoDesign
102. Logo Design Theory - The Characteristics Of Strong Logo Designs: what makes a great local design what makes for solid branding, thes air questions We will answer throughout the section as we look at solid examples of each local design is the mainstay of graphic design. As a graphic designer for over 14 years, I've designed logos for a wide variety of clients for both profit and non profit clients. I've come to learn all the projects of designers tasked with the local design project is the heart of it all. But why look at any poster Facebook page website? What do you see? You see the company's logo on Brand Mark, a group of text symbols, colors and words that try to describe the very essence of a company. And designing one is no easy task Way logo looks and feels is not random. But based on several different factors, the look and feel of a logo must match the company's mission statement. Beliefs target audience in style. Take, for instance, Under armour, the entire brand is focused around the under Armour logo. The logo is not just a marketing tool or design asset, but it makes up the basis for their entire clothing line. Shoes, backpacks and more. and just like Nike under Armour, makes a whole lot of money from their local design and branding. They spent a pretty penny, too, hiring branding agencies to crafted into the multimillion dollar logo it is today. Local design is not just for large corporations. Solid local design principles can be applied very easily. Too much smaller companies without the $1,000,000 price tag. And this is where you come in. And knowing these solid design characteristics can help you identify great local design and help you create one yourself. Strong local designs have the following characteristics. They have balance between symbols, type and elements. Not all logos need type, and not all logos need symbols. Summer just typographic elements such as a simple name written out in a tight face that matches their style. Some logos were made with unique custom typefaces designed solely for you, for the use of that particular brand. They're recognizable, using only part of the local design. Louis Vuitton is a great example of this without seeing the full logo or even the name, you know right away that this is a Louis Vuitton purse. Having this type of brand recognition makes marketing that product or service so much easier they do not need to depend on color to be effective. Color is critical in logo design, but a strong local examples does not need to depend on color. Coach is a great example. The logo can exist in many other environments without using any particular color. This makes the local more versatile and adaptable to all environments. Many times is a designer have had to work with the logo, using only one in color or black and white publication. Sometimes logos that are totally color dependent make this job harder for me to do. They work well in a wide variety of applications. Logo's need to be flexible and dynamic in the logo, Adapt to a small 48 by 48 pixel square and still be recognizable. Can it be just one in color and still have all of its main characteristics? Ah, logo needs to be able to be seen from a distance and still be readable and recognizable. Having a logo that can adapt to all situations is vital when it comes to creating a logo mark worthy of a long lasting brand. They can stand the test of time logo. Redesigns can be expensive, not because you have to pay the designer to redo one, but the cost of reorder and letterheads, business cards, packaging and products. With the new logo, it really adds up. Uber recently did a rebrand back in 2014. In 2018 they decided to refresh the brand once more. With the new logo and branding, they now have to switch all of their print and their digital assets to the new branding and local mark. A very expensive endeavor doesn't mean that the first uber rebrand did not look great. Not really. It just means that uber has evolved as a company logo and branding assets did not move along with it. Thus, the rebrand was necessary to keep up with its ever changing vision. How do you, as a designer, create a logo that stands the test of time simply by getting input from the leadership of the company? Whether that's from the owner for a smaller company or the marketing manager for a large corporation knowing where they are trying to end if it's a company can help you develop a logo that could be flexible and adaptive, their future needs, they avoid popular trends. I cannot stress this. Enough of warding. Trendy themes in your logo can help it stand the test of time. Remember Web two point. Oh well, most of us try to forget it, but it was popular when I was first, starting out, circa 2004 to 2007. Ah, Web 2.0 had glossy buttons made popular by the latest OS X gooey upgrade on Max. Everyone needed the local with the radiant, ah highlighted glossy portion and a simplistic icon. You do not see this trend anymore, and if you do, it looks dated, tired and just plain ugly. Any logo that was designed in the style had to quickly be rebranded as soon as something called flat design came to the style circa 2008 which is a style that simplifies the design . No Grady INTs flatten simple shadows and no gloss or details basically the opposite of the trend before it. Ask yourself if this local will still be on 0.25 10 years from now. If the question is maybe or depends than going for a more classic look, maybe a better bet. Simple clean and understated. You see a level logos now that use gold hand drawn lettering in lots of watercolor. Super cool and trendy now, but five years from now, probably not fight the urge to be trendy but be classy. Instead, they use negative space to their advantage, not a requirement for a great logo but a wonderful design theme I see in strong local designs. They're liked by the company's target demographic. When I think about this one, I think about Gap, a clothing store brand. They did a rebrand in 2010 making its logo more moderate, using a Sand Saref instead of its classic serif typeface chosen for decades. Prior, there was such a backlash and hate for the new logo. They were forced to switch back to its original logo, and it was a very costly mistake. They underestimated how their target audience would react to their beloved brand. Changing in typeface in in style. Make sure your local design will resonate with your company's target audience. Knowing your target audience is half the battle. Who are most of your customers? If you don't have any customers yet, who do you wish to sell to never fear social media getting opinions about a local sign. It's better to get negative feedback earlier in the process, you can adapt and make changes before a final launch. Before the level has already been applied to hundreds of items and products people can read the logo seems like a no brainer characteristic to have, uh, everyone knows you should have a logo that's readable, but here lies the problem. You may have spent so much time with the design, you may not have a fresh pair of eyes to see any of those issues. Make sure others can read it, too. I see this problem a lot with script, fonts and logos. Sometimes certain script characters do not flow well together, and it could make a logo very hard on the eyes to read, which leads us into the last characteristic and a great solid logo design. They are as unique as the company logo should be one of a kind. This is another reason why staying away from trendy design themes is important. You do not want to look like everybody else. The local you're designing is like a snowflake. I see way too many logo redesigns looked the same way on I shake my head and disappointment when I see another rebrand that looks the same. These are just a few characteristics of strong logo designs I've noticed throughout the years studying re brands and logos designs. If you strive for just a few of these characteristics, so you'll be well on your way for a local that will work well for you or your client.
103. Logo Design Theory - Logo Inspiration : When we talk about brands, we have to talk about logos. One of my favorite types of logos is ones that use negative space. The's logos do not ignore the background. They embrace it. They use elements of the white space left over in the background to create something very unique. It's not obvious at first glance, but once the user sees it, they can't unsee it. Take, for example, the classic FedEx logo. You see the arrow? It seems really obvious after we find it. But I looked at the aesthetics trucks for years and never saw the arrow until someone pointed it out. Take, for instance, this discount logo not only is the in unique, it also makes up the percentage sign which ties back into the main branding can even apply animation to this kind of clever double meaning. Take. For example, this time logo that uses the colon is the I letters become objects and objects become letters. Negative space convey. Be very simple. It doesn't have to be complicated. It can put a simple letter box and be able to have something much better than just having the letter stand. Loans. This one's one of my favorites. It actually uses a picture of a rabbit and simplifies it a little bit to make a really cool symbol. I love this one because there's two different levels here. There's the negative space that's created with the N that creates a very readable think word. But there's also think. Think about it. You have to look a little bit longer to kind of see the meaning of the logo. I love that double. This is a really quick local example I created to kind of show the negative space and the double meaning in action and see the end in the logo. But do you also see Z that along with the negative space created at the top of the end with the zipper, you have this double meaning with Z and the end and a little bit of negative space? Both of those elements put together make this logo a little bit extra special. I love to see letters make up objects as well. This is probably one of my most favorite leg was of all time. The local name is paranoia, but you see this little bit of a J that comes down below the eye. It's kind of like we're paranoid, like what kind of ceased seeing something? But we're not really I love it so much. Some double meetings and symbols are obvious on some Take a few seconds to kind of realize it, but I think the ones where it takes a few seconds to realize it I think they mean more when you find it. This is not just a scribble Lee script be, but it also makes up the outline of a banana. Who's gonna forget a logo like this? This is pretty neat. I think this is why this method works so well on branding. I found the majority of these local inspirations on a website called dribble dot com. B r i b b b l e dot com So go check it out for your own logo inspirations.
104. Logo Design Theory - Mood Boards: we're looking for branding inspiration. Look no further than nude boards, mood boards, air beautiful collections of photography textures and voters and color palettes. Before you start designing a logo, picking out typography and picking your headline photos. Mood boards are a great way to source all your inspirations and ideas for your brand through a picture of a plant or nature that seems to inspire something for your future brand. Is there a product? Appel. Oh, a couch. Anything that kind of inspires textures, colors and geometric patterns. Is there a rock that has beautiful hues of orange and brown? She would adapt to your color scheme or palette for your brand. Let's say we're in charge of developing a brand for a men's luxury shoe company. We want to start sourcing our photos. And when we develop a Brad, we really want to get into the mindset of the kind of consumer we're gonna be reaching. Where did they get to be interested in what kind of things resonate with them? These are the things we need to include in our mood board. Are there textures that kind of inspire this mindset or this personality they may have a world traveler. Do they appreciate art? What kind of architecture do they like? What kind of hotel would they like to stay in? And we use all this to create one unified Mood board that will be the source of inspiration for our branding, typography and color palette. For several programs I used to create mood boards. One of them is Canda, which I'm demonstrating right here. I'm able to kind of drag and drop things to kind of figure out what matches the best with what I'm wanting to accomplish with this brand. Once we figure out the right combination photos, I use a really great website from Adobe called color dot adobe dot com, and it's free for anybody to use. But I can actually import to Mood Board in, and you could actually find color inspirations from the different photos that you kind of curated is being ableto pick color palettes. Not at random, not because they go well together, but because there's some kind of inspiration for those colors. So where will this woman live? How does she decorates her house? What's her couch like? Does she like to cozy up to a big, thick wool blanket that she loved coffee with beautiful flowers. Does she appreciate nature? And she relaxed. Chill. Does she take photos of food? Is she a foodie? Does she appreciate the taste and rich textures of food? All these little things. They come together to really help us source or photos and come up with a brand that resonates with who we went to Target and the person who is really gonna be purchasing this brand mood boards air great inspirational kick starters as it provides the basis for color palette. So the mood board I created here for this feminine brand, I'm gonna be able to pull that into adobe color and pull out these beautiful kind of grays and neutral tones. Once we put together our inspirations, we also develop a color palette. We really dive a little bit deeper into branding process. You get into fonts, symbols, anything now else that will really help us put this whole brand package together. I couldn't do it any other way, and I couldn't do it in any other order. Going out of order messes up with the whole branding process Brand's lack inspiration if they weren't originally inspired by something to begin with when it all comes together with a unifying thread, a theme and an idea, I think people really see three authentic nature of your branding process. It's really important. A great website to check out is Pinterest dot com. Just type in mood boards and press search, and you'll be able to find some really great inspiring mood boards to get you started. And a lot of these mood boards aren't just us where photos put together, but they use type and other things and there to kind of create a really cool mood board. You're here because you need inspiration, a kick in the pants to get started. So go ahead and create that mood board, and I give you permission to be authentic Hafun and create an amazing brand.
105. Lesson1 LogoDesign Malluable ClientBrief: Welcome to the logo design portion of the course. This will be a quick dive into logo design process including working with a client brief, brainstorming ideas and executing those ideas and a vector program. This will be just a small taste test of the overall process. And I go over a little bit more of the detailed process and other courses. But I wanted to make sure you got the basics of this very important task. I'm going to use a mock client or fictitious client for this exercise, but going to make it as realistic as possible. During this process, I encourage you to work alongside me. You do not have to brainstorm the same ideas as me and I want you to feel open. You'll put your own ideas or spin on this brand and process. You can even use some of the work we do in this section for your own design portfolio. So let's get started. We will be asking the client a series of questions that will help us get started with the brainstorming process. It could be that some of these are already supplied by the client. First of all, what is your company name and how would you like it to appear on your logo? Malleable is our main company name. I would also like to have a version with the following and smaller print, life coaching. Sophia green. What industry are you in? We offer life coaching to successful entrepreneurs and business owners. What is your unique selling point of your product? What makes you different? We tailor our life coaching to each client. Specifically, we mostly deal with highly successful entrepreneurs and business owners who need help handling next steps in their careers. We helped them narrow down their focus and help them to realize their next steps so they don't feel overwhelmed with big life and business decisions. I think we are different and not only the type of people we attract, but the unique plan we developed for each person. Our name comes from the word malleable, which is how easy it is to bend and change the shape of metal or an object. We changed the spelling to be unique custom word mal usable to factor in the EU as an ode to the personal tailored coaching we offer. It's like taking a valuable piece of gold and changing the shape to make it into something better. Who is your target audience? Those who have already achieved a bit of success in their careers as entrepreneurs or even as part of a company, they tend to demand quite a bit of attention and are weary of paying for a coaching service. We want them to know that our solution is unique but also tailored towards successful people. What is your price point? We charge a fairly high hourly rate for our coaching services. We offer in-person, but also zoom focus coaching calls and develop a custom action plan for them to follow any style preferences you have. I would love it if we incorporated a metal somehow into the branding. Gold specifically, it ties into our overall concept and idea. So that's it for the client brief. You can also access the client brief in written form for later reference and the downloadable resource folder for this course under the logo design section. Now that the client brief is established, we have some information to start a brainstorming process, but a first want to do some basic word mapping. I'll see you in next lesson.
106. Lesson2 LogoDesign Malluable Wordmapping: When it comes to logo design in the branding process, I'd like to do a quick word association exercise. This involves creating a word map or I can take certain key words or phrases from client answers in the company name. And I tried to find connecting concepts are words. For example, the client mentioned the word malleable means moldable. So I'm going to write that word here on top. And what's another word that can also mean moldable? Think of the word flexible. Remember there's no wrong answers here. Trying to think of things that indicate being able to be shaped or formed. Sometimes you get stuck on a word and it's nice to just move on to another word to reduce the possibility of creator's block. So let's think of another. Well, the client did mention metal in the brief as well as liking the color gold. So let's write metal right up here. When I think of metal, what do I think of next? I first think of strength. I want to be able to write the words strong up here. When thinking about gold or other metals, I think about how valuable they are and how expensive it is to buy jewelry and other products with gold in them. So just going to jot that word quickly down here. Also, metal has a reflective quality to it. Rarely are they just one solid color, but they tend to reflect in bounced the light around back and forth, creating a very dynamic look. If secondary words are not coming to me quickly, I move on to another main word bubble. This client mentioned they seek a successful clientele and they have a higher price point. So I'm just going to jot the word high-end here. Now when I think of the word high-end, I think of the word expensive. This does not have to be a negative word here. I also think about something being a rare when it's high-end are expensive. And to be honest, I think that might connect better with the word metal up top. There is no order. You have to go in with word mapping. You add words as they come to you and try to categorize them as such. I think a better word for high-end is the word limited. Higher end products and services are limited because they tend to cost more and not everyone will be able to afford that service. Premium might be a similar word to use here as well. Let's come up with another main word here. Let's try life coaching. That's another word found frequently in the client brief and answers. What do I think of when I think of life coaching? I think about lost people finding direction. So I'm quickly jotting down that word. I think that it offers stability in some people's chaotic lives. Some people need someone to talk to to help them through what seems like craziness in their personal lives. I also think this is very motivating. I think once you get a plan, it really helps to keep you go into follow it. So I'm going to write down that word. This whole word mapping process should feel pretty easy to you. If you ever get stuck on a word, just move on and try another word. After just about five minutes or so, you should have a few words and sub words to go on to create a finished word map. This is really just a helpful guide and developing some starting concepts for you logo. If you don't find it helpful, that's ok. There is no requirement to do this as a first step. Now that we have some words and phrases that are associated with our clients company, let's see what we could do to pick out themes between our words and how we can communicate some of these words and thoughts as shapes for our logo design. By doing a bit of research, I found that the strongest shape in the universe is a triangle. That gives me a great starting point as I have put several words down that associate with the word strong or strength. So just going to write down some of my connections I see with the words and the objects. I know that the client already mentioned that they want to use gold. So we know we want to keep that in mind when we get to colors later down the road, the triangle and Gold Elements are making me wonder if sticking to a geometric shape for a possible logo marker, symbol, make sense here. Remember there's no wrong or right answers. Let your mind start to connect ideas, concepts, and words. Let's stop there and get to some of these rough ideas onto paper. I'm using an app called procreate for the iPad and using an Apple Pencil to sketch. But you can use just plain old pencil and paper to jot down your rough sketches. I am going to add a grid on my document just to give me some added helping keeping my line's a little more straight. I am just starting out with the idea of a triangle. That is all simply just drawing a triangle in figuring out shapes I can create with it. This is nothing too complicated. I'm seeing how it looks overlapped or a separate elements. Just doing these quickly to give my brain a chance to play around a little bit with some creative freedom. Once again, if you ever feel stuck on a shape, just move on to another idea, shape or concept for now. What if we did a typographic logo and emphasize the intentional misspelling of the EU. What if we made the EU a big centerpiece of the typographic logo, just sketching out ideas to see if it's ever worth pursuing. The sketching process is not required, but it does help you eliminate ideas as it's much easier to sketch out complicated ideas than it is to try to put them in a vector program like Illustrator. And it takes a whole lot more time to do it that way. Now I am combining the triangle and the idea of the EU and the typographic logo. This is where you can test out multiple concepts in one logo. This is where some good accidents might occur when you start to combine multiple concepts and shapes. So me do not anticipate until you start to sketch them out. Let me quickly sketch some geometric shapes. I may have to play around more with this one and a vector program like Adobe Illustrator, as it gets a little bit easier to do geometric shapes, they're doing that maybe want to try overlapping triangle shapes that maybe look as if they're weaving in and out of each other and might look pretty interesting, I'm going to start a fresh new document to test this one out. As we sketch, sometimes our ideas do not come out quite right. In reality, I think this looks really good, but it might look too close to the star of David. And I don't want to have a symbol that looks so close to something else. Maybe turning it helps. I want to erase some of the intersecting lines to give it that woven layered effect. Maybe. Going back to my word map, I noticed with life coaching growth is another great word to add or use. I associate growth with leaves and nature. What if we combine the strength of the geometric triangles but with the growth and softness of a leaf. Adding some details to this can make it kind of a unique symbol. One idea usually leads naturally to another, and this is why brainstorming is so important. My thought was the Triangle and the leaf, but my symbol was just getting way too complicated for my liking. So I decided to try out something a bit more simplistic. We can start to pick a few selected concepts to then bring into the next stage, the vector stage. These will be symbols and sketches that I think have the most promise. I'm starting to just label each concept with what comes to my mind first. And do not want to bring too many sketches into Illustrator with you because it could overwhelm the creative process. Less is more when it comes to breaking that overwhelming feeling.
107. Lesson3 LogoDesign Malluable BrainstorminginVector: Now comes my favorite part, the one I've always felt the most comfortable with. I've never been a great artist or an illustrator, but I found that using a vector program like Adobe Illustrator helps to make my horrible sketches and makes them much more polished and much more of a realistic logo. I've always told my students you do not have to be a great artist, to be a great graphic designer. And that is why software exists. I took screenshots of my sketches and brought them in as a simple JPEG. If I spent the time to do a more detailed final sketch, I could even start to trace over my sketches with the pin tool. I've done this before in my digital design masterclass, as you can see in this simple illustration, for example. In this case, our logo mark will most likely be more simple. I'm going to still continue to brainstorm during this time as a create a wide variety of symbols that are based around geometric shapes and the triangle. Also keep in mind that the color of the client wants to use somewhere is gold. But right now, I'm just going to black and white. For this continued brainstorming process, I opened up a standard default and 11 by 8.5 inch document horizontal, and started off with a rough idea of a geometric shape and triangle. Of course, your document size at this point can be any size. From there, I can make a quick duplicate and make a modification to it and add something new. This is that brainstorming process of one idea leading to another, almost like stepping stones in a pond. You cannot hop to one stepping stone without being on the one before it. It is the best way I can describe this process. What I'm doing is taking some of those key concepts like the growth and the leaves, strength with geometric shapes and trying to incorporate these in a lot of different ways. This is all about experimentation you didn't do, do not need to make so many varieties of shapes like I am. Some of these are just purely to find out what shape leads to another, that leads to another, and what ends up being that final symbol. Some of these may never see the light of day, but could have played apart and developing a further idea later on in the process. I also decided to take the letter M And see what shapes can form from it using strong solid line forms. I also wanted to take the you in the name and somehow combine it with the M to play on the first letter of the company. But also the intentional misspelling of the letter U. I am finding different spaces to combine these letter forms, almost like working with a puzzle. Once again, there's no wrong combination of objects. Never talk yourself out of a creative exploration with a shape, letter, or symbol. Sometimes we like to critique ourselves and be negative before we're finished, but now's not the time to do that. Let things just come out like creating a painting. This whole process took around 45 minutes. I would not spend a whole lot more time than that. You could possibly spend all day just coming up with different varieties. But sometimes the best ideas come to you first. Or you could have already sketched out a great shape and you simply trace over an illustrator and finalize. So this whole process could be shorter for you depending on the logo. But each logo design concept process is unique. This one happened to involve geometric shapes, but figuring out what combinations of shapes to use was why this one took a little bit more time to figure out. And remember, there's always the possibility of unused concepts, shapes, and symbols to be repurposed for other projects down the road. Something I always like to remember as I work through this process. Nothing ever goes unused and nothing is ever a waste of time. And now that we have some basic shapes to choose from, let's open up a new document and Adobe Illustrator and work on finalizing our symbol, anti-poverty.
108. Lesson4 LogoDesign Malluable pickingourconcepts: So here we are in Adobe Illustrator. Here's just kinda some raw sketches and ideas I have kind of out, I'm starting to kind of fine tune and pick out some symbols that I think would be simple enough and clear enough for such a high-end logo. We want to go kinda a little bit more simple and not have anything to, to complex. Here's what we ended up coming up with. Here's all of the different shapes put together and it's great to kinda see them all in one place. And I can just kind of study it, kind of sit with it for a day or two. There may be some that really pop out to me as possible ideas. We want to show the client several different ideas. So there could be more than one symbol here we went to work on. And so I'm just looking at these and just trying to figure out what I think could work. So what I'm gonna do is I'm just going to slowly highlight a few of these and just copy them and bring them over to my new document. And just so I can start to eliminate ones that I don't think are worth pursuing. So I'm just kind of going through here and looking at the shapes I wanted to communicate, what I wanted to communicate, which would be high-end luxury. I wanted to have the idea of coaching help, flexibility, strength, just all those little keywords we came up with. And from that or from the client brief, we wanna make sure we revisit the client brief. We revisit our word mapping as kind of ideas of which symbol might work out best for us. So I'm just gonna kinda go through, there's already some I went to eliminate this one with a triangle and this almost looks like a superhero symbol doesn't quite communicate kind of the sense of life coaching and help and assistance. So I'm just starting to eliminate ones I think are a little bit to maybe masculine. And we don't want to be too feminine, we don't want to be too masculine. So just kinda of eliminating some ideas that I don't think quite work and just slowly getting rid of some shapes. And so now I'm here to the leaves, we can start to kinda figure out, let's pursue a leaf as a different concept. And I like how they're geometric and elif combined. But when you zoom out on symbols, this is what's really important about logo design, is when you're doing a logo design, it's gotta look really good, super-duper tiny On a tiny screen, but it's also gotta look good, large as well. So I like to do a visibility test. So I zoom out and I make sure my logos look really good from a distance. And I have a lot of students do these wonderfully complex logo symbols. But when you zoom out, the lines are way too thin and so you can't really make out the details. So you wanna do this visibility to zoom out and make sure that will eliminate some of these. Because this may be hard to tell the details or see the details. We can even start to delete some of these. And so with the leaf, I feel like maybe this one has quite a bit of promise. You can just kinda cluster these together. And there's also the idea of doing a typographic logo as well, where there's not really a symbol two. But after talking with a client, they, they definitely like the idea of using a symbol for a watermark. So with this case, we are going to be mostly. Considering a symbol. So it is a back-and-forth communication with the client that you have to make along this process. So you're not spending so much time with a concept that the client is not interested in. So check back with the client anytime you have a question. Anytime you want to send them, maybe this whole array is symbols or pick out a few and say, Well, which one are you feeling? Is there a direction you can help point me toward? So we have a leaf, we have a geometric shape. I like the idea of playing on the m. So there's a lot of different m's here. This one looks a little less like it m because of the intersecting diagonal lines. So just kind of erasing a few of these. We've already gotten a leaf picked out. So it's going to be one of these right here. These all clearly look like m's a little bit more than the other ones. And perhaps this one. And this one, we're not sure. I'm just gonna go ahead and put both up there. I don't have to just pick one. This one was when I was trying to explore him. So this is kind of that same hexagon shape, but I was putting EMS on each side of the shape but kinda seeing it now, it looks a little disorder. It doesn't didn't translate as well as I thought it would. So sometimes things don't work out and that is okay. Some of these just look like geometric shapes, but they're not really communicating a lot. And this one, a couple of these have potential, I think I'm going to maybe bring this one up. This does have kind of the triangle in the middle and it's a strength, strength like I think that kinda communicates something here. So let's eliminate some, we don't need any of these. And while some of these look really, really cool, I really like how this one looks right here. I'm wondering if it's not losing. I mean, there is triangles in there and triangles into the shape. And that's kind of the idea, but it's just not seeing anything communicated through the assemble. It just looks cool. So I'm just going to have to leave that one. Maybe I can find a purpose for this icon or symbol. And another project I do maybe a personal branding projects. So none of this goes to waste. You can always use the symbols for something else later on. And we have one of these M concepts to, I tried different arrangements of EMS. I like the idea over here. I was trying to combine the M and the EU. And all I did was I drew a, you kinda use symbol right here, just a line stroke you. And then I just reversed it to create an m and put it together. So this is just one shape I created and combine them together to make my own little custom, M and U shape. And I put a little space here for some room. I think this has some potential with the M and the EU. I think that's really cool and makes a really neat shape, but it also communicates the u and the M. And I think this doesn't quite work as well. Maybe we can try different colors, but we're gonna get there later on in the process. So I think we have a couple of great little symbols to start off with. We started off with probably a 100 and now we have just a select few to go ahead and bring into our new document and kinda maybe start to bring in topography into the mix and see how we can combine both of these to really narrow this down even further.
109. Lesson5 LogoDesign Malluable Typography: I'm going to open up a new document. And it doesn't really matter the size of the document because it's still in vector, it's scalable. You can make it any size. I just like to stick with standard sizes. And for you that could be European sizes. I'm in the United States, so I'm going to stick with inches. I'm gonna do an 11 by a1 happens document. I like to do a horizontal orientation, so 11 by 8.5, just because I feel like I just worked better horizontally than I do vertically. So I'm just gonna paste it in here. And here's kind of some basic shapes. This is kind of where I, our idea pool come from. A nice pool of different ideas to pick from as we kind of work with our topography. So let's get our type tool and we're going to type out our name malleable. And I'm going to do it first of all in lowercase, MA, ALL YOU a BLE. So there's our basic name. And this is what I love. Working with. Typography is one of my favorite things to do. So this is lowercase. We're gonna make a copy and we're gonna make it all uppercase. And we're going to play around with ideas of lowercase and uppercase because as we studied in the design theory lessons, uppercase communicates different feelings and emotions than a lowercase. A lowercase is softer, more approachable, modern uppercases, strong strength. So kind of that goes more toward our brand than lowercase, but I wanna see how both look. So I'm gonna go over to my character panel here. It's in my properties, I'm in a newer version of Illustrator, so it is going to be my Properties panel right here and the character or you can access it right here when you have the type tool selected. And I'm going to make sure I'm just gonna go to character. I'm going to go down to this handy drop-down menu. And there is something called all caps. So I can go ahead and click it to all caps. And that's just a quicker way to switch things instead of having to type it all in all caps in kinda do it through the character menu. You can also do subscripts and all sorts of extra stuff as well. So here's uppercase, here's lowercase. And we're gonna do the same thing we did with symbols. We're going to duplicate and modify, duplicate, modify, and just create a really wide array of font choices and combinations to see what feels right, what looks right with the accompanying, accompanying symbols. This is your default Myriad Pro. And we're gonna make this a little bit smaller because we're going to be fitting a lot of different options here. So as I start to duplicate these, if I feel like I definitely want to stick with a lowercase or uppercase, we can start to eliminate and refine further. But for right now I'm keeping both available. So I'm going to move over here and I'm going to cycle through my font choices. And you can, I have my, my favorite font Guide if you're looking for fun ideas, I don't have to stick with those, but just some that I like to stick with. And so as I'm cycling through these, you're kinda seeing serifs, sans serifs, and the newer versions of Adobe Illustrator. You can arrange it by going up to filters and you can arrange it by classification. So if I want to stick with san serif, I'm pretty sure I went to san serif type face. Then you can categorize in all of these will be Sans Serif, which is really, really nice. So Avenir is one I've used a lot and branding projects, so I'm going to check it out. And we want to be careful not to do something too thin and wait for the same reason. We don't wanna have strokes and our logo symbol that's too thin to right now this ultralight is way too thin when I zoom out, you totally lose it. And I have a lot of students struggle with making topography in lines a little bit too thin. When you get it printed, there could be some readability problems. So instead of ultralight, let's kind of move through these weight choices and see what works really well. There's really a heavy, which I think might be a little too chunky. So let's stick with something right here in the middle, perhaps a Diebold, just an idea of seeing how that looks. We can go ahead and eliminate our default because I don't think we wanna have Myriad Pro is our choice. One thing I'm going to do is I'm just going to, instead of black, I'm just kinda double-clicking on my swatch and just making it a light gray. I feel that it really helps me put color and my mind, even though I'm not actually using color, I'm sticking with black and white. It just kinda helps me add more color, color because pure black is so strong. So just doing a light gray here. So let's duplicate and let's make this a little bit faster of a process. So I'm going to go through real quickly and pick out what typefaces I think could work. Oh, that's an interesting one, but maybe a little bit too playful. So I'm thinking about the brand as I'm doing a type choice. That is Bei Abbas new, regular. And it's condensed, meaning the topography is a really, really close together. And I feel like that is, it's really, it's really strong. There's not a lot of spacing between the characters. I don't know. I just don't like the way that is feeling right now. I need something a little more dynamic and softer. And so you have something like this Macchu. So this is kinda those little decorative typefaces, almost like a script, but it's more hand written in nature. And that has a very casual, youthful look, but that's not really going with her brand is at our brand is high-end clientele coaching successful people strength. So you can tell already that that typefaces just not vibing. So what I'm gonna do is I'm going to switch now to serif typefaces and see if a more traditional serif typeface could be stronger. That looks really good. It's kinda like a Dido, high contrast Sans Serif or sorry serif typeface because there's higher contrast between the letters. So this is a really fixed stroke and this is a really thin stroke. So there's high contrast between all of these. It gives it a really nice, elegant traditional look. So let's keep that and make a duplicate and move onto the next typeface. So we're going to try that one. And that one was a Brill, which is a really common when I tend to use. And you can pick one, this one that Georgia, this is, they're both sans serifs. But you notice this one has little contrast between the strokes. They all little bit more even stroke throughout the entire letter and it gives it a totally different look. I think it makes it more readable. And I'm kind of feeling this one more because you don't have that high contrast. I think it makes it easier, chunkier, it just kind of feels a little more modern. And I'm not liking how the all uppercases looking over here. So we're just discovering things though is we make duplicates and test out different typeface choices. Marion, That's one. There's regular italic, don't like metallic works bold. So there's, there's not a huge difference between this one which is Mary on and this one which is Georgia. They're both very traditional typefaces. Always paired them together to see how they are slightly different when he get to the ball terminal here on the a and the ball terminal here, they're just treated a little bit differently, just little different style things. You notice how this is a little bit more flat and this is a little has a little bit more of an angle. So study each type choice and to see what characteristics do you think would work really, really good with your font choice. And in some cases, you may develop your own custom typeface by getting them. I do that in other classes like my logo design Mastery course or my intermediate course where I take a typeface and we create outlines and we literally change the shape of the type to make it unique and totally custom. But once again, that's a little bit more of an intermediate skill. So dido, dido is a very, very popular typeface to use with high-end magazines. And once again, high-end was a word we used in the client brief. So I'm going to just keep that in there. And let's continue to filter things out. Let's try a slab serif. It's going to be chunky. It's going to have a lot more characteristics. But those characteristics could easily overpower or symbol. So we have, we're going to have a symbol in this logo. So if we have a symbol and we have a very highly characteristic stylized typeface like this with lots of slab chunky serifs. It starts to compete with a symbol. So we want to go for simplicity. We don't want the symbol to be overwhelmed by the typeface, and we don't want the typeface to be overwhelmed by the symbol. So slab serifs, they might be too decorative and nature for this were wanting something more simple. So just kind of realizing that as I kind of go through the list here. So let's go through our filter. We have Script typefaces. Once again, I think in this case, if we have kind of a really cool decorative symbol along with the logo, that a script typeface might be a little much. So we're going to skip past some of these and I'm going to just go back and I'm going to go back to as a Sans Serif and see if there's not another choice here that I can go through. And I have Adobe fonts because I have the Adobe subscription and that gives me access to a lot of these. There's also Google Fonts, Google fonts.com. You can find a bunch of free fonts to use there as well. And this has a mix of both of those. So rubato, that's a pretty popular one to use for UX design or online websites. I know that they tend to love to use rubato. Let me see if I can't try a lighter weight just to kind of throw in a san serif. So we have a lot of good choices here. A lot of good combination of lowercase and uppercase. I'm going to spend, you know, 20 more minutes or so kind of trying out more. I would have you along with me, but I definitely don't want to get you bored. Just kinda doing the same thing I just did in the last 20 minutes, but just doing a little bit further to make sure I go through all the font choices and find the perfect font.
110. Lesson6 LogoDesign Malluable Typography part2: So we have some great options here. So we have lowercase and left uppercase on the right. And I liked the way the lowercase feels, it feels softer, more approachable. The ones on the right feel stronger in strength. So let's see if we can't touch up the spacing and occurring between each character because right now it's just default spacing. So I'm gonna take one that I feel like I had some time to kinda think about font and type choices. And I decided to stick with a Serif typeface to give it a little bit more of a traditional Look, we're going to be using gold. We're going to have a very nice traditional, simple symbol. And I do think having a serif in this case could work better to elevate the brand. So I'm going to eliminate in a sans serif font choices. So that kinda helps us narrow it down. We gotta continue to narrow down options or we're going to feel very overwhelmed. So as you, as you enter in each phase, eliminate things as you feel like they're not fitting, just delete it, get it out of your mind. So here's some options. I want to take some of these uppercase. And you know, when we studied our design theory that sometimes adding spaces between characters can give it an elegant high-end look. So let's do the same thing here. We're gonna go up to our Character panel and we're just going to add a little bit of tracking. It's adding some default tracking and we can current it, which means we manually change the spaces. We could do that a little bit later. But I know with this as kind of more of an introduction to logo designs or we're not gonna get as detailed as I would say other classes. But just kind of a little introduction. So here's how these look. So this is pretty, this is the highest contrast between the lines, the thickness and thinness here. And feeling like when I zoom out there's really thin parts of the topography, they get a little lost. And so I'm just gonna go ahead and eliminate it because I don't think it's as practical as I'd like it to be. So now we only have two options. We probably have the same problem down here on the dido, as wonderful and traditional as Dido is. It's got that same problem. It's, it looks really great when it's large. And that's why you see it on massed heads on high fashion magazine. Magazines is really large but, but Dido, dot and really Duke, really good when it's tiny. See, when I zoom out, it's not, not, not very strong. So eliminating that, so just like that, we were able to refine and pick our font choice, which is going to be Georgia. And I love the wider spacing and I'm thinking this is weak compared to this. I may, I like how this looks for some other applications, may be a different logo or a different company. But I think in this case we want something pretty strong that can. What I like about this is it's even it's got the same Cap Height and x-height. Right here. So it just kind of feels more geometric. It feels more like even on the top and the bottom and the left and the right. The lowercase. It has these little gaps that are naturally created. And I just, I just feel like this is more geometric, can align perfectly a little bit better. So let's continue to refine. Let's create a couple copies and let's get some different spacing or tracking right here, tracking between the character. So right now this is, and I'm just right here, my character panel. And I'm going to write down here to tracking. And you can manually put in whatever number you want. Let's try this. Try some really wide spacing, just typing in a number. So very wide spacing and we can even try tighter spacing. Let's do 200. And this is where we get to kinda go. Okay, well what, what's too wide? What's too short? When you have too much spacing between characters, it starts to be disconnected. And sometimes wide spacing has a nice effect. In this case, I think that's too much, but I also think that this is too little. So I feel like we have a Goldilocks situation where we have too big, too little, lets find kinda something in the middle. So I'm thinking this might work with maybe a little more spacing. So I think I'm figuring out that 400 might be kind of the sweet spot, not too wide and not too little. So that's kind of how I discovered the gaps here. You can manually change the spacing between these characters, which are going to have to do though, is instead of having them be one line here all connected as live type, you're going to have to copy each one of these and create just holding down option and dragging and kind of type in each letter. And this is going to be too complicated for this particular project. So we're not gonna get in detail, but I'm just kind of showing you how to do that. And then he would slide these around to find the right Kerning and spacing between each little character. But we're gonna stick with the default tracking for now and now we have some symbols. We have a topography choice, we're ready to combine these. We're trying to find the right balance and size between logo symbol and logo type. Everything is coming together really quickly now that we got through the brainstorming process and I'm excited to continue further. So let's combine symbols here. I am going to pick one. Let's go ahead and pick this one right here. And we can refine this as well. And how I created the symbol, you can kinda see the brainstorming process behind the symbol. But I did what? When hadn't flipped on a grid. So you go to view and he go to show grid. And I was able to take this basic shape. And I just kind of got my pen tool and I just traced right here a simple triangle. So it was, it was probably one of the simple, easiest shapes I came up with. But I think, I think it has strength. It has a geometric part, it has a triangle. I think it could work really nice as a symbol, of course, are symbols or not. Finalized yet we haven't played around with stroke weight yet. We haven't played around with color. We could still tweak everything at this point. So now that we have our grid and if you ever want to turn on your grid does go up to view. And you can hide and show your grid. There's even a little handy shortcut, keyboard shortcut that I'm gonna be using off and on to hide and show a grid. Do you have to use grids? No. You can eyeball it. You can find different ways to do it. I like to have smart guides on. So I'm going to go up to view and I'm gonna get my smart guides on which I've reviewed a little bit in the past. But smart guides are great because I can kind of eyeball it, but it does give you a little help with as little pink indicator lines. Like if I wanted to find the center point between this and this symbol, I can drag it and then find that centerpoint, right? There's gotta kinda snap for you. And so now we have to think about balanced between these two things. And while I'm doing this, I can also kind of line everything up to the grid. So you see kind of em is at that point of the grid and E a can drag that and make that a bump up to the left and then make sure this is pumped up here. So now that I know that grid is intact, Let's talk about balance. So you never want this symbol to overpower the topography and vice versa. So if I have a big old symbol and I see a lot of students do this as why bring it up? So let's kinda bring this down here, or bring both of these down here so we can have some room. So a lot of times I have students do this. Like here's my logo. And I go, okay, love both elements, but the balance is off. If you zoom out, you're not going to be able to really, the name is an afterthought and then logo design names are so important, the company name and readability of a company really is priority. You never want that to happen. You never want this gigantic symbol to overwhelm the topography. And then I'll have people do this and be like, alright, have a logo. And then this, this is almost looks like another character, almost looks like a mistake because it's a small little thing. It's competing with the size of each character. So it's not standing out at all. So it's about finding the balance between the two. And some designers, they are more precise and they use a ratio. So I'm gonna do this is a 100% and I'll do 60% of the width of the typography. And I'm kind of one who likes to eyeball it and feel it. So this is called optical adjustment, which just means I manually adjust it with my eye to see what works right for balance. So sometimes it helps to zoom out, maybe make it a slightly bigger. So anytime I feel like the symbols getting bigger, make it smaller. So that could be a nice balance. I want to zoom out. I want the name to be really the first thing you see in the symbol to be complimentary of the topography. So once again, we can make sure we have it aligned in the center and the grid kinda helps us with that. And the smart guides really help. And we also wanna make sure we have some nice spacing between the logo element and the, the, the topography. Right now I think that's a really good balance. Some people like to have it real close. And to me that, that makes me anxious. That makes the viewer anxious when you have these elements close together. And then disconnected is when it's a little too far apart. So we have another Goldilocks situation where we don't want too far, we don't want to tight. We want to have something just about right. You can use the grid to make it precise or it can be like me. I don't feel like I want to have the grid always as a rule. It can help you, but I don't want to, I want to be able to find the feeling and the right balance, maybe just tucking it. I'm just using my top arrow key. And I'm just going to nudge it a little higher till I feel like it's a good moment and this will happen with time. The more Legos you do, the more you'll be able to eyeball it. And when he first started out, he maybe being more precise and using grids might, you might feel like that's more helpful to you. But once you've done it awhile, you'll start to kinda get used to what looks good and what, what pairs well together. So now that we have good balance, let's try out different symbols and different weight thicknesses. So what I'm gonna do is I'm gonna do the same thing that I've done before. And it makes some duplicates. I'm going to turn off my grid for now because right now it's just a little distracting. So just turning it off. And I can replace symbols. I can modify symbols. So it can bring in our little leaf design. And we can find out what we think. And I'm gonna go ahead and eliminate this option. This one right here. I just, it's not looking good from afar, it's looking too complicated. I'm gonna stick with just one symbol. So you might just decide to eliminate something after you look at it and go, You know what, compared to the others, it's just not good enough. I'm just gonna go ahead and delete it. So we're just holding down option and dragging to create a quick duplicate. And you can see how quickly you can put all these together. You can see it's really a fun process, will really, really enjoy logo design. It's one of my favorite things to do as a graphic designer. So continuing to put these in place. So we have kind of some different options here.
111. Lesson7 LogoDesign Malluable SymbolRefinement : So making some slight adjustments to these, making certain symbols bigger or smaller as I feel like they need to be a little bit closer, just just making always making small adjustments. I think all these are working well and it's hard to know which one will work well until we start to maybe figure out color and we try to figure out the final thickness of the strokes. So let's play around with each symbol to see if we can tweak it to make each symbol a little bit better. So right now I'm going to bring out my Stroke panel. So I have my Stroke panel right here and right now it's got about a 2.4 thickness. So I can make it thicker. I want to have it be as strong or symbol or thinner To be more elegant. That's probably a little too thin when I zoom out, I'm starting to lose it. And you'll notice when I created the symbol, you'll notice that I have these nice rounded corners. And I just went over to my corner right here, my Stroke panel, and I just did a round join and it kinda helps to add. Now, right now this is default, which is a meter join, which is kind of a sharp angle. And when I go over to a round joint and my Stroke panel kinda softens it. So just kind of a little trick there, kind of showing you, since I didn't go step-by-step through creating the symbol. So we can do the same thing we've done before. And we can duplicate. And let's test out some different stroke weights. So right now it's on a two-point stroke weight. And let's see if I can't reduce it and make it thinner. And then increase this one and make it really thick. Just to kind of see kind of the Goldilocks situation and what not too thick and not too thin. I wanna make sure that it's a nice level. And you can also split the difference. So I can always do a 3.5 and I think that's too thick. And just reducing the stroke weight on that and is trying to find the right thickness. So I think what I'm gonna do after kind of seeing how that looks is I'm just going to increase the stroke. Wait just a little bit. You never want to have anything too thin for the same reasons I mentioned before. When you zoom out, you start to lose the lines, you lose the design. And so increasing it, I'm going to split the difference and maybe do like a 2.3, you know, it doesn't have to be 23. It could be something in between. It's all about you to find that perfect thickness. So now I can really make out that symbol now that's thick. I think there is such a thing as too thick. It starts to look to chunky and lose its elegance. So let's go back to 2.3. So feel really happy with that symbol so far I feel like that is the strongest. We can continue to play with stroke weights here as well. So what we could do is we can select all. And I'm going to hold down the Shift key and just deselect this outer circle shape. So now I just have the inside selected. And let's see if I can just make this thinner. And to make it easier on myself, I can right-click and I can just group those together. So now this is all kind of grouped together. And let's see if I can't maybe reduce the weight and have kind of a different contrast. Of weights, which I think makes it a more complicated in a good way icon. So let's slide this out. We've got to be able to compare side-by-side. And let's go back and do the same. It's get my eye dropper tool. And I'm going to sample this thickness of the outer circle and it's going to adapt to the same stroke. So now that's all the same stroke. And we can see how that looks compared to the, the different contrasting strokes that thick. And we can make this thicker and this thinner. So just trying to see what communicates our idea the best, which just looks better overall. Kind of looking at these kind of zooming out and doing a visibility test. Definitely the, the not the two thick but kind of that medium thickness of stroke probably looks the best. I do feel like I want to reduce it a tad. Might kind of feel like it's the right thickness. We can also, we could fill in any of these shapes. If we want to make that triangle more obvious, we can select a believe it already is a triangle shape. I can right-click ungroup. And there's a little triangle shape. I can toggle on my fill and a toggle on a Phil, I can end up making that a red color or something that really stands out. I feel like when I do that, it makes the triangles more obvious because you see that center triangle, but you also see the triangle that's created on the outside, kinda this overlapping shape. And I think that works really well. And if you ever doubt yourself, create a copy and go back to what you had and go, You know what? I need to kinda test this out a little bit. Which one do I think it looks good. And what I like about the filled in is this gives us an opportunity when we get to color to maybe have a standout color there. So if we wanted to do a blue or in our case, we're going to end up doing gold because that's what the client requested. We can have opportunities to figure out what that looks like. Might still need to do a stroke and then do a fill on the inside. So just kinda not bringing it, just doing color for a moment just to kinda go, okay, does it look better filled in? What do we think about that? So I think that's probably the winner. And we can move on the leaf. I think the stroke, this stroke, we can just reduce that a little bit to see how maybe a thinner stroke looks. But I kinda like the consistent stroke on all of these really. So I think that's going to be kind of the theme throughout. And this is really interesting. We could end up playing with contrast with color. I'm going to continue to keep everything in grayscale, so color doesn't become a problem to our creativity. Sometimes when you add too many new things like color and topography, you start to get overwhelmed with different variations. So we'll stick with color later, but just kind of getting an idea of different shades that we could do with this. That could work because we can emphasize the m. I'm just doing the eyedropper tool is just a quick way of kinda gets something the same color. I think maybe keeping the M1 color are one shade and then keeping the you a different shade will help differentiate the M and the u instead of feeling like one big symbol. So it's great how different shades and color can help assemble as well. Ok, so after kinda looking at this, I'm realizing, you know what? I don't think I like this as an option. It looks like a crown. I mean, I see the M, i see the triangles, but I feel like it's not, it's a little stiff. And really liking this rounded corners of the other options better. This one seems a little stiff. And we don't want to have that forum, amazing life coaching brands. So this is a time where hey, you're going to start to eliminate options. So just eliminating, naming that option. And now we're left with four great choices that we can refine further with color.
112. Lesson8 LogoDesign Malluable orientations: So when it comes to logo design, we have lots of different places this logo needs to work. It needs to work in a square format, a horizontal firm format, and a vertical format. You have digital icons, you have social media post, you have large banners. So it needs to look good and a lot of different ways. And we have this topography, this lockup looks really good and I liked the balance of it. But unfortunately, it's not gonna look good in a square because you have this longer name. So we need to have different variations of the logo to be able to be flexible on a lot of different situations. So now's the time we can present and maybe some of these raw ideas to the client and say, okay, here is the genesis of my idea. I wanted to stay with. You can even show them your word map. You could show some rough sketches. You could talk about the process that she went through to come up with it and say what idea or concept you feel like resonates best with your brand. And you're gonna get some initial feedback. This is where you need to start to bring in the client because you don't want to give them something final and they decided they didn't like your choice. And then you did all that work for nothing. So it's good to check in with the client and say, Okay, now what, where should I go from here? Because we have these four options, we need to reduce this at least down to two or one would be preferable. But at the client likes the second one, we can continue to refine that. So let's say we got back with the client and they decided that this reminded them a little bit too much of photography logo. They didn't like the complex, the complex nature of it, and they wanted something more simple, they eliminated that option. And this kinda helps us now we don't have to adapt this logo, three different ones, we can only adapt, maybe too. They also wanted to take a pause on this one. They felt like they really liked it, but it looked and they, they kinda like the idea of the growth in the leaf and then the strength and the triangle and the geometric shape. They felt like with the gold color, maybe that would maybe work a little bit better. So they're just slowly eliminating. But I'm not done with this because I think this has some potential. I'm just going to slide instead of deleting amps to slide it over, you never know, and I might be able to use that for another project. You never know. So there's like a cool him and I don't know, I don't know when you'll be able to use that little shape that can even become a pattern. Who knows? I'm just gonna kinda keep that asset out there. So now we only have to to adapt. So what I'm gonna do is I'm going to select, I just kinda selected all. I'm gonna hold down Option and drag to create a duplicate. And this is when we need to create our different variations. So now we need to create a horizontal version to work really well in website headers. Maybe the top of a mobile website, something very horizontal that'll fit nicely in those spaces. I'm going to try to keep the symbols the same size since we already determined that we liked the balance of that. So what we could do is we can easily toggle on our grid. I'm just gonna go up to view and go down to show grid. And we can match this up just to make sure we have some nice structured spacing. You don't have to use the grid, but I find it pretty helpful. So all I'm doing is I'm just lining it up to this box. And I'm just gonna bring this and I'm just gonna make sure. And maybe there's a specific box spacing between them. So there's four spaces, width of the M. So I'm gonna go ahead and zoom in so you can see there's just four boxes there. Specific determined spacing. And let's say we want to replicate that same spacing between their word and the symbol just to have consistency. It doesn't have to be this rule. But that seems like that would be a nice rule to follow in terms of spacing. So both of those elements are four boxes apart. And this is another kind of Goldilocks situation where we can have too much space and too little space. So this would probably start to feel pretty disconnected. And this will start to feel anxious. Those are competing with each other quite a bit. So just trying to find this middle of the road and it's hard as something you have to train your eye to find. And of course you can do tricks like Like spacing and keeping spacing cassettes consistent by finding certain themes with your spacing and sticking to that. So if you don't have that I trained yet, you can use the grid as a helpful guide. Same thing for this. We can even lined this up the same way and do 44 spacing. We also want to make sure we have the same spacing. This is when we have to do some optical adjustments. So if I were to align this perfectly on the grid, he had this little thin leaf stem part coming down. And so if I align this perfectly in the center, so let say this entire thing spans. See there's the bottom and there's the top. So just trying to and there's four spacing between the sides. So just trying to align it. If I were to align this perfectly in the center of this object, it would probably be right here because this stem is counted as part of the computer, doesn't know that this whole object is really heavy on the top, but really thin on the bottom. So it looks like it's really top heavy, even though this whole object as a whole is aligned perfectly. So this is where we need to start to make her own adjustments, not based on the computer, but based on how it feels. Called optical adjustment because that stem is gonna make everything look top or bottom heavy. So just making some quick adjustments. And I'm going to toggle off my grid. And now we have a horizontal version, we have a vertical version. We can even see how, what's great about having an icon that's got almost like a square shape to it. If I ever wanted to duplicate this. And I'm gonna do a perfect square. So I'm just doing the rectangle tool and I have it on a stroke. I'm going to hold down shift and drag to get a full nice dimensional box. So this is going to emulate, let's say a Facebook icon or any kind of square icon, maybe a Instagram Story which is a perfect square. If I wanna put my little brand or icon on it, what's great about it is as good a fit pretty nicely in that box. Just like this. So just kinda testing out our little symbol so that we know it works really good. And a square orientation. And same thing, we're just kind of trying, trying this out, just kind of hold down Option drags a copy. And then seeing how it looks in a squaring orange because you're not going to be able to fit that big long name and a square that especially a small icon. So sometimes that's what's great about having logo symbols or logo marks along with typography is you have a lot of flexibility. It's not required. You can have just a type Aaker typography based logo. But it does make it easier to adapt it in spaces like this. So I'm just going to organize this a little bit because it's a little disorganized. What I'm gonna do is I'm just gonna kinda categorize. These may be do it in columns. That might be the easiest way to align it up. And notice how my smart guides onsets clicking and then kinda helping me line things up quickly. There's our little icons are just starting to kind of have our final two together. We're going to be creating a business card, perhaps a letterhead creating watermarks. We're just gonna do a little bit of branding. We're not gonna do the entire branding process because that would be a whole nother class to itself. Just giving you a really nice headstart and thinking about presentation and branding. Okay, so we have some good options here, and now it's time for the next step and never seems to end. But Logos Nieto work everywhere. So we have sizes down, but now we need to do background color. So this looks great on white, but how does it look on color? How does it look on black? We're gonna make sure this logo can look good on a very dark grep background and look very good on I'll really white background. So we're gonna do that in next. So let's get started. I'm going to create a new art board. So I'm just going to go up to file. I'm going to go up to document setup and go this little thing called Edit art boards. And we're just going to edit our art board. We have this little art board right here. We want to be able to make a duplicate our boards so we can have one that's on a white background and one that's on a dark background. So I'm just going to go up to this little addition right up here on the top and just add a new art boards could automatically add one the same size. If I want to change my size and my art board, I can go right up here in this top area. And I can change the size of my art board or I can just resize it like this. If I decide to do a whole branding campaign and I have lots of different art boards. I can do that as well, especially when it comes to exporting your logo, you're going to probably want a lot of different sizes. And so you could just create different art boards, different sizes of your logo, and then you can go and export these. So if I don't want to airport, I select it and just press delete. You can go up to File Export, and you can export this as a JPEG or a PNG PDF. Export each art board as its own image, which saves so much time when it comes to exporting your logo, will get to that in a little bit. So let's go ahead and duplicate everything is hold down Option. And we're gonna put everything on a dark background. So I'm just getting a Rectangle Tool and I'm just going to draw a dark background. And let's do kind of not quite black movie, just like, oh, dark gray to kinda indicate different shades of color. A little bit easier than just stark black. So now we need to highlight everything and to make life a little easier, I am going to put this on a new layer. So I'm gonna go over to my Layers panel right here. And I'm just going to add a new layer. And i'm going to take this background square. I'm just going to cut it. So I'm going to go up to edit, cut or you can use your keyboard shortcuts is cutting that out and I'm just gonna paste it on the new layer. And I could do a paste in front and we'll paste it right back where I cut it. And I'm just dragging this underneath. I am just creating a locked layer here, just so I don't accidentally move this black background when I'm using and adapting these logo. So I just have this all on one layer and just have this kind of locked that I don't accidentally move it. Okay. So I'm gonna go ahead and select all my items. I'm going to make it all white. I have a mixture of strokes and fills. So I'm going to have to hand select some of these. So let me go ahead and, and I'm gonna do a little trick to get this all to go to White. I am going to go to edit so you can take each individual selection because some of these are strokes and some of these are filled. So that's a fill because it's typography. So I can sit here and make everything white. And sit here and dislike, go like this and go through here and make everything white. I can do a little trick though. And I can select everything, go up to Edit, Edit Colors. And there's something called invert colors. And it's going to take everything that's dark and flip it around. So I'm going to do Invert Colors. And just like that, it took all the black and made it the opposite, which will be, in this case white. And so just like that we have this. Let's go ahead and make these strokes a white color so you can see how icons will look. So that was fairly quick. If you have a more complicated logo that right now this is just simple lines and shapes and so it adapts super easily to a dark background. We don't have to do any modifications. But sometimes you have really complicated logos with Gosh, I hope you're not using photos, but some people do photos and, and more complicated objects. And when that happens, when you try to adapt it to a darker color, there's fills and things you gotta end colors you have to kind of think about. But when you have a really simple shape like this, and this is why I encourage people to make logos as simple as you can, because it makes it easier to adapt it to all sorts of different situations. So we're starting to kind of have a nice library of choices here. And when we do develop our brand materials, will be able to grab some of these logos and pop them onto our branded materials really easily. So one thing is missing, and that is starting to work with color. And for this section of the course, I'm not going to go super in-depth in terms of color selection. We already talked about color psychology and other Theory lessons. But I really want to kinda work with colors that client has already highlighted, which is the gold color. They really like the gold killer. So in the next lesson, we're going to approach color, start to adapt that and see if we can't get this from two options, down to just one for the client to make it easier to start to do are branded materials.
113. Lesson9 LogoDesign Malluable Color: So I felt we were at an impasse where we needed to get our selection from two to one. So this is another opportunity to go. Alright, client, here, too great options we need to pick one to focus on more. And this is when you may like one, I may like this right? One better personally as a designer, but it's really what about the, what the client wants and what the client needs. A little bit less about what's my personal favorite. So let's say they came back and they decided they really want to stick with the geometric shape. They like the way, the simplicity of it, and they didn't want to be too stereotypical with a leaf. They wanted to kind of have something that was a really unique looking symbol because they are very unique and they did like some of the qualities, the pointed edges and some of the little qualities of it, they just preferred it. So this is a one we are stuck with. This is the one that we need to adapt to lots of different situations. So let me put my Layers panel back over here. And let's say this is it. So let's start to work with color. And so there's so many different ways to refine color pallets. We talked about that in a color theory lessons that I taught, where we can take a moon, craft, a mood board, and be able to take photos, inspiration, and be able to select colors there. We can look at Color Psychology and find colors that would have some of the qualities that we, we, we like in the brand in terms of colors and what kind of emotions that brings out. There's a lot of different ways to think about and craft color. We're going to just kind of test out some different colors. And this exercise you, we could easily spend hours on color, but we're not gonna do that quite as much. I'm gonna get this polygon tool. And I'm going to do just for presentation purposes later on. I'm going to make this the same shape. Just turn this and I'm doing a little trick. I'm holding down shift and see the little turn icon. Then I'm just going to click it twice and I can move it perfectly and 45-degree angles. It kind of helps me quickly turn and move things nicely. What I'm gonna do is I'm just gonna make that a solid shape. And I thought that was a cool way to present our color palette is using a similar shape that we used in the logo. Stuff that was kind of interesting and just kinda finding ways to take certain qualities of a logo and extend that out. And that's how we create really cool brand packages, is we have these themes that we notice and we catch onto. So let's try to get some gold color that is something that the client definitely wanted. So let's focus on gold, and that's focused on a really nice complimentary color to gold. Lets us do a very nice simple to color to color palette, maybe some different hues and shades of that, those two color selections. So we're going to have a gold and we're gonna probably have some complimentary color to yellow. So we got to look at the color wheel, kinda see what would kinda work well. So I'm going to source some really nice gold textures. So I can maybe select a solid color gold. So I'm just gonna go to pixels.com. So I'm on pixels.com, which is a free photo website. I'm just gonna type in gold to kind of see if I can't download some of these textures that we can use. Just kind of cycling through these. I really like some of the color here. Maybe I can sample some of that colour. Ooh, that, that I might be able to sample some color because you'll, you'll notice that gold is a combination of light and darker yellows and maybe a little bit of brown. You'll notice it's really hard to get gold to be one flat color, but we're gonna try. There's also another one called Splash.com. This is if I can't find something on pixels, I just go ahead and cycle through all my free photo websites to see if I can't find something better. I'm looking for a goal texture. Ooh, that could work really well when we start to emulate the gold texture that we want to have. Okay, great. So that was literally the first one that came up. Looks like Katie harp does that one. So hopefully that's still available when you're working it through the class. So I'm just going to bring in these photos. So in this case, I'm just gonna drag them right into Illustrator. And we're just going to be sampling these. So let's make that a lot smaller that came in at a super big size. And let's see if we can't use the eyedropper tool to Sam. You could also do this in Photoshop if you'd like. But I like to stick with illustrator. I need to get my eye dropper tool and I'm just going to start to sample some different Gold options. Just through C, that looks a little bit, a little bit orange to me. That's like a nice deep color. And that's the thing about gold. You don't wanna go to orange, you don't wanna go to Brown. There's usually this like neutral, the middle color. And sometimes you have to kind of find it yourself. So I took the sample from a photo, I can double-click the swatch and I can make this more neutral. So right now it is a little orange, but when you have gold, sometimes it has gray in it. And that's what gives it that gold quality is adding a little bit of gray and a little less orange. So just trying to manually find that color that way as well. So what's a good and I can continue to do this for hours, but we're going to be a lot quicker with this when I believe I'm gonna keep this texture around. Now we need to find the complimentary color to this gold. So I'm gonna go take a look at the color wheel. So I have this color will open and I want to find a nice complementary color to kind of these yellowish orange colors, which kinda be the goal that we're doing. If I go the opposite of the color wheels, this'll be the complimentary colors. It's going to be kind of your blues, but not like deep navy blues, but not light sky color or cyan blues. It's gonna be kinda in the middle. Blues right here. So I'm taking this as an idea of maybe choosing a blue complimentary color. And let's kinda see what this looks like. I am going to just kind of generally pick some here in the blues. Because that's pretty bright. We went kind of chill. So we already had this gold. What elegant chill, high-end. So we don't want it to be quite as vibrant. So we're just gonna adjust some of these sliders. We can even be working in CMYK mode if we're doing logo design, if we want to do print materials, right now I'm just an RGB, but that's a whole nother lesson for another day. So let me kind of, what I really like to see is taking a little bit of that vibrancy away. I'm just reducing the blue and I'm starting to get a little bit of this green to it that looks really lovely right about there. Oh, that's, sometimes it's just you find it. And it works really well. There's some science to it, but there's also just, you're going to find it. You're going to find it. And so if I increase red, let's get add too much of the pinkish qualities. I don't like that, so I'm going to reduce it down to 0. Red gotta have it can increase the green. But I don't think green and yellow are quite as complimentary. But I do like the idea of having some of that reduction in blue, which is good, add a tiny bit of green. Okay, and so I'm gonna go down here to my mini. I can switch this to CMYK at anytime and find out what the ink mixture is. So when you get something printed physically onto paper, or a banner or a poster, you're going to have four different color plates that they're gonna use. They're going to have a color plate that print cyan. They're gonna have a color print plate that prints magenta, yellow, and black. And so this is going to be your mixture of ink. And I was able to call that out in my color panel by going to the more options. And you can switch between RGB, which will be your screen, digital website, and this will be all your print stuff. So when you do a logo, you're going to want to have both. You're going to want to have an RGB version of your logo and you're going to want to have a CMYK print version of your logo. You want to try to make sure those colors match as close as possible, but you're not always gonna get there. And I talk a lot about this and some intermediate level courses, It's really, really difficult to color match and perfectly so you have to make some concessions and this is getting way too complicated. So I apologize, but just wanted to kind of bring that up. So let's go back to RGB and kinda see how that looks. So we can get the eyedropper tool. Once again, we could just double-click our fill swatch. And once again, this is the old color, this is the new color. Just make some modifications to it. Maybe add a little bit more blue to this one so that one's kinda more of a blue. This one starts to have more green in it, and this one is a mixture of the two. So this is kind of where we're at right now. Let's start to apply this to the Logo. Are gonna do that next. We have our colors and we're ready to start to see how this is going to look. So definitely thinking the icon will be a gold. So let's try to test out some of these goals. And you'll notice if I highlight my symbol and I do the eyedropper tool and I do this fill. It's gonna make everything a fill like instead of adapting to the stroke. So what I'm going to do if I'm happy with my stroke width. I believe I am and always make a copy of this before you do it so you can make a copy, slide it over or save a new document. Just go up to Save As and rename it so you still have your old document to have. I want to outline the paths. So I'm just going to go up to Object path. I'm just outlining the stroke. And instead of being a stroke that I can change, it's now just a physical object. And what I can do is I can join. Right now we'd have two separate elements. We have triangle and we have this kind of hexagon. Let's go ahead and combine this by using the shape builder tool. So I'm just gonna get the shape older Tool and I'm just going to combine all of this. And when I do this, it's going to do the fill as well. So what I need to do is I'm just gonna kinda select just the stroke Arius. Notice sound is doing that. Selecting these to go down. And now I can unify all of these lines as one object just like that. So now this is one physical object. It's going to make adding gradients easier. It's gonna make playing with color a little bit easier. I don't have those live strokes after worry about. So now I would be ready to just go ahead and get the eye dropper tool and start to see what some of these gold color looks like. And so let's do a complimentary color and we can even keep this black if we went to, we don't have to do a two tone color. Let's see what kind of a darker color looks like here. Let's not worry about these variations right now. Let's just play around with color. So let's make a lot of different copies of this so you can see what this can potentially look like. So you'll notice the difference between these two. Go ahead and put these up against together. This is more orange has more orange qualities. This has more tan qualities. I'm liking the more subtle look of the, this color of gold, which I believe would be this one. And this is when you're just experimenting with color, these little tiny, tiny shade differences and can make a big difference. Let's do a lighter color. So it's kinda doing kinda the lighter, bluish green. And we can even have some of these Be like a dark grey or black, doesn't have to be two toned. This could be even blue, even though that the client definitely wanted to have gold. So we know we have to at least use gold once because we could do this and that's fine. But the client did make that request and we need to make sure the client's requests are valued. So we could even make the topography a tan or a gold color stew that kinda neutral color. So we're just trying to see out, see what works. And I remember I like this color up top, so I'm gonna do another row of that. But maybe a different shade of blue, green, maybe kinda more of the blue as opposed to a blue-green. So this is just kinda my raw process. Everyone has a different process. But just showing you kind of how I'm thinking through this, thinking through this process. I know it's long and tedious to go through, but I don't think many teachers take the time to go through all this monotony and this tedious snus. But I think you guys are ready to kinda see this whole process. Okay, so let's make that a different color. So I'm just kinda going around using color combinations. Maybe I haven't used yet. I'm already starting. We don't have to sit there and do all of them if we feel like we can eliminate some ideas, let's eliminate them. Definitely feel like the symbol needs to be gold. So see you later. Now. I'm getting it down and eliminating options. So definitely thing that, that is just to orange. So that is eliminated. So now it's a matter of using this shade is go ahead and eliminate these, this shade of gold. Or in this case, I guess it's really kind of a tan, but it's supposed to emulate gold. And then it looks like what's try all three of these. We tried that one. Let's do this one and let's try. I think that one's already the same. So which one? I think this is, this looks beautiful together. I am afraid that it's too light. Perhaps I'm just, I think it'll still look beautiful though. So, hm, this is tough. Once again, client feedback can be very helpful here if you feel like you're stuck as a designer, don't be afraid to reach out to the client, say, hey, I'm having a hard time. These are both great options. What do you think? Help kind of give me direction and moving forward. You're you're part of this process. The client is always part of the process.
114. Lesson10 LogoDesign Malluable ColorExploration: And this is when doing things in isolation or is tough. So we're doing a logo design, but how are these colors going to look on a business card and flier? What we're gonna do is we're going to continue. We have a gold color selected. We're gonna continue to keep these three different secondary color choices available when we start to do a business card letterhead to really see how this logo looks on real products. We're going to be able to figure out which one of these shades of blue-green will work. Because sometimes it's hard to know with just so little highlighted. It's just that one little piece of typography. It's hard to know until we start to put it on solid colors that are this color. So let's start to apply it to something because it's really going to help us refine our color palette. We don't have to refine our color palette before moving on to the next step. So let's do a quick little business card. So I'm going to open up a new document and an Adobe Illustrator. We're going to do a standard business card we're going to use. I'm using inches. You may be using centimeters. You may be doing a different sides. You can easily Google what size a European business card is. I'm gonna go ahead and put that up there for you so you can have that. So we're gonna do a business card size. Standard size is going to be 3.5 inches by two inches in height. So 3.5 wide, two inches high. We wanna do a horizontal orientation. And I'm going to create a couple of art boards here because we want to have a front and we want to have a back. So we definitely want to have two art boards and we want to have bleed if this is going to be a real business card that we're going to be printing. We want to have bleed and we talked a little bit about what bleed was, which helps the printer. They print on a certain size document, but they print a little extra around the edges so that when the printer is printing, it can have a little margin for error and then they trim off the edges. Usually an eighth of an inch will trim off so you don't even see it, but it's there just to give the printer a little bit of extra leeway just in case it doesn't print perfectly on that document. So we're going to add Standard and with a click up once. And if you are going to go ahead and add what is typically the standard When he just click up once, which is 0.1 to five inches, which is 1 eighth of an inch on each, all the way around. And we're gonna do CMYK color. We want to make sure anything. Anytime we print something, we wanna make sure it's CMYK, colour and create. So we should have two art boards. We have our bleed this all be trimmed off but the the printer requires us to put our document outside of that bleed space. So when they trim it, it looks nice and all the way to the edge, it gives it that nice, flushed look. So let's bring our logo in. And once again, we are not ready to finalize colors yet, but this process will help us think through that and we start to see it on some things. So business card layout and design. So we're going to talk a lot about layout later in the course and other lessons that I teach about layout and doing magazine layout. There's all sorts of different projects we could do together to talk about layout. But I'm just gonna go over some basic thoughts. I'm thinking about when doing the business card. So we have a couple of things the client has to have on their business card, phone number, email, website, just kind of some basic stuff. So I'm gonna go ahead and load this in here and I'll be right back. So what I have here is just, just typed into stood the Type Tool and pasted in from a Word document all the different requirements for the client and a typical phone, website, email. And then they wanted to have the life coaching somewhere on there, as well as their name. And remember, they also wanted a version of the logo that also had life coaching and Sophia greens. So that's another version of the logo that we need to kinda think about to satisfy all the Client Goals and requirements. And maybe this business card will help us figure that out. So most business cards, if a client can afford it, they get a front, they get it back. So we have two different opportunity to, to spread around this information. And I like to kind of keep on the back or the front however you want to do it. I like to keep all the information together so they don't have to sit there and flip the card back and forth, which gives us an opportunity to make the front or the back, I guess I'm going to call this the front. An opportunity to show off the branch, off the logo, maybe have life coaching on there, but not to have all that detailed information that can be when they flip it around, then they can find all the detailed information. So it's really about the viewer experience and how you want to break down the information. I tend to like to keep everything kind of on one side as kind of an information side and then kind of a well side where they get to see a photo and whatever they want to have. And so this is where we can really show off the Logo. And what I think would look really, really cool. Here's a couple things. There is something called gold foil stamping. And I talk about this in more intermediate level classes where you can take one specific object of a document and you can isolate it on its own layer. So let's say I want to just cut this. I'm just gonna go edit, cut and create a new layer and called it gold foils damping. And I can just paste it back into that layer, just paste in front and it's on its own layer. Now. Now what I can do is I can send this to the printer. And I can say, I want you to make this layer. I want you to make this layer right here, gold foil stamping and it cost extra money. But this is kinda, I'm going to show you an example of what that looks like. This is kinda what it looks like. It gives it that wonderful shine to it. Instead of just being a flat, solid color, it's, it literally has the reflective qualities of gold. And for this client, they're spending a lot of money finding really high-end clients. I think they can afford to spend money on their business cards. So from a branding decision and a branding standpoint, I think it will be worth the extra cost having gold on their business card. So that's something we can consider when we put this together, is to make sure that as gold, we can emulate what gold could look like by 22 ways. So we want to show the client what it's gonna look like, instead of just having them imagine there being a gold foil stamping, we can emulate that by adding a gradient. So we're gonna go into our gradient panel here and we're going to add a gradient. Sometimes there's default gradients that you can bring in. I'm going to get my swatches panel examined to see if I can't find a really cool default gradient. So you don't have to go download gradients. So we'd go down to my little swatch libraries. I'm going to go down, this is how you can load extra swatches into your swatch library. And you can go down to gradients right down here. And there's a whole list of default metallic ones. Let's see if I can't find it there it is. So gradients and metals, and I just went down to this little library icon. And we can test out some different goals to emulate this effect for the client. And so I can take my Gradient tool and I can click and drag to create different, kind of spread out those different color points or to make them longer. So we want to have something tight. We wanna see that reflective quality. So I'm just going to move this around until I find it. And we can go into a gradient panel and change these at anytime. We could click, double-click each little button and we can slide these colors around. And we can make them tighter by going up into the top. And we can add new colors as well. So if I click on this and I click next to it, it's going to make a duplicate. I can just drag these around, just making a more complicated gold looked as kinda making it more metallic looking. And we can double-click these and make them brighter if we want. Then going down here to my fields can make that a little bit brighter, a little bit more neutral. Not quite as orangey. Not quite as oranges kinda neutralizing, adding a little gray to those different points. There we go. So that kinda emulates what that gold would look like. That is one option. You can bring this into Photoshop and add a texture on top of it. And do like a clipping mask where we apply an actual gold texture like the one we had over here. And we can add an overlay, a gold texture on top of it so we can emulate gold that way by using a photo. We have this photo, this goal texture on top. What I'm gonna do is I'm going to apply a clipping mask so that it mass over our shape. So what I'm gonna do is I wanna put this in the back. So I'm going to right-click arrange. I'm going to send us all the way to the back so that we have our gold texture on top of there. So, or this could be any color really, if we wanted to go this route. So I'm going to select my icon. And I'm going to hold down Shift. And I'm going to select this when Oregon's click and drag both. As long as both are selected, I can right-click and go down to Make clipping mask. And it's gonna do a clipping mask over the shapes is gonna take whatever's behind it. And it's going to clip the shape in front of it to it just like that. So that's another way we can emulate that gold foil stamping. And I do feel like this is probably a more realistic look to show off to the client. This look. We're also going to need to be able to have that gradient we had. And we want to show off that gold look. When we don't have, we're not physically printing that object, but we want to emulate the gold look on digital versions when we don't have the physical gold foil stamping to put down on it. We want to have a gradient to be able to make it look like that as well for branding purposes and consistency. So now that we have that deep rich gold, I'm starting to think that perhaps the darker version of these colors might work better. And one thing we could do is we can reverse things out and we can try putting it on a deeper color. So let's do this deep blue. I'm just going to arrange, send that to the back and we could even put this in white. So that is an option. I think it looks really classy. And now that I'm seeing this, I think this, we can adjust this and not do any of these three options. Now this is why not finalizing color until you do another layout project sometimes can help you because you get to see how these colors are actually used. And sometimes it's different than how you think. So I'm moving down, I'm going to add a little more grey, a little bit more black to this color to see if I can't. Just kind of, ooh, that's a little bit too. Definitely wanna do dark. And this is where it's all about experimentation and seeing what looks good. What I'm doing is before I believed it was too bright and you weren't able to see the richness of the gold. So that's why I was wanting to add a little darkness there so that it didn't compete. And if I feel like that has too much green, I can slide up the hue slider and bring it back to blue. I think that probably works good as well. So that would look really nice as a shiny gold printed item. And sometimes you just need the logo on one side. It just kinda very simple. I mean, not trying to throw a whole bunch of stuff at there. You might want to use a photo for yours. It just it just really depends on what you're going for. So let's go ahead and move on to organizing all of this information.
115. Lesson11 LogoDesign Malluable BusinessCard part2: So we have all this topography and we're gonna talk about how to layout topography in more detail in the next project. But I do feel like we need to change his topography. And the only typography we've used in the brand so far is this Georgia? And if we were to continue to use Ga, let's say that the client wanted to have another version of the logo that said that said Sophia Green, life coaching. And lets us do life coaching for now. Because we're going to have her name on the other side. We have life coaching. So this is when font pairing is so important because right now these, these compete with each other. Right now they're both the same type base. They both have the same spacing. There needs to be some kind of contrast to differentiate between the two because it is a lot going on that's the same. So let's see if we can't find a nice complimentary font pairing for the secondary type. As we know, a great font pairing for a serif is not another serif but a sans serifs. So we can go ahead and filter out and just have san serifs. And we could do something simple and do Helvetica, We can do, remember some of the other ones that we chose and the brainstorming process that we liked, but we didn't want to use it for the main symbol. You can go back to some of those. But I'm going to use a free one that everybody has access to via Google Fonts. This one's called Open Sans. It's a free typeface. I'm just gonna do a nice medium. Wait, let's do regular. And we can even collapse the spacing between this a little bit. Is trying to find ways to add contrasts between the top and the bottom. Maybe, maybe we can get away with a little bit of a bolder. Wait, let's do semi bold. And because this is such an elegant brand, I mean, normally I'd be okay with that contrast, but let's add even a wider spacing here. Let's just try out 800 and make it small. It's, it's really, it's important, but it's not as important as the brand name. And I'm just gonna make sure that's all evenly aligns, gonna select all three of those elements. I'm going to go up here to my Align panel. And I'm gonna do a horizontal aligned center. We're gonna be doing a lot of that later on in the course. So just kind of putting that they're so malleable life coaching. Now I know what it is. It's not just some random symbol, it actually has kind of a industry specific tagline to it. So that's really great for being practical. So I'm gonna move these gradient panels back out of the way. We don't need those anymore. And let now that we have a secondary typeface established, we now have hierarchy. So we have Georgia as our main typeface and Open Sans as our secondary typeface. So now let's take all of this topography. Let's just take the eyedropper tool or I can just go back up and just go. What was that? Bottom one? Open Sans, that won't be easy. So let's just apply Open Sans to all of this topography. Let's do a regular weight for now. And when it comes to sizing on a business card, you'd never want to make it so small that it's not legible, but she never want to make it so big that it looks kind of unprofessional when the cis like gigantic. It just looks kinda of an unpolished. So what I like to do, this is kinda the point size up here. The, I tried to not keep important information under eight or seven. So I'm going to keep it at eight for now. So I think that's a kind of a nice size. So this is what we have to work with. Let's get a sense of type hierarchy going. I'm going to just go up to my Align panel, align everything here. What is the most important part of this block of text? How can we group things together to make it feel cohesive? I feel like the website traditionally goes on the bottom. I feel like the phone number is the most important item on here, followed by email. So I'm just kinda starting to group things together. I feel like Sophia green in life coaching go together. I feel like these two go together. And I feel like the website can kinda be on its own somewhere. So you can see just with some very slight grouping that we did, it's already starting to look more refined. So let's kinda find positioning here. We can put the logo here again as kind of a brand, a tie in from the front. We can even just bringing the symbol here. Spring and assemble. This could also be gold foil stamping and when it's printed, we can even do a watermark. So I could even release, if you ever want to release a clipping mask, the SESAC, that little photo on it, if ever say OK, I want my symbol back. There's right-click. Released the clipping mask. It's going to release it. And now you have the two elements on its own again. And we still have our gradient save, which is great. So I'm just gonna do my gradient again. There's my gradients over here, my gradient panel, just loading that back in and trying to find that gradient so we can even, we can go to transparency is our transparency. We can reduce if everyone or reduce the opacity of a layer. I could do that by just going here and reducing the opacity. And you can have like a little watermark here as opposed to having repeated logo. So there's watermark opportunities we can do with this as well. So just making that a neutral gray because sometimes gradients when they reduced and transparency, they don't look as quite as good. But I am gonna take this gradient and to save it, and it's gonna create like a little box. And now that I have that gradient, I wanted to recall that gradient. I have a little swatch here. I can also save it in my swatch panel as well. I can drag it into my swatch panel and I haven't saved right there. You can save all your swatches. Okay, so now I feel like we need a little type hierarchy here. Uh, let's take our Sofia green and make it bigger. It will stick our life coaching and make it italics, because usually titles, it's kinda nice to have something a little bit different like an italic. So we're just kind of slowly refining things. Let's make the PI for phone. Let's make it bold. And let's make that bold. So it's trying to find contrasts and Howard doing things here we can make malleable. Bold as well, but keep.com kind of a thinner weight. So C out slowly kind of being crafted together here just by using type hierarchy and contrasts between our topography elements. Okay, and that's when divider lines are sometimes helpful. I can just get the line segment tool. The line segment tool, click and drag. And just creating a simple line, I can make this a stroke. So let's make it a gold. Look that to stroke. And let's go to my Stroke panel. There's my Stroke panel that's going to give it some nicer rounded caps to it. So you can kind of see how it see how it has a nice polished look. This would be a cap which is sharp and this would be a round cap. I just think it just adds a little more professional listen to him. And we could make that a solid color to just go back to our solid color. And let's see if we can't make this maybe that deeper color. We've developed kind of a new color palette based on actually applying it to something which is going to be different. These three just didn't work out. So we kind of have our two color palettes here, just going to get our eye dropper tool. These are kind of our main color pallets. We even have a gradient that we developed. So we're starting to kinda see this brand coming together, all these different brand assets. We have a watermark, all these different things are starting to come together as let's see if I can't make that tan or we could make it blue and go into my transparency and reducing it. You know, that's an option. I kinda like it, kinda gray more neutral. And so now we need to make sure we have this nice AND center aligned because right now I don't believe it is. So you can always pop on your grid or it can have smart guides on. It's going to kind of tell you where the center alignment is as you move it around. It's making sure we have even spacing. You can always do like a little trick. I do. Get a rectangle tool, make a rectangle, duplicate it. And just kinda see where it's, Make sure it's evenly spaced. And what we could do is I think we have an opportunity to put the logo again on here for reiteration, but let's do the horizontal version of it. So what we're gonna do is we're gonna go back to a previous file and we have this horizontal version of the logo. Let's adapt some of these colors and have an opportunity to put it on the top here as kind of a masthead and move all this down just a little bit. And let's collapse the spacing between these. Now that we have the logo up top, we want to have too much spacing, but we want to have enough there. So you notice when I position these things on the business card and not putting anything too close to the edge. So that would be way too close. Have a lot of students who like to do that always have some nice margin. Breathing room and whitespace around all your edges. Never have anything to close to the edge. We could probably make this a different typeface to do some font pairing here. So I wonder if we have a chance to make her name the same as malleable. But maybe maybe not quite as as much spacing because we want to have that be in a tighter areas. So just reducing the spacing and make and her name a little bigger. Just kinda do some BOP pairing and bringing out some of that, that main typeface again and the topography neck and make sure all of these are aligned. So I'm selecting all of them and I'm going up to my left alignment panel. And I'm just gonna do a horizontal lines to make sure those are nice and lined up. So there could be a photo opportunity here. We want to keep this nice and clean. So this is just one option. We can arrange this and show the client lots of different options. So we can even switch these around. Like this, which I think might look a little nice because you have this nice left alignment, right bumped up against the left side. So there could be some nice things here. I'd love to tie in more of the golden here. Almost wonder if we could do a little bar of gold. And I'm Scott, take my eye dropper tool, go over the gradient we created. Gonna take our gradient tool. I want to change the direction. Have it be diagonal instead of across because that looks kind of fake. But diagonal looks a little more realistic in this case. So just like a little tiny gold bar on the top of the business card. Just like that, just kinda bringing in of that or you can do it on the bottom, leave the top ice unclean. And so when you send this to the client, you would communicate, maybe send a sample online that you find of gold foil sampling. So they will see that it won't print exactly like this. That little print a little bit. How you, they see in the samples.
116. Lesson12 LogoDesign Malluable BusinessCard Exporting: I also want to do a version without all the gradients just to have a nice, clean, simple version. So in this case I'm just gonna get a file. It's gonna go to document set up and we're going to edit our boards. And I'm going to make a couple of duplicates. So I'm just going to add a new art board and then add any art board, just clicking it twice. And I can click on the title of the art board and move it around so I can bring it to down here as options to show off to the client. So this will be kind of layout option two. So I'm just going to take all this hold down Option and drag and just make a duplicate. And I'm going to make a clean version that is just a solid color without this kind of gold foil stamping. Let's do our solid gold color that we had. And same goes for this. It's going to relate right-clicking and releasing that clipping mask so that I can get that back again. And let's do a solid color for that as well. So that uses solid colors, that looks really, really good as it is. I just maybe that wasn't the right Gold texture to show. I think in real life that'll look really good when it's not just a kind of a fake example of it. But I really love how this clean look is going. So let's say I want to present these to the client. You can export these. Let's say we wanted to do a sample. It's okay if it just goes to this little art board edge because that's all that's going to be exported. But when we do get this to print, let's say they approve it and say yes, I want it. You want to make sure you extend all your background elements to your bleed. This will eventually be, it'll be trimmed and cut down to this, but this is just that extra bleed. And every, most printers require that for business cards. So this is all going to not really be seen that that bleeds off to the edge, that's good. This is a white background so you don't have to worry about it. White just automatically. That's not really ink. So we don't have to worry about white. So all these elements that are color or photos need to bleed off to the edge. And so let's say I'll do two things. Let's do a client presentation. We're not going to send it to a printer which want to send a J peg. First of all, let me save this. And let me go to export. And I'm going to export adds. I'm gonna make sure I select Use art boards because it's going to export it and use the art boards as a way to crop the JPEG. So I'm gonna go down and select JPEG, and we're just gonna do client sample biz card. And then when you do this gets complicated, but hang with me when you're doing a client presentation, they're mostly going to be seeing it on their email or their text. So you wanna make sure you send it an, an, a digital RGB environment to you only send CMYK to professional printing companies. Anything else will be an RGB. So I'm just gonna make sure we have a nice high resolution. And we're gonna go ahead and click OK. This is when it's okay to have a larger file size because you're, you're, you're presenting it to the client you really want to Wow. So this is what it will look like and export at each art board as its own little JPEG. And so there you can present that to the client. You could also bring these in Photoshop. You could put it on a Photoshop mockup of a business card, which we learned how to use mock-ups earlier in the class. So you can do that. I highly recommend that because sometimes it's nice for the client to see that nice look to it. If I am ready to send this to the printer and the client's like love the brand, love the business card. I just wanted to talk about that because I have a lot of students that say, well, how do you export it for print? Well, you've got the bleed check. We want to make sure all of the topography is outlined. Right now it's live text so I can double-click and type it out and it's editable text. What we wanna do for the printer, or they may not have this font, font installed on their computer. So we want to create outlines so they don't have the half, half the font on their computer to be able to open up your document. So we're just going to select all. And we can go up to select, click on All. We went to go up to type and go down to create outlines. So we've done this before. We're just gonna go type create outlines is going to outline all the type. That is a required step for the printer. It makes sure you don't save your final document. You want to be able to save one that has the live typography so you can go back and make changes. So this will just be an extra print ready file. So I am up so we have bleeds, we outline the type, we have, make sure we have nice margins. There's nothing that's gonna get cut off or be too tight to the edges. So we're kind of checking that we can go to File Save As. So we're doing a save as, and we're gonna do a PDF. So this'll be a PDF. And we're going to click on save. So save as, file, Save As. And there's a preset, Adobe PDF preset that default and Adobe Illustrator and its press quality. So I would definitely select for us quality and leave everything as is. Make sure we always have 300 ppi for resolution 300 is a magic number for print. Exporting print files, marks, and bleeds. We wanna make sure we put on two remarks and each printers different, they say I want you to include all this. I, this is how I've done it and I've never had a printer have a problem with anything. Just click on trim marks. You don't need to put all that other stuff for right now. But we definitely want to use the bleed. So we want to check on bleed. And what's great about this is I I went, I had to select a few things here. I've selected bleeds, selected remarks, made sure we're on 300, which is default. If I don't want to have to go back and do all this over again. You can save your preset by going up here to the top right. And I can say my print files. And I never have to do all those little settings again. It'll like memorize all of these settings for me. So I'm going to save as a PDF and it's gonna go ahead and save them as separate pages and one PDF. So I'm gonna go ahead and double-click. And there's the crop marks that tells the printer where the bleed is to be cut, which is gonna be right around here. And if I go over here to pages that's going to have all my different pages. I can zoom out here. So there's the front, There's the back. Of course, we may not need to send them to copies. So we could just right-click and delete these pages or we would have just deleted those other two art boards. The client already approved the one without the gold foil stamping. That that's it. You send the PDF to the printer and they will be able to print it for you and send it to the client. And so that's kinda simple walk-through to how to prepare something for print.
117. Lesson13 LogoDesign Malluable Letterhead: Business cards are great, but let's keep extending this brand further now that the client is starting to approve some items. So we are now going to create a letterhead. So I'm just gonna go to file and we're going to do an 11 by 8.5. We're gonna do a vertical orientation. So 8.5 by 11. And we do want to have bleed on letterheads as well. And let's just make sure it's in print color mode. And that's it. Click ok. We have our 1 eighth inch bleed all the way around. And we're gonna do the same thing I'm pasting says exactly how I do branding projects as I take one completed branded project. And now I can have all these elements to work into the letterhead, so it makes it a lot, lot quicker. So for letterhead, I think this horizontal logo will look a lot better on the letterhead. So this is why we have a horizontal logo in a vertical. And we could take some of the same information. And there's a couple of different layouts we can try for letterhead. You make sure all of that is aligned nicely. So we wanna make sure that this element, since they're so close and alignment, Let's just make sure they all line up nice and selecting them all. It's going up to my alignment options and just doing a left alignment, just little small things we can do. And so I'm also checking my font size to make sure it's nice. And I'm always checking font sizes to make sure they're gonna be readable. I try not to have anything lower than seven, so that's going to be acceptable. And we can have it over here on the right and see how I have my smart guides on. So it's helping click it so that that top is aligned to the top of the malleable. I can drag it over here. I mean, there's so many different ways to align for letterhead. What I'd like to do with letterhead is letterheads to be very practical. So you want to have a nice tight spacing here and you want to leave as much room here for a letter because that's what we don't want to ever limit our clients to how much they can, right? Because we decided we wanted to put the type like right here. And well then you're cutting the amount of usability, the usability of your letterhead. We can also put this in kind of a dark color. We can even take, we can make this dynamic and add a little angle to it. We can highlight the just created a simple rectangle tool. I can take the direct selection tool. I can select this little anchor point and I'm selecting it once. And that's going to add a little bit of a dynamic angle to our shape. I can right-click, arrange your gonna send this backwards and the layering system, I can take everything that I have. Maybe de-select Mellow Gold box, select all my type and just make it white. So that is another option. We can push this up a little bit. We gotta add bleed anyway. So we gotta extend this out to the bleed at some point. And we could change the angle of this two. We don't have to have it be as dramatic, can just make little small. Adjustments and changes every time I do this, it looks different. I've done this project a couple of times. The students tried to keep it updated. And we did this originally two years ago and came up with something that looked a little different. And she may not need to have her name on the letterhead. It could just be, you know, these are when you just need to go to the client, say what exactly do you need on the letterhead before I start to do the layout? So I know how to best work in all the vital elements. It could be. We also, there's another arrangement we can try. And that is keeping this how it is maybe reverse. The angle here. Does have this be kind of a masthead or a top. And we can arrange this and group these together into a couple of different columns. We can have a three column layout. We can even take this as holding down Shift and getting a 90 degree angle. And I'm gonna duplicate it. Drag and I'm just going to make two kind of dividing points to divide the three different columns. And you can have it along the bottom. And this is very efficient because it saves room and you have lots of great space for the client to be able to put to put their letter. And we can even do all of these Center Alignment. And center alignment is going to be good because it's in three separate little columns and they're very short columns. So the center alignment might look a little better. And at anytime you can toggle on those guides and the grids. And you can line things up to the grid mixture. You have similar spacing between the elements. So just don't forget to toggle on the grid when it comes to lay out. It's not a it's not a rule that said it's a guide role, but a guide. And can position or logo, make sure it's not too close to the edge right here or the edge up here. Nice breathing room. It's not going to be too close to any edge, even this one. And so that's an option. You've got a lot of different layout options. You can even bring in. It's going to duplicate our object here or main symbol. We can make this bigger and make it reduce the transparency of this. We can make it maybe a neutral gray. And reducing that down all the way. And we can even do a watermark, just make sure your watermark is not so strong that you can't read the type that goes on top. So that's really important to keep in mind. We can have it go off the page like this. We can have it go. I don't want to get rid of those nice and clean down there, lots of type. So I'm going to put this into the back and see if we can't have elements here. But I think this nice center alignment works the best. So I just was trying to test out some things. So I'm going to save this as a letterhead. Send it off to the client, see what they think. And if I'm ready for print, we go through the same process. Everything is extended out to the bleed. That's great. We want to select all we want to go to type and create outlines. So all of the type is outlined. And then I'll be ready to do a simple save as PDF. And this'll be print. This is for the printer. And we already have our preset saved. I think I said it, my print files. So I don't have to go through and make sure that the marks and trim marks or on its already there, say PDF and I have my PDF ready to go and take a look at it. There is our PDF right there. Yea, look at that. And then if I want to show it off to the client, I there's mock-ups that we can find in Photoshop. Put it on a nice mockup to present it. You can also just save this as a.jpeg. So instead of a Save As I'm gonna do an export, anytime when you just send a quick image to a client, it's File Export As. And this will be kind of a different way to kinda send PNGs and JPEG. So I just do a JPEG, I'd make sure I click on the US art boards. So it doesn't give you a big document file is going to crop it down to the art board for you. And anytime I send out to a client email or some digital way and it's not going to be actually sent to a printer. I always make sure it's an RGB. So there's just a whole lot more to talk about. We have a business card, we have a logo, we have a letterhead. We have some kinda really basic branded items that we can present to the client as a brand package. And this is the point where they go. Great, I got the basics. I really need you hire you to create a social media campaign. I need you to do a product design. I needed to do all these different design work. And this is when some of these long-term clients are really awesome because they're gonna continue to send you work. Most companies need a whole wide variety of design dynam, both digital and also print. And I have a lot of great intermediate lessons in other courses like the digital design masterclass, where we focus on digital projects like website, but we also do a social media campaign. I have another brand brand development course where we take a brand just like this. We even have gold in it. And we do a little package design and we talk about package design and how to present it and how to do posters. And there's just so much more to this, but this is just an introductory section. I wanted to go over the basics of logo design. I went a lot further than I planned, but I wanted to kind of answer all their student questions I've gotten over the years, I wanted to address all those in this newly filmed section. So hopefully you've enjoyed the updated lessons. I continually like to update my content. Let me know what you, what you'd like to see updated and what you'd like to learn more about. I'm always willing to add more.
118. Lesson14 ClientPresentationTemplate: I get asked this question a lot by students. How do I present my logo design work to clients or in portfolios? I wanted to create a template that can guide you step-by-step through this process. You can find the files for this template and a downloadable zip file at the beginning of the course. First off, there's the template. I crafted this to have several different layout options for various presentations. This has pages for presenting color palettes, logo variations, the grid, topography usage in this template is meant to be customized to your unique client or logo presentation needs. You can craft shorter to to three-page presentations showing multiple concepts. Or go more in depth with more detail local presentations. In the folder you can find a sample PDF of when I put together for a logo design for a museum that shows that an action. If you open up the Adobe Illustrator template file, you'll notice you have multiple layout options for certain pages. Simply toggle on and off the sample layer to remove the example logo and place your own logo stuff there. You can add and delete pages to your liking. And yes, this can be opened using an updated version of Affinity Designer too. You can toggle off the sample layers by going into each page and turning them off. It does open a bit differently in Affinity Designer, but most of the file remains usable. There is a detailed guide on how to use the template and the file in the same folder called the How to Use logo presentation pdf. This file gives you tons of great tips and tricks for crafting professional logo design presentations. There are tips on how to export and send the presentation to the client. How to handle multiple concepts, presenting your work that uses golden ratio or grids. How to present color differences between a local presentation and branding guidelines. And more definitely worth the read. I hope you enjoy this added resource. I wanted to create something that gave you a headstart on your logo and branding presentations. Something I wish I had when I first started to do client and professional level work.
119. STUDENT CHALLENGE - Option 1 - Personal Brand Challenge: Are you ready for a student design challenge? This one is going to be a bit personal. Your task is to create a personal brand for yourself or your freelance business. You may be a graphic designer, Web designer, illustrator or creative writer, but all of us have something personal about us that makes us unique. I want you to create a logo that best represents your unique approach to your craft. This could be with use of color symbols, abstract art or something, and has personal value to you and your business. Branding is more than just a logo. The logo is a small part of this. For the student project, the only requirement is to create some sort of logo and name presentation, but also to combine it with other brand assets. This could be a business card, a simple letterhead or just a simple social media post using your brand and extending your brand out to one item so we can see how this works in action. I would love to see your work, so make sure you post in the community area of the course you're currently taking our post in the student Facebook group or its message Me your work. Remember the following when creating your personal brand number one. Remember that personal branding is hard. It could be very introspective and require you to really think about your style, skill and uniqueness. Number two. That personal brand development is about hitting your desired target audience. What type of clients do you want to attract? Number three that you may go back and forth between lots of great concepts and still not be able to settle on one. That is why submitting concepts to a community can be helpful in helping you think and process through which one might work out best for you. If you want to follow the entire personal branding process, I do so in my freelance masterclass for creatives course that's on both skill share and you . To me, you are not required to be a student for enroll to participate. Everyone is welcome. I look forward to seeing what you guys come up with, and I'm expecting this to be a highly active student design challenge with lots of great projects submitted
120. STUDENT CHALLENGE - Option 2 - Logo for GYM: Are you ready for a student design challenge? This one will involve you creating a local design that will simulate a real world client project. Here's the client brief. The full name of the company is called Pacific Calm Health Club and Spa There, a lifestyle gym that offers both traditional gym services but also offers yoga classes and has a full service spa. Target audience is mostly women, with a focus on making them stronger yet less stressed, calm and ready to conquer life. They're both a gym and a spa and their main emphasis on reducing stress. Their tagline, which they'd like to have included in at least one version of the logo, is love yourself healthy. The client would like to see a version of the logo with it and a version without it, so they can use it in many different scenarios. They are located in the Pacific West coast of the United States and want to work that into the logo and brand. Somehow, whether it be drops, waves, ocean themes, they want something simple as well. Nothing that's too complex. They plan on offering a spa shop that would have the logo or logo mark on them, and they prefer to have a logo that contains assemble are just the logo mark of some sort that can stand alone on products if need be, you could post your project in the Q and A or community section of your class are posted right here on the exclusive student Facebook group. This will be a fun and unique project, as everyone will have the same client brief. It'll be interesting how everyone interprets the client brief and adds their own flair and creative style to the client. Good luck and have fun.
121. PROJECT: Poster Design: starting to block out some sample. Copy. Let's go ahead and create a little, uh, layout for a poster or flyer. So I have our main headline actually have. This is one unit. I'm gonna reduce the spacing a little bit here, over here and reduce. Um, letting a little bit great. Make it a little bit bigger. You really want your headline to pop out, and I'm gonna play around with the line middle little bits. I'm gonna go up to my paragraph and kind of play around in the lineman options Have a nice , big, bold headline, but like a little sub subheading headline that goes here, I'll probably make that a little bit thicker. But see the nice contrast between here Big Bold, um, a little bit smaller and lighter weight. So that's a nice contrast. It's nice to use a dividing line every once in a while to separate blocks of text. Just kind of give a graphical element that goes between certain elements. So you have this kind of, um, you don't see text, text text. You kind of have something to divide big blocks of copy. So I'm gonna go ahead kind of keep it when you have something kind of going left alignment . Sometimes it's nice to keep it that way throughout the piece. Got it. Uh, adds a nice unity. So I kind of have some cold actions here, a phone number, which is not quite as important. So I'm gonna maybe tuck that, make it smaller and put it to the right. But the website is going to be our big called action, so I'm actually gonna make this perhaps a boulder weight and maybe a talic. Maybe not a bold. What I like to do is add contrast within a character or within a block of text. Um, I'm gonna keep that bold, but I'm actually gonna make this a lighter weight, get regular. And that has a nice balance, doesn't it? Kind of shakes it up a little bit. It gives your I a chance to break down the information when it's different. Weights like that. So I have This is the box I created. I'm gonna go ahead and create another box just like this. Go ahead. Copy insist. So we can practice our type two a little bit. So how did we create that? We go to area type tool. But first we're gonna need to make our little rectangle. And you can actually do this with any shape we can actually do it with. A circle s are gonna go back and other have my box area type tool, then click up here and it's gonna pace my copy in. And I can adjust this to make it a more narrow. I can even ah, copy and paste have it be two columns of text so that that could have a use less experiment a little bit. Let's do our, um, that's doing the lips tool. Let's do a shape tool for a circle. And I think I have this copied and pasted already. It's Go ahead and slide this over and we'll see if we can't get the text a load in the circles. We're gonna go to area type tool, and I just ignore that warning and just click around. There we go. I could actually conform it to a circle if I wanted to, so that could be kind of interesting. Do you do any shape? You do a triangle. We could do a star. Well, it's a great way to load text within boxes. But the way I use it the most is to load it into rectangle boxes for my body copy to call this smaller text cold body copy. So we're gonna start to experiment a little bit with this and see what we could do with angle tight and some other things. So it's good to add a gold background, so I'm actually gonna go to my layers panel. I'm gonna create a new layer. I'm just gonna add a box here. I could do it any color. Really? I could do a black Let's do a nice black background, maybe like a really dark gray. And I'm gonna move this layer below this layer. I'm gonna lock it so I don't accidentally move it. And I'm just gonna drag and select all of our text. And since that background layer is locked, I don't accidentally select it, you know, make everything like maybe a light gray. So now we're gonna start to really experiment. Let go and move that all off a little bit. So what can we do here? Um, cold action. I could always have that down here. Maybe I can have this spread across a little bit down here. Now we have this line. Divide the body copy in the top section. What if I angled this a little bit? What if I did this right? And let me, actually, I'm gonna delete this, and I'm gonna copy and taste this style. I'm gonna do this. A couple lines of copy here. Okay. So headline right here. I'm gonna experiment. These were all the same angle, and I just just all I did was, um I went to my text box here. And you see that little ah ah, place where you can actually turn the object just like you would a shape you do it there as well. Let's go to the corner headline. Right. Have tight spacing, make it look cohesive. Um, so the balance is off, so we can always change that by maybe changing the weight on one of these toe light. You know, just experimenting a little bit doesn't have to be perfect. Slide that up here. We also had us have a sub headline. We could put that here a little bit, and of course, we don't have a photo in this, but we're just trying to learn our type right now, so we could do a lot of design without using photos. If you are really strong with your typography, I'm just taking the eyedropper tool. So I have this selected right here. This phone number and I won't adopt the same spacing in style. So I'm gonna go ahead and select my phone number. I'm gonna grab my eyedropper tool, and I'm just gonna hope for over here and select. And now I have the same style adopted. So you're starting to see a theme with styles that I'm using. I'm not having I'm not using too many different styles of to be different fonts. Just enough to have it be a little different, but not too many where it overwhelms the design. We're just I'm sliding everything up, making sure it's kind of the same alignment. I could always sell like this object. So, like this object and select my line and go upto alignment. Or if I have the alignment options panel, bring that up and do left alignment. Now I know it's all aligned perfectly down to the left and let me get the website allied to some. Selecting all these objects left alignment And now I know it's aligned perfectly down in the side. So I'm starting to make this poster a little bit more realistic. I just kind of swapped out some of the the text for some more realistic, believable text, not just sample text. And so I'm gonna play around a little bit now that I just typed in some new information. So this is a little longer than my sample text, so I'm just gonna make some adjustments to, uh, the Kern ing the tracking. I'm just gonna reduce that a little bit. It's reduced that. So we have a little bit more tighter spacing since it's a much longer block of text than I originally had in the sample. So that looks nice. My website probably needs to be reduced in size now. Maybe the websites not it's important like that smaller. But the the website is more important. So it's kind of balance that out like that. More important terms of this cold, Um, what we're doing is called type hierarchy and what type or typography hierarchy does. It helps his balance all of our content in a way of that values importance of certain items . So This is obviously a headline. This is the most important item. It's obviously big, and it's obviously central to our design. On the subheading is probably something that's all it important to the headline, but it's not as essentials. It's a little bit smaller, of course, is detailed. Body copy is less important. And, of course, our website is That's are called action. That's what we want people to visit after using after seeing this poster. So that's why that's bigger down here. And this is smaller, so that's just called type higher. Keep want to give it a new official name. So let's go ahead. And I feel like this means a little something. So it's good, a kind of just and type here, maybe a line this m to the f Maybe make it a block. I could play around with the font choice here. I don't know if I like the plot choice here, so we're just gonna preview savants. I've collected all these through the years. There's plenty of websites and go toe to download fonts. Um, trying to think of something that goes really well, Maybe this Ah, go bold pro. And I want these two match. They're gonna take music at my eyedropper tool, and I'm gonna adopt the same thought for music and the same farm for festival. And this is a condensed fought, so it's a little bit taller and more narrow, so you can fit a lot more text in a small area. So that's a nice fought choice for this. So maybe do something like this, maybe make it bigger. We really want people to see it and continue to play around with weights. Talic. I could do all italics that might look neat. Yeah, I like that a lot. Really Like that balance. Great. So let's play around with the color a little bit. We Let's go back to our locked layer was unlock it and select our black background. And let's do kind of a a really deep purple. There we go. I think one thing that's missing is a photo. So now that we've done some type work, let's let's play around. Some photos
122. PROJECT: Poster Design part 2: line. So we're kind of used this as our photo behind our headline. So let me go ahead. I need to send this to the back layer. So I'm gonna go ahead and lock our background layer again so we don't accidentally send this all the way back. Go back to our main layer. I'm gonna right click Arrange Cindy back. So there it is. It's in the background now, and I don't like these harsh edges, so I would like to feather thes edges a little bit, so I'm gonna go up to see if I could find it. Okay, So what effect? Stylized feather. This a really need effect. I used for photos a lot. I'm gonna click on previews. I can see how much is being added. And I'm just gonna kind of do two inches where she may have some different sizes and click . OK, see how it feathers It almost looks like it's blended in. That looks wonderful. So I'm gonna shift the photo down and maybe shift our headline up just a tad. And I actually got to select my headline. All three text boxes and I'm going to right click are actually gonna go to object in group . So now that's one unit. I can shift it around. You move that higher and let's see if I can't make that white. Here we go. And another thing with type is you cannot affects to type, and you can add effects to any object. But this is a great example of how to add maybe a drop shadow to make this pop out over the strong photo. So I'm gonna bring out a new panel for you guys and it's the appearance panel and you can go ahead and recall it by going up to window and clicking that appearance and you'll have it already have it loaded on one of my boxes. And so we're gonna go down to this thing called FX. Short for effects. We go and click, and this could give us a drop down menu of a lot of different layer effects. We can apply to our text layer, and I am going to go to stylized drop shadow. You're gonna use this a lot. I also have my drop shadow. If you know Photoshopped, then you'll be right at home. So I'm gonna click on preview and kind of test out some different offsets and blur that's gonna change. Gonna make it a little bit more blurred opacity. I'm gonna make it stronger so I can actually increase the capacity goes 1 to 100%. So that's great, actually. Won a screen it back a little bit more. 76 6 uh, play around with the offset. The bigger the offset, the bigger the more length it's placed away from the object. So let's do a test. Let's do one and once just kind of show you an example, so that offsets it quite a bit, and if you want to blur, it might have a kind of a neat effect. But let's go ahead and rain it in a little bit. Madu 03 You may have some different numbers because I'm doing it in inches that you may not be using inches, so it's kind of adjusted based on what you have. Make it smaller, bigger kind of experiment, and you could do the same thing with objects. So if I could get my rectangle tool, we'll go over this in a little bit more detail. I could go to the appearance Goto FX and Then I can also add a drop shadow two boxes using the same method. So now that has a nice drop shadow to it. Okay, So what I'm gonna do, I'm gonna make this photo a little bit bigger. I wanted to go all the way up to the top, and I think it's too strong. I think it's really hard for that white text to pop up over it. So we're going to do something, throw it a lot. Actually, we're gonna go in more detail about this, but I kind of wanted to show you an example first of how to practically apply this. But we're gonna change the blending mode on this photo. And, ah, blending mode is a fancy transparency. It's a different way to do a transparency. Ah, so we're gonna call that up? What's great about the blending mode is you can use the appearance panel to change the blending mode. So while we're already talking about the FX option down here, we can also talk about the transparency are blending mode options. So if you go down to opacity, you can actually screen back this photo, reduce the opacity, actually, go select my object first, go up to a pastie and I can reduce it. So it's not a strong. That's exactly what I needed to do, but actually want to do something even better than this because I'm reducing the opacity, but it just looks like has a transparency on it. Doesn't look, um, I don't know, just don't like how the colors air blending it just it looks faded. So I'm gonna bring the opacity back to 100%. I'm actually good. Here's where you can change your blending mode. And I got here by going to appearance, clicking on a pass ity and I'm gonna change my blending mode. One of my favorite blending modes to use with photos on behind a solid background is one call luminosity. So I'm gonna go and click on luminosity and you'll see a dozen transparency, but it makes all the colors the same color of the background photo. So if I wanted to unlock my back ground photo and I want to change this to Yellow Country, did you could see it changes with the colors, which is super cool. I love it. It's only go back to the purple and really I could mix any color I want. So let me go. Double click my fill and make it a little bit brighter. Maybe add a little bit of purple. Oh, that's too much. It almost has a duo tone. Look to it if you've ever heard of duo tones and photography, So I love it. So let's go ahead and adjust just our headline a little bit. Ah, let's if ever wanted to remove a drop shadow Let's say I don't like it anymore. I can actually go ahead and click and drag drop shadow down toothy trashcan icon and it will remove the drop shadow for me if I want to experiment. And maybe what if I took the eyedropper tool and sampled this blue background text? And what if I made this picture because it's already as bright as it could be? One way to do it going to go back toe white. This is where we're just gonna experiment here. The different options maybe make the headline a little smaller so you can read it. But I absolutely love this foot. Are making it bigger. Look, it has a little bit more of an impact on the Flyer, But I definitely think this needs to be a different color other than White. We can experiment with black, black, pop up pretty good. I wanted to be in the same blue family, so that's good. Click on here. I think that looks great. So we're getting there. We're getting there. See, now this Texas is not very readable. Let's go ahead and change this all too bright white cause right now it's unlike Gray. Let's change that to Bright White. See if that helps. And it might help to change the font weight on this a little bit bolder. Let's do, Ah, extra bold tightness. Spacing be a little bit more readable and we could add a drop shadow to this. So I'm gonna go to appearance FX. What sad. You drop shadow on this one. I do drop shadows constantly to help, uh, text kind of show up a little bit better. So that drop shadow really helped it kind of show up, didn't it? I could do the same to this and another little trick. Instead of manually adding the same drop shadow each time for each block of text, I could actually select this one I goto effects, Actually, all there, this it saves the last effect you applied up here. It's actually a little shortcut. So instead of having to do it mainly each time, I won't apply the same drop shadow that I just did to this sub headline. I click on this goto FX, and that saved it. So apply Drop shadow. I could do the same thing for these effects. It's always at the top of your effects panel. This old trick actually gonna go back in the history of it. Undo drop shadow for both of those, cause I think I don't think that it needs it down here. Let's go and zoom out. Take a look at her poster so far, See if we need to finesse it. Zoom out 75%. It's always great to zoom out. See? Okay, Does it work? Does the blocking work? I think I need to work on my headline a little bit, so I'm gonna work on that and come back
123. PROJECT: Poster Design - the finishing touches: So it took about five minutes and I experimented with some other bond options from a headline. I wasn't very thrilled with what I had before. This is too plain. So I found this really nice font War is over. And another one Sun Valley, which I believe her premium bonds they may need to to find out how to purchase those on other websites. Um, but you can find a whole array of other thoughts online as well, but just playing around and wanted to have more of a custom kind of look to it, a little hand drawn kind of scribble marker and just coming some ground effects. And I shifted the photo up a little bit and I reduced the, uh think I reduced the feathering are I increased the feathering. So it looked a little bit more screened back, a little less opaque. Was it a little bit too strong? And I'm also I moved the line down here and made it a little bit thinner, and I'm also applying to the website. All I did was highlight this. I took the eyedropper tool and sampled my headline font and made a little bit smaller. So There's kind of a theme with the font. You can kind of see it here, but also tie it in on the top as well. So I wanted to do something other than a boring block of text. Um, so I decided to make this thinner and maybe a little bit smaller, and I want to feature the band names. So, um, let's go ahead. And I'm just gonna copy this, and we're going to start over so it can continue to practice working with our thoughts. So I'm gonna make just a typical square rectangle go up to our type tool or to do, ah area type tool. Click up here the paste in my band names and let me find a font. Let me stick with It's a stick with open Sands for right now, adjusting some of the spacing I could do it here is Well, uh huh. So let's see, What I want to do is I want to break this up into a couple different columns. Um, so I'm gonna actually copy. Let's see, I want to have four band names. Let me add another band name. I'm gonna do four and four, so I'm gonna four on one column and copy and paste. We're on another. I'm gonna zoom in a little bit so you can see this better. Okay, so I'm gonna make this a talic, maybe make it smaller and maybe italic. We'll say we feature quite a bit of band names. So let's say this is a pretty big festival. I have three columns right now. That looks nice. Ah, one way to kind of break it up. I need some or visual elements or objects to break up this information. I guess maybe adding a line here this copy and paste it. This is kind of a popular thing to do. Copy and paste just adds something to break up the big block of text. Just a little visual aid. I think that needs a little more spacing space that out. So I could make this a different color. Maybe Aiken sample my purple background and make it just a a little bit of a lighter version of it. So it's not as intense. That's one option. I'm selecting everything here. I'm holding down shift. I'm just gonna make everything a little bigger and kind of bring this element together. is this is one unit. Make it feel like it's one unit. So I brought that a little bit closer, and I don't know if I'll need this line anymore, So it's going to leave that. So we might want to put social media icons or something here as well make these little skinnier, well, skinnier. It'll skinnier. I could always copy and paste it so I could have each one be the same with. But I was doing this quickly, so soon mounts. See what we have. So if we like the overall look of it like I could make the photo maybe bigger, more impactful, emotional and see high over. I have drop shadows on each one of these layers, and you notice how the drop shadow kind of see it almost looks like a three D stacked appearance because of the drop shadow. A little bit right here looks nice with that, a little bit higher, so I think I might play around with a photo a little bit more, not super happy with a photo. But I love the blending mode and let's and we'll go over blending modes in more detail in the next lesson. but we could go back up lending mood. I just took a pause and adjusted the color a little bit, just a tiny bit and adjusted the headline and move some things around to kind of made a little bit smaller to have a nice find hierarchy and balance. Ah, but what I was just about to do is click on the photo and mess around with a blending mood . Just one more time to make sure there's not anything else. We can add that another blending mode that might work better so oven appearance capacity and this is the capacity into the left is where you can adjust the blending mode. I'm gonna try a couple of Mount Multiply color Dodge overlay. I think we've pretty much found the right one right off the bat. That one's kind of more subtle. That's interesting. Um, do screen woo really? Like how Screen looks almost as an instagram filter kind of faded Look, I love it, so I'm glad we experimented there. Let me move this up a little higher. Can we move this down just a little bit? Make it smaller. Not that I really liked the photo. And now that the text is no longer over a photo. I could probably back off the drop shadow and make it a little less apparent. I'm just gonna do it. Reduce the capacity of my drop shadows just so it doesn't look fake are too strong. Got to be careful with drop Shadow is not to make him too strong. I actually like it strong on the 2020. There we go. So I think we're done with this poster. I can continue to mess around with some of the elements I could mess around with this all day. Sometimes it's good to call it a day and say I've done I think that works well and I'm ready to send it to the client.
124. 5 Day Student Challenge: I think one of the things that designers struggle with the most is being able to have opportunities to really practice with tangible projects. I wanted to create a five-day special challenge that anyone can tackle at anytime. These projects will become great ways to practice your software skills, but also your creativity while also adding great pieces to your portfolio. There are many different project types in graphic design. So after running several student polls, I selected five totally different projects and to tackle in a five-day period. If there is one or two days where you're just not feeling creative that day or just not wanting to tackle that type of design work. That's OK. Just do what you can. This is for fun and for practice. So let's get started with day one. Day one will feature Photoshop composites. And Photoshop composites are great ways to practice your photo editing skills. They can consist of two or more images put together to create a unique photo presentation. Your challenge for day one is to select at least three different images from any free photo website, pixels.com and splashed on calm. Pixabay are examples of a couple of them, but you can use any photo from a free photo site. The only requirement is that you use at least three images, but you can use more than three. What might help with this project is to pick a main subject matter. This can be an animal or a person, or a place, and choose your other photos to support that main subject matter. This might be your background scene, clouds or something to add to your subject matter. Just a few ideas. One is pursuing something like surrealism, where objects may appear oversized or undersized compared to reality, is going to have a big impact and can be a bit easier to put together as they required a handful of images to pull off. The trick is to add shadows and highlights of the photos to make them feel like they're integrated and they belong together. Another ideas, putting together several photos to make more of an artwork statement piece. It usually features a main subject matter with various supporting photos around that subject that make it feel like they are together as one unit. A unifying theme for these is sometimes a color palette or the photos all coming together to support a particular mood or emotion. These can be a bit harder to pull off because they can require more than three photos, but can be worth the extra time because the final result could be something really interesting. And day two, social media post. Now for day two, I want you to put together a simple Instagram social media post using one of your favorite quotes. This could be a quote from a designer, you follow an author or someone from history. You can have this be topography only layout, or you can integrate photos that support your quote. I hope today's challenges a bit easier to manage and fun to find interesting ways to play with the topography. Remember all of your typography theory knowledge to about balance, type, hierarchy and contrast to make a compelling post Day three, digital illustration. Digital illustration is incredibly popular these days and wildly enjoyable. You've already learned the basics of vector art, so let's put that to the test with today's challenge. Your task will be to illustrate something in vector. You can take a portrait or photo and convert that into a vector art piece. This can take some time. So for some of you, you might enjoy a smaller illustration project, like creating a vector, robot, animal or icon. Once again, this can be super-simple, like the examples you're seeing here. The key to today's challenge is making it a 100% vector. You could even take a hand sketch and vectorize that sketch into a digital graphic. Day for the logo design challenge. Today's challenges in logo design for a bicycle shop that specializes in custom made mountain bicycles. The name of the company is called B spoke mountain bikes. The spoke is a word meaning customized, and it also plays off the word spoke, which is the center of a bicycle wheel. Their clientele are mostly outdoor lovers who love to hike and ride bikes down mountain trails. There, adventurous and loved to take risks. They're mostly male but they're still female clients who purchased their custom bikes. There'll be doing most of their advertising online through paid ads and their website. And because of this, they need a logo to look at, read great in small places. They're interested in a boulder topography, perhaps a san serif typeface. They also print the logo on their bikes and they're interested in coming out with a parallel like long sleeve shirts, water bottles in other accessories that mountain bike enthusiasts we'll need. The very last day of the challenge, day five of movie boaster. Let's use all of our design theory and software knowledge to create a movie poster about how you feel about the current year. I went this challenge to be more expressive of your feelings and emotion about what's going on around you. And in the world. The title of the movie poster will be a word or title that reflects your perspective on that year, but also matches your chosen photo illustration in graphics. You can use the current year, but you can pick a year in the past if that year had a big impact on you. The key to this challenge is to express your thoughts through images, photos, and text affectively. Sometimes simple graphics work well drawing ones either your design. Remember this is all about communicating with clarity AND with purpose. There is a downloadable Word document that goes along with the challenge that lists some of the examples and details mentioned in the video. Good luck, and I cannot wait to see your work. As mentioned before, you can tag me on Instagram at Lindsey marsh design at anytime during your five-day challenge. I love to be able to share and feature some student work. As always, you can post your projects and the student Facebook group and also on your class discussion boards.
125. What's Next? The Intermediate Level Masterclass! Here on Skillshare! : the graphic design masterclass Intermediate level are you rated toe? Level up your design skills. So who should take this glass? Those with very basic skills Adobe Photo Shop and Illustrator And you may have already be familiar with some of the pin tool basics. Understand the layering system and no a few other basic tools, and you have a little experience using these programs or have a solid, basic working knowledge of these programs, or you've taken my graphic design masterclass Learn great design, the first in the Master Class series. Although taking this class is not a requirement to join this one, just needing those basic software skills is all you need. But this class is a natural next intermediate step. This is a practical design course meant to teach you techniques and skills by producing real world projects. We will first talk about intermediate techniques when it comes to Adobe Photo Shop, like diving deep with removing complex objects from photos and using the content. Aware Tools will then talk about photo compositions and composites and put two totally different photos together, using curves and other intermediate Photoshopped tools to make him look like they belong together. We will brush up on the brush tool on adobe Photoshopped toe, learn how the pain on realistic shadows that could be applied to a variety of situations. Way will quickly get into real world projects by tackling a fast food burger ad that is both dynamic and helps his practice. Working with typography, headlines and a affects in Adobe Photo Shop, this course includes a fairly large local design section. We talk about the power of sketching or ideas on paper or on a digital sketching app. This course even includes an extensive downloadable logo design worksheet, and we'll talk more about client presentation when to present a client's color and even exporting files. The golden ratio is a great intermediate local design concept to master and will do just that in this course and speaking of grids will not stop there will talk about the isometric grid system and work through an entire project using isometric grids to create this realistic three D illustration. And brand new to this course is an intermediate in design section will walk through the creation of a magazine, spread and cover and talk more in depth about creating strong editorial designs. Headlines and crafting compelling stories using photography. Infographics is a tough topic for designers, and it could have a steep learning curve I thought would be great To make this the perfect project to work through together in this extensive section, knowing how to craft effective ads and advertisement is a great quality to have it can help you have more success is a designer. We'll talk about how to create effective advertising as we work through an entire social media campaign. There are tons of extra project sections, including one on creating a poster using just typography. Package design is another great intermediate topic, and we'll go in depth about the package design process, including how to work with files set them up, create a rich looking package design for a chocolate bar. Graphic design is more than just creating projects. It's also about finding work and clients. I've included an entire portfolio building section when we walk through how to create studying portfolio presentations and how to build them online and offline. I hope you decide to join me for this incredible journey through lots of fantastic intermediate design topics, projects and more. Are you ready for the next level
126. InDesign Section - Editorial Design Theory: editorial spreads or big, bold and beautiful. If you ever wanted to see wonderful examples of type higher and blocking of elements, take a look at your local magazine rack their use of white space to their big, bold photography. Editorial design principles can easily be adapted into digital designs and websites, so learning the art of editorial layout design is essential for any aspiring designer. Today. I'm gonna be an end designed to create an editorial spread for a client. I wanted to show you the process of blocking inaction and a little more detail, and showing you an editorial design is a great way to show you that. So let's get started. You will notice I'm using the grid system. When I start to think about this layout, it helps guide me toward places I could put content. Content placement is not random. There's a rhyme and a reason for each placement. In this layout, I'll have three columns of information, each with its own photo and title line. The amount of content will be about this length. I place filler text in the column so it can play around with spacing to see how much room that text will take up in the overall design. With all of this information I am having toward the bottom, I'm wanting to need to Thais and draw in the viewer to read my content. The best way to do that is a nice eye catching headline and perhaps a photo to as long as the photo adds to the theme and does not make the design look too cluttered. I am adding a black background to match the darker background photo. I selected this. You also help me use color as the tension drawing element in my headline, as colors tend a pop out much stronger on darker backgrounds. This does mean I need to switch my body copy from black to white text toe. Add enough readability, in contrast to that that typography and type the headline placement and font choices, or where you should spend most of your time finding the right font. Pairing takes experience and knowing what feels right and what has paired well in the past . There's also a feeling you need to batch this design with Who's your target audience here. If it's a woman that take that in consideration while making your font choices. Perhaps a softer font choice may work better here. When you have large blocks of information, it can help to have a headline or a photo to help the viewer know what type of information is being contained in that long block of copy. Also, finding the right cropping for each photo is essential. You do not want to a photo to have too much detailed or complicated information that takes away from the other main elements. Try zooming into important details the photo and said and cropping it that way. The less information would give the viewer, at one time the easier time they will have to absorb the content. When I have solid colored backgrounds that take up a large space. Sometimes I find it necessary to add a little bit of texture. This can add a richness and complexity to the design, but be careful not to overpower with a texture as it can be easily done. If you're seeking a flat, super clean design, texture may not be needed. It all depends on the desired effect and feeling that you headlines that are longer in use dividers are bars to healthy. I further breakdown wording in this case, I'm using a Ben bar in a graphic element for the top to do just that. Finding ways to make an editorial layout impactful in enticing is your main job is a designer, no matter how much information you have on there. In this case, I'm making a two tone spread with a high contrast black and white side. The key to a great layout designs balance to strike a balance between photos, text and other designers. Blocking out your design ahead of time can help you manage all of this.
127. InDesign Section - Editorial Design Theory - Part 2: I wanted to show you another layout with a little bit of a different approach. Once again, I start off by blocking out. My content for my blocks of text will go and finally, where I want to place my photo. What is great about having different panels, sides or spreads is you can break the mold and decide to bring that photo across to the next panel on, have a little fun with. Do not feel like a design has to stay on the same page. If there's a spread in this case, I'm bringing my photo across just a little bit. You could do the same of trifle designs and have photos go across multiple pages or panels to create a connected look and feel. Headline in this case is very important. It's the very title of the store you will notice. It takes a while to find the right choice and placement for the headline. Sometimes there's a need for a second, smaller photo. In this case, I'm trying out different ideas. I'm placing the circle inside the columns of copy, but it's always good to experiment. In the end, I went with another placement, but you never know if you might have a happy mistake, and they end up finding a really cool, creative placement for the type of photo. When you do that experimentation, here's the final layout. Noticed the image really takes center stage now that it's spread slightly into the other page. Also noticed. I used a background photo element toward the top to tie in the theme of herbs that the article end up talking about. The second photo does not overpower the main focal point, which would be the salmon photo on the left, so the second photo is tucked away, but it still helps tell the story of seasoning your salmon. I have also added what's called a drop cap to the first letter of the first paragraph. This helps to add something graphically interesting to break up the otherwise dull block of copy. I also made the page number the same. Fonda's My Salmon thought of the headline. This helps to tie in that look in that font. And to make this a unified design theme, notice the color of the salmon word. I brought out that color by taking an eyedropper tool and taking a sample of that pink color from the main salmon photo. This is just another way to further bring out that design theme. Notice the generous amount of white space. I want to avoid making this design look crowded. We have three total photos and a good amount of text here, so making sure there's enough space between elements will help this breathe and look more open.
128. Lesson1 AdobeInDesign introduction : Welcome to Adobe in design. If Photo Shop is for photo editing and digital graphics, Adobe Illustrator is for everything vector, including logos, infographics, icons, posters, business cards, fliers and more. Then what is left for Adobe in design? Do I even need to learn Adobe in design? Anything that will have more than a few pages is most likely best to design and in design and design has text management tools that other programs do not. It has features like master pages, which help you apply the same text or graphics to specific pages, which makes doing longer form. Content of breeze and design also contains better text wrap options and paragraph management options. Making editorial spreads and layouts easier to craft and edit in design is built for multiple page documents. Creating a 10 page PdF, for example, would be very tedious using the art board system. In Adobe Illustrator, it's not impossible, but being able to manage changes across all art boards is challenging and time consuming within design. Creating new pages and making changes across all pages is why this program was created in design is fantastic to use for multiple page documents, but also for magazine design and editorial designs, e books, printed books, catalogs, conference booklets, portfolio, P, D EFS, look, books, instructional manuals and anything that will be printed on multiple pages. Or be a multiple page digital. PdF and you'll find out in this in design section how important it is to really know multiple programs, as in design, integrates so well with Adobe Illustrator and Photo Shop. We can bring in vector assets from illustrator right into in design and also any type of photo editing we need to do. We can bring that over to Adobe Photo Shop and then edit it and bring it right back into in design. To craft our final document. This section will start off with several real world editorial spreads and pages as we learn the basic interface and how some of the most frequently used tools work. You confined the photos, and some of the resource is used in the section and the downloadable photo links guide you downloaded at the beginning of the course in the course guide. So let's go ahead and happen to adobe in design right now and get used to the basic set up of in design
129. Lesson2 AdobeInDesign BasicSetup: here we are with Adobe in design Open. And I wanted to make sure our screens matched and they got used to the basic set up and how to get everything set up before you get started. What I'm gonna do is I am currently in Adobe in design 2020. If you have older versions, that's okay. I'm gonna be talking about what would happen if you have an older version. Maybe there's a certain tool that looks a little bit different. I will bring that up a little bit in the class, so I'm gonna go and get the basic workspace open. I have kind of my default custom work space here, but let's all reset it so we can have a similar workspace. They're going to go up to window, and this is just like Adobe Illustrator and Adobe Photoshopped. I'm gonna go down toe workspace and I'm gonna make sure it's on essentials for right now. We could always change this later, but I like to kind of keep everything on essentials and then customize it later. And if you have already are already are on essentials, we want to reset our workspace so we can go down to reset, and it's gonna bring us all back to the default settings. Reset essentials. And here we go. This is what it will look like. If you're on the 2020 version. Of course, you can always go to window and bring out more panels. If you don't see the panels on the right, this will be just like Photoshopped and Illustrator. In fact, ah, lot of Adobe A design is very similar to Adobe Photoshopped, an illustrator. So if you know any of those programs, then you're already good to know a lot about the interface and how it works. We have different things, like links which will be important color layers and so and even text wrapped options air here. So if you don't happen to see them on the right and we go over them in the class, make sure you go to your Windows panel and you can call out some of those panels. So, for example, if we want to get our layers out, we can click on our layers panel, and we can drag this any which way and craft our own unique interface that we feel comfortable with with the most tools that we like to use personally. So let's talk about the interface a little bit more. You have similar tools that you've seen before. Like the pin tool. We have a rectangle frame tool, which you'll also recognize from photo shop. We have some basic shape tools, radiant tools, eyedropper tools, thes function a little bit differently than other programs, but mostly their functions are very, very similar. We have type tools and selection and direct selection tools. You'll also notice you have your fill in your stroke just like you do with other programs. We're gonna go over to the right *** to see this Properties panel. If you're in 19 2020 20 version of in design, you're really gonna really need that Properties panel. They've condensed ah, lot of these panels together, so we have your character, your paragraph panels. You also have your airline panels text wrap. Ah, lot of really important quick actions. All of it is in the centrally located properties panel, so that's probably gonna be your most used panel. On the right will be your property, since it's kind of contains all the most frequently used tools. So if I were to go over to select my text tool, and I would start to type notice that the properties panel has changed and now factoring character and paragraph options. So you'll notice that this will change as you start to use tools on the left. So this is incredibly important. The next most important thing is your pages. So in design is meant for multiple page documents. So this is where ah, it's very unique toe other programs. So you have these different pages that she can add and subtract and go right down here to your addition. To create new pages, you can create hundreds and hundreds of pages in design is meant to handle hundreds of pages. If that is something you needed to create, or I have created something a simple of six pages or four pages and then design, but it can handle that amount of of pages and other programs just don't have this page management system. You can organize things into spreads or also single pages. So this is a single page right here, and this is a spread to the spread. You'll probably notice this in the editorial magazine. Ah, spray consist of a left side on the right side spread across and this will be printed As you open up the magazine. You're seeing both the left and the right sides so you can set this up in a lot of different ways and won't get to that in a little bit. So we have pages, we have properties. We have your libraries panel if you happen to have the Adobe Creative cloud suite and you like to kind of share libraries and colors and assets across all your different adobe products. So we have your links, which is another important asset or panel that we're gonna be going over cause we're gonna have a lot of linked assets. And here, like certain photos that are gonna be linked and we can edit those photos outside of in Design and Adobe Photo Shop update there, maybe make it black and white, saved them, and they automatically update in your links panel. So just kind of something will go over. You'll be able to see all this in action when we go over our practical projects here soon. Also layers. It's gonna work a lot like other adobe products where you can add layers on top, um, and have been send layers in the back and the front, depending on what you want to do. So let's go ahead and create a new documents. Were gonna goto file new document or when he opened the program, it'll prompt this same a dialog box. So what we want to do is we want to create a simple 8.5 by 11 documents or just going to a standard page. If you are in Europe, you may want to do in a four. You may want to stick two centimeters, but you can also do interest just to kind of work along with me. It doesn't really matter. We just want to kind of get a standard average page. Size are most frequently used page page size. So we're gonna go down here and set a Peca's. We're going to do inches for now. We're gonna do in 8.5 inches, one with by 11 by height, and we're gonna put maybe 12 pages. Of course, we can always add pages and subtract pages easily in the pages panel. So facing pages is going to have a front cover, which will be a single page, and then it will have spreads any time you do a facing page, and then any time you own click facing pages, it'll just be single pages and not the double spreads. So we want to do a couple of editorial spreads. So let's go ahead and click on facing pages for now. And we can always add different columns if we want to stick to a certain column grid. We talked about grids a little bit with editorial layouts. Some. Some people wanna have a four column grid to kind of go on. We're just gonna click with one for now. We're gonna do something different with grids later, and this is where you can change a couple of different options like your gutter. Um, your gutter is gonna be the spacing between the different column. So if there's a certain gutter, you would have a wider gutter more space between your columns. You can add that as well. Of course, the default margins for inches is a happen inch all the way around, which is very generous. You can increase this if you want, but I like to leave it at a default and we can always change that later and believe is another thing you have to worry about with print. Um, anytime we export something for print a printer, we usually like you to add a little extra spacing on the edges bleed. We've talked about this and previous lessons. Same thing here. You can add it or decide to worry about that later. So let's go ahead and create and the first thing you'll notice. You'll go ahead and the first thing I do whenever I open in design document as I go right to the pages panel and I kind of just kind of see my entire layout. This will be the front cover of Let's Say it's a magazine. I'm going to zoom out to concede this. This is kind of what facing pages does is it gives you that first front page, and then it gives you the spreads all the way down. And then this is your back cover. So that's how a lot of this when you were to export. This is a pdf to send to a, um, place to get printed like a book. This the first page will always be your front cover the back page will always be the very last single page and all your inside spreads will be in between those and we can always arrange. This is well, so let's say we, um, create a document. Let's just go ahead and just create a simple square just really quickly. So let's say I have this spread and let's say I want to move it. I don't want it to be the first spread in the magazine. We can always select the left side, Hold down, shift, weaken, select the right side, and we can drag this all the way down to make it the next one. So I'm gonna drag you can drag it right there in the middle and split it. I could drag it right. I'm just clicking and holding. I haven't released yet. That could drag it over here, so it's gonna come after page four or five. So I'm gonna release so you can move this around how read like and change the order you can even take, take it out of order and say, I want to have this right page. I need to flip it with this one. So I'm gonna bring this down. Put it right there. And you can also change single pages by just selecting one and dragging them around. That's kind of a simple way that pages works. You could go down here and add as many pages as many spreads is you want. You can also select. I'm just holding clicking on the page 14 holding down shift and going all the way down to Page 19 and he can do the trash can and delete entire spreads or entire pages, if you'd like.
130. Lesson3 AdobeInDesign BasicSetup part2: So let's say we don't want to have facing pages and we wanna have a digital Pdf And we don't need spreads because we wanted to have be a single page pdf that has multiple pages. We don't need spreads. This is digital. What we're gonna do is we're gonna go up to file, go down to document set up any time you want to change what we just created, we're gonna unclip facing pages. So we're just unq looking facing pages and I'm gonna click on OK, so you'll notice everything becomes single pages all the way down. This is perfect for anything digital. If you could have a digital. Pdf, if you wanna have a look Book If you want to put your services on multiple pages if you want to have a portfolio. Pdf of single pages is probably the way to go. So you just have to go up and unclipped facing pages. But since we're gonna be doing some editorial magazine designs on layouts for an example toe learn and design, we're gonna go back into documents set up and we're gonna click on facing pages again. And now we're ready to do spreads and while we're talking about the pages and how that works, I wanted to go over something that's really unique to Adobe in design that know whether Adobe Program has and that is master pages. Master pages save a ton of time. If you have 100 page book, anyone have the same header on top. Maybe it's a blue bar that's across the top you can instead of copying and pasting that blue bar less So let's say have a blue bar here and I'm gonna have a title Heroes. Good. Make it blue and I have a little title here that I wanna have. I can hold down, option and drag and keep doing this for 100 pages, or I can use master pages and do it in one click. So this is how we're gonna do with master pages is you have something up here on your pages panel and it's called Master. So let's go ahead and click on this master spread right here. Gonna go ahead and double click and it's gonna open it up almost in a new window. It's gonna be different from the pages. This is its own little page right here and let's say we want to have that blue bar across. I want to do that on all pages because we want to have a title, maybe have it spread all the way across. So we want all of our spreads to have this blue bar. So what we're gonna do is we already This is our master. And let's say we want to apply that on all of these. So we're going to select all of them we're going to right click, and we're going to going to do apply Master two pages. So we're gonna be taking this master page and applying that template to all of the pages. So apply master two pages and you can create multiple master pages so you could have different kind of templates. You may wanna have half of your document, have the blue bar. You may want to switch to a different chapter and have a green bar. You can have as many masters as you'd like. So right now I just have a master, which is the default, and I'm gonna apply it to all pages you click on. OK, And now that we go through our document, look at that. Look how much time that saved us. So let's say I don't want to make it a blue bar. We cook right up here to our master spread that we created and let's make it green and look , it will automatically apply it to all my pages. So pretty cool, huh? So you can also go back up to master and you can right click and you can create a new master. So creating a new master, we can call it anything we want. Let's call it be. Click on. OK, who could drag it down so it can CRB master. So let's say we want to do something. Ah, different. Let's say we want to have a little circle here that will have our page number and we want to have it be purple just like that. We would have a purple thing right there and maybe we have it on the other side. Just a little quick example. Nothing that I would do personally, but just kind of example of how this would work. So that way we have all this, Matt, a master applied. Let's apply the be master to all of these, so select all right click and I am going to apply Master two pages. But this time I'm going to do the be master and I'm gonna click on OK and magically I have that option available. Let's say I want to do the circles on certain pages in the Green Bar. On other pages, we can mix and match masters. So let's say I want Page one through seven to remain circles, but I wanna have pages eight through 13 have the green bar. So now I can just select those specific pages, right Click go to apply master pages, and I am going to make sure it's the A master click on OK, and there we go. We have, um, two different kinds of masters applied there. So whenever you want to have something similar, usually it's a header, um, or page numbers or specific things you wanna have on multiple multiple pages. You're good. I want to be able to utilize master pages. That's probably one of the best tools that you haven't in design and a great way to manage so many different pages. Let's go ahead and get rid of all of our master page applications. Let's go ahead and click it all. We're going to right click right here in the middle and we're going to apply to master pages and we're gonna click on none. So it's gonna race it, and it's all gonna be just a blank template. So now we're ready to kind of experiment a little bit and see work with photos and text to kind of get used to the basic tools. So this is our first project we're going to do. We're gonna actually use photo shop a little bit to help us crop. Ah, this guy's helmet in the background to kind of give it this cool, layered look and we're gonna be using typography. And so one thing we're gonna want to do is let's go ahead and bring up photo shop and you confined this photo that I'm gonna be using here on pixels dot com. I have the link, but you can use any photo you'd like and apply the same effect. So I'm just gonna drag this into Photoshopped. It's gonna open up a new document for me. This is what I want to dio. I want to create that layered effect that we just saw So what I'm gonna do is I'm gonna use Larry masks. So one thing I'm gonna do is I'm gonna selector photo. I am going to duplicate the photo, so I'm just gonna do command c Command V. Just make a quick copy, and then I'm going to cheat a little bit. I have Photoshopped 2020 and I have a great tool that I can get. Monica had dragged this up here so you could not get that confused within design. Since they're the same color, Same dark gray. I'm gonna go select and subject. So that's gonna select this very quickly with for us, and all we really needed is that top head part cut off. And I think that did a good job. So for the second duplicate layer, I'm gonna take this selection and make a clipping mask, and I'm gonna do the same thing down here. So now we have that helmet clipped out. So that's what we have. And for this background, I'm going to clip that as well. Cem's gonna draw a box here. That's my selection. And I'm gonna clip that so it kind of gives it that cut out. Cool. Look, that we want to go for. And so let's go ahead and save this. So we're gonna save this to our desktop or wherever you'd like to keep all of your in design files and I'm gonna say person cut out whatever you want to say, go ahead and save this. What I did is I saved it as a photoshopped file, so you'll notice it is a PSD and I can bring this right into end design. So how do we bring in photos into in design? Well, you can do it similarly to photo shop where you bring in a container and it's gonna be a lot easier to use the frame tools. Ah, then it is to just bring in a photo. So let's say I just want to drag in a photo. I can do that, go into desktop. I want to drag in my photo or in this case, my Photoshopped document. And it comes in super big, and it's kind of awkward, So let's go ahead and create a used the frame tool and use the rectangle frame tool right here, and we're just gonna bring him in on the first left part of the spread. So there it is. There's our frame. You can always tell it's a frame with the ex indication and I'm gonna bring in my Photoshopped file. It's gonna populate right in there, and you'll notice that it didn't quite crop it really well. And that's very typical of very normal. There's lots of ways we can crop this easily by right clicking. We're gonna go down toe fitting, and we're gonna be doing this a lot in this class. And there's a couple of great options where you can automatically frame or fit this photo, and I'm gonna try the fill frame proportionally so it's gonna fill it in and bring it down to kind of this normal size. And there's a couple other fitting options were to do that a lot here shortly, so I have this brought in so I can always adjust this. Bring this down. What's great about bringing in a photo shop file into in design is I can click this and same goes for J Pegs and P and G's as well. I can right click this and go down to edit with and you have some different adobe programs installed that I can use. I can bring it back into photo shop as a PSD file and let's say I want to add an effect. Let's say I want to do a cool duo tone effect. So I'm gonna go to image mode and we've done this in prior lessons. I'm just making this grayscale and then I'm gonna add a really cool just going to image mode. It's gonna do a cool duo tone effect and that looks great right out of the box. So I'm just applying these two colors and I'm gonna click on OK, and what's great about this is I can goto file. I can save it. So I'm just saving my Photoshopped file, and it should automatically populate an update and in design. So it's already updated, so that's really, really nice. You could do the same thing with J pegs. You don't always have to have it be a Photoshopped file. We can edit photos in the same way, and you don't have to sit there and export of J Peg and drag it back in. It automatically populates for you and changes it. Let's go ahead and crop this a little bit and also, let's go ahead and bring this up a little bit. And another thing is, you'll notice these margins, these little pink lines. This is gonna be our margin. Let's say we don't want to see all this bounciness bounding box that we have over here, and we have all these kind of indications and margins and lines. Let's see, we want to get a really crisp, clear view without any margins were gonna press the W key on our keyboard so W and I can toggle all on and off margins and grids and get a clear look so I don't have to have any of those lines getting in the way of me looking at my design. So just press w and you have your margins and just unprecedented. You click it again. And then here we have a nice, clean view we can mess with. So next we're gonna do the headline
131. Lesson4 AdobeInDesign BasicSetup part3: So we're going to add a quick headline and we're just gonna get the text tool. We just do the type tool, and we're gonna click and drag to just create the kind of size we want to create for a headline. And let's just do all Capitals riding do Riding free as kind of a two word quick headline. Let's pick a nice, bold, modern tight face so I could go to my character panel, which is in my Properties panel. I'm going to go down to character and what's great about the newer versions of and designs that have his cool filter now where I can filter out different types of typography so I could do slabs, tariffs? Saref, Sand Saref. So I know I want to go for a modern tight face, so let's maybe stick with San Serif. I wanted to be nice, bold and thick, so I'm gonna go ahead and click on heavyweight and kind of see what comes up. If you know the name of your typeface, which I do, comrade, you go and type it in to stop. This was kind of an interesting typeface, so I'm gonna make this bigger of course, you can make it bigger this way. Or you could do a little keyboard shortcut and do command shift right and left brackets to make it bigger or smaller. So you don't have to sit there and mess around with the character paid all the time so I can hold it and olders gradually get bigger to make that rather big and bring that down. And what's great about having this cut out is I can do my command left bracket and I could bring that back in the layering system or if I wanted to go to my layers panel. You can also change that around by dragging this just like you would with Adobe Photoshopped. So let's say I want to make it a similar color to this duo tone that we have. We can double Click are typography. Of course, this is where we could change sizes and your kern ing, and you're spacing and letting and all that good stuff. But what we want to do is get the color. So we're gonna go up to fill right here in appearance, and we're gonna double click this a double click R T here for text and there's some built in swatches that you can do. And I'll tell you all about how that kind of create your own customs watches. I'm gonna click over here to color. And originally it was Ah, grayscale. But if you see it all just grayscale Adidas had black and black or white go up to this more options panel and click on the extra options and we could change it to see him like a If you're doing a print document and of course you want to do colors and RGB if you're doing a digital document so we can do seem like a we could do a custom color here. Let's say I want to get a ah sample from this photo. I just don't want to try to guess. I want to really get a sample of that photo. So instead of going up here to color, we're gonna go over here to our swatches. We're gonna go and click on Phil. We're gonna double click that and they're getting it. Get this RGB color space view. What we want to do is we want to get this eyedropper tool. We're gonna click and hold. This is the trick. You click and hold and notice how I'm dragging this around. It's taking samples. You could see right there where the samples were being taken. So I'm gonna try to find what I think would be a really nice purple color for this particular riding text on Get a release and click. OK, so that's kind of the trick. You just don't click at once and click over to it like you would expect. You have to kind of click and then drag. And then it's gonna continually find something until you release your mouth. So it's good. And stop it right about making a little bit brighter right there. Click OK, and it's took a sample from that photo so it looks like the headline is really integrated with a photo. So let's go ahead and duplicate this. I'm gonna hold down option and drag to create a duplicate of that, and we're going to this type in the words free. And let's say I want to align these two different tight boxes so it can select selecting this one holding down shift. Selecting that and going to my paragraph. I'm in my properties panel going down to paragraph and then going, I'm gonna go all the way down until I see my line options and I'm going to click on a line top. So those are gonna be now aligned, and I could do the same thing I did before and maybe get a darker or lighter color, and I can double click my type box, getting my eyedropper tool and let sample. Maybe a lighter color release can zoom out, and we can, of course, drag this over a little bit to kind of frame this. I wanted to have a little bit more margin. We can always toggle on R W to kind of take a look at her margins. There's anything we want to line up, and the great thing about photography is we can make it a little bit bigger. So I am going to do a special trick so normally and in design, I have kind of this corner here, and I can just stretch this to bring it across just like this. But then you start to kind of run out. This is kind of where the photos cropped, so I need to make the photo a little bit bigger I'm going to do command shift. I have command shift held down. I'm gonna grab my corner and just make it a little bit bigger and dragon outside. I'm gonna toggle on W kind of get rid of all those margins, and I could go ahead and crop the frame. We'll talk about frames here in a little bit. And so I'm just kind of modifying this, making sure people can see the G. I'm just using my arrow keys to kind of nudge thes like to give it the layered look a little bit, but I really want to make sure people have readability with this and making sure it's, ah line going down to my align panel and realigning those. So we were able to work with photo shop. We were able to work with typography. I wanted to show you one more thing with typography. So I have I just create a simple text box by going here, dragging and typing in text. But what I want to show you is what if the text box right here What if it was a little bit smaller, which you'll notice is the text disappears and what you'll notice is if you double click on the bottom, right little corner here, right when you have that area is double click it. It will bring it right back into the the bounding box. So any time and in design you make a bounding box smaller than the type it the type will disappear until it's made big enough for that type two reappeared, and then it's kind of a little bit interesting to work with. And whenever you have a really big bounding box like this, any time you select it, it'll select anywhere in the white area. So let's say we want to reduce this down to the exact size of typography. We can always go down to the bottom right corner DoubleClick and now we have kind of it perfectly writing. So if you ever see, if you ever reduce it and you see your text disappeared, you know you have text in that text box. It's not. You're not going crazy. Just double click the bottom right. It'll kind of pop up for you and then double click again, and we can kind of have it back to something a little bit different about in design. That you don't have to worry about quite as much with Photo Shopper illustrator. So there's our first little quick design. We did. Let's go ahead and move on to something really bright and vibrant. Once again, we're going to be utilizing Photoshopped to edit a photo and bringing it in to create something like this.
132. Lesson5 AdobeInDesign ArtSchoolPoster: So this is Our next task is to do a little bit more typography work. We're going to do a little thought pairing as well, and we're going to do a little bit more Photoshopped integrations. You can see how I can edit photos and easily bring that in to in design. So we want to bring in our photo here. We have a couple of photos we're gonna work with here. First of all, I'm just gonna bring this write in to photo shop. It's gonna be a book bag. We have his book bag, We want to cut the book bag out and we want to bring this into a really bright artistic abstract art background that's going to be about what to bring to art school. So we want to go ahead and have this be bright fund vivid. We also want to use a very modern typeface for headline. And I thought I'd be neat instead of having a headline beyond a white space that we integrate it into the book bags. Some house. We have this nice, um, simple one color book bags. So it'll be easy to put some white typography on top of it so also have a very interesting fund background I found on pixels dot com. It's gonna be this one right here, and we're gonna bring this in. We're gonna change the colors a little bit to customize it and make it our own. So I'm bringing this into photo shop, and it's a smart object so I can make it larger without any picks, elation or issues. If it's a high resolution photo, gonna bring that behind the book bags going, unlock this layer. So what I want to do is I want to remove the white background. So I'm gonna cheat once more and go to select subject, and it's going to do a really good job of cutting this out for me. I think there might be some slight, uh, issues here that could easily resolve by getting my polygon lasso tool and just kind of adding that into the selection. And there we go, and now we can do a mask. So going to a layering mask and isolated that automatically you see the background pop up behind it. So let's make the book bag a little bit bigger. Let's right. Click are layer. Lets convert it to a smart object. We've done a lot of this before in Photoshopped lessons, and we're gonna make this bigger because we want to put our headline on its We wanted to be big enough so we can have a nice big headline for it. We're gonna go ahead and press enter. What I'd like to do is I really want this book bag to pop out over this really, really busy background. And there's a couple ways we can do this. I'm gonna double click and go ahead and do our layer styles panel. I'm gonna add a quick stroke. So I have just a stroke and originally or by default, it's only like one pixels. You're not going to really see it. But I made it kind of thick enough where almost looks like a cut out, almost like a collage cut out type effect, and I want to make sure it is white. So I'm just gonna do color and just make sure it is white and also adding a little drop Shadow will add and bring make that also look layered and pop a little bit. We don't want to have too much of a drop shadow. So I'm just kind of gonna be careful about how much I use just enough to make it pop out over that background. So let's say I really want those colors to be a little bit more vivid. We have some blacks and grays and I wanna have really bright pops of color. So I'm selecting my abstract painting photo, and I'm gonna just do some quick adjustments. So the first thing I want to do is I want to go down to selective color, and I'm gonna select certain colors and bring out other colors within those colors. So let me take some of the reds, and I'm could reduce the blue or increase the blooms. Gonna go through each of those reducing the sign, notice how that really made the orange pop out a little bit of just selecting all the red pixels. So there's gonna be some red originally in that warrants. You see how making some tweaks is really bringing out the pop of that orange. Look how much more vibrant that is when I change the reds. We could also do yellows, which will really have an impact on the orange because there's probably yellows in that orange and same thing goes for neutrals. We went really brighten those neutral. So let's take some of those neutral grays and add pops of color. Ooh, decreasing the yellow really brought out the blue there. Perfect. So I can sense this is a smart object. I could go ahead and reduce the size of this just a little bit. Perfect. So now that I have that all sized, I can go ahead and say this is a photo shopped file, just in case I ever want to edit any of the layers in the future. So I'm just gonna call this book bag and save it to my desktop, and I can drag it into in design, so we're ready to bring this into in design. Let's create a frame so it could easily bring it in as one big object. So I have a frame here. We can always color or frame if we want to. Or if we press w, you'll see you're afraid if you press w again, it'll disappear. So if you ever want to kind of locate your frames, you just press W, and you could see it along with the margins book bag. We're going to drag it in. It's gonna automatically populate. Let's go ahead and fit this. We're gonna right click goto fitting, and we're gonna do fill frame proportionately, and it's this kind of automatically fill it to all the way to the edges. They're gonna press W begins when kind of see how everything looks without all of that cropping. And let's say I want to adjust this photo so there's a couple ways to adjust a photo. So anytime you click once on the photo and you move it around, you'll move the entire frame around. So their ago there's the frame being moved around. And if let's say I want to move the photo within the frame, I want to change the cropping of the frame I can Double Click, it said, is clicking and dragging Oncken double click the photo and you'll notice is kind of oranges . Is this orange border? That's gonna be where the original photo is, so I can go ahead and click here and drag it down. Sometimes you have to hold shift drag so it drags proportionately and he can make it tighter. This is the original photo. So if I drag this in, that's the original photo. Since we'll talk about this a little bit later and more t deal. So I consume it in sumit out and crop it. So there's kind of really two ways to move photos and in design, there's just kind of clicking and dragging. You'll move the entire frame, you double click it, you'll be able to change the cropping within the frame. And we will definitely practice that mawr. So I don't feel like you have to No, all of this Right now, we're gonna be able to practice at a lot more detail, So let's shift that up just a little bit. Perfect. So let's do our headlines. So we're gonna get our type tool. We're gonna click and drag and let's do this break up or headline and to do two different, uh, portions, what to bring and then toe art school. So let's change this to a nice, bold typeface. I have one in mind called phosphate solid. So I thought that was a nice, thick, bold typeface that'll show up really well on the backpack. I'm not gonna have to do a ton of drop shadow or effects to get it to pop out. Let's make it white. So it's going double click our Phil and make it white right here into our color panel. And let's reduce it just a little bit more in size. So what to bring? Let's go ahead and stack this and we can make this center aligned so we could do that right here in our paragraph panel. In our properties are paragraph area of her properties. And let's say we want to change the spacing between these two lines. It's a little bit, too, why we really want to make it more connected. This look works just like Photoshopped and illustrator in terms of being able to change the spa basing and the gaps between the characters. So down here we're gonna be able to change the spacing between the lines. Let's reduce that a little bit. Bring that together, and we also want to do some fought pairing to kind of break up. So what to bring? It almost feels like you're let yelling, so this, too, is not as important of a word. So let's go ahead, make that a little bit smaller, and let's do a nice then typeface to balance with the thicker, bold typeface. And I have one in mind called Mo Cocoa. It's kind of choosing these ahead of time because that can really take quite a bit of time . Is is choosing fonts, and we've already had a great chance to do that earlier in the class. Let's just do a lightweight metallic. So what to bring? And we can change the spacing here. So that's not so wide either. By changing the spacing between, so we're gonna do a negative was to a negative 100 that just kind of closes the gap a little bit. So what to bring? Has already established what's good, DoubleClick's bottom right corner so that we kind of get that smaller and we're going to duplicate this hold down option, what to bring. And since we already have two, we can just leave that art school, right? So I think what it needs is it just a tiny bit of drop shadow. I don't like doing really thick drop shadows because admit could make things look dated, but I think on black I think we can get away with it. So let's say wanna am drop shadow text effects. So we're going to select both of our text. Boxes were gonna right click, and there's going to be some affects down here. You can also get to your effects another way you could always right click effects. I find this really quick to get to. There's your drop shadow at or glows. It glows bevel in a bottle, that stuff. But you can also do it on a window. You can go down to your window, and there's an effects panel that you can use as well. So we're gonna go ahead and add a drop shadow, and we're gonna have a very tight distance. So let's make it zero perfect and maybe not as strong. So let's reduce the opacity. It just helps to kind of make it pop a little bit over that background. Let's toggle W so we don't see any of our bounding boxes or anything that gets in the way and let's see what we have. I think we could make both of these a little bit bigger, so let's like both text boxes and with in design when you have a text box like this and it's really kind of a paragraph text box. When I make it a little bit bigger, it just makes the containing box bigger. It doesn't actually make the tight bigger. So what you could do is you can select a typeface and do a little trick and do come man shift and I have this top corner, and I'm just gonna make it bigger that way. So just selecting our text doing command shift and you could make it a little bigger, you could do both at the same time. So they scale together the same amount, so command shift and then drag. It is kind of an easy way to make the text boxes bigger but not making the bounding box bigger or the area bigger. So what to bring it to art school? I think that looks really good. We can always ah, let's say we want to adjust our image again. We can select our background right click, go to edit with. We could edit that an adobe photo shop and let's say we want to change the size of the book bag or it would have changed the colors entirely weaken, save it and automatically populate back into in design, But let's say it doesn't automatically populate into in design. We can always go to our links right up here. Links. We talked about this a while ago. Here's your links panel. We can right click. Let's are bizarre book bag link. So that's the Photoshopped file that we've dragged in. This is our person Cut out that we did for the first ah, page. So let's select her book bag would right click and there would be an update link If the link has been changed, there'll be an update link there that you can update the link and it will do it manually for you. For whatever reason, it doesn't decide update for you. You do things. This is how you would interact with any object you bring in is your links panel. Now that we were able to complete a couple single page quick projects, we're gonna tackle our first editorial spread. We're gonna learn about a text overflows and paragraph management and integrating headlines . And also we're gonna continue to use photo shop to help us do some editing with us some specific things, and we're also gonna learn a little bit more about how to bring in photos and containers and do some fitting tools to make them fit just perfectly. So stay tuned for the next project, which will be a quick editorial spread.
133. Lesson6 AdobeInDesign EditorialSpread: Welcome back. We're gonna be conquering this spread for our next project, and we're gonna be putting together several different things to figure out a basic layout. And we're gonna finally talk about grids a little bit sore. Gonna open up back our plane document. Over here, we have, ah, spread. And we kind of saw the general idea for the article. It's gonna be finding the right accessories that's gonna focus on three main photos that are already pre selected and also just a few basic headlines. So we're going to start to think about the spread. How do we want the pages to interact? Do we want photos to go from one side to another? How much text that we have? This is all stuff is designer You can plan out ahead of time, so there's no surprises when you start to put everything all the design elements together, there is some kind of basic layout blocking or plan that's put in place. So one thing I can do is you don't have to use grids all the time. I find them very helpful. But there's times where you can do things abstract and not use a grid Or if you want to have a sense of structure, sometimes grids can really help you and finding the right placing of different design elements. So I have a couple of photos already picked out for this. We have a plan. So a lot of times as a designer you'll be sent a certain amount of copy or text for an article, a headline and maybe some ideas for photos. Or they may ask you to search for photos. And so this is what's good when it's when you're trying to come up with a plan, we're gonna go back to our document. We have just a simple spread here. We need to come up with a layout structure or basic blocking or an idea. And a lot of times, what helps me figure out the placement of all these different photos and text and headlines is to create us and basic blocking using grids. So grids are going to be shown very similar to Adobe Photoshopped and Illustrator. We're going to go up to view, and we're just gonna be showing grids. We're gonna go to grids and guides, and we're going to go down to show document grid sorry to go and click on show document grid and it's gonna be a basic module module grid. We can change. The spacing between this is kind of default spacing for the grid. But we can change all of the spacing and sizes of the boxes inside the grid by going up to in design preferences and going to grids. And we can edit this however we'd like we can make it light blue the color We can make all this kind of different sizes so we can have different subdivisions we're going to click on , OK, we're just going to use the default grid. So this is the next step that's helpful is putting on snap to grid. We're gonna go up to view, go down to grids and guys the same place, and we're gonna do snap to document grid. So now every time we bring in a photo, we can simply have it snap. So let's do an example. Let's do a rectangle. Let's say this is gonna be a photo, just kind of an example of where a photo ago it's going to start to snap to the grid. So everything kind of stays nice and you don't have to sit there and guess where the grid is. It will just automatically snap for you. So that's could be very helpful when planning and blocking out or layout. And you don't have to do this with every editorial spread. Sometimes you could just start to design and skip the grid stage. Ah, but for some people, it's it could be very helpful if they want to have a very structured layout with certain spacing. Um, all even we have our module grids, and we also have a snap to grid option on. We can now bring in all of the elements and figure out our basic layout. So we know we have an article we have article headline, um, which will be a very short headline. We're also gonna have one main focal point photo with the title on it. So I thought that would be a neat kind of spend a whole page on having introducing the article title and have a really good, big, large, strong focal point image. So let's go ahead and start to get that happening here. We have our rectangle frame tool because I know eventually I'm gonna want to bring a photo in here. So this will represent our photo. We can even make this a different color, so it can really get idea of where that's gonna be. So we're gonna have a photo there. We have two other smaller photos, so I'm just gonna hold down option and dragged us to duplicate what we just created. And we have two other photos that we need to somehow help tell the story of the article, but also to break down the article. So we could have to are two photos equally spaced here, and we can have our column of type and basically the article on the bottom. What's great about being able to maybe shift these around is weaken. Break up the text by maybe perhaps having kind of this diagonal layout where you have one on the top and one on the bottom. This will give the text a chance to flow a little bit. Mawr, instead of just being one big block of copy, it will help to kind of intermix the photography and the article, making it a more interesting read. So, so far, I'm thinking, I want to kind of make these boxes as such. Second kind of have kind of an inter mixing and started be kind of an interesting layout, but you can do whatever you want. As a designer, you can have lots of different layouts that work another thing we can think about. I can make this a different color just so I can see all the different colors. I can see them overlapping. Another thing you can do is a designer, especially with grid layouts. Is overlapping grid elements to create kind of some really good tension so we can bring this over on top of our main focal point and kind of have a little bit of overlapping with that photo? So you kind of have this interesting play on elements. They're not all perfectly separated. There could be some playful things you can do with having them interact. And since this is snap to the grid, I can move these around, and I know it's gonna always snap to that module grid, which is kind of nice to know, and I'm keeping a nice, clear margin here. I don't want to put any type past my margin just to kind of give the text some breathing room. We don't want to have any text, um, bleeding in or vital information of a photo to get into the margins. The margins will just be plain and empty. Of course, you can have a photo bleed into the margins, but keep the really important parts of the face or focal point of the photo away from the margin.
134. Lesson7 AdobeInDesign EdotiralSpread LargerBlocksofText: So let's go ahead and load in. Our typography are copy for article. So there's a quick way we can do this. We're gonna use the type tool, and we're just gonna click and drag to make a nice column of type. So this is our type within. Type it in. We can just paste it in from a word document. However, the client sends it to us. But what I'm gonna do is I'm gonna put in some placeholder text, and so I'm right here my properties panel. And if they go all the way down here to quick actions, this isn't 2020. This is in the 2020 adobe. In design, there is a quick little fill with placeholder text button. I'm gonna click on this and it's gonna automatically fill with some basic random tech so we can just get an idea of how much text we have. We can play around with it, So when we put in our final text will have an idea of where went up, place it so just kind of ah, quick way to get some copy toe work with, um because a lot of people go What? What do you use for articles? Well, you can't steal other people's articles. Either write it yourself. Or you could just put in this placeholder text just to give you an idea of how you want your text. A look. If you have an older version of in design, you can do the same thing. You may not have this nice properties panel where everything is in one nice place. You may have all these subdivided panels. If that's the case, you can always go up to type and go all the way down to fill with placeholder text. So that is another way you can do the same thing we just did with that short cut button. So now this and I'm gonna go ahead and toggle off. Um W For now, we can always toggle off W or toggle W to get all that grids and stuff off so we can have a nice, crisp, clear view of her typography. So this is how kind of paragraph management's works in an end design, and it's kind of a unique property of in design and where it really shines. So let's say I have what's called overflow text, so let's say I copied a big article into this smaller box, but the article is a page long. What's gonna happen is called overflow text. So when I collapsed this let's say a collapse it by half that text disappears or it gets cropped. In some ways, you get this little button this little at addition Button, this is gonna be near overflow text button. You can click on this and it's gonna create a new box, and we can split up text this way. So if we have an article, we have one column. We want to bring it to a new column. This is exactly how you do it with overflow text gonna click in an open area. And now I have another opportunity to bring all the text that was disappeared or really comes after. You know that paragraphs. Let's go like this. It's gonna automatically bring it down here so you can have multiple different columns this way. This is exactly how columns Air created. What's great about overflow text is its dynamic, so I can change it and then both columns will automatically read and order will go in order and he can collapse it and as I collapse it, more text will come into the next one. And what's great about this is you can repeat this over and over as many times as you want . So let's cut that off. And that paragraph that was cut off, let's say, would have another column from information. I just pressed that little addition Red Edition sign, and we can create 1/3 column. So that's kind of the basics of how overflow text works. So let's go ahead and create some more placeholder text here, so we're not gonna worry too much about the grid. We're just gonna go ahead and get our typography fine tuned. So let's bring this down and get a plan was going zoom out. Sometimes it helps to zoom out and let's create two columns. Let's have one column here and one column. We could make sure the columns are the same width just like that and one column of information here. We can also put like a little not necessarily the main header, but we could put a little sub header right here. We might need to add more overflow text, which I'm just gonna go down here and fill just to kind of show an example of a little bit of a longer article, and we could start to shift around her elements to adjust so it could make that photo a little bit bigger. Still have a bleed over to the other page, and we can take Ah, we can create a new text box and put like a little subheading here. So that's not gonna be your main headline. Butt's gonna be kind of if we looked at type hierarchy kind of have your biggest headline. You have a sub headline a subheading that's gonna be a little bit smaller than the main headline. This is gonna be your subheading. So subheading will go right here in this area and we will fill that in with real text later . I'm going to make this a type a little bit bigger. I'm using my keyboard shortcut, command shift and left and right brackets, or even go over to your character panel and increase it that way. So now we Cantat goal w back on and see how we could maybe match this to the grid. And since it's on snap to grid, things have already snapped for us could make sure the columns air the same, and with which will be easy to do when you have the great on to check that it's making that same width will when our columns to be the same. So what? What would be an issue? Let's tackle w off what would be an issue with some of this type? Well, first of all, when it comes to a large blocks a type, we study that sometimes that ragged look on the right this is called a ragged alignment. That's great for smaller paragraph. So this subheading having a ragged, um, kind of alignment here ragged means it's not all straight or even it works well. But when you have larger columns, sometimes it could start to look a little messy. So to fix that ragged alignment, I'm going to highlight all the type that I want to change. And on when your properties panel, you'll notice a paragraph option. So this is how we're gonna manage our alignment for paragraphs, and we're going to do this one right here. It's justify with for last line aligned left us, we're gonna go ahead and click on that. It's going to do a nice flushed alignment all the way down to the left and right sides, which you'll notice when we did that as well. See lots of different hyphenation, and I have a lot of clients who tell me they don't like Teetsi that many hyphenation. So there's a couple of tricks he can do to resolve that issue right here in your paragraph panel. You can unclip hyphenate, and it's going to remove all the hyphen ations and redo the spacing so that there is no need for hyper nations. And sometimes this works, and sometimes it doesn't. In this case, it doesn't when you have really tight columns, and he tried to not have hyphenation. If you have really long words, it can look a little awkward with spacing. So you just have to be careful on kind of this judge. Is there too much awkward spacing between lines? You can toggle that on and off hyphenate, so we turned it off and on, and there's a couple other things that can help to. So we have these natural paragraphs, and what really helps to break down paragraphs is put an extra space between the start. In the beginning, of a paragraph. So one thing we do can highlight Oliver type. We go right here in our paragraph options, and there's the space between paragraphs using the same style. So what this will do is a still put spacing between the the paragraphs. So let's say we want to do 0.2 inches. Of course, if you could be in centimetres if you have centimeters. So this just adds a little spacing between all of the paragraphs, which helps everything breathe a little bit. We don't have so much type that's run up together. It's overwhelming for a viewer to not have this nice natural spacing for the I toe break down information. There's also some other elements we could talk about right here in our paragraph panel. We have the first line indented so you could do the first line indented as well. Ah, but usually you kind of pick one of the other, whether you have spacing or an indentation. So let's say we go back to zero for spacing, and then you have kind of this ended. But both of them are a little bit overkill, So what we can do is we can reduce our indentation and then just keep the spacing. But if you ever wanted to end it, that first line that is the key, right here is the first line Left indentation. You can also shift things the left and right. So let's say we wanted to have a little pull quote right here, and we want to add indentation on the left and right of just the selected text. You'd go right over here to this area. This is gonna be your indentation, so we can add a little spacing here, and this is the right side. So you can add a little bit here to kind of create little pull quotes. And, um, just like that, we're starting to get some basic layouts here. What would be nice is using dividing lines, so dividing lines are really nice to break up larger blocks of copy. So I thought, What if we just put a little divider line right here in this area? Ah, great way to add dividing lines is go right up here to your line segment or your line tool . I'm gonna click, and I'm dragging right here, so I'm gonna be able to drag. And if I want to create a perfect straight line. We could just hold down the shift button and will automatically create a straight line for us and then release. And we want to be able to make this a specific color. It doesn't matter the colors right now because we'll get to that a little bit. Just gonna make that a stroke. And we're right here in our appearance panel and we can make that thicker. Or what's great about in designers. Have they have some really nice built in strokes, stroke, character or stroke styles that she can apply? So, for example, I really like this white diamond and he can make it a little bit bigger so you could see the details. You could see how it adds a little bit of detail to your stroke, and there's a lot of different pre built one. There's the dots who could do the dots or you can go back and do this white diamond, which I think looks kind of interesting for this style of article. So now that we zoom out, we have some basic let's go ahead and start to load our photography and so we can get an idea of what we need to do there
135. Lesson8 AdobeInDesign Editorialspread Photos: so you can find the links to the photos I use in this course in the course link photo links guy that you could find at the beginning of the course. Ah, but you can use any photography you want. You could talk about any topic with your project that you work alongside me with. This doesn't have to be the same photos, but have our main photo that we want to feature for article. So let's go ahead and pop that. And I am just going to drag that photo right into this container box and it's gonna automatically populate and I'm clicking on it. I'm gonna right click and I want to do some fittings. I'm going down to fitting and I'm going to fill frame proportionately. It's gonna go ahead and fill it proportionally out for us and do a lot of the hard work for us. Let's do the other two photos. We have this watch that we're just gonna drag right here into this upper frame course it dragged it in and kind of a weird way. But that's OK because we couldn't select the photo right click fitting. We're gonna try something differently. This is something that's new in the last couple years. Content aware, fit. So we know about the content aware fill tool and Photoshopped that allows us to. It kind of is an algorithm that finds subjects and helps you cut, amount and fill it in. This is kind of something similar where we do content, aware, fit. And there's an algorithm that runs where it tries to find the focal point in the photo and helps to kind of frame it for you. So it's kind of nice. You could do what we did before, or we could try this content aware fit, and it kind of uses out algorithm toe to center, align what it thinks is the main focal point of the photo. So let's try that one more time. You have this photo over a woman with a necklace we can right click Goto fitting. Of course, there's shortcuts. If you do the same action over and over, you can memorize the shortcuts. We're gonna go to content aware fit, and this could have find that subject matter for me. So let's say it did that, but I wasn't very happy with how it was doing Weaken select our photo just once, using the move tool or the selection tool. And it's gonna have that blue box again and we can move the entire frame around. So this is how you move the frame of the photo. You could make the frame bigger by expanding that option. But let's say we don't want to just make the frame bigger. We want to make the photo bigger. So let's go ahead and go back to where we were. We're gonna hold down command shift, and now we're gonna be able to scale it bigger so it could make that whole thing bigger if we were to not press command shift and we were to scale this. It doesn't scale the photo. It just makes the cop the container a little bit bigger. So holding down command shift and expanding will make the photo a little bit bigger. If I were to double click the photo, you'll see an orange order Now now can change the way it's cropped into the photo frame. I'm gonna hold down the shift button so it scales dimensionally and Aiken bring more focus in on a particular object, or I'd like to bring in that bracelet a little more so you can kind of change cropping just like that. So really, it's a little complicated, but you know, a couple different sizing options you can click once and get the blue box. You can change the photo frame or do command, shift and scale the whole thing bigger. Or you can double, click and scale, not change the frame, but change the photo within the frame. So it takes a little getting used to. Because other programs like Photoshop and Illustrator don't really behave that way all the time in a photo shop does have a container tool as well. So our rectangle frame tool. So we also want to change maybe the cropping of the woman as well. We want to bring in what is really the most important thing about this article is the accessories. So you want to kind of zoom in mawr on accessories a little bit less on her herself, but on the gold accessories. So we're just gonna double click, and then we're just going to kind of bring in her a little bit, so I get a little bit better. Cropping kind of brings a little bit more of an emotional impact when we zoom in on somebody's face is well, so it's kind of great that we're doing that. And so one thing is missing and that is the headline. So what? We're gonna go ahead and bring that in and I'll be right back. So here is our headline right here fighting the right accessories. We need to find a way not only placement for this headline, but also how do we break up the different words so that it reads a little bit better? Because that's not a very exciting headline. Even if we made it a little bit bigger. It's all the same type base and doesn't really pop out among everything. So we could we have a little white space here. We could highlight or text and change the color from white. Let's go highlight the text and let's change the fill to We could change to any of these colors we have, or go over here to our color picker. Girls go to see him like a and just picked kind of a generic color. We can have it there, but what what we have when we have a subheading and heading, and we have all of our information on the right. It doesn't bring a lot of focus to the left would be nice to have the headline and the girl together so we can really unify the focal point photo and the headline. So let's see if we can't find a way to put the headline on the left side. So the viewer kind of reads the headline, and then they shift over their eyes to the right side, so it really feels more like a cohesive spread. So I think whites probably gonna show up best so we could just go toe white and let's break this up quite a bit. So what we can do here is we can create separate text boxes so we have maximum control over the headline so we could do finding the and how about Lets make right its own text box. So I'm just copying and pasting in its own text box and let's do accessories in its own text box. And so now we don't need this word anymore. So now we have three different elements. We could start to stack, and we could just double click our bottom right corner to kind of bring our text box back into the right size, so there's don't accidentally get selected. So finding the right accessory. So what's the most important part of this headline? Finding the is not quite as importance. We could make that a little bit smaller, right would be pretty important. Make that bigger. And of course, we have to change our text box double click it to make it match, and then accessories could be a little bit bigger. So let's make that bigger. Let's say I want to make it the same size is right instead of having to double click here and go, OK, it's 81 point font and then go over here and copy and paste 81 point Whatever. Whatever. Ah, there's an easier way to adapt. And that is just do the eyedropper tool. I'm gonna go ahead and highlight accessories, take the eyedropper tool and go ahead and select right, and it's gonna automatically adapted to that size. Of course, we have to cut a maker text containment box a little bit bigger, and the same thing goes for photos. Member only selected the photo just once, and we had the blue box and we able to hold command shift and then we can scale it bigger. Same goes for text boxes. So let's say I don't want to have to keep making that bigger and then making the box bigger to keep up with it. I just want to make it bigger. Overall, you can do command shift and scale it that way, too, so you don't have to sit there and keep readjusting that box. We could do command, shift and scale it down or scale it up, so it just kind of saves you a little time not having to change that little text box all the time. So let's try to find some fought pairing here, so I kind of like this typeface. This is Daido, which is a premium font. Ah, but it's a really nice serif typeface used for high end luxury magazines, And so I think that's why I'm really liking the way the italicized wording works here. What could pair really good with that? Let's try a script typeface so we can just go through our typefaces and try to find a script script. So let's go down to script and see what we have. Let's try Pacific. Oh, and sometimes have to make the box a little bit bigger when you change your typeface. Well, that looks a little Ah, a little childish. We have a very high end, elegant spread. Let's let's change that. So it's not quite so childish. Let's try El Fresco. So that has a little bit skinnier and has higher contrast between the lines. We have some thin then, Ah, stroke here with a thick stroke. It just has a very elegant profile. So let's stick with Al Fresco, and I'm going to just do command shift and make that bigger and make that be kind of the focal point of the headline. And let's do the same thing. Let's also make this al fresco. And so what I'm gonna do is I find tucking words into this little kind of natural space that's created under the H and the tea. I'm just gonna use that natural space that's created to tuck that in. I might need to bring this down. So now I'm having an issue with layering I every time I click on finding the right gets automatically selected because script typefaces tend to take up big boxes, Um, selecting boxes. So what we can do is go to our layers panel right here in her layers panel, and that's put finding those. Just drag it on the top. So now when I click on top, I can be able to select it doesn't automatically select right, because I moved it at the top of the layering system. So now we have a problem with contrast and not being having too much going on in the photo and not enough readability of the type. So I selected all three right click weaken group the's just like other adobe programs. And now it's one group. So you see how it looks Had one big bounding box now for all three, and I can Now you move these around as one unit and I can also do command shift and scale it down. If I just did. Ah, if I just scaled it and I didn't hold down command and shift, it will change the box, the bounding box. But if I do command shift, it'll scale the size. So now we're just trying to find that right placement. We consume out, get idea placement and it makes me wonder if I can almost have it bleed over to the other side. That would mean that we need to change the position of our photo quite a bit. Could change the position of our photo. We can zoom in so we have more of a background to move over. I want to make sure the focus is on the accessories and I have an idea that I want to try out. So I'm gonna take this photo and I'm gonna bring it all the way across to right here. And I am going to create Can do this and photo shop if I need to extend that background photo shop by bringing in photo shop and extend it and duplicate that background. But since it's a simple, solid background, I am just do taking the rectangle tool. And I am going to fill that and I'm gonna take the eyedropper tool. I just wanted to sample this background color, so I'm gonna sample the background color, and I just filled in a simple rectangle with that color using the eyedropper tool. And now I'm gonna send this back in the layering system. So this is a rectangle. We can always toggle it on and off to know where we are in the layering system, and we could drag it all the way down to the bottom. So what we could do is we can reverse this out and make it a dark background presentation which will add some richness to the article, just making some minor corrections. So now we can have the headline kind of bleed over here. We can ungroomed this. If we needed to tweak this any and this will give us an opportunity to maybe shorten this article or sometimes you cannot short articles. You're stuck with whatever the client gives you. They still have snapped, agreed on so that everything is snapping automatically to the grid. We could turn that off at any time by going to view and turning off, snapping to grid
136. Lesson9 AdobeInDesign EditorialSpread Final: So now that we change the overall presentation of this layout, we need to change the color and contrast of the type below. So this will probably need to be kind of a very light gray or a white or some kind of really neutral color. That's bright. We're just gonna go over to fill and we can just choose a white color. We could go to see him like a She's a nice maybe a light gray color and right here and same thing with their line if we want to change our line as well now that we're starting to develop the theme here. So what I want to do is I want to start to do some color color matching here. So we match this blue color and brought it over. But what would be really need us to bring out the gold and all the accessories? Because most of the accessories or gold based, So wouldn't it be neat to bring that out and now use gold a lot, but has happened to be a big van? I'm so let's see how we could do that. So what we do want to do is we want to find kind of a gold color palette. So let's zoom in on some of these gold items and see if we can't use the eyedropper tool to be able to sample this. So what I can do is there's If you click and hold the eyedropper tool. There's something called the color theme tool. We're going to select the color theme tool, and this is really neat because it helps us select are really quick color palette for us. So we're gonna click on this gold, and what it does is it takes kind of a sample from that entire photograph, and you have colorful, bright, dark, muted. It's a great way to take create a very quick color palette from a photo, and you can add this to your swatches. So when I am a color theme to my swatch, let's go ahead at it. Where does that go? So where is my color swatches? And we can go up to window color and go down to swatches so this will load your swatch and already had this loaded in. It looks like this little icon right here. This is your swatch panel, so I can add this is my theme that I just add. So I added all these different colors that it automatically picked for me. And, of course, I can add my own. So let's say I select Let's just do a box student a simple box right here and I want to go ahead and fill it. I can go down to my swatches and fill it with any color I want. And this is great when you're working with branded materials because you can save your branded colors and you can go to your swatch panel at any time to load the exact in color so everything is consistent across everything. So let's say I really like this gold, but I want to tweak it a little bit. I can go ahead, double click, and if I wanted to tweak it, or if I wanted to take this eyedropper tool and sample a different gold color somewhere, maybe in this bracelet and you could see the original color and the one that I'm selecting and that actually might be a really good color, so I might stick with that. But let's say we just had an example when I wanted to make it bright green, and I want to add this color swatch to my swatches. Right. Click this Phil Swatch or the swatch over here, right? Click it and I can add to swatches and you'll notice that is now on automatic Swatch and I can, of course, right. Click and delete it if I feel like that is not one that I want to do. So let's go back to that goal. I think this is a really good choice. I can drag this out of this colorful theme and bring it right back out here so I can have easy access to it. You can double click. You can rename these swatches so I could do gold color. You can name this whatever brand color you like. So now I can go to our typography, and I can quickly highlight my typography and my swatch panel. I like to have my swatch panel readily available, so I like to have it loaded here, right here, My quick access access panel, and click on gold color and Voila. So we want to be consistent with our type choices. So we have this Daido that we're using. You can use whatever sand Sarah for serif typeface you want here. But for my example, I have died. Oh, So what I want to do is for the subheading. I'd like to bring out thes same same type face choice because this one looks like it's a default minion pro. So I'm gonna select the text. I want to change, get my eyedropper tool and sample it. It's gonna automatically adapt everything, go down to my Swatch panel, go ahead and highlight the text. I want to change and flip it over to my gold color and voila! And of course, now that I'm seeing this, I would love to brighten that up just a little bit so I can double click this watch and whatever swatch its global, it'll change globally. So let's say I have all of this. So let's say I have that gold and I have this gold and let's say I want a lighten the colors on both of those. If they are set to the gold's watch that both of them have the gold swatch applied, I can change the gold swatch to double click this watch. I can tweak it, and everything globally will change. So anything that had that Swatch could be changed out quickly. So what's great about this is if I had 20 pages and I so let have all of those pages. The headlines applying applied the same color swatch. I can change it globally, Aiken tweak it and make all of that same swatch a lighter color across all pages. And that's what makes in design. So powerful is if we're in Adobe Illustrator. They do have kind of a global styles with colors, but it's just it work so well within design. So let's go and switch that back to gold to both of those are set to the gold's watch, and I want to make this little line gold, too. So let's switch that to gold, and it looks like I need to change the stroke on that went to gold. So just changing that to gold, and I think we're really making some progress here with how this looks. Let's change the typeface of our body copy. We could easily highlight that instead of Minion Pro, we can go to a Daido or we can find like a sand saref toe work with body copy. It just depends on the look where you want to go for. So now that we zoom out, we can kind of take a look at her layout. We can always press W tuggle on our margins and we can now adjust. So now that we have kind of this column kind of starting over here on the right, it would be nice of her photo. Maybe aligned with that doesn't have to. Didn't have to be perfect, but I just thought, Well, maybe that will be interesting. And we can kind of bring this photo over a little bit. Just making some small adjustments to the photo, making sure there's no text that goes past the margin. And now cantata lof W. And we can double click on this photo and see if we can't find do some final cropping with her. Kind of bring her over. She was a little too far on her own to the left, so I thought I wanted to bring her as close as I could to the headline without overlapping the headlines right about there. So she now I can feel like she's a little bit closer and there I don't want to cover up the bracelet cause that is part of what we're talking about with accessories. So there we haven't There's our first basic editorial layout spread that we did together. We learned about paragraph management how to kind of get some swatches going so that we can recall the same color swatches, and we can change them throughout the whole document by just one click. And there's a couple of things I want to go over that will speed time savers just like we had, ah, global styles with our color swatches, where we can assign a color and change everything globally across the whole document. There's also something called paragraph and character styles that weaken, save and recall later so we can start to develop our body copies. So let's say we have our body copy. It's Minion Pro. It's 12 points. It has this spacing between the pair grass. We got all that set up. We can save that's particular style, and we can assign it to another new article that we bring in. So there's consistency across the entire magazine, and we're gonna do that next
137. Lesson10 AdobeInDesign ParagraphandCharacterStyles: But there's two different styles here. There's character styles, which saves the font type, the font size, maybe the color of the typeface and paragraph styles, which will save the paragraph. So all the things in this area, this paragraph it will save all of these options. So indentations, spacing between paragraphs and with the character. It'll save everything that's in this area, which will be if it's italicized if it's underlined all of that stuff. So let's say we want to take this body copy and we went, Apply it to the next one. So let's go ahead and save this as a paragraph style. So we're gonna save the paragraph. We're going to save the spacing between everything so we don't have to manually put the spacing in each article we do. We can have consistency across our entire document, so let's go ahead and add a paragraph style click right here to add, and this could allow us to name it body copy class. So any time I want to edit a particular style, I can go down to the drop down menu and go over to edit, and this will be everything about the paragraph that weaken set so we don't have to set it over and over over. It's a style that's already gonna be saved for us. So you couldn't change the type phase, the font type. Whether it's underlined, we have advanced character formats and some of this is a little bit more intermediate. Advanced, we can add indentations. Justify We can always have, ah, just center, justify or a left justify. We could have indentations their specific care paragraph rules, which starts to get a little bit more complicated and into editing our editorial editing. We can be able to establish our hyphenation, um, whether ah, we hyphenate after five letters or whether we hyphenate after six or seven letters. These are the details that makes and design so powerful for editorial work and multiple page documents because you don't have quite the same control over a lot of these things, especially with justification and hyphenation and all these other options that you just don't have those options and illustrator or photo shop like you do it in design and people wonder, why do you use in design? Because these things were new. Doing 100 page book being able to set thes paragraph styles and have this amount of detail over little things about how the type is treated. I'm from a grammatical standpoint, but also, from editorial standpoint, you can really start to see the power of it. Those are a little bit more advanced options, so that will be for another day or another class. So let's say we highlight all of that and let's do it our body body class copy. So we have basic PARAGRAPH, which is gonna go back to how the default type is. That's what you kind of have. But we can highlight all of our type here. We can go down to paragraph styles. We now have the ones saved. We can edit any of the details at any time Body class copy, and it's gonna automatically make it white. It's gonna automatically do a left and right. Ah, justification. So it doesn't have the ragged center. It's gonna automatically add spacing between paragraphs. We don't have to keep doing that over and over and over again. So let's say I'm already down here. We could highlight, and we can just go ahead and make it a body class copy. And then there's also character style. So let's say we have a certain treatment to this subheading. Let's go ahead and save this as a character style. So we're gonna go to character styles, same way we did with paragraph style. We're gonna add a new character style. We're gonna make this subheading. It is going to say that it's italicized. It's Daido. Everything in this character panel, it's saving. So now let's say I go over here and I want to type in. This will be a new subheading. This is your default typeface. I can go ahead and select my type that I want to change my characters and I want to go down to the drop down menu and go down to subheading, Apply it and automatically save everything. How it looks from up here so you can see how when you have multiple spreads and documents, you can quickly recall paragraph and character styles to be able to make that job a lot quicker for you.
138. Lesson11 AdobeInDesign TextWrap: Now we're gonna talk about text wrapping. Text wrapping is pretty cool and adobe in design. We're gonna do a quick little example. We're just gonna scroll down. We're gonna end up creating this spread. We're gonna be able to create custom text wraps by the end of this quick lesson. So let's kind of go over the basics of text wrapping. Let's scroll all the way down to this blank spread and let's bring in a circle container. So it is doing the Ellipse frame toolkit shift so I can get a nice dimensional circle and let's go ahead and release. I'm gonna make that a color so I can kind of see that a little bitter, but better or aken toggle on my w key and be able to see my frame that way. So what I'm gonna do, it's gonna drag in a simple photo and gonna right click and do some fitting Phil frame proportionately. And there's our little photo. So what we can do? Let's bring in some generic type some to take her type tool and just create a couple columns. Good on my properties go all the way down to fill with placeholder text and let's create a couple of columns. Let's do to equal columns. We have two columns. We learned how to create the columns just recently. And so now what I want to do Let's make sure these columns or even so, let's do we won't have nice even columns. Go ahead and collapse our text box to equal columns. I want to reduce this in size. It's gonna reduce this in size and bring it over. What I want to do is I wanna have a text wrap happening, so I'm gonna bring my photo on top. So I'm just gonna do command right bracket and bring that on the top or can go in my layer system and drag it on top. Make sure the photos on top. I'm gonna go to text wrap options. It is in my properties panel. If you have an older version of in design, could simply go up to window and go down to text wrap. It's gonna have its own little panel, but I'm right here. My properties panel and there's a couple of different text wrapping options you have. You could have no text wrap. You can have wrap around the bounding box. So you have this little bounding box that naturally happens. But if you see that, it's kind of gives it a square. Look, we wanted to kind of go all the way around the circle, so we're gonna do this one right? Here is the third option wraparound object shape. So a wraparound object shape and voila! We can move this around. So I'm making sure I got my blue border. Here's I'm gonna move the whole photo around and you could be able to create all sorts of really interesting text wrap options. So let's say I have this a little bit smaller and this could be right here in the center of my two columns. Let's go ahead and move in. And let's say the text is kind of getting really close to the edge here. That is too close to the photo. We really want to have some white space and some breathing room. There's gonna be some text wrap options that will allow you to put more border around here some blank space so that we can have some breathing room with her type. So we're gonna go over to this little options to say more options, and it's gonna give us some more options with their text wrapping. This is gonna be padding are really it's called offset but kind of creates a padding around the photo so that it'll expand out the text a little bit more so you can see how it's given it a little more breathing room, and you can do it all together. You can link them. Also, we have top bottom left and right side of the object, So since it's a circle, it's automatically get a link. All these. If it was a square, you can unlinked and just do one side. If you really just need padding on one side of ah square, for instance, let's go ahead and reduce this so you can manually type in the number you're not stuck with whatever increments that house. So if we want to do something in the middle like maybe just 0.1 inches, we can find the right spacing are padding around the photo. So this is dynamic, just like it is when we did the overflow text so we can move and shift this photo around and will automatically shape it. So we can do the same thing with multiple columns, but we can create our own custom shape. We're not stuck with us, these shaped tools on and container tools and dragging and photos. We can do something more custom than this by drawing a shape and then applying text wrap options to that shape. So we're gonna do an example of this and create the spread that you see right here.
139. Lesson12 AdobeIndDesign TextWrap part2: you can see on this example. I have my guides and grids turned on it. Just talk. Hold on. W And you can see this custom outline I created using the pin tool to draw around this complex figure so we could do a very neat looking text Wraps. We're gonna be doing that right now. We're gonna go down, Let's go ahead and go down to page 11 and let's just add a new spread. We're gonna go down to the addition. We're gonna click twice. We just created a new spread page 12 and 13. Let's bring in that photo that we had. So here's our photo. Let's go ahead. Bring this one end and I'm gonna do command shift and go and pull that out. So let's go ahead, and we're going to create four even columns. So there's one thing we can do is we go to a new document. This is just one way to do it. You could go down to columns and you can create two columns right here and do create. This could be creating a new document, and it's gonna create two column layout for you. If you were to make this a spread? What's at another photo? Then you could automatically have perfectly spaced columns for you if you want to always keep it to call him throughout your publication. But let's do it another way. Let's say this is just a four column layout all the way across the spa bread. But we don't wanna have other articles. Have that, too. We could use our handy guides over here, so we have our guides that see this ruler going up and across. If you don't see the ruler, you can go up to view. You can hide and show rulers right here in the view option, but she could click on the ruler just like photo shop and illustrator, and it's gonna go ahead and bring out a guide. So I'm just clicking and holding, and we can go ahead and create kind of her own column Layout from this kind of will just be a guide for where to place our columns. If you ever need kind of some extra guys, this won't be printed or saved with the document. It's just for you to help you. As a designer, you can also bring down vertical or horizontal I should say guides as well, Strong a text box, and we're going to do our placeholder text or go to go over the properties panel and fill with placeholder texts and let's do overflows. We're gonna click over here and create an overflow box so that these can be dynamic. And let's also fill this up with placeholder text and repeat. So you remember our paragraph styles where we were able to put spacing between the paragraphs. Let's highlight all of our columns of information and let's apply a paragraph style. So let's do the one that we had earlier. Ah, basic paragraph. Our paragraph style earlier was for a darker background. Let's we go ahead and re create a new fresh paragraph style, and we can practice that one more time, so this could be for a lighter backgrounds. The type is going to stay black or light gray or dark grey. We're gonna go down to our paragraph panel. We're gonna check the alignment. Let's do Let's have it be nicely justified on the left and right sides. We could do left and right. Justify with last line around, aligned left, we're gonna add a little bit of indentation between our spacing between the paragraphs. So let's add a little bit of spacing right down this way. So now we got some nice breakage between all the blocks of copy. We're gonna keep it hyphenated since it's a pretty tight column and it's a traditional longer format. So I think we could get away with hyphen ations and thats it lets go and save her paragraph style and we're gonna call this ah, light background. So now if I were to ever change all of this pair gravels, go ahead and reverted back, let's revert it back to another paragraph style basic paragraph. So we'll go ahead and toggle that to our new light background. And when you load do text, all you have to do is go to your paragraph styles and you have this safe for the next article. You it is. Click it and you would have to do all the set up each time. So now how do we create this cool text wrap option? If we were to bring in a school, wear and do a text wrap that way and maybe increase the padding so we have this box functioning as the text rap for us to be able to carve out the text wrap over our photo. But how do we make this transparent? So we're not seeing this shape. It's just a transparent shape. We're gonna go over to our fill panel. There's this default, Phil and Stroke. We're gonna click this knoll option and we're just taken away the stroke and the fill so that they're both knoll. And let's go over to none. Do it that way, or you can go click on each one and make sure the swatch is set on none. So it's gonna be transparent to have this box that's kind of acting as the text over app, object, object, and we can shift it around. And so you notice has its square. So how do we create our own custom shape? Because this is obviously not a square. This is good to take a custom shape, we're gonna do the same thing we did with the box, but with the pin tool. So we're gonna get our trusty pin tool. We're just gonna trace and object around her. Wherever we want the text to wrap around. We're just gonna trace it and So if you're comfortable with the pin tool, an illustrator and photo shop, you'll be right at home just tracing over her and let me see if I can't switch that to just a stroke so I can kind of see my shape a little bit better. I miss tracing around clicking and holding, and he took the illustrator section. You've got a lot of Pinto practice already, so now we're to do the same thing we did before. We're gonna go over to our color panel or swatches, and we're gonna click on none. So that totally disappears. There's not a stroke or a Phil. It's just a transparent object, and we're going to apply a text wrap option to it. So let's click our move tool. Over here we have our object selected, and let's do wraparound object shape just like that, and we can increase in, add padding around it if we wanna have a little bit more padding. So let's toggle offer W. So I don't see any of our lines, and this is what it looks like so you can do that with any shape. If you have a complex person that you want to do a text wrap around. Just take the pin tool, create a shape, make it transparent and then apply your text wrap options. And he could do any shape imaginable so we could go ahead and make room for the headline. So let's take our four columns of copy and bring it down, and we can just apply a quick little headline right across the way. So just doing a big text box, and we could do the same thing with character styles and create a headline that's consistent throughout our publication. We don't have one yet, but we can always add that. So let's create our nice, bold headline here. So I'm gonna try this comrade tight face again since we use that earlier and I'm gonna make it a little bit bigger. And let's maybe pick another typeface because that's looking a little bit to digital computer age kind of thing. I want to kind of soften that a little bit. Let's go down and pick another one. Let's do as oh Sands uber that looks like a great tight face that's nice and bold and will match with the crisis headline. It's going to make that a little bit smaller and we can make this red. Let's go to our color swatches. We could pick a nice red or we can go over and create our custom color. Looks like I need to load my somehow my color panel got deleted. But that's no big deal, cause I'm goto window click on color and there's my color window. Somehow I lost it. Now it could bring everything down. We have her snap to grid on. It's gonna keep that grid for us. Toggle on W to see if it still lives up with the columns and bring this down. Then we can line up all these columns, go to our align panel in line everything up to the top. So a line top edges. So it's gonna line all of the selected objects to the top. Looks like they're already aligned and just tuck all that in and we are ready. What I might even do is see how I have everything to the margin, and I might even for publications. I might even increase my margin in my document because this is the default margin that Adobe in design has, and I would like I like a little more breathing room in white space, especially when when it comes to typography for editorial spreads. Because if you ever pick up a magazine or really thick one and you kind of look toward the middle of the magazine works the thickest on the left and right sides, you'll notice that and the inside. You kind of have this this curving effect and it's a little bit harder to read text and this and that where the spine is, where it kind of comes together in the spreads. So sometimes I like to have thicker margins thin the default spacing. So I'm just gonna go up to go to file documents set up, and I'm just gonna increase the margins to This is an inch is, by the way, let's go ahead and increase it by 50%. 2.75 all around Click OK, talk along or W so we can see our margins and it's a little bit thicker. So I'm just gonna make some quick adjustments and notice how adding just a little bit of spacing between Oliver elements. So around the margin and maybe a little spacing between the headline, Um, and maybe even spacing here in the spine. Just like that, all these come together to make it a little bit more professional, little more breathing room. So I think that spacing looks a lot better. I think it helps the peace to breathe a little bit. It doesn't give you, ah, viewer anxiety where type is too close to the edge that having that extra margin makes it look really ah, lot more professional. Of course, we're gonna have to change the width of the columns here, since so these columns would match. That's something we could do another day, just going over the very basics of managing large blocks of copy paragraph management, basically, and also incorporating this text rap to also find put something really interesting within the type. Of course, there's little tweaks we could make. Let's say we feel like this is a little too thin to read. No big deal, because we can just select the object and then select the photo. And then issues are right arrow key on a keyboard and slowly shifter over. So there you have it, some very basic fundamentals of in design, and I think one of the best ways to learn. And you'll know that if you've been taking a lot of my classes or if you work through this class that I love to do practical, real world projects, that kind of projects that clients ask you to do, the kind of projects that you're gonna do for your business is someday. So we're gonna do something a little bit more fun, something we haven't done in adobe products before. You might have seen me do this and affinity products. I did Affinity publisher class where we walk through the creation of this project right here we are going to design a cookbook. That's right. We're gonna do a cookbook cover and a couple of different spreads where we have the recipe . We're gonna be able to practice every single thing with that we've learned in the last hour and 1/2. We're gonna be able to apply it to this real world project to create something really professional and exciting.
140. Lesson13 Cookbook Setup: we're gonna be doing this cookbook entirely in Adobe in Designed today, using all of the skills and basic tools that we've already learned in class. We're gonna create a front cover. We're also gonna be able to create a couple of recipe spreads and be able to learn how to export files. So you learn how to export for print but also export a digital version of the same recipe book. So I have some downloadable resource is that you'll be able to get at the beginning of the course That will come with a couple of resource is I got to go ahead and talk about that real quickly. We already created a brand for this, So I have Adobe Illustrator File. So I'm gonna go ahead and double click this. And here is the document that I'm gonna be supplying. It's gonna be a already ready to made logo for our cookbooks. They don't have to worry about that, but I haven't all sorts of different color. So if you want to do something totally different than what I'm doing, I encourage you at this stage. In the course, you're ready to kind of explore your own style, so you don't have to use this logo. But I wanted to supply it for those who like to go and do the project similar to how I have it. But of course, you can go in all sorts of different directions with your own logo or different color. I also have some color swatches here you could kind of go for. So this is a quick little logo I put together for this project. So this is gonna be our cookbook. It's gonna be all about deserts. Dessert first is the name of the cookbook totally made up book, by the way. But I'd love to make it a real cookbook someday, So this is gonna be great because we're gonna be working with Photoshopped illustrator and in design. All three are gonna come together to make this cookbook. So we're in Illustrator. So there's a couple ways we can bring files into in design. Let's go ahead and first get our document going. So we're gonna create a typical standard 8.5 by 11 inch document. It could be in a four. If you are in centimeters and a four woodwork, find us whatever would be your standard book size. It could be a six by nine. If you if you research book sizes, they are all over the place, especially if here in Europe you're gonna have different sizes. I'm in the United States. I'm using inches, but there there's not really a standard book cover size. There was maybe 10 different kinds. So for this cookbook, we're just going to do something really standard. You would always talk to the publisher or printer to find an exact size if you're gonna create a cookbook. But for this example, where it's going to do something really standard and simple, we're gonna go new document and let's go ahead and do inches. And, of course, if you're another sizes, you can do that as well. We're gonna do a portrait. Orientation 8.5 by 11. Let's go ahead and type in 12 pages is to have something we can always subtract or delete pages we are gonna do facing pages. Ah, facing pages is definitely something you want to click if you're doing a printed book, magazine or project. That's kind of how you want to kind of design is knowing how the spreads are gonna interact . If this was a digital project, I would most likely uncheck facing pages and everything will be just a single PdF That would be easy to make. A digital um, PdF Digital Pdf's regularly. Do you wanna have them be facing pages, which is spreads because it's hard to read? A. Pdf When it's a spread, you kind of need to have those single pages all the way down. So it's two facing pages. We can convert this to a digital document later, and we're gonna stick with two columns. We're gonna have to columns here for layout Common Gutter is fine. We're gonna have some thicker margins than the default for the same reasons of the last project we did where it's nice to have a little extra breathing room than the default. So we're just gonna make that 20.75 all the way around. We are gonna have bleed on this project cause we're planning on getting this printed someday, So let's add a little bleed. Standard bleeding inches is 0.1 to 5, so it's going to 50.1 to 5 all the way across. That is 1/8 of an inch don't worry about slug for now. We will worry about that later. Let's go ahead and create a document. So we go to go home, go to pages and kind of see what a document looks like. The first page all by itself, was always the front cover and the back page, all by itself is the very bottom one is always the back page all by itself. And these are all the inside spreads. So when you open up the book, this is the front page. Get a double click on the first spread and this is gonna be the inside of the front cover, so usually don't want to put a whole lot on this left side, maybe a photo or maybe some copyright information or a title. But rarely do you kind of print on that back cover unless you need to. So this will be kind of that opening welcome message, and then this will start to get into the recipe, spreads down here. So let's go ahead and work on her front cover. We have a bleed. You could see her bleed, which is the red line, and are nice, thick margins. And our two column layout. So with a front cover of a book cover, we have our logo. So let's bring that in, because that's definitely the mainstay of the book. Is the title in the logo? So this is Dessert First cookbook. So I'm gonna go ahead and take this entire could go ahead and select this blue gold one. I'm going to right click and group it. And another thing you want to do is you want to make sure all the type is outlined. If I were to bring this in without the type outlined, sometimes it doesn't convert over to in design very well with the live typography. So you just want to right click and create outlines, and it's already been done for you here. So I'm just gonna drag this over, and that's gonna bring it over as an E. P s. Tell you what happens when you just drag a vector, object and design most the time It goes over really well. I could select this fork and this spoon and just drag that over and it brings it over as an E. P s file so I could make it a little bit bigger and it keeps its resolution, which is fantastic. But sometimes when you have complicated vector shapes like this logo, for example, we have a lot of different layers and you bring it in as one objects. Let's go ahead and bring it and dragging it right into in design. Sometimes you get some really strange results in this case. For some reason, it made this outline of a gold stroke that we have just to stroke. It made it a fill, and it's kind of confused how that had a work with it. So we can ungroomed this and ah, we could flip that two stroke. But that's not quite exactly how we want it. So if you ever run into those issues, I'm gonna show you another way to bring it in. We're gonna open up. A new document doesn't really matter the size because it's gonna be any PS. It's gonna be vector, so the size is not quite as important. So let's do a standard 8.5 by 11 and just create. I'm in Adobe Illustrator right now, and we're just pasting the logo file, making it pretty big, and let's go ahead and go to file documents set up. I'm just editing the art boards or canoes, my art board tool and just collapsing that down. So now what I'm gonna do is I'm gonna ask Save this as a GPS to save as a dot r a p s, which is a vector file. Got to do a book logo, click on usar boards and save you can also save is a pdf as well. So pdf are dotty P s Will will keep that logo vector. So let's bring in the logo. And I just went ahead and dragged it in and press the button and look Voila! It went in perfectly. So just sometimes that transition between illustrator right and in design, some funny things could happen. It's very common. So if he ever have that issue Ah, bring that logo in as a GPS or a pdf and bring it in just like you would any file or photo . So now we can make this the nice size. I'd love to keep it. Let me go in Tagalog W. Since columns don't matter quite as much at this stage, we could go ahead and get our grids on if we want to do all that so we can get it aligned. But since I have smart guides on so he knows how to bring this over, you could find the center point by finding that pink line vertical lines. And we know that's gonna be right in the center, and we could drag it down and find our center horizontally right there. We know it's smack in the center. If you don't see your smart guides, you could go to view grids and guides and go ahead and toggle on and off Smart guides. The smart guys always have them all on because it always helps me. So now we need to create a dynamic front cover. So what is most important thing about a cookbook is how the food looks. That's how we sell a cookbook is having this delicious desserts. So we're gonna feature two photos because sometimes just picking one photos really hard when you have a very, um of a variety filled dessert books. So we're doing brownies and cupcakes, and it's really hard to choose one photo over another and have that represent the whole book. So we really want to have a story driven narrative So let's have two different photos so we can represent two different kinds of desserts. So I thought what would be needed if we had this top bottom split. So we kind of have this pie right here in the middle. So the focal point is going to be your eye focusing right on the title. So if we have a photo on the top of the photo on the bottom, I think it would be a nice bounce to the overall peace and would draw the viewers eyes right into the centre, which is what we want it to where we want her focal point to remain. So I'm gonna locate two great photos to use. We're gonna bring those in just like we did previously, with other photos and in design.
141. Lesson14 Cookbook FrontCover: we have a crisp apple pie. Let me go ahead and bring this over. We have an apple pie and we have kind of this raspberry pi. And I thought, Since we have a pie as a logo, let's stick with the pie theme and what we could do if we know we already have a plan here . Let's go out and block out where we want our photos to be divided and we'll get our container rectangle frame tools so we know to bring in the photos. That way. Let's do it right here about the halfway point toggle on W so we can see our container frame. There are two frames just like that. We could always make this a different color so it can see what's going on. So let's drag in our photos, do a raspberry photo, and don't worry about the fitting. I guess we'll go ahead and do fitting fitting Phil frame proportionately. We'll worry about all that later, and let's do our apple pie in the top. Bidding fit fame proportionally. So let's send these backwards in the layering system. We go to our layers panel and just bring that below the logo and that's toggle off her w. So let's finesse this and have the two pies meet together to form one pie but two halves. So what we want to do is we click once. We could move the whole frame, but we want to be able to crop the photo in the frame, so we're gonna double click and see. Now it turned to red or orange, whatever you wanna call it, and now it could shift this around. So let's zoom out, look twice on her photo and let's go ahead and do the command shift so we could scale dimensionally. And let's see if we can't position this photo better. Good. Turn this around. A quick way to turn this around is I can get the corner tool. I can hold down the shift button and I will rotate on the perfect 45 degree angles. I could go ahead and do a perfect turning, turning around. Let's make it a little bit smaller. That's the top half. And let's do the same thing with this one. What's make see if we can't get the corners to match. Make sure we're double clicking here, so we need something to kind of unify this a little bit. So we have this logo. We have these two very strong, vivid photos. What we need is something to bring everything together because there's kind of something missing down here. So what I thought we would do is bring in a band because we need to have the author name as well, and we need to go ahead and integrate that. So I thought about doing some kind of bar to unify everything together and making that bar . I'm just getting a rectangle tool in getting the eyedropper tool to sample one of these colors and go ahead and send that backwards in the layering system. So just kind of a bar to kind of bring everything together and just do some slight adjustments to the photos to make sure they line up really good. So let's go ahead and save our colors swatches. So we ever swatches. Here we can right click the Swatch Addis Watch Perfect and let's go ahead and sample are navy blue color and let's right click and add. Just watch it. So if I ever wanted to change any of these colors, I go to my swatches, drag that color panel out, and I'd like to keep my color panel within my Swatch panels. Let's keep those together so I can toggle between the two. So now I can save these as gold book our Gold Cookbook and say that as Navy Cookbook and you can create folders so I can say cookbook colors, and we can drag in our to color so it can go ahead. Recall those colors at any time we want, and we have them in a nice folder. Let's make it a Navy blue. The reason I don't want to make it gold is I feel like gold drawls way too much attention to the bar, and we don't want that. We want to bring a little less attention, so we're gonna make it Navy color. But that doesn't mean we can't incorporate a little bit of the gold by adding a stroke. So I'm gonna click over here to stroke and make it gold, and let's go to our stroke panel and make that a little bit bigger. It's kind of creating a little ribbon if you want to call it a ribbon, so let's go ahead and add our author name. So it's gonna text box. And what I wanted to do is I wanted to have ah, balance. So we have this perfect left and right thing. We have this perfect top and bottom with the photo and the center logo to title together. So what I want to do is be able to break this up and keep this whole 50 50 split theme we have going on to have recipes by and Lisa Anselmo. Go ahead and put. I think a colon would probably be required right there. So recipes by. And if we just need to make anything capital, we can do all that. So let's go over the character and edit this a little bit. So let's go to our text box was Go to properties. Let's finesse this a little bit. Let's pick a nice typeface for this. There's one that I've already found. It's called Pacific Oh, in its for free on Google fonts so anybody can go download it at Google Fonds Pacific. Oh, I just thought this had a fun character to it. It's a little bit more relaxed and comfortable and cozy, which is exactly what a dessert cookbook would be. And it could be that a lower case might even be more soft as well. So we'll just have toe finesse that typography a little bit later. Let's also make it. We can make it gold would go door swatches, make it our gold cookbook color and make it a little bit bigger. Let's make it perfect so that when we apply it to this side, it'll already be ready. And here's one thing we need to think about. So this is all about drawing the viewer's eye, which is what we've been talking about. This whole front cover is, Where do we want it to go to? If we make this gold, this type gold, it kind of blends in with everything. It kind of makes it all the same. What if I were to break this up a little bit and just do white? It kind of breaks it up a little bit, and I think it kind of works in a way. So let's apply the same thing. We can select this we could do the eyedropper tool and just easily make that the same color . Or we can go to our character styles and go ahead and highlight our text and create a new character style and call this Ah, Pacific Oh, headline front cover What we ever wanted to recall that same typeface presentation we have our character styles already had. So if we had this back to default, we could just highlight this and go back down to Pacifica headline and boom, It's instantly. All of our options are saved. So what I'm realizing is I want to make sure I have its background extended because it looks like this is the end of the photo. Let me see if I can't rotate this photo a little bit. So I'm gonna double click the photo. So I get the orange and I'm gonna hold down shift. And when I hold down shift and do the corner, it's gonna do these perfect 45 degree clicks one to, and I want to find I want to get that spoon somehow shown. So let's see what would be the best position for that. Maybe right here, kind of downward shift. And we could always double click this and shipped it over just a little bit so we could get the right position, just like that so you'll run into this is a very common problem in graphic design is you'll have this perfect photo just like this, But the background does not extend out as much as he'd like. So you need to calm his clone or replicate the background a little further to get that background to extend out for you so you can cropper properly, so that's gonna be an easy fix. We're gonna select this bottom photo we're going to right click, and we're gonna edit this in photo shop. So edit with photo shop, and we're just gonna extend that background out. So we're just gonna go to image canvas size. We're just gonna expand it all the way around. So we're gonna add maybe 5000 of the width just adding 1000 picture pixels around and got to go ahead and click. It's could expand it out, and so it will give us an opportunity to clone. So let's go back into in design and figure out exactly where we need it. So it's gonna be on this side that we need to expand the background to the so around this side right down here. This is where we need to expand it. So as we learned in Photoshopped lessons, there's some really neat tools that we can use the content aware fill tools. So I'm just gonna go ahead. I want to replace this, and I'm gonna go up to my content aware. Let's see if I can't do both of these at the same time. Extender background out. So just have all of that selected. And let's do our content Aware tools edit content. Aware fills it. Let's go ahead and do this and let's take our sample. So let's say, Oh, that's perfect right there Really good already. So whats going click? OK, it's gonna add all that extra background and we could clean it up with the clone tool. So you notice how it repeats the same texture over and over, and it kind of looks like it was, you know, copy and paste. It doesn't look realistic, so let's clean it up and make it look more natural using the clone tool. And if you didn't have a content aware, fill tools because you have a really old version of Photoshopped than he would just use the clone tool. So I have are layer selected, which is this is the layer Here, let's go ahead and merge these two layers together. So have these layers are going to command E or you can right click and merge it, right click and then merge layers. So now I'm gonna click on option and take a sample. May be right here and just kind of cover up a little bit of this repeat texture just to clean it up will make it look more realistic. Perfect. So now we're gonna save and let's save to desktop and working to save it as a J peg and bring it back in its a J peg. It's good, and design looks good or links Check out our links. Here are links and it's gonna be right here. We're gonna re link this with the new one, is gonna have anyone right here. So just relinking this, it should automatically populate. But it doesn't look like it's doing the cropping for us. So we might need to manually go in a sense, is a little bit bigger than the original one. We have to kind of resize it. That's just how it is sometimes. So I know that was a lot of little steps there, but I think when you're this far along with your knowledge, you could start to learn how to integrate the different Softwares. How do you export and bring files in and out? And that's one way to do it. So voila! We have this instant cloned background. We just had to bring that into photo shop. You can't really do that and in design, but that's what it's for. So a couple other tweaks we want to do. Let's I'm thinking this stroke is still too strong. It's taking away from the stroke of the center. And this is where, as a designer, you will go back and forth. You go, let's do this and then you'll realize, Oh, that's way too strong. That's experimental process of being a designer. So let's remove the stroke. And let's do none for that and make it a little bit thicker, just a little bit thicker. And what's change or type? Let's do a center alignment of these two objects, so let's go to our paragraph. We're just doing a center alignment. We're gonna do the same thing with her name and let's see if a lower case looks better for her. And let's make sure both of those are aligned. So we're just gonna go toe our line panel and align them. So what's missing here? So let's zoom out a couple tweaks weaken do I'd love to get a more rich Balu. We've already established this blue with the logo. But now that we're seeing it with these rich colors of the photography, I'd love to have a little bit more deeper are at a little bit more shade to our blue, so we can easily do that manually. Here we can go to our swatch that we have established Navy blue, double click this and we're just gonna add a little bit more black. And so now with our logo, we brought this in a Z E p s. I think we might be able to take the direct selection tool double click the one element. So it looks like we might need to bring this in again, which is no big deal. We can always double click this watch, get a sample of its hex code color, and paste it into I'm in Adobe Illustrator. Just making that the deep blue and then we can save it as an E. P s. And if we're saving it in the same format that we dragged into in design, it'll automatically update for us. Read a double click or we can right click an update link. And while we have our changes. So I thought that had a more rich appearance. So one thing when you zoom out so great to zoom out on your design, I think one thing that's missing is this. Now that we took away the stroke, we still need some kind of line to kind of bring the I two toward these two elements, but we didn't need something. So strong is the stroke. So let's create a little line here, so we're gonna get our line tool, click and then hold down shipped to create a perfect straight line course. It's nice debt. Go ahead and add your your stroke. So let's add wherein are swatches. Glenn do gold stroke and we're gonna click, hold down, shift and do a straight stroke so we can go over to our stroke options and there's lots of different options. Let's try a wavy line because that's nice and soft and goes with her softer feeling for the logo. See how we have these soft lines in the logo. Let's do wavy. Let's make it a little bit bigger stroke. Just making some small tweaks. Hold down option and drag. We're just gonna duplicate that or right over here on this side. And let's go ahead and change It collapsed the spacing here between the lines. Cem's gonna go over to my character panel and reduce That just looks kind of pulling it in . So he talked too much of a wide gap or spacing between those, and we might need to widen it just a little bit. Here is that the way the Y dips down, it is very small tweaks and getting everything isil line. Of course, you could use your rulers and guides if you want to bring in your guides. If you're someone who wants to be perfectly precise, we talk along that w and go for it Great. I think we just need a few more things and will be really close to finishing our cookbook cover. At least let's add a little bit of drop shadows so we can add a layered element to the logo are top of the ribbon. So I'm gonna select our E. P s logo file that we brought in. I'm gonna right click it go down to effects and once could add a little bit of drop shadow . This works like any other adobe program. We're gonna reduce the distance a little bit. Or maybe in creo Let's go ahead and increase the distance. And let's reduce the opacity. So it's not so strong. You got to be careful not to make your drop shadows too strong because it can start to look cheap and dated. If you make it too strong in the wrong place, especially when it's a faded or a feathered drop shadow, we could increase. The size is going. It's changing some of these to make it, but I think would look really good. So once again, reducing that opacity, maybe that was a little bit too strong who just gives it a little bit of a layered look. So if you zoom in here, he got that nice layer. It doesn't look cheap, and we could deploy the same thing to this bar and with the bar. I might even want to reduce the a pass ity quite a bit. Just want a little bit of drop shadow and maybe more distance. So I think we've made a lot of progress. I feel like we're at a stopping point for the front cover. And if we go to pages, we could see our front cover right there. We're gonna be doing a couple of spreads, so let's zoom out here and we're gonna do a couple of desert spreads. But first, let's do kind of a welcome spread. So as we said before, this got to be the inside of the front cover. So we're just gonna have a simple photo there, and then on the right, we're gonna have a welcome to the cookbook message where it's gonna be a letter from our author, Lisa Hunt, which is a made up name. By the way, this is not a real cookbook. We're gonna put a little letter from the author, and then we're gonna do a couple of spreads. We're gonna use master pages to be able to complete the rest of the spreads very quickly. Let's do our welcome spread next
142. Lesson15 Cookbook WelcomePage: you are welcome, Spread. I wanted to do a photo that spills over to the right side just to kind of have this unifying photo. That kind of goes over this. This Ah, this line here because usually we keep things perfectly contained in this page. But wouldn't it be nice to kind of bring a photo that spills over to that other side to bring that whole spread together? Let's get our container and have a photo spread all the way across. Maybe about that much toggle on her w So we can see So we have this kind of ah, cupcake here we want to bring in, so I'm gonna bring in our cupcake photo, right click fitting. We've done this a lot of times already. And while while we have our fitting So I want to bring in this rich navy color and make kind of a box here, So I'm just gonna do the rectangle tool and we have all of our color saves. Let's do Navy Cookbook and make that a fill. So now we just need to bring in our column of information. So let's press w in. Let's we can we don't have to stay perfectly within the columns that the document was set up with, so we don't have to worry about that. But I do like kind of this setting right here. I'm gonna have the spillover toe, one column or right about here, and I gotta fill in with some basic text filler text. And let's see if we can't develop a really good paragraph style for this. So let's look right now we have Minion Pro. We don't have to stick with Minion Pro. We can do something like an open sands. So let's try. Let's to open Sands. That's another one that's free on Google fonts. So let's do an open sands regular so open sands regular for the body copy. And right now it's on 12 points, which is rather large. This is a nice, welcome letter, so it's OK if it's a little large. But let's say we want to maybe bring that down a little bit and let's add some spacing between the paragraphs, so we're gonna go down to paragraph and do our space between paragraphs. Stick to our 0.2 inches that's gonna break it up for us. So let's change this toe white and also shorten the letter. I don't think a letter should do that long. You know you don't want to ever overwhelm people with text, so I'd say a good letter length would be about this length for one single page and let's make it white. Let's put a little more spacing between the lines of type, so we're just gonna go over and add some letting. Kind of makes a little more elegant, Easier to read and let's take Away was Take Away the hyphens. So let's go on Click Hyphenate and we're gonna do a left, Justify left and right justifies we're going to kind of that same alignment we've been using throughout, so just kind of makes it look organized and polished. We could even shorten that letter even more, and because I want to have a nice headline here as well. So let's toggle off W Let's see what this looks like from a distance at some nice padding or margin between the left and right columns. And let's do a really cool headline from What I can do is, I can double click this and apply that character style, and I can also make it our gold and tweak it a little bit. And I also need to spell things correctly. Welcome to dessert for dinner, and I'd like to make that bigger, a more prominent. And we can put this on two lines because right now we have what's called a orphan. This is an orphan. It's all by himself, and it makes it look awkward in a little unbalanced. But if we were to tuck four on that second line, it kind of balances out it out a lot better. We can, of course, make sure that's flush and left, aligned so good to my line panel all the way down here and do a left alignment. And let's continue with that dividing bar. So this is where dividing bars air really helpful to break up content. Let's put a dividing bar there, and what's great is we already have one, and it's themed. No, just creating a copy and destroy dragging it right down to the spread. And we could just make it bigger by bringing it out to the other side to spend messing this a little bit. I'd love to have a hand written signature, and I also want to break up that paragraph more so I'm just going to duplicate this line and do a little signature of her name Hunt. And let's find another script typeface to make it look like she signed it. Of course, you can always bring in a PNG of her signature her real signature on a piece of paper and go into photo shop and get rid of all the white background. I've done that before for clients, but for now we're just going to use a quick typeface. Go to our filters. We would like to have a script. I don't have too many scripts. Installed sores could have to stick with al fresco, which we've used before. Make that a little bit bigger and bring that in, and I like to sometimes angle it to make it look like she signed it. So some people have a natural angle to their writing, is trying to make it look as realistic as possible as much as we can. So there's kind of a signature, and what I think is missing is let's make this a little bit bigger. I almost wonder if welcome to and then dessert for dinner was on the second line. So you noticed that change. When you have the second line longer than the first, it kind of has this natural flow to it, as opposed to a having the first line be longer. I feel like this works a lot better having it be a longer line on the bottom. So just these little small tweaks that she get used to doing as a designer over and over. And let's bring this letter down a little bit and one thing we could do, and I feel like this is a big blank area, but I don't want to add another photo. We have this beautiful cupcake photo right there. I don't want to ruin the impact of that photo. So I wanna have almost a watermark of logo I thought would be really need to be here because I don't wanna have anything that's full color or overpowering, but I don't mind something that's really subtle so we can take our logo. We can turn this into a watermark. So we're just gonna remove this background. So now we have this all in a transparent background and I'm gonna make this white and I'm gonna save this just like any PS. Just like we did the other one. And I'm gonna make this watermark. I saved that to the desktop, and I'm gonna bring that in as a watermark. So I'm gonna drag this right over here and bring that over as a watermark, We can reduce the transparency on here. We can, right click goto effects transparency. And this is how you can reduce your layer transparency. It's kind of like your layer styles panel and photo shop. I guess you could compare it to where is gonna scale that down just a little bit. Maybe 12%. We're just gonna angle this to make it look like a stamp. So we're just gonna angle it a little bit and making a little smaller. So just like that almost looks like a stamp. And now we may need to move. Move this back into the Larry system and bring the Lisa name. We may need to just have it on the left. We don't have that. We won't have those two things overlapping. Great. So now it just looks like a little stamp. I think that really ties in the busy top with the bottom without complicating things or adding too many new elements. Let's zoom in on the photo just a little bit more so I'm gonna double click so I could get my orange border and I'm going to zoom in on the photo, just a really bringing those that yummy frosting into play. And I think it's missing one thing, maybe a little bit of a texture to it, almost like a linen paper kind of a high quality linen paper. I'm gonna see if I can't find a linen paper texture that I could bring on top of there where we can keep it clean and printed on a linen texture whatever you want to do. So if this is gonna be printed on flat regular stock paper, then you can add your own texture. Or you can get it printed on a high quality tech paper and have that be your texture. But since it is gonna be a digital document to let's go ahead and see what we could do about adding a bit of that linen texture
143. Lesson16 Coobook Texture: So what I'm gonna do is I'm gonna create a new container. Make this a color when I got a dragon, are texture on into that container headed dragon in and bring it over top of this photo and see if we can't reduce the transparency or do a blending mode. So let's right click and go to effects. And we could do blending modes just like we do with photo shop and illustrator. And you just go into your ex panel, which is like your layer styles panel, and you can maybe do an overlay. A soft light of it. Hard light might look pretty good. Noticeable. Too harsh. We could scroll through these. It can do your arrow key, and it'll automatically preview for you. I'm just doing my arrow key up and down, I think soft lights probably gonna be the best we can do here and reduce the A pass itI a little dis adds a little bit of texture to it. It's very subtle, but what we could do if we want to make that more pronounces weaken double click it and just make it more zoomed in here to get to Seymour of the texture like that. So that's an option. If you wanted to add that I'm not a big fan of how the blending mode works there. Ah, what we could do is bring that texture into photo shop and fine tune it there and then bring it in instead of doing a blending mode in in design. Because Photoshopped just could have way more options over how it looks. I'm gonna leave it flat for now and in Adeline and Texture a little bit later. So there's are inside spread and our front cover. And now we're ready to do our first recipe spread. Next for this inside spread. This is gonna be our ingredients page. So we wanna have kind of this one picture really shows thean greet the end result of the ingredients and the other side is the ingredients page. So I have all of this this entire group ingredient list for you for these berry tarts. I haven't saved for you in this text file, so you don't have to sit there and make up your own recipe. And this is from eat well, one a one dot com. It's their rustic berry tart recipe. So we're going to start to bring this in, and we want to try to get a plan for our structure. How do we want to lay out a recipe? Well, we really have kind of two columns here. We have ingredients and we have How do you put the ingredients together? So I thought we'd have a two column layout, with the first column being smaller for the ingredients list and the right column being a little bit wider for the preparation and the order of how to prepare everything and also maybe a bottom area for some quick tips. And the great thing about the quick tips area is it. It could be another colored bar and will break up all the white that we have in our recipe in the middle. So it's kind of a way to have the quick tip, but to also break up or design. So it's not one big white sheet with text on it. It's got some color and some background to it as well, so let's go ahead and get started. Let's happen to in design and let's go ahead and prepare our first photo. So let's get our container box and Let's drag in our berry tart photo. And of course, we can double click and drag it to our liking or crop to our liking, and now it can prepare our ingredients list. So I thought we'd have a really interesting colored banner on each one of these. This whole recipe book will follow the same orders I follow. Be need to flip it around so we have this spread would feature the photo on the right. This recipe spread would feature the photo on the left, and so I kind of have this back and forth. So it's not like every ingredient Page was on the same page. It kind of broke it up a little bit for the reader and making it a little more interesting , but I wanted to have the same headline on each recipe page. So let's make that dark navy blue. Let's keep with their branding here, and I want to shake it up and do a little bit of, ah, diagonal shapes. I'm just taking the pin tool to create our own little shape and making it our Navy Blue Sarah's bountiful berry tart. That's gonna be the title. Those two are text box and bring that type in. And if we already have character styles set up, that will be easy for us. So Pacific Oh, headline. But let's make this gold and let's go and save this as a headline type. But let's make it a little bit bigger in size right about there. And once we're happy with that, we could save it as a character style and say Recipe headlines. So now we don't have to sit there and do that. We could just click on our character styles and haven't saved for us. I thought that would add a little angle to this and make it. And I thought what would might be need is to bring this same watermark and do the same thing again, but make it a lot smaller on this upper left side. Maybe not make the ankle quite as dramatic, but we could just spin it down. Just a little bit of angle toe add to everything. So now we're ready for our two column layout so we can take our rulers here and to create some guides who could do a guide for our first column, which is not going to be based on the grids, these air perfectly split half, but we're gonna make it a little bit shorter. And our second column is gonna be a little bit wider for our preparation. So let's bring in our type. Let's go ahead and take what we have here. I'm just gonna borrow this who's could copy and paste it and create our first ingredient column. And I probably need to make all this blue, maybe blue. The only reason I'm doing this is I'm just kind of seeing how all of this put this put together. Great. So now I need a headline for both of these. That'll be a separate text box. So one needs to say ingredients and one needs to say preparation. So we have preparation and ingredients split in half there. So now we cantata all this off. We know that all that is aligned, how we like it, we can finesse this, of course, put a little bit more spacing between those two so we don't get those mixed up. Remember, a little bit of spacing goes a long way. Let's make our headline. Let's make it similar to this so I can go to our character styles and go down to recipe headline, and we might want to make it a little bit smaller because we don't want we don't want to overtake the headline are the recipe names. We just want to make it the same type face, but just a little bit smaller. And we can even save that as a character style and make that subheading on the recipe page . So that subheading recipe and so we could go right here and just use say, think, boom, done. Let's bring in our divider lines and be consistent. And I love using divider lines between subheadings and body copy. Don't have always use it. I just think it really adds a little flavor and a little punch to your design. A little finesse. Never heard anybody. And if you have snap to grid on things, we're gonna snap. Ah, nice for you. So they're just gonna snap right into place and be top aligned. So let's start to add in all of our information, let's go to our recipe. So we have this broken down in a couple of subheadings. Additional subheadings. So have a crust, and we have a filling. So let's just bring all this in, and we can finesse this after we copy and paste it
144. Lesson17 Cookbook RecipeSpread: So now this is all the same type face. So we need to work on our type hierarchy so we can break this information down for the viewer. So this is gonna be a subheading below this up heading. So this is gonna need to be bold or brought to our attention as a headline, a little bit more. So let's just make this open Sands extra bold. Leave it at that. So it's already starting to break down and take this one. And of course, we could make character styles, too. For all these, we could call this the second subheading or whatever we want to do so for the crust. And so let's change this a little bit. A lot of wide gaps between these lines. So let's go ahead. Reduce are letting just a little bit here, and we could probably make this a little bit smaller than the type over in preparation. So let's go ahead and make it 10 points. We could even probably even get away with nine and then collapse it a little further and almost wonder Oven italicize would look good. Just kind of experimenting. Maybe a semi bold, italic perfect. So Let's make all this semi bold italic. If you ever wanna do bullet points, you go down to bullets and numbering, and we could just go ahead and put on some bullet points there. Andy. There's been click over the options, and there's lots of options where you can change how much indentation is happening. So I'm just going to the first line indentation. I'm gonna get a spring that in perfect. So if I find this to be good, I can highlight it. And add that as a paragraph style, since that's technically paragraph of bullets and indentations. So I'm gonna say this as ingredients. So now I can highlight this and go to paragraph styles and do my ingredients. My need o to a manual brake there or left paragraph. So what we want to do now? Let's go and change our line here. Bring her line down. So now we wanna have do something with the bottom. Let's do a little quick tip badge and then have kind of another solid colored section to put our quick tip. So let's just copy and paste this little box of information and put in our quick tip. Let's go ahead and save this as a character style, right here. Call this body copy for Tip and go ahead and loaded it. And let's do our different bar here. Let's go ahead. Let's bring this down and bring this backwards into the layering system. Go ahead, make all of this type of white so you gotta go to our color panel. Let's make it white. And we could adjust this. There's a little bit too much white space, so let's bring this a little bit more to the top. So now we're ready to do our quick tip badge. I'm gonna go into Adobe Illustrator right now and go to that a logo file we prepared. And I am going to go ahead and delete everything in the center. So I'm gonna select all de select this back to layers I want and get rid of all the types. So this is what we can drag in. Of course, you might have to since this had an issue being dragged right into adobe in design. Let's go school and save this as an E. P s. And there's another way to bring in files is the place, um option and we can go up to file, go down to place, and then we can select our badge GPS, and go ahead and open. And then we can place it anywhere in here so you could drag it in or you could go up to file in place. It would be very similar in the way they come in. We'll scale this down. What I want to do here now that I'm bringing this little badge in, is we need to have a little bit of contrast. So contrast is King. I talk about it all throughout the class right now when you zoom out, you have a lot of blue going on. What we want to do is we want to shake that up a little bit and have some contrast to all the blue. So what? My thought was this bottom area, why not make that the gold color? So I'm in my swatch panel and I'm just gonna make that gold. And let's go ahead and put our quick tip language in here. And I thought it may be a little bit of drop. Shadow might work here, too, to make it lift up over that orange, But not too strong. I'm going to select our object right click effects and go to drop shadow just a very, very small one. Let's reduce the opacity to 22% and let's tighten the distance just a little bit. That's all we need. Just a little bit, a drop shadow lifted up above the background. Let's select her type tool and type in quick dips. And let's go ahead and put that on top and let's go to our character styles and see if we don't have something already saved that would look really good. There we go. We already have that save. Let's Ah, break this into two lines and do a center alignment. Or we could do some manual spacing here. There's a quick badge. Zoom out. What I want to do is I want a group, this badge together. I'm just selecting my badge layers. I'm gonna right click and group it, so now I can go ahead, turn this whole thing, make it look like a stamp on the side. So there's a little badge and we have our type here. We could make this four lines. So here's a thing with a typography. I'm not sure if I went over this before, but when you have a big block, a copy, if you have it stretched too far across, it gives the viewer some eye fatigue because they're reading so far cross this line and then they have to come back all the way over here and read again. So it has, ah, reader fatigue. So it's really nice to kind of keep. So right now we have this fairly long. It's acceptable length. Ah, that the reader can go across. But if we just made it maybe four lines, it will just make it even easier for the Buber to read. I was gonna get rid of those lines that they were just competing a little bit too much. So I'm gonna keep it just like that. Keep it nice and clean. Of course, we can always toggle on our margins so it can make sure everything is lining up really well . Just getting a little too close to the bottom. And that's why I wanted to shift all of this up just a little bit. It's always nice to have a good margin around your edges, just like we discussed with the last project. So now I'm just going to continue to finesse some of the spacing. I'm gonna bring this up a little bit. So this is not so close to the Orange Bar Gold Bar. So it's good to see if I can't bring this up. And this is going to set the mood and tone for the whole rest of the book because it's all gonna be copied in reversed. So on the other page, it's gonna be this same layout, just replacing all of the ingredients and replacing the photos. So we really want to make sure it's perfect before we replicate this over and over again.
145. Lesson18 Cookbook Masterpages: so I feel pretty happy with the overall arrangement here. And I also just brought in kind of a credit here because I did not do this recipe. So this is from eat well, when the one dot com So just making sure I give credit to whoever did this original recipe , and I want to kind of bring in that juiciness of the photo. I want to have a little bit less of this empty space and really have that emotional impact . So I'm just gonna select this photo, and I think I'm gonna bring this in a little bit. So I'm gonna double click and get my orange box, and it's gonna zoom in just a little bit more to really get that nice, juicy flavor going. And so now I'm ready to do the next couple of pages, but we're gonna use master pages. We covered that in the beginner section, and we're gonna be able to use that to make this process so much easier we got to do. Let's say we're doing a 50 recipes. This would normally take us as designers. A long time to hand do each spread. But we're gonna create a couple of templates that's gonna make life a lot easier for you just to drop in recipes and do this a lot quicker than if you didn't use master pages. So what we want to do now is we want to create one more spread, and that's the reverse of this. And then we'll be able to do our master pages and have two different master pages, one with the photo on the left and one with the photo on the right. So we're going to just duplicate this spreads. We're gonna go over two pages. We're gonna highlight this spread, which is pages four and five. I'm going to right click and do duplicates bread. It's gonna pop in right down here was gonna drag this back up. So it's right below, and we're just gonna reverse the order. So I'm going to take a page seven and I'm gonna bring it right over to the left side, and then they're gonna reverse and switch. So now if we go to this page, we now we just need to do some finessing of some of the arrangements. So let me pull this photo over. So now it's flush with the spine or with the center. I could probably bring this backwards in the layering system. And there we go. We already have our reverse version. So we have our photo on the right photo on the left. Let's go ahead and replace a few of these photos to show you how easy this will be going to right Click and you are fitting. And then I can double, click and kind of make sure have the right cropping for this. Perfect. And remove that little quote since that was for the first recipe. So now we can just switch out everything chocolate brownie recipe. And of course, we could be more creative at another time. We can see how quickly it is to reverse or change all that out. We could do this book very quickly now that we have a theme and now that we have everything set up, we have a paragraph character style set up. We have a lot of these things done. So now it's gonna be a very easy next 50 pages. However along the cookbook would be, so let me continue to make sure everything looks perfect. So here's what we're going to do? We're gonna work on master pages. So we're gonna go up to our master pages, which could be right here. We're going to create to master pages. So let's do the very 1st 1 So now what we're gonna do is we're just gonna highlight everything that's in this particular spread. We're gonna copy it. So, command, see, Or you can go up to edit and copy. And we're gonna go to our first master here. The spread. We're not gonna do the single page master. We're gonna do the master spread a master, and we're do command V or go up to edit and paste. And we're gonna do a little bit of a special paste. So instead of just pasting, it's gonna kind of paced. It's not gonna pace perfectly how I copied it in the same position. So instead of just doing edit paste, we're going to edit paste in place and it's gonna copy, paste it in the same place that we copied it. So there it goes. Everything's lined up perfectly. So what master pages will do is it will take everything here, and it will replicate it wherever you apply it. So that means text to. So let's say I were to make this a master. Let's go ahead and remove all the masters from this page. It automatically applied it. So let me just apply master two pages and let's just make all that No none. They would go. So if I were to go to eight Page 89 I'm ready to post that particular master page. I can right click apply master two pages and I can select a click. Ok, Wahl I'm already done with that spread. But here's the problem. When you have master pages, it will kind of stick with the text to So we want to be able to change out the text. So what we're gonna have to do is go back to our master pages, but we can leave anything that's going to remain and not need to be shifted around. So that's the quick tips can remain all the bars, the lines. I'm also gonna need to remove the photo. What I'm gonna do in its place is I'm just gonna put a box right here to kind of crop all of that. I'm not gonna need this because that's not gonna need to go on every page. Anything that needs to be on every page, even if the recipe changes, so all of this can remain. We don't have to set all this up over and over over again. We have this master pay saved. So now we can go back. It's gonna automatically apply it. So now what? How do we get the text in the photo in there? Well, that's something we're gonna have to manually bring in. We have our little box, and we can bring in a whole new the photo. So let's say we have the apple pie spring that in fitting Phil frame proportionately. And then we'll have to take all of this type up here, which is really easy, cause watch this. We can do what we did before, but just selector type, it was holding down shift and selecting our type. And then we're gonna go down here and do a paste in place and voila. Now all we have to do is switch it out manually, make sure it looks good, and we can replace everything and looks like the tip didn't come over. And that's okay, because we can copy and then paste in place, and it's pretty much go to your word document, copy and paste. And really ingredients and preparation could really be on the master pages because that's not gonna change on every page. So that's something we can keep in the master pages as well. So if I wanted to copy, go to my master paste in place that I'm not gonna need it right here in my apple tart. So that's gonna go on each page. So now what I'm gonna do is I'm gonna do every other. So this will be a photo on the left on the next one. So let's skip a spread and let's go down to 12 and 13 right Click And let's apply our master master a click, OK? And then we can just copy and paste just our text. And this is something this is this a pretty complex project. So I know there's a lot of steps to get this to go. But once you get it all set up, it makes the whole 100 page book a lot easier. 50 page, however long it'll be. So now I'm just gonna copy my text, go down to this spread and paste in place. And we're already done with that one. We can even copier photo and then dragged that in on replace the photo. And so you saw how quickly I got this set up. Now I have to do is copy and paste. So I did that in what, About 30 seconds. So now let's do the other opposite sides. We're gonna do this this one more time for practice, because I know that was a lot. I just threw out you. So this is the opposite side. This is the riverside. So we're gonna create a master page for this. So I'm gonna go ahead and copy all of this command, see? And I'm gonna create a new master because we have this a master. But now we need the reverse side. So let's create a new masters, go up to this drop down menu and do new master. And let's call it be, make it a spread and we're gonna paste in place, are elements. Now, let's get rid of anything that needs to be switched out with the changing of the recipe. So that right there, we're done. So now we can go down to our spread. Right Click apply, Master Two pages. And now we're gonna do the be master click. Ok, And now we're gonna go up to our brownie recipe, select all and we're gonna have toe. Just get the text for this one. This is the 1st 1 we've done. Some just could remove all these elements. That's already gonna be on the master. A copy Go down here, paste in place. And just like that, that is ready to go. So now the remaining pages will be a lot easier. Let's continue to do a couple more gonna add a few more pages. So let's do this one over again. Let's do this. Spread right. Click apply, Master Two pages. Let's do the be master. This will be the A master, so there's are two different river spreads. So let's say we're gonna copy this. Go down to this paste in place. Boom Done. Copy. Go down to this one. Paste in place. Done. So now all I have to do is replace everything and I'm ready to go. And look how quickly I set up all those different spreads. You could set up 50 pages super easy using Master pages. So I got a question from us, a couple of students and they were the same question. So I wanted to make sure I addressed it. A lot of people with master pages, they wanted to put something not just in the background. Right now, the master page that's being applied is all in the background is kind of one unmovable objects. So if I go down here where the Master Plage pages is applied, I can't move this or touch it. It's all in the master page, right? So I can't. Only things that can move is the stuff on the layer. So they wanted to know what can I do a master page and put something on top instead of underneath in the background. And yes, you can. You go up to master and let's say for an example, I want to do a quick photo. So let me go back and get a photo real quick. Just gonna copy this one for an example. I'm gonna paste a photo. Let's say I want this photo to be on top instead of in the background. I want this to be on top of the layers. The active layers that I have and not just as a flat background image. We're gonna go. I'm in a master right now and I'm in my layers panel And so I'm gonna un collapse this layer I'm gonna create a new layer and I'm just gonna copy and paste are really cut Cut that photo and then post it, Paste it in this top layer, call this top and go to edit and paste in place. So now you'll see I have this whole layer as one layer and then I have this photo on top. So what it's gonna do, it's gonna apply the same thing to the master pages. So if I go down here is gonna automatically update my master pages. So go down here now the photos on top. But I also have elements on the background. But this is unmovable. That images unmovable. So I had that question. People didn't want to have it. Just be background images. They wanted to put something on that over, lays something they already have, so you could do layers and that those layers will carry over from your master pages that you create. Another cool thing is everything is dynamic, So we have the master pages set. We have a B A B all the way down. So if I want to go up and change colors, that's gonna be super easy. So let's go to both of our Masters. Delete that and let's say we want to do a pink header. Not sure. Why would we ever do that? But let's just do it as an example, I'm gonna go down here and do a pink header. So instead of going back and manually having to change 50 recipe pages, look at this. It's already automatically applied all the way across the book, and the same goes for any of the other elements. Let's say I want to change the badge. The badge could easily be changed to a different style, and I don't have to copy and paste it on every page. This is the reason why you use in design over Adobe Photo Shop and illustrator People all the time say I don't have in design. I don't really see it being an important program, but if you're ever gonna do multiple page documents and magazines, any kind of books or publications, any kind of digital pdf's that are multiple pages. This will save you the most time in the world. So please, please take advantage of master pages. You could do the same thing with headers of books. If you want to make it a entire chapter, have a certain header that's blue. And then the next chapter has green. You can set up a many master pages as you want, so there's master pages in action. I'm gonna go ahead and do command Z and go back in time cause I don't want to have pink headers for my information. So let's say we want to export this were to talk about exporting. Next. We're gonna talk about exporting for print, but we're also gonna talk about turning this into a digital Pdf as well.
146. Lesson19 CookBook Exporting: so exporting. How do we export this and get it ready for print? So one thing we want to do is we want to go through and do a couple of preflight checks. Preflight Dis means we're just checking everything before we go to press or pre press. However, you wanna kind of, uh, label it and call it kind of a pre press check this. Make sure everything is aligned properly. Cantata Gle on your W Everything looks great. Um, there's nothing that's gonna go past the bleed or any kind of vital text that's gonna be in this bleed area. Where does double checking and making sure everything looks good. Check our colors and make sure all of our colors, of course, we already did the color swatches. So in all of our colors, all are the same across the entire document, and so is our type choices as well, because we set all that up ahead of time. Another thing to do is check your cover and just make sure you don't have any text that's gonna be in that bleed area cause that's all gonna be trimmed off in the printing process. That whole little section civil area right here, so just make sure nothing is important there and everything is lined up. Toggle off w. So let's say we've gone through everything, and it's great. There was another thing I'd like to check before export anything for print or digital. That's to go down here to this little area, says no errors. This is kind of your pre flight panel, and sometimes you'll have an error and will be read. So we're gonna go click this preflight panel. Let's go ahead and click on the top option. It's good. Tell us if there's any errors with the colors that we've chosen. If there's any errors with overflow text not showing if there's any errors with fonts, not that can't be packaged or sent with the file. All of these errors are gonna come up here, and you can knock them off one by ones. If you have a whole list of errors in address each one as it comes. So, for example, let's say I have some overflow text and this happens all the time, is you have this overflow box and say, got moved by accident, and now we're gonna click up here and two lines of copy or now disappeared and you can't see it. It's called Overflow text. And look, there's all of a sudden this error that appeared we could do a drop down over set text is not showing text frame. You can double click, and it's gonna take you right to that area. So let's say I'm on another page and I go, Oh, there's an error. Okay, so there's some text that's not showing. Let me double click the text frame. There it is. So let me un collapse it. I would have cut off two lines of this person's letter, and that would have looked really bad. So those kind of issues happen, and some thought issues happen where maybe there's Ah, fought that has a license. And let's say you don't have the license, and it's it's not allowing you to export that fought without a license, those type of issues to come up. So now that I've done a preflight check, there's no errors. I've already made sure everything is has a bleed. Everything bleeds to the edge. The printers gonna want that and everything is aligned. I'm ready to go in and export this as a PdF. So let's go ahead and go to file export file export, and I'm gonna do a PDF print. So you have a lot of options here. But let's do pre pdf print. And so they have some preset options here, and I like to do the high quality print. There's also one called Peress quality. That's another great one to do. Let's stick with press quality. Since this is gonna be sent to the professional printer to be printed, let's do press quality. We want to make sure we export this as pages and not as spreads. You would think it makes sense to export has spread so they can trim it off. But in reality now it has to. This is a little bit complicated, but, um, the printer doesn't actually print your pages in order they printed in sheets and stack them and fold them. So in a way, they need to have him as single pages. And this is this something I've learned over time. So we're going to do pages were not to do spreads. This is the exporting options. Everything else stays the same. We're not gonna touch a whole lot, so that's all we did is we made sure it's on pages. Just double check. This is all. If you're on the press quality, everything's great. We want to make sure it's at 300 peopie I or pixels per inch marks and bleed. This is another one we may need to change. So what I'd like to do is I like to click on crop marks only. I find when I include bleed marks, registration marks, printers ignored or they don't really need it. Um, so one thing I've done with with print work is I just click on crop marks. I'd like to see that sometimes when you do magazine ads, they don't like crop marks, but we're doing the entire publication. So we definitely need to crop marks here. And we want to make sure we use the document bleed settings, which we set up in the beginning of the document, which is the 0.1 to 5, which is 1/8 of an inch that standard in the United States. And then there's different measurements in Europe and other parts of the world that don't use INGE's Let's do output. We're not gonna change anything. None of this changes. So all we did was we made sure it's single pages and we made sure this crop marks and bleed . That's it. Now we're going to export. And we could also save the preset if we ever want to save our own So we can do print, print, um, final. You know, if you want to save your preset and now you have everything marked. So now when you export the document in the future, you just do print file and you don't have to sit there and do what we just did. You could do that over and over again. So let's export. Let's open up our pdf. We could see the crop marks right here. That's these lines right here. Perfect. Let's do this so we can see all of our pages and zoom out. And this is when I like to zoom in and zoom out to make sure there's not any final errors. So I'm gonna show you what a final document will look like. This is single pages and you have crop marks on each page. The printers gonna want that cause they're gonna reorder the pages so that they could print it the way they need to print it on big sheets and fold it, and it's not gonna be perfectly in order. And that's why they need to have these separate pages so they can shift it around in the order. They need further printers to print it in the order that she wanted to use. I know that sounds complicated, but it's kind of the process that they need to have it in, so you'll see this little issue here going. Zoom in 100%. This is a little bit from the other side of the document, so you'll see this little issue here, and this is not really too much of an issue. But there's something so you don't worry about it. This is from the left side of the spread. We're doing single pages, so it's cutting it right here. That's OK as long as it looks like it's even when you export it. So let's go here. As long as it looks good and right up to the edge here, you're good to go. This is the way how it exports a single pages because it's adding that bleed. It's ready to go. Sometimes they like you to export your front cover and your back cover as a separate document because sometimes they like to have a figure to have a continuous cover. And we talked about this when we did the book cover their romance novel book cover project . We talked about the front and the back being one continuous kind of jacket when that's usually the same thing here. So you'd send the center in, Um, and that's only for gonna be doing like a book. Um, if you could be doing a magazine than you can totally get away with this. But if you want to have a continual cover that has a spine, so basically anything that doesn't have a spine, you don't need to do that. But if it has a spine and has a back and it's a separate jacket like a book, then you will need to provide that separate document where you have the front, you have the back and you have the spying, which we set up in Adobe Photo Shop for the romance novel. It would send that as just a second document so they can have that, and they could have all these inside pages as well. So that's all good and great, and we were able to get this as a printed book. But let's say we want to have this as a downloadable digital document. We don't want a printed. We want to give it, have it available for people to download and use the recipes in a digital PdF. So it be very simple to switch it around, we might have to do some tweaks and modifications to it. So let's say we have this welcome. So what? What we want to do is we want to go. Mr Will go ahead and say, This is our print one. Let's say this as a separate file cause we're gonna have to do some tweaks to a cookbook class. Let's say digital, let's goto file. We're gonna go to documents set up, and we're gonna click off facing pages. So now it's gonna be single pages. No more spreads because you don't want to have a digital. PdF be a spread because it's kind of hard to zoom in and read, um, for spread, So click OK gonna make everything as single pages. So when people look through the pdf, it'll look just like this. So obviously there's tweaks we can make to this. So I think that has a master. And let's go ahead and get rid of that Master. It doesn't really need one, because that one is not one of our masters we need. So it's a simple just doing some tweaks like this just to kind of make it kind of made for the single pages. So that looks great. And we could even reverse reverse thes eso. What we're gonna do is I'm gonna reverse these pages because I want to show the end result first and then the recipes second. So we're going to go up to page four were just reversing this or maybe Luton go down to page five the photo and let's drag that above page for So now we have the recipe, and then now we have the recipe here. And so what we could do is this is digital. We're just gonna have to do some modifications to make it work. I'm taking this top header and I got a paste it on this page paste in place. Just so those were connected. Since they're gonna be on separate pages, people scroll through, they can connect those two. So just little small tweaks We can make same thing here that's already first. So it might be take, you know, a now, er, to to adapt this to digital, but it's not going to really take too much time. You're just making some tweaks to it to make it additional pdf. So let's say I go through the recipes. I do that in about hour and I'm ready to export. So I'm gonna file export. And instead of print, we're gonna do interactive. This is their digital settings or digital version is interactive and we are going to do all pages and you can export and set a spreads who in export as pages and you can even create separate pdf files as well. We're not gonna really touch anything here. It's gonna go down to compression, and it's all about file size when you have downloadable pdf, so you want to be able to email it, post it, and people not have a problem downloading it. So I like to keep it at 72 which is a low resolution, but it keeps the file size down, but you can bump this up when you exported a 72. And it's not super big and file size. You can increase the resolution and push that a little bit if you're okay with having a higher file size, But I'm gonna stick with 72 for now. Medium right there in the middle is fine. And that's it. We're not gonna really touch a whole lot. All we do is change it. Two pages, Export. You're gonna see this warning. Ah, this document is using the C m. Y que blend space because we started it off as a print document and colors are gonna be converted to RGB. That is okay. It's gonna automatically do that color conversion to that digital RGB space. That's okay, just click, OK, It just means there might be some slight shifting and colors. So here's our digital cookbook. When you can see the resolutions a little lower cause we have a 72 d p I. But if you want to change that to 300 or 1 50 or something in the middle, if you're not really happy with how it looks, but most people are going to see it around this size, I think that's still unacceptable looking resolution. So now we have our digital pdf that people can scroll through and have other recipes. So we have a digital, We have a print, and I think we've covered a whole lot in this section and in this class, I want to teach you one more thing and in design. And how do I take all of this and share it with other people? Let's say I'm sharing with a client, Um, or I'm sharing it with another designer who wants to be able to open it and in design and have everything all linked up and ready to go. We're gonna create an export, a in design package for people to be able to send this entire project and share it with others.
147. Lesson20 CookBook InDesignPackages: So now we're gonna talk about in design packaging. And so when would you want to use an in design package? This is when you want to share it with another designer or you want to go ahead and give the files to a client so that they can open it up and in design and be able to edit and change things themselves. Sometimes thes air acquired by printers A lot of times air. Okay, with just the pdf. But I want to teach you how to do this. So I'm gonna go up to file and go down to package. So file package. That's just like exporting. But we're gonna go down to package, and we're just gonna scroll down. We're not gonna be changing a whole lot. Here's is telling you what fonts are gonna be exported with this. It's gonna export all of these fonts so that when you give the package to somebody else, they have all the fonts, installed, links and images. All of these links are gonna be exported in the package, and everything is good to go. So we're just gonna just simply click package and it's gonna make you say that's we're gonna save that more packaging it up and it's gonna go ahead and give it package it up in a folder for you. We're gonna copy the fonts. We want the fonts to go over just in case they don't have them installed. Also the graphics. And you don't have to worry about some of these other, more advanced issues unless you kind of know what you need there. But I think this is perfect how it is. So it says restrictions apply to copping font for using a service provider. So this just means I'm using Adobe fonts, which I haven't. Adobe subscription. So I owned the license to that. But if I send this to another designer or a client, they may not own the license to that pot. So it's just giving you a warning to make sure if you send this and you could give them the fonts that they have a license or they haven't Adobe subscription as well. So it's just kind of protecting you and protecting your client. It's gonna still bring the fonts over, but it's just kind of a little warning for you, so it's saving it as a little package and to show you what it looks like on your desktop. So here's where a little cookbook folder. It's gonna do it as a folder, and it has all the links to all of the files. So there's our E. P s badge. There's all over photos that we use. There's our logo for the front. It's gonna also have our document fonts We used Open Sands and when you specific. Oh, and it also could have the original in design file. So when you zip this up and send it over to somebody else, they'll have everything they need. All the linked images, all the linked fonts to be able to edit this just like you do right now with this original in design file. So that is Adobe in design. Everybody hopeful. Do you enjoyed learning the basic tools? This is kind of more of a basic introduction. We did this project course. There's always more advanced tools in adobe in design, and maybe there'll be a class that really dives into. Advanced topics have been designed, especially if you're gonna get into publication and, uh, magazine designed there's graphs and charts, and hopefully I can add a few bonus lectures about. If anybody's interested in going into something more specific, just let me know. So hopefully enjoyed the class. This is the last software section, and hopefully you learned in design and you know how to work with all three programs. But you also know how to work within all three at the same time. So dragging one over to another, we're bringing a photo into photo shop, saving it and bring it back into in design really know how to use all three Softwares as one package, really, to make some really professional, high grade client projects.
148. Lesson21 AdobeInDesign ExtraLesson: a few lessons to go over some extra tips and tricks and adobe in design on just to kind of give you some more time saving options. So we talked about Master pays it pages and how we can use that and apply it over and over to save time. But what about page numbers? Won't say we have a 500 page book. We don't feel like copying and pasting a page number and changing it. Well, there's a little trick you can do an and design. We're gonna go to our master right here in our master spread, and we're gonna create a new text box. We're gonna insert a special character. So this is something you're just gonna have to memorize or do a few times to get used to it . We're gonna go up to type, go down to insert special character. We're gonna go down two markers and we're gonna select current page numbers. We're gonna go ahead and click current page number, and you're going to see on the master page in A and this is gonna be a little formula that is going to insert the page number of that current page. So we're gonna go ahead and remove the A that already currently had. Let's say we want to have a page number here and let's say we want to have a page number on the other side. This is honor Master Page. So we're gonna apply our master to all the pages. We want to have numbers on select all of our pages, Right Click Going to apply, my master. Just make sure a is applied, so it's gonna do that formula on all pages. So now if I go down to my page, you see, it's page one, then page to you could see how it entitled all of them all the way down. So this will save you a ton of time if you're having a number. A huge book was very easy to apply. We're gonna go and create a table you're gonna go up to table. It's got its own little menu system and we're gonna create a table. So we're going to create Let's say we want to create four rows and four columns and ah, let's say we want to have a header. We won't have a title, So we're gonna put a title. We would have won hetero Endless is do a basic state table style click OK and could allow us to drag and put it anywhere we'd like. So let's click and drag and make it about this size and release and there is our table. So let's go ahead and highlight this top header. We're gonna right click and we're gonna merge the cells. This could create kind of this header for us. So right click merge cells and it's gonna merge it all into one. So now I can have a little header here and I could click this whole cell right click, and I can, of course, change the colors here. Change the background. So here's our Phil. Let's make it our blue color and we could make text. Make that white and, of course, change or text. So if we ever want to change our table, we can just go up to the table. Options go down to table options table set up. We can always add more rows and subtract more rose this way. So let's say we want to add Ah, let's add a couple more rose. So let's add two more rows. We could change your border, so it's not quite as thick We can change. Make it ah dotted lines or wavy lines, stew dotted lines, all these different things that we can do. Click. OK, so let's UN collapse or table to reveal our other two rows. So there we go and we could always do command shift, just like we do with photos and just like we do it. Text. And we could scale this whole table bigger or wider. Or if we just went ahead and scaled it without holding down shift. I could tuck certain things in so we can double click here and drag. So let's say we want emerge Just those cells together, right click, Merge sales right click Merge sales. We could even do columns, right click emerge cells who can build whatever table you'd like. Of course, there's table options, which changes the table globally and their cell options, which only changes the qualities that's inside the cell. So let's say we want to do a different Stroker Phil. We'll say we want to make it thicker. Let's make it pink. You see what's going on, then click on OK, we can change individual cells as Well, so no, this looks kind of weird, but just kind of showing you some basics of tables so that we don't forget that as an important quality of in design live clickable links to the interactive digital P D efs. Absolute. So we have a client, pdf, and it's 20 pages and they have services, and they have different websites that would you click of certain button it goes physically takes them from the pdf to a website. So it has created a simple box and a text box, too. And I was gonna right click, and I'm gonna group those together. So now their one unit, I'm gonna make this whole unit clickable. I'm going to right click. We're gonna go down to hyperlinks and we're gonna click on new hyperlink. And let's just say google dot com, for example, and what we're gonna do is on the pdf. It could be an invisible rectangle. So you may be designed a box and you don't want the link to be visible. You could have ah, invisible rectangle Or just have the button be clickable, or you can have a visible rectangle that has a specific quality or color to it, but we're gonna do an invisible rectangle since we already have a button link and we're gonna click on OK, And now we're just gonna export this as an interactive pdf for digital pdf. So here we are in our pdf that we just exported. And look, I have a clickable link. I can click on it, and we're just gonna go ahead and allow. And there we are, so you can create all sorts of interactive links and your digital Pdf's just by using and design. If you don't, you could do the same thing. If you have Acrobat pdf pro, which if you have the Adobe subscription, you can add it this way to go ahead and click on it. You could do it right within this tool, but if you don't have this tool, we can also do it in in design. So it's great if you wanted to add a little bit of interactive elements to your digital. PdF's
149. BONUS! InDesign Portfolio Building Template! : I need to be able to offer you this great resource. I spent a couple days really crafting this to make sure it could be really helpful for my students. So one of the biggest questions I get is how do I build a portfolio? I have classes and lessons that go in more detail about that, but I wanted to provide you guys with a template a portfolio building template when very sizes. So you can at least have a framework to get started with building your portfolio. And this would be a pdf based portfolio for sending to clients for applying to jobs. Whatever it is you need a pdf base portfolio four. So if you look at the resource files I provide you, you're gonna have this file system. I have this in two different sizes. We have a horizontal presentation and a vertical presentation. They both have their benefits. Depends on what kind of work you do and how your photos air working what orientation and you want to go for, um and also I'm happy to announce that I have this in both a four size so European sizes. Asian size is basically the whole world uses this measurement system and then for the United States. For this, For those who use inches, I have 8.5 by 11 template as well. So two different sizes, depending on where you are in the world and two different orientations vertical and horizontal. So I wanted to talk a little bit about how to use the template. If you've taken the in design basic lessons and you'll be right at home, you're gonna be ableto really move around this template without any issues. I also provided an example. Pdf So you can kind of see how I adapted this template, and ah grabbed a couple of different layout pages to craft something a little more custom. I'm seeing kind of see how I've used that in this example, just kind of scroll through this. I have a pdf where you'll be able to access this and see how have used some of the pre made layouts to be able to craft a portfolio. So let's open one of these. In the example. Let's do a horizontal version and one state stick with the A four horizontal size. We're gonna go ahead and open this up and this is a packaged in design file. We studied that in the basic in design lessons, and so you have the links here to all the photos that are used in this case, there's only one photo you have document fonts, which you have roboto. This is from Google fonts. Make sure you check the license. It's free for personal use, so you could just check out the license on that. And that is the only fun I used throughout the entire piece. And you can get it on Google fonts. Or you could install it directly from the template files. And lastly, is a two different files. The i N D D would be the file that you woop, and that's the in design file. The I D. Um El is kind of a more universal format that you can open it up. It's kind of more of that universal documents. So if you have an older version of Adobe in design, this would be kind of the file that she would use. If you don't have a current up to date version, let's go ahead. I have the 2020 version, so let's go ahead and open it up, and here is the basic template. I'm gonna go and zoom out. You can see all the page layout options. You have to go ahead and start with Page one, and it's got some basic instructions on page one. But I figured a video might be a little bit easier, so moving pages around are gonna go up to my pages tab and we could go ahead and move any of these around. So how do you use this portfolio builder? What I like to do is go through all the different layouts to see kind of what particular case study might match with a certain layout. Of course, all these customize you can move this over and make it go bleed, or however you want to customize it. But they're just some basic layouts that I think are personally effective. Win displaying different case studies and graphic design projects. So let's say I want to use this one right here. This is the photo overlap layout. That's the eighth layout. Let's say I want to start with that page for my first case study. I can just drag this page all the way up to the top make that my first page, and same goes for the other ones I can even duplicate. Let's say I want to have two of those in a row. I can right click duplicates, spread and now have Page one and Page two, and you can customize all this is just a header, so I can either say this is my first case study and swap that out with information. So let's say I want to change the color so I don't really like this color for my headers, or I want to use a different color for each one and my portfolio. For each case study, I decided to go with a different header color so that when people were scrolling through the pdf, they'd be able to identify what pages went with what case study. But let's say you wanna have them all changed the same. I'm gonna go over to my colors, watches this, watches panels, go and drag this out, and I have something called branded color so this could transfer over and your template. I'm just gonna double click this branded color, and I'm gonna change it to any old color. Let's say kind of this darker blue click. OK, and this is global. So that's watch is on all of the headers and also all of the type. So let me go ahead and change that again so you can see. So I noticed that changed the top, but also all of the headers as well. So you can kind of change that globally. You don't have to sit there and change it on each page. That's what's so nice about having the swatches assigned to specific objects. Let's say I want to drag this photo right in and just drag it right in. It populates. I can right click goto fitting, go to fill, frame proportionately or however you want to fit it and you can go ahead and do your photo . Of course, we covered a lot of this in my in design basic left lessons where you can double click the photo and crop it within the frame or just click the frame wants to change the frame size, as you could see. For my example, there are so many different varieties of layouts here that she can use, and I find these layouts barely effective, and it's gonna depend on your project type and how many photos you have? What layout might work out best? I like to have a variety of layouts in my pdf presentation so that they're not the same layout over and over Your switching it up. Maybe you have a photo on the right and then you have a photo on the left on the next page just trying to keep her pdf portfolio. Interesting. As people looked through the pages and remember not to make it too long, try to keep it. You know, under 15 pages is possible because that's a whole lot of work for people to look through. They may never get all the way to the bottom. So keeping it with your only your best work maybe pick 3 to 6 different case studies that she can have pick out your best work only all that other smaller work. You could put that on the side or make a gallery page of the very end with some kind of random selected work instead of featuring a whole page on some of those. So there's some quick tips, and hopefully you will enjoy this portfolio building template. I spent a lot of time on it, making sure you had both a vertical and horizontal version and came up with some what I thought were really good layouts. But you can customize it, make it your own. I can't wait to see your pdf portfolios and actions that can land some of that client work and start to get jobs.
150. Class Suggestion: Branding Masterclass for Graphic Designers : The branding masterclass. This course covers all aspects of the brand design process, from sketching to portfolio presentations. There is not one thing this class leaves out. It is massive covering topics such as understanding client briefs, learning to ask the right questions, client and competitor research. Finding a target audience, creating a customer persona, finding a style direction, finding a brand's position in the market. Word association exercises, word mapping and other brainstorming activities. How to start sketching and sketching out different concepts. The select concepts for further development, the entire logo design process, picking the right typeface, gridding in a finalizing our logos, creating a logo system, creating a typographic system, creating a flexible color system. Understanding color psychology and its effect on brand design. Working with projects and mock-ups to further develop color palettes. Applying our brand systems to real-world projects. Creating and writing your brand voice and language, creating photography rules for brands, developing a full client presentation, creating a Behance portfolio case-study, understanding the basics, a brand standards and brand guidelines. And so much more. The brand development process plays a critical part of the marketing and success of a company. I want to show you not only what successful brand design looks like, but also how to brainstorm those concepts and ideas to finally turn that spark of an idea into a fully finished project ready for the client presentation, your portfolio, and the world. So this class gently guides you through this process with a practical real-world branding project. Using a case study for a sushi restaurant and delivery service. I created this course so you can start to offer branding packages to land bigger, higher paying clients and propeller to the next level in your design career. This course gives you the tools to know how to spark creativity, ideas, concepts, and put them into motion. We go over several tools to help prevent creator's block and to make it easy to come up with ideas that are relevant, authentic, and meaningful. Looking at blank pages never has to be scary again, you'll feel confident filling those pages with finished Polish content that will wow your potential client. We will work on building a finished case study presentation for you to start building a strong portfolio. We will work on creating both a client presentation and a brand guidelines manual to help people know how to use your brand design and identity system he developed. This course has a nice balance of theory and practical software projects. This classes for those who have taken any of my software courses or have basic knowledge of Adobe Photoshop and Adobe Illustrator and Adobe alternatives, as we will not cover beginner level software basics. This course comes loaded with a 50 page brand design guide that details the entire class and the easy to read accessible PDF. This course comes with a style presentation, Adobe Photoshop template and Adobe Illustrator brand presentation template and an Adobe Photoshop be hands portfolio template and more ready to serve. Charging more elevate your design offerings and changed the direction of a career. When to be a designer that understands both the business and design aspect of the branding process to craft strong brands. I will see you in the first lesson.
 Lindsay Marsh, Over 600,000 Design Students & Counting!