Transcripts
1. Introduction: Hi, my name is Major
League Mr. Hill, and I'm a self-taught
graphic designer that specializes in web design and branding and
marketing sales funnels. I run my creative studio full-time for my laptop
while working with dream clients and
the health wellness of Business and
Entrepreneurship industry. In this class, I'll be covering
everything you need to know about designing
your own brand guide. This is applicable
if you are designing your own personal brand as a freelancer or an entrepreneur, or if you are working
with clients, you'll also get a behind
the scenes look of my entire brand guide design
process in Adobe InDesign, I used this process for all of my branding clients
because I want you to get the exact step-by-step
process down so you can finally create your own
brand guide with confidence. I'm so excited to get started.
2. Class Project Overview: For your class project, you have two options. The first option is to
design a brand guide for your own personal brand or a business that
you want to create. This is the option that I will
be teaching in this class. The second option is to
design a brand guide for an existing brand that
you've created in the past. This can be at brand assets from a past client
on existing client, or even a brand
assets that you've created in a different
skill share class, or for a school project. I personally will be using Adobe InDesign to
design my brand guide, but feel free to use any
graphic design software of your choice once
you complete all of the lessons in this
class and finally, have a strong foundation of the entire graphic
design process for creating a brand guide. I will go over the class project a bit more
in depth while also giving you examples of some of the options that you can
do for your class project. I'm so excited for you to dive into the content
and get started.
3. What's in a Brand Guide: So what's an a brand guide? There are a number of
different elements to include in a brand guide. And it can range from being extremely in-depth and b over a 100 pages long for bigger
businesses and organizations. Or it can be clear, concise to the point and be less than 10 pages long
for smaller businesses, or maybe businesses that
are just starting off, what you choose to include in your brand guide essentially
depends on two things. The price or clients pay and where they're
at and business, bigger businesses typically
have some sort of foundational representation
of their brand. So if you're designing
a brand guide for a bigger organization, you'll want to add things
to a brand guide that helps elevate their
existing business. Odds are they'll have
a bigger budget to spend on things such as
advertising and marketing. So inside this brand guide
for bigger businesses, you may want to
include things such as creative art direction, insight for their
advertising touch points such as photography sheets or product packaging in a brand guide designed
for smaller businesses, start-ups or maybe
business owners that are just trying to get
their feet off the ground. You want to sell
the big picture. You want to help
small business owners see the growth potential of their business and get them really excited
for the feature. For example, if you're designing a brand and logo
for a yoga teacher, inside of your brand guide, you can present mock-up examples of their logo on things such as yoga mats or athleisure or
even a yoga studio sign. This also gives you
the opportunity to upsell on other design
services by showing your clients that there is
more to a logo by placing a brand on products or even
a store front mock-up. If you're just starting
off in the industry, there is no harm to
creating in-depth brand guides even for
lower ticket clients. It's always good practice. It also helps you streamline
your design process and allows you to build
rapport with your clients. And also gives you a
sense of how long it takes you to design and how much you should actually charge
for your design services in the future if you do want to increase your prices in general, a brand guide should
come at the end of a design project as a final
handoff to your client, it should serve
as an overview of the entire project and include all the things
that were given to you in the client brief. This is by far one of my favorite parts of the process as a designer because it's where you can see all of
the brand elements and how they come together
in a single brand guide. You'll also be able to give your clients the tool set
that they need to actually use their brand across all consumer
touch points so that they succeed year after year
for many years to come. Now there are a number of brand elements that can be
found inside a brand guide. I will just be naming a few. This would be, I guess what I'd consider the foundation
of a brand guide. But the more elaborate
the brand is, the more in-depth your
brand guide will be. So this is not everything. It is a starting point. So to start, the first thing is mission and vision statement. And mission statement is defined as a statement that communicates how an organization or business
serves their customers. It's also a great foundation
to help employees remain focused on the overall
goal of the business. So you want to be able to communicate the brand's
mission and vision statements. Where are there now, what their current mission is, and what their vision
is for the world in the future and why they
want to make an impact, why their business
exists essentially, you want to make sure
you include that at the beginning
of the brand guide so that you can start to
warm up your audience into, Wow, this is a really good idea and this mission
is so important. So here are some examples
from Nike and lululemon, but a mission and
vision statement is definitely one of the essential
bits in a brand guide. The next bit is a brand goal
keywords, tone of voice. Now here are a few of the brand goal
keywords and tone of voice examples from my
own personal clients. So it can really range from
what you're looking for. But essentially what
you want to do is describe the overall
mood of the brand and the overall goal of
the brand so that your client knows how they
want their audience to feel. Essentially, the
main thing here is the connection your client wants to have with their audience. So the more in depth
you explain that, the more valuable it
is to your client. The next thing is a
moodboard in inspiration, which essentially
is just a collage and contains a variety
of images that helps you define the
brand that you've created to your client. They also can work as a guide in developing a brand projects
such as a website or logo, and can also be
the foundation of photography shoots
necessary when your brand needs to create image collateral for advertising campaigns
and marketing campaigns. This is a really good idea, especially if
you're working with bigger businesses to help them visualize the brand mood
that you want to capture. And this isn't just in the logo or just
in the web design, but it can be used in imagery and photoshoot
and videography. This essentially
sets the foundation of the mood you've
created as a designer, but also helps explain that to the client and your client feature business partners
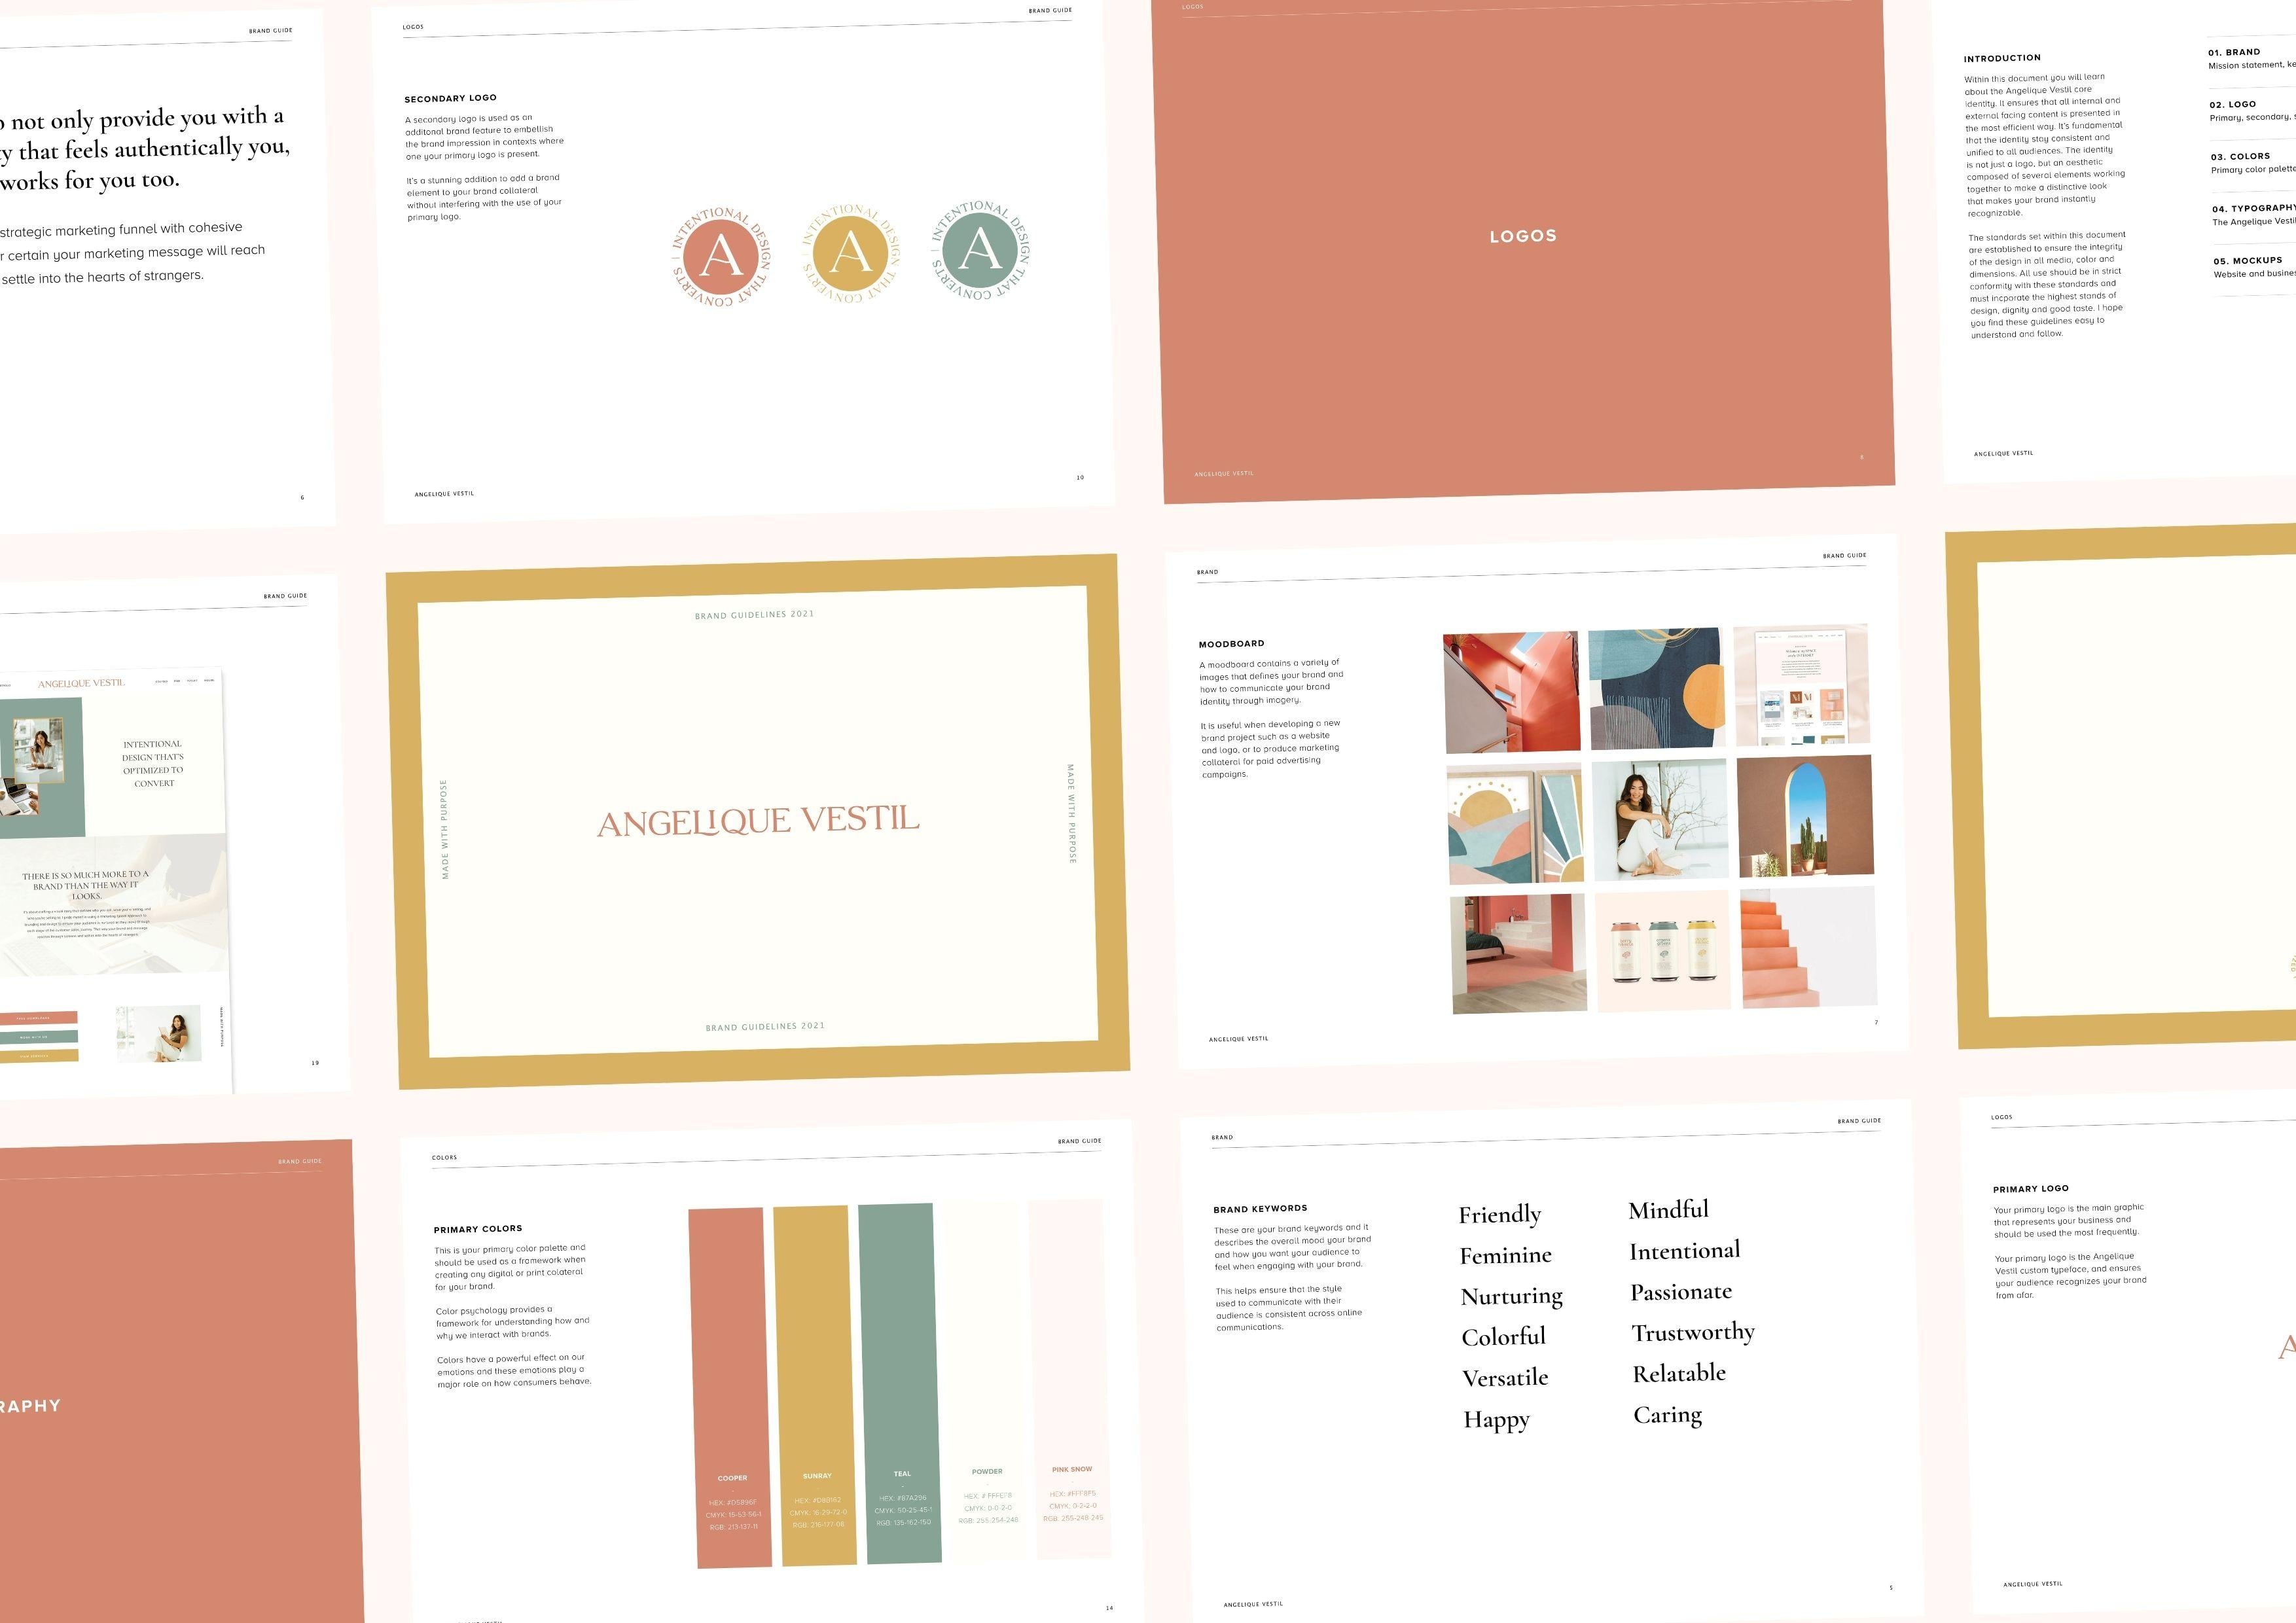
and team members. The next bit is all
logo variations. Now here are a number of different logo
variations from primary, secondary stamps,
signatures, typeface's, everything you name it. You want to explain
each logo variation if you have more
than one and explain its use case when is a primary logo US versus
when is a signature use. You know, you want to
explain each logo, why you've created it, why it's personal to the brand, as well as where they
can actually use it, maybe the signature marks
and these standards are just used to add some
flair to simple pages, but the primary
logo, for example, is used across everything and is the primary brand elements
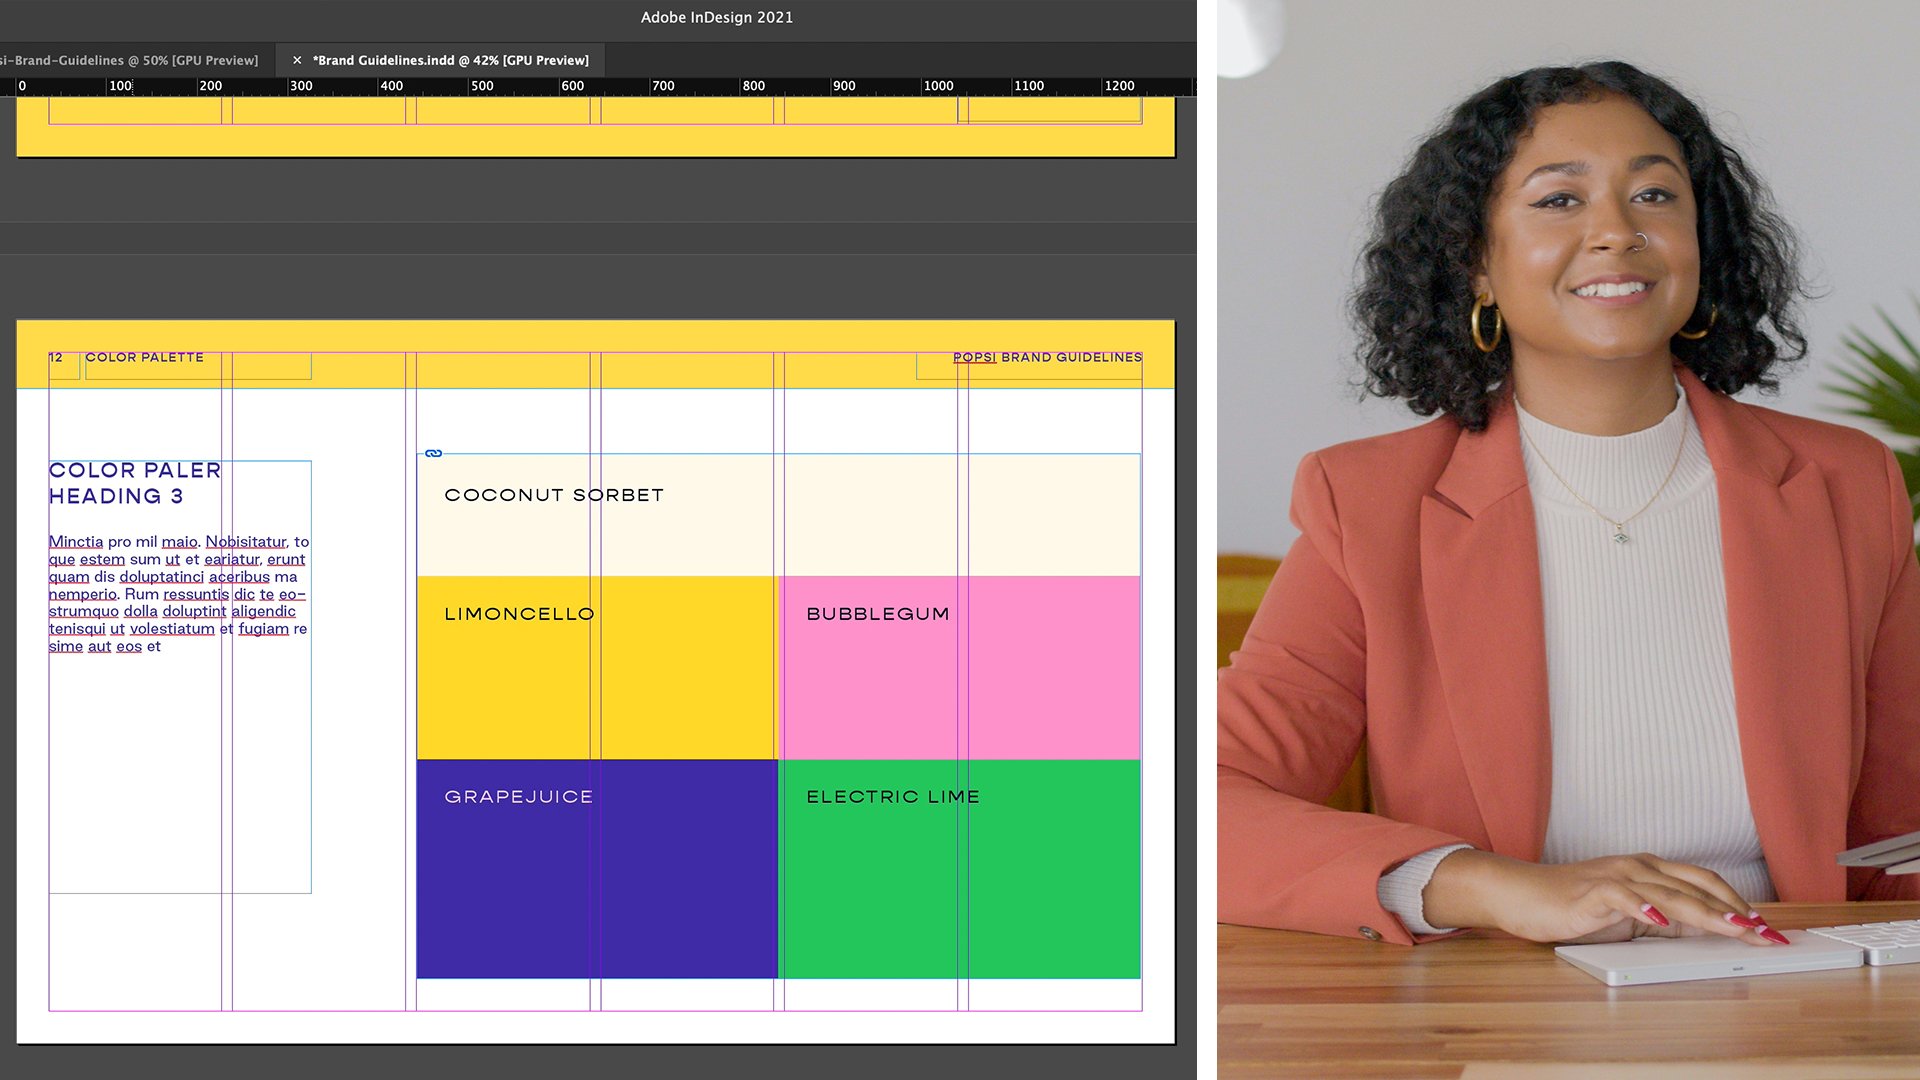
that people recognize. The next thing is color pellets. And you want to
give your clients the framework to actually
use their color palette. And the most efficient way you'll want to
make sure you have Haxe CMYK and RGB codes. And then you also want to
provide them of when to use a primary color
palettes and how to use their primary color palettes consistently across our website. On the left-hand side, the client I was working
with had it both a primary and secondary
color palette. So explaining the
difference between primary and secondary
color palettes and when to use a
secondary color palette, you know, it all plays
a role into a brand. So you want to explain that. So portray that these
are the colors and this is how they're used
together within the brand. The next thing is topography. As you know, if
you're a designer, typography has a
large influence on a brand's identity because
it is an art form in itself, and it comes with
predefined characteristics and moods and feelings. And you want to explain
why you've chosen this typography for
this particular brand. You want to one, explain the fonts and
when to use them. If it's a sub-header or paragraph or signature
or whatever, you want to explain
what the type is and what paragraph
style it sees four. But then on the left-hand
side you can also see how the different types are
actually used together. So that is really
useful as well. The next thing is brand
shapes and patterns. So on the left-hand side, shapes was the primary
focus of this brand. It was very shape heavy
from imagery to logos, to everything on the web
site was very shaped driven. So we wanted to
emphasize the use of shapes and how it essentially
played into the brand. On the right-hand side, brand patterns is also something that a brand can be
really known for. So say for bigger brands
like Louis Vuitton, that LV brown print is something that they're
really known for. So you want to also
explain brand patterns. If the brand that you're working
for has a brand pattern, then make sure you explain
it and its use case and why it should be used
and when it should be used. Imagery, animations
and illustrations. Again, this helps your clients visualize for use of imagery, animations and
illustrations across their website and
why you chose these. Again, the entire brand guide is essentially to help sell
the story behind the brand. So the more you explain your
reasoning behind choosing particular illustrations or
sourcing particular images, the better you become at telling the story and selling the
story of the entire brand. And that is your job
as a designer is to help bring a brand to
life through imagery, through tax, through design, through creativity,
and sell that story. So that is essentially what comes into a brand
guide and imagery. Animations and illustrations all play a role into it as well. And it's really important to
be covered in a brand guide. And one of the last things
I'm going to be covering is brand mockups, signage
and packaging. Now on the right-hand side, the mockups are sourced
from Creative Market, so they're not mine. On the left-hand side is a website mock-up of
a brand we created, but you want to sell
the big picture. So say for example, you're just selling a logo or a brand identity and they don't necessarily have products yet, but later down the road, maybe 23 years on the road, that's where they want to go. You want to help them at visualize their future
as a business too, the more you can use
the brand identity and the logo on storefronts,
on product packaging, on business cards, on websites, the more your clients get
excited about the brand, because it isn't just
this arbitrary symbol that you've made up. It is well thought out. It brings value to the direction they want
to go as a business. And IT also creates a lot
of meaning to them as well. That is essentially some of the elements that go
into a brand guide. There are a number of different things you
can add in as well. You can, you know, adding UI if you're doing a
brand guide for an app, or you can expand even by
sharing the founders story. A brand guide isn't restraints
by any specific things, but the most important
thing is having a structural foundation to start off with and then
expand as you go. Basically, all of
the things that I covered in this lesson is pretty much what I cover
in most of my brand guides, and it is the
structural foundation of everything I create. So I hope that helps and I'll see you guys in the next lesson.
4. Features that Make a Brand Guide Captivating: So now that we've covered
the main features that actually go
into a brand guide. Now I want to talk
about how to actually design a brand guide that's
actually captivating. The biggest thing when creating a brand guide is the
fact that you want to sell the brand story not
only to the business owner, but to their team, to their business partners,
to their stakeholders, to the investors, and
to their audience, whoever is going to
be buying from them. You want to make sure that
this brand guide speaks to the client's core values and everything that
they stand for. And that is essentially
how you make a brand guide captivating not only is it
by selling the brand story, but it's also by making sure that there is a
structural foundation to the entire design
of the brand guy that makes the content in
it easily digestible. So to start, I always
think some sort of index system or filing method is really important
in brand guides. On the left-hand
side, you can see at the top above the line, there is a number index, and this is found on every single page in
this brand guide. So that when clients or business partners or investors are flipping through
the spring guide, they know exactly what section
in the brand guide there in It's basically
like a table of contents for this brand guide. It also helps your mind know where you are
in the document and also helps you categorize where you're
at in the document. On the right-hand
side, you see that the four corners have its own unique element that is consistent throughout
the entire document. So in the top left-hand
corner you see mood board. But then as you flip
through the pages as well, you then we'll be able to see that it's not just
somebody board, there's logos as well, There's topography as well. So it is that sort of filing
method or table of contents method that helps people
read through the document, but also takes note of where
they're at in the document. The next thing is
actually explaining the logo design and symbolism. So if you've actually done the logo design than explaining how you got to be final
mark in the final logo, then those are really useful. On the right-hand
side, you'll also see exclusion zones which can be useful for particular brands. Not necessarily necessary
for all brands, but can be useful to some, say, for example, you're not
actually doing the logo design, but maybe you chose symbolism. You'll also want to
explain why you chose particular icons or symbols, or illustrations or graphics, and why you source them. What do they actually
bring to the brand? Why did you choose these
to amplify the brand? So explaining the process you
went through when actually creating the design and creating the final
brand, all in all, help sell that brand
story because it adds a unique touch to
not just pictures, but it adds a story behind
the image, the icon, the logo, the symbols and whatever it is you are
trying to explain. So the more you explain
the process behind creating a brand or creating
some sort of symbol design, then the more valuable it
is to your clients as well. The next thing is descriptive
explanations on how to actually use
each brand element and how they work together. So on the left-hand side, this is a mock-up that I
created and it explains exactly what a business card is used for when it's applicable. On the right-hand side is the gene mummies
brand mark and stab. And basically explains how this is a supportive
element that helps identify the brand at once without attracting away
from the primary logo. So making sure you
provide some sort of explanation on how to
use each brand element, where to use it
and when to use it also adds value to
your clients because they're not just
trying to shoot in the dark with this brand
that you've given them. They actually have
the tool set and the directions that
you provided them. These descriptive explanations throughout the brand guide. And the last thing I wanted
to cover is consistency. Consistency, consistency. This is so critical, especially when it
comes to brand guides, because that is the main
purpose of a brand, right? Is to make sure that your RAM looks consistent across all consumer
touch points. So it is critical to make sure that your
brand guide is also consistent and on-brand
so that your clients, when they receive
them, they're like, oh my god, this is my brand. This is what we've created. This is what we've
works him hard on. So maintaining
consistency throughout the entire document is critical. As you can see, the cover pages
in the main content pages all have the same table of
contents sub header section. And then all the
texts are align on the same spot, in the same area, in the same format across
every single page to create that unique consistency across the entire document
on this one as well, all of the text
is aligned right? And then you have
the four corners being the frame of the
entire brand guide, whether it's on the cover
page or the content page. So that again, helps create structure to the
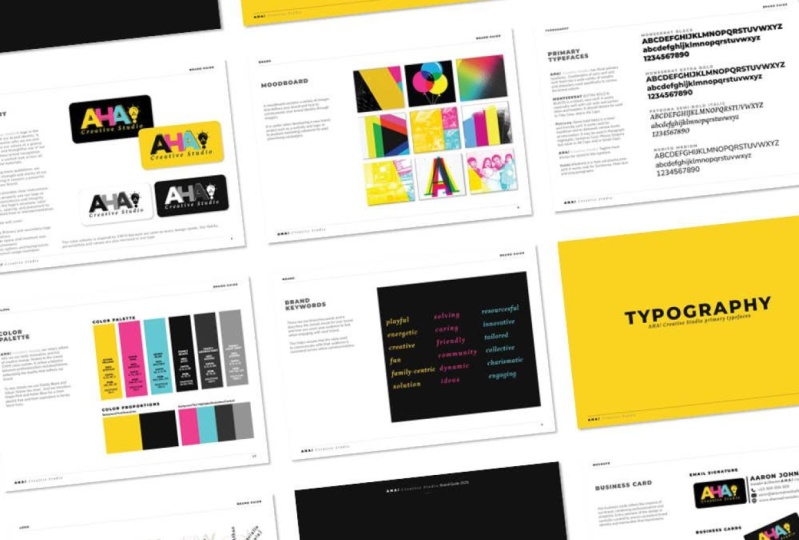
entire document. And this one, although there
are colors everywhere, there's still
consistency because this brand was very colorful, very playful, very fun. We wanted to make sure that the actual content pages were all different brand colors and the cover pages were actually had the unique shape
and imagery as well. So it's actually opposite here. We made the main content pages all different secondary colors
and the main cover pages, as you know, the
clean primary color, if that makes sense. But again, it's
consistent throughout the textile is
consistent, the format, the outline, everything is on-brand and it makes
sense for this brand. This wouldn't necessarily
make sense for a brand that was going
for a minimal vibe, you know, but it is fun. It is still consistent
and it has that structural foundation of
the tax being aligned in the same spot and then having the same shapes brought throughout the entire
document as well. So those are some of the most
important things when it comes to the structural
foundation of a brand guide. And again, the
biggest thing here is to have some sort of
foundation and to be able to use it
consistently throughout the entire document
so that when someone actually receives it and
when they read through it, it all makes sense to them. They're not trying to look
for information somewhere on the page because it's in a
different spot on each page. They actually know exactly
where their IZ to go to read the explanation and to actually see the brand elements at USU. So hopefully that kind
of explains how to make a brand guide captivating
structural foundation and consistency is everything. And I cannot draw
that down enough, but it is everything, especially when it comes to
designing a brand guide, because you want to
give your clients the tool set that they need to actually use their brand
and succeed across all consumer touch points with the brand elements that
you're giving them. So I hope that
helps and I'll see you guys in the next lesson.
5. Where to Find Design Inspiration: So first I want to cover my favorite places to
find inspiration for my brand guidelines
and the outline and the foundational structure
of my brand guides. Now, obviously at
this point you've already created the brands. You shouldn't have some sort of idea of what
you're looking for. So for me, I'm
just going to look up maybe feminine brand guy, because the brand I'm designing this brand
guide for is feminine. So you can have a look
here and start to see different structures
of content that you like. So I'm just gonna
go ahead and start opening things in new tabs just so I could actually get
a visual of what I like, what I don't like, and maybe
get some ideas of things I maybe want to add as
features into my brand guide. So basically this is
the ideation phase to help create a strategy of what you want to do
with your brand guide. So this is one brand
guidelines style. Now there are a variety of
different brand guides He can make and the design
is pretty much up to you. So use this as inspiration and use it to fuel your creativity. When you're first starting off, it's good to replicate other brand guides out
there just so you can kind of understand the
structural foundation of what makes a brand guidelines Good and parallel
and seamless and structural. But obviously when you
are working with clients, you shouldn't copy
other people's work. But when you're starting off, it is good to try to recreate. Things are already
exists out there, just you could get practice. Here is another really
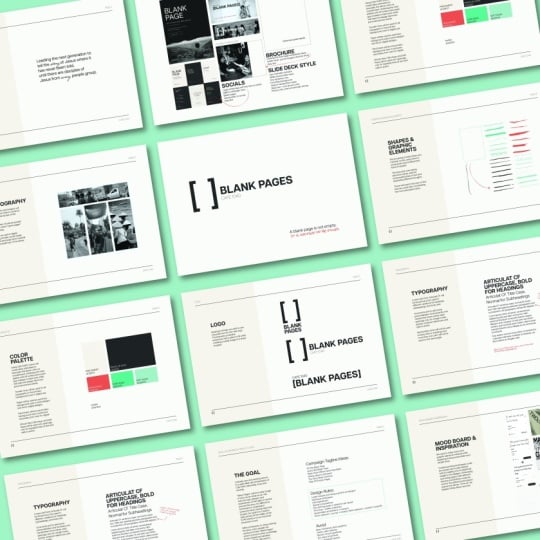
neat a brand guide style. This is more feminine. I like the minimalism of
it and the lines as well. And here is another
brand guide style. I like the dark and moody. I like how all of these
are on the left-hand side. So regardless, you
have the page title, a subset, sub header, and a main description point. I love how everything
is boxed in squares. It's very subtle,
but you can see that there is a
grid here as well, because even this text
matches this text here, which matches this
text here as well. So there are grids that are
being followed, which I love. So go ahead and start finding
content that you love. So I love Behance. I also really love dribble. If you aren't familiar
with dribble, it's another really great
place to find design. So you can go ahead and maybe
search minimal brand guide. And then from there you
can again start opening up other people's work
to get inspiration. So I'm going to just go ahead
and open it into new tabs. And you'll start to see
that there is a lot of really talented
designers out there that create really
unique brand guides. In this class, I'll be
mainly covering how to design a minimal
brand guide just to make sure that you have
the structural foundation to enhance your brand
guides in the future. But it is also really fun to look at other
people's work as well. I love all the colors
here, but as you can see, there still is consistency with this outer edge and
the header section. And then I also love this. I love the colors in the color usage wrap
the entire thing. Um, it is very consistent. I love the box easiness of
all the shapes and stuff. And then this one
as well as really unique because it
is more rounded, which I imagine is
used throughout the brand and as
well as in the app, because this is an app
brand guide design. So again, make sure that you are doing your research
and look for designers of brand guides that you
admire and take bits and pieces of their work
and implement it into your brand guide as
we go through this class. And especially if
you're starting off, it is really good
to just recreate existing brands that
you already like. But again, don't take that as your credit and your own work. It is just two. So you know, the
entire process of setting up a brand
guide and as well, pinterest is also a really
great platform as well. You can look up brand guide,
inspiration or whatever. You can use different
keywords that are similar to what you want
in your brand guide. And then you can again select and choose
what things you like, what things you don't like. Here is a brand style guide with Spotify and here are different features
that they include. Exclusion zones, for example. So you can go ahead and choose things that you like,
things you don't like. Here's another one as well, with this fluid line, which is really unique as well, more so in the app world. But again, do your research, take note of what you like
and what you don't like, and that is the best
place to start.
6. Master Pages and Paragraph Styles: A brand guide is something
that comes after you've already done the
design work for the brand. So you'll want to
have at least logos, colors and fonts, chosen. Other things like mockups,
business cards, moodboards, whatever it is can be added into your brand
guide as you go, which I'll show you when I actually start creating
the brand guide. But you'll at least want to make sure you'd have colors, chosen, logos, or if you want
to just follow along, then feel free to
do that as a well, this essentially
helps streamline the entire process so that
you can create a brand guide. Efficient and effective
way possible. But as you get more experience, creating a brand
guide will become a faster and faster process. So this basically makes
it easier for you, especially if you're just
starting off that you can take things from this document
and move it over to you, the brand guide document. So all of my brand collateral
is in Illustrator, but I like to design my
brand guides in InDesign. So I'm just gonna go
ahead and open InDesign. Now that InDesign is open, you'll want to click Create New, and I go over to print, click view all presets
and then click a4. A4 is one of the most
popular printing type. So I just like to use
this Presets and you can then change the name to whatever you want
it to be so easily, the steel brand guide. And then I keep the width
high-end units the same. I typically change the orientation
to landscape because I like how much space landscape
view gives me hovering. You can choose to do
vertical or landscape. I've done both, but I
prefer doing landscape. Then you'll want to
uncheck Facing Pages. Facing pages is only useful
if you are designing a book. Back kind of opens up in
the middle because this is typically is just a PDF or something that clients
want to print, then you just want to make it so that it's
not back-to-back. And then you can go ahead
and go down to margins. I typically keep things as is, you can feel free to
change the margins. You could also change
this later on. And then from there we go
ahead and click Create. So now that we have the
InDesign document open, the first thing you'll
want to start doing is creating a master pages. So master pages can
be found if you click Pages over here
and then click A-Master. So this essentially
is a theme master, I guess a template of
your entire document. So this helps maintain
consistency and cohesiveness across
entire brand guide. Also, this allows you to make
changes at the mass level. So if you make sure you set up your document in
the correct way, then you can make
massive changes. You can change fonts, you can change colors, you can change
pretty much anything if you have a master for it. So it is useful, especially what's your
brand guide gets very, very, very, very big. And you want to make changes to a 100 page document and then making sure you're using master pages is so,
so, so important. So I'm going to start off by
creating my first master, which I'm personally
going to use as my main content page layout. So if I double-click A-Master, that means that it should
be chosen and clicked on. And the first thing I'm
going to start off by doing is creating the
guides and grids that will essentially serve rulers of the entire design just to
make things easier for us, I'm going to expand this
a little bit so that we can kind of see the
full view here. And I'm going to
leave it a little bit smaller so that I can
click to Illustrator. And I need to put your go up here to layout and
click Create Guides. From here, you can
then play around with how many rows and how
many columns you have. I'm going to click 68 and
see what that looks like. And then let's see
actually quite like that. Rtd Maybe I'll go
up to eight here. Yeah, actually quite. What about six? No, gates better. And we took so I'll do 88. Now this doesn't have
to be an even number. I mean, you can choose
whatever guides you like. I typically like to
make them even numbers. So sometimes you'll
have six rows and columns or vice versa. And then kind of play
around with this. This can always
change it later on, but it's good to kind of
see something that you like and start to imagine the designs that you can have whisk grids. So I always make sure the
guides fits the margins. Otherwise, if you get to page, then it's the dimensions of entire page as opposed
to the margin. I typically like to do margins. I'm gonna go ahead
and click, Okay, and now if you click W on Mac, you can then turn on
and off the guides. So as you're designing, you can use a guide
design and then kind of see the design that you're making without the guides there, which is super, super useful. So w allows you to
change your view. So first things first,
I'm gonna go ahead and create the sub
header of the page. So I'm gonna go ahead and
click W and make sure that my guides are back on and
just draw a line across here. Now if I click Shift, it will make sure that
the line is straight, which is super useful. So I will just draw a line up until that point and
then increase the color. The stroke 21, that then
creates a line for us, but it is a bit too
sick my liking. So I'm gonna change this to
you. You'd be pointing to. So this is just a
line, I'll sleep, but then you can start
to choose what you actually want to deal with
the layout of your page. So sometimes I like to go out of my margins to play
around with things. Let's see here. Yeah, So I actually quite like that there. I'm going to add
a text block now and then dry it in over here. And then I'll start typing
what this document is. So I'll click Delete
vestibular branch and then I will make it
smaller so can see it. And you want to make sees subheaders really subtle
because you don't want to distract your reader away from the main content
that's going to go here. So Jacque was steel brand guy. And when I increase
the spacing to maybe a 100, maybe 200. And I actually think I will move this over to the right-hand side because I'd seen their
preferred there. I actually don't
like the Cera fonts, so I'm gonna go ahead
and change the font. Look fun, do I like here? And I'm going to increase or
decrease the spacing a bit. So I like that there. And then I will
copy that could w, so I can see my guides
again and not line up. And you can see that
the green grids kinda snapping into place, put that directly across
it at their parallel. And then for now, I'm just going to type
this in as page title. Because this is a master page, you'll actually be able
to pull specific content from here and change them
individually on a page. This typically allows
you to kind of maintain the consistency
across your document so that, you know a page title is in the exact same place every time you flip through each page. So for now I'm just going to
get the page title there. And then I'm going
to copy this again. Take this down to the bottom. And then I'll erase that. And right-click and click
insert special character, go to markers and then
click crunch page numbers. So that will change
based on what page you are since we are on a master
of justice a for now, but that's totally fine. Pool. So that is looking good so far. I actually think because this is kind of,
there's three corners. I actually want to
move the brand name, which is over here, and move this over
to the bottom. So I'm going to turn on guides
again just a little bit so that I can see and then
type in the brand name. Sorry, I accidentally
typed in lowercase. So what I can do is
actually click it and then go under here and
click all caps button. And then it will automatically
change it's all caps. So that makes the design
a bit more square, which I am really
starting to like. And then what I want
to do is then it creates the content
that would go in. So something that
typically I like to do with my brand guides and especially with
on content pages. I'd like to add a and a description of to use
a particular thing. So I'm going to click W again, draw a text box here. And I want to in the
center of the page. And then I will right-click and then fill with
placeholder text. Then I want to actually
start making it look like a real paragraph just so I
could get a real visual. So let's see. I will just add in some spacing in the middle
so that I can start to see what texts might look like if I were to
add it in later on. So that's there. And obviously this is
just a font that I randomly is the start font. So I'm going to actually use the same font that I
used for the subhead, but make it a little larger. So I'm going to choose
the seat at Grand again. And then I look, she's regular, didn't actually make it center. So it actually turns out this is a really thick font
even though it's light. So I'm going to change this
completely and tried to choose a font that kind of
matches with the brand. And go ahead and type
in Proxima Nova, because I know
that's like just a very clean, simple font. I am actually going to increase the spacing a little
bit just to add some space there and then also increase this letter
spacing as well. So I'm going to change up to 50 to see what it looks like. At least 30 K that's
starting to look cohesive. And another section up here, erase all this and
then click page title. I'm going to make that bold
and maybe underlying it, increase the spacing of
it and now are starting to see some consistency
throughout here. I'm just going to go ahead and line this up to the grid. In. This can change as we go along. Serves as the outer template, and then you'll be
able to pull this in two different
content on your page. So now that we have the
majority of the content that we want on our primary
content page completed. We want to make sure we save each type of texts as
a paragraph style so we can then pull them across pages and also make
changes at scale. So you'll want to make
sure texts that are the same are defined as one paragraph style so you can keep it consistent
across the entire page. So to start, I'm gonna
go ahead and click this brand guide text up here. And then I'm going to
hold Shift and then click this page number
placeholder here. As you can see, it's
like them both. What you'll then want to
do is go over here to texts style and make sure
you click this plus button, which allows you to create
a new paragraph style. So go ahead and click that, and then it will come
up with this thing, paragraph style to
highlighted in blue. You could go ahead and
name it whatever you want. But you want to make sure that the organization makes
sense in your mind. So I'm gonna go
ahead and click this as sub-header aligned, right? This needs to be different
than the subheaders on this part because these
are aligned left. So it does make a difference. Now that that saved, you'll just go ahead, click Enter and then it
should save automatically. And then you'll want to go ahead and do the same thing with these page titles
over here as well. Seo click the plus button, click Create New,
and then name it. Subheaders aligned left. As you can see, you can
then choose between these. If you were to click
sub-header line right, you'll see that it
will automatically change from align
left, align right. So then you make
sure you want to click aligned left to the side. And as you can see, you can see that this text down here is actually lowercase. So I want to make sure my subheaders are
always capital letters, regardless if I accidentally
typed in lowercase. So what I want to do is
click that again and click the top again and then make
sure to click all caps. And then what you
want to do is then click this button to redefine the style so that it is carried
across the entire thing. And just to make sure
I'll go ahead and do the same thing with these
ones on the right-hand side. Make sure it's in all caps, and then redefine
the style as well. So now we have both of our
sub-header is defined, and now we'll want to define
our page title, page style. So bit of a tongue twister. So you'll go over here, do the same thing. And then it click
New paragraph style and click page title. And again, what
you'll want to do, you'll want to make sure
everything is the same. So because I like
this in all caps, I want to make sure that
I click all caps as well so that when you
make changes at sale, everything is the
same and there's no inconsistencies throughout
the entire document. So click all caps and then you'll need to redefine
that style again. And it actually seems like the tax name wasn't
actually saved. So you'll just need to go here, click the pencil, and then you
can name it as page title. And go ahead and click. Okay, so now that is saved as our page title
as you can see. And then you'll want
to do the same thing with the body texts as well. So go ahead and
click Create New, and you can name
it paragraph style or body texts or
whatever you want it. So I'm going to just name it main content, paragraph style. Again, you just want this
to make sense in your mind. So you can name
these whatever you want as long as it
makes sense to you. So now that we've
finished designing the main content page, we can then move on to
designing the main cover page. So I'm just gonna go
ahead and click A-Master, right-click and then click
duplicate master spread a. So as you can see, it
creates now a beam master and it's exactly the same
as the page we just made. But instead what we want
to do is now differentiate this because I'm going to use this as my primary cover page. But I still want to maintain the same consistencies across the documents with
minor changes. So this the subheaders in this line and this grid
that I've created will be carried across the
entire document to kind of make sure that everything is maintain and has the same
structural foundation. That is one of the
most important things when it comes to design, is having a strong
structural foundations. If I click w,
everything is the same. So instead what I'm gonna
do because I don't need it, this body text,
I'm just going to go ahead and click Delete. And what I then want
to do is actually create a rectangle
because I want to add some color into my document. So I'll go ahead and
add that rectangle. Go ahead and click Properties. And I've just realize I haven't added in my brand colors yet. So now is a good
time to do that. So I'm going to go
ahead and go to my plan assets and illustrator. And I already have my color
palette housing here. So I'm just going to
go ahead and click it. Click copy. And then I'll go back to
my Adobe InDesign file, click paste, and I'll just click w so I can see
the whole thing. I'll go back to the selection
tool and I'll shrink it down here so that
it's much smaller. What you'll then need
to do is rotate it. If you click shift at, then rotates in perfect
45 or 90 degree angles. So that is super useful. And I will just add that here. So now that we have the color
palette copied onto here, all you'll need to do is go to this little button and
click this folder button. Can then name the color
group, whatever we want. So maybe Angelie, AB
Fran, brand colors. And click, Okay, so now that you see that those
are plugged in, we now have that in
a folder which is really useful so that we can
easily add colors as we go. So I'm going to go
ahead and highlight that rectangle that
I made before. And what I'll want to do is
fill it with some color. So I'm going to maybe
do you coral color, maybe yellow, blue,
things like coral. And so now obviously
all of the texts that was on this is
behind the shapes. So what you'll want
to do is click Command and the left
square bracket, which brings things the bad. Alternatively, what
you can do as well is click Arrange and
click Send to Back. And now as you can see, we have black tax on
this coral color, which doesn't make sense. So I am going to
change text to white. And I'll use the brand
color that is here as well. Now, as you can see, this is a new sub header style, although it's the
same as it in black, since it is why it is considered
a new paragraph style. So you'll want to redefine this as its own textile as well. So click New paragraph
style and you can click sub-header aligned right whites. And then you can
just click this and then redefine the style just by clicking that
and then clicking this. And as you can see, it automatically changes
to white as well. And you want to do
the same thing here. You'll just change the font
color to this white color. And again, you'll want
to redefine this as a new paragraph
style and clinics sub header, lines left white. And then you'll need to click this bottom corner
sub-header as well. And then just go ahead
and click the style. And as you can see, it makes it super easy to make
changes at scale. Also go ahead and
change the stroke of this line to that
white color as well. And then I will change this
text to white as well. And then what I'm going
to go ahead and do is move this to the center. Now, if this these grids aren't showing up on your
document, that's totally okay. You can go up here to View Grids and Guides and you
can make sure Smart Guides, snap to guides and grids
are here if you need more precise snus
when you're moving something and you don't want
something snapping to guide, you can always uncheck this. These are the shortcuts here
as well if you need them. Alternatively, another
really good thing to help sanitize your tax or
objects or whatever it is you're creating
is by scrolling down and going to align. And you'll want to
click this down arrow and make sure things are
aligned to the page. And then you can
just click align horizontal centers,
align vertical centers. And then obviously
this is aligned left, so you'll just click Align
Center as well here. And because this
is a cover page, I do want to make
this tax much bigger. So I'm just gonna go
ahead and double-click it and increase the text size. Maybe to 20. And then just so that you have space in case we have
longer page titles later. I'll just go ahead and expand
that, centralize it again. And then I think
like all of that. So then what I then
need to do as well is a defined this as
its own style as well. So have new paragraph
style and then click cover, page title. So now that we've defined all your paragraphs styles have designed your master pages. I want show you how powerful
having master pages is. So say I want to pull a master page into
the primary document. All you'll need to
do is drag and drop. So right now, page 1 automatically has a
master applied to it. But say I want to override
it with the B master. So I'm gonna go ahead
and move that into here. And then we can start to make the outline of her document
just by dragging and dropping these master pages
in so that you can start to see what the brand guide
can possibly look like. So, you know, if
you can imagine, you can have your work a logos cover page had her primary, secondary logo, it's tucked SRA. Maybe talk about typography
or your header fonts, paragraph font, and you see the consistency across
the entire thing. Now, a few say for example, you want to then bring
this to the first page. All you need to do is click Command Shift and then click
and then it automatically allows you to make edits to the original master page without affecting
the master page. And say you want to
type something in here. Love the love of law, and say maybe you
decide you don't actually like this paragraph on. You can then go ahead and
click properties here. Go ahead and make changes. Maybe you want it bold perhaps, or you want it bigger. You can then click
redefined style. And as you can see up here, it automatically
make some changes to even the paragraph style of the main content on
all the other pages, even though it's Master page. So as you can see, it can be super
useful, especially, say at the end of the
entire design projects, you want to change your fonts. You don't want to do it page by page and making
sure that you have these paragraph
styles defined from the get-go is super,
super, super important. So I'll just go ahead and click Command Z to undo all of that. I just wanted to
quickly show you the power of master pages
and making sure that, you know, you have
your paragraph styles defines in the beginning
and why it's so critical.
7. Brand Guide Design Process: Now if you click on any of
the master page things, you can't move it because
it's part of the master page. But what you can actually
do is bring things up from the master page on to the specific content page
and then customize it. If you click Command Shift on Mac and then click the title, you'll start to see that you can actually bring this title to the current page and then actually make changes
to the title, which is super useful, but also make sure you have
consistency across the page. Same thing here right now, I can't click it or select it. But if I click
Command and Shift, then I can then
change this as well and make sure that
says logos as well. Well. So then as we
start to go through, you'll start to be able to
add in things as we go. But for now, I'm
just going to start creating the outline
of the page. So the next thing that
would probably be colors. I'm just going to adding all
the cover pages now so that I can continue to
create this outline, colors and then typography. So logos, color,
typography, mockups. And I'm actually going to bring this page up to the
front and cite it up there and actually
make this one say brand. So this is basically everything that has to
do with brand mission, vision, whatever
you want to add. So now I have my
cover pages added. I have brand logos, colors, typography,
and mock-ups. That is kind of the outline
of my document per se. And then now I
actually get to add in the content and what I actually
want that to look like. So I'm going to start off
in the brand section. So again, a similar
type of thing. You just drag and
drop things from the master pages
and then add them into this outline that you're
slowly starting to create. So first things first, I'm actually going to
do mission statement. And I actually now
that I look at it, don't think I like
this underlines, so I'm just going
to click Command Z to undo it so that
I can't select it again and then go back to the master so that I can
make the change at scale. So then I will undo
the underlying, see what that looks like. Move this up a notch
so that we can kind of see it looks psych,
little bit more. I think the line height
is a bit too much. Okay. So now that I made that
change on the master page, I'm going to go back
to Pages and then go back to the section after brand. That's looking a bit better. So I'm going to click Command
Shift to bring that to the current page and then
type in mission statements. And then typically
here I like to add in a short description on what
this means to the clients, but to make things easier, I like to do everything in bulk. So first, I want to create the outline of the
entire document without actually adding in content or customizing content. Because again, I
want this to be done in the most efficient
way possible. I want to add brand keywords. And I also want grand goal. I may even want to
add board as well. And again, what we're doing now is creating the outline
of the documents. And now we have the
mission statement, brand keywords, brand
goal, and then meet board. And then I'll just keep
that at that for now. If I once add things in
later than I can, again, I'm just focusing on the
outline and now so for logos, I want to have primary logo. Secondary logo. Add in another page below that
brand stamp. Another page. Save it. Let me see what other assets
I have in terms of logos. So those are standard
Sukarno scam, right? That's good for now, depending on the logos that use created and the brand
that you've created, all of the content
that you add into your brand guide can change. I am doing this based
on my personal brand. So I want to make sure that I am including everything that
makes sense for my brand. If you are working
with, you know, a corporate company,
they might have different needs than
a personal brand. So you want to make
sure you're adding things only if they're relevant to the brand you're creating this brand guide for.
So that makes sense. So then going into colors, I'm just going to, this
changes two primary colors. You could also add in a
secondary color palette if you have one, since I don't, I'm just going to delete
that spread and go to typography and type in header font paragraphs. So that's colors, typography. And then we have mockups. So here you'll want to mock
up anything that's relevant. Again, if you're just
doing brand identity, this is a really good place. Actually upsell other services you might offer as a designer. Someone comes to you
just for a logo design. You can then mock-up
maybe a website or product packaging or
a storefront labels, whatever it is,
tagged shopping bags. You wanted to mark things up
so that you could possibly upsell other avenues of what a client might
want from you. So this one I'm going to
add in a website and then add another page that
says business card. And we'll show you how to
get all of these done. So now that we have the layout of the page
as we go through this, you'll start to see
brand mission statement, brand keywords,
bread, goal, mood, board, logos, primary
logo, secondary logo. Brands damn, favicon,
colors, primary colors, typography, header,
paragraph, mockups, website, and business card. You can continue to
add things as you go, or you tend to just keep
things as is right here. So going back to the top, I'm going to start with
the easiest section first, just since I already have
all of the logos completed, I'm going to go ahead and start adding in the content from this primary page on my brand collateral
page and moving it over to this section here, there is a PNG of it. And I will drag and drop
that into the documents. And then I will make
it a little bit smaller by clicking
Command Shift so that it shrinks
everything to scale. Okay, cool. So now that's on the page. I once a place this
somewhere that makes sense for this logo to be. So what I'm actually
going to do is I want to centralize this on the
other half of the page. I'm actually going
to draw a square. I want it to be a perfect
square as well just to maintain that cohesion across line up the square, community outer bounds. And now you'll only
see this square from the guide's section
because there is no no fill or no color
by if he highlighted, ie can then be able to see it. So I want to center this logo in the
middle of this square. So what you'll want to do is highlight both of the sayings. Click Align to Selection. And then you can centralize this with the central
buttons over here. Cool, So that is that. And then, and then just copy these just so that we
can maintain that. Look, if you click
Command Shift Option B, it will actually paste that in the exact same place as opposed to if he just
click Command E, it will paste it
wherever it wants to. So I like to click Command
Shift Option on Mac to make sure that it copies and pastes in the exact same
spot. And then same thing. I am going to adding secondary logo PNG
file into that square. And then from there, you can either fit this
to the grids by that, or you can click Fit, fit frame proportionally and it should centralize it for you. So then same thing, I'm going to click Command
Shift to make it smaller. And I actually want to be adding two of these in
the same exact spot. So since I have multiple
different colors in my brand, this maybe useful. So I'm going to drag
and drop this blue one. And actually now that I'm here, I actually may want
to add a third one. I'm going to click
Command Shift again. And then duplicate this again. Move it over so that
it's in the others. Then go back to my Finder. And I will drag and drop the yellow one over
here as well. Cool. So obviously those
are not in line. So what I'll do then
is highlight them all. Go back to here and make sure
I click Align to Selection. So I want to align
vertical centers so that makes them all in line. And then I also
want to distribute the objects evenly across
this entire space. So under distribute objects, you can click this and then it automatically
centralizes this. I then book group this by
clicking command group, click W to highlight
this with the square. And then centralize that
again within the square. Cool. So that is some
secondary logo examples. And the more you
can kinda showcase the brand throughout
the brand guide, the better it is and the
more useful it is as well. So that is the primary
logo and secondary logo. And then I want to add
in the brand stamp and news the brand stamp
over from my files. Paste that in here,
click Command Shift and shrink it down to a size that And then again,
going back up here, I want to highlight
this invisible square. Go back down here, click Command Shift Option B, and then it will paste it in the same exact spot
and then same thing, align things to the center. Now, there are a few different
ways you can align things. And I typically like to align my logos more specifically
to the center of the page. However, you can also align it just to the left-hand
side, if you like. I personally prefer
centralizing my logos just because there's so much
empty space that I want to fill up with he now the content. So I typically like to
centralize my logo, but then if it is text-heavy, I will align it
to the grid a bit more like you'll start
to see later on. So that is the brand stamp. And then going on
to the favicon is obviously is just the thing
that goes on your website. And then I will go ahead
and go to section as well. And this is at the favicon. And we'll take this same
square from the top. Command Shift Option B, a bit smaller, and then
centralize this as well. Cool. So now I have my logos
inputted into the brand guide. And now we can move
on over to colors. So it my initial document, as you can see, I already
have my colors here. So I'm actually
going to just copy and paste directly from here. Or what I can do is actually based on what I want
my grids to look like. So I'm going to draw a square. And I will make it maybe all
the way down to the bottom. And I'm going to start
in putting colors based on the document
that I have. So it is 400, copy and paste and copy
them and geese together. And I will make
sure that they're aligned vertically and then
I'll also distributed evenly. And then since I've
selected them all, I can then move them based on what I think makes
the most sense. So I actually quite
like it within the bounds of the grids. So I'm going to go
ahead and custom adjust each of these squares
to match up with the grid. So then you can
see the outline of each thing really show up
in the overall design. Now fancy mouth. You can start to see the colors. So now I'm going to fill it with other colors
in the document. So those are the primary colors. Going on to the next
section, typography. I'm going to skip
typography for now. Now going into the mockups. First, I'm going
to design a square here that I can just move over the website design directly from my files
into this document. Drag and drop this screenshot of my website mockup
into the file. And you'll see that it actually populates into that square. And what you can do is then
click Fit and then fit frame proportionally and it
should auto adjusts for you. So I'm going to move this
down a bit so we can see the actual website
that's customized. Then what I want to do now
is actually a line this up With the top. I don't actually like
this black line here, so I'm going to just
crop it out of the way. This up again to the
top of this square. Drag this down because I liked the look of it hanging
over the edge. Actually, since its way, it doesn't really going to
shrink this down a little bit. So I can see a little bit
more of the website design. Go to that section there. Pretty much line at the bottom. That is what that looks like. I think I'm going to
add an outer stroke to make things look a bit here. And you can make it
smaller, pointed. Cool. I like the look of that. Wanted to add a drop
shadow so I can actually see what it looks
like a little bit more. Make the opacity 20 percent
shot looks like preview, so that distance is a bit off. A little bit cool. So I'll click Okay and
see what that looks like. And I do like that drop
shadow actually a lot. And then what I'm actually
going to do is go back up here to the logo section and highlight that square that I was making sure
everything was in the center. And do the same thing here. Command Shift V, and
then I want to align, make sure it's aligned to selection and
centralize the two. Cool spot is starting to
look really, really nice. And I'm, I'm really happy with
how it's starting to look. And then same thing
I'm going to copy this man shifted down to
the business card section, then go back to my
folder and make sure that I can add in my business card
mock-up here as well, meaning go over here to
my business card mockup, drag and drop it
into the selection. And there it is. Now,
I'm going to undo the SRO minus square up
to this section here. And similar saying, I'm
just going to centralize it from here. Turn it simply. I think she want to make this
match this square because I actually kind of likes things
bleeding off the page. And then if I click,
right-click and then fit frame proportionally, it should adjust based
on what you selected. So I could either keep
it like that or I can make it expand beyond the grid. Which sometimes is fun, not necessarily necessary,
but sometimes it's fun. So I'm going to bring this
brand guide selection here to the front as well as
this page number by clicking Command
Shift and then click. And then I'm actually going
to expand the bounds of this bit more to the edge of the page just to see
what it would look like if this actually does beat
off the page a little bit. So I will go ahead and click Fit frame
proportionately again. Span this little bit so we can
see the design a bit more, actually quite like
the look of that. So I'm actually going to bring this back so that these
come to the front. And then I'm also going
to bring this line to the front a little
bit so that I can adjust this and make it look a little bit more like
it makes sense. It's going to drag this. So I actually really loved
that and how that looks cool. So now I have most of my content and imagery
actually in the brand guide. So now that most of
the imagery is n, I'm actually going
to scroll back up to the sections that have text. So now I am just going to pick w so I can see my
grids again and go to the textbox tool and drag
and drop something here. So then you'll want
to type something that makes sense to be a header. So if you go over here, you'll start to see a
mock-ups of texts that I've written there so much more to a brand and
the way it looks. So I'm just going to
type that for now. And then I will actually
want to go ahead and choose a font that
I want to end for more Int and then
increase the text size. Or you can type something like
this is an example of what your header text
should look like. And then you'll want
to make sure that these are all written out
here and where you need it. So I'm just gonna go
ahead and click enter and click HRM warrant care amount. Reduce the size
here a little bit. And we can actually
change this to be similar but different. And I actually think it
should go at the top. And I'm going to copy and paste this same thing and go down
to the paragraph section, it command Shift Option paste. And then I will actually do the same thing for
the body text. So my body text is
actually Proxima Nova. And then I want to decrease
the size to make it a bit more accurate to what paragraph typography might look like. Copy and paste. Could
even remove this and adding filler text to make
it a bit more believable. Then again, you
want to change this to font crux in Mendoza. Regular. Actually going to
add in a bit of spacing here. Cool. Now if I click w, This
actually isn't in line, so I'm going to
move that sounds. Make sure it's in
line with the grid. Same with this one. Move it down so that it
is in line with the grid. That looks good now. Cool. Now we have our paragraph
font and our header font. And I'm actually going
to copy this again and take it all the way up
to mission statement. Line this up. So I've already written my mission
statement, but again, this brand guide is supposed to give your
clients that tool set they need to succeed and making sure that they
know what their mission. And it is their brand goals are, is all plays a role
into being able to use their brand in the
most effective way possible for many years to come. So I've already
written all of this, so I'm going to go ahead
and go to my website and copy and paste things from
my mission statement, brand keywords, brand
goal into this document and now fast forward it so you don't need to follow
along as I'm typing, you can kinda see what
that process looks like. Hi. Hi. Okay, so now I've finished
my mission statement, my brand keywords,
and my brand goal. This is pretty much copied
and pasted directly from my website since I've
already created my website. And then I'll actually want
to go into my mood board. So what I will want to do
first is actually create the layout for what I want
my mood board to look like. So I'm going to go
ahead and click Shift. I want to make perfect squares. So I'm gonna go ahead and click Shift to make that
perfect square. And then align this. I now want to move this actually over all the
way to the right-hand side. Actually, no, I'm going to
keep it over to the left. Copy and paste, move
it down a bit to hear. Spot is going to be the
outline of my mood board. I guess I'm going
to actually try to make it a bit more horizontal, so I've done that. Then I also want
to distribute them horizontally in the same manner. So I'm going to
go ahead do that. I've already created a
mood board for my brand, but I'll want to go ahead and go to my Pinterest board
that I've created a while ago before I even made my logo and pull
ideas from there. So if I do hand off my
brand and the future, basically my team or partners or clients or whoever
is working with my brand. Epoch given moment knows the mood that I want to
create when creating any other brand collateral or anything useful to the brand. So I'm gonna go ahead and go to Pinterest as well as
go to my Instagram. And then basically
what I'll do is save pictures directly from my
Instagrams, my Pinterest, and add them into my mood
board so that in the future, people can easily get a feel of what I actually want
my website to look like. So I'm gonna go to Pinterest, go to my primary
Pinterest board, saved pick Angelica steel brand
in my brand is definitely inspired by coral beach
themes, neutral colors. And in general, that's
kind of the vibe that I'm going for whenever
I create something. So I'm gonna go ahead and
right-click this image. For now. I'm just going
to save to my desktop. Now I have a mood board. So now I have a
mission statement, brand keywords, brand goal, mood board, Logos, primary,
secondary brand stamp. See the con, colors,
typography, and mock-ups. So next thing now that we have
all the content added in, you'll then want to add
in short descriptions of what each thing is and how
your clients will use them. So you can research why a mission statement would be
beneficial to your client. But because I've done
this for so long, I'm just going to go ahead and type in my own disruptions. Now that, you know,
you don't have to watch me type 2. Okay, great. Now that we've finished all
of them on each of the pages, now we will finally
make the final tweaks. So again, I have a page title
section from the master. And what I want to
do is actually put this tax to the
page that we're on. So then I can then change and
say what section we're in. So I'm going to just copy
this and say brand, brand. And then this one says logos. So I'm gonna go ahead and
do the same thing here. Logos. Great. So now we've added that. What I'll need to do next
is actually added in the hex codes and all the details for
all of these colors. So I'm gonna go ahead
and do that now. Let's go ahead and centralize it. Then what I'll do this here, whites will copy, paste. And then what I'll
do to make things easier is actually go into Illustrator and open up the actual color
property so that I can easily follow along with what
color I'm actually doing. Otherwise, you have
to opening close. Everything we will do now is actually make sure that everything is capital letters. Cmyk is 1553, 56 One. And for naming my colors, I like to go to
coolers, dot-com. And then you could
actually put in the hex code directly there. And then it comes up
with creative names. Sometimes they're really good, sometimes I don't
really like them and kind of make up my
own color name. That sounds good. Now,
I'll maybe do Cooper. I'll actually go ahead
and change this to bold so that it has a
bit of differentiation. And then the same thing
will happen here. I'll go ahead and
open Illustrator, open this yellow color
and paste the hex code. Now continue to do that with every single section that I need to for this
primary color section. Hi. Okay, great. So now we have the
color swatch finish. And then last but not least, we'll want to add a table of contents and then a
cover and closing page. So what I'm gonna do now is add a table of contents page
before the first page. And then I'm actually going to add a blank page so that I can custom create this cover page based on what I essentially
want it to look like. So what I'm actually going to do is do an outer box that
is this yellow color. And do an inner box that is just paper white or even
the off-white color. Beautiful. I'm gonna
go ahead and add in my primary logo to go ahead and take that from one
of the login pages, copy it, and then click Paste. Go ahead and center
this to the page. What I then want to do
is add some features that allow me to describe what is going to
be inside of this document. So I'm just gonna go ahead and take one of the subheaders, make it possibly blue, and say brand guidelines. So I'm going to actually make this a bit bigger since
this is the cover page. And bring it in from there. To spice things up a little bit, I'm actually going to
add in primary slogan. And I will actually centered
vertically matched page. Same thing on the other side. I don't know. Finding them with the sign and then aligned to the
center of the page. But see how that looks like. I actually think this is
a bit too long the text, so I'm going to change
it a bit to make it a bit smaller so it
looks a bit more uniform. And I'm going to
change this as well. So I'm liking the
look of that as well. Your cover page can
essentially be anything. I like to make it look different than my
other cover pages. Just to make things a
little bit different. And I'm actually
going to duplicate this spread and use it as
a closing page as well. So I will delete all of
this actually, stead, I will go ahead and grab the
primary stamp and take this, bring it down here, paste it down, and
put it right here. In the center. We've
got bit smaller. Centralize it. Perfect. That is then the closing page. And then last but not least, we have the table of contents. So I'm gonna go ahead and
name this table of contents. And then you'll want to describe what can be found in
each of the pages. So to keep things uniform, I like to keep it says same layout but change
it up just a little bit. So your table of
contents should serve as an introduction to
the entire document. So in this description, you'll want to actually
explain what this brand guide is used for and how your client can actually use this
to their advantage. So I'm just going to
write a short snippet into what someone can find in brand guide and why he's fall for the
person who's reading it is the introduction. And what we'll do now is actually make the
table of contents. Hey, now you have it. That is my entire brand guide and my entire brand
guide method. I will share this entire
brand guide with you guys in the class projects section
for you to take a look at. But essentially that is my entire process for
creating a brand guide. I like to streamline processes, so I like to do
things one at a time. I first start off
with the outline, go into adding creatives, then adding in any
texts specific things, then going into
the descriptions, then formatting it
the cover page, table of contents
and closing page. And that is it just about it.
8. Final Edits & Showcasing Your Work: Now that we've finished the
design of our brand guide, you'll want to go through
the document one last time to make any final changes. So this refers to proofreading all of the
texts that you've written, as well as making sure all
of your grades are in place. And if you see something now that you've
had some time away from the brand guide if you want to make any design changes. So as I go through, I'm now looking at
this and I'm thinking this text is way too big, so I'm just going
to go ahead and go to Properties and make it a bit smaller because
I think it is too large, especially for a
document like this. Let's see. I think 13 is okay. But I think the texts
heights too high, so I'm just going
to go ahead and change that maybe to 20. Gonna go ahead actually and
copy this and then put it in a new text box so I can adjust
it a little bit better. Okay, cool. So I like that better. That looks a lot more in line. And then I'm going
to keep going down. I'm gonna do the same
thing to this one. So I'm just gonna go ahead
and copy this up here. And then click Command Option Z. Grab the text from the back. Paste that there. Then I will continue to scroll, see if there are any other final changes
that I want to make. So this is really intense. I don't like the old caps vibe. So I am just going to
actually go up here and grab one of the headers just
to make things more uniform, especially when you are
designing things very quickly, it can be easy to skip
over some things. But once you start
doing it more often, you'll start getting into a rhythm of designs
that you like. And you'll also have an
eye for things like this. So I'm gonna go ahead
and paste this here. And I also want
to make sure that this text is the
same thing here. So I'm just going to go ahead and again pull the texts from the back and then
paste it into here. Then this is also silvery bags. So I'm just gonna go
ahead, make this smaller, gonna go back up here and define this as a
paragraph style. So I will define this as
paragraph style for content. All right, We'll go
ahead and go back down again and change
this paragraph style. That same text. That looks good. And then, yeah,
There you have it. So now that I have made any final design changes
to my documents, I then we'll go up to export it. So all you need to do
is click File Export. And I'm already in the Angelie with steel Dropbox folder
that I've already created. So I typically like to create a new folder and then
maybe name at brand guide. And then you have a few
different options here. So I typically like to
export one as a PDF. So I'll export one
as a PDF, save that. And then you can pretty
much leave all of these as is if you do have hyperlinks. Sometimes people like to include a hyperlink to maybe a
contact form or an email, make sure you check this. But because this brand guide specifically doesn't
have any hyperlinks, then we don't meet that. So I will make sure to
export this as a PDF. You don't really need to
change anything else. So export. And you'll see this blue
bar loading up here. So once that is finished, then that means the guide
is export it properly. And then what I also like
to do is X4 as jpegs, that is makes sure that I have actual individual images of
all of the different files. So I'm just gonna go ahead
and click JPEG, click Save. And I want all pages. And then again, I
will export it. Awesome. Now that that is finished, I will go ahead and
go to my Finder. Now within my brand
guide folder, I have the PDF, which you can then see here. And we can go through each of the pages just to make
sure everything looks good before we actually
send this off to a client, so everything looks good
and I'm happy with that. I typically just sum the PDF and then you
just send an email and basically introduced
with the brand guide is or you can even jump on
a call with their clients. And then I also like
to export the JPEG. So this is individual images of each page of the brand guide. And the reason why I like. Export jpegs of a brand
guide is to design some sort of image or mock-up of my entire brand
guide collectively. So what I like to do
with these images is actually then create a file that is ready to export and upload to
things like Behance, dribbble or Instagram
or even Pinterest. So since I've taught you
how to design an InDesign, I will show you how to create a brand guide overview
in InDesign as well. So I'm just going to go
ahead and click Create New. And you can go ahead and
click Create new document. And I will actually
choose pixels, and then I will choose 1080. By 1080, I will name this
brands tried overview. Go ahead and click Create. Now you can go ahead and
create this in Canvas, Illustrator, Photoshop, whatever you feel
comfortable with. But because I've already
showed you how to design a brand
guide in InDesign. I'm just going to
show you how to design something like
this in InDesign as well. So what you can do
is go ahead and drag and drop some of your
jpegs into this file. And you'll just need to click Command Shift and
size it to the grid. Then, then what I typically
like to do is command paste and then repeat these fat. We can start to see
this come to life. So then I like to
line it up too, actual square, and then I
will duplicate this as well. And then line it up. So now we have all of
the squares in there. And then what you will then do is be able to click
on one of the images and then actually be able to drag and drop different JPEGS from your file just to display what your brand
guide actually looks like. So I will just go ahead and drag and drop that
into the middle. And it's always good to display all of the
different pages on your brand guide
to kind of display your work in various
different ways. So the more pages you have, obviously the better
this will look. But if you have a smaller
brand guide, don't worry. You can choose to make this maybe nine images
or even six images, and then scale it from there. So don't be afraid to play around with what
you're working with. There is lots of
mood boards here. Put some logos there, maybe some cover photos as well. Because there are
lots of covers. Put that there. So I'm actually going to
change and put this mood board there and then maybe put something or clean
in the middle. This. So I am liking the look of that. And then you can always change the color of
the background similar to how you did the
brand guide document. And then you can go
to this section here. And then now what I wanna do is then perhaps add a shadow. So I am going to go to effects
and click Drop Shadow, and you'll want
to click Preview. And then you can then
change the opacity to maybe 20% and then also maybe decrease the size to something smaller,
maybe one pixel. And then Offset. I'm going to change these to three to make it a
bit more subtle. So I'm liking the look of that. Let me see what that
looks like now. And now. I can then change
the design of it. If I, oops, if I want to move
things around and center, I can do so. I can group all of these
together so it makes it easy and then center
it within the page. Right-click align
to page center. Center. Alternatively, you
could even rotate it to get more of that artsy look, maybe expand it so that there are things going off the grid. And basically there you have it, then you just need
to go to Export again and then export
this as a JPEG. Click Save export. So then once it's
ready and once you have successfully exported it, you can then use this to upload onto B hand
struggle Instagram, and even upload it to this class project section after you finish
your class project, I just wanted to show
you how you can display your brand guide
after you complete it without just
exporting the PDF. But essentially, once
you go to your Finder, you will then be able to see for brand guide
overview here. And then this will be ready to upload or put
wherever you choose. So that is essentially how you export it and how
you can display your brand guide
and your work to prospective clients or
add to your portfolio. And I think it's always
good to have some sort of visual and overview of all of the design elements as they
come together in one place. So I hope that helps and I'll see you guys
in the next video.
9. Your Turn: Now it's time to take everything you've learned in this class and finally incorporate it into creating your own brand guide. For your class projects, you can choose one
of two options. The first option is to
create your own brand guide, for your own personal brand or for business you
aspire to create. Perhaps you can choose to
create a brand guide for your own design studio of vintage clothing boutique
or even a cozy coffee shop. The second option is to
design a brand guide with existing brand assets that you've created in the past. You can essentially
pull brand collateral from existing clients
or past clients. Or you can even pull from a different Skillshare
class or a school project. Once completed, the shorts upload your final
brand guide designs. It's the class project
section of this class. Then along with
your uploaded file, make sure you answer the
following questions. Number one is to make
sure you provide an introduction and overview of the brand guide design
that you've created. The secondary is more for fun, and I want you to explain
the part that you enjoyed most about creating
your own brand guide. I'm constantly reviewing
student's projects and I genuinely loved
giving feedback. So make sure you upload your
final designs for me to see. I can't wait to see all of your projects and see what
designs you come up with.
10. Thank You: Thank you for taking this
class and I hope you learn a lot about the entire brand
guided design process. If you enjoy taking this class, I'd love if he could
leave a review as I genuinely loved hearing
feedback from my students, if you'd like to stay up to date with all future classes that I published in relation to design
a branding or marketing. Make sure you give me a follow by hitting the Follow button. I love sharing my work and
behind the scenes look of my life as an entrepreneur
on Instagram, YouTube, and Pinterest to be sure to
give me a follow outside of Skillshare on one of these platforms at
usually for steel. Again, thanks so much for
being here and I can't wait to see all of the
designs that you create.
 Angelique Vestil, Web Design, Branding & Marketing Expert