Transcripts
1. Introduction: Hi, I'm usually with steel and welcome to my blogging for beginners course. If you're looking to launch your own blog on WordPress admin, this class is for you. I'll be teaching everything from how to get started with blogging, the benefits of blogging tip, picking your blog name to actually getting setup with WordPress with your web hosting and choosing your web hosting and also giving you a few options that you can choose from to actually make money online with your blog. I started my own travel blog in 2017 that has now become monetized, generates a consistent income every single month. I've also been able to land most of my freelance clients for my web design and marketing agency through my blog and do my own website. So I'm a big advocate for having your own brand on the internet, whether it's for sharing your passions or advertising your business. I think there is so much benefits to having your own blog online. When I started my blog, introduced me to the world of entrepreneurship and actually making money online. And I do not say this slightly, but it completely changed my life. So if you are looking to learn, uh, my entire process, the benefits of blogging or just learn a little bit more about what blogging and tails then definitely check out this class and I can't wait for you to get started.
2. Class Project Overview: For your class project, you will actually be going through the process of launching your own WordPress blog. So each lesson is broken down to that. By the end of this class, you will have your own WordPress website and blog up and running and launched. I will walk you through the entire process of actually setting up web hosting and then actually getting your own theme and website and blog designed. So through that entire process, I want you to play with all of the design elements that I talked about, all of the different marketing touch points I talk about and bring them altogether so that you actually have a tangible blog to launch and share with an audience online.
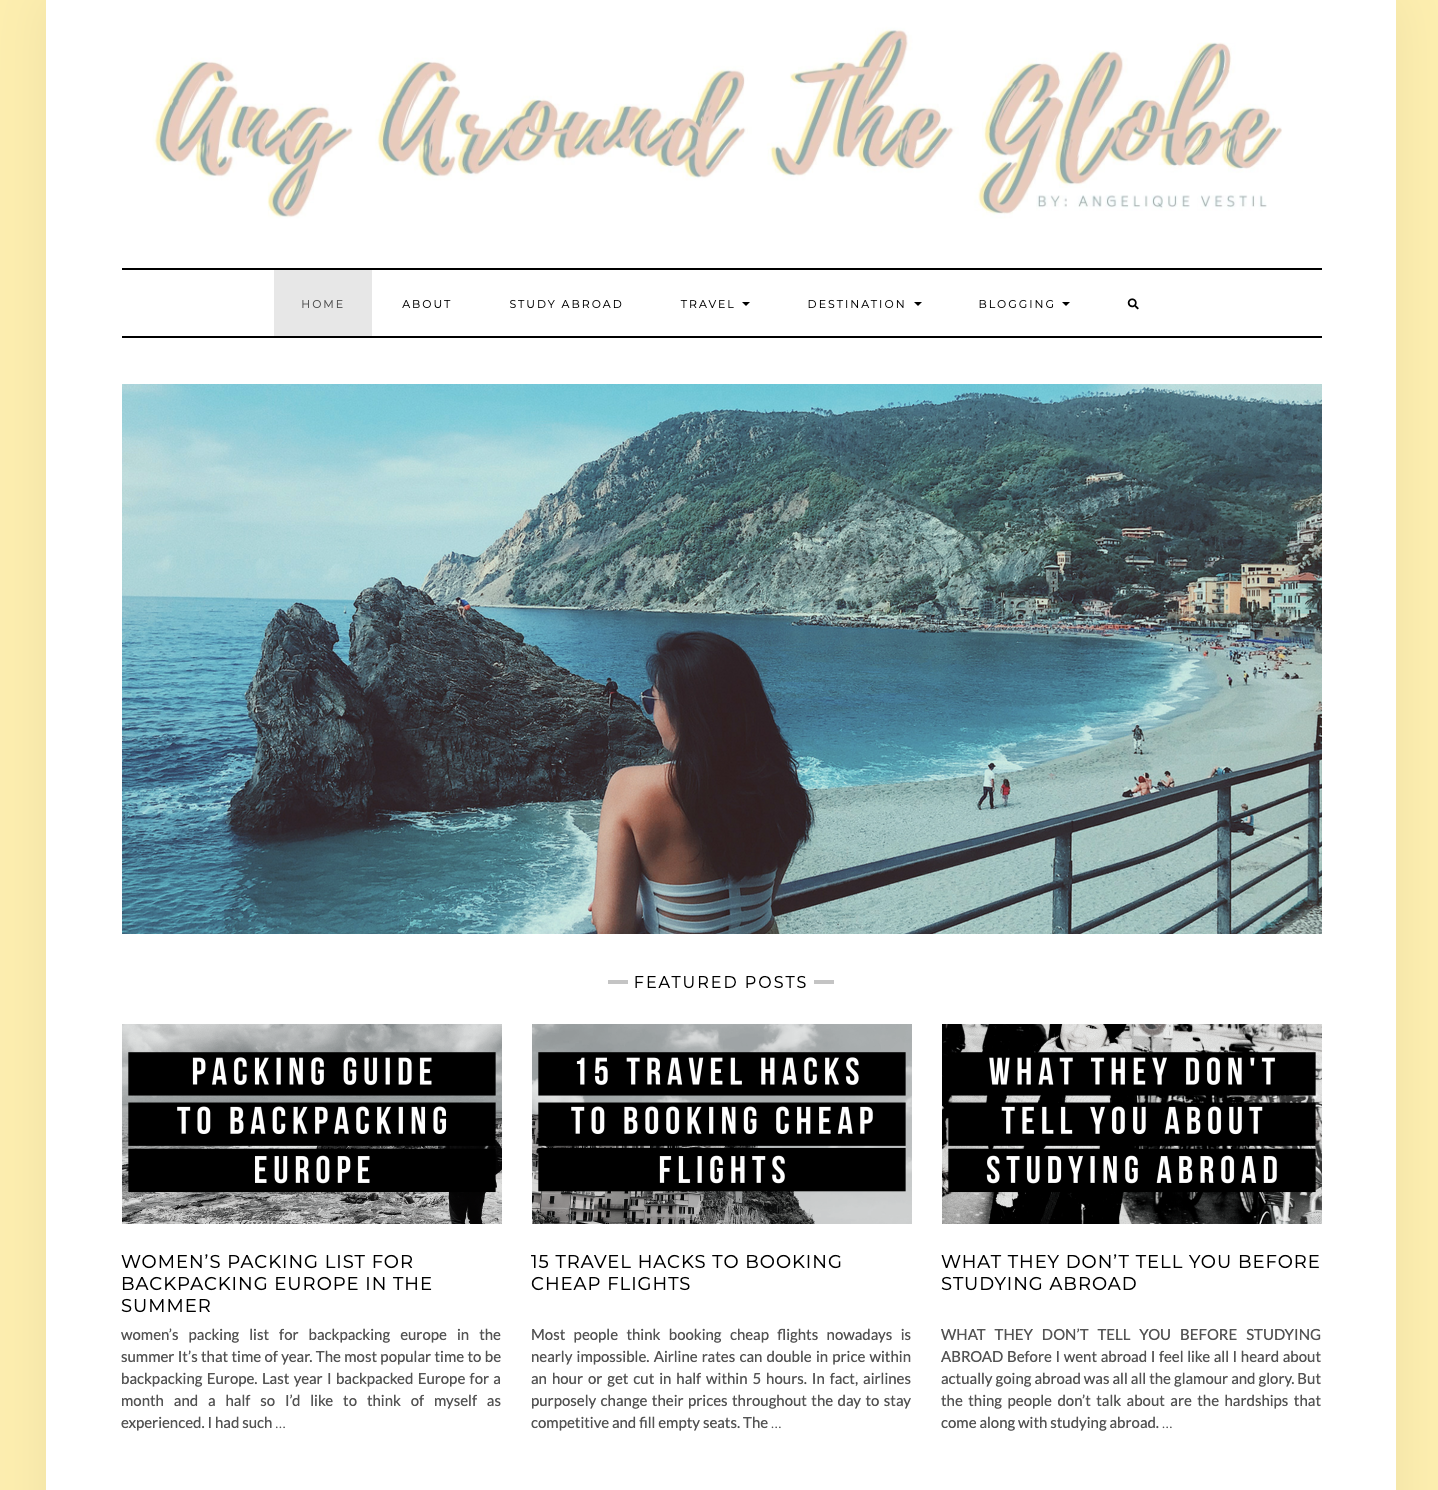
3. The Benefits of Starting a Blog: If you're here, you're probably trying to conceptualize this whole idea of what blocking is and what this whole industry kinda folds. And if you're here, you're probably trying to understand the benefits of starting a blog or a website and how it could kind of open up opportunities for your business, for your life, and all these different things that you might have not even considered before coming into this course. So I'm just gonna go over a few benefits of live blogging is kind of the way to go or at least a really great place to start off. Starting off, it's a great opportunity to build your own brand. And a brand is something that is so essential because it's ever evolving. It helps you kind of conceptualize your goal, an end goal with starting a blog, it helps you build trust, play around with design, has an opportunity to, to, for you to give value and build authority. And it helps you strategize your overall business plan without having too big of a business investments. So it helps you kind of build your identity, helps you kind of understand advertising and marketing that you want to help create with your brand. And that's one of the benefits of blogging. Another way is a really great way to express yourself and share your passions. I started my blogs because it was a reason for me to express and share my experiences, traveling and just sharing my experiences like something I'm really, really passionate about. So Andrew on the globe was the very first blog I started, and I started it before I went on a solo backpacking trip in Europe just because I wanted to have a place to jot down my memories or help people give tips because so many people were asking me for like backpacking trips. So being able to share information about something that I was super passionate about back in 2017 was something that I really enjoyed doing. So it's a really great way to share your passions. If you're super passionate about something, It's a great way to express yourself and trigger knowledge. And if you're passionate about it, people will listen like no doubt at all. People are interested in hearing what you say. And as long as you're able to get it in the hands and in front of the right people, then it's definitely a great way to share your knowledge in a certain area that you are super passionate about. Another thing is making the money. So this is why a lot of people come into the blogging industry in the first place. It's a really great way to monetize. Pretty much a blog is meant funnel people into your paid services, paid products, whatever it might be. You can make money with affiliate links, which is basically selling things for other people and making commission off that. So say you were someone to some Amazon T-Shirt or something that you really love and want to share that you can make, commission off every single purchase someone buys through your link. And these metrics just kinda show it all small businesses with blog generating a 126 percent more leaves. Interesting content is one of the top three reasons people follow brands on social media. 81% of US consumers trust advice and information from blogs because you're a real person and other people and people reading this are also real people. So if it's coming from persons, person, it's a bit more trusting than coming from like a big brand corporation because it seems like a lot of noise and you don't really know what's going on on behind all these different corporations. So a blogging from a person, a lot more people trusted advice from that. 97 percent of companies that blog have 97 percent more inbound links. So a blog is a great way to funnel people with inner website if you get to a point that you're constantly creating content and it's all about consistency. So pretty much your blog could pretty much funnel people back and forth with your website, with your blog. Within all these different resources that can make and generate money. 67 percent of B2B, which is business to business marketers, use bugs to generate 67 percent more leaves. 434 percent. Websites with bugs have 434 percent more index pages. So this is ranking on Google, ranking on all these different search engines. Pinterest, Bing, whatever you want to use, yeah, helps you get more index pages in these different search engines because surgeons and engines are always crawling websites to see what information is out there and how can the people that are searching for specific terms get the most amount of value by creating a ranking. Sam, and websites with blogs have 97 percent more index links. So it just goes to show that there is a lot of opportunity with blogging to make money. And it's kind of an open opportunity to kind of start thinking about ways to make money online. The next thing is. It's a great way to gain brand exposure. Brand awareness is probably the most important thing for a brand. It doesn't matter if you have this amazing brand and no one knows about it, right? You need to build awareness around your brand and get as much exposure as you can so that people, your ideal clients, your ideal readers, start seeing your brand on such a great way to gain exposure and building a blog and creating content is a really great way to go about that. It's also a good place to keep track of things. So memories to progress, to growth, to photos, to experiences. It doesn't matter if you want to make a blog just to make money. But when I first started my travel blog, it was all about tracking my memories, my experiences, seeing the growth I was having for the different trips I was going on and really tracking photos. It's kind of like a diary of your life. And you could, if you go back to some of my first post, you really see the growth and how much I've evolved since then. When I first started my travel blog, I was 18 or 19 and just wanted to see the world I had never traveled by myself. I was in such a place where I just didn't know what opportunities the world existed. And now fast-forward a few years later, I'm living in Thailand. I have my own business. I'm taking on clients and all these different things just because I was exposed to all these different things. So it's a really great way to kind of track rows, keep track of memories, hold photos, and write about experiences and track progress and to share what you're going through. A lot of people might resonate with you, and there's a lot of people that go through similar things. So it's a really great way to kind of just keep track of things and it's always so fun for me to go back to old blog posts and things that I've learned and how much growth I've had proof of content. So if you are a writer and you want to maybe one day become a published author. Having a blog to share your writing is a really great way to build credibility. Even if you're not a writer, this is just an example. But writers who consistently share their writing often get more writing gig. So this is just an example. I have been in the blogging industry since around 2017 because of those bogs. It got me my internships, my copywriting gigs with new clients, content writing gigs. Because I had experienced writing so many blog posts in the past and researching what goes into creating good content, what is good copywriting? So it kind of goes to show that learning how to write online is a great way to open up out all these opportunities that you may not know existed. Every single interview that I had with my internship and jobs, I talked about my blog and writing and sharing content and social media. And a lot of people really like and trust the fact that, oh, this person savvy, they write a lot, they'll be able to see your writing. Who knows, maybe one day you'll become a published author from it. And it also helps folks credibility. So a professional writer is an amateur, he didn't quit. Everyone starts off at the very beginning with no knowledge about the space. The only way you could learn is if you continue to put in the word, continue to learn. And every time and every single posts or content or article that you write, your growing with that and your strategy grows with that. And so don't be intimidated if you've never written anything in your life. A blog is a great way to kind of SAR as an amateur and broke her pro or whatever you wanna do. Every single blog is different. And if you can make it your own unique style, like I know there's so many things like a blog with no words. It's all photos. There's a lot of people with just like stories that they've written. Personal stories, poems. If you want to share knowledge about a particular thing like traveling or fitness, or just life, advice. People will listen and so figure out what type of content you want to create and that's a really great place to start. And yeah, those are just a few benefits of logging. And I'll see you guys in the next video.
4. How to Determine Your Niche: So how to determine your needs? If you don't know how to, Nietzsche's don't worry, I'll go into depth about it in this video. But determining your niche is probably one of the most important things you need to do before you jump into building a blog. This will help with creating your blood name, really consolidating on the type of people you want to share your knowledge with, the type of person you could give value to. And so it's really important that you take this module seriously because it is probably the most crucial. And the more specific you are niche you want to target, the better because it allows you to shutter guys your marketing strategy, your advertising Shen, who, your branding strategy. And the more specific you are, the person that would be reading your blog, the better. So just a little bit of a nice breakdown. What is a niche market? So a niche market is a subset of the market on which a specific product is focused. It defines the product features aimed at satisfying specific market needs, price range, production quality, and demographics you are intending to target. So I'm just going to give a little bit of some examples of the brands and blogs that I've created in the past. So the phenyl Passion Project is my podcasts and blog, and it's all about empowering women to chase after their passions and turn them into reality. And chasing those goals and just really empowering women to not feel constrained by societal norms and what people expect from them. So everything that female Passion Projects related was narrowed in on Women. Specific market was focused on women trying to chase ratings and 10 passions and still living. And so knowing that was the market that I wanted to talk to you before even creating anything related to that brand was so important because it helps me narrowly on the type of value I would be able to give to this specific demographic. Similarly with my Andrew around the globe plug, it was started when I was growing up my first backpacking trip. I continued to grow it as I was studying abroad. I continue to write on it when I first left for Asia and moved here. So it was all experienced, driven and talking to a specific person who might be traveling for the first time. Or once you know about the certain experience they should expect when traveling to new country. And so narrowing in on the type of person in a niche, one target is super critical. And in the next following slides, I'll a couple of questions that you should definitely journal on and answer and takes her and say because this is so, so, so, so, so important and I can't stress that enough. So I'm just going to jump into a few questions that you can start asking yourself. Who's really, there's three parts that you should really kind of think of what a niche market includes. And this is just a few of them. So first, identify your interests and passions. So what do you like to do in your free time? What are you passionate about? What can you do for hours on end, and never get tired of what things in the world interests you. What can you talk about without feeling drained? Pause this video and take a moment to answer these questions. So seriously, take these questions seriously, writing down anything you are interested in, anything you're passionate about, anything you're knowledgeable about. This could arrange from so many different things. It really is based on what gives you energy to wake up in the morning. Is it going out for a run? Is traveling the world? Is it swimming laps in a full? Drawing painting is at writing. Literally think of anything that you are passionate about, sharing knowledge, educating people, inspiring people. Any of that can fit into the whole interests and passion bucket. And this is really important. And just because you're interested and passionate about it doesn't necessarily mean that you will have to be good at it and vice versa. So if you just like, really like music, but you're not good at playing an instrument. That's still something that you are passionate about and interested in. And if just because you're good at something. So if you're good at writing doesn't mean you're passionate about writing. It all goes, kinda all coincides in one another. And the more you consolidate the interests and passions you are interested in, the better. Pause this video, take a moment to answer these questions the best of your ability. The second thing you want to do is figure out what you're good at. And like I said before, just because you are passionate and interested in it doesn't mean you're good at it. And just because you're good at it doesn't mean you're passionate and interested in it. So here are just a few questions to ask yourself. What things are you naturally good at? Are you good at communicating with people? Are you good at inspiring people? Are you good at organizing your life and Planning Your Gays? Are you good at creating systems about how things function and how they connect? What are you naturally good at innately? You just wake up doing it. Or you see for queen, are you just very spontaneous and are really good at procrastinating like anything at all. Think about what you're good at and start from there. What are your strengths and weaknesses? Really be so specific with this. The more, you know, the both your strengths and weaknesses, the more it'll help you consolidate what you're good. So really write down what you're good at, what you're bad at it. And yeah, it'll just really, it's so helpful knowing your strengths and weaknesses. And like I said before, you can be passionate and interested in something and be good at it at the same time. So if you are just really good at fitness and super passionate about fitness like that's really great if you're super passionate about flying and you're really good at drawing, then maybe becoming a designer, interior designer, graphic designer, web designer, maybe that is in your future. You know, there are so many different possibilities with just things you're passionate about and things you're good at. And it's so important to hone in on those to figure out something like your niche. And just because your passion about it doesn't mean you should sell it as a surface. A lot of people like to separate what they're passionate about from what their job is. You know, I feel like a lot of people sometimes think because they're passionate about it, okay, Maybe I should charge for the service, but sometimes putting a price on something that you're passionate about, it takes the fun out of it. So don't think because you're passionate about it and you're good at it, that you should sell it as a Service. I'm from, it's really important that you understand what you value and just set these boundaries of what you can take at any given moment. And sometimes it's just trial and error. Sometimes you think you're super passionate and super good at something. And then later down the road, you just saw like, Nope, this isn't for me anymore. I need to pivot and change what I'm doing. And that is a okay, So, yeah, think about it. Have a few moments to write down what you are good at and pause this video and take a moment to answer these questions before moving on to the next slide. The third thing is, what problems can you help solve? Now combine your interests and passions with flight, you're good. Is there a problem that needs solving? What do people need more? What do you think the world needs more of? How can you help society? These are all things and questions to help you figure out what problems can you help solve? And just remember, your y will always be bigger than me. So if you are super passionate about helping people, changing the world, inspiring people, don't know how to do that yet. That is totally fine. But if you know why you want to do those things, maybe it's you want to change someone's life. Maybe you want to inspire someone who was somewhere just in a really dark place and you want to inspire them to love themselves more and appreciate themselves more. That is far bigger than how you're going to do that. So if you understand the why behind, why you are going into this and why you are creating this blog in the first place and setting the intention behind this entire thing. The how will become easier the further you go. And so I want you to really think about what problems can you solve? How can you help society? What do you want the world to look more like? Do you want there to be more and more happiness, more gratitude, more knowledge being shared between each other. Do you want to you have a community of people are just so people are doing more connected, more than ever at this point of their life. Think about feet wide and the y will always be bigger than the house. So pause this video, take a moment to answer these questions, and I'll see you guys in the next slide. So now that you have it all, there are, like I said, three steps. Your passions and interests, plus your, what you're good at, plus the problem you can help solve equals your niche. And so putting these together is something that was really good to do at the beginning before I even jumping into a blog and what it consists of. So passions and interests, I was super passionate and interested in traveling and just monitor right about it. What I was good at. I'm really good organizing and sharing my knowledge. And so I was creating these travel guides and that's already creating combining my passions and what I'm good. So travel, communication and then the problem that I was able to help solve. So giving people information about the chips prior, just building trust and hearing it from a person to person, It's really, really good. So travel, communication first, organization and helping people with their first trip created my needs of people. Helping people that are new to traveling and experiencing the world in sharing my experience with The trips I've gone on, my experience studying abroad and all these different things. And so that's how I came across my niche. Answering those questions kind of take some time to figure out how those things can turn that into a niche. So now that you know your niche, it's really important to start finding people blogging in that space and in that industry. And this is so important because it helps you trying to conceptualize your whole blog idea before going full force jumping into an idea before you know if it's good or not. So researching before actually creating your blog is so important because one you want to see the type of content that already exists out there. You want to see whether or not you can see yourself in the shoes of some of the people in that space already. And just because you might think it's saturated, like for example, when I went into the travel blogging industry, I was like, there's no way anyone We're going to read this. There are so many travel blogs out there that are way better than mine. You know, it's super intimidating. Seeing these people live in blogging for years and feeling intimidated by it. But it's all the more reason to go into it because, you know, people want to connect with more people. You know, there's more different age brackets. If you're younger, you're older. Like if you specific with a niche you want to target the better. And so fine people blogging in that space, figure out ways you can kind of give more value. Means you can kind of compete in that industry and really see the type of things that people are saying. And anything regarding a niche market that you're targeting, and then see how you provide value. And I am 100% believer that there's space for everybody in the online world, everything. So when are connected that more and more people are actually connecting with each other because of all these different experiences that might be same between people. And so really just figure out a way to connect to people. I think that is the most important thing about a Nietzsche's. The more authentic you are with going into what you want to write about, what you want to blog about the entire industry you want to attract and why the better and finding people blogging in that space is just to help Curie ideas by no means am I saying completely rip their entire website and take it for your own business model. There is no way you should do that. One that's copyrighted pretty much. And the more you really are authentic with what you want, what you want to share, the better. And then the next thing is once you do all that research when she break down your needs. Once you do the market research is to create a client avatar. So this is just a mockup example of a customer avatar worksheet. Find a picture on Google and see if this is a type of person. I can help you give them a name and age and gender, their status thing, or have children or not, where they're located. Maybe their favorite quo, occupation, job title, income level of education, some goals and values. They might have some challenges and pain points. They might have, um, any source of information that you might think they like to do. So blogs, they might read books, they might read magazines, different gurus or mentors they might like. Possible objections are why they wouldn't buy. So you can kind of puree everything around your clients. And this is so important. Take some time to really dive deep into creating client avatar like this. The more time you spend focusing on the type of person you want to attract, the better. And this is so important to say, take the most time here. And before jumping into creating a blog name and signing up your domain, focus on the type of customer you want to help and the type of customer that would find value in reading. And so, yes, that is all I have for now. Take this module seriously from beginning to end. Do not move on to the next module until you complete all these questions. Really create a map of all the things you want to share. And that is kind of where I'll leave it up. And I'll see you guys in the next module.
5. How to Write a Kickass Blog Name: Now that you've finished and broke down your niche, now is the fun part is how to write a kick ass and blockName. Blog names are so fun to create because at one it just kind of helps you visualize what the future might hold for you. And finding the perfect name for everything are all about is always so satisfying because it kind of gives you a really felt like, oh wow, I can actually do this. It kind of brings it into your reality. And I think that is the most important thing about a blog. A website name is that H should inspire the heck out of you to make change, to share your values, to share your passions. And that is the most important thing and the most exciting thing because, oh my God, every time I finally found the perfect Wagner, it helps me to slide, relax, but also feel excited that, Oh my God, this could actually happen. I can make a difference. I can see all these different things. So this is the fun part. So before diving into creating your blog name, here are just a few things you need to know. This is going to be hard. So don't rush it. Like do not rush it. Because if you rush it, then What's the point? You know, you're going into this whole blogging, creating a website with intention and mess up the whole thing needs about intentionality. So if you rush it, it won't end up being that if you rush any of these exercises that I'm going through out this course, then what's the point? You know, make sure you're setting intention behind everything you do. When I first created the female passion projects, which was my my blogs and when my podcasts, I meditated on that for like I journaled on so many different broad names and it's always funny, like if I was to go in my journal and find that exact time that I kind of wrote out different ideas. There are so many things that are like close. And I was like, I'm so close to finding the perfect name, it just wasn't perfect. But when you hit the perfect line, you're like, Holy shit, this could be my reality and I can make a difference, make a change. I could give value to the world. And that is what you should feel when you find the perfect love me. Like you shouldn't feel like half empty. Now you should feel a 100 percent full and satisfied with the exact blog name. That is perfect for everything you are doing. Picking your blog name is like naming a child that shouldn't be rash. It should be set with intention. Like think of your blog as your baby, even though that might sound a little extreme, because it's not an actual living being enough. I think of every single brand that I've created for myself as a child because, you know, it's a baby when you first start. And then the more you nurture it, the more it grows and more you grow. And it's the same thing with a blog. We all start off at somewhere where we're like loss and don't really know what's going on, but really set intention behind it. That's the number one thing that I want to spend the rest of this course to just be all about intentionality because it's so important and you can totally feel the authenticity behind a brand that's created with intention. So take it seriously and, and don't rush. You'll want something short, sweet. Remember Oba also catchy. That's kind of like logged name, website name, brand name, just in general, you don't want some big super, super complicated that everyone's like, when you say it out loud, you want it to be, remember, double touch, roll off the tongue, and then it should embody overall as a person. And the main question would be, what someone be able to write out your blog if you set it out. There are so many people that think of all these names and then you're like, if you say it out loud, like hyphen Around hyphen, hyphen globe, hyphen.com, you know, ever like wait, what? So it should be remembered. It should just feel like the female passion project rolls off the tongue. Everyone knows exactly the words that you're saying without you having to spell it, you know? And those are just a few examples. So make sure that it can be written if he were to say it out loud. And this is a good test to run through friends and family and be like, Hey, can you write this out what I'm saying? And that's just a good tests just in general. But here are some ideas, if you are completely so you don't know where to even start with a blog name, what? To even think about journaling things out. So, so, so, so, so powerful. And I cannot stress that enough. Journaling and meditating on things really, really helps me conceptualize everything I wanted to do, everything I wanted to create with every single brand that I felt about, not with just my own bread, with clients brand because everything should be set with intention, as I said before. Yes, so here are just some ideas to find will help you get your creative juices flowing before jumping completely into writing your kick ass lump name. A good place to start is to write out adjectives that describe you. So just some are like amazing, awesome, helpful, and insightful, sustainable. Once in a lifetime, understanding all of these adjectives need to describe in this isn't just, this doesn't have to be like your name. This is just to kind of get those creative juices flowing. The more you write down adjectives and more you can kind of create Connie names and brand names, you know, so just write down any adjective that might describe. You, might describe something you're passionate about. And this is just like I said, to get those creative juices flowing. Then next thing you should do is think about your favorite hobbies. And so this kind of goes hand in hand. If you've already know what exactly she want to be targeting, then you might be able to skip this step. But if you like running, if you like soccer, if you like walking your dog, if you like nature, if you like reading, write down all of your favorite hobbies, see if this might relate to a blog and website name. Depending on the R, This will all have a little different. But like I said, is just to get some ideas flowing through you and thinking about what you're good at, what your hobbies are. Adjectives that describe me, that's a really good place to start. In general. The next thing is to use your name or your nickname. So Andrew around the globe is my travel blog, is just a nickname that I had growing up. And it just kinda stuck. I have a really, really long name. And so a lot of times when I say Julie, a lot of people are like, What, How do I spell that? So when I created the Android, the globe, I wanted to make sure that it was something that I said it out loud. People knew exactly what's right. And here, drama globe just kinda stuck for a really long time and it's so bad. So this is just an example of me using my nickname, my actual website saying jQuery.com that she's my name. You know, it it could be anything you want. This is again, just examples of possibly writing blog names. The next thing is take info from your favorite books and movies. So here are just some books that I loved. If there is a book out there that just like you embody that book or that movie to think of some things that happened in that movie, some words that were used in that movie. And maybe use it as ideas to spark potential blogging. You know, it's never a bad idea to get inspiration from people who have a living writing books, writing movies. They are really good with literature and writing and English and stuff. And so if you find something in there that you're like, yes, this is it. Then you might use it as a bug name, might just some random word in this book, you know, but you never know, take inspiration from pre-written things in your niche, Google stuff that are like in a thesaurus or might relate. And yet I could also be really good luck in CFO. Use a play on words. So this example is a little extreme. I suggest using a tongue twister, but I wanted to just point out alliteration, which is the same letter starting words As always, good. So Peter Piper and you know, that would just be a good brand name because p and p, the female passion project, that's PNP as well. And I'm not using this just because to P, but anything that starts with the same consonant is always been a kind of rolls off the tongue. People really like that, like adventurous. Like that would be maybe good. Not for me, but like just to give you guys some examples, like bumble bee, that's not a good example, but you get the point. And so this is just an example of Peter Piper pizza. Not realistic. Tbp is really good. It's good reframing, creating loaded logos. It's just easy to remember because you're like, Oh, those words went together really nicely. So if you can use a plan words and maybe use some alliteration that is really, really good as well. And keep it short and sweet unless it works. So if you have the perfect name, don't completely discard it from the list of options, especially if you think it's too long. You know, if it's perfect and you think it's perfect and go for it. But the key is to keep it short and sweet. Here are just a few examples. The phenyl crash projects. I've mentioned this before, It's my podcasts, blog. And that keyboard maybe argue that that's like pushing blame. Because when you type it out it's quite long. Maybe passion projects would be good. You know, fan of mentors, that's another brands of that. Mike, my brother and I and our full team work with is another really short and sweet name, streets to the point where family. It also is an acronym for Facebook ads machine and mentors. It's just kinda rolls off the tongue. Mike, the seal name, pretty short, pretty sweet. Just rolls off the tongue again. And then mindset breakthroughs. This is one of our team members. Luis is podcasts as well and mindset breakthroughs. That name itself is like amazing. And so remember trouble when you say it out loud and people know exactly what you're saying when you say it out loud. And so this is just a few examples of some names that are entire team here has written and I just wanted to show these as examples. Just so you kind of get some inspiration for what you're doing. And I've said this before, but I'll say it again. It should be easy to say out loud. So if you can't say easy out loud, then don't use it as your blog name. It's easy to spell, easy to say words, avoid numbers and hyphens. It's really complicated when someone's like, Oh, you have a cool blog, what's it called? And you speak out loud like Typhon or on the hyphen book for number 21.com. Like, you know, the tides out looks insane. We complicated and saying that everyone's like what the hell like, why are you using all these hyphens on what does the number? Whereas like if Michael Jordan were to create a website and just named it like MJ 23, like that would make sense because that's a that's a number that she's associated with Michael Jordan. Unless you have a number associated to you, I wouldn't recommend using numbers. It gets a little complicated. I mean, I think just texts straight through is always really good. And remember, ears hear differently than a phrase, looks like on paper. And last but not least, leave room to grow. You know, you never want to have a blog that constrains everything you're all about. You should be able to grow into it if you're like in college and then you're just talking about college budget. I mean, maybe be a good niche, but once you're out of college, you kind of outgrow that brand name. So an example for me, it was like Andrew around the globe started at something that I just wanted to create for people who are just need to traveling. And then it eventually turned into sharing how I make money online and how I make money while traveling, you know, and it wasn't contributing because the name in itself lives like my why is I want to travel. I love to see the world and I was able to grow with that from the first trip I made, him actually moving across the world to Asia and just growing with it. So it should be to give me room to grow. And you shouldn't feel constrained and restricted by the name. Always think about how you could grow with the brand if you're not there yet, how will you get there? And those are just some really amazing things to think about. And last but not least, all good things take time. The patient patience is a virtue and seriously, when you're writing your blog, just be patient. You do not want to rush on thing that is linked, naming a baby at all. And so if you really sleep on it, if you really think about it like on a law and get creative and just get inspiration from things. Don't rush it the patient and it will come. And it might take a few days and months. Okay, but once you find the perfect font name, it's like, Oh my God, thank God, I was waiting for this all along the way is totally worth it. I've slept on so many names and then like sun, suddenly I'm like, oh my God, yes, that's the one, you know. And it's all a work in progress. So don't rush it. The patient or the things that time. And there you have it. I'll see you guys in the next video. Once you have your blog name, that's when you can move on to the next module because that is all about setting up your domain names and angular web hosting, getting it all configured and figured out. Yeah, I'll see you guys in the next video.
6. An Intro to Web Hosting: So setting up web hosting and getting a domain is good. Web hosting worth the investment? 110%, yes, if you're super serious, if you made it this far, It's just telling me that you are so serious about making this blog work for you, and that is all that matters. Web hosting? Yes, when a 110% a good investment. So why is web hosting important? So customer service is a lifesaver. If you have a good web cluster, they'll save year on, on things. If you find that there are good ones with good customer service team 24 hours for, you never know when something technical technically will go wrong with your website, with your blog, and you're just having customer service available to you is a lifesaver. It on a sunny trust me, I've used them so many times. It gives you total control over your website. Free web hosts exist, but you do not own your website, the web host under website if you are for free. So if you buy web hosting and invest in web hosting, then it gives you total control over anything you wanna do with your website could monetize, you can run ads. But sometimes with web hosts, they're like running their own ads and they just have the ability to shut it off. It's a one to it. It just doesn't make sense. And if you're thinking, Okay, there's free web host, Here's why the heck should I pay for web hosting? And yes, free web hosting exist for free web host is I guess it before it restrict your ability to customize and monetize. You cannot have a unique domain name. So if I was like Angelica was field dot tumblr.com or angry Basildon, Weebly.com. It kind of takes away that trusts, you know, it's like less trustworthy when it's not just a.com. Like I have Angie for steel.com. It's not as friendly as something that's just short and sweet. And if you have a good dot v.com, dot Wix.com, dot squarespace.com, dot wordpress.com. It kind of gets like a little confusing because our in-flight was like, am I on Tumblr, am I on? We're website with what? Like it. Really, seriously, Kant's confusing. And it looks way less professional. And so if you want to create a unique domain name, then you'll need to invest in web hosting and it totally pays off. In the end, 100% free web hosting design elements are very, very restricted. There's only so much you can do on a website. I think the more you invest in yourself, the Marne bus, you invest in your brand with better. Now I'm not going to suggest something that's like insanely expensive because that just doesn't make sense. Obviously, you're serving off and you want to minimize cost as much as you can. So this is why I suggest we host. I've been using Bluehost for ever and I can tell you firsthand that it is so amazing, honestly. So Bluehost makes it extremely easy to create a WordPress blog. If you are in tech savvy, bluehost has tech support like there have been so many times where things have gone wrong with my website just because I'm trying to put it in random code that I found on the Internet. And then suddenly it's broken because one, I'm not a coder and I'm not that tech savvy. So bluehost has amazing tech support. They can recover websites if it's honestly, yeah, I've had the best experience. Bluehost tech support and 24 hours come out like, that's amazing. You get a free blog domain. And so if you invest in Bluehost web hosting, you could just get a domain straight from their hosting services is anywhere from ten to 20 to $30. And giving it for free with two humps. Like it's so good and it allows you to customize your bug domain. It won't be like a dot Bluehost.com because those are just some Bluehost. It'll just be your blog name.com, and that is what you want to create. It also offers super cheap prices and a super affordable. In the next module, I'll go over creating and setting it up. And so don't worry, I'll fully go into depth of explaining that. And I'll just make a mock sample for you guys essentially. And it starts as low as three, 95 per month. So if you are serious about this is really, really cheap. You know, that's like a cup of coffee for a month. And so it's certainly worth it and I recommend looking into it. It's really, really amazing. And your bug will be self-hosted, which means you can actually monetize your blog. There are a lot of times with web hosting that you cannot monetize your bog and they want to control everything you're doing. But if it's self-hosted, it means you could make money on your bar and if you wanted you that, you don't have to do that. But if you want to eventually turn it into the side income, the better. And WordPress through Bluehost is free and it works. Wordpress.com and wordpress.org are two different things. But it's completely free to sign up. And it's totally, totally worth it.
7. How to Get a Domain: So now this module is going to be a tutorial of how to sit up your Bluehost, get everything checked out and sort it out and everything regarding that. So what will this module will include? You're probably wondering what this figure is, but I'll explain in a second. So this module will include registering a blog name as a domain, going through hosting packages, linking domain and hosting and getting everything situated and set up. So pretty much the way I will show you this is actually, I am going to create a blog for my dad the other day. He called us, which is my family and I because we have weekly and daily family FaceTime calls. And he was just like, I'm going to say, YouTube channel. And it's funny because I'm going to show you in this video just to the type of personality he adds its seizure. So kindhearted and loving, but also super fun. And I'm just going to go through creating a blog for him so he could just kind of share his lifestyle and stuff with the world. Because honestly, there's so many times where I'm like, Oh my God, Mode tab can go viral. And I think he's starting to believe it. So you started a YouTube channel, a blog, and I'm just going to create a blog for my dad. And it'll be the same process of setting up a blog for yourself just as CPK. This is my brother and dad doing that dance in a hotel room when we're all traveling together. And it's just so funny. So exotic dancing. So it's like honestly like so fun. I'm really excited to create this fog for me. Doubted, because honestly, he's just hilarious and I can't wait for him to share his life. The ideas he just wants He's super into longevity. Increasing your lifespan and how to say young, as long as possible. And so having a cigarette, I think is really, really exciting. So I'm going to just walk you through how to get that all set up and good to go from your end. So this is a Bluehost homepage and below I'll include a link of how to get to this page and to get this 395 a month deal. So I'm just going to walk you through setting up we'll hubs. And if you're here, then I salute you because it shows you're taking this seriously. And I so appreciate it because, you know, this is going to open up in a lot of opportunities no matter what you decide to do with your blog and your website, there is a lot of different ways to go about this. So just click on the link below and we could go ahead and get started. So quickly, get started. I'm just going to start from the beginning and kind of go from there and build this website with you guys. So if you want to split your screen, do like half watching this video have going through the tutorial, then the better. And it'll just make it easier. So you can just kind of follow my directions. So these are the passages will host. There's a lot, there's basic plus Choice class Pro. But when you're starting off, it's really the only thing you need is basic. And maybe down the road you'll want to expand. You know, but basic is just like all you really need when you're shutting off. So I'm just going to go ahead and click Set. And you could either create a new domain or use a domain. So if you have like a domain already set up with I go daddy or something like that. You could use this link. I'm going to walk you through creating a new domain in Bluehost. So pretty much like I said, I'm making a website for my dad because he just wants to share his lifestyle and plan look like how to increase your lifespan with the world. And one, I think he's going to go viral. So pretty much longevity boss, and this is not capitalized. Longevity boss is the name he wants to go and just kinda rolls of the time. He's all about longevity, increasing your lifespan. You want house 100. And honestly, I'm a so here for it. So just serve show. You, just click Next. And essentially it will search through its database and see if it's available. So lunge every boss is available. And it's amazing. So I'm just going to put his name here and then just fill this out. I'm going to pause this just for security reasons, but fill this all out. Okay, So now that you've put in all their contact information, if you scroll down, just go to package information. Now there are a couple of different options. The best pricing is if you sign up for 36 months upfront, and it's 395 per month. If you sign up. It depends on what you foresee for the future of your blog, on your website. But really it does make a difference when you buy for the long-term because e-mail a $1.2 dollars really does our long-term. So 12 months, $71, 24 months, a $118, and 36 months is a $142 totally worth it. And it helps you in pursuit like secure and all that stuff. And then scroll down to Package and extras. And so these are the things that are already. You don't really need code broad-based, and you don't really need sight loss, security essential, pretty much the only thing you will be domain privacy protection. This will just make sure your site is secured and the HTTPS, it makes it secure and more trustworthy. So this is really, really important to have and it's only $0.$11 per year. So it's literally just a few cups of coffee. And then enter your payment information and then click, I have agreed red terms of service and then could submit all causes video. I'll enter my credit card number and everything else. And I'll see you guys in the next step. So now that you've had some purchase Bluehost web hosting, and I just want to congratulate you because this is the first set to so many opportunities that your bug folds for you. And so now the next step is just creating a Bluehost account. So click Create Account. And then in the next video, I'll show you how to create an account.
8. Setting up Web Hosting: Now that you've clicked Create Account now you could create a password and then fully create your Bluehost account. Now, the best way to do this actually is if you go to the email that you've signed up with, verify any emails that you need to do. So there will just be a ton of verification, not a ton like two or three benefit for emails so that you can verify your e-mail and then they could do authenticate you as a human being and not a robot. You know how all of those capture things. Make sure there are no Rob robots. So go to your email, verify everything, create your password, and then it'll take you to a dashboard and I'll show you the glucose dashboard. But pretty much that's all you have to do to get web hosting and your domain is situated. And yeah, that's all you really need to know to get started. So one of the verification emails you'll get will actually lead you to this website once you verify it. So they'll say You success of a verified or who is contact information. So to get started with progress, pretty simple. Just clicked here on my sites and then it will lead you to your Bluehost login. So same thing from before. You'll put in the same e-mail and go ahead and get started. So I'll go ahead and do that. Now that are being logged in, it will take you to the Bluehost dashboard, which will help you create a website. So pretty much what kind of site are you creating? A blog on links or business professional. I'm just going put blood. What type is it for my dad, I'm just going to be lifestyle. And then who are you creating it for you myself, unless your cranium for clients, then just continue with fats. And then what do you want to name your site? So I'm just going to stick to the brand that my deadlines to create. What you want to name your site longevity boss. And then what's your site tagline? The journey to living past 100 years old? My dad is all about 170, like I've said. Yeah. Are you comfortable with creating websites and this will vary depending on your light tech background. Typically is I've gone through this so many times, printing it out for myself and for clients, I would click vary, but I would just do a little and then and see what would happen. Also, Bluehost, like I said, has amazing sights and like customer service support. So if you want help and need them to design your website, then they're ready to help. And it's so, so, so hopeful. So the next thing is continued to be inflection and things like that and so much fun. So I'll go ahead and explain that in a second.
9. Getting Started With Wordpress: Next I'll just press Continue to the inflection and this is the fun part. There's so many themes that you can use and use as just like an example of what you want your website to look like. There are all these different websites that you can go through. Now, this depends on what you want to create there so many different things. Take some time to think about this, but also know that just because you click it now doesn't mean it's like finalized. You could change this at any point while you create your blog. And yet It's really, really amazing. So I'm just going to look through a few and see what exists already. Maybe I'll click log. Let's see. Let's see. I really like this one, I think so I'm just going to click this. And then I've actually never uses theme, so I'm just going to go ahead and click on one. And then all of the thieves are pretty much similar. And then picking the theme will actually install WordPress for you. And so it'll set up layers of security. It will end our class. It's pretty much really shooting for her forward. We host does a lot of the heavy lifting to turn your website into something that's tangible and easy to set up. So once you find the theme that you want, click in it, and then it will be installed onto your website. And so now that works here, you'll see that this is just a temporary domain because your domain is so registering, this will upgrade automatically in the next day or two you in the next few days, once your website's ready to launch, then that's when this will upgrade. And so what you'll want to do is actually click on my site and then click log into WordPress. And this will take you directly to WordPress. And this is how you should plug in. You could either go through who has sat farm. You could do a bunch of different things, save it in your bookmarks. This will take you to the actual WordPress dashboard, and it is a pretty straightforward, I'll spend a couple of videos explaining the dashboard and going into that and designing it. But just a brief overview. This is what your WordPress dashboard looks like.
10. An Overview of Your Wordpress Dashboard: So this is just going to be a quick overview of your WordPress dashboard, different tabs, what they all mean, what they all do. In the next few videos, I'll kind of go more than that sun. What specific things you can do with WordPress within the certain towns. But from a general perspective, this is just an overall view of your dashboard. So pretty much this is your homepage dashboard, anything that you end up connecting, whether that's plugins or opticians or anything along that nature that will be shown in here. Honestly, I don't really look at this stuff. The main places that I look are here. This is shot pack. Once you get it all set up and just click Activate pretty much it will show your site sat. Since I just created this WordPress website, there are 0's stats. But later down the road, this is where you would be able to see anything along how many views you're getting, how many link clicks where your audience is coming from. And that's where this will all be housed. Here on this post tab. This houses all your blog posts. Obviously, I don't have any blog posts. I created this draft one earlier this morning, so that's just there, but this is where you would create a new blog post. This media tab houses all your media. So anything from images to videos to header images that will all be housed in this library. Once you click on pages, this will how's all your different pages throughout your website. So this is your homepage, your About page, your contact page, anything along those lines. And then you could house them on here and then also edit them and take actions. Whatever you want quickly from this tab. Comments is pretty straight forward. This houses all your comments. If people were to comment on your blog coasts, and that is only if you have your comments enabled feedback. Honestly, I don't know what this does. I've never used it, but I'm assuming that it's just connecting any feedback that you might be getting from any plugins that you've installed or customers that want to give you feedback. This is where that would be housed. Wp Forms is WordPress forms and this is any form that's filled out through WordPress. So that's any contact forms, any along that nature if you have any other forms on your website, this is where you would be able to how is it appearance? This is probably where you'll spend the most of your time is especially in the beginning, is in appearance. You could do everything from themes to customizing to adding widgets to, to editing your menu and header and background. And so this will all be housed in hearing this for now is just any theme that I've installed. So I've gone through a couple of free ones that I just thought were interesting plug-ins. This is where any plugins will be held so you could activate, deactivate. Be careful with plugins. You don't want to overload your website with plugins. Sometimes it will either slow down your website or create problems because not all plugins integrate with all themes. So just be careful that whatever plugins you do decide to download, it integrates with your theme because sometimes there could be miscommunication and then you have all this broking code on the backend which you don't want to do users is housing all the users that have access to your WordPress site. So if in the future you start to build your team and grow your team. And then higher content writers are virtual assistants to help out with writing or editing himself. They could come on in here and then be able to have access to this website without using the admins, email and login contexts. So you could actually have subscribers, contributors, authors, editors, admins, and anything along that nature, tools is literally any available tool within the WordPress website and dashboard. Obviously don't have any tools at this given moment. Settings. This is anything related to your site title, your tagline, anything from the type of new users roles or to your language, to your time zone, anything along that lines that will be housed in your settings. Pretty simple insights. This will give you any insights based on analytics. You would have to activate this as well. It really depends. Some of these things in this dashboard are additional payments that you might have to pay. But don't worry later down the road, I'll explain like the top of the line, plugins and tools that you should use without having to necessarily use the ones that WordPress gives you. So this is another thing, opt-in monster. Again, not necessary, but it comes with WordPress. So if you want to give it a shot, you can as well. So that's pretty much every single thing in that, the WordPress dashboard from a really general overview. In the next few videos, I will go more in depth on what everything means, how to really customize based on your theme and everything along that nature.
11. Collecting and Creating Brand Assets: So before diving deep into creating your website and personalizing it, the most important thing before jumping into that is collecting and creating a plan assets. So before you build, it's important to collect and create the following. The website logo, your header imagers, any featured photos you might want to use, website copy and brand colors. Now it's essential you do this before you build your website, because you can't build a website if you don't have anything to put into it. So even if you don't know the final lies, things you want to input, whether it's images, whether it's website copy, it's really good to create a folder titled your website name and then how's everything in there? Once you have everything house together, it'll be really easy for you to upload everything onto your theme builder so that you could see Missy create your website without having to stop and look for images or without having to do a brand photoshoot. So it is so, so, so crucial that you do this before and take this seriously. Because you can't build a website if you don't have anything to put on your website. So really give this thing a think through and look through it all. I'll go more in depth on all these different things. So logo's very simple. Most people know what a logo is, but it's pretty much something that represents your brand. You could really easily create logos in Canva, which I'll really quickly walk you through in a different video. But logos are simple. You don't want it to be over the top. You want it to represent your brand. And the, like I said before, none of this is final. So even if you just have a placeholder that's just the name of your website or blog. That is totally okay. My Android, mysql.com logo is just my name typed out. Nothing super fancy, nothing super-special, especially when you're starting off, it isn't necessarily necessary to make it the perfect logo, even though logos are extremely important when you're starting off, it's okay if you just have your name, type, style or something super-simple and you could easily build that in Canvas. The next thing is header images. So these are just a few of the header images from my own personal websites. Super simple. It's just me smiling or just something visually pleasing connects to the audience that would be viewing the website. And that is essentially what a header image is. It doesn't necessarily have to be you. It could be by a landscape or anything along that nature. It really depends on your brand and your branding because all of my websites are pretty much personal brands, it makes sense to have at the top as the header image because it allows me to kind of build rapport with my audience for anyone who's coming to my website. The next thing is featured images and website copy. So again, these are just taking images off my website. All of these images are images that I've created, anything from about community podcasts. All of those back images are images that I own. Same thing. All of these headers were uniquely created by me. All of these images around my about page, my homepage, anything related to that were images that I collected prior to make sure everything coincides with each other. So website copy is essentially the texts that you have on your website is just a place holder for now, like I said before, you won't be able to finalize it until you have your full theme ready to go. But it's good to have placeholders at least for the time being. So even writing an about page about yourself, about your brand, who you are, what the purposes, anything along that nature is really, really important. So if you want to see Missy build your website without having to stop in-between different things. It's really important and really good to just collect everything prior and to write everything prior. The next thing is brand colors. So my brand colors, obviously, each website has its own different unique color palette. But I specifically chose my colors with my branding and mind. Your brand colors should really represent your brand and it should all coincide with each other. When you go to the most beautiful websites, they all have a color scheme. So if you could find a color scheme that works for you, then the better. So a really great resource that I love, love, love, love to use is Pinterest. And when it comes to creating moodboards, finding color palettes, creating your brand color scheme, and just building a brand in general, there are so many beautiful resources on Pinterest. The only thing you needed a surge is brand colors, color palettes, mood boards, web design, anything along that nature. And it'll come up with a number of different colors schemes that you can use for reference or for SPO. You could even try to copy websites from Pinterest, web design, pins and anything along that nature. So brand colors, figuring out and consolidating on what colors stand for your brand. And it's important that you recognize that different colors mean different things. So you just want it to be really warm. You want it to represent you as a person, your brand in general, and wants to really be a part of the branding process. So branding is everything. When it comes to website, you want everything to kind of go together from font, colors, images, and editing images. So if you have a color scheme in place before building your theme, it saves a lot of time in the long term because it allows you to once again build your website with intention and not just kinda guessing and putting random things together as you go. So the more time you spend actually focusing on visualizing what you want your website to look like, the better and easier it will be for you to actually make that theme come to life.
12. Where to Find Brand Inspiration: So in this video, I'm going to share with you how to use Pinterest to get web design ideas for and ideas and everything related to visualizing your brand identity and creating a brand identity before it actually jumping in to creating your website. So this is my Pinterest dashboard. This is a new one. So I'm actually starting completely from scratch and testing it out to create a case study. But I have a few other Pinterest brands as well. So what I'm actually going to do is go ahead and search, search all of Pinterest for business brand ideas. So I'm just going to look for blog web design. So log of Web Design, this is really great. And what you'll want to do is make sure that this is picked to all pins. And now that I actually searched that there are so many things here to get inspiration from. Like honestly, Pinterest is amazing. To just visualize what websites include, what copy people are, including what images people have on their websites. So you could kind of mimic these different types of websites and copy not what, what they look like, but kind of copy the images that you want to include. So this is just a really good idea to visualize what you are about to create. Because I know it can be really stressful to even visualize what you are about to create. So looking at for web design ideas prior to actually building your website is really, really, really important and really, really amazing. So this is where I'd start off. You could even look up logo ideas for a wellness brand. Like you could be so specific and Pinterest will populate stuff. So some of these you could tell our bonus Brandy logos and you can use that in Canvas to create something similar for yourself. And this is honestly the fun part is you could just create a ton of boards along that. So you could actually maybe create a board and then maybe name it, logo ideas, and then create it and then continue to save inspiration to that board. And then once you actually have that board created, you could go to your private profile, actually click on the board and then see everything you've created and copied all in one place. So the more you focus in on your brand identity and figuring out the colors are prevents. You could even look up brand color ideas for female brands like something. So, so, so, so specific. Jo find blog posts, you'll find color boards, you'll find color palettes, even with the codes of the colors you could get so specific with finding things. As inspiration, even see this one has the numbers for each individual color. You could find so many amazing things to visualize what your brand should look like and what you want it to look like. And then you could also use some of these web design layouts as inspiration for creating your own personalized layout. So I hope that helped Pinterest is honestly one of my favorite resources when it comes to designing websites for clients and designing websites for myself because there is just so much inspiration on there. And it's honestly so amazing and it's so fun because it's like, I feel like creating our brand identity is like shopping for the interior design of a house. It's so fun. You kinda just play around with colors and all these different things and yeah, have fun with it. Create a ton of boards and see what you come up with. You never know maybe pruning is even in your future. I never thought that that would be for me, but like all designers that I know use Pinterest on a daily basis to create mood boards, to create brand concepts, and creating your brand concepts before building your website is so critical. So take some time, pinned some pins, look for colors, get in SPO, and then move on to the next video. And then I'll see you guys there.
13. Designing Your Logo and Brand: So this is the Canvas dashboard, pretty straightforward once you get to canva.com, which are linked below. Once you've created an account which you can do super easily if it even signing with Facebook or your Gmail account, pretty much what you'll wanna do is go to Canvas, and this is a dashboard. You can look at all the templates that they actually have. They have a bunch of different templates that you have. Facebook posts, instagram stories, Instagram posts, Facebook covers, flyers, business cards, literally everything. They have, all these different templates that you have. And they actually have a logo category. So if you want to, you can go to logos and it shows up a lot of different templates. And you could use any of these because it's free on Canvas. But you could use any of these as reference to create a logo for your brand. So what I'm actually going to do is click the sudden because I think it looks cool. And I'm going to use this template and I'm just going to title this. My dad's bran, which is longevity boss, establish 2020. And you could search for different photos. And since these are all stock images, you can actually use any. There is a pro version which is paid if you want to buy it. I'd highly recommend that you have way more access to all these different photos and elements. Elements is more a logo inspired. So you could actually use any of these logos. You could add texts, you could even Arab Music and Videos change the background colors. But I am just going to go to elements and maybe look at what is being featured. Maybe I can find a man or something. And yeah, maybe I'll just keep that in there for now because I think it looks pretty cool. And that will be the logo that I use. In the meantime, I'm going to maybe create a couple of different variations. So longevity DeVos, I will save that and download it. But take some time here is spent some time creating your logo, playing around with the different templates that Canva has. Maybe even try outs Canva pro and see if you like it. It really gives you so much more flexibility with the good things you can create. And it's definitely, definitely, definitely worth it. The next thing I'm going to do is actually create a new variation. And I want it to just be saying longevity boss. And maybe you want to make it a little more unique or maybe different sizing. So I'm actually going to open a new link in a new tab and go to Create a design. And you could actually customize dimensions. So typically, I like to have a longer with them height for logos just because I think it makes it more flat. A lot of times they make it square. It really depends on what you prefer. So I'm actually just going to measure this as 500 by 200. And then it creates design. And now I have a horizontal image. It, they have all these different blood. Say probably think I'm creating a header image, but if you do want to create a header images, you could also do them in Canva. So this is a really, really great place to just kinda maybe build a brand, play around with colors. But also just starts to see a brand come to life before jumping into actually building the website, creating the theme, and making it your blog, actually giving it a personality. So I'm actually just going to go in the old tab and just copy this. Sometimes this works, sometimes it doesn't, so you'll just have to play around with it. And then I'm just going to copy and then paste it into here. So see, I really like that. And I think it totally fits the brand That's my dad wants to create. So I'm just going to ungroup this and I'm going to delete this because I just wanted to say longevity boss, I want to make it maybe taller. A bigger thank could've even made smaller. But that seems a good. I'm actually going to take the color of the background here just to keep it consistent. So what you could actually do is go to new color, copy this little code. This is just for transferring colors. And if you don't want to do this, that's fine. But then I can click the background, click here, add a new color, and then change the color background. So now this color theme, and this is the same. And what's really good is that now I have two different variations of my logo. And I could just play around with what looks good on the website in different places. It really all depends on what you are trying to create. So play around with Canvas, see what things you can create. If you use some templates, I'm just going to add a new page just to show you guys. If you are playing around with the templates, you could change any of these colors with the same thing. And just like change colors here, if you actually end up creating a color scheme that you really like, I'd recommend copying these numbered colors and then pasting them into a notes file just so that you can see what colors look good together. Now, even just seeing these colors together, honestly, I think they look kinda good. Would it makes sense for my dad's brand, but maybe for a personal brand or like women or like neutral Sandy tones colored. See these colors honestly, you look really good together accidentally. So play around with different colors, different logos, different headers, and see what you can create. This simple, just strengthen the amount of brand images that you can use throughout your website and the more personalized you make it the better. And Canva is an amazing resource to have. And especially if you are new, there is a Canva pro trial and I'd recommend it when you're starting off because one, create a ton of stuff for free and have access to all these different stock images. But then you could also use as 100 images or background images. But yet Campbell is amazing. So that is just a little overview of what you can do with Canva. You could even be even more specific. I could change the spacing. So if you go to this button here, you could actually change the spacing between the letters. So letter just moves it like horizontally, which I think looks pretty cool. Line hi, If I had more than one length, it would change the height. So just play around with what Canva has and the different buttons and the different tools that you can take advantage of. And once you are done with creating your logo and any header images you might want for your website. Then you can move on to the next video.
14. Finding The Perfect Theme (Free vs. Paid): So finding the perfect theme is the fun part, but also can be extremely intimidating. If you think you are not tech savvy, you don't even know how to conceptualize making a website look pretty, then that is a okay, I'll go more in depth on themes are user-friendly and themes that might not be as user friendly. And really depending on where you are at with what you wanna do with your blog and what, how you want to scale your business. Then picking the perfect theme is really essential to make sure that everything that comes from. Now today, starting your blog to scaling their bog is all integrated and setup from the very beginning, you don't want to build a business on a rocky foundation. So picking the perfect theme from the very, very beginning is essential to the growth of your business and scale your business. So just going into the next slide, I'm going to really explain a free themes first paid themes. Now there's a difference between the two. Free themes are free obviously, and there's a lot of limitation that comes with free things. They are very much so less customizable. They have really the bare minimum essential to make a blog run. It's less user-friendly to figure out, and there's no customer sport, so you have to figure it out by yourself. I've built websites on free themes, but it takes so much more time because it's kinda like you have to code and a lot of the things that you want to create might not be integrated with a free theme. So free themes, yes, they are freed, but they are a lot less customizable if you are not tech savvy than it is a very difficult to build a successful blog off a free theme. Granted, I don't want to suggest something that's like way out there and away like super, super high-tech, you'd need. There are a lot of different ones that do require, like maybe coding and different things like that. But that's obviously not what I want to suggest to you because I know you're at a place. And when I was starting, I was super into needing by creating my very first website because it isn't meeting like you might not think you have the technical ability to create a website, but trust me, with the right theme, then there is a lot of opportunities. So going into paid themes, they are more likely to be really damn good, like really, really good, because they are paid. The creators often spend more time to make it more user-friendly. So the better they make the theme, the more people will purchase it. So, you know, these creators are really trying to think of the user experience that someone is going through when they are by a theme, they are solving a problem. And usually the problem is that the average person has no freaking clue how to create a theme and how to customize it. So paying for a good theme is definitely worth the investment. It's more customizable. They often have tech support, which is a lifesaver. It's the same reason why and what with Bluehost sentences, Same reason why I pay for my themes personally is because of the tech support. You have an idea how much they will save your ass when you are just so confused with what's going on. I've used tech support for all my themes that I've built websites on, especially in the beginning because I just have no idea what was going on. And it's really easy to find a ton of tutorials on paid themes. Tutorials are all over the web. And if you get a scene that is used by the masses of people than it is really easy to find tutorials on specific things that you might be looking for. Whereas for a free theme there are a lot more obscure, a lot more, less people know about them. And so that means that there will be less knowledge out there, just openly available to you. So tutorials and tech support, honestly, the number one thing that you should look for when considering your themes and buying themes. And it has more integrated plugins that already come with the theme, which means there is a lot more opportunity to get more conversions. So an ungraded plugins can be anything from capturing emails to creating landing pages. And if you have a theme that does all of that, It's like integrating all these different systems that exists like click funnels and lead opt ins and all these different things. But hosted on your WordPress site. So you have a lot less trying to figure out how to integrate different softwares as opposed to having something housed in one place at one time. So obviously, paid themes is the way to go. In my opinion, I'm going to suggest one for you. I thrive themes and honestly it's amazing you can do so much with them. And I'll explain a little bit more about what Dr. has and what it includes if you were to get a thrives beams membership, but trust me, it is totally worth the investment and I'll explain why in a little bit. So suggested a paid beam is 110% Dr things you could do so much in there. You could just look at the homepage of everything, thrive themes related, pretty much all in one online business toolbox NOW and this back and forth between developers, no internet marketing fluff, and no mix enough king at your WordPress backend together, it's all really integrated with what you need to create and what you need to do. So it's pretty much like I said, all in one toolbox. It's affordable for somebody just getting started, but also has the level of quality where it can scale with you and help you build a $1 million business of it. A lot of the top dogs in the blogging website, online marketing, digital area, have built really successful businesses using thrive themes because of its integration. And I can tell you firsthand, that is totally worth it. You have access to tons and tons and tons and tons of plugins. And it has a focus on converting people on your website. So this is capturing emails, creating lead magnets. How to make sure your evergreen content is consistently being rotated through everything along that nature Dr. beings can do. And it will want a 100 percent give a real boost to your blog and your business. There is no doubt. I'll go a little bit into what the thrive themes membership includes. So pretty much thrive architect and thrive optimize helps you build landing pages and places to capture emails. And when you are building a blog or a website being number one thing you should focus on is how to capture emails, because your e-mail list will be your number one marketing resource in your email list is honestly such an amazing thing and it is something that you should really therefore is, how can I build this email list and grab our architect? Dr. optimized is really, really great for that. Thrive beam builder. It's just basically a Scene Builder for WordPress. It will help you customize your website really unique to you and what you want to create. Drive leads helps you capture leaves. Thrive quiz builder. This is now another great way to capture leads is creating a quiz. It's the same reason why a lot of people go on BuzzFeed and take those random quizzes like which Disney princess Ru, like, stuff like that, people take those. So that is another way to optimize for conversions, is creating a quiz around the content that you decide to create. And again, leads back to my main point of working towards building your email list. Thrive ultimatum, this is helping you kind of create a countdown system for any offerings you might create in the future. Dr. Ovation, This is a really great plugin to house testimonials you might have on your website. And that is really amazing once you get to that point. Clever widgets, just a great way to add widgets your website, without figuring out if it's going to integrate or not. A lot of times with three themes and three widgets, it's a lot of trial and error to see whether or not integrates and works gathering goes together with Thrive beams and clever widgets. You just know 100% that everything within the Thrive membership all integrates without a doubt, headline optimizers. So you could really split tests headlines and figure out what's working for you and what's not working for you. Dr. apprentice, this helps you sell stuff and anything along that lines, draft comments is where you would house all your comments and make it user-friendly. So it's not just like a random really old school textbox and his men, you can really customize it to make it unique to your website. So that is just in general like what free versus paid is. Like I said in this course, I'm going to focus on thrive themes one because that's what I use and that is how you will start to see results is by creating something using thrive because it just has the most amazing integrations. So in the next video, I'll just go over installing thrive, getting it on your website, creating a theme on Thrive and then everything from there.
15. Where to Find Free WordPress Themes: So if you're at a place where you just kinda want to scope out your options and see what free themes exist on WordPress. It's really simple to look for them pretty much you go here to appearance. And then it will take you to this seems homepage sham, here are just some free themes that I've been solved in the past. On this website, I've tested a few just to show you. But once you go into it and customize it, it might be a little bit more difficult to customize to your likings. So pretty much what you'll want to do is go to wordpress.org Themes. And it will take you to all the themes that WordPress has. And you can really decide whether or not one of these might work for you or if they might not. But like I said before, free themes are yes, free, but a lot of times they are a lot less easy to customize. And it's just kinda like guessing which does what really? I've tried to build a few websites using free themes and granite. Eventually I was successful with using some of them, but not all the time. A lot of times it's a lot of guess and check and seeing if he could actually really make this unique to your own business. So this is where you would easily find it. You could filter it by what's popular. And men, if you do decide to get a free one, then really looking through reviews that you might have seen. Google reviews for these themes because a lot of times they might look nice on paper, but when you actually go into it and solid and then CIA it will say upgrade to this. And so yes, it is free, but a lot of times there are hidden charges within these free themes, even though they are free to download. You can play around with this. But in this video, like I said before, I'm going to be focusing on thrive themes because I just think it's really a lot more user-friendly, way more customizable for someone who doesn't have a tech background because I, when I started, I didn't have a tech Brett background. Everything I learned about creating websites was personally taught by myself, spending hours on end watching tutorials. So I've had my fair share of late nights watching tutorials on how different things work. And by no doubts that I've seen is at the top of my seems less. So. This is just where you would go if you were to look for a few free themes before you fully wants to commit to using thrive themes.
16. Getting Started with Thrive: In this video, I am just going to go over getting started with thrives. So if you're watching this video, then you are telling me that you are super serious about creating a block, creating our website, and really creating and building the foundation to build a business in a website that is going to be optimized for the long-term. Now getting started, I know is really, really intimidating to think of what the future holds. But really building that foundation and focusing on building a strong and stable foundation is the most essential thing when you're starting off because like I said before any previous video, you do not want to build a business on a rocky foundation. If you do, in the end, it will end up in lots of like falling apart, lots of creating Band-Aid solutions to a short-term, short-term problem that will actually end up being a long-term problem. So if you are focused in 100% serious about the growth of your business and scaling your business. Then getting started with thrive is honestly the way to go. And I tell that to you sincerely because I've had massive success using throb, my team members have had massive success using thrive and just telling you firsthand that it has been amazing. Before jumping in, click on the link below and it will take you just to throb dashboards. So we start off on the same page. And I could walk through with you getting started with thrive and getting it installed onto WordPress for you. So, and now that you've click the link below, this is the homepage of thrive and getting started with becoming a thriving member. You can see if you even just drawn their websites. There are some pretty successful people that have built million-dollar business with it. And there is just like all the reasons why he should invest in thrive themes that really breaks down what everything has and what it means. And honestly, it's just been amazing for me. So you could either click this button or that button at the top and then click a, become a thrive themes member. And then it will take you to the next page. And again, we'll walk you through what you'll get everything that is included. So you could really just read through this if you'd like to get more of an understanding of what Thrive has and what thrive includes and what's fixed basket when you get a Thrive membership? I'm not going to read it because I know you can need once you're done reading all of that. And our 100% serious about the growth of your blog in your website, in your business, then you can start and click, Get it now. And so thrive membership is really reasonably priced. It's $19 a month if you pay annually, and then if you pay it quarterly, then it will be $30 a month. So that's four times a year, you pay than $90 and then a few paid annually. 19 at times 12 is 228. So that's kinda the upfront pricing that you see with thrive. But like I said, your email list is the number one saying you should focus on when building a blog, building a website, anything along those lines. So you could click Add to Cart. And then once you've continued, it'll take you to check out till they saw your email, your first-class name, password, country address, city, state, zip code, and then you can pay either with PayPal, a card, anything along that nature. And then you will put that in here. Obviously, since I already have a thrive themes member, I'm just going to go into my thrive themes dashboard. And then it take you from there on how to install thrive themes into your WordPress dashboard if you are starting from scratch. So once you purchase or our themes and meet me in the next video and I'll see you then.
17. Installing Thrive onto Wordpress: So once you are on the drive beams dashboard now you have access to all these amazing, amazing products that is 100% the way to build a foundation for your blog or website and your business. So the amazing thing about Thrive is that almost everywhere throughout their website is that they have product. Tutorials are actually really, really amazing and really, really good. So just really quick to have all the thrive themes, plugins and products installed into your WordPress dashboard. Pretty much what you want to do is download and install the thrived product manager plug-in and then it, click it, and then it will download. Once you have the Thrive product manager downloaded, you'll want to go to your WordPress dashboard, go to Plugins. And then once you are within your plugin section, you'll want to click Add new. And when you click add new, you will now click Upload plugin. So now that you have that thrive product manager downloaded, you'll actually want to go to your downloads and then see where it is and then compress it so it's zip. The only way you could install something and upload something to WordPress is if it's a zip file. So if you're on a MacBook, you'll right-click and click Compressed thrive product manager, and it'll create a zip folder on Windows. I'm pretty sure you just right-click and then click the zip or compress similar style, but it should be a right-click in your folders. And so once you have that, you could actually choose a file and then go to your downloads and then click the zip file that you just created, and then click. And then once you have that uploaded, you'll click install. Now. Now that it has been installed, you'll want to activate the plugin. So once that is successfully insults, click Activate. And now down here you'll see that product manager is now a new tab created on your WordPress dashboard. So going ahead and clicking product manager, this is what's connected to your thrive themes account. And then you'll need to log into your that Themes account through WordPress. And then that's how you connect WordPress to thrive and successfully install your thrive product manager in to your WordPress Dashboard.
18. Activating Your Thrive Dashboard: So now that you have your product manager and salt into WordPress, pretty much she'll have to solve a specific plugins that you'll want to add into your WordPress. The easiest thing is if you select all and then just install all of them, but you don't necessarily need all of them. So make sure you look through and then find out the information about whether or not these widgets and plugins apply to you. But for now I'm just going to install all of them to make sure that everything is is there and nothing is missing for the future, build this website. So now that all the products are installed, you'll want to go to your thrive themes dashboard. And this is where everything will be housed. So this is just like the fun part. You're just getting started now you have all these resources available to you to start really growing your blog and your website the best of your ability and honestly thrive is amazing with that. So before I jump into everything, this is just what your thrived dashboard looks like within WordPress. It has now just become a tab in your WordPress dashboard as you can see here. But there is so much you can do with thrive. And honestly this is just the beginning. So in the next video, I'm going to start off with how to start building your website and your theme to start optimizing and getting traffic to your website. So this is the fun part. Now that you've gone through all the hard work of getting everything integrated installed. Now is really to start building the foundation of your entire blog in your business. And I am so, so, so excited for you and to see what things you guys actually are able to create with thrives. So that's about it for setting everything up and getting everything ready to go. And then in the next video, I'll jump into making it really unique to you and your blog, your business, your website, whatever you are focusing on at creating at this point in your life. And I am so excited for you, like I said, and I'll see you guys in the next video.
19. Thrive Support and Available Resources: So before jumping into actually starting to make your website customize, I just want to show you the thrive themes dashboard where to find things, how to get help. So essentially what you'll want to do once you install the product is click on getting started. So this will help you tried to figure out any information on anything. You're stuck with a particular feature. If you don't know how a particular feature works, you could find it in the knowledge base may be fine product tutorials and really start to make this unique to you. So if you have technical issues, you can go on the forums. If you want to know how a particular function or feature works, you could go to knowledge base. And if you need help with bargaining and conversion, website building help, then you could jump into thriving University. So and another great resource is the thrive themes blog. So thrive has a ton of resources that you can use. I'll link all of these down in the description to help you just kind of maybe conceptualize some other things thrive beams can do for you. But essentially what you can do is click, I'm building a website or my website is building up. If you're here, you're likely building a website. Go ahead, click Open, and then it will take you to this page. And then now you have a little mini-course made by Shane, who is the CEO of thrive themes. And pretty much you can see what different things that you can start to create and personalized on your thrives. Everything honestly, that kind of setting up, I'll cover in this course. But if you need some extra guidance and a little bit more thrived theme specific question. You can go ahead and go to your thrive team member dashboard. You can find product tutorials here the knowledge base is basically feature driven. If you want to review the theme demo, you can go here and if you have some questions, you can go to the forum. So everything is actually housed in your member navigation. So this is where you would find things when you are trying to figure out particular questions to thrive. They are super, super helpful. So take advantage of this, ask questions. But pretty much thrive has really amazing support staff, but also just amazing content readily available. So if you have a question, there's probably already a question asks about it in the forum, and you can just search your question and see what types of things come up.
20. The Foundations of Your Thrive Theme: Okay, So now that you've done all the work to get to this point, now is the fun part. You could really start customizing your theme and personalizing our website. So you could actually see everything you've done up until this point actually come to life. So what you'll want to do is actually go into your thrive dashboard. And you'll want to click thrive Scene Builder. If you don't see thrive Scene Builder, you'll want to go back into your products manager and then installed the thrives. Pretty much once you're here, you'll go to the Thrive team builder themes. Click this and then click Install. Since I already have it installed, I'll actually just go ahead and go to the thrive even builder. So now it takes you to the theme builder wizard and pretty much end, pretty much thrive themes will actually help you step-by-step build your theme. And that's how amazing it is. It's super user-friendly. And as long as you continue to walk through this, show up, you'll have your website up and running in no time. So just make sure before you get started that you have everything you need, your logos, your brand colors, any images you might want to use, or headers. This is just to have a place holder. So what I'm actually going to do is since I have all my own personal brand assets already in the folder, I'm just going to build this website as if I would build a personal website of mine. So just make it super simple. You'll just click, Get Started, and you could actually upload a logo for your site. So since this was my dad's that I initially created, I am going to just build this as if this was my site. So I'm going to pull in my logo. This is the folder that I made. This has like any assets I might use. Logos, pictures that are edited for my website, and you can really see all these brand assets readily available. I might not use them all, but having more photos ready and available before you start your build is just an amazing thing that you can have because you can just play around with different images, what looks good where? So that's pretty much what I have that folder. But for now I'm just going to go ahead and pull my logo. So now that I have my logo, I'll just click Continue. And so I'm going to choose my main brand colors. If you saved your colors from your canvas, or if you got some in SCO from Pinterest and know exactly what color you want. You can go ahead and put that code here. I'm just gonna go ahead and try to choose a color. I like. Cool. I'm just going to choose that color for now. This is just a place holder so you cannot change at any given moment. But I'm just going to click that and click Apply. And then I want to click Choose and continue. Cool. So now that you're on the header tab, now you can go ahead and choose your header, which is pretty much your navigation bar. So if you go up here to this drop-down arrow, and now you see all these different types of headers that you can possibly use on your website. There's all these different options. You can change colors, you can honestly do anything that you'd like. And there's quite a few of them as well. So I am just going to search through this and see which ones I like. And then I'll go ahead and do that. I'll just click this one. I just like the, like the simplicity of it. And we'll let it load. Awesome. So now that I have that as my header, we can go ahead and click, Choose and continue. And now you can go ahead and choose your footer, which the place at the bottom of your entire website. So you could do this same thing. Go to the drop-down arrow, and now you tend scroll down and see what footers you like and see which ones will possibly were clear theme. Again, this isn't final, so you could come in here and change anything that you might want to change in the future. But this is just a place holder for now. So you could really just start visualizing what your theme can possibly look like. So I am going to put in something super simple like this. Actually, I don't really like that. So I'm going to go back in here and pick something else. I'm going to click this one. Cool. So now that I have my footer, I can go ahead and go to the next page and click, Choose and continue. So this is your homepage and pretty much you can create anything you want. So this is when people type in your URL, what will they find? So you'll click either choose ready-made homepages which Dr. beams has. If you already have a website, you can display one of your existing pages or you can display your blog as your homepage. I'd recommend having a static homepage just so there's some consistency when people land on your page and all the content on your homepage is personally curated to target your audience. So I'll just go ahead and click that button. So this is what they have showing when I use one of their ready-made templates. And he could just scroll down to see whether or not you like it. You can just visualize honestly what things you can create with thrive. And that's the most amazing thing is that you can just. Have anything you want your psych ready to go. So pretty much this is just a really basic template. You could go in here. And obviously all of the texts was just spiller tax. But you could go, if you don't like this, you could go up here and then really customize what your homepage can look like. So similar thing, you can just go here and then see what things you really like, what things you don't like and really personalize it to you. Again, this is just the layout of things. You could add things, delete things. You could even just make your own homepage if you want to. But I honestly really like this header part where you could really just personalize what it looks like. So I'm just going to keep it on this page and I'll click continue. And now you're choosing a what is the content will look like when you have a single book costs? So if I scroll down, this is kind of what they already have. But you could go ahead and click this down arrow once again. And once you're here once again, you can scroll down to see what you would want a single blog posts silicon. So this is just one piece of content, one article that you've written, and just the design around it so you can really make it unique to you. I'm just going to scroll through this and see what different things they have available. So I really liked this full-width featured image. It kinda just goes with the style of the full image of the homepage that I'm making. So I'm going to keep this as well and click it, and then click, Choose and continue. Now, since I don't have any blog posts on this website, decision of spiller. This will be essentially the template that you have every time you create a blog post. So I'm going to go ahead and click, Choose and continue. So now this is your blog posts list pretty much this is where all of your blog posts will be housed. This is just one blog post that I put in there the other day. But once you start writing more and more blog posts, this is where they'll all be housed. So I am just going to see what different logos they have and then figure out which one would actually fit my overall theme. So as I scroll down, I'm just going to see what different options they might have. So I'm actually just going to keep mine. I think it looks good. I like how once you have more blog posts the way it looks. So I'm just going to click that and then click Choose and continue. And now you have a page. This is a landing page. Essentially this is what, well funnel people into your page or just like your offerings. And once you're actually here, you could go ahead and choose a particular page you might want. So you could actually just scroll down and see the different options. Thrive themes is actually made to generate leads and to convert your traffic into an e-mail list or a paid audience. So everything you see that has e-mail generators, that's just essentially how people will funnel into your page. So I am going to see what different things they have. Since I don't necessarily need lead generation at this point, I am just going to click this one. It's just a static image. And then it has like a little place where I could put in a bow or something like that. So cool, That's kind of how it looks like. Now you could have, you have a sidebar so you could really customize what this looks like. And as you can see, this is the color I chose as my brand color and Ashley, and that will continue to populate throughout the site as the theme color. These quotation marks are the same color. So that's kind of the idea behind it. So I'm going to go ahead and click, continue, and now you can choose a header. So right now I'm just going to click Choose your WordPress menu. Since I don't have any menus activated yet, since I just created this site. I'll go ahead and do that later. So now the entire wizard setup is complete. You can preview what your site looks like in a new tab. So once you preview your site, you could go to the new tab and really start to visualize what your website has the potential to look like. So since this is a team builder, it's all just filler text. Once you have your copyright in there, you could have your images in there and you can really personalize it and make it unique to you. Change colors, add images, write blog posts, and then really understand what things you can create and start to visualize everything that you want, your websites. So this is just where you don't max, you could visualize that. And then the thing about thrive themes is that through out the entire website, once you have a membership, they have videos. All over the place. So you could actually go ahead and click this video and watch what is what thrive actually has and say yes to do next. So there are all these different options that you can do. So pretty much once you get to this point, another thing you can do is go over here to branding. And this is something that you might want or might not lines. But essentially, this is the theme colors. So once again, this is the color that I chosen, the beginning. If you don't necessarily like it, you can go ahead and change the color. Again. You can go in here and choose your logo. So if you have two different variations are real logo, that could also be a potential option for you. You can have a dark version and a light version. Maybe this is a white version of my name as well. So you could have two different variations of your logo and I honestly recommend it. Register your brand just like resonates way more. And your logo can be used in way more places if there's multiple different variations. And then a favicon of favicon is a small little square logo that would go up here. Right next to your name. You don't necessarily need one. But it is typically really, really small. So if you want to have a logo as a feed, recall, I wouldn't recommend using this logo. Maybe shortening, shortening it. Maybe you like justice. A would be a good favicon just to have a connection to my branding. I'm not going to add one right now because I don't necessarily think it's necessary, but if you want to, you can add that there. You could also go to typography, and this is where you control all texts on your website. So you could actually go ahead and click this Edit button. And now you have all your font elements here. Now you can see all the different hierarchies of headings you can have. So heading one might be a title of the blog posts, heading to my titles within your blog posts. And in three might be underneath that. So it just creates a hierarchy of information that you may potentially write in the future. So you could actually go in here and choose any of these headings and change the fonts individually. As you scroll down, you can see the paragraphs be everything from that. So since you can edit them individually, can edit them as a group of all the headings. And then as you go to this where you could edit them all at once. So I'm actually just going to go here to control all the headings. And I will pick a font. So as I backspace now I have all these different fonts. What I'd recommend actually is going to Google Fonts and seeing what different fonts they have because these are all Google fonts. So what I'll do and what I'll link down below is the Google Fonts website. And once you are on the Google Fonts website now you could actually see what different types fonts they have. So say for example, I just want to type something and see what it would look like in that given fonts. So maybe that's my brand name. Maybe that's like a header. So hey, my name is Angela. I'm so happy you're here. So this is just a filler and then you can actually see what the different fonts look like and whether or not they would fit in to your brand name or everything related to that. So what I'd actually recommend is doing the fonts and figuring out the fonts. Before you actually jump into seem I think fonts totally make or break a website. So just make sure that you really spend some time here. Personalize it. If you don't want to do that, then the automatic fonts that thrive chooses are really, really good. They make it. So you don't have to necessarily change fonts. But I think it's just a really good way to brand. So you could actually choose by different categories. You can choose any of these. I'm going to look at serif because I think this, these types of fonts like make things super girly and just like look super user friendly. So I am just going to see which ones may look good on my website. And this one looks interesting, so I'm actually just going to click it. You could actually save fonts to your website. You could click select this style and it'll actually be saved. So then at the end, you could either download the entire Google fonts or you can compare some of the things that you liked and then have them all in one place so you can really compare them. So that's pretty much Google fonts in an, in a review. So now going back to the topography tab, I could go in and choose a font. And it was called Playfair display. And now you can see what it looks like from there. So you could keep that if you don't like to change it, but that's essentially what that will look like. So I'm just going to click Apply and leave it at that. You could go ahead and if you want to change all the texts on your website. So similar thing, go to Google Fonts. And if you have a particular font that you already know you want to use, then you could go ahead and do that as well. Since I'm just showing you how things work, I'm just going to leave it at that for now and click Save work. And then I'll go back to the first tab and then go back into everything that I've created. So the next button is templates. And this is pretty much all the templates that you've chosen in the site wizard builders. So as you scroll down, this is just kind of bit default. This is where you would change. If you, for example, wanted to change the template of your homepage. You can go ahead and click edit and then figure out what you want to do there. You could add it your homepage here, and that's what's active. Or you could even look at all the different templates that they have to offer on Thrive beans to say, if I wanted to look at some of the other homepage options, you can click here and view them all. Maybe you want to create a post. So maybe you want to go through page and then see what different pages they might have. But another thing you can do is actually click Add New and then you can personally customize your own theme, which I'll show in a later module if you do choose to do that. But that is pretty much what you can do once you get to the thrive themes dashboard. Once you go through the setup wizard and then once you finish the setup wizard, and then maybe choose your branding a little more mature type templates. And then now is the time you could actually start customizing and editing everything you can do from there on. So once you're finished here, you can move onto the next video and I'll see you there.
21. Personalizing Your Home Page: Now that you have the overall structure of what your website can look like, now it's time to start personalizing it and making it unique to your own brand and your whole vision. So this is where you would go. I'm just on the WordPress dashboard for now. But essentially what you'll want to do is go to pages. So thrive is essentially a builder on top of WordPress. It'll just help you just make things visually appealing. So this is the generated homepage that we made in the DR setup wizard. Essentially what you can do is click here, you could click, but this will actually take you to the WordPress builders. So what you'll want to do is click edit with thrive architect. And it will take you directly to the thrive builder to personalize. And this is where you can really start to personalize your website. So as you can see now, there are, as you hover over things, there are boxes. You could change texts. You can really start to make it your own. So what I'm actually going to do is show you around pretty much if you want to add a new element, you could go ahead and click here. So this isn't finalized. You can change anything around here. You could add a new concept content block. And then it will show you all the different types of content blocks that you can add. So as I scroll down, you can really start to see that there are a ton of options for things you could add, maybe some recommended resources and testimonial, more photos. You could have a look around and see what different things you might want to add onto your website. So it really depends on what type of brand you are planning to build. For. Now, I'm just going to exit out of here maybe later down the road, I'll watch you add a few more content blocks. But for now, I'm just going to go ahead and start editing this. Another thing you can do is if you want to change the template of the entire homepage, you can see all the different homepage templates again and you could change any one of these as well. These are just some old landing pages that they had in the past. They are no longer consistently producing these. But you'll have access to all the resources you might need. But you could also have a look at this as well. And then I'll be different homepages that you might want to check out and try. But that's essentially where you can find and change templates. Now you can go ahead and change anything about this section. So if you click on this image, maybe you want to change what it looks like or change the image on it. So I'll actually scroll down and click Background style. You can see here that the color is over the image. So maybe I want to change the image. So I'll go here, upload a new file. And now I could just choose a photo that I already have just to put as a place holder. So for now I'm just this one and see what it looks like. And I'll click it and then click, insert into post. Cool. So now I already have that image in there. It works, but it also kind of doesn't. So maybe I can make this better. I'll just click Apply. So maybe I'll actually see what it looks like if I was to remove the color. So honestly, I like that a lot better. I could change the color of the font. So maybe a left align it, or maybe just move it over so it's not fully like that. So maybe I'll just have a text like Hi, welcome. So now that I have this here, maybe I don't want this to be covering my body. So what I'll actually do is click it and control the margins and the padding. So you could go here and either drag this and it'll change the padding on the right side. Or you can just like put it in a number and it'll edit. So as you can see, now, the box is getting smaller and maybe I wanted to make it to 100 just to see what it looked like. Maybe that's not small enough, small 300, that's 3000. So maybe 500 is what it should look like. Cool. So now it isn't covering my body anymore. And the same thing can happen with this text. So I will do the same thing, alignment left and have 0 there. And then maybe I want to increase the spacing a little bit between that, that top bit and this part. So then I could just add a little section about what exactly my website does and who I help and what I do. So I'm just going to put that in now. So that is there for now. I could do the same thing so it doesn't cover my body. And then I will just go ahead and type that as well here. Since I know the top one is at 500, maybe I can do that. Maybe because it's a little longer. I might want it a little smaller, so maybe 700. Cool. So that's kind of what it can look like. You can start really making it unique to you. Maybe you want to start changing the color of the font. You can highlight it, go two main options. And you can go ahead and choose whatever color you want. As you can see here, as I change the color here, it kind of automatically updates. So I'm just going to choose something that maybe would go well with this particular color scheme. I really like this dark red or you could have template colors. Something you can do is actually added to your colors. And then just click favorite. You could globalize it. You could kind of add things as you go. But pretty much this is how you can change that. And then maybe I would want to turn this black and then change this to black. So That's kind of how you can start customizing things. As you can see, it's already coming to life. Maybe you don't necessarily want your face to take up the entire thing. You could actually change the height of how you want. I'm just going to leave it there. You could also change the positioning of the text. So that will all be housed in this front section. Maybe you want to move this button over and similar thing. You can change the color. You can align the button left and an old control, everything that you create. So now that I actually move this to the top left, now I kind of want to change the spacing. So what I'll actually do is go back to layout and position. Maybe make this a little smaller to six hundred. Six hundred. And now it's two lines and kinda works a little better. So maybe as I'm scrolling, I noticed that I don't necessarily really like how this scroll. So I'll actually click the image itself and go to the background style. And then I'll actually click on the image and unclick this static background image. You could then move your left or right, depending on the image you have. You could also change the size. You could maybe make it that I just be that I cover so there's no extra and unnecessary spacing. As you could click Apply. Now, this is a header that I would possibly like. So you could go ahead and do that throughout the text. So maybe you want to change this these funds. So like what we do, why we do a testimonials, prices. You can start to customize everything from what you offer to the images you create an everything is around the same. So as you can see here, these are kind of the bread crumb. So pretty much this is content box inside a column, inside multiple columns. As you can see, as you click, it'll change to what you're viewing. This is the column and then this is the entire background section. You can see how it's highlighted. So you could really go super hyper specific on what you want to create. You can add images, you can add tags. Maybe I write after this, I want to add something different. Maybe I want to add a different page, Bach, and maybe add some steps of why I do the things that I do. So you could just add any of the elements that your website might want to use. Maybe you can drag and drop this entire section below this one and then maybe that looks a little better. You could really just play around what it is. It's just super user-friendly. And yeah, that's pretty much how you start to customize your website unique to you and what you want to create and what you want to offer. But that's essentially how you do that. You just go to that, that Pages section in the WordPress. And then you could really start customizing a unique to what you want your brand to look like and what things you want to create just by changing some texts, um, and then, uh, playing around with these settings here to see what things you can create. But that's essentially the start of just a beautifully designed website. As you can see, it's pretty easy to set up. You just click drag drop. You could change images because there's so many templates that you can choose from. You can just create anything. If you don't necessarily like a block, you can always delete it. Or maybe you want to change things around. Maybe you don't want that there and you want that there. You could just essentially drag and drop everything. So it's really simple. That's just kind of how you can start customizing it and tailoring your homepage to you and your brand and what things you want to create. So that's where I'll leave it for now. And happy homepage welding. And this is really the fun part. You can really start to see your brand come to life and add different features to what it is you want to create if you know exactly what you want your homepage to look like, kudos to you. If you don't, go back to Pinterest and start viewing things about web design and homepages ion, just so you can get an idea of images. You might need a copy, you might need to write. If I go to Pinterest now you could actually search whatever you want. So maybe feminine Web Design homepage. And as you look that up, there will be a ton of things that will populate. And now you can see just what your homepage can look like. And essentially you could build this in, Thrive and make it super unique to you. So maybe click on it. Have a new board of what things you might want to create. Maybe I'll click on this one and see what things I like. This is just filler text. Maybe I want to actually see real people in action. So maybe I'm want to click this one. And now you could really start to see like a homepage, some, some things you might want to add and then customize it, relate to your liking and what you decide you want to create. So Pinterest, again, I love Pinterest. It's an amazing resource to just help you visualize what things you can create, even if you're not a designer. But if you have kind of a template, you could kinda mimic and get ideas from an inspiration prompt. You can really start to visualize your entire brand, come to life and it is so, so helpful. So get some ideas from Pinterest, play around with your homepage and your brand assets and really start trying to customize it to your liking and your needs. If you wanted to change the header US interests go here and click Header, and then you can change the header as well. So that's essentially how you can start customizing it to your liking. And it's pretty straightforward since you just hover over, click it and then all these things come up. You could change borders, world behavior, and everything along those lines. You can also view what it looks like on tablet as well. And since I actually made the padding, what you'll want to do is go back to the positioning. And I'll change this to maybe changes a little bit more and then customize it. So this really depends on what platform you're viewing on. So make sure you take that into consideration when you're building a lot of people view on mobile or on tablets. And then you could really start to make it unique to each particular viewing platform. So again, this is on mobile and I'm actually just going to bring this back down to 0 and just have it take up the entire space. And then same thing with this part, because it looks hazy. And so there you have it now you can really just start to see. You could even drag and drop the picture specifically on mobile and click the background style. Go ahead and click the image again. And then you could move this left or right. So depending on what you are looking at and what the platform it is you are looking on. You can just really start to make this unique to you. And yeah, click Apply. And then maybe I don't want this necessarily at the top on mobile, maybe go to main options and then choose the bottom. So you can really play around with this, see what things you like and visualize things that are actually real and are about to come to life for you. So play around with all these different features, have fun with it. Get some info. It's honestly so fun because once you kind of understand the ins and outs of the way thrive works and what things you can do. It's a no brainer. And it's, and it's fun because it's your brand. You could really personalize it and make it unique to you. So that's essentially where you can start. And I hope you have fun, enjoy it. Takes some time here, this will probably be the most fun part is really customizing it and making it unique to you. Scroll Pinterest, and then I'll see you guys in the next video.
22. How to Build Your About (or any page) From Scratch: So now that I'm all finished with my homepage, this is kind of what I've built. I just put in some of my own pictures, created some of the baseline structure. Since this is just a mock-up. Again for me, I'm not gonna go ahead and put coffee here. But you can really tailor this again to what you want to create. So now that you have at your homepage ready, none of these navigation buttons work. If you click on them, they won't go anywhere. So essentially what you'll want to do next is make your next page. So maybe you want to now create your About page. You'll actually do is go back to your WordPress Dashboard. So I'll just go up here and then click dashboard. And now that you're in your WordPress Dashboard, it'll be the same, similar structures. So I am just going to go ahead and click Pages. And to add a new page, you'll actually go ahead and click Add New. And you'll want to title this. So maybe I'll just title this about me for now. And then I'll click Launch thrive architects in again. Now you'll start to build your page from scratch on what your About Me page can look like. It's the exact same billed as building your homepage. But since you already know how to do that, I'll just do a quick run-through. Same thing. You'd add elements. You can change the template. So maybe I want to go in here and change the template of what I'm about to create. Or you can really just start to customize everything that you're doing. So since I want to just add an elements, I can go ahead and click here and then add it inside this content box. And I pretty much the same thing can happen is you can start to add anything that you'd like to have on your website. And I can just click Add that. Maybe I notice I actually don't like this layout since something that I built in the setup wizard, I'm just going to delete these content blocks and actually just go ahead and change the template. So I will click here on this cloud button and choose a different templates. So I'll just open up the shape shifts theme and see what different pages they might have as an about page. So I don't necessarily have to like any of the templates that they have. Maybe I want to completely build a page from scratch. So I'm just going to open at this blank page and choose it as a template. You can really customize it. You need to your liking with the blank page builder in honestly is so good and super simple to use. So even though it is super intimidating to start off as a blank page, pretty much this is going to be your Canvas now for your About Me page. And once again, Pinterest is an amazing resource to use as inspiration builder. So I'm just gonna go ahead and start to build this from scratch. So this is essentially how you build any page. So maybe you have a podcast or, you know, you want to create a, an additional section to the brand that he created. Whatever you want to create. This is where how you can do that and where you can do that. And this is how you build a page from scratch. So you could go ahead and start the different types of blocks. This is the same thing that you had as before. So maybe the first thing I want to add is this full width image. And this will just kind of be the header of it. Um, so I actually really, really like that. And maybe I don't necessarily like how tall it is. So I am just going to uncheck this. And now it's a bit smaller and I can control the height here to make it bigger or smaller depending on your liking. So you could go ahead and do that. So then I'll continue and add more page box. And since this page will be 100% an About Me page, what you'll want to do is just really tailor it to what your brand, what your business, what your blog is all about. So, so I'm just going to go ahead and click that button and I'll start tailoring things that are about me. And as you can see, that this is the brand color that I initially chose. This is what we'll continue to. This is a color that will continue to be used throughout the entire website. So you can really tailor this. So then I'm just going to continue to add a few more page blocks. So then once I kind of have the structure of what the about page can look like, then I can start adding new textboxes, more sections and everything along those lines. But for now, I'm just going to start adding page blocks and then create the overall build of the about page. Okay, now that I've added a few blocks, now I kind of have a basic structure of what's my About Me page can look like. Since this is just about my personal brand, maybe I'll tailor it specifically to offering service for Pete, services for people. But I'll just show you how to customize this once again. So click here, you can just change the images again, very similar to what we did on the homepage. Okay, so now I've added a few personal images of myself. I'll show you a little bit more things that you can do. So maybe here I want to accentuate these testimonials and add a background styles. So you could actually just go here, pick a solid color, maybe I want it to be the same color. I'd recommend continuing to save the colors you like here just by clicking this Add button. And then click favorite just so then you could start saving these codes and habit not having to continue to find it in your notes and things like that. So this is something that I really like so far. And then that is just how you can start to customize it. So maybe you want to add, maybe there's a temp, there's not a specific template for the particular thing that you want to create. So you'll want to go up here to this Add Elements button. And then you could essentially build the foundations of what you want to create. So maybe you want to have some columns. Now you could actually choose how many columns you want, what size you want them. Maybe I wanted to have these three columns all different sizes. Then I could actually go back into the elements section and start to add different things that people might input on this page. You could put an image there. Maybe I'll just choose this as a place holder for now. And now you can start to see it start to come to life. And then maybe on both sides I want to have a text. So something along those lines, you could really start to customize it and make it unique to whatever you are creating. Maybe there's like a content reveal that you're working on. You could pretty much just add everything there. Am starts to build it using these building blocks. So maybe you want to add star rating. Now you could have this reading. You can add countdown, testimonial, a call to action, maybe a guarantee box. There are so many different things that you can add to, like different sections of your website. For example, maybe you want to add more of your blog posts links, and then you can choose which particular posts that you might want to add and move silo of it. So it really depends on what you want to create. It's really unique to everything that you are doing, but there are so many different options. So honestly the way how to use thrive is just by trying to figure out ways that I could actually start to implement some of my contents into the entire homepage and then just guessing and checking, that's the best way. And then you can really start to play around with all the different blocks they have and the different templates and really start to make it unique. So that is it for just customizing your own unique page by starting off with a blank page and then adding different blocks as you go. And then if you don't like any of those box, you could also just create a custom block. I typically just stick to the block that they made just because I think they are way better designed than something that I personally would design. So that's kind of what I seek to. But if you want to play around with the different options that you may want to create, then you can go ahead and customize your own column. So I'm going to save that for now and then to publish this page, since this is just a draft right now, just go click here. You could click save and preview or exit without saving, save and return to post editor. And that will pretty much save your content. You can get returned back to the dashboard. And once you're back in here, since I already published this button, it just says update, but if it's still in your draft, this will actually say Publish. So make sure you click Update and then, and then it will be just published and visual to your public. So now you could add it to your menu as well.
23. How to Create Your First Blog Post: Okay, Now you have a homepage in an About page, and now it's time to start creating content. And this is the fun part, but also it, this will take the most amount of work because obviously involves writing. But this is kind of the structure that you'll want to use when you are building a new post. So you go to the dashboard and then click posts. And then what you'll want to do is click Add New. This will take you to, once again, thrive builder. And you can either write your content in here. So this is actually the WordPress post builder. And maybe I just wanted to title it. How to start a blog. You can put in just a mock title there just to see what things you may be able to see. But what you'll want to do is once again, launch it in Thrive architects. So then you can really customize it to your liking. You can use the blog coasts settings that you use in the very, very beginning in the setup wizard. But essentially this will just be the template that you follow. So maybe you want to add in a new element and you can really build it as you go. And so maybe I want to add a text. And here I can choose the headline. You can go to the sound arrow and make it the heading 1. So then maybe I will do the same thing, started a blog. And then maybe now I want to actually build the body of the text. And you would continue to type out things there. Maybe I want to add image. So now you can really start seeing the structure of how you would be able to start to build your each individual blog posts. Or you could do it directly in the builder so you can see what it looks like in your theme. But since this is what you just picked in the setup wizard, you could even change the template. So if you want to change the template, you would have to go to this button, switch to thrive builder. And you can click, Save and Exit. And then it will take you to thrive being builders so that you could actually change the template of what your blog posts might look like. So that's essentially the structure of building a blog post. You could go directly in the WordPress dashboard and then starts to build it. But now that you are actually in the builder, now you can really start making it this unique to you. So this section here will actually change depending on what the blog post is. Is this would show the featured image that you have in the WordPress dashboard, which I'd actually show you, but say you want to really personalize this sidebar. You can once again continue to add more photos of yourself. And right now it's in black and white. So maybe I will change that as well. And then you can just continue to add things in here. So I'm just going to leave that. And then you could continue to start changing things in here. You could add banners, you could add related articles. You can delete things, add things. So maybe I am just going to delete some of these things. It just doesn't make sense for me to have in this moment. But maybe later down the road I will want to have the sidebar a bit more focused in on what I'm doing. And then maybe I don't necessarily want to show my a tag. So this is kind of how you would start to build everything from like your structure of what each blog posts will look like. And then you could actually save this. And then this will be an exact template, every single blog posts you have. So essentially, then you can really start to see the build of your block. Okay, now I've added a few things about me. And then maybe now I want to go back to thrive architects, so then I could actually edit the posts. So once you start building in here, this will kind of be the structure of what your blog post will look like individually. And when you're in Thrive archetype, That's where you'll actually write the blog post. So for now, I'm just going to put in some content that I, I've written in the past. Just to show you guys what a blog post can kinda look like once it's actually built out. So now I added a few different things into this blog post. Just some texts that I've written in the past about how to start a blog. So this is kind of what each individual blog posts will look like. Probably wondering what this picture is. Essentially this is the featured image that you have. So essentially what you want to do is click this up arrow here and then click save and return to post editor. So now that you're in the WordPress settings of the blog post itself, you could actually control different aspects of the blog. Even though you can't see it, these settings will apply to what is happening in the blog. So if you want to, you can go ahead and add some categories. Maybe this is just blog category. And you could actually add these categories into your menu if you so choose. And then I'll click add new category. Maybe I want to add a few tags of how to start a blog. You could add those there as well. And then the featured image, like I said before, is the image that's shown at the top of that dot blog posts, which I'll show you in a second. So once you click set featured image, I am just going to put an image in there as a placeholder. So now that I've selected the featured image, this is what it will look like there. And then maybe I want to add an excerpt which is a little sneak peek on what the blog post is actually about. Again, this isn't necessary, as you can see, it's optional. But you can go ahead and just maybe copied the first sentence of your blog posts. Maybe you can just summarize. Blog post is about and that's where you can put that. And then what you can do now is actually preview it and then see what it looks like. Cool. So now I have the featured image showing at the top. How to start a blog is titled there. And then the blog post is just here. So that's essentially how you would build each individual blog posts. You could really make it unique to you. Again, you can change the template of each individual blog post if you so choose. But since this is kind of what I like and what I would like it to look like. I'm just gonna go back here and click Publish. You have to make sure you publish everything. Because if you just save it, it's saved as a draft and it's not necessarily publish. So make sure you publish it. And then this will start showing up in all different blogs sections on your website. So now that you have a blog post, now we can customize what the actual entire blog lists posts will look like. So I'll go ahead and show you guys that in the next video.
24. How to Edit Your Blog List Template: Now that you've created your first post, he could go back to your WordPress Dashboard and go back to your thrive dashboard. What you'll want to do now is go back to the thrive Theme built-in builder. And then this is where you could actually customize a template of the blog list setting of what your blog list looks like. So when you go to templates, this is just the structure of what you set in the Setup Wizard. What you can actually do is go to this list template and then go to the default blog. So this is the default that you selected in the setup wizard. But if you want to change it, you could go ahead and go to edit. And now you have this structure of what your blog will look like. For now, this is the only blog post I have on the website, but you can start to see the overall structure that you decided to create for each individual block. So say for example, I don't necessarily like the highlights of my recent. So I could actually go ahead and delete this and delete this. And now I just have a blog post to keep the consistency of the brand. I highly recommend continuously using the same content box throughout your website. So since I deleted it, featured posts now I can add a new content block to the top of this and then customize it to what I've used on other pages and everything on those lines. So we've been through this before, but you could essentially again add anything you want to the top of your blog post page. Okay, so I just put a filler block in their frame. Now, this doesn't have to be perfect, but you can always, once again and change the image. Okay, Now that I added my own image, That's pretty much the content box that will be shown no matter what, wherever this blog post is. So right now this blog post doesn't look anything special, but this will kind of populate as you start to write more and more blog posts. So don't worry if it doesn't look exactly how you want it to look yet. You could always change it in the future. Again, nothing is final until you make it final. But also whenever you're going through different sections, make sure you're viewing it on a different views. So this is what I really like thrive is that they automatically optimize for different devices. A lot of customise websites don't do that unless you do it manually. So that is the one really good thing about thrives. So what you'll actually do is click, save and return to template dashboard. Once it's saved, you'll actually be able to go back to your template dashboard. And now you have a homepage and about page, a blog list page or a blog post. And now you want to create your menu. So now that you have kind of the baseline structure of what your website will look like. If you're really, really good, then you will be able to then launch your website in just a few hours. So the main thing now is just setting up your actual menu bar. And I'll cover that in the next video.
25. Time to Launch Your Website!: So now I'm back on the WordPress dashboard. But if you've made it this far, then you are amazing. I just wanted to tell you that firsthand because you are nearly, nearly there. So pretty much built the foundation of your entire website, built the homepage, you've built an About page, you launch your first blog posts, you created your blog overall list, content, grid, whatever you want to call it. Now, you can actually start creating your menu. And once you have your navigation menu, you could really start customizing everything from there and even launching your website. So the best and easiest way to go to customize your menu is actually in the WordPress dashboard. So once you're back in the WordPress dashboard, you'll want to go over these tabs, go to Appearance, and then click. Since you don't have any menus, yeah, you could just go ahead and create a menu and this will be your main menu. So I'm just gonna put Me menu here, but you can name it anything you want, and then you'll just go ahead and click Create menu. Now, once the menu is saved, you could then actually go ahead and add things. So I would go to view all. And then you could add your generated homepage, your About Me page, your blog page, and then add that to your menu. So once it's added, you could actually rearrange any of these if you want to. Eventually get to a point where you want to show your categories for your blog. You could even add new tabs into your blog. So your blog would be the parent and then the about me would be the child. So that's kind of how you would create hierarchy in your menu down the line if you so choose from now you could go ahead and just keep it to percent ball three tabs. And then once you click the down arrow, you could actually change the label. So I am just going to label that home. Keep that as about me. And then, so then now you have your menu saved. Once you click Save, And once you do that, your menu will actually be shown throughout your website. Another fun thing you can do in the menus is add custom links. So say for example, you have a podcast, a YouTube channel, and Instagram. You could put in the URL here and then also add that to your menu. Maybe you want to add specific categories like I mentioned before. You could add that to your menu under your blog section. If you once again, so choose. So then you could actually, I'll just show this to you four examples. So inspiration or something that is kind of what that would look like. So once you're here, now you have to actually activate your menu in your thrive. So once you finished with this menu structure, now you'll want to go back to your thrive dashboard and go to your thrive Scene Builder. Once you're here, it'll take you to your theme templates. But you could go back up to the site wizard and then go to that menu section that we skipped earlier. And now you can go ahead and choose the menu. So now you could click Main Menu and then main menu on the footer as well. You could also have different header menus and phentermine use the footer menu will just be the same. I'm structure of how you create that. You just create a new variation of a menu. So you could do that as well. But for now I'm just going to put main menu. And now I'll have to activate the menus on my site. So now we're nearly, nearly there. And now you could actually preview your site. So now I have a homepage, some tabs about like everything the brand is all about, some extra sections about things I offer an opt-in. Now you see everything up and running. This is obviously the main menu that I just created. So now I could click About Me time. So then it will take you now to this About Me section. And you can scroll down and see what different things there are. This is just what I was playing around in the templates before. Scroll back up. You could go to blog. And then now you could actually see your blog in action on a real page. So this is kind of what that would look like. And then once you create the blog, you could actually scroll down to inspiration. And then this will actually taylor each individual thing in that category. This can also be changed as well. You can type in your search bar or search things pretty much. You can go ahead and click how to start a blog. Read the blog posts that you've created. So everything that we've created so far is a bear. And now the next thing you need to do is launch your website, which is the fun part, and I'm so excited for you to be doing that. So just previewing it is already probably getting super, super, super excited. So then what you'll want to do is go ahead and click that coming soon. And then you could actually now click launch your site. So once your site is launch, then anyone will be able to find you using your URL. So that's essentially the baseline structure of building your own website, your own blog, and desk. Congratulations. You are one step closer to sharing your passions. And I just wanted to congratulate you for personally creating this website. I know it's been a long time coming. You've put in a lot of hard work to get to where you are at this point. And I'm so excited for what the future holds for you. So thanks so much for being here. Thanks so much for taking this seriously and showing up and making this website and your dreams work for you. You're one step closer and I'm so excited for you. And I'm so excited for what your new website holds and to see your guises creation. So send them in, post them in the Facebook group. And I will see you guys there and chat to you soon.
26. Thank You!: That's a wrap. Thank you so much for taking the time to finish this class. And I can't wait to see your final blogs up and running on the internet. Don't forget to upload a screenshot of your final blog so I can actually give you guys feedback. And also don't forget to connect with me on Instagram and YouTube at Angelica with steel. I'm so excited for you to launch your whole blog on the Internet. Take advantage of all the opportunities at the blogging industry has and the same age and I can't wait to get started. See you soon.
 Angelique Vestil, Web Design, Branding & Marketing Expert