Transcripts
1. Intro : we owe blush for beginners to create a simple mushroom industry. In this class, you will learn how to draw in pain. A simple, much administration use English. My name's Amelia. I'm an artist and illustrator living in the ambulance, and I like to draw inspiration from everyday life and the nature around me from my work. You won't be needing any prior knowledge of this class as I will guide you to my process of drawing, sketching, finding inspiration, choosing callers. And we will also be looking at materials needs in order to complete the class project which we will cover in the next video you get, incorporate all the skills into your own process and apply them in other personal projects . You may take off at the end of this class. You will have a wonderful mush administration, which you can put on your wall. You can give it as a gift to a friend or you can make Prince very sneakers out of three disguised doing, you know, whatever you want. Okay, I'm really excited to join me today and let's get started
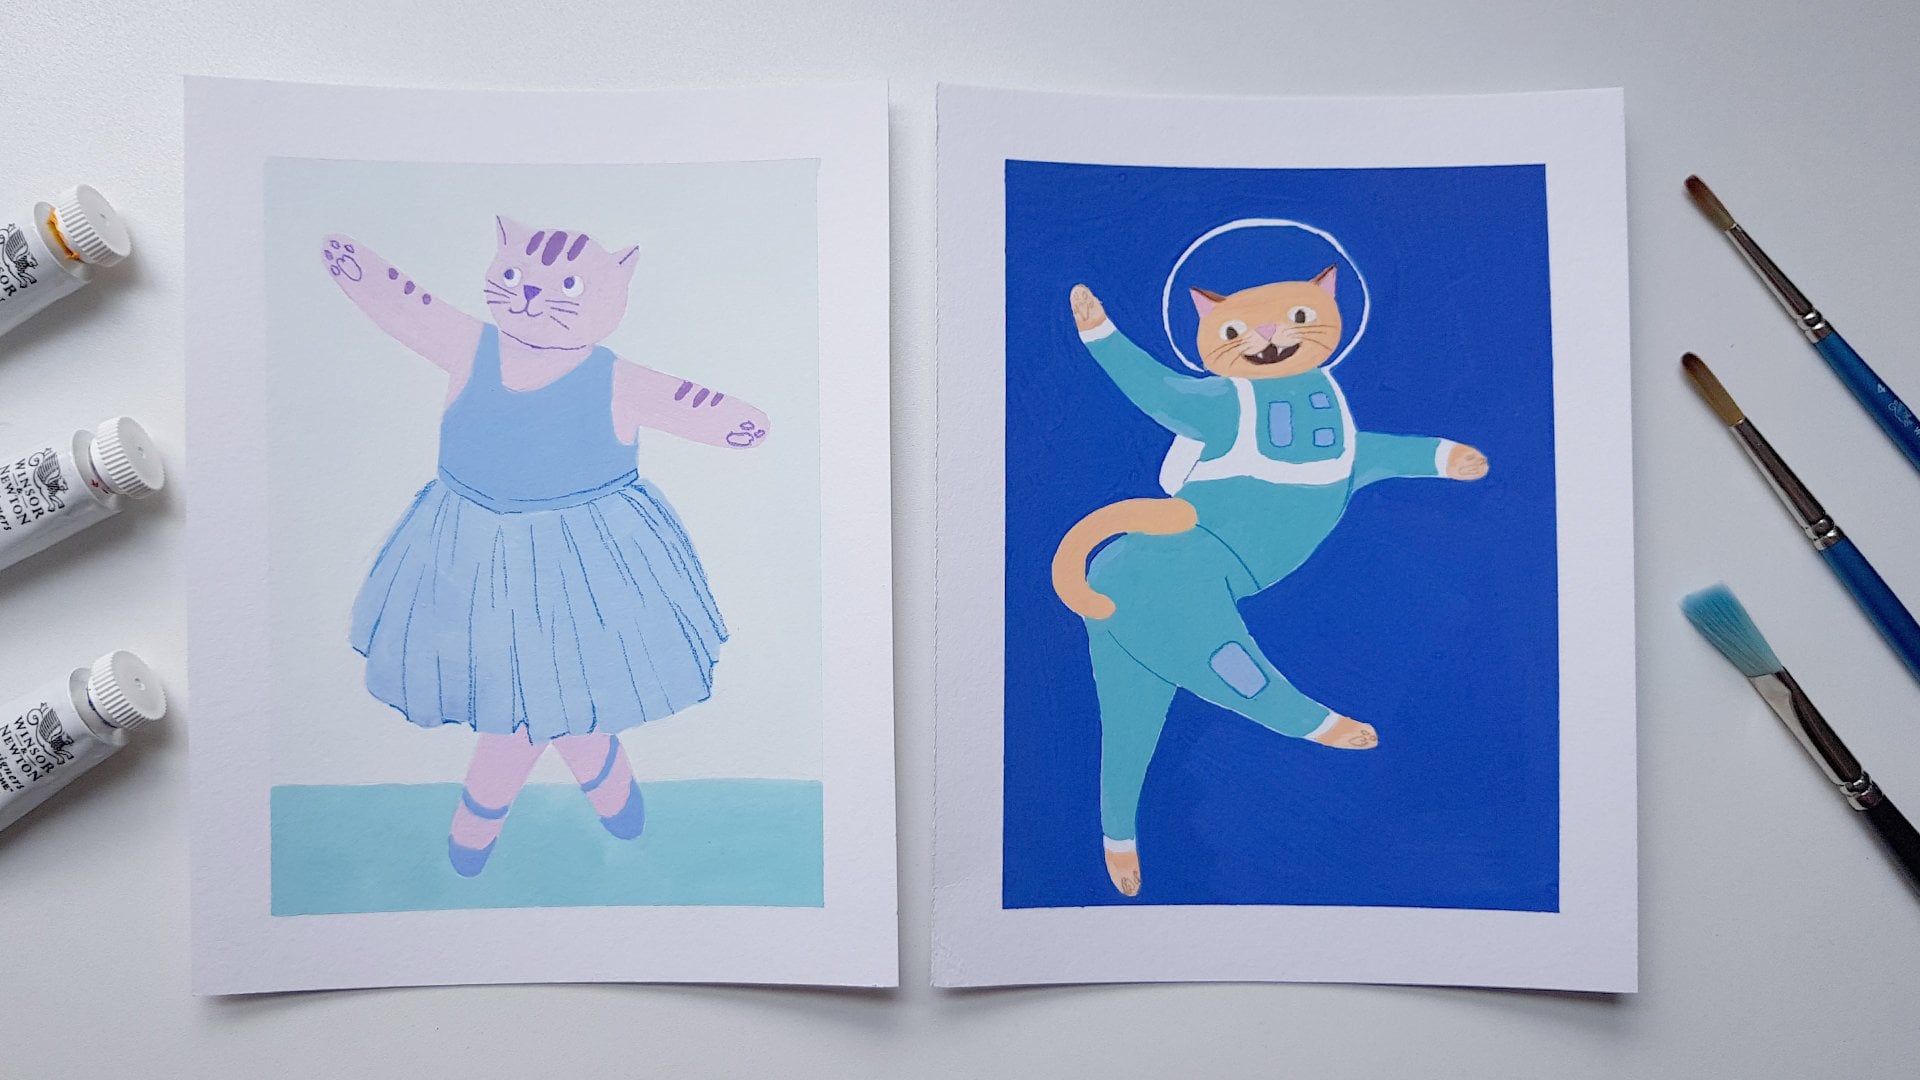
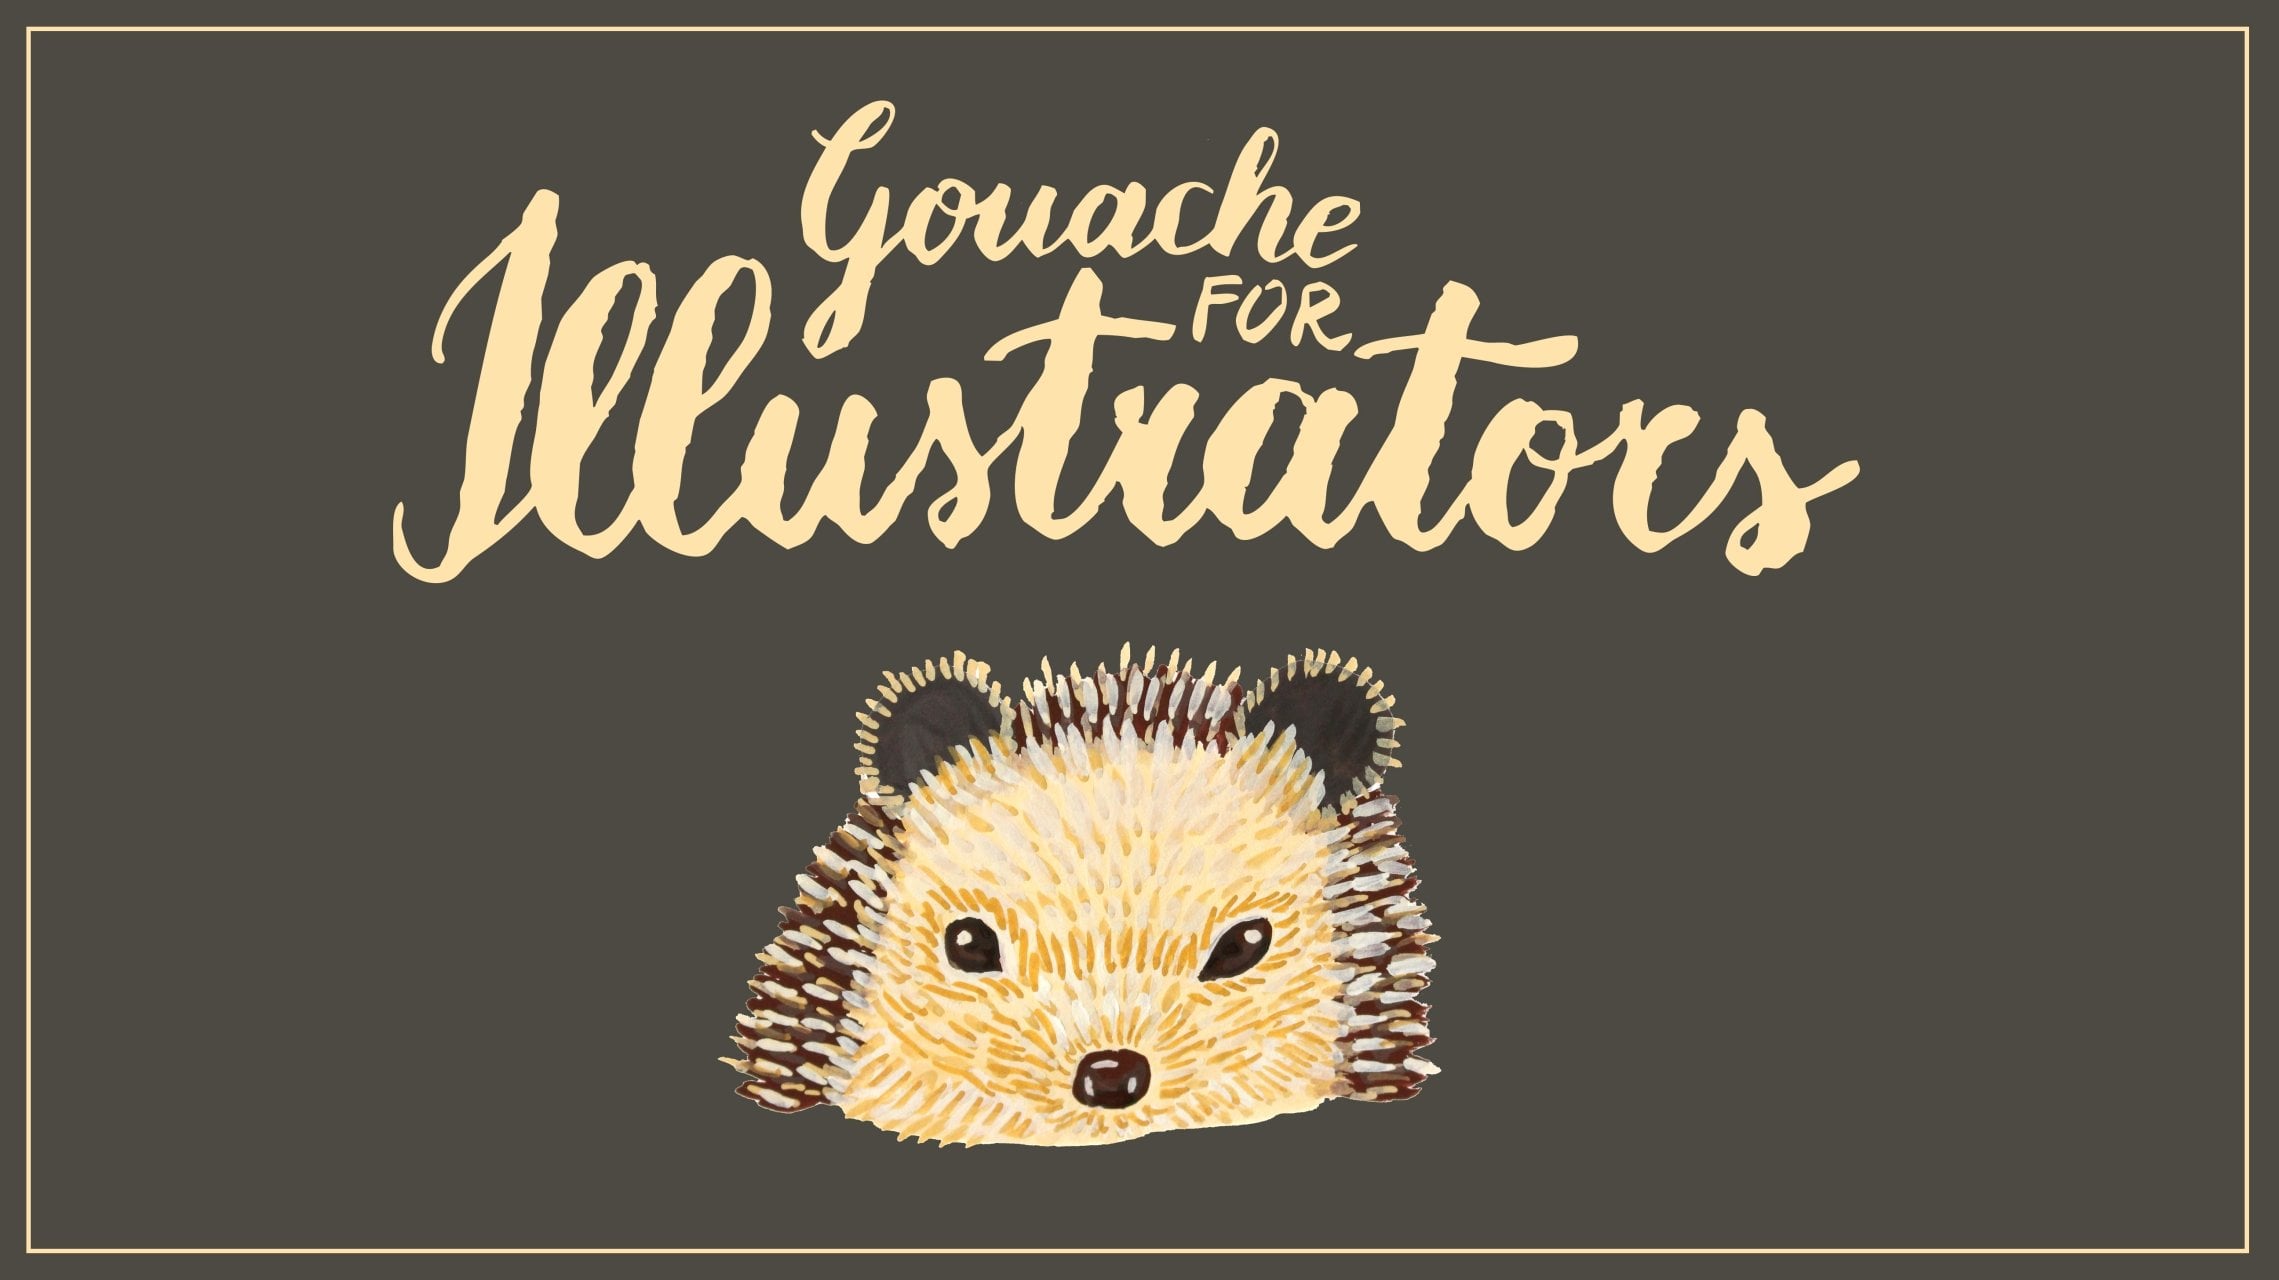
2. Project : for today's project will be creating a mush administration. Help using wash, but if you do not have that, you free to use any medium. I chose mushrooms for this project because I had a personal breakthrough while painting them from a photo to Kuol. Akel. Give me so much confidence to keep going with my art and my yes, and I really hope that maybe that will happen to you as well. I think this project is really great for beginners because we will be working very, very big basic shapes and also very limited color, which looks really nice. Remember to keep an open mind and explore the shapes like the most, and also the colors like I will be using some of my favorite colors. You might also want to have a look in the project description before you get started to get a clearer idea what's required. Let's have a look. It's on the materials we will be needing for today's project
3. Materials: I think materials you're gonna be needing for today's class, I will be using artistic wash things. Brand is really good for beginner, since he has a lot of colors to choose from. It is budget friendly, and it also reactivates very easily week, a little bit of water. You're gonna be needing a mixed Allah, and I'm just using the regular plate for brushes. I generally used three sizes. The first size is a number one, which is used for fine details. Second is in the retreat rash for bigger areas, and the third is the number four. For background. You need some vessels for sketchy. I use fully Cromwell's because they really like their texture. Can also use the regular a ruler, an eraser and some watercolor paper. I like to use the three Contra gs and because of the sticks chur a glass for your paint water and the paper told to wash off your brushes. You can reuse this pregnant that's are also very encouraged. Way have a low materials ready. We'll be talking about finding inspiration in our next class. See you soon
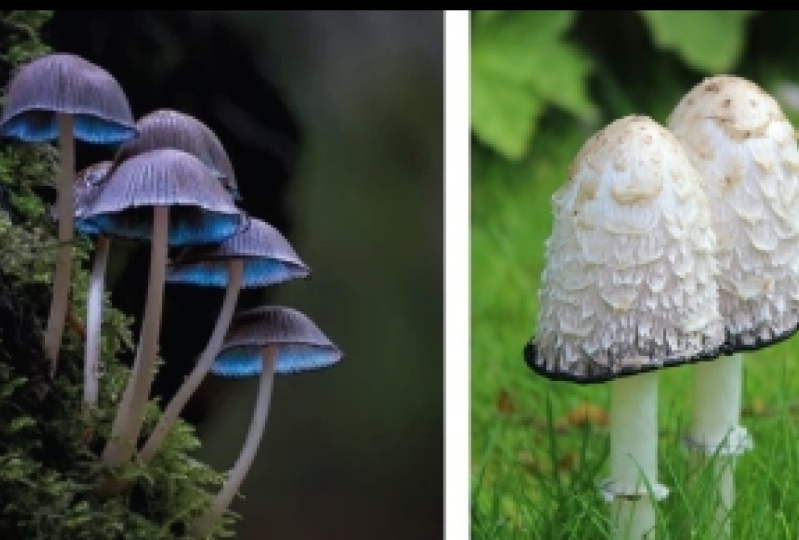
4. Finding inspiration : you should leave my measures of expirationist interest. I spent some time looking at photos and even other artworks to get inspired and get an idea of what I want to draw. The thing I don't get first is the shape, and I think the mushrooms that send out to me and that I found most interesting color doesn't matter. This march is you can change into whatever you like. You can find my pain transport in the description of this class. If you want to pay the same Russian society, I think I'm going to go with these marshals. I really like the way they were clustered together and the overall shape of the composition . You know, it's really easy to simplify. I also really like this one. She put the cap really stands out to me and I think would make for a nice piece. You're fortunate enough to live next to a forest. You can also go and take some photos yourself. Think the ones I have. Remember to pick the ones too, like the most, and you can accept master correct every six to great your own original designs. It's every field mine. In the next lesson, I'll show you have to sketch your mushrooms and how to simplify the image to create your illustration.
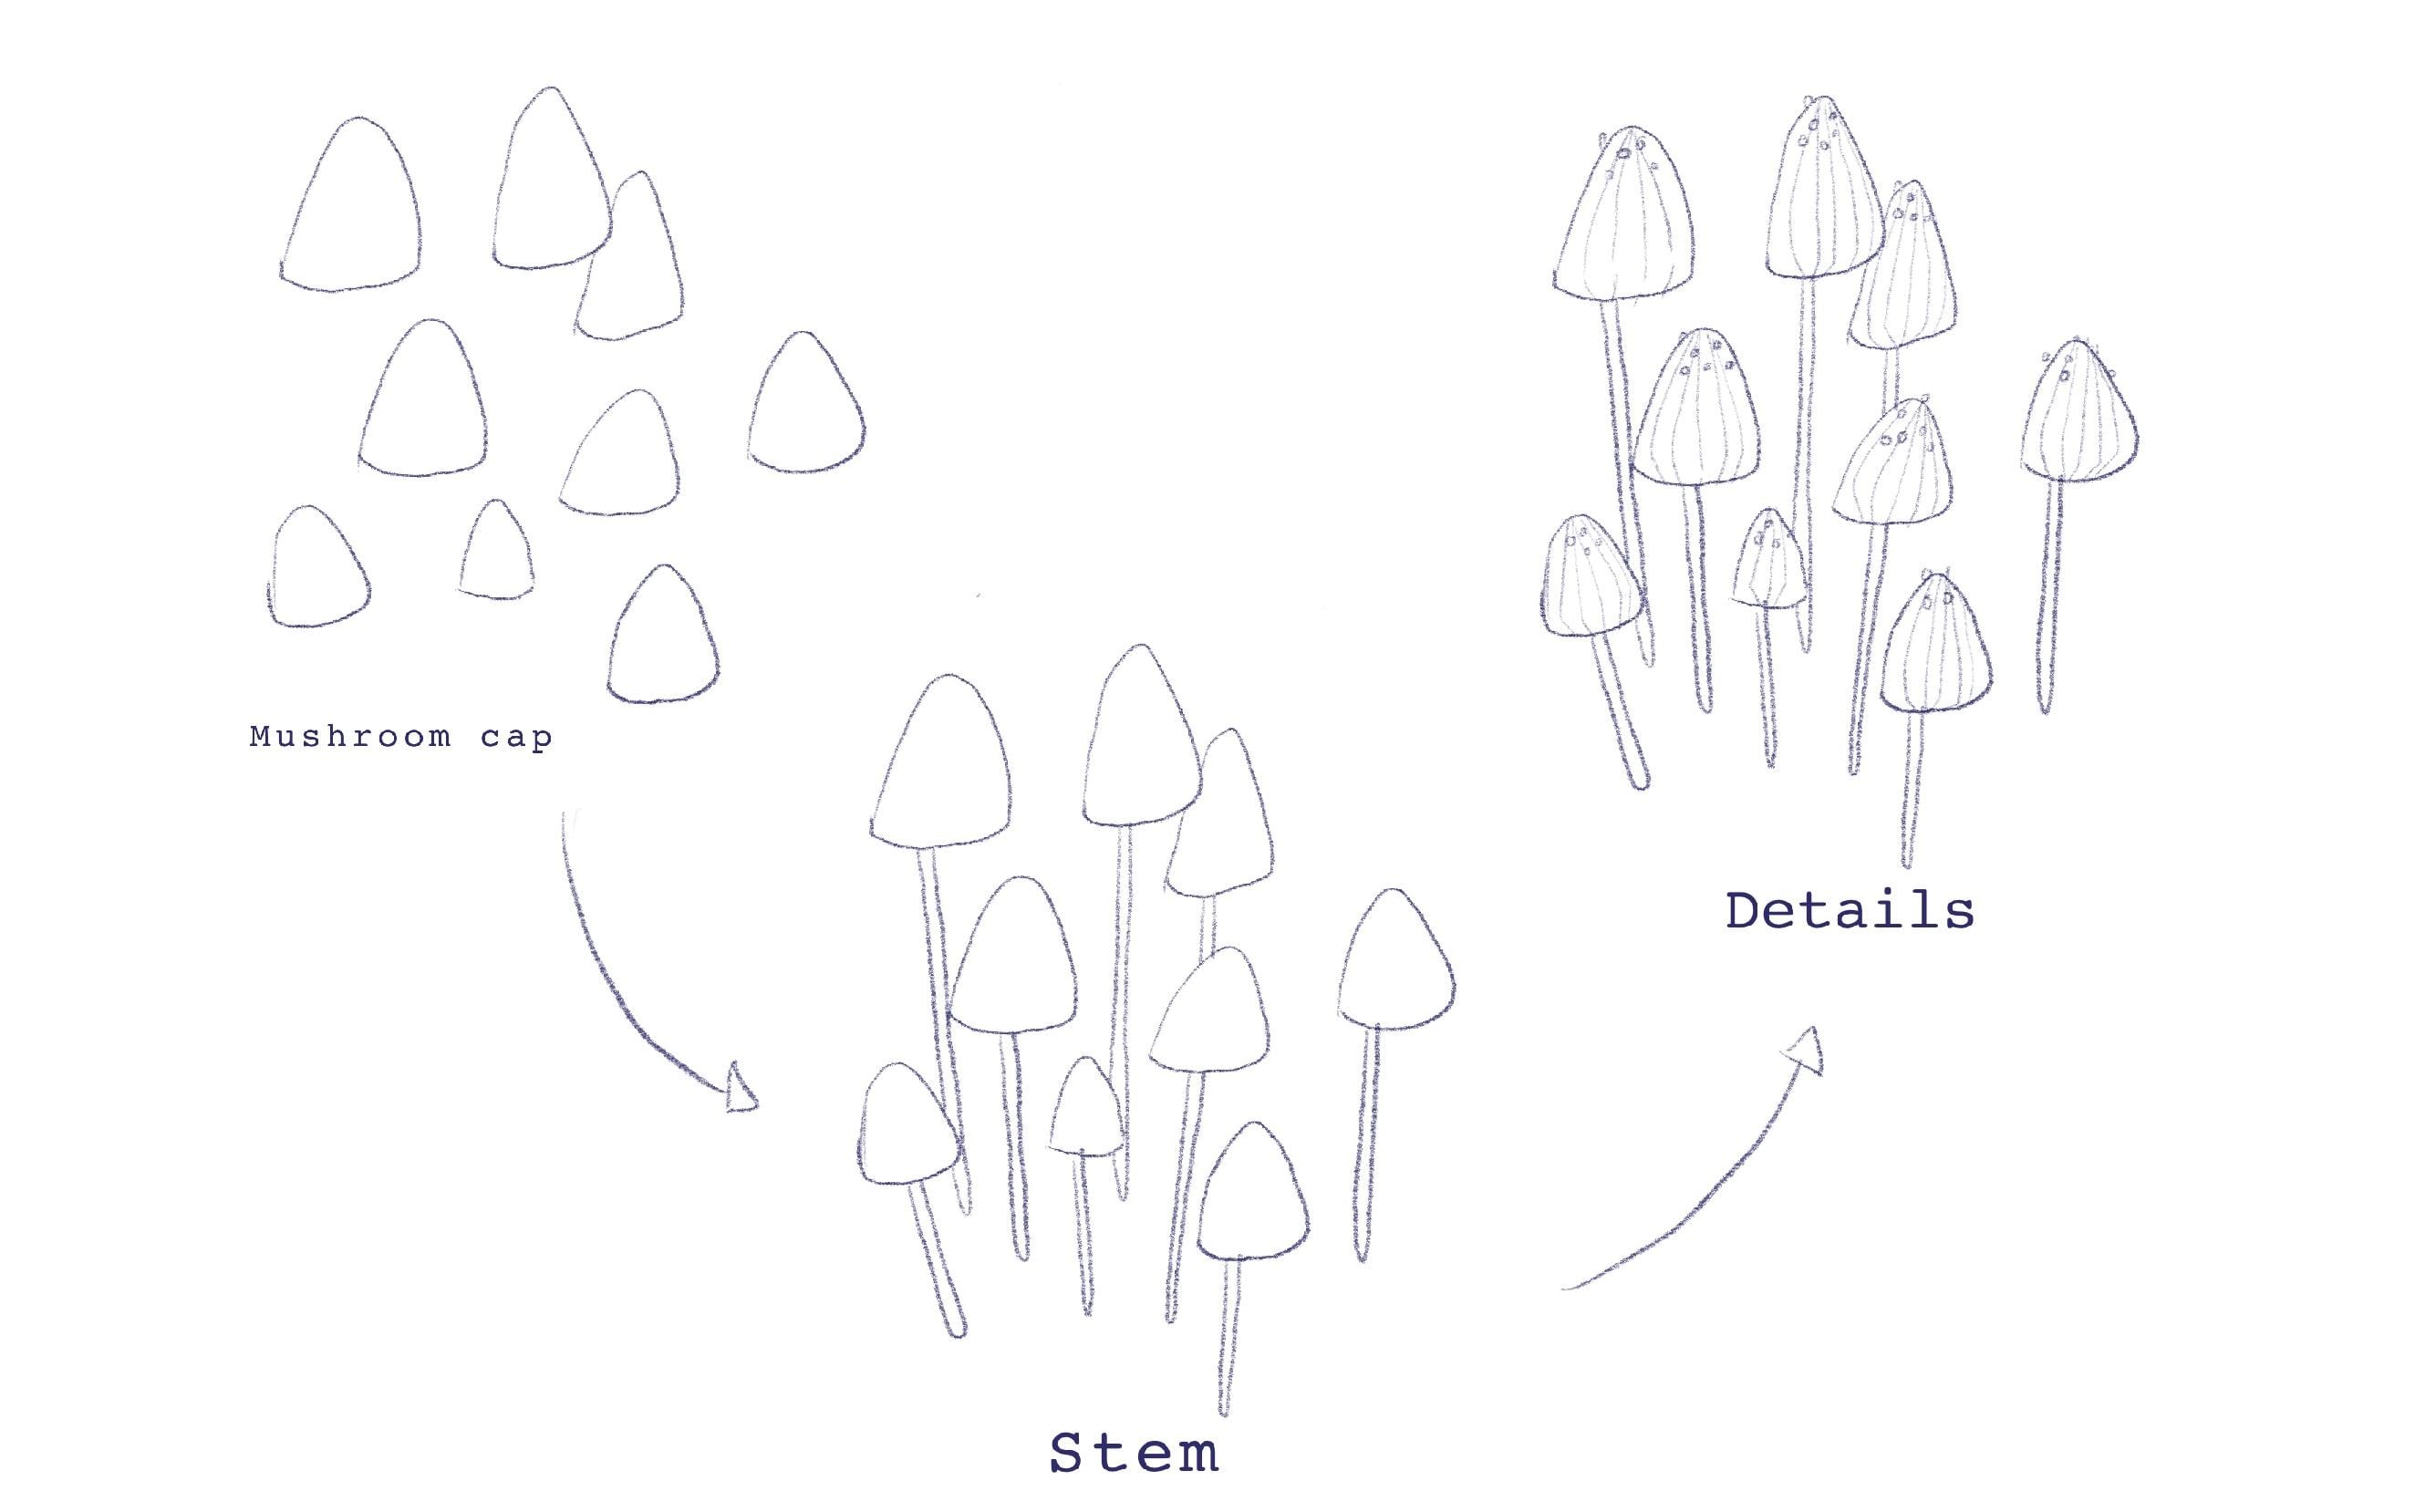
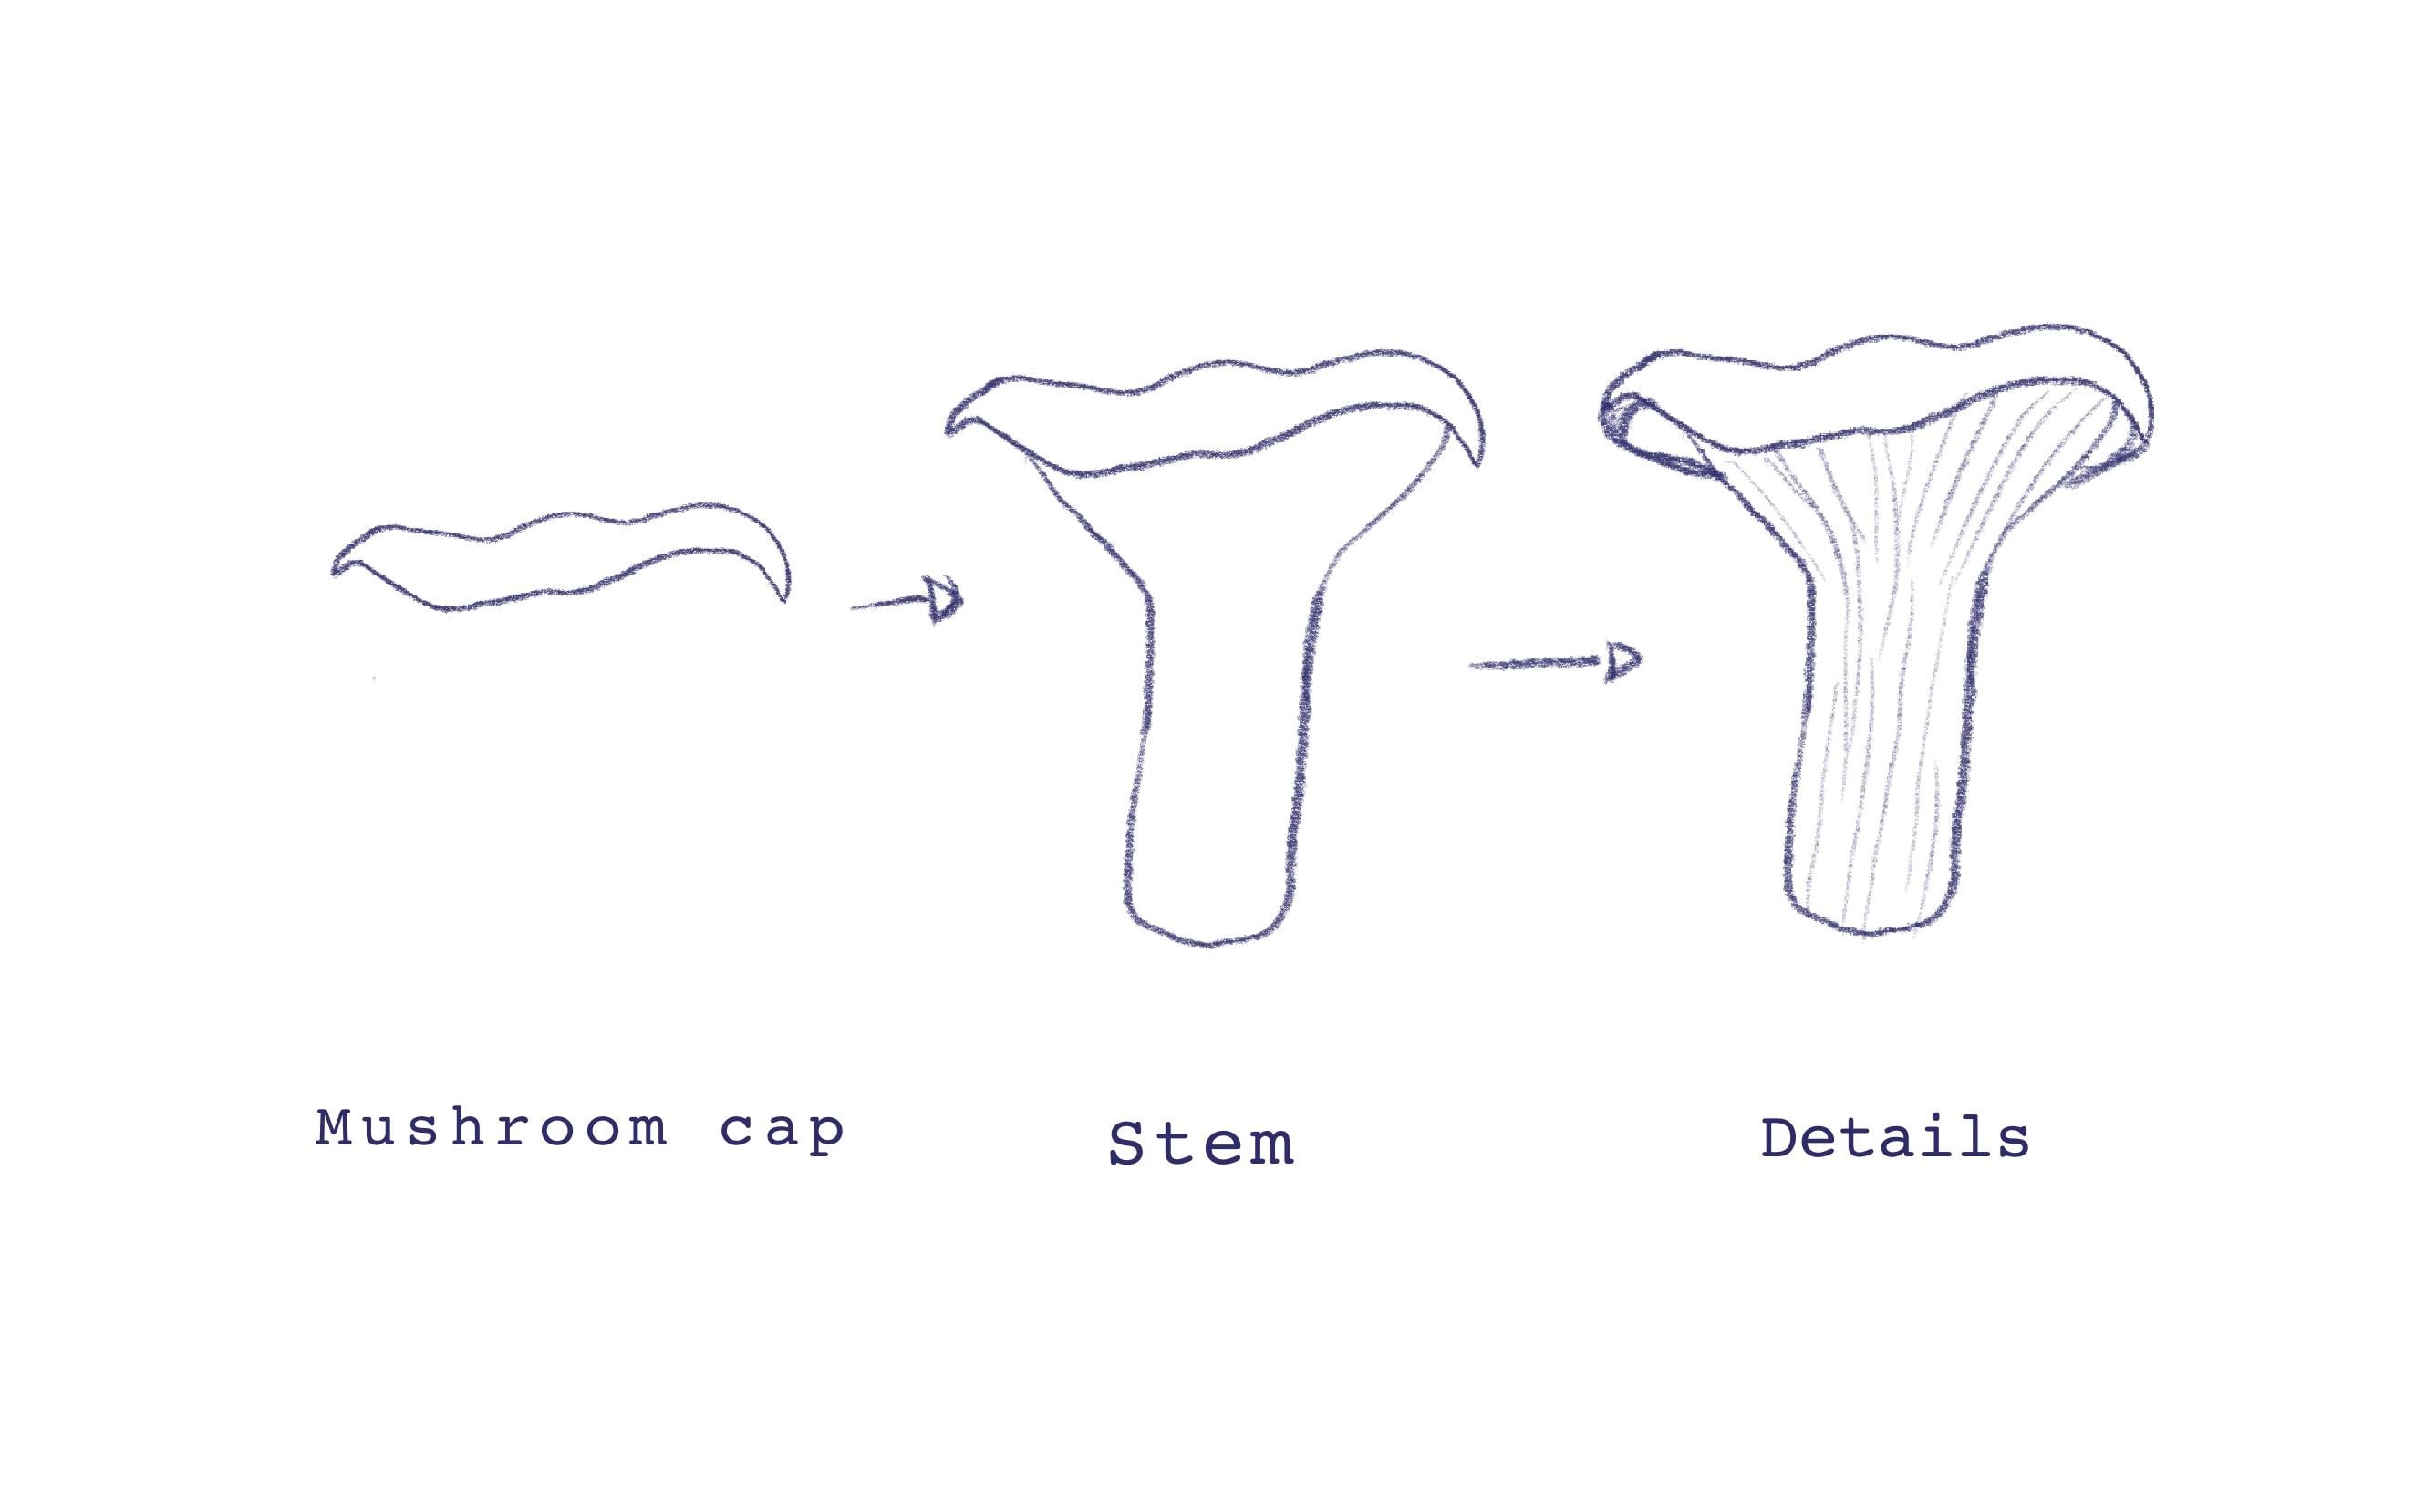
5. Sketching : I broke the process down into three simple steps to follow and drying your mushrooms. You can use this no matter what shapes your mushroom state. This lesson. Oh, sure, you told my sketches for the illustration based on the polls we've seen earlier. I start by drawing the mushroom caps this way or know where all this things will go, and he helps me position registration on my page. Don't worry about your shames being exactly like the photos because mushrooms have wonky shaped, so make it your own circus E. I start drawing this times. He didn't get play with dipped by placing some form of the others. Poor victim. Smaller or bigger again, They don't have to be perfect, so don't worry about that. Currently lately sketch work and what kind of details I want on my washing. You don't have to be super exact. This is just to give us an idea for the painting. Later, most of these lines will be covered by your paint. I decided to give some texture to this tense by adding some lines again. I go very lightly with my pencils and I try not to press hard. Let's have a look at the second Skitch again, I followed the exact same steps but get a totally different results. You can play around with the shapes here, maybe one course to work in a more cartoonish in mind. Or maybe you want them were realistic. Do whatever feels best to you, and I'm sure you'll get the best results. This also really great exercise for trying to figure out the style back to painting. With the subject matter being so simple, you can try different methods and different techniques to find what's best for you. I know that I kind of know where my mushroom caps are gonna be against our planning steps. And with this marshals, you can see the stems kind of look like they're coming from the same point there taker at the top and they get dinner as they get to the bottom to deploy pretty come from it is particular drawing. I decided to add something mentioned by adding those little dots following these three steps of cats, then nd simplifies the process that makes during this intimidate your painting look are facing and put together the next lesson. Before we start planting a demonstration, I will give you a few tips on how to use squash
6. Tips on using gouache: my first deep when using quash is to switch your colors to have a guide for the final result, they often drive very different shape that what's on the tube Darker colors will dry, lighter and lighter colors with right dark. Second, deepest to use fresh print because you get the best consistency. That way, your pay will be really creamy, and you cannot get this result if you re wet. It is also really important. Not at a lot of water in the beginning, bit by bit to keep the level of capacity you want. Question using. Can we reactivated easily with water? Can use the pain with small bit of water to create a very made and a cake effect. You can also use it. I loot it with a lot of water to create. A more watch country is just based on your preference. I prefer tomorrow a quint. If you don't just enough. Walter, you can get streaky lines like base wants, which can also creates a really cool effect. You can keep adding water until you get the capacity that you want. Next step is to mix enough colors for your background or for any part of your painting that you may need. It's almost impossible to mix the same color twice, and I made this mistake and got really frustrated with my painting. Had different strips of colors, which I did not want, so make sure that you have enough. If you're using water base Ben's, you don't have to wear a wasting pain because you can reuse it after if you want to hear it , a brain to make sure your first layer is completely dry before you add any day. Those to prevent mixing off layers and use a very small amount of water. And this is what happens when the layer mix together. Anyone that the media doctor. Now that we have all these tapes on how to use squash, let's get to painting or illustration in the next lesson.
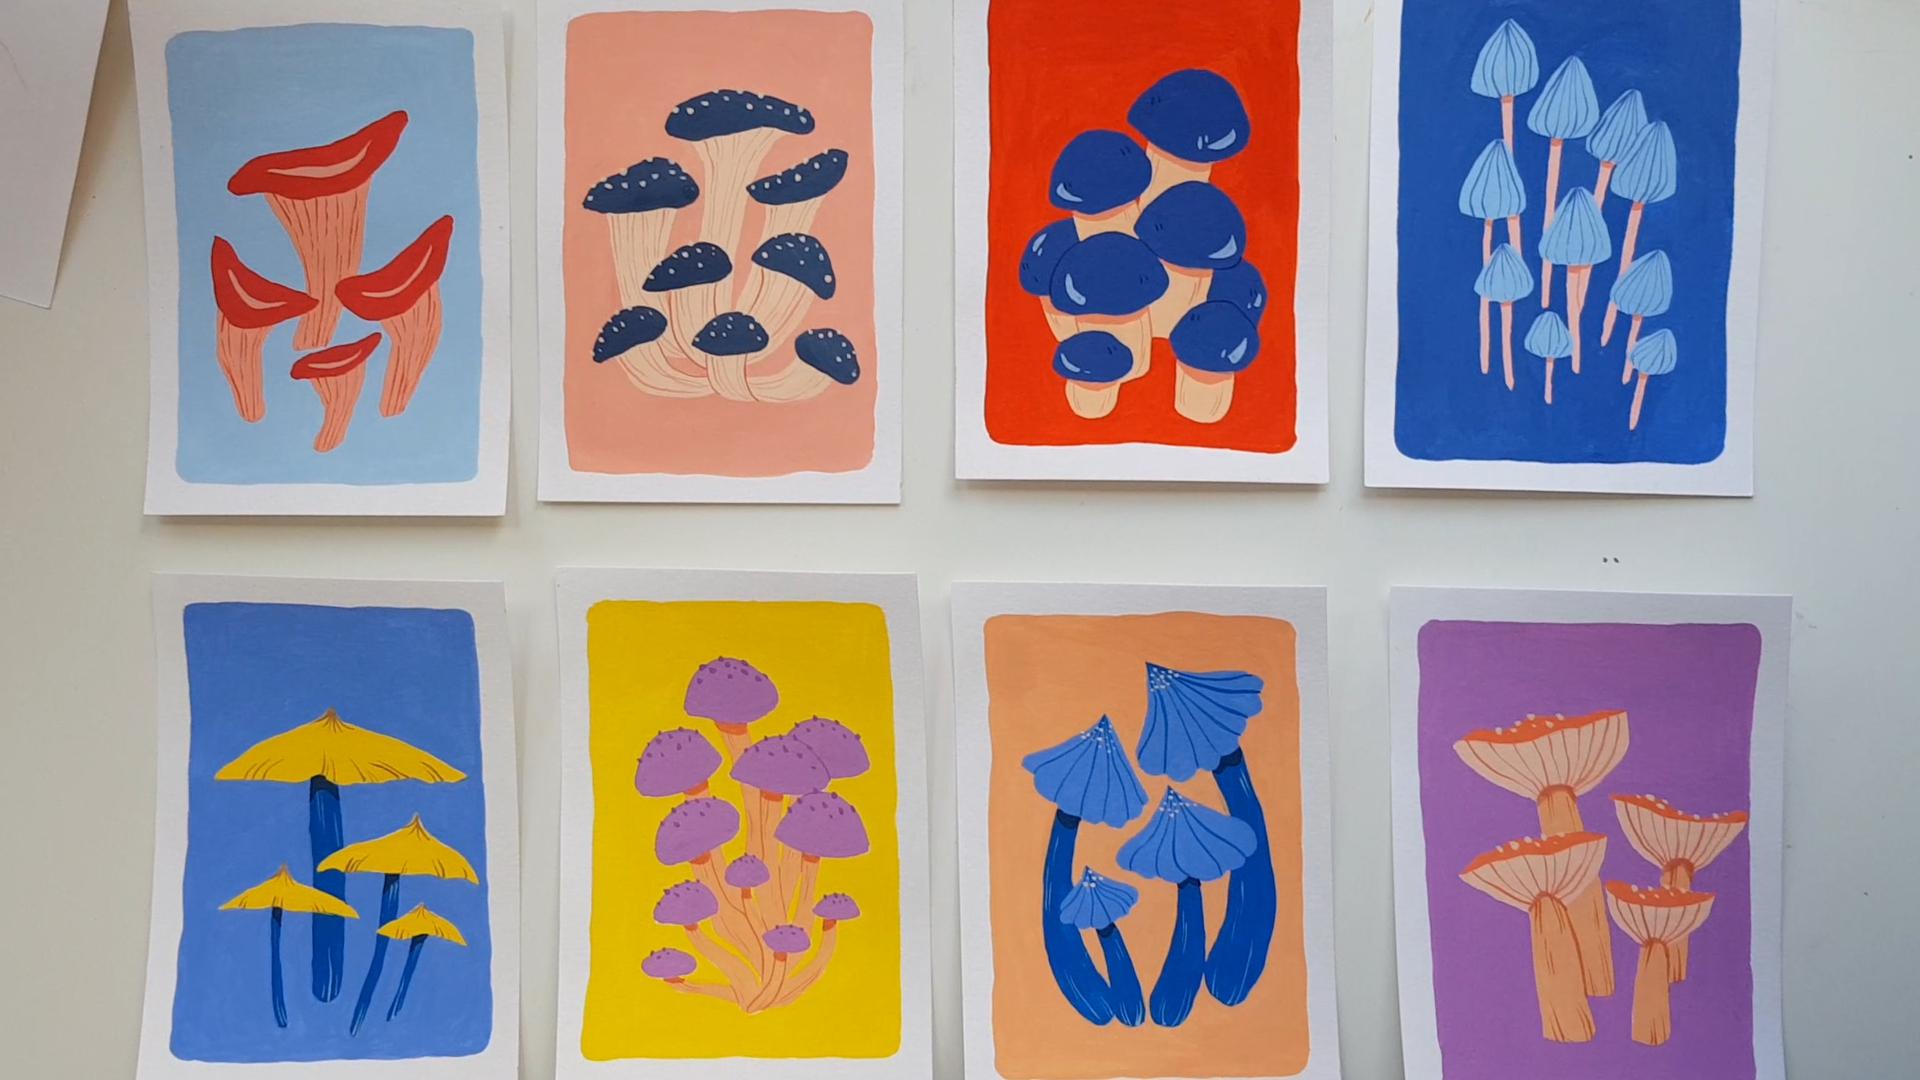
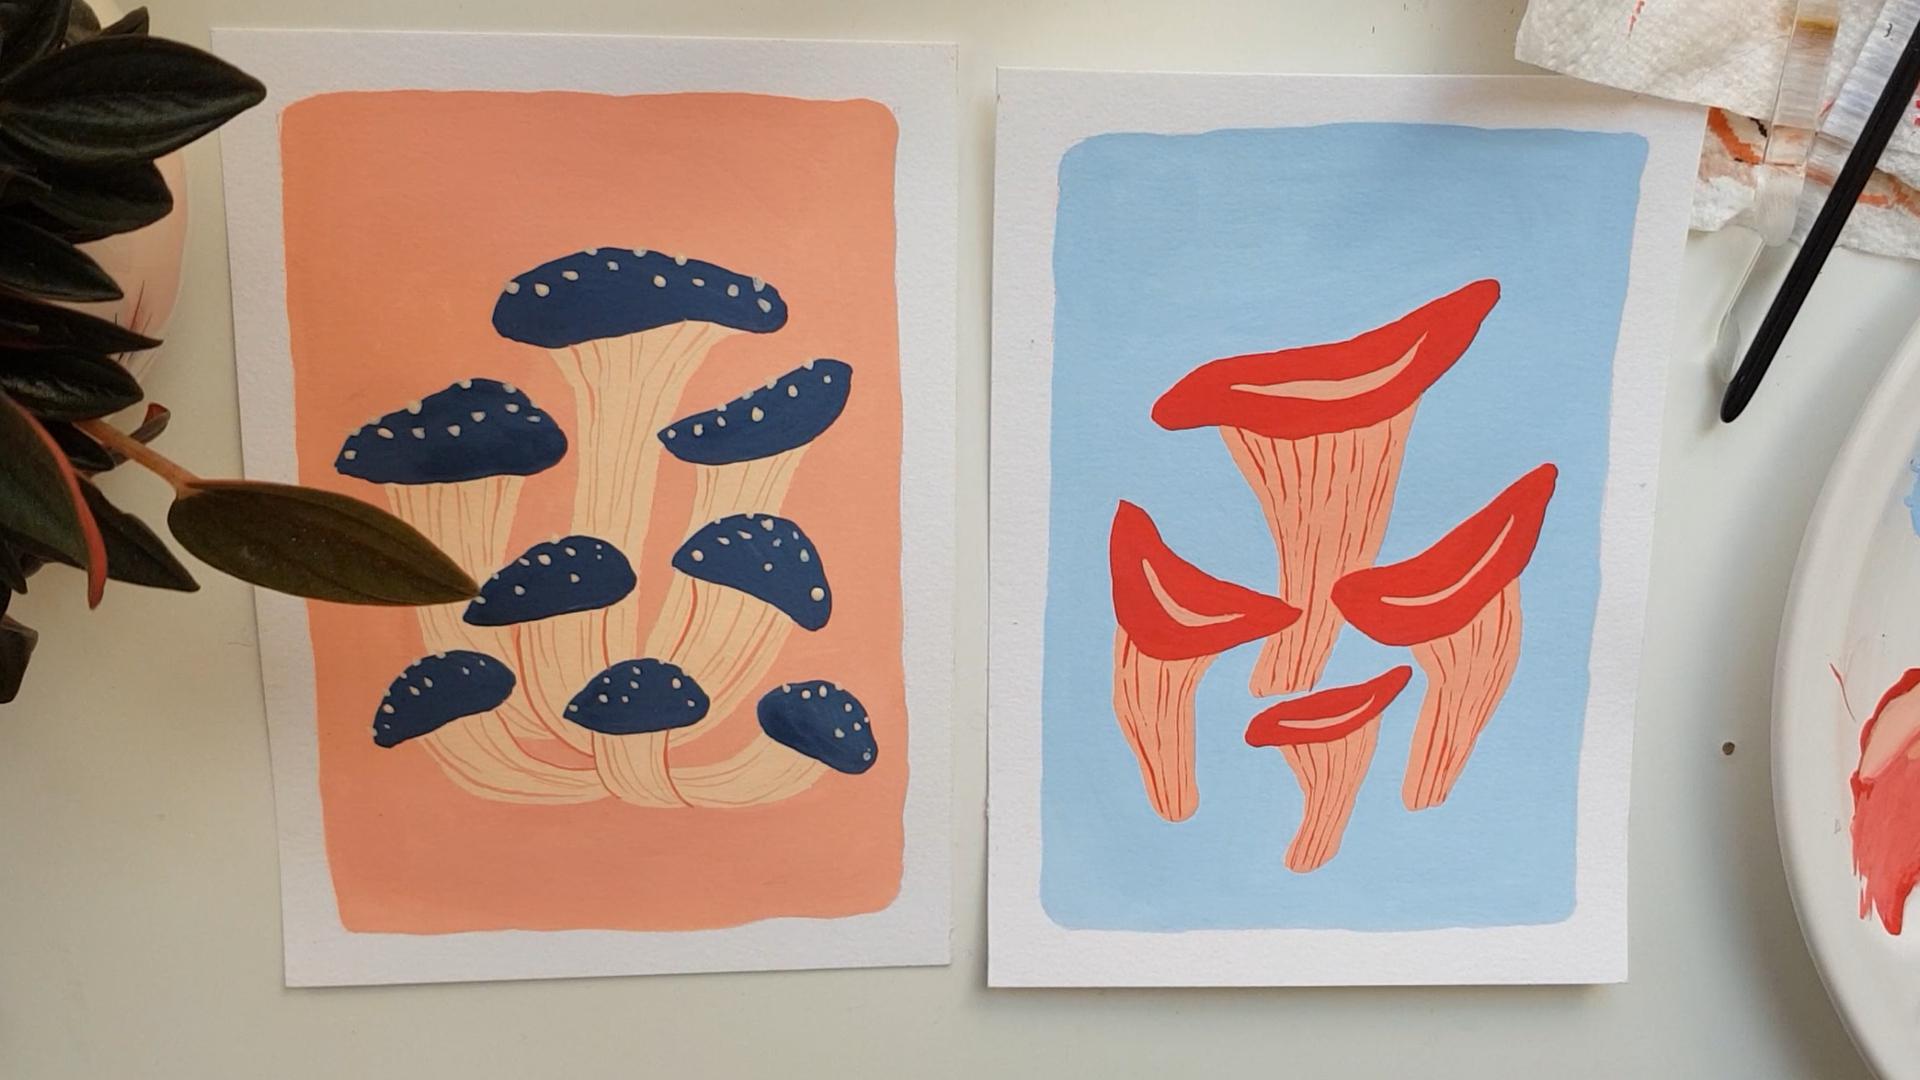
7. Painting: Before we start painting, we need to decide on the colors we're going to use. I used to really limited color palette around three different colors. I repeat this colors in different contexts in other paintings in order to create a collection. The repeating up colors really brings everything together. If you do not know what colors you want to use, you can use adobes color. Well, if you're unsure, I started by erasing some of the harsh months I had in my sketch. I do not really want him to show through to my painting. Now I'm going to start a color for my background. Like in my video, I really suggest you mix enough background color so that you don't run up as ever, painting the background with my size for a brush. It holds the most pain, and I can cover a lot more at once. I started the corner and slowly spread the paint around the page because I used to like the color for the background. I decided to paint at first and then paid the mushroom with darker colors. It's much easier to cover a lighter color if you've made any mistakes. I'm not being too careful here when the edges as I really liked the role. So when I get into really tight spots, I decided to switch to my number one brush that I can get those corners. I don't know, have this the right control with my bigger brush. And I feel this is better. I destined creating the mushroom caps with red and my size three brush so that I have a really good contrast between the colors and my mushrooms will stand up and wait until the background is dry. So I don't accidentally makes the blue and red together diligently dealing with each red cap. I was a little impatient here and have to be honest and didn't wait until they were completely try. But please, if I use the lines of color for demotion, I use the one from the back on something, my subject distant out. As you can see, this red caps really stand out to page. I've been spends only after everything else was dry. I just said it is the same red wine. There were the number one rushing in corners where I want to be really precise, and the nice was to my number three brush were to be good. Aaron and I just friended paint about from the Cornish downwards. - Let's have a look at this. I followed the exact scene. Started the corner, the paint confederation, paint and water. Yes, there's reading the pink around a major and mixed enough color slides, writing any travel again . I was really impatient here, and I didn't wait for the background to drive with. Please do because they don't know what those color mixing together. And that got very lucky. After I feeling most of the area, I took my number one brush and just Linda working edges and correct any imperfection that I wanted to correct, just that I was happening. The result. And I decided to used this really, really dark blue because really pops on the page. In contrast with the pink that I use for background, - we are so close and we're almost finished with our ministrations. The last thing we have to do is my favorite part, and that is batting the details and finishing touches, which we will do into next Best
8. Adding details: This is the only thing that we have left to do in order to complete the registration. It's my favorite part because your ministrations personality comes through all the details you decide to add for details. I used the same colors and for my face to keep the local non Russians grace. As you can see, I put the same color I put on the Russian stepped on. The captain created details. You can make the details as simple or as complicated as you want. I personally prefer them will be more simpler, but it's up to you. The lighting for this little mushrooms is better line in the centre, create a little bit of death and now understands I'm gonna go on with the red days, where the caps to create the streaks, which gives the really next texture to the mashups like the ones we did in the sketch. And there you have it. Our first illustration completed. Now let's finish this other one as well because he looks like they're on top of each other and decided to give a bit. But outline to Stannis, reach overlap. I don't usually do this, but I wanted to have a definition off worst and ends, and one begins isis in color for duck, as I did for the details later, I decided to add these lines to create a little bit of texture. You can add adults or patterns. You can create cool effects. It is your illustration, and you get to decide. - I don't need to be more character. I decided to add this cute little thought like Oh, red mushroom cap would have. But mine are blue. This is where the magic happens, because you can create your own musical illustrations and you can mix and match patterns create something truly unique. There you haven't are completed illustrations.
9. Final thoughts: you've made it. You created a lovely little illustration using watch. We've covered things from inspiration to sketching and coloring to create something truly unique. I hope this class give you the confidence to keep working with, wash and explore other things in different subject. I cannot wait to see what you come up with in the purging gallery off this class. So do not forget to upload your creations that everyone can we have any questions? Please reach out to me and not try to help you in any way that I can. Your posting your paintings on Instagram. Don't forget to tag. I live my name in the description of this. Plus, did you enjoy this class? Please leave a review and follow me for more classes like these in the future. It's been such a pleasure creating these plus and thank you again. And I hope I'll see you soon. I
 Emilia Ghebea, Artist & Illustrator