Transcripts
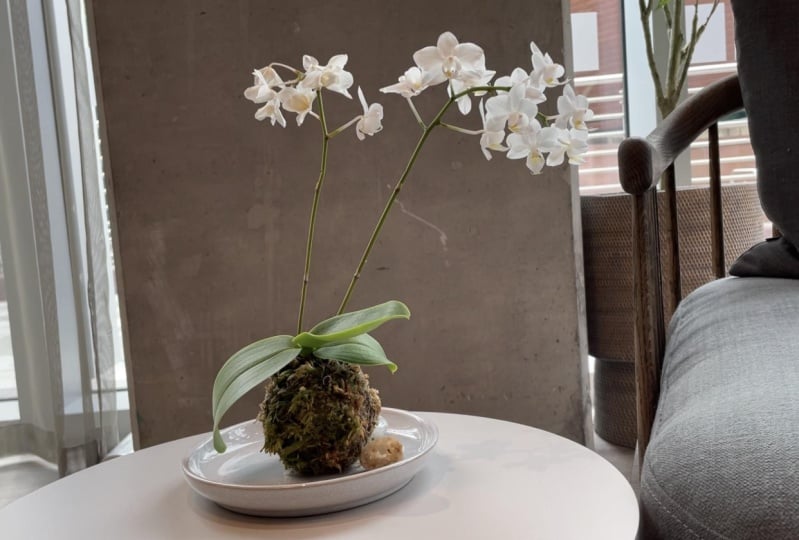
1. Potless Orchid: Hi and welcome. My
name is Scanga, and in this class I will show you how to make an old head. A beautiful cookie gamma. You will learn how to make a cut them out without
using any soil. I will explain what
materials you will need to make sure that you're all happy. You can display like this. Then they taper. I recommend for that. You can find from the scene and click further ado,
let's get started.
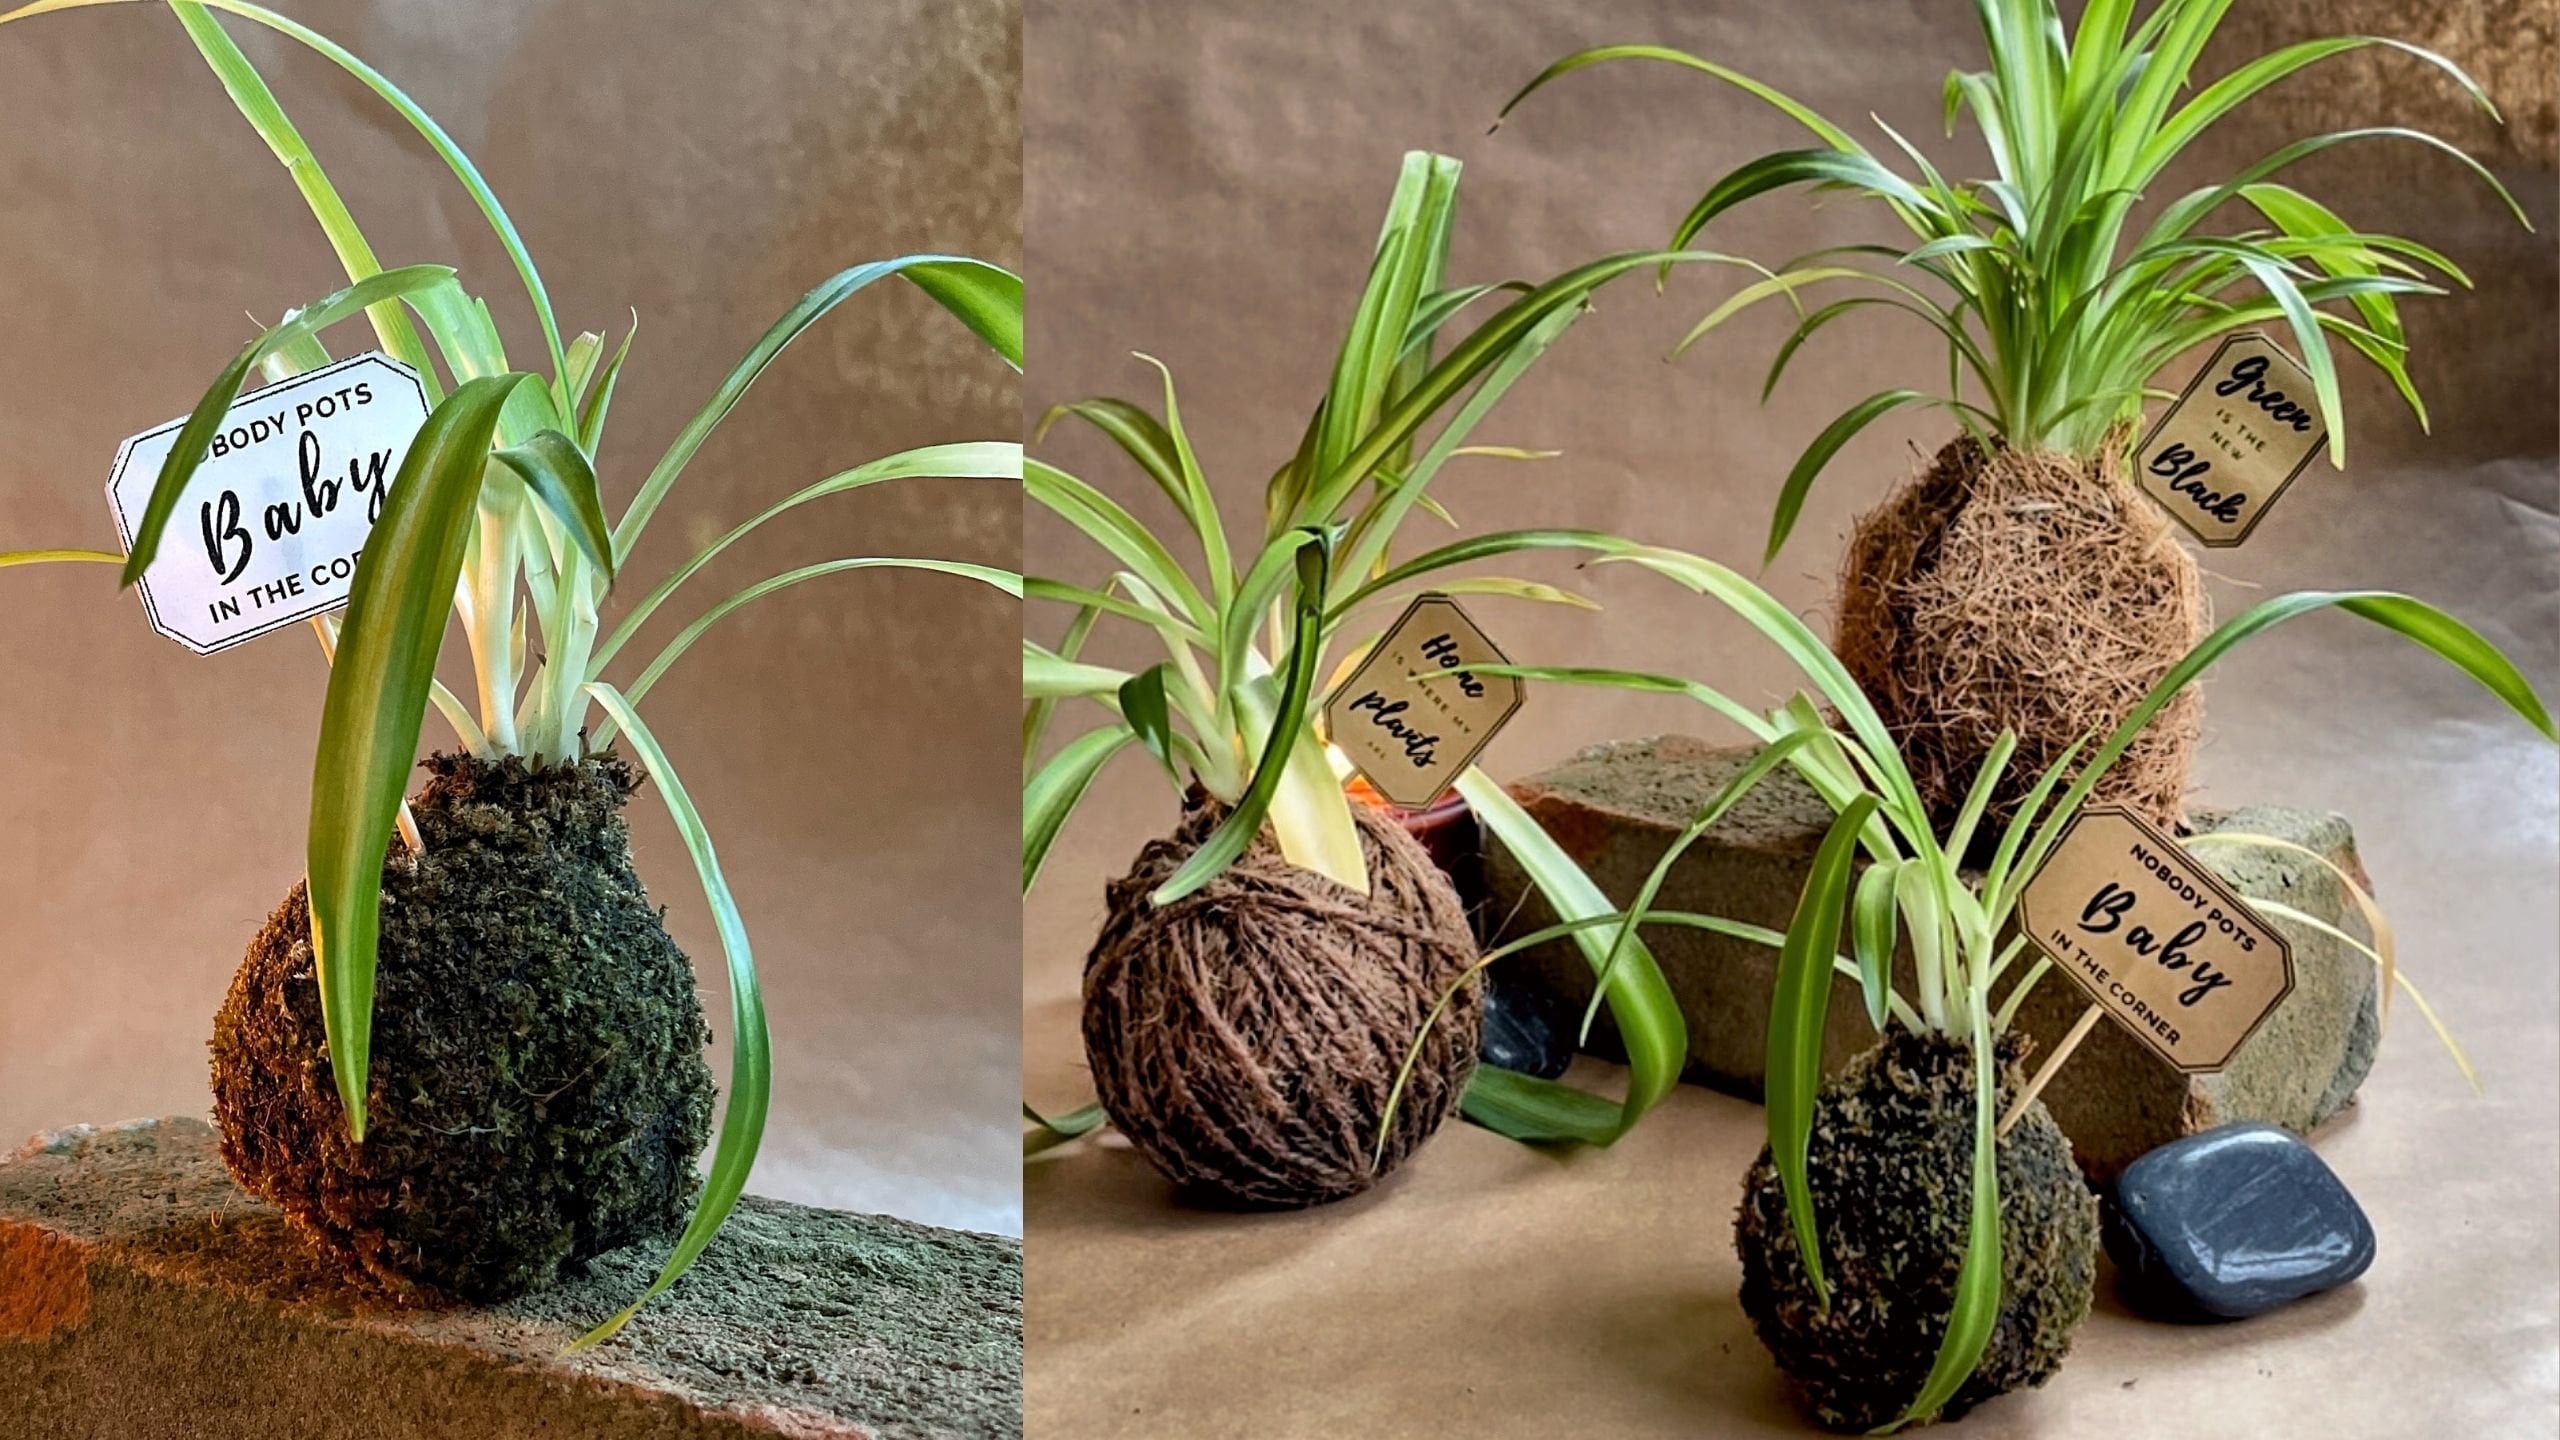
2. Materials: What do you need to
make another feed into a nice cookie lemma,
you will need a plan. I will use this small size or hits that already
has some flowers, some absolutely
beautiful flowers. And it came in a nice kind
of transplant plot, plot, kind of transparent, transparent port that you can
see that the roots are nice and green and
they look very healthy. Still currently. This leaves in. So ready, Let's have a look closer. Look. This tiny market
already lives in most, most of them come in the
blood that contains Spark. But don't worry, you
just need to get rid of the park carefully so you
won't damage the road. Or you can use the
flower the same. So this looks like it
has some root rots. So if you're all kids, like mine, not quite
hat, look quite healthy. But this one. So when you put it mounted
on the sphere or a ball, you want to get rid of this bit so that the roots will be safe. I'm just going to play
it back before I use it. The next thing that
you really need is a sphere or a ball. You can buy it in. Like this one is a dog toy. I started from my dog.
She doesn't mind. It hasn't got the
squeaky bit in, so she doesn't care. What is important. It has open. The inside is open and you can buy toys dog toys
are usually bigger. Sometimes the both go into the dryer to help with the clothes are
really good as well. That area inside the head, let's surface to stay
on and stand out. So when you put it on
the table, it doesn't. That's not for all away. Very easily. Obviously it will somehow. But if it does go
away or roll away, you might want to add ring. So it has a nice surface that
it stays on and stands on. That the thing is, I like to use is this velcro
to keep the or hidden place. He doesn't need the
specific work roles or plan for Chrome, you can use a little
bit thicker wine. There are green colored
client as well, so it's not going to be visible. You finish a scissor
and some sphagnum moss. It is already hydrated,
nice and stuff. It is not green because it was hydrated from the break
and dried version. But if you keep it
in a bright area, it often becomes green
again in the live. So that's what I'm hoping for. And the last thing that
you need is this thread, not this one, but
let's read the hue. Can you Bella, who had the
most in place with decimal? So ideally, you can
use transparent ones, but I find that the darker
ones are obviously but either. So yeah, that is it. Let's get started.
3. Preparation: The first thing that
maybe I need to do is to get out of there. Get the roots out very carefully because we don't
want to damage the roots. This one's quite rude,
bombed, I think. Really want to come off. So it is easier when you have
yours and bark because it just comes basically off or
out of air, flows out effect. It is good. Very carefully, I don't want to damage the root, but it is good that this
one is already in loss because that means that it already familiar
with the conditions. You can reuse the moss
if you want this orchid. Clean, new one. You can see the roots and the roots are green because
it has chlorophyll in them. And that means that they
can photosynthesize. So that is why they are
not going to put this in soil and close roots
into the soil. So this is now for a second I thought
I I ripped off. No, it's fine. So now that I opened it, I see that it's not her
eyes, but pretty cute. When you cut the roads, you want to use that. You did it in all kinds
of different factor. And you only want
to cut the rules that are rotten basically. You want to keep
the house a bit. So we go, I think. Others. Just one. No. No. So yeah. Alright. I will stake, should have done this before, but I will just take these
islands off as well. Because just for not having done neither me mathematically, we can see how this
will sit on the wall. In general that you don't
want to put it this way. So I want to say here nicely, I've used this one and try it out in the book. Remember you can use Twine going like this. I would hope so. Yeah. So do you want to find the place where the
kid that one? There you go.
4. Your Project: So the next step is
to cover the ball. In most first, because I got
this weird liquor football, I will just put
this to the side. I don't want it to be visible, but I will leave this in here. So what I'm gonna do is covered the ball in
most accurate with it twice and then
put the orchid on top and then cover it in. Again. Kind of keep the sign doesn't need very thick layer. Just wanted to kind
of make sure that the boilers mafia Zippo lacked the look of it. You can just skip this stuff. It doesn't matter how
you wrap it around. So ideally in one
made me say bar. When you do it, I find it that the darker the thread
that less visible is basically it is totally up to you what
the water is coming off. So now we want to find this foot. Note. We've run thumb, I'm holding this thread in
place. And the other one. Okay? So with this one, it doesn't really matter how I want to keep this very long. Because this way let me say it this way. Guys on the side. Okay. Become can see the bell. Give it some nice it is. Alright. Just going to say
kept in place. So. The top fund about them. So now I'm just going to cover
this with a bit of moss. I'm not even sure. I like it this way to be honest. I just get some out. No one sits nicely on the top. Again is the bed. And from the filament. So I'm just going to erase
some more muslin top. I would definitely
call that good, but actually I'm not
very bothered about he went to keep my not end on this read longer if you want to get on this box. And just loosely, loosely, don't want to definitely
don't want to hurt the roots. So here I can see a little bit, little bit more of
the root, this one, and I just want to
cover it. Must. Go ahead. Remember you don't want to, don't want to just
want to hold in place. When you are happy
with the look. It's my new tie them together. Find the other end. It's just the regular. Not lazy. But this is how it extends nicely. They look so amazing. But forget to take a photo of a chair it in the
project section. See you next time.
 Kinga Molnar, Plants • Simple DIY • Experimental Life