Transcripts
1. Introduction: Hello fellow
illustrators, art makers, creators and animators.
Exciting news. A fresh, new app
has just landed, ready to take you to a world filled with movement and magic, where you can bring
your dreams to life. I'm talking about
Procreate Dreams, a new two D animation app
from the makers of Procreate. This new app has expanded
my creativity in so many ways and I know
it can do the same for you even if you have no
animation skills at all. Discover the art of
effortless animation. In my course,
getting started with Procreate Dreams,
Animation for everyone. Procreate Dreams is
not just an app. It is a powerhouse for
unleashing your imagination. Developed by the brilliant minds behind the drawing and
painting at Procreate, which has taken the digital
art world by Storm. Procreate Dreams is a full flooded animation
studio at your fingertips. It comes equipped with
easy to use tools that turn anyone with an
ipad into an animator. You'll be shocked at how quickly you could create
something magical. And I'm here to teach
you how to do it. I'm Usa Barda and I help
people find their creativity through drawing and now
animating on the ipad. I've helped millions of people
all over the world learn new art making techniques and discover their inner artist. For over a decade,
I've been pushing the boundaries of
making art on the ipad, and now animation has become an exciting addition to
my creative process. Animation to me feels like
pure magic every time I press the play butt and I can't wait to share
this magic with you. Procreate dreams may
be fresh on the scene, but I have been deeply
involved with it for several months as a beta
tester during its development. Even more exciting was when the procreate team
invited me to London to present a Procreate Dreams demo just after the big
keynote announcement, where they unveiled Procreate
Dreams to the world. Since then, I've been
diving deep into animation. And it is so addicting. All of this experience means
I have so much knowledge to share with you and
I can't wait to get started in this course, we're not just
scratching the surface, we are diving deep into the
procreate dreams universe. We'll navigate the
app interface, master gestures,
and then explore the three key
animation techniques, The classic frame
by frame animation, the precision of key framing, And the innovative
performing tool that allows you to instantly animate
through acting and feeling. Get ready for hands
on experience. You'll embark on a
series of follow along animation projects
that will have you creating diverse
movements like twirling, falling, driving,
flying, swaying, looking, blinking,
spinning, and more. You'll explore
animating over video, working with audio and mastering essential animation tools such as key frame anchor points, onion skin timing and easing. And I promise it's not as
technical as it sounds. And for you procreate users, you'll learn how to animate
your past procreate work. Including setting up your
artwork for animation and importing your procreate
files into procreate dreams. This course is for
anyone keen on exploring their creativity
through animation. And serves as a crash course for folks wanting
to get started, whether you're an illustrator wanting to bring
your art to life, a content creator aiming to enhance your brand with
engaging animations. Or an animator looking to up your game with
procreate dreams. This class is for you
to take this course. You will need your ipad,
your Apple pencil, and the Procreate Dreams app, which is available
on the Apple app. And don't forget the original
procreate app as well. We'll be using it for
a lesson on setting up your artwork for animating
and procreate dreams. As a student, I've got you
covered with resource files. You'll have access to ready to animate templates so you can
dive right into learning. Procreate Dreams
is a game changer, and it's not about creating
intricate animations. It's about having a
blast and finding new ways to express
your artistic side. Ready to set your creativity in motion with procreate dreams. Let's make movement magic together and bring
some dreams to life.
2. Class Project: My goal for this course is to equip you with the skills you need to create your own
animations and procreate dreams. As you follow along
in this course, you're going to be creating simple animations from scratch. You're going to be animating based on some templates
that I'll provide. Then I'm also going to talk
to you about how you can take your procreate artwork and bring it into procreate
dreams to animate. By the end of this, you should
feel ready and equipped to start creating your own animations and
procreate dreams. At the end of the
course, we'll discuss ideas for jumping in to
make your own animation. As well as how to share your creations as a class
project on the skill share. In the next video, we'll
talk about the tools and resources that you'll need to follow along in this course.
3. Tools & Resources: To take this course, you're
going to need an ipad. I also recommend having an
Apple pencil because it is the best tool for doing these types of drawing
and animation. And then of course, you'll
need the Procreate Dreams app, which you can find on
the Apple App Store, and it is a one time
payment of 1990 $9 And then you also want
to make sure that your ipad is compatible
with Procreate Dreams. So you can find a list of compatible ipads
at Procreate.com slash Dreams and you
can make sure that your device is compatible and
then follow along with us. The other thing I
recommend having is the original procreate app, because we are going
to do a lesson where we talk about taking
past procreate work, getting it all set
up for animation, and then importing
into procreate dreams. You'd need the
procreate app in order to open the file that I'll
provide you for that. And then the other thing which
is good to have is we'll do a lesson where we
animate over video. And I have a video
that you can use, but if you want to
take your own video, you just want to have
like a camera phone or something that
can take video. That brings me to our
next section where we talk about the class
resources that you get. As a student of this class, you have access to
a resource pack. And in that resource pack we
have a few different things. We have some dreams files that I'll show you how to load
up into procreate Dreams. But these are files that are all set up and ready
for you to animate. Then we also have
a procreate file that we will together go through and convert over into a ready to animate procreate file and bring it into Dreams. And then we'll also have
a little video file if you want to follow along
with the video project. Before we move on,
I'm just going to quickly show you how to download that and store those files on your ipad so that you're
ready to access them. When we dig into the
course material on the projects and resources tab of the skillshare class page, you'll find all the resource
files for this class. Go ahead and download
all of them. When you do, they
will appear here in your Downloads folder
of your Files app. The resource files include
three Dreams files. One procreate file that
I'll teach you how to set up and procreate and
import into procreate dreams. And then one video. If
you wanted to use this to follow along in our animation
over video project. You can import the procreate
file just by tapping it and it will import
automatically into procreate. Then for these
three dreams files, we're going to go ahead and
select them all and move them into our procreate
Dreams data folder. We're going to select and we're going to select
these three files, The kelp forest, autumn leaves, and the breezy palm tree. Then we're going to move
down here at the bottom. We're going to go
into on my ipad and we're going to find the Procreate Dreams
folder right here. This is where all your procreate
Dreams files are stored. Open that and then open
the Theater folder. Then just to keep
things organized, we're going to put all of
our files into a folder. We're going to tap this little
folder with the plus sign. We can call this Procreate
Dreams class files. And tap done, then
you can tap copy. Now if we go to on
my ipad and find the Procreate Dreams folder
and go to theater, we have our class folder and
we have the three files. If we go into Procreate Dreams, here's our Procreate
Dreams class files with our three Dreams files we're going to use
in this class. I wanted to quickly mention
while we're on the topic that this procreate Dreams
folder is where all your Procreate
Dreams files are stored here in the
Theater folder. And you can actually
create folders and drag and drop them in. You can back up files from this to a hard drive or share
them to your computer. Here's where you
would find all of your Procreate Dreams files.
4. What is Procreate Dreams?: Now before we dig into the app and navigating
around the interface, I just wanted to take
a minute to talk about what Procreate Dreams is. Procreate Dreams is a
two D animation app that allows you to do frame by frame animation and key framing. As well as this really
cool performing feature that we're going to use
a lot in this course. It's from the makers
of Procreate. So if you're familiar
with the procreate app, it's by the same people
and they have done a phenomenal job of creating
this app and making it really easy to use with
the goal of just making animation accessible for as
many people as possible. So that's why they've created the tools to be so easy to use. And just very fun,
in my opinion, if you've worked in
Procreate animation tools, or maybe you've taken my
easy eye catching animations course which uses procreate. This is a whole new world. You can animate on a timeline, you can have multiple tracks, you can move things around. It's very non destructive, so you're not actually
messing with your artwork. You're just applying effects
and keyframes over the top. You can import video, you can import audio and create really robust
storytelling animations that have a narrative. And there's just a lot
you can do with it. And I've been having
so much fun over the past several months really exploring the depths
of what this app can do. While it is easy to use and the tools are
very user friendly, it is also very powerful app and there's a lot that
you can do with it. And it's really exciting
to see what some of the experience animators have been creating with this app. There is definitely a lot of really advanced stuff that
you can do with it as well. But to get started,
we are going to do some very simple
projects where you can follow along and create some
really simple animations. So it's going to be a lot of fun and I'm really
excited to get started. In the next video,
we're going to do a little bit of
an interface tour. We're going to talk
about gestures.
5. Interface Tour: Are you ready to jump in
and procreate dreams? In this video, I'm
going to give you a tour of the procreate Dreams interface so you
will know how to navigate around as you
create your animations. Let's get started.
Before we get started, I just wanted to note
that there might be some slight visual
differences to the way a few things are named in this course versus the app
that you have in front of you. And that's just because
I recorded it on a slightly different version of the app, but it's
nothing dramatic. You should be able to quickly figure out exactly
what I'm referring to. When you open up
procreate dreams, you will step into the theater and this is where
all your movies are. So if you're familiar
with procreate, Procreate has the gallery for artwork and Dream has
the theater for movies. So here you can see I've got a whole bunch of
movies in my theater. A couple things you
can do in the theater. You can long hold on
a project and you'll get this pop over where
you can rename duplicate, share copy to your icloud drive. Which is something I'll
show you right now. Over here there is a side
bar, this little icon. And if you open that up, you can switch between files
that are stored on your ipad and files that are stored on
your cloud drive, because you can actually
work right off of your cloud drive, which
is really, really cool. But for now, let's
just stick to on my ipad and then we'll
close the sidebar. Then over here we've got the
Select button where you can select multiple movies and do
a couple things with them. But more importantly, we have this little plus sign
in the upper right, and we tap that to
create a new movie. You can swipe up or down to get these different templates and different sizes and resolutions. But for now, let's go ahead
and find the wide screen, the wide screen template. There are some options before
you jump into a project. Here under the three dots, you can tap that and you can set your default frames per
second and duration. Let's go ahead and just
set those at the default. If yours is different than mine, you can just tap,
reset to default. Then let's go ahead
and tap empty. That'll take us into the
Procreate Dreams interface. The interface is divided
into three parts. Up here we have the stage. Then in the middle
we have the toolbar. Then down here is the timeline. Starting up here, this white
rectangle is our stage. This is where your movie plays. Everything within this
rectangle would consider to be in frame in your movie, but we also, around the outside, have what we call backstage. And it's kind of this
like gray gritted area. And this is the non visible
area around the stage. So elements that are in this
area would be out of frame. And it's great to have all this extra working
area because you can have something
over here and then bring it into your movie
and back out again. And we'll get to play
with that a lot. And the other thing
in the stage is this, and this is the time code, and you can actually tap it to access some different options for editing your onion skins and setting the background
color of your project. Don't worry about that for now, We will definitely
revisit that soon. Next up we have the tool bar, which is this bar that
goes across the middle, starting over on
the left hand side. We have these little
rectangles and that will just take us back
out to the theater. But let's go ahead and tap
back into our project. And then this is
your movie name. And there's some options
under here as well, so you can actually
tap your movie. And that will take you into
your movie properties. Here under Properties,
you can set the frames per second and
the duration of your movie, as well as the resolution. There's some different
options under stage playback options. This is also really important. This is where you would
export your movies. But we will come back to that once we've made some animation. And then there's some
other preferences as well. We're not going to dig
into this too much, I just want you to know
that this is here. Then we have some tools over
here on the right hand side. The first icon here
is the play button. The next one is
this little circle, and that is how you
enter performing mode, which is how you can
record movements, actions, and effects
in real time. We'll get to play
around a lot with that. Next up is the
Timeline Edit mode. You would use this
to select content, to cut, copy, paste,
Duplicate, and group. Then we have the
draw and Paint mode. If you tap that, it might look familiar if you're used
to working in procreate, we'll come back to
that in a second. But the last icon here, this little plus sign, this is button and you can use it to add
different tracks, you can import content, text
and that sort of thing. But let's go ahead and
visit the drawn paint mode. If you haven't
already, go ahead and tap this little squiggle. And when you do that, you should see drawn paint up at the top. And then we've got
some tools over here. In procreate Dreams,
drawn paint mode is essentially the right
hand side of procreate. You've got your essential
tools like your brushes, and if you tap into that, you can see all the
different brush sets. Then we've got the smudge tool, the eraser, we have our layers. Then we also have the
color picker where you can choose a color. Let's go
ahead and do that now. Literally any color you want. I'll just choose
a blue like that. Then for your brush, you can
choose any brush you want. Right now I'm in
the drawing set and I have the Blackburn
brush selected. But you can select
any brush you want. One thing I want to show
you right off the bat is when you're drawing
in procreate dreams, you are not confined to drawing within the
bounds of the stage, which is this little
gray rectangle. You can actually draw anywhere
inside or outside of it. You can draw over
here, over there. This is great, because
like I mentioned before, you can draw elements
over here and then move them into the screen. When you animate, you can draw like a really long
background and then scroll across to make some camera movements
and other fun stuff. Over here on the left hand side, this is how you adjust
your brush size. So really big brush,
really small brush. And then this is
your brush opacity. So how see through your brushes. Now that we've made a
little bit of a mess, let me teach you how to
undo and redo to undo. Anywhere in procreate dreams, you can take two fingers and tap on the screen,
and that will undo. You can take three fingers and you can tap and that will redo. Then you can take
two fingers and hold them down for
a continuous redo, and that will go all the
way back really fast. And then of course, you can hold three fingers down for
a continuous redo. I think those gestures
are some of the ones that you'll probably use the
most in procreate dreams. But the next lesson
I'll be teaching you even more gestures
for working in dreams. There's a really
cool feature I want to show you about
procreate dreams, and that is what they
call eternal und. So you can actually exit back out to the gallery.
You can quit the app. You could turn off your
ipad, what have you, but if you go back
into your project, you can still undo. It, retains all of your undue history and it's saved in the Dreams file format, which is really,
really exciting. So go ahead and undo until you have nothing
left on your screen. And make sure that you are in the draw and paint mode
if you're not already. Now I want to talk a
little bit about using procreate versus procreate
dreams to do your drawing. You will find a lot
more drawing tools in procreate and I like to
think of them as a team. Procreate is great for
generating artwork. It's a well equipped workhorse
for drawing and painting. Now Procreate Dreams is the
workhorse for animation. You can do a little bit
of each in the other. Procreate has animation tools. Dreams has drawing tools, but use the tool that's
best for the job. Me personally, I like to draw in Dreams to do
like test animations. And then I'll go make
my final art and procreate and import
it into dreams, which I will show you how
to do in this course. Okay, let's just draw something. I'm going to turn my brush
opacity back all the way up. And then just draw
like a little circle or a little squiggle like that. When we do that, you'll
notice something has popped up here in
our time line area. This is a track, and this track is filled with a
piece of content. Two important terms when it
comes to procreate dreams. You can think of tracks as
containers that hold content. Your track spans the entire
duration of the movie, and you can fill it with
multiple pieces of content. You can adjust the duration of this piece of content by
just dragging the edge. Just grab the edge here and
then drag it back and forth. You can just how long it is. Then you'll see like a lighter
gray little bar across. That's the full track and we can fill this with
a lot of content. Let's go ahead and
drag that back out. Now let's go ahead and
tap plus sign here. This is the Create button. And we're going to add
a new Content Track. Tap Content Track. And you'll notice we have
a new empty track that we can fill up with
content here in the stage. Let's just grab a
different color. We'll get like a green
or something else, and then we'll draw
another scribble there. Now because these two drawings
are on separate tracks, we can animate them
independently of one another. We can make this move
or animate one way, and this move or animate
a different way. As I already mentioned,
you can adjust the content length by
dragging the end like that. You can also move content forward or backward
in the timeline. By just tap hold and dragging
it forward or backward. You can move tracks up or
down in the hierarchy. Just grab somewhere
in this empty part of the track and then
drag it down like that. It's good to note that
tracks at the top will be in front of tracks that
are on the bottom. If this blue were to
pass across the green, the blue would be in
front of the green. If you tap and hold on
a piece of content, you'll get the content pop over with some
different options. You can delete it
if you want to. You can delete a track
by holding down on the empty area of a track
and choosing Delete Track. Or you can delete a track by
holding down on the content, going to track options, and then we've got some options that are specific to the track, so we could just delete
the track that way. Let's go ahead and undo until we get our two filled
up tracks there. I wanted to mention something
for the people that are used to working in procreate or other digital art software. And that is layers
versus tracks. If you're familiar with layers, layers and tracks are
not the same thing. Tracks, or even just
separate pieces of content allow you to separate out parts
of your artwork so that they can be
animated separately, move independently
of one another. Layers are for creating artwork. They allow you to separate
parts of your art to aid you in the drawing
and painting process. You can see that if I go ahead and create a new layer here, just grab different color real quick and draw over the top. You can see that this drawing, even though there's two layers, is treated as one unit in
this piece of content. There's a lot more that
you can do with tracks and we'll learn as we jump
into animating for now. Let's go ahead and exit
to the gallery view. Tap this little symbol
with the rectangles. That's an overview of the
procreate dreams in our face. In the next video,
we're going to talk a little bit more about
using gestures.
6. Gestures: In this video, we're going
to learn about gestures. We've already learned about the two finger tap to undo
and three finger tap to redo. But there are a whole host of other gestures that will
make navigating around, procreate dreams, a
breeze. Let's get started. You've already learned
that you can do a two finger tap to undo and
three finger tap to redo. Let's learn about some
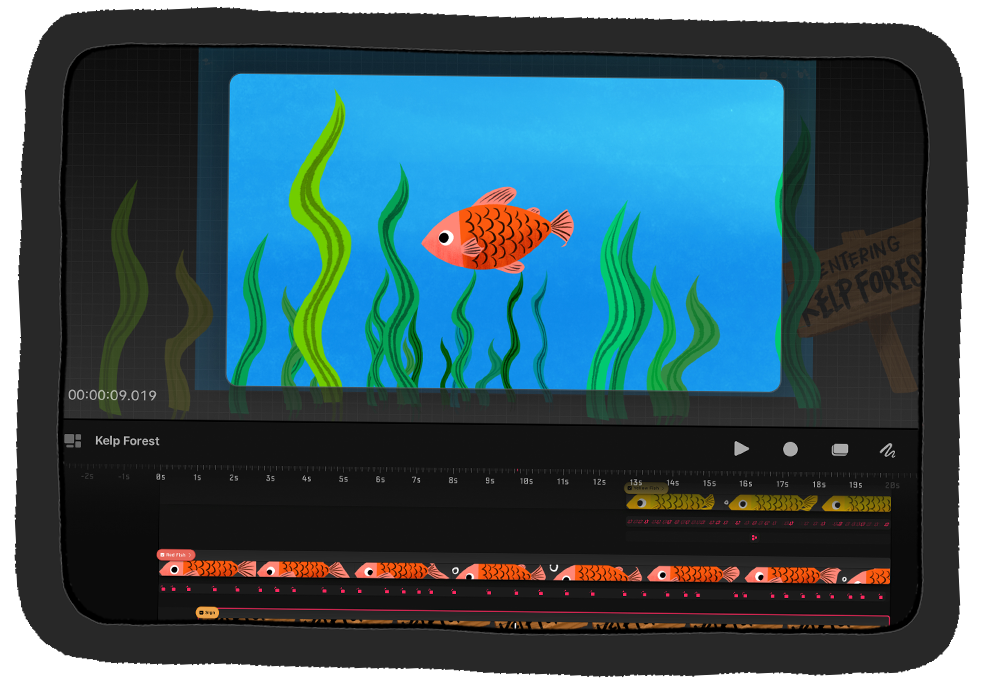
other important gestures used in procreate dreams. We're going to open up one
of my finished animations. This is included in
your class resource. We're going to open one of
my finished animations. This is included in
your class resources. And what you're looking
for is the one titled, One Kelp Forest Animated. We're going to go ahead
and open that one up. This animation has several
tracks filled with content. Let's learn about zooming
around here in the time line, you can take two fingers and do a pinch or spread
to zoom in or out. If you take three fingers
and slide them horizontally, this will adjust the time scale. This will show a lot of time. And then this way we'll zoom
into a short amount of time. You can take three fingers
and move them vertically. And this will adjust
the vertical scale. It just makes a little easier to see your tracks and
everything else. Then if you do a quick
pinch gesture like this that will fit the entire
movie onto the screen. You can see your entire
timeline and all your tracks. You can double tap to
focus in on content. If you keep double tapping, eventually you'll
get to Max Zoom, where you can see your
movie one frame at a time. The stage up here has
similar gestures. You can pinch and spread
to zoom in or out. And then do a quick pinch to
get all the way back out. But let's go back
to the time line. Let's do a quick pinch
to zoom all the way out. And then we'll take three
fingers and we'll go vertically to increase the vertical scale and make our tracks
a little bit bigger. This little red shape with the icon in it is the playhead. And you can move it back and forth to scrub
through your movie. If you zoom in on the
timeline to a certain area, your playback will only play whatever is in that amount of time and then
it will loop back. Let's zoom all the way into
this little section here. Right now it's just
playing this little bit, which is really
great for previewing just a little portion
of animation, so you can really focus
in on what you're doing. You can also take the Playhead and flick
it back like this. That will go all the
way to the beginning and then it will start
your movie playing, do a four finger tap to enter
a full screen player mode. You can take a
finger and you can scrub back and forth
on your movie. You can tap down here, you have some controls to
get back to the interface. You can tap with four fingers again or you can just tap back. One thing that I like to
mention that makes it a little bit easier to do
the four finger tap when you're holding an
apple pencil is I like to use these four fingers. It's my pinky ring finger,
middle finger and thumb. And just tap like that. Let's
zoom in just a little bit. Let's talk about the playhead
just a little bit more. If you see a little
clapboard symbol, you can tap the playhead and
get the key frame pop over. And these are tools used
to create animation, which we'll get into more later. Then if you long press on a
piece of content like this, tap and hold, you get
the content pop over. And there's options to
cut, copy, duplicate. There's also a
bunch more options there which we'll
get into later. That's a little bit
about gestures. They do take a little
practice to get used to, but once you get them, they become second
nature and they're so useful for working
in procreate dreams. Now you have a really
good overview of what the procreate interface looks like and how to use gestures. In the next video, I'm
going to introduce you to three key ways of animating
and procreate dreams. And then we're going to
get started animated.
7. 3 Key Ways to Animate in Procreate Dreams: Now we're familiar
with our interface. We've learned a little
bit about gestures. And in this video,
I'm going to talk to you about animating
and procreate dreams. There are three key ways to animating and
procreate dreams. The first is frame
by frame animation. So this is where
you draw each frame of animation by hand. If you're familiar with
the old Disney movies or even like what a
flip book is like, you're familiar with
frame by frame animation. The next key way to animate and procreate dreams is
animation by key framing. Keyframes are
essentially points on a timeline that define the
state of your content. Where it is, what shape it is, what effect it has,
that sort of thing. In our timeline, we would
have a keyframe that says, I look like this here. And then another
key frame later in the time line that says,
right here, I look like this. And then the software
will smoothly transition those two states. So it would move it across, or it would change the
effect, or change the side. But it would smoothly transition from one key frame to the next. This is a great way to create very precise movements
in your animation. The last way to
create animation in Procreate Dreams is through
the performing feature. This is a brand new, very innovative feature by
the Procreate Dreams app. Basically what it does is you enable performing
and then you move things around or you
apply effect and it will capture your
movements in real time. It's a great way to create very organic,
expressive movements. And it's also a great
way to just quickly animate something because
you're just doing it by feel. I love animating through performing because
you really just get into a feel of it and
it's just a fun experience. Those are the three
ways that you can create animation and
procreate dreams. And in the following
three lessons, we're going to spend each lesson going through
those three types. First, we'll explore performing. And we're going to create an
animation using performing. And then we're going to
explore keyframing manually. So we'll do key framing. And then finally, we'll explore
frame by frame animation. For those three projects, we're going to be drawing
our own subjects to animate. But I don't want you to
worry too much about the art making drawing process. We're just going to be drawing simple things to get ourselves familiar with these three
types of animation. Very excited to get started
animating with you. So without further ado,
let's jump into it.
8. Performing a Balloon: Welcome to our first follow
along animation lesson. In this video, we're going
to be exploring one of the three ways to create
animation and procreate dreams. And that is my favorite method, and that is performing. And performing is this
really awesome tool. It's very innovative
to procreate dreams. And it allows you to capture your movements and apply
effects in real time. And it will capture movements
and it's just a lot of fun. And it's a great way to very
quickly animate something. But also it lets you create very organic movements because
you're doing it by hand. So I'm really excited to show you cool things that you can do with the
performing feature. Let's get started. Here
we are in the theater. Let's go ahead and start
a new movie project. We're going to tap the plus
sign in the upper right. The movie template
we're going to use is the four K wide screen option. You can go ahead
and just tap empty. Let's go ahead and
draw something so we have something to animate. We're going to jump right
into the draw and paint mode, which is this little
squiggle icon here. We're going to go ahead
into our brushes. You can really choose any
brush you want for this, but I'm going to choose the inking set and I'll
use the syrup brush. Then you can go ahead
and choose a color. We're going to be
drawing a balloon. I'm going to pick just like a reddish orange
color like that. Go ahead and draw
a balloon shape. Like a round shape that's
pointed at the bottom. Colored in then a little
circle at the bottom, and then a little
nub on the end. Let's grab just like a
slightly darker red. And we'll zoom in. Just add a little
dark spot down here, and then I'll grab white and add a highlight up
there. Super simple. There's our little balloon.
We'll zoom back out. Let's go ahead and exit
draw and pat mode. You can either tap done up here or you can tap a
little squiggle again. Now that you've drawn something, let's try animating it
through performing. To enter the performing mode, you're going to tap this
little circle right here. Once you do, you're
going to notice it changes to a little red square. And it also says ready up here, as if it's ready to
record your movements. Let's just get started by putting your pencil
on the screen and just moving the balloon
around like this. You can do really fast movements or do really slow
ones like that, but that's pretty good
just for a few seconds. Then we can move the play
head back as you do. You already see what's happened. But let's tap play. We can see that it's captured all
the movements that we. One thing I wanted
to show you here, I'm going to go ahead
and pause it is this little option that says modify. I'm
going to tap that. We have an option for
motion filtering. If we were to turn this up, that's going to smooth out all the movements
that we just did. I'm at like 58% I'm going to
go back and play that again. You can see that it's a
little bit more smooth, it's not quite as expressive. Then I'm going to pause
that, go back to modify. If I turn that all the way
down and play back again, now it's very expressive. It's very accurately capturing everything that I
just performed. I like to keep it at around
15% for general purpose, but you can of course,
adjust it as you need for whatever type of
animation that you're doing. Go ahead and tap, modify again
to get out of this menu. Make sure you don't tap done, because that'll take you
out of performing mode. Let's explore some other
things that we can perform. You might have noticed
that this drawing has this red bounding
box around it, these dotted lines with
nodes in the corners. Let's practice making this
bigger and larger using scale. To do that, we're going to tap one of the corner nodes and drag it like that. You go in and out to make
it bigger or smaller. You can also do a
non uniform scale by grabbing just the edge of the bounding box and just
squishing it in like that. Or you can grab
the top or bottom and squash it down like that. You can also do a rotate. To rotate, you're
going to tap one of the corner nodes and this little gray curved
line will appear. I like to call this the noodle. It's not the technical term, but that's what I
like to call it. You grab the noodle and then
you rotate around like this. A Another thing I want to show you is how
to edit your contents. Anchor Point, and this
is the point around which rotates and scales
and other types of things. Let's go ahead and tap these
little three dots here. We've got some options to flip, but we're going to
choose edit anchor. And you can see this little plus sign that is your anchor, that's the point around
which it rotates. You noticed when we're rotating, it was like spinning
around that point. If we were to move it
down here and tap done. Now go back and you can see that it's like spinning
around that point now. Isn't what we want
for this case. Then as you're scaling it down, it's scaling it
around that point. Just something to keep in mind. It's just another
way that you can control your movements. I use anchor points a lot. I'm going to undo that, to
reset the anchor point. You see it says undo anchor. Now it's back to what
it was. Let's just go back and play what
we've done so far. So you can see it moving around. Then in the second it's
going to scale it bigger, smaller, make things bigger,
smaller, squish them. You can also distort
and you can warp, which are two other really cool transformations
that you can apply. There it is, rotating around,
Let me show you warp. We don't have a lot
of space left here, so I'm just going
to undo a little bit and then move the
playhead to right there. You want to put your playhead up on the content right here, so that you can see the
white little clapboard. If you tap this clapboard, we've got our key
frame pop over. The little action menu. We're going to tap move, and
we're going to choose Warp. When we do that, you'll see
we've got this grid up here. Let me perform. Make sure we're in the
performing mode now. You can grab any of these nodes and fold your artwork over. You can warp it like that, just like you need some
really funky stuff, so you can get some
really organic control over the types of
transformations that you make. Oops, there we go. Now we can see all that
stuff. There we go. All right, now that we've
done some animating, you'll notice that
in the timeline, all these little
tracks have appeared. There's like these gray tracks
with red symbols in them. These are key frame tracks. And this is how performing
in Procrete Dreams works. It automatically
creates keyframes for each of the movements or
adjustments that we make. If you're not familiar with keyframes, don't worry about it. We're going to go
into key frames more in the next lesson. But it's important to know that you can edit these keyframes. So if you want to
adjust your movements, you can manually do that down
in these keyframe tracks. So far we've performed some move action
scale, rotate, warp. But I think the
real magic happens when you combine some
of these movements. Let's undo until all
these key frame tracks disappear and we can start over. We're top, tap, tap. Keep going back until all the keyframe tracks are
gone and we can all right, we're going to move
the playhead back to the beginning and we're going
to start with a rotate. So we're going to
tap the corner node, grab the noodle, and just
do some swinging motions. You can see how, how big my motions are
with my apple pencil. You can also spin around the, spin around the other way that I'm almost doing
like a figure eight. Okay, I think
that's pretty good. Now let's layer on
another type of movement. We're going to move the
playhead back to the beginning. This time we're
going to do move. You'll notice as soon as my
pencil touches the screen, it will start going through my timeline and my other
animation will play. Watch this. There we go. You can see as I'm moving it
around, it's still rotating. It's probably not doing
exactly what I want it to do. So I'm going to stop and
I'm just going to undo, tap to undo, and then move my playhead back to the
beginning and just try again. That's the fun thing about this is it's like a performance. Sometimes you have to practice a couple times to get it right. That's looking pretty
good. One thing I want you to notice
is that as soon as I lift my pencil off the
screen, it pauses. And then if I were to
put my pencil back down, it will keep going
and now I'm off. Let try that one more time. I think if I can scrub
over and see like, okay, it's tilting
that way first. So maybe I'll move
it that way to start like that and then
come back that way. Just go back and forth. There's the spin. Take
another one's coming up here. There we go. It doesn't
have to be perfect. This is like a balloon, like
flying through the air as the air is being let out of it. All right, let's rewind. Move our playhead back
to the beginning and do more layer on
one more motion. This time we're
going to do a scale. I'm going to tap the corner node so that I can do a scale, but I'm going to just hold
it in place for a second. And as again, as soon as my pencil touches the screen,
the timeline will go. Then that way I can time
when I want to scale. And it's like, it's like zooming off into the distance as the air is running out of it. So I'm just going back
and forth like that, making it bigger or smaller
at the times that I want. Okay, got to the end. Now let's go ahead and
play all that back. Now we have this fun, chaotic, really organic type movements that we can create use
in the perform future. But movements are not the only thing that
you can perform. You can actually
perform filters. Let me show you that.
Next I'm going to pause, then I'm going to move the playhead back to the beginning. If your playhead is down
in the keyframe track, you'll have this
keyframe symbol. But just put it up on the
actual content itself. And you'll get the
clipboard or platboard, We're going to tap
that, and this time we're going
to choose Filter. Let's choose Opacity since we're still in performing mode. If I slide this back and forth, it will capture me doing that adjustment that turn
it all the way up to 100. Now I can play that back, you can see it
fading in and out. Let's move here,
let's do another one. We're going to tap the playhead, go to filter, and let's do blur. And we can make it
blur in and out. It was coming close to
the camera or something. You can blur it or not
being that precise about it. Let's do another one. F HSB is fun. That's hue saturation,
brightness. And this one, you can change
the colors, which is cool. You can cycle through
the different colors. Our animation ran out.
Now it's just in place. But let's go ahead and just play that whole
thing back so you can see all the
different effects that we can create
using perform. I hope you're a little
more familiar now with how performing works
and procreate dreams. As you can see, it's a
great tool for making these organic,
expressive movements. Or if you just want
to animate something fast without having to
do any manual settings, I hope you enjoyed
learning how to animate using the performing feature
and procreate dreams. There is a lot of really cool stuff that you can do with it, which we will explore
in future lessons. In our next video, we are going to dive deep into key framing. I'll see you then.
9. Keyframing a Car: In this second follow
along animation lesson, we are going to be
exploring keyframing. We saw a little bit of keyframing when we were
learning about performing, performing works by automatically
generating key frames. But in this video,
we're going to learn how to create
them ourselves and to set where they are and adjust the timing and
things like that. Then just to talk a little
bit about what keyframes are. Key frames are a point in your timeline that set your content to be
at a certain state. And you can set one state in the time line to be here and then the other one to be here. And then the software will smoothly transition in between. And you can edit them, you can set them up to do
a lot of different stuff, which we'll get to talk about as we go through the lesson. But keyframes are great
if you want to create precise movements as opposed to more organic movements that
you might do with performing. Let's go ahead and
get into key framing. Here we are in the
theater. Let's go ahead and create
a new movie top. The plus sign in
the upper right, and we're going to choose the
four K widescreen option. And then go ahead and tap empty. We've got a 32nd project. And let's shorten it up a
little bit for this one, we're going to tap where it says Dream One or whatever it says for you, that's
your movie name. And we're going to
go to Properties. We're going to adjust
the duration here. Just tap this number.
Then here under seconds, we're just going to tap in five quick five
second animation. Tap in five and then tap done. For this lesson,
we're going to be drawing a little car to animate. Let's pop into our
draw paint mode. Tap the little squiggle, and we'll start by
choosing a color. You can have your car be
whatever color you want. Then for brushes, I'm going
to use the Inca brush, which is found in
the inking set. But of course, use
whatever brush you'd like. All right, we're
drawing like the simplest of simple cars
for this animation, we're just going to start with
like a line like that and then like a curved little
shape like this on top. Then we'll go ahead and
just color that in. Zoom in if you need to. Dad my brush size a little
bigger. There we go. All right, then one
thing I like to do is to erase the bottom edge
so I get nice sharp corners. If you tap and hold
the eraser tool, it will select your current
brush to use as your eraser. So you can see now that I have the Inca brush as my eraser. And now if I race with it, my eraser marks match
my brush marks. So I'm just going
to bottom edge. And now I've got some
nice sharp corners in an optional step there. Okay, now let's go back to our brush and we'll draw
the top of the car. So I'm just going to draw like, let's do that again
like a semicircle, half circle like that. And then a line down
for the window, there's our cars body. All right, now you
can see we've got our car track in our timeline. So let's take a minute
and talk about how it's important to
separate out parts of your artwork that are
going to be animated independently of other parts. For example, we'll
have this car body, and while the car
body is steady, the car tires will be spinning. We'll need to put the car
tires on their own tracks. Let's go ahead and
create a new track. We're going to tap
the Create button, which is this plus sign. And we're going to
choose Content Track. And you'll see now we
have an empty track. Let's go to our
colors, and we'll choose black for our tire. And then we'll just draw
a circle like that. Keeping things
really simple today, we're not going to win any
awards for our drawing skills. In this lesson, I'm going to choose like a
lighter gray and then draw little cap on
my tire. There I go. Then even lighter gray. Just to add a few details, I'll do like a circle in the middle and then
some little lines. There go, great. All right, now our other tire needs to be on its own track. We're not going to put
it on the same track. Let's go ahead and tap the plus sign and create
a new content track. Then we'll draw the other tire. Instead of picking
the color picker, I can use the eye
dropper tool to select colors that are
already on my screen. So I can just hold
a finger down and you can see I can pick
the red, the white. I'll pick my black. And then I'll draw
the next tire. Try to get them the same size. I feel like that's huge. Let me try that
again. All right, well, it ain't perfect,
but that's all right. Then let's go ahead and select the hub cap color, medium gray. Draw little hub cap, Okay. And then I'll grab this
lighter gray for my details. Circle in the middle and
then some lines around. All right. All right, there's our
wonderful little car. Let's go ahead and get
out of drawn pat mode. So we can tap a little
squiggle or you can tap done. Let's get to animating. Let's start by animating
one of these tires. We're going to move the playhead all the way to the
end of the track. Then you're going to
tap the playhead. And you're going to, and
then move and scale. Then when we do
that, I'm going to zoom in a little
bit so you can see. You can see now if I
move the playhead, we've got a keyframe here, right where our playhead was. And then it
automatically creates a keyframe at the beginning
of our track as well. Now we have two
points that we can change and the app will blend
those motions together. For example, let's go ahead
and move the playhead onto the first keyframe. And you'll notice that it lights up as white, so
you can see that it's white. And that means
that that keyframe is selected and we can edit it. Let's move this tire. We'll just put it
up there for now. This is not our final animation. I just want to demonstrate here. Then move your playhead
all the way to the other key frame and we'll
put the tire over there. Now if we hit play, we can see that we have these two
states on this key frame. It's there, on this
key frame, it's there. And then it's going to smoothly transition from that to that. That's how key frames work. It just transitions in between whatever states that you set, each of the key frames. Let's go ahead and undo that. All right. I'll go
all the way back. Move your playhead to the end, and then tap the playhead
and choose Move, and then move and scale. All right. We're going to make our little tire rotate around. We're going to
actually manually type in what rotation
we want it to be. We're going to take our playhead and we're just going to pop it up so that we can tap
on this key frame. I just moved it from there
and I just moved it up. Now I can tap that key frame. I can type in a number into
this rotation like 360. I choose 360 because
that's one full rotation. And it will end right
where it started. If I play now it's going across and then ending right back
at that same spot. Then when it loops
back to the beginning, it's going to start
at that same spot. It'll be seamless,
but it's really slow. Let's actually stop that. We'll tap our keyframe here and let's type in higher number, but we want to make sure
it's a multiple of 360, so it will still end
where we want it to. We'll just do 3,600
because that's easy math. Now play, you could see how
much faster it's going, but it's also going
the wrong direction. It's spinning this way.
And if this was a tire, it would be spinning that way. If the car is moving forward, let's do one more adjustment. We're going to tap
the key frame, go to rotate, tap the
number and just tap minus, and that will just reverse now. We're going negative
360, 3,600, degrees. It's going the correct way to notice as this is
spinning around. And I'll zoom in
so you can see it, is that you will notice the
motion starts out slow, then it goes fast, and then it slows down as it
gets to the end. This is the rate at which
the motion is happening, and that is called easing. We can edit the easing to be something else. Let me
show you how to do that. I'm going to pause if you
want to edit the easing, you can tap and hold somewhere
on the key frame track, that's not one of these
symbols, just in the gray area. Tap and hold. Then you're going
to go to Set all easings. We've got some options here. We're going to choose linear, linear, then we're
going to play that. Now you can see that it stays a consistent rate of motion as it goes all the
way across the timeline. And there's no hiccup when it gets to the end because we did that full rotation, it just keeps going
and going forever. I'll show you some of the other easing options just so you know, I'll tap and hold the
key frame, track, set all easings we
have linear which is just constant state of motion. Ease in, which will start
slowly and then become steady. Ease out, which will
start steady and then slow down at the end. And then ease in and out, which is what it
was to begin with, where it starts slow and slow. Those are options, but
let's stick with linear. It's good to note that
once you set your Easings, whatever key frame you
set up in the future, we'll obey that easing
unless you change it. Whatever we set up for now will always be linear
until we change it. All right, that tire
is looking good. Let's go ahead and animate
our other tire as well. Should be pretty easy now
that we know what to do, Put the playhead at the
end of the second truck. Tap the playhead
and choose move, then tap, move and scale. Move the playhead up. So that we can tap
the key frame. Let's go to rotate
and type in 36003600. And we know it needs
to be negative, so we'll tap negative. The easing should
already be all good, there's little tires
going around and around. The next thing I'm
going to do is introduce you to groups. A very powerful tool in
procreate dreams. I love groups. They allow you to have so
much control over your work and apply animations over
the top of animations. And it will make a
lot more sense once we go through this
example of the car. We've got our car and we've
got the tires moving. But we also want the
car to maybe like go across the screen like it's
actually moving across. So we are going to put all
these tracks into a group. And then we're going to animate the whole thing going across. Okay, let's show
you how to do that. First, we need to select
all of our tracks. To select multiple tracks, you're going to go to
the timeline edit mode, which is the little
symbol right here. And then once you're in
time line edit mode, you'll notice that when
you draw with your pencil, you get this really cool
like light up line. And this is what you
use to make selections. So if you were to go draw
over pieces of content, you'll see these like red boxes around them or red outline, and that's how you
know it's selected. You can draw over it
again to deselect. You can go like that.
If I wanted to select just like half of it or
something like that. You can also tap
clear up here to clear your selection and
deselect everything. But let's go ahead and
select all three tracks. So we'll just like draw over all three and you can
see they're all in red. And then we're going
to tap and hold on one of these to bring up
our pop over menu. And we're going to choose group. Okay, now all of those tracks
are placed into a group. We can open it up by
tapping this little carrot, and then we can see all
three tracks in there. Now essentially
this becomes like one piece of content that we
can apply an animation to. I like to think of groups
as like an envelope. Like you have something
animating and happening and then you put it in the envelope and
it's still moving. But then you can
move the envelope itself and everything's like
moving at the same time. Let's put that into practice. All right, let's go ahead
and animate our car. Moving from off the
backstage to the other side. Just moves through the
frame and back out. Before we add our key frames, let's go ahead and just move this into our starting position, because that just
makes things easier. You can tap it to bring
up your bounding box and then move it down here
if you wanted to, like shrink it
down or something. At this point you can do
that and then just get it in position and now we're ready to start
keyframing this. We're going to move our
playhead to the end. We're going to tap the playhead. Move, then move and scale. Now we have our two keyframes, one at the beginning,
one at the end. The beginning is already
set to this position. Let's just move the
one at the end. We just need to tap,
tap our artwork. And then just move it
to the end like that. Now we can hit play. We can see our little car
rolling across like that. If we wanted our car to
move more quickly across, all we have to do is
move the key frame. Let me keep playing that. If I move the key frame
all the way over there, now it moves across really fast. If I move it over here,
it'll move more slowly. Basically what's happening
is if I move it over here, it takes more time
to get from A to B, so it will go slower and less
time to get from A to B. Here you decide however
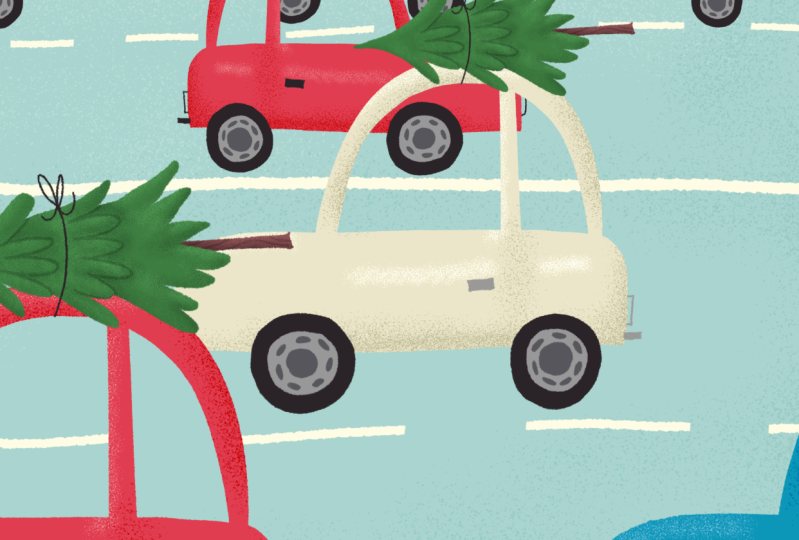
fast you want your car to go. It looks pretty good. Now that we've animated
this little car, let's use it to create
even more cars. We can do that by
duplicating this content. So let's go ahead and
posit, and we're going to actually duplicate
this entire track. To do that, you're going to
tap and hold on the content. Go to Track Options, and then choose Duplicate. And that's going to duplicate the entire track and all
the content inside of it. Okay, now we have two
copies of the car, although you couldn't
really tell because they're like literally right in
front of each other Here. Let's move around
one of these cars. We're going to actually choose the bottom version of the car, because this car is going
to be behind the other car, it's going to be
underneath itself or underneath it here in
the Track hierarchy. Let's go to our first key frame. Just slide the playhead until it turns white with
the little symbol. We're going to grab this little corner node and just shrink it down a little bit and then
move it up like that. Then we're going to slide on over to the other key
frame on the other end, make sure it's in white. We're going to also shrink it down and move it up a
little bit like that. Now we have our two
cars going across. But it's looking very odd because they're going across
at the same exact rate. Now what we're trying
to do right now, a little bit of
depth in this scene. Very simple scene, but
there's a couple of things to keep in mind when you're trying
to create depth. Anything that is close
to the bottom of your frame is closer to the
viewer and it's bigger. Anything that's
closer to the top of the frame is going to be, like, farther away
from the viewer, and it's going to be smaller. That's why this one is smaller. But there's one other thing
when it comes to movement. Things that are closer to you seem like they're
moving across faster. And things that are
farther away from you seem like they're
moving more slowly. That's why when
you're like riding in a car and you look
out the window stuff, often the distance
seems to slow. But the car next to you
is like zooming on by. What we need to do to make
this more realistic is to make this foreground
car go faster. That's really easy to do
with these key frames. All we have to do is, let's see, make sure
we're on the right track. That would be this one. You can always tap it and make sure the bounding box
is around the one you want, or you can just
go to this little checkbox and turn it on and off. That's the one. Oops. Okay. All we need to
do to make this car go faster is to adjust the
key frame. There we go. We can just drag it
over to the left and that's going to make
it go faster already. That's looking a lot better. We can make it even go faster if we want to see
how that looks. I think that looks a
little bit better. I just made it go even faster. Now we have two
cars going across. It seems a little
bit more realistic because that one's going faster. Now another cool thing
that we can do using key frames is we can change the color of
one of these cars. Let's maybe change the
color of the bottom car. We can do this using key
frames, which is really neat. We're going to
change the color of just the body of the
car but not the tires. Let's open up our group. Tap a little carrot symbol here. Let's find the track
with the car body. Okay, then we're going to just place the
playhead anywhere. We're going to tap it and
we're going to choose Filter. And we're going to choose HSB. Then we can just use the slider to pick a different
color for our car. We will do like a blue or something. That
looks pretty good. Now, if I were to
scrub back and forth, you can see now my car is changing colors from this red
all the way to this blue, which is not exactly
what we want. We want it to just be
one color the whole time and there's a really
easy fix for that. We just delete this keyframe that tells it to
be red over here. So let's go ahead and tap and hold it and choose
delete key frame. Now since that's
the only key frame, it's that state the whole way across and it's
blue the whole way across. Okay, so you can
always apply a filter, as long as there's just one, it'll stay the same
the whole time across. Okay? All right, so let's
close this group now. We've got our blue car,
we've got our red car. How about we do one more car? Let's duplicate this blue car. We're going to hold and
go to Track Options. I should note just
tap duplicate here. That's just going to
duplicate the content and place it after
in the timeline, which is not what we
want in this case, but it might be useful
for other things. Let's tap and hold, and choose Track Options and Duplicate. Okay, Now this new car is going to be
behind the blue car. It's lower in the
track hierarchy. This is the one we want to edit. Let's go ahead and do that. We're going to go to
this first key frame, we're going to make it smaller, and we're going to
move it up like that. And then we'll go to
the last keyframe. We'll make it smaller. Move it up. Okay, here we go. Now we have the same
problem as we did before, where they're traveling
at the same rate. This one on the top, this one in the front is the fastest. This one on the bottom, which is the one in the back,
is going to be the slowest. We can move this key frame out like that if you have space, or you can shorten
the other two, whichever way works for you. Now let's watch that.
Looking pretty good. Looking pretty good, but
I don't know there's something else because they all come in at the same time.
And then slow down. Another cool thing that
you could do is just drag the content across
the time line like this, like we'll do with
the red car tap hold and just drag it down. That will make it start
later in the movie. And let's watch
that, which looks a little bit more interesting
I think because they're not coming in
at the exact same time. You can adjust. Maybe we'll move this one over a little bit. They all come in at
slightly a different time. Maybe it will move
the other one. You can play around
with the timing and see what looks best for when the different cars come
in. It's pretty good. All right, let's also change
the color of this last car, and again that's
inside the group. We're going to
open up the group. We're going to go down here, find the key frame, that one key frame that
changes the color. Tap it and we'll change
it to some other color. Maybe like a green.
Sure. Green color. All right. Or maybe we can do, I want to get like
a yellow, yellow. Right now, the color
of this car is dark. I'm going to find
a orangey color. And then I'm going to bump
up the saturation and the brightness. Now
I have a yellow. You can play around with the different sliders to
get different colors. All right, what are
we thinking here? I'm going to have this one
come in a little bit later. All right, so now we have our
three cars zooming across. Let's go to full screen view. Take those four fingers and tap that way we can see our
animation in full screen. All right. You should
be very proud of yourself for key
framing and drawing, and key framing this
entire animation. Whenever I do an animation, I always like to think of like
how can I take this a step further and it's really easy to do and procreate dreams
like what else can I do? So let me show you maybe some
other things that you can keep doing to this animation
to just keep enhancing it. So let me get out of
full screen view back. Okay, I'll close that group up. Okay, so we have this little
grouping of animation. I'm going to put all of these
three groups in a group. I'm going to go ahead
and tap the edit mode. And then I'm going to
select these three. So you can see they're
all highlighted in red. Hold and choose Group. Now we have this little snippet of animation all
contained in one group. Now I can duplicate this. Let's go ahead and we have
to get out of edit mode. To do this, get out
of the edit mode, tap hold and choose
Track Options Duplicate. Now we can just move this one down the time
line a little bit, maybe a little bit more.
A little bit more. There we go. Now we have a whole bunch of cars
coming on down the road. You could do that. You
could duplicate that and move it down as
many times as you want. Track options, move it down about the same
rate, the same distance. Now we've got a lot of traffic happening here in
our little scene. You could even go in to one of these groups and change the
color of some of the cars. Let's go to like this
blue car and just go find that key frame
that changes the color. We see maybe like a teal color. I can also change
this yellow one. Find that key frame. How about a pink?
That'll be fun. Just repeat, reuse the
same animation you did, but just change up a couple things so that
it looks more complex. That's what I like to
do. How about this one? Well, maybe do one
other color over here, like a deep blue. Make it darker, less
saturated. That looks cool. Now we have a whole bunch of
cars going down the road. Let me see. Let me actually
close all these groups. Okay, there we go. We've got all our cars going
down the road. You could also adjust the duration of your
movie a little bit. If you want to be
longer than 5 seconds now that it's longer, you can go ahead and tap the
movie name here properties. And then maybe we'll
do like 10 seconds instead of 5 seconds done. Then we can just start
duplicating things. I'll just duplicate
this group itself. Tap hold, and choose Duplicate. Now, it'll place it next
to it on the timeline, and I can just drag
it up into one of these empty tracks or something because that
one has different colors. Look at how fun that is. Let's do one more duplicate. Just drag that offset it, yeah, look at all our traffic. Another thing we could do if we wanted to keep going and keep refining this and making it more interesting is we could
add a background. Really easy way to do
that is just to go into the time code here, tap these numbers, and then
you go to background color. And we can just choose a gray
because they're on a road. We could go to one of these tracks down here or
add a track down here. Tap the plus sign,
add a content. Go to our draw and paint mode. And the draw lines on the road, maybe get that Inca
brush and the white, grab white or yellow even. But I'll do white and
draw a line like that. And then another line like that and then
get your racer brush. And just to make these
dotted lines, I can't see. Okay, Get out of the way cars, there we go, They're in my way. Then these would be closer
together because it's farther away. There we go. Now the thing to note, because when I had
my play head here, when I started drawing, it
only filled in up to there. I just need to extend this
one back. There we go. All right, let's go ahead and
play and go to full screen. I think that it
just looks so cute. There's a lot going
on and all we had to do was animate
just that one car. Now looking at this piece, I think there's just one
more thing that would really just take it to the next
level. That's audio. Let me show you how to import
audio to your animations. Let's hit back and
we'll hit pause. Let me go to Safari. I found a sound effect
that you can get for free from a website
called Pixabay. They have free to use sound effects that
you can download. Be sure to check their
license agreement, but I'll provide you guys a link to this
particular sound effect. Let's go ahead and
download Doodad then. Our downloads are up
here. It's all done. So I'm going to tap that, tap the little magnifying glass. Now here I am in the Files app, in my downloads folder, there's the file that I just
downloaded, the audio file. It's really easy to drag and drop in something into
Procreate Dreams. You can just tap and hold, you can grab it and then
I like to do it this way, Pull up my Doc, go
to procreate dreams, and then I just drop it
in wherever like that. This is a really long file, but I'll show you
how to trim it down. You can tap, hold,
and move it along. You can also, that's loud. I'm going to turn it
down for you guys. Okay, there you go. Move your playhead
across and you can tap and choose Edit, and Split. And now it split
into two sections, and you could just
delete the other one if you wanted to
shorten it really fast. But let's go and play
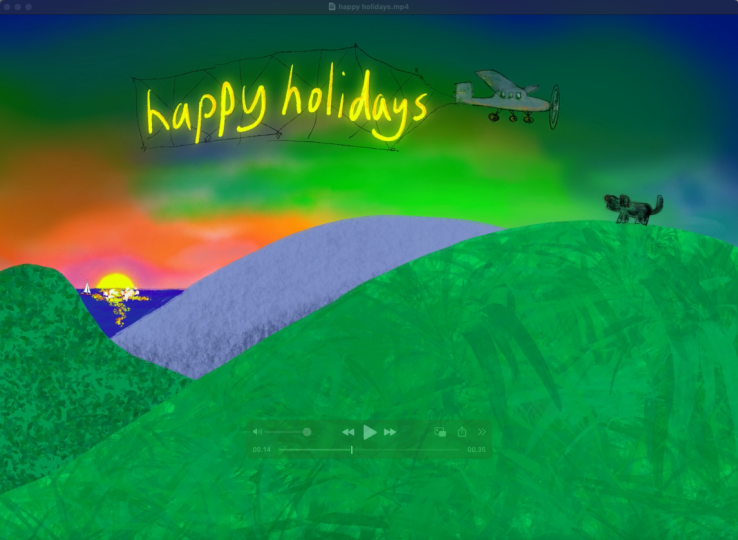
that now with some audio. That's great. So now
we've got the hustle and bustle of all the trafficking
noises happening as well, and it really sells the
effect of the animation. While we're talking about audio, I want to show you a
couple of things that you can do with audio. We do have access to our
little playhead with our key frames because we can do just a couple of
things with audio. We can adjust the levels. If we wanted to have
like the audio fade out at the end, this is
how you would do that. You can tap the playhead
and choose level. Then we're going to
leave this one at 100% Then we're going
to tap over to the end. Tap, tap it. Then we're going to turn
this one down to zero. Now you can see it goes down and the music is going to fade out. You can adjust the
levels of your audio by doing that and setting
key frames for that. You can maybe if you wanted to do it at the beginning
where it fades in, I can tap and
create a key frame. And then create one
more key frame here at the beginning and then
turn the volume down. It should fade out right at the end and then fade
in at the beginning. Awesome. I think
that sounds great. Audio is a really fun thing that you can add to
your animations, and it really, really takes
them to the next level. I hope you enjoyed seeing some of the possibilities
of things that you can animate using key framing
as well as adding sound. We also introduce
groups in this one, which is another very
powerful feature that I use in my
animations all the time. Definitely a lot of really
good stuff in that lesson. Up next we're going to explore the third key way of animating
and procreate dreams, and that is frame
by frame animation. I'll see in the next lesson.
10. Frame-by-Frame Fun: In this video, we're
going to be exploring the third key way to animate
and procreate dreams. And that is through frame
by frame animation. Frame by frame is when you draw each frame in your
animation individually, one by one, and you draw them a little
differently each time. And as you put them all together and play them
next to each other, your subject changes
or moves or animates. That's how frame by
frame animation works. And Procreate Dreams has some really great
tools to make it easy to create frame
by frame animation. Let's go ahead and
dig into this. We have two little mini
projects for this one. Let's get started
with the first one. Let's start by creating
a new project. So we're going to tap plus
sine in the upper right. Let's stick with our four
K wide screen option and tap empty. Let's pop over into
our drawn paint mode when we're doing frame
by frame animation. Procreate Dreams has a really cool feature called Flip book. To access that, we have this little gray
handle in the middle, which is only visible if
you're in drawn paint mode. But you can take
that and drag it down and now you're
in flip book mode, which is full screen experience. And we have our frame by frame, kind of little thumbnails
that we can flip through and add to as we do our
frame by frame animation. So let's do a really
quick little frame by frame in exercise. We're going to go to our brushes and we're going to go into the Luminant set and choose
the light pen brush. This is a really fun brush
that has like glow effect. Then for our color, we're
going to choose like a orangish yellow
but not too bright. Something that's down
here a little bit. Then we also want to make sure our brush size is
all the way up. We're going to start by also setting a background
color for this animation. We're going to tap our time code down here in the lower left. And we're going to
tap background color. I think this will
look good with like a nice bright orange color. Okay, now you'll see when
you draw with this brush, it's all like fun and glowy. So we're going to use that
to create an animation. But let's go ahead
and undo that. Let's draw our first frame, and we're just going to
draw a line like that. Then you can tap over to
the next frame just by tapping the next thumbnail
down here in the flip book. Now let's go ahead and
enable another setting that's going to make this
whole thing a lot easier. And that is onion skins. You'll find the
ability to turn on onion skins down here
in the time code. Let's tap that again.
Then you're going to tap show onion skins. Onion skins. Show you a preview of your
previous or next frame in animation that you can use as a guide to draw
your current frame. There are some options to edit your onion
skins right here. You can change the opacity. I'd like to keep it
down a little bit. In our case, since we're
drawing with yellow, it might be helpful to choose a different color
for our onion skin. So I'm going to choose
this purple color. Now let's keep going. Now we have this that we
can use as a preview, and we can draw our next frame. Then we'll just draw this
meandering little line. It doesn't really matter
what direction you go, you can make it curve. If you make it a little
bit longer at times, it'll zoom around a
little bit faster. Maybe long over here, maybe we'll go this way. Now just keep going around. Okay, maybe we'll
do a loop de loop. Get into like a meditative
state doing this type of animation. Right, go. Okay, one thing I want you to note down here in the type code is just
how to read this. Right now we're in
our 1 second of animation, the 23rd frame. We have 24 frames per second. If you do the math, we
have 24 plus 23, 47. I think if we were to add
another frame or two. There we go. Now we're in a
second second of animation, first frame anyways, not that important to
understand but good to know. All right, I think
that's pretty good. We've got like 2
seconds of that. Of course, you can slide through and get a little
preview of your animation, but if you want to get
a real time preview, you can go ahead and tap done or you can just flick the
flip book out of the way. Just grab this handle
and flick it down. And now here you can see all
of our frames in animation. I'll take three fingers
and slide horizontally. And we can see all our frames. And then if we hit
play, we have our, I don't know what this is, our little glowing line
going around and around. It's almost like
a little firefly. Once it gets to
the end, it jumps to where it was
at the beginning. And they don't
exactly match up in this loop if we wanted to
make them actually loop. Here's a little trick
that you can do. We can hit pause. We can grab
this frame in animation, and drag it to the
end like that. And then we're
going to tap on the second to last animation, our second to last frame. Double tap. Double tap again until we get these
labels at the top. And now we're in max zoom view. This is zoomed all the way
in as much as you can get. And you can see each
individual frame. The purple is our
previous frame. The blue is actually
the next frame. This is this blue here. We can start adding frames to meet back up with that,
which is really cool. Now we can tap the
plus sine and that will add a new frame
in between these two. Now we can start to
blend this motion to come back up with this blue one, that's this frame and animation. The next frame is
blue because if you go to a onion skins forwards, that's set to blue by default. But you can change it and
you can change the opacity. Now we can blend this to meet up with that one.
Let's go ahead and do that. We're going this direction. Go that way. Tap the plus sign. You'll only see
this plus sign if you're in the
drawing paint mode. Just something to keep in mind. Let's curve around that way, then we'll meet
back up this way. Go one more, I think
that'll do it cool. All right. All the way out
and play, there we go. Now we have this one
frame gap right here. Because we moved it over here. Let's just move it back. So we'll tap, hold and drag. And then just scroll all the way back and drop it
back in. Now play. We'll do full screen with
the four finger tap. There's our fun little
frame by frame animation. Let's go and hit back because we can have a little
bit more fun with this. Now that we've animated all
these different frames. I like to re, use
stuff as much as you can to create something
more interesting. Let's go ahead and
group all of these together and do
something fun with it. We're going to tap the
time line edit mode, which is this icon here. And then we're
going to draw over all these frames to select them, so they should all be
highlighted in red. And we're going to
tap and hold on one of them and choose group. Now they're all one
piece of content, but inside the group, if
we tap Little Carrot, we've got all of our
frames of animation. Let's close that and get out
of the timeline edit mode. Now let's duplicate this. We're going to tap and hold. We're going to choose Track
Options and then Duplicate. Now we have two copies of
this, but the second one, let's just move it to a different position
and maybe rotate it. Let's tap the little
corner, grab the noodle. The rotate node is
really the name of it, but I like to call out the
noodle, move it around, then we'll see,
that's pretty cool, But maybe we'll move this
one over here a little bit. Maybe we'll rotate this
one a little bit more. There we go. They're
really in sync with each other. There you go. That's cool's got some fun
stuff happening there. We can even change the color of one of these with a key frame, which we learned in
our last lesson, where we're doing keyframing. We can tap our playhead, Go to filter, go to HSB, and then change the color. I think like a pink
would be cool. Let's do a pink like that then. Since we have this starting
key frame that's yellow, it's going to change to pink, which honestly
looks pretty cool. But if you don't want
that, you can just delete this keyframe by tap
holding in choosing delete, and now it's pink the
whole way across. You could repeat this again. You could duplicate it again. Let's go ahead and tap
hold track options, Duplicate, change colors. Well, maybe we'll move it
first and then we'll change the color. What color? This time, I don't
know, like a blue. That's cool, that's fun. And then I don't
move it, rotate it. We can even change the
timing a little bit. Now watch, this is really cool. Like to change the loop
on one of the tracks. We can tap Duplicate, just duplicating the
content, not the track. Now we have another one there. Then we move this one over a little bit in the
duration of our timeline. We move this one over to
meet back up with it. And then we just
chop off what we don't need. It's
the same length. And since it was
already looping, it'll keep looping.
Look how fun that is. There's a quick little
exercise to get you familiar with frame
by frame animation. I'm going to take
you through one more little mini project to teach you even
more about that. We just did a really simple little frame by frame project. I have one more frame
by frame project where we will create our frames
in a different way, play with timing and
easing a little bit. There's some really fun
skills to pick up in this little mini lesson as
well. Let's get into it. We'll exit back out
to our gallery view, and then we're going
to tap the plus sign to create a new project. We'll just stick with
our four K wide screen. And we'll go ahead
and choose empty. Let's go ahead and jump
right into drawn pat mode. And we'll go into
flip book mode. We're just going
to drag this down. Okay, now we're in
flip book mode. We'll choose a color. I'm going to do like
a blue this time. Any color, we're going
to draw like a ball that goes back and forth like
this, any color sign. Then for my brush,
I'm going to go to my inking set and choose
the dry ink brush. Okay. And then my brush
sizes all the way up. Since I know I'm
going to be doing frame by frame animation, I'll just go ahead and
turn on onion skins. Now I'll tap here and then
choose show onion skin. You can also edit if you want to change the opacity
or whatever you want to, whatever your preferences
are for your onion skins. Okay, let's go ahead and
draw a circle over here. This is our first frame of
animation for this project. We're going to actually draw the first and the last
frame and animation. And then we're going
to blend in between. Let's just go to the next frame and we'll draw the last frame, which is essentially the same
thing, it's just over here. So draw another circle. Now we're going to go back to the first frame, and
we're going to tap it. And then we're going
to tap this plus sign to add a frame in between. Now we're going to draw what this ball is going to look like in the middle
of the animation. That is going to be this crazy long stretched out
version of this ball. Okay, it's like curvy and
stretched out like that. So let's go ahead and color that in now our animation goes. It's pretty quick. Now we're
going to start over here. And we're going to start, we're going to add
another frame. And we're going to blend
these two frames and draw what these would look like in the middle of that movement. We'll tap this one,
this first one, and we'll tap the plus sine. So now we have one in
between these two. What would this look like in
between those two shapes? Probably something like that. Maybe like a circle
shape, long oval. Then we know it's going to
be the same on this side. So we can go to
this one, tap it, and add a frame in between and do something similar there. Okay? Okay, now let's go back. Now, we're going to blend in
between these two frames. The first two frames
we're going to just like keep adding
stuff in between. We're going to tap
this circle again. Tap the plus sine in between. This probably just like an oval that's not
quite as stretched out. Maybe even less than that,
maybe something like that. Don't overthink it, just go with whatever you think
will look good over there. And then the same
thing on this end, we're blending in between
the last two frames. There we go, color it in. Okay, So now we're getting
somewhere messed up there. Just a race. Okay. All
right. All better. Okay, So now we're
getting somewhere. So we can see we've got this like back and forth kind
of thing happening. Let's see, let's go ahead
and do it one more time. We'll go to the first
frame, add one in between, and now we're going between
the yellow and then this one, something like that,
maybe color it in. And then we'll do
this one at the end, between the first and
last frames right there. Let's get more circular
now. Okay. Oops. Okay, there we go. Let's go ahead and
just exit out, and we'll see how
this is looking. We're going to just flick the
flip book down like that, and we've got all
our frames over here, okay. And we'll hit play. It's looking pretty good, but I want to do like a
bouncing motion back and forth. We'll just change
our playback mode. In our movie preferences, we're going to tap the
name of our movie here. Then we're going to
go to time line. Then we can change
our playback mode from one shot is
what it's set to. Now we're going to change
it to ping pong and that's going to go pop back and
forth like ping pong. Go ahead and tap.
Done. There we go. You could keep going and
adding frames in between however much you want to elongate your motion and
make it more smooth. Another thing you might notice
though is our little ball starts out slow and then shops across and then slow like that. This is another way to create easing like we did when we
were doing key framing. We could set the easing
like the manual frame by frame way to do it for
something like a ball bouncing. That's how it would
naturally happen. Anyways, another fun
thing that we can do with this animation is add
something else to the ball. Because again, that's
what I like to do with animation is like
what else could I do? What more could I do
to this? Let's grab our little handle here
and drag it down. Maybe we'll get black
and we'll just make it into a little happy face. Or maybe we'll go
a little smaller with my brush. Try that again. Make a little happy face like that and then go
to the next frame. Our happy face is going to
slowly get stretched out and longer like that mouth flatter, eyes are starting
get stretched out. The mouth is like straight now. Now the eyes are like
super stretched out. The mouth is also really
stretched out and frowny. Then we'll reverse course on this side. We've
got our eyes. I think it was like
a straight mouth. Then they start to get
a little more rounds. There we go. And then this one's now starting to get
back to a smile. Now we're back here, okay, let's see that top done. That looks pretty
cool. We can see like the face like
stretching across. One thing I want to mention
when you're trying to decide, do I need to do frame
by frame animation? Can I just key frame it? I use frame by frame
as a last resort because I am super
impatient and I don't like to redraw things
over and over and over again if it's where the shape of it is
fundamentally changing. It's rotating around in
a three D space or like this where it's like
becoming this like elongated and the smile
is changing to a frown. Then you might want to do
frame by frame animation. Or if you just want
that like hand drawn, frame by frame look, you would do frame
by frame animation. The way that I process through, I'm like, okay, can I do
this with key frames? Can I rotate it? Can I warp it? And then if not, maybe I'll go to frame by frame animation. But the preference is
totally up to you. You can animate in
whatever way feels good to you and makes the most sense
for your animation project. So we just finished up with our lesson on frame
by frame animation. And with that, we have
really taken a look at the three key ways to
animate and procreate dreams. And when you're creating
animations in dreams, you can combine these
different methods in all sorts of ways. And you can decide which
type of animation is most appropriate for the type of movement that
you want to make. So we're going to explore
those different things and get familiar with these
types of animation. As well as learn a whole
bunch of other tips and tricks along the way to create
really amazing animations. And the next lesson, we're
going to be animating one of the files in
your resource pack. But I will talk to you about
that in the next video.
11. Tumbling & Twirling: Autumn Leaves: Welcome to the fourth
animations course. For this lesson, we're
going to be animating leaves tumbling and
floating down from a tree. So we're going to be creating this like falling, tumbling, twirling type motion using
the perform feature. I love this technique
because it's so easy to do, but it looks really dynamic. And we're also going
to talk about grouping animations and duplicating them and adjusting timing
and things like that. For this lesson, you're
going to need one of the files in your resource pack. And this is going to
be the one called Autumn Leaves Dreams. So we'll go ahead and open
that up and get started. Okay, so we've got our Autumn Leaves Dreams
project opened up here. And this is all set up and
ready for you to animate. But let me show you a little bit about what is in
all these tracks. So I'm going to take
three fingers and swipe up so we can zoom in vertically on our tracks
and get a better look. Starting at the top, we
have our yellow leaves, each on its own track, so that we can animate
them individually. We've got leaf number one, number two, and number three. It's these like three
solid colored leaves. Then we've got our
front foliage, which is just this
like orange shape here, our tree trunk. Then we've got the
three back leaves, which are the solid color
leaves here, number one. Number two, and number three, we've got the back foliage, and then of course, our sky. That makes up our entire scene. Today we're going
to be animating the leaves tumbling
and falling down, twirling around that thing. We're going to be doing all of our animations using
the performing feature. Let's start with our yellow
leaves. I'm going to zoom in. I always like to scale up vertically so that my
time line is nice and big. Let's make sure we select
our front leaf number one. And move our playhead all
the way to the beginning of the track to create these
tumbling leaf animation. We're going to be rotating our leaves and then we're
going to move them down. We're going to
perform all of that. Let's go ahead and
enter performing mode. Tap the little circle right there and it
should say ready. Then I'm going to
zoom in because we're going to rotate first. We want to get it, look at
that and make sure again that your playhead is at
the beginning of the time line to rotate. We're just going to
tap the corner node and grab the little noodle, the little rotation node, and then just rotate around. It doesn't have to be like
a consistent movement. It can go slow and then fast. The more irregular it is, the more organic
it's going to look. And we'll just
animate it until it gets to the end of the timeline. Cool. Then I'll zoom back
in. Then we're going to move the playhead
back to the beginning again. Because now we're
going to animate it, going down the tree like this. To zoom all the way out. And then we're going to
make it come down and we're going to do motions. So let's go ahead and
do it. There we go. So it's spinning as it's tumbling down and
going side to side. And this really fun animation. It's got to pause. We will work on our second leaf. So we're going to go
to front leaf two. For this one I'm going to do
a back and forth swaying. Make sure the playheads at
the beginning tap the corner, grab the little no
little rotation node, and we're going to go back
and forth these big motions. This is what we did in the
balloon animation when we're learning about
performing. Here we go. We probably don't have to
animate all the way to the end, because it'll go out of
frame before it finishes. Let's go back now. We'll get it going down and we'll also go back
and forth like that. This takes a little bit
of practice because this one you have to time it
right to the rotation. So I'm going to undo with a two finger tap and
try that one again. It's pointing that way first. I think I'm going to
have it go that way. There we go, That's
a little better. It's just going you get a feel for the movement which is really
fun with perform. Okay, let's do number three. We're going to go to
front leaf three. Move our playhead to the beginning and we're
going to do some rotations. Maybe this one will do
like a slow rotation. Nice and slow. If you
do like an oval shape, it'll be slow and it'll
speed up as it turns. You can play around
with what shapes you draw to create different
types of rotations. All right, so we've
got that one spinning. And they'll zoom out so we
can animate it coming down. And we'll just go, I like that one going in
front of the trunk. You really see it? All right. Now we've got our three
leaves coming down. We'll just do a
quick preview with four finger tap so we can see how things
are looking so far. But I think those look great. Let's go ahead and go back. And we will animate
our back leaves here. Tap back, pause, and let's go down until we find
back leaf number one. Zoom our scroll all the way to the beginning
of the timeline. We'll zoom in on this guy. For this one, I'm going
to do the swaying motion, but maybe not quite so big, so it doesn't go so
far to the side. I'm going to do like smaller
motions back and forth. Nice and slow like that, Almost doing like a figure
eight with my apple pencil. Okay, good. Now we'll animate that one. Coming down to that one's not going back and forth quite as much because
of those smaller movements, but I think it still looks good, especially when it's grouped
with all the other ones. Let's do the next back leaf, let's go to back leaf two. All right, for this one
we'll do like a spin. Then maybe we'll stop
and go the other way. We'll see how that looks. All right. It's pretty good. Let's go back and we
will animate that. Falling down. Good. I think it went down before it
went the other way. But that's okay. Looks really good. Okay,
one more leaf to do, and we'll animate this one. Spinning. Maybe we'll do kind of a faster spins,
really irregular. All right, that's
probably enough. And then we'll animate
that one coming down good. All right, let's take a look
at how that's all looking. Awesome. We have a lot of variation in the way that
the leaves are coming down. And I think the more
variation you add, the more natural this looks. Let's go and tap back. Now let's use what we've
already animated to make this even more full
with falling leaves. Let's go up to the top and find our three front leaf tracks. Let's go ahead and we'll go
into edit time, lane mode. And we're going to select
these three leaf tracks. Then we're going to tap and hold on one of them and choose group. Now they're in a group, now let's get out of our edit mode. Tap and hold on that group. Go to Track Options
and choose Duplicate. So now we have two copies. Okay, we can do something as simple as moving
this down the timeline. A little bit like that, maybe a little bit further. Now, the only problem
with doing it this way is you can see up here, there's no leaves and then
boop, there's leaves again, that might bother you, but if it does, we can
do something different. Instead of leaving
it where it's at, we can just move our, we can just move
our animation group up so that it's
coming into frame. Then we should animate. The only problem with that is they get stuck where we
didn't quite animate it. Low, far enough down.
But we can fix that. Let's just go into the group
and find those three leaves. I hope not that one. This one is one of them. Then we'll just scroll back
until right before it stops. Then we'll go to
performing mode and just continue the movement
and make it go down. There we go. And then
the other one would be, this one stops right there. Let's start here. And then we'll just continue
the movement. It never happened.
Okay, let's go ahead and also duplicate
our, our back leaves. Let's go down here
and we're going to go into edit mode.
Select these three. Tap, choose group
out of edit mode. Tap and hold, and choose
Track Options, Duplicate. We can do pretty much the
same thing that we just did. Can move it down the
time line a little bit. We can, thankfully,
this one doesn't have the same problem
quite as much like they do just like
start to appear there. I'll scoot it over
a little more, but we can move this up
just a little bit so it's behind the tree
there, the foliage. Now we have all those coming in. We can slide back and forth. Maybe we'll move it
down a little bit more. Those ones happen
a little later. We only have a tiny problem
right there with that one, just like the little tip
of it is hanging out. Let's open up that group
and find that one. And just continue the movement. There we go, right there, go to perform and then
just continue it on down. Super easy to fix. Now let's go ahead and see how this
is looking in full screen. We're going to take
four fingers and tap, and we can tap the back button. To start at the beginning, play. Look at all those
fun leaves that we just made very easily, especially when you
start duplicating them. And you could keep
duplicating them to keep the leaves coming down
as long as you wanted. I hope you had fun
learning how to do that. Beautiful, like
tumbling, twirling, falling leaf animation.
That one's a lot of fun. It's a really versatile type of animation because you can use it for other things
that might fall. If you have snow falling, it would probably go
in the same pattern. Or if you have like
maybe a feather, like slowly coming down anything that kind of like falls and does this type of motion that sort of animation
would do well for. So I hope you had
fun with that one. In our next lesson, I'm going
to teach you how to create a looping animation by making some cute little characters.
I'll see you then.
12. Looping Animation: Spinning Shape Characters: Welcome to the fifth
lesson in this course. We are going to be creating
a looping animation. So one that starts and
ends at the same point. So when it repeats,
it looks like it seamlessly loops forever. So I'm going to be
teaching you how to set up your animation
to do that. And we're going to do that
by creating these fun, colorful, spinning
shape characters. So these really colorful shapes
are going to spin around and they're going to have a little eyes that
move around and blink. And I love making character
eyes in my animation. And they're really easy to do, so I'm excited to
teach you that. We're also going to play with
blend modes a little bit, so there's a lot of
really good stuff in this lesson and I can't
wait to get started. We're going to be drawing
this one from scratch, so you don't need any of the resource files or
anything like that. Just go ahead and open up Procreate Dreams into your theater and you will
be ready to go. So for this one we're going to create an animation
from scratch. So let's go ahead and open
up a new movie template. We're going to tap the plus
sign in the upper right, And this time we're going to choose the four K square size. You can go ahead and just tap
empty for this animation. I'm going to be teaching
you how you can make a perfectly looping animation. By default, we've got our
default set to 32nd duration, which is just way too long to be able to observe the loop. We're just going to shorten the duration of this
movie right off the bat. We're going to tap the
name of the file here, Dream one in my case. Then we're going to go to
Properties and choose duration. And let's just set
it to 10 seconds. Okay, 10 seconds and then tap done. Now it's much shorter. Let's start by
drawing something. We're going to be drawing
these little characters that spin around different colors and shapes and
things like that. Let's go up here to
our drawn paint mode. Let's pick a color. Go
over to my colors and choose just like a nice
bright blue color. Then I'm going to go
over to my brushes, and I'm going to use the Blackburn brush that's
in the drawing set. Okay, I'm going to draw
like a wavy edged, circular shape,
something like that. If it's hard to do that, instead of just trying to draw a wavy line that
goes in a circle, you can always just start with a circle, which might be easier. We want it to take up like
a quarter of this space, because we're going
to have four of them start with a circle and then add wavy edges to it. It can be totally
regular and wonky. That actually looks better
for this animation. The more irregular and funky it is, I think
the better it looks. Just go ahead and
color it all in so it's one solid shape. There we go. Now
we've got our track. What's going to make up each of these characters is we're going to have a
shape that spins. And then we're
going to have eyes that look around and blink. Because those things will be animated independently
from each other. They need to be on
separate tracks. We're going to tap the plus sign to create a new content track. Choose content
Track. Now we have a new track here and we're
going to draw our eyes. We're going over to our colors, we're
going to choose white. And a quick little
tip for choosing white is if you double
tap close to white, it will snap to a
pure white value. It's a pretty cool little thing. Then we'll give our character some eyes just do like big
eyes, that's pretty good. Then the pupils will be moving
separately from the eyes. Those will also be
on a separate track. Let's tap the plus sign
and choose Content Track. Now we have a track
for our pupils. Men go to our colors and
choose black for the pupils. When you're drawing eyes
that you intend to animate, you want to put the
pupils just right, dead center in the middle
of the eye shape like this. Okay? They're going to look like a little bit like deer in
headlights, but it's okay. Okay, there's our first shape. All done. We can go
ahead and tap done. Now we can get to animating. I'll just keep it
zoomed in like that. All right, let's start by
animating our shape spinning. We already did a little bit of spinning when we
did the car lesson. We're going to be doing
something very similar to that. We're going to move our playhead all the way down to the end. Then we're going to
tap the playhead move and then choose move and scale. Okay, That's going to create a key frame
at the beginning. And a key frame at the end. That's good to know because that's how we create
our looping animation. We have a key frame at the beginning of the end
that are exactly the same. We're going to tap this one at the end, little
keyframe there. We're going to go into rotate
and we're going to type in a number that is
a multiple of 360. Let's just do 360 to start and we'll see
how fast it looks. Let's play really slow. We can adjust that,
make it faster. But also you can see we have
the easing setting built in. It starts slow and it
goes faster and slow. I'd like to just change
that right off the bat. You can tap somewhere in
the key frame, Track, tap and hold, set all easings and we're
going to do linear. And then it will be a constant
rate all the way across. Let's set this to
something else. We're going to do
multiples of 360, so we could do 727 20. Let's see how fast that is. I think that's a good
jumping off point. It's slow, but the other shapes will also be turning and we'll do them at
different rates. There's that, it will perfectly loop because
it's multiples of 360. Let's now animate our eyes. We're going to be
animating our pupils moving around like this, like it's looking around. The first thing we
have to set up, if I were to move
these eyes around, and I moved them this way, they're going to extend
past the shape of the eyes, which is not a natural look. Let me undo. We're
going to actually set this pupil layer
to be a clipping mask. You're going to tap and hold on the pupil track and go to mask. And then choose clipping mask. Now if we were to
move them around, see they're contained within the eye shape, that's
a clipping mask. It basically keeps whatever's on this track within the shape
of the track below it. And there's a lot of
really cool stuff that you can do with
clipping masks, but eyes is a really good one. If we want our loop
to cycle around, we need to have a key frame at the beginning and at the end
that is exactly the same. All we need to do is go to
the end, move and scale. And now we have a keyframe at the beginning and the
end that is the same. We can animate in between. And we know it'll be a loop, because we'll start
here in here, and then start right
back in the same spot for animating eyes. I like to use the
performing feature, let's go ahead and tap on that. Then we can start it moving
around them in a little. You can go to the side, go to the other side, go up, go down. Just make sure you stop
before you get to the end. Go a little bit more then. It doesn't matter
really where you stop. It'll blend it back
to that point because we have that key frame here
that says the eyes are here. Now if we play and it loops, it'll start over again,
right in that spot. Now we have looping animation. The other thing that we can
do is create a little blink in our eyes that would be on
our eye shape track here. There's a couple ways that
you can make eyes blink. First of all, let's
set up our loop. So we want to make sure
that it is looping. We're just going to add
a keyframe at the end. It's important to note that
if you're in performing mode, you won't be able to add a keyframe like
nothing will happen. Just get out of performing mode. Move your playhead to the end. Tap, move and scale. Now we can animate in between. There's a couple ways
that you can animate eyes blinking and one of them is
with the performing feature. Basically you're going
to grab the top side of the bounding box and then just
close and open like that. You can tap and hold and then whenever you want
to close and open, the problem with this is
it can be a little slow. If you want to do
like a fast blink, then sometimes it's hard to get it exactly closed
at the right speed. You can do it that
way, but you can also do it with
manual key frames, which is a little bit
easier in my opinion. We're going to go here
in our key frame track, we're going to move
our playhead to wherever we want the
blink to happen. Then we're going to tap. Now you can see it's white. We've created a keyframe there. Move it over a little tap, and then move it
over a little tap. Now we have three key frames. This is going to be open, open. Let's go to the middle
one, which is going to be the closed state. We're going to make
sure we're not in performing mode for this. We're going to go ahead and
just close it like that. Just drag it down.
Now let's play that. It's still a little slow, but we can easily adjust that by just moving
these keyframes. To the middle one, maybe
go even faster than that. Like a little quick blink,
however fast you want. Yeah, I like that now. You can just go through wherever you want to blink to happen, just tap, add three
key frames like that, and then grab the middle one. And then just close
it like that. All right, let's see, I think we'll do two
blinks for that one. This is what the
animation is looking like so far. We've
got our spinning. We've got our blinking, and
we've got our looking around. Okay. And then of
course it loops right back at the beginning.
Totally seamless. All right, that's looking good. We're going to be adding
some more characters. We're going add three
more characters. We'll shape characters
to animate just for keeping things organized. I'm just going to
group these together. I'm going to go into
my timeline edit. I'm going to select these three, then I'm going to
tap and hold and choose Group, there we go. It's all one group, one unit. Then I'm just going
to move it down to the bottom T. I have these other leftover trucks
that I'm just going to use to draw the next stuff
that I need to draw, if you don't have
leftover tracks or if you just need a track and
you don't have it, again, you can always go up
to this plus sign and choose a new content track and it will create a
new empty track. Move your playhead to the
beginning of the time line, and then we're going to
go into drawn paint mode. Okay, Move playhead to the
beginning of this empty track. And let's go into
drawn paint mode and draw another shape. This time I'm going to
do a bright orange. You can do whatever
colors that you want for this colors that contrast are going to look good for
the final thick that we add. To make this look really cool, I'm choosing a lot
of different hues. Let's do orange for this one. I'm going to do a
triangle shape, something like that. And
then I'll color it in. Okay, we got a triangle. Then we're going to
draw the eyes on the next track up or you can tap the plus sine to create
a new content track. Double tap close to
white to choose white. Then put our eyes, maybe this one will have a
little bit smaller eyes. Draw your eyes and then top the plus sign to
create a new content track. Then we're going to do
black for the pupils. Again, making sure
to put them right in the center like that,
there's one shape. And I'll go ahead and just
group these together. Tap, edit, select
tap and hold group. Then I'm just going to start working right in this
empty track here. Back to draw paint mode for
this next shape I'm going to do like a pinkish color,
nice, bright pink. The shape I'm going
to do is like this wonky star with
like six points. I've gone off the
edge, but that's okay. We'll rearrange things
in a little bit. Just go ahead and focus
on drawing for now. Get and color that one in. Okay. Then we'll just do the same thing
that we did for the orange one and
draw our eyes. I have this empty track here, I'm going to use right here. It's important to note that
if your playhead is not at the beginning of
the empty track, and it's like right here, when you draw something, it's going to only fill
in from that point. We need it to be in for the whole duration
of the timeline. You can always like
drag this out, but I think it's
just easy enough to put the playhead there
before you get started. All right. Let's do
the pupils in black, right in the middle.
There you go. Then we'll create a new track, and I'll group
everything at the end, tap the plus sign and create a new content track
if you run out. Then for the last one,
I'm going to do a, a yellow shape with
a scalloped edge. Do like a round shape,
something like this. I haven't said this yet,
but you can tell that I'm overlapping stuff that's
actually intentional. Actually want things to overlap because
we're going to use a blend mode to make these colors mix together
and will look really cool. There's my circle. And then I'm just going to
add little scallop shapes or lines all the way around just to make it more
interesting of a shape. Then make sure we color all
of them in. There we go. Okay, there is that shape. Then we're going top
the plus sine to create a content track. Get white. Draw our eyes. Maybe I'll make them
big here and go. And then another Track. Tap the plus sign Content Track, and draw my pupils in black. All right, so there
is our characters. I'm going to group
everything now. I'm going to tap done To get
out of drawn paint mode, I'm going to go to my edit mode. And then I'm just
going to choose these three, the yellow ones. Tap and hold group. I'm to select these three. Tap and hold group. Okay. Then if you have
any extra tracks, which I do, I'm just going to move everything down
to the bottom here. Just drag it down.
Then I'll delete all these extra tracks
by going up here where it says content
and choosing tracks. Then I'm just going to select
all these empty tracks. Tap and hold and choose. Delete. Now we just have
the tracks we need, okay? All right, before we
animate the rest, I'm going to reposition
everything a little bit, that it all fits. I'm going to move that
one up a little bit. Move that one in, maybe
shrink it down a little bit. That guy over. Just reposition them
so they all are actually in inside your movie. The balance of your movie
that's looking good. We're also going to apply our fun effect that I was telling you about
using blend modes. We'll start with
this yellow one, we'll go to the group with
the yellow face tap and hold. And then find where
it says blend mode. Then we're going to choose
multiply from this list. You'll see that when we
do that anywhere that it overlaps has this
color mixing effect. Basically, it's making things transparent. That's
what blend modes do. They dictate how a track interacts with the
tracks below it. Depending on what
blend mode you choose, it behaves differently, but multiply is a really fun
one for mixing colors. Let's do it for the other ones. We're going to go to the
pink character tap and hold, go to blend mode and
choose multiply. Then we'll go to
the bottom one tap, go to blend mode and multiply. Then we don't have to
set the bottom one because there's nothing
below it to interact with. We don't really need to set
the blend mode of that one. All right, it's got
everything set up now, we're just going to go
through and do what we did for the blue character
for all of the other ones. When I'm doing this having to do repetitive type animation, I like to do it in an
assembly line fashion. We need to set
everything up to loop, so we have to add key
frames to everything. Let's go ahead and group, but open the groups
so we have all three. Then we're going to
add a key frame to the end of all these tracks. We're going to tap,
move, and scale. Go down to the next one,
Tap, move, and scale. Tap, move, and scale. Then I'm going to skip this one, because that's just the group, now, I'm on the peak
one, move and scale. Go down to the eyes,
Tap, move and scale. And then the shape,
move, move and scale. Then one more time, skip the
group for the orange one, go to the eye, pupils
move and scale. Down to the tap and
scale, move and scale. Let's go back up to the top. Okay, we've got all
the key frames set up. The next thing we can run
through doing is setting up all the clipping
masks for the pupils. Find all the pupil layer tracks, top holds, clipping mask. Again that makes the
shape of the pupils stay within the shape of the
eyes Clipping mask. And then this one clipping mask. Okay, we've got all
our pupils set up, now we can start animating. Let's start with the pupils of our first shape we're
going to use performing. Let's go enter performing mode. Then we can just
move them around. Looking up, down, maybe it's back to the middle,
maybe he goes that way. Just make sure you stop
before you get to the end. And then you can see that it will blend it back to the frame, that key frame that we
set up in the beginning. That'll loop, okay? And then I'm going to do all
the pupils at the same time. Just because it's easier to do one thing repeatedly in a row. Maybe that guy's like crazy. He's looking up, he's little
jittery, that guy. Oh. So you can have fun
with your movements. One thing I should know,
anytime we do perform, it's always good to check here under modify for your
motion filtering. If it's up really high, it's going to smooth out your motion. You might need to
adjust that if things aren't looking the way
you want them to look. Okay, let's do our
orange guy here. Last eyes, he's looking down. It's good also to see what the other
characters are doing, so I'm going to zoom out. Maybe they're looking at
each other, maybe not. Okay, there's that guy
got all the pupils done. Now we can work on our blinks. I'm going to go up to
this layer or this track. If you remember for the blinks, we're just going to go
into our key frame. Track, tap and then
choose the middle one. Oops, make sure we're out of performing mode.
Let's forget that. Get out of performing
mode, close. I'm going to make these a
little closer together. Okay, Then maybe
we'll do another one. However many blinks
you want to do. Okay, The middle one, maybe I'll do one more. Okay. And then choose the
middle one and close the eyes. Good. Now we've got three
blinks on that one. Okay. Let's do the next one. We can just, that
would be the pink one. What I think might be fun for the pink one is to do blink, blink. Maybe I'll start here. We're going to make, not three, but we're going to make six so that we can make it
blink twice really fast. Okay. We're going to
now go to the second one and we're going
to close it up. Then we're going to go to
the second to last one. Close that up and we get
a little blink blink. You can even do as many
blinks as you want in a row. We'll do another
blink over here. Just put in your
three key frames and then go to the middle
one and close the eyes. Okay. All right. Last one, we're going to do this
one and I'm just going to do maybe like one,
just for Tim sake. You can do as many blinks as
you want. Go to the middle. One would be this
guy here, okay? Okay, everybody's blinking
at least a little bit. Next we're going to animate
our shapes spinning, because we only have
one spinning so far. Let's start at the
top with our yellow, this one. This
parts really easy. You just go to the
last key frame and we're going
to type something in Tap, there we go, go to rotate, and let's type in a different multiple
of 360, 14, 40. Let's see how that looks. Cool. I like that it's going like a lot faster than that one. Let's do our pink shape. Tap it, rotate, and
maybe we'll do 720. Then we'll do minus. And we'll make this one spin
the other way, which will look cool. So we'll see how that
looks cool and you can really see how
things overlap. Looks really neat. Okay,
then let's do the triangle. Now let's see tap
in the triangle. Let's do 1,800 for this
one and we'll do negative. Now the triangle is a little
wacky and that's just, it's not like a round shape
like these other ones. We should set our anchor
point for this triangle. I'm going to do the, let's go ahead and edit
the anchor point of this, it rotates a little bit better. I'm going on that track with orange shape and then
I'm going to tap these three dots in the corner
and choose Edit Anchor. And you can see this little x, little plus sine is the point
around which it rotates. If we were to move
this like up here to the top and then tap done
and then try to rotate it, you can see now it rotates
around that point. Using these anchor points
is a really good way to get control over
your movements. You can use it
with other things, like when you do a
non uniform scale, it does it to that point,
which is pretty cool. But let me undo that and we'll set it to where
we want it to be. Let's tap the three dots
again. Choose edit anchor. And we're going to place
it right between the eyes, that way it's rotating
around that center point and it remains as centered
on the eyes as possible. Let's go top done. Now we can set our key frame. We're going to go to rotate, we're going to do 1,800
and then negative. Now you see it feels a little bit more centered
as it goes around. That's the last little bit of this animation. Let me hit play. You can see once the playhead gets to the end and goes back, it just loops very seamlessly. And this is especially apparent when you go to full screen view, and everything just
keeps looping forever. This lesson has a lot of
really important skills in it. Learning how to make something
loop is super great. We learned about anchor points, which we will explore a lot
more in lessons to come. Then the character eyes, which I love adding
eyes to things. I think it's just such a fun way to bring any object to life. I hope you enjoy that
lesson on creating a looping animation
by making these fun, spinning characters
with the blinking eyes. There's a lot of ways that
you could use the techniques in that we learned in that
lesson, especially the eyes. I love putting eyes on anything. It's kind of just like a fun
way to make an animation. Just get a shape,
put a face on it, or even just the eyes, you
don't even need the face. Make them blink and look around. And it's just a lot of fun. So I hope you had fun with
that one in our next lesson. I'm really excited
about this one, because if you're
a procreate user, you might be
wondering how to take your procreate
artwork and bring it in procreate dreams so
that you can animate it. And that is exactly
what I'm going to be teaching you in
the next lesson. So let's go ahead and move on over to the next
lesson and get started.
13. Animate your Procreate Artwork: Cactus Scene: In our next lesson, I'm really excited
about this one. Because if you're
a procreate user, you might be
wondering how to take your procreate
artwork and bring it into procreate dreams so
that you can animate it. And that is exactly
what I'm going to be teaching you
in the next lesson. Let's get into it. This
little bike that I animated from a drawing that
I did several years ago. I actually have a
tutorial, my Youtube, about how to draw this one, but here's the little
animation. It's really simple. I just have the bike
wheels turning as the whole thing goes
across like that. Let me show you how I prepared this piece to animate
and procreate dreams. And then we'll go through
and do one together. All right, here is the
procreate file for that piece. Let me just open up my layers. This is what my
layers look like. This is what they look like. For me to create this piece, I like to separate out
different parts onto different layers to aid
in the creation process. If I want to prepare
the to animate first, I'm going to think
about what is going to be animated as you saw. We had the tires spinning around and then the
whole thing went across. We know that the tires need to be separated
out from the bike. At the very least, we can start merging things together that aren't going to be
animated separately. Like all these layers
with the bike parts, that can all be merged together. We've got our three layers
for the tires, for this one. Let me turn these
off real quick. This one here has the spokes on, it also has the gears on it. I would just go to the
selection tool and select that and then
swipe down cut and paste. That way I can merge it in with all these other
bike layers here. Just make sure you turn on the layers
before you merge them. You can do a quick pinch to merge them
together like that. Now, I can also merge all the layers for the
different parts of the tire. I don't need those
to be separated. Then I can delete stuff I
don't need like sketches. I can delete those layers. This is all like sketch stuff. I'll delete all of that. Now
I have these three layers. The other thing that
you want to make sure of is if I turn this
layer with the bike off, you can see in my tires, it's not quite
complete right there. And that's because it's being blocked by that
part of the bike. I didn't actually have
to color that in, but now that it's
going to be animated and the tire is going
to spin around, that will be showing
you also want to go in and clean things
up like that. I would select this color and
find the brush that I used, which I drew this
with my pencil box. My pencil brushes,
I'm going to choose that pencil brush then
I'll just color that in. Maybe I'll clean
up this line here. Just get it looking good. So that way when it starts
moving, it looks good. That's enough right
there. I'll turn that on. Then the other thing is these tires will be moving
independently of one another. They'll both be
moving around their own like center point. We need to separate
out the two tires onto their own layers. We would again go to
the selection tool. Just draw a selection around it, swipe down, cut and paste, And now we have the two tires. Now this one would be
all ready to go and ready to import Procreate
Dreams to start animating. Now you can follow along with
me and we're going to prep a procreate file and import it into procreate Dreams
and animate it. Here we have this cactus scene that is included in
your class resources, so you can follow along. Just open it up really quick. And this is actually something
that I drew as a part of a tutorial that I
did several years ago. You could actually
find this tutorial on Youtube and draw this whole scene yourself
if you wanted to, or you can just use the
file that I provided. The first thing
to do when you're prepping a file from
procreate to use and Procreate Dreams is to exit to the gallery view and duplicate
your file because you want to retain your original
file in case you need to go back and make changes or just so you
have that original copy, because we're going to be either merging things
together or cutting things apart in this one
that's set up for animation. So we're just going to swipe to the left and choose plate. Then I find it's also handy to rename the duplicate
something like animation. It's cactus scene animation. That way I know that's the one that's been all set
up for animation. Go ahead and duplicate
it and we'll rename it. And then we're going
to go ahead and open up the duplicate. First of all, we're going
to think about what kind of motion and what animation
we're going to do for this. I thought it would be really
fun for this piece to do some motion graphic style
animation where we have the different elements like
falling down and popping in and doing that so that they come together and
make the final scene. Everything is basically going to be animated independently. The different,
these three things are all going to be
coming in separately. Let's look at the layers. We don't have a lot to
do here, thankfully, but we can see in this layer, layer two, we've got
everything all on one layer. We're going to need
to separate those out onto their own layers. Select that layer with
a multiple cacti, Then go to your selection tool. We'll just draw a selection
around this big round cactus. Then you can take
three fingers and swipe down and choose
cut and paste. That will place it
onto its own layer. Another thing that we
want to make sure we do because the
original layer was on, has a blend mode turned on. And that's going to
make it like interact with the layers below it. And then when we paste it, it doesn't have the blend mode, so we just need to
make sure to set it. We're going to tap the little n and then change
it to multiply. You can see before and after
it has that blending effect. Let's go back to
the layer with the three tall little cacti. We'll start selecting them. I'm just going to draw
selection around that one. Swipe down, cut and paste. Set the blend mode in my
layers. Go to your layers. Oops, And choose multiply. Then we'll go to this
one and should be the last one we have to do draw selection around the middle one, swipe down with three fingers, choose cut and paste. Now we have everything
separated out like we need to. I got to set the blend mode
of this one to multiply, okay, Everything separated
out onto its own layers. The other thing we
want to look at is you can see in the
little thumbnail here. But let's turn everything else off so we can
see what's going on. We're going to tap and
hold a little checkbox for this layer that's going to turn off everything
else except that layer. Now you can see that
there's some holes in here because they're being
covered up by the cactus, so we didn't see them before. But since things are going to
be animating and coming in, we probably want
to fill that in. We're just going to
do a little clean up. I remember when I drew this, I used a brush from
the drawing set, the built in procreate
brushes called Blackburn. I'm going to grab this color. I'll just sample it. Just just white then just fill in
the holes like that. Okay, Then we can
go ahead and turn everything else back on by tapping and holding
that checkbox again. Then the other thing
that we want to do has to do with the
background color. When you import a procreate
file into procreate dreams, it doesn't carry over
the background color. I like to create a layer that has the
background color in it. We're going to tap the plussine
to create a new layer. And then we're going
to move this layer down below all the other one. Tap, hold and drag it down. Then I'm going to select
the background color with a finger like this. Then I'm going to use color
drop to just drop it onto my canvas and fill that
layer with color like that. You can see now it's
filled with color. If we were to turn
off the background, nothing happens because
we have this layer. Then if you are a super
organized person, you could go through and name all your layers if you want. And those names will be transferred over into
procreate dreams. That's an optional step, but I'm just going to
leave it for now. All now that our
file is all set up, we need to go into
Procreate Dreams and create a movie that we
can import this into. Let's go ahead and switch
over into procreate dreams. I like to do this by swiping
up to bring up my dock. And then I have dreams here in my Doc. I'm
going to tap that. Then we're going to
top the plus sign to create a new movie. It doesn't really matter
what template you choose because we're going to end
up customizing the size. I'm just going to choose the
square one and choose empty. Then we want to make sure that this movie is the same size
as our procreate file. I'm going to go back
over there real quick to see what size this is. We can go to the Actions menu, canvas information, and
then go to dimensions. We can see here under
pixel within height, that's the one we want to read, is 2,800 by 3,500 pixels. That's the size
that we're going to need to make our dreams movie. Let me go back over to Dreams and to change the size of this, we're going to tap here
on the movie name. We're going to go over
here to width and height, and we're going to type
in the same size here. This would be 2,800 by
3,500 pixels. Then tap den. Now we have a movie that's the same size as
our procreate art. Let's go back over to Procreate. To import a file from Procreate
into Procreate Dreams, it's really easy using
a dragon drop method. Let's exit back to
the gallery view. This is the way that
I like to do it. I'm going to hold and drag my file out
here and procreate. And then I take another finger
and I pull up the doc from the bottom tap over two dreams. And then drop it in there
it is in my timeline. The other way you can do
it, if that is difficult, is you can use the
split screen view. I'll undo and show you that
if you're in procreate, you can tap these three
little dots up at the top. There we go, the three little
dots and choose Split view. Then you can choose Dreams. And now we have a
side by side and you can just drag and drop in. You can also use
this side by side to drop in audio files, video files, images,
things like that. Now let's go ahead and close
the side by side view. Describe this little handle in the middle and there we go. As you can see,
our procreate file has imported as
one single track. We want to be able to use all those layers that
we created as tracks. There's a really
easy way to do that. You're going to tap and
hold on this piece of content and then choose convert layers to tracks
right here in the menu. Now you see this single piece of content has
turned into a group. And we can open it up and we can see all of our layers
inside the group. The other thing that I like to do is just straight
out of the gate, ungroup it, just so it's
a little bit easier. I'm going to tap and
hold on the group, it's the top track
and choose group. Now we have everything as individual tracks and we're
ready to start animating. Like I mentioned,
we're going to apply some motion graphic style
animation to this and have things like appearing
and popping in and do some different style stuff
for each little pieces. Let's start with
this red ground. Let's see, I'm going to
zoom in a little bit that I have just a few seconds
visible in my timeline. Then I'm going to put a keyframe right here, around 2 seconds. I'm going to move
the playhead there. Choose move, and then I'm going
to choose move and scale. That will automatically
put one at the beginning. It's going to be the beginning keyframe that we're
going to be editing. That way, everything finishes and it looks just like this. Let's go to the first key frame. I'm just going to move
this down so that it slides into view like that. Tap it, then move it down. Then another cool thing
you can do is if you put another finger
on the screen, you can drag it down
in a straight line. It will turn on snapping, so you can drag it
down like that. Then you can press play and
see how that's looking. You can, of course, adjust
the time it takes to come in by just moving the key frame over if you wanted
to come in faster. But I think that
looks pretty good. Then I'm just going to do like all the background elements, I'm going to do this
white circle now. I'll go ahead and find that
track with the white circle. And I'll add a key frame
right there, move and scale. Then I'm going to
leave this one. And then we going to go
back to the first key frame for this one. I'm going to have the circle, like start small and then
come up to full size. I'm tap, then I'm just going
to grab the corner and scale it down until
it's really tiny. That now if I play that,
that's getting big. While that's coming
up, then of course, you can always
adjust the timing of this by moving the
key frames around. Maybe I want the circle
to start a little later. I can move them around that way, but I think it was probably better before I'm
going to leave it. Don't worry too much
about timing because we'll adjust that
all at the end. We'll leave that for now.
Now let's think about our, I'm going to start with this
one here, big round one. I thought it would
be fun to have it fall down and do a bounce, almost like a little squash
as it hits the ground and then bounces back
up like it's squishy. Let me find the track with
that big round right here. It's this one. We're going to add a keyframe just
like we did before. Find the bottom, the timeline, tap, move, move and scale. And then go back
to the first one. We're going to move this up. This time he's going to
move it up and you can put a finger down to
snap, there we go. And straight line, now it's coming down looking
pretty good so far. I'm going to adjust my
timing just a little bit. Okay. Then I'm also going to change the easing
of this one because I want it to fall at
like a steady rate instead of it's automatically, by default it sets
to ease in and out. I'm going to tap
somewhere between my two key frames
and hold and choose, set all easings to linear. That one comes down
and then stops. Now I'm going to do the little squish animation to do that. We're going to start here
on this last key frame and then move it over just
a little bit and press, just tap it to create
another key frame. And then move it over a
little bit and tap again. Then on this middle one, we're
going to squish it down. If we were to squish it down, we can grab the top edge of the bounding box
and squish it down. But that is making it also
raise up off the ground, which is not what we want. We can edit our anchor
point so that it stays anchored to the ground
and just squishes downward. Let me tap, tap a
little three dots, anchor and then put it down
at the bottom. The top, done. Now, if we move it down, you can see that it's staying
right there at the bottom. It's just moving down that way. Let's see how that's playing. There you go, hoops, see it's coming down. And there's a little
bounce and comes back up. If the bounce takes too long, you can of course, adjust your key frames to
get the timing right. I think that's
pretty fun. I want to do these long ones
in the same way, have them come down and
do a little bounce, But maybe in quick succession, boom, boom, boom,
they fall down. I think I'll do this
one first on the end. Let's go ahead and
just add a key frame. I want them to fall
right after this one. I'm going to put it right here. Move, move and scale. And then go back to the first key frame and
move it up like that. Now it's coming in slowly, so I'm going to scooch
this key frame over. Probably still a little slow. That's probably a
little bit better. Then I'll add those
two other key frames. Start here, tap, tap again. And then I'm going to
go to this middle one and add my little squish. But first of course, I need
to edit my anchor point. I am going to tap this
little three menu. Edit, anchor, And anchor it right down there
at the bottom. Now I can squish
it a little bit. Let's see how that's looking. That's fun. Okay, I'm
going to do the same thing for the other three. Go over here in my
timeline, move and scale. I'll just go ahead and move
my key frame over now, because I know it's not
going to want to be way over there to that one. And then move this up
using snapping, okay? Now boo boo, that's what
I want just for it to land like due then I'll add my little bounce with a
couple of key frames here. Tap, and then we're going
to go to the middle one. We've got to set our
anchor point at anchor. Put it down there. Done now
we can do a little bounce. Let's see how that
looks. That's great. Okay, it's looking really good. Now I'm going to do this little
one over off to the side. Which one here? I will place my key frame here. Tap, move, move, and scale. You get into a flow
of it once you start doing like
repetitive things. Okay, there's that. Just
scooted that one over. I'll select that
first key frame. Move the whole thing
up using snapping. Looks good. Let's add
our little bounce. We got to edit our anchor point. Tap the three dots it
or put it down there. Done and let's squish it. Oops, I did a uniform scale. I guess I got a little
too close to the corner, but we've got to grab the top to do a non uniform
scale like that. Okay, let's see how
these three are looking. Perfect. That's exactly
what I wanted to do. Great. Okay, those
are looking good. The last one is our
big seguarotypet. This one, what I imagine, it starts from flat and
then goes up like this. In perspective, if you can imagine like a piece
of paper being flat, let's see, being
flat and then whoop. It goes up like that. You can see the
perspective of it. It's wider here. I hope that makes sense. We need to set a couple things. We're going to key frame of distort which we
haven't used yet, but let's go ahead and set, let's see, we want it to finish probably
about right here. I'm going to go
ahead and tap move, then this time I'm
going to choose distort. Choose distort. I'm going to move this
key frame closer. I don't know exactly what my
timing is going to be yet, but for the first key frame, we're going to drag the sides. Just grab the corner and drag it out to the
side like that. This is going to give
it a little bit of perspective as it's like down
on the ground, so to speak. There's that, we'll play
with the timing of it but let's also now add we're going to do a squish
but all the way down, tap over to where this
distort keyframe is, Then move your play head up so that we
have the clapboard. Then we're going to move, and then we're going to
choose move and scale. Then we've got our other
key frame, way over here. Let's drag it to match
up with the distort. Now they're in line
with each other. We'll go to this
one. We're basically going to just squish
it all the way down until it's disappeared. We got to edit our anchor point, just like we did when
we were squishing the other cacti, The three dots. Go to edit anchor and
then put it down here. And then tap done.
Now we're going to grab the top edge of
the bounding box, then go down until it's like basically on top of itself.
It's not there anymore. Now see how it's as if it was like a flat piece of paper and it's
like standing up. I'm probably going
to play with the timing of this a little bit. I'm going to be adjusting
these key frames. Yeah, probably right there. And then I'll move
this one to match. Just keep these two
in line with each other and I want it to
happen a lot faster. I'm going to scoot
these over quite a bit, that's probably too far. Play and adjust the timing
maybe a little faster. I also think some
easing settings would be helpful for this. To make it like finish slow. I'm going to set the
easings for two key frames. I'm going to tap and hold, I'm going to set all easing, let's do ease out. I'm going to try that. Then I also need to do it for
this one down here. Set all easing to ease
out because they're separate key frame trucks there, that's a little bit better,
it's a little too fast. And play around with the time line or the
timing I should say. Not the time line there. Okay. There, I think
that looks pretty good. Now, you might notice here, everywhere else
in the time line, we've got this dark line. Because it still exists. It's just like squished
down really small. We can just drag the
edge of the content here until it meets up
with these key frames. It's like that, that way. There's nothing there
until it starts moving. There you go. Let's see how
things are looking so far. Far it's looking pretty good. I just think this one needs
to come in a lot faster. I'm going to move my
keyframes over a little faster then I want it to happen. So not just faster but
like drop in sooner. Instead of moving all
these key frames around, I'm just going to move
the whole content to the left in my timeline, then it'll happen
faster essentially. Cool, I think that's
looking pretty good. Probably would
want everything to come in a little
sooner than that. But you can always
play around at the timing and get it look
in exactly how you want to. But the last thing I want to
animate is this little sun. Because it's just sitting there. Static. I thought it
would be cool to have it like come in like the
sun is like rising. Come in from the side like
that around in a circle. We can do that really
easily with anchor points. Right now if we
were to rotate it, of course it would just
rotate in a circle. You can barely even see
what's happening because it's around that point in the
middle. Let me undo that. Instead, we can move our
anchor point somewhere else and then make the radius around which it
turns a lot bigger. I'm going to tap this circle. Tap the three dots. Go to edit anchor, then I'm
going to put it like down here in the backstage area. And then done. Now if
I were to rotate it, see it comes in from the side as like a
big radius like that. Undo that so that I
can key frame that in. Because I want it to come in about right there. I
want it to finish. I'm going to move,
move and scale. Then if I zoom in, I have my two key frames. I move this one a lot closer, go to the first one, and then
tap a corner of this shape. And then grab the
little rotate node and move it so that it
rotates out of the way. Then, ooh, fast adjust. I still have ease out because
that was the last thing. Every time you
change the easing, it stays that way for future
transform key framing. If I were to change
it to linear now, everything else would be linear after that until
I change it again. So that's why I think
it's on ease out. I'm going to slow that
down a little bit. I'm going to have it just adjusting like when
it comes in there. I think that looks pretty cool. Let's zoom out a little
bit because right now our whole thing
is like 30 seconds. Because that's the, that's
what the default set to. After the animation stops, we'll give it a few seconds
and maybe we'll have the whole thing be like 10
seconds instead of 30 seconds. Let's go ahead and tap
where it says the name of the movie under duration. We can tap that and choose ten. And then tap done. Now
let's go to full screen. Take four fingers and tap, then let's rewind all
the way and play. This is a really fun lesson because it shows you that
you don't always have to make things animate or move in the way that
they might move. Like in nature, it's sometimes cool just to have
things like come into the frame and do like
interesting movements and come together to create
the final illustration. You can do it all super easily by just creating
those key frames. I hope you had fun
with this one. In our next video,
we're going to put a little pep in our step as they teach you how to animate over video. I'll see you then.
14. Animation Over Video: Pep-in-your-Step: Welcome to our next
lesson in this course. This is going to be a fun one because
we're going to learn how to animate over video. For this lesson, you're
going to need a video. And I've provided one for you, but you can always go
out and take your own. I'd like to call this one pep in your step because
we're going to record just basically your feet walking down the sidewalk or
walking down the street. So you want to grab
your iphone or your camera phone or
whatever and just record yourself holding your camera steady and walking
down the street so that you can see your feet and you don't need very long, maybe like 8 seconds or so. Take a video of yourself or you can use the one
that I provided and then you're going
to want to transfer it over into your ipad. You can put it into
your camera roll or into your files app. And then we can go ahead
and animate over it. And this is a great lesson
because we're going to be doing a little frame
by frame animation. And then we're going to be
grouping and duplicating, and key framing them to match the movements of our feet.
And it's a lot of fun. Then just real quick to talk
a little bit about animating over video because I have
done quite a bit of that. I know I mentioned earlier that Procreate invited me to London to do a demo back when they did the big announcement the summer. And the thing that
I demoed was I created this whole
animation over video piece. It was a really fun
concept I love. And so I came up with this
concept to do making pancakes, but all the animations are puns. So I got to animate over video
in lots of different ways, through frame by frame, key framing, performing
all of that is in there. So I'm just going to play that little video
for you right now. It's just a 1 minute video and then we'll jump into our lesson. Oh, oh, will she stick this landing? She, here we are in the theater. We're going to go ahead and
create a new movie project. Tap the plus sign
in the upper right. This time we're going to
find the four K Social. I wanted to point something out because I haven't
shown you yet. You can always this little
four K. And you can get some different options for the size of resolution
of your movie project. But we're going to
stick with four K. Then we're going to go
ahead and choose empty. Let me show you how to import a video to your time
line. It's really simple. You go here to the plus sign and then you're going
to choose video. And this is going to take
you to your camera roll. If you took the video
yourself and air dropped it to your ipad or something and
it's in your camera roll, you would choose
your video here. But if you're going to
use the class resources that I sent you and you're
going to use that video, let's go ahead and hit cancel. You're going to
tap the plus sign. And you're going to
choose files because we have that one stored
in our files app. So go ahead and tap files. We had that in our Downloads
folder under Lisa Bardo, Procreate Resources,
And then here it is, the Walking Feet video. You can go ahead
and tap that, and you'll see a little checkbox. And then choose open. And here we see our video
on our timeline. Perfect. Let's start by just editing our video
clip a little bit. I'm just going to zoom in. I want it to already be
walking when the video starts, I'm going to scroll ahead
right before I start walking. Then you can edit this
out by tapping and dragging that over like that. Or another way that you
can edit video is by tapping the playhead
edit and split. Then you would delete
this other one. Just tap hold and
choose delete content. That's a few more steps. Probably the first
way is better then. I'm just going to move the video all the
way over like that. Then let's see about
the other side to do. Just walk and walk in.
Okay, I'm going to go until about 8 seconds here. Instead of actually just
trimming the end of my video, I'm just going to
change the duration of my video so that it's
8 seconds total. We're going to go up
here where it says the name of our movie
in my case Dream One. Then we're going to go to
Properties and we can tap duration and change that
to 8 seconds and tap done. All right, now our movie is only 8 seconds.
It will stop here. You can see that
the video extends past the duration of the
movie, but that's okay. All right, so we're going to add a fun little bursting
animation on the feet. As we walk down the street.
It's going to be really fun. Let's zoom in a
little bit until we find where the foot taps
down for the first time. Right there is the first time that the foot steps
down onto the ground. We're going to be using
frame by frame animation to create our little
bursting animation. We're going to tap the plus sign and
we're going to create a new track to use for
our animation tap track. Then we're going to go
into drawn paint mode and we're going to start
with the flip book feature. You'll want to find
this little gray handle that will only appear when
you're in drawn paint mode. And drag it down like that. And then you can reposition
this to wherever you want. Then we'll zoom into
our foot a little bit. For this animation,
I want to use that light pen brush
that we used when we first did frame by
frame practice. God and find light pen, it can be found in
the luminate set. Since I'm wearing
all blue in this, I'm just going to choose a
nice bright blue for my color. Oops, that is not blue.
Let's try that again. Blue, maybe a little more cool. For my blue, Little darker
blue. That looks good. I'm going to choose that
color. It's like a navy blue. And I'll undo that for this little animation.
It's really simple. You're just going to
draw a few little dots to start like that. And then we're going to
go over to our next frame in animation here
in the flip book. Then to make things
easier for us, we're going to turn
on onion skins. We're going to tap the
time code right here. And we're going to
choose show onion skins. You can also onion skins to customize what
they look like. I like to turn the opacity
down a little bit. My onion skin is
set to be purple, which I think is maybe going to blend too much with the blue that I'm trying to draw. So I could change it to a
different color like green. But let's go ahead
and try that now, and we'll draw our next
frame in animation. Now these dots are going
to become little lines. We're just going to
draw little lines now, coming out of the same place as the dots like that and then
tap to the next frame. We're going to make the
lines a little bit longer. You notice I'm drawing
from the outside in and it's giving me
a nice little taper on my lines, which is cool. Go to the next frame and
make it even longer. I think my onion skins, I made them a little
too transparent. So I'm actually going to
edit them and make them a little more
opaque. There we go. And tap out of there,
keep on going. Maybe this will be
the longest that it gets. Make long lines. Now you'll notice that we're getting away from the foot and that's okay. Don't
worry about that. Just go off of your onion skins that you've got on
your screen now. We're going to make
the lines taper off. They're going to go out, we're going to tap
to the next frame. We're going to make them
a little shorter now, like this now they're going
out and disappearing. Next frame, okay, then maybe one more
little short lines, then actually maybe one more. Whoops, little tiny dots. Okay? All right, now if
we flip through, we can preview what the
animation is doing, or we can get out
of flip book mode and just get back
to the timeline. We're going to grab
this little handle and just throw it down. Now we can see a little bit
better what it looks like. It's easier if you like in take three fingers and scroll that way until you just
see the frames. Because then it'll loop
again and again. Let's see. Okay, it looks really crazy. But you get the idea the
lines are going out. Like I mentioned, looks
a little funny because it's not following where
the feet actually are. We're actually going
to use a keyframe to keep it in the right spot. But first we need to
group our frames. Let's go ahead and tap the
Timeline Edit mode button. Then we're going to just draw a selection over
all these frames. So just draw until they're
all selected and read, tap and hold and choose group. Now these are all
considered one unit and we can apply a keyframe
to this set of frames. What we're going to do is here, it's in the right
spot, but here, where it goes out, it's not. I'm going to go to the end of this little piece of content. Go to move, and then
choose move and scale. We have two key frames now, and on this one
we're just going to move it to where it should
be, which is right there. We want it centered
like over the foot. Now it's following where
the foot is going. If it's still off in a part right here, it
feels a little bit off. You can always add
another key frame. Just drag your playhead
down into this keyframe. Track, tap it. Now we've got a new
keyframe there, you can tell because it's white and then put into position. All right, now that looks good. Boom, boom. I was repeating over
and over again. Now, because we
are clever people and we don't want
to have to redraw that again and again and again. We can just duplicate
this little set of frames and put it over
all of our footsteps. Let's do that. We're
going to tap and hold on this little
piece of content. Then we're going to
choose Duplicate. Then we're going to find the
next step right about there. And we're going to
move this content down the timeline that it meets in, not in position but in
time with the footstep. Then all we need to do is adjust these keyframes to put
them in the right spot. Place your playhead over this first key frame and then put it where
it needs to be. Then go to the next key frame and put it where it needs to be. Then the last one should be
probably like back there. It travels with the
foot. There we go. Now let's see our two frames. Step cool. Another thing that
we can do is we can actually use a
blend mode to make this interact with our
video a little bit. Let's try that and
see how that goes. Let's tap this
first one and hold. And we're going to
go to blend mode, so we want to be able to
see what we're doing. Let's put the
playhead over there. Now we're going to tap
and hold blend mode. And I think the add
one is really cool. That might be a
little too glowy. Maybe I'll try a different one. Let's see, Screen
screen is cool. If you want, you can do that. This one has dark
outlines around it, and this one's like
really bright. Maybe we'll do, I like add, it's really bright. Boom, boom. It's up to you if you want
to add a blend mode or not. If you like the way that looks, I'm going to do it to
this one too, Blend mode. And I did add, I've got
add on both. Pretty cool. Okay, now we've added
a blend mode to that. Now we're just going
to keep duplicating all the way down our animation. We're going to tap hold and duplicate and then move it down. Well actually let's find out on our playhead where the
step is right there. Then we're going to
move the content, the beginning of the
content is at the playhead. Then we can reposition, make sure we're
on the key frame. Put that there, that
one that there. And then go to that 1
Ft we're on already. Put that one there, okay. There we go. That's looking a little off. I'm going to actually move
this plate or this key frame over to that spot and
then I'm in a reposition. Maybe that'll help. You
can always adjust because sometimes you step a little bit differently than
the previous step. Now if we want to keep going and filling this whole
video with this, we can do it a little
bit faster by just like duplicating a whole bunch and then starting to move
them into place. Let's duplicate. Woshre we go tap duplicate. Let's start with a few, then maybe we'll start at the
end and move it over. We'll move this one over here. I'm just going to
spread them out. This is probably what
I would do naturally. Tap duplicate. We can always add more if we
don't have the right amount. I'm just duplicating
as many times as I think I need and
moving them over. All right. I'm basing it on the distance between my
previous frames to guess, but now we can adjust. There's the step, I can
move this one over now. Then I'm going to just move
them all into the right time. First there's my step, that one actually happens a
lot quicker than I thought. We'll move that over there. There's my next step. I'll move this one over here. There's my next step. I'm actually going to
duplicate this one. Tap, duplicate then
put that there. There's my next step. That one's actually not bad. Okay, then you'd keep going
until you do them all. I guess we're almost done.
I'll finish them off. Um, step, move that one over and step and
move that one over. Good. We've got a couple
more so let's up duplicate. Okay, and then move
that over. There we go. Adjust the timing and then we'll adjust the positioning.
All right. Think that's the last one, gotten all our footsteps well stops before we
get to that last one. Okay. Now you would just
go back to each one and just adjust the location
of all these key frames. Looks good. That one is
where we need to start now. It's just putting in the work, adjusting where they need to go. I like doing this in
like an assembly line. That's why I like
set them all out. Then now I'm going through and doing the key
frames because it's just a lot faster than to do all the steps for one
thing at one time. There's this just makes it go
a lot faster than it could. Let's look good, let's
do the next one. Let's just keep going and just adjusting
these key frames. It's our way of tracking motion. There we go, and
we'll do this one. I'm just placing it
around the foot. If it's bothering you to see all these onion skins
which is bothering me, you can always tap the time code and choose hide onion skin. And that actually
changes things a lot. Like you can see the blend
mode and everything. That's probably a good idea. So go ahead and turn
your onion skins off and then you can keep adjusting your animation. Okay, that's pretty
good right there. Okay, I think we're
getting towards the end. I can see I'm at like 6
seconds here in the time line. So that means we're
getting close. Just like a couple seconds more. So keep placing these in place. Okay, a couple more. We're at 7 seconds now and
that might be the last one. All right. We did it guys. Let's go ahead and push these into position and there we go. Okay. Moment of truth.
Let's see how we did. We'll zoom all the way out. So now we can flick the
playhead back like that and it, we'll start playing
and it looks so cool. I love it. Let's go on a full screen view and I'm going to start it over. So that's just like a really simple thing that you could do. There's so many ways
that you could make video, interact with animation. I've got a couple of examples, which I will show you next. Here's one that has some sound, so I'm going to
try and play that for you and I won't
talk over it. This was just a simple, this is just a simple
little animation. Then I was just
like actually here, if it's ever bothering you, when you have audio in your
project and you want to like temporarily disable it so it doesn't bother you as
you're scrubbing through. You can just tap this checkbox
and that will turn it off. Now it's not going to bother us. So that was a little bit
of music that I added, so I just added some little
lines kind of similar to how we did the lines in the first frame by frame,
little mini project. And this is just like
a little distort to create the wing
kind of flapping. We'll show you how to animate
a wing in a little bit. And here's another
fun little animation that I did with some eyes, which we learned how to do eyes. But this is all done. I think
I did some frame by frame. Just a fun, fun little story. Tomato gets mad, he gets manhandled, then he
doesn't get taken. All right, let's
show you one more. This one is a really fun one. This is just a video I
took of my kids on a walk. And this was when I was
just playing around with procreate dreams,
when I first got it. And just experimenting
with what I could do. But it's a fun one. I still really enjoy it. This lesson was just a
really quick little thing that you can do to
animate over video. But as you saw in that pancakes video
showed at the beginning, there is so many things
that you can do to make your animations
interact with your video. So keep exploring that. It's a great way to not
have to draw a whole scene. You can just add animations
over the top of videos. And you can get a lot of free to use stock video from sites like Pexels.com Unsplash.com They all have free to use video, so
that's a good resource. And then if you wanted
to pay a subscription, there's one that I like to
use called Story Blocks, which has a big library
of stock videos. So those are all good
resources if you want to keep exploring videos without
having to create your own. In our next lesson,
we're going to be animating a whole scene. We have this palm tree
that's swaying in the breeze with bird
flying clouds moving. And it's a lot of fun. So I'll see you in the next lesson.
15. Animating a Scene: Breezy Palm Tree: Welcome to our final follow along project for this course. For this lesson,
we're going to be animating this
wonderful palm tree sort of scene where we're
going to have our palm tree swaying in the wind with the
palm fronds moving around, clouds moving across, and then a little
bird flying through. So there's a lot of different
elements to animate, but you are fully
equipped to do it all. Plus, we're going to introduce
some other concepts and ways that I like to use animation that I
use again and again. And we'll do some of
those techniques in this. So let's get into it. So here we have the breezy
Palm tree Dreams file open. This is all set up and
ready for you to animate. So let me give you a little
tour of what's inside. So I'm just going to scroll
up a little bit to zoom in. All right, starting at the top, we have our grass group that is these three
little tufts of grass. If I open up the group, you can see the three tracks, three little tufts of grass. Then we've got this one which is just like the front
ground can turn it off, that's just to hide the bottom of the palm tree.
That's what that is. Then we've got our trunk, which is this track here. Then we have our palm fronds, which is a group
I can open that. We have five tracks in here
for the five palm fronds. 12345, we have those that we're going to animate
each of them individually. We've got our bird,
there's our bird. We've got the bird wing
and the bird body. Then we've got the ground,
which is just down here. Then we've got our cloud group. We've got three clouds. And if I open that group, we've got our three clouds. Then of course we have our
water and then our sky. That is the whole piece. Let me go into full
screen view and I'll talk to you about what
we're going to animate. Going to full screen view. Okay, for this one, it's a breezy day. We're going to have
our palm tree, just like swaying in the wind, We're going to have
our palm fronds also blowing around and
moving organically. We're going to animate these little tufts of grass
down here at the bottom. And have them blowing
around a little bit. Then we're going
to have our clouds going across the sky also
being blown in the wind. Then we're going to animate our little bird friend and have it flapping and going
across like that. All right, so let's start by
animating our palm fronds. We're going to go ahead and find the group with the palm
fronds and open it up. All of these will be rotating
and swaying separately, but they're all going to be
rotating from the same point where they connect to the
top of the palm tree. We need to set up
our anchor points for all these palm fronds. When I'm doing like a
lot of anchor points, I like to do them
all at once just from a workflow perspective. Let's start with Palm one. We're going to tap three
dots and choose Edit Anchor. Then we're going
to move it right here on the palm tree,
top of the palm tree. Then we're going to go to two and move the anchor
point for that. Then go to three, move
the anchor point, go to four, move
the anchor point, they're all going
into the same spot. And then do the last
one, number five. Okay, now we've got our anchor points set
up for all of those, we're going to be using
the Perform feature to animate our palm
fronds blowing around. Now we could just have
it rotate like this, but we're going to do
something a little extra to make it look
even more organic, and that's using the Warp tool. Let's go ahead and enter
the performing mode. We're going to move our playhead all the
way to the beginning. Then we're going to
tap the playhead move, and then we're going
to choose Warp. Okay, when we do that we have this grid with
all these nodes on it. We can grab anywhere inside
the grid or the little nodes themselves to warp this and give it some really
organic movement. So I'm going to zoom in and I'm going to grab this
corner node right here, and draw like little
circles with it. Make sure my play heads
at the beginning. Okay, so I'm going to grab
this one and then just draw some little circles all the way across until we animate
the whole thing, and it gets to the very end. A little small circles
is all you need. Okay, we've gotten to
the end. Zoom back in. Then I'm going to actually
go all the way back. And I'm going to do that again. I'm going to grab
a different node. And maybe I'll grab
this one here. And now I'm going to draw a
little circles with that one. As we do that, those two
movements combine and create this organic,
wobbly wavy animation. Okay, we've reached
the end now you can play that back and you can
really see what it looks like. You could go back
and do another node. But I think two
is probably good, because once we add the
like swaying motion, it's going to look really good. We've done our warp two times, and now we're going
to do our rotate. We're going to move our
playhead up onto the content, so that we get the
little clapboard, tap it, choose move, and then choose move and scale. Now we're going to
rotate, tap the corner, grab the little rotate node. Then we're going to just
sway back and forth. When I'm doing this
sway animation, I'd like to draw
little circles because it eases in and out of the
swaying back and forth. And it's not so harsh like
it's like nice and smooth. Now we have that
first one swaying and also organically changing
its shape a little bit. All right, so we're going to do that exact same thing for all these different palm fronds. Let's go to the next one, choose palm two and move the
playhead to the beginning. We're going to tap the playhead, choose move, and then we're
going to choose Warp. I'm going to pick this node
here in the upper corner. And just draw little
circles like that, going around and around
until we get to the end. Okay, that one's all done. I'm going to rewind to the beginning and do
it one more time. This time I'll grab
this corner over here. The circles don't have to
go at the exact same rate. I think the more off it is, a little more organic,
it feels okay. Now I've done that. You can see it moving.
I'm going to rotate it. Move my playhead to
the beginnings tap. Move, move and scale. Now I'm going to rotate it, I'm going to come
around this way. Tap. I'm just doing little circles back
and forth just to keep this moving consistently
the entire animation. There we go. All right, number two is all
done and we can preview how cool that's looking. Now let's go to number three and we're going to
do the same thing. Put the play head all the
way to the beginning. Tap, move warp. If you notice, when I'm choosing
which nodes to do, try to choosing the one that's
closest to like the tip. And starting by animating that. Make that go around like that until we get to the
end of our time line. Okay, And then we're going to go back for the second time around. I like to choose one
that's close to like the side of the leaf. We'll choose that one. Just
do little circular motions. I find this animation
very calming. Just making these little
circles going around, you can almost get into
a meditative state. Awesome. Okay, so back in and we're going
to rotate it now. There you go, Grab the
corner and rotate it. Just drawing little circles so that it goes back and forth. Okay, What's all done now? Let's do number 42
more to go move. What I'm not doing
is you can also grab inside these grids and
move it around like that. That is something
that you could do. But if you're going to
be stacking the warps, doing two like I've been, you want to grab the nodes, otherwise some unexpected
transformations might happen. Because it's like, oh, you're telling me I
need to be over there, but now you're telling me
I need to be over there. It doesn't work
tooper Well, play around with it so you can see. But yeah, I'll do this
one here near the tip. Draw little circles all the way around or all the way
until it gets to the end. Okay. And then go
back and do it again. Let's see, Maybe this
one just little circles. I love the way this
ends up looking. It looks so like groovy to me. Okay, got to the end. And now we can do our rotate. Move and scale. Tap the corner and let's rotate. I think I accidentally scaled
it, so let me undo that. Okay, let's try that again. Rotate this time. Sometimes if you grab that
corner node and drag it, it'll do a scale instead
of grabbing the. Rotate a little noodle. Okay, that one's all done and we have one
more left to do. So let's go ahead
and do the last one. We do our two little
warps and our rotate tablet's do this one. No, actually I'm going
to do the other one. It's good to experiment, to see what works best
for which node you grab. I'm going to grab this one, but I like the tips to
wave around a little bit, little tiny circles. Okay. And then we'll go
back and do our other warp. Let's grab this one here. I think the bigger
circles you make, the more it's going to look like the wind is
blowing really hard. I find these little
circles work really well. The same with the rotate. Let's see, the rotate
on that one tap. And like if you were to
really make it rotate, it's like there's a
hurricane or something. But we don't want that. We just want a little bit of movement. Like there's a light sea breeze blowing this palm tree around. Okay. Almost done. All done. Now we've animated all
of our palm fronds. They're moving,
they're grooving, they're getting
blown in the wind. Everything is just moving independently and has these
really organic feel to it. Now that we've done that,
we're going to make the entire palm tree
blow in the breeze. We're going to need to group the palm fronds to our trunk. I'm going to close
the group with the palm fronds that's
already in a group. So I'm just going to
close that group. I'll get out of
the perform mode, then I'm going to go
to the edit mode. Draw around the trunk
and the palm fronds. Those are both selected. Then I'm going to tap and
hold and choose group. Now that's in a group and we can animate the
whole tree swaying while the palm fronds are also doing there, organic
swaying motion. The first thing that we're
going to need to do for this group is to set our
anchor point for the tree, because we want it to rotate
from where it's growing. Just like with these, they
were growing out right there. That's where our
anchor point was. So we're going to
put our anchor point down here for this tree trunk. Let's tap it. Let's
get out of edit mode. Tap it, choose the three dots. Go to edit, anchor, and
then we're going to move it down at the
bottom of the tree, right there. Tap done. Now we can make the
whole thing sway using the same rotate with
little circles. Move your playhead
to the beginning tap and then grab one
of the corners. Grab the little noodle. Whoops, I need to get
into performing mode. First tap over to
performing mode. Now we can rotate it. We're just doing like a light, like small little
circles going back and forth that until we
run out of time. We can also go up
to modify here, We can turn up our
motion filtering, that might smooth the
motion out a little bit. If it's feeling a little jerky, you can go up to modify
and turn that up. That looks pretty good. There's our palm tree
swaying in the breeze. Looks, looks really nice. Let's go ahead and posit. Now we're going to animate these little tufts of grass
down here at the bottom. We have in our tracks
the grass group. Let's open that up and we're
going to choose grass one. We're going to animate
this using warp. We're still in performing mode. We're going to tap
the playhead move and warp this time I'm going to
grab inside these grids. When you grab inside
versus the nodes, it warps more just like
play around with it. Because you get a
feel of like how these different things affect
the way that it warps. I'm going to grab like
inside this square, and then I'm going to
draw little circles. You can see that bends
my grass a little bit. There I go. Okay, so we got our
first one animated. And I'm just going
to do one pass. I'm not going to
do it twice like I did for the palm fronds
because I think that looks pretty good and this
is a pretty small detail. Anyway, let's do the next one. I'm going to grass
two, tap move Warp. Let's grab inside
this rectangle. We actually, maybe I'll
grab in the middle. Let's see, tap experiment with where in the mesh grid you choose to do the warp
performance or performing. Just make that move
around like that. Okay, that's good. Then
we'll do this one over here. We're going to move
the playhead over W. Let's do inside this corner
in this little rectangle. I love this. It looks like
they're like bending over. I'm not exactly trying to time any of my
movements to the way the other grasses are blowing because I'm just trying to
keep this very organic. Okay? All right, so we
have done our grass, they're all moving and blow. If you wanted to
be really extra, if you were creating
something on your own, you could animate all these
little bits of grass. But I have them all
merged onto one track. But we're doing
something like this. You can animate as many
things as you want. Okay, that's looking
pretty good. Let's work on our clouds now. Let's actually close
our grass group. Let's go to our clouds. Our clouds group
is already open. But if it's not, go
ahead and open it up. We have three clouds and we're just going
to animate them. Moving straight across
using key frames. We've already done a lot
of work with key frames. It's pretty simple to do. Let's zoom all the way out. And we will start
with this top cloud. I'm going to select this track, and then I'm just going to
move it over here to start. Then I'm going to my
playhead to the end. Then I'm going to tap, move, and then move and scale. Now I'm going to move it across, and we can use snapping
by putting a finger down. Tap, Put a finger down. And it'll move straight
across like that. Then let's play that back to see exactly how slow it's going. It's pretty slow. We can also set our easing like
I want it to be linear. I'm going to tap inside
this keyframe track, set all easings to linear that way it's one constant rate
all the way across. Still super deep or slow. We can move the key
frame over a little bit and adjust how fast
we want it to go. We'll leave it there
for now and we'll play with the timing in
just a little bit. Let's do this next cloud. I'm going to start it out by just moving it there to begin. Then we're going to add another key frame,
move and scale. Then we're going
to move it across. We can use a finger to make
it go into straight line. There we go. Oops. Okay, we got that one moving across now we'll do the
last one, cloud three. I'm going to move it
over here to start, then add a keyframe right here. Move and scale, and
move that one across. Now we have all
three moving across. And it looks very unnatural because clouds wouldn't
normally do that. But this is very
similar to when we were animating the cars at the very beginning
of the course. How, based on how
close they are to you, they'll move at
different speeds. The only difference here is
we have a horizon line here. Something to know is that things that are closer to
the horizon line, closer and distance
here are further away. They're often the distance. As you might remember,
things that are further away move slower. Or they appear to move slower than things that
are close to us. When it comes to drawing, where you have a horizon line, things that are close to
the horizon are smaller, they're further away,
and they move slower. And then things that are
further away from the horizon, like this cloud, are
closer to the viewer. They're bigger and
they move faster. With that knowledge,
we can adjust the timing of our clouds to
make them look more natural. Let's see here, we'll change
maybe the fastest one, which would be this one here. To make it faster, we
just move the key frame over so that there's less
distance between the two. Now we have that one moving. Then the bottom one, which is this one, is going to be the slowest. I'll make that one longer. There we go. We have the three different
speeds of clouds. It looks very unnatural because they're all coming in
at the same point. Just like with the
cars, when we like adjusted the time at which something comes in.
We can do that here. Maybe we'll just move
the top cloud and just move it down in the
timeline a little bit. It comes in a little later
and see how that looks. Maybe that's a little too
long. I'm going to move it back just a bit there. So let's see how that looks. Looks pretty good. May also move cloud three down a little bit and
play with the timing. See like how you want
things to come into view. I think that the look like they're almost
going the same rate, so I'm going to make
this one go a little faster and then this
one go even faster. Well, maybe too fast. Okay, that's pretty good. Okay, so I think that
looks pretty good. The other cool thing
that we can do, since we have this
group of clouds, I'm going to go and
close the group as we can duplicate
the group so that we have more clouds cycling
through our sky. I'm going to posit,
tap and hold on, the cloud group, go to Track Options and
choose Duplicate. Then we're going to just scoot the duplicate a little further
down on the time line. Maybe a little
further than that. They come in a little later. Maybe it's too far. Let's
see how that looks. We've got our clouds
coming in and then we have more
clouds coming in. I think that looks pretty good. Then since the
beginning of our movie, there's nothing in the sky. Maybe we'll duplicate
this again. Ahold option. Then this one will move
back this way quite a bit. Now our movie starts
with some clouds in the sky like that there. I think that looks really good. Let's go all the way to the end, so we still have
some blank space. Maybe we'll duplicate
it one last time. Track options duplicate. We'll move this
one even further, maybe a little further down. There we go. That too far, you adjust the spacing, whatever many clouds you want to have, got a lot of clouds. But that's okay. I
think it looks good. All right, so we've got
our clouds all animated. Now we're going to animate
our little bird friend. And this little bird animation
technique is really fun. This is something that I learned
from Nikolai Lockerston, who is just an amazing, incredible artist in animator. So talented, and he showed me how to do this
cool bird animation. So I'm excited to
share it with you. So let's go ahead and basically we're going
to be animating our wing so that it flaps up and down as a
bird would flap. And then we're going
to animate the whole thing kind
of flying across. So let's start with the
wing. Let's find the wing, and we're going to move our
playhead to the beginning. We're going to be using a non uniform scale and make the wing go
upside down basically. But this looks super
unnatural and weird because we need to set our
anchor point, undo that. I'm going to tap the three dots and we're going to edit our
anchor and we're going to put it right at the bottom of the wing like that.
Then tap done. Now you can see if we grab
the top of our bounding box, it moves just like
a wing would move. Undo that. We'll
actually perform this. Now I'm going to go
into performing mode and we're going to
flap our little wing. As you're doing this,
you want to think of like how fast you
want to flap it. And also like what the motion of flapping would look like. Maybe like that. You play around with it and try
it a couple times, but I'm going to
grab this top edge, Then I'm going down fast
as if it was flapping. And he's working hard to fly. I'm going to stop because, well, a couple things. One, I think I was
going too slow, but also this looks terrible because we have to
go up to modify and take our motion filtering I think all the way
down would make it look best because that will capture all of our
movements very accurately. If you're doing like
these really fast, expressive movements,
you want to keep your motion filtering down. If you want to smooth it
out, you would turn it up. I think we could probably
flap a little faster. I'm going to undo my perform, then I want to try again. Now I'm going faster,
I'm on my downstroke. It's a little faster than
my up stroke because to me that feels like how
flap would happen. I'm going to go until I get to the end. All right, that's good. There's our flapping motion. I think that's a good speed. Okay, flapping looks good. But as you might notice, this bird only has one wing. We're just going to duplicate this wing that we
already animated. So that we have two tap and
hold on the wing content. And go to Track options
and choose Duplicate. Then we're going to
move this track so that it's under the bird body. It's like behind
the bird's body. You can actually grab somewhere
next to the track here, even though it's like
all black over here. But I'm next to this track. And then move it down like that. Now it's behind the bird body, but it's in the exact same
position as the other wing. We just need to rotate
it a little bit. Put it so that
it's in a position where the wing is
all the way up. Then you're going to go and
rotate it just a little bit. Tap the corner and then, whoops. Make sure you're not
in the perform mode. Get out of perform and
let's try that again. I'm going to tap the
corner, grab the rotate, and then just move
it this way a little bit so that we can
see both wings. There we go, now our bird has two wings and it's ready
to soar across our movie. Okay, let's do him
out a little bit. We need to group
these three tracks together so that we can move
the whole bird as one unit. Let's tap the edit mode. Select these three tracks, Tap hold and choose Group. Then I'm just going to delete these extra tracks.
Top and hold. Delete top and hold. Delete. Top and hold, Delete. Okay, just keep things clean. There's one more
delete. Okay, now we're ready to animate our bird. He's missing some wings
there. What's going on? Okay, Sometimes this happens
where maybe you accidentally moved a track and
I'm missing a frame. So get out of edit
mode. There we go. And then this wing, okay, everything's all in line. Now, sometimes that'll happen. I need to adjust if
things disappear, always check to make sure that your content is
long enough, Okay? So now we're ready to move
this bird across the sky. We are going to make it rotate and then we're going to
make it move across. There's something to be
said about thinking about the order in which
you perform things. For example, if I
put this bird here, I went to perform, and I moved it across
the sky like that. You can already see
how like, unnatural it looks because
it's like straight. And that's why we're
going to have the rotate. But if I perform
the move and then I go back and I try to
perform the rotate, it's going to be really hard to control it because it's like moving across the screen as
we're trying to rotate it. We'll want to do the rotate first and then move it across. Let's undo that. Okay. We
can do the rotate now. Move your playhead
to the beginning. Make sure it's on
the bird group. Okay, And then we're going
to rotate it slowly. So we're going to go, oops, I also need to edit my anchor point because it's
over there for some reason. Let me undo that. Tap the
three dots, Edit anchor. And I'm just going to anchor it right to the middle
of the bird like that. Okay, done. Let's go ahead and
perform this now. Tap the performing
mode and let's rotate my bird's going to fly up A and then he's going
to go down and then maybe fly back up and then, all right, that's probably good. I'll probably be off the screen by the time we get this far in the time line,
there's my rotation. You can go up to your
modifications and turn up the motion filtering
if you want to make it look a little smoother. 35% All right, that looks good. So I'm going to pause now. I'm going to get out of
performing mode so that I can set this over here for my
starting position. There it is, over there. And now I'm ready to move it across. I'm going to go back
to performing mode. This might take a couple tries to get it to
go the way you want, but we're going to go up, then we're going to go down, and I don't think I'm
doing that good of a job, so I'll probably undo this. Okay. Basically, if the
bird is pointing up, it's going to travel
up in the frame, up higher in the movie. Let's try that
again. We're going, we're going up, we're going, then we're going to go down,
then we're going to go up again and then we're
going to go down. Okay. That time got too
much in the tree. I might even like go
back and like redo my rotate if it isn't
rotating the right way. All right, let's
try rotating this. Let's try rotating this again. We're going to tap and
we're going to maybe go up then That's probably too
high up. Okay, that's right. Again, we're going to go
and we're going to go, then we'll straight out and go, okay, that's probably good. Let's get out of
performing mode. We're going to move this into the starting position, so
we'll start right there. And now we can do the move. Let's get back to performing
mode. And here we go. So we're going, we're going
straight out a little bit, going up and going down. I think that was pretty good. Let's see. Awesome. It looks like he's
fighting a breeze because he's going so slow across. So you can animate it and make it go faster, but
I kind of like it. The only thing I probably
will change is like I'm going to move
the whole group down a little bit to make him
come into the movie just a little bit later. Here we go. So we have some clouds blowing and then the bird comes in. Let's watch that in full
screen view. Four finger tap. I'll press the little back
button and then we'll play it. So we've got our clouds
blowing across the sky, and then we've got our bird
coming in, flying across. It looks like we've got
a pretty strong wind with the speed of these clouds. So you can always
play with the timing. You know, adjust how fast you
clouds are going and stuff. But overall it's a fun animation
and it really shows you what you can do without even having to redraw any
frames of animation. We can create this
bird flying and all these kind of organic
movements with the palm fronds. And it's a lot of fun. I hope you enjoyed animating
this fun little scene. In the next video, I'm going to talk to you
about how you can export your animations from procreate dreams so that
you can share them.
16. Exporting your Animations: Let me show you how
to export your work from Procreate Dreams. So
that you can share it. You're going to tap
the movie name, which is right here, and
then you go to Share. The option you'll want
to choose is video. There are some other
options as well. You can export your
frames as images. You can export your
current frame. You can export as a
procreate dreams file. This is if you wanted to
share the actual working file with somebody or if you
wanted to back it up. But I should note that when you here from the
movie settings, this will purge all of
your undue history. If you want to retain
your undue history, there's another way to do that. And then of course we have some custom settings down here, so if you need any
of these options, that's where you'll find them. But let's go ahead
and tap video then. From there you can save it to your files, save
it to your camera roll. You can airdrop it, whatever it is that you want to do
with your video file. If you would like to share your animations in your
skill share class project, there is a place
to insert a video, but it's not the best and sometimes it's a
little bit buggy. I recommend uploading
your animations to some video hosting website and then sharing a link to that. You can use Youtube or
Vimeo is a really good one. If you have the video
app on your ipad, you'll get this little
option to upload to Vimeo. And it'll upload it
straight to your Vimeo and you can share the link. In your class
project, let me show you how to export your
work from Pro Grad Dreams. So that you can share
it. You're going to tap the movie name,
which is right here. Then you go to Share. The option you'll want
to choose is video. There are some other
options as well. You can export your
frames as images. You can export your
current frame. You can export as a
procreate dreams file. This is if you wanted to
share the actual working file with somebody or if you
wanted to back it up. But I should note that when you here from the
movie settings, this will purge all of
your undue history. If you want to retain
your undue history, there's another way to do that. Then of course, we have some
custom settings down here. If you need any
of these options, that's where you'll find them. But let's go ahead
and tap video then. From there you can save it to your file, save it
to your camera roll. You can airdrop it, whatever it is that you want to do
with your video file. If you would like to share your animations in your
skill share class project, there is a place
to insert a video, but it's not the best and sometimes it's a
little bit buggy. I recommend uploading
your animations to some video hosting website and then sharing a link to that. You can use Youtube or
Vimeo is a really good one. If you have the video
app on your ipad, you'll get this little option to upload to Vimeo
and it'll upload it straight to your Vimeo and you can share the link
in your class project. Then I did want to show you, since we talked about
exporting as a dream file, I want to show you
where your dream files are stored on your ipad. I'm going to go into my files
app, which is right here. I'm going to go on my ipad and then I'm going to find
the Procreate Dreams folder. Inside the folder is a
folder called Theater. This is where all your procreate dream files will be stored. You can actually back
these up to hard drive. You could plug in
a hard drive into your ipad and drag and drop them hard drive to back them up. You can also create
folders in here and organize them into
folders, which is pretty cool. And one cool thing to note
is if you do just like back the files up this way they will retain all of
your undue history, which is really good. If you export them
from procreate dreams, you'll lose all
your undue history. Just something to keep in mind.
17. A Look at my Swimming Fish Animation: I have one more lesson for you. And this one is not exactly a follow along, it's
more of a demo. I just wanted to
talk you through another animation that I
made and some of the ways that I created the animation just to kind of inspire
you and give you more ideas as you venture out onto your own to
create your own animation. So this a little
scene with a fish in the ocean flipping
around with seaweed going. And I'll talk to you about how I created those animations. Here's a little
animation that I made. Let me go in a full screen
and I'll play it back. This uses a lot
of the principles that we learned in this class. With the fish flipping around, it's a lot like we did the
bird or the balloon where we rotate it first and then we
move it up or down like that. That was all one using perform. Then I also performed a warp
on these little seaweeds. So I drew the seaweeds and it's individual
pieces of content, and then I applied a warp to
make them go wibbly, wobbly. We have two, which I'll
show you in the video. We have these tracks which are just a little wave and
they're going across. That's it, it's just a
long wave and it goes across and we have two of them. One's going this way and
then one's going that way. Then the other element
to this piece is I have a little bubbles. If I open up my fish, I have these groups of bubbles. You could see them
going. There we go. Because these groups are
inside the fish group, They're moving along with the
fish, which is pretty cool. The other thing I forgot to
mention are little fins. Let me go into the fins. Each of the fins actually has a warp performed on it as well. They're like going back
and forth, waving around. Then I have the eye also
moving around as well, which we learned
how to anime eyes. Then the other thing
that I did with all these same elements is this. Which you guys have
in your downloads, in your class resources. I took all those
same elements of animation and didn't really
re animate anything. I just drew this sign was the only other new thing
that I added to this. But I have the seaweed moving across while the
fish is staying still, which is another way that
you can create movement. A little fish coming
in at the end. One thing to note, which we talked about a lot, is that things closer to
the camera move faster. I have layers of seaweed and the one that's
like the biggest, that's in front
and the top here, this one at top of
our track hierarchy, it's moving the fastest. And the ones in the back are
actually moving much slower. So that's another way that
you can create movement. It's called parallax, but yeah, so yeah, I just took
all those same elements and created this fun
little animation. So you can kind of dig around
that file and check it out and see kind of what I did to create it. And I
hope you enjoy it.
18. More Animation Examples: Here's another really sweet little animation
that I really love. And I'll play it the whole way through because it's
got some sound to it. So let's go ahead and there's a lot of things
in here that you are very familiar with doing.
Let me go to the end. All of the way that the
trees are moving around, they're all either
like a warp or rotate like we did
for the palm trees. That's most of what I did here, even for the back is a
little bit of a warp. I just pulled the
back out a little bit to make it breathe And that's
all done using perform. Then the other cool thing that I want to show you
about this piece, I'm not going to get too
much into all the animation, but I did these
camera movements. After I animated everything, I grouped it all into one group. And then I animated
it moving across. So I have a key frame. I
made it all really big. And then I put a keyframe to
make big, to make it here. And then it moves across here. And then I cut to
another part of the scene and scooted
it down that way. And then I cut to another
part of the scene. It's just like a way to create some camera movements
to really enhance the storytelling
aspect and also just give your animation
even more life. Then I did like a big zoom out and it was all
time to the music. That was really a
fun way to do it. Another great thing about
this is your artwork is not the same size as like
social media vertical video. This is a great way to
kind of get around that. So I was able to like zoom
in and make it this size when actually the artwork
is much smaller than that. It's not the same ratio. That's another fun thing you'll play around with is
camera movements. Especially if you're
animating an entire scene. And then I have to show
my little alien plant. I really love the way
this guy came out. This was all done using the same techniques that
you've learned in this course. For the tentacles,
I did two warps, just like we did for
the palm fronds, which I actually also did
for these palm fronds. And then I did a little
bit of a rotate. The tentacles and the palm
fronds are all the same way. It's just like
performing a warp. Performing another warp, and
then performing a rotate. And then we already
know how to do eyes, just moving the pupil
around and then closing the eye shape whenever you
want to close the eyes. And this one, I also added
a rotate because the, the E and the like tentacle, whatever you call that
is all in a group. So I was able to rotate that, it's just a fun
little animation. So this is a little
landscape that I did on a recent
trip to Portland. And to animate this,
all I did was add anchor points to the bottom of all these different
little wildflowers, and then just perform
rotate on each of them. And it turned out really nice. I think this one would
also be good with some like wind sound effects
and some music. So that's just a few of my
procreate dreams, animations. I have plenty more, so I'm sure I will be
sharing more in the future.
19. On Your Own: Now that we've reached
the end of the course, I hope you feel like
you're ready to branch off onto your own and start creating your
own animations. There are so many possibilities of things
that you could do. To start off from here, one of the easiest
things to do is probably to find one of your
old pieces of artwork. Bring it into procreate dreams and start animating
elements of it. That way you don't
have to draw anything. But you could also create new
artwork and animate that. You can find a video and create
some animation over that. And you can also
think about adding audio and music and things like that,
which is really fun. And when you're trying to
figure out stuff to animate, just think about
things that move. So we've done a lot
of different things, like we've done
cars and birds and leaves falling and
branches swaying a ball, rolling a clock going around, a clock ticking a
windmill going around. So you think about
things that rotate, so you kind of want to think about the types of
motions that you know how to make and
maybe think about what subjects do those motions. That's also a good
place to start. But I've been keeping like a running list of possible
things to animate. Just like things that move,
types of movements to make. So you can kind of start a list going of things that
you can possibly move. But just play experiment how fun I am so excited to see the types of things that
you animate on your own.
20. Conclusion: Welcome to the end of our Getting Started with
Procreate Dreams course. I hope you feel like you
have gotten started and you're ready to go
off on your own and create some
awesome animations. We definitely have
covered a lot in this class and you've
learned a ton of skills that are going to
help you create really wonderful,
engaging animations. But there is even more to learn. The world of animation
is wide and there are lots of methods and techniques
and tips and tricks, and lots and lots to learn. So that's kind of what I
love about this medium, is that there's always
new things to learn. And if you learn something
new and you're like, oh, work that into
how I animate. So lots to explore. And I hope to keep bringing you more educational
content so that you can learn even more
about working in procreate dreams as
well as procreate. So definitely stay tuned for more to come and
until next time, I hope you have fun working in procreate dreams and
happy animating. Bye bye.