Transcripts
1. Make Background Music in GarageBand Using Apple Loops: be making basis. Listen, would you like to learn how to create your own professional background music that you can use in your podcast Radio commercials, YouTube videos or even online courses? Royalty free? Then you're in the right place. My name is Joseph Evans. I'm abusing producer have over 10 years experience producer music and a top thousands and thousands of students just like you how to produce music. Now, if you have no experience, don't worry. All right. In this course, I'm gonna be showing you step by step, how to create background music that you could use on a professional level cruelty free by just clicking and dragging. Okay, so that's right. If you use your mouse that you can create professional music using this course now, we're gonna be using a program called Garage Bands. All you need is an apple computer, and I'm gonna show you step by step, how to download the program, how to create your own project, use apple loops, edit um, arrange them into a song, mixed the music and exported into a finished product Juca used in your videos or in your online courses or podcasts. Okay, so enrolling the course, and I'm gonna be on the other side to help you learn how to create your own background music and garage band using Apple. Oops!
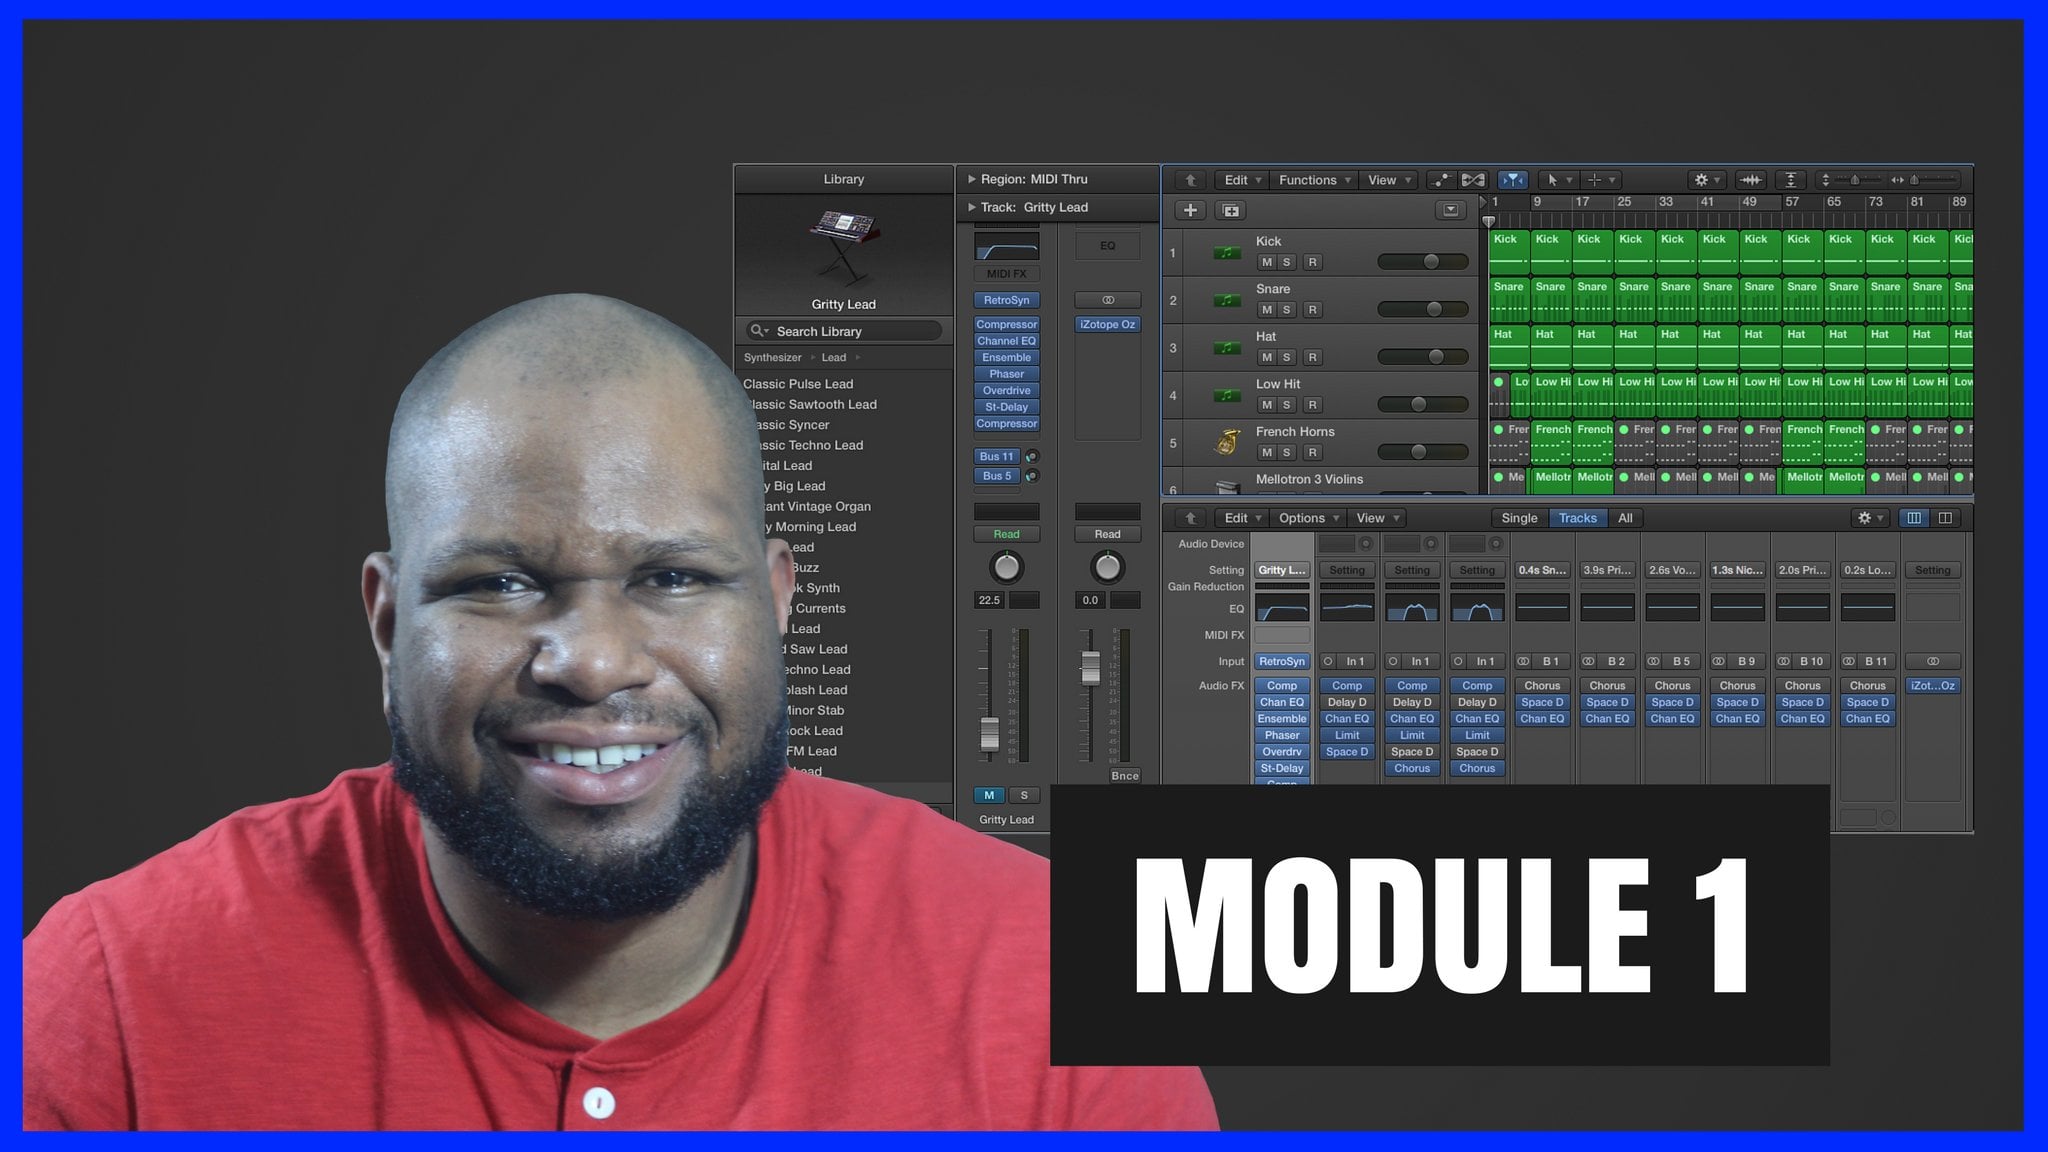
2. Welcome: Hey, what's going on? Welcome to the course. My name is Joseph Evans. I'm gonna be your instructor. I'm just gonna be leading you through this course, and it's very simple. Even if you have no experience producer music, I'm going to show you how to use GarageBand and Apple Loops to create your own background music. Now have over 10 years experienced producing music. And I know professional production techniques. I do it on the Bailey basis, and by the end of the course, even if, like you have no experience producer music, you're gonna be able to create professional background music using this course. Okay, so what's going to be covered in the course is basically how to download GarageBand. It's only $5 in the APP store. I'm also gonna take you to a basic territorial or where everything's at the main features and functions. You're gonna need to create music, how to use apple loops. Okay. And in how to arrange your apple loops and edit your apple loops into an actual song, okay. And by the end of this, you're gonna have professional background music that you can use royalty free, meaning you don't have to pay out any royalties. Any fees for this music and you can create it on demand. So whenever you need music for podcast, your online course, your YouTube videos or anything else that you're using background music for, you can create it yourself and you'll be professional and grade a quality. Okay, so if you have any questions, please feel free to reach out to me. I'm here for you. Thanks so much from rolling. I'll see you in the lectures to come.
3. How to download GarageBand: again. Welcome to this course. Basically, in this lecture, we're going to be covering how to download GarageBand onto your computer. Now, you do need about four gigabytes of RAM to download GarageBand and you has to be a Mac computer. Okay, Some type of apple computer. Now, this is how you do it. You basically go down to your doc, go to your launchpad, and then what you're gonna be looking for is the APP store. Okay, Now, APP stores right here. But if you don't know where saddle your last pad, you could go to search, push, app and bam, Here's your APP store double click that and your APP store is going to open up now, once your app stores up and running, the basic way to search for GarageBand is to global here to your search and typing garage. Being put in er and garageband is going to be the very first, um, icon right here, over to the upper left hand of the screen. Now, I already downloaded GarageBand, but when you're first trying to download it, you're going to see something like this where you have a price right here. Garageband should only be for 99. What you're gonna do is click on that and then enter in your your information and then you'll be able to download garage Been OK, but this is a great program to use, all right, and I actually love it. It is really a great program. I mean, especially for beginners or getting started. This is a great program. Don't worry about these reviews. I actually like what? You know what the offers here. I mean, for the price, you can beat it. So go ahead and download it again. It's only 4 99 It's only, you know, saying it's under a gig of memory, you know? Saying so. It's very well. Ah, doable for anybody who has a Mac computer. Um, if you have questions, let me know. Thanks so much for watching
4. Getting started: Alright, guys. So now we're gonna go ahead and get into the actual creation part of this course. Okay. This is where you're gonna learn how to create your own project and garageband you everything you need to know about apple loops, how to drag and drop it into the project window. Edit those loops and arrange them into a song, and then mix it and export it. So you have finished MP three or way foul. Okay, So one thing before we jump into this, I want you to review this course. If you like the information, leave a review. If you think it could be better, go ahead and leave review anyway. Because I want to know what I can do to make it better. Or how it's helped your life help to make your life easier. All right. So without further do, though less jump right into the course information I see in the lectures to come
5. Create a new project: in this lecture where we're going to be doing is creating a new project in GarageBand. So the first thing you do is go down to your doc. An open garage band. Of course, if it's not there, you can always go to your launchpad and search for it there. His garage band Boom. And it prostrate at what you click there and you go to foul. But my already have a project open. So that's pretty much What would you do? It was you would go to foul new and business, but pop open start with an empty project. So this click their double click, and this is going to open up now. I just want to just give you a few different days here, First off bpm. BBM is how fast or slow your track is going to be. So you can change that by clicking here and moving up with your mouth. Shut down with your mouse or you could double click it and you can manually enter in the number. Okay, um, you're not gonna necessary had to worry about having your measure known on because we're just using apple loops. Also, these little buttons or hot keys. So right here is the first button opens up your sound library. This button right here is very important, because anything you we would select anything you scroll over. It will give you a definition of what it iss and even some hot keys or key commands that you can use. So this is a great resource right here. All right, this is your, ah, basic place where you'll be able to add all of your effects. Okay, to your various tracks is where you got your plug ins. Your effects. This is your editor. Okay, this is what's called a transport station right here. Or transport basically and go left. Right. Stop. Play record. Okay, this is your display here, and you could look at everything in measures of actual minutes and seconds or in bars. Beats key. Signature time signature. Don't worry about those things. You can Ah, coming here. Move the overall volume up and down of your track. And if you hold down, option on your keyboard and push this Any betting in the key in in the, uh, program, it will push it up to nominal gain or to the original place. This is where you can add notes. It's pretty cool if you want to import music, any type of fouls. This is where you could do that. And last of all, we have Apple loops. Okay, so since there's thousands and thousands of thousands of sounds or whatever or really hundreds, it takes a few minutes or a few seconds for it to load. But, ah, once it's loaded, you'll be good to go. So in the next lecture, where we're gonna be doing is really covering how this absolute background here works. How all this stuff works, different ways to use the apple loops and everything like that.
6. The features of Apple Loops in GarageBand: in this lecture, we're going to covering the many features of apple Loops. Okay, if you look right here again, this this was called a loop. This is where your apple loops are when she selected this is gonna pop up. As you can see, everything is organized based on the type of instruments or sounds that she did You looking for? Okay, So say if you want to create rock or blues, you just click on that. And every sample or midi foul that's rocker blues is going to pop up. Okay. Ah, if you want to get some drums and they you want some drones specific in the Pacific Johndroe say you want urban drums now all the urban drums air here or, um, Elektronik drums, etcetera. OK. And if you ever get lost your like, dang birth. I'm kind of got somewhere and I don't know where to get how to get back to the beginning. This push reset, all right. And of course, when they said reset, you have every sample. Like I said, there's hundreds to choose from now. That's when you have what's when you're located in this section right here. Now, if you go to this section right here. It's broken down. It's a little bit different, and I actually kind of like it visually here. It just kind of helps me to stay home organizing to see it better. But you can just look at your here. You have all favorites. John Rhys on this is this is very important. So, you know, if you're working in the Pacific genre, you could easily go here and everything is organized for you. Even has it down by instruments to say if you want a violin, you have all different types of violence, even by genre, different moods. Very important. Now, if I'm not mentioned favorites right here. Right. So say, if you like a particular you know, saying sample Say you like this guy right here. If you want to save it to your favorites, all you have to do with go over here to this box either that the heart is click right there . Now, once you go to your favorites, you have this guy right here. You don't want your favorite Seymour? It is Click off of it. Done OK, now lasting here is you can control the volume like this okay. And again, if you hold down, option the option key and and push that it will take this volume back to nominal game. All right, but as is in a nutshell, um, you know the benefits of Apple Loops. I would also will say this that, um, let me go right here. If you click right here, it organizes a certain way too. So you could see it by lymph of sample and by beats. So that's a pretty cool feature as well. And you can search for anything that you want right here as well. So you could say, All right, I want a guitar. If I could spell it, Here we go. So that's that's That's the basic features of Apple loops here, and it's very simple again. If you want to play anything, just click on it. Oh, I want to stop it put Stop and that's it. So on the next lecture, we're gonna be talking to Maura about how to actually work with the loops
7. How to choose your samples: in this lecture. What we're gonna do is talk about how to choose your samples, all right? And the first thing you want to do and choose your samples is identify what type of genre of music that you're gonna be creating. It is very simple. So what I would do? Let's say if you want to create a hip hop track, okay, you have a dope video that you want to have some cool, catchy hip hop music to. You know, what you're gonna do is come over here to the very top and this where Here you have these three little you know, lines Click on that click on genres. Okay, it's got takes a little time to low, but after lows, you go to hip hop and the you start obviously selecting tracks. I always recommend you start with drums first, so it's very simple. Click on all drums or you can just click on hip hop. All right. Hip hop is gonna have every single thing, you know, saying, but if you just want drums, start there. So you have all these different hip hop jobs you can choose from is very simple. Find something that's catching something that catches your ear. So what I would do is, you know, to start clicking on him and listening to it. But the first thing you're gonna need is some drums. That's pretty cool sample. So once you find a sample that you like this dragon over here to the project window, OK? As you see it says drag apple loops here. Now, the next thing you want to do is find a base line cyber sound. OK, so you go down to base. It's kind of much like what you did with the drums. You want to go here it in here and listen to something that catches your attention. That's pretty cool. Um, Now, as you're actually doing this, you could create a loop to listen to the actual drums that you have. Wow, you pick your bass sound so you can kind of get a feel for how your actual track is going to sound. So let's listen to what I'm a push play, and we're gonna push this one. Now after you find the base line or based instrument that you want this, click on it and drag it right here in to the project window. OK, Boom. And now you have your baseline Here. Move. Go ahead and push. Play or you put space bar on your computer. Pretty dope. Right now. The next thing you need after you get your drums, your baseline is some type of a melody instrument. Now, what you could do is this fig pic any type of instrument you like. But let's just say that we want some type of sim for maybe, let's say piano. Uh, so that doesn't really work. Well, let's try something else. Let's see. Like, um ah, guitar. Not really working steel. Let's go with melodic. See if it works well with it Pretty cool right now. You could continue to build this up some or maybe ask some strings or anything like that, but Oh, that's ultimately this is a pretty good, um, you know, saying loop, I'm gonna keep on messing around with this a little bit more, See if we can find something else. I'm actually gonna short in this loop, clicking right here and dragging it out, and I'm gonna push play and then start, you know, trying more sounds now. One key tip here is keep things simple. Our recommend maybe going with about anywhere from three 28 samples really do. The five is an ideal kind of Kushner's spot. Now, that's pretty cool. Um, and I would just keep on plan around here until you feel like the track. It's finished, but pretty much did in this election. I just really want you to find out what you need to be doing to check you add badgered your loops. Okay, now things to keep in mind. Here are some tips is you want to make sure the loose sound like they work well with the actual music, meaning that you don't want something that's in a completely different key or completely sounds off. Make sure it works well together if it sound like it's classing that you don't want to add it.
8. Editing techniques: now that we have chosen the samples that we wanted to use, the next thing where you need to do is actually edit the samples. Now, this window right here was actually open all I did the closes come up here to the loop box and click on it, and it gives you a full display of the actual product window. Same thing if you go over here and click off of your library. Sound library. You can Seymour of your project winner that way. But let's talk about these editing techniques now. The first thing I want to teach you is how to copy and paste. This is a very important technique that you need to learn. Now, the first thing you need to do in order to copy and paste is understand that wherever you push this play head or this little line right here is where your audio is going to be pasted after you copy it. Okay, So say if you copied this foul right here, if you're play head is right here. The in this loop is going to be pasted right here. Okay. And let me show you what I'm talking about. It was very simple to copy and paste. All you had to do is highlight it or click on it. Okay, so you click on it like that, or you can come over here and right click and highlight like that. Are you actually doing left? Click? But you can come over here to edit. Do you copy? Okay. And then see where your play head is. If you go over here to edit and in push pace is going to automatically be put right over here where the play head is now. The reason why I actually paste up here instead of down here is because this track wasn't actually selected. So if you select this track and then push, go to edit and push, um, paste, as you can see, this foul right here is place right here. So those are the things you want to keep in mind? Is that she? First off select the track that you want to be, you know, to copy and paste this select actual foul. They moved to play hair to wherever you want it to be placed in your in the in the project window. Okay? And then push Dingle to edit and paste it. All right, So now there's some hot keys in order to do this as well. If you go ahead and click on the audio foul and push command C on your keyboard that copies . And if you push command V, let's say we want to paste it right here. They're paste the audio file right there. Okay, so we talked about copying. Now let's talk about the leading is very simple. All you have to do is has come right here in the in the workspace window and highlight the fouls you want to delete. And you can go over here to edit and push. Delete. Okay, now, another way to delete is, though, actually click it and in pushed elite on your keyboard. Very simple. Now let's say that you delete something or you you know, you made a mistake and you want to undo that. You can come over here and go to edit and click on unduly undo right here. Or you can use the hot key, which is command Z. So let's use the hockey command Z and you could keep pushing it. And as you can see you Oh, you have your loops here, but we don't want those in the track. So what I'm gonna do is delete those. So so far we know how to copy and pace, and we also know how to delete. Now we need to know how the trim. Ok, now we have this right here. This drum loop is too long. Okay? We just want to have this the lymph of eight bet measures or eight bars for our loop. So what I would do in order to trim this Is this highlighted by left clicking and in highlighting, Or I just click right here on the audio foul or the midi foul. If you have You used the media foul. Go over here. Our first off move the play head to the place that you want to actually trim. Think about if he has some scissors. If if this was like a piece of cloth for a piece of paper you wanted to cut right here, that's where you move your play hit and then you're gonna go to edit and come down here to split reason that play it. All right. Now, you take this, you could move it wherever you want to in your workspace window or the project window. Another word to use or you could simply delete it. Okay, Now I'm gonna push. Undo. So command Z. And now it's Let's say that I want to, uh, you know, treme this and a quicker fashion. What I would do is move to play here too. Where? One a trim it, click on it and in push command T command T is a hot key to, you know, to trim it. Okay, you could push delete on your keyboard. Now you have a, um you know, saying very well organized loop here. You could use this also, after we actually track out or arranged this loop into a song. Where we going? More into that later in another lecture, The last thing I want to talk about here is joining together two pieces of audio or two pieces of ah, loop. As you can see here, I could move this simply right here and move this around. But what if I wanted just to become one reason? Okay. What she would do is you highlight both of these and then go up to you to edit and join reasons. But I'm gonna teach you that hot key to do it. So actually, is command J. So think join. Join starts with a J. If you push command J, it's gonna ask you this question right here. Don't worry about this. Is just asking if you want to join those regions puts, create. And now you have a full reason here, instead of this being two is one. These are very important editing features I want and techniques that wanted to teach you in the next lecture, we're gonna be going mawr into the creation process. So thank you so much for watching.
9. Arranging your Apple Loops into a song: and the next thing we want to talk about is how to arrange our apple loose or our samples. Now, when I would talk about arranging it, all I'm doing is taking this and these this loop, OK, and I'm gonna to format it in a way where it flows is an actual piece of music instead of just a loop. OK, so you wanted to have an intro, you know, verse hook course or we know those different sections of actual song. So the first thing to do is actually listen to it, OK, you might want to adjust the volume up or down to make sure certain instruments or not, you know, blaring too loud. But just listen to it, see how it sounds. Now, as you can hear sounds 30 cools actually sounds very different or unique. But the thing about this is is you don't want this to kind of drag on like that on and on and on. You wanted to give some type of variations. So what you're gonna be do doing is actually using some of these editing techniques that taught you in the previous lecture. So what I would do is I will actually copy all of my loop. Move this, play head to the end of the actual loop and then pushed. Command, See the copy and command V to paste it. Now, what you could do is you can just keep on pushing Command V, and it's going to drag your loop out. Um, a little farther now, usually with background music. All right, it's not is long. Okay, So what we're gonna do is I'm going to actually push on here. This is a display mode. If you push time, you can see exactly how long it is. The minute 20 seconds. I usually works pretty well. So what I would do is I want to create an intro. What I would do to create a intro is I would first mute out everything, and this may be still put a blue pon and push play. And what you would do is you just practice bringing in different parts of your apple loop here and to see what parts would be best to come in and certain parts. So, for instance, I'm going to play this first think that it would sound good for this This base baseline to come in. So what I would do is I don't want it to come in, you know, on Lee, I only wanted to come in basically right there where this play head is. So what I would do is I used to trim features are pushed command t to trim this and then click on it and delete this part out. So and then I would listen to it again. All right? And so, as you can see here, Okay, I want the drums to come in right here. You can come over here and zoom in or zoom out by coming to this little line right here, zooming in, zooming out. But I wanted to just take, like, one measure before the next part of the song and bring the drums in so I would zoom in here , move the play, head to one measure before and push command T That's going to trim this. You can also do it by going to your edit split regions. Okay, So split it or trimming. All right. And I'm just moved left or right by taking this over your track pad, take two fingers to move your track pad on your computer or your apple mouse, you can move your finger left to right to move this. Okay, But you just click here and pushed elite, all right? And so now we have a pretty good intro. Now, when this song actually comes in, I want to bring in his new sound. So what I'm gonna do is I'm gonna take this loop and move this over here, and this is going to play as the course. So what I'm gonna do is I'm going to click on this and delete this. And now this part is gonna play when we go into the course. So what I'll do is I'll move this play head to right here so we don't have a list of to the beginning. Listen to it from the beginning. Excuse me. And I'm a push play, and we'll see how it sounds going into the course Now, if you want you. This is where you could take this other part out. Just because, you know, you don't want to keep on doing the same thing over and over and over again. So what I would do is this clicked? It took it out. And now it's going to go into, like, a verse part. I was gonna bring this back over here, or if you want to, you can actually I'm acquis undo by pushing commands. He I could take this little part out and just have this part going in for the verse. - Okay ? And see, as you can see here now, we're bringing back in the course, okay? He just basically gotta play with it in to see what parts work best for what parts. But basically, I'm going over kind of some basic principles here. Usually what I do is I mute out the whole the whole track here. I make sure I put each section into a loop. Okay? And I begin to a mute the different sections to see what instruments are but loose Sound best for the section. Okay, so if you're working on the course, you start bringing in your different loops one by one, and you can trim, edit or delete or copy and paste whatever you want as you go. All right, now, technically, this this particular some loop is not finished, and we might have to actually extend it. So what I would do is come over here to the very end where you see this little triangle and extend this out some or because I don't want it to end so abruptly. If this ends right here is gonna be kind of abrupt. So what I want to do is create an outro, okay? And so what I could do to create this out show is copy by highlighting everything pushing command. See? And then move this play head to the end of that measure, pushed paste. And now that you know that's pasted over here. So what I wanna do is created out show gin now show, you know, is done the same way all the other sections of the song is are done is pretty much, you know, you listen to your audition it so you could just have maybe just the drums and the bass. Or you could just cut out the drums so I should get enough for the out show. So what I would do is I'll just delete the drums and voila. You know, you have your son your track arranged into a song. Now, if you want it longer, Of course, what you could do is you could take this and extend it. And so instead of putting this out, So right here, I could have repeated diverse. And let's do that real quick. I'll just delete this. Highlight the verse and the hook, and then I'm gonna push command, see the copy it Bring the pill a head to the end of that and pushing command V to paste it . Now you just extended your song, okay? And then you can come over here to the very in. Zoom in, and you could extend it by coming over here to this little triangle. All right, standing that try and go out and then I can repeat this. Ah, basic out. So, like we did before. So pushed Command C command v all right, and take out the drums. And now if you come over here to display motor, go town to time, we could see Oh, this is about a two minute, 24 2nd long track. You know my videos about that long to so cool. So this is a basic arrangement. So that's how you do it. Start to finish. Thanks for watching
10. More arrangement tips: All right, So now that we have our basic arrangement here, we basically want to just see what we could do to add to it, to make it even better. And that's what we will come back to our loops and finds maybe some different effects, maybe some vocal effects or different effects that will make this track stand out even more Now, I like that sound. I think it would be great to add that a little bit later in your verses. Just a kind of gearing bring a little bit more spice to your versus. So this is kind of listen to that. All right, so And if you notice I haven't really been going through a whole lot of these, I'm just really just kind of picking one. And then as soon as it jumps out to me, I use it, okay? And that's a key tip here, but I just wanted to go over some tips here that you know, this you could always change what you also have here. You want to keep things simple, but you could change this. So what you could do is say, all right, I want this actually to be the verse, the main part of the verse instead of this part. So what I would do is I would copy it. I push, you know, by selecting it, make sure also, you select actual track, but then select the actual audio FAO or absolute pushed command. See the copy of the movie, er, play head at the beginning of the measure for the ah, for divers, his pace and voila. Now you have this actual, um, 16 bar loop here for U verse. So what I would also do here is pushed command, see again, Because you want duplicate this for verse two and move the play head to the beginning and pushed command. You want, of course, highlighted Chris Command. See to copy it and pushed command V to paste it. So it's a simple way to do this. And what I would usually do is cut out. Maybe this first part of you know your versus allowed. Now, let's listen to how it sounds coming out of the way. And then that kind of came into abrupt, so I'm actually gonna keep it. How we had it before by pushing command Z to undo. And instead I'm gonna is gonna take this first section out. This This will kind of come in as an added bonus part towards the end of east verse. So let's listen. Okay, Now, as you can hear, it kind of really didn't blend. Well, so you know, you want to actually look for maybe some type of a sound effect to blend knows together or what we call a feel. OK, so you come here and you just listen to our our descendants. Certain field boy. Oh, what boy? Oh, what boy? So let's just check that out, All right? So basically, I added a feel right here, and what I will want to do is you saw assault. Did you hear? High dropped out the actual beat, dropping out to beat. What kind of gives you more time to or the listener? Time to focus on that field. Okay. So because if you had to feel going at the same time, the beat was going, basically it will complicate the song. And it just told listeners ear off. So, basically, what I would do is I'll come up here to the drum track Push command T two, trim it. Okay. After I selected it. Course you want to move to play here, too. That about one measure before? Okay, Right where you added this. Ah, feel and elite that part. And now it has, like, a better transition into that next phase of song compared to this, you know, it kind of worked well, but it is also kind of with steel kind of abrupt. Now, another cool thing here is you can actually repeat this same type of, um, technique and the big you know, before basically really before each, um, new. You know, every eight bars if you wanted to. Okay, so I'm gonna go ahead and I cant brought to play head one measure before this next section of the verse trimmed it by pushing command T crystal eat. I'm also gonna push. Ah, select him. Make sure I select this track here where the field is pushed commands see and paste this feel on this track. All right, So listen to it now, boy. Now I want to try something here. I'm gonna actually let's listen to see if this part right here which sound good during the hookahs. Well, so I pushed Command, command. See the copy it. I have the play head right here at the beginning. Puts command V. And let's listen to this. We'll get Luke going too busy. So I pushed command Z to delete that. All right? Or undo that, but you get the basic just of everything here. Basically, what I'm doing is I'm using, um, feels and adding extra parts to the song to kind of make it more interesting and build the beat better. Now, let me give you one more trick before we go here. Um, you know, it will be a little bit tedious to kind of Repeat this. You have to come over here, trim this, take this copy and pay all that. It would be tedious to do all that. Ah, Quick. Waited to get all of this over here would be to actually come in and delete this second verse by highlighting and pushed in delete and then copying that first verse highlighting that first wears a person command, see, and then moving this play head to the beginning of that second verse and pushing command V to copy and paste it. Now you don't have to try to think about all right. you know, let me come over here and tediously do all of these different parts. Last time we do this track here, though, is I'm actually going to, uh, cut, Cut this track right here. Split this region right here. One measure before, and I'm going to take this feel click on the field track. Copy it. Just this one and then paste it right here. And I want just actually be on every hook. So what I would do is I can just delete this, and I can copy this, And if I hold down, shift and select there, it will just basically, um, highlight both of these and so I can push command, see the copy and bring this play head to the beginning of this chorus and pushed command V to paste it It will I, you know, saying you could do the same thing right here. You can delete this. These are the drums and then moved his play head all the way over here and then push command V because we already had this copied. And now you have you know, this perfect section Oh, are are basically flow of a song here, and I'm a Go ahead and notice this. There's Ah, this feel at the end of the song is well, one verse, one verse or run Red rescued me before the song is Someone's gonna highlight it. Make sure the actual track is selected Then highlight the region. Copy and paste. So let's check this out. - Boy way, boy boy.
11. Mixing tips: All right, So now that we've arranged our music completely, ask him, you know, transitions to it. Um, the next thing to do is to add a basic mix to it now in a garage band. You know, I just want to really skylights some simple mixing tips. Okay. I don't want you toe overly complicate the mixing process. The main thing you want to make sure that you do is make sure that should tracks are first off. Name properly, says so you can know where everything is at. Okay and tepid ticket. TEPP giving. Technically, um, once you dragged these samples in here and it's already named say, if it's not you what you would do the name it is. Go over here to the track and double click here and you could just say drums. You could just double click it and drums and push inner. And then also it. Now, this is named now, as you can see, though, is named right here. But you still see the old name here. So if you click on this track and then click on the actual reason reason by clicking but right clicking OK, this is gonna pull up and you can see name regions. So click that. And now you can name the actual region as well. Save so drums. Okay. And they see what you want to do is do that for all of your tracks. So I would just go here and push like baseline and you get this push will actually help me . Gotta put inter first baseline, inner and in you name the regions and you push baseline right there as well. Okay. And I would say, OK, this is going to be our AARP short for our pay. She ator They are one name it our boy. All right, are to click on the reason. Right? Click on it. Name it are up to click it strings looks right Click on the reason and then name is And I'm just gonna push Feel for that click on the track right click on the region And then you could name it Ok, now after is everything is named properly. Then I want to properly order everything or organizing. So drums coming to the very top. Then you have your baseline Then that's when you move into your melody tracks which will be these AARP agitators, and you have some strings and your feels. Okay. All right. So after is organized, you want to get the proper levels. Now, the thing is, to keep in mind when you're mixing is all everything is about balancing. Okay, so you want to make sure you can properly hear everything. Meaning all of the different instruments. All right. But she can also make sure that everything is not, you know, competing. Okay, So what you would do is you was so low out each instrument and get a loop somewhere. Say, most of that part is gonna be most of your songs being played. That's usually the course. And you would just listen, all right. Course, that's fine. But you want to make sure also that you get would get net level. You want to make sure there's no clipping, no red. Okay. And you see that slight clipping. So it was red. So you don't want any distortion on your tracks? Will bring it down So you don't see any red? Usually, if you bring everything under negative six db If you look at it, we're says volume says negative 60 b. Bring it under that you'll be fine. So then you start bringing in other instruments. So you want to be able to hear the instrument, but with But you don't want it to be competing with the drums. So so say, if I brought this base up, see how is loud in the base? The kick drums are to me the drums It is louder than the drums is not gonna You know what blend Well, So I want to have him, you know, loud enough when you hear the bass sound, but not so loud where it's taken over debate the kick drum boy , right? You also want come over here to this other section if you have other parts of your music, you know, bring your, um, your loop over here it says other parts and blend that in as well. And while are you done? Now, the cool thing about your apple loops is that most of those loose already premixed. So you're not gonna have to try to, you know, really add a bunch of queuing and compression and all that type of stuff to him. But if you do want to Assam effects, add those effects sparingly, and I'm gonna show you how to actually add effects. If you do want to do that. So the first thing you want to do is select the track that you want to ask him effects, too. In this case, I want to put a delay sound on our field where it has like this like B J. For every boy part, we want to go ahead and add some type of delay. So what I would do is come over here to this little novel here. Spahr controls. All right. And click on that click on the I, and in you can come down here. It's a plug ins. All right. Now, this is actually selecting the master are if you want to do to do this on a master, but you want to you don't want it to be on a master so unclipped the master. And this is just going to be on a track that you select. Okay, But we want to put a delay effect on here. And so what I would do is click over here and go down to delay and pushed delay. Designer and I always recommend that you use presets, so click on over here on the factory and go too simple. I would do maybe something like, you know, just just pick one of them and figure out which one you like best. I'm gonna go with this doggedly. So now let's check this out Now is you Listen, that was kind of off. So we would do is pick of different win. Just keep on picking ones until you find the one that works the best. Um, I'm gonna go with now. That was pretty cool. Now what? You could do it if you don't want that much, Um, of that echo effect in there, you can come over here where it says wet wet is actually what's going to be controlling the actual amount of the effect. So I can turn that down over here, and I Let's listen to it. So you got here it, but you can't hear it. Pretty cool, right? Keep things to keep in mind When you're using effects is again use it sparingly or meaning used to keep it simple. Don't try to add too many effects. Don't try to do too much to you. Track these apple loose already premixed they all they have sound effects on him a lot of times. And so you just want to Adam just to spice it up, submit some, um, if you want to remove in effect, all you have to do is go over here to the left of the effect and click on that, and we'll turn it off for on. Okay, So that's really what I want to show you on this as faras mixing that you can come over here and ah, at other effects too, if you want it. But, you know, keep it simple, right?
12. Exporting your background music into a mp3 or aiff/wav file: All right, So now that you have your song mixed, you know you got the problem. You have the proper Everything's enabled properly. You have the proper levels, and you've added maybe some effects in here. All right, What you want to do is click out of all of that and turn your loop off and zoom out to the very end. I would bring this play head to the very beginning. And you could do that by pushing this button right here or pushing space bar on your computer. Or Steve, Enough space bar. But you're inter button puts return. All right, I would give it one more Listen to make sure everything is flowing right, Maybe not. Make sure everything nothing is out of sync here because sometimes you might, you know, copy and paste it wrong or whatever. You just want to make sure that you listen to it. So say if you copy and paste it wrong, maybe say this was off. You would cut one of coming in here and make sure that everything is on points. I would come and move this in tow where it's supposed to be. Um, but yeah, that's pretty much what you want to do first. And then what you're gonna do is after you have everything ready to go, come over here to share and then go down to export song to disk. All right, Now what you're going to be doing is first naming your track. Now, I've already done the naming here, but what I would do is I would go ahead and put put, you know, type out the name of your track. I'm gonna say London. You could twist a, um, space bar. Or you can put you can, you know, say I would just go ahead and push the hyphen, and I would put the genre, and then I'll put exactly what it is I'm gonna say. Background music. Okay, Now, you can also choose where this foul is going to go. I always have it go directly to the desktop. The reason why is because you know you can't lose the foul there. You know, saying you're always on your desktop, you could easily find it If is there. Okay. And what we're gonna do is we're gonna actually create an MP three foul. All right. This is one of the major ways are one of the major fouls that everybody uses. If you don't know what MP three Falih is, you know, you definitely gotta, you know, get hip to ah, what's going on in today's times, But basically, we're gonna create MP three, found that they have different quality. Said he's here, Uh, you know, some people say, Well, let's why don't you just click the highest quality right here? The reason why I would recommend you don't click That is because the foul size would be too big. And on some players online that foul size will be too big to, you know, upload. So always go with this high quality setting this 1 92 kilobytes over here. Or, if you want to be safe, go over with 1 28 kilobytes. But we're gonna go with 1 92 Click that, and it's pushed export. And as you can see, it's doing, its thing is bouncing. And if you come over here to your desktop, you have your new foul here. All right, it's gonna play. Do Now let's say you want a wave foul, all right, your same process. If you go there to share Goto experts on the disk. As you can see here, there's no option for away foul. Well, actually, technically it is if you go to a i f f. That is actually a another name for away foul. But on Lee on Apple computers don't worry if you see an AI FF foul, it can be used on other systems, like, you know, Windows systems or seek personal computer based systems. Um, and it acts the same. Is away found basically away foul or a i f f our ism or higher quality foul. It contains more data, and so it has a higher quality here again, you don't want to go with the highest here, go with 16 bit at CB quality 24 bit A. I f f owls are particularly because, you know, say, if you're working with another creator and you want to keep is much other particular quality and and intact, they choose this 24 bits. So say, if you want Teoh send us off to a mastering engineer, okay, then you can select 24 bit, and then that would be the best thing for him because he couldn't get the foul at the best optimal quality. But if you're posted it or uploading this foul to a CD, you always want to go with 16 bit. So you, Chris, 16 bit you already named the Yari. Have it selected where it's gonna go your desktop support export, and it's gonna do it staying here. All right, you go to your desktop to check and make sure, and as you can see here, you have the A I f fell foul. So that's how you export your track. And I just want to thank you for watching man see you the next lectures.
13. Thank you: What's going on, Yaar? Thank you so much for finishing this course and taking this course by now. You know how to, you know, use GarageBand and Apple Loops to create your own background music that you use and podcasts that you use an online video courses, YouTube or anything else that needs background music. So again, I want to invite you to take, you know, action on this. Go ahead and create your own tracks. Okay? And also leave a review. If you like this course information. If you had fun and you're now confident you're able to create your own music, leave a review on this course and also post you know your results post what you actually created. Go ahead and upload it to YouTube or uploaded to Soundcloud. Take that link and posted in the course. I want to see your work. I want to hear what you come up with and other students due to so again. Thank you so much. I see you in the course of to come
 Joseph Evans, Make Better Music Now: Follow Me