Transcripts
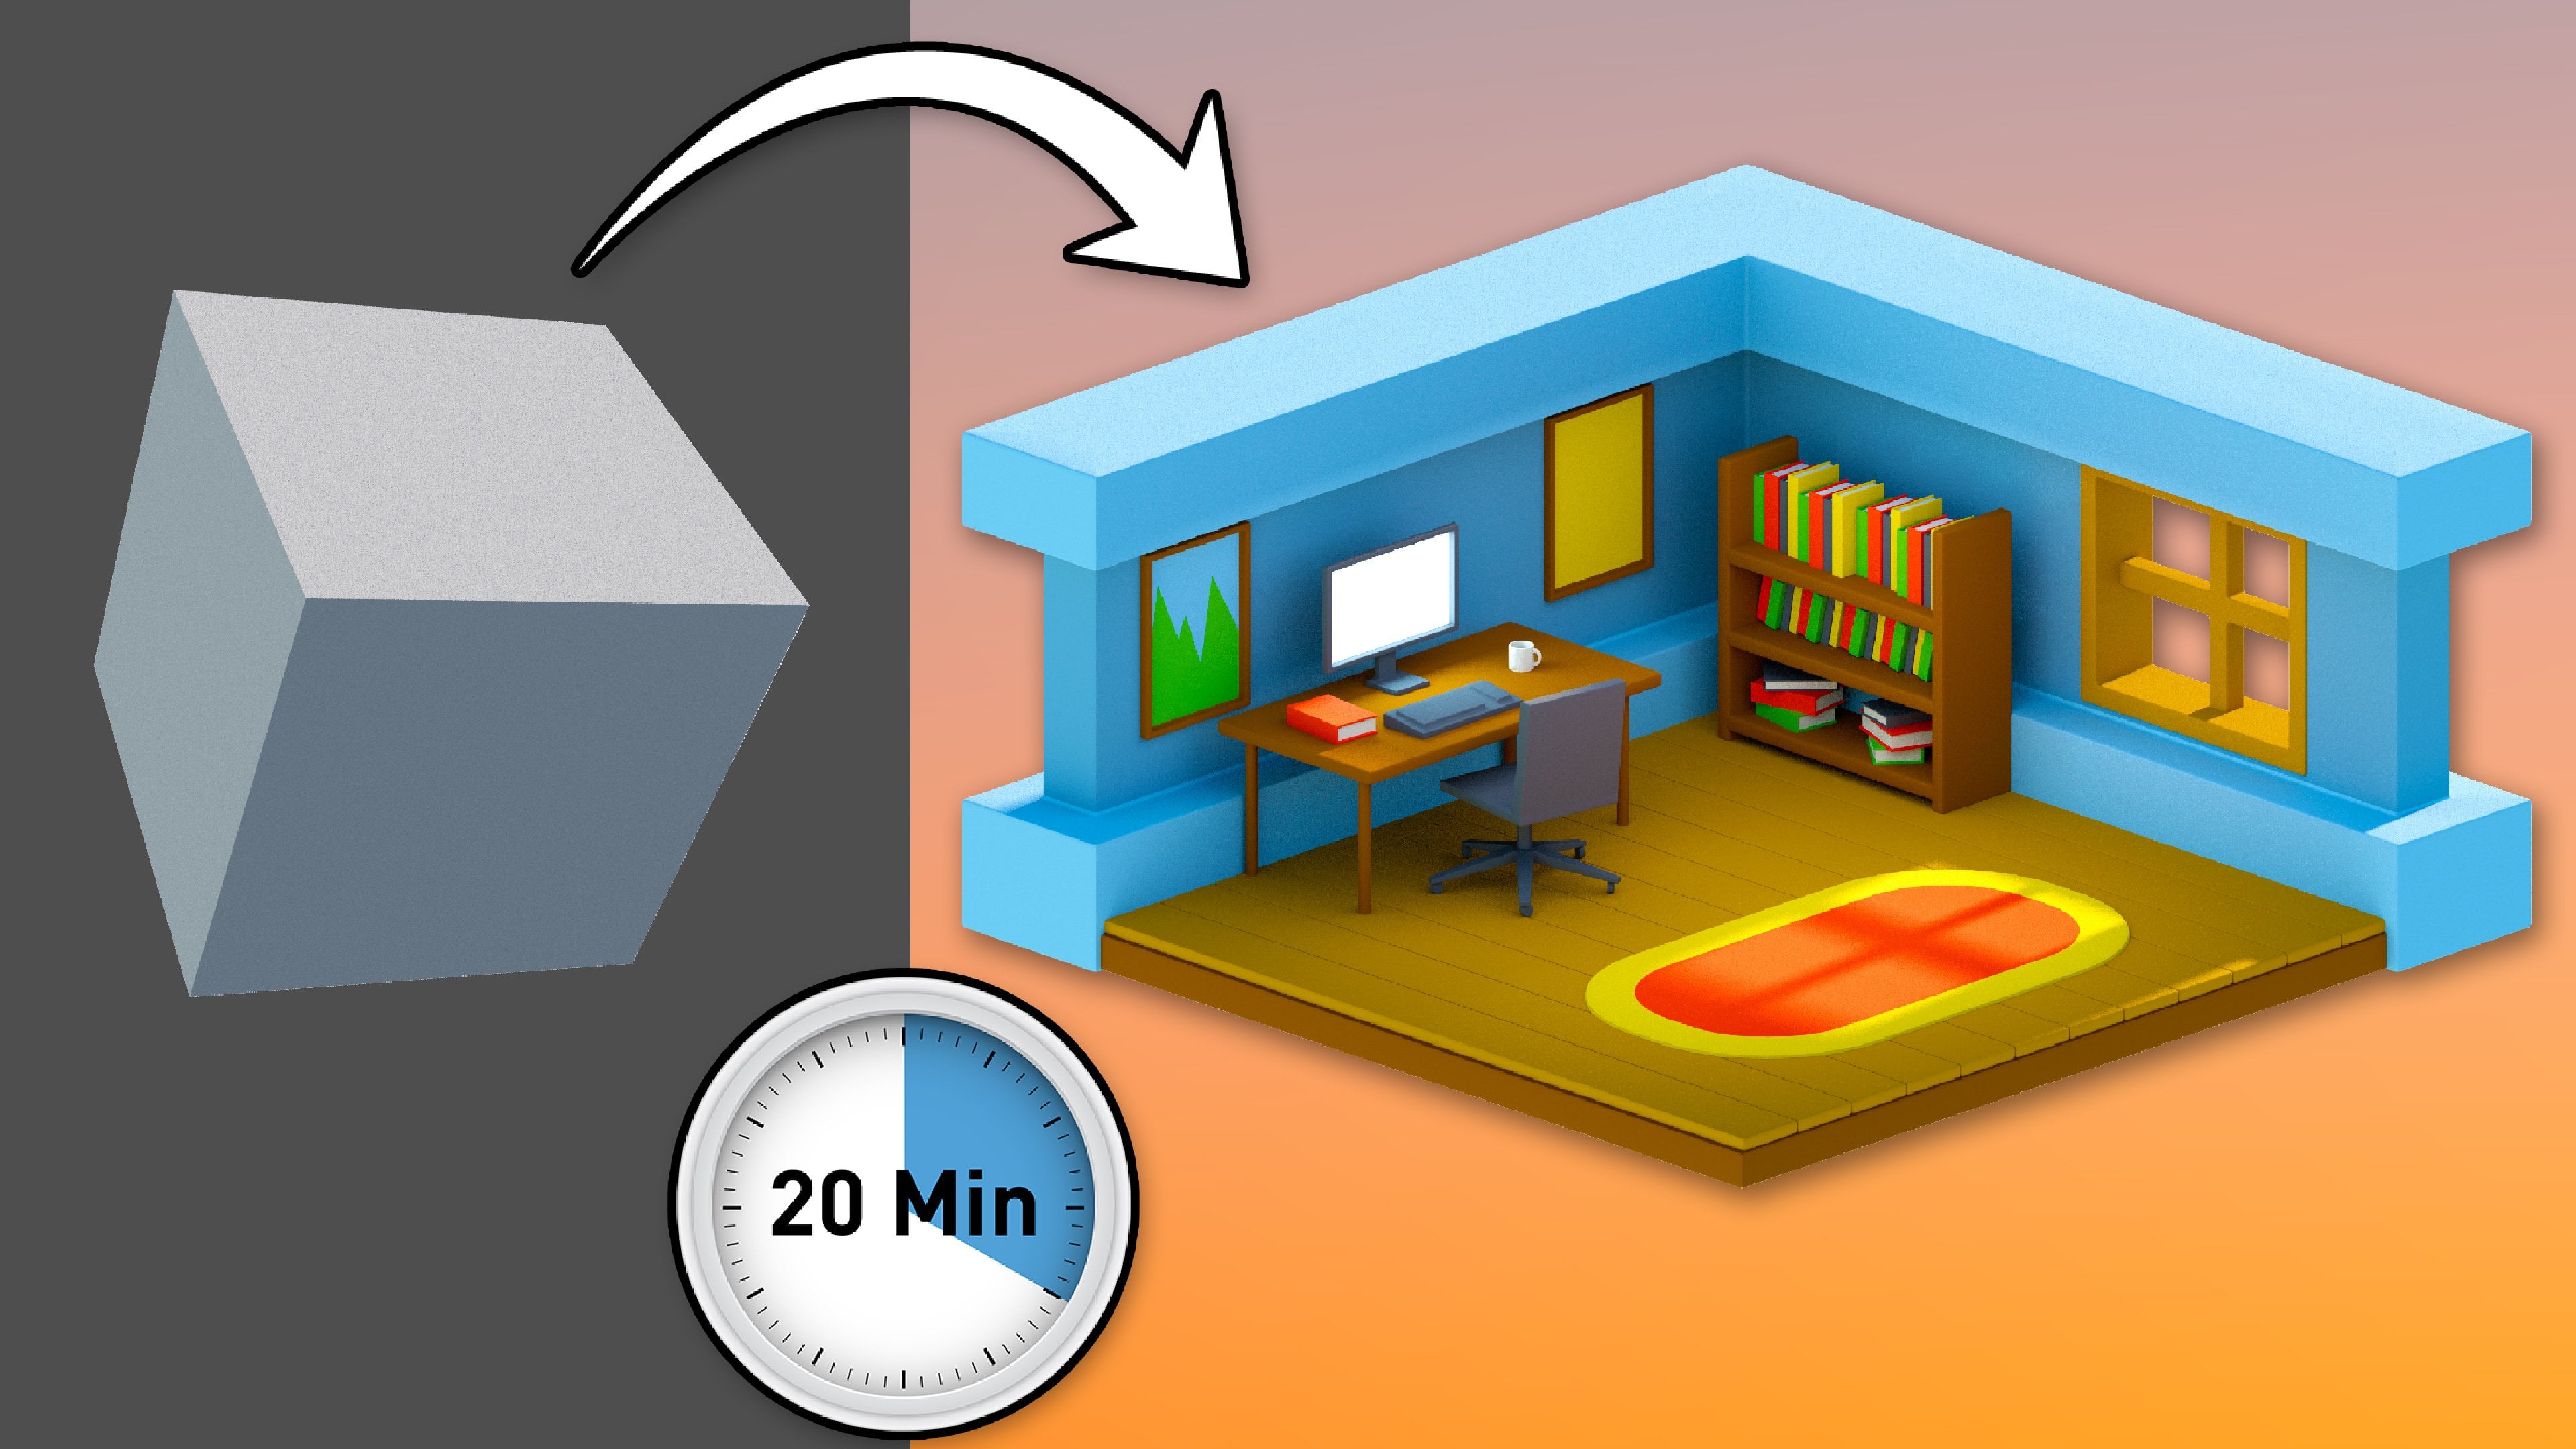
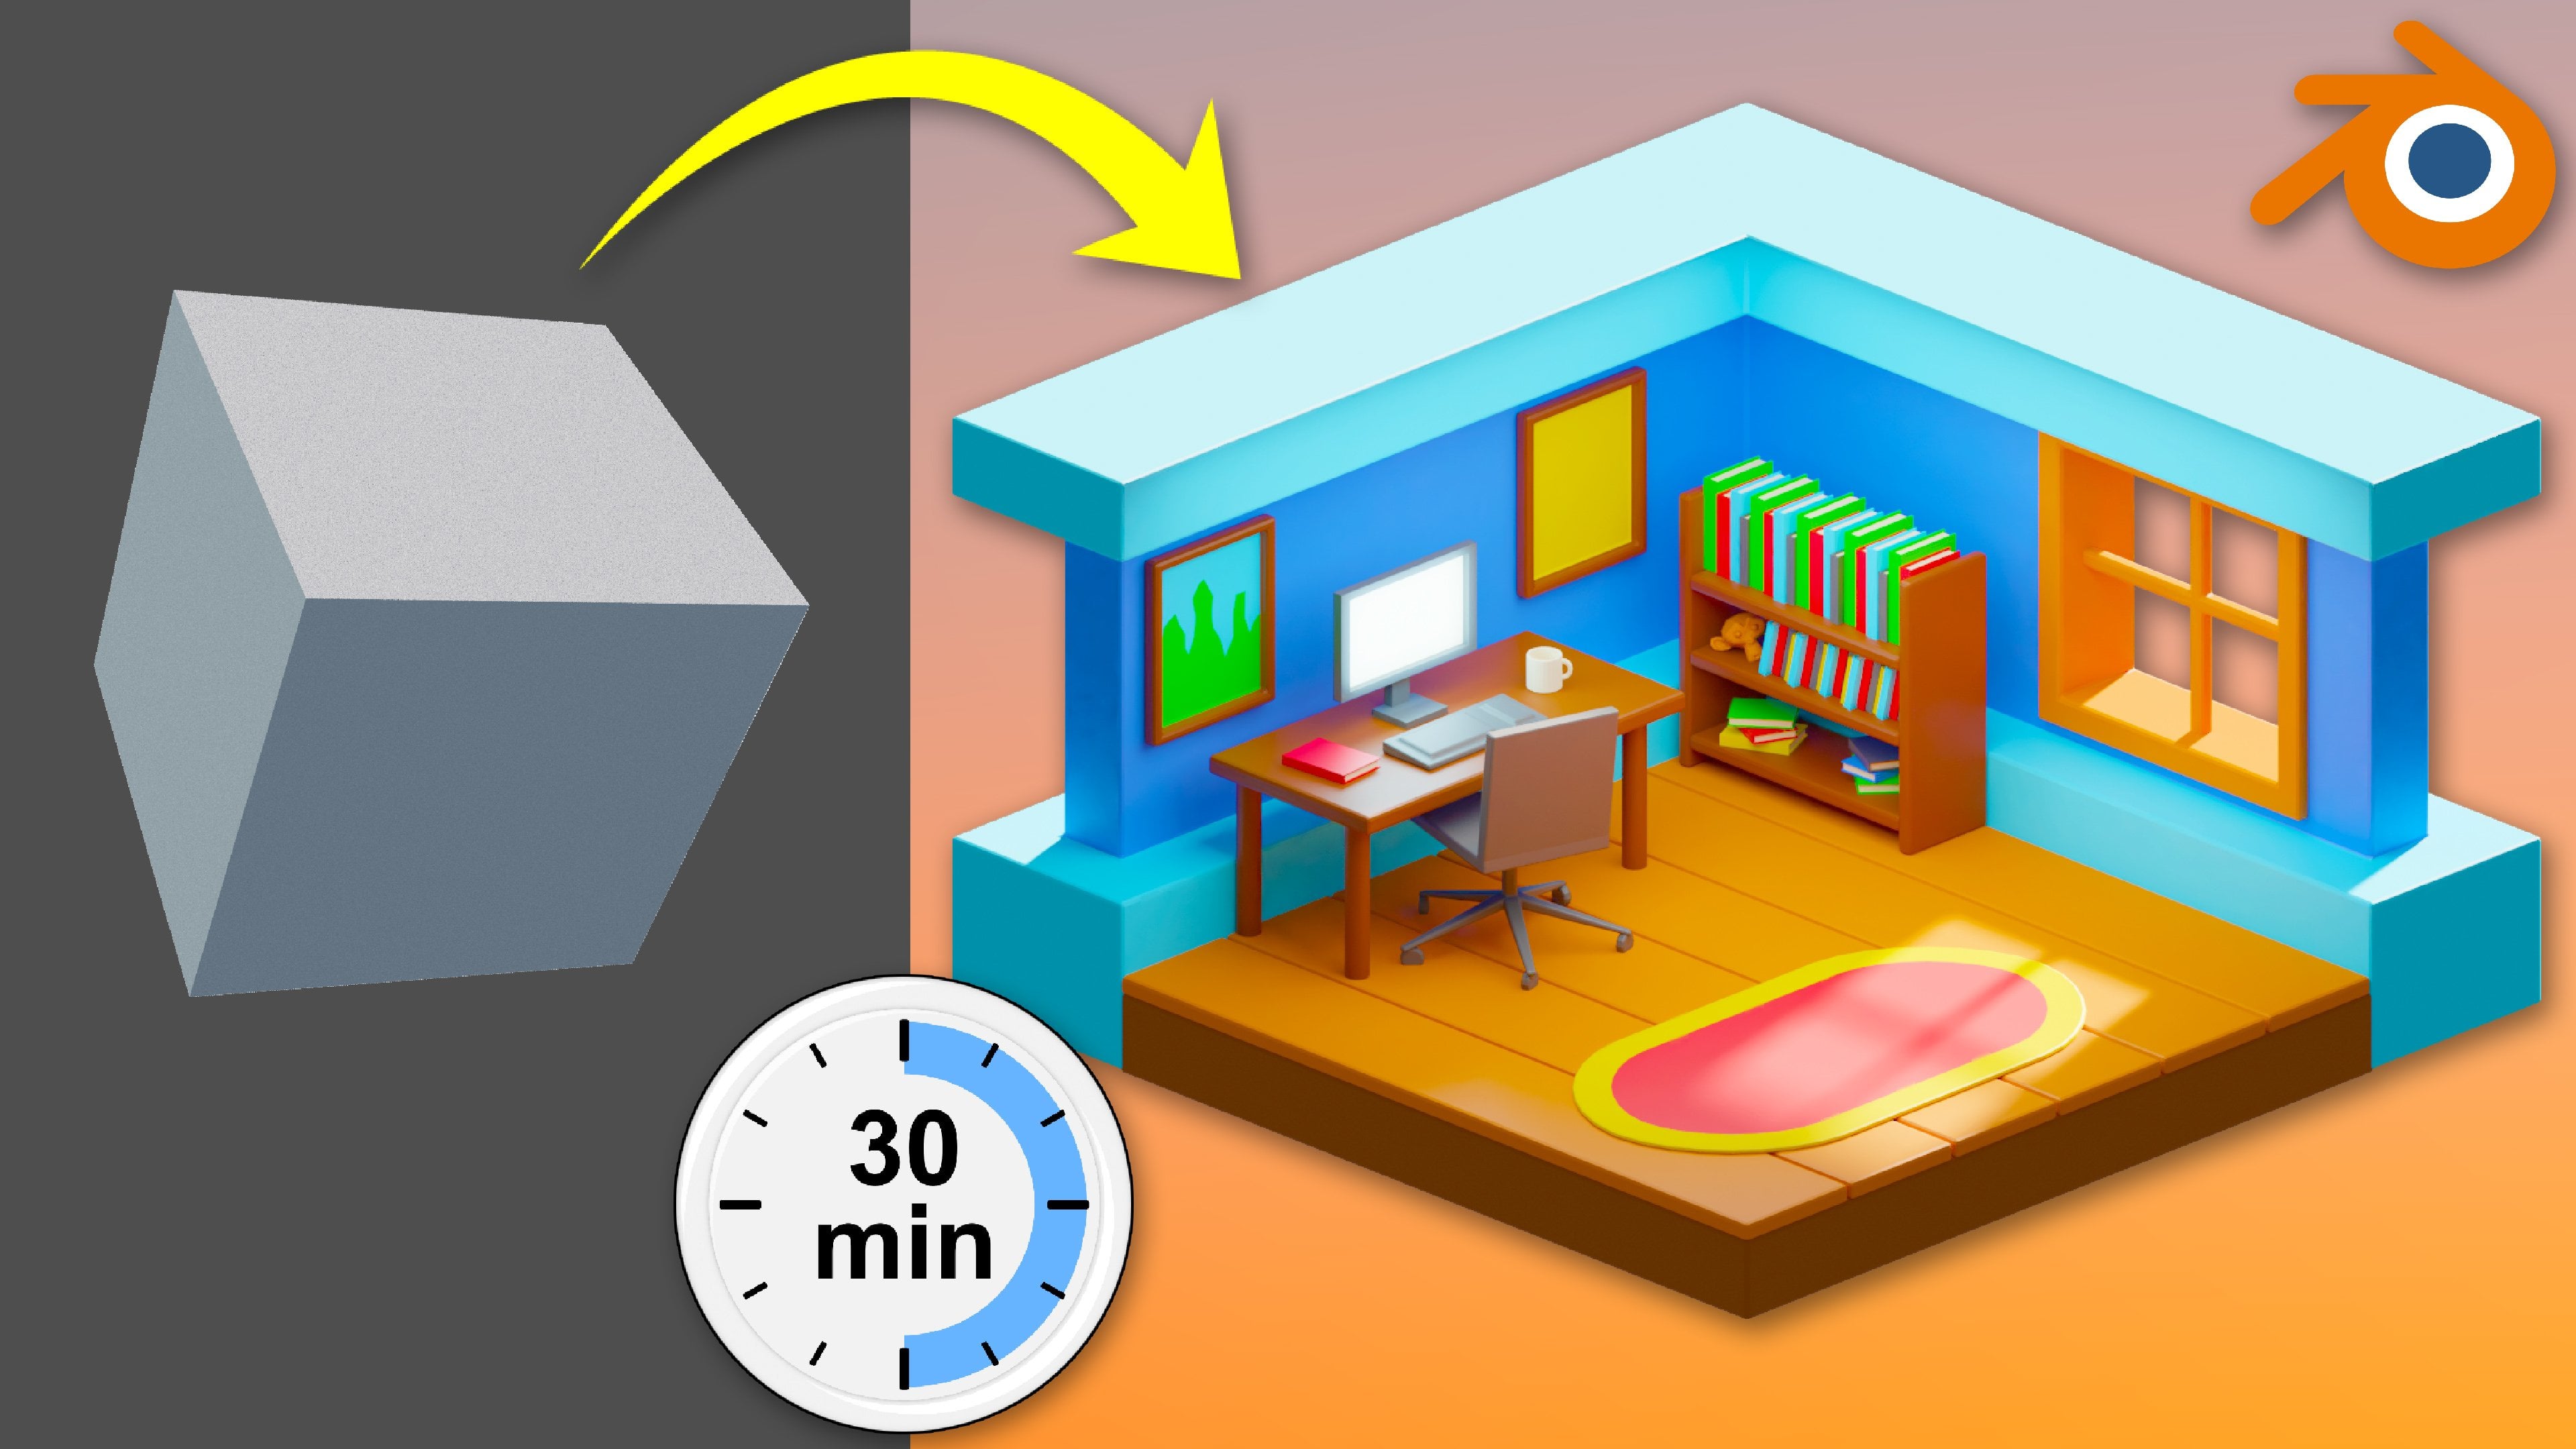
1. Introduction: Fun and engaging characters are one of the most important parts of any game. If you want to make games, then you'll need to know how to create characters that your players will love. Hi, I'm Shane, and in this detailed class, I'm going to teach you how to create this little robot character. There were already lots of really good classes out there that show you how to model or make, or animate, or even how to import your character into a game engine and make it playable for this class covers all those steps and more in one complete package. Over the next four hours, I'll take you through the entire process, including the modeling, texturing, rigging and animation, as well as the right way to export your character from the modelling software and into the game engine. Once we're in the game engine, I'll also show you how to set up the animation states, the logic, and how to tweak the field of your character to your liking. This might all seem a little daunting right now, but I'll break it all down into manageable chunks to take you from a reference image right through to creating your first fully playable 3D video game character. I have been using Maya Andrew male engine for over 15 years and I've been teaching them to begin as light cue for 10 of those years. A qualified teacher. And I put all of my experience with students into the design of this class to make sure the material is as accessible and easy to follow as possible. I've made all of the resources that you might need to complete this class available to you, which includes the reference images, textures, as well as the scene files for each part of the class and the Unreal Engine 4 project. You can use these to pick up the project at any step of the class. So you can choose which parts you want to follow depending on the skills you want to learn. Okay, That's the interactive the way. Thanks for watching and I can't wait to see you in the class.
2. Project Setup: Before we can make a start on muddling our character, the first thing we will need to do is to create a project and get our reference images in the scene. So let's do that first of all. So job one is just going to be file Project Window, robot characteristic with name. So I might call it up robot character. And then you need to choose a location for your project. I'm going to put it in some way. I'll be able to share with you guys. So if I put it in my drive, shared, you can see I've already got a ThirdPersonCharacter tutorial folder. You can put a folder wherever you want. I'm just going to choose this things. I've already got some images there, which we'll look at in a second. And then we'll select that. I'm not going to change the name is just going to click on Accept. Okay, Now that's just wanted to put some files in the correct place in that project. So let's open a window here. So here's that folder that I just put the project him. And these three images here are our reference images that we're going to be using. So I'm just going to put these, so I'm just gonna go cooked. And I'm going to put them into my source images folder. Paste. If you want to use the same images is made you absolutely can. This project that I'm working on right now will be linked down below in the description. And you can get to this at any point. So that's how you can do that, right? So now my project is set up. Let's go back to Maya. And I want to save the scene. So File Save Scene As. And you can say that I'm in the right place because I've just set my project and I'm going to call it modelling. Yeah, I'll just go with modelling, that'll do it. Save. I would also recommend at this stage to make sure that you've got my three favorite settings zone, which is infinite undoes, incremental save, and autosave. And I'll link the video somewhere public top corner of the screen so that you can do that if you haven't already. Okay, what I'll do now is change the workspace for Maya Classic to modelling standard. Gives me a little bit more screen real estate. And then I'm gonna go to my four of you. And there we go. And I'm going to bring in those source images that I just showed you the upper into the source images folder. So here's the top view. So we're gonna go view image plane, import image. And it put me in the right folder and I've just copied the 509. So which view is now on top? So we'll use the top image. Open. These images should line up pretty closely because I drew them in a way that should mean that that happens. But we might just have to use a little bit of common sense to get things lined up. So now we're gonna do the front, Import Image front whenever it is. And then we'll just got the side left. Import Image side. Okay, so they're all in, that's a good start. Now what I want to do is make sure that I'm gonna be working to the correct scale because we want this to just work when we take it over to Unreal Engine, when we're done, our gonna set it to about normal sort of human height, which is about a 180 centimeters, is kind of the high-end of the average male. So we'll go for that. And the way I'm gonna make sure I do that, I just create a cube. They doing see the cubes just there. I'm going to open my channel box and I'm going to resize this cube. So I'm going to set the height to 180. And then as I zoom out, you can see that's kind of how tall I want my character to be. So now I'm going to select all of my image planes. Just doing that with the Marquee selection. That's not sliced off three as it. Okay, we'll do them one at a time. So let's scale this up. And what I want to do is make sure that it kind of matches the height of the cube I've created. So we'll do the top of the head. That looks about right and the foot. So I just need to move my cube down a bit to get it. But I didn't just turn this grid off for a minute. Okay. It means get it roughly in the right place. And then I can see that this just needs bringing down a little bit. That's about right. And so you see that I've set my scale to 11.3. I'm going to round that to 11 because that's going to make it easier to do that for the other views as well. So that gets that started. I cannot delete that cube and I'm going to set the size of the others to 11. So this one here is going to be set to 11. And this one here is also going to be set to 11. So there we go. Hello. So you can now see that I've got these reference images in. Everything should line up and see the edge of the fingers pretty much lines up in different views. So to the bottom of the feet and the top of the head. Everything's pretty close. So all I need to do now is move these images out of the way so that they won't be annoying when I want to model. So we just move this one back here. This one will push back there and you always want to be pushing them down or back. Don't bring them up or forward because they'll get in the way. Okay, so that now Postman place things in the orthographic view. Nothing's changed there still where I want them to be. And that's the setup complete. We've got a project. We have our reference images in the right folder. We've also set the image planes to about the right scale. And we have saved our scenes. That means that autosave will kick in as well. Okay, In the next part, we are going to be creating a cube and turning that into the main torso.
3. Model the Torso: In this part, we're going to make the torso and we're going to make that out of a cube. First of all though, I'm just going to turn off some of these grids because I'm just have a look and it's not coming across very well on video with the grid, so we'll get rid of that was we don't need them if that would kill that one as well. So, and I guess, uh, started. Now what we're gonna do is create a cube them. And you see that it's tiny, tiny miniscule. First thing we'll do is we'll just make it a bit bigger so that it's roughly the right place and the right size. I'm just gonna move it up a bit as well. And then I'm just going to make some changes to it. But first of all, let's give it a name so we'll call it torso because that's what it is. And then I'm just going to start making changes so that they pretty much matches up. So you can see that I need to just move that forward of it. Like that. One mode that you might find useful while you're working like this, if you go to Shading and go to x-ray is wireframe, but it does kind of show a little bit of shading as well. So it can be quite good for just getting that sorted. And then actually it's a little bit too tall, so we'll go for that. Well, I guess it close enough. Yeah, that'll do it. And it's starting to show now that the images aren't necessarily perfectly centered, which is annoying because I put a center line on the image in Photoshop. So I'm not sure why it's being this way, but we'll just have to use a bit of common sense. It's fine. Okay, next thing we want to do is put a center line on this. Torso cubes are subdivisions width needs changing to two. There we go. And then we can start making some changes to this. So one thing that we need to be aware of, Let's just put this onto x-ray as well. There's a bit of a flare here. I'm gonna, I'm gonna be able to get that without another edge loop. So I'm gonna go to this tool here, which is the multi cut tool. And then whilst I'm in this view, just going to make it active by clicking somewhere in it. And you can see now that the tool is active and I'm going to hold control. And that will now tell me that I can put a whole edge loop and I'm going to aim for about, there, is pretty good. Okay? Well, I want to do next then is set about getting this shape about right. And I'm gonna do that mostly in vertex mode. So let's put our move tool and then I'm going to select whole rows and just scale them where I think I want to, so I wanted to do about there. I'll probably flare this out a little bit. And the top does want flowing out even more. So I'm going to do that. And then I'm going to leave a file. Let's just move this row down a torch, so it's just touching the top there. And then these vertices on the size of them. I'll show you in this view here so you can see what I've got. So I don't why haven't they go so I've got 1, 2, 3, 4, but not the two in the middle. And that's so that I can now bring them down. Like so you see this matches up here, but that's too far out. So what I'm gonna do is just bring it in a little bit. It's kind of go somewhere in the middle. And that is a damn fine start to our shape. What I want to do is round that out a little bit as well. And I'll do that in edge mode. So let's go into edge mode. And I'm going to double-click on that edge there. Now holding Shift, I'll double-click on that edge and the two on the other side. And what that means is that now in this view, and I'm actually paying attention to this face here. I'm going to round it off. But what I kinda wanted to do with that is get this face here to be pretty square. And the reason for that is they will become a better circle later if I make it square now. So that's pretty good. And at this stage, I'm going to make my first preview of that shape. So if we press three, That's kind of how the torso is looking so far. So it's not quite there yet, but as we add more detail to it, and maybe even priest some edges, this will start to come together. So now we'll create the area for the arms to attach. So I'm going to press one again. And now I want what I do on this side to be reflected on this side. So we're going to use mirroring. To do that. I'm going to open my modeling toolkit, which can access with this icon up here. Within this tool, you can see that we have symmetry. And I'm going to turn that on for object x. And now if I go into face mode, and you can see that if I select any face, the one on the opposite side is highlighted as well. So I'm going to click on this face here. And then what I want to do is do an extrusion. So I'm gonna do Control and E. And then by clicking and dragging on the word offset of this little gizmo that pops up. I'm going to put that kind of offset on it there. And that's pretty good. And then I need one more extrusion control a again. And this time we're going to go into a minus number on the thickness to create a bit of a cavity. It's like a socket for it to plug into. And then we'll just double check that that's happened on the other side. It has we're good to go. I might not have it quite that thickness. Just push that back at them. Yeah, that's good. Okay, so back into object mode. Well press three again. And now that we've done that, that's starting to look a lot better. That's pretty good. So there's just a few refinements that we need to make out. And I'll do that by leaving this smooth preview on. And I'm also gonna leave mirroring on as well so that I can work on this side and know that it's also happening on the other side. So let's go into edge mode. And you see that this edge here, my move tool, I'm really needs to go up here to fill out the shape. And that's working pretty well. And then we'll get this edge here and we'll do something similar to make the chest shape look a bit better. That's nice. I'll do something similar at the bottom. This one doesn't run that quiet as well, so that's fine. But it will do later because we're going to use another method. So that kind of does that. I also want to see how it's looking in this mode. And we can see that it's not quite as I wanted it to be. So I'm just going to bring this out a little bit here. So we get a bit more of that flaring going on. Yeah, that looks nice. And then for this top corner, I think I'm going to leave it. I'm quite happy with that. Okay, so now let's put this back into object mode and press one. Make sure that the shapes that we want to peculiar anywhere. No, I think that looks good. That will do it for the torso them. So we have created our shape, we've named it, and we're going to leave this smooth preview on so that we know what we're working with going forward. In fact, I am gonna make one more change because I want the bottom to be a little bit flatter, I think. So what we'll do is we'll go into edge mode. And I'm going to select all the edges around the bottom like that. And I'll get, I'll leave the middle. And then what we're going to do is go into mesh tools, turn on the crystal that and then it tells you how to use it slipped components decrease and then drag middle mouse button. So click and drag with the middle mouse button. You can see that it kind of hardens those edges a little bit and we only want to do it a bit now, I'll be fine. Yeah. And that just makes that a little bit sharper. Back into object mode. Okay, so that is our torso complete. In the next step, then we will be taking a look at how we construct the head.
4. Model the Head: Now it's time that we make the head. And as you can say, I've chosen quite a blocky shape, which means it's a fairly easy shape for us to create. The shape we're going to start with is going to be a cube. So I'll just create a new tube is going to be inside the torso. So I'll just put my move tool on to get it so that I can see where it is and make sure that I can see the head in these views just so that I can get this cube roughly position. And then I'm going to need to size it up. So that was like a pretty good size. We can see here that it needs to come forward a little bit. And also a little bit. I'll just bring the scale back down. Okay, that's a pretty good start. Next thing we need to do is reduce the size of the face at the back. So I'll go into face mode for that. Slip that one face. And then I'm just going to scale it down until it kind of looks right. It's going to have to comfort a little bit and also a little bit. That looks pretty nice. Just check that I'm happy with it in the top view as well. Not bad. And the whole shape actually, I do remember I decided that I wanted to add a little bit wider than I did tall. It's not quite square. Okay, that's a good start. Now you can see we've got kinda this inset for the screen that makes up our little robot dude's face. So we're gonna do that by going into face mode. Get the face at the front. And then we're going to extrude that and just add enough set whatever looks good to you. So something like that. I'll extrude again and then I'm just going to bring the thickness in southern we've got a bit of kind of separation from the frame and the screen. And that's for the modelling that's pretty much done. What we need to do now is work out how this is going to be smoothed the same as we did with the toss them. So I'm going to need to be in edge mode to this. And I need to press three to see what the shape is currently previewing like. So that's set, you can see it's not quite the, hey, yeah, it's a little bit too rounded, so I'm going to work on the edges at the back first. I've still got object symmetry on, on the x-axis. So that means that I can select the top and bottom and I only need to select one side else, let both on it. And then we're gonna go to Mesh tools, turn on the crease tool. And then I'm probably going to use this view here to see how this lines up and then just push it back. So I get the same kind of curve, which is something that I might need to just move things and resize them later. But I'm just trying to get it closer this stage. Next, I need to control how swear it looks. So I'm just going to double-click on that edge there. You can see that it's got all the way and it's got the one on the other side because of the symmetry. I'll hold Shift and do that on the bottom as well. So now you can see I've got all of those edges selected. And now I'm just going to go middle mouse button and drag until the shape looks about right? And for this one, this view here is going to be my friend again, I want to get the same sort of curve that looks pretty close. Next we need to select this edge and then hold shift and select this edge loop. And then I need to get the kind of rounding on the front here. So He's got rounding going on that looks pretty close. And then these four edges in the middle are actually just completely hard because we want a good separation between the frame and the screen. And as you can see, we are now pretty close to get in the shape. So all I need to do our thing is go into vertex mode. And then I'm going to move solids these vertices a little bit just to get the shape that I want. And I think all of these on the bottom just need to come down with it. From a dead, not the back and move that back up. That's pretty close. Now then I just need to do one more thing, which I forgot to do when I created the shape. So let's put this back into object mode and then go to my channel box. I need to name this cube. So we're going to call it head, which is a fairly sensible name, really doesn't need a capital date. There we go, and that is now done. So we've now got our torso and our head. We're going to leave the smoothing preview on because we want to see how this is going to turn out, but we're not going to be applying the smoothing yet. In the next part, we're going to model this bit here, which we'll call his hips. So let's move on to that.
5. Model the Hips: Now it's time for us to make the hips. And as we have done so far, we're going to use a tube to be the start of this voice. So let's get the new cube. Just move it out of the main part of the torso. And then I'm going to name this. So we'll need to scale this up a little bit. And I'm just going to refocus my image planes so that I can see what I'm working on a bit more clearly. So we're going to need to do something like that. And obviously doesn't need to be quiet that tall. It's pretty good. I'm gonna go slightly wider. As you can see, these reference images don't line up perfectly, so you just have to kind of average out any differences. The front view here isn't quite where I need to be, so I just scaled up together a bit closer. And that is a good start. Well, I will absolutely need, and this is a central line. So we'll go into the inputs and we're gonna change subdivisions width to two. There we go. That's a line straight down the middle. And now we can start adjusting the shape a little bit more. We've still got symmetry. I'm not really going to help us. So if I just go into face mode and select the face that, and then I'm just going to scale it on the height and move it up to get this pretty close. And I'm going to leave this bigger than is there because this is going to smooth out and they'll probably have the result of rounding that. So it makes it a bit smaller. So I think that's pretty close. And we can't really see it in the view of any of the images that I've created. But I do know that when I started in this exercise together, I also brought that edge vote a little bit. And this edge forward, not quite as much. And then if it is going to object mode, that's probably going to necessitate bringing that in a little bit. That, okay. So that's the beginnings of our shape. What we're going to need to do next is just work on creating the sort of leg sockets. So interface mode and click on that face there and it's going to be an extrusion. So control and 8. And we're going to want to put an officer on this. But if he can say is not doing enough so around the bottom. And that's because it's treating this all kinda has one face and we need to just change, Keep Faces Together to be off. And you can see now I get to borders. So that's pretty good that so I'm going to go for an offset of about three, 3.5. And then what I want to do is try and get this shape here to be fairly square. And that's going to help me out. So in order to do that, I'm going to go into edge mode. And I'm just going to scale it in on this axis here. And that's actually pretty square. I don't need to change anymore about that. What I'll do is go back into face mode. We're going to extrude again. And we're just going to go minus on the thickness like that, put it in a little bit and we'll probably a slight offset on it as well. That's just press 3 to see how that's looking. Yeah, that's pretty good. Press wanting him. Okay. The final thing I need to do now is just to work on the top. So I'm just going to bring this down a bit so I can see the top interface mode and the top two faces. I'm going to extrude an offset on. Yep. And I think what I'm gonna do with this is just scalar in on the axis a little bit. Yeah, I'll do. And then I'm going to extrude again. We're going to go minus. Not be upset if we're going to go minus on the thickness. Like that, we're going to add a slight offset to it. And again, I think I'm just going to try and round out a little bit by doing that. Let's press three. Okay, that's pretty nice. That's close to the shape that I want. So what I'll do now is just make one final change. I'm going to go into edge mode for this, just press number one to make sure I've got the right edges. I want that one there. So it's not the center one, it's just the two either side of it and it's just going to kind of flatten the bottom part of this out. I'll show you what I mean is if I press three again, kinda want to say this view here and put my move tool and I'm just going to move those down because it's just flattening that part out and acquire the way that looks. Okay, so what we need to do now is go back into object mode and put this in place and see if we need any further changes. So I'm happy with that. Not necessarily happy with the height anymore. So I need to think about that. Let's just deal with this and we'll just scale the whole thing up. And then I think it's likely to be this vertex here. I wanted to bring back lie that possibly this one here, just into there. That looks pretty darn nice. I think. Just making small changes to get it to match the concept, to make sure that I'm happy with the shape. Yeah, that's pretty good. So that will basically do it for that. Well, I'm going to deal with now is just add a very quick sphere. So it's going to drop this in here. And you see that on the image there is a sphere there that's doing that connection. So what I'll do is I'm just going to call this lower back. I'm going to drop the subdivisions down to eight by eight. That just means that I can smooth out later if I choose to. And I'm going to scale it up. Like so. It doesn't really matter if this intersect. That's kinda the point of it rarely like that. And then I'm just going to go back into, in fact, what I'll do is I'm just going to go into object mode. And I'm going to press three whilst that's selected. And then I can make any changes that I think I need to add shape. Same and this V on my goodness, definitely in this field. Like so. That was pretty nice and that should just make it a lot like that all joins up. So let's just yeah, that's pretty nice. That's going to wrap this step of them coming up next, we're going to need to take a look at the arm.
6. Model the Arm: Now we've got our torso, hips, and the head is time that we have a go at the arm. To do that. We're going to start with this or proportion, just hear and believe it or not, we're going to use a queue. We want this to be rounded like a cylinder, but to make the two pieces that connect, it's going to be much easier with a cube. So that's where I will start. So we'll have a new cube. And then I'm able Toulon, I'm going to put it roughly where I want it. And then I'm going to name this first of all. So it's going to be L underscore upper arm. And the L denotes that this is for the left arm and the right arm as we look at it. But the characters, It's their left. So that's how we're going to name it. Next, what we need to do is just get this scaled up. So we're going to scale back uniformly to about there. And then we're going to scale it that way. And we're only trying to aim between here and here, these bits that come off of what we're going to add. So that gets us started. What we need to do is go into inputs poly cube 4 and subdivisions height. We're going to change to three. And this is the magic part here that's going to allow us to have the two parts of the upper arm and the lower arm to have the kind of elbow joint. Now that we've got that, we just need to round this out. So let's go into this view here. We're going to go into edge mode. I'm going to get that and that, and that, and that. And so I've got the four corners as we looked at it that go into scale mode and we're just going to scale in on this axis here. And you'll see that that gives us a fairly round shape. And that's pretty much all we need to do. So what we'll do now is put this into object mode and we're going to duplicate it Control day, and we're just going to move it over. I'm going to name this to lower arm and we'll be using this later. By duplicating this, we know that they're going to meet or properly when we put them together. So I will just ignore the lower arm for now and just move that out of the way. And we're going to continue working on the operand. The first thing I'll concentrate on is getting this little area here model. So we're gonna go into face mode. And we can see that if I select these faces here, it's also going to slap them in the back, which I actually don't want now. So we need to turn off symmetry, go into the modeling toolkit and just turn off symmetry for this step. So I'm going to select the bottom face there and the top face. And we're going to go Control E to extrude. And then I'm just going to use the thickness to take it to about there. So in my case as a thickness of three, then the back, I need to select all of the faces. With those faces selected, I'm going to press Control a to do an extrude. And I need to get the offset right, so I can't go plus because that's going to turn it inside out. I need to go minus and I'm going to go, I'm following the blue line here. So let's just see where that needs to be. Looks like it's okay about minus 1.3 for me. So I'm happy with that now I'll do. And then I'm going to extrude again. And I'm just going to make the thickness. We're going to go in this direction like that and I'm going to go well into the shoulder. Then I'll press three to make sure the shape looks like I expect a dose. And you see that it's rounded out here, but at the back it's a bit peculiar. And the easiest way to solve that edges press Delete, and you'll see that all round the out. So this is now mostly don't we just got to find out where we want to decrease the edges. So I'm going to go into edge mode. I'm going to double-click this edge loop back, hold shift and double-click this edge loop. Those two. And now what we'll do is go into mesh tools. And when a crease those all the way we want to fairly hard edge there. And then those edges, that those edges are not one and that one thing, See that's going to go all the way around. I want to harden that as well. And then I'm pretty sure that that one and that one these here. So I'm pretty sure it's everything apart from just the ones at the edge. So I'm leaving those will harden that out. That's not bad about do we need to do some work on these? That's not exactly what I'm looking for. So we're going to just select those and we'll do the ones on the bottom and decide how rounded I want needs to be. In fact, I don't know if I do 12 around that, then we're just going to leave those hard. Yep. So that's good. That's the operand done. Now we just kind of need to repeat the process on the. Lower arm. So we're gonna go into face mode. We're just going to move along a little bit here. If I was going to object mode first, and we need to go, well I've got selected that, that's crazy. And do that. Just select this and we're going to move it basically into place, which is going to be there. And then we're going to get this face here. We'll extrude it Control a. And then we're going to add some thickness to it to get that to kind of meet up there. Now should do it. Oh, no, that won't do it. Don't do that. That's crazy. Just that one Control key. And then we'll add some thickness again, That's better. This is why we always check. So that's like a pretty good join that. I'm happy with that. And then I'm just going to grab these faces here, 1, 2, 3. I'm just going to move them along a little bit so that they're going to be inside the next piece of arm. And then I'm just going to delete that to keep it round. And then we'll press 3 to see how that's looking. Not bad, but clearly there's some creasing that needs to go up. So we're gonna go into edge mode and I'm pretty sure that one there, that on there. So all of these going around are going to want to be selected and creased. Okay, so I've got all four of those. Let's just get our creased tool back. And then we'll hard and not yet, That was pretty good. But that's making it clear that these here also want to be creased 123123, most creased those. Much better. 1, 2, 3, 4 increase those. Yep. And I do wonder, just creased this top and bottom here. That one and that one and see what that does or why. Yeah, Mikey pathway. So that actually creates kind of a rounded journey. Let me show you. So we'll pull this out. That's rounded on the top and bottom. I think I'm going to try and repeat that with the so let me just go into edge mode. And will often increase these ones, 1, 2, 3, 4. And then we're gonna go into our crease soldier, I'm just going to sludge from over here and increase Do I like that? And that'll increase it a little bit, but not all the way. And that's kind of nice. Okay, back into object mode, that loss, okay, And then we'll pop this back in place. That's basically the operand company or the upper portion of the arm. Now we need to go into this big heavy looking part here, which I think I'm going to use the cylinder four. So we'll go for a new cylinder. And then we're going to just bring this out here, scale it up a little bit so we can see what we're working with. And then we're going to call this L underscore lower two because there are two parts that make this up. I'm going to change the subdivisions axis to 0. Now, eight is what I want. And then going to rotate it by 90 degrees on the z-axis apparently. So we'll type 90 in there. And that is a pretty good start. So what I'll do now is get this into place. So it was pretty good there and I'm just going to scale it down a little bit. Because I'm just kinda lining this part up here. Then interface mode. And I'm going to select all these faces here. And then you can see that there's a bit where it flares out. So we'll move those phases to that, then will scale them up. Nice. Then we'll extrude those faces Control a will add a little bit of thickness to it to bring it to about there. And we will set the offset. And that you can say is pretty much created that part of the arm are happy enough with that. And I think I'll just end by creating a bit of a socket for the wrist to fit into. So with that same selection in place, I'm going to do Control a. I'm going to add a small offset, control E. Again, I'm going to go backwards on the thickness and add a small offset again. And then we'll just press 3 to see how that comes out. Pretty down nice. So what I can see now is that there are 10 smoothest are going to be a couple of changes I need to make. So I'm going to go into edge mode, double-click on this edge. And I'm going to scale it up. Yep, I'll double-click on this edge. And I'm going to scale it up. And I think I'm going to move it along. Something like that looks quite nice. Okay, so that creates that part of the arm. Back into object mode. For that this is starting to come together. We're going to need a rest, which is going to be a sphere. So quick step. We're going to plop that in place about that. I'm going to call it L underscore wrist. And then it's just the case Rarely of 0. Let's just knock this subdivisions down to eight by eight. And I'm going to rotate it so that the poles sticking out. So I'm going to rotate it 90 degrees on Z. And then I'm going to scale it into place. So I'm going to press three so I know how this looks when I actually smooth it. Thus, I'm just going to be a pretty good fit. How does it fit? They're not quite. So let's just make a couple of small changes. So it looks like it is fitting into that socket and that's not bad. Yeah, Now I'll do that. And now we just have the hand today, which believe it or not, we're going to start with a cube for that. So new cube. And what we will do with this cube is move it towards where the hand glyphs. And I'm going to have to make some use of my top view for this one. So what we're gonna do is just get this to about the right dimensions. Like we'll have to add a little bit of height to it that that's good. And what I think I'm going to do just to help me refine the shape is I'm going to add an edge loop at the edge, the tone note we multicore told. And if I hold Control and it should, let me choose where I want to put this edge. I'm going to put it about there. And then into vertex mode, what I want to do is just select these vertices here and this one to move them to that. It's just going to refine the shape a little there, make it look like it's a bit rounder. That's kinda nice. Okay. So that's going to be the bottom portion of the hand. Then what I'll do is create under the cube to represent kind of the thing is they're all going to be one piece and I think I'm gonna do it as two separate pieces as well. So we'll drop that into object mode. I'm going to get under the cube. Let's get roughly where it needs to be. I'm going to get it to about the size and shape that I want. Well, that's pretty nice. And then we're going to get the height and the thickness, correct as well. I'm going to have this not quite as tall because the point of this is that it's the next part of the hands. I want it to be a little bit smaller rarely. And then into vertex mode. I'm going to start these two vertices here. Are these all of the vertices on the end dayGreeting sake, I'm going to use my Scale Tool to just bring that in there. And I'll probably just use my move tool to bring that up a little bit like that. So that's that first part. And then what I'm gonna do is just make sure I'm naming these. So this is going to be L underscore, hand one. This one's going to be L underscore two. And then we're going to duplicate this. Move it to here. This is going to be L underscore. Thing is, I think. And then the shape of this needs to be refined. So we're going to go into vertex mode and do that. So let's bring this down to about here. Let's move this one up to about there. Okay, this bay, he is going to go there and this one's probably going to help me round out the most to about that. How does that look? No bad. I think what I'll do with the end of the fingers here is I'm just going to scale them down a bit to thinning out. That's pretty nice. Back into object mode. And then I'm going to use this bit just to give me something to work with for the thumb, which I'm gonna do two pieces as well. So let's duplicate this Control day. And we're just going to move it here for now so I can rename it L underscore thumb one. And then we need to do a bit of work with this to get it to do what we needed to do. So we're going to scale and change the height. And then we need to work with the vertices. Get these into place. So we'll put one there. And over here, That's not bad. And then we're going to follow the contours that we've got, the image. So it's going to give us our first piece of the thumb directions. And then I'm going to duplicate this one more time. So Object Mode Control date. Let's move this to here. And this is going to need a little bit more refinement in vertex mode, so that one's going to go there. This is going to go here. This little bad boy is going to go there. And the final is going to get that. And then if we look at it in this sort of Yale, That's not bad. That's pretty hand like He's just going to need a little bit of guidance with the smoothing now. So back into object mode and let's see what's needed to make this look like a sexy hand. So we'll press three unless, Okay. We're gonna go into edge mode. Select those and those, those, and those, you can probably work this out by yourself if you haven't already. I think you get the gist of S. So it's going to be into crease toe. And then decide how much you need to increase all of these edges to get the result that you desire. Let's go for that. That was pretty nice. I do want to crease the other abet. And then just these here. So 1, 2, 3, 4. Let us just creased those as well. So psyche is going into the hand on the bed. So I think that looks nice for that one. Onto this ROM, press 3, we already have our creased Toulon into edge mode. For this one is going to select all the edges, increase them up until they've got a bit of a bend on them, but not too much. Same for this one into edge mode. Press three, crease them all and then we'll just bring it about Canaletto back. And then probably these two I'll crease even less. That looks nice. Yep. And now I've just got two pieces of thumb today are pretty much the same thing that I've just done. So we'll press three into edge mode on them all, crease it and then dial it back a little bit. And then the same with this one into edge mode. Crease. Oh, it's not free. Say What's going on. Oh, I need to press straight. There we go. Crease, dial it back a little bit. And then for these two, at least we're going to dial it back a little bit more. And that's gonna give us our hand. Lovely. Okay, We're almost interrupt this step. We just need one more piece. And that's going to be the shoulder. Which what we'll do for that is we're just going to duplicate this bad boy here. So Control day. Let's get this into place and size doc. So we're going to move it to about there. And then we're just going to make sure that it looks right in this year, it should all be centered because we haven't really moved much of the grid. So let's big advocate it. Push it into the socket. How's that looking? I think it needs to be a bit bigger. We don't want to kind of overfill the socket. They look weird. That's not bad. It does suggest that we need to a little bit of work on the socket on the torso, which I will come back to. But for now, I think that looks pretty good. I think I just need to move that touch to line up there. I do think we can probably move about a parallel there. May be forward a little bit. Yeah, so actually what I'll do is I'll leave that as is for now. But as we finish, the arm will move altogether so they face in the sulci a little bit better. Okay, That does it then follow this. Our next will be the lag will be a little bit easier, I think, because we can reuse parts of the arm and we don't need to make as many pieces for the thought. So we should be pretty close to done after we've got the ligand, right. Let's move on.
7. Model the Leg: With the arm complete, we can now move on to the leg. And as I said, we can reuse some of the pieces that will speed this up a little bit. So let's just jump straight into it. We'll kind of start at the top of the leg and work our way down, I think. So we'll take this part here and duplicate it. So this is the shoulder oh, box. Before I do that, I need to just have a word in myself. I didn't rename this last time, so let's do that now. Okay. Is that the duplicate layer just renamed? No. So now we'll duplicate it. So it's still cold shoulder but that's fine because we'll rename it to What is this called? Okay. I think we'll call it L upper leg joint because it's not the upper leg and it's not the hips. So that's what we'll call if anybody knows anatomy, by all means hamlet has actually called. So what we'll do now is we'll just kind of rotate this around so that it's pointing where we would expect it to. And then make sure that it kind of fits in its socket. Which just not a bad fit to be fair. Yeah, that's not bad. We'll just move it in a little bit further. Yeah, How us okay. Nice one mostly matches up with the concept as well. So that'll be fine. That next what we'll do is take this part and this needs to be duplicated as well, so control and date, and then we'll move it down like so we'll rotate it. And I'm just going to name it upper leg. And then we need to put this bad boy in place. Yeah, it's pretty nice. And then if you've not already guessed, we're going to take this part, which is the lower arm. So let's duplicate that. Move it to where we want it. Rotate it 90 degrees. Make sure we name it. Why is that called low around three and there's something weird, so I need to go back and check my renamed. But we'll call this the lower leg like that. And then we'll get this in place. And I probably don't need to get in a little bit close here to make sure that that's lined up as well as it can be. In fact, what I'm going to do Is a translate X. I think I'm going to copy it. There we go. And then we can see that that lines up. So I just copied and pasted that intimate sure that it was fit perfectly. And there we go. So that's that part. And then we're going to take this part of the arm and we're going to fashion this into the leg B so that things got a little bit of detailing on, but that's not too difficult to add. So that's what comes next. So Control and D. And then we're going to move this here. We're going to rotate it by 90 degrees. We're going to call it lower leg. To hope for that naming won't mess up. And then we just need to make some changes to this. So let's put it roughly in place. That's pretty nice. And then we can see that it's a little bit too thick at the moment. So we'll make it smaller and then I'm just going to restore the height to it. And then we're gonna go into edge mode and get that edge loop there. And with my crease tall, just hard and that pretty much all the way. And then I need to get this kind of rotation on it here. So I'm gonna go into vertex mode for that and select the vertices. And then with my rotate tool, I'm just going to do that. And then you can see that it also is a little bit smaller, so I'm going to scale in as well. So that pretty much gives me the shape I want in there. Then I'm going to go back into edge mode here. And I'm going to move this up a little bit and you see that then the shape follows a bit better. And then back into vertex mode. Or set all of these at the bottom. I'm going to rotate those to match the shape again. And then maybe making it a bit wider. Yeah, that was okay. So that's the beginning of our leg shape. We now need to add this little bit of detailing, which I'm gonna call the shin pad. And I don't really know what it is. I just thought it looked nice. So let's do that. To do that, we're going to go into object mode for now. We'll press one. And it's going to be these four faces on the front that create as far as so into face mode 1, 2, 3, 4. Well then perform an extrusion on these controlled and a, and we're going to add a bit of an offset, not too much. And then we're going to extrude again. The thickness won't work this time because. It takes a funny directions that I don't want. So instead, I'm going to go to my move tool and just bring it forward by a bit. That's kinda nice like that. Okay, so that gets us what we want, but I don't want this detailing all the way around. It stands out a bit too much. So we're going to rejoin it down at the bottom. These here. So if we go into vertex mode, there we go. And I'm going to go to Mesh tools, and I'm going to target weld that vertex onto that one, that one onto that one, and that one onto that. And then that will help us detailing, look really smart. Let's press three to see what we've got so far. Maybe change at all. Okay, so that actually looks okay as it is, but I want that detail to stand out a little bit more. So we're gonna go into edge mode asset that you've got. I don't want that one there. I'll select those and that one and this one here, it lets me. So we'll get there. It was. And I want these here as well. We'll just crease them together because we want this similar side effects. So that's the selection we need. Let's get our crease toe. And then we're just going to increase this as far as we want it to. So I'm not going to crazy all the way up something that stands out too much. We'll go for something like that, I think. Yeah. And then that detail stands up fairly nicely. So once we get a kind of plastic, you're looking material on there that I'll look pretty good. And so that leaves us one more piece to create, which is going to be unique. We're not going to copy anything from up here this time. It's going to be the foot. So let's get a cube. And let's put it roughly in the right place. We'll call it L underscore thought. That's a good name for it. And then into our orthographic views to get it roughly sized up. So it needs to be a little bit wider than that and little bit taller. That's a good start. Has it look in this view? Not bad, but I think we need to bring it forward a bit and just make it a bit longer. Okay, that works pretty well. But to add extra detail, what we're going to need is some extra edge loops. So holding Control and I'm going to hold shift as well. That's snaps where these can go and it means I can get one in the center. I'm going to put one. In fact, I probably want one there. And then on this one here, I will want one that is in the center there. And that's going to help me to produce this shape, hopefully. So now I'm going to go into vertex mode and get these vertices here and bring them down. This one here needs to come down a little bit. This one here also could deal with coming down, but not too much. That's OK there. And now we can see here we've got some changes that need to be made. So that's going to come down, that middle one can stay there and this one's going to come up and move in a little bit. Yeah, that looks not too bad. Let's press 3. Now that's what we need to create some edges now to get this to sort of hold its shape, I'm just going to move that up a little bit. And then these two together, I'll just bring forward a touch. Maybe these two here, I'll bring back just a tiny bit like that. So now I'm going to go into edge mode and we're gonna do the ones all the way around the front, around the top router. So we'll get those. I'm going to press number 3 to see what my creasing is going to do. Go to Mesh tools, crease tall, and then not quite crease all the way. That's pretty good. And then I'm going to repeat that on the bottom because I need the Muslim to be flat. So we're gonna get all of those and I probably want these as well to try and get it as flat as possible. The more creased that all the way. Yeah, that looks good. That is our thought. I think I think what I'll do is just bring that one there. In fact, I'm just gonna have to move the whole shakedown to do this. I want to round the top off a little bit more. So I'm going to get that edge and that edge there NGOs bring those up ever so slightly. And then make sure that the overlap isn't too much between the hot and the lower leg. Yeah, That's pretty nice. So let's just go into vertex mode now and make any final changes. So I don't want it to be too tall. I think this vertex here and come back a bit is causing the shin up to look my favorite. Yeah, that'll do it right. Back into object mode. We will leave all of the smoothing on fanout. Okay, That does it for most of the tricky tomato pieces. In the next step, what we'll do is the finishing touches, so we'll smooth things. We will mirror them over, we'll add the antenna, get everything generally ready to go for UV mapping and texturing. So I'll see you in the next part.
8. Mirror Geometry and Finishing Touches: This step is all about getting the modelling finished. And I think we'll start with getting a little antenna on the head of our little champ. That's going to be nice and straightforward. We're going to start with a cylinder. So I'll just create a new cylinder. And then let's move this up. So I want to jump the subdivisions on the axis. We're going to knock down to about 16. She'd been, I still want this to look quiet round. There it is. And now what we need to do is get this positioned. Sorry, my top view, you know, graphite is pulled into wireframe. I can see that I had that position that about that and it looks like I had it slightly wider as well. Only slightly. Okay. And then in this view here it goes, I come quite close actually. And we need to just get that positioned about there, I believe. And then you can see here that that's still a both the mesh. So it's going to have to go down slightly more light bat to make sure that it intersects. Then what we're gonna do is we're going to name this antenna and we'll make our changes. So the first thing we need to do is go into face mode and we're going to select all the faces on the top, like so. And then we're going to extrude them at a slight offset like that. That looks good. And then we'll extrude again. And we'll add a bit of thickness just to bring it up a bit and then one next to it again. Well add another offset. This is going to be slightly mocks, is going to be the thickness of the antenna itself. And then we'll extrude again. This is going to give us the height. So we're going to need to look at this view is time. So that's raised that thickness to about that. And that's good. Make sure that we can say the top of this. We'll extrude again. And we're going to add thickness again like that. And then we're going to select this face. I'm holding Shift, double-click on the next one to get the whole edge loop. Well extrude amlodipine if thickness to that and that's just going to add that bit of detail to the top. Okay, Last thing I'm telling them pretty darn good, but will do nicely. Next, what we need to do is attach the head to the toss. So we're going to create a little neck for that. And that's actually just going to be two metallic looking cylinders. We're going to let the audience imagine how exactly the head is attached and how it moves around. We're gonna keep it simple. So we'll start with a nova cylinder. And I'm going to put the subdivisions on the axis to 16. Again, it seems a nice number, but my move tool on. And then we need to just get this in place. So in this view now, I wanted to do is just turn on the grid because I want to know I'm going to tip it's off center, but I want to take it too far off center. So let's just make this slightly taller. It needs to intersect the torso and the head. I'll do. And then we're going to move it off to the side just slightly. And then I'm going to duplicate that. In fact, I'll name it first. We'll call it neck one cell. That was a good catch. Duplicate it, move it over. And I just want this one to be slightly thinner for no real reason just to add a bit of visual variety. So let's scale that up as well. So those are going to be our two neck pieces. That'll do nicely. Those are the last things that we need to model then we need to do is just the finishing touches to get this ready to be mirrored. And the first thing I want to do for that is to just reposition the arm is not quite in the socket as I would like you to bake. So I'm going to select all pieces of the arm like that. And then we need to get this position. So if we have a look in this view here, we can say here's the socket and it's just kill the grid again. Here's the socket, and this is just not sitting within the socket, so we'll just move that up a little bit. That looks pretty good. So that should now be sitting within the socket. And I think we already see in this view now taught. This view here shows the knees come forward a bit as well. So bringing it forward just so that it's sitting a bit more central within that socket. Yeah, that will do it. So I'm not happy with the position of that. Next thing I want to change is I want a bit of overlap in these handpieces, so there's not a gap between them. And then again, the audience, whoever is look at it. We'll just assume that these are somehow joined. A modulation do the hard work so we don't have to. So I'm just joined in these up, just get the edge overlap of a sweet, Beautiful, Okay, we've got that. And then finally, I just want to make sure that I'm happy with the naming of the arm because we've got L underscore lower arm. And then for some reason L underscore lower arm to which I don't like us really uneven. So I'm going to add a one to this. So the naming is a bit more consistent. Right now that we've made those finishing touches. The next thing we need to do is to smooth out with geometry, because at the moment it isn't. So if I show you what I mean, I'll select everything and press 1. This is how our geometry actually looks. And if we were to import this into Unreal Engine now, even with the smooth preview on, this is how it would come through. So we need to make these changes. So we'll start with the head them. Just switch into my large perspective view for this. Okay? What we're gonna do is go to mash and smooth. And you can see that it smooths it. And it tells us that we've done this once. We have subdivided by one, and it's still two squares. So if we now just click and drag on that to two, that is much more like the shape that we had in mind. But for this one, specifically, because I want the head to look smooth, I'm actually going to take you up to three. This is the only piece I'm going to do this with, but I do want that. So there we go. That's the head done. Well, we'll do the torso next. So there's the torso selected. And instead of going into them and you, I'm just going to click on this icon here for smooth click on that. And this one's just going to get two divisions. There we go. Okay, this piece here just needs one, as does this PC x. These are already fairly smooth, so just give them one each. And then everything else along the arm kinda need to so smooth it and then give it two divisions. This one here will smooth it and give it two divisions. Yeah, that's pretty nice. This piece here, smooth it two divisions, and then all the hand pieces need the same. So let's move to divisions. Otherwise we don't get the shape that we want, especially this overlap and the rounding out just won't come through on the hands. So we'll get all of these. Okay. That's the arm. Don't let us do they what do they call it? The hips. So smooth that will give it two divisions. This socket here of the joint that goes into the socket just needs one. This is going to have to, this is going to have to this is definitely going to have to. And the foot will have to as well, just to keep it fairly simple. And then just this little bit here allows that to move around. We're going to add one division to that. Okay? So now all the smoothing is done. I think I'm gonna make one more change. I think the neck looks a little bit too much. So to remedy that, I'm just going to move the head down slightly making it look a bit stone pier. Yeah, that's pretty good. Okay. What we need to do now then get this left arm and left leg to duplicate over onto the right-hand side. There are multiple ways that we can do this, but I'm gonna do it in the way that I prefer. So I'm going to select all pieces of the arm there. I'm also going to hold shift and select all the pieces of the leg. And these have all been different pivot points. I need them to have one pivot point that is exactly on the center of the grid. So to do that, I'm just going to group them like so. And you see they're all selected now. But more importantly, if you go into this center view here, they all share a common pivot point, which is bang on the center of the grid. And this is another reason that when we've been modeling, we've only used the image as a rough guide because we want it to be able to marry this later. So we've made sure that the model is on the center line. I haven't worry too much about the image that's just been there to guide us. So now that we've got that selected them, what we will do is go to edit, duplicate, special, and we'll click on the little settings box. Let's move this over here so you can see the effect. When we do this, we want to copy. We are going to grip on the parent and then yours will probably be set to this. So 1, 1, 1. And we want the scale on x to be minus one, like so. And that's it. When you click on Apply, it'll duplicate everything over and you're all good. And what's also good about this is that now what we can do, let's just turn that grid off. Certainly get too distracting. It's just rename my thing. So it's kept the exact name. So you can say this here is called the L underscore shoulder. This here is also called L underscore shoulder, which actually until today I didn't think my I would let you do. I think it's because they're grouped, that it's allowing them to have the same name. And that helps us with renaming. So what we'll do is we'll select everything. On this side, not I had them. So we've got all pieces of the arm. So how does such that the group now it's up to the individual pieces. And then we'll do that with the leg. Yep. And we're just going to rename these all in one. Go to do that. We're going to go into modify. And then we'll click on that, what we click on search and replace names. So I'll click on that and delete these so you can see I'm putting in, so we didn't name these very specificly. Everything starts with an L underscore. It wasn't L space. It was Ellen disco. And that's because if we just replace the L, Then we place all the else. So we need something a bit more unique than that, which is going to be L underscore. So whenever it sees L on the scope is going to replace it with R on the scar like that. And then we can just click on Replace. And now if we click on any of these, we've got our underscore shoulder underscore off her arm on the scholar around one as to, uh, like peace on the skull level, like to. So it's now all perfectly renamed as well. Isn't that grand? So we'll just do now a couple more finishing touches before we can wrap up this step. So the first thing I wanna do is just get all those pieces we just put into groups out of their groups. So for that, we're going to go to windows outliner. You can see here are our groups. So we'll click on the name of the group and then we'll go to Edit group. And they are now no longer groups. And we'll do the same for Group 2 at it on the group. And now everything is all back as separate pieces. And now what we're going to do is just delete the history and freeze the transformations, which is good practice on anything that your model rarely. So it's like all of the different pieces of mesh. We're gonna do, modify, freeze transformations. And I will just check that that worked and everything. Everything should be zeroed out or have one on the scale. Yeah, That's all worked. And then we're going to do Edit, delete all by type, history. And we'll know the last work because underneath This section here now, there'll be nothing listed, which there isn't. So I'm just going to disappear the outliner. And that is the modelling. Don't we have completed Chapter 1. In Chapter 2, we'll be looking at getting some basic materials are misguided as well as a bit of UV mapping on the head so that we can texture the eyes on there. So I look forward to seeing you for Chapter 10.
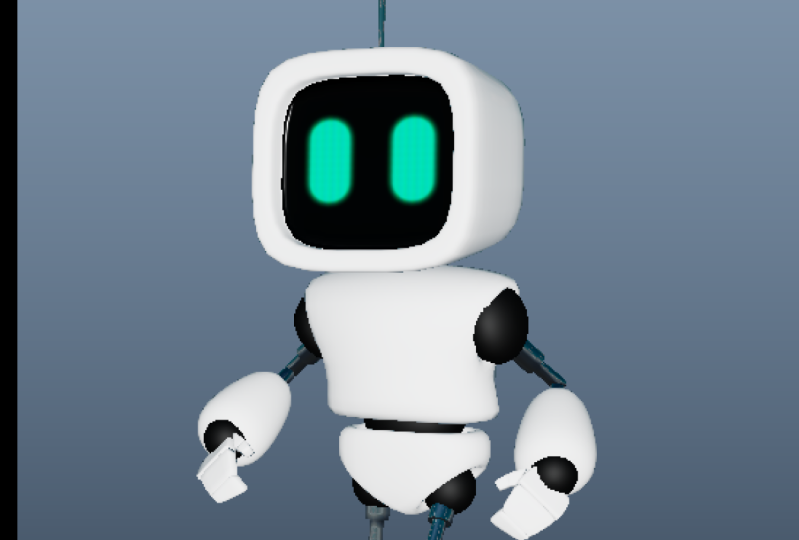
9. Create Materials: Now it's time to start thinking about putting some materials on our little robot character. This stage, there are only really placeholders. And we use them to create the material slots that will need when we get him into a male and jump. But it also makes it easier to work with because we know what it will look like when he gets into engine. So we'll start with creating some fairly basic materials in this step. But the first thing I'm gonna do is just make my workspace a little easier to view by getting rid of these image planes. They serve that purpose now. So I'm going to click on Show. And I can now just click here for image planes or you can say I compress ultimate form as well to get rid of them. Now, I'm going to need is my Hypershade. So let's open that up. And I just wanted to make sure that I can see the stingray PBS is available in my Hypershade menu. If it's not, you need to load the plugin. Google how to do that? Or drop a comment below the video. If you're not sure how to do that, there you go. I can see that stingrays there for me, so that's no problem. I'm also just going to add a viewport to my hybrid shade so that I can see what I'm doing. So we'll go to window viewport. So interesting. And I want to draw this just here. Where the Create go. There we go. So now I'll just make that viewport a little bit bigger. And I'm going to press six so that I can see when I apply my materials. The first material will create is going to be a glossy white plastic, something that looks very apple from the early 2000s. So we'll create a new stingray PBS for that. I'm going to name all of these. So we're going to call this m underscore white. The M denotes that this is a material. And then we just create what we want here. So I want it to be white. So we'll drag that slider all the way across and I want it to be glossy so we're going to drop the roughness all the way down. And that's basically it. That's all we need to do that. And then we can apply that to all the elements of our model that need the glossy plastic. So I'm just going to drag and drop it with my middle mouse button Onto the parts of the model that I intend to have this material. And for the hands to save myself a job. I'm just going to select all the pieces like that. And we'll just right-click and do Assign Material to Selection. And same on this side. Assign Material distillation. And for the head, even though I don't want the glossy material on the screen, I'm just gonna drop it on everything for now. And then will overwrite the screen later when we create that, That's the first material created and apply them. The next one we want is the metallic looking one. So let's clear, our work area will create a new stingray. I'm going to call this one. And underscore Chrome, which is just going to be a nice shiny metal horrors. So our base color wants to be a shade of gray, but I might change that. The metallic we're going to change to one. You see that makes a big difference straight away. And the roughness is going to come down because we want this to be really shiny. Something like that looks nice. And then you can experiment with the different base colors. I want it to be quite a light color, so we'll try that. And then as I did before, I need to apply this to the parts of the model that needs it. So these two here, also, those these parts of the leg and these here. And finally, I think we just need them on the antenna. Okay, That's coming together. Just realize that because this is a new viewport is show me the image plane. So I'm going to turn those off because I don't need them in this view either. Then we go. And the last material I will need is going to be like a black sort of rubbery kind of material. So we'll clear our workspace again. We're going to have another stingray. We're going to call it M underscore robot. There we go. So this one's going to be black and I'm just going to take it slightly so that it's not perfectly black. And then the roughness needs to be a bit higher. I'm zero-zero point seven. Pretty nice. I might actually just bring the color down a torch. Yeah. And then we just need to assign this to the remaining pieces. So it's mostly going to be these joining pieces. Then just get is the ultimate. And we're going to assign material to selection. There we go. So now let's just minimize our Hypershade for a second and see if we're happy with them. So you can say, I'm not seeing any materials here yet. And that's because I still have the shaded view on which is this one here, smooth shadow, well, I really need is the textured view. So you can click on the icon there or just press six on the keyboard. And that'll bring up losing. See we've got our metallic areas, we've got the white glossy areas, and we've got the black rubber looking areas. So that will do it for this step. Then in the next one, we're going to work on the face. And for that we're going to need to bring in a texture, do some simple UV mapping, creating the material, and then apply it to those faces. So let's move on to that.
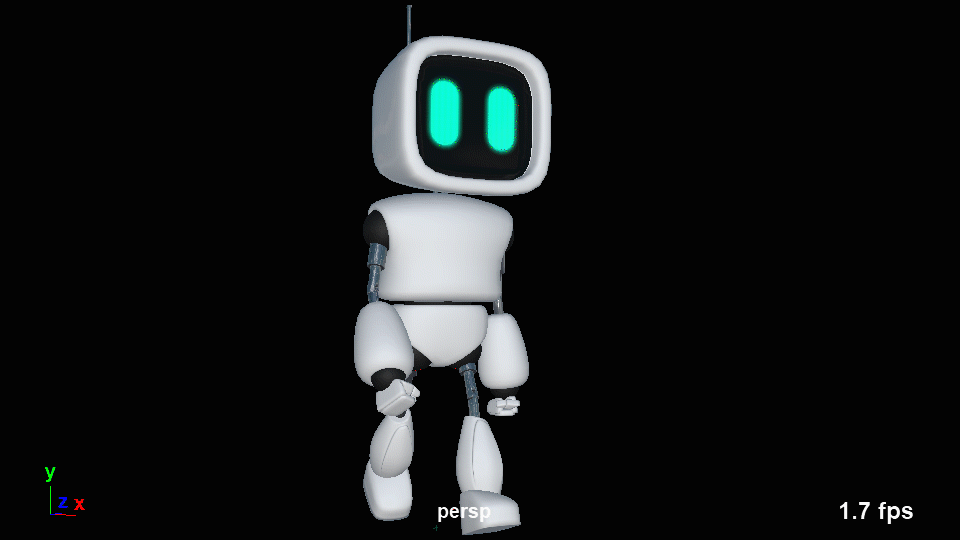
10. Create Face Material Using Textures: Now what we're gonna do is create the material that we're going to put on the screen or the face of this character. And this is actually quite important for the character because he's quite a simple character. The only way we can give them any kind of personality or emotion is going to be through what we put on there. And it's just gonna be cute eyes for now, but we could do more with this going forward. So the first thing we need to do is make sure that we've got the textures. So I've got here head texture and I've got the Photoshop file that I use to create it as well. What I'm gonna do is put those in the appropriate folder. So I'm just going to cut where they are. This is the project folder that I'm sharing with you. So you'll be able to find these in the source images folder. Sago, we've got the front side top image that we used right at the beginning. And now I'm going to paste into here the head texture. And yet I know that's moved. So there we go ahead texture. And these are, these are the eyes that we're going to use. So make sure that you get the textures from the link in the description or that you create your own so that you're ready for this next step. Back into Maya them. And we're gonna go back into our Hypershade heavy. It is clear the workspace. And in fact, before we create the material, we're going to UV map the head. So let's go into face mode. And really all we need to do is select all the faces that may cop the screen. And the easiest way to do that is just select the ones in the middle and then press Shift and full stop to do a greater than selection. And you can see that then goes exactly where you need it to be. So I'm just going to see how far Yes. I'm just going to bring that back ones with a less than so that's pretty much all the faces that make up the face or the screen. Okay, so now I'm gonna do a UV projection. So just quickly I'm going to go into my UV Editing Workspace. And that's because it will show me this here. And I need to just make sure that I've got this, these faces that just take up the 0 to one space. So we're gonna go to UV and we're going to do a planar projection. And it looks like it's going to be on the zed axis because that's the axis that looks like it's cutting through the face. So we'll click on project. And there we go. That's now created a projection of the face. If we only select those faces, that will be perfect. So that's the head UV map that was nice and straightforward back into object mode. And then I'm gonna go back to my modelling standard view on this brings my Hypershade back for me, which is what I wanted. So what we'll do now is create a new stingray PBS. We'll call this m underscore screen. Rename that. And this time we need to use a color map. And that's going to be our texture. So we'll get that first of all. So there's column out when need to scroll down. Here's where we can apply the texture. So we'll click on this little checker box here. This takes us through to file for is why it's called here. And I can click on this folder next to image name and choose head textured up PNG There it is, open. And that creates the material. And now I want to do is just make sure that I'm happy with the other properties for it, such as change this from sphere to plane. Okay, So then what we'll do is click back on here. And I'm just going to have a look at the roughness of this. I don't want it to be very refined. It to look kind of like he's got a shiny glass screen. So we'll go for something like that. And we're going to leave it here for now, but I think we will come back to this material in a second. So what we need to do now is go back into face mode. And luckily for me that face selection still there. But if it's not remember, you can just get the 1234 phases that make up the middle and then do a shift and full stop to get a greater than selection to make sure you get all of those. And then with our m underscore screen material, we can right-click and Assign Material to Selection. And that will give him is fabulous little face low, yeah, that guy go. So I'll just minimize the Hypershade for a sec. Have a look at him in all his glory. Not bad. And this is where we're gonna get to this final change. So we want this to look like a screen, but the eyes are quite dim and screens emit their own light. So we want our screen material to mimic that same effect. So we'll go back into Hypershade them. Make sure that we've got our m underscore screen selected. And we're also going to use an emissive map. So I'll tick that box there. We're going to connect to the same texture to that emissive map. So head texture. And already this looks a little bit. Gloria will click back on here again. And then what we're going to look for is emissive intensity. And now we can use this slider. And you should build, see that happening as we make the slide ago. All. It makes the eyes look brighter and it goes to one. But I think you can type higher numbers in there. They go for you. What make it ten? They can seem really bright. I think that's overkill has got something like two. So go between 0 and 2. Yeah, until it looks quite nice. So again, this is just a preview purposes rarely, and we're going to rebuild this material when we get to our meal engine. But for now we want to know how he's going to lock has randomly in him. So this gives us a good impression of that. Okay, so we can close the Hypershade now. So this is our little chap with his materials are, we've completed another chapter. Well-done you. So moving forward in the next chapter and the next few steps, we're going to be rigging Misko, which means giving them a skeleton and then assigning the different parts of the mesh to the skeleton, making sure that that skeleton has controllers and that he's ready to animate. So I look forward to seeing you for more fun.
11. Rigging 1: Add a Skeleton: So here we are in Chapter 3 then. And this chapter is going to be all about getting our character ready to animate with moving forward. So we're going to be rigging him. And before we can move on though, there are a couple of housekeeping things that I should have during the last step, but I forgot to, so we'll get those sorted now. The first of these is the fact that I didn't put a material on these two parts of his neck. So I'm just going to select both of those. Will just go into the Hypershade quickly, find my chrome material and Assign Material to Selection like that. And then that will have this metallic material on. Next, we want to just move our character up so that he's standing on the grid. And to do that, I'm just going to select everything, but I'm just going to de-select is fought and re-select the four. And that will just put this controller down at the bottom. And then we're gonna move into one of these views. And again, a bit of housekeeping. Let's just turn off the image planes like that. And we'll need to turn on the grid for a minute just so that I can line this up. So it's about getting his feet onto this thicker black line here. And it doesn't have to be perfect, but it does have to be close. That I'll do there. So then we can just turn these grids backoff because they just look ugly on video. And one final thing I want to do, and this is just a prep stage for later. That's to get all these parts of his body, all the geometry. And we're going to put this into its own layer. And that will mean that we can make that layer reference later so that we don't accidentally selected for now we're just going to put it into the layer. So with everything selected, we'll click on Layers. And then we're going to go to create layer from selected. And that will put this if I just toggle the VA, everything that I had selected is in that layer, we will rename the layer to GEO, which is short for geometry. And save it. Okay, now we're ready to start rigging. So first of all, I can deselect everything and I need to change my menu set from modelling to rigging. And we get some new options up here. And the one that we want to open, first of all, if we go to skeleton, it is the Human IK option. We click on that and it opens it up. And then we get some tools here that we can use. What we need to do is just click on the first bottom, which will create a skeleton for us. There it is. And you can see that because of the way that we muddled our character, the scale isn't too far off. But you can see that it's not perfect because he's got arms coming out of his head, which is not how most people work. So we need to solve our scalar and we also want to make it so that we can just see the rest of the skeleton. And in the viewport there was an option for that, this little chap here which is called X-ray joints or you can also get it from, I think it's in shadow now in lighting know in Shading, X-Ray Joints. I'm just going to click it here and then it will always show the joints on top. And so before we just start to get this scale correct, Let's name this character so that we know what we're working with. So on this little drop-down here, you can click on Rename character and give it a name. I'm gonna call it Rob for abrupt the robot. I know that's a little bit cliche, but I'm not feeling creative today. There we go. Right now we need to just scale it down. Now there are different ways of doing this. You can just change the character scale in here. So if we go to something like 0.8 and that will scale it down. But then you see that sets it back to one and it's a bit finicky, so I'm just going to undo that. And the way that I like to do it is there's this little controller here. If you've slept on that. So just a little cross between the legs. And you can use that to you, make sure that the scale tool is available to you. And for now what I'm gonna do is just switch to the front view. Because what I'm most interested in getting this hips controller in the center of the hips about there. So whether or not the arms line up all the heads not important for now, we're just getting the hips in place and everything else will flow out from there. Okay, So that's pretty good. Now what we'll do, we'll leave the legs for now. We're going to work our way up the spine. But you can see there's only 1 at which the spine can bend because of the way we've constructed the robot, which means there are too many spine joints. So what we can do is here in our settings, we can just take the spine joints down to one. And you'll see that will alter the way that our rig looks a little bit. But it also means it's a little bit more accurate as well. So now we can just move up to the next joint, which will be called something like spine or spine one, I forget what it is. The name is not important for now. We're going to move that up to here, which is the point at which you can see will look like the little robot can articulate. So that's where we're going to place that. Next we're going to work on the arm. And you can see that I'm working on this some specifically, I'm never going to do anything on this side of the character. We just work on this side and then we can mirror it. So this little area here is essentially the clavicle and we're gonna put that up to about there. And then this one here is going to be where the shoulder rotates from. I'm just going to place that about there. Yet, which makes sense. It's pretty much the center of this little shoulder joint we created earlier. Then we need to put the elbow in place. So that's going to be pretty much in the center of that join we created. And then finally we need to move to this joint, this joint here. And this is going to be where the hand pretty much connecting. So this is the bit where it needs to bend from, if I'm probably gonna put it about there so that the range of movements not too high. And you can see that I was moving this across and now just moved that RMP. Stan, I need to check that that hasn't broken the definition. So what I'll do is just move over to this tab here. Everything here is green. It says characterization is valid. As long as everything's green, any changes that you make, you're okay. If they ever go orange, then you've done something wrong. You need to redo it and you'll have noticed that so far, the way that I've moved all of these joints around is that I've moved them. I've used the Move tool. If however, I use the rotate tool, so I've moved that one down, but if I've done it by rotating, you see that these have now gone orange, which means bad, bad, bad. So undo that, makes sure that all stays good. Now just be flipping back and forth between these two tabs to make sure I'm not doing anything silly. But that there is going to do it for this part of the arm. What I need to do now is just check how it looks in the top. And we can see the answer to that is not great. So we're going to select these again. And I'm probably just going to press F5 on this and turn on X-ray Joints just to make it a bit easier for me to work with. So we'll bring the arm forward at the shoulder. And then everything else should line up because it's a hierarchical structure. Which means that when you do something at the top of the chain, everything below that follows it. The rest. I'm just about happy with. I'll leave that there. Next. We need to do the fingers. And again, we might need to make a change to the big because I think we've got too many joints in their fingers for the amount of joints we've got in the hand that we modeled. So I'm going to take the number of bones down to two. And you'll see that reflected in the hand. And I'm also going to just keep the thumb and the middle finger. You can see that there aren't individual fingers in there, so it's just like a mitten. So we only need one finger to control it. So we'll take off the index, the ring, and the pinky. And that is all by hand we need. And then it's just about putting things in place. So it's where bends should happen rarely. So I'm going to straighten this up and then move that to where the bend should be. Same with this one. And then this one here is just going to go right out to the end of the finger. Or close enough, I'm overlapping it a bit because there's a bit of a slant to it. And then we're gonna do something similar with the thumb. So that's going to bend about there. This one here is going to go about here. And this one's going to go out to the end of the finger or thumb. And then what we need to do is for the thumb, especially let's go into the 3D view to check this. Because you can see the thumb actually has a bit of the heights of the finger stays flat, but the thumb drops down a little bit. And a lot of people are modeled their characters in a way that, that makes sense. I tend not to. So we'll get that part of the thumb will just bring it up to about the middle. Get the next joint, move that up a bit and then the end of the fingers should be fine. Okay. I think I'm happy with the arm. Next I'll do the leg. So I'm going to move into the front view for this, you'll see I'll be changing my view is fairly regularly for this to choose the one that makes the most sense. And then we're going to put this here. And it's not ever so important that this is in the center of the circle, that the sphere, this is actually more of an optical illusion. It makes more sense to have it where we want the leg to swing from. And I'm gonna put it about there, try and get it as central as possible. It looks good. And then we're gonna get the name which is currently to load out. So we're going to drop that in place there. And then I'm probably going to change to the side view and out to check where the foot should they? So yes, for the knee is fine. The ankle joint them is going to come down. And again, this needs to be where you want it to articulate. So for me I think I want it to articulate about there. And then this part, I always used to think that it went right to the front of the foot, but he doesn't. It goes to the ball of the foot, which is about there in this case. Perfect. And so there's only one more thing that we need to look at, and that's the head and the neck as well, I suppose. So this is a neck joint. We're going to move that up and I think it's about there, but we need to check the side view for this as well. And yeah, that's pretty spot on. So remember that the way that their neck bend is just an illusion really, nothing actually bends. And then this bit here is the head. And this usually goes to the top of their head. So I'm gonna go fairly central and up towards the top. Okay, So that is now all the bones in place. What we need to do now is have them mirror over. So this sides good, This side not so good. So what we'll do is just click on this little icon here. And as long as we have this Rob character selected, it shouldn't matter what selection we have here. Some people think you need to select the bones that you want to mirror being. Say I've got this top of his head selected. If I just click on this icon book. There we go. He's now all mirror it. And that's all we need to do in this step really. We've got the skeleton created, we've created a character definition. We call them rob. We've put all the joints in the right place and we've mirrored them over. So in the next step, we're going to be creating a control rig for the skeleton and also connecting the geometry to the skeleton so that when we move the skeleton, that will drive the movement of the character. So I will see you in the next step.
12. Rigging 2: Add Control Rig: Now that we've created and got the skeleton that we want, our final step on the rigging chapter is going to be to get this control rig in place and to make sure that the geometry follows a skeleton, right? So what we have so far is a skeleton, and if we select any of these joints, we can use the Rotate to controller and that will move it. And you could animate this way if you wanted to. But my ear is much more powerful than that and it has some really cool tools that you can use. The way that we want to access this. First of all, is if we just go to definition and then we've got some additional controls across the top. And there's this one here, which is create control rig. If we click on that, you'll see that the skeleton starts to look a little bit different. And we've got lots of these extra controls here. And this is what we want. So now instead of having to rotate, I can grab this circle here, put my move tool, and then just move that hand around and see at the moment we haven't attached the geometry to it. But the skeleton is now moving in what's called inverse kinematics, which means that it is doing the mass. If I move the hand, it'll calculate what these happen with all the other joints to get that hand over there. The same applies with the hips like that, and also with things like the shoulders. So that's brilliant. We've also got the fact that the skeleton still there. And you'll see that with my move tool, this did really doesn't want to move, but with my rotate tool, it does. And that's because it gives us the ability to animate with both forward kinematics, which is when you rotate each bone individually. And inverse kinematics where you slept controller and you can just kinda move it around. So that's brilliant, isn't it? I'm a big, big fan of that. So now that we've got that, there are a few things about it we can change. So at the moment we've got this selected, which is full buddy. And you see that if I move this, the whole thing goes. We can change this here. And instead of full body, it will just move the arm, which can be better for making sure that you don't completely lose control. And then there is this one, which is just for the selection. But in this case you can't do anything with it that would only work on forward kinematics really. And you can also change, so I'm just gonna put that back. You can also change the look of these control. So if we go into this little blue drop-down menu here and to edit controller week, there's a rig. Look. At the moment we're on wire. But if you want box instead, so you want this to be a little bit easier to see, you can change that. And there is also the option to have stick, which looks like that. And this is down to personal preference. My preference is the wire because that's the one I'm used to. But you can choose whichever one you're most comfortable with. They just look different and they all work the same. Okay, then now that we have setup this control rig for our skeleton, we need to make it so that geometry is going to follow that skeleton. So here's what we'll do for that. We need to just turn off the forward kinematics and the inverse kinetic. So this is the two types of control that might just creates a force. And we're going to click on this icon here, which turns back on the original skeleton. And this is what we're going to make sure all the geometry follows. And I'll try and demonstrate this as clearly as I can. So what we need to do, first of all, a select a piece of geometry and we're going to start with the hips. And then we need to select the piece of the skeleton that we want that geometry to follow when it moves. And I'm just going to turn off the move tool for this. So I've got that and I want this to follow this joint here. So I'm going to shift select the hips. And because this is in a hierarchy, you'll see it selects the whole rig, but that's not a problem. And then what we need to do is parent the geometry to the rake. So select it in that order was important geometry, then joint. And then you can go to Edit and parent. Or I'll show you on the next joint. So this one here, I'm also going to parent to the same joint, so Shift select. And this time I'm just going to press P on my keyboard. And now if I was to move this skeleton, you would see that although this house cut and doesn't go with it. But you would see that when I move that joint that goes with it, which is good. Next up we're going to slip the torso and that's going to follow this joint. So then we'll press P. Lovely. The next piece of geometry that I'm interested in is this one here. And I'm going to have this follow the clavicle. It's just let that properly and then press pay. Now we'll start moving down the arm. So this operand is going to follow this shoulder joint. So I'll press P. And you'll notice though, if I want to select the bone, I can go like this. And that will only select the bone because there's a order of priority in which my will let you select things. So if I want to select the juncture and click on it, but if I want to select the bone, I can click and drag and that can make selecting things that I want now really easy. So if I click on this part of the geometry here and then just hold shift and drag. I can select the bone and breast p. Same for this piece of geometry. Shift and drag to get selection and press P. So both of these lower arm sections have gone on the lower. Part of that. I'm also going to have this parented to that same bone. And then for the hand is going to be which bits I want to follow walk. So let's just press while I'm pressing F. And then we'll sort that piece of geometry and this and this joint to move till off again, pay this piece of geometry. This joint, pay this piece of geometry and this joint, this piece of geometry and this joint p, this piece of geometry on this joint and P. Okay, and at this stage, I'm just going to test a few things out. So let's just turn back on the controllers here. So we'll get that, that, and we'll move the arm and make sure that things are following as I would expect it to. And that looks pretty good. And then we'll just let this hips controller and moving up and down. Yeah. And then all the torso and the arms go on with it so far. So now we'll just turn that back off and we can keep going. So next up, we're going to have this piece of geometry here. Now, as I said earlier, we don't really want this to move. The reason that it's a black material that you can't really see any detail on, is that audience, the player will just assume that it's moving, so we'll select that and we're actually going to parent it to that joint there. Just tell my move tool off again. This upper leg part is going to be parented to the upper leg joint. The first lower leg part is going to go to the lower leg joint. And then the second lower leg part is going on the lower leg joint as well. And finally, the foot is gonna go on the foot joint p. And the final thing to do now is just get the head attached and the neck as well. Don't forget the neck like we did earlier with the material. So I'm going to select that bit there. And that's going to be parented to this joint here. Okay. Same for this. And apparently it's at that joint there. For the head slap the head shift, select this joint in the head, press pay. And then for the aerial or the antenna, I'm going to select that and actually just parent that to the rest of the head. Okay? Now what I'm gonna do is I've just done one side. What I'll do now is just fast-forward me doing the other side so you can see what I'm doing, but it's going to be identical to wider than this side. There's just no way of mirroring this. We have to do this the old school way. So here we go. Okay. I think I'm done them. And the reason I say I think I'm done is it's really easy to just miss something or to parent something that you didn't mean to do the wrong thing, etc. So now we need to test, so we'll turn that skeleton off. We're going to turn back on these controllers here and we just need to test them out. So I'll grab these hips, get our Move controller, and we'll just try and move them around. That looks good. And everything is moving as I would expect it to. Let's grab a leg and move that around. Okay. That's actually the foot controller one or this one. Yet none of us okay. And everything is kind of doing. Ik was expected to just check the other leg. Looking good. Check on yep. Check the other arm. Yeah. Check the head. So you can use the Move control on the head. I actually prefer to use the rotate on the head. Yeah, that looks okay. We'll just move his head side to side. Yep. Good stuff. And then finally, let's just check the fingers and you get this kinda cool thing to control a on the end here, which is kinda nice. And we can rotate that. And that will kinda make a fist for us. And there's one on the thumb as well. Let's have a go at that doesn't really behave in the same way that we go. But it looks like that is working as expected. We'll just check this knuckle joint there. Yeah. So what you should do now is continue to check everything, make sure that everything behaves as expected. And if it doesn't redo it. Now what we need to do is just a couple of loose end, tangled things. So we'll go back to where our channel box layer editor, we have geo layer. And what we want to do is make that reference. So now we just can't select it. We can still move it by moving the controls. And then we go look. But we can't accidentally select it and break anything. So that's good rarely, isn't it. What we're also going to do is make sure that we save this as a very own file because this is now a rig that we're happy with. It works as expected. Rigs can be a little bit temperamental and can break. And so we're going to save this and then never work on this again unless we have to. This is just something we can go back to if the egg breaks down the line. So we're going to do File Save Scene As and I'm just going to call this clean rig. And then I know I've always got a clean rig. There we go. And that's it. We've completed another chapter, a new have now got a rigged character who is ready to be animated and then eventually put into a real engine and he's going to look so sick. So I hope you're excited about the next chapter is going to be a long one. It's going to include all the animation. So I look forward to seeing you all excited for animation in the next step.
13. Animate an Idle Cycle: Okay, Then now that the rigging is complete, it's time to get some animation onto this little chap so that ease ready to go into the engine. We're going to start with creating an idol cycle, which is the one that plays when the character receives no input from the player. So when they're standing still, you don't want it to be dead still. You want them to look as if they're still alive. Sometimes it is called the keep-alive loop or a brief loop as well. Now I want you to kind of suspend your belief a little bit for this because we're going to make this robot what like he's breathing. And of course, robots generally don't need to breathe, but to make it look like he's not just dead still, we're going to create this idol cycle. So as you can see, I've got my rig open and to make sure that I don't save over anything that I want to keep. I'm going to save it straight away as idle. So File Save Scene As and we'll call the idle. So it's going to be 1250. Idle cycle. There we go. Save. Next stop singing. Say that I think I left you with the channel box open, but in Human IK, what I want to do now is just make a change here. And so here we've got this kind of full body controls. So if I just select the control and polymer of a, you see the whole thing moves. When I move this over to here. And this is where we're going to do our animation. And what it means is that we pull it over. It won't move the whole body, but it will move the whole arm. And this is just to make sure that we don't end up setting keys on things that we don't want to. It gives us a little bit more control as we're going forward. But we're also going to do is just change out the modelling view. Now there is an animation V0. So if we have a look at this, so this gives you a viewport up here and a graph editor down here. I don't really like it's good for the graph editor, but it didn't give me enough space here. I'm not a massive fan of that, so I'm gonna do it a different way. I'm going to go to my a classic. And that's because it gives me a timeline down here, which we'll need. And then I'm going to graph editor on the side. I'm going to suggest you do the same thing. So what I'll do first of all, it just go to Windows animation Editors, Graph Editor, an open one of those up. Ixy for me, it's already docked to the side because that's where I tend to keep my open view in a separate window like this. If it does, just move it over to the side, like so. And then you can kind of have your views side-by-side, which is the way that I prefer to work. One of the thing that I want you to check is that this little icon down here isn't red, so it shouldn't be by default. But this is auto Kate. And again, to make sure that we are in control and without any keys that we don't mean to, we just need to make sure that that's off and I'll keep everything nice and clean and organized. The first thing we need to do to get this animation going them is to create our first sort of base pose. This is how he's just going to be stored. And we want this to be fairly dynamic. So I'll just start building this now. We can just make the Alibaba is small x. We don't need so much of that just yet. And we'll start putting this post together. So I'm going to start by getting the hips can draw. And you'll notice I do a lot of slides on this marquee selection. And just near the edge of what I want, I find that's a little more accurate for me. So I'm just going to drop his knees down. I'll probably raise that backup a little bit later, but just to give me room to move his legs, we're going to drop his waist down low back. And then what I want to do is I'm just going to bring this forward and out a little bit to about there. And then I'm also going to attempt to rotate this out a little bit. Kinda do that by moving the toe. Let's see. It's going at a funny angle. So what we'll do for that is we'll just drop into the top view. Person F to find that particular control should be that. Well, let's just double-check. Yep. And then I'm just going to rotate it using this yellow manipulator here like that. And that will just make sure that it stays flat on the ground because otherwise that wants to go out a little bit. Okay, then what we'll do is take the or the thought and this one's gonna move back now as well. Kinda like that. Now the thing about back feet is generally we'll raise our heel off the ground if that's how we want to stand. So what I'm gonna do is I'm just going to a top view again, just so that I can rotate the LLL bit. And then I'll do some other stuff with it. And I'll probably need my other views to help me get S. So the first thing I'll do is I want to raise this up. So the LSI keys so of using his toes there to get the extra height. And then I'll just turn the grid on so that I can get that lined up. And I think I'm also going to do is just rotate it that way a little bit as well. So that should give that a fairly nice low. So let's have a look at how these legs are. Not bad. So I'll do now is I'm just going to bring the hips backup because this is kind of myapp pose really. So that's not bad. I think the four here minus needs to go back a little more. I don't like it further back. I think I like it actually a little bit closer in. So I think what I'm going to have to do is just raise radius hips up a little bit and maybe just bring his hips further forward a bit as well. That's better. Okay, the next thing I'm gonna do them is just try and saw his arms out. And that obviously we don't want these to be stuck out the way they are. That's, that's too much parsers raise them up a little bit, mom again, no, yeah. So let's get attention. Just do these with the risk controllers if I can. And what we're gonna do is just kinda bring it down, bring it in. And this one's going to be slightly back, this arm. So we're going to bring it down a little bit more, has just made this view a bit bigger. Bring it to that kinda position. And then there's a fairly good starting point. I'm going to get the shoulder controller and just sort of not the shoulder, the elbow controller, just to bring them ALL bit as well. Let's see what we get. That's not a bad start. I might have to come back and refine that. And then we'll get this wrist here. And I want this one to sort of do the same thing, but this one's going to be forward a little bit. We'll bring that down. Bring it in. We don't want it to be too far out. Then what I'll do is I'll just rotate that hand down a little bit. Same with this one. Everything is a bit too straight or maybe just rotate that in. Same with this one. You can see I'm just saw a building this pose as I go until I start to feel happy with it. From one of the views I've got to be in the most conscious off here is the back view, since that's the one that will likely see the player from most of the time. So I don't want that to get too out of control really. Think I'm also just going to rotate this a little bit. So that's shoulders back and he's kind of leaning that way. And then we're just going to counteract it back by bringing the head back. So that's a bit more forward facing. And that should then give me a little more freedom with what I can do with this arm. Okay? So I think we'll use that as the base pose. I think that's good enough that we'll do. I think I'll just make one more slight change to the fingers because they look far too wet you, so if you just let the end controller and rotate them around, you'll see it does the whole hand. And then the thumb mechanic got to rotate on two different axes. So we're bringing in a little bit, kind of goes up too much. So for bringing it down that way, that looks a bit nicer. And then we'll do the same for the other thumb. Make sure that I understood the one controller that I want to bring that another obey and take it down. Okay, So we'll say that that is the sort of base posed that we're going for the ethanol so is going to be built from what we need to do next is get things so that they actually move. So for this loop, I've decided that it's pretty much going to be a fifth frame loop. So you can see at the moment that we have 200 frames and our timeline and it's displaying a 120. We don't really need to take that 200 number down, but we do need to take this one down. I'm gonna just type 51. And the reason that I'm doing that is because it's a fifth frame loop and we start at one. So it's one to 51 will give us 50 frames. And now we're going to start getting some movement. So let's just flip the hips and check that it's doing what I wanted to yet. So when I move the hips up and down, everything above the hips goes, That's good. So with just the hips selected, we're going to put our play head on frame one. And then we're going to press S on the keyboard. And what that does is sets a keyframe. We also need a keyframe setting up 51, because this is a loop, frames 151 needs to be identical to make sure that it returns back to the position it starts to that. And then in the middle we have framed 26 and unframed 26. This is going to be our down part of the animation. And what I'm gonna do is just on the y-axis bringing down a little bit. We're not gonna go too far with this. Or he starts to look a bit, a bit too much. And then we'll press S. And then if we play it, you should start to say that we've got the beginnings of this sort of breathe animation. So that's the first part of it done. Essentially. The last thing we need to do in this actually involves the graph editor. So if I just bring the Graph Editor back to so it's got some space. And we'll start the hips controller again. And I'll press a, if I'm going to select everything like this. And then I'll press a again. And you'll see that there are two curves here that have got some movement on them that's represented by these lines here. And what we're gonna do is make sure that this kind of happens forever and ever so important on this particular, but it will be important on the other. So we'll get into the habit of doing it early. I'm just gonna zoom out a little bit. And what we're gonna do is go to View. And we're going to select infinity. And what that does is shows us what the animation does before and after the keyframes we've sat and we can have a cycle so that it keeps going. To do that. We're going to go into, let's just select everything. We're gonna do Curves, Pre infinity cycle. And you'll see that that curve now is curving before we set an keyframes. If we do the same for curves post infinity cycle. That will happen for F, which is really useful to us in getting this loop, especially when we start adding offsets down the line. So that's the hips done. I'm happy with that. The next thing we'll do is grab this chest controller just here. And we're gonna do the same sort of thing. So we're gonna go to frame one and press S, frame 51, and press S, and then go to frame 26. And on this one we want him to kinda look like he's breathe in. So we'll put the rotate tool on and we're just going to rotate him forward and touch. Not too much. We don't want this to be distracting just enough that we can see it. And then we'll press S. And then we're going to play this to test it out. Yeah, that's really good. That's doing pretty much what I wanted to do. Now, the problem with this is they all start sort of very mechanical. And one of the ways that we can alleviate that is with something called an offset. And it kind of creates a bit more of like a wave of movement going through the character rather than all be in this sort of mechanical what we've got now. And this is fairly easy to do in this case. So if we just go to make sure that we're seeing all the curves and we select everything like that. We're gonna do our pre and post infinity. So Curves Pre infinity cycle, curves post infinity cycle. And this is really important for this one. Because what we're gonna do now is move these frames along the timeline a little bit. So I'm going to hold Shift on my keyboard. And then I'm gonna do middle mouse for this and just drag to the right. And then I'm going to move it about, well, we've got a Minos about five frames to the right. So 12, I've already done 345. And you see that now there's no keyframe on frame one anymore, but it's moved to frame six, frame 31, and actually frame 56, which we can't see here. But the reason that this offset is important is if we zoom in on this curve, there is still some movement happening before frame 6. And that means it's going to stay even despite the fact that we've moved on. So we'll do that with anything that we offset. That's really important. Okay? So what we'll do now is play this again and see how it's looking. And you'll see there's a bit more of a wave of movement going on because we've done the offset on the chest. So I think that looks pretty good. We need to do next is a similar sort of thing, but this time to the head. So let's go to frame one. And what I'm gonna do on frame one is just let the head controller, I'm actually going to move it up ever so slightly. And that kind of creates a bit of overlapping action, which kinda looks a little bit better. So with that done, we're going to set a keyframe on frame one. Move to frame 51, set it again. And then I'm 26 as we've done so far, we're now going to rotate it down a little bit. And that's gonna make the handle like he's got a bit of weight and that there's some effort to go with them. So we'll do that and then we'll just play it to make sure that that's working. Yep, that's not bad. And what we're gonna do now is offset that movement. So let's just select this again. We're going to make sure that we can see all the curves. We're going to select all the covers is pressed a make sure that we're showing them. Yeah. So it's going to be Curves Pre infinity cycle, curves post infinity cycle. And then we're gonna do this offset. So holding Shift and my middle mouse button, I'm going to move this one. I think probably another 10. So 1234512345. Yeah, and that's moving frame 11. That's perfect. So then we'll test this and see if I'm happy with it, I might decide to tweak this a little bit. Let's see. I know that's not about are quite like the fact that he's heads quite huge. And now it looks like he's got some real weight to it because of the way that we've animated it. So that's pretty good there. The next thing we need to do is just something with the hands. So I'm finding all of these bones at the moment a little bit distracting. So let's try and turn these off. So I'm just clicking this icon here that turns off you forward kinematics. And then we've just got the controllers for inverse kinematic showing. And then we'll have a look at what the hands are currently doing. So they're going up and down. That makes sense. I'm happy with that. But I kind of want them mortal lot like they're staying still. So here's what we're gonna do. We're going to select both wrist controllers. And on frame 1, we're going to press S. And we're just going to yeah, we'll set them on frame 51 more process as well. Okay. And then at 26, Here's what I'm gonna do. So I'm just gonna put it in this from view here. I'm, I turn on this tool here. It's called the grease pencil. And I'm just going to go to here, let me make a mark on the screen. So if one mark here and one mark here, this tells me where those risks controllers are on frame 1 and frame one. So now if I move to 26, I can see sort of where they've moved to. So what I can do now I can just turn the Grease Pencil tool off. I'm going to select this controller here, so this is just the characters right hand. I'm going to move it up and out a little bit like that. And then the same with this one. So I'm moving up to about the same height by a, moving out a little bit as well, more pressing S. And then what I'll do is just go back to frame 51 and remove that marker me with the grease pencil. I can turn that tool off now. Well, I can try to go a tool. There we go. And then we'll see how that looks. Okay, so if you're paying attention, you'll see the mistake I made. I made the movement here on this wrist, but I didn't set the keyframes, so let's just make sure that I saw that out. I should know better than this. Okay. So put the Grease Pencil tool back on. I'm going to put my back him. Then I'm going to go to frame 26. And I'm going to turn that tool off. Put this roughly where I want it to be up and out a little bit. Press S this time and then we'll just play it. Yeah, that's not bad. I think I can get down with that. Oh, yeah. Right. So let's now just kill the Grease Pencil tool again. We'll just get rid of that word up or down frame on this. I'm get rid of that and close at all. And then what I want to do is get the offset sorted out. So let's just make sure that for this, you'll notice as well that there are a lot more controls on extra got tourists to work with. So I'm going to select both of them and just click once at the top, scroll down to the bottom and shift select that. I'll show me all my curves per se to make sure that we're showing up and select. We're going to do Curves Pre infinity cycle, curves post infinity cycle. All good. And then we're gonna do the offset which is going to be about same as for the head. I might do it a couple of frames before or after it, we'll see how it looks. So middle mouse button and shift and I'm gonna go to the right. 1, 2, 3, 4, 5, 6, 7, 8, 9, 10, 11, 12. Let's try 12 frames. Okay, We'll see how this offset locks. Not a fan of that. Let's make a little tweak. I'm just going to put the offset back a little bit. So instead of it being that far fall, you're going to bring it back little bit. So let's go 123454. Try that. Not really enjoying that either will go further. So we want to prove all 51234 or 5% about frame 80. And let's see how that looks. Yeah, that will do. Okay, so that is pretty much the idle cycle. So what I would recommend to you now is that you can go on and refine this a little bit more if you choose to. So if I wasn't trying to do this quick, I would probably put a little bit of movement on the fingers. I'd have some side-to-side movement and probably rotate things side to side as well. Um, just so that it doesn't look too mechanical. Although one of the reasons we're doing this as a robot is because mechanical movement does at least make sense. So what we'll do next is we'll move on to the walk cycle or more Bhatia, a basic walk cycle as well. And then we'll be getting well on our way to having a character that we can put into the engine. So make sure that you've saved this as idle cycle File, Save Scene. And then into the next step, we can make our next cycle. I'll see you there.
14. Animate a Walk Cycle: With the idle cycle complete and saved then is now time to move on to our walk cycle. So let's make a start on that. So I've saved this. So what I want to do now to make sure that I don't accidentally mess this up, is opened up a version of the clean rig again, so we'll do file open scene. Let's find clean rig and open. Don't need to save that because it's already saved. So here is my clean rig them. And what I wanted to do this time is set this up for a 24 frames cycle. And that means we're gonna go from one to 25 because we're starting at one non-zero. So we'll set this to 25, like so. Next thing I want to do is just move my views around a little bit and we'll see how this goes. So what I'm gonna do first of all is moved my graph editor down to the bottom for this, you'll hopefully see why in a minute. There we go. And I want another perspective view. So I'm going to go to Panels and we're gonna tear off a copy of this. And this gives me another perspective view. And then I'm going to move this to just sit down the side there and just resize that a little bit. Like so then I'm going to change this view to a side view. So I'm gonna go predefined bookmarks left side because it's a copy. It will also make this one the left side, but that's okay. We'll get to that. And then on this one we're going to go to Panels Perspective and we'll just make a new one because I just overwrote my other perspective camera. And this now gives me two of you. So this one, I've got a little bit more freedom, I can rotate around. And this one gives me a good profile view so that I can see what I'm doing. Well, I'm also going to need to do so that I can see when the feet are contacting the floor in this view is turn on the grid. And you can see that I now have this thick line here which is representing the floor. I'll just go to show and turn off cameras which removes a line there. So that doesn't get confusing for me. And with that then I think we're ready to start animating. So the first thing I want to do is make sure that my Human IK control is on this middle one here, which is body part. And now making sure that the play head is on frame 1, we're going to set up the first pose of this walk cycle, which is known as the contact pose. So for this, I'm just gonna change to my channel box so that I can see that I've got the right values as I want them. And then we're going to select the hips controller. And the first thing we want to do is just move the hips down a little bit so that we've got some bend in the knees. So let's just move this down. Yeah. That looks pretty good. So just got a little bit of a bend in the knees lie that and I think I'm just going to round that down to 61. There we go. And then we're going to work on the characters left for. I always like to take the left foot forward first, which is this one. And you can see that I use this view here to select that because it would be very difficult to select it here. And then with my rotate tool, we're going to rotate this up to something like that. And I might change this in a minute once I get it in place, but something like that. And then we're just going to move this foot up so that it's in line with the ground. And we're also going to move it forward. So just make sure that I'm getting this where I wanted to just bring this down so it's contacting the ground. I'm just going to rotate that around a touch further. And yeah, I'm happy with I think I'm going to round this to 23. And let's just make sure that I am happy with the rotation. Just something like that. That looks quite nice. Now we're gonna move onto the right foot, which I can select fairly easily from this view. And Alex, I've moved the left out of the way. And this one needs to be rotated down slightly to something like that. And then we're going to bring it back in line with the ground. And this one needs to be moved back. And look, I think that's just once rotating a little more. Bring that up a torch. Maybe not quite that much. Let's just put that back. Yeah, that's quite nice. And believe it or not, That's pretty much everything we need to do right now. For the first pose, the contact pose. What we'll do at this stage is set keyframes on everything that we have adjusted so far. So that's the hips controller, so I'll select that and then press S. I'm also going to slide this foot controller and press S, and the other foot controller and press S. And that is the beginning of our first posed on the contact pose. Next, we need to move to frame 4. So we're gonna make a change on this one, basically every three frames. So frame for is the next stage that we need to go to. And this is known as the down pose is the lowest that the hips go in the whole cycle. So that's the body part that we'll start with. We'll select the hips controller and we need to move down a little bit. Let's see how far we want to go. Yeah, I like that. So I think we'll round that to 59 because we're pretty close to that anyway. If I cannot work in a whole number that it's easy for me to make tweaks to. Okay, So we've done that. Next thing we want to do is I'm going to select this photo and I'm going to rotate it back to flat, which I believe is just this axis here. Yeah, so I've put that flat and then I want to get it back on the ground. So let's just bring it in a little bit. So I've got room to do that and we'll get it back in contact with the ground. That looks pretty good. And then I just wanted to get this sort of interposition where I think you lose. Good. Yeah, I like that. So we'll set that, we'll round that to 21. And you can see that that now is the foot come flat and it's also come back slightly as well. On this one, the back leg actually gets a little bit more extreme. So what we'll do is we're going to rotate this around a little bit more. Something like that, which is going to necessitate bringing it up so that it's not going through the floor. And we're also going to need to move it back as well. So say maybe not quite rotated that much, bring it down a little bit. Yeah, we'll give that a go, I think. So. I'm at about minus 32.5 there. Let's round that to minus 32, I think should be good. Okay, I think I'm happy with that, so let's keep those. So we'll select the hips controller, press S, slide this foot process and select this and press S. And then we can see that already we're getting the beginnings of our walk cycle. So next we need to move to frame 7. This is what's known as the passing pose, and it requires the hips to go back up a little bit. So let's just start with moving the hips up. My don't want them to be it's gotta be sort of higher than where they started. Yeah, I will go for that. I'm not going to go for 62, I think. Cool. I'm going to work on this fault first as I tend to do in each step. And I think I'm going to want to move this back almost to where it started. What do we think? I'm going to set this to one I think just a little bit before where it started. And obviously I need to get it back to being on the ground as well. So I'll just flip to the 0 by moving the hips up. Some happy with the position of that foot. Let's select the other thought. And on this one I am going to rotate it forward or down rather a little bit. And this is going to create a bit of a drag movement, hopefully. And then I'm going to move it forward to about there. And then I'm also going to raise it up. And that's just going to create the effect of this like overlapping this one that's coming back. Don't want to raise it too far off the ground because it can look a bit too stumpy. Yeah. So I think I'm pretty happy with those positions as well. So let's keep the hips and both feet because they are the only bits that we've made changes on so far. Good stuff. So that's how passing pose hopefully in place that see how that's coming together. Yeah, not bad so far. So then we'll move to frame 10. This is known as the up pose. This is the pose where the hips are at the highest. Think I'm just going to type in 63%. Wanna take it to much higher, but I do want it to be higher. So that's done that we could possibly go a little bit higher. Maybe you want to experiment with that, but I'm going to stick with 63. And then the left foot needs to go back slightly. So it's not allowing me to push it all the way back yet. So I'm going to do is put a little bit of a rotate on the tail because this is starting to go back. Now I'm going to solve a tip toe position, so we'll do that first. And then I'm going to start moving it back. I guess. Yeah. Don't want to really go any further than that, so we'll call it minus 21. That's pretty nice. And then we'll get the other fault. So this is his right foot. And we'll move this forward. It's going to come forward quite a lot. I think. We need to get some of this drag off the foot, bring it almost flat. Just a little bit. A drag on it like that. And I'm probably going to bring it down a touch. This is going to be kind of seeking the ground. Now this is going to be allowing him to put the foot down soon. So we'll go for that kind of high there. And hopefully that should do it. So let's now select all of these. So a key, the hips, key, both feet. And then we'll see what's going on there. Yeah, That's pretty nice. And now we're gonna move onto frame 13. And for this one, we're not going to put in the positions manually because this needs to be a symmetrical walk cycle. So what we actually need is for frame 1 and vein 13 to be identical except to switch the position of the feet. So we'll do with the hips first because that's the most straightforward part to do this with. So we're gonna go to frame one and select the hips. And then we're going to right-click on frame 1 here. Go to Copy, and that copies that position of the hips. Now we'll go to Frame 13. Right-click paste and then paste like that. And you'll see that the position of the hips changed. And they are now going up and down between those keys. So that means that they are now going to be an identical position on frame 1 and 13. Now we want to do something similar with the feet, but have them switched positions and I'll share how I'm gonna do this one. So I'm going to go to frame one and the one that's at the back. Perfect. We're going to copy. And then while I'm still on frame 1, I'm going to switch to the other fault because I know that I've switched them. Then I moved to Frame 13, right-click paste and paste and put it back here, which is where we wanted it. There is one problem is also moved it over to be in line with this four. And that is normal, that's expected, but we need to do we just put that back on its own side. And what we're gonna do is just invert the x-axis for that. So it's currently set to minus 10.448. Let's remove the minus and that policy it back on its own side and we've reversed that for position. But this is important. You can see that while these are dark red, this one here is light red, which means we need to press S again just to make sure that that stays on its own side. Otherwise, I'll move back over so I'll press S. And that's that fourth done. With that still selected them. I'm going to go back to frame one. I'm going to right-click Copy. I'm going to select the other foot. Go back to 13, where I'm going to paste. May go and see that that's now crossed over, which we don't want it to do. So I'll invert the x-axis. I put in a minus in there. And then we need to press S while we're still got that selected. And then you can see now we've done that. We don't have to set the keys because there is already a key on the hips. And there's a keyframe on that thought and a keyframe on that foot. So now what that means is that we should, I'll just make this view active, be able to scrub through from one side to the next. So that's the first part of our walk cycle. So we've got one step, but we need to have two steps that this will properly loop. So what we do now on the next set of poses is we just use the fringe you've already got and we swap them over to the other feet. And that makes it really easy. So that's Frame 13, DOM. We're gonna move three frames on 12123. So frame 16 is going to be what we do next. So let's start with the hips them. So we're going to get frame for right-click, Copy. Go to frame 16 and paste. That's the hips don't. Back to frame 4. And as I did previously on the back foot first, this is just I do it in this order so that I know which ones I've already done. So select the Copy, select the front foot, move to 16 and paste. And then we need to make sure that we invert translate x. And then we press S, that's that foot down. Then we go back to four and we copy. We switch the feet, go to 16, paste and paste. And then we'll invert translate X again and press S. That's another pose dump. And we'll repeat this now by reversing seven onto 19. So let's go to 7 first. Select the hips. Copy down. We're gonna go to 19 and paste back to seven. Select whichever is the back foot and copy slightly the other thought moved in 19 and paste. There we go. And then invert the Translate X and press S. Then we go back to seven. We copy this frame. We then select the other foot, go to 19 and paste. Lovely. And then we invert the Translate X, just as we've done previously. And we press S. And then we've got kinda one more of these today. And then we can just copy all of frame wanting m. So let's go to 10 this time. And I'm just going to select the back foot again, it doesn't matter. I could select this one by always start with the back and move over. But in fact, what we'll do is we'll do the hips first. So I'll select the hips and we'll copy. Move to 22 and paste. Lovely. Then we'll go back to 10, almost at the back foot and carpi slip the front foot. You're 22 and paste. Nice in the x. Don't forget to do that. Otherwise it will look all weird. Press S, and then back to frame 10. And we're going to copy this one. Select the other foot, go to 20 to paste and invert. Not forget process. At this stage, I'm just going to run it through and I'm going to look at it and do that. I'm going to look at it in this view to make sure that I haven't forgotten to press S and that nothing crosses over. Yeah, So far, so good, that looks are wicked. Okay, so now what we need to do is just make sure that one and 25 are identical. So I'm going to select the hips, that foot controller and that controller. So I've just copied them all, selected them all at once. Then I'm going to copy frame one. Move your 25 and paste. And then we'll let that play through and see what's happening. So there will be a little bit of lag on 25 because that is one and 25, the same frame is playing twice. And I want that for now. But if any point you want to preview it without that, the frames, it will not say export, we just take off that frame. So I'll just play 24 frames and it removes that little bit of a lag. So let's just have a look in this view here. That's not bad. So I shall no doubt notice is a little bit mechanical, but he's a robot. And that works. So, so far, so good. We've got the legs down. The next thing we're gonna do is just a little bit more work on the hips to make sure that the work looks a little more natural. We're still gonna allow it to be mostly mechanical, but we'll add some rotation in the hips just to make things feel a little bit nicer. So I'll select the hips and we're going to go to frame one. And what I'm really interested in for this one is the rotate. Seeing C. Currently we have keys on the rotate, but nothing's happening. See, I'm just visualizing this in my graph editor so that I can see what's happening. So the only thing that we should have changed the moment is this Translate Y. And whilst I'm in Translate Y, we can see that there is this particular curve here doesn't make a lot of sense. I'm going to select it. And then I'm going to select my shifts, let that my tangents, and just rotate that around. So I'm holding my middle mouse button to do this just so that flows a little more. Okay, So that sorts that one out. Now I'm interested in, I believe is rotate x. What we're going to want to do is rotate the hips forward a little bit. So I'm just gonna do this. And you can see that up here it shows that it's the Rotate X that's moving. So that's the axis that I'm going to be concentrating on. And we want to lean into whichever thought is making contact. So what we're gonna do them is on frame 1, I'm just going to want to rotate it towards the left foot. So if I just rotate and I only want to do this slightly because I do want this to be subtle. I'm going to rotate. So you can see that to put that foot forward is going minus. So I'm gonna do, I think on that one minus two. And then what I'll do is reverse down frame 13. So I need to just press S on frame 1 first to make sure that that sticks. And then we're gonna go to 13. And we're going to just put 21, rotate x to reverse that and press S. And then we know that on 25, Let's just bring 25 back. We need to have this identical to frame one, so that's going to be minus two and we'll press S. Okay, so you can see that our curve is there. But there are now a lot of curves aren't really helping with this. They're just getting in the way. So I'm going to select these three keyframes here and just hit Delete on my keyboard. And same for these here. And you'll see that that now creates a bit more of a smooth curve, which is what we wanted. So now, as we play the walks, like I'll do it in this view, you can see most of these illustrated in the arms that he is swaying left and right a little bit, which helps to just add a little bit more magic to this cycle. What I also want to do is give them a little bit of side to side we go When he's got a foot planted and he's putting all his weight on it. And we're gonna do that on Frame 7. This is where he's got plenty of weight on the in this case is left fought. And this one, I think is going to be this axis here. And we can see that it's showing us lots of changes. But the other one we're really interested in is rotate y for this particular one, because that's the one that's moving the most. So I'm Frame 7. What we need to do is make sure that that hip raises the one with the weight on it like that. So what I'm gonna do is I don't want this to be subtle again. So I'm rotate y, which is the one that I know are one. Let's just put straight again. I'm going to set this to two. And that'll just rotate it in slightly and we'll press S on there. And then we're gonna go to frame 19. And we're going to put minus two on this one. I won't press S again. And then you can see that these keyframes now need to be here. If we delete them, it will delete them off of the Rotate Y as well. Big C that's now going up. And down and backup and that's creating a nice little loop as well. So let's play that and see how it looks more. Have a look at it in this view. Just take that extra frame off. Yeah, that's not bad, that's looping fairly well. There's a little bit of a sharp change here. I think that's going to be okay. The next thing we're gonna do then is we're going to kind of move up our model. And we're going to sort of counter what's happening in the hips on the chest. Because as one leg move forward, Let's say the left leg moves forward. The right shoulder tends to move forward. But you can see that as this leg is forward here, it's the same shoulders forward. So we kind of need to counter that a little bit. Before I do that though, I'm just going to go back to my Human IK control and I'm going to change to this, which is selection. So I'm no longer now moving on. The kind of whole joint chain is just a particular part of it. And that's because it just, one of the things of this rig is that even though it's really great to set up and there are some quirks to animating with them. And for this particular part, we need to just move here to make things work as expected. So let's just get ready for this. So we're going to make sure that we're on frame one. And we're not going to animate on one of the controls this time. We're going to animate on this actual joint. So it's called Rob control. Spine is the name of it and you can see that it selects everything above the hips. And what I'm gonna do is just see which axis I'm rotating. I'm, so it's the x-axis, which is good. And I'm just going to need to bring this forward a little bit to counteract what's happening below. So I'm probably gonna rotate it forward by about and 5. I think it looks good. Yeah. So then I'm just going to press S on that. Go to Frame 13, and I'm going to invert that. So it's going to be minus five. And you see that that is now inverted. So I'll press S and then unframed frame 25. Let's bring 25 back. I'll go back to five and press S, and then we'll just see what that's looking like. Undo that. So the chain. So that's looking like in this view. Yeah, and that's a lot better because it's just counteracting what the legs are due Him and it makes everything a lot, lot more weights going on in this walk cycle. So that's pretty good. Now it's time to make him look less like he's walking on a tightrope. So I'll take his arms from being in the T position and get them swinging as they should. Such as move back to frame 1 for this. And for this one, I'm going to be working on this arm that's closest to us first, which is the right arm. And I'm not going to be using this controller because we've changed the method. If we try and rotate it, it won't work on the controller anyway. So we are going to be working on that joint there. And it's called Rob control right arm. And you can see this one will rotate it. Before we do that though, is going to be easier to just get the hands kind of in the position that we want them in before we start swinging them around. And for that we do actually want to go back to body parts controlling the Human IK. So let's just put that on. And then what I'm gonna do is try and make a fist. So if I get this end controller here, and if we just rotate this round a couple of times, you'll see that it bends in the two finger sections. Again, Ben, nicely around. That's kinda nice. And then we've got to do the same with the thumb. But first of all, we just kinda need to bring it down, which is the axis there. And then we can bend it in a little bit. It doesn't matter if they overlap a little bit. That's fine that I'll do for a fist on that side. Let's repeat that over here. Okay, so we've got offices in place that will just make it look kind of nice. And then we're going to go back to Human IK or just go back to selection. And then we can start to do what we need to do. So as I said, I'm gonna be working on the characters right arm. Okay, So we're gonna rotate this down. So what we need to do, first of all, I just want to make sure that I can see my channel box here. And I'm gonna rotate this and I want this to go too far, something like that. And then we're going to need to rotate this forward, is the left leg forward. So it will mean that the right arm needs to go forward, something like this. But what we also need to do is kind of just clearly in a little bit as well. So that's a decent starting point. And what we'll do then is just on that controller, we're going to press S. And then on frame 13, you can see now that this foot is back, this arm, this float, He's forward, this arm, nice to go back. So what we'll do is we'll move the arm back. And then so if we move it back like that, we're also going to need to move it in a little bit. And we're going to need to do that. And you're gonna see a problem that I'm going to have with this. So you see that's kind of where it needs to be. That makes sense. And we'll press S. And then what we'll do is we'll just take frame one more copy that and we'll paste. So that's gonna give us our loop. So if we just start by looking at this view here, Let's play it. That's not too bad. But if we look in this view, the arm really kicks out as a swinging it. And this is another one of those quirks of this rig. The way that the arm setup is not quite ideal for the arm swing. And so it can take a lot of trial and error to get this to behave itself. So I'm going to show you what I've done. And you can just use similar values to how I put it together. So it took a little bit of trial and error, but I'm just going to put in the values that I know that I like for this. So rotate x, I'm gonna put in minus 30. So I've moved to frame 1 for this. So we'll do minus 30 there. For y, we're going to put in 70. And present, we're gonna go minus 55 and we'll set that. And then we're going to copy it to frame 25. Like so Frame 13. What I want on this one is 75, C, That doesn't change much. 70, this won't change much either. An 85. It's changed very little from where I had it. But this will make a difference. And then if we play this again, you'll see that there's, the swing out is still there. So what we're going to need are some frame to sort of correct this. I call them correction frames. We're going to need 17 and 18 and 19. So I'll go to Frame 7, thirst. And then the values that I liked this correction of 35 on the Rotate X, 70 on rotate y, and 20 on rotate z. Like that. And you say, Let's just throw that in a little bit and then we'll press S. And then we'll move to frame 19 and put in the values that I like for this one, which are going to be 13. On the x-axis. On the y-axis we're going to have 75. Just brings it in a little bit. And the z-axis is going to be 20. And then we'll set that. And at this stage, if we play it, you'll see that it does kick out a little bit, but it's more that the arm goes behind. That looks quite good. Once we put the bend in the elbow of the arm is also going to look pretty good. So what we'll do now is we'll actually set the animation upon the elbow to sort of finish this off and make it look quite nice so that playing go to frame one. And I'm just going to select the elbow joint there. On frame 1, I'm going to set the zed rotation, which is this one. And I want that to be so that it looks kind of like that. Yeah, that looks good. I've just created a bit of a bend in the arm there. So we'll set that on frame one. And we'll also set that on 25 because they need to be identical. On Frame 13, which is when the arms back, we're going to set the zed rotation to almost back to 0 really. So let's just do that. I don't want to go all the way back though. That's pretty nice like that. So it's round about 3.5. So if we have a look at that again, so I'll have a look at it in this view here. You can see that that arm bending forward adds a lot to this arm swing if we have a look at it in this view, it also now helps the arm not thought like it's swinging out so much and makes it look quite natural, which is what I'm looking for. There is one more change that I want to make to this arm swing vote just to add a little bit more fluidity to it. So with the elbow joint selected, we're gonna put enough set on it. So let's just get all the Rotate values. We'll select them. And we're gonna do Curves, Pre infinity cycle, curves post infinity cycle in that now keeps that animation going forever. I'll select them all. And then holding Shift and my middle mouse button. I'm just going to move them along five frames. So there's 1, 2, 3, 4, 5. And you can see that it's now moved along. So if we now check that out in this view here. Yeah, it just makes the arm look a little bit more casual leisure. Take off the extra frame to remove the, the bit of lag in there. Yeah. So that's not bad at all. That's the right arm complete. And what we do for the left arm is we basically just repeat that, but we're reversing the frames because we know what the values are that we want and we'll just type these in and make it nice and quick. So let's go to frame 1. Select the shoulder. So the values that we know we want for this are 75, 70, and 85. And we'll set that. And we'll also set it on frame 25. Beautiful. Then we'll move to frame 13 and make our change. And that needs to be minus 3017 and minus 55. And that kind of brings that forward. So we'll then set that on 13. So we're happy with that. Then we need to get the elbow. Oh, no, no, no. I've forgotten a step. We need to go back. We need to go buy only need to put the corrections. And so on Frame 7, we need to have the correction of 30, 75, and 20. And we'll set that and then we'll go to 19 and add our other correction, which in this case is 35, 70, and 20. And we'll set that. And that just stops things from going to wild. Now we can move on to our elbow. And in this case, we're going to have on frame one odds that rotate was about 3.5 on the ground, wasn't there. So we'll set that suppose a slight bend in the elbow. And then we'll set it on frame 1 and frame 25. And then let's just check what value we had on the other arm on the frame was framed six now, isn't it? So it was basically 48. So that's what we'll set this one to. So on Frame 13, we're going to set it to 48. Awesome, we're going to press S on the keyboard to set that. And we're gonna get an offset going on as well. So let's just press a to view all our curves, make sure that they're all showing up. Select them all. There's going to be Curves. Pre infinity cycle, curves post infinity cycle. Yeah, that's working. And then we're going to offset these by five frames. 1, 2, 3, 4, 5. Brilliant. And then we're gonna take off that extra frame so we can preview. And let's press play. So that's not bad at all. How's it looking in this view? Pretty walkie. I like that. The last step that we're gonna do then is to just add a little bit of weight to the head. And then we can call this walk cycle complete. And I'm gonna do that on this joint here, which you will say can control this angle on the head. So we're gonna go here. So on frame 1 then what we're gonna do is just rotate this up slightly, and it just needs to be just slightly, something like that. So I've gone minus 0.3, 35 on that. And we're going to set that on one and 13 and 25 set. And then I'm Frame 7. This is when we've kind of finished put in the weight down. We're going to move the head, download it and this will put in our rim offsetting by default here, but we're going to move this forward. Again, not too much. So I've gone about 2.3. So set. And then on frame 19, we'll do the same. I'm just gonna type this in 2.3 and set. And then what we'll do is just see how that looks in this view here. Let's just take off the extra frame. Yeah, and that just adds a little bit of a bump to the head, makes it look nice. So let's just have one last preview of this before we wrap up. So I'm just going to turn off these views here. Take a look at it in the front view. Nice. So keep in mind that there is a lot more that we could do to this. We could have add a lot more sway to the hips. We could have if we wanted to sort of counter animate it the head to make it holds a bit more straight when he's walking, but I quite like that. It sways. I think it looks charming. Some people don't like that and you manage to take that out. You can continue to work on this as much as you want. But for my purposes and for what I wanted to do, I'm going to consider this DOM. So let's just stop that, preview them. And we're gonna go to File, Save Scene As. And I'm going to call this one walk cycle. So let's just change the name. So 13 walk cycle. And when it becomes time to export this from my unimportant into a meal and you will become in back into this file just to make sure that we explore all of the frames that we need. So we're not a 100 percent done with this yet, but we are done with it for now. What that means is that in the next step, we are going to be attacking the run cycle. So I look forward to seeing you for that.
15. Animate a Run Cycle: Well, don't forget in the walk cycle complete, we are now going to put a run cycle together. So this is going to be the last of our complicated cycles that we need to do for this character. So let's do what we've done so far. And we're going to just open our cleanroom again. So let's go to Open scene. And what did I call it clean rig. There we go. And now because of the way this is setup, I just need to set my cameras up again, so I'll do that quickly. So that's the cameras setup. And now this one's going to be about a 20 to frame cycle. So what we'll do for that is we'll put in up until frame 23 so that we've got room to loop this and we'll take the final frame of when we're done and we'll get straight into it. So we're gonna go to frame 1, which is where we are. And let's just go to the channel box so we can see what values we have. And we'll select the hips. And the first thing that we'll do as we normally do is just take the hips down a little it yeah, that looks pretty good. And we also want to rotate him forward a little bit so that it looks like he's got some forward momentum. And we'll just rotate him forward. Model was good about that. And that will then necessitate just selecting the head controller, bringing that back so that you still looking forward. They shouldn't be looking at the ground. You should be looking ahead to where he's running. So that was quite awkward so far. So now let's get the legs sorted. So we'll get the left leg first. And we want this one to be the one that goes forward. So let's just bring it forward a little bit and, a little bit and think about where we want this to be. Something always to be slightly higher than this. This is called the straight like Pose. And actually both feet are above the ground. So I'm gonna go for something like that. And that should mean that it can bring it further out. And we also want to just rotate this around. That is pretty nice. And then we're going to get the right leg and this one needs to go back. So let's bring this one up a little bit. When it takes one look quite high to get started, I think bringing it back as well. And let's just work out what the rotation is going to be as well. Yes, something like that. I think we want this to be quite bent round. We're going to get the floppy effect on the fault. So that was pretty good. And then we'll move that back further. Something like that. We're just going to bring that up a little bit higher. Yeah, that's quite good. So that kind of creates off first position on the leg. So you can see that this leg here is kind of going out and forward. Let's just double-check the position of that, see if I'm happy with it. I'm just going to bring it slightly further forward. Just to get the extended leg. Yeah. Okay. And that's gonna do it for frame 1 on the left. So we need to start the hips and both feet controllers. And then we'll just press S on the keyboard to put that first frame in place. Now we're going to move along. And the kind of center at the end of this first step is going to be framed 12, but we're going to just mess with the spacing a little bit so that we get a sense of hanging in the air and the feet moving quickly and hopefully this will become clear as we put it together. But what that means is we're just going to move two frames forward for this next pose. And that's going to be to frame three. And this is going to be our down pose. And because it's the down pose, the hips are going to move down a little bit. Only ever so slightly, something like that I think. And I'm just going to set that key on there now. And then we'll get the left leg. And this is going to now be flat on the ground. So we're gonna take the rotate off of the zed axis, make sure that that's going to be flat. And then we need to work out where we want this to be. I'm also just going to turn off cameras here. So it's clear that this is the ground, this line here, That's what we're aiming for. So let's just bring this down about there. It's going to bring this back a little bit more. I like that. Yeah. And just make sure that we're happy with the position of this on the ground. Yeah. That's pretty nice. And then we're just gonna do some work on the right leg as well. So we'll get that selected. And let's just move this into place. So I'm going to actually make this a little bit higher position, kinda like that. We're just bringing this forward. The down pose is also kind of a cross between the down pose and the passing pose and a walk cycle. Seeing CIA this leg starting to come forward as well. And we're just going to move the rotation on this for a little bit, so it's not quite as harsh now. Yep, that looks good. Okay, So that position feels pretty nice. Let's set keys on both feet controllers, and on the hips as well. And now so we've done frame 1, frame 3, we're now gonna do frame five. And this is going to keep, the movement is quite snappy. And then we're going to start spacing them out a little bit going after this. But for frame 5, this is what we call that push pose. And we also need the hips to be moved up a little for this one. So let's make sure the hips are selected. And we're going to move this up. Yeah, that looks good. And on this one, the left leg moves back quite a lot. I think you can see that it's now struggling to contact the ground. So we're going to have to rotate the foot around as well to make this happen. So let's just get that setup. Let's say that looks pretty good. And that means that we can then move this up. Yet now looks nice. And now we can move this back. Yeah, to about there, I think. So. I'm happy with that, but the left leg B and back means that the right leg now needs to come forward. So let's bring this forward to about there. And they also want to move it down That's far too high. That was good. And then obviously we need to rotate this around as well because that doesn't look right. So let's just bring that to about there. We still want a little bit of drag on this. We're not going to make it perfectly straight. Something like that looks pretty good. So I'm happy with that as a position. So that's the push posed on. So let's make sure that we set keys on everything so the hips and both feet. And we'll press S on that. Now we're gonna move instead of going to Frame 7, we need to now start to slow this down. This is where we're going to begin to hang in the air. So we're gonna move to frame 8 and 9. Frame rate. We're gonna put our oppose. So now the hips need to go up to their highest point, select, select those. And we're gonna go a fair bit higher about that, I think. And if you want to make sure that yours looks like mine, you can always copy the properties I'm using here in the channel box. So that's my hips in place. We're then going to get the left four. I like to do the left foot first. And this is going to go back a little bit. And maybe opposite tail. Let's move it up first. Yeah, that's quite nice. And then let's move it back a bit. Yep. And we're going to have to rotate this as well just to make it make sense. Yeah, that's cool. So that's now behind the character. So let's get the right leg. And this is obviously going to need to come forward a little bit now. So let's move it forward first. If you'll let me know, I need to move it up a bit as well. That's better. Let's just keep moving this out. Yeah, that was pretty nice. And this now does need to be rotated again. So let's get that to where you want it to be. Yeah, that's pretty nice. Seeing C is now leaping quite high up in the air. And that's just come from the push Post is pushed himself up into the air. And now he's kind of swap in his stride over. This is all looking pretty good. So that's good. The hips, both feet controllers will set a key there. And that basically does it for the positions that we need. What we need to do now is a frame 12 needs to basically be identical to frame 1, but we need to swap the leg positions. So let's start setting the outline. So we'll go to frame 1 first of all, and we'll select our hips. These are just going to be identical. So we're gonna copy that. Move to frame 12 and paste. Lovely. And then we need to copy the feet above, swap them over. So just so I can kind of organize this in my mind, I always go for the back foot first and then I copy it. And then I selected the other thought. Go to the frame that I want to be on, and then paste. And you can see that that has worked apart from the fact that as with the walk cycle, the four has swapped over. So we need to just invert this x-axis. Takeaway the minus, press Enter and then we'll press S just to make sure that the keyframe is set and the foot will stay there. And then we need to do the same for the other foot. So we'll go to frame one and we're going to copy. Now we're going to select this fault, go to frame 12, paste, and then invert the x-axis and set the keyframe. Okay, so you can see that these first two frames are quite close together. And then it got a little bit slower and slower again. And that makes it kind of hanging in the air. Now we're going to repeat the same kind of timing and spacing. So that's a frame 12, Don, I'm happy with that. So the next one is going to be two frames on frame 14 and will be copying from frame 3 to get that. So let's go to three and get the hips. Will copy that. Then we're going to go to frame 14 and we're going to paste so the hips are fine. And then back to frame three. And now we need to start swapping the legs over. So let's get that leg there and copy. Select the other leg, move to 14 and paste and invert the x axis. And set back to frame three. Then we're going to copy slack. The other thought, we had a 14 paste and paste. And then let's make the change to the x-axis and set. Okay, so that's coming together. Now we need to do another two frames until I'll be on frame 16. I'll be copying from frame 5 to make that happen. So let's go to frame 5 first asset, whichever foot is at the back. And we'll copy it so that the front foot go to frame 16 and paste. And then do all it will invert the trick. Set back to frame 5, copy, select the other, and go to 16 and paste in color. It will change here and set so far so good. We can see that now we've got one more frame to do, which is frame 8, and that's going to be three frames on. So we're going to 19 now. So let's go to frame 8. I'm going to select the back foot first and copy it in 19, paste and paste. And then invert the Translate X and set. Go back to Frame Rate. Copy. Get me the foot, go to 19 and paste and invert. I've done something wrong there. So let's just go back and see if we can work this out. So back to frame 8. So we'll try and copy this from four, I think. Then we'll start the other foot, going 19 and paste. Okay, let's invert this and set. And I don't think I remember to set the keyframe here. So let's just invert this one again and set. Okay, That does look a little bit tired. Yeah, and I forgot to do the hips on this one as well. So let's go back into the hips. Copy and put this on 19 paste, paste. And they also put 0 and 1600. And getting forgetful, been doing this for too long. Copy and go to 16. Is that right? I think it's right. And paste. Yep. Okay. So let's see if this is coming to. Those. Have a little look in this view. Yet, nothing's broken yet. Okay, so the final bit of work that we need to do is just to get everything to loop on frame 23. So I can just select all three controllers that we've animated on so far. Go to frame one and copy. Then go to 23 and paste. Now to see whether or not this looks okay, I'm gonna take the last frame off. So I'm just showing frames want to 22 will hit play. And that's not bad seeing, see that he's going up and down. The feet are going much faster when they contact the ground. And then he kind of gets the effect of hanging in the air, which looks pretty cool. So that's the first part of our Ron Don, and that's the leg sorted the lower body portion. As with all our animations, we tried to do this as quick as possible. This is very much just a block out and we're allowing it to look quite robotic. What we should've done really there is have some sway in the hips and all kinds of stuff going on. But this is enough just to get us to do what we need to do. And it looked fine when we don't. So our next step is to get a little bit of a sway going on with the shoulders to support the swinging of the arms. And the controller that we want for that one is this one just here on the spine is very small, but you can see it's just there. It's called chest origin effector on this one. And if I've just put my Rotate tool and you should be able to say that this is perfect for sort of rotating the chest and everything above it. I'll just undo that. And what we're gonna do is just rotate this and try and put some holes in as well. And hopefully at the complete what I mean by that. So we've got on this one, the left leg forward. So we're going to be bringing the right shoulder forward because we cannot do it in opposites. So on frame 1, we're going to rotate by about that much, some close to eight on there you can see. And then I'll just press S there. And then we're going to put the next one on frame nine and we're going to rotate the other way. So because I went for about eight annex, they're gonna go for about minus eight here. Just try and keep things fairly symmetrical that we'll do. And then what we're gonna do is copy this and paste it onto frame 12. And that's because we want his shoulder to stay in the same place for about those three frames. And that's kind of a lining it up with the hang in the air that we did on the legs as well. So it's kind of holding that. And now what we'll do is just copy frame 1. And we're gonna put that on frame 19. So a paste it there and that'll bring it back. And we're also going to put it on frame 23 paste. And now if we just play this again, you can see that we've got our run going on. And we've also got a bit of a sway in the shoulders as well, which is going to support the swinging arms. So far so good. I think we can stop that. Back to frame one. So the next thing we're gonna do is work on the shoulders and the elbows. But before we do that, because it's kind of easier when they're still up by the side, we're just going to turn the hands into little fists. So let's just slept this end controller here with the rotate tool. And you might just have to rotate this around a couple of times just to get that to make a bit of a fist. And then we'll get the old thumb controller. Rotate this around. Probably rotate that around a little bit as well, and then bring it in so they can click through a little bit because it's going to be moving. The player won't be able to tell. And then we're gonna do the same over here. And I could probably just copy and paste the values from the other hand bought. I don't wanna do that. So there's that part on the thumb controller. Not that one, not yet. We'll do that one. Ring that around a bit and then bend the thumb in lab. So that's going to be our two fists created. This stage, I suppose if you wanted to, you could turn this, put the arms back and turn it into a bit of a new router, R1. I'm not gonna do that. I'm another string in elms, but it's an option if that's what you choose to go for. Okay. So we'll work on the shoulder closest towards first because it's easy to see in this view and we'll get the right shoulder can try and see I've accidentally selected two there, so I'll just be a bit more careful with my selection. I only want one. And then we need to kind of get this one as well positioned as we can. Because everything's going to be built off of what we do on this first frame. So what we'll do first is just rotate this arm down. So bring it down to about there. And then just so that I can help myself to line this up and I'm going to put this back in a minute, but I'm going to put the arm into the position it will be in. And that's going to help me to line up the shoulder joint to put this where I think it should be. Okay. So I think that kind of position their works for me. So you can see that the arm kind of is mostly straight down, it kicks out a little bit. But again, this position right is really important. So you can see the values that I've ended up with there. And that's pretty much where I want that to be. Then what I'm gonna do is just for now because I'm going to come back to this later anyway. I'm just going to straighten that arm out again just by zeroing out those properties there. That's good. Then because I'm happy with the position or I think I'm happy with the position of the shoulder on frame 1. I'm just going to press S to set a key on that value. So now similar to what we did on the chest controller, we're going to use the same frame jelly. So we're going to now move to frame 9. And on this frame we need to rotate the arm back rarely. So we're just going to take it back like that. Right? Okay. In this case, for the arm to just kick out a little bit. And we're going to use different values to help us to get to that. So I think the petitioner one is about seeking see, I've just kind of tilt the wrist out a little bit. The arm does kick out and a swan quite a long way back. So in that position, I'm just going to press S on my keyboard. And then to get that hold, I'm also going to set that on frame 12, like so. And then for frames 2023, just like we did with the chest, we're going to get frame one and copy that onto frame 20. So we'll paste it there. And we'll paste it onto 23 as well. And then we'll just have a look at how that's coming together. So quite robotic at the moment. And I think once we get a bit of a swing in the elbow that's going to come together. Let's just see how it looks here. Yeah, that's not a bad start. So now we need to move on to the elbow. So for this one we're going to set the elbow joint just there. And we're gonna go back to frame one. And then we need to get this rotation dialed in now the elbows, basically a hinge joint. So we only really need to rotate it on this one axis here. That one should be fine. So it's rotate is Ed for me. So I'll rotate it on frame one round about two. About there looks good. And then we're going to have to set that K. And then we're gonna go to frame 9. And let's rotate this again, but we probably don't need it as far this time. Yeah, that looks pretty good. Let's go to frame 12. So don't want this in exactly the same place, I don't think. But probably close. Yeah, that looks cool. We'll set that. Now we need to go to frame 20. And let's rotate this quite a bit forward. Yet that's quite nice. And then of course, frame 23 needs to be copied from one so that they're identical. Paste. Okay, let's see how this is now looking. Yeah, that's pretty good. That will work, I think. So we've now got the top part of our little robot guy going on his right arm. So far so good. What we need to do now is get the values for the other arm, and we're just going to copy those from here. So frame one, we're actually going to copy from frame 12. So of this shoulder, we're going to frame 12 and we'll copy that value. And then we'll select our other shoulder controller. Go to frame one and paste. And you see that now pause you on what's cool about this is it also copies the elbow position virus, meaning that we don't have to put it in this time. So that's frame one. Now let's go back to the right shoulder. So we've just done that one. I haven't me. So the next one's going to be framed 20. So we'll copy that and then go back to our shoulder. And 20 is going to be paste onto frame nine in this case. So let's paste that on there. And you can see that that has gone forward. And then what we'll do is go back to the other shoulder again. And this time so we've just done 20, So now we'll do 23. Copy that. Get the shoulder. Who missed? Go to frame 12 and then we need to paste working out so far so good. So now I think we're going to be copying from frame 9 on the right shows. So we'll copy that. Go to this arm here. And then we're gonna go to frame 20. And hopefully we're going to paste this. That looks good. And then back to the right arm, hopefully for one final time, go to frame 12 and copy. I'll roll the shoulder. Moved to 23 and paste. Okay, so now let's just take off the extra looping frame and we'll hit play and see what we got. Okay, so we can see we've got arms swinging backwards and forward. They're doing their thing. We've got the legs go in, no legs across in over. Let's check it in this view here. You know what, That's not bad. So again, there's lots that we could do to just smooth this out. We could put a little more overlap in the arms. We could also add some overlapping animation to the wrists as well. But for now, I think that's going to do the job will move on to a head. I think. So let's have a go at sorting this head animation out then. So I'm going to need to split the head controller and I'm going to go into wireframe view here so that I can see when he's not straight. And I'm also going to change this view here to a front orthographic view. Because if I just press F4 here as well, you can see that that's basically not straight. I think I'm going to turn the grid on. Just give me an idea of when things are straight as well. So we know that on frame 1 things aren't going to be lined up and we can see that. So we're going to use this axis here to just saw bring the head back straight. And I'm also going to bring it straight in this view as well. And that looks pretty good. So we'll set that. And now we're gonna keep the same spacing is with the chest because that's where things are going to change. So its frame now where this is most extreme. So we'll try and put this back. So I'm just going to now rotate that around to get that straight. And we're going to need to rotate the head to get this back straight as well. Nice. And then if we just keep that the same frame 12, that should work out nicely. And see that that now loses that as we go further on. So we'll copy the values that we've got on frame one. And we'll move to frame 20 and we'll paste those in. And that should straighten out. And we'll paste those in again at 23. And then we'll check for any abnormalities. And as it's playing, that looks fairly clean. So that's just press six in that view. Yeah, not bad. And we'll just go back to our perspective view and see what we think to that. That's okay, Let's take off the extra frame. Not bad, not bad. So we'll just try and get the head now to stay the same sort of height. Suing see here is basically looking up, but here it's not. So let's just try and correct that there is a math is a little bit of variation in this, so long as it's not too much. Let's see how that looks. Yeah, that's okay. So I think that's gonna do it. For most of this animation, what we need to do is just select all the controllers that we've put animation on. And do pre and post infinity just in case we decide to make any changes to it. So that's going to be that controller. That controller. That controller. We also did the chest, we did the shoulders, and we did the head. So for all these curves, and I'm just going to select in here absolutely everything. We're gonna do, Curves Pre infinity cycle and curves post infinity cycle. I'm just going to select the elbows separately. That's just de-select here with him first, so elbow and for the elbow. And then we'll set everything that makes part of this. And we're gonna do Curves, Pre infinity cycle, curves post infinity cycle, and just check that it hasn't broken anything. Yeah, I think that looks okay. That's gonna do the job for us. Let's just give this one final look. So I'll just turn off the controllers here. Press Play. Take a look at this from behind, which is where the player is mostly going to say, I would imagine. Yeah, I think that works. So again, we could make this a little bit smoother. But for what we're trying to achieve to just get this carrots what together pretty quickly. I think that looks wicked. So what we need to do now is save our work. So File, Save Scene As. And I've been numbering these. So this is going to be 14 run cycle. And then we'll hit Save. And that means that we're now almost done with the animation section of this course. All we need to do now is create a jump. And we'll be ready to start, say in this little chap hop in a male engine. So I'll see you in the next step where we'll make him jump.
16. Animate a Jump: Okay, So as promised then we're going to finish the animation section of the exercise we're doing here. And you'll be probably relieved to hear that this is just a one frame animation. We're just gonna keep the jump really, really simple. Let's open our clean rig and get this set up. Our jump pose is going to be heavily inspired by Mega Man. So we're going to open our clean rig. Here it is. And we don't need to worry too much about the view on this one, we just need to build our pose. So let's just give him some fists again. Mega Man has fists when he jumps. There we go. So we've got a couple of fists. Now, Mega Man, when he falls, tends to be rotated back slightly. And we're gonna do that for the top half of the body like that. And then we're going to bring the head back and I went into lock down slightly here so that he's kind of looking for where he's going to fall on land rather. And then the arms tend to go up in the air. So let us bring the arms out and they kind of the palms are facing forward, so we'll do that. So that looks pretty good for that arm. And then we'll do this one here. Let's just on this one That's rotate this from the elbow. See how that looks. And then oh, hello, That's not right. That's better. Or if it will bring one of the arms forward. I don't want this to be too symmetrical. And then we'll get his leg controller. I am actually I've got some reference images of the Mega Man jump open while I'm doing this in case you're wondering, might, you might find that useful to do something similar. So let's just rotate that like that. And we'll just kind of rotate the leg out a little bit unless the knee do this as well. And then the other thought, we do want a bit of a bend on it. If I got the right controller there, I haven't is this one I wanted that. And we're just going to rotate around so that it looks like the fox trying to find the ground. I think I'm going to bring both feet back a little bit. And I think that will pretty much do it for that pose. It'll get across the idea that he's jumping. And that's really it for this one. So we are just going to select everything was set a key frame on to make sure that they stay there. And that's it. So let's save this one file, Save Scene As, and this one's going to be where were we up to 14. Although they've gone a bit weird. I'll put that one back. I didn't name it properly. I didn't leave the NBN. So this one's going to be 15. Jump and safe. And that's really it for the jump animation. We could make this more complicated. We could have him so that he kind of wobbles in the air and we could add a land animation. But if I kept adding things to this, we'd never get the exercise finished. So that will do it. In the next step. Then we will be looking at how you go about exporting all of these animations properly. And then we can get into a male engine and begin importing and putting our character together. So I'll see you in the next part for some exciting exporting action.
17. Export Character & Animations from Maya: With the animation complete, then we can now move on to exporting everything we've done so far to make it ready to be imported into Unreal Engine 4. The first thing we need to do is export the character itself without any animation on it. So I'm going to open a scene for that. And you just need to get one that is your completed character without any animation. So for me is this version 11 that I've got. So I'll open that. And if I move through the time slider, you can say no animation on there whatsoever. Now this really should just be a case of exporting it. But there is one thing that I want to correct and I need to do it on this version. I don't insert any others, just this one. I'll try and show you what it is they go as the light catches his face, you can see that the screen's not flies got this kind of crease here. There's not particularly nice to lock out, so we're just going to fix that before we export. So let's just open the channel box. We're going to take the geometry out of reference and put this into face mode, like so. Then I'm just going to select the four phases in the middle. Just take that glare off. And then I'm just going to press Shift and full stop. And that will just select all the screen like that. And then I'm just gonna do mesh, display and hard and edge. There we go. So now if I go back into object mode and move that around, you see that that now looks flat. It's just nicer to look at. Okay, then let's export this guy. So File Export, All is what we need. And I'm going to create a new folder for all these files that I'm going to create. So I'm going to come out of my scenes folder for now. And I'm just gonna come up to this kind of top level here. Thirdpersoncharacter tutorial is what I'm calling it. I'll create a new folder there. I'm just going to call this exported. And then we'll call this one Rob mesh because this is the kind of mesh that we want. And then just make sure that you've got the following settings on this one. So Smoothing Groups, Yep, smooth mesh, yep, there's nothing else that we need there. And for this one we don't need animation turned on. So we can just click on Export. You will get this warning, but we can ignore it. There's nothing there that we need to do with it. So we'll close that. Okay, that's the first one exported. Now we need to do one of the animations. So I'm just going to open the scene and we'll do them in the order that we animated them. So we'll start with the idle. So There we go. We'll open this up. I will say this because I made a change to the face. And here we have the idle. So let's just have a quick look at that. Cool. I just want to say, remind myself where this starts and ends. Okay, so it's not a big deal being say I've got a frame set on 51 which matches one. So it means we're only going to export as far as frame 50. So that's just not like that. Frame 50. There we go. That's the cycle that I want to export. So we're going to do File export all again. You can see that it has remembered where I want to put it, which is very helpful. We're going to call this one rub on the score idle. And this time, I think you have to include the geometry, so I'm not going to turn that off, but we do need to export the animation, so we'll tick the box there. And then it's this bit here that we really need to worry about. So we do want to make the animation. We're going to set the start and end frames. So 150 is what we decided them and we are going to resample everything. And that will do it. We can now click on Export for this one. Lovely. And we repeat this for the next two. So file open scene. Now we're gonna do the walk cycle. Again. I just want to double check where this starts and finishes to make sure that I'm not duplicating any frames. So it's just turn a controller onto say, yep, So there's a frame and 25, which means 12 to 24 is probably fine. So we're going to do File Export. All this one's going to be rub on the score walk. Everything has been remembered from the last time we set this up. So bake animations always need to set the iFrame, so frame one to frame 24, and then export. Lovely. So we'll close that. And then we're going to do the run cycle next. So open scene, Let's open the R1. Yep, that's working fine. So what we need to do now is just double-check where I've got the frames looping yet it went up to 23. So one to 22 is what I want. File Export, All right, underscore Ronnie, frames 1222 and then Export. Okay, So now we're gonna do the jump. This is going to be slightly different. Let's get it opened up first. So there's the jump. So we have set one key frame on this boat or just tested this to see what would work. It won't let us do this if we export just one frame we need to do to otherwise it doesn't see it as an animation take, which is what we need. So let's set that up. So File Export All. And this is going to be Rob. This is actually a fall, so we'll call it fall. And we can just use as the jump. So Rob fall and we're gonna do frames one to two, and that will at least give us an animation take. And then we export. And that's it. That's everything that we need. What I'm gonna do is just make one more change to the way that I have got all my files setup so that when I'm in Unreal Engine, I only need to be looking in one folder. So here's the folder that I've got set up. Here's all the animations that I've just exported. What I want to do is just go into my robot character. We're going to go into source images and just take this head texture. So I'm just gonna do a copy of this. I'm just going to drop this in, export it because we're going to need that texture as well. So that now puts everything we need for this step in the same folder. And that will do it for this video. The next one, we're going to create a new millenium for project and set about getting things imported. So I'll see you there for that.
18. Import Character & Animations into Unreal Engine 4: Now that we have got everything exported from Maya, we're now done with Maya and it's times get into Unreal Engine. So you can see that I've already taken the liberty of opening or male engineers do not have to wait for me to do that. And we're at the select or create new project screen. For this. We're going to create a new project. So we're going to go down here to New Project categories and we're gonna do games. And then we'll click on Next. And as we're setting up a ThirdPersonCharacter, we are going to use the third person template because we don't want to set up absolutely everything from scratch, such as the controls. We just want to be setting up the character. So a third person is perfect for this. And then we're going to leave absolutely everything else the same. Well, I'm gonna do though is just save this to a location that I can share with you lot quite easily. So I've chosen the ThirdPersonCharacter tutorial folder, which is the one that I'm making available to you if you follow the link in the video description. And it's called Rob, so you'll have access to any blueprints and things I create as well. Should you want to download them? Okay, let's create the project. Okay, that's the project setup. Then if I hit play, you can see there's already a character in there. It's the default UV for mannequin. I don't think he's got a name. I think someone should give him a name. But there you go. That's the one that we're going to be replaced and we don't actually want that one. So let's set about importing our own character so that we're ready to set him up in the upcoming steps. So I'm just gonna move up to the content folder. So right up to the top level for this. And we're going to create a new folder. So let's right-click. We're going to go to New Folder. And I'm going to call this one character on the score, Rob. Nice and easy. And then we're going to create another new folder within that. So I'm a character or a folder or make a new folder. And this one's going to be called rub on the score, mesh. Beautiful. And then within that folder, so I'm going to go into the rub mesh folder, as well as the mesh in here. We're going to need the textures and materials. So we're going to create one new folder here, or we're going to call this material. We're actually also going to store a texture in here, but as there's only one, I don't see the need to separate that into two different folders. So let's go into the Materials folder them. And the first thing we'll do is just important that texture. So let's go to add or import or click the button there. And we're going to import to this folder. So let's click on that there. And now we need to find where we save that too. So you can see that I have already been put almost in the right folder. I'm looking for this exported folder and there's the head texture. So we'll open that up. And that's now imported and it just needs to be saved. So I'll just click on Save All. And you'll see this asterisk disappear when I save it. There we are. That's now in the project. Now we're gonna go back to the mesh folder and we need to import our character. So let's right-click and import. We're going to find Rob mash click on open. And now it's really important that we get these settings right. So we need to tell Unreal Engine that they seize a skeletal mesh. So we'll click on that, will leave the import content type as it is. The only other thing that I really want those to change it if we go all the way down, I don't want to create a new material, so do not create, and I do not want to import textures. We're going to do that manually, so you've got more control over it. And then at this stage, we should just be able to click on import. Okay, well get this warning, but it's not a problem. So we'll just close that. And we can see our Rob mesh. Let's just open it up. There is so you can see he's got no materials on him yet, but he's come through all these body parts are in the correct place. So that is going to work. So we can just close that for now. And what we need to do now that he's in there is to get his materials made an applied so that he looks as he should. So let's go into our materials folder. I'm going to right-click create a new material. And we're going to call this one M for material underscore. And we'll call this white plastic if I can spell. Caught. Almost certainly one of the first. So I'll double-click on this to open it. It's a really, really easy material to make this. So I'm just going to right-click and do a constant three vector, I think. And this basically just gives us a color. So I'm going to plug that into base color and then click on this value here to make that white. And when this catches up, you'll see we've now got a white material. What we also want to do is just create a constant, which is this one here. And this can have a value between 01, which is going to control how rough our plastic casing. See that there is very, very glossy. Let's put it on a cube. You see it That's quite reflective. I don't want it to be quiet that glossy. So we're gonna give it a roughness value of something like 0.2. Yeah, though I do it. And that's that first material made, so we'll save that one. We also want a black rubber. So we're going to create a new material and score a lot rover. And then we're going to double-click on this. Just move that over there. And then we're gonna do a constant three vector. My base color. I will actually just going to come slightly off of black for this only slightly. And then we're going to add another constant to control the roughness or plug that in. And this one wants to be quiet rough. We're going to go 0.8, which would be 80 percent rough. And rubber doesn't really reflect, so they can see that it's now working out quite nicely. So we'll save that one too. I can close that. And the final one that we need to create is the one for the head. So we're going to go for new material. And on the score, we'll call it screen. Open this up. And for this one we're going to need a texture. So I'm going to right-click and search with texture sample. There it is. And here we are looking for this head texture image. And we're going to plug that into RGB. And let's just put this on a plane so that we can see how it looks. There we go. Pretty nice so far. We're going to need a constant for the roughness. We want this to be a fairly shiny screen. So let's go for 0.2, I think. Yeah, it's got like a matte coating. Let's go 0.15. Slightly smoother than that, okay? And one thing that I want to do this is completely optional, but I like the look of it. I want to make the eyes glow a little bit. And for that we need to use the emissive color. And we're going to multiply it. So I'm just gonna right-click and add a multiply node. And the result of the multiplier is gonna go into emissive color. And then we're gonna take the color of the texture and put that into a. And you can see that already that's having an effect. And then I'm going to add a constant to be and any number. So at the moment is multiplying this by 0 and it's having no impact. If we now multiply this by, let's say three. You see that that kinda brings the eyes to life and makes it look like there's a lit screen there. And you can experiment with whatever number you want there and you can always change it later. But that is the basic material. So we'll save that. Now we can close it. Okay, so you can see now that we have three materials. If you've been paying attention, you will notice that the metallic material that we also need, we have not created. And the reason for that is because there's already a chrome material in Unreal Engine. So we're just going to use that instead of making a new one. So now what we need to do is assign the materials to our character. So let's go back to rob mesh. And I'll open this. And over in the top-left corner here you can see we've got four material slots because of the way that we texted him earlier. And so now we need to just make sure that we put the right materials in the right place. So what I like to do is click on isolate, and that will show us what each material is. So this one here is clearly the white plastic. So I'll do this drop-down and just start typing white. And there's white plastic. And then we're gonna do this one here, which appears to be the Chrome. So if we type Chrome, there it is. And then the next one, if we isolate it, this is the black rubber. So at that and then finally is going to be the screen. Cool. And now when it all comes together, we have our character setup and properly textured in Unreal Engine. So far so good. But next, we need to make sure that we've got the animations important as well. And in order to do that, we're going to go to the character Rob folder. So we've got the rub mesh. When you create a new folder. I'm going to call this one Rob. Underscore and aims, which is short for animations. So we'll go into here. And this is where these animations now needs to be imported. So what we're gonna do is right-click and we're going to go to Import to this folder. And because we've already been importing from this folder here, it's taking me to the right place. We'll start with the idle, Rob, underscore idle and click on open. And again, we need to make sure that we get this right. So is a skeletal mesh, but this time we don't need the mesh because we've already got one. So we can turn that off. But what we need to do is tell it which skeleton to attach the animation to. So this little drop-down, now, there's the original YUV format, him and there's our Rob mesh. So we're going to tell it to go on to that one. For the animation length, we're going to change that from exported time to animate a time. The reason for doing that, the exporter time should work, but I noticed it was importing duplicated frames. So we're changing it to animate a time and that seems to sort that out. And then all we need to do is click on Import. And then you can see that that is important the animation. And if we double-click on it, we should see that that is up and running, which it is. So now we've got our character materials on one of the NMS set up. So we'll just save that. So it's in that. And now we need to import the rest. So we'll go to right-click import. And this time we're gonna do the walk. So we don't want the mesh, we do want to attach it to the rope and nothing else needs oh, yeah. Animate a time it's remembered from last time. So let's click on Import. We'll double-check that that's working as expected. Yet we've got a lot going on there. So we'll save that. Next. We're going to import the run. So import, choose the wrong open. So don't import the Mesh. Do put it onto our friend Rob and make sure that it is an animated time and click on Import. Give it a quick check. Looks good to me, and click on Save. And then one final one, we're going to import get the fall. So we do not need to import the mesh. We do want to put it on the rubber mash animated time and import. And then we double-check. Yep, that is doing the job. So we'll save that as well. Okay, That's gonna do it for this step. We have now imported everything that we need. We've got the character materials and all the animations ready to start putting this guy together, moving forward. In the next step, according to my notes, we are going to be putting together a blend space which is going to allow us to have the character blend from his idle state to go to walking and then up to running. Depending on how hard the player pushes the analog stick when they're playing the game. So I'll see you in the next step for that.
19. Blend Idle into Walk into Run with a 1D Blendspace: Now that everything is imported, it's time to set up this a blend space to blend between the animations that we've got apart from the fall, which we don't need. Okay. So here's what we need to do. We're going to right-click in our alums folder. We're going to go up to animation. And we're going to choose.
20. Create an Animation Blueprint: In this step, we're going to set up the Animation Blueprint. So what we've done so far is we've told or melons and how to blend between our different animations. But we've not really told it when to blend them. And we've not told it which animations to play on why we like, for instance, it doesn't know when to show with the falling animation. And the Animation Blueprint is how we give you all of those instructions. So in our rob animus folder, we're going to right-click, go to animation and find Animation Blueprint. The parent class. We're going to choose an instance. And it needs to happen to our Rob mesh skeleton. So we'll click on Okay, I'm going to call this one rope underscore and M BP. So Rob Animation, Blueprint. Lovely. So we need to open this up. And everything in this window deals with which animation is shown and when. So this bit here, the result is whatever the final pose that we want to show is going to be. So we have to plug something into this and we're going to create something called a state machine. So in a right-click here and start typing state machine. And then we can say Add new state machine pops up. So we'll create that. I then want to just rename this. So I'm going to call this locomotion, which just deals with how the character moves. And the result of this is going to be what plugs into here. So even though we've done nothing yet, that is going to be the result. So we'll just plug that in now. And then we're going to double-click on this to open it up. Okay, So here's our entry point. And what we're gonna do is just dragged out of this, we're going to add a state. And we're going to call this idol war. Wrong. Hopes that's why your name. So let's just make sure that we don't have run them. Capitalized letters. Idle, walk, run, there we go. And then we're going to open this up. And what we need to happen in here is the blend space needs to play. So we're gonna get this. We're going to plug that into the result. And when he something to drive this. So we're going to have to reference this somewhere so that this speed changes depending on what the character does. And the way that we're going to do this is just right-click on speed and we're going to promote this to variable. There we go. So now, whenever this variable changes, is going to feed into the blend space, which is going to change what animation is played, which is going to go to the Animation output pose, which is very good. So if we now compile, the character should start to widen. And that's because this speed variable is currently set to 0. And you go, you can see that that's set to 0. And because there's nothing else to drive it, that means that the output pose just becomes idle, which is good. So far so good. If you want to see this in action though, you can just go over to speed here. Drag to the right. And as we move this up. And what mouse very upsetting for it. They might just call heck to do that in real time apparently. But there you go. We can now see that that's the walk. If we hoped that again, I'll go to the runs. So I'll just set that back to 0 for now. And we'll compile. Okay, so that tells us how to have him idle, walk or run. But it doesn't really tell us whether or not he should jump. So in order to do that, we're going to need to set a couple of things up. So let's just go back to locomotion and we go, and we're going to need a condition of whether or not the character is in the air to do this. So now that we've got this setup, what we need to do now is create some logic to drive all of this. So we're gonna go to the Event Graph up here. And you can see that it gives us these two notes to get us started, which is exactly what we want that Chile. And these are going to work together. So the first thing we want to do is say, is this valid? So make sure that this is actually the character we using. So we're going to, first thing we'll do is that what we also need to do is get the velocity of the character. So from this polynomial, because this is our character, we're going to get to velocity, which is basically just the speed that our character is moving up. From the return value of this, we're going to get the vector length. So vector length. And we're going to use that to set the speed. So let's get our speed variable and we're going to set it with what that is. And so that now the actual speed that our characters moving across the level is going to become our speed valuable to drive the blend space. So that right there should do it. So I'm just going to comment this out so I know what's what, so I'm just going to select these three nodes here and press C. And we're going to do sift speeds. Nice. And then just with these two here, Let's just make a bit of space for them. Common. See, if Pawn Owner is valid. Just so that we know everything's there. Let's just compile that and make sure it's all working. We're not getting any errors, which I have to say to you is a very, very good sign, okay, so at the moment, this would now work perfectly to get the character running around. Although we do need to set up the character blueprint, but if that was all done, he would run around. But what he wouldn't do yet is jump. And we're going to need to set that up as well. We need a variable to work out. Is the character actually in the air? And we're gonna do that in this logic as well now just to get this setup. So out of here, so I have Get Pawn Owner, we need to find something else. We're going to get a movement component. So get movement component. Lovely. And the movement component that we want is, is falling like that. So this return value then we're going to promote to a variable like that. And we're going to call that variable is in question mark. Okay, so that is going to be whether or not our character is currently in the air. And we're going to set that using this. So actually what we're gonna do now is before we do the speed, we're just going to cut him with this. So we're going to take our execution from here to set that, and then to set that. So what we're doing now is every time the Animation Blueprint is updated, going to check whether or not the character is in the air, and it's also going to set the speed. So let's comment this is character falling. Okay? And that is pretty much all the logic that we're going to need for this now. So what we also need to do is just set up the jump. So let's go back to our locomotion and out of the idle walk run, if we dragged out of here, we can add another state. I didn't rename it properly. Let's rename it. And I'm going to call this jump. I'm calling it John, but it's really falling. I want to keep it easy on what we'll do is just open this jump and we need to make sure that whenever this is happening, they place the fall animation. So let's just have that in there. And that's it. That's all we need to do for that. So let's just compile that. My ego that's all set up. And because I compile that you see it's giving me a one, this will never happen because I've got nothing set up to make it happen. So we're gonna go back here now and we're gonna make it happen. This little arrow here is what we call a transition condition. So we need to set something on this to tell it whether or not to transition from here to the jump. So here we're going to say, when is it allowed to go from either walk, run to jump or double-click on this. And it's going to be whenever is in air is set to true. So if we compile that, takes away the warning, so that's good. Every time our character is in the air, you're allowed to go to the jump animation. And then what we need to do is get this to go back. So we'll go like that. So this is now, you see we've got arrows pointing out. So to go from here to here, we set a condition and then from jump back to idle, what Roman need another one. So it's going to be is in F and we'll get that. And then we're going to need a NOT Boolean by that. So whatever is in air is not true. And there we go. That is now going to transition back to the idle walk run. So now what we're gonna do is compile that. And that's it. Then we have now setup the animation blueprint. We have all the conditions to play them animations. So that now when we're being game on me, I was going there which animations we want to play and when, which is all very good stuff, I think. So moving forward, what we'll be doing next is setting up the actual character blueprint. This is the thing that we can put into the game. So I'll see you in the next step for that.
21. Create a Character Blueprint: In this step, what we're gonna do is now setup our character blueprint. So we're just going to save and close the Animation Blueprint has served its purpose. Let's go back up to our main character folder and we're going to create a new folder here for our main blueprints. So we're just going to create a new folder. I'm going to call it Rob underscore, BP. Sort of our blueprints are gonna go. So we'll go into this folder here. In this folder, we're going to right-click. We're going to create a new blueprint class. And the obvious one for this one is going to be a character because that's what we're creating. So we'll click on that. I'm going to call this one Rob underscore, BP. This is our main character blueprint. And we'll open that up. By default, you get a capsule which kind of represents your character in 3D space. This is how they'll collide and things. You've got an arrow which just kinda points which way is from Tom. And you've also got mesh which is not showing anything else. We haven't chosen mum. And there's also a character movement component which has lots of defaults for how the character moves and behaves, which will change some of those later, but we'll leave them at default values for now. So if we go to the Mesh component here, There's a space for Skeletal Mesh. And here we can choose our Rob mesh. And then he goes in and then we obviously need to make a few changes because he's to HIO and he's also not facing the right way. So let's just bring him down and we need to get his feet pretty close. So let's invalid rotate him first. So I just got my Rotate tool and by pressing a gonna rotate it 90 degrees so that he's facing front. And then I'm gonna change my perspective view to a front view. And then you can see here that he's feet are really lining up with the bottom of the capstone. So what we'll do is just turn the snaps down on the move to one. We'll zoom in real close and we're just going to line this up with the bottom of the capsule. That should mean that connects with the floor properly. Okay, Now what we're gonna do is just zoom out the capsule is about the right size and shape. So we'll leave that as is for now. And we'll go back into perspective view. Now we need to tell this blueprint which animations to use. So he's already expecting to use the Animation Blueprint, which is good because we created one. We just need to tell it which Animation Blueprint we wanted to use. So forgot to Anime Class. And there's the rub anim blueprint we created. We'll click on that. And straight away because there's currently no value in the speed, it will default to idling, which makes sense, doesn't it? Okay, now what we need to do is set up a way for the player to see the character to have sort of inhabit 3D space. And to do that, we need to put a camera in there. And this is kind of a two-part process. So first of all, we need to create what's known as a spring arm. And this is kind of how the camera will attach to the player. So this will be how far back it is. It will be whether an eclipse do walls, et cetera. I'm just gonna put it up in terms of height, if it lets me to about the neck, something like that. So that pasta spring arm in place them. What we need to deal with the spring ARM selected, we're going to add another component and that's going to be a camera. There we go. And that puts that in place. If we want to move, it is better to select the spring arm and move it all up together. So I think I'm gonna go slightly higher, kind of head height by that. And whilst we've got the spring ARM selected, we just need to turn on Use Pawn Control rotation, which means that it gives the character control over the rotation of the camera. So essentially using the right analog stick or your mouse is going to allow you to control what the camera's looking at. What we also need to do is just open the class defaults, which is just located up here. And we're just going to turn off, use control at rotation your. And that's just going to allow us to keep control of that camera as well. And one other final thing we want to do just to make sure that the camera behaves as we expect, is go to the Character Movement Component here. And then we're just going to scroll down. We're looking for the rotation settings section character movement rotation settings. And we want to turn and orient rotation to movement, which means that when the character style is moving around, the camera will saw a default going back to straight behind them, which kind of helps to keep the play oriented all times. Okay, so that's, that's most of what we'll just compile that for now mature and not get any errors which were not. What we need now is in our Event Graph, we need the logic that's going to allow us to control the character. Now I could spend the next 20 minutes getting you to do this one step at a time. But we're gonna do a little cheat here. One of the reasons that we use the third person blueprint is if we go into this, here's the default character, the mannequin. And we're gonna go into their event graph and just take all the logic from here. He's already got the gamepad input, set up, the movement import mouse input jump is all that, which just means that we don't have to set this up from scratch, so we'll select it all and we'll do a Control C for copy. Well then go to our blueprint. We're going to delete these nodes here, x, we don't need them. And then we'll paste with control and v. There we go. So then that gives us all the logic we need. But if we try and compile this, you'll see that we get some errors. And the reason is, is that we need two variables. There's one called base turn rate and one called base lookup rate. And these are both float variables. So if we go into variables and add, so by default this things, it's going to be a Boolean. I disagree. It's going to be a float. And we need to get in the name. So it's going to be the first one is base turn rate. Base rates are just happy out, don't put any spaces in, but do make sure you capitalize the first letter. Press Enter, and that would be the first one. Then we'll add one more variable. By default, this one's going to be a float because we just used it. And this is going to be base rate. So base rate. And then we'll compile. The errors go away because these variables, and now there, we do need some default values for these variables. So I'm going to go for about 90 on each. You can always come back and change these later once you've experimented, these just deal with how quick of the character will change direction. So if you move from running forward, so running left, how quickly will the character blueprint rotate to the character? Okay, so let's compile that again. And believe it or not, that's it done. That is our entire character blueprint setup. And in fact, that's the entire character set up. In the next step, what we'll need to set up is the Game Mode blueprint, which basically just tells all male and gin which character we want it to use. So now what we're gonna do is switch out from using the default mannequin and switch to using our default Rob a character. So I'll see you in the next step for that.
22. Create a Game Mode Blueprint: Now it's time to create the final piece of the puzzle really, which is going to be again mode, which is going to tell a meal engine what character you want to use to replace this mannequin character basically. So let's get that setup. So I just need to, I've got an asterisk up here, so I need to save this. And I can just close this for now. And we'll close the or meal for ThirdPersonCharacter. I'm done with that as well. Okay, so I need to go back to my character Rob folder and into the blueprint folder. And we're going to create a new blueprint in here. So right-click Blueprint class. This one's going to be a game mode base. And I'm going to call it Rob underscore game mode, blueprint, so that we know what that is. And then what we're gonna do is open it. I want it to be in the class defaults, which I am. And I want to set the default Pawn Class 2, my Rob BP. And that's all we need to change in their Absolutely. So we'll just compile and save that and we can close it. Then what we want to do is go to the World settings. So the world setting should be over here, but if you've not got them open, you should be able to get it from here worlds, I think there's just there. And in this section there's a game mode here. And we want to tell this to use our game mode that we just created. So we're gonna go to Game Mode override, and it's going to be Robert Game Mode blueprint. There we go. So that says that all that will only do it on this level though. So for one it can we do it for the whole game? If we just go to Edit and Project Settings and go to the maps and mode section. We can just change the default game mode from third-person game mode, which is the default ones, to our rope game mode, blueprint, that's all good. So now we can close that again. And now what we're going to do, Let's just position ourself. Here. We're going to put in our character and you'll see is below the floor until we let go and then he pops into place. Looks good. And now if we test, this is still not going to work. And you can see if a test is still going to default to on we'll mannequin, which is no good to us right now. So what I'm gonna do is select my character here. And if we just go into his details and scroll all the way down to the bottom, we're looking for the pons section. There it is. And we need to set auto possess player to play a 0. Let's just try testing this again now. So we'll click on Play. And now you can say that we have a character. He runs around. He's got his fall animation jump works, everything is in place. So what we can do is just delete this default mannequin now, because he's just getting in the way, get out of my way, default mannequin. And that's basically everything that we need to have done. I'm just going to show you one more thing before we move on. So I'm just getting my Xbox controller, plug it into my PC. Hopefully it's going to work. And now with that plugged in, I'm just going to lightly touch the analog stick. So I'm only touching this a little bit and it goes to the run animation really quickly. And you see that the character is actually not moving very far across the screen. And so the wrong kind of feels unnecessary. And so we're going to need to make a change to that. So that brings us to the end of this video and an introduction to the next video, which is going to be fine tuning and polishing what we've got. So I will see you in the next video where we'll make our final changes to this character.
23. Tweak the Character & Finishing Touches: We're almost done then. What we need to do now is just a little bit of final tidying up and polishing to make sure that this all works. So as we said, the wrong isn't really starting at the right time and there's a reason for this. So if we go to rub, BP, and when we go to our character movement section, what we're looking for is the max walk speed. This is how fast you can go. And it's currently set to 600, which means that a max speed, we're moving at 600. Now that's fine. If we now go to our animation blueprint specifically, the blend space is what we're looking for. This axis only goes up to a 100, which means that when the speed reaches a 100, which is only 1 sixth of full speed, it's already breaking into a room. So what we need to do is change this maximum axis value to 600, like so. And we'll just save that. And we're just going to dot right over here. Whenever you change, if you want the character to move faster. So let's say we want to change that to 1200, then that's fine. But what you'll need to do is also go in and change this axis value as well. So now if we just make sure that everything is saved, it is. And we play. Now, if we move on, just click in this window, moves some dishes man looks that you can see that as he's getting faster, is taking them longer to break into the full wrong. And that just matches up a lot better. So if you want to test this, just make sure that you've got an analog stick. And it just means that there's less sliding of the field along the floor. So That's that pretty good. I want to make one more change in the blend space. So in fact, I'll just show you why I'm making the change first if you just go back into here. So as he walks very, very slowly, because of the way that we've put the blend space together. It kinda looks like he's got a limp because the idols go quite far back. Even when he starts to break into what you see still looks like he's hurt himself. So we're going to try and alleviate some of that. I'm not going to try and get rid of it completely, but I'll get rid of a lot of it. And he's actually, if we go into these blends samples, the walk, It's currently snapping to the grid. If we turn that off, we can tell it exactly where we want that to happen. So it's currently happening, a speed of 120, and we can bring that down. So let's say that when we get to a speed of 10, and you'll see that that is now much closer together, they should have broken into a full walk by them. So let's save that and we'll just give that a little test. So there was probably still be a hint of a limp, but he should get out of that pretty quickly. There you go. So now I'm walking about the same speed and the limps already gone. So it won't go away completely. If you're really just feather. The analog stick, it can still be found, but it won't stick around for as long. And you can even play with those values even more to change that further if you so desire. Okay, That's one fixed on anyway. What we're also going to do is add a double jump just because I can and I like a double jump. So let's go into our blueprint and we'll change this in class defaults, there are lots of things that you can change. I'm just gonna change the max jump count from one to two. Pretty straightforward. Let's give that a little test. So jump, jump, jump. There is now a double jump. Yeah. Now if we weren't doing this as a super fast or as fast as I can make it costs. And have done a slightly different animation to indicate that the second jumped out limb. The other thing that I don't particularly like about the defaults is the jumps are two floaty for me. I like them to feel snappier and also it's not high enough or can't even get off that. Oh, I can I can only just go there, but I can't get up here. So let's make some more changes to this jump. So we're gonna go to the Character Movement Component and we're gonna make some changes. So I want him to come down faster. In order to do that, I'm going to raise the gravity scale from one to six. Now if we just made that change would live, Jim would be even worse. So what we also need to do is go to was jump. So in the character movement jumping, falling section, we're going to change the jump zed velocity to 2000. So to offset the fact that gravity is now stronger, the jumps also going to be stronger and it will just make everything feel snappier as a result. So let's just compile that and we'll give that a cheeky little test. So let's try this now. So jump. Yeah, so it goes up and down much quicker. Jump, jump. So I prefer this. You can obviously tweak this to whatever your preference is. But I like that. It feels like something's happening immediately and you can get down quicker. I find it easier to line up. One other thing that I will change them about the jump is because this is meant to be a platform in character. You also want to be able to control them in the air. And that's these air control thing here. So if I just change that to 0.9, compile that again and test one more time. Now, once I'm in the air, I can kind of changed my mind a little bit like that. Which can be much better because it means that now if I'm about to miss a platform, I've got a way of correcting it in midair. So That's the jump pretty much done with. There's one more thing that I want to look at. So if we just run into the wall, he buries his face quite far into it. And that's because of the captures a little bit too thin for the character. So I'll make one final change if it go to the capsule, should be this here. I'll just go into the viewport. So select the capsule. And this has a radius. So the radius is set by default to 34. I find that if I say 250 for this character, it'll stop him from going as far into the wall. So let's now compile and play. And now if we just run him headfirst into the wall, that feels much better now, I can just about get is facing the wall, but it's not as offensively bad. So there we go. That just feels better. You can see is a lot like that. Just about contacting the floor. I think I need to just raise that capsular little bit. So I'll rather dropped the character a little bit. Just do a couple compile play. Let's see if we can get him upon a platform to see if that's working. Yeah. That's now contacting the floor pretty well. So I I'm going to stop there. I'm going to call that an overwhelming success. So what you have done with me over the duration of this course is literally everything that is required to setup a character for use in Unreal Engine 4. You have modeled it. You have UV mapped, kind of give texted. You have a rig debt, you've animated it, you've exported, imported, you've done the logic, you set up the blend space, you've done the blueprints, and you've also tweet it to your liking that I think can only be considered a success. So well done for finishing the course.
24. Conclusion: And that's it. You've made it to the end. Hopefully you found this class helpful and learned a lot along the way. If he did, then I'd really appreciate it. If you could leave a review. I'm still very new to Skillshare and positive reviews like yours can really helped me to get discovered and in turn, be able to help more people in the skills they need to get into making games. Thanks so much for spending the last four hours with me and I really hope I'll see you again in a future class.
 Shane Whittington, 3D Artist, Educator & Entrepreneur