Transcripts
1. Introduction: Hello and welcome to class. My name is Christina
Moyer and I've been drawing and painting
since I was a little girl. And I just love art. It's my happy place today. I'm so excited to share
this class with you. I've been wanting to do
this since I first started my skill share journey
because it was a really fun project that
I created in university. And I think it's a
great way to explore charcoal and learn
how to use charcoal, as well as a little
bit of technology, a little bit of animation,
a little bit of fun. And you don't have to
be good at drawing to have a successful
charcoal animation piece. It's a really great way
to explore the medium of charcoal while also creating
something really fun. Because in the end,
the project is an experience that you
can share with somebody. Let's talk about what the
project is right now.
2. The Project: Today's drawing class, we're going to
explore the medium of charcoal by creating
a charcoal animation. But what is that really? We're going to be taking
pictures and tons of pictures. As many as you want, depending on how long of a video
you want to create, how long your animation
you want to have. We're going to create a story or draw anything,
whatever you want. As you're drawing, you're taking pictures,
moving out of the way. Take a picture, move
out of the way. And every moment you're
making these marks. Now what's really interesting
that sets charcoal apart from other mediums
for this type of animation, is how charcoal
leaves a history. It's hard to fully
erase charcoal. So what's going to happen is as you're drawing and erasing, and drawing and
racing and smudging, you're going to have
this history of your marks that you've
made, like footprints. You're leaving
behind those marks that you've erased are
no longer the focus, but they're still there and
they add to the whole story. So I'm going to show
you my project and then I'm going to
help you create this. As you go through it,
you're going to learn a little bit about
charcoal, how it works, and what you can do with it, and how you can use this in
future projects. How fun.
3. The Materials: Do need a few things
to make it happen. We're going to need a
camera of some kind. You're going to want
it on a tripod. You're, you're
drawing materials. But in addition we're
going to need something to put all of those together
and create an animation. We're going to talk
about some options you can use to make that happen. Let's get started.
Here's the animation.
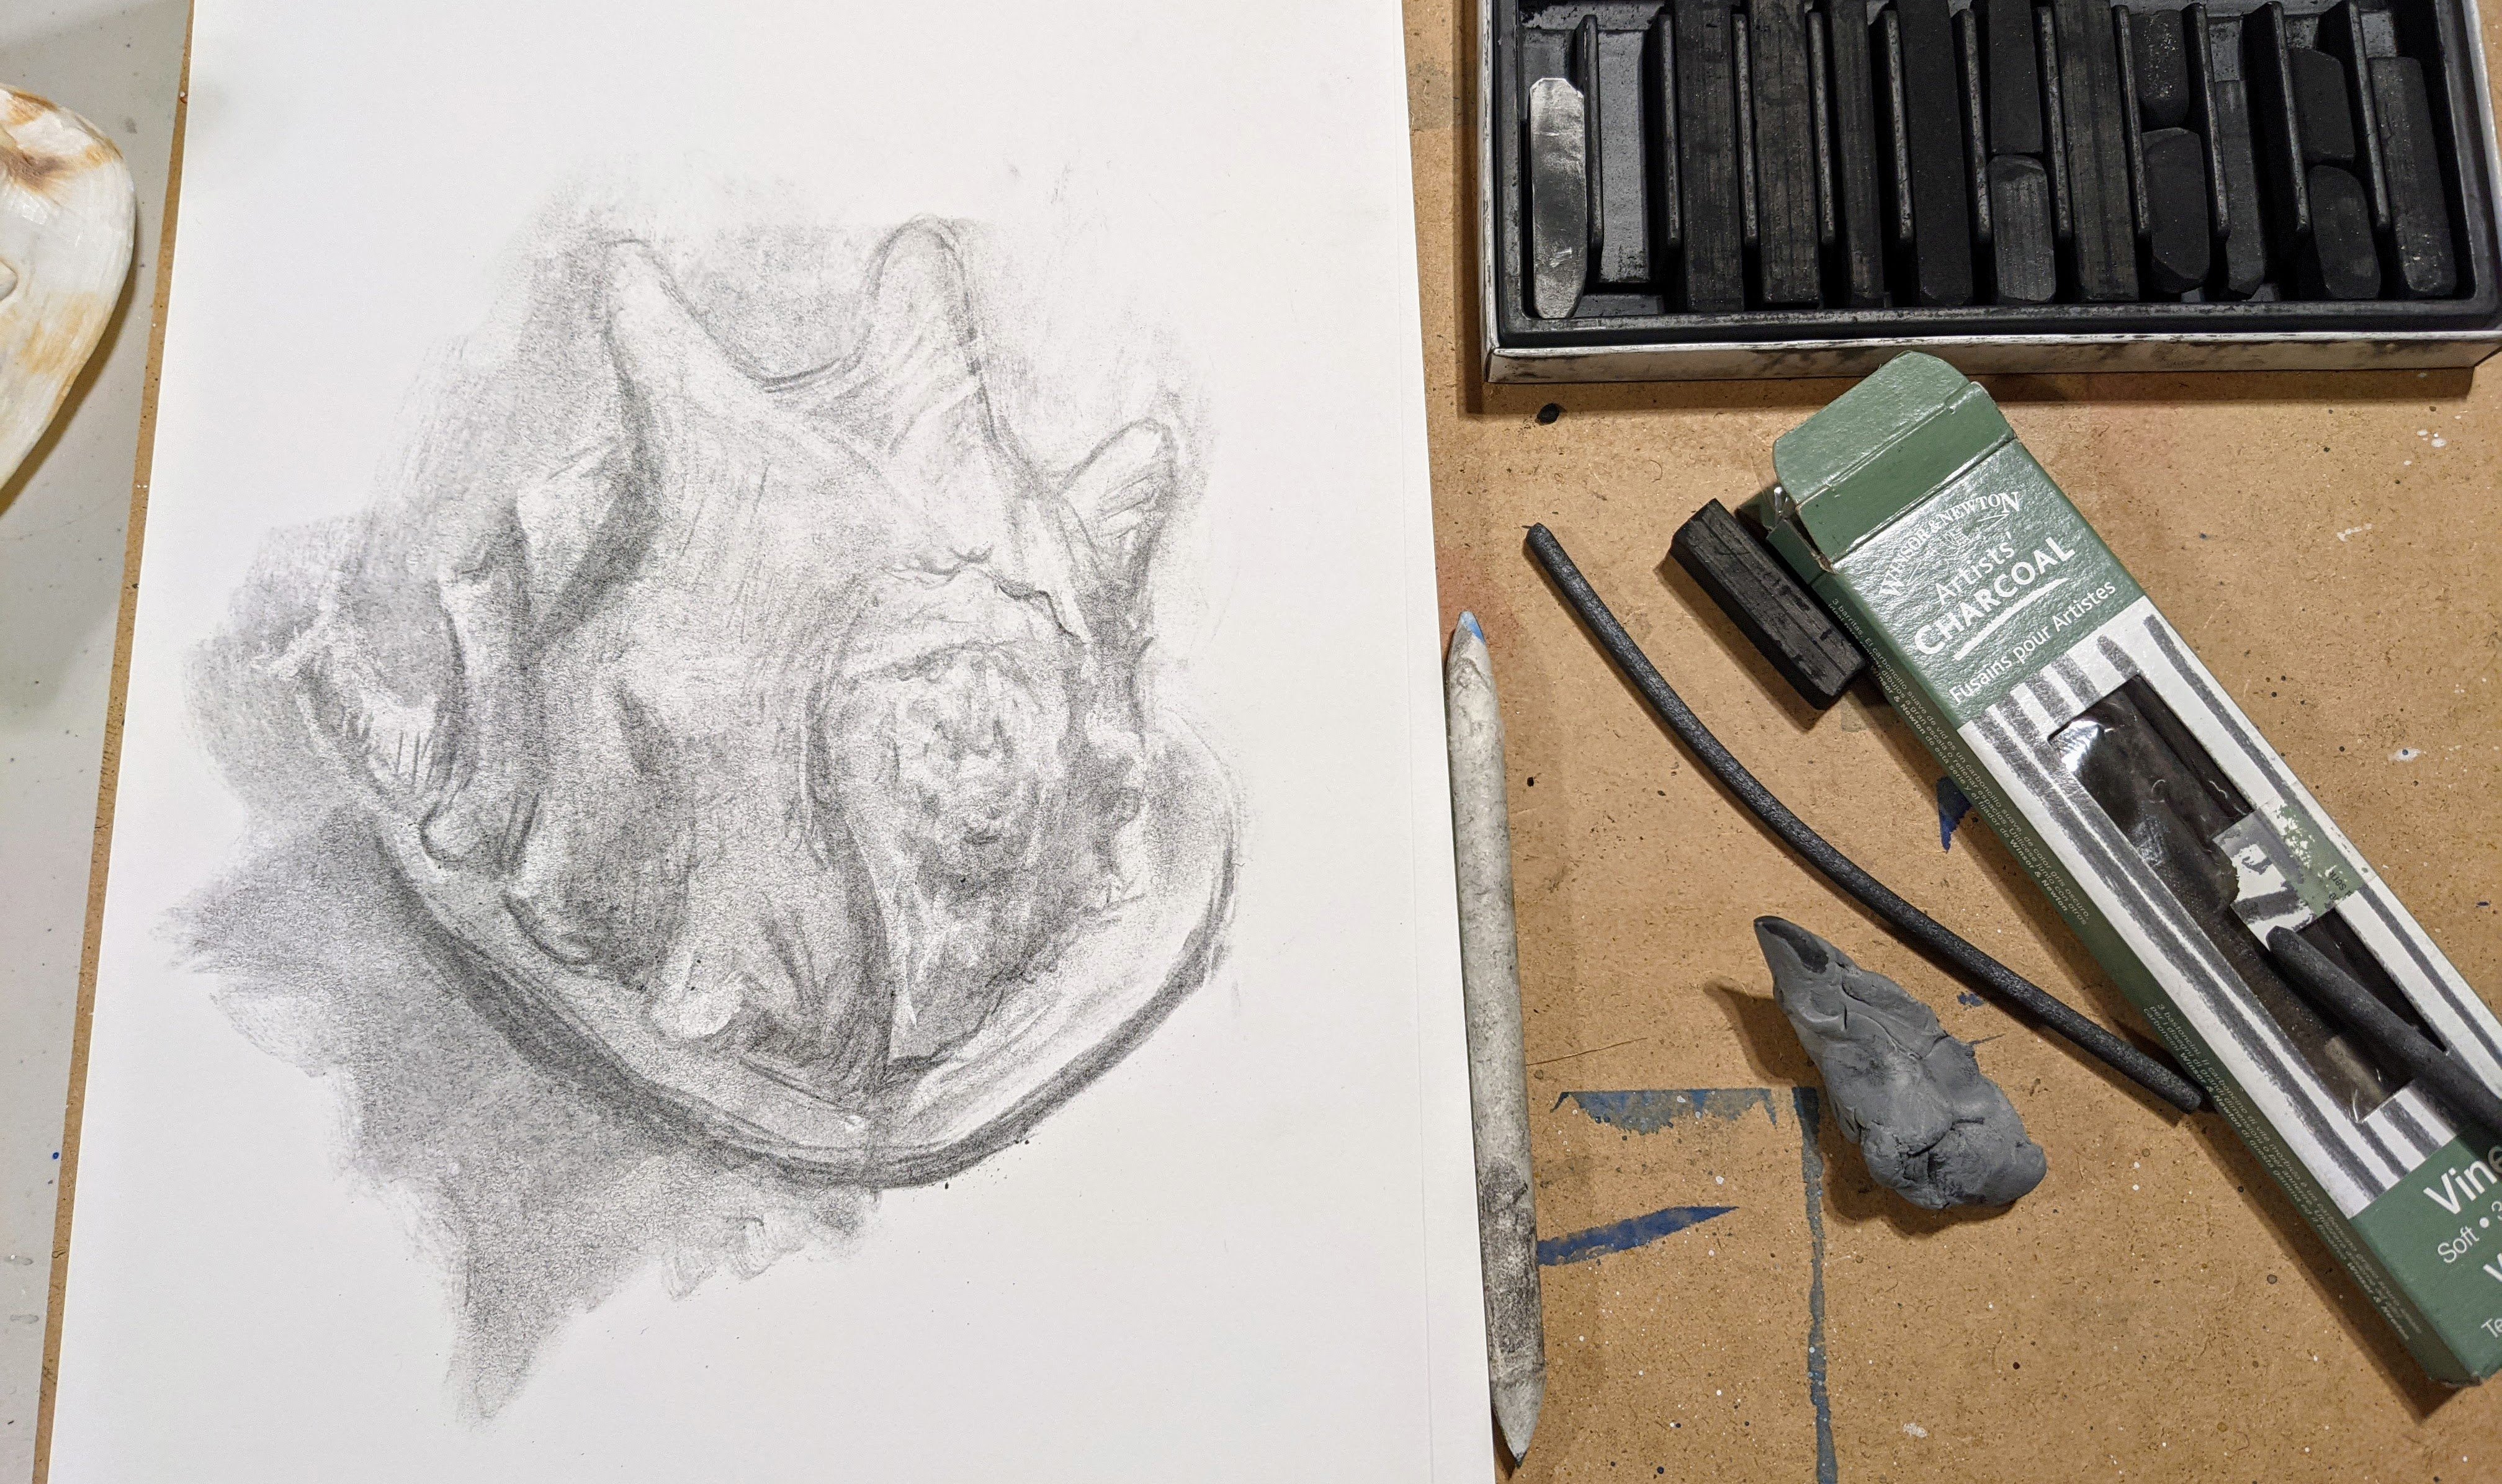
5. The Setup: All right, let's set
things up with success by starting with a good paper
that's made for drawing, something that allows for
charcoal pencil pastels. Anything like that is
going to be successful. I'm using a 16 by 20 and it's in a sketch
book. It doesn't have to be. It could be just a single
loose piece of paper, just make sure it's
decent quality. And I'm going to clip it onto a backing so that
it's nice and sturdy. And then on my easel, tightening my easel in. And then we're going
to clip the page on so that there's no movement
happening from the page. When we're doing an
animation like this, we want to make
sure that most of our variables are kept
in line and then we make only the changes
that we want to show in the animation, making sure things are
nice and clean looking. I'm using just these clips on the edges where the
paper is lifting in my sketchbook just to keep that nice and
strong and sturdy. And that's the main,
the key thing. So anything can use
some kind of clips. You can use paper clips. Even if you don't have
these kinds of clips, just something could even
use some tape if you need to to kind of
keep things in place. We're going to be
using charcoal, so there are different
types of charcoal, but whatever you have access to will be fine
for this project. Also, your hands
are going to get really dirty with charcoal. Just note that space, your whole work
space can get dirty. You can use a blending stump. This is a really helpful tool. You can use your
fingers to blend. You can use other
things as well. And then this here must
have is a needable eraser. It helps to clean your hands as well to help minimize some of the post
production editing. If you set up your camera
and tripod so that you only see the sketch
book in the display, like your camera is not
showing anything else. Like that's going to be
ideal for this project. So just make sure you have that. It's going to give a nice, cleaner, more professional
kind of appearance. And you're not going
to have distractions of the edge of the paper or
background distractions. We want to focus on
what you're drawing, what the animation's
going to be. Okay, so make sure you
just have that view in that place and make sure
your tripod stays in place. You're not going to be
shifting that around. You want something that's
going to keep in place. If you need to make little
markings on the floor or something wherever
you're placing your tripod. Make sure the stand for your easels going to be
stationary and not moving around. Keep those variables in line
so that we can have a nice, smooth looking animation that's
neat and more effective.
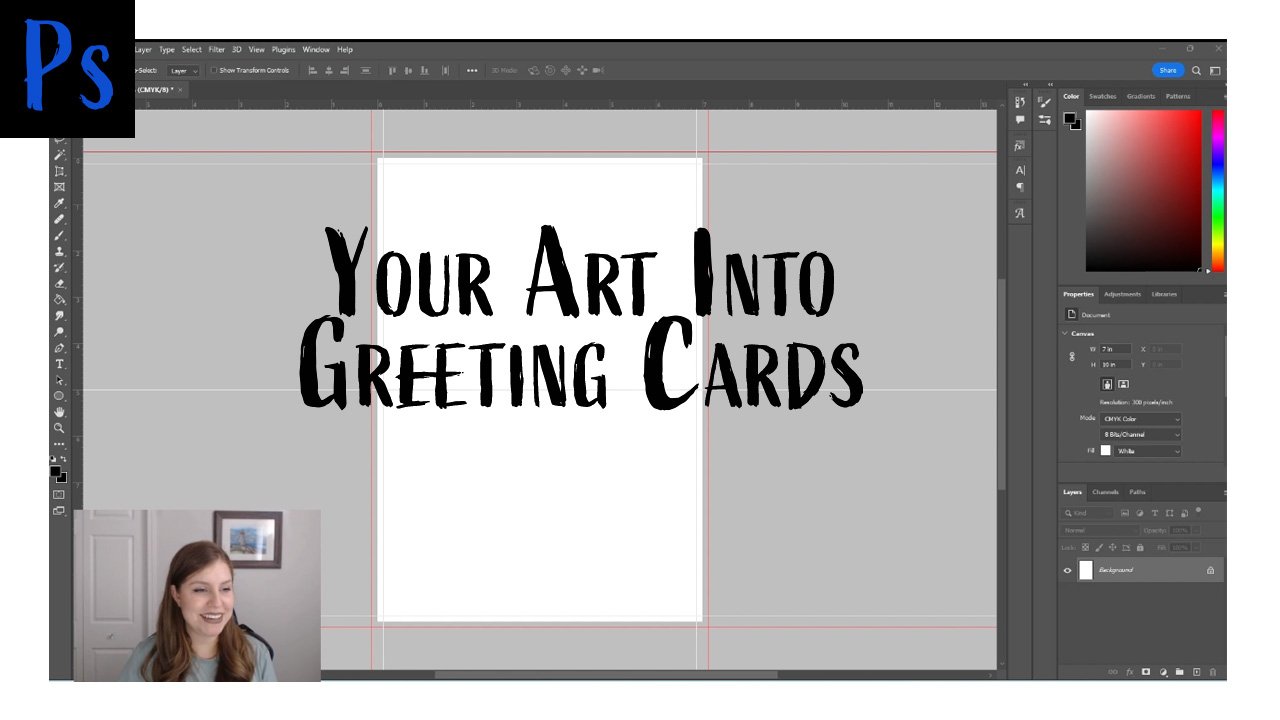
6. The Software: So what software do you need? How much is this going
to cost you to do this? Well, I decided to make this
as accessible as possible. You do have options that you can pay money to put this together, this animation software,
or you can use a free app. I'm going to show
you which one it is, and that's the one I've
used to create the project. So that I can understand
from all sides what you want to do and make
it accessible for everyone. And what's cool
about this app is there is a premium
version for it. And I did not purchase that. I just used the free version. And there are some
limitations from it, but I will tell you how
to use it that way. You can also use programs
like Premier Pro, or if you have another
product that works for you, if you have an Apple product, maybe you already have movie
just as a software already, part of your computer
system or phone. And that will work too. I just want to make
sure that everybody that wants to give this
a try can give it a try. Now you are going to
need some camera. If you're using this
particular software that's free an app, then you're going to want to use that to take the pictures. And you're going to
want to make sure you keep that phone, whatever camera
you're using steady. If you're using a DSLR
or point and shoot, you're going to want to
make sure that camera stays steady throughout the
whole drawing process. Using a tripod is ideal. If you can't get
access to a tripod, find a way to get your phone
to be in the same place. Maybe holding a stand of some kind that's
going to be sturdy, not just topple over and not impede the view
of the camera either. If there's a software
that you love using for creating stop
motion animations, let us know in a discussion, open up a discussion, and
let's talk about software. If you're not really sure, let's create a discussion and talk about it so
that everybody can feel confident in whatever software they
decide to choose.
7. The Process pt 1: All right. You have
your setup ready to go, you have your camera in place. You've downloaded the app, Stop Motion Studio or whatever
else you're going to use. If you're using something in post production
like Premiere Pro, maybe you're just setting up your camera and taking photos. So as you can see, I've
got a couple of things. I've got my eraser
in my left hand, and I'm switching it back and forth with my charcoal
in the right hand. I'm right handed, So I have
my charcoal and eraser, and I do have my blending
stump nearby as well. You can use that just as
you go whenever you need. I'm not using a storyboard
for this animation now. Typically you do. Typically you prepare by
creating a storyboard. However, this is not
a typical animation. This is something where I'm
going with spontaneity. I'm going with the flow
of what the image is saying to me to tell and
to say, and to express. I'm going to leave
that part up to you, whether you want to create
a storyboard or not. You can do that before you get started with
this section here. But let me just show
you what I'm doing. Really, I'm just taking
photos in between my steps. I draw a little bit, and this is how I started. If you want to start this way. To start with a little line that starts to move across the page. Maybe it's, mine's
going loop los. Maybe yours is going straight across or moving
in straight lines. But as I go, I'm also, I'm erasing some of the lines. Now they're not going
to race 100% So here you can see the
picture a bit better. Okay, so I'm going to
draw a little line. I'm starting to imagine
it as a thing that it's alive and so it has
a start and a finish. And that's why I'm
erasing the end side, and it creates movement. I'm drawing a little line and
then I'm taking a picture, or I'm racing and then
taking a picture, just depending on
which stage I'm at, I might draw a race.
Then take a picture. Draw a race, take a picture. Maybe there's some
smudging in there. Maybe your smudging is
actually drawing for you because charcoal is so soft. When I say that the pigments, they come off so easily. If you're using a graphite
pencil with like an eight B, it's very soft blends really easily also is a
little bit messier. This is definitely
messy. You're going to have little dust, charcoal dust falling down. So make sure you don't have nice light carpet
underneath your workspace. So I'm evolving the image. It's starting with just a line. With the lines getting bigger, and I've decided I'm bringing
another line into view. Now, I didn't start at
the very edge of my page because what matters
most to me is that I'm starting at the edge of my view that the pictures
are being taken. I'm looking at my viewfinder
once in a while to make sure that I'm within my image, within my viewpoint
for the photos so that the animations viewable. We want people to
be able to see it. Right? I'm starting this
story with one image, one line, and then we're
bringing in this other line. And they're going
to speak together, they're going to communicate. You're going to see it's
almost like a dance. You can see that my erasing
isn't very effective. It's not really
erasing very well. This will depend on
which charcoal you use. If you want one that's
going to erase more because currently it's not erasing
very well and that's okay. I knew that was going to happen. Then, use a vine charcoal. A vine charcoal is
lighter and there are different types of
vine charcoals in terms of depth of tonality. Maybe some are really dark and maybe some are really light.
That's what I mean by that. If that did not speak
to you in English, in your understanding
of tonality, if you just have a
regular charcoal, then all you need to
do is go on with it. Smudge draw, or you
don't have to smudge, but if you want to, you can. And then trying to
race as you go along, You might be thinking
this doesn't really look like
anything right now. And that's okay, because it's starting to
become something. I'm taking tons and
tons of pictures. What I like about
this angle that I'm showing you right now is you can see the app in how simple it is. It looks very similar to what your camera might look
like on your phone. Now, I did notice
that it wanted me to have horizontal station. It didn't want me to have
a vertical type of video. I'm not sure if the premium
version allows for that, but that's something
to keep in mind if you want to have
a vertical video. And also if you're
planning a storyboard, always get to know what
direction you're going in, what the ratio is going
to be for your film. I do like that. This is a
typical set up for movie. If you're watching videos
on Youtube like you are, you might be watching
a Youtube video. Typically it is horizontal. However, we have shorts and reels and things that
can be watched vertically. You can still share those on
those kind of social medias. Is that the right
term? Social media, Okay, so as you can see my lines are starting
to come together. They're actually
joining up and so it's starting to create a bit
of a more of a story line. First, I just had this
line kind of moving around and now it's actually meeting up
with another line. So that's kind of like having a conversation like what
is going to happen here? Are they going to touch what
happens when they meet? It can be a simple story. It doesn't have to be
a complex scenario with people and all
that kind of stuff. It can be very simple
and it can say a lot with just minimal lines, minimal visuals that
you're giving to it. So that's what I said, You don't have to be a skilled
artist to do this class, but you could, and you can
make it more intricate, you can have more things
happening at the same time. And you can also start this off by having a picture
already complete. Like you could just draw a
picture as your starting point and then have that picture moving and create an
animation from there. You don't necessarily
have to start with a blank page as I have
right now for this project. Let them speak and let's talk a little bit about
using your charcoal. I hope that it makes
sense to the set up and that you aren't having
problems with the software. Simply as you can see, I just draw a little
bit Once I make a small change here and there might do some
erasing with my change, I take a picture snap, it makes a little click
sound, You know it was taken. The other cool thing is
you can actually get a little remote with it as well. If you are using a remote, it's less likely to have that
bit of shaking happening, which could blur your image. But I didn't find any
of my images blurred. Even though I wasn't
using a remote. I was really happy about that. Now my lines have met and
what's going to happen? I'm not going to show
you the whole process because that's not
what's important. You don't have to, because I'm just doing the
same thing here. I will in the step two
continue to show more. But you don't need to see
the whole how I created it, because you're going to
create your own story. The main point is that you
know how to use the software, that you know how to use some charcoal and play
around with it a little bit. If you're nervous about
starting right onto this page and start drawing and taking
pictures and everything, go into your sketchbook. Try a few little things. Try using your blending stump. See how it works a little bit. It's similar to chalk pastel
but just super condensed. It's like the India
ink of chalk. It's really strong, it's
going to get messy. Make sure your clothes
that you're wearing are especially if you have a tendency to wipe your
hands on your clothing. Make sure you're wearing
not your favorite outfit. Yeah, just make sure you're
having fun and going along continuously
taking pictures. Don't draw too much
before taking a picture. I'm making small little marks. And then taking a
picture that's going to give me more of a
smooth animation. If you want it to be
a little bit more. Jarring a little bit
more. I'm not sure. I would say jarring
is the right word. Then you could draw a little bit more and
then take picture. But you can also try it out. As soon as you leave the app, you press the back button. It's going to keep
your project in line. You don't have to do this
project all in one sitting. But it is nice to have
things set up in place, like keep your
tripod where it is, especially if you're using
your phone, like me. And don't move your
background either. Like don't move your paper. Make sure it's stationary, keep that still
and set in place. Those are really some of
the most important aspects of it you decide to draw. That's totally up to
you. Have fun with it. Practice drawing something
you've been working on. If you've taken
my drawing trees, maybe you could draw a tree
or see a tree growing. You're going to
see this one here. I decide to create this
nucleus and then have it grow. Let's move on to the next side of the
process in part two. Coming up right away.
8. The Process pt 2: Let's continue on with the
process in this part too. So I've got my blending
stump in hand now and again, making sure I'm not forgetting
to take pictures as I go. Because sometimes you can
get lost in your drawing. So don't forget to
be taking pictures and looked like I took a bunch
of pictures right there. One I thought might have been
wobbly, so I took an extra. And you can do that
too if you're worried. Now, what's neat about
this is I have a lot of concentrated charcoal in that little nucleus,
let's call it. When I take my blending stump, I can draw with my
blending stump, so I'm creating these veins,
they're actually roots. We're bringing down these lines, just dragging it,
pulling from the center. You can give this a try to, if you have an area
where you want a softer line and the softer lines will be
easier to erase as well. So that's another thing to note. If you are looking to have
something race more entirely, then you're going to
want to try that. Because the other
areas, as you can see, are really tough to erase. And when you try it
and get into it, you're going to feel that
you're going to say, oh wow, this is not a racing. As I thought even as good
as a needable racer can be, you're still going to
have some struggles there. Just take note of that. And remember to take little
pictures here and there. Now, if you're worried
about forgetting, set yourself a
little like 54321. Take a picture. You can
do it every 5 seconds. You can set it. You have some kind of
reminder, whatever you need. Actually count out
loud if you want. If that's going to help you
remember, that's great. So I'm just adding a little
bit more into there with my charcoal so that I can pull more color Even
though it's black, more pigment through
into those veins. They look like veins to me. These veins, roots
pulling tone onto them, make them look more concentrated,
like they're growing. That's kind of the feel
that I'm going for. So I might make a few marks here and there in different areas
and then take a picture. But if you want to do every 5
seconds, that works for me. As you can see, I'm actually
having something grow. Maybe your story will come to life in the
same way mine did, where I started with a
little line, a loop, Dilo, and then another line
coming and joining together. And I thought, oh, this could
grow into something neat. To see a plant grow, or a flower or something. You can decide what
interests you. Maybe there's something
you enjoy drawing. It could be as simple as a
line moving around the page. It could be, you know, a drawing that you're
working on and you're just showing kind of
a time lapse of it. Because that creates
a story too. Just seeing how you're creating a process with your drawing
can come to life as well. And then you can see whether you want to create some
kind of animation. Like if you're drawing a
portrait, for instance. Maybe you have the
portrait close its eyes and then
open its eyes again. Or open and close the mouth,
or change expression. Or maybe the hair moves around. There's all kinds of
things you can do with it. It could be a really
simple thing. Maybe just the eyebrows move. Maybe the blink, the eyes blink. Maybe it starts to age. Maybe you're showing
the process of aging, like it could be really neat. Maybe you're showing somebody
walking across and it shows them aging as
they're walking across. And it shows this
history of things. As you keep drawing
them and you have this messiness
with the charcoal, it looks a bit messy, right? Because you have those other
lines that are still there, but it tells that story. The footprint is still there. And it's quite
interesting making these subtle changes to
have a smoother animation. Totally up to you how smooth you want
your animation to be. Make small changes and I
think it's most effective when you do both the erasing
and drawing in the same. Still do both actions before you take a picture because it's not going
to make as much sense. If you draw, take a picture, erase a bit, Take a picture. Depending on the story. For my story, that didn't
make as much sense. It makes more sense
to do both so that it's speaking to that
object in its entirety. You can see I had that first bit of growth for my little plant
and then now it's got that. It had like that baby
growth and then it has like the adult
growth coming through. So it's sprouting
up and rising up. And as it's rising I have a stronger root system
building and growing deeper. And there's so much
symbolism with, I was going to say symbolic, there's so much symbolism with growing plants,
with this imagery. And I think the feel of
charcoal speaks emotionally. I really love this medium. For that reason, the
emotional value it has because of the textures
and the depth it gets. So black you have this black black that you don't achieve with
just a pencil. If you put markings of your
HB pencil, a two B pencil, even up to an eight
B pencil next to a smudging or
marking of a charcoal, you're going to see
a huge difference. I mean, AB is going
to be closer, but it's quite a big difference. So there's this dramatic
effect with it. And the fact that
it doesn't easily erase is another aspect of it. Again, if you want it to more easily erase a couple of things, use your blending stump, and you can see how I'm using
it to draw quite a bit. It also helps to smooth out some of that texture that
charcoal initially creates. And the other option
is to try the vine. Charcoal typically comes in a little box with a few sticks, and those are a little
bit easier to erase, especially if you get
the lighter toned ones. But they're almost more like a graphite with some of
the tones that they offer. So keep that in mind if
you want that drama like I'm getting with
this, give it a try. It can't hurt to just
try it once this way. And then if you like
it and you want to try a different medium,
try it a different way. I love that this is really
an inexpensive art project. A lot of art projects
can get pricey, but this one's very accessible. Charcoal is not
expensive. Paper. Depending on the paper, you
can get higher quality paper. But even the higher quality
isn't that expensive. When we're looking at canvas as a comparison and
various other mediums you can be using
blending stumps. You can get them pretty much any art supply store,
craft supply stores. Typically, if you
can buy pencils in that store of varying
types like a pencil set, you should be able to
get a blending stump. I'm going to say your craft supply store, art supply store, you should be able to
get a blending stump and eatable eraser. Those often will
come in pencil kits. If you're buying a pencil set, if you're already needing
to buy one anyways, you might as well
consider getting a set. Then you have those
pencils on hand, you can take some of the drawing classes
that are on here, and then you can use
your blending stump. Now, once you've used
this blending stump with a charcoal, it's tainted. It's going to be a
little hard to use that for pencil once you've
used it for charcoal, but you can just
tear off some of that and get the
clean, clean bit. Unless you want to use it with some charcoal and
give that a try, why not give it a go test it out in your sketchbook first, you can see that some of
the markings do erase. Like I said, when you're
using your blending stump, Now I'm not going to show you the whole drawing that I create. You're going to see that you've already seen that
in the project. What the whole scene
was that happened. But what I do want to talk about in these last couple minutes of this particular lesson before we conclude to post production. There are so many
options when it comes to post production editing. And you can keep it silent. It could be a silent film. You can add music to it if you're just
using the free app. This will require using a different software
to then add music. Either when you go onto
social media and then you're adding music just like you would on a reel or something like that.
You can do that. But if you want a
specific music to it, then maybe put it
in Premier Pro. But if you want to purchase the Stop Motion Studio
premium version, I do believe they
have the music. I have not purchased it,
so I haven't tried that. I have these other apps
such as Premiere Pro, I use for video editing. I could add music in that
point or just keep it silent. See how it works in that way. Once you exit the project, you'll click on the three dots next to the title of the
project that you created. And there are different options. There's play if you
just want to see it. Maybe you're showing
somebody there's Save As. That's when you can save
it to your computer or something like that.
There is a share. When you click on Share, you have some options whether
you want to share it to various areas it can share right onto some of your apps that
you might have on your phone. There's also the
option of renaming it to whatever name
you want to give it. Maybe there's something in particular that
you were creating and so you have a name for it, you can create a duplicate,
or you can delete it. You have options if
you press Save As, then you could save it to your computer in the
location that works for you. And that's all you have to do. You don't have to do any
other post production. As long as you've set this up in a good way where you've
cropped it out already. You have good lighting, and you don't need any music. If that is the case, then you really don't need post production,
which is fantastic. How easy is that? Again, if you have any problems with
any of these processes, please create a discussion
and let's talk it out. And help each other, because that's what's great
about a class and having a teacher is you can reach out and get some help.
9. Conclusion: All right, you did it,
you completed this class. Let me give you a few things
before you wrap this up. Before we wrap this class up and we're finished
and you can move on to your next lesson and
skill that you're going to focus on a couple of things. So if you created a
story like I did, where the end result isn't like a piece you want to put up
and frame on your wall, then you don't necessarily
have to spray any fixative, but it could still get kind of messy and smudgy in
your sketchbook. If you used a big
sketchbook or a big paper, maybe you're just tossing
it out. That's what I did. Or maybe you created a piece
that you do want to display. Charcoal is pretty messy. So what you're going to want
to do is use a fixative. You can purchase a fixative. You can use an
aerosol hairspray to fix that all the little particles so they're
not going to smudge anymore. They're not going to make a big mess and get ruined if you've created a piece that you want to frame. So make sure you
do that. Even if you're putting a
glass frame on it, it's good to spray the
fixative so it doesn't get ruined in the future.
That's super important. Also important is, let me know
how you enjoy this class. Give me some feedback. You can
put notes and discussions. You can submit a review
so that I know what you really appreciated about the class and anything
that I can improve upon. Also, I would like to
see your projects Now, because the project
gallery is pictures, it's going to be a little
bit hard for me to see them. What I want you to do is
if you have Instagram or one of these other avenues,
Youtube or something, you want to upload it there
and share a link to it in the discussion or send me a message that you
want to share it with me. That would be
fantastic. You can also tag me if you're putting
it on Instagram as a real I would love to see your animations and
offer any feedback. If you have specific
feedback you're looking for, make sure you let me know and
I'm so excited to see them. So thank you so much
for taking this class. I hope you enjoyed it
and I hope to see you in the next drawing class
or painting class or whatever art skill that I'm providing and that you
want to participate in. All right. Thanks
again. We'll see you next time. Bye now.
 Kristina (Moyor) Choy, fine artist