Transcripts
1. Introduction: This is a sale sheet. Or is it a sale sheet? Either way, it doesn't matter. It's a little piece
of paper or an image that you can use to make
your artwork shine. I made them using
a layout program from Adobe called In Design. Hi. My name is Kristie Westberg. I'm an artist and
surface pattern designer living in Pasadena, California. I make artwork using
block printing, my iPad, and pretty much any other medium
you can think of. In this class, I'll
show you how to make your own set of custom
templates so that you can make sale sheets
quickly and easily to pitch your artwork to art directors and other companies
for licensing. First, we'll make a list of
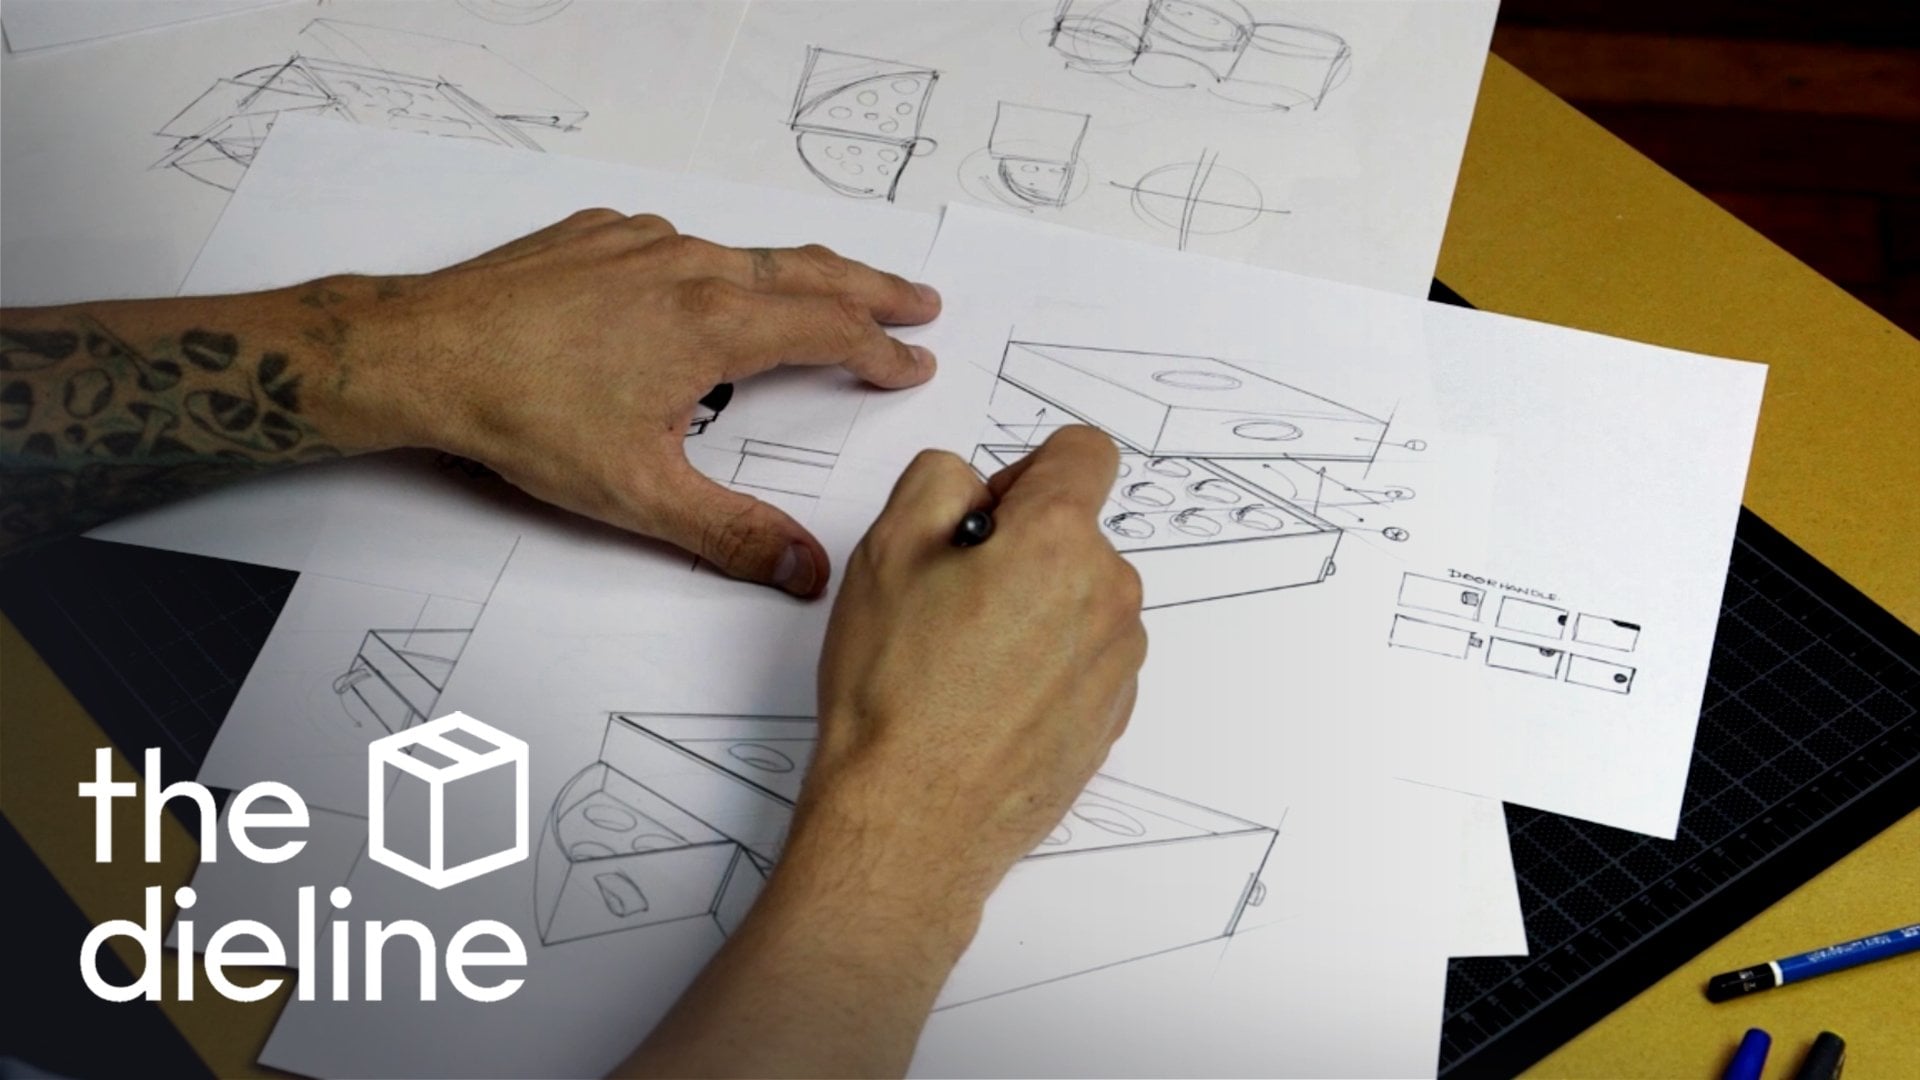
the types of art you create. Then we'll sketch out
some layout ideas to make your work shine. I'll take you on a tour of
in design, and finally, we'll take your
sketches and turn them into your own set of
sale sheet templates. This class is perfect
for in design beginners. Think of it as just dipping your toe in the pool of design. It's not a deep dive. I'm just going to show you the bare minimum that
you need to get your perfect set of custom sale sheet
templates up and running. Ready to get started.
See you in class.
2. Class Project: O The project you'll
be creating in this class is a set of sale sheet templates
using Adobe and Design. We'll walk through every step of the process together in
the following lessons. Once your project is complete, head over to the Projects and Resources tab to
share your work. I'd love to see your
layout sketches, a screenshot of your templates, and an image of a sale sheet
filled with your artwork. Be sure to block out any personal information before you share your sale sheet. While you're in there, make someone's day and leave a fellow student
alike and a comment. In the next lesson, I'll show you a few sale sheet examples from fellow artists to help you get your creative
juices flowing.
3. Sale Sheet Examples: Before we start brainstorming
our sale sheet templates, I thought it would
be nice to see a few examples from
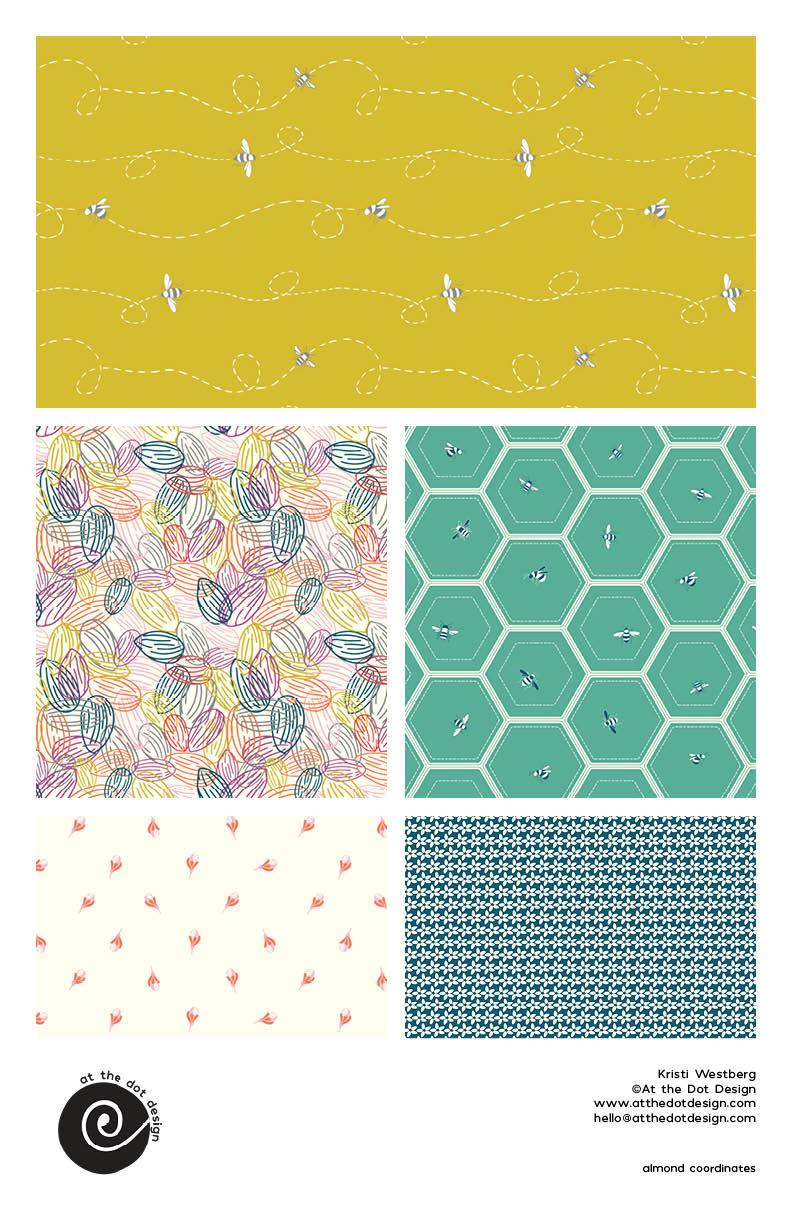
fellow artists. This first sale sheet is mine, and I want to just emphasize
that on all the sale sheets, you'll see a few of the
same elements repeated. Everybody has included a logo. They are contact details, your website, your
e mail address, and then also, you'll
want to include what you're calling your pattern or group of patterns
or your illustration. That way, if somebody wants to pick up and
license your work, they know exactly what
to call it and you know that you both are talking about the same piece of work. This first sheet just
highlights one single pattern, so it's just one box
filled with pattern. This is going to be the
easiest sale sheet to make. Next one is by Nikita Raju. She is a wonderful
artist and friend, and she kindly shared a
few of her sheets with me. This sheet has three
different boxes. There's one hero pattern
here in the middle, and then she has this
coordinate pattern in two color ways in these
two different size boxes. You'll see that she has her logo and her contact details
over on this side, and then she also has the name of the
pattern listed here. Other way that you can highlight three different patterns,
or in this case, Nikita has put three of the same pattern in three
different color ways. She has the same
pattern split into these three horizontal
boxes across her page. I think this is a really
great way to highlight three patterns that have
the same hierarchy. There's not one hero
pattern with coordinates. It's three patterns that all fall into the
same hierarchy. They're not battling
one another. There's not one hero, there's
not one focal point print, but they all work together
as a small collection. This sheet is one of mine. I have a small
little illustration here of a Christmas sweater, and then the pattern that's in that Christmas sweater
is in this big box, and then I just have
this little box with this tiny little V pattern. That's a pretty simple pattern. I felt like it
didn't need to have a whole lot of real estate
on this sale sheet, but I still wanted it to be there so people
knew that this was a coordinate that
goes with this selection. Next up, we have a sale sheet
from Quietest Noise Studio. The artist is Hilary Moore. Her work is lovely,
as you can see. She has a small collection here. She has her hero print
in the biggest box, and it's just gorgeous. Then she has three
coordinates along the side. She has one more complex print, definitely like a nice
blender print here, and then another print the
smaller box at the bottom. So you'll see that she's laid out her information a
little bit differently. She has her logo here
at the bottom left, and then she has the name
of the collection right underneath and then her
contact details right here. This last set of sheets were
submitted by Jamie Murray. She has a company called
Jamie Murray Designs, and she has shared
several sheets. She has three collections that come together to form one
really large collection. And so to highlight that work, she has split it onto three different sale sheets.
This one is the first one. And her collection has a name. This one is called the serpent. Then she also has a
nice little description here of why is it
called the serpent? What are we looking
at here? Then you'll see how she's laid out her hero pattern and her little bit more complex
patterns here at the bottom, and then her simpler more
geometric pattern on the right. The next sheet in her group of sheets is called
the gate keeper. Again, she's got the logo for this section and a little
explanation at the top. You'll also see she has a lot more patterns on
this particular sheet. She has this big pattern. And then two medium size, and then three smaller boxes. This is another way
where you can add quite a few patterns
onto one sheet. I also just want
to call out so she has named each pattern
down here at the bottom, and then I like the
way that she has organized her logo and
her contact details. It all looks really
nice together, looks really crisp
and really clean. Third sheet in this very large collection
is called the owl. I really like the way
she's broken this up, she's got a couple of different color ways of the same pattern. She's got a more complex
hero pattern here, and then these two
patterns beside. She's managed to fit quite a few patterns
on this sale sheet, and then she has one additional
sheet she's included, which is a mock up. This is the whole
entire collection altogether is called Fable loom, and she says it's a trio of
tails passed down through generations that flow together seamlessly and shine
independently. I think that's really great that she's explained you know, why these three
collections are together. And then she's
given you an idea. This is what it could
look like on swatches. This is a fun way to show
off your work as well. I would say that
I still like that she's included these
other sheets with this large sheet because
you can really see the artwork a lot
better on these sheets, and you want to make sure
first and foremost that art directors and companies are able to really see
your artwork shine. If you want to do something
like this with the mock ups, I would say it could
also benefit to have an additional sheet where
you have really big boxes. That really highlight all
of the wonderful line work, all of the wonderful work that you put into your patterns. Those are just a
few ideas to get your brain working to figure out how you want to lay
out your own sales sheets. In the next lesson,
we're going to start doodling and
brainstorming and figuring out how we are going to start laying out your sale
sheets. I'll see you.
4. Brainstorming: I hope that last lesson
got your brain storming. Now it's time to think
through the artwork that you create so that we can showcase
it on your sale sheets. If you go to the resources
area of the course, you'll find this workbook
that I made for you. Inside, there's a
checklist that you can think through all the types of artwork you already create, or if I've missed some,
you can add some here. On the next page, there's
some layout sketch pages, so you can start
brainstorming how you want to lay out your
artwork on the sheets. The first thing I'm going
to do is go through and check off all the types of
artwork that I already create. For me, I mostly make patterns, I make small collections,
large collections. Then I sometimes will make spot illustrations that also have patterns that
accompany them. For me, that's pretty much
all the artwork I create, but maybe you create
greeting cards, singles or collections, or you might have other
artwork that you create. You might create
original paintings. You might do block prints,
you might do something else. I've left this area for you to fill in anything
that I've left out. Now that we've thought through the different types
of artwork we create, We can use this
information as we brainstorm for how we're going to lay out
our sales sheets. As I'm making layouts, I'm going to be thinking
about the type of artwork I want to share
with art directors. Be sure that you're thinking
through the type of artwork you want to use
for your sale sheets, as you start working through and brainstorming on the next page. Now, I also want to mention that there are a few things
that you want to make sure that you include on your sale sheet on
every single one. You want to have your
logo or just your name. You want your
contact information. Then you want to
name this sheet, a specific name so that
an art director can say, I'm interested in fall floral. And then you know exactly
what they're talking about, because once you start
sending lots of pitches out, there's a lot of your artwork
out there in the world, and you want to make it
as easy as possible for art directors to tell you
what they're interested in. The name of the pattern.
Now, you can put that information anywhere
you want on the sheet. For me, I like to
put my logo here, and then I put my
contact information here and my pattern name here. I have also seen people put their logo in
a little box here, and then maybe they have
their patterns running behind it. This
could be your logo. And then your
contact details down here, just in the center. You could put everything
down in the corner. You could really do
anything you want. I want you to think about as
you're making these layouts, where do you want these
elements to be on your sheet? If you want to keep it easy,
just go with this one. But if you have an idea or a really exciting
thing that you want to do on your own sales sheets
to maybe set them apart, go ahead and start thinking
about where you want that information to
be on your sheets. I'm going to start by
brainstorming the easiest one, which is a one off pattern. For me, if I have
a one off pattern, I'm just going to
want to show it off really big one giant block of
pattern. On a single sheet. That's going to be
consistent throughout. I'm just going to make
these three lines so that I know that's
always going to be there. Now, if I'm going to
do a small collection, most of my small collections
are three patterns. There's a few different
ways we could lay three patterns
out on this sheet. We could have three big blocks that are in this orientation. To me, that would mean that all three patterns are existing
in the same hierarchy. Now, let's say that I
have a hero pattern. Then I would want the hero
pattern to be in a big block, and then I would have
two smaller blocks to show up those patterns. When it comes to
large collections, there are tons of ways that you can lay out your sale sheet. You could have a hero print, and then you could have medium. These are maybe your
secondary prints. Then let's say I have
four blender prints. That's one way you
could lay it out. Another way you
could lay it out. Let's say that last
collection had one, two, three, four, five,
six, seven prints. Let's say you have
a huge collection. Let's say it's 12 patterns. I would still want
a nice big block for my hero. That's one. Then maybe I would
have two here, two, three, I still have
these lines here. Then I would have one,
two, three, four, and then I could even add 12, or I could make that
all one big block. Now we have one, two, three, four, five, six, seven,
eight, potentially nine. That's still not
quite as many as 12. But let's keep brainstorming. Maybe a nice way to present a really big collection
would be to put it on two separate sale sheets. That way each pattern gets a little bit more real
estate on the paper. For that, maybe I would
do a big block here, and then cut that in two
and have two on this side. I still have my information
down here, remember. Then you could have a big block here and a big block here. If you had two sheets like
this, one, two, three, four, five, that'd get you up to ten patterns on a single sheet. That's not bad. Let's
brainstorm one more idea. If I was going to do a spot
illustration and patterns, then I would want that
spot illustration to really be the
hero of the sheet. And then I would have
my two little patterns down here, my information. There's no wrong or right way
to lay out your patterns. Just do what makes sense for you, what makes
sense for your work, and what makes you feel confident when you are
sending out your pictures? I want you to feel really excited and really confident when you go to
share your artwork. Having sale sheets that you
love is a big part of that.
5. Creating Your First Document: This lesson, we'll set up your first document
inside of n design. The first thing we're
going to do is create our document inside
of Adobe In Design. I am using the Adobe Creative
Cloud version of n Design, so this is Adobe In Design 2024. To make a new document, you can either use
this blue button in the top left
that says New file, or you can go to
file new document. Now, I usually just use
the Big Blue button, so I'm going to
push that new file. When you open that up, you
get this dialogue box that lets you make a lot of
choices about your document. The first thing I want to
do is change the units. I want this to be in inches. Since I've created a
document like this before, it already has my size, which I'm making my sale
sheets in 11 by 17. In a portrait orientation. You may have this box checked
that says facing pages. If you do, you're going
to want to uncheck that. If you wanted to go ahead and add a certain number of pages, you can do that right here, or you can add them
within the document as we start creating
our sale sheets. You can set the columns and the space
between the columns, which is called
the column gutter. For right now, I just want one big column and this
gutter doesn't matter. Then you can also
set your margins. I'm going to have mine stay at this half
an inch all around. You also want to go ahead
and name your file. I'm going to call mine
sale sheet templates. Okay. We have everything
all ready to go, so all you have to do
now is hit Create. And there you go. This
is your document. In the next lesson, I'll walk you through the in
design workspace.
6. Workspace Walkthrough: This lesson, I'll
walk you through the basic tools you'll need
to create your sale sheets. Now that we have our
document all set up, I want to go ahead and walk you through the Adobe
design workspace. If you use other Adobe products, this might feel very
familiar to you, but I still wanted
to walk through the workspace to make it easy for you to
follow the course. So on the far left hand side, there's this tool bar, and if you hover over
any of the tools, it will tell you exactly
what the tool is. For this class, we're
mostly going to be using the black arrow, which is called the selection
tool or V on your keyboard. We'll be using the type
tool or T on your keyboard, and then the
rectangle frame tool, which is F on your keyboard. Along the right hand side, these are called your panels, and this is where
you can make all of the adjustments and changes that you want to your document. You can see all of your pages, You can see the properties
of your document. And then along this little bar, there's all of these
different panels that fly out when
you click on them, and you can use this
double arrow in the top right hand corner
to minimize it again. Now, my workspace likely
looks different than yours. I wanted to walk
you through how I got my workspace to
look exactly like this. I like to use the essentials workspace inside
a adobean design. It's very minimal. There are other workspaces that have
lots of things across the top, but I like to keep my
workspace quite minimal so that I have lots of screen
space to see my document. If you go up to the top right, there's this drop
down menu with all of the different work spaces
that you could use. You could check one of those and see if there's something
about that that you like. Like I said, this one has a lot of stuff going
on at the top, or you can go back
to essentials. The other place you can find the work spaces is
under Window workspace, and then there's all the
same things listed here. Now, I've done some
things to customize my essentials workspace to
make it the way I like it. So I'm going to go ahead and
go under the work spaces, and I'm going to hit
reset essentials. This is what essentials
will look like if you set your workspace to this
particular workspace. Now, I like to add some additional panels so
that this works well for me. So if you go to Window, then you can see all of the panel options in
this drop down min. And to add a panel, all
you have to do is select. So the first one I'm
going to add is color, and so under color, there's a few options, but
I want to add swatches. Now, you can see that that gets docked to this little
mini bar over here. If you want to minimize it, you use those two arrows
and it'll minimize. The next panel I want to add is under object and layout, a line. If you have a panel
that comes out and it's just free
and loose like this, if you just grab it by
the bar at the top and then drag it over to this
little docking area, you'll see a blue box form, and if you let go, it will drop it into
this little toolbar. The next one I want
to add is transform. Then under type and tables, I'm going to add character, and that's what we're
going to use to change a font or a font size. I'm going to drop
that in the toolbar. Then the one more I like
to add is paragraph. And that's going
to let you justify your paragraph left,
right, or center. So I'll drop that in
the panel as well. Okay. This is my workspace. This is how I like my workspace to look, but by all means, play around in your version of n design and figure out
what works best for you, or just copy mine and we can move forward really
quickly and really easily, and you'll be able
to see exactly where everything
is that I'm using. In the next lesson, I'll show you a feature
that we're going to use inside of In Design
called Parent page.
7. Setting Up Parent Pages: Lesson, I'll walk you through setting up your very
first parent page. This is a feature inside
of in design that allows you to make
global changes. Now, to tell you exactly
what I mean by that, let me show you an example. Before we get started, I
want to make sure that you can see the difference between
being in your document, and you'll know that because the actual page is
highlighted in blue. Or if you're inside
of your parent page, you can double click and then you'll be in the parent page. Whichever one of these is blue is the one that
you're working in. It's important to know
that now because they're both blank and it can
be easily confused. Inside of a parent page, let's just do a
really quick example of why these are so powerful. I'm going to create just a
really bright colored box. We have this really bright colored yellow box
that I've just added. I don't know when
we would use this, but this is just for an example. To close this swatches panel, you just hit those double
arrows. I'll close that. Now you can see that
the parent page has the yellow box and Page
one has the yellow box. To add additional pages
to your document, all you need to do is go down on the pages panel to
this little plus sign and it says Create New Page. So we click Create New Page, and now we have two,
three, four new pages. You'll see that the yellow box shows up on every single page. Let's say that we want to
change the color of that box. If we weren't utilizing
parent pages, we would have to go into
each individual page, select the box, and
change the color. Now, the real strength of parent pages is that
they allow you to make those global changes without having to do individual
page changes. If I go back into the parent
page and I select the box, and then I go back to my
swatches panel and I decide, now I want this box
to be bright pink. You can see All of the pages switch to having
this bright pink box. How would we use
this in real life? Let's say that you rebrand your design
studio or your business, and you get a brand new logo, you're super excited about it, and you want to update all of your existing sale sheets
with your new logo. Instead of copying and pasting that logo into
every single sheet, if you're using parent pages, can switch out the
image and it will globally change all of
the pages all at once. You can see this is a
really powerful tool for information that could
change in the future. That could be your logo, it could be your contact details. You might change
your e mail address, you might update your website. Something might
change over time, and you can use
parent pages to make those changes happen really
quickly and really easily. Let me just show you a few
things about in design. If you want to delete
a single page, you can just Take that page and drag it down to the trash
can, and then it's gone. If you want to delete
multiple pages, you can select one page, and then if you
select the one at the very bottom of where you want to delete and hold shift, it will select
everything in between, and then you can
click and drag and bring all of those pages
to the trash at one time. Let's start working on actually formatting
our parent page. I'm going to delete
this bright pink box, and now we're in
our parent page, and we have a fresh sheet that we're going to
start working from. The first thing that
I want to add to my parent page is a guide. To add a guide to any page, you can just go up to
the ruler at the top, click and drag down and
a guide will appear. The same thing happens
if you click on the left hand side ruler
and drag to the right. Now we have two guides. I don't want these
particular guides in this particular spot. So if you click on the
guide and hit Delete, it will go away, and I'll click on the second
one and hit delete, and now we have a
fresh page again. To add a guide, again, I'm going to drag down. I want this guide to be at the 15 inch mark,
which is right there. That's going to be
my guide to help me know where to place
things in my document. The next thing I want to do
is add a logo to my document. To do that, you go over to
your tools panel and you use the rectangle frame tool or F on your keyboard
and you create a box. Once you let go,
this message will come up that will ask you if
you want to import an image. You can click Import image, and then I'm going to import
this placeholder logo. If you click open, then
it'll add it to your page. There's a few things I want
to draw your attention to now that we have this
logo in this box, and we'll fix this fitting
problem in just a second. The first thing I
want you to see is that there's this
little blue link. Associated with this
particular box. Inside of in design, all of your images are not directly embedded
into your document. This is because if you were
to add all those images, say you were laying out
something enormous, like you were setting
up 20 sale sheets. If you had 20 really big high resolution images
in that document, It could really bog
down your computer, and it might make things
run really slowly. What in design does
is it just has a little preview that it attaches to that
particular bounding box. That little link is
telling us this image, we know where the image
is outside of in design. We know which folder
it's in and when we close and reopen
this document, we know where to pull the image. You were to move that image
into a different folder, then that little link
symbol would be broken. If that were to happen, it will ask you to relink the image. I just wanted you
to know that for future use in case you open up in design at some point and you have all
these broken links. It's likely because you moved
the images outside of in design and it no
longer knows where to find the preview
of those images. To fit this logo to
this bounding box, if we right click, then we
get all of these options. What I want to do is work on how the object fits within
this bounding box. If you go up to fitting, there are several options, and I want to fit
content proportionally because I don't want
anything to stretch or become out of whack. If we do fit content proportionally, It will
fit it to the box. The next thing I want to add to my parent page is my
contact information. To do that, we use the type
tool or T on your keyboard. Again, you can click and
drag to create a text box. Once you do that, you'll
get the little cursor. For your contact details, I would recommend adding your
name, your business name, your website, and
your contact e mail, and you could format that in whatever way makes sense
for you and your business. I'll go ahead and just add
some placeholder text. So we know that's
the information we want in the contact box. Now, we have all of our
contact details in there. I want to change the
format of this text. If I select all the text, and I go up to my paragraph
tool in my toolbar, I want everything to be
aligned to the right. I'm going to click on
the ify write option within the paragraph panel. To close the panel, again, you hit the double arrows, I also want to go ahead
and change the font. I'm going to use a font that
I use within my business, and I'm going to keep my
font this particular size. I also want to make sure everything is aligned
with my margin. Everything looks good to me. The next thing that I want to add is one additional guide. But when I start adding my placeholders for where
I want my patterns to go, I don't want them to go
right up against this line, I want there to be a little
bit of breathing room. I'm going to go back up to
the ruler and I'm going to pull an additional
guide all the way down. I know this first
guide is at 15 ", so I want to put
this one at 14.5. And that's going to give me a nice amount of space between where my artwork ends and where
my contact details begin. Something I want
to mention about the images that you're going
to add into your document. If you've clicked into the
image or even hover over it, you can see this
little circle come up. This is called the
content grabber. In theory, this could be nice, but in my experience, I find it pretty annoying. If you click on
there, you can see it will move the image
within the bounding box. Sometimes if you're trying
to move really quickly, you'll move the bounding box
or you'll move the image and you're not grabbing the thing
you are meaning to grab. I'm going to Put everything
back the way it was. To turn this content
grabber feature off. You go up to view Extras,
hide content grabber. When you do that, now when
you hover over an image, the content grabber
is no longer there. If you want to select the
image inside the bounding box, all you have to do
is double click and then you can move the image
inside the bounding box. If you just want to
move the whole thing, you can just grab
it like normal. I'm going to go back and make sure everything's the
way I want it again. That's just a tip
that I wanted to make sure I told you before
we move on because the content grabber can
be confusing and it can cause you some
stress moving forward. I would suggest turning it off unless you're
used to using it, and then of course, leave it on. Now that we have everything
added to our parent page, I want to go ahead
and show you how that looks inside of
the regular pages. It's going to look
exactly the same. But when we add
additional pages, they will all have
that information it. Like I said, it's going
to make it really easy to change things
globally moving forward. If you have anything on your
pages that might change in the future and that
you want to be the same across all of the pages, that is when I would
use the parent page. If you have something
that you're going to change on every single page, then I would say leave that
out of the parent pages. We're ready to move on.
In the next lesson, we'll set up our very first
layout inside of design.
8. Creating Your Layouts: This lesson, we'll start taking our layout sketches and bring
them to life in in design. Hey, we are getting very
close to having a sale sheet. I want to see the entire
page in one window. To get this smaller, I'm going to hit command minus or control minus
on your keyboard. You can use control
minus or Control plus to increase or decrease the size of what you're looking
at. Just so you know. The other thing you can do is
use this little Zoom tool, Z on your keyboard, and you can just drag to
get exactly what you want. Terms of size. Okay,
we're ready to start actually creating
layouts on our sale sheets. Before you start doing that, I want you to make sure that you are not in your
parent page anymore. You're now in the first
page of your document. The first layout I
want to create is just one big box
for one pattern. This will by far be the easiest sale sheet layout that you could possibly create. We're going to use the
same rectangle frame tool or F on your keyboard, and I'm going to create
one big box that follows the margins and hits that bottom
guide that I created. That is my first layout. Now, we could start
adding our images now, but I want to create a few
layouts and then we can practice a few different
ways to add in our images. I'm going to move on to another sheet Now
I'm on page two, you might want to have
multiple boxes on your sheet. Most likely you will
want multiple boxes. Now there's a few ways
you could do this, you could just start
drawing out the boxes and figuring out what your gutter size is and how
many you want on the sheet. But what I'm going to do,
I think for this sheet, I essentially want there
to be two columns. There's an easy way to create these guides within in design and they will do
all of the math for you. If you go to layout,
Create guides. Now you can start
deciding how many rows and how many columns
you want on your page. Say we want two rows
and two columns. I just usually leave the gutter at exactly
where they set it. You can hit preview, and it will show you
what that looks like. Now, let's say you only
want the center guides. Then you could take
away the rows, and then you just
have your column. I'm going to go ahead and do
two rows and two columns, and that's going to
be where I work from. I'm going to click Okay, and you'll notice that
those guides only show up on that page,
which is really nice. You can create guides for
each individual page. On this page, I'm going
to create a new layout, and we're really just making placeholders for what we're
going to add in the future. I want to have one big
box for a hero print, and then I want to
have two smaller boxes for two coordinates. That is my second
layout, three patterns. I'm going to move
on to page three, and I'm going to go to
layout create guides. For this one, I want three
columns and two rows. You can divide this
up however you want. Maybe I'll actually
put three rows. That's going to help
me envision what I want this to look like.
I'm going to click. For this layout, I'm going
to have one large pattern. One medium, and then
a smaller coordinate, and then down at the bottom, I'm going to put three
additional prints. So you can start to see all the different ways that
you can create your layouts. Now, I want you to go ahead
and work through and create as many layouts as you brainstormed in our little
brainstorming session. And when we catch up
in the next lesson, we're going to practice
actually adding our patterns to
these placeholders, so we can really
start to see what our artwork looks like
in the sale sheets. In the next lesson, we'll start adding your art to
your sale sheets.
9. Adding Your Artwork: This lesson, we're
finally going to add your artwork
to your salesets. Now it's time for the fun part. Adding your artwork
to your sale sheets. I'm going to start
with the easiest layout, the single pattern. You use your selection tool, V on your keyboard. You can select the
placeholder we created. Now, you can either
import an image by using this import image
box that comes up. You can also go up to file
and place or command or Control D. And then
that brings up a dialogue box where you
can search for your images. I want to say that when I finish creating any
piece of artwork, I always export a 300 DPI high resolution
version of that artwork. And I use that to drop into my sale sheets
as I'm building them. I have one place
where I put all of my high resolution images that I'm going to drop
into my sale sheets. Let me just find
that really quickly. I have this folder
called portfolio images. I'm going to go ahead and drop this big floral
pattern in there, and you can see it drops in
and if you double click, you can see that the image is a little bit
bigger than the box, but not quite as tall. And this is why I export a really high resolution
image because I want to be able to increase or decrease the image size
without losing quality. So to change the
size of the image, you can select the box and then double click to get
the actual image, and that will let you move it around within the placeholder, but it will also allow
you to change the size. Now one thing to know
about doing this is if you just drag it
one way or another, you're stretching the image, and if you pull down
from the corner, you're also not changing
the size in proportion. So to keep everything
in proportion, you want to hold down the
shift key and then drag. That's going to keep
everything in proportion. I only need it to be a tiny bit bigger to fit in
this sale sheet. So I'm going to get it in place and you can move it
around however you like. And that's my first image
placed in my sale sheet. The other thing I want to
do on this sale sheet is I want to name this pattern. That way, an art
licenser can say to me, I want this particular pattern. To do that, we're going to use the type tool again or
T on your keyboard. I know that I want my name of
my pattern to be right down in the bottom right hand
side of my sale sheets. Again, you make that box and
the little cursor comes up. And this particular pattern, I have named it Orchard Bloom, and I want to go ahead
and select that type. I'm going to open up
the paragraph tool and align it to the
right hand side, and then I want to make sure it's the typeface that
I would like it to be. Then I think actually, I like that location
for the text, so I'm going to leave it there. Now, if you want to make this consistent across all
of your sheets now, you can just take this box and do command or control C to copy. Then when you get to the
other page, if you do edit, paste in place, We'll paste it right in
the same exact spot. I'm going to go ahead and do
that on all of my sheets. I don't have to worry
about placement. From sheet to sheet. Now,
let's do another one. So if I want to do this
three pattern sheet, I'll go ahead and
select this bigger box. I'm going to hit Control D, which is the place feature. It brings up my
portfolio images folder, and I'm going to put this
almond pattern in the big box. Select the next box, hit Control or Command D, and I'm going to move
on to this B pattern. I'm going to add that in, and I'm going to
do the last box, Commander Control D, and
add this third pattern. If I double click.
The B pattern. You can see this is a
really large image, and I don't want the proportions to be quite
the way they are currently. I'm going to hold
down shift and I'm going to shrink down this image, and then I'm going to move
it around within the box until it's exactly
where I want it to be. It's like deciding how it's
cropped. Think I like that. I'm going to do the same
thing for these little buds, and I want these to
be much smaller. I'm going to hold down
shift and shrink this down. And then move it
around until it's exactly how I want
it in the box. Then this section, I'm going to call Orchard Bloom coordinates. You're just going to continue on adding your patterns
to each box. I just want to give you a few
tips on how you can reuse these same pages and add more pages to your entire
document or delete pages away. Let's choose Page one. If you write, click
or control, click, then you'll see this menu comes up that says Insert pages, move pages, duplicate
spread, or delete spread. So I'm going to go ahead
and click Duplicate Spread. Now we have two of the same. If you go into that
copied spread, then you can double click inside of your image area
and you can hit delete, and then you have a
fresh page that you can use to add
additional artwork. Can also move your
pages if you want to reorder how they are
within your document. You click on the
page and drag it. You'll see a little line come up on the right hand
side of the page, and that's going
to place the page after the one that
we're on top of. I'll go out to page
five. If you let go. The other thing I
want to show you is how you can add vector artwork. That's one of the
nice things about in design is it's vector based. You can add vector artwork directly into your document if you want to add it that way. Go to this blank page, and I'm going to
open up Illustrator. And I have this pretty
simple notebook design. I'm just going to
select it all and hit control copy to copy it and
go back into in design, and then I'm going to
hit command V to paste. Now, it's still vector artwork if we zoom in on it
and I double click. You can see it's
still got its points. Can see there they are.
I could move it around. I could change the points within in design if that's
what I wanted to do. But what I'm going
to do instead, I'm going to go ahead and
delete the empty box, and that way, I can resize this artwork and not
have the box in the way. I'm going to hold shift
and enlarge the artwork. It's a different format
than the box here. I'm going to just use my guides. And just get it to
the right height. But then I'm going to go ahead and just drag it and center it. And you can see that
center line shows up, so we know it's in the center. That's one way that you can add your vector artwork
directly into in design. The other thing I
want to show you is I added this vector artwork, which this is vector, but it has a lot of points, and so it's a really complex
piece of vector artwork. Something that's this
complex is really difficult for in
design to handle. I wanted to show you the error message that
comes up when you try to insert something that's this complex into an
in design document. I have this other blank page. I'm going to go back
to Illustrator. I have my Jack rabbit here, so I'll select it all, copy it and paste it. Now when you paste it, it says, this command would
create a large number of page items that would
severely degrade performance. Data will be placed
as embedded EPS. If you have something
that's got a lot of points, it's probably easiest to
just embed it as an image. But if you want to embed
it as vector artwork, It's going to come in as an EPS. If I click, it's fine,
it's still here. I'm going to go
ahead and get rid of that box in the background. Then you can go
ahead and resize, I'm going to resize
the bounding box. Then what I can do
actually is if I right click on this under fitting, you can do fit fill
frame proportionally, fit content proportionally, which is what I'm going to do, or you can do fit
content to frame. If you do fit content
proportionally, it won't stretch it in any way. I'm going to go
ahead and do that. Then it's exactly the
size that I wanted it, and I still have
it double clicked, so I can go ahead and
center it on my sheet. Then I would go in and I would rename this particular
illustration, Jack Rabbit. There's two different
ways that you can add vector artwork into your file. Now I want you to go
ahead and go through and create as many sale
sheets as you want. You can fill in all the
sheets you've created, you can duplicate spreads. So fill in everything
that you want to fill in, and in the next lesson, I'll show you three
different ways that you can export
your artwork.
10. Exporting Your Sale Sheets: This lesson, I'll show
you three different ways to export and share
your sale sheets. By now, you should have all of your sale
sheets ready to go. I have gone ahead
and created a set of ten sale sheets with
a variety of layouts. I'll just scroll
through them quickly. So you have an idea
Now we want to export our sale
sheets and there's several different ways
that you can do this. Let's go ahead and I'll
show you the first way if you go to file and export, and then the first way I want
to show you is as a JPEG. This is how I would
save my sheets if I was going to be pitching
my artwork through e mail. I'll go ahead and
save them as at the dot Design submission. Going to save them
to my desktop. If you hit Save, then you get another box that comes
up and you can either choose to export a range or just one single sheet or you can export
all of your sheets. I also like to keep the
resolution at 72 PPI when I'm doing this because I'm
sending my artwork to companies and I want to make
sure it can't be copied. That's low enough resolution
that it can't be copied, but high enough
that on a screen, it's very visible and you
can see all my detail work. Export. Then if we
go to the desktop, you can see an image of
one of my sale sheets. Now the next way, you could export
your sale sheets, you go to file, and export. Then I would like to export
it as a PDF for print. So I printed my sale
sheets for this class. I to be truthful have never printed my
sale sheets before, but it was quite fun to see
them in a physical form. If you wanted to have
printed sales sheets, this is how you
would export them. So I would call
these sale sheets, for print, and then
you click Save. On this, the preset you want to keep it on is
high quality print. This means if you wanted
to send it to a printer, it would be high enough
resolution that you would have nice
clean crisp images. Then again, you can choose
all of the pages or spreads. You can make all the decisions you want around how you
want it to be formatted, and then you just click Export. If we go to my desktop, where I'm dropping everything, so it's getting crowded
on the desktop, you can see a PDF. And you could send that off
to a printer and they're high enough resolution that everything should come
out nice and clear. Then the last way I want to
show you how to export is to actually export it to
be a sharable link. To do that, you go to
file and publish online. And then you would
want to go in here and give it a title,
give it a description. You could also enable password
protection if you wanted. You could make it spreads
more like a book. You can go into advanced and make selections
here as well. You can also add your Google Analytics
so that if you wanted to see how many people or who is actually visiting this
page, you can see that. Once you've made
all those choices, then you just hit publish and you just wait
for it to process. And then you get this link. You can click Copy link, and then if we open up
a browser and paste it, you can go through and look
at your sale sheets online. You could link to this from
your website if you wanted, or you could send it
directly in an e mail. It's up to you. But those are three ways that you can
export your sale sheets. I hope that you guys go forth
and that you feel confident and ready to pitch your artwork and that your
sale sheets look wonderful. Your artwork is really
highlighted and beautiful. And I cannot wait to see your projects in the
project gallery. I'm really looking
forward to seeing your artwork and
celebrating with you. That's it. We did it. Time to wrap it up with the Bow and head on over
to the conclusion.
11. Conclusion: Thank you so much for
joining my class. If you have any questions, be sure to go ahead and pop them in the class
discussion area. I'll be sure to answer
them as quickly as I can. If you liked the class, hit the follow
button by my name so that you'll be updated
as I make new classes. I'd also love to hear what
you think about the class. If you would leave a review, I would be so grateful. Finally, remember to upload your sale sheets in
the class project tab. That way, I can take a look
at what you created and give you some feedback and
celebrate your success. So many bloopers happen when you make a
skill share class, and I just had to share
these few. In the class. Remember to upload your Finally, remember to upload
your class project in the class project tab. No.
 Kristi Westberg, Artist at At the Dot Design