Transcripts
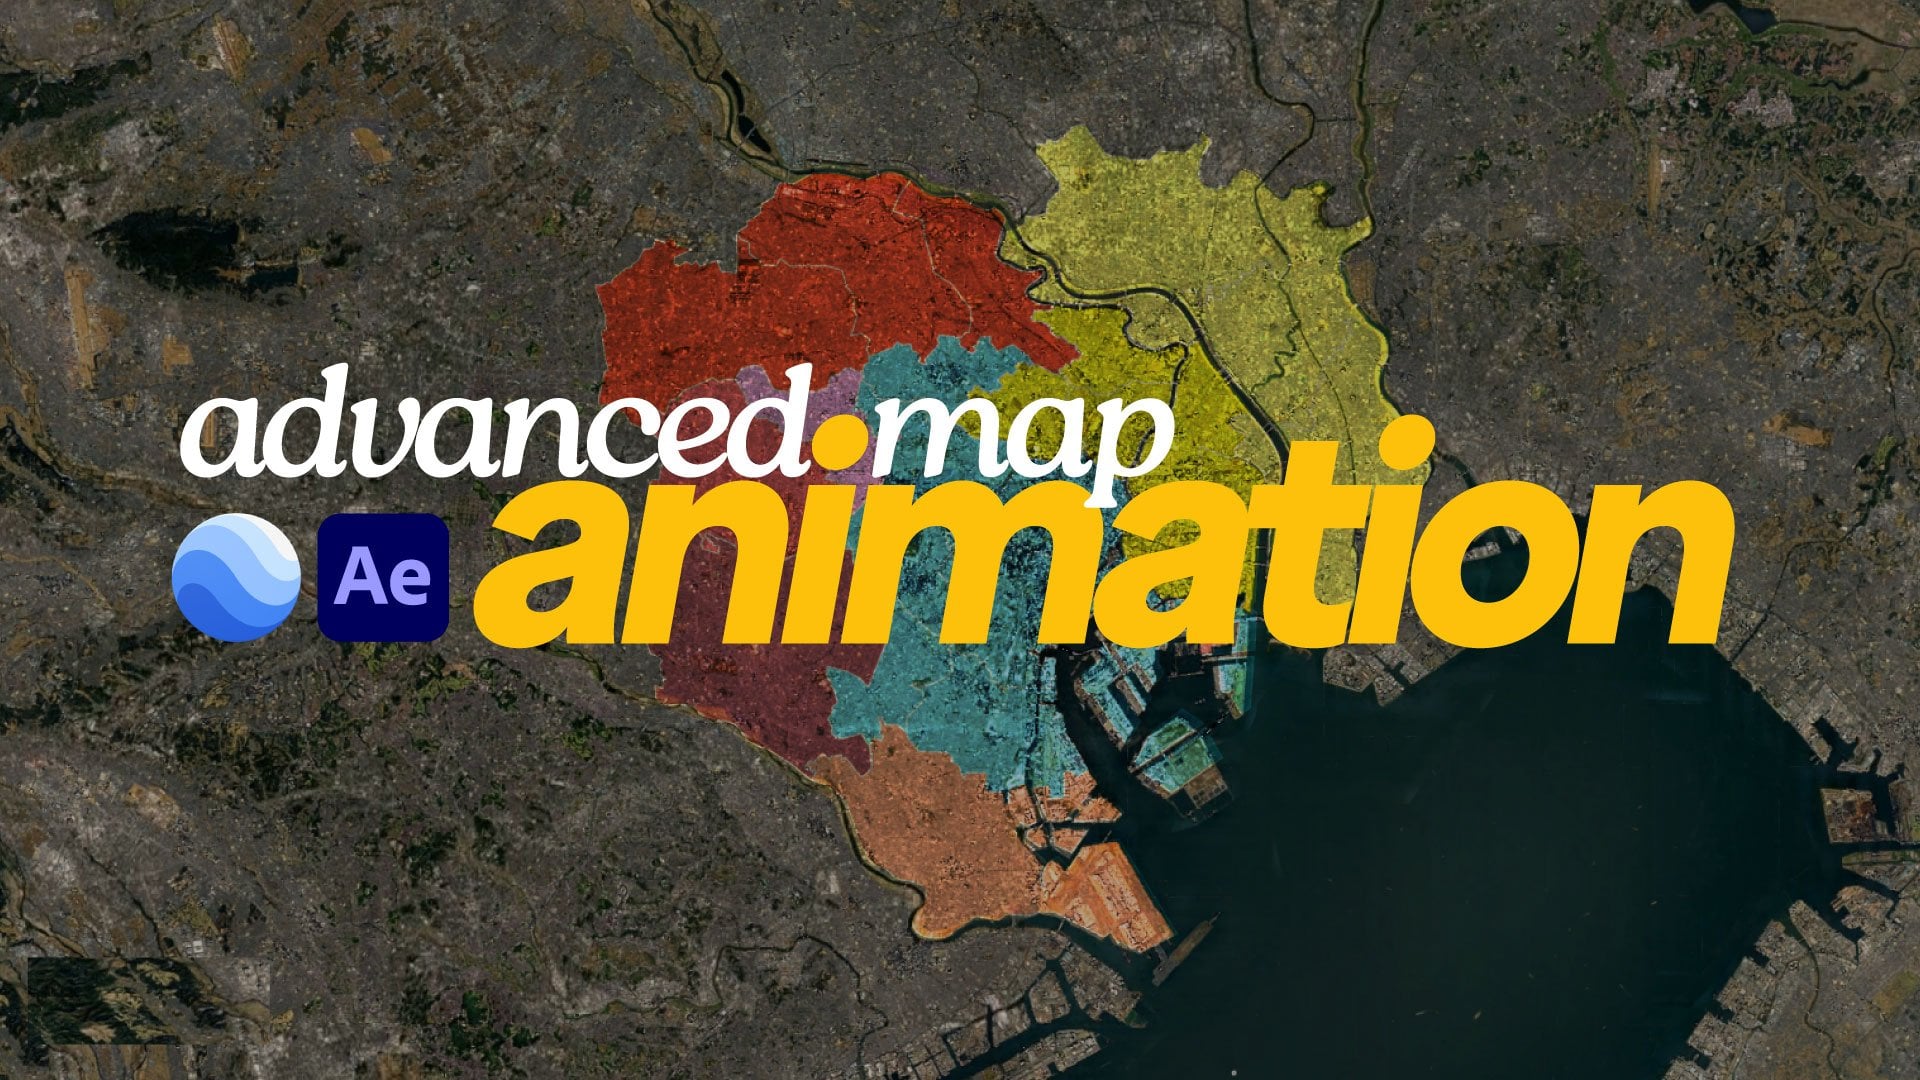
1. Introduction: Welcome to the enchanting world
of fantasy map animation. In this class, I invite
you on a journey where creativity and your love
for maps intertwined. Whether you're an
aspiring animator, an imaginative storyteller, or a dedicated
fantasy enthusiast, this class will unlock
the secrets of crafting, captivating maps that come
alive through animation. Hi, my name is Mikel. I'm a professional video editor and motion
graphics designer. I have an experience of five years in the
motion design industry. I have worked on projects
spanning brand animation, explainer videos,
title sequences, promotional campaigns, and more. I have been in love with
maps since I was a kid, so I started combining my skills and passion to create
map animations. In this class, you will
learn how to create and animate your own
fantasy country. We will use after
effects built in tools. No need to use any other
software like Adobe Illustrator. We will establish the
landmass and see, then construct
mountains, villages, and rivers with some elements. We will also add
vintage paper texture and place names to
simulate an old world map. We will then animate
coastline and make it look three D using animators
like wiggle path, merge path, offset path, and effects like roughinges
and b***ding mode. This kind of fantasy
world map is ideal for your comedy
sketches, fictional films. Just to show off your after ex, skill in your portfolio. You need little to
no experience with Adobe after effects or
any kind of animation. We will learn
everything from ground. Are you ready to dive deep
into your fantasy land? Let's create it together.
2. Class Project: I'm so excited to design and
animate the map together. For the class project, you will have the
opportunity to unleash your creativity and create
your very own fantasy map. Not only we will be adding
some fun elements to it, but we will also be animating
the coast lines and turning them into a three D animation with the help of after effects. To ensure that you can
successfully complete the project, I will be building the
same animation through the examples and guiding
you along the way. To make the most of this class, it's important to find a steady
pace that works for you. Take notes as you go along. And do not be hesitant to rewind or dial down
the video playback. If you find yourself struggling to keep
up with the class, if you have any questions
or run into any issues, do not hesitate to ask for
help on the community tab. I'll be more than
happy to assist you in working through any
problems you may encounter. To successfully
complete this class, there are a few things
that you will need. First and foremost, a
stable Internet connection. This will ensure that
you are able to access all the necessary resources and materials required
for the class. Additionally, you will
need to have Adobe after effects and media encoder
installed on your computer. These software packages are
essential for completing the assignments and projects that will be assigned
throughout the class. Once you have
completed the project, be sure to post your
final animation to the class project so
that you can share your amazing work with
the rest of the class. I can't wait to see
what you come up.
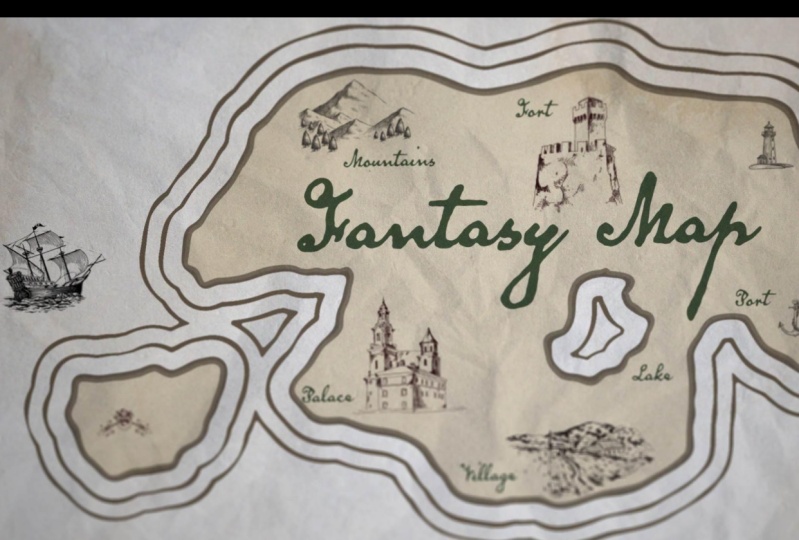
3. Creating Boundaries & Basic Shapes: In this lesson, you will
learn how to create boundaries using Pen tool
in the aftereffects. Now that we are inside
Adobe After Effects. For the first step, I'm going to create the boundaries
of my little country. What I'm going to do is click on the new
composition here, let's call it Fantasy Map. And the resolution
will be 1920 by ten. My frame rate is 24
frames per second, and the duration is 5 seconds. Since I'm going to create
a loopable animation, I want the background color
to resemble vintage map. I have made this
palette according to the look I want to create
in this fantasy map, which is also downloadable in the resources section
of this class. Now I'm creating an island, so I'm going to
grab the Pen tool. If you fill is not
set to a solid color, here's how to do it. You have to click on
this blue text where the fill is written and change
it to whatever you want. In our case, it's a solid color. And when you want to
change the color, click on this rectangle beside Fill and select the color
or type in the color code. I'm also going to set the
stroke to a solid color and change the color to this dark color from the
palette that I've created. I'll set the stroke
amount to 15 pixels. Now I'm going to
start drawing out the shape or the
boundary of my island. One thing to keep in mind is if you want a curve to be there, all you need to do
is click hold and drag in whichever direction
you want it to be. Until you're happy
with the shape, I'm going to complete
this main island now. I want there to be a
little lake in the center, and then I want there to be another small island
somewhere else on the map. Since we're animating
the coastline, this will create a dynamic look. Let's continue
drawing the shapes according to how we
want them to be. Now, if I open up
the shape layer, I want to stay organized. Under contents I have three shape elements
that I've created. This is the main island
that we created. This is the lake and
the small island. I'll move the main island to the top and name it Main Island. Then I'll name the lake lake and the small island,
Little Island. Now I want to create a hole in my main island using
the lake shape. To do this, I'll need to
select both shape groups, right click and group them. Then with the group selected, I'll add Merge Paths
animator tool. To do that, I'll click on
this Add Animator button, then select Merge Paths. Now we can see the merge paths
animation in our contents. In the merge path mode,
I'll select Subtract. To subtract the lake shape
from the big island. It's important to make sure that the main island group is above the lake group for
this to work properly. Now I have the general
shapes of my country. We should name all of our layers to be able to
identify them later. So I'm going to click this
group and call it Country, An Outline of your own Country using Pen tool in after effects. And in the next lesson, we will add some details
and make it look beautiful.
4. Adding Details & Refining the Map: In the previous
lesson, we designed our main country using
pen tool and after text. In this lesson, let's add more detail and make
it look dynamic. To make it look
better, let's use the wiggle paths animator to add some dynamic edges to
the boundary of the island. We will select the contents
and click on Add Animator. Here's the wiggle
path. Let's adjust the parameters until we
get the desired look. Right now it's a
little too wiggly, so I'm going to bring up the
size to something like 25. I'm going to bring down the
detail that two details, so I'm going to bring
that down to two. Starting to look
a little better, but I can see sharp
points in the corner. I'm going to bring this down to smooth and now we are getting somewhere that looks quite
a bit better, actually. Pretty nice. Now it's
important to note that wiggle parts animator can behave strangely when duplicating
the shape elements. So we will set the random
seed parameter to one. This will prevent us from making different shapes every time
we try to duplicate them. That we're creating the
borders of this map. It's not very important because it's an imaginary fantasy map. But if we're creating
an important map, I would want to make sure that these borders I create
need to stay in place. Let's duplicate
this shape layer. And for the first layer, I'm going to rename it to land. And the second one will
be called Coast Line. I'm also selecting
the Coast Line and go to fill and turn it off. Now we just have a border in this layer
which we will be able to an practice using wiggle part to create different effects till you're satisfied with the
shape of your country. In the next lesson we
will create coastlines.
5. Creating Coastlines with Roughen Edges & Blending Modes: In this lesson, we are creating the coast lines of our country and learn about
the b***ding mode. For this next step, we are
roughing up the edges. But before I do that, I want to find a background texture. Because when I start
roughing up the edges, I want to make sure that my composition looks as good
as I go through the process. So I found this texture
from royalty free websites. I'm going to bring
this into my project. Here I'll write, click on it, Transform and Fit to comp with. Then I'm going to lock it by clicking this lock
in the corner. Now one way that I
can b***d this in is I can set this to multiply. And that's going to bring some of that texture through and
darken it up a little bit. Now I want to focus
on these corners. These edges, because they're just looking way
too sharp for that. I'm going to turn
off the coast line by clicking on this
Y in the corner. Then select our land. Now I'm going to add the
effect Roughen edges by going to the effects panel. Open up the effects window
here and drag the effect. Now we can change the
parameter and create the look. First I'm going to increase the border and all I'm trying to do is create a border or stroke that has
a variable width, so it's not all the same width. And I must have the
resolution set to full here. I want this to look like
a hand drawn vintage map. It doesn't look hand drawn. When that stroke is perfect, all the way around now, it's already looking much better if I turn off the ruffin ages, that's before and this is after. Cool about these
roughages is that you can animate it and make it
look like water animation. Let's click on this eye in the corner to make
coastline appear. We will copy and paste the same roughages that we
created for our land layer. I'm turning off the land layer. We can see how coast line looks and we can see that
it's not together. To fix that, I'll
decrease the border until there are no gaps
that looks perfect. I have attached the
vintage paper texture in the resources
section of this class. Feel free to use it or find your own vintage textures and try using it on
your fantasy map.
6. Adding Text & Elements: In this class, we
will add labels and text elements to name various
locations on the map. Now that we're done
with the base map and created the base texture, let's add some elements to make this map look not so plain. I'm going to give
this map a name. So I'll go to the text
element over here. And click on my map so
that I can write on this, let's call it Shells County. To change the font
and transform it, I need to go to the
character panel. I think I like this font. You can make it
bigger or smaller according to your
preference by going here. And then I'll position
it by holding the layer and dragging to
wherever I want it to be. I also found these hand drawn vintage graphic
elements on line. You can download them
from the resources. This is going to be my palace. I'm going to switch
the b***d mode of this to multiply and I'll do the same thing to
all the other elements and speed this up. I also want to put an
adjustment layer on top which will hold a vignette and
noise like an old map. We will go to the effects
and add CC vignette. I'm going to change the
parameter a little bit and let's add noise and we will set noise to maybe
10% One last thing I want to do is add some texture to the top to
make it look weathered. That can be done with
watercolor texture. I'll add it into our
timeline and then set the b***d mode
like we did before. This one is looking pretty good. I feel that this
is overpowering, so I'm going to bring the
opacity down by selecting the layer and hitting on
keyboard for transparency. And we always name our layers. So let's call this war Color. The action item for
this class is to come up with unique names
for the locations, find fonts that match
the style of your map. In the next lesson,
we are going to dive deep and finally animate
our fantasy map.
7. Animating the Map: It is time we are going
to animate our map. In this lesson, let's
jump right into after ex. For the coastline, we need
to animate two parameters. We will use the
border of roughing an offset path amount to create
the effect that we want. Let's go to our
coastline and add an animator called offset paths. Roll down the offset path, I'm going to make the amount zero so that it will
stay where it was. I will create a key
frame somewhere here. So let's go to the two
second mark on the timeline. And click on this
timer icon here, that will create a key frame. Then I will see how long I
want the waves to appear. I think that will
do, this is going to be our end point for the border. I need it to fade out. If I try to tinker with this, you can see it slowly fades
out. That's what I want. So what I'm going to do is see where it
completely disappears. And I'll put a key
frame over there. Let's put a start frame. I'm moving my playhead
to the beginning. Again, I'm going with
my visual instincts and see which will look best,
changing my border. I'm also going to change
offset amount the same way. Now we'll play back and see it's fading out
at the end very fast. So I'm going to go
maybe more than halfway and change the
parameter of border. I'm also going to
add bezier here. You can do this by selecting our keyframes and clicking
nine on your keyboard. That will smoothen the animation and make it look
not so mechanical. If I play back right now, this animation will
play out and stop. I want this animation to loop. For that you have to go to
your animation hold Alt and click on this on the slayer
box that has opened up. I'll type loop out, select this and then copy. Then we can go to our next animation and
do the same thing. Hold Alt and click in the box, Paste what we just copied. I also wanted to look like
there are two more waves. Let's duplicate the same
coastline twice on the timeline. I'll space this out so
the waves look like they're coming one
after the other. Now when I start this animation, it seems like it waits for a
bit to start the animation. To make it look seamless, I need to make it start
before our start frame. I'm going to grab all of these and push
them a bit behind. Now one of our coast line starts before our time line starts, the middle one at
the start points and the last one
right after that. Now your job is to
complete this animation. And I'll see you in
the next lesson. Where we will be fine tuning and exporting this animation
to show it to the world.
8. Fine-tuning with 3D Camera: In this lesson, we will learn how to take the animation
that we made in the previous lessons
and make it look three D with key frames
and adjustments. We need to create
a new composition for our three D animation. Right click on the
project new composition. Let's call this a
three D fantasy Map. We already have the same
settings dialed in, click okay. And drag our fantasy
map composition from project window
to the time line. To be able to make
it look three D. We need to create
a simple camera. We need three layers, our map camera and
animation controller, which will be a null object. The reason we're going
to use a null object is that we can move the
map by using pitch and bearing directly from the
null object as compared to animating by moving the
anchor point of the layer. It's just a better
workflow that most of the animators use to
make our lives easy. To create the null object, we'll go to layer, select new the null object. Click Enter on the layer
and name it controller. We will go to layer
again and select Camera. Make sure you have
the type set to two node and then for
preset to 50 millimeters. And make sure you have depth of field and lock
the zoom enabled. Click. Okay. And it will
give you this warning that says camera and lights do
not affect two D layers. So select a layer and
choose the layer, three D layer from menu. But if you go to our timeline, we can toggle three D
on both of the layers. If you can't see this, simply
toggle switches and modes. And if you can't see this, you can click the
buttons down here. The controller should be placed
over the area we want to focus on so that our camera
will work as we want it to. I want my map to zoom
into my palace here. So it will also have
a little bit of that wave animation we
have been working on. I will drag widget
over our place. Now I'll zoom in a bit. So the anchor point of the widget is exactly
in the center. To be able to get all the three D effects applied
to our base map, we need to parent
our base map layer to the controller widget. Here you can see this
hurricane looking icon. I'm going to hold it and drag
it on the controller layer. I'm also going to
lock this base map, so I don't accidentally move it around while
animating the camera. We are set to animate this. Now I want to show
my complete map from the first frame and
then zoom it to my palace. So I'll take the
playhead at start point. And now I'm going to twirl
down the controller options. Here we will find
transform properties. There are four basic parameters. We will add key frames
on position scale, X rotation and z rotation. Rotation helps us move
the pitch of our camera, and Z rotation will
help with bearing. Just to make things
a bit easier, I'm going to select the
controller layer and hit the key. All of our parameters are
now in the initial position. I'll go to the four
second mark and simply zoom into the palace. Then I'll change the position so that the palace is in
the center of our frame. I can start to change the pivot and change
the bearing as well. Three D animation is done here, but it's looking very
mechanical again. So let's add user to this. Select all the key frames and
hit F nine on my keyboard. Then I'll just offset these
X and Z rotation parameters, which will give our
animation a raw look. Let's make some camera
adjustments now, double click on the camera, even though we have
turned on the depth of field that's not
that visible yet. To blur this out a little bit, I'm going to go to stop. Bring it down to 2.8 maybe one. You can see it's
looking much better, but it's still hard to tell. Now I'm going to have
this preview selected and go to blur level
and increase it. The animation is
pretty much complete. The final thing I
will do is turn on motion blur for these layers
by going to the time line. I just realized this
when I was playing the animation to see any flaws. If I go to our fantasy
map composition, we have one more problem here. These lines of my main country intersect with the
island coast lines. As the animation plays out, it will look good if they
merge as they fade out. Let me tell you how to do that. Roll down the contents of the
coastline with the content selected at merge paths and
that will do the trick. Now our animation
is ready to render. Let's go to export and
then add to media encoder. I'm going to use this
preset which matches our original composition
and then render it out. That's what our final
animation looks like.
9. Final Words: Congratulations, you have made it to the end of the class. If you've been following
along and animating with me, you may have your own
fantasy map by now. Do not forget to share
this in the project. I would love to
see what you have come up with and it will also inspire the students who are creating the
map along with you. It's been quite a journey, but we have learned
how to design a fantasy map in after effects and animate
the coast lines. We have added b***ding modes and adjustment layers to
give a vintage look, created labels and elements
to make it dynamic. And finish it off by exporting
our beautiful fantasy map. I will make more classes
like this in the future. So check out my
skillshare profile and follow me on Youtube and Instagram for behind the
scenes and future updates. In the resources
section of this class, I have included PDF full
of keyboard shortcuts, and after effects elements
to use in your class. Take this with you and make even more amazing
map animations. Wishing you all the best and I can't wait to see you
in another class soon.
 Snehal Wagh, Filmmaker