Transcripts
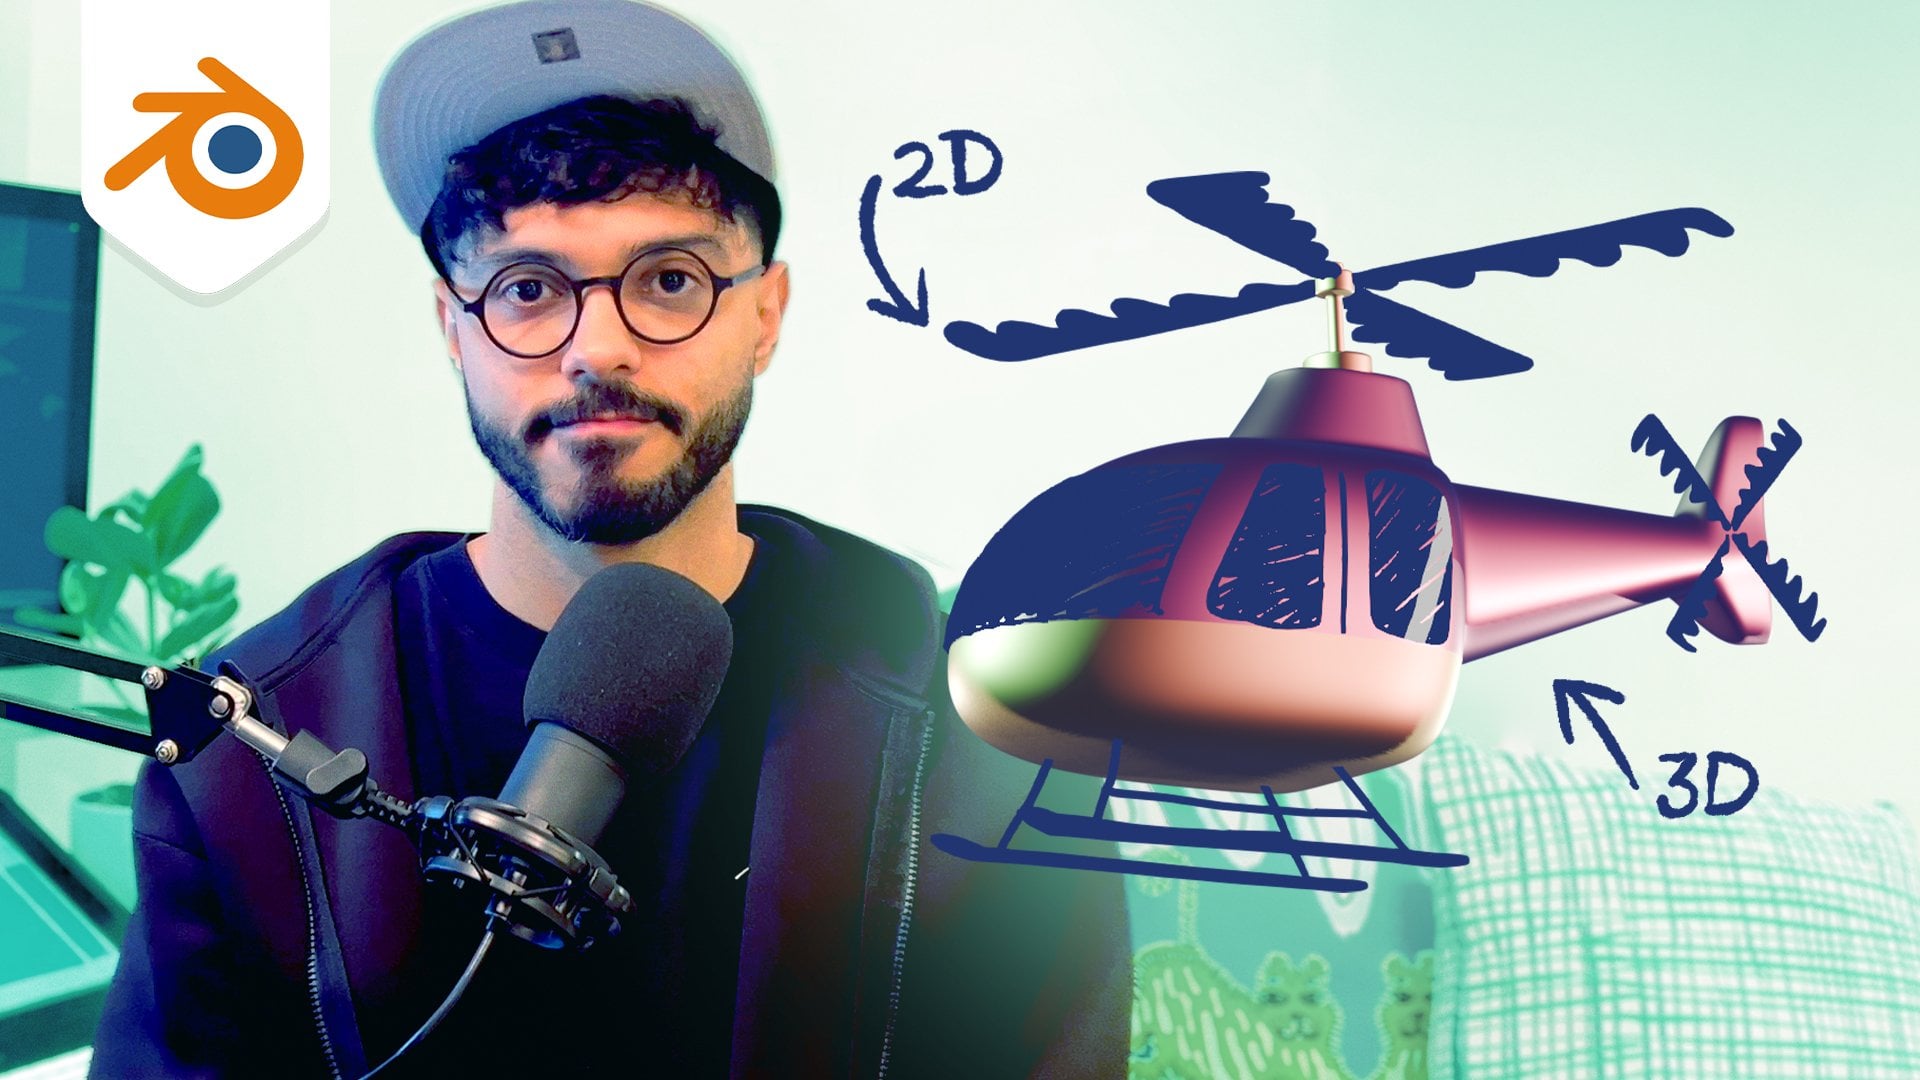
1. Introduction: Frame by frame has
no limits other than your client's
budget and a line. That's why I want to
show you how I create good animation that looks
like frame by frame, but only uses a
couple of drawings. Hello, my name is Giiorge. I'm from Brazil, but I
live in the UK and I have more than seven years of experience as a motion
designer and animator. I love how Cartas are capable of telling stories,
making people smile. That's why I always
try to be funny and playful with the
characters I create. In this class, we're going
to make this animation where I simulate the camera
rotating around the Carter. For that, I made only
three illustrations. Then I let after effects do the hard work for me creating
the frames in between. First, we are going to use a illustrator to create three
poses of our characters. For that, you're going
to see what you have to bear in mind when
illustrating for motion. Then we're going to send
the three illustrations to after effects and animate the shape layers so we can make one pose seamlessly
morph into a node. The result will be a
smooth animation of our cartas rotating and
change perspective. Throughout this process, you're
going to learn how to use the speed to trick the eyes and create
illusion of movement. How to animate many shape
alyers in one goal. And how to fake three D even when working in a fully
two D environment. This classes for anyone
that wants to animate cartas without reign with
complex reading or plugging. But especially for
motion designers dealing with tight deadlines, AKA most of us some experience with after
effects is desirable. But if you are an
ambitious beginner, attached at the resource section all my project files
so you can open it, play around, and have fun. The approach I'm going
to teach you here is how I animate my
stuff every day. To prove that, I have added a bonus lesson where I show
you real client projects. And you can see that
this technique can be applied in many different cases. Join me and I bet
it's going to change the way you see and work
with after effects.
2. Class Orientation: Welcome to this class, guys. Thank you for taking it. For this class, we're
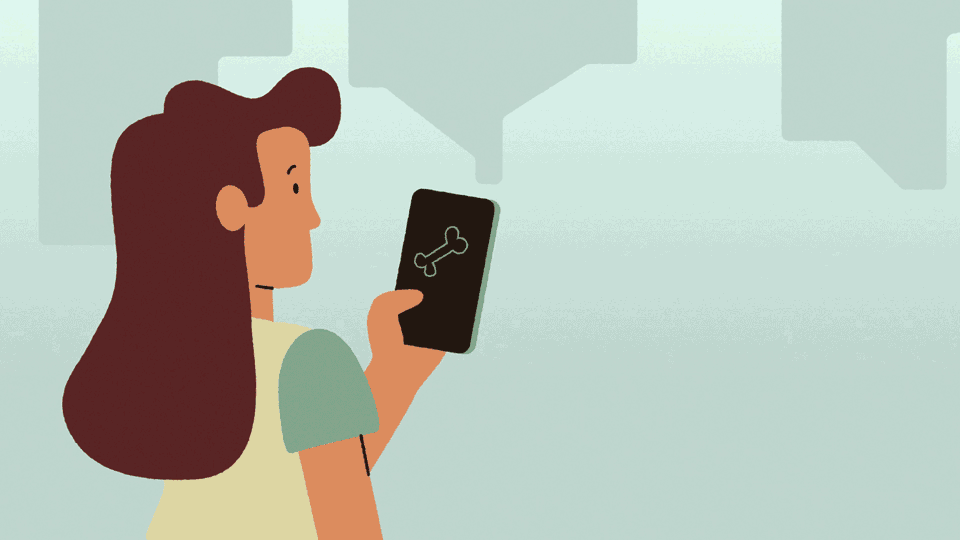
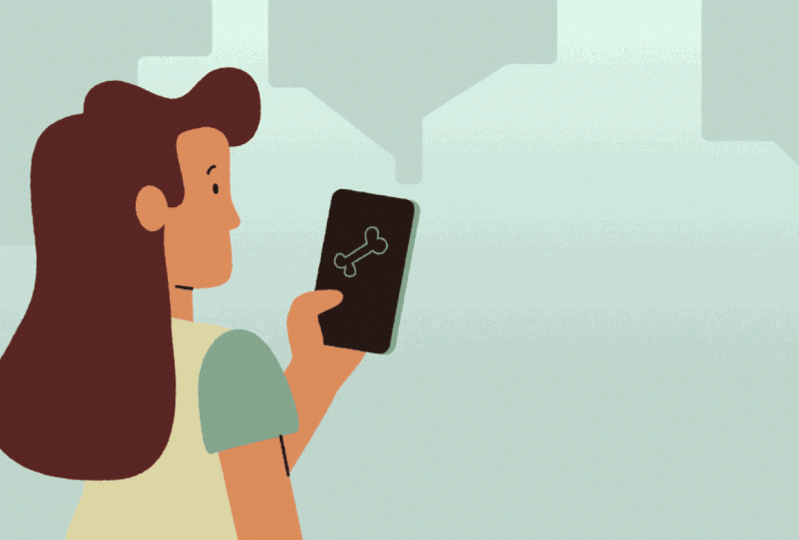
going to create a disanimation of a 360 degree, where we're going
to see the charters holding a smartphone, which is a very common
piece in motion graphics. And we're going to
start by sketching it. We're going to sketch
our characters, we're going to vectorize
them using a illustrator. For that, I'm going to show
my process of vectorizing. So you're going to see some tips on what to bear in mind when illustrating for motion before importing it to after effects. I'm going to show you the logic behind the animation we're
going to do for that, I'm going to talk
a little bit about a speed graph which is going to be our best friend
in this process. Then we're going to impart the three pulses
into after effect. And we're going to
animate the shape layers, one pulse transitioning
to the other until the Carter makes the complete
rotation at the end. I'd like to make sure we apply some principles
of animation. We're going to add
some anticipation and accommodation at the
end of the movement. Please don't forget to publish your project so I can comment
and give you feedback. Thank you for taking this class. I hope you enjoy it and see
you in the next lesson.
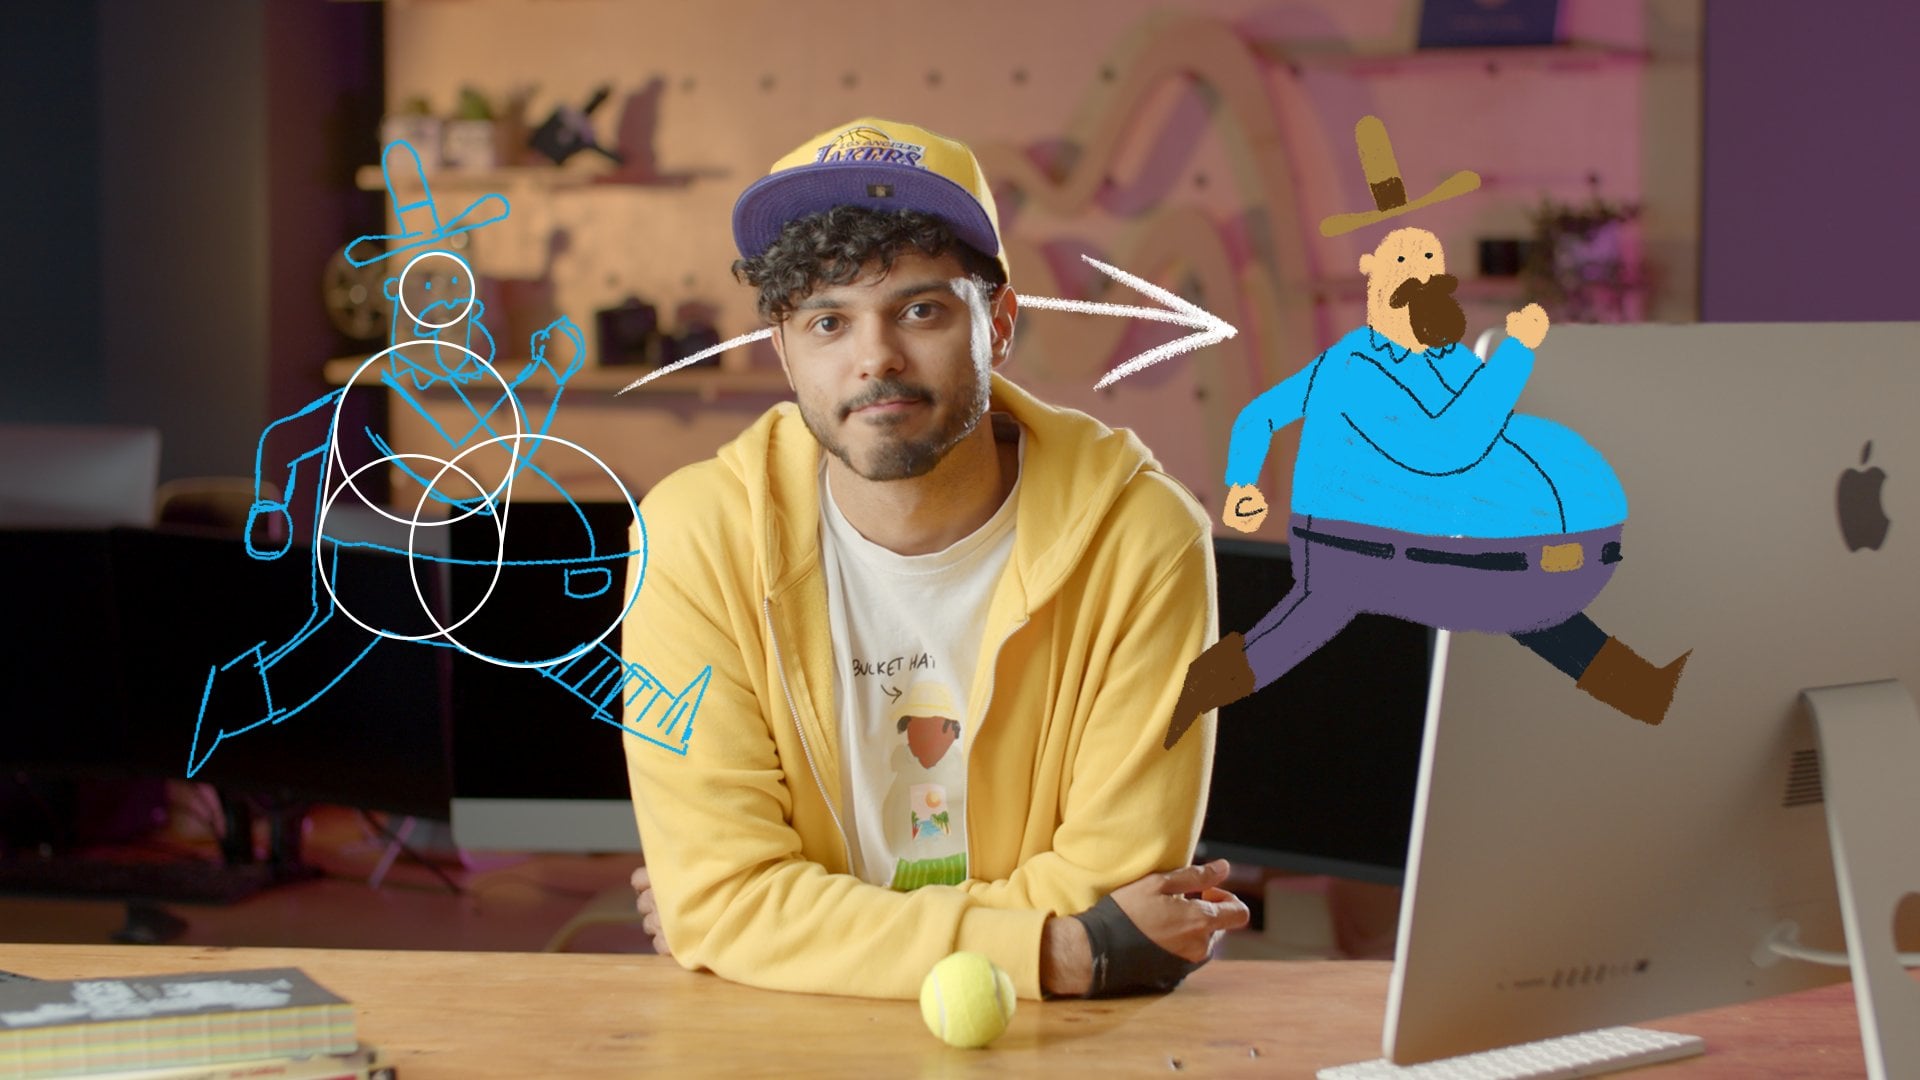
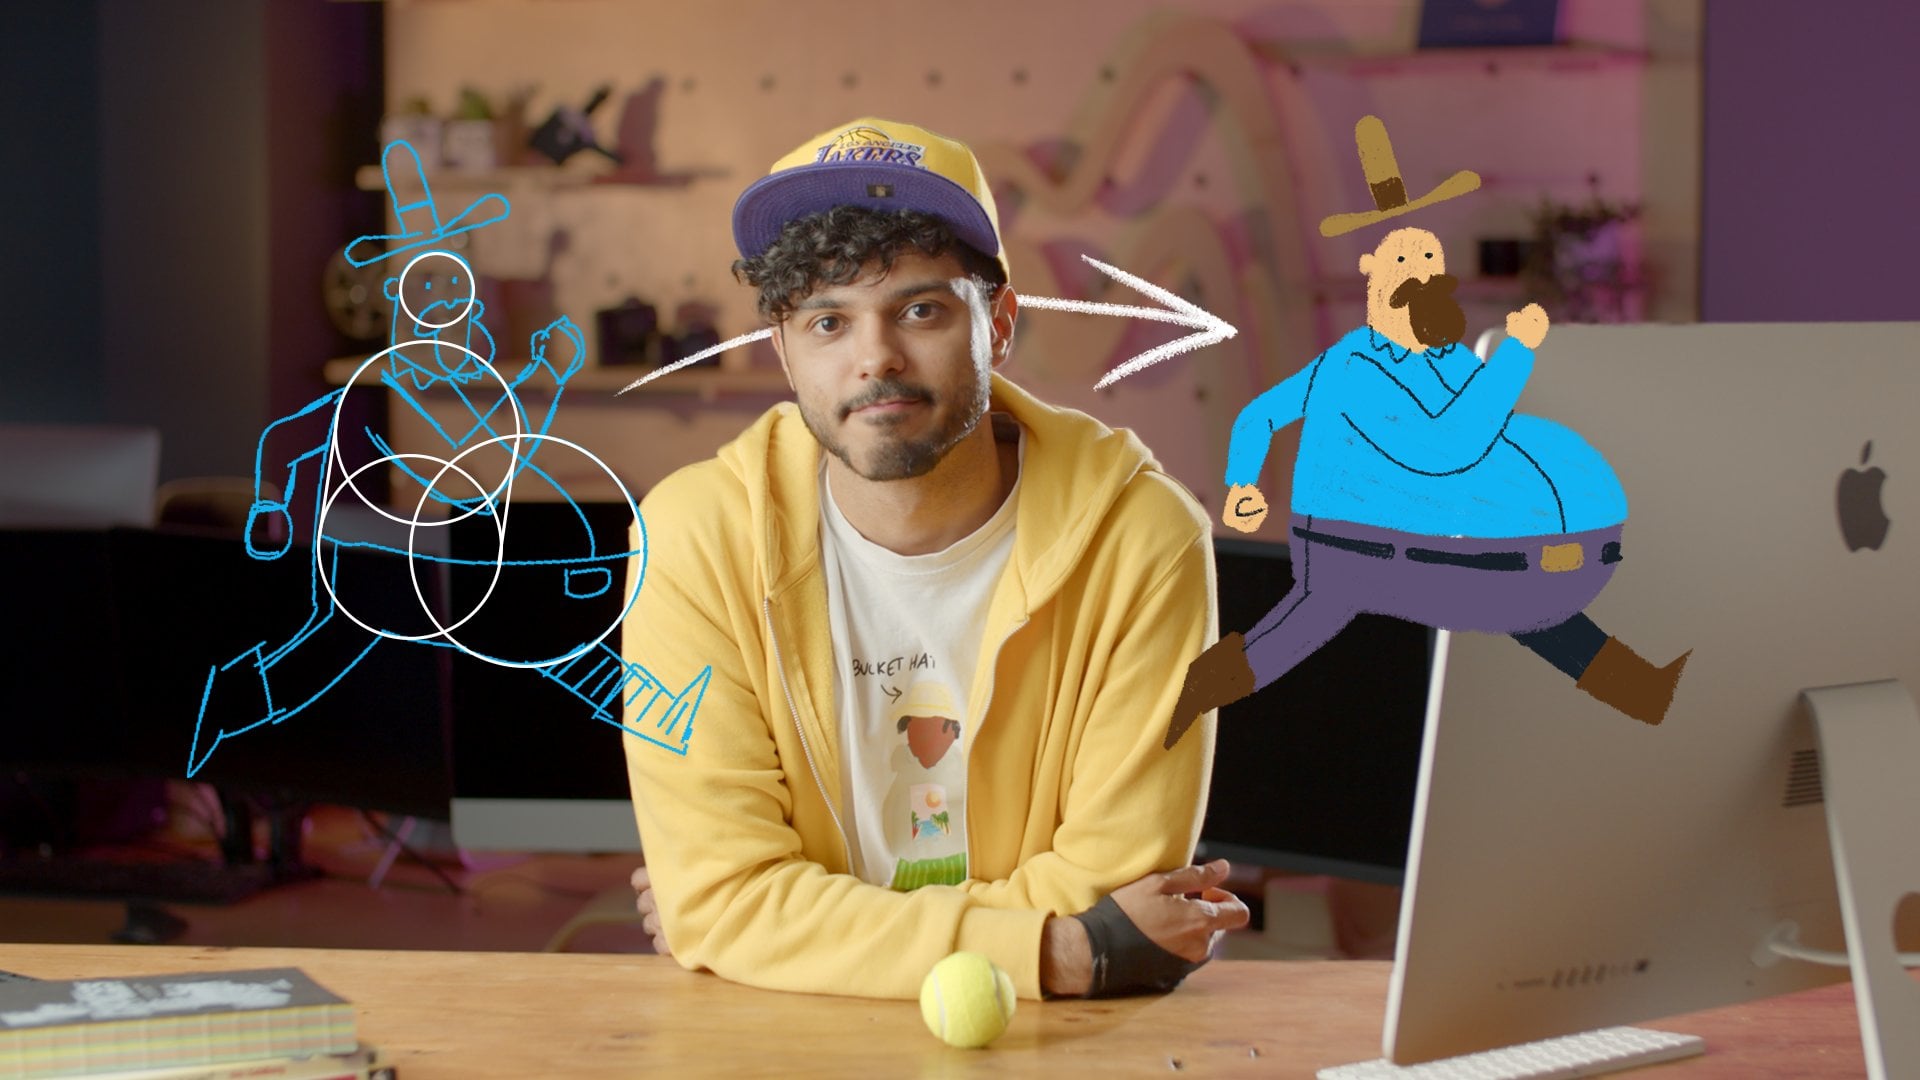
3. Sketching Your Keyframes: Okay guys, the first step
of this process is to plan the animation and sketch the three poses
of the character. Let's go, it's time to
plan the animation. First, I have to say that this project doesn't require you to have a walk with a pen
to draw like I have here. All we're doing
here is sketching. It's all right to draw in
a real piece of paper and just photograph with your phone and send it to the computer. First, let's imagine what we're going to have
here in this animation. We're going to draw three
poses of the Carter. This is the frame,
three of those. Now our Carter will
be always a static. This is the top
view of the Carter, and he's like here
holding a phone, right? So we're going to have the
same Carter in all the frames, because the Carter
are not moving. What is moving here
will be the camera. So I will sketch a camera here, so we can imagine where the camera is positioned
in this first scene. And I first do the last one, which you'll probably be here, and obviously here, the camera
is far from the Carter. Then what we're
going to movement of the camera doing that, it's going to come from here. In the middle point, the camera will be probably
something like this. All right. Now that
we know that this is the camera trajectory and positions they're going to have, I going to imagine what shots we are having in each of
the situations in here. As the camera is very
close to the Carter, we might have something
similar to this. We're going to see the phone, the second shot,
the camera is here. We probably have the hand
here within the phone. I'm not showing the full
body here because I want to review the full body
only in the last scene. In the last scene going to
have the Carters like this. I would like to have a dog here, and this is what the
shots are going to be. This is my initial planning, although she's not like showing the full body in all the shots. I might need to start by drawing this because it gives me a
full picture of the Carter. This is what I came up with. I went through a process
of designing this charter. Each one of you might have a
different approach to that. I put some guides
here as you can see, so I can keep the proportions. And although I like to create
the full body just in case. But I'll probably
have something like this because of the shot here, I will show the full body. This is what I have. Feel free to design the Carter
the way you want. It's just important to
keep the proportion and make sure the
rotation makes sense. We are ready to vectorize
this, Carter now.
4. Vectorizing in Illustrator: Now it's time to open
Adobe Illustrator. And I'm going to show you how to vectorize those
illustrations. Let's go. Okay guys, welcome
to Illustrator. Well, the first thing
we're going to do here is importing this sketch
we just did here. Is it I can't just
drag and drop. First thing that we're going
to have a look is the layer. The layer tab is very important because we can separate
the elements here. When we take it
to after effects, the layers there will be
separated like they are here. I want to make sure
this reference is in layer so I can name
this layer reference. I want to lower the opacity, selecting the reference image. I'm going to come in property
and decrease the opacity. I also want to click in opacity here and
change it to multiply. Multiply will allow us to draw under this image without
changing the color. Otherwise, you're going to have a tint of white
because the opacity is 17% If we multiply the
color won't change. Then we're going to go
back to the layer tab. Let me create another lyric
click in here, I will. This layer under the reference
here will be the vector. I want to make sure I will lock this reference layer so I
don't click and move it. I'll click here. From
now on I will just be able to draw on
this layer vector. Obviously, if I have this layer selected and I try
to draw anything, it doesn't allow me to. I have to be in this
layer to draw anything. In 99% of the cases I use
this pen two to draw. You have other variations of
the pen to like this one. You could click and create
some arcs like that, but I never use
that. To be honest. You have other options
like this brush, you have a pencil here. If I click and hold, you see other options. But what I actually
use always is the pencil which works
simply by clicking click, Hold It, so I can
create those handles that indicate the
direction I'm going to draw the next
part of my curve. I release it, go to other point, click and drag it,
create the curve. There are some
important shortcuts. For example, if I hold shift, I will lock the handles
45 degrees, nine degrees. If I hold out or option
on Mac, I will break. That allows me to
make some sharp edge. That is not very possible
when I'm working like this. Also, if I'm holding it, creating my handle
and I hold space bar, I can change the
position of the point while I'm still holding
the bottom of the mouse. This is pretty much it. Here I see the
stroke and the film, so I can come here double click, So I change the
color of the fil, or the color of the stroke. And obviously here
in my property type, I can change the stroke weight. And I have some other options for the stroke,
which are the cap, which is the tip of
the stroke that can be rounded or can go projecting
around the joint. When I want it to be rounded
on the edges like this. Those are very
important settings. Vectorizing is
interesting approach because when you have a vector, it's different from
having a bit map. Image. Map images
is made by pixels. If you expand it like
this image here, you can see as it was made
in Photoshop as a bit map, you can see the pixels. The vector never
loses resolution. It's very important,
especially for us that are working with
animation and after effects. Because the after effects
allows us to modify those vector shapes like this and allows us
to animate that. That's the core
principle of what we do. It's very important for this technique to
work with vector. Now, let me delete
what I created here. Just pressing delete, and
I want to show you how I actually vectorize
my characters. It's good to be very
close to the characters. And I will start here at
the chin. I just click. Then I will click here again and hold until I find
the curve I want. I can also hold out
so I make one side of the handle different
from the other which will be
affecting the curve. I can see already that
the stroke is very thick. I want this stroke to be one
and the feel to have none. I usually just start
using just a stroke. I click, hold out to
break the handle. So I can draw the
nose click and drag. Then I will go all
the way there. Here. I will not draw this ear, because I want to draw
it later with a sphere. Okay, I made this part, then I would do the same
for the rest of then. Always trying to have the minimum amount
of points possible. It's not good to draw like that, We're going to talk
about it later, but this is very bad. Let's keep your points to the minimum because it
will make our life easier. When animating, I
always do the lines first and then I come with like changing color
and making the fees. I also have those shapes. Just click here and hold
to show me the options. It's very nice when I have
something that's a circle, I can simply draw a circle. This is what I have once I've
vectorized everything at this point is when I actually change the
colors and stuff. Let's suppose that I want
the skin color to be, I will flip here so
I can have just few. Let's see that. I want
something like this. For the skin, I want some
brown hairs like this. You just realize that this hair should be
behind my carters. For that we have the shot Curt, which is command
or control bracket or one thing that you
could do is come here, right click, go arrange
and bring to front, Bring forward backward
and send to back. In this case I wanted
to send to back. Obviously, you could always see here the order of your shapes. You select the shape, you're going to
probably see it here. This is the last one. Now you can see that it is selected by the symbol
here in the little square. I can press eye to
select this two here. If I want the same few
stroke, I just click. But I also can, for example here I have a brown
few in this here. If I want this brown fuel
to be in this stroke, I want to make sure the
stroke is in front. I press the eyebotom or click here to use
this eye dropper. If you hold Shift, you can select the color to
the place that is in front. In here, I took a color
palette. The Internet. This is the Carter with colors. Everything is inside
the same layer, and the background that I put
here is in another layer. And obviously, I
could block that. I will not click and
move it in the next. I want to talk about
some things that you have to bear in mind when
illustrating for motion. Some limitations you may have when taking our illustration
to after effect. See you in the next one.
5. Vector for Motion: Dos & Don'ts: Now I want to talk
about dos and don'ts. When illustrating for motion, it's very important
because we are animating the shape
Elayers in after effects. That means the shape we're going to draw is
very important and needs to be clean and effective so the animation
process will be easier. It's a very important topic. This class guys, is
about things that either after effect
doesn't recognize, so you shouldn't do
in your illustration. Or things that if you add, you're going to have to
rebuild in after effect. First of all, in
this example here, you can see gradient. Gradient is fine
to after effect, but you'd probably have
to rebuild it there. It will not carry on from
Illustrator to after effect. I use a plugging
called Overlord, which is not a free one, but it's very advisable
to have with one click. I could import that and it would keep the gradient
using Overlord. But I want to teach
you how to do everything without
necessarily using a plugging. I will show you how you could recreate the gradient in
after effects very quickly. Just to give you an idea
to create gradient here. In after effects you need to select your shape,
which is the hair. In this case here, you would come and change
from El to gradient. Like here. You could have
linear or radial gradient. I would go for linear here. Then I hit okay. And then you can see that immediately you
have two dots here. As you can see, I have two
colors by clicking here. Now I could change those colors for whatever
color I want to use. But of course, imagine having to do that every time
you have ingredient. The second thing here is
the stapered strokes. Stroke here is made
by using this tool here that creates variations of width throughout the stroke. It's a very powerful tool. I really like using it, but after effect
doesn't recognize it. If you really want to use
taper stroking after effect, you would also have to rebuild
this one overlord also. The way to do that
here is you're going to select the lines. Let's open here the content
of your shape layers. And you're going to
see that each of those parts are in
different groups. I would go to a stroke, open the properties
in the stroke, and here we can have taper and playing around
with those properties, you could have a similar effect of while you have
an illustrator, this drawing here uses
effect in the stroke. This effect is actually a brush. You could click here and
you'd see the brush here. This brush is not
recognizable by after effect, so you'd have to come
here and change to basic. Basic is the normal line. If you don't see
this stroke here, you can come here in windows
and you could see brushes. You'd see the basic
in the brushes. If you want to have these
rough edges in after effects, you can do that by using
some effects there. I do not recommend you having this effect in your
Illustrator file. Now, if I really want to have the rough edges in
my illustration, I would like to add effect, creating a new
adjustment layer so I don't apply the effect
on my individual shapes. And here I could
come to effect and preset and I type
turbulent displays. So I click and drag here
to my adjustment layer, and that's what happens. That's because my parameters
are too big here, so I have to reduce the amount. I usually put something
like 15 the size. I want something very, very small, like five. I already get a little
bit of roughness here. I can click and drag, so I see the effects happening. This is how I would make
the rough edges effect. Next one you can see that I have some blur effect here and some
inner shadow in this one. Those are effects that
illustration has. Most of them you
could potentially recreate there in after effects, but you cannot have it in your drawings to see if your
object has some effect, you have to click it. Go to Windows and
go to Appearance. Inside appearance, you
could see your stroke, your few, and here is the Gaussian blur that
I don't want to have. So I can just click
here and hit the Lit. And the same I would do
if I select this one. I can see that I have
a inner glue here, so I can select them
both at the same time. Select here, remove
the inner glue. The last 1.1 of the most
important ones is here, the number of points. You don't want your
illustration to have too many points as we are
modifying this shape, the least number of points
you have, the better. I'm going to show you the effect of having too many points here. I would like to use
only the body here, just to show how having so many points can make our
life way more difficult. Here I have added a key frame to the path which I will
teach you how to do later. Going a little forward, I would like to change this shape as if the
body was rotating. Select the two here. I will do more or
less what I think would happen in case this
is a Carter rotating. I have something like
this which gives us an illusion of
three dimensionality. And you saw how I did that by changing point by point here. Imagine having to do
that to this one. Look how many more points
I have to work with. I would spend way more
time changing this shape. Always try to keep the minimum number of points
possible in your drawings. I also want to give you
some tips on how to reduce the number of points because sometimes you're working
with someone else. Illustration, there
are two very nice ways to reduce the number of points. One of them is automatic. You select the shape, you go to object path, then you go to simplify. When you go to simplify, you already see that it's
automatically reduced a lot. The number of points I
could reduce even more. And here I have a
balance between keeping the shape I have and reducing
the number of points. So I want to have the
minimum number of points, but keeping the shape
as much as I can. This button here
makes it automatic. It balances it for me. Now I have way less points
than I used to have. The second way is a manual because sometimes you want
to remove a specific point, remove it, but keep
the shape as it is. The way to do that
is coming here and selecting the lite anchor 0.2 which is the
same as the pen two, but with a minus. If you don't see the two
here, it's probably hidden. So you can click in these three points
here at the bottom, and you're going to see all the tools you have hidden here. You just have to grab
a tool that you don't find here and pull
it to the two bar. But I'm using this one. Let's say that I want to
remove those points here. You keep the circle
with four points only if I just click here
and remove this point. Look what happens
with the shape. The shape changes a lot, so I lose a little
bit of my curve here. That's why I recommend you
clicking here, Holding shift. If you hold shift,
look what happens. I remove the point but
the remains the same. By holding shift, I make
those other handles here so I can keep the same curve even though I no longer
have the point here. So I will do the same
for the other points. I think four points are
fine for the circle, so I remove those points without changing
much of my shape.
6. Speed Graph & The Art of Morphing: Okay guys, before going
to after effects, I want to show you the
process and what we are actually going to do
when animating shapy layers. And for that, we're
going to need to talk a little bit about
the speed graph, which is going to be our
best friend in this process. And you will
understand why guys, this is the class where I teach you all the secrets
of this technique. From now one you're going
to understand how it works. Here we have a star that
morphs into a ball. In this animation, this
morph doesn't look good. It's simply change
from a star to a ball. And this is not
convincing at all. This is a simple movement. I have a star in a circle, a new object that
control both of them. And in the middle of the trajectory from
point A to point B, I simply cut the star
and have the circle. There is one simple
thing here that I can do to make this
morph way more convincing to show you
that why will select both key frames and I will come here to see my
animation curve. I want you to make sure you
are in the speed graph, which is the case here. To check it, you
just come here and go speed graph instead
of value graph. You see that we have
a linear movement, which means the speed
doesn't change. Now I want us to
come back and put my cursor here at the moment where I change from
one shape to another. You select it again
and come back to the curve by selecting
the two points, which are the two key frames, how you press nine. So they go to zero and now
I have a curve like that. That means that now
we have, as in, what I need to make sure here is that the
peak of the speed, which is the peak of this curve, is exactly at the moment where the start changes
and become a circle. But I need a more
drastic movement here to make it even better. You pull this handle here
and put this handle here. You get very close
to the center, But I want to make
sure this tip here, the peak of the curve, is exactly where my
needle is right now. If you remember the
animation before, you can watch it now. And see that now I have
a very convincing morph, even though it is still just the star
becoming the circle. That happens because
the key frames in this moment here are far
away from each other, which gives the impression
that in this period of time, the star really morphed
into the circle. You can also see that if the peak of the speed
is somewhere else, the morph doesn't look as good. To show that, you select both. Again, I will go back
to our speed graph. I make sure the peak
of the curve is now around here.
Pull those handles. If you play the animation, you see that this is bad. Because you see they start becoming the
sphere very clearly. I believe I convinced you that the morph works
way better when it happens in the exact
moment where we have the peak of the speed in the
movement of the position. This is how we are going to morph any shape to
any other shape. But it's very important
that we are not only changing very different shapes like we are doing with the star, we are doing a little bit more. This is what I did in
this example here. Look how good this morph looks. This one is a very smooth morph. Let me show you how I did that. Of course, I have to
make sure the peak of my speed is at
this point here. If I go to my graph, I see that this is exactly
the peak of the speed, and it's where my shape changes. But in this case,
here I did more. I animated the shape
layers at this point here. Here I have a star, and this is what I have here. I just change it slightly, the shape of the star by moving those points here
and animating the path. In this moment, the star
changes to the circle. But again, I don't have
the circle straight away. I have first a shape
that remembers the star, but it quickly
becomes the circle. In this curve here, I made that, I also want the peak of
this curve to be here. In the beginning, the
curve starts with a very high speed and finish
very smoothly with the star. The path of this star,
I have the opposite. This is how I have a
very smooth transition. But you can see that from
this point to this point, I change the shape. But nobody's realized because I make this shape
closer to the circle. And from this circle here, if it, so the shape
would be to the start. In the animation, I will
explain details how animate the path like this and you're going to see step
by step, my process. For now, I just want you to understand the technique
and understand how we can trick the eye
by pretending to have a full transition even though
we don't actually have it. I hope you enjoy it, and I
see you in the next lesson.
7. Importing to AE: Layers! Layers! Layers!: So guys, before bringing the illustrations from
Illustrator to after effect, I'm going to show
you how to prepare your file to go to animation. Now we are going to
organize this file so it's ready to go to after
effect and animate. I have those three poses already and all I'm
going to do here is to group together part of the body that I want
to stay together. When I go to after effects, there is not really a
rule to do that you can separate the part the way
it makes more sense to you. Of course, it's going
to affect the number of layers we are going to
have in after effects. Let's see how I do it. I will be selecting
the parts I want together and I will hold
shift to select other parts. And I want all the phase
features to be together. So I will press Control or
Common G to group it together. It's now grouped and if I
come here to my Layer tab, I can find the
selected one and I can see that all
my face features are together in this group. So I will do that for
the whole Carter. I want the face to be together. The hair is one thing. I want all this body
to be together. Sometimes I group
and as you can see, the body came forward, so I would have to
adjust it later. So to do that, I
will select the arm. I will group the whole arm
and I could come right click, arrange, bring to the front. Here we are. Those legs
are separated as well. I want these lines here to be with the leg in the
front, which is this one. And I also add those shoes and come on G to avoid me
clicking on the background. It is important to block
the background here. And it's important
the background is in another layer here. I also have to put the
leg backwards now. So I'll press command brackets until it gets the position. Should be. I think I'm going to
have this whole thing here together in the
arm and the phone. Okay, let's do that
for the other poses. Now, everything is
grouped the way I want, but now I would like each one of the poses to be in
a separated file. And also, I want
to position it the way I want it in the
final animation. Let's revisit the sketch. As we did in the initial class, you remember those
different shots, how you select this two here, which is the artboard two. Duplicate this art board. It's going to tell me that
the background is blocked, so that's why it's
not being copied. The third scene here, let's unblock the background
so I can copy it like this. Let's plan the shots according
to what we have here. Here, there is a
very important thing when you want to
scale your Carter, because you have two
ways of scaling it. In one option you would
keep the stroke width and the other you'd
increase it proportionally. To open the options to do
that you press command K, and here you can active stroke. In effect or not, I will activate that
and press. Okay. I can scale that the last one, but I would like
those three poses to be each one in one
different Illustrator file. It will make our life easier
when going to after effect. To do that, I will open
two new Illustrator files. Make sure it's 1920 by 1080. Now we're going to bring
those other illustrations, two other illustrator files. I select this one here, Common C, here in frame two, I will press Common
shift V. I will paste this illustration
here exactly at the same position it
was in the other file. You'll do the same
with the third one. And of course, in this one I
can delete everything that I don't need and I'll delete those others to art
boards as well. So now I'm going to start
with the frame three as we have the full body
here going to the layer, you can check if
you have the parts of the body grouped correctly. And I just realized that I
haven't grouped the dog, so I will select
the dog and come on G. So I have the dog
as a one single layer. It's very handy
because I can see little parts here
of what is grouped. I can see a single path here, and this is the middle
of the shoes look. So it's important to be inside the group
of this leg here. To do that, are
you selected here? Then I can click and
drag this blue square here and put it inside
the group I want. Now that line is in
the correct group. Okay, we have
everything grouped, but they are not in
different layers yet. For after effects to
read as separated parts, they need to be in
different layers, not just in different groups. Luckily, there is a very
easy way to do that. I just have to select the layer where
everything is inside. And come here in this menu and click Release to Layer sequence. Now you can see different
colors on each layer, which means they are
all different layers, although they are still
all inside the layer one. I want to remove everything
from the layer one. Select all of them, and I will drag it
outside the layer one. The layer one now is empty. I delete that, and I
have every part of my body as I grouped it
in different layers. Now, the last part I want
to name the layers here. Just name it to indicate to
myself what each one is. Now I have to do the same on every single
one of my pulses. It's important to
notice that the names doesn't need to match the
names in the other poses. Okay guys, now everything is
ready to go to aftereffects. See you in the next lesson.
8. Setting the Timing : Okay. Now in after effects, we're going to set the
timing of the animation. The first thing we are doing here is importing
the illustration. Right click, import file. So I will start with the third
one which is more complex, so it's a better
example to give. Instead of importing as footage, I want to import as composition, retain layer size, and press. Okay, now it's already
creates a composition for me. I would double click it and I'd like it to have 6
seconds of duration. To change the duration, I go to Composition
Composition Settings and set here as a 6 seconds
and the frame rate. I would advise you
to use 24 for now. Here I can change the
resolution of my preview, so I go to full so I can
see the character properly. Now you can notice that
all of those layers are separated the way
I did in illustrator. But they are all illustrator
layers like this. I want them to be shape layers, so I could edit the curve
and modify it to do that. And I will start with the head. I right click here, Create Shape from vector. This way it hides my head and creates a shape layers
called the head outlines. Now I can edit the shape of my. That's what we want to do
for all the layers we have. I can do all at the same time. I can create create
shape front vector. Now I want to delete all
the illustrator layers. I no longer need them as all the layers have
the same color label. I can just right click in this color label and click
Select a Layer group. It's going to select all the
layers with this color here. And I press backspace to delete. Now I have my whole body
all with shape layers. One thing I like to do
for this process is to put my time line
tab on the side. Click here, hold, drag it here. Now I have my animation
here on the left. And here on the right. I'd have more space to see and to
open my content here. I could reduce this element here because most of
them I would not need. So I can hide this
one, for example. I just need for now the parent links shaped
layers have content. So you can open here and inside contents you're
going to see groups. Each group will contain one of the elements
of my drawings. If you open the group, you're going to see the path. And here you can see that
this is the path of my arm. By clicking here, it's
already selected. So I can see the little squares which are the points
of my illustration. Before animating
that, I want to make sure all my anchor points
are in the right place. Anchor points are the points from where my elements rotate. As this is the arm, I would like the anchor
points to be in my shoulder. I just use these two here. Which shot curd is
Y and drag here. Each element here would
have a rotation point. The head for example,
would definitely be. And the neck, the hair could potentially be
something around the hair. For the face, it
doesn't really matter. But all the rest, I can put the anchor point where I think it
makes more sense. Once I position my anchor point, I'd like to parent. So when I control one part, the other will follow. In most cases, I
would like the body, the main torso to be the core elements from which I could control
the whole Carter. That's why I will probably
link my legs to the body. To do that, I will come
here in this weep. I can simply click and
drag and put in my body, I'll do the same to the arms, the head as well. The face should be
connected to the head, and the hair is also
connected to the head. So I can see now that
if I move my body, the whole carter moves with it. Although I'm able now to move the whole Carters
by moving the body, I'd like to have a new object here to control the whole body. And don't necessarily modify the parameters of my
body when animating. Right clicking, new new object. Now position the new object to my body and then I have to
link the body to the new. Now you name this
new pulse three. I will use this dark
green and I will block it so I don't move
the background at all. Everything else, I want to
have a specific color, Orange. You could choose any color, and this is important
for us to be organized. Now, this whole process
has to be done for every single pulse as
we only have three. It's not too bad that I did all that
for all the pulses. I will cop them and make
sure they are in the same. I just copy and paste. Now I can clearly see which composition is which
by the different colors. I can close the other two
composition and name it. Okay, now I can see that the three poses are at the
same time in my frame. We're going to set the timing by determining the duration
of each of the poses. Make sure the pose
three is at the top. We should never begin the
animation in the frame zero. We have to allow some time in the beginning for the view to understand what is going on. They might start moving
around the one a half, I guess I can roughly say
that in 2 seconds and a half, I will crop the pose one and I can click and drag the end
of the comp like that. In this moment, the
Po two would start. The pose two is only
a transition pose. It's my less just for 1 second. The rest of it will
be the pose three. You definitely should
press play and watch the animation like that to see if the timing makes
sense to you. I will make sure in they are
not overlapping like this, so just drag one frame
behind and perfect. Now we have the time set, it's time to start animating.
9. Animating Shape Layers: Rotating the Head: All set guys. We're going
to start by animating the head of the Carter time to talk about animation
in after effects. Guys, now that we have
set the timing so we have the duration of each of
the poses before anything, I want to show you how does it work to animate shapy layers. We're going to start by trying
to make this eye blink. First, I need to
find where my eyes are as every shapy layer
you can open here, and you're going to
see the content of it. We have two groups. One is the eye, one
is the eyebrow. I want to animate both. Make her blink. I
will open the path. And every time I have
this little watch here, that means I can add a key frame and animate
this parameter. Let's click path
on both of them. Where your needles here is is where it's going to
create the key frames. And for me to see my shapes, to have this button
here activated. If I turn it off, we are
not going to see your path. I can walk a couple
of frames forward. To do that, I press command
or control error to the side, 1234 frames ahead. And now I can modify my shapes. I'm going to change this
shape to make her blink. I have this animation. Once I have it, I'd
like to go two frames ahead and mark another
path key frame. I have the ice remaining
closed for two more frames. And then I will count
1234 frames ahead. I will select those
first keyframe, common common V, and
grab this bar here. This is the preview bar. That means the animation I'm previewing is just
between here and here. And I will hit
space bar to play. She's blinking already. When doing this blink, I always like to add easy to the first and the last key
framed by pressing F nine, nicer, in my opinion. Now we're going to
have to make this pose transition to the next one. That's why I will extend
this one here so I can have this as a guide as I
want this one to be a guide. I would like to select
all of them and lock it so I don't click
and edit it by accident. Now the first thing I like to
animate is the new object. So I can animate the scale and the position already before
animating the shape layers. I will press P
select position more or less where I want
the animation to start around 1
second and a half, I will mark a key frame and
I will press for scale. Mark scale as well. And then I'm going to press, which is going to show me only the active key frames in this case,
position scale here. Then I will go to the last
frame of the pose here. And I first animate scale. The size of my Carter will be closer to the size
in the next pose. This look good to me. Now I'm
going to move the position. I also want to change
those handles here. It also makes a
curve when it moves, arcs are also a
principle of animation. It's important that your
movement are never very linear. I want to reduce the
scale a little bit more. All right, let's
select my keyframes. Click here to open
my graph editor. I want to make sure I am in the speed graph, which is here. Now I will select the first key frames I can
click and drag to select both. And I will press nine. So I'll have my depo
easing in here. As I showed you guys before, I want to make sure the peak of the speed is at the
end of my animation. That's why I want to select my key frames here and pull the little
handle I have here. So I will make this curve. I can also pull this one
the opposite direction. So this is what my curve. Does that mean? My movement will
start very smooth and the peak of its speed
is going to be here. You may be wondering why
they are inverted like this, but the curve of the scale
is in this direction, because we're scaling it down. If I were scaling it up, it would be flipped. Now, I'm going to
animate the path to make a fake rotation. Oh my God. So I will have to go in each
layer and open the content. And open the group, and
select the path for each one. The answer is no, you don't need to do that, because I will
teach you a trick. So let's close that and I'll select every
layer of my Carter. And let's go to the 1 second and a half where my
animation begins. If you see here, you have
this little search bar here. I can search for any
effect or parameter here. And it's going to show only those for the
layers I have selected, if I type path all my path. Show. I will select all of them. I can just click and drag down only the path of
the ice were not selected because we already
had some key frames on it. I will click here. Now I can
select everything again. I can even click here and
select a label group. And now I can press you. It just shows the path
that I want to animate. If I go to the last one, I can click and modify the path. And I will automatically
create the key frames. As I want to start just
animating the head. I want to hide everything else
so we don't get confused. Now let's see how I
animate this head. As I do, like the head to
rotate in this direction here, I think I won't need the
other pose reference, so I will hide them. If I double click, I can see my points. And let's see what would happen
if my character rotates. I can select more than
one point and drag. Then if I need, if I
to animate the ice, I will probably click on
those ice paths here. And I can click and drag
to select all of them. In the eyes, we are going to
be stretched a little bit. If I select all of
them and double click in one of
the points I have, this is square here will
help me to edit it. So I could rotate for example, which is not the
case for this one. I could squash it a little bit. Let me select the key frames of the head and keep
playing with the shape. I also like to creek
and drag here, so I can see the movement. It's very nice, so I can see
if it's actually working. If it's not, I can see that I should change
a little bit more. The ears, I'd like something
a bit different here. I'd like the hair to
swing a little bit. To do that, I create a box
to select the key frames. Here I'll double click, so I can modify only those four key
frames that I selected. I can use the Zunkorpoint here. I can click and drag to
change the position of it, and I can rotate the hair. I press Enter to
confirm what I did. You have always to
go back and forth to see what are you doing
and to make some changes, I can press Space Bar, that will give me an idea
of my head rotation. Now I need to make sure
this animation curve is the same as the
scale in position. What I can do here is select all of the key frames
I just created. Go to my graph, press nine, so they will all have
the def, easing. And pull this handle here, I can see that the key frames
of the hair didn't change, so I just select them like
King Dragon, like this. Press F nine in this one and pull the handles like
I did with the others. Let's watch. Perfect. This
is exactly what we want. I have a little script that I always use that is essential for me when I need to have the same curve and many
different parameters. As you could see, it's
very complicated to select many key frames and edit
the curve all at once. That's why I would recommend
you download any styling, a script called Easy Copy from the AE scripts website and
you can name your own price. Obviously, I recommend
you donating for them, although you can
get it for free. If you want, I can
come in here in Windows and find easy copy here. I drag my easy copy here. It allows me to copy and
paste the curve of animation. If I select two of my
keyframes and press copy, then I select all of the
others and press Paste. I'll make sure they all
have the same curve, and that's what we want
in this case here. Now I will unlock and turn on the visualization
of the post two. So I will hide everything
that is not the face. So now I can return the beginning for where
it's supposed to be. But I want to leave
one overlapping frame because I might still need
a reference here again, that animate the
position they scale. I'd like them to being this scaling position
halfway through this pose. So I'll drag my cursor here to the middle and mark
the key frames. Now I'm going to
do the opposite. This head here will have to match more or less the
position of this head. In this case, you're going
to scale up a little bit, and then we're going to
change the position. And don't forget to keep the
art, this is where we get. Let's select everything, even
the ones that are hidden. Now pick here to find the path and mark
all the parameters. You always have to
mark them all again. I select Led Group and press I want the shapes to be like this in the middle
of the movement. As I said before, let's grab it here to
align with this one Now, we're going to change the shape. It can get closer
to this one here. All right? I think I'm happy
with this movement now. Let's change the curve
in one of those. Press F nine on both you do now the curve like
this, in this case it is. Start at the peak and
then get smoother. Use my friend easy copy, You just select press copy, then select all the
others and paste. If you copy the curve
of two key frames, you can only paste if
you also have pairs here and you see that they
all have the curve I wanted. I can preview and
see what's happened. This is what we have. One is small detail because I have
one overlapping frame here. I'll make sure I
don't have that. I have to use my scale here, make sure I don't have frames
overlapping like this. I can even drag
those key frames, one frame I had, and pull all of them,
one frame ahead. Now it's going to
look even better. Now we're going to do that for the body and the rest
of the animation. Hope you enjoy it. See
you in the next class.
10. Continuing the Rotation: All right, now you understood the whole process
of the animation. Let's keep going. Okay,
let's animate the rest. Music Music And now I also have the whole
body animated as you can see. But by playing it, I realized that the
movement of the hair in the second pose should be slightly different. So
I'm going to fix it. Now that shows how important it is to watch the animation
many, many times. So you can see
detail that you need to and things that
you could improve. Music Bed. Music Bed. This is what I got so far. And for this pose here, I see a little problem. This pose stops
when it gets here. As we pressed nine
in the beginning, it sets the speed at
this point to zero. And that's not really what we want to fix that,
it's very simple. I just go to position, select this keyframe
here, open my graph. Now I want to drag
this key frame up. It's no longer on zero. It makes the animation
fast in the beginning, is lower in the middle. Although it never gets
to zero, it never stops. And faster again
at a speed peak, which is very
important for us here, all those key frames should
have a similar curve to that. That's why I use my
friend easy copy. I will select three of them. Copy and then paste in
all the other ones. Now when I hit play, you can see that it slows down, but it never really stops. As always, I see some
adjustments to make. Let's do the rest. Music Music Bed. Music Bed. Here we are guys. This is what we have.
Now, I realized after the animation that I had to change a little
bit the position. So I just put my coursor here, select the position key frame, and I could change
it the way I wanted. And you just need
to watch it many, many times and you're going
to see what you can improve. But for now, I'm happy. In the next class,
we're going to talk about some more details
that we can add. And we are going to add
anticipation and accommodation, which will make the
animation way way better. See you in the next work, bye.
11. Anticipation & Follow Through: It’s in the Details! : Okay guys, the main
animation is ready. But as always, we have to think about some
principles of animation. So I'm going to show you now how to add some anticipation, which is like the carts going
back before going forward, and the accommodation of the hair at the end
of the movement. It is very, very important. Let's do it guys. After the last class, I have made some adjustments
to the animation. I want to show you some, You can see that now
I animated the dog. I want very quickly to
show you how I did that. The dog layers is here. All the shapes are in one layer, which is not the best practice, but I want to show that
it's possible to do that. One thing that I want
to show you is the fact that in most recent
versions of after effect, I'm allowed to color my keyframes as I want
to make the dog blink. I did color the key frames of the eyes by selecting them right click label and I
can select the color I want, Blue, for example. This way I can mark
specific key frames that I want to give a
special attention to. Other than that, I linked dog to the new there is
controlling the Carter. I will just unparent it just to show you the movement
of the dog by itself. Press this bottom here
to single the dog. You can see that all I did was animate the shapes so it
could make the rotation. The tail has a mix of
animations of rotation shape. I have the path animation, but I also have some
position and a rotation, and those are the key frames. I even have a small anchorpoint
here as you can see, which I could change by
using this two here. But this anchor point is specific for detail
for this group. If I select the whole layer, I see the big anchor
point which is here, which is the anchor point
of the main object. This is very, very
interesting because it adds another layer of complexity
to what we can do. Because you can not
only animate the path, which will give you a
lot of flexibility, you also can animate
all those parameters, including which is something that you don't have
for your normal layer, but which makes a very
interesting distortion. The other thing that
I decided to do, I have added an arm behind her
that were not here before. It was important because I realized that we
would probably be able to see this arm at
this point of her rotation. And you can see here the arm, one that comes up at this
point coming from behind her. And I also added
second coming up here. I felt that it was
also necessary. I have also added a little shadow here
which is a small detail. But now I would like Yes, to create some anticipation and accommodation which are going to help the animation stand out. Let's start with anticipation, which is when the Carter moves
in the opposite direction. Before going forward,
I will just come here in my new press you to
review all the key frames. I will mark a keyframe
here in the position. In the next one them, I want to move the cars a little bit to the left like this. By doing that, I have to pay attention on my handles here. I will say this two here. Make sure this handle is in
the right place like this. I can watch what I just did. I adjust the curves
because it needs to be more soft, just a little bit. I'm also adjusting the timing by moving the key
frames a little bit. Now it's working better. Now, I would like the hair
to swing a little bit, so let's mark a key
frame here for the hair. In this one here, I also
edit in the curves. All right, now I'm happy. Now we have a little
bit of anticipation. And then at the end, we need to make sure that
the hair will go a bit forward after the movement is stop and swing a little bit. Let's see how I do that. You always have to watch
your animation many times and play around with
the shape of your object, the duration, and the distance
between the key frames. The core animation is
done already guys. Now we're going to
add a background and I want also to
add some effects and final details that I
want to talk to you about before we
render the animation. We're almost there and see
you in the next lesson.
12. Adding a Background & Rendering: Okay, okay, the final element
that we need to add to make the three D rotation more convincing is a background, so it's going to help to
create these three D effects. And then we will render the
animation. Check it out. The animation is now
pretty much done guys, but we all want
this animation to look like it was
done frame by frame. When we animate frame by frame, we very usually animate
on 24 frames per second. But we animate on chose, which means each drawing
less for two frames. That's the same of animating
in 12 frames per second. That's why I want to add an effect to make the animation
12 frames per second. So it will look a lot
more like frame by frame. To do that, I would like to
create new adjustment layer. This adjustment layer
needs to be on top of everything and I will
find here, in effect, in per set, an effect
called posterize time, it can dragon drop to
my adjustment layer. Here I can add the frame rate of my
animation by the four. I have 24, but I want to
change it to 12 when you play. That look more like frame by
frame and you also get rid of some imperfections that you end up having when
you animate like that. Now I would like to
show you that I created a background here
which is longer. This is actually the same high
but three times the width. This is a illustrator
layer inside a pre comp. I'm going to put it
behind everything. I want to see my new poses
because the rotation have to follow the same timing
of the position of my new. Let's first position,
My background here. Let's press P to
review the position. And I have to keep
these key frames aligned to the ones of my new because they
are my reference. I will go to the next one. As my charters are
going to the left, I want the background
to go to the right. Just a little bit like that. I can have a three
dimensional effects. Now I want to jump to the key frame where
my characters slows down and I will onlymate the
position of the background. And then when my Charters
gets to the final position, so does my background perfect. Now I need to match the timings
of those curves as well. I know when I change drawings, like in this moment is
in the peak of my speed. That's why I'm going to select all those key frames and make sure that
between those two, the peak of the speed is
exactly at this point, it's going to match the
animation of the Carter. Okay. The same here when we go from the post
two to the post three. This is where the peak
of the speed should be. Of course, I don't want it
to stop at this point here. I will just bring
it up a little bit. Two of them, the initial anticipation key
frames also should match. Let's see where the peak of the speed in
this moment here, which is more or
less around here. This is where the peak of the movement here
should be as well. Great, let's play the animation. Now, I just need to
animate the scale. To animate the scale, I would like to
have a new object, because I want it to scale always from the center
of the artboard. Let's go layer new object. You bring it down, make sure
both has the same color. I will parent the
background to the new and I will control the
scale through this new. I want the scale
to start here from the last one because it's
where my scale will be 100% Now I'm going to scale
it up a little bit more here as I want the curves of my scale
the same as my position. I will just select three of them and use my friend easy copy, copy here, select
here, and Paste. To avoid my background losing resolution because of the scale, make sure this first
button here is activated. And then I will click
this little sun here, so I will have a
continuous rasterization. I have to go inside my
background pre comp and make sure it's activated in
this layer here as well. Let's click here, make
sure it's activated. So you can see that no matter
how much I scale it here, it's now never loses resolution. Let's play to see
how it's looking. The animation is ready
guys. It's looking good. There are some effects
that are very popular and very fun to use that I'm
going to show you how to add. The first one I
showed you before is the turbulent displace that I can use very small
parameters here. It's going to give us a
little bit of roughness, maybe even more here. Also a little bit of noise. I'm going to use
this noise here. I like to use grain and I can just increase those
values a little bit. This will make the animation
a little bit less flat. Okay, we are ready to render. Before render, we
need to make sure this bar here is covering
all the animation. You can double click
it if you want to grow it for the
whole composition. I go to file, Add to hander. Here will change
the format to 8264, which you give us an
MP four file. Okay? And here, select where I
want to save my video. That's it. Just hit Render.
13. What Next? Keep Spinning! (BONUS): So guys, we got to the end. But now I want to have
this bonus lesson, which is like me showing you some projects that
I have made before. And I use the same technique
in different use cases. It's going to be very
nice to see like how powerful this technique
actually is. Let's go here. I am ready to show you how I use this technique
in my daily project. This one is very similar to
what we have in the course, which is a character
rotating and looking behind. I have three poses here. One is this pose where the
head is in this position. The second is like this. There is like a very
quick rotation, as you can see from this
frame to this frame. Then there is a bigger one, which is this rotation, which I do change the head
from this frame to this frame. When you play it quickly, you don't notice that you don't actually
rotate everything. It's only possible because
I made the changes of frames at the
peak of the speed. The second project I want to show you is an interesting one. In this project, I had
to animate some hands. Hands would change
shape all the time. I designed many
positions of this hand. I had a new controlling the movement at the
peak of each position. Movement, I could change from one pose to
another and it would give us a seamless transition
in this case here. I even added a middle frame
between this and this. I actually had three
drawings in here, but this change does happen
at the peak of the speed. It shows that with
very few drawings, it's possible to make a
very convincing movement. Later in the same
project I have this. It's a astral hand. It turns and swings from left to right at the
peak of the speed. Again, I change the drawing. In this case, I also added a pose in between
which is this one. It just lasts for one frame and then you
have the other pose. I also added a smear, which is making the stick
change shape like this, which also happens in the
fastest moment of the movement. Last but not least,
this animation here. This one is a little
bit more complex just because I used more
drawings than usual. Those are the poses
I made for this one. I made a small animatic before vectorizing
all those poses. This is the animatic
that gave me the base for me to vectorize
the poses I wanted. Then in after effect, you can see that this looks very much like the project we
just created in this course. You can see that each of those sections is
a different pose. This one, especially
for just two frames. But they always transition one to another at the
peak of the speed. If I show any of my key
frames and you're going to see that this is how
the graph looks. They all start at the peak
and finish at the peak. For me to have a
perfect transition, I hope you guys enjoy that. That's pretty much how I
do most of my projects. I cannot wait to see what you guys can create with
that seeing the next one.
14. Conclusion: That's its guys.
Congratulations and thank you very much
for taking this class. We started by sketching the
ideas and the three poses of our Carters so you could see how I vectorize it in
Adobe Illustrator. And we imported the
illustrations to Adobe after effects to make
it become shapy layers. And then we animated
the shapy layers. And at the end, we added
principles of animation. We also added a background to make the rotation
more convincing. And we got to the end. Please, don't forget to publish your project so I can comment
and give you feedback. Please, if you could
review the class and make any comments or
critiques you may have, take care and see
you in the next one.
 Gui Jorge Porto, Designer and Animator