Transcripts
1. Introduction: Imagine if you could combine two D animation and three D animation
using the same softer. Well, this is what you could do using blender GrizyPencil. Believe it or not,
Blender is a free softer, and GrizzyPencil is its revolutionary
tool that allows you to animate and draw two D elements on top
of three D objects. In a fully three D space, this opens up a world
of possibilities when it comes to creating
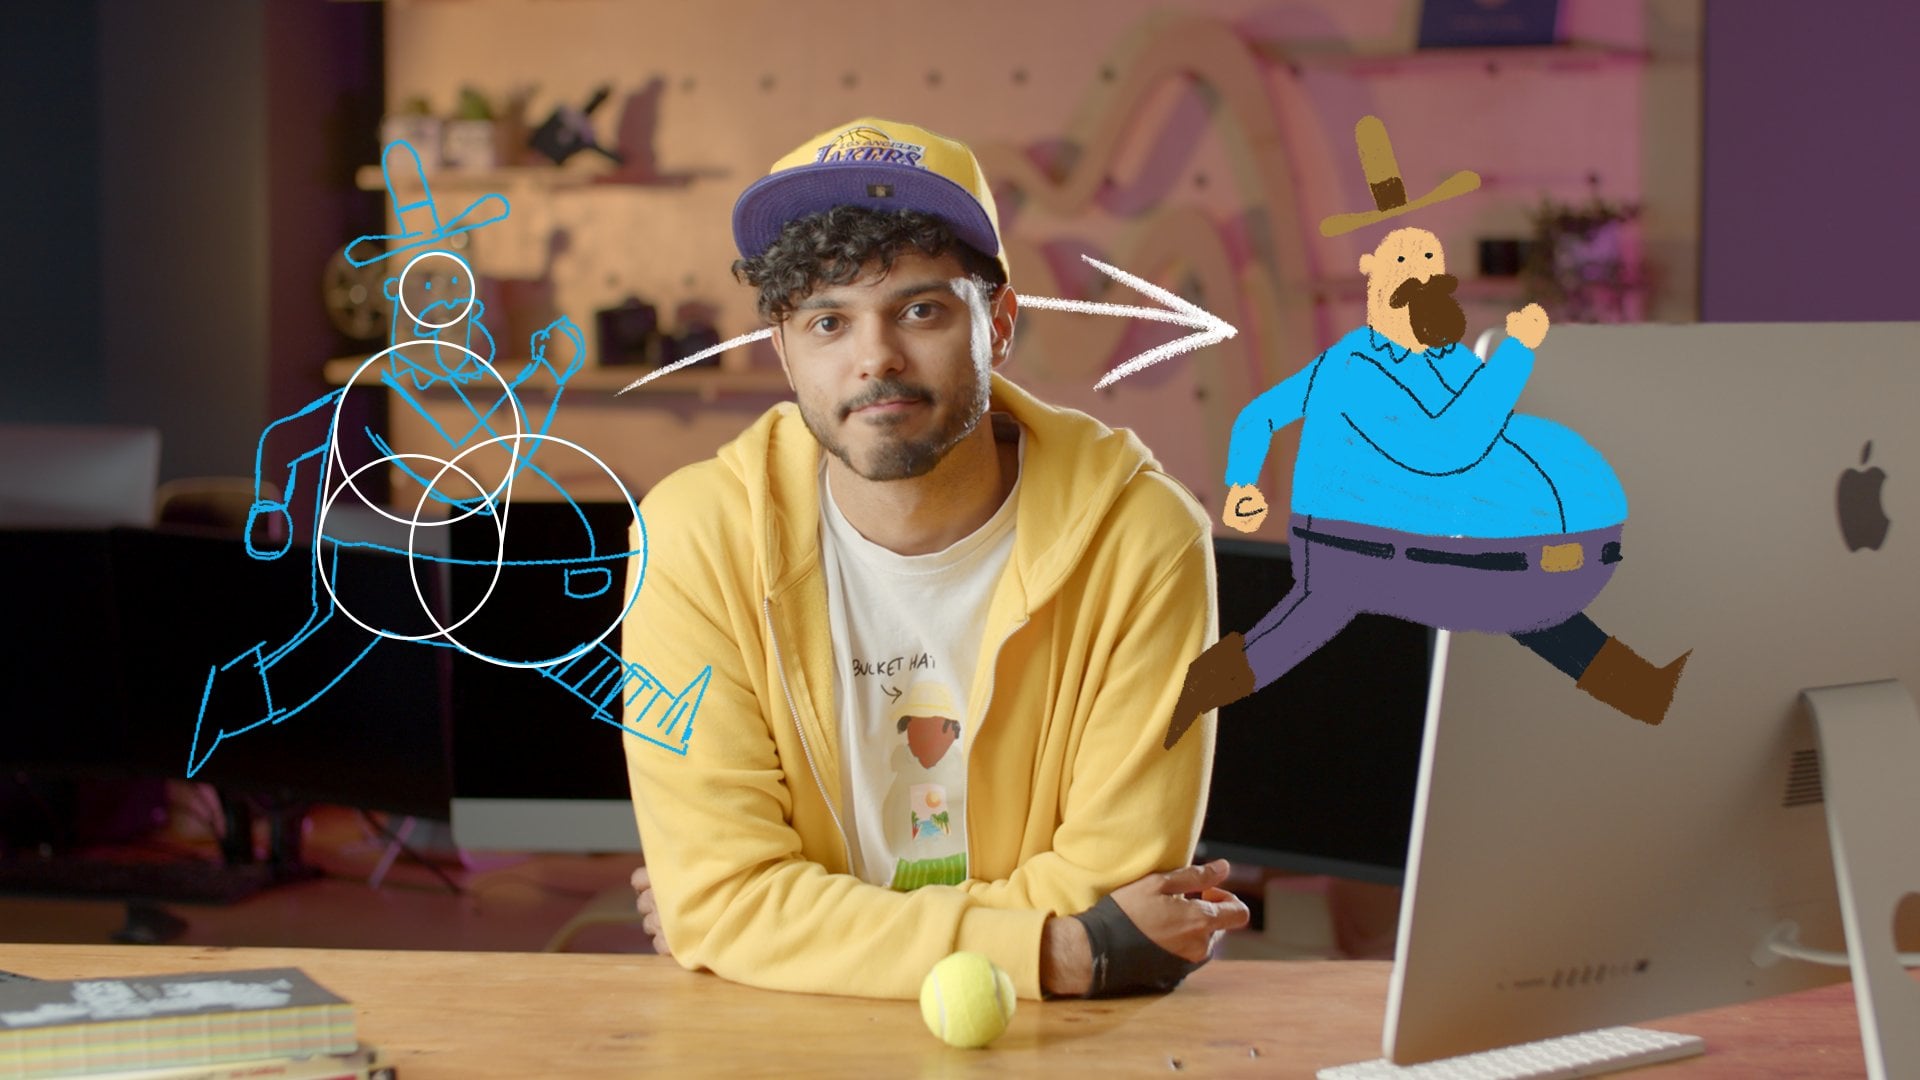
different mixed styles. I am Gui George, a Brazilian motion designer
and animator based in the UK, and I have always
struggled to decide if I like more two D or
three D animation. That's why grizyPencu is such a special tool for me
because it allows me to draw frame by frame
two D elements on top of the three D objects
that I create using Blender. In this course, I will show
you everything you need to know to get started using
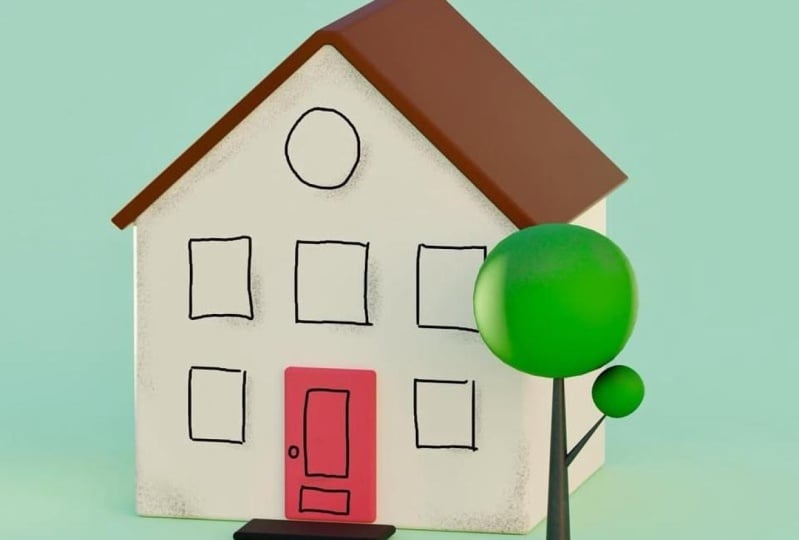
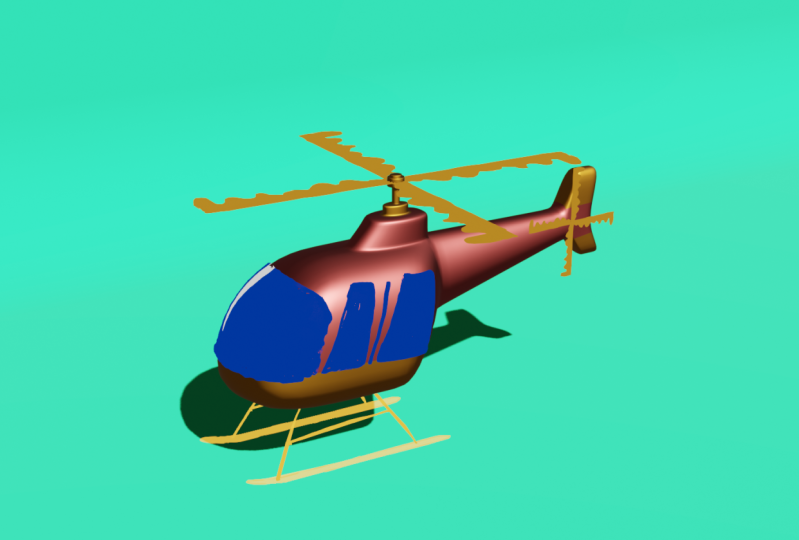
Blender grizzyPencil. We're going to create together helicopter that is the
perfect mix between two D and three D. We will start by modeling the
body of the helicopter, adding to it some
very simple materials that we're going to
create together. After that, the landing
kid, the windows, and the rotor blades
will be created and animated in two
D using risi pencil. We will animate both using key
frames and frame by frame. So I will show you
how to use ony skin, which is very important when you're drawing
frame by frame. At the end, we will parent
the two D elements to the three D helicopter
so you'll be able to animate
everything as a whole, and then we're going to
make the helicopter fly. I will also show you how to use some effects and how to prepare your file
to render properly. If you are a beginner, you can still follow this class. But this is more for
intermediate users because I'm going to go very quickly
over the basic of blender, so it should be nice if you already know something
about the software. Working with two D is very cool. Three D is amazing. But if you are able
to combine both, well, this is real magic. So join me, and I promise
we're going to have fun.
2. About the Project: Guys, welcome to this class. This video is just to explain
how the class is organized, so you're gonna know exactly
what to expect here. You're gonna have four
different parts in this course. Part one, it's
going to be a very, very quick and basic overview of blender in case you
never seen the softer. Then we're going to model the helicopter and create
some materials to add to it. If you already used
to blender and you already know the three
D part of the software, you might want to
skip this part. In Part two, we're going
to start talking about greasy pescil and
I'm going to run you through the
basics of the two. You're going to see how to draw, how to modify our
brushes, how to erase it, how to change colors, how to control the placement of your drawing in
the three D space, all the basic stuff. Part three is when we're
going to take everything we learn and apply to the
helicopter we created before. So we're going to draw on top of the helicopter all
the elements we want. We're going to animate
the rotor blades, and we would also animate a reflex going through the
windows of the helicopter. We're going to use different
animation techniques. Part four is all about setting up the render,
and it's very, very important because there are some tricky details
that you have to pay attention in order to
render your project properly. Okay, that's it. So let's
get ready for a blender.
3. Quick Blender Overview: Okay, guys, this is the
blender first screen. I just going to go
through very quickly some very basic stuff just in case you're not very
familiar with blender. You can still follow
along in this course. First of all, by the full, we already have three
objects in the scenes. We can select them both here in this list or click it
directly on the object. This is a light,
this is a camera, and this is our cube that
is here by the full. To navigate the view part, I use the middle
button of my mouse, so I can rotate around
the main object. If I hold Shift, I pen the viewport and if
I hold command or control, I can zoom in or out. I also have this gizmo
here that takes me to whatever angle that I want my
objects to be viewed from. If I click X, I'm going to see here it shows right
orthographic view. Y Z, this is something that's going to be very important
when using grizyPencil. I can also click
and hold so I can easily rotate around the
center of my viewport. Here on your left, we
have the selection tool, and the stree buttons here move, rotate and scale are the tools
I use to move my object. If I click here, I can
move my cube here, rotate it, and here,
I can scale it. All right. As I want
to start from zero, I will delete every
object from my scene. To do that, I can either
press A, so I select. I can obviously click here, hold Shift and click
the others to select all of them here in
the collection panel, or I can simply click and drag, select then O and press X, which is the button to delete. Now we can start from zero.
4. Modeling the Helicopter: Okay, now let's start modeling the body
of the helicopter. In 90% of the cases, we always start a
model with a cube. To add a cube to the viewport, I go add, mesh, and I add a cube. By the fall, the blender is in this object mode that
you can see here. But to edit the model
that we have here, we have to go to the
edit mode. Here we are. The first thing that you need to know is that those three buttons here determines if you're
selecting the vertex, the edge, or the
face of the object. I have a vertex selected, I can select the
vertex of my object. Obviously, holding
shift, I can select more than one and
with the tools here, you can move them and modify
the shape of the object. You can do that with
edges and faces. As you can see, let's press common Z or Control Z until we get back to
the original cube. I always scale up my
cube a little bit. In order to have flexibility
in modeling my cube, I have to add some
new edges to it. The best way to do that is by using these two here
called loop cut. Loop cut adds more
geometry to the cube. This way, I have more
points to work with. I will add some subdivision. Here, I have those options here that I could increase
the number of cuts. In this case, I have two
and I like also a cut here. Maybe two would be good as well. All. Now we have enough
geometry to work with. From this moment, I
can start selecting some faces. And move then. I start to create the
shape of the helicopter. Remember, we can also
select edges if we want. We can also scale up. Now, I'd like to
extrude this part here. I have the tail of
the helicopter. To do that, I use the extrude derision two
or use the shot cut E. I can get more or less
to the shape I want. Whenever I want, I can add new loop cuts to add some new
geometry and keep modeling. And this is pretty
much how I want my helicopter to look
in this first moment. Now, you might notice that
this is slightly too squared. To make it rounded, I add an effect called subdivision surface
that's going to add more geometry and make every curve of this
model smoother. To do that, I will come here in this icon where I can
find the modifiers. Add modifiers, generate and I'll find subdivision
surface in here. Look, what subdivision
surface it does? It adds geometry, but it
forces the curves of my model. I might lose some details here. That's why I have to add some loop cuts in the areas
that I need more definition. Should be. Here, in
my modifier settings, I can increase the subdivision the effect is going to make. If I increase the number
in my level view part, it gets smoother and smooer. When I go back to
my object mode, I can see my model, right click and
select Shade Smooth. All right. This is how
my model looks now. This is basically the model
I'm going to use to add my greasy pencil elements and create this mix between
three D and two D. A
5. Creating Materials: So, guys, I have
polished a little bit my model and I added this detail
here for the propeller. I also added this background, which is something very simple. Is a plane with a
rounded edge here. Another thing that I did
was naming the object. So I have the helicopter, like properly named in
the background here. So let's add a very
basic material here. To do that, let's
select the helicopter and come to this icon
here, materials. So now I click New to
create a new material, and by the fo we have
this white material. So let's name it helicopter one. To see what is going on with
the material applied here, we're going to have to go to
another visualization mode. Here we have four different
ways to see the viewport. The first one is wireframe. The second one is the default
that we don't see material, and we have the
viewport shading, which is a simplified way
to see the material work. The last one will be the one that will
simulate the render. As we don't have any light, you're going to see that
everything is gray. The one you want to use for this class is the viewport
shading. The third one. The white material
is somehow here, so let's change its color. Here in base color, here I can select the color. I use this color here. And down here, we have metallic. If I increase it, you're
going to see adds a little bit of shining to
it. That's what I want. And here we have a roughness. So if the roughness is zero, you can see the material
is fully reflexive. And if it's one,
it's pretty opaque. Let's go something in the middle like this
should be fine. Now I'm going to add
a second material. Let's come here again and click plus to add another empty
slot for the material. In this empty slot, I can select either one material that was created before
or create a new one. Now I would like to
add a second color. Again, let's open surface and the second color
will be a yellow. Let's add some metallic. I can click here preview
to see what I'm doing and Roughness 0.5, that's right. But of course, I already have my first material
applied here, so I don't see the new one. I would like this new
one to be applied in specific part
of the helicopter. I have to select the part where I want the color to be applied. So let's go back to
edit mode, select face. Now I'm going to select the area where I want the color
to be different. Which be this part here. It's important to say if
I click this button here, the selection will consider
the things in the other side. The object becomes
kind of transparent. So by doing that, if I
select this object here, it will select both sides of it. Another area that I would
like the color to be applied is this stripe here, the bottom of the helicopter. I think it would be
nice if the base is in a different color to
apply this material, all I have to do is having it selected here and hit a sign. If I click a sign and I go
back to my object mode, I can see that my helicopter
has two different colors. The last thing I want to do is to add a color
to the background. Let's select the background. I can come here in the material zero and change the color of it. This is the color I
would like to have.
6. Grease Pencil: Getting Started: Now it's time for
a grizzy pencil. The first thing I want to do is to change my viewport mode to the viewport shading
so we don't get distracted by the
mafurs on the screen. Now, we need to go to a
mode here called draw mode. But when I open my modes, I don't see the draw mode here, which is the mode where we
can draw with grizzy pencil. That's because in order to
work with grizzy pencil, the first thing to do is to
add the Griz pencil material. So let's go add grizzy pencil and we
can add a blank object. We created the object
G pencil here. I'll call it test for now. Now when I go to object mode, I can see my draw mode here. When I select the draw mode, you can see that I have
drawings to on my left here. If you start drawing, you can see that you already doing two the drawings
on the screen. Here, you can change the radio. If you increase it,
the line gets thicker. You can also see this button on the right that activate
the pressure of the pen. Then you can see that
my line increases the thickness depending on
the pressure I put on my pen. The strength is
actually the opacity. If I reduce a little bit, my line gets more transparent. And of course, we also
have the pressure here. So we can vary the opacity based on the
pressure of the pen. You can also choose the cap, which is the ending
of your line. And here we also have
some interesting options. The most important
is the smoothness. Right now it's zero. That's why my line
is very rough. If I increase my smoothness
to 1,000, for example, when I draw, you can see the difference of how
smoother my line becomes. To erase my lines. I have here, the erase too. Now I can just erase it. But there would be other ways to erase and edit my drawings. You can see that if I change
from draw to edit mode, we can see that those lines that I drew
are actually points, and you can select and edit the same way you do
with any other shape. And as this is the
case, I can also, of course, right
click and dissolve. This way, I delete the points. I can also use to
edit my drawings, the scoped mode as
we do when scopted. I could even make those lines smoother using the Smooth tool. That means everything
that we draw with greasy pencil is this
vector path that we can edit however we want the same way we would
edit any other mesh. Now, I would like to
go back to edit mode, press A to select and press X, so I will delete all the points. And let's go back to draw mode.
7. Grease Pencil: Changing Colors: Now, we already know how to
draw using grizzyPencil. Now, let me show
you other options that we have when drawing
with grizzy pencil. And here on the right, you can see that I
have some settings to modify colors and
the brush I'm using. So if you click in
this image here, you're going to
see that you have predefined options of brush. You could also find it
on the top left here. So you might find some
interesting ones. Now, let's go out of this
tape that we are right now, which is the two tab, and let's go back to material. And you can see that by the foll we have a
black material here, so you can see here that we have a stroke and the
base color is black. That's why when we draw, we just have a black line and no fill if we
change the color, you can see that we are
modifying the material black. That's why every line that I draw is changing colors as well. If I want another line
with a different colors, I would have to create
another material, click new, then I would
change the color here. To orange, for example, with this new material selected, if I draw, I'll have a new line here in
a different color. The same way, I can have
a fill and obviously, I could have a
different field color. Now, if I draw, I have a fill. I could use the
eyedropper here to use the same color in
case I want something that has the fill and they
stroke the same color.
8. Grease Pencil: Tint: There is another very nice too that I would like
to show you because it brings a lot of possibilities.
I will draw a line. Of course, I have changed
the color to blue. I'll make it black
again, and with tint, I would be able to paint
this line and to give it this color here that I can change by clicking
and selecting. And I could potentially
paint the line here. You can see that
nothing happens. That's because what
this tool does is to add the tint to the
material of this object. That means you cannot see it
being changed in this mode, which is the viewport shading. To actually see the changes, you have to go to the viewport shading,
which is the next one. So you can see that
the orange that I have added null is
visible in my line. It's nice that this
is allowing me to create like
gradients if I want, and I could also
decide if I like to affect only the
stroke or also the fill. To show that, let me
draw a line here. Now we have a black line
and a dark blue feel. And now, if I select my
tint, I can paint it. As you see, it's affecting
the stroke and the fill. Come on Z, I could
affect only the stroke. Or only the fill. But in this case,
you can see that I cannot create shapes
inside the fill because those colors need the
meshing formation to do what we do here with
gradients and they stroke. They stroke is composed
by many different points, and the shapes is one
single solid thing. If you'd like to create any
gradients inside your fill, the best way is to change from
solid to gradient and now you can play around with colors
and change the location, rotation or scale to create the gradient with two
colors of your choice.
9. Grease Pencil: Drawing Placement: Now that we already
know how to draw, how to add color, we have to talk
about the placement of the drawing when you
draw the three d space. For that, we are
going to talk about those two options here that
work together and are very, very important for you to know the location of the
drawing you're making. The menu here in the left
is our stroke placement. That's the point where
the line going to be placed when you
draw on screen. For now, it's setting by default to the
origin of the scene, which is the center
of the world. To see that very clearly. I will click Y so I can see
my back orthographic vial. And when I draw anything here, this line that I'm drawing is exactly in this red line here, which is 0.0 of my
sin in the Y xs. The same way if I click X and
do the same drawing again. Again, it's a line to
the 0.0 on my X line. You can see the difference if
I go now to three decursor. Three dcursor is this
red and white circle in the center of this crane. I can change the position of my three de coursus
with these two here, so I can just click and drag and I put it in
another position. By the fat, the tree dcursor is in the same position
of the origin. But now that I change the
position of the tree dcursus, it's where my drawing
will be placed. So right now, I tree
decursor being here. And I draw now. You can see that this
line is now aligning to the tre decursor
not to the center of the word as this
line I did before. And same happens if I
click on X and draw here. You can see the
difference between the alignment of this
line and this line. This way, I can always control the point where I want
my drawing to be placed. Another way to change my tree decursor position
is clicking here, you can go to tree decursor and here you can
change its location. To make it go back
to the center, I can either put zero in
all those parameters, and I can also use
the shortcut Shift C. And now the tread cursor
is back to the center. Let's go to Edit mode to delete all my drawings and
go back to draw mode. The other very interesting and very useful options is surface. When you click surface, you can draw over an object. So if I draw here
along my helicopter, can see by rotating
the camera that my line is following the
shape of the helicopter. The problem is the line is still very far away
from the helicopter. That's why in the
option surface, you can see offset
if I change it to zero.005 and now I
draw another line. You can see that the line
is touching the helicopter. That's perfect if I want to draw some details
on the helicopter. The last option is the
stroke in case I want to continue drawing from a
stroke that I did before. So here, if I keep drawing, my placement would
always be the start or the end of the stroke
that I drew before. But other than the placement, you can always choose the plane where your stroke will be drawn. If you select the view, you can always draw parallel to the view
of your viewport. This is as if you had a camera in the position you're looking at and your drawing you'll always be parallel
to that camera. So if I draw here, for example, and I rotate, you can see that the plane
where this drawing is is facing the direction where my view used to be looking from. I can also choose these
different planes to draw. For example, in front, regardless of my camera, my drawing will always
be in this X Z plane. And of course, you can draw
on the side or on top. The last drawing
plane will be based on the cursor, let's
erase everything, and you can see that
this might be affected by the rotation of
the tree decursor. So if I draw something
like here and here, the drawing will be placed
in the XY plane like this. But if I come here to the three cursor settings and change its rotation
and I draw something, you're going to see
that the plane changes, and it's in the rotation
of the tree decursor.
10. Gtrease Pencil: Layers and Masks: There is one last thing that
I would like to show you before we actually draw
on our helicopter. Let's go back to draw mode. I'd like to show
you this tab here. Data. That tab is exclusive
to greasy pencil. Here you can see that I can organize my drawings in layers. That's very, very handy. Let's suppose that
I make a drawing here this time I'd like this
drawing to have a fill. For that, I want to go through my material surface
and activate the fill, which is right now it is
black, but it's transparent. I just click and increase Alpha, so I have a black
shape like this. Going back to data and here
I can create another layer. Let's name it just for
us to be more organized. You can see that the draw is in black field and white
line is empty now. Now I would like to
draw in white line. To do that, I create another material
kicking plus and new. This time, I just
want this stroke and I want it to be white. Great. With the new
material selected here, I go back to data and I make
sure I'm in this layer. So now I make a white
line like this. It's nice to see that if
I use those arrows here, I can change the
position of the layer. They can select which one is in front by changing
the order here. But the other thing
I like to show you is the possibility
of creating masks. If my white line is selected, I can come here and mark this box masks and
when I open it here, it's going to allow me to select which layer here I
want to use as a mask. To do that, I plus plus, and it's already come up as the only other mask that I can select, which is black fiel. When I do that, you can see that the black field is
masking, my white line. Here you can also invert
the mask if you want. Tagging mask here would be the
same of selecting this box here and you can see when I activate and
this activated that, the masks respond to that. This is a great way to organize your layers and to make
masks whenever you need it.
11. Drawing the Landing Skid: Okay. Now it's finally time
to draw on our helicopter. For now, the first thing, I would like to hide
the background because if I want to draw from the base of the
helicopter like this, I don't want that background
to be covering it. Let's go add greasy pencil
and a blank material. I like to start by drawing the landing
skid of the helicopter. I name the layer. I'll go to my draw mode and
to draw this kid, I like to draw from the
base of the helicopter, so I would click in
the Z vision here, and I would draw. But you can see that my draw is actually
overlapping the mesh. That's because the
placement of my draw is in the tree dcursor and it is
on top of the airplane. So let's come on Z. Let's go to the Y
V. And let's change the Z location of the tree
decursus in this menu here. Remember, if you
don't see this menu, it might be hidden here. So let's change the Z location. It looks like a good position. Make sure the decoter
is activated, and I also want to use
the view drawing plane because it's going to draw in whatever plane my camera
is at the moment. So now let's change
the material for me to have the colors
and the fill I want. I will come here in
the material tab, and here I will select
the color I want to use. I would like to have a fill, make sure the Alpha
is completely opaque, and I use the eyedropper to select the same
color of my stroke. As I'm going to
draw a closed path. I'd also like to activate
this button here. This is the auto merge. It's going to join
the last point of my drawing to make sure it's
going to be a closed path. And now, finally, let's
go to the Z view. And I want also
to make sure that my smooth is activated to
help me draw a better shape. And finally, let's
draw. All right. I really like the imperfection that greasy pencil
allows me to have. I'd like for the front of my
skid to bend a little bit. To do that, I go to Edit mode. Let me make sure I have my transparency Tuggle
X ray activated here so I can select the points behind and I want to
go to the Y view, and I select the points. All I need to do is rotate those points and of
course, move them up. This is what I have with
the tip slightly bend. But now I would
like to go to data. And create another layer. This one will be called kid and this one we can call pulse for
the lack of a better name. This time, I would want
to use another material. Let's add a new
material quick new. I still want to use
the same color. Now going back to the
draw mode and making sure I am in the pulse layer
here, let's draw. As expected, look at the position where
I placed the pole. It's not really
attached to my skid. That's because the three
dcursor is at the center, so the pole will
be at the center. In this case, I prefer
to change it manually. So let's go to edit mode. Let's select all those
points here and move it. And at this view here, I can see exactly
what I'm doing. If I would like to avoid
selecting the kid here. That's why it's good to
have different layers. I could simply block this kid, and now I could select
and move only my pulse. Great. This is exactly how
I would like it to be. Now we're missing another part, the other side of
the helicopter. What I'd like to do is to
use a mirror modifier. I can come here to modifier, and I can add that
to grizzy pencil the same way I add
to any other mesh. If I click Add modifier, you're going to
probably find mirror. But now it's mirroring
in the X axis, which is not exactly
what we want. So we just select Y, and now we have this. Our helicopter now has a base. You can have an idea by
seeing how it's going to look when the previous of
the materials are activated.
12. Drawing the Windows: All right, guys, let's
draw the windows now. For that, first thing, let's add a greens
pencil material here. Let's name it windows. I'm going to come
to draw mode in my material step to select
the materials I want to use. And I select the material that has a field for me to
show you something. Let's make sure we change
the stroke placement to the surface because
now we're going to draw over the three D mesh. And of course, we have
to edit the offset. Otherwise, the stroke will be
too far away from the mesh. So let's try a number
like 0005 or something. And then I can test we can line and see how close it
is from the airplane. I think it's fine. Come and Z. I want to show you that if
we are using stroke and fill and we draw over a
surface that has a curve. You see that the fill is kind
of coming inside the mesh. This is a problem we
always have if we try to use fill to draw over
a mesh that is not flat. That's why I'm going
to select instead of stroke and fill only stroke. And to draw the windows, we're going to do the following. Looks great. And now to have some fill here,
I want to do that. I actually like the holes
that it leaves because I think it gives
the impression of really hand draw on
top of the tree D. But obviously, if you'd like, you could fill up this
space by drawing more, or you could even
come here at data, and under stroke, you have the option to increase
the thickness scale. You'd probably end up getting rid of holes if you
don't want them. But in my case, I want
to leave the holes. Let's keep drawing the windows. I'm drawing only
half of the windows because I could
use mirror later. So after doing that, I could come here in my
modifiers and add a mirror. I have to make sure it's
in the right angle and I have my helicopter
windows draw like this. I could even consider
reducing the thickness. So I have the spaces
even more apparent. O
13. Drawing and Animating Rotor Blades: For this course,
we're going to learn how to animate in
two different ways. One is using keyframes and
one is frame by frame, so you can see both approach. For now, we're going to draw and animate the blades
using keyframes. As always, let's add the greasy pencil material,
rename it, blades. Make sure we position the tree decursor because it's going to be our
reference when drawing, making sure it's in the
right place in both views. And then we go
back to draw mode. I want to draw from the
Z view like this and make sure the three D course
is the stroke placement, and I'm okay with view. It could also be the top view. But as we are already
in the Z view here, this is the plane we're
going to draw at. I like first draw a circle, so I have this
reference when drawing. So I just click and drag here. Hold out and shift, so it's going to be
a perfect circle and growing from the center. I press Enter to
apply the drawing. So now, as this circle is
only a reference for me, I would like to come
here in data and make sure this layer is properly
named as a reference. And if I want, I can even reduce the opacity of it down here. And to create the
actual drawing, I would add another layer here, and this will be
actually the blade. Now let's make sure to
select the material. I want to use stroke and fill, and using the draw too, this is more or less the shape
I want my blade to have. So this is a blade in movement. Now I will go back to data so I can just
hide my reference, and let's have a
look at my drawing. Let's animate the rotation now. I will go to object
mode, select my blade. Let me raise the bar here, which is my timeline, and here I can select
the number of frames. Let's say that my
animation going to have 2 seconds and 24
frames per second. That means we're going
to have 48 frames. So I will animate from
frame one to frame 48. To animate the rotation, I need to make sure the anchor point of my draw
is in the right position. Right now, by the foe, it's in the center of the word, which is
not what we want. So I'm going to
go option origin. And here, I will
change the position of my anchor point to position
it in the right place. I also want to scale up
my blade a little bit. To do that, remember to
turn off origin here. This looks fine now. So the first key frame
is already here. Let me go to items, so I will select which
parameters I want to animate. In this case, I will just
animate the z rotation. So I will just write click in the Z parameter and
insert single key frame, and going to the last frame, I have to imagine how many
rotations per second. It's going to be a pretty
high number because it's very quick to make sure I always have a
looping animation. I would write 360 and would multiply by the
number of rotation. See if 100 will be enough
to add another keyframe, a right click and insert
single keyframe again. Let's play the animation,
see how it's looking. We can try something slower, maybe 360 supplied by 80, and this time, replace
single key frame. I like it. It's working well. The helicopter would also have a smaller
blade at the tail. I don't want to draw it again, so let's duplicate this blade. I can select the
blade, Control C, and Control V, so I could
have the name. Blade tail. And I'll just move the
blade to this position. But to avoid confusion, I would rather delete
this animation here by clearing the key frames
so I can reposition it. Scale down, and I animate again, but this time on the YXsOhGod.
14. Frame By Frame Animation with Grease Pencil: Now it's time to animate frame by frame with
grizzy pencil. I like to animate a reflex
going through those windows. I pause the animation, go back to the frame one here. And I would like to do
a couple of things. The first one, I will apply the mirror I'm using
for those windows. If I have the mirror, the reflex will be affected by the effect. So let's go here to modifier, come here and hit Apply. Now I'd like to go
to a special layout exclusive to animating
two D inside Blender. As you may know,
every single one of those is a different
layout of blender, and here I already have
my two D animation. But in your case, you
might have to click plus the animation
to the animation, and then we're going to
come to this layout. This looks a bit dark because
there is no light here. We can solve that just by
clicking this out here and this activating this N
word. Looks better now. I'm already in the draw mode. I can now create the
material I like to use. I can click Plus here
and add a new material. I like this one to be white
stroke and white fill. Now in data, I like to create another layer which
would be called reflex. Now we are drawing on this
layer with the white material. I like to make sure my stroke placement is
at surface and using an offset similar to the one I was using before when
I drew the windows. Here at the bottom, we
have two timelines, but we might use
the one at the top, and you can see that
when I click Windows, I see here the semi layers
I have in my data tab, and those are my key frames, and I'm drawing at
the reflex layer. So now I can already draw
something like this. It should be my reflex. Here, I can use the
arrows to the left and to the right to navigate
through the timeline. And now when I go
to the frame two, I'd like to have activated this button here, the auto king. This would create
key frames for me automatically when
I draw a new frame. You can see that now if I do
another drawing like this. The other one becomes green, so it disappears, and I have a new keyframe here
in my timeline. Let's go to the frame
three and keep drawing. And the same happens. Animating frame by frame with greasy pencil is
as simple as that. Of course, if I'm
still in this frame, I can cover some holes. And the very nice thing
about that is that I also have control
over my onion skin. For example, if I go
to the frame two, I see both frames. The green is the one before, and the purple is the one
after the one I'm selecting. And if you go to
the type of data, and here at onion skin, you can select how many layers you want to show
before and after. I add two, for example, and I can change the colors and the opacity of my onion skin. The same thing you can have
in every animation software. Let's go ahead and keep
drawing our reflex. So now if we hit play, you can see that we have
something like this. To make sure these reflexes
affect only the windows, as we saw before, we
have to create a mask. So selecting reflex,
we can tag masks here and select windows
as the mask we are using. And now the reflex is only
affecting the windows.
15. Noise Modifier and Parenting: Guys, it's pretty much it. I will just show you guys one effect that I
love using and you would also animate the airplane going up and down a little bit. The effect I would like
to show you going to be applied on the grease
pencil materials. So let's start with this kit, and we're going to
come here to modifier. Let's minimize the mirror
that is still here, and let's add a
little bit of noise. The noises and
effects that create a random animation to the lines, so it feels more
sketchy and alive. Can change the parameters
here to make it softer, and you could also
change the speed. Here at random nis, you can change the step. So that means the shape is going to change every four frames. So I usually add that to all
my grizy pencil materials. So this is how it looks. Everything has noise.
Cool, isn't it? Now, I would like to parent
every grizzy pencil to my helicopter
original mesh so we can add a little bit of
animation to the whole thing. All I need to do is select everything and select
the helicopter list. Right click parent and object. Now, I just see
the helicopter and all my grizzy pencil
are underneath it. But my animation still
works as it was before. And now I go and
animate the helicopter using key frames. Done.
16. Final Render Set Up: Finally, here we are. We have our final piece. As you can see, I
added some details. But these classes is still very, very important because there are some very important things that you have to know when it gets to rendering
your final piece. You'd be able to see my project, so you're going to have access
to my lighting settings. First, I will show you some
small things that I did. I created those clouds
animated frame by frame, using the same
technique I showed you when we were animating
the reflex of the windows and you can see here in my two
D animation layout that I used my
onion skin to help me animate this cloud
in a way that it looks. Then I just animated it going
back. This is what we have. And you might have
noticed that the color of the strokes is slightly different from what
I originally drew. This is because you can get grizzy pencil lines to be or not to be affected
by the lighting. What you can see right now is being affected by the light. This is an option
that you can find in every grizzy pencil
material that you have, and I can access them inside the helicopter here as they are grouped the
windows, for example. If I go to my data, you're going to see
this option here. Lights. That means this layer here will be affected
by the light. If I turn it off, you can see how it changes the
color of the reflex. So I will go to each one of my layers and turn off lights. Great. Now it's looking
more the way I want. The last thing that is very
important is the fact that if I render an image right now
going to render render image, you're going to see that I can see the grizzy pncle drawing, even if they are
behind the object, and it's looking different from what I can see
in my viewport. To avoid that, there is an
option here in your view layer right here and inside
passes and data, I have to activate this Z. This would allow grizyPenc to identify the object that are behind something and
they're going to take it in consideration
n rendering. So now if I render image,
it's looking good. So now we just need to come to output and select
where I would like to save my animation and click
Render Render Animation. And here we are. Here
is the final render. As I often do, I add some adjustment in after
effect in post production. Obviously, I rendered
the PNG sequence, so I bring it here to make
my final composition. I would also want to show
you another example of something similar that I did that follows the same technique. As you can see, I
have a little bit of the noise on the hair
and on the lines. I did animate a reflex
on the glasses as well and the eye blinking
is frame by frame. This is just to inspire you to use this technique
wherever and however you'd like
and I really cannot wait to see what you guys
are going to create. Thank you for sticking with me. I hope you learn something
and see you in the next one.
17. Thank You!: Guys, thank you very, very
much for taking this class. I want to let you know
that I will be commenting on every single project
you guys post here. So make sure you guys do that. If you created something, you'll be able to find the project files
of this helicopter we created together in the resources section
of this course. And obviously, I would appreciate
if you could go there, review the course and
tell me where you think, any comments so I can get
better for the next one. Hope you like it and take care. See you. In the next one. I'll be there in
all social media if you want to
reach out. See you.
 Gui Jorge Porto, Designer and Animator