Transcripts
1. Introduction: Hey guys, joined the community
in here and welcome to the Foundations of Pinto
flooring for kids. This is a five-week
course that I taught originally, live on Zoom. And now I have all
the recorded videos up here on the website. So this five classes that were taught over five
weeks in each of the classes is
going to go through a different kind
of pencil drawing. That is really going
to lay the foundation for your skills in
drawing with pencil. The first-class that
we're gonna do is really just pizza bisects it. So we're going to
learn about tone. We're going to learn
about blending tone, and then we're going
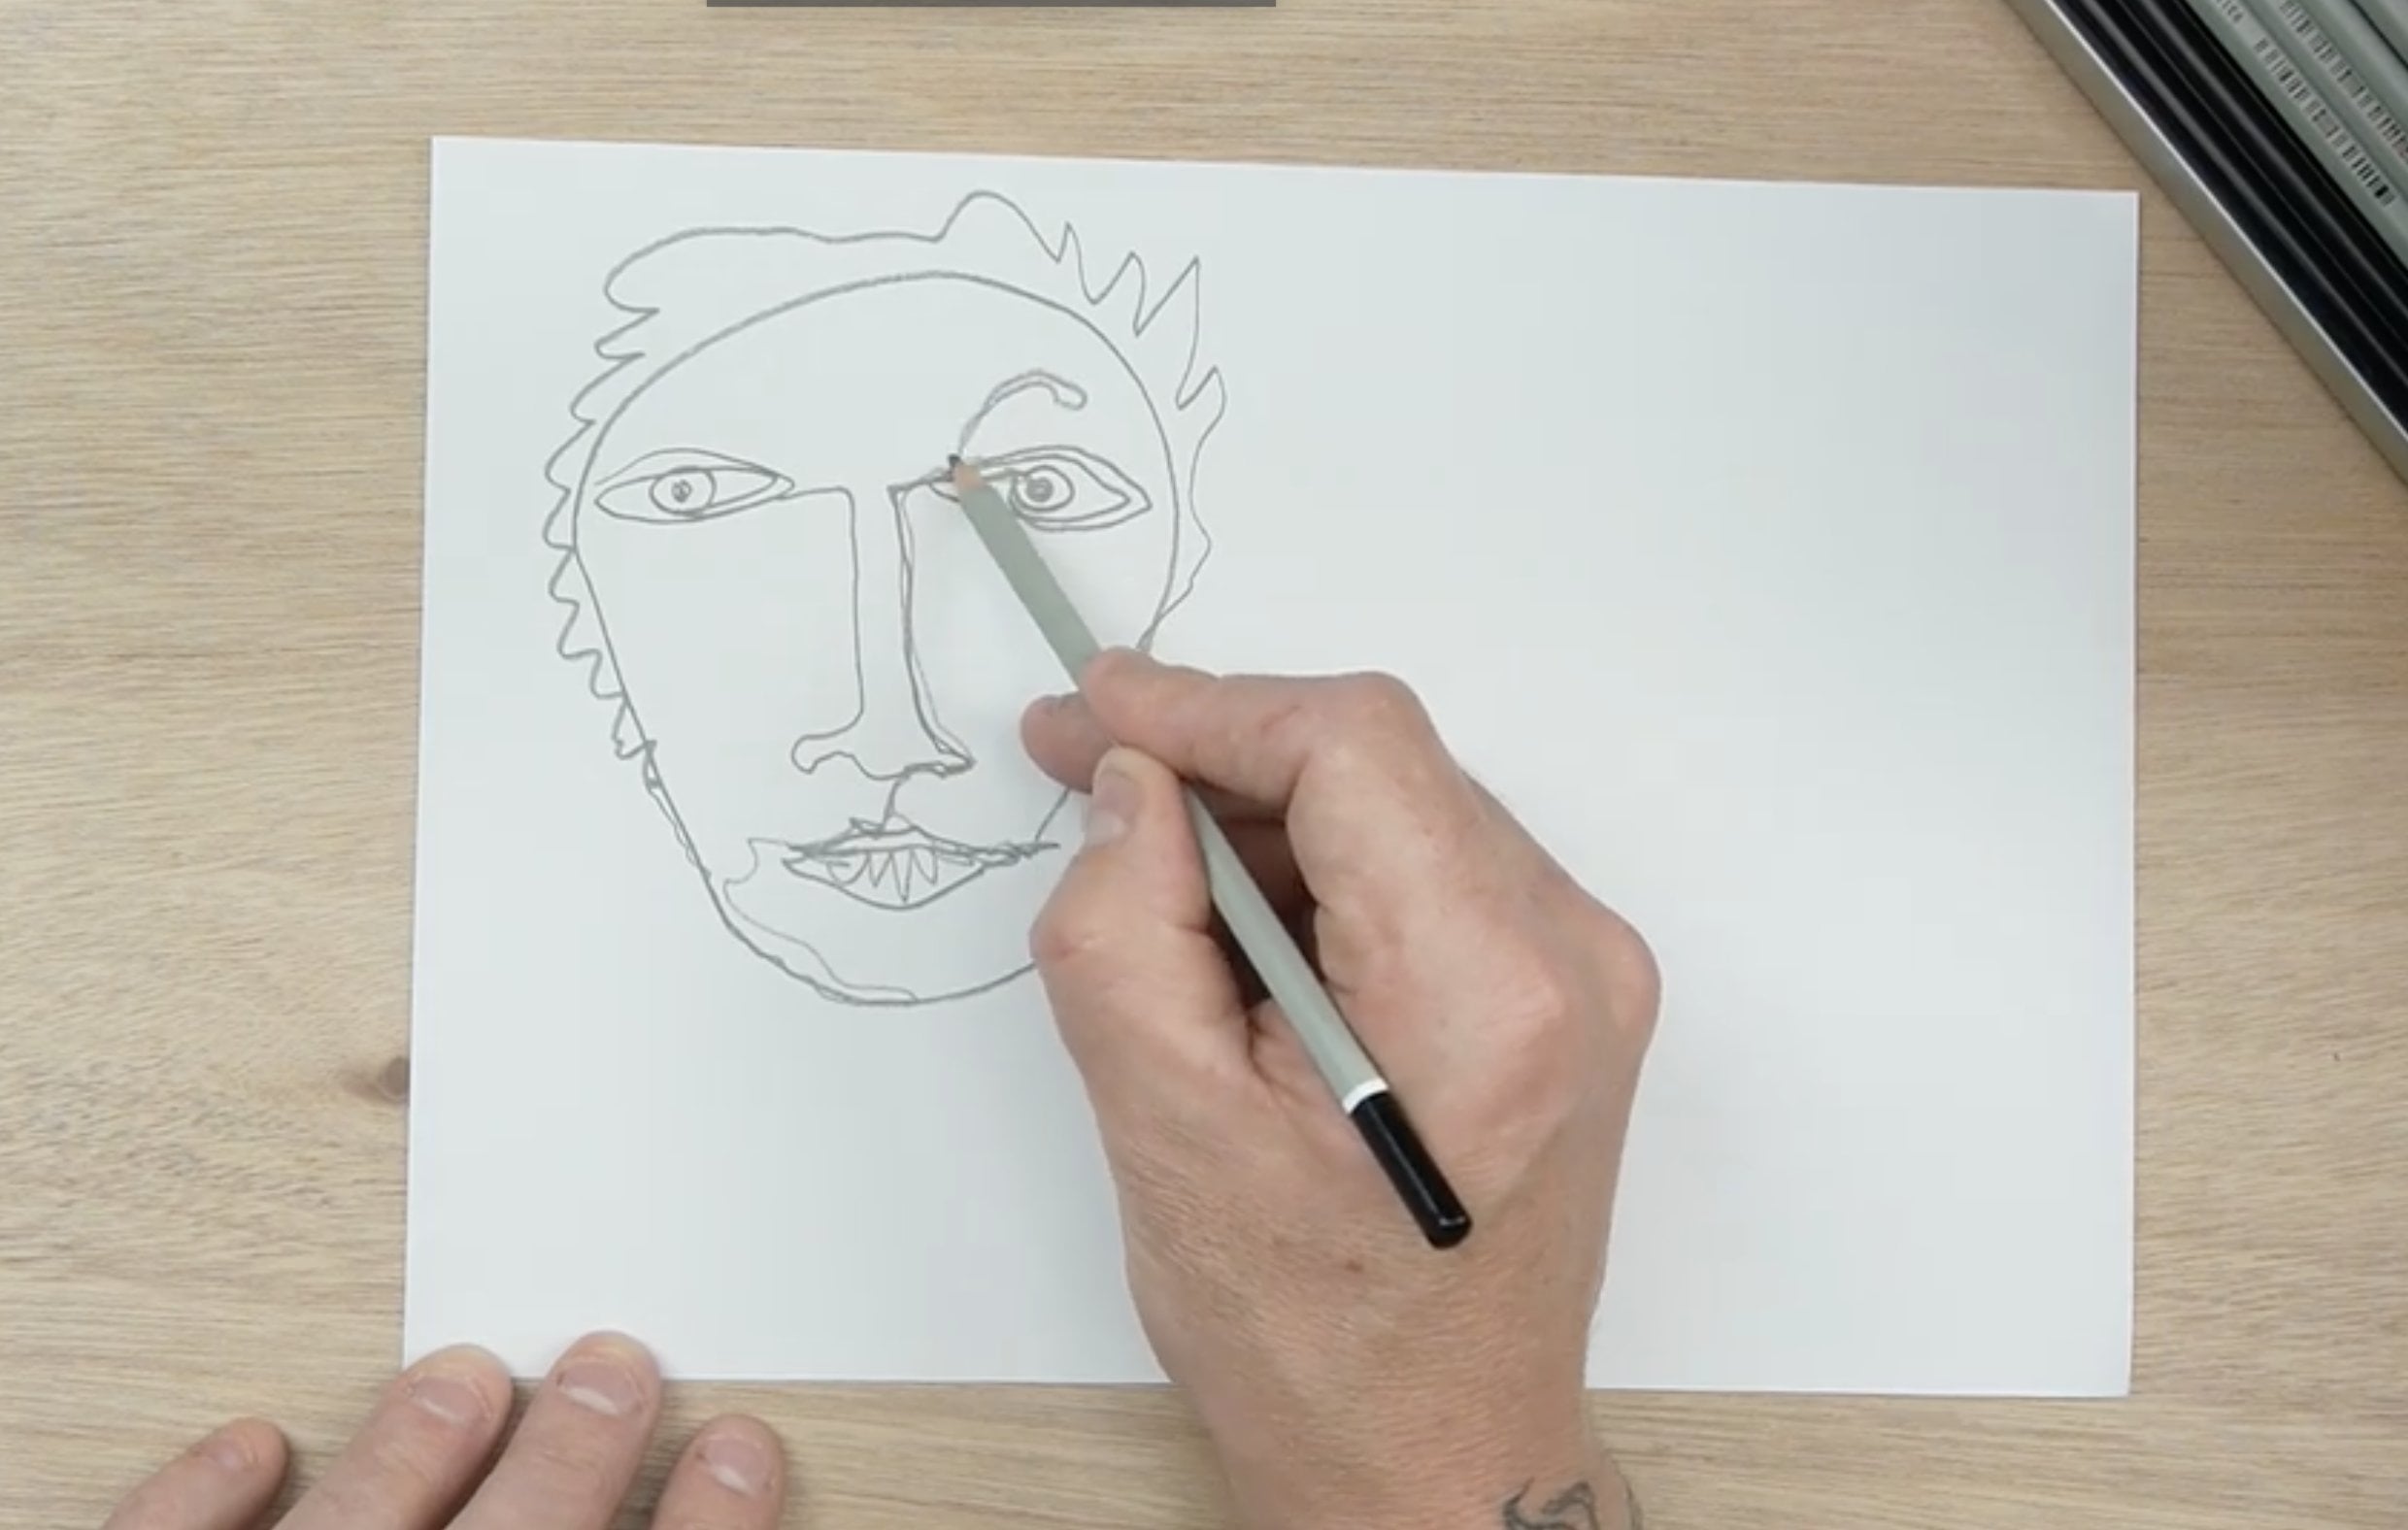
to draw an apple. The second class we're gonna do is it all about drawing faces. And I'm gonna teach you some of the different structure and some of the proportions
of the face. And we're going to
finish up by drawing a frozen cartoon character,
which will be a lot of fun. The third week is all
about drawing landscape. We're going to learn
about how to draw and perspective 12 perspective. And then we're going to draw us really cool old bomb cottage
and a Scottish landscape. That's gonna be really fun. The fourth week we're going to learn about
observational drawing, which is where you look at something and you
copy it on your page. We're gonna be looking at
a few different objects. You can practice along
with the drawing. You can go and find
your own objects in through that as well. Really see to upskill
observational drawing. Then in the last
week of the course, we're going to be drawing
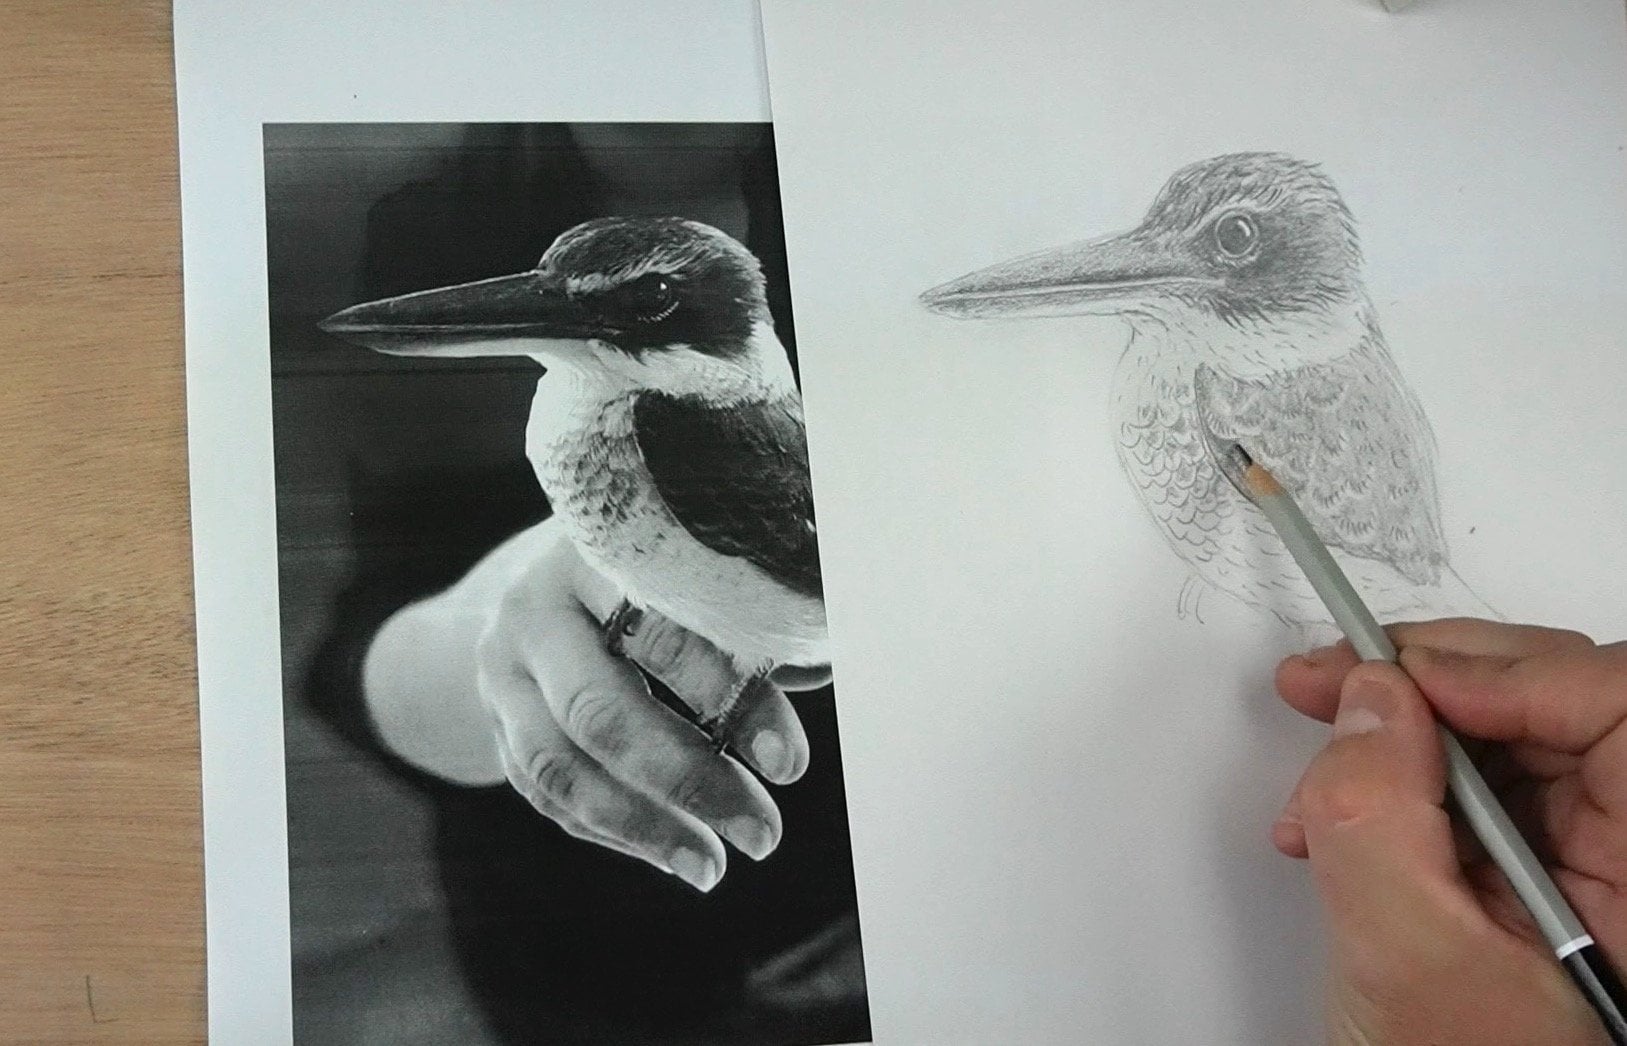
a king fisher birds. During birds is one
of my favorite things to do and I'm gonna teach you all about
the basic shapes. Feeling in adding tone and then adding in the feathery textures to make it look really detailed. So hopefully you guys really
enjoyed this five weeks of classes learning about the
foundations of pizza drawing. There's so much fun
to be had during my pencil and it's such
an easy thing to do. When you have learned
some of the skills, you guys will be able to do some amazing drawings as well. So let's get started
on our first class, which is the basics
of pencil drawing. Hey guys joined the
commitment hit for the last week in this
series of five classes, I'm gonna teach you how to draw. I came fishing boat. And you probably know if
you've seen my app before, I loved drawing and
painting birds. So this is something
really special for me. This photo is actually seen
ten by one of my students. Yeah, it's a really cool
black and white photo of a king fisher. And I'm going to teach you
how to draw the basic shapes. Had to kind of fill in and
draw the rest of the bird. We're going to talk about
the texture and the fetus, and the tone and all
the details as well. So hopefully by the end
of the class today, you'll have an amazingly
detailed finished drawing of a king fisher. Kids started.
2. The tone bar: What we're gonna do is
we're starting off with if you've got like an
HB or a to B pencil, so something that's
reasonably sharp. Notice not a really soft pencil. We're going to start off and we are going to draw it. We're
going to use a ruler. We're going to draw a line about halfway across
FH, just like this. We're going to come
down a little bit. And then we're going
to draw another line. You guys can see what I'm doing. Then we're going to
draw some boxes. So we're gonna draw 123, five boxes like that. Now if you don't have a ruler, that's okay, you can just
free hand it on there. That'll be totally fine guys. But you should have
five little boxes along the top of your page. Now what I want you to do is I want you to number those boxes. Okay, guys, So at the top, above them, just right, 1234 and you use that five. Alright, this is
pretty basic so far, I'm sure you guys
are just so we've got five boxes now here's where we get a
little bit different. I'm going to swap over
now to my six B pencil. Now, six BE. Let me just quickly
explain that. The higher the number
before the be, the softer the pencil is. That just makes it
look even darker. A six P's, a nice soft pencil. If you've got an HB or
this is what this other one's a three dB will be harder, so it won't be as
software as Doc. I'm using a 6-bit about you guys just use what you have
there in front of you. I want you to color in the number five
square really dark. Just go for it. Rarely doc. Try and stay in the
lines if you can. We know the lines a little bit. So basically as dark
as you can do it without ripping the
paper. All right, cool. Now I want you to go down to number one. Now
this one is different. I want you to I
want you to color this one is light as
you possibly can. Okay, so number one, square, super light, really like
and you guys do that. All right, Now what we're gonna do is the in-between squares. We're going to scale it up. I'm gonna do the three square mixed and that
one's gonna be like a middle, a medium, dark. Now you can go back
over it and you can keep adding on more paint
so as you go, that's fine. But about sort of this, if you guys can see on my
screen, you see the difference. All right. Hopefully you
guys are still with me. Now on the number
two, you guessed it. We're doing an in-between
the lightest and the three. It's like, just try and guess the tone which is
in-between those two tones. There we go, Perfect
guys, That's CO. Doesn't matter if
it's not really tidy. It's just about practice
and getting the tone right. And then the four is
gonna be pretty dark, but not as dark as
five. Fill that one in. You might need to go back
over the four couple of times so that it looks like like that dark
but not like the five. The five is like
really, really dark. Okay. Hopefully you
guys are still with me. So do you want to give
me a thumbs up if that's all looking good,
you're happy with it. You keeping up, okay. All right. I don't think I'm
going to faster this point. I think you guys are
doing great, well done.
3. Tone by numbers: Okay, so we have those
55 stages there. Now we're going to go into something called
tone by numbers. Okay, so we're gonna
draw a cylinder. Now, here's how we
draw the cylinder. You were watching, you're ready. We're going to start off
with an oval for the top. Just do it. Not too big like that. Then you're going to use your ruler and you're going
to draw the sides of it. Now, I'm imagining it
like a like a cane, like a pineapple or something. The bottom has to be
curved as well like that. Draw that guys. I forgot to switch back
to my sharp pencil, but if you can draw with
whatever pencil is fine, so draw your cylinder like that. Now what we're gonna
do is we're going to use a ruler like this. So get your ruler
along the side. And we're going to
roll down eight lines. Ready guys watching
this starting of the each just go a
little bit in and do 13456 c if and the last one is
usually a bit skinny because you run out of
space, but that's fine. So eight different lines. You don't get the
exact number, right. Don't stress guys, it's
not that important. Okay? So we're gonna have,
we're gonna outlines. Now we're going to
number the spaces. So this little, the first space on the left is gonna be a five. The next spaces of 4321, we're
not numbering the lines. We're numbering
these spaces in here on the cylinder 2345. Just number them
along the bottom of the cylinder light bear. Hopefully you guys can see that. All right. Here we go. I'll bring it up
a little closer. You get to see what
I'm talking about. You should have
your cylinder with the lines and your
numbers for each gap. Now what we're gonna do guys, is we're going to
transfer the color from, or the tone, sorry,
from the squeezes into these little gaps. So fives are easiest
to start with socio foot back to
my dark paints, almost 65 on the edge. I'm going to do five. And I'm going to color in
that space. Super dark. What I've done. That's pretty easy. Hey guys, you can you can transfer
that five to there. And the same on the other side. The outside number
is a five as well. Awesome. You guys are doing,
sorry, well, awesome. You've probably guessed it. Number one is gonna be as light
as possible, super light. You just got one should
have 11 in the middle. If you've got like if you've done lines and you
will end up with one. I want you to fill in
the rest of these ****** with the numbers that
relate to the tone. So number two is up here, a little bit darker
than the one. Number three is a
bit darker again. Number four, pretty dark, but not as dark as the five. You guys see what's
happening on my example one, it's actually starting to go from dark through the
light in the middle. Do that on both sides. It doesn't matter what order
you do them in really. You can go from light to dark or you can go
from dark to light. Just make sure each little space relates to the number from this tone bar that
we did at the top. And it's called a tone bar. A little bit dark. Just going to leave the
top of the cylinder white. We're going to
leave it the paint, the color of the paper, because that's where most of the light comes
from up at the top. Just while people are
finishing that off quickly, I'm going to just just real
quick talk about the PSO. If you look at the
end of your pencil, look really closely, probably not gonna be able
to say might very well. Do you notice how this is like a really nice smooth
black bird on the bottom. You guys seeing that? What happens is if you've
got a really self paint, so you will end up with a really smooth flat but right on
the bottom of the PSO. And that's really
good for getting these soft tones that
we're trying to draw. That's awesome. Now, what do you notice about this cylinder
now? The shape of it. Do you guys, we're
gonna look more 3D? Kinda does. And why, the reason why that happens
is because at brain knows that shapes like this get darker around the edges and
the lighter in the middle. So it's really
just like a trick. It's like an allusion
to be able to show you that it make it
pertained to look 3D. Awesome guys. We're gonna we're
gonna carry on. If you're not keeping
up, don't worry. You'll get a chance. We'll have a chance to
refresh a little bit later.
4. Tone buy numbers cont.: Flip over tea shop Pizza now. So if you've got a second paint, so this time we're
going to do a cone. Now we're staying
on this sort of staying on this half
of the page still. How we do the cone is this. We do a curved bottom
just like the cylinder. But we use a ruler
to draw two sides. So you do a point
up here and you draw one side, two sides. You guys say that
the current has to straight sides and a curved
bottom like that vein. We're gonna draw
our lines in it. So how many lines to your camera drawing 12345678 lines. Now you guys are already
experts at this. So show me how good
you can do it. I want you to tone these are I want you to
number them and then turn them just
like the cylinder. Okay. So you're gonna have
five on the inch 54321. Going like that. Now, if
you didn't do enough lines, you might end up at
a four on the edge. That's okay. That's not the
end of the world, guys. That's totally fine.
We've got a nice cone. Now, start adding in the tone. So number five, just like the cylinder. Let's
look at the cylinder. Number five is gonna be
real dark, super dark. Now, just careful that you
keep it nice and sharp as it comes all the way up
to the top by the point, it gets a bit trickier
out there, doesn't it? Kinda have to use the
very end of the pizza. Coming down to the four. You just do it in
your own time guys. So just carry on through filling
in each of those shapes. Those areas need to do more for. But doc, just remember with the one to the one is
light as you possibly can. It's so light that it's almost like a pencil is not
even touching the paper. Alright, now I'm a
really fast drawer guys, so I'm going to be
faster than you, but that's all right.
You keep going. And I'll give you guys a
chance to catch up the debt, sort of how it's going to
look when you're finished. Alright, so keep, keep
filling that in guys. But give me a thumbs up once
you've finished the cone. So I know that some of you have finished the
cone and we're ready for the next picture. All right. Good work, guys. Yeah, I'm getting a bunch of
you saying that you're good. So that's cool. If you're not finished
it, that's okay. Just keep working on it and you can catch up as we go along. All right? Even if you don't see the
other cool thing guys is that I'm actually filming
this class as well. And so I'm going to put this up on my website so you guys can go back and watch this
whenever you want. If you feel like you're
getting too far behind, don't worry, you can come
back and watch it later. Okay, Cool. Now we're going
to get a little bit hotter. Okay, so let's flip
over to a sharp pencil. Everyone needs to
start on this now so we can all be up
to the same place. Now we're going to do a circle and we're going to
turn it into a ball. What we're gonna
do is like this, draw your circle
down the bottom. It doesn't matter if you
circle is not perfect. If it ends up looking a bit
egg-shaped, that's fine. All right. Now, for this one, what we're gonna do is
we're going to draw a four smaller circles inside this big circle.
Here's how we're gonna do it. Watching this, we're
going to draw. We're going to say
the light is coming from this side like
this, this error. We're going to do one
little, little circle here. Then we're going to do
another circle here, 123. And the fourth one is
gonna go around like that. Let me hold that up a
little bit closer if you guys see do you guys
see what I'm talking about? Okay, so try and draw
that now yourself. You got one big
circle to start out. And you've got four
smallest circles that are inside that big one. I see how they sort
of laying closer to one side and that's where the light is
going to come from. Guys, you're doing really well. By the way, this is, this can be quite tricky learning
all these new skills, aim your drone your circles. Now what we're gonna do is starting off with
the little circle, that little baby circle there
is gonna be number one, just like our tone bar. Start off really super
lightly, light as possible. Number two, the second, the second ring is
going to be number two. So that's gonna be like
our number two tone. You guys, you guys got the
idea and I write number three, it gets a bit darker. Nice. Keep working your way
out so you get to number five right at the edge. I wonder if any of you guys
are finding this too easy. If you finding this too easy, why don't you give
me a thumbs up? Just to give me an idea. Couple of thumbs downs. That's fine. Okay, cool. So what I'll say to those people who think
it's a bit easy, this is actually still really
good practice to be able to just start off with
a good foundation. So we are definitely
going to get into more complicated drawing
and hotter drawing. But once everyone
knows this stuff, yeah, everyone will be much
better at the hardest stuff. Just keep keep bearing with it. Even if it's too easy, just
keep following it along. Then I'm up to number
five now I'm up to my last outside ring, so real dark press really
hard when you do that one. You can hear the Pinto
just going for an eye. Kind of drawing outside
the frame there. All right. Cool. Look something like that, guys. Yeah. Okay. If you've
got your camera on, why don't you hold
it up to the screen? You just give me a little give me a little look.
That'd be cool. Nice work guys. Yeah, Awesome. Hey, that's really cool. It's cool to see what you
guys are drawing well-done. You guys are keeping up code. Okay, Awesome. So
let's carry on. So what we're gonna
do now if you, if you are like if you've
struggled a bit with that and it's a little bit
too hard, then that's okay. You can keep going
and you can remember, you can watch a video
later on and just sort of keep practicing it.
5. Continuous tone: In the next thing
we're gonna do, we're gonna actually come right back to new thing. Now, we've done our first thing. This is called tone by numbers. Now I'm gonna do this
on the same page, but if you've run out
of room on your page, get a new piece of paper. You'll see what we're gonna do. Okay? So grab your
sharp pencil guys, whatever it is, shop
I'm using a three baby. You could use an HB or
something like that. We're going to draw
another tone bar here. About the same size
as the first one. But the differences were not gonna have any of the
squares in there this time. We're just going to have a
long continuous bar like that. What we're gonna do here,
this is where we're gonna get a little
bit tricky, guys. We are going to number it five
on the right-hand side and one on the left-hand
side from five to one. Now, this is a bit that
you have to watch. If you guys want to watch, watch me nice and closely. What we're gonna do
now is we're going to tone with the pencil
from five to one, but we're not gonna do it
in the stapes like this. We're gonna do it continuously.
Here's how you do it. You start off pressing
really hard like this. So you have my pizza was
going back and forth. I mean, you go you just move your pencil forward
a little bit at a time. What I'm doing, and as you get closer and closer to the one, you press the
lighter and lighter. Getting down to the one
you should be getting really nice and soft
and light like there. Now if it's not dark enough, unless the end you can carry on, you can go back over it again. Debt actually mine is
looking pretty good, actually, I'm pretty
happy with it. Could maybe be a little bit
darker through the middle, so just a bit more tone in here. Awesome. Okay, so it should look something like this, guys. Alright, so draw yours. Now. Draw your continuous
tone bar going from a five down to a one. I will just give
you guys a minute as minute or so to
catch up on that. Just give me a thumbs up
when you guys have done that continuous tone
bar, so I know. Yeah, good work. Gamma, I can see that
that looks great. Nice. Cool. Yeah, thanks for the thumbs up. That's cool. You can see a few of you guys. I can see some of your name's Matthew thin or I
could work tank. Su-8 is called continuous tone. And this is where we
start to get into a bit more of a detailed sort
of way of drawing. Now what we're gonna
do is we're going to take this and
try, and try it out. In real life, we're going
to draw another cylinder. Remember, oval top, two
sides and curved bottom. It doesn't really
matter whether you draw a squashed cylinder
or a really long one. It doesn't really matter to me. This time. All we're
gonna do is on each side down the
bottom, you write five. In the middle, you write one. Okay? And that's what
we're gonna be doing. We're gonna be going
from a five to a one. And from a five to a one. You guys understand? Just like the continuous
time we did here. Let me see. What is what have do this. I'm going to start
off like this. Start off like this. Now the cool thing about pizza, as you can layer it up, you don't actually have
to start off super dark. I'm going to start off
probably about a three maybe. I'm gonna just do that soft tone into the one in the middle. Hey, does anyone go to saw
a hand from drawing stuff? You guys are doing a right? Hopefully if you've been doing
my Facebook live classes, you've probably been
doing lots of drawing, but yeah, sometimes you can give us a handle if you're
not used to drawing. If you need to just
stretch your hands out, you could maybe just stand up, have a bit of a stretch. We're about halfway
through the class, guys, you're doing super well. If you need to have a straight
She's taken a minute. Keep drawing. Okay. Here we go. I'm going
from my five on the e1 through the
tones to a one. And I'm just building it up like I'm starting
off a bit light. I'm starting at about a three. And then I'm going to
build it up to a five. If the side. Now
I find it easier to stop doc and go
forward with my life. So I like to flip my page
around now, just like this. And again, start on the five
or start dock on the side, and then go forward. Now, just so that you guys know won't work if
you draw this way, see how I'm doing it now
this is the wrong way. If you go sideways like this, you'll end up with little lines. You have to go, you have to draw it like this in
line with the side. Then build up the
darkness on the page. Awesome, you guys
are doing so well. This is a really important
skill to learn guys. If you can master this skill, then you'll be able to draw
so many amazing things. It might, even if it seems
a bit boring right now. Don't worry, because it'll get more interesting as we go along. Now, you see what's happening. Now if you look at the screen, you'll see how we've
got the same effect on this continuous cylinder is we have got on the tone
by numbers cylinder. If you squint your eyes,
they look the same. But this continuous one
looks more realistic. It doesn't it? It looks better. It looks more cola. All right, so that's
what we're aiming for there is that continuous tone.
6. Toning a circle: Alright, now, we're not
going to do the cone. We're gonna leave
the current out. We're gonna go on to the ball. All right? You guys guessed it. I'm going to have your
ball, you circle, but you're not going to draw any of the circles in the middle. Now what I want
you to do is just choose your direction
of your light. Just to actually
leads. Just hold on a seat before we
start on the ball. One of the things that tells
us that something's 3D is that you can tell the
direction of the light. Okay. Let me, if I jump
back onto this one here. What happens is when you
see an object, you know, generally that is lighter above, so the light is
coming from the top and it's going to be
darker so to underneath. If you have a rounded shape, you know, like I mentioned, like a soccer ball or something. It's gonna be really dark underneath and it's gonna
be really light on the top. Does that make sense? That's what we're trying
to do is we're trying to create that illusion. We said like satellite
magicians, actually, be honest. Um, we're trying to credit, so we've got the light's
coming from the top. Just do a little
arrow if you want. The way to do this as you start, your tone bars are
actually from here, coming all the way through to that little circle
of light in the middle. And then you've got
to do those going, but they're going all
the way around the bowl. We definitely getting into
more complicated drawing now. See if you can do it. This is your big teeth. Do
you big chance? Start turning that ball and
trying to make it look 3D. I'm gonna give you guys
like five minutes to do this because this is the hardest
thing we've done so far. Don't worry if you
haven't, you know, very quick, we're going to spend a bit of
time on this one. Now, some of you might
have already done this, but we are going to
do a little bit of smudging on this ball. But not just yet, we'll just, let's just do the
sketching first. Because people,
sometimes people will do a bit too much smudgy, smudgy. We don't want to do that. Now, remember on the tone
by numbers ball here. It does go from dark to light up the top near
the light source, but it's very skinny. We've got, we've got to
have that up here too. So we're gonna have a
little bit of dark, but it fades the light really
quickly. See what I mean. You're starting to look 3D. Cool. Keep on drawing guys,
doing really well. All right, guys, as we
work on there, now, one of the things is that
if you're quite young, then you might be finding
this really hard. That's okay. You guys just, just like practice it and just try and
improve your skills. We're gonna be
drawing something in a minute, in a
couple of minutes. So we're actually going
to draw an apple, which will be pretty fun. But for now, if you're
finding it a bit hard, just yeah, just bear
with me while we do it. All right. I'm what I'm gonna do. I'm just going to give
you guys I'm going to connect up the chat so you
guys can check if you want. But what I want
you to do is just use the chat not to each
other, but just use a chair. You've got a question. If you've got something that
you're not sure how to do, you've got a question
about what we're learning. You guys can pop that in there. Now I've got someone
here who can have a look for
me and just like, tell me what everyone's saying. But let's not use the
chat to be silly, okay guys, because we were
focused on doing our art. You see how guys we can see how I'm just
slowly building up, building up the tone, see how that board is
looking like real data. Now I was looking at real 3D. Let's hopefully you all guys ones are starting to
come together as well. If you want to do but
a smudgy. Smudgy. Yeah, cool. That
looks really good. Jp mix. Not sure if it's
like you're running. But anyway, what I want you guys to do for
this smudgy, smudgy, what you do is just use
your finger or fingers have like natural oils which
is really good for smudging. What you do. Watch
what I'm doing now. Just put your finger on and you just swirl around in a circle. Try not to go too far
outside of the ball, just keep it inside.
You see what happens. It starts to smooth out some
of the paint so you start to get real super detailed. Co I'm pretty happy with how
this actually looking now. I'll just give you guys another minute to finish that off. Wow. Joshua, That looks
awesome, dude. Well done. Yeah, that's cool. All right. Thanks, guys. Thanks for someone who just did the mine
looks really good. Yeah, There's totally at I am
the teacher of the skills, so I can show you
guys how to do it. So don't worry about trying to make it as perfect as mine, but just like try and improve
on your own drawing skills. Awesome. Alright guys, so just send me a
thumbs up when you, when you have
finished doing that, toning the bolt, that
circle so I know that you're done. Good. Okay, so we're getting a
good number of people. Let me just jump on.
Sweet. Okay, this though, some of you that
are still going. Okay. So just keep
working on a guy. So give me another minute
just to kind of work on that. I tell you what we'll do.
We'll do a little extinction for the people who
have finished. What we're gonna do just to make it even cooler is we're
going to add a shadow. The shadow comes down in the opposite direction
from the light. So seeing my lights coming
over here Is my son code. Just make sure you stay muted. Okay, everyone, because we don't want to have the noise coming through on the opposite
side to the light. Here's how you do it. You do
a little curve like this. Bomb. The curve looks like that. Then you just fill them in and really
softly with the pencil. This is our chance to
really get involved with the smudging because
we want that shadow to look nice and soft and blended. Okay, So really priesthood with your finger to try and smudge that went down. Nice. You got to see what she
said. Oh, here did a shadow. Be looking something like that? Oh, yeah. Good work team. Yeah. Nice. Yeah. Just make sure the
shadow goes all the way underneath the ball there. It's nice and dark around there. And get it really nice as
smudgy in there as well. Okay. All right. Awesome work skills part of
our project today, guys. So basically this is
all I practicing. What we're gonna do is
each class that we do, we're gonna be learning
some skills and we're gonna be practicing some skills. Alright, Thanks Emma,
That looks really good. So what we're going to do
if you are behind this, okay guys, don't
worry about that. You'll be able to catch
up because we're gonna be doing a longer,
longer drawing now. We're gonna do some skills
first and then we're going to do like an actual
drawing, alright.
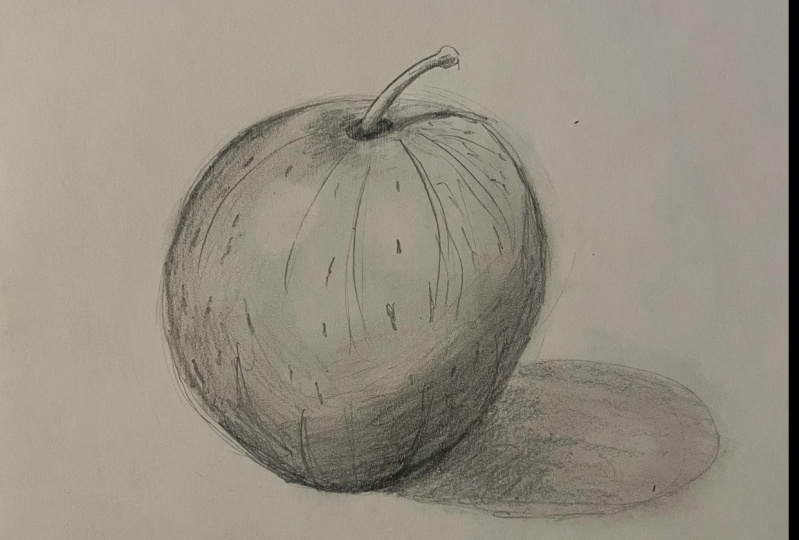
7. Drawing an apple: Do you guys want
to see the actual drawing that we're
gonna do today? You guys ready for it? You might need a
fresh piece of paper. I'm going to put
that over there. Come a fresh piece
of paper here. Alright, here it is. Awesome. Check it out. Hopefully you guys are seeing my screen nice and
big on your screen. This is an L. Pretty easy. I would say you guys
actually know how to draw this already because we've
been practicing it hates. But what we're gonna do this, a few little extra things
that we're gonna do. We're gonna use some of
the skills we practice and then we're also going to
add some other things that, all right, so how
do we set this up? What we're gonna do,
I'm gonna have this on my screen so you guys
can see it well, good. Hopefully that's good. They're starting off
with the sharp pencil. We're going to, we're
going to sketch this now. How do you do this? How do we even do this? First of all, you're
going to try and make it about the same size. Alright? And we're going to just
start off like this. Move your hand around and
around in a circle shape. Now, isn't, it isn't an exact circle really,
isn't this apple? It's kind of a bit different. So what we're gonna
do is we're going to flatten out at the top a
little bit just like that. Pretty close to a circle, but it's not quiet a circle. And then also the bottom
is a slightly more pointy. There we go. Now, do you guys
notice how I drew hates of light
little lines there? Those are like my sort of
guidelines to start off. So I can actually just use
my rubber and I can rub out some of those extra lines
that I don't need anymore. Now because then it's
like out of the way, you've just got the
shape of the epithelium. Now obviously we've
got our little stalk coming up, which
looks pretty cool. We've got to draw
the little circle where they stalk comes out. It's like a little
circle like that. Then just copy the stalk. It's coming out of that hole. It's got a little fat,
but there they have Fitbits where it
attaches to the tree. Hopefully you guys are
on board with it. Nice. Now they did kinda looks at
something that looks fine. You guys notice how
there's these lines coming down on the
side of the apple. Yeah, I'll show you
an example of that. If you imagine like a basketball,
Let's plug this over. You guys have mentioned
like a basketball like this or a beach ball. It might have a line that
straight in the middle. But as it goes out more
a curved out like that. You guys see what I'm
talking about there? Those are called contour lines. Those are the lines
that follow the shape of the ball as it
spins around though, they'll change one that
they'll become more straight. But those lines like that kind of tell
us the shape of it. You can see a few of
those lines on the app. Okay, so we're just going
to sketch those in, just like this sketching. Curving out. In the middle there, almost stripe there pretty
much a strike down the cubing outline that go. Now the good thing about
drawing an apple guys is that every Apple will
look slightly different. So it doesn't matter
if your apples like No perfect. All right, awesome. So now we're going
to switch over to F6 baby or whatever
a soft pencil is. We're going to start
doing the shading now with the light
coming from guys. Can you guess? Coming from the bottom? Know it's coming from this
side, isn't it at the top? And you can tell because there's that nice white patch
there that highlight. It's kinda coming from the
front and also the side. Because you can see
where it's in shadow on the opposite side
actually you can tell because the shadows
coming off on here. What we're gonna do is
we're just going to start adding a tone. And just like we
did with the bowl, we're going to add
in our shading starting on this side here, and we're going to work
it back into the middle. Coase's start adding shading in. Remember that you can start
off nice and lightly guys, you can start off
with like kind of a three level shading tone and then build it up
more as you go along. It's good not to rush
this part of it, guys because you
don't want it too. You don't want to
do it too hard, too soon because otherwise, it's really hard to
rub those bots out. Now, see these a little
bit of duck over here, even though the light is
coming from this side, is still a little bit of dark where it goes around the corner, around the edge like that. Now, what's going to
happen around the Stoke? But any ideas? How are we going to draw that? But it's gonna be a
little bit tricky. Yeah. What we're gonna do is
we're gonna make that Stoke, but really not the actual stalk. But like the better
around the store going to make that really dark. Like a five doc. Then we're going to
fade that five out really fast, just like this. Now the reason it's
a five is because it's going like
inside the apple. So it's kinda like in shadow. You can see that
there's a big kind of shady pot up here as well. So we can just draw, just
draw that in, turn that in. Alright. Now we're gonna do a little
trick with this highlight. We're gonna use the
rubber later on. So just don't worry if you
get a bit of tone over there. Don't forget about the
smudging two guys. We want to try and
smooth out the sample, wouldn't get it nice
and nice and toned. What do you think? How is yours looking? It's looking all right. Is it looking like an like an apple? Maybe, maybe not. Keeping on drawing? My impulse go like a weird
lump on the side. A. I mean, I could just
rub that out a bit, make it at least the lumpy
might get at least a lumpy. Yours looks like a pumpkin. Okay, that's cool. Probably not too
different to draw a pumpkin is drawing an apple. You can draw just some big
rounded, but it's almost side. Maybe you could do like
a Halloween pumpkin. Debbie, funny. Keep looking at my
example Picture guys to get the kind of idea of
how it's supposed to look. I've kind of been like all around mine and I've
edited and some tone, and I've done a little
bit of the shading, a little bit of the smudging, and a little bit of the shading. But what I'm gonna do now
is I'm going to build up more dark tone
around the bottom. I'm gonna I'm gonna
do another layer of Dr. and I'm just going to get real doc in here or we
can just like a five right down the bottom. Real dog. Now if you do really dark tone, it's going to give it a
really nice contrast. So I don't know if you guys
have heard that word before. By contrast, in a drawing, it makes it look
really good. Nice. Looking pretty good. Looking pretty banging. Alright, you keep
working on yours.
8. Finishing the apple: And don't forget about those, some of those shapes to
those little curves. Now, if you look at an apple, if you imagine
like a real apple, do you think it's
like a perfectly smooth like clean surface? No, that's right. It's not as it it's
got like little, little bits of color, a little bits of empathy,
fictions and stuff. So you can notice on here how there's all these little marks. We can add those in. So just like this guy, so what you do in a little
bit of a bit of a mark here, and just remember that it
kind of make those marks go inline without curves in
line with our contour lines. Maybe there's more of
them where it's dark, so more down the
bottom like this. Now don't worry if yours
isn't looking amazing guys. This is about learning
and practicing. So just keep trying to put those techniques that
I've telling you. Keep trying to put them
into place and you will notice your drawing will
get better and better. So don't worry if it's not
looking amazing in the moment. By the end of five weeks, you guys are gonna be
so good at drawing. You're going to be
impressing everyone. Now what we're gonna
do is we're just going to add a little
bit of detail in. So I'm going to do, do you notice how there's
this thought, right? The bottom of the stalk
is darker because it's on that side away
from the light. I'm just going to
make a dark line on the bottom of the stalk. It's kind of a bit
small to shade it. I'm not going to really
worry about toning it. I'm just going to add
a dark line there. Then I'm going to add this little shadow with
stalk shadow comes, you can see here just
really lightly curve that shadow over there. Not much, there's
not much to it. But what it does is it makes, kind of imagine that
this is a realistic, a real apple with a real shadow. Guys
get what I'm saying. Now we need to add
an out really cool looking shadow under here. So remember how to do it. The light is coming
from this direction, so curve is gonna
come out like this. You're just going to fill
it up with some tone. Probably keep it pretty light. So I would say like
about one or two even. You guys know the trick.
You use your finger. Get a bit of smudgy, smudgy. Doing so well, guys, we've only got about
five minutes to go. So you're doing super well. You're hanging in there. Smudgy, smudgy. I want to make it a
bit darker down here, just underneath the applesauce,
like, looks better. Alright guys, just got
to make sure that way it will stay muted, please. Robert guys, doing super well. Okay, so we've got
a shadow there. This is looking nearly done. I'm actually super happy
with how this is looking. Now what I'm gonna
do If you guys might not have a rubber and eraser. But if you do, what
you can do is grab it. Just so over here, we've got
the highlight on the apple. We're just going to do it, but we're not gonna
do it too hard. So we're going to rub around, but we're gonna make it a
bit softer on the edges. Here. See what I
mean. You can even smudge a little bit around
the edges of that rubber. You can rub it out nice
and solid in the middle. But we don't want to
really sharp line. But yeah, then they
actually looks pretty good. And then if you notice there's a few little white highlights
up here around the top. So I'm just going
to do that as well. Little highlight there. Couple little highlights here. Nice. You can actually draw
with your Robert, did you know that we might do
some more of that later on, but you can draw
into your shading just by drawing with the corner. Awesome. All right, good work team. So I'm gonna say that that is
finished now that drawing, if you've if you've
got your camera on, you can hold it up and show me so I can
get a little look. Nice. Yeah. Turn your cameras on,
guys and let's have a look. Oh, well done. Super good men. So detailed. Molly, good work model. Okay. I'm seeing
other people. Wow. Nice to many of
you guys to name, but you guys are doing so well. You've done, you've learned these amazing skills
just now and you've actually turn them
into some cool. I'm just going to flip my
camera around to wrap us up. Alright, good work. Today, guys. Hold on. Let me just seven here. Alright, cool. So today we've been, we've been doing tone
here, We've been done out. It started off with
that tone by numbers. So you remember we did the
steeps from five to one. This is where we
need the contrast, really dark tones and
really light tones. We did that practice
tone by numbers, and then we did all
the, the practicing of the continuous tone here. So let's get a little bit more complicated when you do that. But I think you guys did
circle well on that. I mean, obviously
we drew apples. Yeah. I think that I think you guys have done really
well from what I'm saying. Alright, now, if you guys
love to draw and you're, hopefully you're doing
this because you love to draw and you
want to keep bidder. So what will be cool is if I give you guys a little bit of homework, is it all right? Can I do that? Your homework this week? We're going to be
I'll see you again in awake your homework this week is you're going to draw a
piece of fruit from harm. Can be any kind of fruit at all. It can be a banana, it
could be an orange, could be a watermelon. I didn't know you guys choose whatever
fruits lying around. And I want you to use some of those skills and techniques
that were pregnant today and do a really good
detailed pencil drawing of the fruit.
 Joe McMenamin, Artist - Illustrator - Teacher