Transcripts
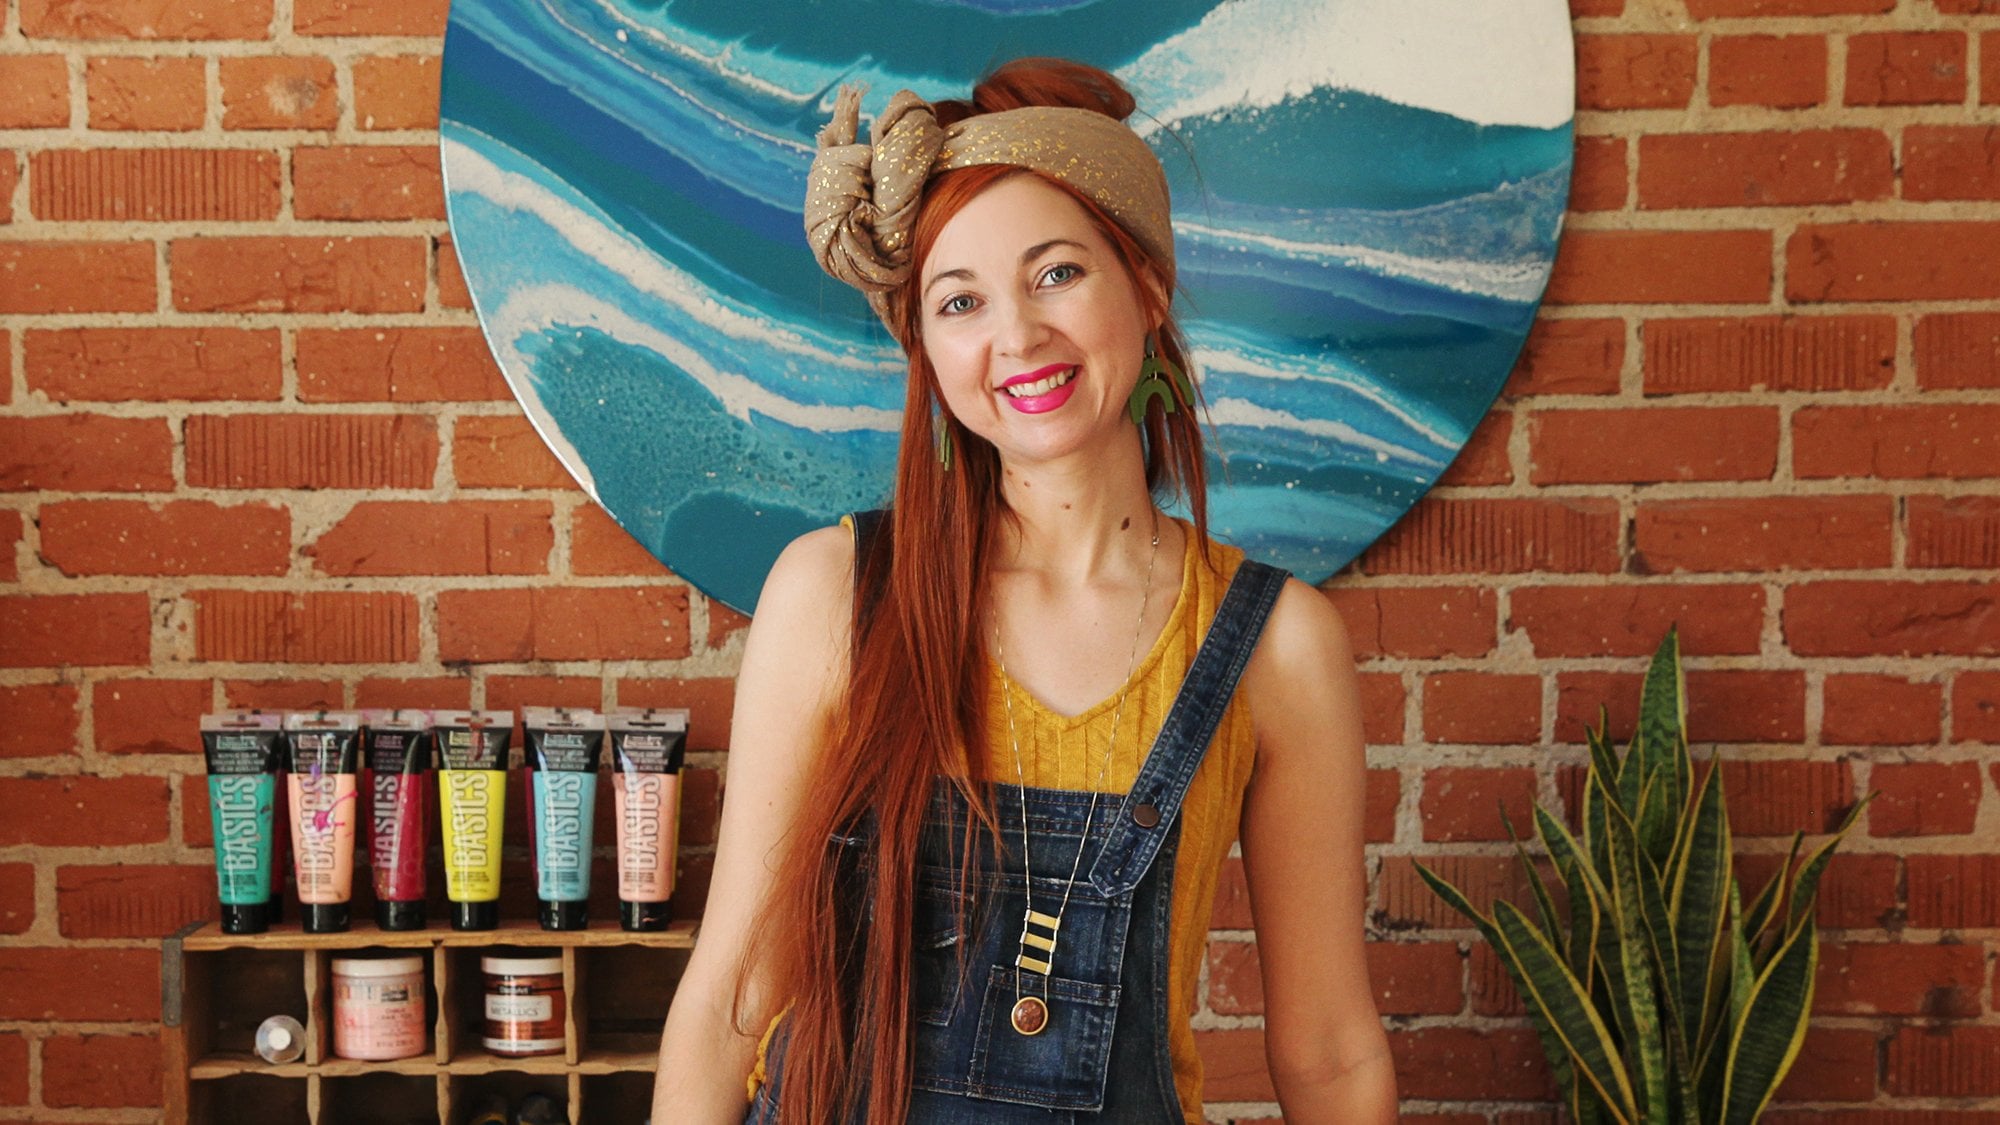
1. Fluid Acrylic Painting Intro: Hi, My name's Kate Hungary, a very studio I'd like to share with you how to do acrylic pouring using the puddle. Poor method. I've been doing this type of painting for just over a year. I really love how intuitive and meditated it can be. It's a lot of fun to experiment with, and I hope you enjoy it, too. I'll be covering the supplies needed to do this project, how to mix the paint to the proper consistency. And then I'll do a demo of pouring the paint onto the canvas, followed by a troubleshooting to make sure that you know how to fix any issues that you may come across. So let's get started.
2. Supplies List: the supplies you'll need for this project first are the canvas. I like to get my campuses at Michael's. Use a coupon helps and be much cheaper. Here. I have a level two. I like these because the framing and tightness is a little bit better than a level one, but you can use a level one if you like to save a bit more money. You do need something that's nice and tight, though, because the way this pain works is all about movement. If you have something that sags or his boat, you'll lose the pain in ways you don't want to. So get yourself a good canvas to start with. It doesn't need to be very big here. I have an 11 by 14. You can start with an eight by 10. Sometimes I go way up in size, too, but start small toe. Learn the process first, because pain can be expensive. Now the acrylic paints don't need to be anything fancy. I've seen people use craft pain from the hobby stores. I didn't get the best results with these myself, but other people have their quite cheap, usually about a dollar or so each. I really like the liquid tex basic pains. They're my favorite for consistency, and I had the least issues with any cracking or texture issues as the paint dries. I also like the Blick acrylic paints. If you have these, these are This is a large size and it's about $10 a tube. But it goes pretty far. Um, it would take a several large campuses to use up one of these. Then there's also golden pain. Now this is going to be more expensive. It's also more fluid already. This is the actual fluid acrylic golden. Um, I do like a couple of the colors in this. In particular, I'll usually use the goals, but again as expensive. So your costs are gonna add up fast. You won't need necessarily as much medium or water mixed into this, but it's not really necessary. So I'd say start, uh, less expensive with something like this, until you really know the process and that you like it before you spend a lot more money on it, Then one of the more important parts that this project is the fluid medium. So Jack 800 is used for, says right here, Lok raising. So I use this to help make sure that the pain is very smooth and flat, that I don't get any crazy or cracking in it. Uh, it's really just helping Make sure that the finished project, once it dries, comes out to how I want it. Then we have the liquid tex pouring medium mediums like this will help you get the consistency you need without sacrificing the quality. I've seen some people used flood flow troll. I personally haven't used this yet myself, because I like to make sure it's really quality. But if you're just playing around and you want to experiment some more, this can be used in place of the other mediums. But know that this takes a lot longer to dry the way I do. It already takes about 24 hours. Teoh. Make sure absolutely 100% dry where you can, like move it, lean it up against a wall. Touch it kind of stuff. This will take even longer. It's an additive that people use for painting walls at home, so you can find us at the hardware store if you want to play with it. So that's the actual paints and mediums for the mixing. You want some basic, um, cups. You can use a little bit smaller if you're just going to be doing smaller paintings. But I do some pretty big paintings, so I have to have these larger cups. Then you need handy dandy stir six, because that is how we mix it by stirring, then water. Have lots of water handy because after you do the paint and medium, then you use water to keep mixing it down. Teoh a fluid state uh, gloves. I'm such a mess. I have to have gloves. The pink, it's everywhere. It definitely said, Get all over your hands because you're going to be tipping and tilting the canvas and the paint runs off the edge right onto your hands. So I also wear clothes that I can get paint all over. So gloves, I think, are a must. Um, I like to have at least one tool what I can drag through the paint on if I want, add some little extra details. You can also use the stir sticks for that. I use a scale because I'm a little extra over the top and a big thing with the pain is making sure that each of your colors is even inconsistency. So I measure how much paint two medium toe water and that I do that in each color about the same. So I like a scale, but you can. I've all it. Then you could use cups for. I have these little paint triangles because you're going to want to elevate your canvas off of your painting surface. Eso It needs to be able to go under the corner like this to lift it up off the table. Some people pay on the floor, but I don't like being on my knees that long, so I paint on a table now with that said to You can obviously see, I have plastic down over my table. I also have plastic on the floor because, like I said, sometimes I'm a hot mass of all this paint. I have paint on my shoes. I get paint everywhere, So if you're in a space that you really need to protect, make sure you put as much plastic down as you can anywhere and everywhere
3. Paint Mixing: All right, So now let's make some paint. Right now I'm gonna be using the liquid Tex basics Bright aqua green. Then I'll use the liquid text pouring medium the gak 800 on water. So I've got this turn, so hopefully you can kind of see what's going on here again. I use my scale just to get things about even eso that when I go from this color to another , I know that the consistency is very close. Otherwise, you'll get some issues when pouring. But I'll talk about that soon. So for this size paint I like to do to start with about an ounce of paint. So again, I got measuring going on here. So I've got about announce. So with Keach color, I'll put about an ounce of paint into it. Then I split it the next ounce because I do about 1 to 1 off paint and pouring mediums. So again, one part paint toe, one her pouring medium. So I have one ounce and I split it between the two different pouring mediums. So I'll dio ah, half announce of the gak 100 and again these air approximations. You don't have to be super exacting. Now I'll do half now of the pouring medium, so you should see about two ounces. I'm a little over right now, but that's OK Now I mix these together to start with. This is just so that I know that the pouring medium is really incorporated into the paint itself. Make sure your scrape the edges and the bottom and get it all mixed. Really well, now I'll take the water. This is just tap water. I used these bottles cause it's really easy, but it's not actually the Kirkland water anymore. It's tap. I refill it. I use it over and over again. It's really nice. Some people have tried to see if there's a difference between tap or distilled on all that kind of stuff. Um, I don't find it makes a big enough difference for me to experiment with, really least in the ways that I do it. But feel free to try, because this, uh, medium and type of painting is really all about experimenting. So now you do just a little bit of water at a time to start mixing it, and because if you do too much water, then you've gotta put more pain and more medium back. And because you've made it to thin when I get to about the right consistency, I'll show you what it looks like. Also depending on the medium or the type of pains that you use. If you pour too much water in at a time, then you'll see clumping where the paint and the water don't mix together on the way. If you see that happen, um, I've found that if I let the paint just sit overnight and go to mix it the next day, then it'll finally incorporate. But you really don't wanna have those clumps when you're doing this painting because it will show in the end they won't flatten out. So I pulled up the stick and watch how it comes off the paint. Stick to look at consistency. I'm getting pretty close here. I also look for me. My weird way of testing it is to see how it lands into the pain as it comes off. So I need just a little bit more water again. You can see just a little bit of water at a time because trust me, it can sneak up on you just mix mix mix can scrape the edges. Grave the bottom. Make sure all that pain is getting mixed in because you're fluid. Nous is the key to this type of painting, All right, so I'm going to try to show you it gets hard because we're talking about tight spaces here . But first I'll explain what to look for for me when I pull the stick up and watch the paint drop in. I like to see. Actually, you know what? It's slightly thin. Here's what you dio. If it's slightly thin, just put a tiny bit more painting again. Always when you're working on stuff like this small, small, small increments to fix anything because I was just going back and forth too thick to thin to thick, to thin. Just make sure that little bit of ad and it's really incorporated. Okay, so a poll pain up when it falls in. I like to see the dense, the pain of it, so it falls in and then it sits on top just a little bit. Let's see if I can show this. Hopefully you can see that I know it's kind of hard. What's even a little bit closer. Do you see how it dips? Just a little bit in that showing me the right consistency.
4. Spot testing: As you can see here I have a crazy, massive campus. I like to take paintings that didn't come out the way I wanted them. I didn't really like the colors the way this turned up. So now I can use this cameras for tests. So I do little blobs where I test the colors together before putting it on my large painting. That way I can see if one color is disappearing underneath another more than I wanted to. This painting process can get pretty scientific if you want it. Teoh. Each paint color has a different weight to it. The actual pigment of the color itself has weight, and so white is heavier than other colors, so sometimes it can sink below. The other color is that you're using and you lose it. We don't want to deal with that too much, or you don't want to do a giant painting and have things go much more right than you realize. So that's why I like to test them before I moved to the big campus because I don't really get into the super scientific, because for me, this process is all about having fun. I'm letting go So that's why I just do a quick test. It's real simple. I'll show you how usually, even if I'm not doing a puddle poor, I test in the puddle method and use just a tiny bit. I usually do to little ones next to each other so you can see I start with Dark Green first , and I'm talking about drips off of these sticks that just drips. So again, drip, drip, drab, drip different colors on top of each one. Doesn't matter if they're perfect or anything like that. Um, my metallic colors, like gold, definitely disappear below other colors. So when I'm doing them, I like them to be on top for the most part. But I'm gonna layer the men a bit more injustice e This way you'll know if one color disappears too much, then maybe you need to thicken it up just a tad bit. That's what I find if one pain is thinner. So if it looks more like milk than it does, heavy whip um, that means it's too thin in comparison to the other ones. So when you're doing that test to see consistency, you want to make sure all your paints are the same consistency, so I'll just finish off my little test here. Now. This actually showed you what the real painting is going to be like. I just move it all around like this. Now that's what we'll do with the real painting Teoh of the campus all over. Then I let it sit. Sometimes I could move it even further just to really see how things are going. So as you can see what little heart, let me put it up closer. All right, so this is my test here. I think you can see how the gold is losing its riel potency, and that's because it's slipping below the white like you can see right in this area. I think most the other colors are doing pretty well, though I did have white on top, so it's obviously a bit stronger than the others. You can see little tiny bubbles start to appear, and that's where um, you get what people call cells In the nice class. I'll show you how to really do giant big cells, but in this class we'll just see what naturally happens without any additives. Sometimes if you blow on it you can get those cells to pop out more, so it's nice to see that we will get some in the final painting. So I always suggest again. Once you've gotten your paints mixed as well as you think you can, there's close to consistency to each other as possible. This is your test before doing your large painting, and then you'll know that it's going to be a super success.
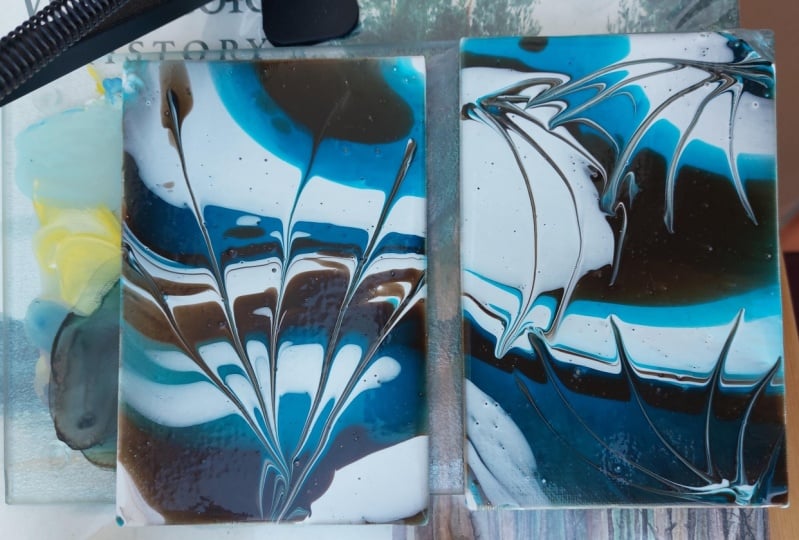
5. Pouring Demo: all right. Now we do the actual poor painting. As you can see, I've got my little painting triangles underneath the canvas. You want to make sure the canvas is as level as possible. If you have an actual level and you wanna make sure go for it. For me, my painting surface just needs to be fairly level, because I actually move it over to drying surface that I've set up in the same way with plastic and the triangles. But I know that surface super level. I don't get much pain over there, and the real mess happens here. We've got my pain to the side. Now. This is where I you could do it with your hands, or you can use a tool as well. With paint falls off, you want to cover the edge, so sometimes I'll scoop the pain and put it on here. So, having this tool handy eyes good as well, you can use the story of sticks if you want to, but make sure you definitely have your paint covered. Are your table covered? Some people will use a bucket if they don't want to do a table like this as well I have a giant bucket with the canvas inside this Brooks. The bastard links that I'm not hitting anything. So now we start pouring the paint onto the canvas. I like to start with the dark color usually. Um but this doesn't have to be. You can mix it up. I'm going to do pretty basic puddles right now. Start small. They get bigger as you layer. Make sure you get some pain out towards the edges. Let's do one in the middle to now. You don't have to dio. Actually, I do for you. You don't have to do basic puddles. You could you a weird blob like that too? But the thing with puddling is we're gonna keep pouring into the middle and layering that up So again you don't have to start with similar colors like I have. You could dio all sorts of wild colors. I love it. If you took a picture of your colors and shared it before you start your painting I love seeing different everybody's different color palettes. So you can do that as your progress shot. Now again, I mentioned that gold or other metallics like silver or metallic versions of colors for me have always slipped down below everything. And I don't want to waste that paint so I don't put it into the puddles until towards the very end. So you won't see me doing them just yet. Now I'm doing all of these in the exact same order. But you don't have to. You could you could mix up the order, so maybe I'll do that for you. Right? I did. Dark, light, white, dark in these three dark light white. And now maybe I'll just put some light back in so you can tell they don't have to be the same. The trick is to just keep pouring into the middle on them and layering it up and just bit by bit, Don't go Jump in the hole, cut out at once. If you start seeing the paint slip off towards one side of the canvas more than another, then that means you're not level. And you should try and prop up that side a little bit higher. Because at this point, you don't want everything running off to one side already while you're still working on layering up your pain. Now I do like to use a lot of white in my paintings, so sometimes I'll just prep by making a lot of extra white in the first place. Use it as a filler sometimes in between the paint colors. Um, but I just like bright paintings, so I use a lot of it. I actually use like again. So this is where you can just have fun. The really hard part about this painting to me, I think, is really just mixing the paint colors and checking their consistencies. That's the part that you really want to get, right? The rest of it. This bit is just about having fun and using your intuition. Where do you want a little bit more? Where do you want less? This is the really fun bit. And as you can see, I get drips places doesn't matter. It just adds character around. You can see they start blogging together. That's fine. They're all gonna run together here in a little while. And each puddle does not mean to be the same number of layers, you know. Oh, starting to puddle here. You know, I'm seeing There's an empty space over here, So put pedal down. You know, just a little bit right here, too. Now this being process, you can get a lot of wasted pain if you pour too much onto the canvas because you tilt it so you don't need to get to like you don't need to keep doing this until everything's running off the edge, because that's probably too much pain. Really. Um, so I'm pretty close here to where I want to be at with the paints, and now is when the gold comes in. Now you can choose to put some paint over the goal. I probably will in a few spots, as you can see like it's already dipping below that white in places. So that's why again, I add it at the last because I don't want it all disappear. As you can see some paints or running off the edge there, that's totally fine. Uh, I'll just start telling you about one thing. Let's say you're working on a much bigger campus. You've already tilted stuff a bunch, and your paint isn't getting off the edge. You could do one of two Well, maybe three things you could put water down that will help it run off faster. You could at more paint down you go like this. Um, paint running over paint will move a lot faster than on the dry canvas itself. She could do that. If you've used up all your pain and you don't have any left in your cups, you could just grab the edge and pull it out like that to get it wet, too. But let's get tilting. So now you're gonna grab under the underneath the campus, Not so much the edge or you don't want to be like that. You really want to be underneath it now is where you just have fun. You want to make sure the paint comes down into the corners, you get it running off everywhere, then you play with trying to get things back. Like now you can adjust a little bit of your composition basically. So if I want that middle bit over there more, maybe up here or down, that's just where you play. Said it back on your things. Like I said, I got paint all over my gloves. Now you can see a bit. There's no pain right here, so I see there's gold here, so I'm gonna come over here scrapes in this painting Put it down over the edge like that. One of things I love about this painting style is how it goes over The edge is of the campus. So I when I'm doing big ones to sell, we usually dio a deeper canvas. And I dont frame them because I love how it runs off the edges and the look that gives it. Yeah, that's where I just go kind of baby all the edges Now get them pain, Teoh, Get them looking nice if they didn't do that on there, All right, so like I said it, right, gold's disappearing there, but that's fine. It's subtle. Um, I didn't derive anything through my puddles before doing this. So you get very distinct what I call islands now if you don't want as distinct before you start tilting. I could have taken my tool and dragged it through the puddles in different ways to mix that up more and get things going in different directions. But this is kind of fun for me. I like it, so I sit here a little bit. Watch as things settle. It's probably hard to see from the current camera, but there's a tiny, tiny pinpricks, um, those little bottles coming through. Uh, some people makes cheap pains with expensive pains because they get more of these cells. Onda also people, um, put additives in it to create cells, which I will show you in a further course. But this one really just wanted to show you the basics of this paint process. Now, with these, I like to try and open up the cells a little bit, but blowing on them. It'll move the paint around a little bit, too, but that's fine now. If some of this is to basic for you, you could also drag your tool through inhibit. I'm kind of liking how it is, though, but I'll do it a little bit just for you to show you how you can really add detail, right? So it's real simple, but you can keep doing that. I've got some paint on here already is. You could always clean it off first. You don't add stuff like I did there, but let's say you don't like how that happened. Why kind of come back through and try and add more green Now if you have green in your cup . Still, you can also add pain to this right to cover that back up a little bit trained. Add it to the surface. Let's see where else can use in detail a little. See, I love wiping my tools on my clothing. That's why I wear such my Sikh building. While doing this, you can really customize this. You know, it's really easy to pour the paint, but you really want to find how to make this process yours. And so maybe adding little details like this really sets you apart from other people. Really changes it up and again. You know, I could say man, gold really got lost. Let's add some more gold in here. Swipe it on here. Now, remember, colors air puddled here. So when you're swiping through, like over here, I just did. I pulled up some green from the bottom, so just know that's a part of this process. If you're a perfectionist, then you're gonna have a hard time with this. So really, try and let go and just let the paint do what it wants to dio and you can suggest things, But you can go all out. I'm really do whatever you want here. This is the part where you get to just have a lot of fun. That's the basics. Remember to make it super level, though this is also when if I'm totally done with it, I stepped away and about 10 minutes I come back sometimes will even take a picture of it at this moment so that when I come back in 10 minutes, I'll really know if this side start to slip off too far that way. And then I know to kind of put shims under that toe, lift it back up, and I just use my stir sticks as some shims. So I just kind of come back and baby it and watch if things are slipping off one side too much more than the other, messing up the composition and stuff that I've done. All right, I hope you enjoy, um, when you've finish your painting, I suggest you take a picture at this point when it's still wet. Show us what it's like we'd love to see. Then, when it's fully dry, take another picture. Things will settle differently sometimes on it's always just nice to see how the process changes
6. Troubleshooting Common Issues: Let's talk troubleshooting issues. Sometimes when you're painting, things don't go according to plan. The verse will cover is cracking and praising in a finished painting. Once it's completely dry, sometimes you'll see small cracks. That's usually because your pain is too thick. We're pouring the paint onto the canvas. You want to make sure that your puddle, when finished on there isn't extremely thick. If it is as the top player versus bottom layers dry, you will see actual cracks in your painting. You can fix this by just adding more water or more mediums to make it more fluid and thin. Or as you're tipping, just make sure good amount of pain actually runs off and you're not left with a thick puddle on their crazy ing eyes really about adding the right mediums to make sure that you get a riel smooth finish. It's technically thought of as surface defects. You'll see some textures again. It's in the drying process that these will happen so you won't see it until it's too late. So really, make sure that you're mixing your paints to the best of your ability. If you've poured your paint onto the canvas and It's just not moving very well spreading across the campus. That's most likely because you haven't mixed your paint down far enough into a liquid state . Remember, you want it more like a heavy cream, not a pudding, so make sure that you're really getting it fluid again. Test on ah, small campus to make sure it's really flowing. Females are not have enough paint on the canvas, so it's not, um, able to travel all the way off the edge because you just didn't poor enough to begin with. So make sure you're not skimping too much on how much pain you put on there, because you do need to let it run around the campus. But there needs to be enough of it to start with when you're mixing your paint after you've put the acrylic and the medium in there and you've started adding water. If you see clumps for me, it means you've added too much water too quickly. So again in the first place, remember to just add a little amounts of water at a time. Andi thoroughly mixed it in. If you have clumps well, first off, just trying. Keep mixing it, see if you can just manhandle it into fully mixing in. If that's not working, set it aside. Maybe start over if you're pressed for time, or give it at least a couple hours to let the water trying permeate into those clumps. Sometimes I've had to wait until the next day, and then when I go to mix it, it finally just easily mixes in and again. That's just because the water is able to work its way into the acrylic paint. But as long as you add just a little bit of water at a time, you really shouldn't have any problems with clumps in your paint mixing. Now. If you have your dried canvas and you see your little bumps in it, that's most likely because you did have clumps in your painting and they've now dried underneath. If you have any kind of clumps in your paint mixture, they won't flatten out. You may not see them at first because as the pain is sitting there, it's pretty thick. But as it dries, it can dries down, and then the bumps are left and the rest the pain is down smooth. So really, make sure you're thoroughly mixing also, Sometimes I let my paint sit overnight because it makes too much, and I'm going to do another painting tomorrow. But a thin layer of paint will form on the top of the pain as it's drying, and so you want to make sure that you pull all of that up and out. Throw it away, because if you try and mix it down into the paint, it's going toe. Have clumps on, and that's going to take a lot to, like, permeate or anything. So that's probably some bumps that you get in your painting. If you've done that, sometimes pain can drive around your stick as well, so just make sure if paint has already starting to dry in your cup, don't try and makes it into the painting. Pull any dried paint out of the cup so that you don't get texture. Imperfections that bug you later If you're paint is running off one side of the canvas as it's drying. That's because you don't have a level enough surface, so once you're done with your painting actually back up before you even dinner painting, decide where you're going, toe. Let it dry. If you're letting it dry on the table, your painting on, then make sure this is level in the first place. If you have a secondary spot to put your painting, make sure that's level so that when you finish your painting and you've moved it over, it's already in the level surface. You can use a natural level to double Jack this because otherwise, once you've moved it over, it will start to slide toe wherever the low spot is, because again, it's very fluid, and that's what we love. But it can be an issue in the drying process, and we want to keep that painting that you liked in place. So make sure its super level and what I like to do is once I moved it to the drying spot about 5 10 minutes later. All go back and see if there's any movement happening. Sometimes before I leave it, I'll take a picture so that when I come back to it, I can really for sure see where it started to move or gone. If it's not very obvious, sometimes it's far more obvious than you want it to be. In those instances, try and put shims under whatever you have propping up your painting on the low spot, you could work against where it's already started moving again. Come back sooner rather than later, because things can start to move really fast. So I come back five or 10 minutes after said it there and then I'll come back another 10 minutes after that, especially if I had to fix the level nous. You need to keep coming back and checking on it until you're pretty certain that it's not moving at all at that time. Also, because some of the pain will still be moving off the edges, even if it is level just because of how much paint on your campus. I like to take my trowel tool or one of the Popsicle sticks and run it along the edge, but underneath, obviously so already just along the edge to catch any of those paint drips. Because if you allow them to dry as drips, then you'll have. Those trips will literally drive there, and for me, sometimes if they're big enough, it pushes it away from the wall, which I don't like, so I just come along and finish up and trying catch any of those drips and take them off. So then I have a little bit nicer finish in the back. Also for people who care a lot about the finish of the back of their painting before you started. If you don't want any of these little pain, um, swatches. If you don't want to paint spots on the back, your canvas, then you need to use something like Blue Painter's tape and tape off all the way around here. And make sure that you don't touch any further in Make sure just touching on this when you're doing your actual painting. I don't have a problem with these, so I don't do that. But some people really like a super clean back to their painting, so I would do that first, um, for finishing off painting after it's completely dry. I use I experience with different ones, but you don't want to use a spray finish or their arson painted finishes for protecting your paint. It's really a thing about longevity, so I right now I have this UV resistant clear coat acrylic coating by crime on. I have a gloss on their Sometimes I do a matte finish that's really just a preference thing on gloss, sending lost Matt any of that kind of stuff. But you want to look for a non yellowing, moisture resistant coating to protect your painting on the non yellowing is really, really important because, um, as you're painting sits in the sun, depending on what you sprayed on it to finish it, the sun will yellow certain coding finishes, so really make sure it's non yellowing so that your painting doesn't change colors over time. I also I sell my paintings on so one of my extra steps, obviously finishing it off for the hanging system. I just put little hooks, screws into the sides with this little wire right here. You don't need a lot of slack on this to hang. So doesn't need to be super boat. Straighter is better. And then my little special touch down here. It's hard to see on the camera, but it says, uh, certain certificate of authenticity. So I put the name of my piece, I sign it, and I put the year that I created it, and I even put a little bit of my information like my website and stuff like that. I'm here and I stay blade on the back so that that goes with the painting, no matter what, And people confined me later because sometimes let's say taking in someone's house and someone says all really like that. Where did you get it If someone met you, What a show. They may not remember your name. And let's be honest, our signatures are not always legible. I sign the edge of my painting, and they always do it on the same edge on all paintings. I don't like it on the front. Some people do, but I don't want it messing with the look at the pictures by saying that on the edges. But I also sign it again on the certificate of authenticity goes with the painting so that people can find me later for a second painting or not. But that's a little added touch when I go to sell things. Obviously, if you're hanging your house or your parent's house or something, you don't need that. But that's metal. Step up in about on beyond to sell, Um, so that's about how to finish off your painting. And finally, if you're pre mixing your paints and you want to store them because, honestly, especially if you're doing larger pieces, your hand can get a little store like my thumb gets, or quite often from mixing so much. I guess I really had stir stick. But so all mixed up like full cups and several of them at a time when I'm doing it, because often ideo 24 by 36 canvases, and that means quite a bit of paint. So if I have paint left over or if I've premixed because I know that I'm going several paintings in a row, the biggest thing is to have an airtight container. There's all different kinds I've seen people use jars or different, all different bottles. You confuse things like this kind of bottle, or even if you have left over these, you could put paint back in them. But the trick, especially because you're using acrylics, is air tight containers because you do not want to paint drying. So that's the big thing. All leave paint sitting on the table for maybe 24 hours, but no more than that, because rial a thick film, will start to develop again. I just pull that out and use what's left underneath it. But you don't want to just keep doing that day after day because you're really wasting pain at that point. So just transfer it to airtight container and you'll be set for storing your premixed paints. And that's totally doable thing. Todo. So if you have any other questions, feel free to post them and ask away. I've been doing this for a little over a year, so I've really been through the wringer on experimenting with stuff on and having to troubleshoot things on my own. So ask away and I will try and answer to my best ability. Other than that, I hope to see your awesome projects from this, and I hope you come out with an amazing painting.
 Kaitlin Goodey, Creative art and business encourager