Transcripts
1. Introduction: Hi, I'm Chris. I'm a watercolor artists in Richmond, Virginia. Welcome to how to paint a floral watercolor. I think watercolor reads are one of the most fun things to paint. They also are always my most popular instagram posts. So I think people really tend to enjoy that. So we're going to start at the very beginning and the elements that go into a water color read and take this'll class all the way through to the end where you can learn to create your own layered watercolor floral. I know you guys are anxious to get started, so we're gonna jump right in. We're gonna talk about supplies. We're gonna talk about leaves. We're talking about focused flowers, and then we're gonna cover some filler flowers. The last step before you put it together will be to learn how to paint little detailed elements that can make your wreath unique and special. First part of this class is really geared towards beginners. So if you are more comfortable with watercolor already, feel free to jump to part two. That's where we're really gonna put together our reach. But if you want to start sort of wet beginning, stick in here with me in part one. We'll start with our believes and will build our way up. First, let's gather our supplies, so jump to the next section and we'll do our set up.
2. Part 1- Supplies: all right. First things first got to set yourself up for painting, and this is pretty much exactly how it would set myself up when I have to start a new project. First thing you need is some watercolor paper. I like cold press paper, and I like to use a block. A block is different than sheets because it has the pages all attached so they don't buckle when they get wet. Our shoes is a great brand, but there are lots of other good brands of paper. There's Fabbiano, Kansan, Strathmore Legion paper, so it doesn't have to be a block, and it doesn't have to be arches. Do look for, um, £140 paper. Cold press usually seems to work the best, but you'll have to experiment with different types of paper and see what you like best. If you use sheets rather than a block, find a piece of cardboard or wood, something that you can use some painter's tape and tape your edges down. That will keep your paper flat, and it will buckle when you add water. Um, as you paint, the next thing you'll need are some brushes I like to use round brushes, favorite sizes of the round brushes, and if I could only pick one, I would probably pick a six or an eight. It's a good medium sized brush. The thing that I like about round brushes is they have sharp points for details. But they also fan out wide so you can get broader strokes. There's lots of different brands to use. These are some Princeton, our heritage. Siri's. I have some pigeon letter brushes Here is well, there. They they perform really wonderfully for today. I think we'll use mainly, probably six round A two for small details and maybe a 10 and eight or 10 for larger things like our leaves or larger florals. Next, you guys get some clean water. There's no never imagine, too, that this is an old salt ajar. Uh, use whatever you have on hand, but get some clean water. Most people like to use one or two jars, sometimes for cold colors and warm colors. Sometimes when you're rinsing a dirty brush versus wedding, a clean brush. I usually have two or three jars, and I tend to use them interchangeably, and then I have to change at my water, you will need paper towels. This is just for drying off your brush. Maybe blotting your brush if it's a little too wet to get a little too much pigment, that sort of thing. So just have that handy near your water so you can use that for blotting or sometimes for cleanups, because everybody makes mistakes lasting a lead. Our pace. This is my very, very messy pallet thes painter Windsor Newton. You don't have to use Windsor Newton. There are a lot of great brands of pain out there. Some come in Pan's like this was when my first sets, where they come in pans like this is a great starter set confined. These online, Um, these are all from tubes. Push Daniel Smith. There are art philosophy paints. There are various grades and various prices, so you have to sort of find what works for you in that In that area, these are artists green. I think they perform really well, but Windsor Newton has Cotman paints as well, which are a little less expensive sometimes. So find what works for you, and I will show you which paints will be using for our practice elements today
3. Leaves: Let's start with leaves. Leaves are really fun to paint, and they come in all shapes and sizes and they are really important part of any wreath. So we're going to start with some simple leaf shapes and kind of work our way up to some more complex ones. I'm gonna start with my number six brush today. Yeah, we're gonna start with our sap hooker screen, olive green and green gold, just like you said. So you need to kind of get some paint going, mix it in the pan there, so here are different. Could see those different tones better. And let's start with the basic. We've there two ways to paint watercolor wet on wet, wet on dry there, just like they sound wet on wet. Would be if I just took my wet paintbrush went over here and I'm gonna make a C shape. It's probably really hard to see that, because again it's just water. I'm gonna add some pigment just so you can see it, But basically, you take your water and make a seizure, and you do that again sort of backwards on the other side. I'm adding some pigment just to give you the ability to see it. Water on the page is not not that easy. Once the waters on, he can go straight into your pan or into your mixed pain, and you can start to drop paint in and you'll see how wet on wet moves it flows wherever the water is touched. The paper, but not outside of that area. It won't flow into the dry areas by itself. That's what. On dry, you'll have to push it there yourself. So what on dry is my nice wet brush here on a dry piece of paper? You got a lot of pigment there. This is just the most basic leaf shape. Okay, so whether you want to do more of a wet on wet or a wet on dry is completely up to you. But what I would say on that that note is I like to do a little both. I usually actually start off more with a pale leaf, which is, um, gonna be a wet on dry. He's just these little curve shapes, right? And then I like to add in shadow and depth by adding some different color pigment. This will be important later when we're trying to add depth, their shadow, her layer in in our wreath. So have some fun with this. Well, speed this along here, but you can watch as we do a mix of wet on wet and wet on dry in a simple sort of C curve and a backward C curve paint technique so you'll see here that you're getting a little variation to tone leaves. Sometimes you can leave a space here that's nice. It denotes the center of the leaf. Get a very pale leaf with the bleeds going and all sorts of variation on a simple form of leaf. So that is leaf number one. All right, let's move on to leave form number two. This will be a little bit different. I'm still gonna work with my size six. This second form of leaf will be a sort of a stock, so let's practice using the very tip of the brush to make a thin a very thin line. You're almost hardly touching the paper. If it's easier for you to use a two or a four round for this, do that as well. We're just going to bring a tiny little stock off the side and we're still going to use our basic leaf shape. We might elongate this shape a little as it will allow us to fit more leaves in on the stock. Let's shoot for five and see how it goes. So I long get out the one you can leave it like that. It could just be a very sin leaf. Sometimes you see them from the side. It's almost like the silhouette. If you want to make it fuller, you can bring out the other side, and then I'm gonna work on the opposite side. And this is just a matter of doing it. Me, backwards and again. These might not match perfectly. That's okay, too. We're just We're just practicing the shapes off the leaves. We can go back again and add pigment at the based. I always like that effect. Um, I think it's a nice way to add depth, and I'm just gonna keep using different shades of green. Just for fun on this, um, again, pull out a little stem. Maybe he's got a little bit into him. Maybe he's a little monkey. This is totally fine, I think. When in doubt, go lighter on your pressure can always come back over and add more in. But once the water colors down, it's a little tricky to get rid of it, although we will talk about that because I'm sure I'll goof up here any minute. So I'm taking a little sap mixed with a little olive. I guess this guy's gonna being more than five, but that's OK. He'll be seven. I told you, I really like the odd. I like odd numbers. I think it looks better. I don't know what. And then his middle stock Here we are. Finally, Maybe he's a little lighter out bringing some green gold. He's more of our traditional she and that's your stock. It's got some variation we can go back in. We can add some darker tones to some of these while they're wet again with the wet on wet. Once they drive, these will just leave big blobs. So so you don't want to mess with them once they're dry. But you can you go in and put some deeper tones in there, almost like a shadow. See how that got a little just dry? So it is kind of sitting there we can encourage it to move. But I mean, go with a little water, but sometimes you over touch, so be careful. All right, So now that we have one, let's practice thes down the road. - Okay ? So you can see these are all a little bit different. The colors are old, a little different, the shades on and tones and are mixed indifferently. Some of these have the white space like we had here. Um, some have you can see strong pigment tones, and some are really pale. They could be anything you want. Um, these were really fun to paint, so practice them as much as you like, and next we'll move on to the final form of leaf leaf. This is gonna be sort of the wild card of the leaves. This is going to be something that looks a little more natural with a little more movement . A little more. I don't know, wildness to it. Same colors again. Guys, I'm gonna work in some lighter tones. Um, when you start making your wreath, you want to start with the lightest tones. Um and so I'm just going to take some of the gold green and olive green blend. Um, with, um, a good bit of water. So to get some movement in your leaf, I'm gonna actually start with a teeny stem and then I'm literally just going to make a wave . This is like freeform leaves, and then I'm gonna come in with just water and kind of match up to it so you can kind of see what that looks like. There's more pigment on one side. When I had a little more in, He's just got a nice little wave to him, a little bit of lighter center. So this is where you have some fun with shapes, OK, you've gotten your basic shapes. You've worked on putting them on a branch, and now let's just have some fun with shapes. They could be more. I don't know palm frond e, and they don't have to be symmetrical as the other thing. I want you to keep in mind. There's nothing that says they have to sort of match up perfectly. I like the blend in that they can be round right, a little tip and there's so round, kind of Ah, maybe there's just center to him. It's got a little stem. Yeah, a little more olive here or even in the center. It's also fun to see how they dry. They usually look a little different, sometimes a little paler. Sometimes the pigment bleeds a little more. So have some fun here. Okay, Justin. Experiment in funny leaf shapes, but snow stems on him. If you want to, and we're set for leaves, let's move to the next part of the process. Focus flowers, larger flowers that there are fewer of and that sort of anchor the reach in a few places.
4. Focus Flowers: we're going to start working on what I call focus flowers. The larger flowers that really draw your attention the wreath and appear a little less frequently. I've mix up some opera rose and some permanent rose, and I'm gonna start with the op arose and a good bit of water on my number six round. The first focus flour I want to work on is a sort of typical just five pedal, and our shapes are gonna be similar to our leaf shapes. So we're gonna do that kind of see shape and bring another one in and maybe not meet it. And also, we're not necessarily going to bring the pedal to a point. And that's really what our first pedals gonna look like. We may take less pigment for the next pedal and more water and just touch that other pedal and leave some white space. And this pedal, maybe, you know differently, shaped back for a little pigment for third pedal. Maybe this one isn't gonna touch quite as much. And again, the sheeps are not perfect. Can I turn my paper for the next one which has still a decent amount of water this pedal is a little bit tucked behind, and it's absolutely find a touch the other one again. You can see the white space. We're leaving in the center a little more of the upper rooms for the last petal. Again, I'm turning the paper because it just makes it easier to shape my pedals. This may over a lab, so we're gonna just go right over the last one and it gets a little quickly. That's totally fine. All right, that's sort of the first pass at the flower that we'll go back and we'll just shape it a little, however you like. So I would like to pull this pedal out a little more. We had something here. Bring in a little more pigment over here, and I just I like to keep the pedal sort of organic on. Not not really perfectly symmetrical, but do your flower the way the way you like. So this is fairly what on A It can play with it while it's worlds. What? I'm gonna go just pick up a little more pigment of the op arose so same color and just touch the centers to see how you get that little bit of darkness there. We'll do that a few more times As we work on our focus Flowers. These will all be different every time you paint them. But this is a good example of that. I also want to show you how we do almost a side view of this. You don't always see the flower face on, so I'm still going to just work with opera Rose. It's one of my favorite colors. Exide pedal. You might see maybe this flowers facing down it's just gonna be this shape. He might see the side of the flower and you'll see the side of the pedal and then just see where that other it'll start to come out. You won't see the base of those pedals. So, uh, maybe just three pedals here, bring them out a little, shave them as we go on. So this is the center of the flower here. Your stems gonna come out like this. It's just a little side view. Sometimes it helps when you're making a wreath to add some things around your focus flower to bulk that area up. That's gonna be the basic shape of our first focus flower. And we could wait until it's more dry or while it's wet. You get some of that Windsor yellow deep and just touch in the center as well, and that will bleed out. And that gives a nice effect and you can even do it here. Did see maybe the center of the flower and you get a nice bleed. So let's practice the five pedal focus Flower could be very symmetrical, completely loose like this, and also will practice a little bit of this side view. Flower pne flower. I'm gonna use opera rose here slightly different pink. How do you like my pinks? And we'll start with this top of sort of row of flowers. There's three ish there again. Simple pedal shape, Um, not to clean and are lines just fine and a little bit of an opening here of the bottom. Kind of like we left for the centers of the leaves. And then I was going to sort of line up a few of these here, pull him down again, feel free to pause and go back. Rewind as you go. So I like that sort of is the top For now, I'd like to pull these sort of points down like this sort of texture of them. Um, and then maybe I'll start on the bottom with a little less pigment this time. A little more of that feel of what? I'm wet. I'm gonna pull down some pedals just like we did, just like I'm showing you there, I should say, Don't get a little bit of paint more. Just pull the lower pedals and so there's kind of like a side again. It's a p any, but not go now. Maybe I'll pull out my six for this. You could even partner, too, to get a little darker pigment. And let's add these little A little side view pedals just a little. It's a funny, too, and I think it really adds to the flower. And that's your basic sort of pne flower you can. You can play around some more with this and add in some again some color and detail and back over here. Make this guy darker, right? As long as your flowers or wet you can go back in and add color in depth to them as they draw, you'll get some nice effects and nice bleeds on this one I was just showing you that on the side. He might have a little, you know, a little bud coming off. So when you're doing your, um, you're focused flowers, which, in part two of the class will show you how to place them and where they go. You'll have some options on the larger flowers. But I like how those guys air coming out, and I like on these flowers to add a little bit of the the yellow, and you can bring it down on its own. Or you can just add it in to the pink. Make sort of a fun pop, and we'll use thes when we move into you Part two and put our wreath together. Let's move on to filler flowers.
5. Filler Flowers: Let's work on some filler flowers. I think filler flowers, air fun. They kind of fit in anywhere you need them to on your wreath. I'm gonna start with a six. I think I'll start with our offer Rose again. And this is going to be very loose. Almost Shylock. But, um, it's basically rule. Squiggly says. Start at the top and just do a little dashing around, okay? And then get a little more water and kind of do that again. See that it's kind of sweeps in from the side to see my little sweet shapes and then a little more water. We're going to get almost like a like an ombre effect as we go and kind of sweep it in from the sides. Add some in the center kind of up and down motion in the center and leave your white space to see how there's all this white space you don't You don't want to fill it in two months. It just gets too crowded and you lose some of the detail. And really guys, that's it. There's not a whole lot to that filler flower, but he can be big or small and kind of fit in anywhere in your wreath. A little trick I like to use is to come back into thes lighter places and just give a little bit of a line at the bottom. It's the armor's, adding a little bit of darker pigment along the bottom. Okay, this helps to give it. See that? See that? Nice depth hands and little dots at the top sort of trails off. But I really love the effect of that. And it just the looser. You are kind of the better it looks. It doesn't doesn't have a lot of structure to it. So I really like that guy. Um, we'll talk about his put his stem looks like later, but that's number one filler flower. All right, let's talk about another one that's similar. Going to stick with one type of one color paint because I feel like you get to see the difference a little better. So back to upper roots this is going to be a stock. We're going to go real light to start on the upper rose. Okay, again, we're gonna It's well, maybe a little more pregnant than that list. All right? We're going to make almost like pretty much a blob will make. Maybe I like odd numbers, so we'll make seven of these blobs. Okay? Notice that they're not perfectly rounded at the top or at the bottom. Um, they're very pale right now. I don't I don't like him to be too much in, like, a perfect shape, so I'd like 1/7 1 here. We're gonna let them sit there for one minute. I'll come back to them. That will be filler. Flower number two. Okay, So, filler flower. That's hard to say. Filler flower for Is going Teoh be a little bit similar to this focus flower. We're going to start with basically almost no pigment. And it's a four pedal, very rounded four pedal meet in the middle. Now, it might be hard to see right now because it's so pale. They're almost, like, quite perfect circles. But they almost are. And they're just going who he got big come out like this Cases they're very wet. And our wet on wet technique, they're very wet and they're just gonna be open at the centre. Pretty much he's kind of unbalanced, but that's OK. They're gonna kind of fit in around other things. So they're not. They don't have to be, um, perfectly shaped. All right. So you can see his basic shape of before pedals all coming together at the center. And then again, what will end up doing is just bleeding him out from the middle. And it will have a really pretty effect, almost like a cherry blossom canyon effect. And those will be our little filler flowers. We can plop those anywhere in a group which is usually better like a group of three. I want to come back to filler flower number two here and take some boulder pigment. Just gonna add is if they had some outer pedals. So come along. Each one doesn't have to be on both sides. Sometimes I just do it on one side like that. I'm using my two now, huh? Just come along and add a little bit right over top of what you did before. And sometimes it's just like this. So have fun with this. It's just a a little extra detail. I do like to leave the bottoms again. Kinda open. It's nice place to plop the stem right into so I don't and they get larger. Maybe as they go, you know, down. So here we have guys, three types of filler flower, this sort of wild guy. And again, you can still go back in. If you want to add more, did you tell and what will do then, with our we'll take some of our green gold from our leave painting, and we might just add teeny bit the stem that would bridge out. We'll see how much you know stem we need when we put these on a reef. Sometimes you know you don't need much because it's covered in leaves, but and that's what she'll do with ease to you. Almost make a dot, and it's okay if it bleeds and a doctor and you'll bring. See how the kind of states right in there and you'll bring that stem down. And they all kind of meet up somewhere and probably long here, you'd have, you know, some leaves that we practiced. This is the most basic leave shapes will add those that as we go and then again on our last one, my add more pigment to the center, and that just keeps flowing out and making a really pretty filler flower. So we have some focus flowers and we have some fillers. Now that we have focus and filler flowers, let's talk about little bonus details.
6. Fun Elements: Welcome back to the final segment of Part one. This is the fun elements part we're gonna use. Both are pinks and our greens for this Also, get out your number two round for this. Let's start with what I really like. It's kind of a berry. Okay, so let's get a little of our permanent to stew permanent. Rose doesn't have to be a perfect circle, you know, Berries or kinda different shapes. And you see how I left a little white spot there? That's where the sun shines on him. Basically. And just maybe put three of these guys, um, in close proximity, Do you know, have to be in a particular shape, But again, like the odd numbers and they all don't have to be exactly the same size. Okay, that's gonna be sort of are fun. Element number one. We'll let that dry for a minute. Meanwhile, let's go back to a paler green, maybe take your sap green, water it down a good bit, okay? And make us we'll just do a little stop, okay? Make a little stock. And then this is something that well, it's gonna come out different every time. But we're gonna make a shaggy stock. Okay? Like that. You can do him one sided. I like to get a little more water. You gotta make sure it's not too wet or you'll end up with no whitespace. The key is to leave a little white space there. Would you guys feel to see that? And then you're gonna do your other side like to do? Okay? It's not gonna match up. That's OK. It's a little bit piney and a little bit. Franti, This is fun. Toe have poking out at different areas of your reef. I'm gonna go grab a little of the olive and maybe even makes it a little bit with some of that hooker screen. Okay, We need a really little bit on the very tip Very tip of your brush. And while this is still a little wet, go underneath a few of those sections on both sides or one just depends on your taste. This is kind of like how we did in our first filler flower when we added in so much water. Uh, when we added in some color to the base, okay. And then we're gonna let this dry for a minute to. So you think of another kind of fun or quirky element for some sap And all of how do you just a tiny I'll do a tiny little branch. Some really teeny little open. Like how these guys see how they're open in the center. Santini open, please. Sometimes it's hard not to feeling that center too much. It's very tough. So sometimes that's just a fun little thing to have peeking out of your re. And you know what? Just for fun will move. Go back in here again. We're using this froze matter. And if there was a very tucked behind one of these will be more in the shadow. Right? And maybe you would only see part of it. So it's gonna be a darker color, and you're only gonna see maybe this much of it. Okay, you took it right behind that guy. All right. Give me a little bit more of a cluster of Berries, and maybe we'll add just one more. It doesn't have to be huge, but it can really add a lot of fun and color to Yuri's. Okay. All right. This is just like a little cluster of Berries Let's for a bonus, do one more cause I think this guy's kind of fun. If you take a couple of stems, it's use Olive on this and maybe one curves this way on one curves this way, Maybe one comes. Do you have a little more like this? Okay, And then we had that winds really deep out earlier this tone here, get some, but don't don't get too much, um, color on your brush. We're just going to make and that's a lot. But we're just going to make a little kind of a goofball. And we'll do that on all three of these. Number. Shake a little trick, guys real pale. And that's okay, Then you can, either at more of this color of pigment, more of this yellow. You could even go in guys with something like a yellow ochre or even something with a tinge of orange. And again, just touch one side. It's one side, and if I dry a little bit but one side this guy is so much pregnant, you lift pigment out. Sorry, Bill. Clean, dry dish move back in. And these guys, they're just fun. If you want to add in a a little extra. Something tears a little shadow. There's something but leaves on there. Let's finish off. Since we're talking, let's finish off of these guys Might come down. Can't always follow the stock all the way down, right? Sometimes it goes behind. There were. So these are some quirky elements. Little fronds, um, like to sometimes go back into those after their dry and outline the the main stock. See that so you can see that and maybe re outlines some of the besides. But this is just the fun stuff to add in. You can layer these over worries that are lighter or in between, or they can pop into the center of the leaf or to the outside.
7. Part 2- Color Pallette: all right, Welcome to part two of the class. We're ready to go ahead and put a wreath together before we start. Let's talk a little bit about color palette. There are lots of ways to find inspiration. Go on, Pinterest, go online. Maybe your neighbor has a beautiful wreath or you have some beautiful wedding flowers or something that inspires you. Or maybe you're trying to match something in your house. We need to find a color palette that works, and I want to teach you a couple tips and tricks in talking about our colors for our flowers. I saw a beautiful bouquet the other day that had these oranges and blues and purples. It was really a different color palette, but I thought it might be a fun one to try. So let's let's experiment together. Let's let's test out some different things and we'll figure out what we what. We want a paint. I like the a combination of a purple, um, with maybe some blue. It gets you a really lovely color like that, and I'll show you all these paints in one minute, and I also really like combining to get a coral color maybe a opera rose that we worked with before. One mixed with a little bit of cadmium orange, maybe orange, a more pink. And we're just gonna swatch out some of these ideas to see what we like, But let's play around with some different shades and see, I'm gonna do some variation of these colors and I'll show you those in one minute to make sure your greens are gonna match, and you don't have something that contrasts really harshly. One trick is to add in some of the colors that you're using when you're mixing your greens . So if we want to use a lighter green in our wreath like our green gold, and we really like that one of the things we can do to make sure it will coordinate with what we're what we're doing over here is to take a little of that purple and not too much and mix it into our green. This will help us see that our greens whoa look a little less harsh up against that, and we may have to play without a little Maurin, adding in and out, Um, but that's a good starting place. Here are the paints will be using today
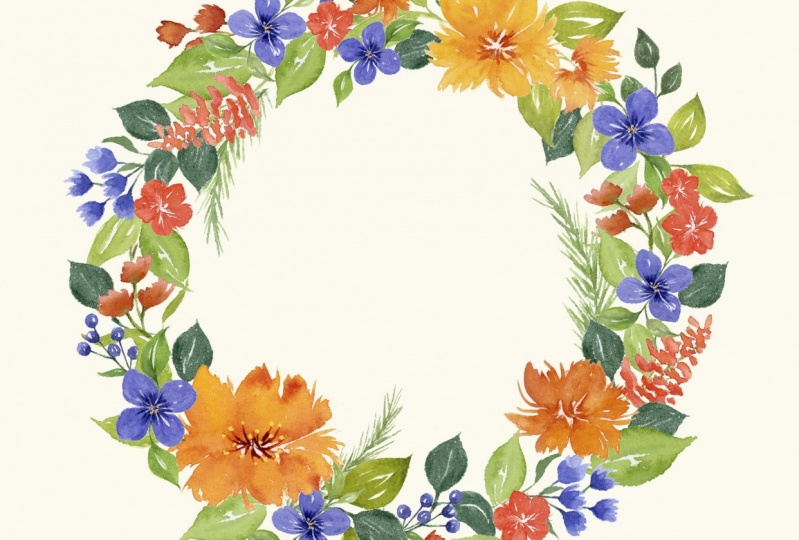
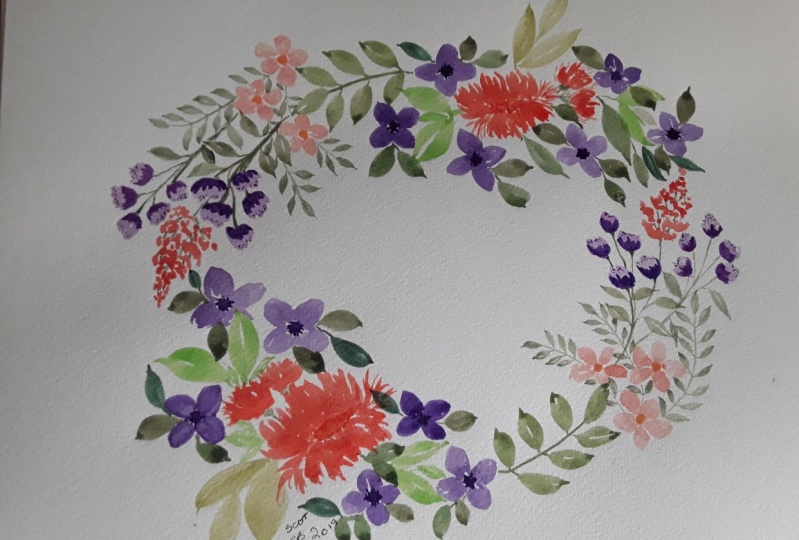
8. Putting Together Your Wreath: Now we're ready to put our heads together. Get your blank paper. Make sure you have fresh, clean water. Your paints mixed up and I would suggest a 10 6 and two You raise could be symmetrical. It can be completely wild. I usually cheat. Take a bowl and I trace a really light pencil line around it. It just gives me kind of a guide. I'm where to place my flowers. So I've done that here. You might not be able to see that, but just gettable and you know that will leave some space around to build your grief. We'll kind of go for a general symmetry today. What I'd like to do is place our focus. Flowers kind of at the corners here, fill in around either side of them and then at our foliage around that. OK, so we're going to start today with our focus flowers. I'm going to do a mix of some of the ones we learned. So I'm gonna start with my orangy pink color. I think in laying down your first flowers. Don't get too stressed about it. We're going to do a lot of layers. Let's just start with maybe a p any like flour. I'm gonna face it this way. Okay. I like that. I'll start with the bottom petals. Now I'm gonna take a little the pigment off again. Dab it on my paper towel. Little more pink into some of these areas, ending up nice and vibrant. Okay, if you remember, we did our focus fires. We did like a little bud to the side. I want to add a little more heft or wait to this corner of the wreath. So I'm still working right now. That was my 10. Get my six for this. So paint this along with me. - Remember those little tendra lines? We had tiny little parts had some of those and they they tend to look really pretty. And I'm gonna again while it's wet. We talked about our wet on wet. Let's go back in and just make sure we have some of that details. - Okay , guys, we have kind of are focus. Flowers are anchor flowers. They don't look exactly the same. That's fine. They're not going. Teoh, if there are things that you still kind of want to touch, that's okay. I always end up common going back I try not to over touch it really easy to do, and it usually ends up making them us. All right. So filler flowers are gonna come in along here. But before we get to the filler flowers, I really want to think about the foliage and then the balance with the other colors. So I think just to start, let's put in a layer of our pay list green in the form of some of those just really simple early leaf shapes that were the very traditional shape. Okay, let's start on that will build out a little bit from each of our focus flowers. Okay, We have a little bit of foliage there. Let's think about what goes in around these flowers. I like the shape we're getting here, so we'll probably going and erase the rest of the pencil lines. So let's work a little with our six on some of those blues. I'm actually going to use one of our other focus flower shapes. Um, more of the combination of the 4 to 5 petal shape that we learned. I want to leave some centers on these blue ones to use some of these colors in the middle. So these air fillers, But we're still gonna work in these areas. I'm gonna add one on the backside here and then out over here, down along the reef. This is kind of a judgment, and we're still in the early stages of building the wreath. You really can't go wrong. Just just put him where you want. I'm going to start off with, I think just a little bit of pigment on my brush. - Okay , so we have some focus and a little bit of the filler flowers, a little bit of foliage. I think we need to go in now and bring something out on to match on the sides. So match these up, and then we're gonna jump to the next filler flower. - Okay ? I like how this is coming together. Let's move into a little bit more our greens to get a little bit of a darker green tone and Teoh to sort of help us decide where are other filler flowers will go. And I'm a take a tinge of our Daniel Smith purple just to just to darken it a little bit and see that so these guys might have little branches coming off little stock leaves like we did turn your paper so it makes sense. But we're basically working out from either end. Remember how we shadow are Leave. Sometimes we use less pigment on one side, more on the other. And I didn't actually make a stock to start, so I'm just gonna go ahead kind of build this out as I go for the other purple ones instead of adding a whole stock. Maybe we just bring some leaves out. Maybe we work on making them a little a little fatter, like some of our fund leaves we worked on these are gonna look like anything that you really see in nature. That's okay. Sure. You can see what I'm doing here. See if I show only part of it. It looks like it's kind of behind that one. This is where you work in some layers. Looks like it's behind that pedal. Okay. I like how that's looking. Can see it's not perfectly round, and that's OK, because we're gonna build out and around. We're even gonna build on the backside of these. Let's talk about another filler flower. I think maybe we'll use the anti ones that we that we liked. I'm going to do these in a very pale purple and will come back in with darks. Remember how they start off his blobs? - Okay , we've made a lot of progress and we're about halfway through. Let's jump to the next segment to finish this off.
9. Adding Detail to Your Wreath: Let's bring back into more of our Coralie pink. Maybe in a slightly paler color this time. And do some additional filler flowers. I'd like to do the little squiggly ones. Let's try those first. - Okay , Now, remember these. We also add detail to with a little bit of a boulder purple blue, like we did with our ones that we do with opera rose way to mix up some more color. - Okay , I think we need to add some stems and stalks into our fillers, which will again help add foliage and and add to our greens. I'm gonna stick for the stems with this, too. And then for the leaves will probably branch out with a little bit of a larger brush prime moving to the six. - Okay , you can see how we're getting some symmetry to this, but we need to start really filling in some additional florals and or leaves, depending on where we wanted to go. I'm thinking this needs a lot more of our greens, so we'll start filling in greens around. But before we do that, are there any other filler flowers we want to use? I think maybe we go ahead and fill in our greens and come back for our fun pops. So start filling in with me. Feel free to watch what I do. Rewind. Go back, mix up. The different greens will start adding in details as we go along. - So you see what I do on one side I'm doing on the other side. I'm using a lot of the green gold right now to try to make it pop and to add some more darker tones to it. We'll go back in with some of the darker greens, too, but it's a lot easier to start with a paler color and layer a darker color over. We'll see him using some of our smaller leave sets that we learned, and right now I'm going to go in and take thes two and put them over here a swell. I want to show you what I'm doing here where I put this leaf behind this other leaf. I'm adding some darker tones because those leaves would shadow each other. That gives us a little layered effect. Go back and do it over here, where it's wet as well. I don't always do that, but it does have a nice effect. And if this is still a little damp, we can add those shadows in and it helps it look a little more like those Liza really on top of each other. And you also get a really nice bleed on some of those. So these are the parts where you start to look at it and decide where you want to fill in, how tight or loose you want your wreath to be and where you think you need more different colors. I'd like to go in and do the centres of these flowers now, because I think that will help us get an idea of the color balance are I want to go back in with a little darker green and some of these places to And then we're going to talk about our fun little details. Okay, so stick with me layer in behind with some lighter colors, and I'll show you now how we're gonna put some dark over some of the earlier leaves that we painted. - So , guys, this wreath is getting to the point where we could keep going and going and going and adding in mawr and more layers you could keep putting leaves like this but high and other leaves. You could keep bulking different sides up until you get it into a place where you where you like it. That's totally your call. Feel free to play with it until you feel like you're reads is in a place where you feel like it has enough. You can tuck a leaf, a darker leaf behind. You know, I like where this is right now. I like the color mix it has going on. You see, some of my leaves are getting a little odd shapes like the ones we we practiced and they're not through. The squiggly line leaves, so feel free to add different types in. But leave some white space. That's that's nice, too. And now let's talk. Let's talk teeny details. So the first thing that I see that I would like to add some detail to are the centres of these flowers. I would like to add some darker purple lee blue here to really make those stand out a little more than a lot of pigment on my number two, and I'm just going to go around the centres a little again. That's a lot of. It's a lot of pigment here. I'm kind of motion it in where it would be like a the base of each pedal Next from our sort of set of fun items I thought we might add in some are wisps. I'm gonna use a darker tone for this. Probably the sea green from undersea green from Daniel Smith. Mix it in with a little bit of olive green and I'm just gonna pick a couple spots here. I'm gonna bring a couple into the center and a couple out to the side. - Some of those little round puffball guys I think we could add a few of those in maybe are pale purples. - And I had one more. It just needs a little more Are, uh, pinky orange. I think I might add a little more out here and even out here, So let's do some of these tiny fillers, but let's fill him in outside. Okay, I'm gonna stick with two. - OK , guys. Now we're just gonna take it out a little bit with some leaves. We'll go real fast and filling these stems and we will be done way could probably keep touching this all day. adding layers and leaves in placing things behind. But I think this is a nice wild spring wreath just the way it is.
10. Final Thoughts: First of all, I just like to thank you so much for taking my class today. I hope you've enjoyed it. And I hope that you have learned a lot painting along with me. Secondly, I would love to see your work. Please post it to this page, please Post it on instagram and tag and hash. Tag me at Sweet Seasons Art. I would love to feature some of your work in my stories. Thanks so much.
 Sweetseasonsart Cris, Let's think Spring with some happy flowers!