Transcripts
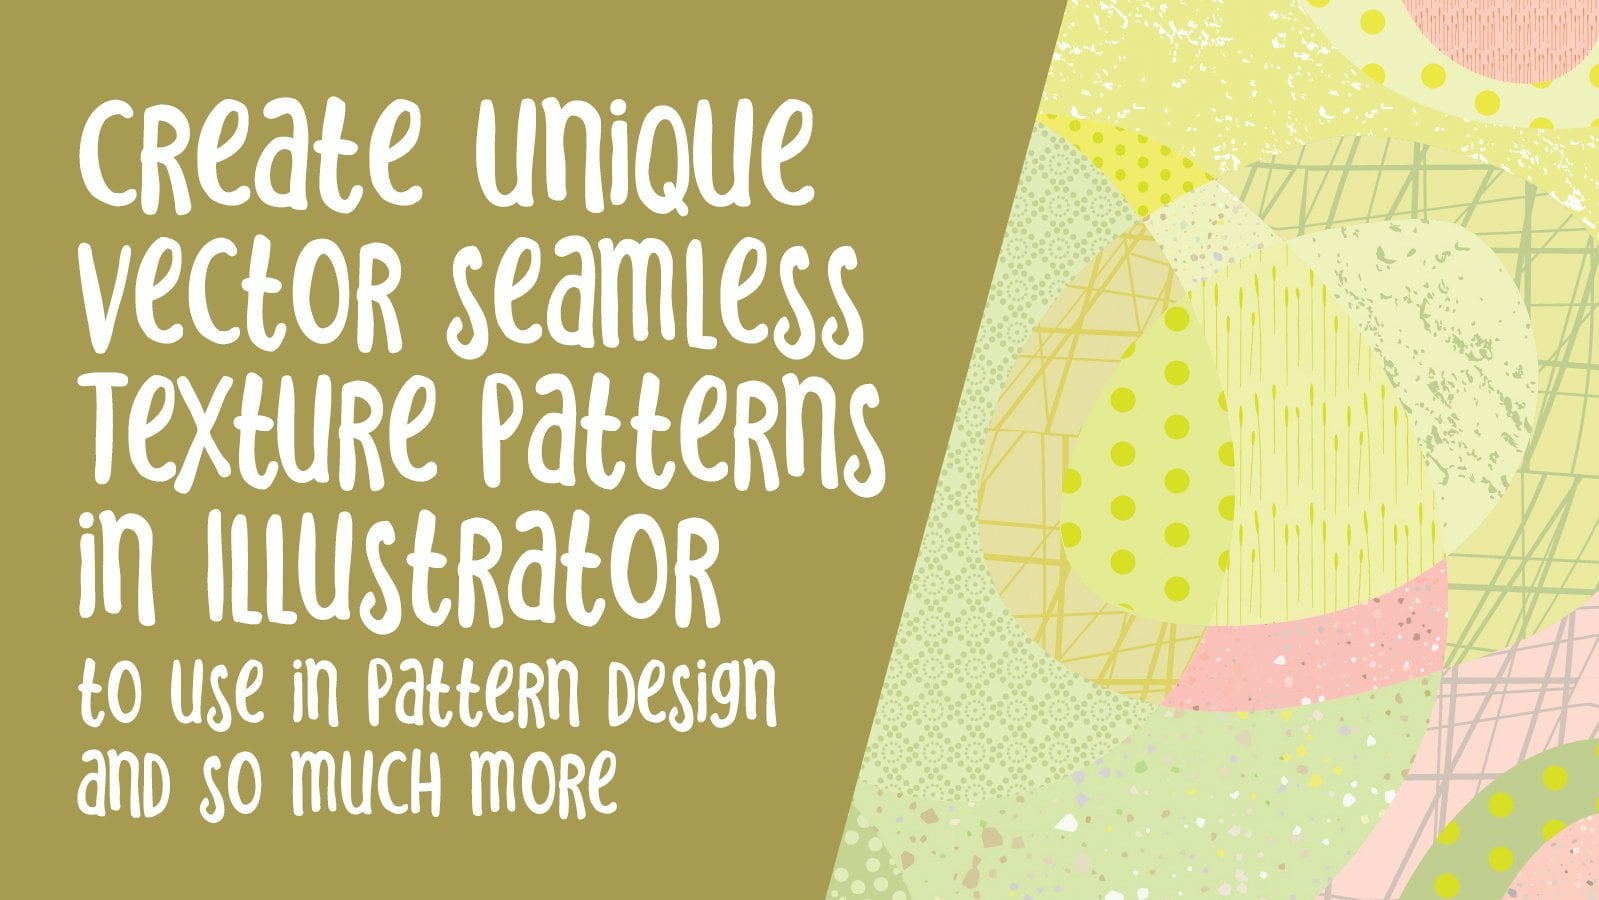
1. Intro Flip Flop Ogee Pattern Design and Live Transformation: Hi guys. Welcome. My name is Dolores NASTRAN and I'm coming to you from sunny, Manitoba, Canada. So I'm here today to bring you another class that uses live transformations to help you create a repeating pattern. I showed you this technique with the live transformation Mandela's, as well as the scallop design class. So this is just another one in that same series. With this one, we're going to create more of a grid pattern, but we're gonna do an OG pattern. An orgy pattern is a really traditional pattern design type, but it can be really updated to do the kind of thing that you see out there right now. This class, I would consider more of an intermediate class if you have used Illustrator before, and especially if you've taken some of my other live transformation classes, this should not be a problem for you. I mean, as a beginner, you may struggle a little bit, but you can always slow down the lessons. I will try to give you the information in such a way that it can be broken down easily and digested. I've created a Pinterest board to show you all kinds of different examples. Are you ready to get started? All right, let's get to it.
2. Creating Live transformation Template: Hi guys. Welcome to less than one. If you didn't take one of my other two classes, then this class has been to help you set up your very first template. The really cool thing about these templates is that they can be used again and again. Are you ready to get started? All right, let's dig in two original classes where we did live transformations. We did a live transformation, Mandela and one of them, and the other one we did a scale-up repeat pattern. So you may have seen or been a part of those two classes. And if you have, this is going to be pretty straightforward for you. I'm going to go through the process of creating the template with you that does the live transformation. And we're going to create different versions of the OG pattern. Now I have to tell you, I've heard this pronounced both OG and AGI. So I looked it up and OG seems to be the correct pronunciation or gene. I've always called it my flip-flop. That's what I used to call it with my high school students. And you'll see why, because we're going to do a lot of reflecting when we're doing this pattern. So an orgy pattern is something that is quite traditional. You can see lots and lots of examples of these if you search them out on Pinterest, This is my board here where you can definitely go back and refer and see a lot of the examples that I have pinned. So it's basically an onion shaped kind of a pattern. It's very closely related to things like the quadrat foil. I can show you quadrat foils real quick. You'll recognize it's kind of like a trellis pattern that is very common, but basically it's built on the same way. So you'd be able to build both type of design or this type of design using the live transformation that we are going to be creating. So the template, it may take you half an hour to build it by. You'll be able to save it and use it over and over again with all kinds of different applications. In the end, I actually really like kids just past one here and want to show you, I like this. I mean, this one is really funky with the sort of gradient lines. There's one that I saw that IS diamonds. These are kind of a quadrotor foil. This one here and this one here. What quadrat foil actually stands for is for leaves, can't remember what language. So the one we're creating will be somewhat similar to this as you can see. So I'm going to show you how to create that real quick. And the real beauty of it is that you are only creating that very small amount of art. So this quarter here, I'll show you my art board and you'll see that that is all that I've had to draw in order to create this beautiful repeat pattern. Ok, so let's get started. I'm going to make a new document. I'm gonna use my usual ten by ten. And in order for this to work, we're going to create a rectangle for the background, might art board size and my pattern size will be ten by ten. So the only thing you need to do is make sure. Bigger than that, so I'm just gonna do it 12 by 12, and I'm going to use my alignment tools here. You can see that it's going to align to the art board. So all center that both ways. Now this should have no fill and no stroke because this will be what kind of records the entire transformation. You'll see what I mean in a second. I can close off these panels here. The two panels that I'm going to be mainly working with are the appearance panel. So I'm going to drag that out here and we're gonna make that nice and big and the layers panel. So let me move my document over a little bit so we can make room for both of these. It's important for us to have these two open, but it creates a new layer. This is the one that will record all of the transformations. So we're really going to be just working with this quarter of the arch board because it's ten by ten, I'm going to draw myself a new rectangle, square, I guess, sorry, five-by-five. So five inches by five inches. And this one, I want to align it to this corner of the art boards. So I'm going to align it with this. So Alliance the top and this aligns beside and this one I'm just going to create a guide with. So if you remember shortcut for creating a guide is Command F5. And now this will not print. That is currently on this layer here. So let's call this one the guide layer. I can lock this. It's not something that we're going to be really needing in the long run, but I like keeping it there just gives me that visual. Now to hide the art board, if you are want to do that, command Shift H will hide it. Let's keep it showing for now just to make this a little bit less confusing and also so you can see what's going to be happening here. Let's just draw something real quick. I'm going to use brush and make it a little bit bigger. I'm using my right bracket and I'm going to get a better, give it some color. X on my keyboard brings the stroke to the forefront. Let's just pick red and we'll draw a rough shape in here, which will be how you'll see the visual of the transformation going on as we apply these next few steps. So I'm going to select this and what I actually recommend that you do, I'm gonna delete all these unused swatches. I am going to have my layer that I'm using selected over here. And I want to make sure that it's targeted, so to know whether it's targeted, here's all my content. I am going to hit the circle here, okay, and you'll see that that kind of creates a little target here on the Layers palette. And it's important that we work with this entire layer because remember that rectangle that we've got at the bottom is what's going to really record our transformations. I'm going to use the appearance panel to apply all these transformation or to specify all these transformations so that no matter what we do in this layer from now on, will be reflected in all the quadrants of my ten by ten square. So the first thing I'm gonna do is click on this effects here. I'm gonna go to distort and transform. And this is the only one that we're gonna be working with and we're gonna go to transform here. So click on that transform. And what we wanna do is we want to transform the object. Remember what I'm doing? Getting the transformation for this entire square. So I am leaving this center point on the grid selected k. So I've not changed anything up here. Transform objects is the only thing that I have selected. I'm going to reflect it on the X. You can see that that's happening here. And I want to do that with one copy and I click. Okay, so I've got that transformation happening properly. So that's my first flip-flop. No. Make sure I'm still on this correctly targeted a medieval Back to the effects panel, back to distort and transform and choose transform. And yes, I am applying a new effects, so I click on here this time. Same thing, nothing else changes up here. But this time I want to reflect it on the Y, make sure that it's one copy. So just like that, I have a transformation template set out. And I think while we're in here, we might as well set up the repeat. So we have, we can see more than just this art board. We're going to see double the size. So let's go back to distort and transform back to transform, apply new effect. And this time we're not going to be doing anything with reflection here. We're going to be simply moving. So we're using this little area here. I'm going to type in ten inches over. I'm going to type one copy and say OK. And while we're at it, let's do a couple down here. So we're going to hit effects, distort transform, transform, apply new effects. And this time we're going to be moving it down. So we're going to use this vertical measurement. We're gonna do ten inches down. If you click on the preview, you'll see the repeat here, which is what we want. And we want to make sure that there's one copy of it. Okay, so now we can actually get rid of this heart here. Our entire template is complete and ready for use and as long as we work within that layer, so let's call this one artwork layer. Get rid of that heart. And it's kinda weird because you really get the feeling like you have to select all of these over here, but you don't have to. You just clicking on that one. I just noticed this is off-center, so at some point I must have accidentally moved this. So I'm going to select this backing rectangle, my transformation rectangle, and just make sure that that's lined up perfectly to the art board again, promises, shifted it at some point, but now it's all good. Get rid of all of this. I'm gonna save it. And later on, I will show you how to save this as a template that you can use over and over again. And so I think I'll save that for the next lesson. And I will see you there.
3. Creating a Set of Simple Brushes: Hi guys, welcome to lesson two. Examples that I showed you used a lot of handmade brushes. So that's what this lesson is going to be all about. I'm going to show you how to create the brushes that you can use for creating this pattern. Let's get started. So our template here is ready to go. Remember that it's really important to have this rectangle here. So that was the one that you really can't see unless you go to your preview which has command y. If you had accidentally deleted that in the last tap than just undo. And I want to show you how I went about creating these sort of lines that I have in my original design. So if you'd seen when I went to this document, this brush profiles layer, we've got a hidden, but here you go out like you take a look at it. I pretty much worked with just a couple of brush profile. So here are the brushes that I created. So that's this one here. That's this one here also had this one. I'll just drag it off and I'm going to show you how I created those. So I'm going to copy those. We'll take them into our new document here. I'm going to select all the unused brushes and delete. And so currently just the one, that first one that I actually used in here is in the brushes palette. I'm gonna go to my layers. I'm gonna create a new layer here called pressures exist, one lost my are there somehow, but I'm gonna go back to my brushes, layer paste. And we're gonna talk about these three brushes here. Brushes, as you know, are extremely simple to create. And I have showed you this in many different classes, but I'm going to take the time to show you these real quick because they are just really quick to produce. So I pulled an ellipse, I filled it with black. Oops, I didn't fill it to wind it. Let's fill it. And I'll zoom in a little bit so you can see what I'm doing here. But it's really easy to make changes here. If you use your direct select which you can hit a key on your keyboard to access, you can click on the individual points here. Once you have a point, clicked, an anchor points selected, these controls come up in the control bar and it's just as simple as that. Use this convert anchor point tool coverage to what they call a corner point. And you've created this profile. Now to add that to your brushes panel, you simply drag it and she was our brush hit OK. And here I usually change. I could have drawn it the other way, but I could just change the direction of drawing to follow the shape from the rounded and to the pointed end bots. The way it will be the most intuitive for me and I always hit tents here, so it I'd be able to color that brushstroke once I created. So let's just give it a test run, select it, and draw with it. And you can see the kind of line that I can create without. So this one would have a rounded and so you saw this one, which is this one that I created here. That one, again, very simple. Pull your ellipse, use your convert anchor point tool, and this time click on both. So you're going to select hits with the direct select E on your keyboard and you can get a point on both sides. So this would be different than the one that I've created. It's going to add this real quick just in case it's something we can use, change after tenths and, okay, and I'm kinda creating the brushes at sort of the size that I might be using them. You can make them bigger or smaller. You can make the exact same brush smaller to start out with like this by just creating a different version of it sold by was to use the Brush tool with this one. And with this one you can see at how my two thicknesses. So that's one of the ways you can go. I'm going to use this profile to also create this brush here. So I'll bring it back up to full size again. All I did here was at a point on both sides, top and bottom. And then I used my arrow tool to move. So you can count how many times you hit your arrow if it's moving in, increments smaller than what you want. Command K, change your keyboard, it increments here. Let's try it at one. And let's hit this five times. 12345. I could have done both. So I could select both of those top ones at the same time. Could have done that at the bottom. You can also just go by I. The way you create this profile is how your brush will look eventually, just to make it different from the one that I've used down here, I'm just going to even alter a little bit more and maybe bring that down. I can move these, I can select see home drag selecting over them. I can do that to line them up. This time I'm going to say align to selection and line them up to each other on both sides. See how that even did out there. And I can either shorten or lengthen edge based on what I do with this point here, I can make sure that these two are perfectly aligned. They would have been if they were if I hadn't moved them at all, they would have been just from the ellipse, the shape of the ellipse, and flattening out that inside a little bit more might even sometimes do things like round the end. So if I select that anchor point there you see I get a little widget for rounding. It's going to be just pull it and then I would have a blunt end brush. It's it's all up to you and what you're intending for your final design. Drag that one into the brushes, Pallet art brush. Okay, tense. And you've got a selection of brushes there, so we'll see which ones we end up using. I can keep this layer intact and just hide it. I'm going to actually lock it as well. And so it's basically invisible and it's just there if I need to go back and create more brushes. So now to select a brush and use it, I would, first of all, imports some swatches, maybe a current color group that I've used. I've actually in my swatches library in one of my previous courses, I went through the process of creating pellets for 2021. So I'm just going to add those. Click on each of these folders here. It adds your color groups here, Swatches, palette, and I can shut that down. So now I've got a bunch of colors to work with. I've got a bunch of brushes to work with and we can just get started. So in the next lesson, what I'm gonna do is show you how I went about creating things like this heart, some of these leaves, and then some really neat stuff with the blending tool to create this outside group of lines. Alright, so I'll see you in the next lesson.
4. Fleshing Out the Complete Design: Hi guys, welcome to lesson three. So in lesson three here we're gonna make use of both precious are also going to use color. And the last thing is going to be a really fun that use of the blend tool. Alright, let's get started. So overall, what we've got here is like what I explained at the beginning with an emoji pattern. It's like an onion sheep. I guess that's the best way I can think of to describe it. Sometimes these are full S-curves. Let's go back to some of these examples. Again, you can see that this would be kind of an S curve. This one would be an S curve. But I really want to work with something a little bit squarish looking. This is one I really like to, this diamond one, and that's something you can easily do with this template. And we'll talk about this one later, gives us is something you would do with a half drop repeat of your pattern rather than a grid repeat. But like I said, I want to work with that sort of squarish. Look at this one here that I had showed you at the beginning. So when you're looking at this, essentially, it is a pattern that radiates out to the corners. So I'm going to, I mean, really when you look at it, it still falls under that same definition. You can see that there asks happening if you go and follow the line this way. So that's what I'm creating with my pattern. If you look at the whole thing, you can see that if you started up here and went down and back around, you've got an S curve, then that reflects, and that's what creates our overall onion shape k. So I am working on this design, which I want as a coordinate for another set that I'm making. I've already chosen the colors for that set. And so this is the basic palette that I'm going to be showing you. So let's go to our document that we've been working with and let's get started so I can keep this line here. I think it's pretty, pretty good for what I'm trying to do with you. Now, if you want to get really smooth curves and things, you know, definitely you can do all of the same things that you always do when you're editing lines. I'm going to eliminate that point there. Use my direct select and pull to give myself and even smoother curve here. Now I'm going to start creating the lines that radiate towards the center here. Actually, maybe I'll start with the heart, since it's the biggest item. And the brush that I would use for that is this brush of the second one here on the list that looks like half of a heart. So let's select a nice pink color B for brush. And you've got your brush selected and let's go a little bit bigger. Let's try two points. So just so you can get your orientation here, draw that first shape. Know somehow I've selected it as a fill instead of a stroke. Ok, here we go. Now you can see the way I pull creates aligned from the Y to the narrow. Okay? So if you don't like that, you can go back to your brush, double-click on it and you can change that. I am going to leave it. So I'm going to undo that. And you can see from my original drawing that when I drew my heart, because we're in this quadrant, I'm drawing it from thick to thin at the bottom, going to the middle at the top. So I'm just going to put the basic line in there and we can make adjustments to it. So pure selection tool again. Last one, you can see that it's the reflection that creates the heart. So depending on how you want that shaped, you can change the curve of your line. The other thing you can do is experiment with the line thickness. So here I have it at two points. I'm going to try that 1.5 or that ended up being 1.51. Ok. Now I'm going to experiment with the curve again. And there's no right or wrong way to create this heart gets totally your call. What I like about this look that I'm creating here is that it's a little kind of folk RT, atoll painting kinda designs that people did back in the day. I still see a lot of traditional art like that posted. And I've got some words on Pinterest that you can look back at. By the way, this board that I was looking at is part of my greater surface and pattern design collection k. So all of these are categorize if you're looking at these, let's say o to me, inspired hadrons, which was one of the other classes that I did, the folk art pattern. You can see a lot of these little sort of reflected things happening in a lot of these patterns. So definitely refer back to this board if you're looking for reference, or of course you can just type in something like folk art tool painting to get some really nice examples of motifs that are created in that particular style. Okay, back to my design. And I think that, so let me look back here, hoping that I do that. Okay, so what I did with mine is I had the heart away from that middle reflection line. I had mine away from that middle reflected lines so that I could pull a nice line around it, soulless, centered about here-and let us do that second line. So that would be this light pink line. And you can see by the shape of the line that it comes to a point on either side. So the same brush or this brush here actually would work and we'll try 11 line and a later peak. I'm going to curl that one rate around like I did the original 60. I'll quickly, a pattern can come together when you're using these brushes. And that's one of the things I really like about creating these brushes. They're so quick and so easy to use and they help you really fill in a line or a pattern so quickly. So that is thicker than the line that I had there. I'm going to now stop referring back to that other one and just compose the way I see fit here. So 0.75. And now I'm not even going to refer back and I'm going to just go for it and do what I feel would look good on this side. Now what this kind of reminds me of two is peacock feathers. That could totally be a peacock feather design, maybe something for another course at some other time. Mr. tying in some of this yellow, I think. Oops. Select the line yellow. No, you can do so many different things. I mean, where do you start? I could give you so many ideas and look how quickly this is coming together really. Let's do a different line shape and see how we can make this work. This is going to be so different than my original example, but that's part of the fun, is being able to experiment and create these very different looks. With all of the same techniques, now had created this yellow, altering one of these colors. But I want to drag that yellow down into my color set here. So I have to use for other bits company the time-lapse a little bit of this as I move through my design here. Now if I wanted to create bigger circles here with this round brush. So I've just selected the basic round brush here. And I'd like to make some of these a little bit bigger. I can just use my right bracket key to increase the size. Now the last one I wanted to show you was the kind of corner that I created. I know this design is absolutely completely different from this one, but that's what kinda makes it fun. I do want to however, show you how I created these lines here on the outside. So we'll go back to my design here. This is going to be done using the blend tool. So I'm gonna create a line probably using this profile here. So I'm going to use a different color and I'm going to make it yep, that's swine 0.5 and we make it much lighter. So I'm double-clicking on the stroke up here, selecting a lighter color for want to save that color, I can drag it down here into my color group and create a line here. I'm going to make that one even thinner, point to five. I'm gonna make one over here in the corner. This one I'm going to move right into the corner. And now what I'm gonna do is use the blend tool with these two lines. If you've never used the blend tool before, it's kind of a fun tool that will help you create these lines between this one that we already have and this one, and it doesn't automatically. So if you go to the Object menu and down two, the blend tool, first thing you wanna do is go to the blend options. I'm gonna do a specified number of steps. So I think I could fit in probably three lines here between these two. And what the blend tool will do is draw those lines for me automatically. There are two different ways you can orient them. I think I'll try this angle. This is something that you need to experiment with to get an idea of how they work. This one aligns it to the page. This one aligns it to the path. So from path to path, that's the one I'm going to use when hit OK and nothing happens. You have to go town to blend again and make, I know the shortcut is Command Option and b. So I can hit that Command Option B and you can see that my lines in between are automatically drawn. So it's not neat, really quick way to do a bunch of lines to fill in an area. I've seen this used absolutely beautifully to create what looks like liner block printing, liner block cutting. I knew this, how to do this for a long time, but didn't realize that you could actually change the color of one of them. And the Blend tool will automatically do the step between the two colors and create some intermediate colours are tense. Also, you can see that I can alter these lines and then my entire angle of lines adjusted. So that's all happening automatically. So that is a really cool function. If you experiment with this at all, you'll, you'll definitely be blown away. I will show you though what happens if I change this color. So let's what color should be changed his two, Let's try changing this to that darker beige. And you can see now that what's happened is it's creating all of the steps in-between the dark beige and the light beige. You can do a completely different color and it'll do a different kind of a stepping between the two. So it's just doing all of that calculating behind the scenes. You don't have to do any of that figuring yourself, and I really love that effect. And when you really look at the whole pattern is not lovely how it creates that for you. Let's hide the art boards and let's hide the guides. What's the shortcut for hydrides commands, Yep, command semicolon. But look how pretty that is. So once we do this area in here, we're going to have a really pretty patterns. So I'm going to time lapse, but do that part is I'm just drawing that one in selecting this one so that this line that I draw is the exact right color. Pull out RID up. And I'm going to try to pull that right up. I think I'll go a little bit thinner with that. So you can either click on your strokes palate here, or if you select the whole line, it'll come up here. I'm going to try this out. 0.15, that 0.25. as well. I'm not sure how I want the shapes, so I'm going to do it real quick. So I'm selecting both of these lines. Remember the shortcut is Command Option B and number of steps. I'm gonna keep the same for now as the top corner. And let's just see how that looks now it may be that we'll want to reduce the number of steps or change some of the positioning of the lines so that we don't have this dark area kinda being created. So whatever I do, if I delete anything on the lines, the blend still remains in effect. And it's whatever I do to those two outside lines, this blue one and this inside one, that alters the way the blend is happened. I'm thinking of that. I want to undo, then go back and change my blend options to, to consent of three. So that's the number of lines that will be drawn in between. So let's do that at one's a little bit more in keeping with what I have here. And I'm going to make adjustments to some of my other lines to make this work. So I'll just time-lapse out for you real quick. Now, always keep an eye on what's happening here with your overlaps and whatnot, you can see that anything that goes beyond the line creates kind of a weird effect that could be exactly what you want. So you can work with that. Or what we can do is create a clipping mask to prevent anything going beyond the art board. So I think I will show you that in the next lesson. This lesson is plenty long enough for now, and we're gonna go through and do some perfecting In the next lesson, I'll see you there.
5. How to Create and Use the Clipping Mask: Hi guys, welcome to lesson four. So sometimes it's really easy to work within the grid. But other times it's nice to be able to go over the edges. The best way to do that is by using a clipping mask. So this lesson's going to focus on creating that clipping mask and all of the pointers that I can think of to help you get through it. Alright, let's get started. The clipping mask will help you deal with any of this overhanging stuff that you really don't want to have repeating in your pattern. So we're gonna go back to our layers palette. We have to make sure that we are in the artwork layer. And I'm going to create a rectangle or a square for this corner that is the exact size of our pattern. So I'm going to grab the Rectangle tool, which is M on your keyboard. I'm option clicking and look at that. This five inches by five inches, which is what I need exactly. It'll I'm going to say, okay. You can see that's completely messed up everything in here, but this is the rectangle here. What I want to make sure I do is align it to the art board, align it to the left and to the top. And I gotta make sure that there is no stroke or anything on that particular square and it has to be on the top of the stack here in the artwork layer. Now what I wanna do is create the clipping mask. So I gotta target this whole layer. You can just go to the flyout menu here and make clipping mask. And now you can see that everything is neatly cut off exactly where our square, our original square, and our original artwork is. Okay, so now that has dealt with anything that's overhanging. So we can then do, as I've done here, which is to hold the lines beyond the edge, I'm actually going to lock this cookie mass. I can close the Layers palette. Now, you can see that now these lines can be pulled off the edge and you can see that land in nicely to create this really cool sort of effect. Let me hide my art board so you can see. So it's like this area in itself has become a really valuable part of our designed to. So you can definitely play around with everything that you've got going on there. Now, these lines, for example, could also be pulled in EC, watch this area here as I do that, you can see the, the effect that it's having. Make sure you've got the direct select tool so a on your keyboard so that you can move individual points. But I think that's pretty neat how this is all kind of coming together. And you can see here those two lines are beautifully aligned. So what I would do is grab that endpoint on both of them. I would hit Option Command J, which gets me to this average dialog box. I want to average them both a one on top of the other. I say, okay, and that lines them up beautifully. So if you go over here now you can see that they're beautifully lined up. So think about your design and how you want it to look. You can still go and do things like change the line thickness. So let's select that whole line. And this comes up here, and let's do a little experiment here just by doing 0.5 instead of 0.25, which is what I had. You can see how that affects the overall design. And you can see that the blend tool does a great job of tapering or reducing the line thickness here in accordance to what you have on this first line. Now let's say you wanted to change this. Now you're looking at it and you're thinking, I wish I had done only two lines in between. You can certainly go in and, you know, you've got this blend. You can go to objects, blend, and here hit release. Okay, so if I release, everything goes away. I can go back down to the land options. The two with what we did for that last one. So let's just leave it at that and Matt, Option B, and now I've only got two lines in between. So you definitely use your judgment. You know what you want your design to look like. Of course, you are the boss, you are the artist. You can decide if you want to add any other motifs or make any changes to your design. But essentially that is the amount of steps with the workflow for your process that you need to go through to create something like this, I'm gonna make some adjustments here. I'm gonna time-lapse it. And then we're going to talk about the next step, which is creating our repeating pattern tile that we need to create. So here I go. No, I'm doing that blend. Not sure I want that amount of steps. So then I can just go back into the planned here. I'd options and I can change that again. So I think I'll experiments you what one looks like, a kinda like that. Now sometimes, you know, you've created the bland or what you really wanna do is altered this path in the middle. If you did ever want to do that, then what you have to do is expand appearance on this and you have to go right to the blend under objects and expand. Then you have that as a separate brushstroke. It's no longer editable as a bland, but you've got the control, which is sometimes what you need. Remember now we've got that clipping mask so we can go well beyond the edges if we want while we're creating our flip-flop design, if we wanted to use it as a means to smooth out curves and so on. Now this curve, I would select this and I would use my simplify command, which is, I've got it a shortcut command, period. You can find simplify also under the object menu, you can go in and adjust the settings. I'm actually pretty happy with four. I could go to the maximum here, that would give me six points. Or I could go to the opposite extreme and have less. It's up to you. I like having really just the least amount of points when I'm doing a curve like this so I can really control it. So I'm going to hit OK here. I can see that this is a 100 here. So what I'd want to do here is hit this to make a smooth point. And that gives me a much easier curve to work with. And the more and more I look at this, the more To me it reminds me of a peacock feather. That's something I would definitely think of creating with this mean, let's look at Peacock patterns just for fun. He caught surface pattern repeat is a good reader search it. I'm gonna do peacock feather and that would be so fun now to use this template as a way to create your peacock feather. Maybe that's what we'll do for our project. All right, back to work. I really like how the clipping mask is giving me such nice clean edges on everything. Now if I wanted these to perfectly align along the top here, I could select all of these points here and I would hit a line and that would have them behaving, narrate, what do you think? Have we accomplished what we were setting out to do in this lesson? I think So. Let's try something in here. That's the fundamental. So that would be this corner. Lets try to circle. Now, I should show my guides and maybe what I'm gonna do is hit the ellipse instead so that I can line it up right to this corner here and we'll fill it instead of stroking at what color do you think the pink picking maybe that LO What do you think of that? I'll pick, I'll leave that for now. And maybe one right here, two guides again so that I get that lined up. When I should have done here is a five-inch cried. So what I could do is show my rulers demand are shows the rulers. I can just pull a guideline to the five inch mark command semicolon shows that line to me and that allows me to line up, break to it, hide my dartboard again, hide my guys command semicolon. And yeah, I think that has turned out absolutely beautifully. So in the next lesson, let's create our pattern tile from this. Alright, I will see you there.
6. Lesson 5 Creating the Pattern Swatch: Hi guys, welcome to lesson five. So in this lesson, we're going to create the actual pattern swatch. And then we're going to use that pattern swatch. Let's get started. All right, I think I am ready to export this as a pattern swatch. I'm sure I could do a ton more to make this even better. But I think for the intensive purposes of this class, this will be adequate for the most important thing to do. Let's look at our layers palette here. We're going to do this repeat pattern as a perfect square because it is a grid. A grid repeats. So we're going to be using a rectangle that perfectly matches the size of our art board. Not going to see you before doing this. I haven't seen you for a bit just to be sure I've got it all seemed safe. And I'm going to create a square ten by ten. Now we say rectangle could help actually no, fill on it ten by ten. And of course it messes everything up and I'm going to make a new layer. I'm gonna move that rectangle to that layer. And I'm going to make sure that it is perfectly aligned to the art boards. No field, no stroked, and I'm ready to go. Now the important thing to do here is to expand that chatter that I have going on in the background. I personally like to keep everything intact in that artwork layer that I'm working on. So I'm going to duplicate it by dragging it onto the ADA Layer icon at the bottom here. So you can see here I've got a perfect duplicate. I'm going to lock that original to make sure that nothing happens to it. I'm going to select this layer. So you can see I've got that selected. You can actually drag that rectangle into it after, but I'm going to expand the appearance of it first. So I've got everything targeted. You can see here I've hit this little target. I'm going to deselect that rectangle, which was the big transformation rectangle that we had in the bottom that pretty much always is at the bottom of your stack here so you can de-select it the way I did, or de-selected here just by clicking on this circle and then go under object to expand appearance. And everything has been expanded and is ready to be made into my pattern swatch. So I'm going to drag that ten by ten square in there. We're going to select everything. And this ten by ten will be what defines the pattern. Once I've expanded appearance on it, I also go back and hit expand again and you'll see what happens. This will expand all fills and all the strokes. Click OK here. So each of these should be now a shape. Now in a case like this, where there are two parts to an object you could select and use Pathfinder to combine. One of the advantages of doing that if they are overlapping is that they will then be easier to simplify. Because my next step is going to be to simplify so that there are a lot less points because you can see here there are a lot of points on all of these that could potentially slow down my computer considerably Actually, if I use this as a pattern, so I'm going to select all and want to make sure I've got everything included in my select and drag selecting over everything here. I really only have to worry about this corner because that's where my rectangle is going to be. Hold down your Option key while you're dragging to make sure that all the paths are selected, all parts of the path are selected. Now I could hear my processor fan has come on already, which is telling me that Illustrator is really working hard to do all this processing. So what I'm gonna do is Command period, to access my simplify command, let's just take a look at how many points there were originally. So in this pattern swatch, we would have had 3 thousand points at the setting that I have here, I reduced it to 533 points. Let's see what happens as we increase this. Even if we go to a 100%, we're not going to hit that 32, but it's going to give us really good representation of our original shapes. This is something you can experiment with trying to figure out what really works for your pattern. I think for mine, I was fine with it even at 600 points, which was 84% simplification. So I'm going to hit OK here. And this, the square is now simplified sufficiently to make my pattern tile. Now that I've got it all expanded, everything is ready to go. I've just pulled this Layers palette off so that you can see me adding my swatch. I'm gonna get rid of my original test swatch here. Now this ten by ten rectangle I'm dragging into. There I go again, calling it a rectangle by ten by ten square, dragging it into the artwork layer onto the bottom. Now I can target that layer and you can see everything is selected, both the square and the art world. I can now drag it into my swatches and my swatch has been created. So let's just do a quick test over here. Drag my layers back here again. And it doesn't matter what shape you draw, but now you can see how beautifully my pattern turned out. So if I wanted to change the scale here, I would use Command Option Shift d, which is my shortcut into the transform each, I've got that at 30% here. I could do more or less whatever I want, transform the pattern. And you can see my entire repeat there. Maybe that's a bit too smallest. Tried it 50 or even 75. So tada, another project completed. So in the final lesson, what I'm gonna do is just show you really quickly this pattern on a mock-up or two and then we'll wrap up. Alright, I will see you there.
7. Lesson 6 Half Drop and S Curve Repeats and AlT File: Hi guys, welcome to lesson six. So at less than six here I just want to show you the use of our pattern template to do both a half draw and an S curve. So we're gonna do that. And then I also want to show you real quick the use of the recolor tool. Let's get started. Before this class is over, I said I would show you how to create a half drop repeat. And I also want to show you this really cool S curve kind of a repeat that's really similar to a lot of the examples that we looked at when we were on Pinterest. So I'm going to show you how to make those changes just using the appearance panels. So this one here is basically the inside of this original one. And what I'm gonna do is just show you how to alter those appearance panel settings to make it work. I eliminated some of this outside stopped just to make it easier. It still has all of the same appearance panel settings. So let's open that up and take a look. I'm going to call this 1.5 drop. So I just duplicated that layer, the original one that we had, a nice wall height those and hide those temporarily. And so we're gonna go in and we're going to affect the settings in the appearance panels. So in order to do that, remember you have to target. Now, did you notice that before I had that layer targeted, the appearance panel didn't show those transformations. You'll see that pop in here as soon as I hit the target button. Now you can see everything here and all of the different transformations. So our first transformation is the Reflect on x, which is gonna give us that repeat side-to-side. And then this one was the vertical reflect. So those two are fine. What we wanna do affect the positioning of this one here. So I've eliminated a couple of the things that weren't going to work with my design, that darker blue line that was in there and the effect that we had created with the Blend tool. So I've taken those out and what we need to change here in order to make this into a half drop is we need to change the move. So instead of being horizontal ten inches, we would do horizontal five inches, and we would do vertical five inches. Alright, so that's how you create the half drop. And of course, if you wanted to have the duplicate of all of this, you can do the same thing again, 55. What I would do is like this and then add an additional transformation that just moves this whole group. You repeats this whole group a couple of times. So in order to do that, I would move it vertically, the ten inches. And here instead of just one copy, I would put something like three. Now you kinda get the full effect and you know that you'd be able to extract a ten by ten tile for your Swatches palette later on. Okay, I mainly like doing this just so that I can visualize it. It's pretty much what the pattern maker tool dies, but this way, you don't have to use the pattern options at all. You're visualizing everything right here on the art board. So that's that one. So let's hide that. We're going to show this one and this one, I will explain. It's pretty much the same idea, except this time what I did is I worked with this area. I'm gonna show my guides because I had created guide, the five-inch march. So I made Five-inch rectangle with within five inch square, within that ten inch square, align them to the upper left hand corner, just like we did in the other lessons. Let me just target this and then you can see all those transforms. So let me just get rid of these so that I can show you how I did them. So I'm just gonna get rid of these two because these two are exactly the same as we did last time where we had the reflect on that one, and then on this one we had the reflect y. That's our flip-flop again. Okay, so exactly the same as before. And this next move is the one that's going to give us the continuous S curves. So we're going to apply new effects. This time we're going to move it. We're gonna make you bucket straight across. So we're going to move it ten inches across. So ten on the horizontal and 0 on the vertical. We're gonna make the one copy and click OK. And then we're going to, so that's this one here. And then we're going to do the same thing again. And we're gonna do 0 on the horizontal, can on the vertical. And here you can do one or two or whatever amount of copies you want to be able to see all at once. And that's given us that beautiful s-curves. So I will hide the guides and you see how that works. So again, really if you wanted to alter anything here, you're still working within this five inch square here. The scale of this pattern seems a lot bigger than the other two because on the other two would kinda worked within the five inch square. But you can see how fun this might be and this will be the one that would give you more of the effect of what these kind of shapes are giving you. And it really just is how you compose your shape and your artwork within that shape. That gives you the really cool and interesting patterns. I'm going to experiment with this one a lot. Eventually. It'll be on my to-do lists, but I want to definitely create some that have these really light-colored motifs in the background, experiment with different colors. So something like this, you know, you could do pattern fills. So you could draw a solid colored shaping behind here. You could do that just with your pen tool. Again, just in this corner here. No stroke. Let's fill it with one of our colors. I'm going to pick up light yellow. This one might be a little bit too late. Like this. This would be something that you'd have to send to the bag, but also probably create clipping mask four. Let me just pull that down and see if that'll just solve the problem. But you see how that, yet that works perfectly. And you can see the different effects you could get just by recoloring that. While we're talking about recoloring, let's do some experimenting with the recolor tool. So let's just select this particular one here. It's always so weird I feel like I have to select this entire thing, but technically all I have to select this, this corner. Let's go into the recolor tool. And I've used a really limited palette here. But even with that, I can just scroll through the colors that I have here. And actually that was really cool you with a block. I don't know how I ended up with black on that article back and check but had no black in my original design. But, oh, well, it's kinda cool to see it. I can click on this right now and just change the color. Let's aim for just agree. Bg gray. So that's really fun. You can go through and use this to just randomly change the color here. Actually just chose another one of the color groups here, this top one. So just have some fun and experiment with this recolor tool. I just wanted to show that to you real quick and just give you an idea of the type of things you could do. So you've got three different versions created with essentially the same brushes and lines and motifs. And you've got three really interesting effects, but you've got them in really contrasting patterns. So then those templates are something that you can save as templates for further use. My, the method to do that is to leave as a template here. Generally what I do is first of all I do a Save As so a duplicate of the whole file would probably due to duplicate here because I would want to save all three of these different types of repeat. But let's just, I'm gonna get rid of these two. So this one and this one, I'm going to show my art boards again, my art board over here, Select All over here and bring that over and then make sure that I've got aligned to art board. I would make sure that I have the two rectangles, the one that is the clipping mask. So you see that here and you see the transformation rectangle at the bottom here. Do them one at a time. So I'm selecting it. You can see here it's targeted, align the sides, Horizontal Align Left, and vertical aligned top, and then do the same thing with this one. Make sure it's targeted, not selecting the wrong one there, sorry. So make sure you've got the proper one. And it's gotta be that transformation one that you did in the first place. Make sure that it is aligning to the art board. This one you can do centered like it was originally, I would eliminate all of the artwork layers you see here that I had these above the clipping mask. So it wouldn't it wasn't actually clipping. So if there had been a problem with overlap, that would have been y. I'm going to select all of these artwork layers and eliminate them. Now this will be the transformation. Sometimes I actually type out some instructions for myself. For example, what I might do is type O, S curve. This curve template. Sometimes I do just actually have one graphic in there just to remind myself of where to work. And this really helps me just to remember what I need to do and where I need to work in order to create the pattern that I'm after. So then once you've done that and you're ready to save it as a template. You just go under File, Save As template. This is going to save it with the AIT extension you see here. And this is my templates folder that is just resident in my, there'll be illustrator folder. I personally preferred to save it into my main pattern design. And I've got a folder called transformation templates for live, live transformations. So rate here and here, I correctly name it to whatever that is. So that's the S-curve master. Click OK. And now anytime I want to use or create something like that, this is available or my use without me having to go through all the steps. But believe me, it's worth taking the time to do these different templates because you will use them often. Alright, so I will meet you in that last lesson. We're just going to wrap up and take a look at the mockup. See you there.
8. Outro and Conclusion: Hey guys, you did it. It's not fun. It's always great to get to the end of a project and just really see everything that has come out of it. I would love to see you use this template to create a few more patterns. Why don't you check out my Pinterest site. That's my site Dolores art slash Loris, non-aspirin. But I also have another site called teachable worse, desperate. So between those two, I have a lot of artists resources for you. Check out my OG board. As always a light to my course with a nice set of mockups, I would just love to see what you have come up with. You can check out all of the resources I have there and please check out my website. I've thought it back up and operating and you can join my mailing lists there to get some of my blog entries and other little things that I offer. They're just come and see me. I'd love to see you there. Alright, so take care. I'll see you next time. Bye for now.
 Delores Naskrent, Creative Explorer