Transcripts
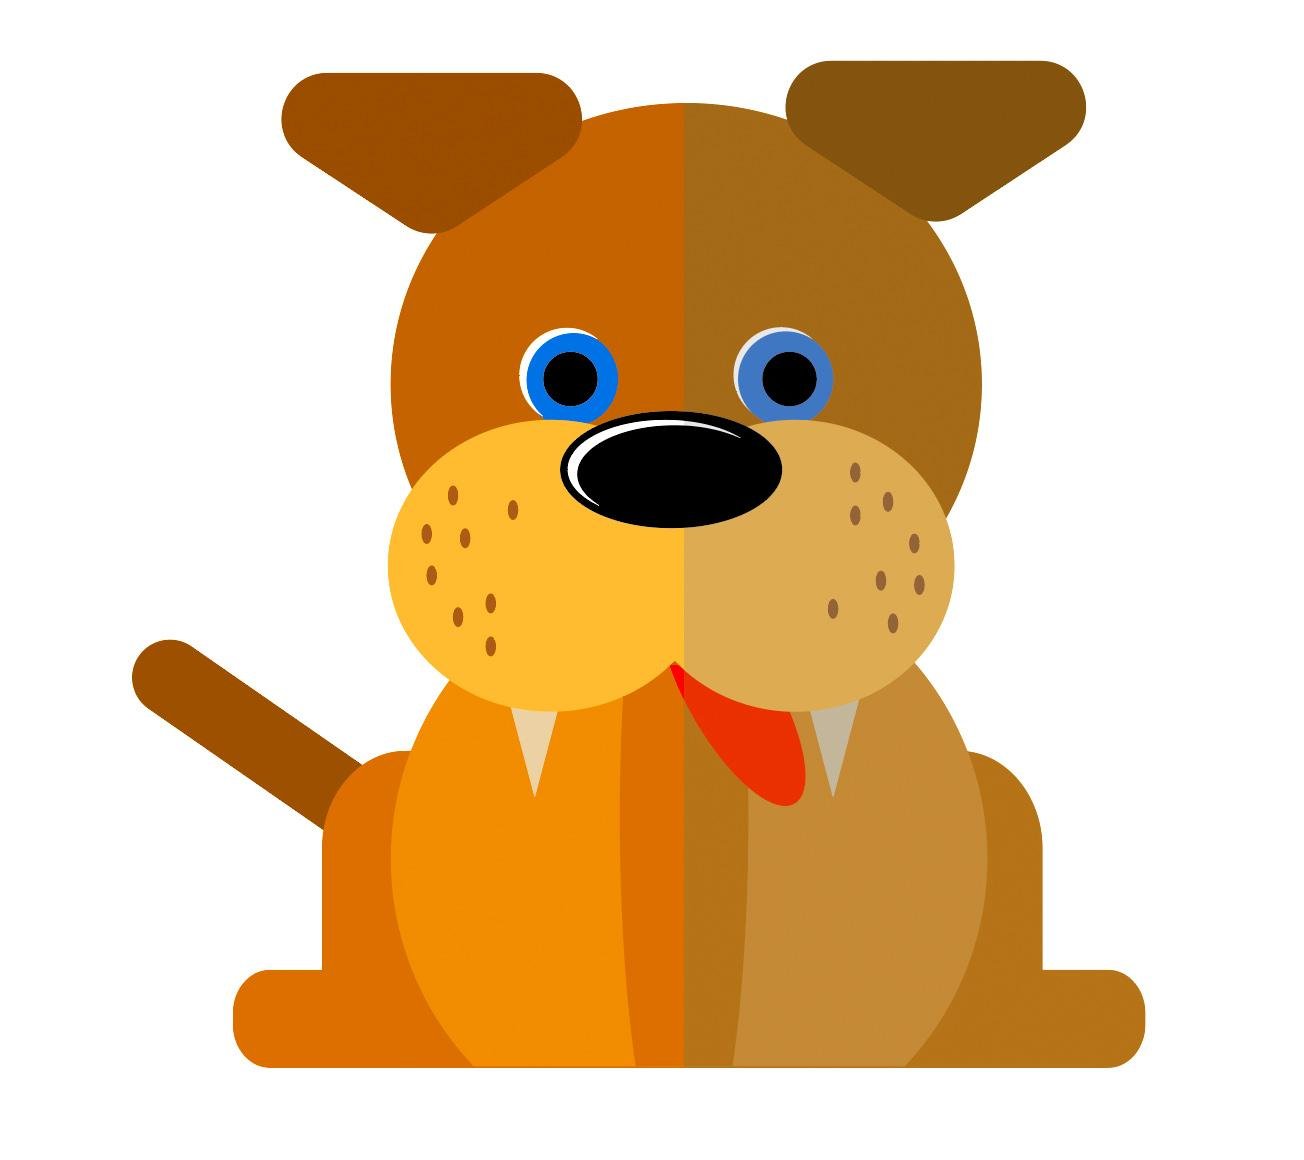
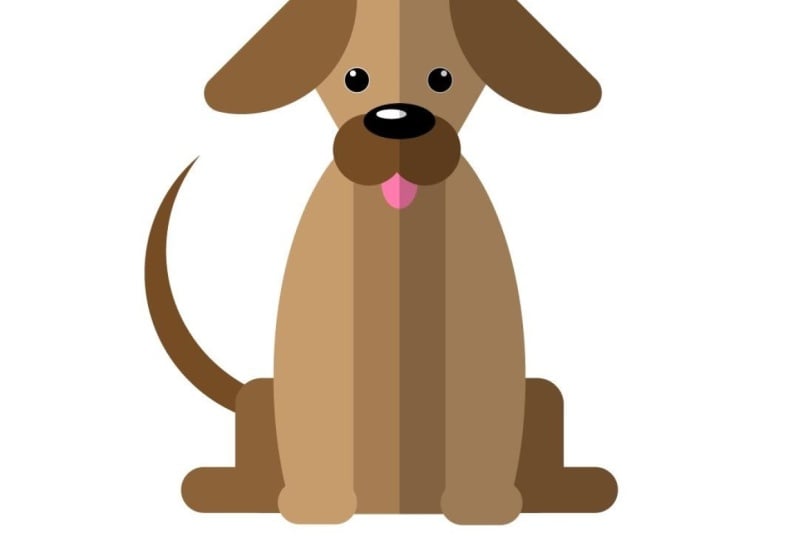
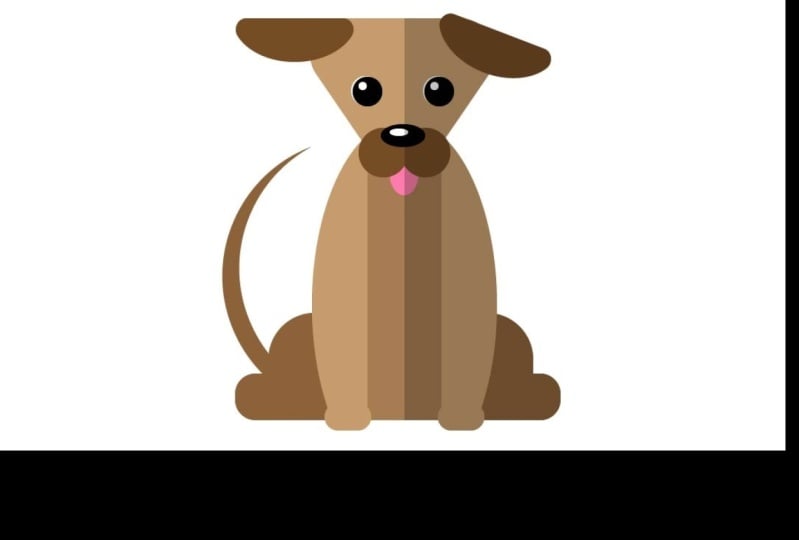
1. Flat Art Characters - Intro: Did you know that there are 1.2 million puppies born
every day in the world? No, neither did I. Anyway, I want to show you how
to make another one. And we're going to
be using some really cool tools in Illustrator. And, of course, once
you've done this one, you'll be able to
do all sorts of different puppies
and cats and well, any other flat
characters as well. Let's get started right away.
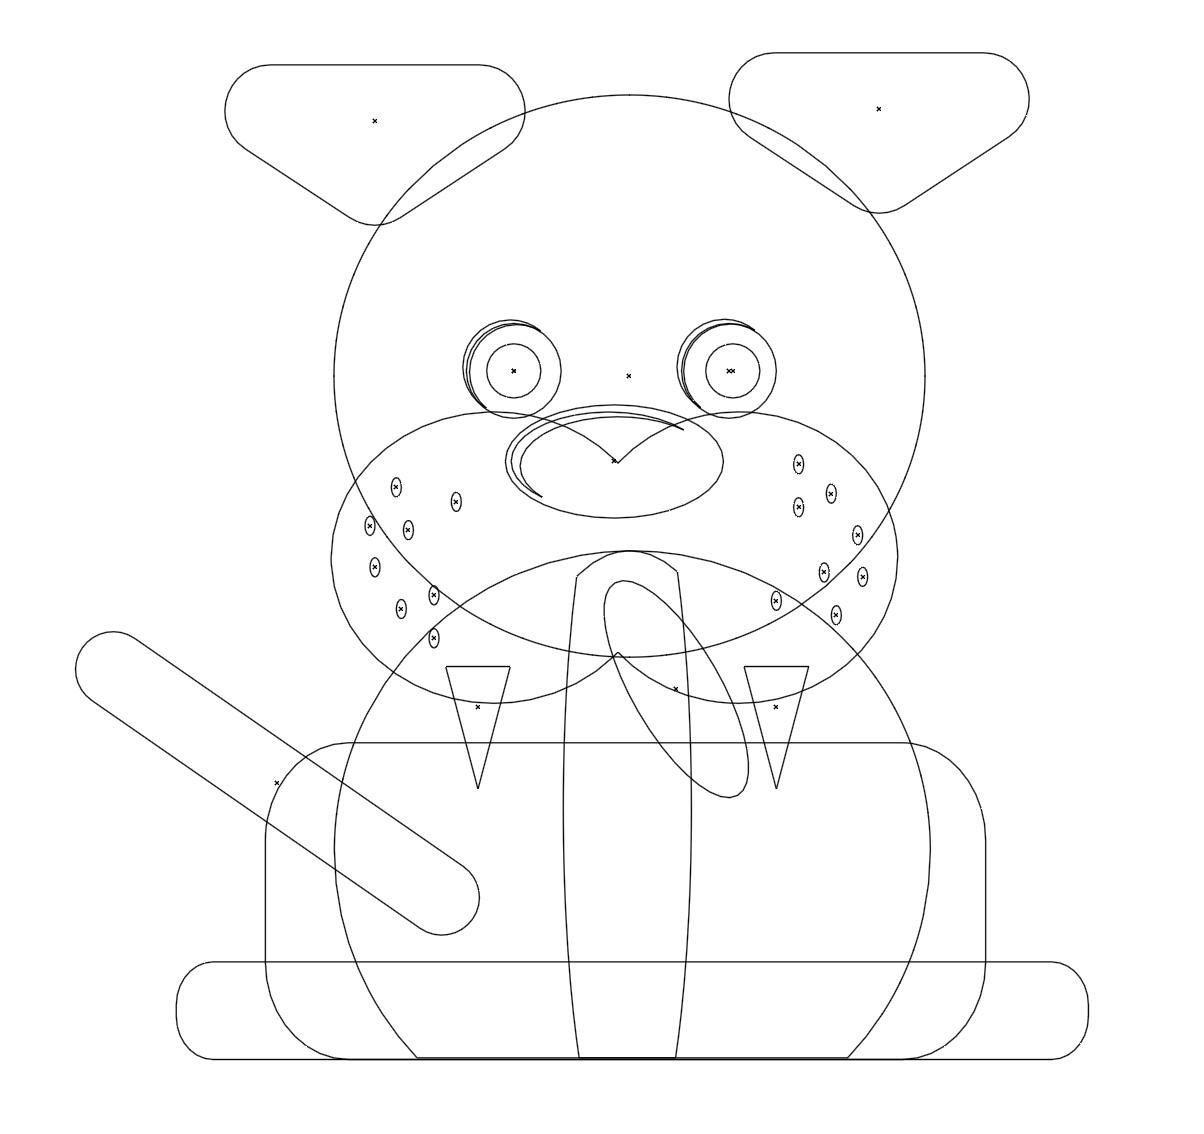
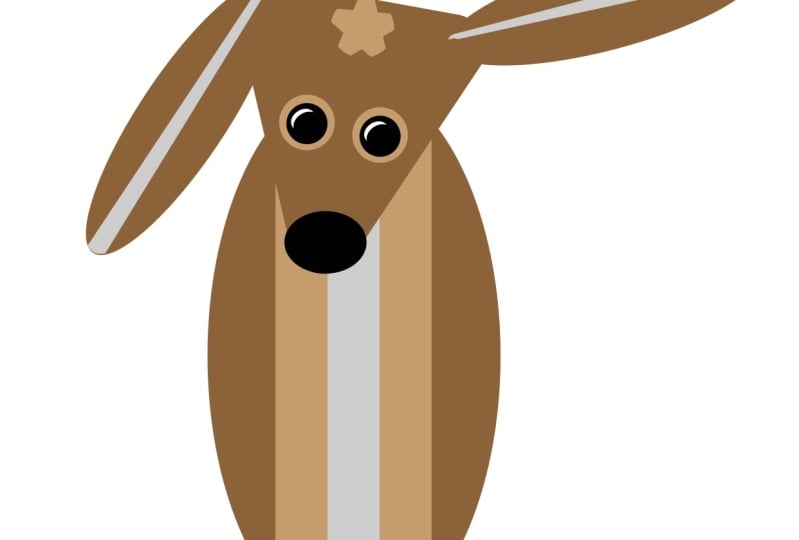
2. Create the Feet & Choose Colors: In order to make our
little dog like this, we're going to start
with a new document. So I'm going to go to File New. I'm going to go across
to web to choose the 1920 by 1080 pixels. Now, I want this to
go to Instagram. So I'm going to change the size, the width in here
to 1080 as well. So it's going to be 1080
pixels by 1080 pixels. And I'm going to
click on Create. So I'm going to go
to the Window menu. I'm going down to my swatches. Over here, here are my swatches, and this shows all the colors that I've got that I can use. Now, you can either
view the swatches like this or as lots of
little squares. And we're going to
be using some of these brown colors in here. So if yours doesn't look
quite the same as mine, just click on those
buttons until it does. Now, let's start off by making the feet and
the legs of the dog. And we're going to
use a simple shape. We're going to use
a little rectangle. And I'm going to click and drag to make a rectangle
at the bottom. This is going to be
for his back feet. And I'm then going to go to
these little dots over here, and I'm just going to pull
slightly on the dots. And you can see how
that rounds off the corners over there. So I'm going to have rounded
corners for his feet. Now, if you've made
it the wrong size, just go back to the black arrow tool and
you can grab the top and move it up and
down until you get it to what you feel
is the right size. I also want to make it brown, so I'm going to start off with a fairly dark brown
over here for the feed. Now, let's make another one
for the legs, the back legs. So same again, I will
use the that same tool, that little rectangle tool. I'm going to click and drag
another rectangle in here. Now, you can see my
rectangles are not quite in the right
position over there. So if you use the
black arrow tool, click and drag to
select them both. You can then go to this little align option
and click the center align. It's called Horizontal
Align Center. Click that and it will align
them both up perfectly. And lastly, I'm going to
click on this square, go to that corner and just put it in to round
off the corners. You can see the overlap so you won't actually see that
bottom one in there. Now, these have
both got a stroke, a line color around the outside. If we select them both
and then go along here, you've got the fill color
and the stroke color. And you can do exactly
the same thing over here in the appearance. Click on the stroke itself. So it's on this little one here, that brings it to the
front and choose none. That's the white square with
the red line through it. And that will just remove the stroke from around the side. So there we go. We've
got the back legs done. Have a bit of a go with that, and I'll take you
into the next area.
3. Create the Body: Anytime if you look at your shape and you think
I need to change it, you can click on these
individual shapes because I think the
back leg should be a little bit taller and you
can drag them up like so. Let's make the body,
and the body is going to be an elliptical shape. I'll go to the Ellipse tool. I'm going to draw in an
elliptical shape over here. Now, it doesn't really
matter about the color. But what I want to
do is I want to put the ellipse down here over
the bottom of the dog. Let's make it a
little bit taller. Oops. If if you make a mistake, just use Control Z on a
PC or Command Z on a mac. We'll just pull that
up a little bit. Like so. I'm going to
pull it down to there. Now, the first thing
that we need to do for the body is to get rid of
this bit at the bottom. So what I'm going to do is
I'm going to use a tool which allows us to cut shapes
up or add them together. I'm going to go and first
of all, find another shape. So let's just do this
on the side here. So we'll move that
over to the side. I'm going to make a
little rectangle and put the rectangle over the
bottom of that there. Use the black arrow tool. That's the tool
right to the top to click and drag to select
both those shapes. So I've clicked and dragged. I've touched both those shapes. You can see as I click and drag, touch both of those over there. And then we go down and we
find this little tool here, this is called the
Shape Builder Tool. And it's kind of like a little arrow with
two shapes behind it. All I need to do now you
can see there's a plus on it is to move onto
the shape here, hold down the Alt or the option Keys option on a mac
and Alt on a PC, and you'll see the
plus turns to a minus. Now, if I click and
drag over those two, it will just subtract
them from my shape. So then that's going to be the body of the dog over there. But I still want to make this a little bit more interesting. So I'm going to go over here. I'm going to do another shape. I'm going to put this shape over the top of that one over there, line it up roughly. I'm going to select
both of them, so use the Black selection tool and click and drag
to select both. And then I'm going to go along
to the Shape Builder tool, hold down the old key, and subtract that
bit and that bit. Now, what I've actually
got here are two shapes. This shape here, oops. If you do that and
it goes a bit weird, just double click to get out of what's
called isolation mode. You got this shape here and
you've got that shape there. So this shape, I'm going
to make a lighter brown, and I'm going to move both of those back on top of the dog. Now, these are
actually the legs. This back one here's the leg, so let's make them a
lighter still like that. Lastly, we want to put
on some pores down here. So I'm going to use
a little rectangle, draw in a small rectangle, use the same colour as the legs. I'm going to zoom in for this. So it's either on a
Macts Command and plus on a PC its Control
and plus to zoom in. And you can see here
I can just grab a corner and round that off, and then I'm going to pop that over there as
his front foot, we might make it go down
just a little bit like that. To make a copy for
the other side, hold down the Alt or
the option key and drag that across over to there and pop that
on the other side. Like so. You might need
to move it around. It might actually even look better where it just overlaps a little bit like that over there. Command or Control minus
to zoom out again. That gives us the basic
body for the dog. Anyway, have a go with that. If you are absolutely
new to Illustrator, run through this example two or three times until
you get what to do, or just go through halfway
through the video, stop, try it out a bit
more, stop, try it out. Anyway, have a go with that.
4. Make Head & Ears: Let's make the head. I'm going to actually go over
here to the left, and I'm going to go down
to the polygon tool. And I'm going to just
click once over here, and that brings up
the polygon options. And I can then change the
number of sides to three. If I click Okay, you'll see I've got this little
triangular shape. Now, that's going to be
the basis of the head. So I'm going to go back to the black arrow tool at the top. I'm going to make it bigger. There. It's the wrong way round. I want it to be actually, I want the pointy
bit at the bottom. So if you have a look
at your properties, you'll find that there's an
option here to flip things. I can just flip it
that way round. Then I will grab
this little dot over here like we did with those
squares and drag that in. That'll round off all of
those corners like that. If you want to make
it bigger, grab a corner and you can size it up. I think I'd like a
nice head like that. Big one over there. I think that's
working quite well. Now, what about the ears? Well, the ears, I'm
going to use an ellipse. So I'm just going to draw in a little elliptical shape here. I'm going to get another shape click and drag
that over the top of it. Use the black arrow tool to click and drag
to select both. And then down here, as we did before, I will
use the Shape Builder tool, hold down the alter
the option key, and click and drag
across them to get rid of the other bet
that I don't want. Now, you can see there aren't any dots in there
to round them off. But if you go to the
white arrow tool, now there are some dots, I can just pull them in
to round off the ears. Now, we're gonna have one
ear over here like that. Let's change the color
and make it a bit Well, I think we'll make that
quite dark over there. And then I'm going to
make the size correct. I'll just pull it
out a little bit. Then I'm going to hold down
the alt or the option key. I'm still on the black
arrow tool, by the way. Hold down the alt
to the option key and just drag a
copy of that out. This one's gonna be at an angle, so I'll move just off
the edge over there, click and drag
together that sort of nice little puppy ear type of look going on
there. Try that out.
5. Use Ellipses for the Mouth & Nose: I'm going to take
a little ellipse, and I'm going to draw in
the tongue over here. I know it doesn't look much like a tongue yet. I'm going
to make that pink. I'm going to take an ellipse, and I'm going to make
a perfect ellipse, so perfect circle. So I'm going to hold down the
Shift key while I do that. So there's one side. Let's give that a
color over here, and I'm going to use
the black arrow tool to move it into the right place. I'm then going to
hold down the Ot or the option key and
make a copy of that. And then we're going to
take another ellipse over here and just draw in another shape which
is going to be for the nose to make the
nose black like that. And you can change
the colors if they're not light or dark enough, go in and adjust the
colors in there. Once again, have a go with
the nose and the mouth.
6. Make the Shiny Nose & Eyes: Made a little white ellipse. I've done tau tears that you can see it and I've
filled it with white, and I'm going to
pop that on top of his nose to give him a
shiny nose in there. I think that's
looking quite good. And for the eye, I
made a white circle, then a smaller black circle, and then a very
small white circle. I've just moved them and
put them all together, and that gives me the eye. Then once again, I
can make a copy of those and place it on
that side over there. I think that's in
the right place. Let's just move it
along a little bit. You can place these
wherever you want. Really simple one that one, have a go and make
your puppy some eye.
7. Create the Tail With 2 Circles: The tail. I've made
a big circle here, and I'm going to hold
down the alter the option key to make another
circle over there. You can see they are just about or very, very
close together. I'm going to select
them both and then use this little tool here. Remember tool for
cutting things out? Well, I'm going to
hold down the old key, click and drag to subtract that, and I'm going to move
this over to the puppy. Now, lastly, I want to move
this behind the puppy, so I'm going to go to object, arrange, and say
send to the back. And because it's selected, it
will send it right the way back behind the
puppy. Try that out.
8. Shade Character & Export and Outro: Now to give our puppy
a bit of shading, I'm going to take a rectangle and put a rectangle
over half the puppy. I'm going to make
the rectangle black. Now, what we do is we use
the black arrow tool and you click and you drag and you select everything in your scene. And now use that same
little shape builder tool. Down the lt key and click on the area that's
not on the puppy. And what that'll do is it'll
subtract everything else. Now, we've actually got a
black shape over there, you can see, which is
the shape of the puppy. We go across to the
appearance down to opacity, and we reduce the opacity
all the way down until you just have a slightly darker
area on one side of your dog. To export our puppy, we're going to go to file. We're going to say export, export as we're going
to be exporting this as either a JPEG or a
PNG file for the web, give it a name Use
your artboard, click on Export,
and then o that. Your puppy is now ready
to be used for the web. I hope you enjoyed
that and make tons more animals like that and don't forget to
share them with us. If you'd like to learn
more of Illustrator, I've got a beginner intermediate and advanced course available. Just click on my name
at the bottom or find or search for Tim Wilson and go to my profile page and you
can see the courses in Adobe affinity and
Canva that I do. Don't forget to follow. That way, whenever
there's a new course, you'll be one of
the first to know.
 Tim Wilson, Adobe Certified Instructor and Expert