Transcripts
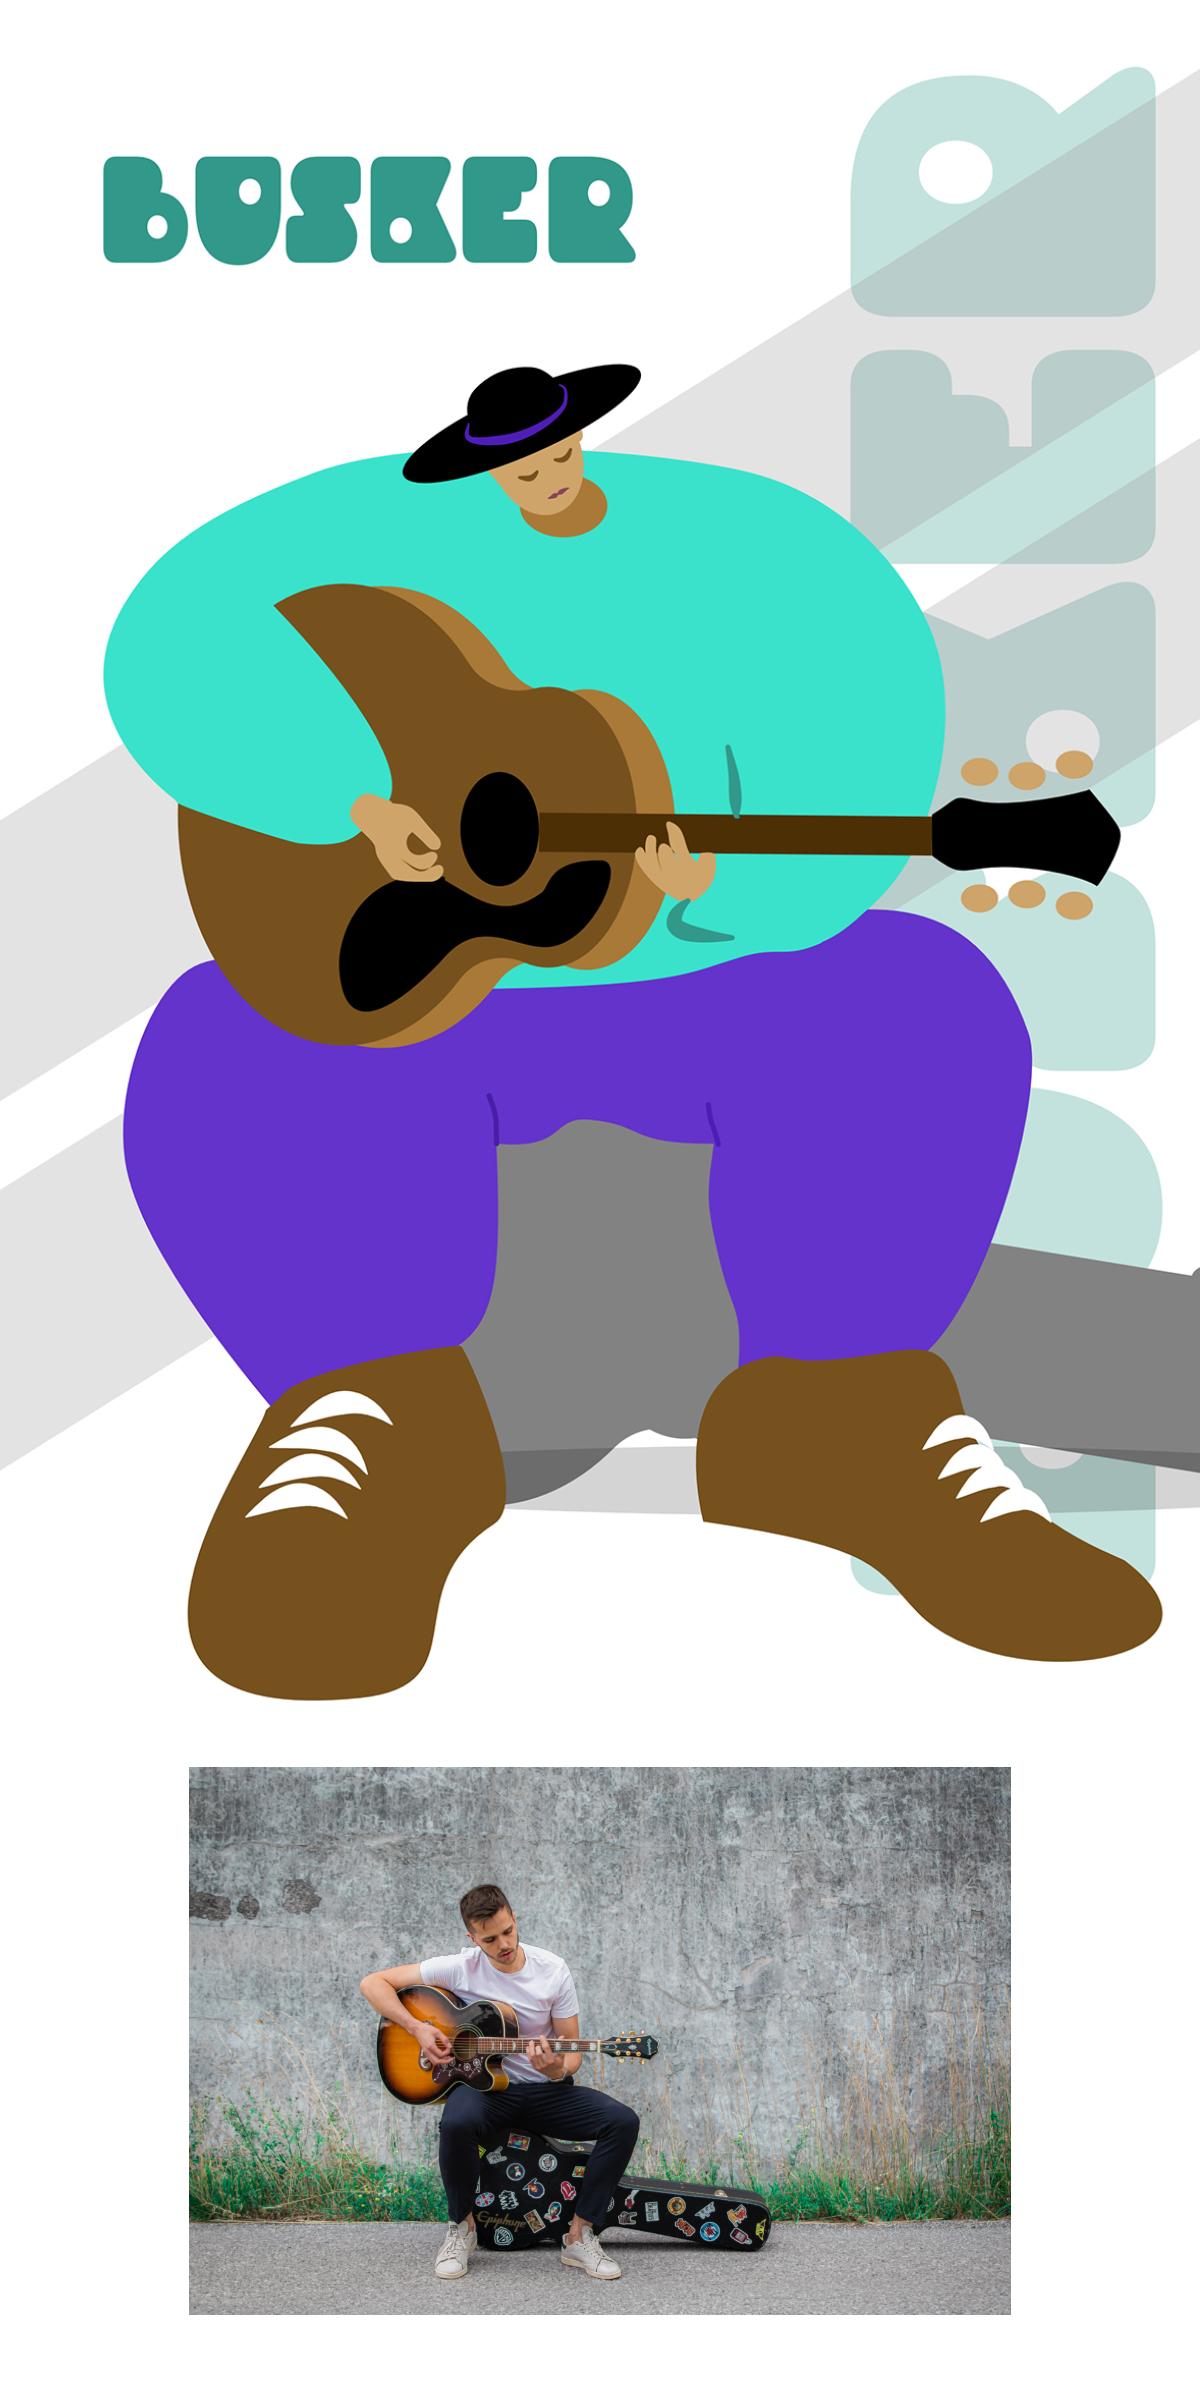
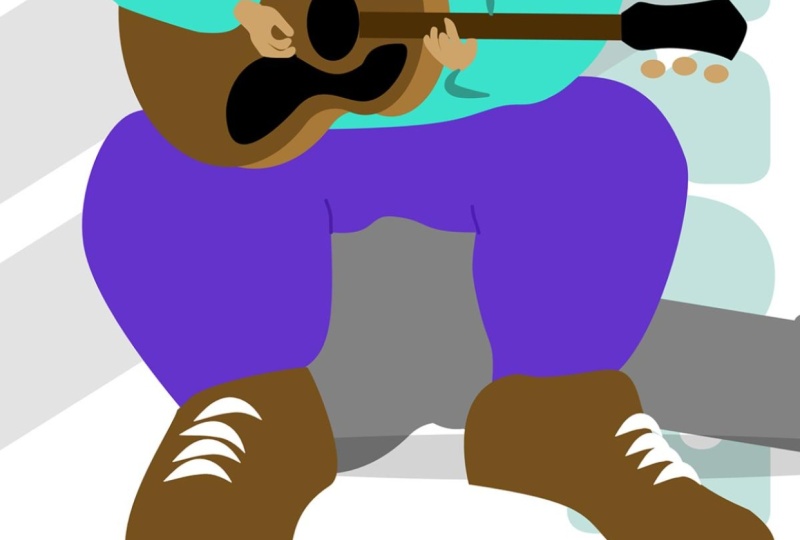
1. Welcome to this Flat-Art Character Design Course: It's project time, and this is one of my
favorites, as you can see. I love illustration, and this particular one
is done in a very, very popular style where you draw a simplified
version of a person. And in this case, you make
the head much, much smaller. And you can do that
with feet or hands. But I want to take
you through this, and we're going to
be using or we're going to be starting
with the photograph. You can see how
the photograph and the illustration are
kind of close together. And what I want to do is take you through
this step by step, so we use the photograph and then we'll draw
from the photograph, but we'll change it
and we'll simplify it. You can see how her face looks nothing like the
illustration face, and I want to show
you how to do that. And each of these parts
are going to be separate. So, you know, the head, the hair, the face, the glasses are all
separate pieces, and you can change
them later on, and they're not hard to do. Now, you can take this technique
and put it onto people. You can put it onto animals, you can do it on things. It's such a cool technique, and I can't wait to
help you with this. Let's get started. A
2. Place the Reference Image & Draw the Head: Et's go and get a new document. I'm just going to use an A four, make sure it's RGB and
click on Create document. Now, we're going to
work from a photograph. So although our final result is not going to look anything
like the photograph, it's going to be a
rough representation, but we're going to use it for poses and how hands
look, et cetera. I'm going to go to file and place and find this
file called reader. I'm going to bring
her in like so. So let's just go up
here and lock it down and change the opacity so we can see what we're doing. I'm going to click on
the padlock to lock it. Now, we're going
to start off with the back layers and
start working forwards. And we'll start off with a head. Now, this whole style, as you saw in the intro video, it's a very a flat art
illustration style that's quite popular where you have these very small heads and
big bodies and small feet, sometimes people have
very small hands or sometimes they
have very big hands. Now, this one that
I'd like to do, I want to have the small head, small feet, big body, but big hands, as well. So let's start off with a head, and I'm going to use that to
redraw. We'll zoom right in. And I want to start off right at the back
with the back parts, which is probably
going to be the neck. And then we'll look
at maybe the ears, then the face, the
hair and the features. We're not going to be going
heavily onto the features, just some very simplistic ones. So I'll start off and I'll
use and you can use the pen, sorry, the pen or
the pencil tool. I'm going to start
with a pencil, and I'm just going to draw the neck in very
roughly with a pencil. So starting here, I'm
going to go in and go down across and then up over there. So let's get rid of
the stroke from that. We can do these things
later if you forget, but I'll remove the
stroke from that. And then the next thing is, I want to draw in the
head shape over here. Once I finish this,
by the way, I'm going to scale it all down. Now, you could use an
ellipse to do this, or you could use the
pen or the pencil. I'm going to go with
a pencil again, but without all of this
stabilization on it, so I'm going to take that down. I'm going to reduce the
amount of stabilization from 90% to something
a lot less. Oh, I need to do the ears first. I've just realized, so
let's draw in the ears. Over there, there's
one, and there's a second one over here. If you find like mine,
they're a bit too large, use some of your tools here to just reduce the
size a little bit. Remember, this is not an
accurate representation of this person. This is just a rough getting the rough
for our illustration. Let me go in and
do the head now. So I'm going to start over
here where the head goes underneath the hair and
then move over there. Now, you can see this is a
problem because I don't know what I'm doing because I
can't see what's underneath. So let's stop there, and I'll just hide those layers. And I'm going to
start that again. So from the top round. Ah, that's looking better. I can sort of see
where I'm going. You don't have to be
too detailed at all. We just want the rough
idea over there. I think that that'll
be absolutely fine. Now, so that I can see the rough idea that
I'm going for here, I'm going to switch them all on, and I'm going to just change
the colors over here. So I'll go to color, and we want to find the
tone that we want to use. Now, I can go through all of these colors and
change them later on. Now, here, I've chosen a sort of a rough color that I want. So let's go with, say, something like that, have there maybe make it a
little bit more brownish. You know, something like
that, I think would work. And then I have
all these shades. So this is brilliant now because I can then go
along just very quickly, and I can go to my curves. But the moment
that I hit curves, you can see these
options disappear. So let's go back in here again. And what we're going to
do is we're going to save some of these out as swatches. So we're going to
make a new swatch, and this is going to be a
document palette over here. I'll call this reader. And then I can start to work my way through those colors
to save them in there. Now, I'm going to go
back to color here. I'm going to say, Okay,
let's save that one. And once again, I can just
click on there to save it. I'll go back to this
one, save that one. Let's have a slightly darker brown I'll just go back
to that one again there. So I'm just going
back to the sort of first one to start off with to get back to
my shades over here. That one I'll add in as well. Once again, there are
slightly faster ways of doing what I'm doing here, but I'm just going
about this the long way to show you
how easy it is to work with these colors
and just change and find different shades and
tints and tones in here. Maybe I just want a
lighter tone over there, and I'll bring that
one in as well. Now, I can then go through this really
quickly and say, Okay, well, this is going to be
the slightly darker color, and then this will
be her face color. And then the ears.
Well, I'm going to take both of those and make
them ever so slightly darker. Now, if I find that things
are too dark or too light, I can just go up here
and tweak it and just lighten it up in
there a little bit. You can see how I can tweak the color of her ears
a little bit, as well. Once I've done that, I
might probably take those, select them all, and group
them together over there. And that way, they're
all in one group, and it's easy to
switch them on and off while I'm actually
doing the next section. I'm going to stop there.
So what I'd like you to do is bring in
your illustration, sorry, your photograph
over there, just place it in the middle. Do some rough drawings
around the face where you think you want
the face to be remembered. You just use the rough
shapes over here, and you can then choose
some skin tones over there. I've chosen slightly darker
skin tones than she is, but you can choose lighter,
you can choose darker. You could go to the
Simpsons route and make her yellow if you wanted to that
would just absolutely fine. Whatever you do, save
some of those in the swatches by just
pulling your swatches out and choosing a base color, and then you can have
shades of that color, and you can save that
into a new swatch, and you've given that swatch or palette a name. Try it out.
3. Add in the Face Details: Now, let's do some face details. Because the hair is actually
in front of the face, I'll do the face first. I'm just going to
click on my group, and I'm going to zoom
in a bit over here. Now, we're going to
keep this really nice and graphically simple. So I'm going to go
and get some circles, so some ellipses
here and just say, let's have a little ellipse. Over there. I'm holding
down the Shift key to get a perfect circle. And this is going
to be the one eye. I'll just make that black, and I'm going to
hold down the alter the option key and do
another e over there. You can see really,
really simple. Let's put in a little
mouth over here. Now, for the mouth, all I'm
going to do is the top lip. I'm not going to draw the
whole of the mouth in. So I'll just use my pencil. I'm going to switch
my stabilization off so I can be a bit
more detailed about it. Zoom right in, and I'm going to draw just the top
lip in over there. Around and back again. That looks appalling.
Let me do that again, but I think I might need a bit more stabilization over there, use that was really bad. It is quite difficult. I'm
working with a laptop, and I've got a track pad on it. So I'm trying to draw with
a track pad with my finger. So over there, up to here, round, I will have to
change this a little bit. And just gonna go
back along there. In black like there,
it looks like she's got a moustache,
doesn't it? And then I will use my node
tool and just move some of these in a little bit and tweak
it round a bit like that. Of course, that would have
to be red over there. Remember, this is
an illustration. We're not going for real life. If you didn't like that, you could then still
go in and say, Well, what about if we just did
a bottom lip over there? Just a little one like that. And just take that
down a bit like so and then move that
up a bit over to there. Now, let's switch on
the background as well or her face over
there and have a look. So we've got something
along that line. I could remove that
bottom one and just have the top lip over
there if I wanted. Lastly, we need some glasses. So I think this time, I will use elliptical tool. Once again, we're going
for stylization here. I'm going to do a
shape like that. So it's a slight it's
not a perfect circle. It's a slight ellipse. And with that, I
don't want a fill. I just want a stroke on there, so I'm going to
go to the stroke. I'm going to just increase the stroke a little
bit like that. Back to my move
tool and I'm going to rotate it a bit, like so. So I think that's sort
of roughly where it is. I'll just used my
arrows to move it up a little bit and across
a little bit like so. And then I'm going to hold down my alter option key and make a copy to go on the other side. Now, those are
going to look like eyes if we just
leave it like that. So I'm going to put in
the line between them. I'll zoom right
in, get a pencil, and I'm just going to draw
in from there through to there and increase the
stroke width on that. Now, that's kind of
sticking out with that sort of rounded part. I'm going to go to my
caps and just switch off those caps so it's
a straight line. And then this side here, we just bring that in
a little bit, like so. It doesn't matter if
these are not perfect. If you wish at this stage, you could still go a little bit further, so I could say, Well, let's have another
little line out there, and another one over here, and even one that
went behind here. Over there. It might look a little bit better once
the hair goes over the top. Anyway, do have a
little bit of for go. We're not bothering
with the nose. If you want to make a nose,
that's absolutely fine. But just put in those
little details in there, and then we'll do the
hair as the next one. Try it out.
4. Hair & Eye Direction: I'm going to take all
of these things that I've put on the face,
select them all. I'm using the shift
key to select and group them
together, as well. So we've got that
group in there, and I'll just turn
that off for now. Let's draw in the hair. If you want to use the
pen, that's fine. Otherwise, I'm going
to go with a pencil. And I'm going to draw
in a shape over here, which is going to be her hair. So I'm going to start over
here and draw this shape in. Going to kind of go to there. I think let's just do
a few little lines. Not too much detail.
That's going to go round to the top in there. It's kind of sticking
out the top a bit, but it's a cartoon, so it
doesn't really matter. It's an illustration, shall
I say, so it doesn't matter. And that I'm going to change, so we'll go to the
color, and I only want a fill on
there, not a stroke. So let's go and choose
a color for that. I think I'll go with maybe
a dark brown in there. I don't want the stroke, so I'll get rid of the stroke from that. Now, you notice
there's some hair over here that I haven't done, and that's because I want to
put that behind her face, not in front of her face. So let's go back to
the pencil over here, and I think we're going to have sort of something which is
going to go up to there, just around I think that'll do. Let's do the same thing, get
rid of the stroke from that. So we're just left
with the hair. And if it's like mine,
not looking very good, just click on those points and pull them out a
little bit like that. Now, lastly, we want
a few little sort of hairs down the bottom here, which will be slightly
darker in color. So we'll use the pencil
and we will just draw some hairs in Now, you can see it's in front
of everything else, but don't worry about that. We'll get rid of the stroke.
We'll go to the brown, and I'm just gonna
choose a slightly darker brown over there. And I might even need to pull these out a little
bit like that. Okay, this one is
going to go all the way down behind the head. So it's actually behind that. When I switch on
the head, you'll see that that's behind the head, but I'm behind the hair. The hair is in
front of everything else, and then we'll
switch that on, and there we've got the face
of our reading character. Now, our reader seems to
be staring straight at me. So I'm going to go in. I'm going to click on the eyes, so select one eye and select the other eye and just
move them down a bit. So you see over there, by moving them down
in the glasses, she actually looks now like
she's actually reading the book rather than staring
straight ahead at me. It's because we don't see the
whole of the eye in there. We've got nothing to
associate it with. So looking at it in the glasses and moving down
to the bottom of the glasses, then it appears to
be looking down. Over here, just go through this and put everything
into groups again, so I'll select those two and
group them together as well. So we've got all these
different things in groups. Finally, we can
take all of those, select them all, and group
them together as well. So this is the entire head, but we've got lots of
groups inside the head, so we can go back and
edit anything in there. Try that last bit out
by doing the hair, so use a pencil to get some
rough hair shape in there. If it's not right, don't
worry, try it again. It's not the end of the
world. Put some hair which is going to
go behind the head, and then we can go in and
just move things into the right stacking
order in there and group them all
together until you're left with a
little head like that. If you want to move the
eyes around at this stage, if she appears to be staring in the wrong direction,
have a bit of a go. Anyway, do try that out.
5. Draw the Hands & Shirt: Let's look at creating the body. Now, we're going
to work as before, from the back through
to the front. So I'm going to start
with the torso over here, this area in here and I'm
going to do that as one shape. This is going to be quite easy. It doesn't have to
be perfect at all, so it's going to be
hidden by the book. So we're going to just
go down across to there up to here,
and stop there. I will move that
below the head layer, so you can see it's
behind the head layer. In fact, let's hide
the head for now. And I don't want
a fill on there. Sorry, I don't want
a stroke on there. I just want to fill, and we will just use any old
color for the moment. I'm going to go with
sort of this sort of pinkish color in there. And then I'm going to hide that. So what is the next thing to do? Well, let's do the
arms over here. So we're going to have
an arm which comes round there over there and
back and up again. So over to the pencil. Let's go with this arm. So down there, round
up to there, B and up. That looks funny, doesn't
it? Let me go and grab this. Pull that in a little bit, like so, and maybe this can be moved up a little
bit like that. Now, one of the things that
really shows these type of illustrations
is the fact that the bodies are really quite big. So we can take some of these points and start to move them out now and say, Well, why don't we pull
this one out over here and that one out over there to just make
it a little bit bigger. Let's do the other
side. Oh, I've just noticed that that's
not quite the right place. I'll just move
that around there. As before, don't worry
about getting them perfect. I'm going to leave the stroke
on there so we can see it properly when we switch
this on like that. Let me go over to the side
to create the next one. So once again, over
to the pencil. I'm going to do the shoulder, which is kind of
going from there. In fact, I'm going
all the way out to the right the way round. Now I don't know quite
where I'm going, so I'm just going to go across
like that and down a bit. Now, you can see
the problem is I'm going to get to
that stage there. And then this bit over here, which crosses over is
going to be a problem. So instead of doing
something like that, we can do it in two sections. I'm going to draw in the
bottom section first. I'm going to do that over there. And let's hide that
so we can see it. And then I'm going
to do the top bit as another one on top of that. So I'm going to say, Okay,
we've also got this one here. Which kind of goes
down like that. As always, do not worry
about the details here. That's not very important. Let's fill those
with color as well. So when I switch these on, you can kind of get an idea that we've got the
two arms over there. I know they don't
look like arms yet, but do bear with me. We've got the two
arms over there. We're going to put some hands
in there hands in here. We will make her head
much, much smaller, so we're not having
to worry about making this even bigger still. Let's get in some hands. So I'll hide all these. And draw in a hand,
and I'm going to zoom right in to do this hand. I want to make them
a little bit wider. The fingers a little bit
wider than they are at the moment to go
with that kind of sausage finger type of
style that I'm looking for. So I'll get my pencil to. I'm going to take the smoothing
down a little bit more, not too much, and the
stabilization down as well. So I'm going to draw in the
hand here and I'm going to go all the way up As I said, don't worry about the details. You can see these are quite
big and chunky and wobbly. Those are very, very
wobbly fingers. I'll go round to the
beginning again. Now, that is a very
wobbly finger there. I'm just going to pull it
in a little bit. Like that. Now, if you're
looking at this and thinking, Tom,
that'll never work. That's the way I
feel sometimes when I'm doing these sort
of illustrations. I look at it and think,
Oh, my goodness, this is just looking awful. But once you've finished
it, it looks great. So we'll make that a little
bit wider over there. And, of course,
that being a hand, we need to fill it with a color. I'll just pick one
of these colors that I've got over
here, skin tones, and I'm going to get my fill sorry to my stroke
and switch it off. Let's turn on the rest of
the things for the moment so you can sort of see the idea. So they are a little
bit too wonky. I'll zoom in and over here, I'm just going to pull some
of these out a little bit. So they're slightly
less wonky than that. Maybe I should have had
a little bit more of the stabilization on Anyway, just pull them out and see
what you get from that. I'm gonna live with
that, honestly, you're probably looking at
it, thinking, No, you're not. That looks awful. Anyway, I will just pull
these out a bit. Like so. Let me do the other
hand. And so same again. Let's hide everything.
Go to this hand. This one's a little
bit more complex, and we can do it in two parts. Maybe we can have sort
of the back part being a slightly darker skin tone, and then these fingers being a lighter skin tone.
Let's try it out and see. So I think this time, I'll
increase my smoothing a bit and just take my stabilizing
down a little bit more. So I'm going to do this
bit over here first. And that bit will be a
slightly darker skin tone. And then I'll hide it. And
then I'll do the fingers. Let's have a finger
that goes over here. Once again, nice
and chunky ones, another nice and
chunky one here, another one over here. And one last one, which is going to go
all the way up to there I think I need to move this
one down a bit as well so we have something
more like that. Once again, don't laugh.
Your turn will come. Okay, let us, lighten
it up a little bit. These ones will be
lightened up, too. And I'm going to get rid
of the stroke from those. And stroke from
that goes, as well. So let's pull that out. Like so. And we show the thing
that's behind it, which is that shape there, which is slightly darker. We'll show the other hand, and then all these
bits down here, and this sort of gives us
our sausage finger hands for this particular character. Anyway, do well, first of all, enjoy yourself
doing that so far. Once you've got the
shoulders in over there, go and do your hands like
that as simple as possible. And don't worry if it looks
really, really weird. That's not the point. It will look great when you've
finished it. I promise. So try it out and do
some shapes like that.
6. Draw the Book: Now, one of the things
that makes my hands on here look so weird is the fact that the
wrists are so narrow. So I'm going to
use my node tool, click on the wrists and just
widen them up quite a lot. There. Make those nice
and wide like that. And this one as well,
let's widen that up. I will have to go to this
one and pull that out a little bit as well. Move that down to there. Okay, we now need to
do the book over here. The book is going
to be very simple. It's going to be the pen tool. I'm going to hide
all these items. Oops, we've still got a
few fingers up there. I'm going to just click from
point to point there, there. Oh, let's do a little
curve there. One there. Just guessing which
is underneath her fingers and up to there. And then we can take
that, give it a color. Let's just make
that red for now. And then we need to
do the pages as well. So I've done this the
wrong way around. So when I do the pages, if I click from there to there, that's going to be
filled with white. And then the same on
the other side as well. So it's going to be there.
Let's just go around there. Now, I've done them, as I
said, the wrong way round, so I will need to move the two
pages underneath the book. Oh, wrong way. Let's
move the book up. It's easier. Over there. Select those items,
group them together. And then when you switch
all these layers on again, we can then decide where
to put the book in the whole layering
system down here. So we move the book behind the fingers and the
hands, I would imagine. There we go. And we've got the book
in the right position. Let's zoom out and
have a look so far. So I'll just hide the
background for now. That's not looking too bad. I've just noticed there's
a bit of a gap by her hair over there
with her head. You don't always
notice when you've got the photograph in
the background. So I'm going to go
use my node tool, go to the group that's
got the hair in, click on the hair group. Click on that bit of
hair to select it, and then I'm just going
to move some of these across a little bit, like so to try and
cover that up. Think that's okay? And we'll just fold
those up again. A look, that's getting there. The clothing obviously
needs a little bit of work. But do have a bit of
a go with the book, so make the rough book shape, then make the pages or do the pages first,
whichever way you want. Make sure then the right order, group them, and then move
them below the hands. Try it out, see how you get on.
7. Save, Group & Draw Legs: Now, really, really
important before we go any further,
have you saved it? Got a file and do your save as, and then you just
keep going save as you go along just in case. I want to clear up some of
these little shapes over here. So, for example, these ones over here, not that hand there. Those ones, I'm going
to just select them, and I'm going to group
them together as well. So we've got this hand group. We've got another hand group,
we got the book group. These ones here, I'm
going to leave those separately at the moment,
although the head. I'm sure that can go right
at the bottom over there. I don't think we need it
to be above those two. Now, let's draw in
the legs over here. They're gonna be
reasonably easy. I'll use the pen
and sorry, pencil. And I'm going to just
draw in the shape. Now, I just need a bit of a stroke on there so I
can see what I'm doing. I'm going to start
with this leg here, and I'm just going to do
a really big big knee. Over to there. There's a funny kink in it. So we'll go over
to the Noe tool. Click on that and just get
rid of that kink, like so. We can make these a
bit bigger, actually. Let's have them that
knee being quite large. There. If like me, you've just got
something like this, which is weird,
you've got that cusp, don't forget you can
always click on it, go up here and just reset it
to being a curve in there. So we'll just reset
that like so. So there's the first one.
We'll just hide that one. And let's do the
second one, as well. Now, the second one, I'm going to go
around here up and over all the way around
to where her jeans are. And let's go up to
that point there. And, of course, that's not
quite where her clothes are, so I'm going to
pull this across, pull that across as well. And you can tweak any
of these that you want. I think I will tweak that and
make it a little like that. Now, having done that, I've just realized I've crossed
over these two. So, in fact, I will
need to take it down to there and reduce that
one that way, too. I think that'll possibly
work. Let's do the foot. That's going to be really easy because it's going
to be very small, so we're going to do
a foot like that. Over there, and it's going to be small rather
than big like the hands. So I'm going to just reduce
the size down over there. Let's give that a color, so I'll just use purple for the moment. Get rid of the stroke on that. Let's switch these two
on so you can kind of see where the legs are. There's a bit of
a kink on there. I think I'll go back to my tool, click on that and make
sure that that is a smooth curve. All that across. Like that. Now, let's switch on some of these other bits and pieces and have a look at
what we've got so far. Not too bad. If we hide the background, you
can see where we're going. Now, we've got a very,
very small foot, which should be underneath the jeans or whatever
she's wearing. Our hands, Oh, we've
got a stroke on there. Let's get rid of the stroke, and same with the fingers, I should actually select them and make sure I get
rid of the stroke on that. The hands are quite big, but we want the
head to be smaller. So let's use the move tool, click on the head, and scale
it down before we scale it. Go to your stroke, and in the stroke, check about the scaling. I'm going to say
scale with object. So when I scale this down, the glasses will scale as well. So we're just going
to scale that down, so it's going to be kind
of quite a small head. I know it looks a bit
funny at the moment. But this style of illustration
has got small head, small feet, and big
hands in there. If you want to try it out
without scaling, do that. Scale that down and
you'll see that the glasses will get
bigger, as well. Maybe that's something
that you want with those big old glasses or
thick glasses in there. Now we're still not finished by any stretch
of the imagination. So I'm just going to
say stop over there, have a bit of a go with a sort
of bottom section in here, very, very simple shapes. Make a small foot
to go in there, or you could go the other
way and you can have a really big foot to match
the very big hands on there, and we're gonna have the
small head at the top. It's up to you. Try it
out. Get to this stage.
8. Color & Details: I'm going to change the
color of her leggings, so I'm going to select that. And instead of white, we'll just pick a different
color for the moment. And I will go with sort of
blue jean type of color. Flick those over and get rid
of the stroke from that. And the same with
this side as well. So the same color. Get rid
of the stroke over there. But because we can't
see it properly, and it is behind the other one, I might then decide to
change it and go, Well, let's make it slightly darker
so we can see them both, kind of like we did
up the top here. I'm going to get rid of pretty much all of the strokes now. So selecting all these objects, going to stroke and choosing
none for all of them. The only one that I
don't want to get rid of is on her face, which is the glasses, which
has got the stroke in there. And let's go now, put in
some details over here. Now, when you're doing this, have a look at your
shapes as well. So I'm going to go
to the fingers. I'm going to click on that
because that's a bit of a weird shape that I've got going on in there
with that finger, and let's make that more of
a sort of a chunky shape. Over there. You can just work your way
through these if you don't like what you've done and just try out different
shapes in there. Remember this whole
style is all about big solid looking pieces. Now, we're going to add a
little bit of detail here so we can kind of get the
sleeve going down there, show the sleeve going in there, and, of course, on
her leg here as well. We're going to do
that with a stroke. I'll use the pencil. Well, I'm just going to draw a
little line from there. Down like so. So that's where the
sleeve is going to go. And I'm going to
use this tool here, which is our little
linewidth tool to just make it a little bit thicker in the middle
to give it a bit more. Well, interest, really.
Let me do that again. So over here, we're
just going to have the sleeve or the
feeling of the sleeve, and using that, we'll just
pull it out a little bit. Like so, once again
to get the feeling. Same over here, I think,
although, actually, I've just realized I
don't need it down here because this one is actually going to be the
same color as that one. So I will just go over here
to my color and just use a slight different color
pink for the moment, purple, and maybe we just lighten up just a
little bit like that. Zooming out a bit. Don't worry. They look at a bit
extreme at the moment. We're going to make them look
a little bit less shortly. I'll do the leg, as well, so
I'm just going to go up over there and use that tool to just make it a
little bit thicker. Like that. Now, of course, these little shapes over here, this one and this one
we've got are on strokes. I'm going to go to the stroke, and I'll then go and
choose the pink, but maybe just
darken a little bit. So it gives the feeling you can see of some sort of shadow. The same with this
one onto the stroke, and I want to use the same
blue that I had on that, but darken that
down a little bit. Over there. Have a bit of
a go with those and just do some little lines in there to get an
interesting feeling. And then we'll start
to look at finalizing the colors on this and the different fills and
what we can do with that. And at any time, remember, you can move these
things around as much or as little as you want.
9. Color Adjustments: Et's look at some colors
that we can use with this. Now, I do like the blues. I really like that blue there. So I want to find a color
that will work with that. And in my color wheel, I'm going to go across to the color that's
diagonally opposite, which is this orange over here. So it will be over
there, that orange. So I'm going to
just start off with selecting some of her top over there and choosing an orange I kind of quite like
that orange there. Now, I will just add
that to my swatches. And then I'll go to this section here and choose the same orange. And this bit over here, I think I'm going
to use the same orange that I've got there, but I'm going to darken it
down a little bit in there. Let's go to these two bits,
which are the shadows. And same again, I can
just darken them down. Now, I've done the wrong one. I've done it on the fill, not on the stroke, Alex, flick that over and get
rid of the fill in there. If you find they're too
dark, just go back again. Pick the orange once again, making sure that you're
on the right one. Pick the orange
and just darken it down ever so slightly or
change it ever so slightly. You just want a subtle
amount in there. Let's go to this one here. This one is blue, and I think it's a little bit
too dark at the moment. I would just have a
subtle amount on that. And for her socks, I'm going to choose
the same orange again. I keep going and getting it on the stroke
and not the fill. So let's remove that and
flick that over to there. But I think that
could be darkened down a little bit like that. Now, what about this red
over here of the book? Well, I need to first of all, make sure that I'm
actually on the book, not on the whole of that layer. I'll click over there so I can see choose the book itself, and we can then pick a
different color from that. I might try blue. That actually works very well. I can try darker blue. It's up to you just experiment and see
what would work very, very well for that
particular document. That light bit over there is better because we've got the
darker colors at the bottom, which hold the image in place. Of course we still got
to do a background, but have a little bit
of a go with that. Don't forget getting
these shapes in here and using darker colors of whatever color you've chosen. When you go to your colors, remember you could
pick a main color, whatever that color might
be that you want to use, and then look at using a
color which is diagonally opposite that as your
secondary color in there. And then use lighter and
darker shades of that color.
10. Create the Background: I've switched on my background so I can see where the couch is, and all I'm going to do
is to take a rectangle, and let's have a
rectangle that goes over there and another rectangle. I'll just hold down the old
key to make a copy of that, which is going to
go over to there. And I can then change the
color on these, as well. So let's just make that
a slightly lighter blue, and this one maybe a
slightly darker blue. And we're going to take those
two, group them together. And send them all
the way down to the bottom over there
and hide that picture. So that should give us this
interesting background. Now, it is a little bit too blue because we lose
her book on there. So one or two things I could do I could
either go to her book and change the color
of her book or I could change the color
of the background. I really actually like the
blue on the background, so I'm going to go to the
book and change the color on that book and make it a lot
lighter or a lot darker. There we go darker.
That works beautifully. So we've really only
got two colors in here, blues and yellows and
technically the brown, as well. Have a little bit
of a go with that. Put in some sort of
background in there.
11. Adjust the FInal Lines and Export: I've tweaked mine around
just a little bit. I went in and I clicked
on some of these, and I made the shoulders
slightly bigger, the arms slightly wider, and this slightly
bigger, as well. And you can just keep
fiddling as much as you want. Once you've done a save and you made sure
that you've saved it, why not try other ideas in here? Have a look and see
what it would look like if you did
small hands as well. So if I went in and
made the hands really, really tiny over
there and got there to hold the book and would
just make them really small. Like that. And the
same with this one, with this one here, we've
got this in a group so I can click on the group
and make that tiny. There's also got these
really small hands. We might have to tweak
this around a little bit, so we'd actually go in here with this line and maybe pull
it over to there so we get something which is more closer to that that sleeve. Same with this. This
would have to be moved up a little
bit, like that. Maybe that would
move over to there. And we've got a mini
version of that hand. So, which is
interesting, really. I think this one here, I've made a bit of mistake on that. So I might just have to reset that curve in there as well. Now, if you've never
seen this style before, let me show you that it's
ready, ready popular. I've just gone to
the web and I did a search for flat
art characters. And this is in Google. And straightaway, you can
see lots of them come up, and this is one of the styles over here where people
use small heads, big bodies, either small feet or some of them use
large feet as well. So this style is
actually really, really popular at the moment. Once you've tried this one out, why not try variations on it? Do a save as, and
then change it, and then save that as
something else, as well. Small hands, try the
small feet thing. All you've got to
do is selected. Change the size of
the feet to make them tiny as well, like that. And you can get all sorts of wild and wonderful
results from that. Anyway, have fun with that, and as always, please
post your results. I'd love to see what you do,
especially with this one. This has been one of
my favorite projects. Really enjoy doing it.
12. Well Done & Thank You: Congratulations. You've reached
the end of this course. I'm sure you're
creating amazing work. Now, don't forget to
leave us a review. It really helps us to help to
build more courses for you. I also do courses in Adobe, as well as Canva and Procreate. Don't forget to follow me and
have a look at my profile. I'll see you in the next one.
 Tim Wilson, Adobe Certified Instructor and Expert