Transcripts
1. Introduction: Hi, I am Tinting. I'm a graphic designer specializing in editorial
and info graphics. I have been freelancing
since 2016. First on up work now also
on fiber as a pro seller. For the past few years, I have successfully built my design business from
scratch using these platforms. Freelancing changed my life. I'm able to travel while
still running my business. I can take more time off
to spend with my family. I'm doing what I love
on my own terms. And from anywhere,
guess what you can too, whether you are just
starting out as a side business or looking for a place to offer
your services. Fiber is the platform you
should definitely try out. The best thing about fiber is that when you publish
your services, potential clients will
come to you without you having to go out there
and look for opportunities. In this course, I will
teach you everything you need to know to launch
your fiber business. In four weeks, we
will cover analysis, identify your marketable skills, discover your hidden talents, and turn them into
profitable gigs. Case studies, fiber profile, creating a fiber
profile that showcase professionalism and build a reputable image
for your business. Fiber gig creation. Learn all aspects of creating your first fiber gig
to look professional, credible and attractive order management
and communications. Discover effective strategies
for communications, managing multiple orders,
and delivering satisfaction. For the course project, you will set up
your fiber account and optimize your profile page. Create your first gig and deliver order from
start to finish. I will also share best practices to run your freelance
business successfully. Are you ready to
unlock your potential and create a freelance
career that you love? Join the course today and get started on your
fiber journey. See you in the course.
2. WEEK 1: Analysis: You want to find a suitable
service to offer on fiber for those who don't
know what to offer. This week we will
start with analysis. This is an exercise
to help you to discover your marketable skills
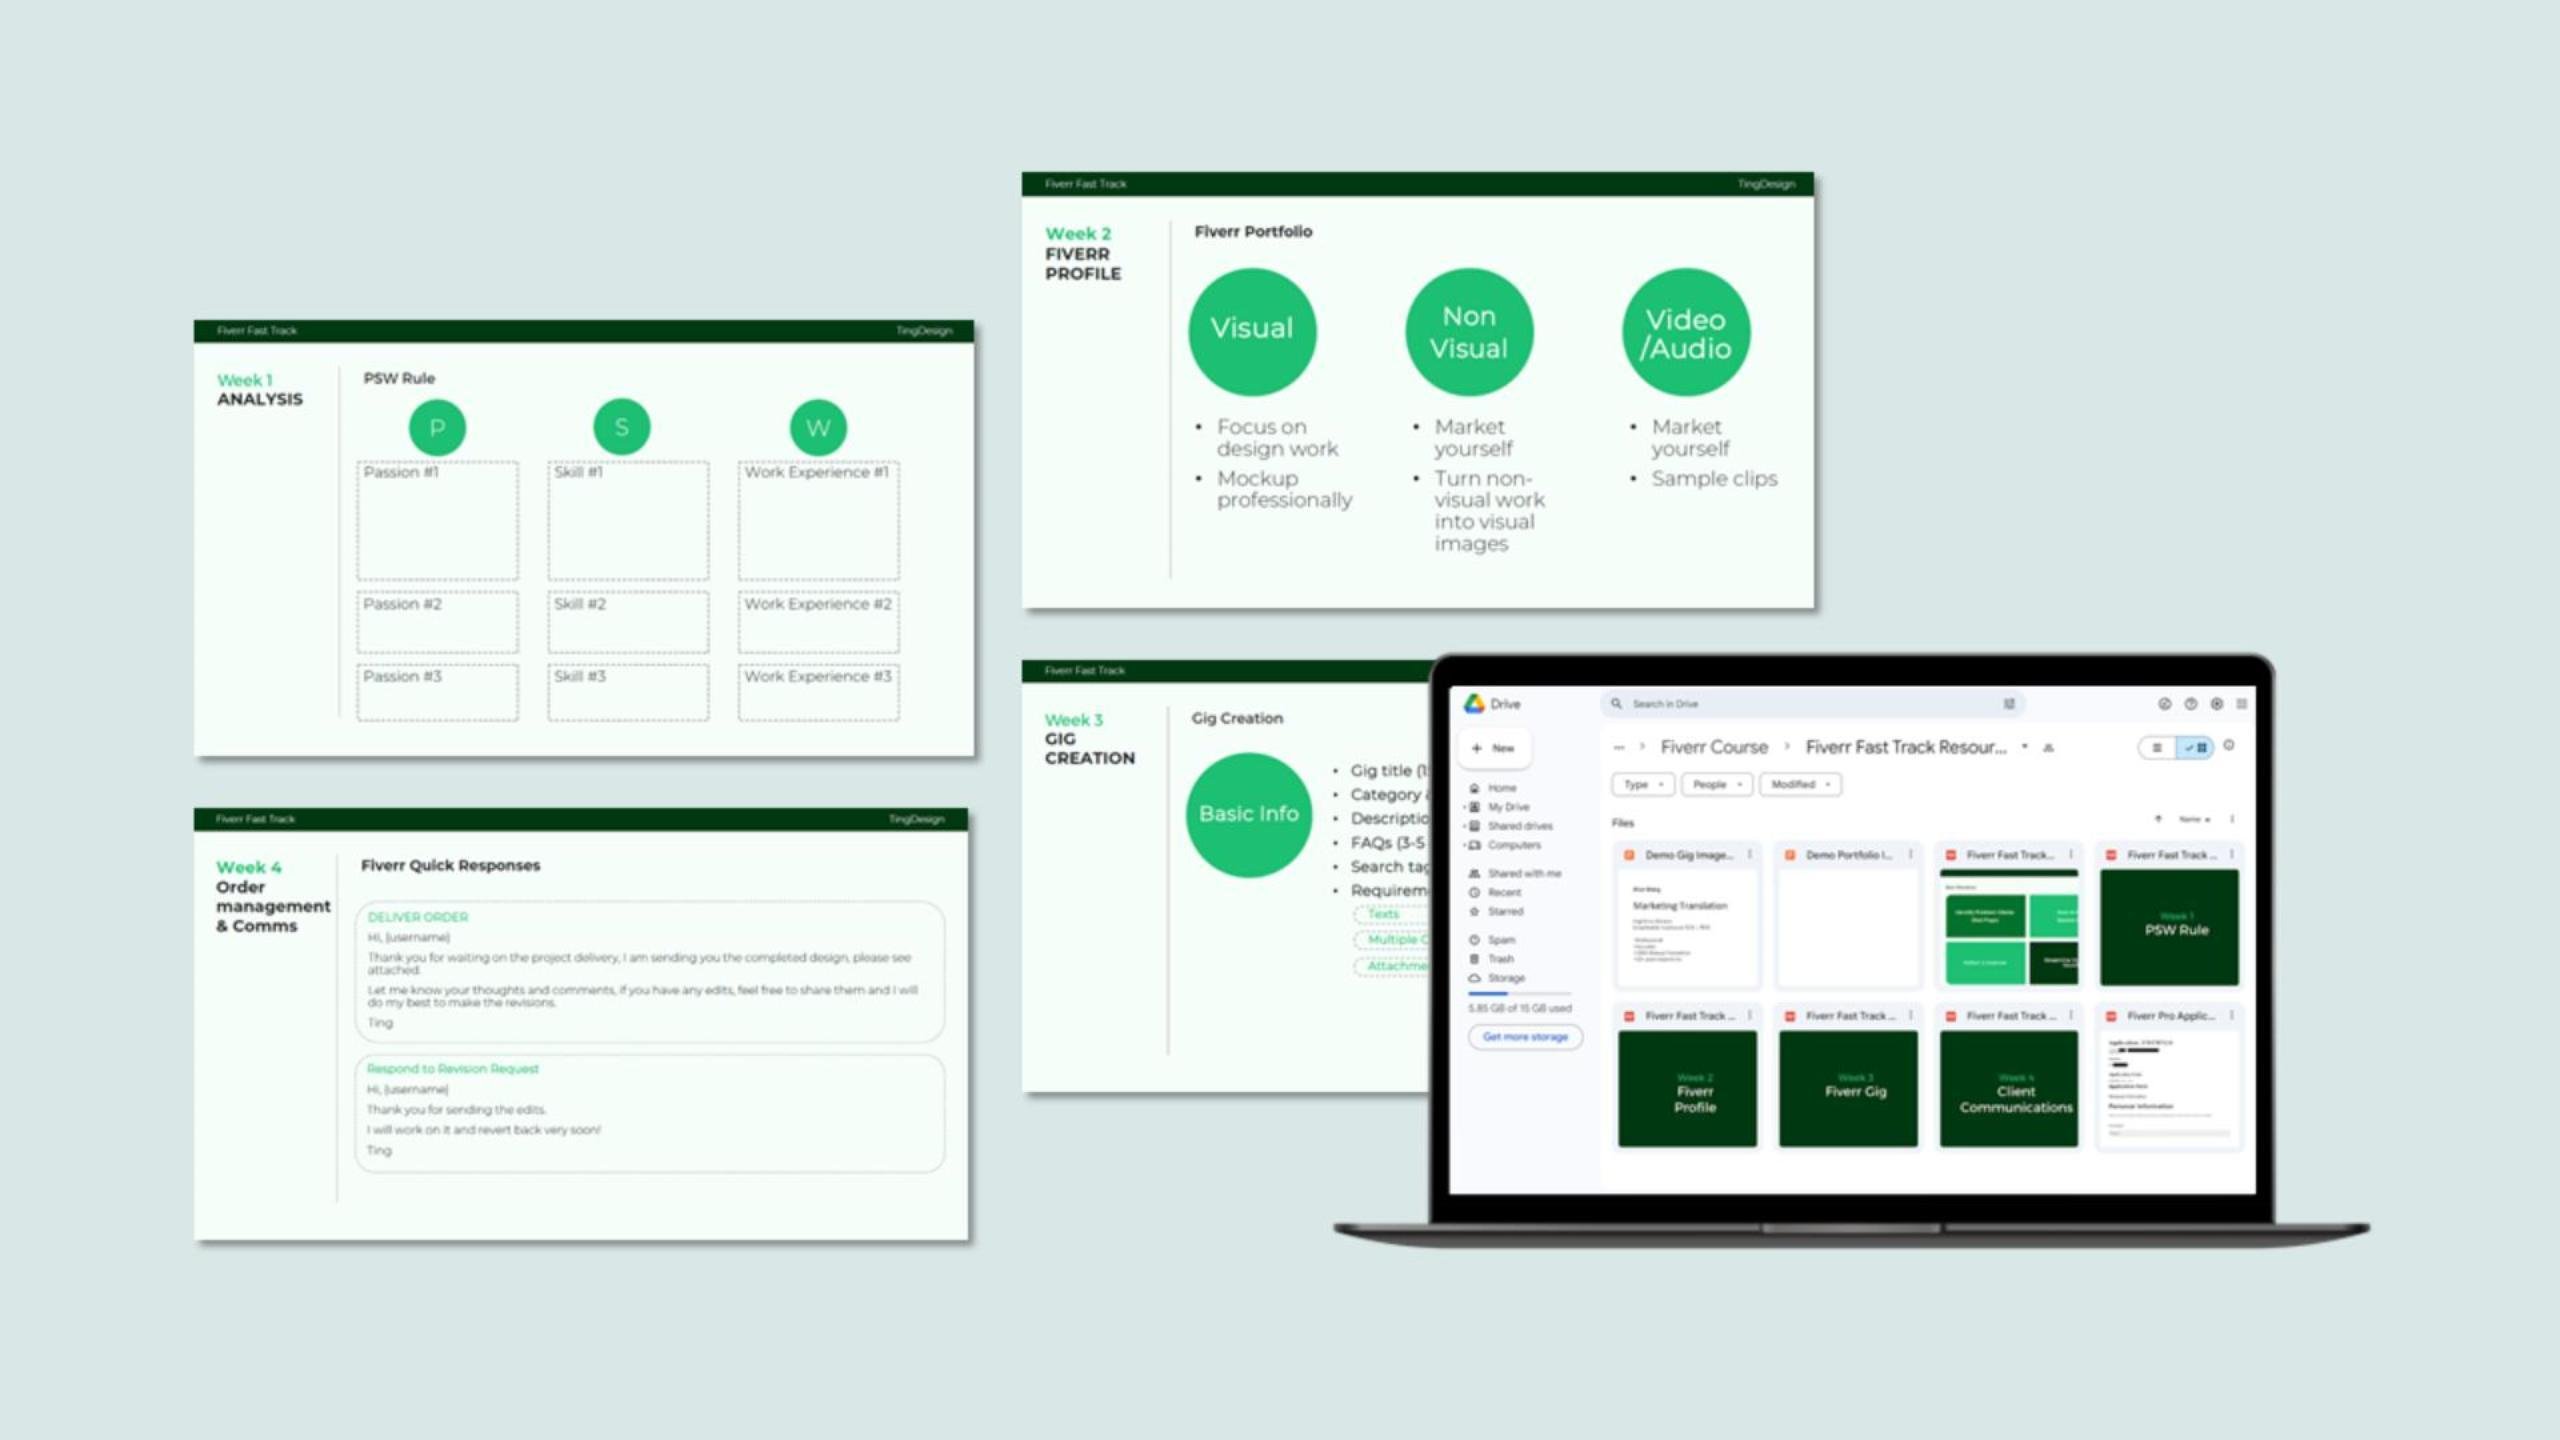
and your hidden talents. I developed this method
called PSW rule is for passion skill
work experience. By using this rule, you will be able to find
your marketable skills. The PSW rule starts
with passion. What are you passionate about? What things make
you feel excited? What hobbies make you lose
track of time? Skill. What are you naturally good at? What talents have you discovered through practice,
work experience? What knowledge and
skills have you gained through past
jobs and practice? About these three
categories for yourself, list the top three
for each category. Passion number one. Number two. Number three, same goes for the skill and work experience. To help you to understand how to apply this
rule for yourself, I want to show you
three case studies. The first one is myself. Under passion, I
have art and design. I have a true passion for
art and design since young, before I went to college. Geography and languages. I love to read about
countries and I do wish to speak more
languages than I do. The last one is
technology for skill. I have graphic design and Adobe Creative suite
through freelancing. I have gained extensive skills and knowledge in working in graphic design and I use Adobe Creative Suite
from day to day work. Chinese language.
I'm a native speaker and I can design in
Chinese as well. Cartography, which basically means making work experience. I have been working as
a graphic designer as my main profession, translating. I'm also doing some translation work from English to
Chinese and vice versa. And as well as teaching. This is how I got started. I started to offer
graphic design service in both English and
Chinese language. It created a niche for myself, as there aren't so
many graphic designers who are able to design
in Chinese language. A second service I created is design localization
into Chinese. I still have clients from many years ago who still
sends me this specific work. That's myself. Now let's move
to the second case study. Call her Alice in Passion. She has a passion for
culture and history. And the second
passion, education. The third one is communication. For the skill, she
has language skills, she speaks Chinese,
English, and Hebrew. The second skill is translation
and interpretation. The last one of course, computer skills and Microsoft
Office work experience. What did she do before
she was a tour guide? She also taught, she did
administrative work. What can Alice offer? Because fiber work
are mostly remote, tour guide will be excluded. I thought about number
one translation service. She will be able to
translate from English to Chinese as well as
Hebrew to Chinese, which is a niche market as well. There aren't so many
people offering this and much less competition. The second one, interpreter
service in Chinese. I think this will happen
mostly su fun or zoom meeting. But also she can offer it
on site where she lives. Now, our third case study, Sam. Sam is passionate about
interaction, design, technology, culture,
and travel in skills. He used Figma,
Photoshop in design, UI, UX design, English and
Thai language work experience. Sam has been a UI designer
and graphic designer. What can he offer? Here is my idea. Very obvious. Number one, UI design in English
and Thai language. Number two, website design. There's a lot of demand in
website design and I think it would be nice to offer Thai language as well
in the beginning. Some of you might find it hard, especially if you
don't have a lot of work experience
or past projects. I think you can dig deeper even into the time when
you were in school. Try to ask yourself these
three key questions. They will help you to uncover your unique talents
and value experience. What work experience
do you have the most? What roles have you helped? What skills did you develop? Don't underestimate even
ordinary experiences such as project management,
communications organizations. The translate into valuable
freelance services. Compliments. What do people
compliment you about? What tasks do you shine? Remember, compliments highlight your natural
skills and strength. If writing e mail is your thing, maybe you should do
it as a service or your ability to analyze data can be turned into a
market research service. Joy. What work brings you? Joy. What makes you happy? What activities make
you lose track of time? Don't dismiss your
passion as just hobbies. If you love watercolor, maybe it is perfect to start a watercolor
design business. Write down the answers
for each of the questions when you compare them with the passion scale
and work experience, PSW rule, you will see how it
all comes together for me, this method helped
me to develop and thrive in this competitive
world of graphic design.
3. WEEK 1: How to Become Fiverr Pro: If you have an
existing business, I encourage you to apply to
become a fiber pro seller. When I first heard about fiber, I wasn't interested at all. I'm thinking $5 a gig. It's not for me. But then I realize it's only a
marketing strategy. Most of the sellers sell
much higher priced gigs. In 2017, Fiber introduced
the Pro platform, which separate from
the regular platform. Since I joined in 2021, I noticed more and more professionals has
been joining up. I encourage you to
apply if you are an established professional
and it will surely give you a jump start
for your fiber business. My experience applying for
Fiber Pro was very positive. The process was easy to follow. The application was
straightforward and did not require a lot
of time to prepare. I submitted my application
in April 2021. It took about three months until I get approved and get on board. At the time of the application, I have been working as a
freelance graphic designer, full time and upwork. I had completed over
200 projects and also had a track record working with large corporations
and businesses. Here are some key points for the application form
to become Fiber Pro. The first part is personal
information, your full name, address, website, social
media, education certificates. If you have any professional
information and portfolio, you need to describe yourself, your profession and business
in three to five sentences. And also describe your
work process and flow. What do you need from the
customers to get started? Projects and portfolio the
customers that you worked for, the role that you had
and portfolio samples. Video introduction. I encourage you to submit a
video introduction. I filmed a short video when
I submitted my application. Just to speed up the
application process, I think it really
made a difference. Saw my face and my speech. It really added a human
touch. You can do the same. Prepare a short
script and record yourself with your mobile
phone is perfectly fine. Make sure that it's
concise and supports your application form
and portfolio samples. If you are interested,
feel free to check my Fiber Pro
application form back in 2021 in the course
resources folder. Once you become a pro seller, you will have the Pro badge. You will be approved in
related subcategories. This is where all your
gigs will be created. Under of course, you can
expand to more categories, but it has to be done
through manually apply. There will be a fiber staff to contact once you
become a pro and you will be guided
if you need to expand to more categories. I have been a fiber pro for
a little over two years now. There are great benefits
to be a pro seller. The first one, of course, you get better clients. Clients mostly are
business clients who are professional and the
projects are larger. Just a real pleasant
experience to work with them and you have
a higher selling price. All the pro gigs starts at $100 Dedicated search
on the fiber website, there is dedicated
search for Pro Services. Buyers will be able to toggle on Pro Services to
view only Pro Gigs. Faster payment. For
a regular seller, you have to wait 14 days before you can withdraw
your earnings. But for Pro seller the
time is only seven days. After seven days, you can
withdraw your earnings. Vip customer support. If you are a pro seller, you have VIP customer service dedicated for pro sellers and really fast from
my own experience, they reply in 2 hours. If you have any problems, questions, or requests, feel
free to reach out to them. Here are the five benefits
to be a fiber pro seller based on my experience working on fiber for
the past two years.
4. WEEK 2: Fiverr Website: Let's get familiar with fiber, website, and service categories. The main categories are. On the top, you can see there are subcategories under
each main category. Fiber has been expanding
a lot recently. As you can see, they
have added AI services. All of the
subcategories are here. Imagine I am a buyer and
I land on this home page. Obviously, I would go to the categories that
I would like to purchase the service from
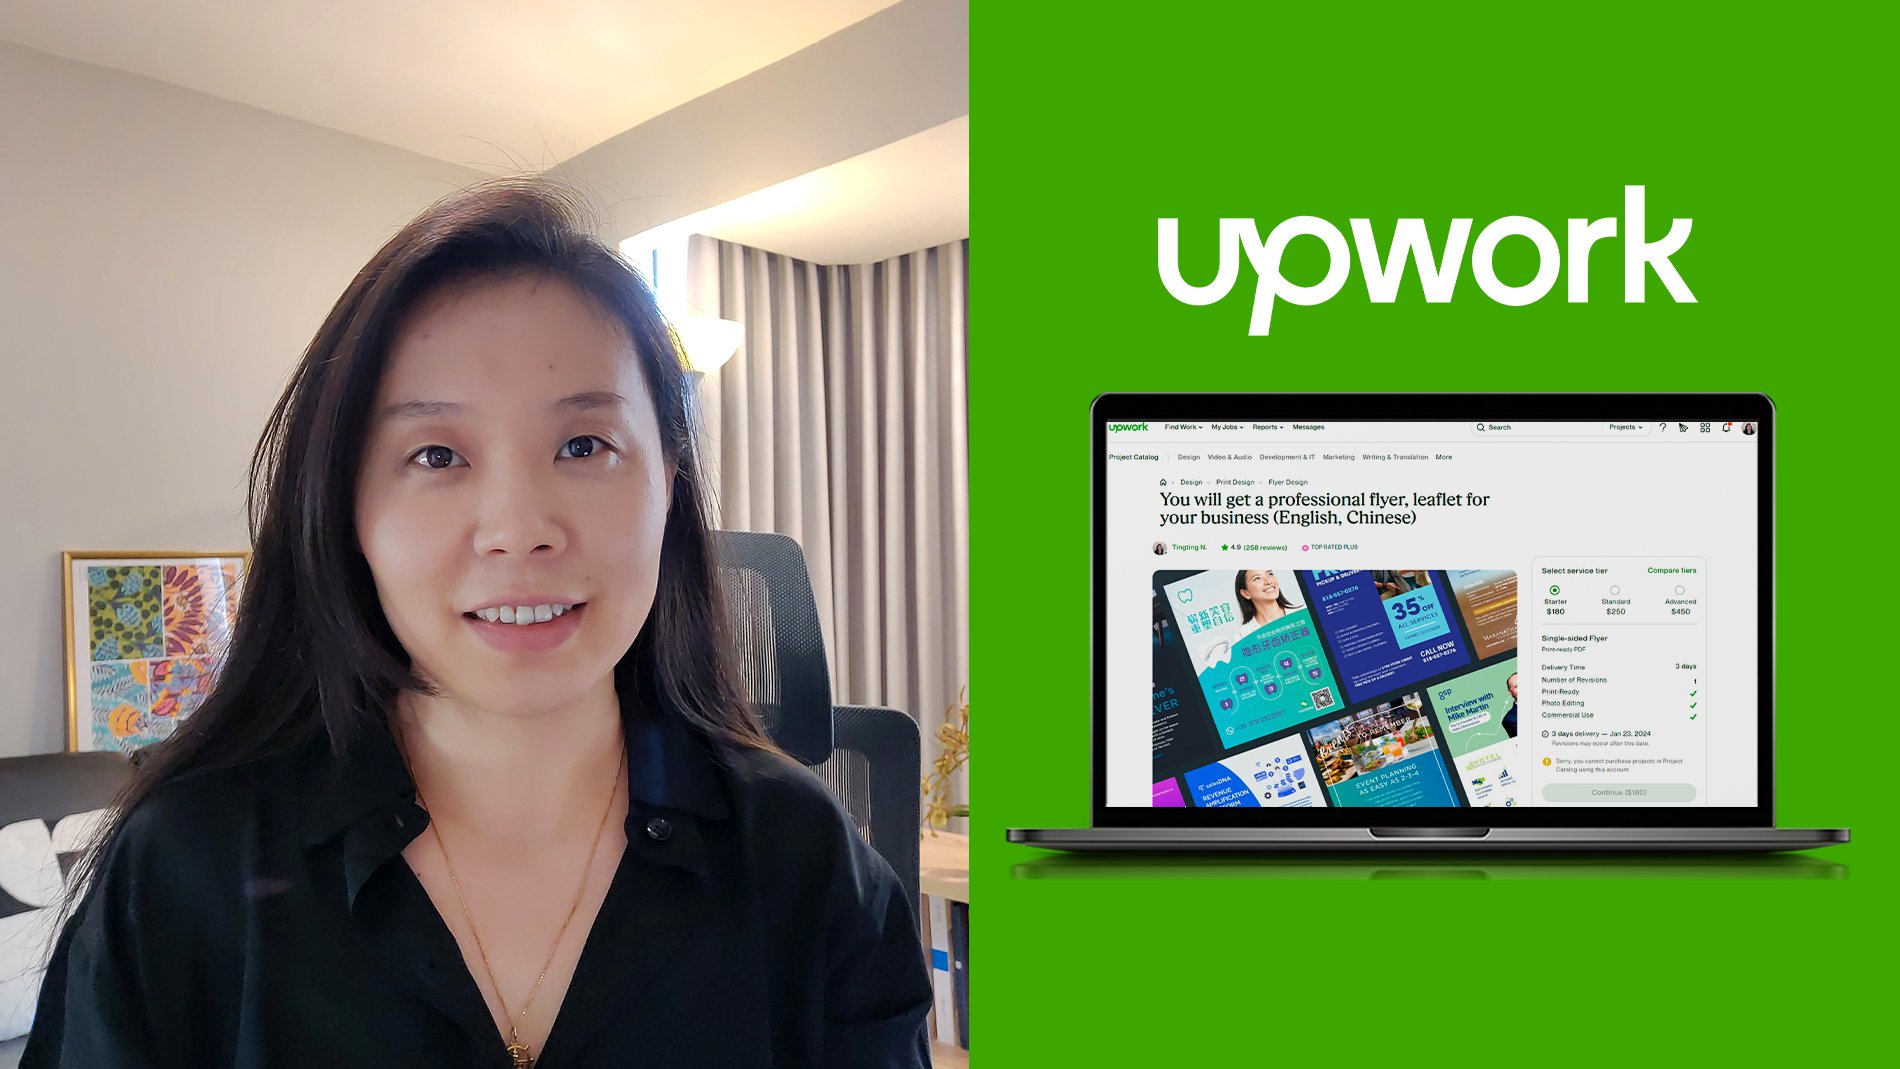
or basically make a search. Let's say if I want to try
from the menu translation, you will be able to choose the
language from one language to the other language
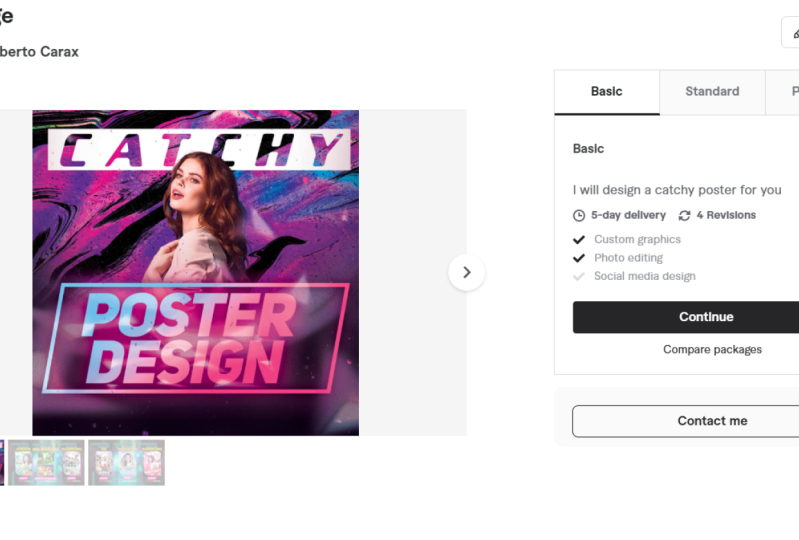
or just browse here. You can toggle pro services only or people who are online. Say if I want to try this one, it opens its own page
and you will see the name as well as the short
description about this gig. They can read for more
description right here. Here you have tiered packages that are suited for
different needs. For example, this one would be 2000 words and goes
up to 4,000 words. These are related and
frequently asked questions. Can click See the
Questions Reviews. You can see all the reviews
you can choose most recent. If I click Continue, you will see the options. The package is the basic and
you would like one order. There are some extra services that you can buy to
get faster delivery, to get formatting and so on. This is a gig page. Now if I want to know
more about the seller, I would click on
the top, his name. This is his profile page. You will see his name. This is his business name, a pro badge and rating, and the short description
of the business title. These are all his gigs. Now you've seen fiber website before creating
your own profile. The best thing to
do is to search for freelancers who are offering similar services from browsing other sellers, pages
and portfolio. You will get ideas and
inspirations for your own profile. You can look at their profile, their portfolios,
and their pricing. After researching,
choose 123 freelancers that match your background, your skills, and the
quality of work. It should really match like 90% They will be
your role models. What do you do with
your role models? First, you can learn the
aspects that they are doing, great since they excel in maybe the gig images or years of experience or clear
pricing structure. Second, you want to
be better than them. You want to stand out. Look at the aspects
that they are lacking that you think
you can do better. Maybe you can offer better
price or faster delivery, or you can offer a
complete service. For example, design a website, and on top of that,
build the website. By doing this, you
will slowly but surely know where you are standing and where
you are heading.
5. WEEK 2: Fiverr Profile: Whether you are a regular
seller or pro seller, you need to set up your
fiber profile page after creating an account. Think of it as the
online store front, where you have to fill in
all the elements required by fiber and showcase
your portfolio. Tell your story, the
value of your offerings, and convince potential buyer
to choose your service. All the elements of a
fiber profile are here. You will need to have
number one profile picture, Your name as well as business
name, your profession. A short description about
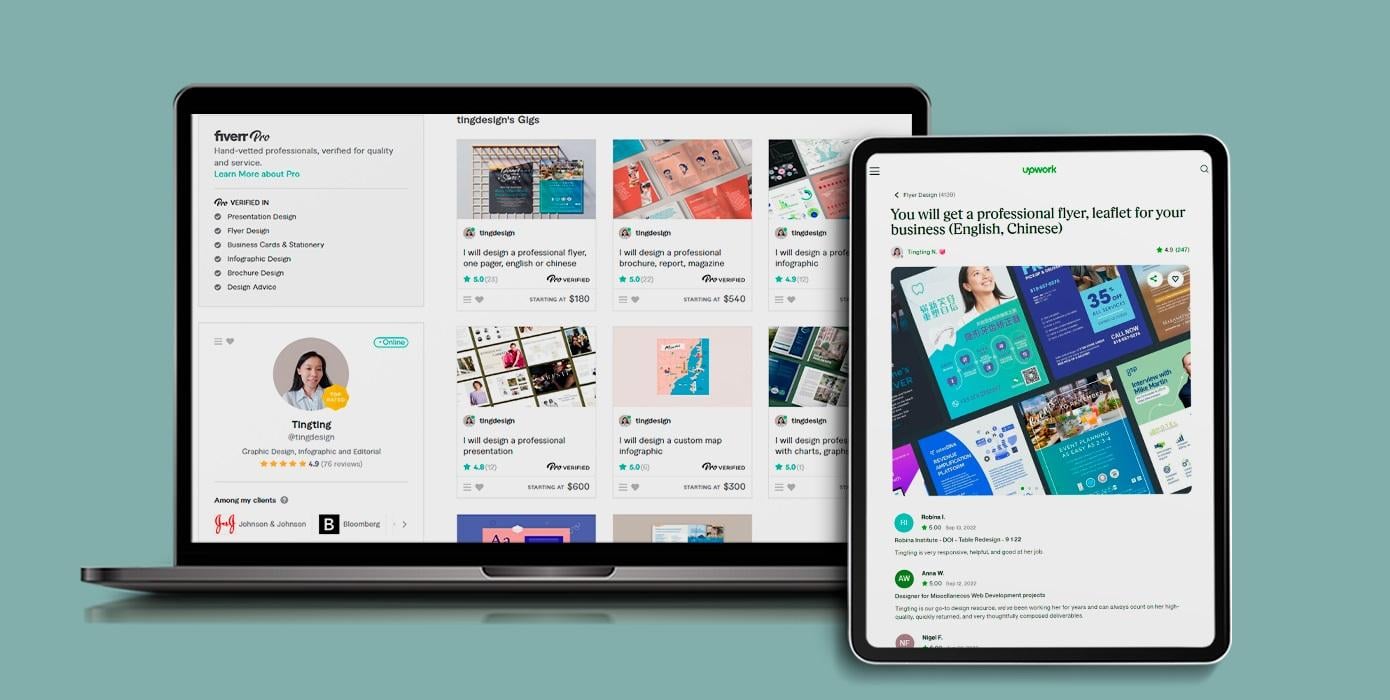
yourself and the skills, clients, education and tests, web and social presence. The last one, portfolio. Let's look at my profile as an example to see all the
elements on the live page. This is my profile
picture and my name. This is my business name and short description
of the profession. These are the pro
categories I have been approving about me. It's a short description
about yourself. I have my name and my profession as well
as years of experience. What I do is that I create design solutions uniquely suited for your brands and purposes. The last call to action
in the scale section, I have added all the
related tags, my clients. This has to be
approved manually. You cannot just add
the logos here. You have to go through a manual verification
process with fiber staff. Here are my service
kicks under it. It's my portfolio. This is my portfolio
page where I grouped different projects
into its own categories. I have 90 reviews. I actually completed
around 220 orders. About 91 people left the review. That's around 40% This is my profile page and you have to fill in all of this when you
set up your own profile. Among all of the things I will talk about some of
the difficult part, which is the description
about you and your business, as well as the
portfolio section. Let's look at how to write
your own fiber profile. It doesn't need to be long, but it's not easy to
write about yourself. My personal experience
is that we tend to be modest and not confident
about your achievements. If you are on fiber,
you are a business. A business cannot thrive if you keep all the good
things in secret, you need to advertise it. First, tip, Don't
be shy when writing about your skills,
experience, and achievements. Name dropping can be helpful. Number two, throw in numbers. Believe me, it catches the eye. Number of experience, number of projects, satisfaction rate. They all draw attention and
establish your credibility. Number three, use AI for help. You can ask AI for ideas. You can also ask AI to write
based on your own ideas. You can ask I for better words. I have two profile examples to show you that might help you. As you can see, the
numbers stand out. We have seven years of
experience and also 100 websites completed as well as list of industries she
has worked ways before. Second example, as you can see, name dropping when he started working and featured on fiber. Another one sounds professional
but also credible.
6. WEEK 2: Fiverr Portfolio: The last part and the most
important part is portfolio. Since we are working in
different industries, some are visual,
some are non visual, some are in audio and video. It's not always the same
when creating portfolios. For example, if you are
in visual categories, you are a graphic designer, UI design, fashion
designer, even architect. You should focus on your work and provide
professional mock. Ups. However, if you are
in non visual categories, such as writing, translation, or consultant, you
can use your photo to market yourself to
establish the brand. Second is to turn your
work into visual images. If you are in video
and audio category, of course the portfolio should be video clips and audio
clips of your work. Also, you can use
yourself to establish your own brand portfolio Sample should
follow three rules. Number one, no clutter. You don't need to add images, you don't need to add texts. Just avoid clutter. It will bring down the quality. Be authentic, show
your original work. Avoid generic images and
more ups like this artist. Be consistent. Only showcase high quality and relevant works. Works that support your
offerings on fiber. When it comes to making
the portfolio image, freelancers in non
visual category find it difficult to turn their
work into visual images. I want to show you that you can actually make portfolio
sample in Powerpoint. Yes, that's right.
You don't need to use Adobe or hire a
professional designer. Imagine I'm a translator and I have translated this article. Instead of using the translation in Word document as it is, we will make a
mark up like this. Before doing this, you
need to see if your work has been designed and ask
for permission to use it. Now we have a blank canvas. If you would like
to change the size, you can go to design slide size. Custom slide size I
am using right now, the standard 16 by nine. First we want to give
it a background color. You can go to format background, solid, feel, choose
the color you like. Let's temporarily use this one and bring in the design works. Zoom, Select all of this
to make sure that we are resizing them at the same
ratio about like this. Spread them out,
group them together, hold down shift so you are
not changing the ratio. You can see the guide,
It's centered vertically. And what about horizontal?
Okay, now we are. And you see the background
color doesn't really match. Let's try to use the eye
dropper to pick a color. This one, okay? Maybe we can choose more colors. Give it a little bit deeper so that it contrasts with the
design. With the design. Now you can see we have
a simple mock up also. You can give some
shadow to the images. Go to picture format, Picture effects shadow.
Give it a shadow. Okay, now you don't see very well because the
background is dark. Let's try to change it slightly. Bring it up a little bit. Now you have a completed
portfolio image to use on your fiber profile. If you want to make
it even better this with the computer,
we can do that too. You will find the
two websites that I use a lot to find
a good mark up. I'm trying Pixabay. Let's do laptop mark up. Right now I have
all the mark ups. If you don't find
anything interesting, go to the second website, Raw Pix typing
laptop and mark up. This one is even
better because you can choose free and also file types. I usually use PNG, it's easier to edit and you can skim through,
find the one you like. After you have
downloaded the laptop, you can bring it into the Powerpoint and
center it a little bit. Bring in the file, which is this piece,
and fill the space. We can crop it out.
Here you have it. Once you're happy
with the design, we can save it as a JPG
to upload on fiber, go to file, save as, choose the location, change
the format to be JPG or PNG. As you can see here, it's ready for uploading
onto your fiber profile. A simple design makes a huge difference.
Everyone can do it. You can try it on
Powerpoint or you can use any software you
are comfortable ways. There is also a
Canva you can use. It's a web based application
that's easy to use. You can make simple
designs like this.
7. WEEK 3: Fiverr Gig: You've discovered the
skills you can offer as a service and completed
your fiber profile page. Now it's time to
create your first gig. Let's get into it.
Your first gig should be created
correctly and complete. Not only is required by fiber, it will help you to attract
high quality clients. There are three groups
of information you need to prepare before
creating a gig. Number one is the
basic information. It includes gig
title description, FAQ, and so on. Pricing should follow the
Fib three tiered packages and Gig images are to be uploaded as samples
of your services. There are several things
in basic information. Number one is gig title. Gig title is not your job title, it's not your profession, It is the specific service
that you are providing. Here are some gig title samples. As you can see, it all
starts with I will. This is a system setting and you don't have
to change that. All you need to fill is
after I will do something, design something, create
something, translate. Something should be very
clear and specific. If you don't know, try to
search on fiber website, look for similar
freelancers and use their keywords, category
and subcategory. Be sure to choose
the right category because this is very important. Sometimes people don't find you because you are in
the wrong category. As I mentioned just now,
check other freelancers, see which category
they are using and you can do the same description. This is your chance
to further explain in details about your expertise and highlight the value
of your services. Don't leave the gig description empty because this is
also an opportunity for you to repeat the keywords and to help the search engine
to find your services. There isn't much
formatting you can do. The only thing you
can do is to vote. And also you can use
bullet points and paragraphs to
separate the block of text so that people can
skim through easily. Faqs, I think three to five
questions are very good. You need to anticipate what clients might ask,
provide answers. Think about delivery
time revisions, file formats, software
you work with. You can come back later and
modify these questions. Search tags. Search tags
are for SEO purposes. You can add five
maximum relevant tax. When you type in the tax, be sure there's no typo
or mistakes requirements. What information
do you need from the clients to be able
to start the work? Be clear and specific. On fiber system, there are
three ways you can ask for information Will be texts which the client can
type in the answers, or multiple choice or
attachments such as PDF, word documents, and so on. You can make it either
mandatory or optional. Personally, I don't
like it if it's mandatory because it
creates an obstacle. I make them all optional. Be sure to think
through what you need from the buyer
for this service. The better prepared you are, the smoother the
project will be. Pricing. Fiber has these
three tiered packages for you to offer different priced
packages for different needs. Even though you can just
offer one priced service. But I think you should
use this feature as five prioritize services that
has three tiered prices. By default it's called
Basic Standard and premium. And you can add a
little subtitle to it explains what it contains. Here I have six page, 16 page, and 32 pages. Depending on your services, the options might
look different. While the revisions
are the same, you can have 123 or
unlimited delivery time. You need to choose the time that you can
deliver each package. Clients will be able to use it as actually a
filter on the website. They can filter out depending
on how fast they want. The service pricing
is important. Clients are not
necessarily looking for the cheapest quality client, look for the best value. Don't undervalue your services, and as mentioned before, do some research on similar
offerings and freelancers. I do have some suggestions
when pricing your service. It depends on your
level of experience. We start with the beginner. If you are a beginner and
you want to gain experience, I think money shouldn't
matter that much. You can use the
entry level price. If you are intermediate, If you are a new seller and
you want to win clients, I suggest you start at the 20% less than
the average sellers. If an average seller sells
at $100 you could sell it at $80 As you
grow into level one, level two, you
build more reviews. You can actually increase by 20 or 50% if you are
an expert and pro, there are three factors
to think about. Pricing, what is your hourly
rate and what is the demand? How many freelancers
are offering similar services and how many inquiries you
have been getting? The third one is
the financial goal. What is your financial
goal if you want to make $1,000 a week for
20 hours of work, and then you can easily find out how much you want to
charge for such service. Last but not the least
is the gig images or videos Fiber only allows three Sunil images
to be uploaded. Optimal size I found is
1920 by 1,200 pixels, depending on the screen size. It won't have so many margins on the top or the
left and right. You can make your gig images
according to this size. Like a portfolio, you need to turn your work into
visual designs. If your work is video
or audio categories, it's best of course, for you to upload video and audio clips. You can also attach documents, but only in PDF. You need to provide a
gig image that looks professional and high quality. For people like me,
it's a little bit easier because we are
involved in visual design, so we could use our work. But for people who are in
non visual categories, it might be a little bit different if you
are not a designer. I have prepared this
tutorial for you so that you can follow along and make
your first gig image.
8. WEEK 3: Gig Image Tutorial: I did a little research
on translation gigs. Based on the research and looking at what other
freelancers are doing, I prepared this sort these keywords to be
used on the gig image. We're going to convert this
text into an image like this. If you are not a designer
and would like to follow this tutorial to
make your first gig image, all you need is the
Powerpoint or Canva. Write a few keywords for your
service and get started. Remember in previous
lessons we talked about the best
size for gig image is 1,900 by 1,200
pixels in Powerpoint. You can change the
size in the design. Slide size, Custom slide size. This is in inches,
but don't worry. You can type in 1920 x. Height would be 1,200 x. Then you click okay. And this is the right size. First step, we need to make this background geometric
background with three shades. We need to create this part. Let's start by
drawing a rectangle. I want to see all
the shapes together. I'm going to give it
a transparency, 50. Now we need to
create the curves. For the curves, let's
insert oval shape, the big one first. Give it the same
transparency, no outline. Choose the two
shape, no outline. The third oval, I'll
copy it and paste it. Make it smaller, rotate it slightly to create
that nice curve. Now select all the three shapes we're going to go
to Shape format. Merge shapes, make it fragment. You going to tear
them all apart. Now we can remove the
shapes that are outside. Now we need to merge
the big shape together. Let's union, now we
have 123 shapes. We need to give them
three different colors. Let's go back to
the transparency, bring it to zero and
this one as well. This one, we can give
it a dark shape. Once you have the base shape, you can do the same
one in the color, choose more colors, push it up a little bit and you will
see a lighter color, more vibrant and lighter
color like this. Give this one even
lighter shape. If you don't like it, feel free to adjust. But I like the
lighter color to be, the smaller and darker
color to be bigger shape. Now you have the background. Make sure they do
not have a outline. Now we bring the content
to bring your picture. Have your picture
ready, drag it in. We will crop it. First crop to aspect ratio, which is one by one,
which is a square. Make it bigger, crop it. Then the second step
is to crop to shape, which is the basic shape, that's a perfect circle. You can resize it as you like. Now it's time to bring the text. You have this text, change the color to be white. You can use custom phones or whatever you have
on your computer. The basic rule is
to have contrast. You want to see difference between the heading
and subheadings. And the four bullet points
can be four features. We're going to put
it at the bottom, we can take it out for now. Now we have the heading. For the heading, I'm
going to make it even bolder and bigger. This one, it's not necessary
to have the names here. If you want to keep it,
you are free to do so. You can put this up
and make this smaller, can add a line and give
it a different color. Now let's work on the
subheading. Subheading. I added a little color to it so that it pops up.
Let's do the same. Insert a rounded
rectangle and make it, give it that same
highlight color. And send to back. Make it this for the four
features on the bottom. We can do something like this. Let's bring it in copy
and then paste here. Let's remove the bullet
points, give it a color. And the same font
I want to bring to two lines only they
are a bit too close. Let's make it wider. The last step is to add
the checkmark icon. For the icons, you can use this free website called
Monster and typing check. Here you have all the
icons that you need. Download the one you like. When downloading the icons, it's better to download them in SVG because in Powerpoint, SVG file can be edited and
it doesn't lose quality. Once you finish the design, you can go ahead and
save it as a JPG or PNG. Go to File Save, and choose the file
format to be JPG or PNG. Png tends to have
a better quality. If you like it,
you can try again. Here it is your first gig image.
9. WEEK 4: Client Communications: Now everything is set. You are just waiting
for that first order. It might happen faster
than you think. Naturally, most clients will message you before
placing an order. You will find all
inquiries in fiber inbox. This is where all
the communications happen before an order. Once the order is placed, there will be a separate
channel to message. Good communication is
vital for your business, especially when you
are a freelancer. Just by improving your
communication skills, you will be able to attract
high quality clients, maintain good relationship,
and gain repeat customers. This is the only
way you can have a steadier income and
sustainable freelancing career. I will share with
you some principles for good communications and also some tools to help you to communicate better
and more efficiently. The first principle is thor. Thorough means that you
should read clients messages thoroughly
and complete. Check the files they shared with you to fully understand
their needs. Second, professional, professional communication
requires you to have a good command
of English language. If you are not a native
English speaker, you should look for
ways to improve your written English as well
as your speaking English. Also, learn the ways to communicate with
empathy, with courtesy. Try to use phrases like
thank you, could you please, Or I will be happy showing your empathy positivity and the clients will
immediately feel it. The third one is
timely responses. For me, it's not to
reply within an hour, but reasonably fast,
like under 12 hours. Considering the
time differences, imagine you are a buyer. After sending out
multiple inquiries, you must be anxious
to hear back. Freelancers who respond timely will likely to get more orders, and more clients will come to
them to help you catch up. Fiber will send
you notifications on your e mail and mobile app. Remember to turn all
the notifications on in the settings
under your profile, there is a quick response
templates that you can use to help you to respond
faster and more efficiently. Here are some templates that
I use from day to day work. You can pre type all
these situations according to your own needs
and modify it as needed. When sending to
individual buyers, just remember to edit it every time to avoid sounding
like a robot. The hottest topic
right now is AI. There are a few AI models
available for the public. I think it's time for you
to get used to it and also utilize it in your
communications. For example, you can use AI to understand
clients messages. You can copy a block of text into AI and ask AI to
summarize for you. You can use AI to
help you to respond, to find better words, and compose a better response.
10. WEEK 4: Order Management: Fiber already has a very robust
order management system. There are four main steps. One, you receive the order. Two, you deliver the work. Three clients review the work, four revisions, and client approves the delivery
for step one. When you receive an order, hopefully the client has provided all the requirements
and project files, but not all the clients. Behave professionally like that. If you are missing any
project files or information, be sure to reach
out to them while waiting for the client to
provide necessary information. You might see that the
deadline is approaching. In this case, you need to submit a request to
extend the deadline. Fiber is very strict
on timely delivery. Missing two mailing
deadlines will count against you when you are trying to
reach the next level on fiber. Step two, deliver the work. There are three
things to remember. The first thing is that
deliver on the order page, not through the chat. Then you need to name
your file logically. You can use the client name, you can use the project name, and also add version numbers that you know how many
revisions you have done so far. The third one is to add extra. If the client ask
for more revisions after you have done like
five revisions already, you can ask the client to pay for the extra revision work. This is to ensure
that the client walks away with
100% satisfaction. But also it is fair that you get compensated for
the extra work for step three fiber gives
the client three days to review the work and
request revisions if the revisions are minimal. And of course you
will be able to do that and the client will be
happy to approve your work. But what if the client is
not happy with your work? How do you deal with unsatisfied
clients and disputes? Here are some common
three scenarios that I hope it will help you to deal with this
difficult situation. Small project with
supportive feedback. I think in this case the client is interested in continuing
working with you and I think it's
the best for you to first communicate
with him or her. And then you need to set a
clear revision goals so that you can make the revisions and meet the client's expectations. Scenario two, small project
with unsupportive client, this is the most
difficult part because the client is definitely
disappointed of the result. I would just refund them instead of going
deeper and making revisions after
revisions without knowing if he or she
will be satisfied. In the end, there is a chance that you will get
paid but end up with a bad review because the
client thinks that what he or she got is not
worth the money he paid. The worst thing is
to get bad reviews. When you are just starting
out on the platform, try to do everything
to avoid it. Scenario three is when
you have a big project, it requires a lot of
time to complete it. What I would do is to only
send sample works for review. Once the client confirms and
approves to move forward, then you can complete
the whole project. This way, if the
feedback is really negative and there's
no way to turn around, you can give a full refund
without wasting hours of work. Remember, every time you work with someone new, it's a risk. And you need to do
everything to mitigate the negative impact that may
come out of the experience. Because you are
running a business, there are chances that
you suffer a loss, but you should be
able to balance out in order for your
business to grow.
11. WEEK 4: Fiverr Levels: There are four levels
on fiber To maintain your current level or
reach the next level, you will have to
meet a few criteria. This evaluation will happen
on the 15th of each month. If you do not meet
one of the criteria, you will be lowered back
to your previous level. Fiber is very strict about this. Be careful, should track
your level actively. To do that, head to analytics. Scroll down to the bottom, you will see this
list of criterias. Let's look at the four criteria. The first one is response rate. The percentage of you replying to clients, inquiries
through messages. It needs to be over
90% If you can install fiber mobile app to
help you respond while you are on the goal
order completion, you need to complete
at least 90% of the orders in 60 days. Order cancellation is
counted against you. If you have a good reason, contact customer
support to ask them manually exclude that
particular cancellation. For example, if the client
decided not to work on this project or he placed
an order by mistake, it is not your fault
and you should explain to fiber staff not to
include this cancellation. It can be critical if you have ten orders and two
cancellations that would put you under 90% required to maintain your level
on time delivery. We already talked about
timely responses. It is also important
that you make sure deliver orders through
fiber system on time, every time or asked to extend the deadline if the work cannot be completed before
the deadline. Rating the quality
of your service is the key Fiber allows buyers to give public reviews
and also private feedback. This is little known how it
actually affects your review. Remember, we talked about different situations
when disputes happen. Try to mitigate loss and avoid creating negative
experiences for the clients.
12. WEEK 4: Manage Multiple Orders: Sometimes I have more than
five projects going on, but I seldom miss deadlines.
How do I do that? Of course, I rely
on five dashboard. It is the first thing I
check when I start my work. In the dashboard, you will have all the orders prioritized
according to the deadline. You can check orders under my business orders and you will see different types
with priority, active, late
delivered, and so on. You can also rely on fiber, as it will send you email
reminders about checking new orders and delivering the orders when the
deadline is approaching. On top of fiber dashboard, I also have a few tips
that you can learn from me to help you to
manage multiple orders. The first thing you
can use is to do list. Now you have the
technology to help you instead of writing it
down on a piece of paper. There are tons of apps
for this purpose. Just remember, it's better that if you have
everything in one place, including your work
and personal tasks. I use Google tasks as it works across
different platforms. It works on the browser. With my Gmail, it shows
up on my calendar, and the mobile app is
really helpful as well. You can create different lists, for example, one for
work and one for life. You can create tasks by dragging one E mail into
the tasks sidebar. You can view all the tasks in your Google calendar and mark
them complete as you go. The second one is
prioritize all your tasks. Think of the deadline
for each task, how long they might take
you for each of them. I like to work on the easy one. First things that don't drain my brain or take a
long time so that I can preserve my energy for bigger and more difficult
work during the day. Another important method
is time blocking. Time blocking are
like time boxes you can set for yourself
for certain projects. For example, check e mails. You can set a time to check your e mails maybe
three times a day, one in the morning,
one after lunch, and one end of the day. It doesn't break up your time. While you want to concentrate on other important projects. For bigger and more
difficult tasks, you should block your time
and avoid distractions. For me, I prefer meetings to be either the first
thing in the morning or the last thing
when I finish my day. There's no right
or wrong method. Time blocking should
fit your lifestyle, your private situation,
and adjust along the way, find what's best for you.
13. WEEK 4: Fiverr Payment: Now the best part getting paid, you will find all your
earning information under my business earnings. First, you have to wait
for the earnings to clear after the buyer
approves the delivery. It takes either 14 days or seven days for the top rated
and pro seller to clear, then it will be available
for withdrawal. You should set up a
payment method beforehand. You can use various
methods including Paypal, Payioneer, Fiber Revenue
Card, or bank transfer. I am using Pioneer. I'm not affiliated with them. It's only that I'm using it
and the fees are very low. I only pay $1 per
withdrawal to my bank. Feel free to check out
other options and remember, if you have any questions, reach out to each
customer service to clarify before you
initiate any transfer.
14. BONUS: Best Practices: In this bonus lesson, I want to share with
you a few things I learned along the way
while freelancing online. I wish I knew all
of this back then, It would have saved
me a lot of time and stress When you
are a freelancer, you are your own boss, but it comes with a lot
of responsibilities. You need to constantly
making decisions. You need to negotiate, and also think of strategies
for you to grow and thrive. Here are four things I
want to share with you. Number one, identify
problem clients. What are the red flags? How to deal with them and
avoid difficult situations? Number two, how to
retain repeat customers. What are the qualities
that they are looking for? Number three,
reflect and improve. This is very important for your business
to grow and thrive. Number four, streamline your business workflow
for optimal productivity. First, identify problem clients. What are the red flags? The first one is
unclear expectation. This kind of client, they don't know what they want, they do not have any objectives
nor anything prepared. It will either
cause you a lot of stress due to the client
changing his mind, or the client won't be happy with what
you'll come up with. The best thing is to
stay away from them and refuse politely in
the very beginning. Second one is little respect
for your time or work. For example, a client sets an impossible deadline or they message you and expect you
to make changes on the spot. Yes, they hired you, but it doesn't
mean that they are entitled to control your
time or the way you work. The last one
sensitive to prices, they might come and ask for discount or special
price the first time. Sometimes they will say, oh, I have many
more work for you. Or might say it's
just a logo design, it shouldn't take that long. Or simply, your
price is too high, you charge too much. They might be interested in the value and quality
of your service, but they never pay the
price you are asking. Now let's talk about the good customers,
the repeat customers. What qualities are
they looking for? Here are three qualities. The first, consistent, high
quality work, is the key. Try not to overwhelm
yourself and maintain the quality of work or improve the quality
of work over time. Reliable, Be available, become the go to person for
your client's needs. If you can, try to respond
in a timely manner. If you are not available, try to communicate with the
client and let the client know when you will be able
to take the job discount. Who doesn't like discount? You can give them
ten or 20% discount for repeat projects. As you are very familiar
with their personality, with their projects, it's
a win win situation. Third aspect, it's
important that you set a time to review your
work and your business. It can be quarterly
every three months, or six months, or annually. Think about the improvements needed as well as
the bright side. Your success should
be celebrated. This will make you feel a
lot of positivity and it can actually help you to grow
your business in the future. For example, think about
the successful projects. What kind of projects and what specific industry or specific topic that
you are so good at? Think about the
compliments you received. What kind of skills that
you shine the most. You can use this key information to help you to narrow down your services and create strategies for your
business in the future. The improvement needed may
be in one of these areas. It can be your skills or your process as well as
hardware and software. The last part is
streamline your process. Every person has their
own process or workflow. I didn't have any
workflow documentation in the first two years. Every new project, I would have to plan the
whole process and waste a lot of time
because I had to do many steps repeatedly. For example, writing lists of requirements for the clients, gather portfolio
samples for clients, consideration
quotations and so on. I follow the course on how to improve and streamline
the business process. Now I feel more relaxed. I can see clearly my own process when I
start a new project. Not only my
productivity improved, but also I can minimize risks. The client become more satisfied with the work
and the experience. Since we work in
different fields, there are no universal formulas. The only way to establish your own workflow is
through trial and error. You can follow these four steps. Number one, analyze
your current workflow. Number two, break down the
process into different steps. Number three, identify
the key steps where you can improve. Number four, use templates
that can be automated. Take my work, for example. I have to first communicate with the client and agree
on project goals. And also receive files
from the client. Then I would start
working during the work. I need to use Adobe programs and many other resources online, such as inspirations,
phones, icons, and images. Then I will send the work to the client and make revisions. I automated a few things
for each of the stages. I have all the sample works
for each services ready, send out to clients. I also have a table with a full list of my
services and pricing. I have a message template
requesting files for the client for each of my
service during the project. I have resources online,
bookmarked, and organized. I also have resources offline, saved, and organized
on my computer. I use Adobe templates with already prepared
grids and guides. After project, I have standard mockup files
for my portfolio. I can easily switch out the designs for different
types of mockups. There's no perfect process
or workflow and they were likely to require continuous adjustments
and refinements. You may want to change
the process based on the results to achieve
the best outcomes.
15. Closing: Congratulations on
completing the course one step at the time. I hope this course
will help you to take the first step into
your freelancing career. Please feel free to share
your fiber profile on the course project and I will check them out and let
you know my comments. You can also find
the resource files and course presentations
in the details below. Good luck and happy work.
 Tingting Naggiar, Freelancer, Graphic Designer