Transcripts
1. Introduction: Have you ever wanted some ideas for creating some beautiful, high key and low key imagery? I'm Paul Wilkinson, an award winning portrait photographer, and for the past 20 years, my incredible team
and I have run one of the UK's most exclusive
boutique studios just a spit and a throw
from Oxford and London. I host the Mastering portrait
photography podcast, and I'm also the author of the bestselling book of
exactly the same name. In this video, we're going
to show you some ideas, some really simple ideas for
creating punchy, high key, bright vibrant images, and on
the other side of the line, some really moody, romantic, low key images all
here in our studio. Hopefully, at the
end of the video, you'll feel inspired
to drag out a light or two and go create some
images all of your own. Please enjoy this video.
2. Exploring High-Key & Low-Key: So, what do we mean
by hai ki and Loki? Well, broadly speaking, a hike image is where the predomination of
tones are bright, white, light, whatever
words you want to use. Similarly, or conversely, Loki simply means
dark and moody. So when we knew we were going
to do this video, Katie, Sarah, and myself sat down and put together a
quick mood board. Just a collection
of images that we thought either we might try and replicate or we
could be influenced by. Now, it's a great
idea to do this on any issue any lot of
shots were my own. So were from other
photographers. I'm guessing by looking at them. So we probably generated by AI. But we just trolled the web
and found some ideas that we thought would be interesting
to experiment with. The great thing about a
mood board is even if you don't get to do everything
that you find, and, frankly, we haven't is there's always an opportunity at
another date to go back, revisit the board and
think, Do you know what? I wish we could have
done that. So I can highly recommend you do it. Now, we've picked a
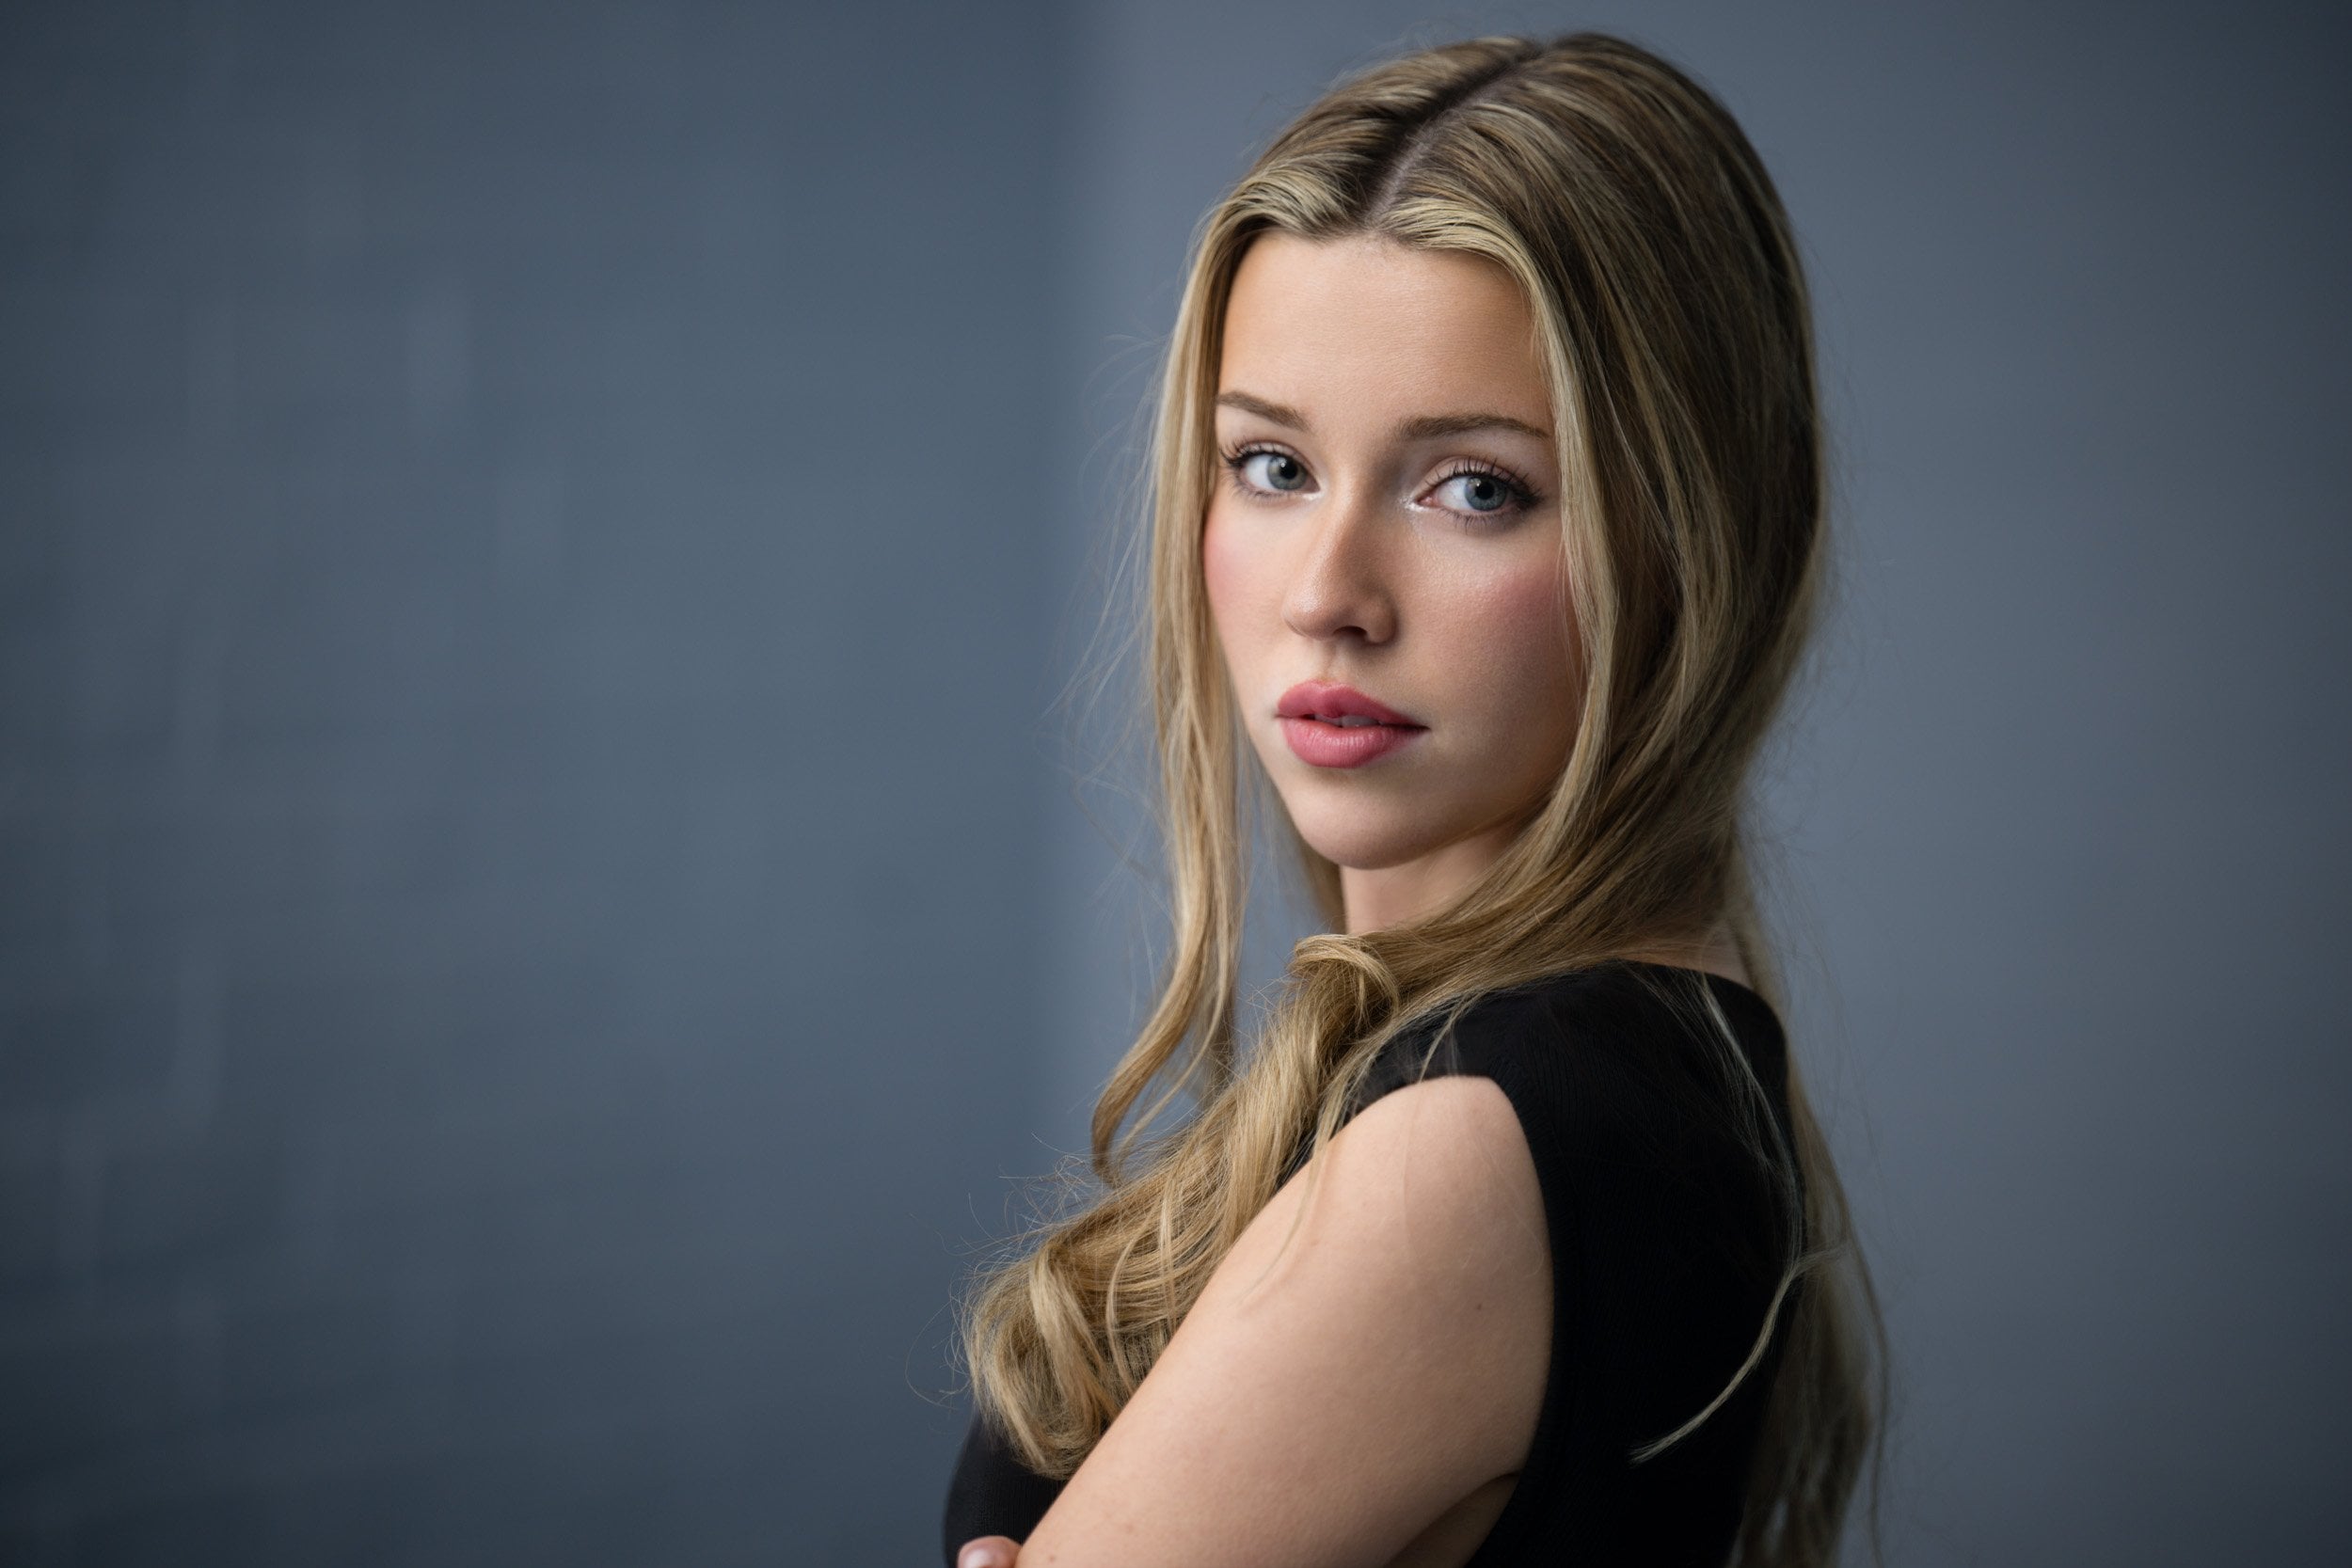
couple of models on our outfits to suit the day. We've got Abby, who
has fair hair or rather hat when we last met
had fair hair, fair skin, and we knew she'd look
great in a white outfit, and we could do really clean, interesting images
where every single tone is right up in those
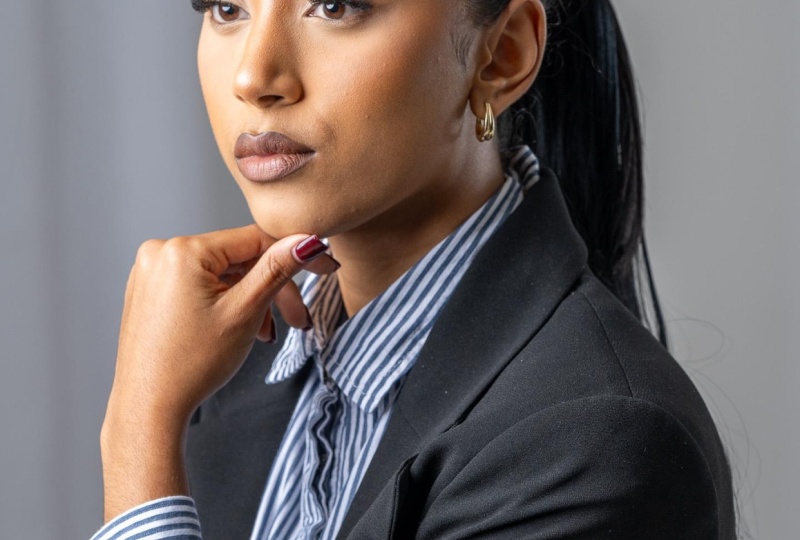
high registers. And alongside that,
we've got Lizzie, who is beautiful and dark hair, dark skin, and we picked
dark outfits for her. And she really has a more
kind of 80s rock cover. I mean, I'm I'm
giving my age away. That sort of sort
of big curly hair and a really dynamic
face, beautiful jaw line. And we knew we could
create really moody, dark images with her. Now, of course, of course, life throws you whatever
life throws you. And when Abby turned up, her
hair was no longer blonde. So what we did as a
little bit of trick, though, Well, we
can probably still do everything. It'll be fine. But if she ties her hair up into a bun and just leaves a couple of curls
to frame her face, actually, that will
work beautifully. So I've still got a predomination
of really light tones, and I've reduced how much her
dark hair is in the shot. She's also wearing a top,
she brought with her, rather, a top that
was off the shoulder, which we picked out because we thought we could
work with her. And the point is a
very simple one, is it doesn't matter how
much planning you put into how many mood boards
or pictures on mood boards you
collect together. In the end, you're going to be sort of a little bit at the whim or the control
of your client. When they turn up, you're
going to photograph them, however they look, whatever
color their hair is, whatever outfits
they've brought. And even in this case, where we're defining something, we're creating
something, the models still managed to throw
me a curveball or two. But there's not a lot we can do. So we just adapted
and went with it. Now, luckily, for me, I'm an
instinctive photographer. That's the whole joy of it
is that while I'm working, I'm constantly
thinking up new ideas. And so, Okay, I couldn't do
quite what I had in my mind. We'll revisit those
at some other point. But what we have created in this video, well,
they're stunning. So with that all in mind, let's head on to the
first of the ideas.
3. Idea 1 - Simple High-Key Portraits With Just One Light.: So in this first section
of this first idea, we're just going to
play with one light. I like doing that anyway, nearly all of my shoots. I will start with
just the one light. Why? Well, it's really
straightforward. And the less things
you have to worry about on the technical
side of your job, the more things you can
concentrate on the experience, making sure someone's
having a good time, and most importantly, making sure you make someone look good. Here, we start with the wall. I've got a wall in the
studio. It's painted a nice photographic
neutral white. Everyone has some kind
of surface they can use, whether it's a wall indoors or outdoors or whether you're
just using a studio backdrop, a paper or a canvas. In this instance,
because it is a wall, I can easily get Abby
to lean against it. And I like doing that
because it allows me while I'm just getting
my head around it, starting to read my subject, it means that she
can just stand, lean on the wall, put her hands in the pockets,
and do you know what? That's the easiest
pose of them all. I'm not a big fan of creating exaggerated
or extravagant posing. That's just not my style. And it's a style decision. It's not don't do it. It's certainly not a lesson. It's just that I like
that casual capturing a little bit of who someone is. And if you ask someone to lean on the wall
for long enough, eventually, they
will settle into it. So, Abby's leaning on the wall. I've just moved the
light around or a little bit to
create a little bit of a shadow to the side. So as you move the
light to camera right, you get a little bit
of shadow camera left. And that helps to set the
subject into the scene. If you don't have any shadows, you're always
running the risk of it looking sort of cut
out or artificial. Now, of course, there are instances when that's
precisely what's required. If you're doing photography for Dan Kinsley, for instance, then that's almost exactly
what they're going to need. But here we want
it to look real. We want it to look
authentic. It's a portrait. It's not a fashion shot. It's not a sort of
documentary shot. It's appropriate that it
looks really natural. So we've moved the
light around a little just to create that
shadow, and, of course, at the same time,
I'm paying attention to the halo of light that's
appearing on the wall. And of course, every
light has a hot spot, and you want that hot spot to make sense in your photograph. Unless you're blowing it
out completely to white, the hot spot will be visible
in your final image. So we've just spent a little
bit of time dancing that around until the whole shape
of the light on the wall, the shadow behind Abby and Abby herself all hang together. It all feels correct. Like I've paid attention to
the layout of the image. Of course, there's
always that thing of making sure there's catch
lights in the eyes. That's sort of a given for me. Brought Abby forward a
little bit, as well. So just to see what would
happen if we tried, let's say, a bit of
Hollywood lighting. Now, Hollywood or glamour
or butterfly lighting is a very simple
lighting pattern. It's a very effective
lighting pattern, and you can use it with
almost any modifier, as you'll see later on
when we get to one of our later ideas in
the low key section. But Hollywood lighting has
the single characteristic of throwing shadows away from
the camera, away and down. And you can see it
really clearly when the shadow under the nose
is bank under the nostrils. It's called butterfly lighting because the shape
of that light is meant to look sort of
like a butterfly's wings, but I've never spotted it. I can't see it. I just
know that that's its name. And if you're doing
this lighting pattern, what we're trying to do here
is make sure the light and the camera and Abby's nose
are all on the same line. And that way, all of the shadows are falling away and down. There's no light
going to the sides. It's just away and down. And that's a very traditional Hollywood glamour or
butterfly lighting pattern. And then I thought about playing a little bit using one
of our reflector boards. Now, in our studio,
our reflectors are actually doors painted
white with a stand. So we've put that
up in the studio with an auto pole behind it
so it's nice and stable, and that gives me a corner
in which I can do things. Has two primary effects. One, the obvious one, it gives me somewhere to lean
someone if I felt like it. And two, it gives me
a kickback light, which just lifts the contrast. It's a really beautiful light. When you're working
with high key subjects or high key images, having that extra fill, it just reduces the
contrast ratios and brings this sort of
softness to the image. Now, I'm using a
studio reflector or door in this instance, but most of us have got a cornet in a wall or
corner in the studio, a cornet in the we don't here. I don't have that
ability or not easily. And so we've just built our own, put the door in, put
it on it stands, put an auto pole
behind it for safety, and asked Abby to
lean back into it. And of course, as
she's done that, we've laughed a
little bit about it, because it's not easy thing
to do once you actually place someone in a corner
where do elbows go? Well, we've worked
that out with her, and we're laughing
and messing around. And I've captured some
of those images as well. So at some point, she
played with her hair, and it has a real life about it. It has a rawness, a naturalness. Never, ever avoid taking those
pictures. Let me reword. Always take those pictures because if you take
those pictures, your portraiture will
have an authenticity, an energy about it
that's one step above just posing everything. Now, some of it is posed. I asked her to twil her hair
because she had done it earlier off camera, and
it just looked natural. And she did this
thing where she moved and caught her eye
towards the camera, and they just made the
most beautiful image. So always try those things,
move around a little bit. Use the studio space
that you have. If you have a corner, try it. If you don't have a corner,
maybe consider getting a door or something you can
prop in nice and safe. And then at the very end,
kind of to prove a point, we tried exactly the
same thing with Lizzie, who has dark hair and a dark outfit because you
can do it that way round. I sort of all of
this is about taste. It doesn't matter how much we teach or how many
ideas we give out. In the end, it
comes down to what you like or what I
like in this instance. And so I really like
harmony in my image. I I've got someone with a
high key outfit, fair skin, fair hair, I'm going to generally migrate
towards high key images. If I've got someone
with dark hair, dark skin, and dark outfit, my go to position,
still probably with one light is to shift
across to low key. Here, we thought just
as an experiment, we'd just try and get
the picture with Lizzie. She's wearing a dark outfit. She's got dark, beautiful hair. Her skin is a tone or two
darker than Abby's and we've just popped her in
just to see what it would look like
against a light wall. Now, here, it's
worked really well. As it happens, you can create a beautiful image with a light background
and a dark outfit. But as I will demonstrate later, it's a little bit more tricky
to get a great image of a light outfit
with fair skin and fair hair on a dark background. And on that, let's head
on to idea number two.
4. Idea 2 - Getting More Creative High-Key With Two Lights: Stunt. Okay, so we've spent some time playing
with a ton of light, hikey backgrounds,
hiky subjects, really punchy, beautiful,
energetic lighting. Now let's move it to the
other end of the spectrum. Let's turn the light down. Let's do something
darker than moodier. And let's face it,
as photographers, we're all drawn
towards that slightly Rembrandt Dutch masters feel for some inexplicable reason, we do love the gloom. So here we're just extending what we did in the
first two ideas, but we're taking one
big light source. It's 35 centimeter
by 1 meter softbox. And I'm just moving
it around, Lizzie. She's got dark skin,
dark hair, dark clothes. We brought down a dark
paper background. Now, you can use a
couple of things. You can use gray, if you wish, and just move everything
slightly forward. In fact, if you want to, you
can have a white background. If you've got a white
wall, don't think for a minute, you can't
make it dark. Just make sure no light hits it. It's a
very simple trick. Move everything as far
away from the wall as possible and make sure no
lights are pointing at it. It's amazing how dark
you can make it go. In theory, if you get
your ratios right, you can make it jet black. However, here, what
we're trying to do is we're trying to
create tones across the whole image so that we move the light around so that
first and foremost, of course, we want Lizzie
to look incredible. Many of these shots are
reminiscent of the kind of headshots you'd see
Hollywood actors and Hollywood actresses have. And it's a very simple lighting
pattern it's one light, you can place it really quickly. You don't need a lot of kick. You don't need a lot of space, black background or
dark paper background, a little bit of room, nice
subject, and you're done. And I think that's
probably why it's so popular with actors who
don't have a lot of time, but still want
something beautiful. So I'm positioning
a light to try and create the light
on Lizzie first. Then I'm adjusting it to see how much light I
need on the background, so it has some detail in it. If it just goes jet black, it comes back to
that same problem where it feels cut out. It feels just I don't know, it just doesn't
feel quite right, and I really love to
have it so there's, like, a harmony in the tones. We need some light
striking the background, even though it's dark. A Disney, we can bring
our white board in. It's still on its
stand, so I can just move it around,
kick some lighting, and that will also create just
a little bit of detail on the edges and will also lift the shadow so that if I've
got tone in the file, I can make decisions later on in post production about what
I want to do with that. I can, if I wish,
make them hard black. Here, I just want
that gentle tonality. In my head, I've got a really beautiful
monochromatic image. Actually, when I pointed
the camera at Lizzie, it just erupted,
and there's also some really beautiful
color pictures in there, because with the top, dark background and her hair, really, the only bits of the
subject that are not monochromatic
are her skin tones. And so that has a joy in
and of itself, as well. Then when we've done
all of that, we've moved Lizzie forward, and then I've put the
light over above her nose. And that creates, of course, same lighting pattern
as we've done before, the Hollywood, the glamour, or the butterfly pattern, where it diminishes the shadows. And I'm just trying
to concentrate on where the shadows or rather, where the light is
striking my background. And I'm looking for
that archetypal shadow under the nose, that
particular shape. And when you've
got that, you know you've hit it more or less. The light, your subject, your camera are all
on the same line. So all of the shadows are
dropping away and down. And then I've brought in a second light,
another strip box. That's another 35 centimeter by 1 meter soft box just
underneath Lizzie's chin. And this lighting pattern is pretty much universally
known as clamshow. And clamshow just
means you've got one light pointing down. You've got another
light pointing up, and they make that pattern, which apparently
looks like a clam. So there you go, clamshaw.
For people of a certain age, Pacman, but nobody calls it
the Pac Man lighting pattern. Don't know why they should do. Um so anyway, you have this
beautiful lighting pattern, and that uplift light reduces
the shadows even further. So even though, with
Hollywood lighting, the shadows are
moving down and away. Now I've got this loss of
light coming up as well, and that just takes off the
edge off even those shadows. Hence, the fact, this is a lighting pattern you'll
see on every oil of Ole and every beauty magazine
cover on the planet. A lot of fun, a very
effective thing to do, very simple to set up, to set your powers of lights until you don't want too much light coming
up from underneath. You want just enough to create
the effect you're after. Now, just to prove a
point on Ida three, we're just going to take a
quick picture of Abby who's still got her white outfit on, and we're just going to
show if you're not really careful it can have the tendency to look
like it's cut out. Light skin, light hair, light outfit on a
dark background, particularly on a
black background can look like a cutout. It's not my go to. It's much more effective
when you've got dark outfits on a
white background, but when you've got white
outfits on a dark background, at least to my taste, I don't like the look
of it quite so much. But on that happy
note, let's move on to using some hard light
for idea number four.
5. Idea 3 - Hollywood, Glamour & Clamshell Lighting: So onto idea number four, which in so many ways
is the simplest of all. It's just a bare head
flash or bare head flash with a simple
reflector dish on the front. Now, I would think most of the time you buy a studio flash, it's going to come
with either a spill kill or a dish of
some description. So this is a shot you can take the day you take your
strobes out of the bag. You don't need soft boxes, you don't need reflectors.
You don't need anything. You just need your light and a little bit of knowledge.
Now, that's it. Of course, a hard light. Now we talk about
hard and soft lights, and I say this in pretty
much every video. A hard light simply means the edges of the shadows
are distinct and clear. They're hard edged shadows. The best example, of course, is anything on a bright sunny day. You've got long drawn
shadows on the floor, and they have a very
clear and distinct edge. Soft lights, that edge is
blurred or almost non existent. Now, here, if we're using a
really hard edged shadow, I need to know my
model really well and know that they trust me and they know that in
the finished images, any sort of lumps and
bumps that are part of that puzzle are
going to be either fixed or they're
going to be shot in a way that they're flattering. Because the thing
about hard edged shadows is they don't just pick up structure and the beauty of a face and cheek
bones and the eyes, and they don't just define shape and sculpt with
lightness and darkness. Of course, they do
exactly the same thing for skin textures and for
chins and for wrinkles, they do exactly the same. Job. So you have to know your model and they
have to trust you. But therein lies
the rewards because it's a style of work
that is very classic. You can make it
look like sunshine, you can make it look like
a candles your subject. You can do 1,000 things with it. You ever wondered looked when someone opens a door
in a dark house and the light from one bulb comes through it and it just picks out some detail in the distance. It's exactly the same effect. So it can be used for
really theatrical, interesting images if you just
have the courage to do it. So here we've started with
some simple lighting. Much of this is either
a combination of Rembrandt lighting and
Rembrandt lighting is a name given to a lighting
pattern where you have a triangle light on the opposite cheek to
the light source. Very, very classic. It
was the Dutch Masters. We're going way back who first painted it or at least
first got known for it. And so you can start
there. You can then do Hollywood or glamor lighting
straight down the nose. If you look at Hollywood
and glamor lighting, and you turn everything
to the side, so set your subject up,
set your lighting up, and then simply move around and look at it from a
different angle. It gives a really beautiful, interesting light, but in
a very different style. And we've done that with
one or two of the images. Now, here we've used
a reflector dish just to try and contain
the light a little bit. Our studio isn't huge. And I don't want, just
pinging around the room willy Nilly because it
makes it harder to control. We've done a few, but
mostly we've used a dish. If you want a little
bit more control, you can get a dish with a grid or get it with some barn
doors. Equally effective. A grid gives you a much more tightly defined cone of light from the reflector. And you know you've
seen this before, but probably not knowingly. If you walk into an
office and it has those metal grids on
all of the lights, they're there for
the pure reason until you're right
under the light, the light doesn't strike you. It creates these
beautiful washes of light over the workspace. And so a honeycomb grid on a reflector has a
very similar effect. We've used it in all
sorts of ways here. We've lit the face. We've
created dramatic lighting. We've moved the light
around, so it has a little bit light
on the background. We've used it from the side, and I've created, in particular, this really stunning image where the light is just
running down Lizzie's face, and there's these beautiful
cheek bones, beautiful light, really dramatic and like an album cover or a book
cover my kind of thing. So with that, let's
move on to something a little bit more complicated
for idea number five.
6. Idea 4 - Using A Hard Light For Low-Key Portraits: Okay, so on to Idea number five. Now, this is a little bit
more technical, I suppose. But the simple idea,
the real idea, the bit that underpins it, is what if you combine high
ki and low key in one frame? Now, of course, you can
do a lot of this in post production, but ideally, we're going to create
something in camera for a simple reason that is quite satisfying
to do it that way. Now, traditionally, when
we've done this kind of work, we'll put a split
background down, so we'll have half
white and half black and mess around with that. But what we lit it in a way that created half
hike, half oki. So what we've done is
we've dropped a gobo into one of our focusing
projector heads for the lights and just shone as a basic window frame style
gobo at the back wall. So that's kicked out
into bright white, and we've put Abby into it with her white outfit and a fair and we've used that whole frame. And in fact, on its own, it's quite an interesting image. It quite a theatrical,
arty monochrome. And then with Lizzie,
we've positioned her on the side of the frame
where it's gone dark. The great thing about using things like focusing
spots is you don't get quite so much pinging around your studio.
We do get some here. There's no avoiding it because
it's such a small space, but you can control
it in a way that you can't with soft boxes
and even with grids. So I've got this sort of
angled window lit up. I've got Abby in there. And then I've got the darker
shadow off to camera left, and I've put Lizzie in there, and we've brought another light in the same sort of
combination of lights. It's still one of
our Elinchrom fives, with its 35 centimeter
1 meter softbox on it, and shine light across the
frame to pick Lizzie out. I've brought Lizzie
slightly further forward, so I'm trying to avoid too much light spill into the background. I don't want it to be light. I want it to be
really, really dark. And then to compensate for that, I've come back a little bit with my camera so that
it doesn't make Lizzie look that much bigger than Abby because they owe
a distance between them. And if you want to
compress perspective so things look closer
together front to back, you just stand further
back and zoom in. So we got it all positioned up. I've made sure that
the outline of the window light or the
gobo is nice and straight, sorry, nice and sharp, using
the focusing on the head. Balanced all the lights up just by taking some test shots, and then you end up
with what I think is just quite an interesting, unusual take on what to do
when you have a dark subject, a light subject, and two lights. Excellent. Mt. With that, that finishes ID umber
five, but of course, it wouldn't be one of
our five ideas videos if there wasn't a little
bit of a bonus at the end. With that, let's get
out the smoke machines.
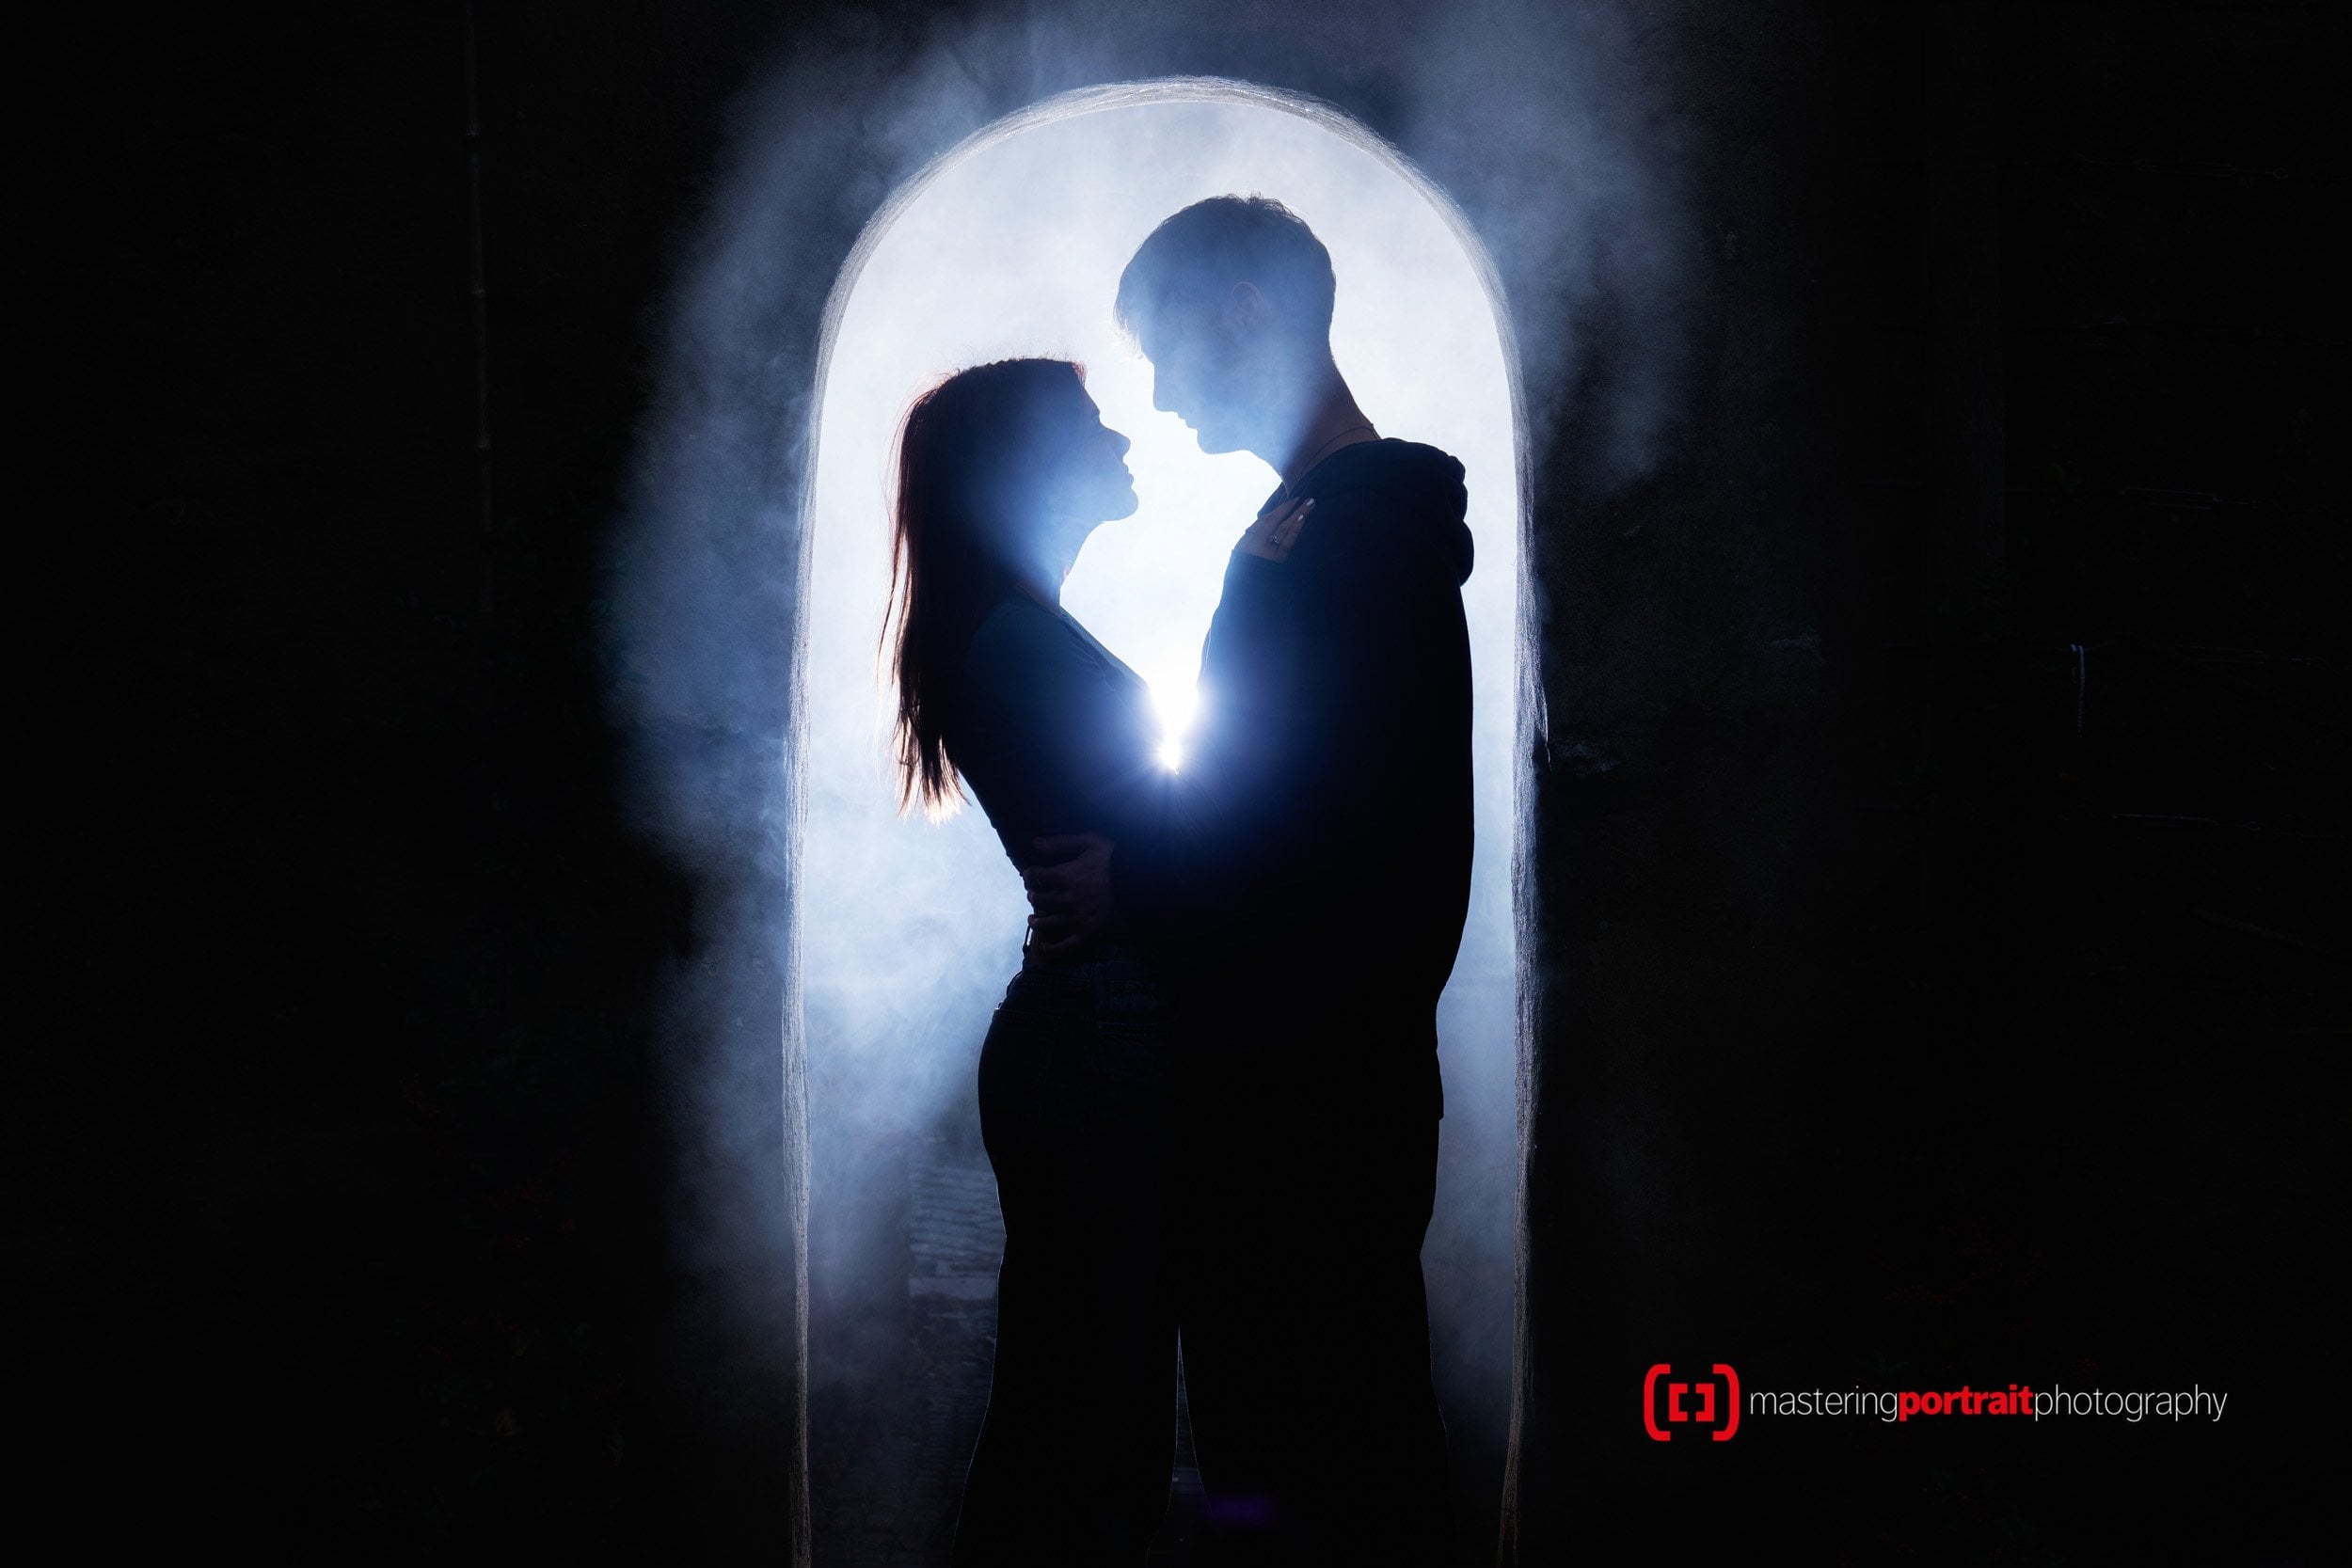
7. Idea 5 - Combining High-Key & Low-Key Lighting: So five ideas wouldn't be five ideas if it didn't
have, well, a sixth. And of course, the
thing about being a photographer is
you get excited. And so we've allowed
ourselves the same excitement that you will have when you're
creating images. Why wouldn't I? I've got amazing
people in our studio. I've got time and
space to do stuff. Well, who wouldn't want to play? So for this final section, we're going to
create a video that explores the use of these kinds of techniques
in more detail. Just thought,
wouldn't it be great if we brought out one of our PMI smoke machines and lit it as if it was a
stage production, think something gothic, think something phantom of the opera. Be Lizzie's whole look, she's got this beautiful
black dress and her hair and this
incredible cheek line. The whole of it just works. I just thought it
would be incredible. If we filled the
room with smoke, and if you fill a room with smoke and shine
light through it, all of the light
shows its tracks. So you use hard
edged light sources, which is why theater productions or going to see a
band look so good. If you look, while you're
waiting for the band to start or waiting for the orchestra
to pipe up, if you watch, you'll notice there's always haze machines kicking out fog, and it does that so that you can see all of the
beams of light. In clear air, you can't
see a beam of light. It doesn't work. But here, we're filling the
studio with smoke. I've tied one of our
or clamped, rather, one of our Elinchrom threes
to the ceiling with a snoot. It's just a basic snoot. These are not expensive.
They're typically in traditional photography
used as a hair light. You'll see them flown over the top of different
shots just to point light at hair so that it separates it from
the background. Here, though, we're using as a defined shaft of
light from the gods. The room is full of smoke. You can see the light track. And then I've taken
a fresnel lens. Now, these are a little
bit more unusual. Not every studio
will have these. But you can also
use a second snoot so you can use a
gridded reflector. But I like the beam of
light you get out of a fresnel or Fronel to
be more correct ns. These are the same
lenses you'd see in any theater
anywhere in the world. So I've got this snooted light creating a cone of
light behind Lizzie. I've got another light
coming in that's got that beautiful
fresnel shape. Sat Lizzie in my
Nan's old armchair. It's just this glorious, almost Gothic in its own right. And all I did to
Lizzie is I said, pretend you're the
protagonist in some movie. You're the arch nemesis of someone and just
owning the space. And let's see what happens. Then she kind of got
into it and the way she sat and the way she looked. I just all sort of worked. It took a minute to get all the lights in
the right places. And to get all of the smoke
to be the right density. And I'm wandering
around with a smoke and a fan, trying to
get it all right. By the way, this will this
will set off smoke alarms. If you're using smoke machines, you have to override the smoke alarms for
a period of time. Trust me, I know this. So we've got the room
with smoke. We've got these shafts of light.
We've got Lizzie. She's just got attitude, Gale. I've got her to move her
face around a little bit, and I'm using a really
low camera angle to create a bit of theater, a bit of drama in
the positioning, the viewpoint of the camera, something that is ignored
so much of the time. So I've got the camera
pretty much on the floor, wide angle lens, shaft
of light, beautiful. And then we kind of got
a bit excited, though, What would be fun if we
lit a candle and just did something sort of almost
like a Netflix poster for, I don't know, a religious drama. I'm making this up, of course. And she held this candle, and we popped the
smoke nozzle up behind and changed its setting. So instead of it pouring smoke
out or pouring haze out, it drifted threads of smoke. And these PMI machines
are brilliant for that. You can create cold smoke,
looks like dry ice. You can create warm, drifty smoke, which is
what we're using here, and you can create hot haze, which is what we were
using for the first shop. So this little drift of smoke, we just ran across. Now, we're all having to hold
our breath a little bit, because the air
movement itself in the studio is moving the
whole thread of smoke around. Poor old Lizzie, every time
she wanted to breathe, had to breathe away so that the air movement didn't
move the track so much. We had to turn off all of the air conditioning in
the studio as well, because the fans were just
moving the smoke around. So we did all of that,
and it looked amazing. We finished creating this
image with the candle. And as I do, I'm messing around, and I'm talking to one of the guys from Ellen
Crum, who's visiting us. And I just laugh and say, Look, we can change the whole
lighting in the studio. We have some aperture b7c
bulbs laced throughout. So I get my phone out and
I turn it to blue just to show him zi is still
holding the candle. The light from the two lights is still there shining through. It's actually the
modeling lights off these amazing Elinchrom lights. And it just looks amazing. So very quickly. We switch mode. And I take some photographs,
not using strobes, but now using the LED
modeling lights and the blue lights in our studio and the natural
glow of the candle. And, of course, it gives you
a completely different look. But that at the end of the day is what photography
is all about. Seeing things, creating
things, solving puzzles, and just having
the best time with cameras and light. This.
8. Bonus Idea - Add Drama With. Al Fog: So they have it five ideas for hi key and low
key photography, and, well, a handful of bonus
ideas beyond that, too. Hopefully, we've shown you
just how little equipment you really need to create
the most stunning images, whether they're
bright and punchy, whether they're dark and moody. And on that note, we'd really love to see what
you come up with. Maybe you'll create
something bright and punchy, or maybe you're like
I am sometimes, more of a moody soul, and it's
the darkness that appeals. Either way, please upload your projects using
the links below, and we promise that we'll have a look at those for
you if you wish. Also, why not head across
to mastering portrait photography.com where
there's a whole load of content all dedicated
to the art, the craft, and the business
of portrait photography. And it also happens to
be the spiritual home of the ever popular mastering
portrait photography podcast. But whatever else
you do, remember, be kind to yourself
till next time. Take care. Too doesn't matter. Anyway, I'll get there. I can see in the
background, Katie's got to edit this going, Oh, no. Again, she's still wearing her dark outfit, still dark haired. I don't know why she
would have changed it. I'll do that again. Why
would you change that. 1 minute. A, you've
come in. You're blonde. Yeah. We've done this
within 10 minutes sake. Right. Stop laughing. It's really hard
when you're just in my eyeline giggling like a fool. No, you wear that
It doesn't matter. Better little t,
better little it. Better little it.
B little it dh. Wow. Wow No. I
just want to go E. Oh, sit down. Had to fly. Be kind to yourself. Kinder than they're being to me in here. Curples. So what do we mean? Curve balls. Be kind to
yourself. Take care. We're done. We're done. We. Curve balls.
9. Class Summary And Thank You!: So for this second idea, still using high key lighting, and I can't stress this enough. We're using simple kit. I mean, we're using
very expensive kit. It's beautiful
Elinchrom lighting, but my point is that you
don't have to splash out on the most sophisticated widest range of equipment
on the planet. We're just using two lights. We're on the front light,
we're using a strip box, and all I'm trying
to create here is some contrast in the image. And when you figuring out what you're
going to photograph, part of the puzzle is
to reverse engineer how you'd like it to look and then try and create
lighting for it. Occasionally, you just trip over it. You move
a light around. Wow, there it is, and
that's happened to me several times today
as it happens. But this one, this one we knew we wanted to
try and create. And it's a very simple approach. And what we're trying to do
is create a very softly lit, high key look camera right, but then have dark tones and
dark contrast camera left. So to do that, we're going to move the strip box to the right. We're going to use it
in its vertical form, so it has a lovely wash of
light down Abby's figure. And then on the
other side of that, we're going to spin
our studio flat round, and on the other
side of what was a white door is now black foam. And it's useful when we're
recording podcasting and it's just sound
absorbing foam tiles, but they have the very
happy coincidence of being able to absorb light. And if we move that
really close to Abby. It stops any light
going past her and then bouncing back and
softening those shadows. The closer I get it,
the darker the effect. So we've run it in
pretty close to Abby. We've run a soft
light on the front. We've got this beautiful
shape to the light. But now I've got to
answer the next question, which is I wanted it
on a white background. The idea for the shot is to create something
that's really contrasty. It's almost pure white
in the background. It's almost dead
black in the shadows. And then there's that really
lovely skin tone in between. So two options, and you could
approach it either way. The most obvious and the
one that most people do is to shine light at your back
wall or your backdrop. Very easy to do. Turn the
power pulmos to full, probably, and just
chuck light at it. But the problem with that is you don't have an awful
lot of control. It tends to ping
around your studio. It tends to soften the
shadows unless you've got other studio flats to kill like where
you don't want it. But here's a really
simple approach. If you have a big soft
box like we have here, a 1 meter square soft box, bring it in really close
behind your subject. That gives you total control. Over the whiteness
in the background, but it also gives you
a little extra touch of joy does if you're a
photographer who loves light, which is the edges of that white light source start to wrap around your subject. So where it transitions
from front light or the shadow to where it's
lit by the back light, you get these beautiful
little white highlights around the figure and
around the jaw line. They just I don't know, for
me, they feel wonderful. So then we moved on to doing something just
slightly different. It's all based off
the same idea. I'm going to leave the big white soft box in
the background. And then I've got a
couple of options here that are
really, really easy. They're almost
like bonus images. I turned Abby to the
side and got her to find a spot on the wall
for her to look at. I always do it that way around,
so there's a known point. Don't try and go
turn your head left, turn your hat right, turn just pick a point on the wall, put
your finger on it, and say, Look there,
and then you can work outwards from that. So I've got Abby to
look across the frame. She's totally surrounded by the white from the background, and then I've lit her first with the same soft box I lit earlier. In fact, we've really
not moved it very far, and that gives us this beautiful high key white
background portrait, which has this really has
a sophistication about it, which belies how
simple it is to do. And then simply switched off the front light and
taken a silhouette. And because softbox
is so close to Abby. It's right up against
it pretty much. As you get light
wrapping around. So if you look, there's this most beautiful
catlight that runs across the
surface of the eye. Now, I know it's
a subtle detail, and it's probably lost
on half my subjects. But for me and for
you as photographers, and for some of our subjects, it just adds this really
beautiful little detail. Then we've brought
Lizzie back in with her dark outfit and dark hair
just to see how that look. And of course, it still
looks absolutely fantastic. It's still not where
I'd head to as my first point of call,
but rest assured, if you've got a white background and someone that
just looks great, you can always take
a classic portrait. We've done enough of the punchy, the high key, the
light and airy. Now let's go and explore something on the
moodier side of light.
 Paul Wilkinson, Portrait Photographer