Transcripts
1. Course Introduction: Learning to video edit
is just like magic. When the illusion is
revealed, it all makes sense. Do you want to
learn how to create professional looking
video content that you can post
just about anywhere? Then you are at the right place. Hi. My name is
doctor Craig Blurt and I am an IT professor, and I've spent over
30 years developing the most effective ways
to teach with technology. Working together with Joshua, who's been involved in
videography for over ten years. We have developed some
of the top rated, most popular final cut
pro courses available. Our course caters for you. Wherever you are in
your learning journey, beginner, intermediate,
advanced, this course enables
you to become an efficient and
professional video editor with skills to work on
just about any project. The difference between
amateur video iting and professional video editing is normally pretty obvious. But why choose our course. There are many courses out there with world class content. Magic. The magic that
happens when you combine world class content with a unique teaching approach. We've combined the best
learning content with a proven teaching approach
based on my research. This is the magic
because it means you're guaranteed to learn
what you set out to learn. Our unique teaching
approach is not about simply watching videos, but active engaging learning, and that makes all
the difference. Hroughout each
stage, you'll have a main project that
you'll work on that will keep you
active and engaged. But in addition to
this, we'll be giving you different mini
challenges and these are sport projects
that will test all the skills that we've taught you and challenge
you even further. But all the while, we'll
be there to guide you and show you how to develop
real world skills. If this is your first
time using final Cup, then this first section
is certainly for you. This first section is
short but important. And we'll be looking at
the final C interface, how content is organized into libraries
events and projects. And finally, how you should
structure your projects. So, you know what they say? There's no time
like the present. Let's get right into it. Welcome to the Final
Cut Pro environment. To make sure you
don't feel lonely, which online learning
can sometimes be. I'm going to keep my
happy smiling face in the corner for the
first couple of lectures. However, as we
progress and get into the real fine action parts where to learn the skills
is really important, I'm going to vanish and let us really focus with our
distractions on the content. But rest assured we are always here and ready to help
you with any issues. So if this is your first
time using Final Cut Pro, let's quickly familiarize
you with the environment. Now, just before
you do anything, if your program looks a
bit different to this, what you can do is just
quit Final Cut Pro. And then, while holding
down command in option, at the same time, re open
the program from your doc. And you'll see it prompts
you to delete preferences. Don't worry. This isn't going to delete any of your projects
that you may have. It'll give you a
window like this, letting you know
what's new, et cetera. This now restores the program back to its factory setting. So it'll look the same
as what we're using. After opening the application, it should look
something like this. There's not much to see, but don't worry, things will
get pretty exciting soon. So don't go anywhere
because in the next lesson, we'll explore this
space and begin to see what Final Cut
Pro has to offer.
2. The FCP Interface: It's time for action
and learning. So, if you haven't
done so already, open final CP pro. Okay. Yeah, we are
inside of the program. Now, if this is your first
time opening final Cp, it should look
something like this, not that much to
see yet, but soon, you're going to see some
really amazing things. Now, before we do anything, let us first get you
comfortable with this space. And don't worry if some
things don't immediately make sense because as we
work through the course, you'll gain a complete
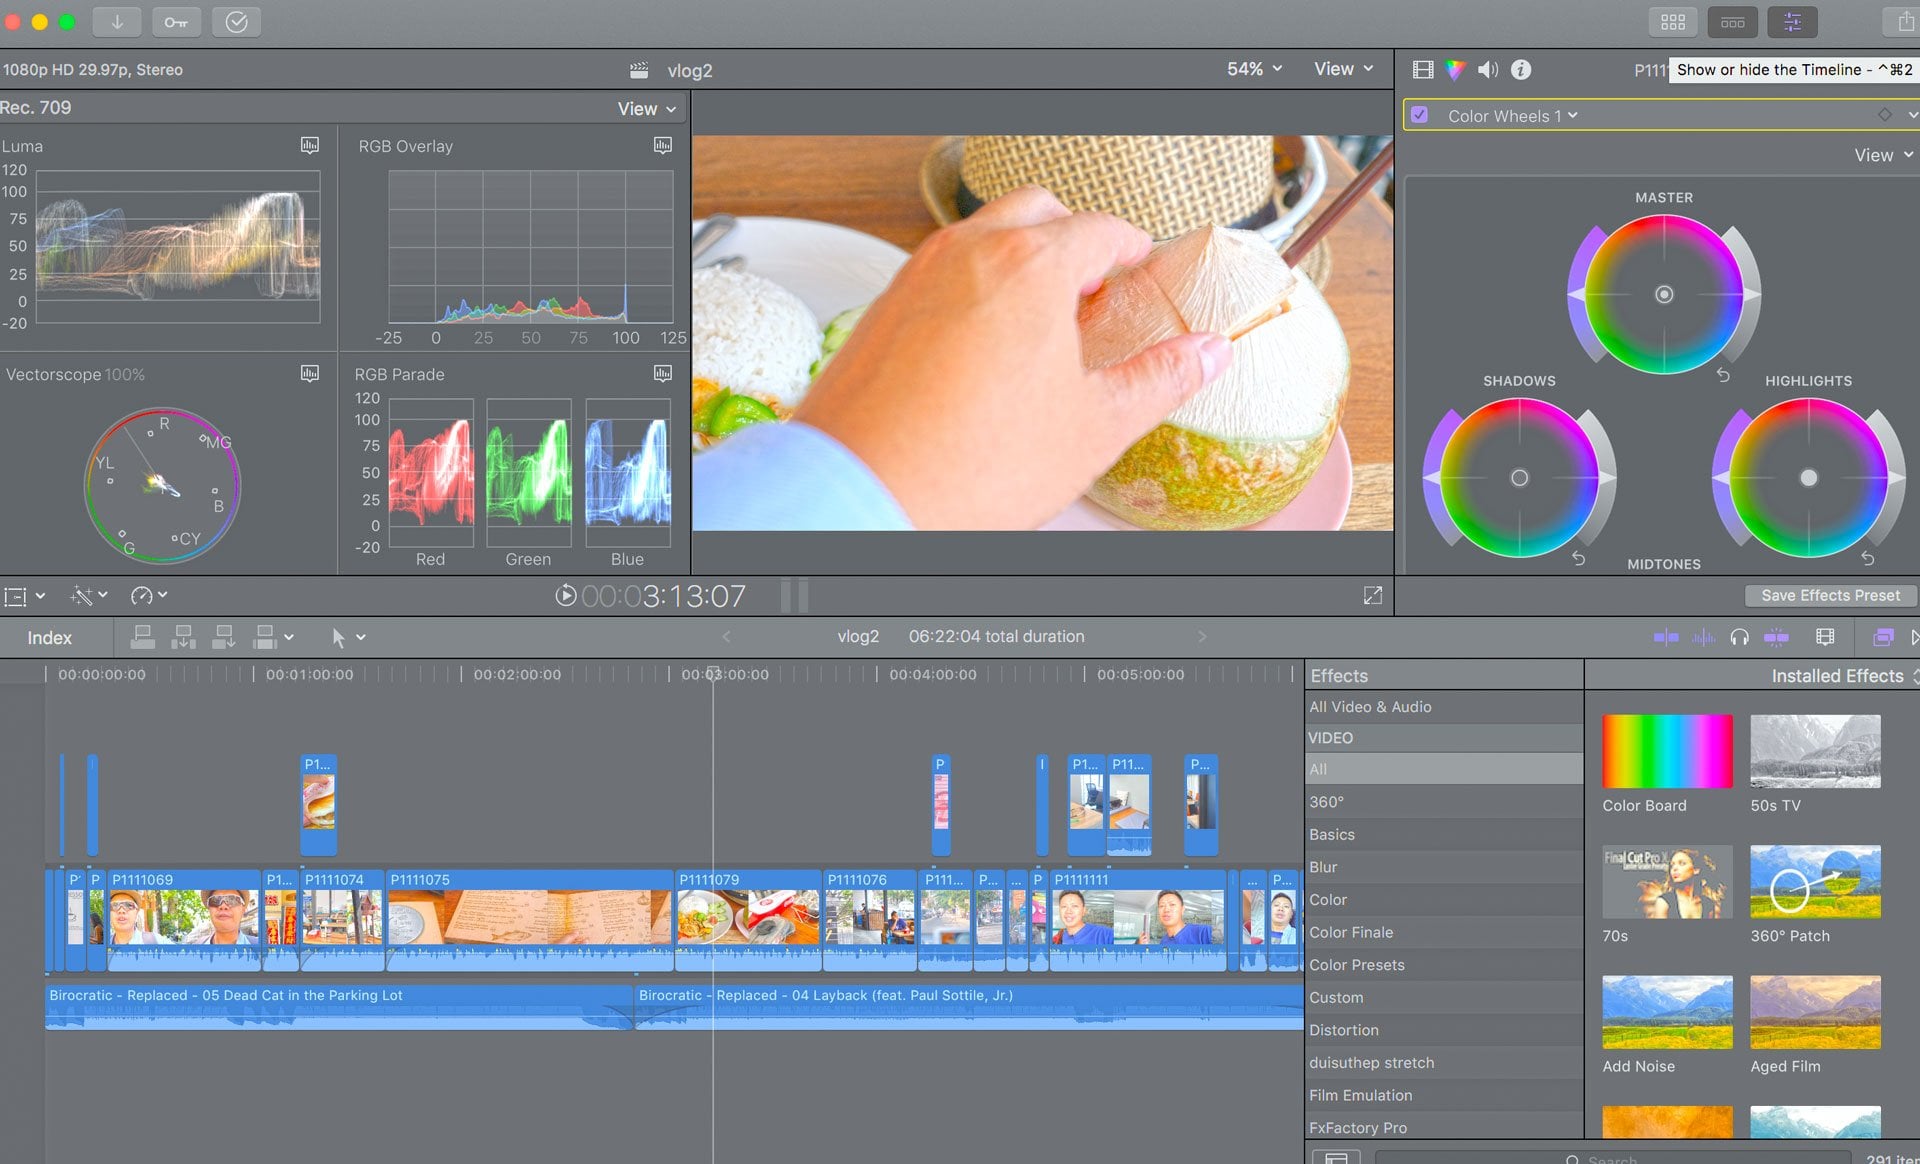
understanding. So right in the middle, you
will see your preview window, and this is where you'll see your media while
you're editing it. And this is where most of the
action is going to happen. Then right to the left of you'll see two rectangular gray boxes. This is where your
library events, projects media will be found. It's basically where
you'll find your footage. And if you're too sure what libraries and events
and projects, I don't worry because
we will also be covering that in more
detail in a future lecture. Then just above this, you'll see a few buttons. Now, these are for importing different types of media
like sound effects or music. And finally, the third
button is for adding text objects and much more as you're going
as soon discover. Now, to the exciting area, looking down at the bottom, you'll see a large
rectangular area, and this is your timeline, and this is where most of the
editing is going to happen. Then quickly looking at
the right hand side, and specifically these
last two buttons. Here's where you access
different effects that you can apply
to your footage like 50s TV or aged
film and lots more. Now, the last button on the
far right is for transitions. Now, there's a really
powerful effect, which we'll use to make cuts between scenes look like
really super smooth. And finally, the top right
corner has the inspector. And as the name implies, this is where you can find
out more about your media, as well as adjust
different effects and titles, et cetera. Now, your final cut pro work
space is very customizable. And you can hide the timeline or the inspector
simply by kicking one of these buttons up here and it gives you a
much more focused view. Now, also, if you move your
mouse between the areas, you can adjust the
size of the spaces. Right. It's all about making
it right just for you. So that's the final
cut pro environment. It's pretty simple and you'll soon be really
comfortable with it. But just take a couple of minutes just to
play around with it so you can get comfortable in the space as we move forward.
3. Libraries, Events, and Projects: Before we leap into
the fun stuff, there is one more thing we
need to cover libraries. But we're going to
keep a children sweet. In Final Cut Pro, libraries store our projects,
events, and media. And knowing how to organize
your final cut pro, content can save you a lot
of time in the long run. So lean in and focus
for a moment while we imagine your final
cut pro library in terms of an actual library. Now, just like a real
library that has shelves that organize books
into different categories, so Final Cut Pro has
events that organize projects and media into
different categories. Now, depending on how
big your project is, we'll determine what you
store in your event. So, for example,
let's say you have a YouTube channel
with five minute videos, In this situation, for each video you create, you will store all your media and your project under
that single event, and this is what you'll
do most of the time. However, if you're working on a big project like a
movie or a documentary, you would use your events to store media of
a specific type, such as music media
or B role media, which would make
it easier to find. But enough talking, let's
see this in action. Here you look at a
running course that we created in Final CA project
so you can get an idea. You can see there
are multiple events in the course with
names like 1.1, 1.2, 1.3, 2.1, et cetera. And these names correspond with the section
and lesson numbers, much like this course as
sections and lessons. In an event, we'll
have a single project, which is a lesson
and all the media that is associated
with that project, such as the main
footage, B role, external audio, stock footage, and all that sort of thing. Now, this means we
don't need to search around for these clips
when it's time to edit. When we finished
filming the course, we added and organized all the media into their
corresponding events, and so had quick access to all the footage when we need it. Right? That's a brief
overview of final Caps, libraries, and
events and projects. As you use it more,
you'll get more and more familiar with it. Now, one thing really important
if you stay organized, future you will
really think current. So be organized
from the beginning.
4. Recap and Do: During the course we're
going to keep your actin. This is how learning
is most effective. We don't want you to just be sitting there watching
these lessons. We want you doing. So at the end of each section, as well as during lessons, we're going to ask
you to do things. Just pause the video
of doing lesson, whatever it is, try
the activities. This is going to
make your learning both rewarding and fun. So what did we covered so far? Well, we've looked at
opening Final Cut Pro and familiarizing ourselves
with the interface of different areas
like the timeline, the inspector in the preview window and the media, et cetera. We looked at how you can adjust the interface to really
make it suit your needs. And lastly, we looked at
Libraries, events and projects, and how they are structured
and interrelated, as well as the importance of keeping yourself organized to
save time in the long run. So at the moment is not
a lot for you to do. Your starting easier,
starting gently. You only task at the moment. Open Final Cut Pro, play around with the interface, get yourself comfortable
with the different areas. And then the next section, we'll start creating projects.
5. Section Overview: Well, before we get going, Let's quickly have a
look at what we'll be covering in this section and what skills you're
gonna be learning. This section is focused in getting you properly set up
a final Capra by teaching you some of the key concepts and skills that will help you become professional
and efficient. To introduce these concepts, we will be creating
two projects, MTB and road trip. Now we're going to provide
you with all the media so that you can just follow along as we cover the key concepts, such as the basic
process you should follow when creating
the new projects. Also, we'll be
looking at some of Final Cut Pro is primary tools, and we'll be learning what
they can do for us too. Lastly, we'll be
looking at some of the most important
buttons and options. So you are really fully familiar with the Final
Cut Pro interface. Now this section
will provide you with fundamental knowledge that's really understand you in good stead for the
rest of the course. So let's take a look
at what we're gonna do in this section.
6. Creating our library, event, and project: It's time to get going
with our first project and put some of the
knowledge that we've learned in the previous
section into practice. Let's it, as we discussed in
the lecture on libraries, Ginny, when you are
working on a new project, you want to create
a new library. As this will minimize
the usage of system resources as Final
Cut Pro won't need to load each particular
Final Cut Pro project every time you open the library. But paradoxically, for these two projects
we are working on, we will work in a one library. This is because both
the projects are all very small than when
containing match media. Social media will be housed in one event instead of
and multiple events. We can finally create
our new library. And quite simply, if you can remember from the
previous lessons, all you need to do is go to the top where it says
File, go to New. And then library
will simply call this library projects as this is where we will store
all our smaller projects, but you can call it
whatever you like. If you do have an external
hard drive is suggestion is that you plug it in and
store your library there is. It'll take a lot of pressure
of your mac storage later, as we've mentioned in
a previous lesson. Next thing we will do
is create a new folder. And we'll call this
FCPA course projects, as we will house all the
media in this folder. Now simply hit Save and your new library
should be credited. Now at the moment,
there isn't much to see the sides that generated event, which is just named
after the current date. For our two projects that
we're gonna be doing, a road trip and MTB. We can rename the generated
event to road trip event. For the final Cut Pro project. We'll call it road trip. Next we can create a new event. This time we can
call it MTB event. Now, by right-clicking
on the event, we can create a new
Final Cut Pro project. And this time we'll call it MDB. I know her very creative. Sometimes it's just best to
just go with what simple because then you can figure out where everything is stored. And that's all he
has to do for now. Quite simply, we have created a library which we stored in its own folder on
the hard drive, and then recreated to events and two
corresponding projects. But now basically we are ready. We essentially have the capsule, all the housing, which is going to be ready for all the media that we're
going to place in. The next lesson, we'll look at downloading and importing
the media so that you can follow along then join in the exciting process as we
begin editing our project.
7. Importing our media: In this lesson, we
downloading and importing our media
to the events. And we'll also look
at the various ways in which you can import media. As we say in this course,
we believe the best way to learn is by being
an active learner. So to help you follow along, we're going to be
providing you with the resources which
you can download. Now, if you want to
use your own footage, you certainly can do that too. It just might be a little bit more difficult to
follow along at a time. And if you really
are the sort of passive person and you don't really want
to do the activity. That's fine too. But we still highly suggest
that you do follow along and participate for at least one
or two of our main projects. So let's get started by
downloading the relevant media. Now that we have our
source videos downloaded, the first thing we
wanna do is move them over to our final Cut
Pro project file. This way we can have all of
the media in the same place. Opening Final Cut Pro, we can now look at the
different ways in which we can import this media into
their corresponding events. Firstly, if you look at
the top left corner, you'll see an arrow
pointing down. If you click this arrow, it will open a new window, which is essentially
a file selector. And here you can find your media from
different locations, such as an external hard
drive or your computer. This import window
is useful if you change specific media settings
for a particular project. If you looked at the side, you will see there
are a bunch of things that you can do
when importing media, like adding it to a new event. And we're changing its keyword, which is the same. The more the name it has
when it's important. You can also analyze and
adjust the imported videos, video and audio settings, or even create proximity. We'll look at some of
these more complex topics in the advanced section
of this course. One thing we will discuss in this first section is where
it says copy to library or, or copy too hard drive, depending on if the
events library is stored on an external
hard drive or not. If we select Copy to
library or hydride, this means that the final Cut
Pro will create a copy of the media and stored either in the library
or as a folder, a new external hard drive. Now, generally, this is not the way we like
doing things that instead of letting Final Cut Pro create a copy of the file, leave the files in
place that this means that they won't be a
duplicate of every fall. However, if you are nervous that you might lose
the original files, then yes, well, by all means, let Final Cut Pro create a copy, but realize you're
going to have lots of extra file is being stored. So I'll instead leave
the files where they are as they are with the library and I nowhere
news or delete them. Okay, so now we can see we
have our files imported. And Final Cut Pro has even
created keyword collections, which is just the
name of the folder. But we'll also look at keyword
collections in the future. For now, you
shouldn't be able to find your imported media by clicking here or by
clicking on the event. Now we can import our media
for our other project. For this project, we'll
import the media in a different way, faster way. And this is simply by dragging
and dropping from finder. And this is generating
the way you will find that we use
on most occasions. So going to our
finder, we can quite simply drag the folder
over to the MTB event. Here you'll notice a small
plus icon over the media. This is because Final
Cut Pro is trying to create a copy of the media. To stop this, you can simply
hold down the option key. Now you should have the
road trip media imported. And if you click on the event, you should see all the
media you dragged over, as well as the
road trip project. That's importing media. The two different
ways you can go about doing it is
actually very simple, but you should take these few extra steps that we've showed you as you want to try and control the amount of computer storage that you are using because you're going
to thank us for that. In the long run.
8. Dragging the media onto the timeline: So at this point, we've been looking at a lot
of basics of Final Cut Pro, and now we really do get to the really more interesting,
exciting stuff. In the previous lesson, we
imported all of the footage that we're gonna be working with into their respective events. At this point, we're ready to start getting really practice. But by bringing
our media down to the timeline to begin
the editing process. What we wanna do now is take some of our clubs and
start working with them. To begin the heading
due process, all you need to do is move over to the project
you want to work on. So in our case, we're going
to work on the road project. So click on the road trip, then double-click on
the road trip project. And for the moment of truth. To bring the media
to the timeline, all we need to do is to drag it over to the timeline and drop. As simple as that. We can grab another clip and bring it over
the timeline by doing the same thing,
drag and drop. And as you drop it, it will stop building
your timeline. And in this timeline, this is where, where
the editing happens. This is where your footage
comes together and how you start creating your
movie or your video. One thing we will quickly
point out is that if we move over to the MTV project and import media
into the timeline, you will see that
some of these have audio waves at the bottom
of the media thumbnail. And as for our other footage
in the road trip project, there are no audio waves. And this is simply because
the stock footage that we use doesn't have audio imbedded like our
MountainBike clips do. Now you may also have
noticed that you super observant when you click
on one of your clubs. Final Cut Pro brings
up a preview window. And if you move your
mouse over this area, you can scrub through
the selected video. This is really just a
quick way that you can easily look at the footage to
get the part that you want. And then if you only need a
selected range from a clip, all you need to do is click and drag and then move the selected footage
over to the timeline. Now that we have a few
clips on the time now, all we need to do
now is hit space. And there you have it. And extreme rough cut of
your final video production. So really just simply moving the clips from the media
section, the timeline. We really have started
building our final movie. But obviously there's
still a lot more to learn and a lot more exciting
things to do before we get to the stage where
we really have a movie that we suggest that you
start getting to know this area and what
we talked about yet. But by moving some of your clips over to
the timeline era, even maybe create
a small sequence of clips to
familiarize yourself. Because there's lots more
exciting stuff to do. So enjoy as we are
getting one step closer to building
movies in Final Cut Pro.
9. Tools and functions: Well, I hope you've created interesting sequence of clips
because in this lesson, we're going to be
looking at the tools you can use to edit these clubs. It's kind of like
opening up a toolbox for the first time and see what
each tool can be useful. So with that said, let's open up the toolbox and get started. Opening up Final Cut Pro. You can see I created
a sequence of clips. This is the first few scenes
of our final project. The intro, you might
say, I suppose. But what is the final
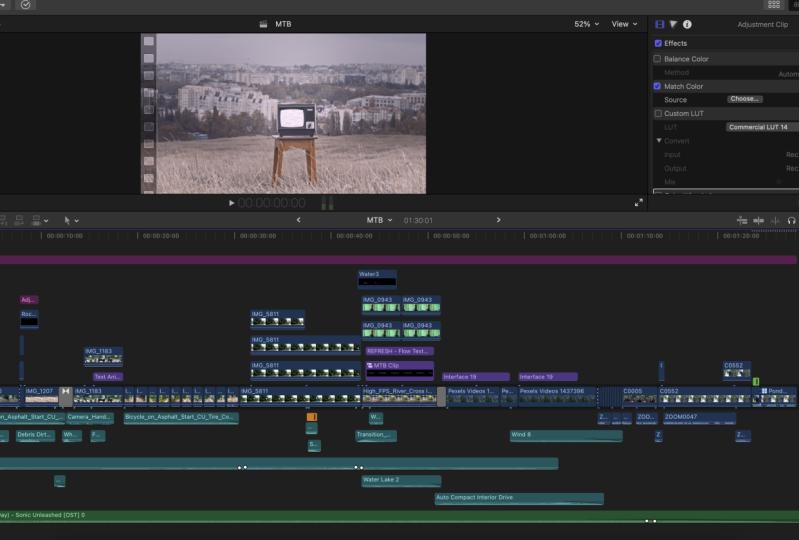
project about ask? Well, as you know, we've created two events, one called MTBE and
one called road trip. For the road trip event, we'll be taking what is essentially just stock footage,
unrelated vehicles. But we're going to
combine them with some music with the right edits. You'll be absolutely surprised. What we can turn it into. For the second project, which is called MTB, will be taking footage which was acted directed in
film by Joshua. And we'll be creating a
short video of what is essentially just cycling
down the driveway. But we'll use multiple
editing techniques and music to make it
much more exciting. However, to start with, we'll be working on
the road trip project. I've seen clips here
on the timeline. These clips are completely
unedited and I'll fall there. So let's see what these tools
can do to edit these clubs. Firstly, one of the
quickest ways to trim down Eclipse is simply by moving our mouse to
the end of the clip. Here you will see this
pointer appearing. Next. Simply by dragging. You can shorten the
clip from either side. This is very handy if you find a clippers taking too much time and your
video, for example. In the same way,
you can also extend Eclipse duration by dragging it in the opposite direction. But do note, this will only
work already shortened clips. Now, moving all
pointed to the left, you'll see an arrow
looking pointer. If you click this, you can see that it opened
up drop-down menu. Here you can select what is essentially a whole set
of different tools. The first one is
the select tool, which is the one we
currently have selected. What is the select
tool? You might ask? Well, the Select tool, what you'll be using
most of the time. It's the general jack of
all trades kind of tool. And you know what they say, jack of all trades, master of none, but often times better
than a master of just one. However, if we want to perform some more
specialized operations, we can look to some of
these other tools which can often help us get a certain
job done a lot quicker. So looking down
at the first two, this is the trim tool, simply by clicking it or
you can just click T. We can access this tool. You'll notice that
your pointer now changes to the trim icon. So let's see what
this tool can do. You know how we sorted this clip in the beginning
by dragging the end of it. Now suppose we don't want to change the duration of the clip, but we want it to start and
end in a different position. We can change the position of
this clip by simply moving the trim tool over
the clip and drag. Here you'll notice
that the media inside the clip is changed, but the actual duration of
the clip is staying the same at the trim tool is really handy when changing a
clip that might mess with the other media in
your timeline and we'll see how this
can happen later. That's it with the trim tool. What you can also do is move it between two clips
and easily change both clips duration
while keeping the tool and the total
duration the same. You can see when I drag
the tool to the right, it shows more of this club
and less of the other. And when I move it to the
left, it does the opposite. That brings us to the next tool. And this tool is
called position. But before we discuss
what this tool does, we need to talk about Final
Cut pros, magnetic timelines. I'll demonstrate what I
mean when I say this. If I delete this clip
from the timeline, you'll notice that the
other clips automatically jump into fill the gap. Kinda like a, like a magnet. This effect can make
editing a bit easier. But in some scenarios it
can really be annoying. Especially if you don't
want your whole timeline to change just because one of
the clubs has been removed. So the tool for this job
is the position tool. Let's have a quick look
and see how it works. And don't forget
command Z there. That's your friend. If you make a mistake, you can easily undo anything. Here. We can bring back
the clip we just deleted. Now using the Select tool, if we try move this clip
above the next one, you can see how the one next to it immediately
jumped into its place. And this then subsequently affects the timeline as a whole. However, if we select
the position tool, we can now do the
same thing. Here. You'll notice that the magnet
effect is not happening. Instead, there is this gap, which is essentially
a blank clip that Final Cut Pro generates. But you also notice
that the timeline as a whole is not affected. What we can also do with the position tool is moving
clip inside another. And we'll simply
displaced the area of the selected clip,
as you can see here. And this is really useful when
the timeline has sizable. With that, let's move
to the next TO, which, as you can see here, is range selection,
quite a hefty name. So what does it do? Well, essentially,
in the other lesson, where we could easily
select and move a range of media to the timeline by
clicking and dragging. Well, if you want to do
the same on the timeline, you'll notice that all that happens is the clip does moves. How do we select a portion of the clip that we
want to cut or copy? Easy, use the range
selection tool. And now if we click and drag, you'll see now that you
can select a range, which you can then copy or cut. Also, you're able
to select a range between multiple
clips like this. Now that's really cool. And that brings us to the blade. Arguably one of the most
important Final Cut Pro Tools. And you will certainly find
yourself using this a lot. So let's see what will
the excitement about? Well, that was a simple, yet elegant and as you
can see, it cuts clips. Yes, just like a blade. And you'll notice a
fresh cat is denoted by a dotted line and basically
means you've made a cut, but you didn't do
anything with it yet. So if I were to crop the clip a little bit
where the cut is, you'll notice the
dotted line disappears. The blade tool is a quick
way to organize clips in the timeline and discard those unwanted extra
bits of medium. For example, if I thought
this clip was way too long, I could simply cut and
delete the excess. Or if I found the section in the middle of the clip
was not necessary, I can catch it in-between
in the middle of my clip. Hendra move this middle
piece just like this. Right? That's much better. With such an excellent tool. That now brings us to the last two tools, the most worthless. I don't know about that. They may be bottom
of the barrel at maybe they're worth
is going to depend on how much you
need to use them. The laws to tools or
the zoom and the hand. And these two tools
can come in handy if you don't have a trackpad
or a side-scrolling mouse, these tools are really handy. Let's quickly take
a look at them. Moving to the Zoom. Here, we can zoom in or out of the timeline to get a
closer look at your edits. Now if you've got a trackpad, you could just pinch
it with the zoom tool. If you hold down Option, you can zoom out of the timeline or the
Trackpad, you can pinch out. Now you certainly
going to need to zoom in and out of
your timeline a lot. So get used to doing this. The last and probably
definitely is the hand tool. With this tool, we
can move through our timeline and we
will be needing to do this when the
timeline gets long. But also alternatively again, if you've got a trackpad
or a side scroll wheel, you can use this to move up and down and
along the timeline. Wow, that's it. These are the main
tools and we will see how each of them gets used
in a practical sense. But for now, what
I'd like you to do is just experiment
a little with them, play with them, try and get a better understanding of them. We gotta be using them
a lot as we continue through the course
and on our journey, these are going to become
your stock standard tools. So get a little bit
comfortable with them. Try them out and remember
if you make any mistakes, you can always Command
Z and go back.
10. What do these buttons do?: It's time to look at the
last few main buttons and tools that we haven't covered within the main interface
of Final Cut Pro. And by that I'm talking
about these buttons. You may or may not know
what some of them do. But if you've experiment
a little bit, you may know what they do and figure them
out for yourselves, which we always encourage. But if you haven't,
this lesson is definitely one. You
want to have a look. Let's have a look. Moving
over to the far right. Just before the effects
and transitions, you'll see an icon shaped like a small clip from a film camera. If you click on this, it
opens up a control menu. And this menu allows you to adjust a few other
little things. Firstly, with the first slide, you can zoom in and
out of the time. I'm just like we did before with the zoom tool or
with your trackpad. If we look below that, there are a bunch of
different buttons. Remember how we
discussed how some video has audio embedded
in some does not. Well with these clips yet, we can change how they
are displayed with these options because
these clips have no audio, it's a little bit pointless having a show that
audio waveforms. So instead we could have a show, the video thumbnail
bucket. Yeah. But for continuity sake, we're going to
leave it as it is. Lastly, looking at this
slide, if we move this, basically zooms out on the y-axis making
the clips thinner. And you might need
this if you've got multiple tracks sort of
stacked on top of each other. They also options to show
clip names and angles, and clip roles and lane headers. But for now this is
really not too important. Bringing us to the next button which is appropriately
called snapping. And if we enable it and drag our play head
across the timeline, you'll notice, well, it snaps between the clips and
that's what this tool does. It literally automatically snaps things to the break in a clip
like the start or the end. But it does more than that. But let's go to the
sound effects tab. If you remember that
from the first lesson, to get to the sound effect, you simply click on this
button at the top right, and then click sound effects. Final Cut Pro brides
are a wide range of free sound effects that you
can Using your project. But even so, you can always import your own sound effects
that I think we should be fine to illustrate with what we've got here. Let's see. Let's say we want to get to the interior car
club and we want some car noises to stop playing when we add
that part of the club. Well, we could do
this by searching. And here you will see auto
compact interior drive. Drag this to the timeline,
but below the clip. And here you'll notice that when you are dragging the
audio below the clip, automatically snaps to
the start of the clip. And if we turn Snapping off, it does not snap to
the start of the club. And the same is true if we drag clips on top of one another
with the snapping on, it automatically snaps to
the start of the clip. One thing to note here
is how fun Cut Pro. You can easily have
an endless amount of media stacked on
top of one another. This is known, this is
going to make you hungry now as a pancake timeline, because basically
that's what it is. You're adding layers of media on top of one another to make
something that is interesting, kind of like a, a really super delicious
tasty stat pancake. So we could go back the sound effects and
add, for example, some winds down to
our first clip simply by searching for it and
then dragging it down. This time we can see
there's a lot of excess clip we don't need here as they shouldn't be wind like this
inside of our costs. So we can chop the excess off by using our blade
to remember that. And notice that because
we have snapping enabled, it automatically
brings the blade to where the clips into set. So with that we can easily
chop it off and deleted by clicking and pressing
using backspace. Now we have two different
sound effects and we can stack these two sound effects
like a pancake by simply moving the one
on top of another. Let's have a listen. Much better. Well, this pancake of a timeline is getting much
more interesting indeed. Let's check this next option, which is shaped like
little headphones. And if you click on
it, you'll notice that all the clips except the one we're on gets grayed out.
Now What's this about? Well, it's basically
letting you listen to a single audio track at a time without needing to delete
all the other audio tracks. So if we go to the first clip
and select the audio track, interior drive, and
click the headphones. Now if we play, notice you don't hear
the sound anymore. We only hear the audio
from this track. And this feature is really useful when you need
to listen to and edit audio of only the single track that you're trying to work with that editing and distinct to the audio that's interfering
from all the other tracks. Now that brings us to
the last two buttons. The first one you'll notice is grayed out and we
can't predict it because this option needs
this option enabled to work. And so what does
this button do them? Well, if we click it and move our mouse out
to the timeline, you will see that the video moves to your pointers and that this is
known as skimming. Just like imagine if you're skim reading, you're skimming. And in Final Cut Pro
basically allows you to quickly skim through
your footage and find the areas
that you want to work on and generally advise that you keep this
option on it as well as snapping option enabled just to make your life
a little easier. So now that we have skimming on, you can see that we can now
click on this last button. And what this
button does is also skimming except for audio. So if we enable it, we can now ask him through
the audio like this. Normally, you probably don't
want to keep this option enabled unless you
specifically editing audio because it can become
a little bit irritating. And that's pretty much it. But there's still a few
other buttons here and there and that we will
discuss in future lessons. But as we say, the best way
to learn is by doing so, play around what you
covered in this lesson and try and figure it out
and try and get comfortable. Because the more you get comfortable with
these basic tools, with the interface,
they're easier. It's going to be as we go
forward on our journey.
11. Recap and Do: Well congratulations,
you've officially reached the end of the second
section of this course. And the section was really about getting to know
Final Cut Pro and, and getting to know
how to use some of the more important tools. And this is really an important section because
the next sections we're gonna be using the skills that you develop to edit videos. And because this knowledge and being able to do it
effectively is going to stand you in good stead for
the rest of the course. Now, it's time to recap
everything that we've learned in this section and
you have a task to complete. Now remember that
learning happens slowly through repetition
and really importantly, really importantly
through activity. So enjoy the refresher
and then learn in doing. So, what did we cover
in this section? We first created our
projects library that we use to store our first two
projects, MTB and roadshow. The library and all
the associated media got stored on an
external hard drive to ensure that we
didn't follow up the computer file storage. After that, we imported
our media into their respective events and we looked at the different
ways you can import media. Then we dragged the media down to the timeline
and started secreting a few clips to make what was really a very rough
draft of a movie. After that, we looked at
the different tools and how you can utilize them to
become an efficient editor. And finally, we looked at what all these
different buttons do. And now they can also
help you become quicker and better as a Final
Cut Pro editor. So that brings us to the DuPont. Now, for the DuPont, what we mainly want
you to do is really familiarize yourself with
the different tools, play around them and
becomes somewhat of a, of a Final Cut Pro if
you get a meaning. But the best way
to do that is by actually having a total task. So thirsty, what you do is, is to start creating
this road trip video. Have a look at the
clips that you have and trying to assemble them into a sequence that plays back somewhat like the road
trip final project we showed you in the
beginning of this section. Now, you don't need to use
all the clips and the video, but it doesn't need
to be that long even. It just needs a start, a middle, and an end. And remember to use the editing techniques
that we taught you, such as cutting and trimming
to make the basic structure. And that you're going
to end up starting to produce a very exciting
short little video.
12. Section Overview: Welcome to the third
section of this course. This is the last beginner
section before we start getting to some real
professional grade stuff, never will start
ramping things up. Also in this section, this is a large and a really
comprehensive section. And by the end of it, you will have
completed an exported, your very first project. They will include a whole lot of special effects and efforts. In this section, we'll be adding multiple skills to
your growing toolbox. So you're gonna
be able to create an edit your own videos. Firstly, of degrading the draw
for our road trip project. We'll be looking at how you can add transitions
in-between some of the clips to make
the scene changes happen in a smoother and
much more interesting way. They will look at how
we can speed up and slow down the clips
with the use of return. After that, we'll
see how you can re-size your media
so that you can zoom in or out of your media or stack multiple clips on
top of one another. We'll then look at adding
keyframes to your fixed. Now, this will allow you to get really creative with your edits. As Final Cut Pro will create a smooth animation in-between the effects that you're using. We'll then look at adding
music and audio GO clips, as well as some advanced audio edits to make them a whole
lot more interesting. After this, we'll add
titles and title of fixed. And finally, we'll export your completed
project with all of the effects and save it as a file so that you can
share it with a will. So that's the heads-up
for the section. As you can see,
there's lots that we want to do that we're
gonna be covering. So if you haven't
already done so, let's take a deep breath
and get ready to dive in. And let's let the fun
learning journey continue.
13. Transitions: I hope you managed to
create some kind of a story of the clips
that we provided you with, well, with
your own clips. Now in this lesson, we'll
look at how we can turn these maybe somewhat a little
bit boring sequence of clips into something a
lot more interesting. We will be exploring
transitions which are really super important
to make your clips, I suppose, and transition in a smooth and interesting way. Transitions are all about how one clip changes
into another clip. And you will see this effect in almost every video
that you watch. So let's begin by
taking a look to see how we can start improving
our video with transitions. Now, before we start, we will briefly go over how we created the rough draft
for this project. However, just
understand your version doesn't need to look
the same as ours because we really are
encouraging you to be creative and make it
your own project. Looking at our
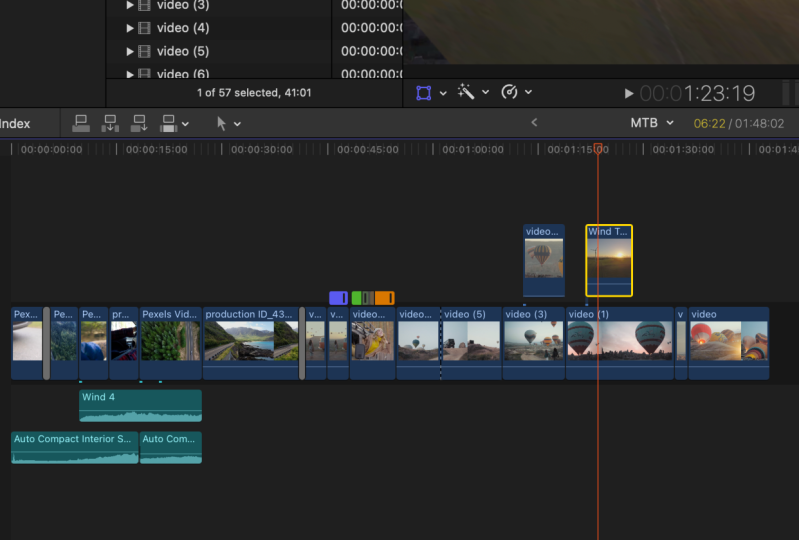
sequence of clips, you can see the
way it's ordered. It starts with the
small sequence like we had in the
previous section. This is our intro. And then it goes to
two drone shots of a car driving from
one end to another. And then we have
all these clips, which is our middle. And then finally, our
ending is made up of these different shots
of the hot air balloons. So now that we have our drop, Let's see what
transitions are and also how we can start using
them to make a video. A whole lot more interesting. Now, as you know, are ready to access transitions, all you need to do is
click this button here, which looks like a
sideways hourglass. And when you click this, it will open or close this window. Now, in this window
you'll find all of Final Cut Pro
pre-installed transitions. And as you can see, there
is a whole section of different transition categories
such as 360 degrees, which works with
360 degree videos. So you won't need
these just yet. There are also blurs, dissolve, lights,
movements, et cetera. Instead of looking
at the categories, we can just go to o to see all the different
transformations that are available
in Final Cut Pro. Looking at the
transitions, if you move your mouse pointer
across any of them, it will show you a preview of what the transition
looks like. For example, we can
see cross dissolve is a very simple
transition going from one clip and dissolving
to the next. Or 3D rectangle, which is a far more
complicated transition. It turns the clip into multiple
rectangles and fades out. But generally, with transitions, you wanted to try
and keep it simple. As transitions aren't
really meant to be, notice that they should
be subtle and seamless. So do be careful not to
overuse them between clips as this can result in really
irritating your viewer. Even making some states
are feeling a little bit dizzy and nausea
from all the effects. Ideally, make use of transitions when cutting
between different scenes. Of course, you can occasionally use them for something extra. But the guideline,
we believe is less, is more when it comes
to transitions, right? That being said, let's add some transitions to Eclipse
and see what they can do. So looking at these two clubs, one over car and one of a
kind of far as we can see, when we play it back, the scene sort of just
jumps to the next scene. So let's try and
add a transition between them to try
and tie them together. All you need to do is
drag the transition over. And you will see that this gray box
automatically appears. And it shows a preview of where the transition
is going to be placed. And then if we drop it, you will see there is now a gray box that shows us that we have a transition between these two clips. Let's
play the video now. And while, that's a lot
smoother than before, Let's try it again, this time with a different
transition. Going back to the
transitions and selecting lens flare this time, we can replace the
current transition by simply dragging it on
top and letting it go. Now if we play the video, we have the lens
flare transition. It's as easy as that to just try different transitions
and see which one works best in
the scene change. So just be prepared to
experiment a little bit and drag different
transitions and just see which one feels right. Okay. Now that we know how to add
transitions to the media, Let's see how you can edit these transitions to
make them even better. Firstly, we can make
transitions longer by simply dragging them just like we did to shorten or
lengthen clips. We can do the executive
same with transitions. So if we drag it like this, it makes it longer. Now when we play it back, you can see the actual
transition happens a lot slower. And this is also something that requires playing around with until it just feels right for the scene that you build it. Many transitions have
different ways you can adjust them to change how
they're going to appear. Let's take, for example, the lens flare transition. If we click on the transition, you will see it presents you
with additional options. These options will change
depending on the transition. With this transition, I can
adjust where the lens flare starts and where it ends by adjusting the
x and y-coordinates. Doing this, you can see
the transition matches up with the natural lens
flare in this clip. Funny. One other thing to mention is this message where
it says There is not enough extra media beyond clip edges to create
the transition. You might rethink. What's this? Sometimes, when you add a
transition to your clip, you may get this message. It means basically that
there is no handle, which CNG means there's not enough extra media for
Final Cut Pro to work with. And so in order for Final Cut
Pro to create a transition, it needs extra
unused media so that the clip can transition
into each other. How do we fix this? Well, we can simply
crop a bit of both clips to ensure that
there's enough space. And now if we try and add
a transition, it works. Alternatively, you can just let Final Cut Pro automatically
fix it for you. Just simply drag the transition to the center of both gloves, drop it and hit okay. When it gives you
the warning, you'll notice that Veronica
pros automatically shorten the clip to get the extra mediate needed
for the transition. That's all we covering regarding transitions for
now and in future lessons we're going to look at how we can make these transitions even smoother because transitions
can be extremely powerful. But for now, you
know what you gotta do it over to you to experiment with the different
transitions and the different settings and
just have a little bit fun trying them and adjusting the settings of the
transaction and playing with the transitions and see
how you can start to learn about the power of
transitions in Final Cut Pro.
14. Retiming Clips: It's time to change the
amount of time that our clips play in the
timeline with re-time. Okay. I think I
said time a few too many times, but
didn't have that. This lesson is all about timing. Because in this lesson, we will be discussing
retirement, which is really super important
feature in Final Cut Pro. Essentially, a yacht
allows you to make a clip go at any speed or
even in any direction. In a way it's
actually, your tones do almost become like
a time traveler. So let's see how this works. Firstly, let's find a clip in the timeline we want to return. Okay, so looking at this
clip near the beginning, we can use real time to make it a little
bit more interests, but Dean bar, by speeding up
the last bit of the club. So firstly, we'll cut the clip to where we want the return. And now all we need to do is select the clip
and hit Command R. And this opens some
real-time options. And there are a couple of ways
we can go about retiring. The easiest of which is dragging your mouse over to the end. And just above the
clip you will see a little slider
that you can drag. And when you drag this
clip pores shrink down and essentially
is now in fast motion. And as you can see,
it's now 604 per cent. Speed it up. And now we can play it back. It gives you a fifth of
the cost speeding up, which makes this a
lot more interesting. Alternatively, you can also
slowed down or moving. Start, slow it down
and clip this. Try moving to a different color. Here we will use the
hot air balloon. Now for this clip, if
we again hit Command R, and this time if we drag
the slider the other way, we can make the clipper players, oh, it's in slow motion. If you want to quickly slow
down or speed up Eclipse, we can use these
drop-down options and select faster or slower. But the problem with this is it's a little bit
less customizable. Otherwise we can also
click on Custom. And that brings up a
whole new set of options. First, as you can see, we can change the
direction of the cup to either the
forward or reverse. Or if we want the clip to play
for precisely ten seconds. We can also do that here. Before we look at
more incredible things everytime can do, let's take a look at what these small dotted
lines mean that appear above the clip
whenever you make an edit. I'm hoping you've noticed these. As we've been doing
different things, you'll occasionally see
these dotted lines. Now, what do they mean?
Basically, these lines indicate if something
needs to be rendered. And Final Cut Pro is
essentially trying to make sense of what
you've just done. Whenever you make a
change to a clip black, we've just done the timing or adding effects
or transitions. Final Cut Pro has
to make a lot of different calculations
in order to display the final edited clip. So if we hit play
without rendering, you might notice that it
will lag and drop frames. And this is because
It's not yet rendered. As soon as you stop editing. Final Cut Pro will stop
working on the editor made. And when it's done, it'll play back
the edit smoothly. It has been rendered. And this is just
one thing to note because unless your
computer's really, really super fast,
Formula One fast. Whenever you want to
see an edit that you've made with added lagging and
especially an advanced edit, you need to wait for the
dotted lines to disappear. Now this brings us
back to returning. If we want even
more customization, we can look at this
button up here, which opens up a whole
range of different options. Firstly, selecting the
clip we want to return. Or even better, we can select
a range we want to return. Let's do that. Now click the re-time button and let's slow it down
to 25 per cent. Now you'll notice
that just the portion we selected is slowed down
to twenty-five percent. However, if we play
the video back now, you will see that it's
pretty sort of statuary. And this is because
the video is only recorded in 24
frames per second. Does that mean we
gotta live with it? Now we don't. There is a way we can make
this video a lot smoother. Final Cut Pro has many,
many powerful features. So firstly, let's select the whole clip and
open up the menu. And as you'll see here, there are many options
which you can choose from to add different effects. And we'll look at some of
these in future lessons. But for now, I really
encourage you to try and play around until you can also discover some
of these features. But let's for now just focus on what we want to try and make our video smoother now that we've read timed it and the frame
rate isn't good enough. In order to do
this, we can go to an option that's found
under video quality. Here we have two
different options, frame blending and optical flow. But these can help make
Avenue a lot smoother. For this case,
we're going to just make yourself frame blending somebody selected and then
wait for it to render. Remember what that means?
Wait for the little dots to have all done their
thing and gone away. And you'll now notice
when we play back our super slow mo video, it's far smoother and you don't really notice any
of that stuttering. So as you can see, right, timing is really versatile
in Final Cut Pro. It's a very important effect. Now, it's your time to try
and use a real-time try, try and create interesting
effects on your projects. Whether you dramatically want to speed up certain clips
or parts of Europe. So all dramatically
slow them down. Try make your project more
interesting with three time. It'll be worth your time. I couldn't resist the ending
with that tuple jack, but it really will
be worth your time.
15. Multi-layer tracks & Transform/Crop: It's time to discuss an edit, so simple, it's so important. And that's the transform tool. This tool basically let you reframe an image to
however you like. So you could crop into
a smaller section or you could flip the media upside down, vertically
and even more. That's it. Let's see this tool in action. So going down to the timeline, Let's select a clip
to try out this tool. Let's use this one. So firstly, I'm going to cut
this clip so that we only apply the effect
to just a few seconds. Now, move the playhead
over the globe and then select it to access
the Transform options. And all you need to do is
click this button right here. You'll now notice that
the video has a border over it with a bunch of different little blue
circles around it. Basically, these circles are handles that you can use
to re-size your video. Depending on what handled you selected a little change
how the video is resolved. So for instance, if you
want to stretch the video, you can use either of these
handles and stretch it out. Alternatively to make it taller. We could use this handle
and stretch it vertically. But normally, all you want
to do is zoom into the clip. So for that, you just need to select one of these
corner handles. And as you can see,
you can zoom in. To position your clipper. All you need to do is select
any way on your video and click and drag it to where
you want it to be positioned. It's as simple as that.
Now you can hit Done. So now let's play the video. We can see how this particular
clip is now a zoomed in. Well, there's a lot more that the transform
tool can also do. So let's just have a little look at some
of the other options. Firstly, you may be
wondering how you can change your video now
as all the handles seem to like just appeared to get your handles back and view a couple of different
ways we can do this. But firstly, if you
look at the top, you will see a small dropdown
with a percentage in it. And this basically what
it's doing is it's telling you the size of your
preview window. Now if you click this,
what we can do is manually zoom in or out
of our preview window. So if we zoom out,
let's say 225%. You can now see that
our blue handles all back is now that the back. What else can we do? Well, let's quickly
have a look at some of the other options. Firstly, we can flip our video simply by dragging a corner
to the opposite end. If you look at the middle, another handle that you
can grab it as this one. And this, this, you rotate
your video in any direction. So perhaps this is useful. Sometimes maybe you'll
videos a little bit slanted and so you
can easily fix that. Now remember how we discussed
Final Cut Pro users. I pancake timeline. If
you don't remember, you can go back and review that. Well, let's see this in action. So moving over to
our media window, Let's grab a small section of a clip and move it
onto this clip. Just like this. You'll notice whatever clip
is on top gets displayed. And this is the pancake effect. And this is one easy way really to create what's
called a cutaway. For example, if you
have a video of someone talking and you want to
maybe give a bit of context, you can create a cutaway is one of the best
ways to actually create the context of
where the person has maybe speaking in or
zooming into them. Now, just because
the video is on top, it doesn't mean that
this one is gone. It's still there. So let's see how we
can make it appear. We can do this using Transform. And this time, we can make the video smaller,
just like this. Now you can see that we can see both of the clips
at the same time. This is useful in quite a few scenarios
including cutaways, where sometimes you don't
want a complete cutaway, you just want a small one
in a section of the screen. And you'll see often,
you see this on news broadcasts where
you can see that the main action
that's happening and the reporter and a small
section of the screen. Now, lastly, if you click
this drop-down menu, you will see two other options, which are crop and distort. Now, you probably won't find yourself using these
options as much, but they also serve really important
roles to visit if you click the Crop tool now and I'll be sure to have
the Crop Tool selected here. What this tool is
going to let you do is very similar to
the transform tool. Just how we used it
to re-frame a video. We could do the same here. Now this time, instead of pulling the handles out
to zoom into our media. We instead move our handles into essentially
reframed our shot. So if we do that,
you'll see that the highlighted section is how the media will be re-framed. And once you click Done, you'll see how now zooms in to the area that
you just cropped. If we want to zoom out or we need to do is click
this button again. And we can easily do that. If you're simply just
looking to re-frame a shot, this tool is what
you want to use. But if you need to do something
more advanced like read, rotator and re-frame, then then the transform
tool is your best option. Now, moving to the
trim tool, this tab, when you click it, you will have these dotted borders
around the video. And if you drag one of
these square handles, you can see that the video trims from, from each direction. And this is useful
if you want to maybe show two videos
side-by-side like this, or just to fit more media
next to each other. The last option we have is
what's called Ken Burns. Now, the Ken Burns effect
is really clever effect and its an effect that's
used to take a still image, a photo or something, and apply an illusion of
motion to that image. So if you click on
it, you'll see it brings up these two boxes, start and end with the big
arrow pointing between them. Now are quite simply
what this means is that the video will
start displaying our media are still image at 1 and then pen smoothie
to the second. So perhaps we want to
start out our frame here and ended here. And now when we play
back the video, we can see how the effect works. And finally we have the distort. And as the name implies, this lets you distort a
video just like this. Now, this effect is really useful in some
particular scenarios, such as overlaying a video
into a real-world object. We can then use this tool to match the objects dimensions. And then the last thing
to note is that all of these effects can easily be accessed in the video inspector. For instance, I could
zoom into video using the transform tool in the
inspector and sliding scale, or I can zoom in and out. Alternatively, I
can trim a clip. Justing effects
like this and this. It's a little bit slower, but it's actually a
lot more accurate. Those are some of the
tools transforming, trimming, distorting. And these tools are really versatile and you can do so
much with them and as always, give them a try and
play with them and see what really interesting
effects that you can achieve with these tools.
16. Key-framing: In this lesson, we're going
to be looking at key frames. And this might be a
little bit more advanced, but you don't need a stress or worry about it because this is something as you
start practicing with the tools that we're going
to show you in this lesson. You'll pick it up in no time. So what exactly are key-frames? Well, let's look
at it like this. Right now. For any effect we
apply to a video that they fit happens
essentially straightaway. So like with this clip, where we zoomed and using
the transform tool, the zoom effect happens
pretty much instantly. However, with keyframes, we
can have it slowly zoom in. Kind of like how the
Ken Burns effect works. Well, except a lot more advanced and it's a lot more
customizable as we'll see. So keyframes essentially let you try incision or
animate your effects. And interestingly enough,
the word keyframes in Final Cut Pro derives from
the old animation world, where only important key frames of the animation withdrawn. And then later,
what would normally happen at a different artists withdrawal the frames
in-between the keyframes. And that's why animation
happens smoothie. And so it's the same
in Final Cut Pro. Let's take a look at how
we can keyframe effects. Returning back to our
Transform effect, where we zoomed up on this clip. Instead of cutting
them and zooming in, we can use keyframing. We can bring our clip back to
normal using the trim tool. Now if we click the Transform button
and at the top you will see there is a small diamond but with a plus icon inside it. And this button allows us to add a keyframe to our
Transform effect. If we click this, you'll
see that the icon changes. And this means that
this frame is keyed. And just like how in
the old animations, you'd have people
that would draw the frames in between
two keyframes. So it's the same as in
also in Final Cut Pro. You need to have two keyframes in order to
create an animated effect. We move along the VA. We put down another keyframe, as you can see,
represented by this icon. Now that we have our two keyframes, what
can we do with this? Well, this is where the
animating essentially starts. If you look at the top here, you will see that they are two arrows next to
the diamond button. And we can use these arrows to quickly jump between
the keyframes we added to create a zooming effect like we talked about
in the beginning, all you need to do is jump to our second key frame and
scale and position our clip, just like we looked at
in a previous lesson. And you'll see that now, as we do this, two arrows with a red line in
between appear. And these errors
are our keyframes. And the red line is the
animation that's going to happen in between
our two keyframes. Now if we play the video, you can see how it
smoothies, zooms in. So just like the animators
back in the day, we created the two keyframes, but Final Cut Pro created the animation between
the two keyframes. It's really, really clever. You should also know that once you've added one
keyframe to clip Final Cut Pro will
automatically add another keyframe when you
make changes to the effect. So because we added a keyframe
to the Transform effect, if we move forward
a few frames and change something like
flipping the image, you'll notice that
Final Cut Pro has automatically added
another keyframe. If we play the video
again, we get this. Now. It smoothly flips a video, although you may not
want this to happen. And in a future
lesson we'll look at ways that you can stop this. But right now, we've only just scratched the surface of what
key-frames can actually do. And although this takes a little bit to fully understand
and grasp this topic, the really, as you
know, the best way is to practice it for yourself. So dive right in and just
start playing around with keyframes and see what you can do to get the hang of it,
then don't worry about it. Some parts you don't
fully understand, you can't figure it out because
we definitely coming back to look at some of the
amazing things you can do with keyframes later on. Yet again.
17. Adding Audio: We've worked quite
a bit with videos, so let's have a little look at starting to work with audio. In this lesson, we'll
look at how we can bring our clips to
live with audio. And we'll also look
at how you can perform advanced audio in it. So let's just jump right in. You should already
be quite familiar with audio because if you
remember in our earlier lesson, we looked at adding some of the stocks sound effects to the beginning
of our timeline. So now let's see what the
final Cut Pro is capable of. And in terms of editing audio, what we have here is the wind sound effect and the
interior core sound effect. And then after this clip ends, we have only the
cause and effect. However, the way
these sound effects suddenly cut out is a
little bit jarring. But before we look at
how we can fix that, Let's add some music
into our timeline. At this stage, if you
have managed to download some music from one of the
places that we recommended, you can use that. And if you've got other music, that's also perfectly,
but just remember, if you're planning on
posting your video anywhere, you need music and tracks that are copyright free or
that you have the license for. So let's add our music to our project and just
like we did before, or you need to do is drag and
drop it onto the timeline. Just like that. Now, you can see there are music
expands and all our clips. One thing to note when
creating a video or the star where it's basically the
music is the primary audio. One good editing
technique is making the video flow to the music. Let's see a quick
example of this. As you can see, the effects
such as r0 times and clip changes happen on
the beat of the music. Generally for a video like this, you will first add your main music track and then edit your clips
according to the music. So let's see how we
can edit our audience. Very handy tool to have open
pretty much all of the time. And especially when you're editing audio is
the audio meter. And you can open the
audio meter simply by clicking this
little button here. Now, we can see our audio
levels to ensure that it's not too soft or too loud. Generally speaking, your audio
levels should be between minus 20 and about
minus ten decibels. And that let us play this audio. You can see that it
peaks at one decimal. We even get a warning that our audience is going into
the red with the meter. How can we fix this? Well, to lower order, all you need to do is bring
your mouse to the middle of the audio track and you will see these two
arrows appear. Now, if you drag down or up, you can change the level of
your entire audio track. Otherwise, you can also
change your audio app and the inspector by simply
moving the slider. And in fact, it's often quicker
to make the edits here, but it's far more precise. And it also in the inspector. If we play back out what you can see that
it's much quieter. Have a wind sound in our color, what he's just too loud. So let's bring these
levels down to, let's see how we can do something a little
bit more fancy. Remember how in
the prior lesson, we looked at how we
could use keyframes to make our Zoom in
effect super smooth. Well, we can also use
keyframes with audio tracks. To add a keyframe
to an audio track, all you need to do
is go down again. And two, you see these arrows. Then hold down the
option key and click. You'll notice now that you have the small little diamond shape, which means you added
a keyframe right here. Now, if you remember, you need two keyframes for
anything interesting happens. So we add another keyframe. Now, we can do
something interesting. All you need to do is drag
down one of these keyframes. And you can see all
the audio levels before this keyframe drop. And then it gradually increases. So the music starts playing loud when we shift to the Casie. Let's do the same
for this track. You can see with
adding audio and getting creative with some
advanced editing techniques, we are able to create something that's really a lot
more interesting. Now before we end this lesson, there's just one more
thing we need to look at, and that is what's
called audio fades. Now, it seems you can create audio fades
also using keyframes, but if you only need to
fade the start or the end, the other way is a lot quicker. So all you need to do is move to the edge
of an audio clip. And when you see the
sideways arrows, make sure you see these arrows. It must be these areas.
Simply click and drag lift. Diseases that you'll
notice is a curve. Now we have a nice
audio fade-out effect. And if we plaque that, you will hear how the sound
and audio slowly fades out. We can also fade
in audio by doing the same thing at the start. So that's pretty much
it for this lesson. We've covered a lot
regarding audio editing, and these are
advanced techniques. So this has given
you one lesson. You should try it
out for yourself. Remember, learning
happens in the doing. So see if you can master
this and get creative, which can really
do some fun things with audio edits
in your projects.
18. Titles & Text: Titles, all the next thing
we're going to have a look at, then there are just so many
uses for titles such as becoming an introducing a
video or making points during, during a video as a teaching
video or are providing context or displaying
addition information. A lot of videos finished with the rolling credits and the
list just goes on and on. So how do we add titles or, or text into our videos? Well, if you remember
in the first section, we looked at how if you
click on this button here, it opens up a titles
and generators sidebar. And it's over here where we can access the different titles
that we can use in our video. As you can see, Final Cut
Pro provides you with many different text
options such as 3D, 3D cinematic,
building out credit. Lower thirds, that
list just goes on. If you can't see these options, make sure to click this little triangle
to open the drop-down. Now let's see how
we can add some of these titles to our project as well as how we can edit them. The first thing we
need to do is select a title to use for our project. We won't select the
3D titled just yet because they can be
quite complicated. So let's start with
a nice 2D title. Like this drifting title. Now we need to do
is drag it on top of the clip where we want
the title and drop it. If we play our video now, you can see that this title now appears on top
of other deer. And as you can see, this
title is drifting effect. Now one thing to know is
some of Final Cut Pro, texts have movement
effects like this one. But a lot of the titles are
just playing like static. So for example, if we bring the basic title down
to the timeline, you can see that it
is completely static. And often you actually
only need a static title. But I think for Avenue here
to make it a little bit more interesting is because
it's an intro to it. We'll stick with
the drifting title. Now that brings us
to editing titles. How can we actually
change this title? So it doesn't just
say title subtitle, and also how can
we make it longer? So it plays maybe over
the entire gland? Well, to make the title
appear for longer, all you need to do is bring your pointer over to
either edge of the title. And then you can just
pull it until it reaches the length
that you want. It's easy as that really. Now, how do we change the actual texts so that it is so nice I
bought road drop. The easiest way is to just
double-click the actual texts. And now we can change
this first line to road. And if we double-click
the lower text, we can change this to true. Now if we play our video, That's much better to
actually saying road trip. Let's see how we can edit this text and
change its effects. We can make all of these
edits within the inspector. Looking at the expected,
you'll see that there are multiple different
tabs that allow us to perform different
edits on this text. Looking at the first tab
that shaped like a T, If we click on this one, it has all these different
checkboxes and sliders. And then this one is we, you, you edit the actual effects. And because this text
has a sliding effect, we can adjust that here. If we uncheck these boxes, you can see the way
it slides in changes. Alternatively, if we
look at a basic title, you can see that it has no
parameters that we can adjust. And that's really because it doesn't have any
special effects. Obviously. Moving back to our
sliding title, Let's see what the
other tabs to. The next tab over
is where you can change how the
actual text appears. And as you can see, there are
a lot of different options. And a quick tip. To expand this window, you can just double-click it. And you can do the same
thing to shrink it down. And it just remember Final
Cut Pro is modular and the editing space can adapt
to what you're working on. Now let's take a look at what
can be done in this area. Firstly, we can change the
actual font of attics. And as you can see,
Final Cut Pro provides quite a large selection
of different funds and you can use
in your projects. So let's select a different one. Okay, let's use this one here called hopper script.
That looks better. Now, if we look down, we can change the font size, vertical alignment,
line spacing, and a whole bunch
of other things. We can also change
the text face. We can change its color, its opacity, blue, etc. Going further down, you
can see the eye even more options such as adding an outline and glow drop shadow. There's many, many things that
you can do to your texts. And I encourage you to, to add some text to your footage and then
experiment with, with some of these options. Because that's obviously the
best way for you to become familiar with them and to
see what is available. Finally, the last two tabs, yeah, not take specific edits. If we click on this video tab, we can see that this
is like a normal video inspected where you
can transform or crop. But you can actually accomplish
most of these two tabs. So you don't really need to worry about
these tabs just yet. Well, that's a look at titles and your short-term use
a lot in your videos. Get playing, and get learning.
19. Exporting projects: This is the moment
you've been waiting for. It's finally time to
export our project, which basically means
saving it as a file. Now, if you've been
following along, then this is your
moment where you finished your editing
your project and you want to export it to a file. This lesson, we're
gonna be looking at the different ways
that you can go about exporting a project. Let's dive right in. Here we have our
final project with all the special effects and edits that we've
applied in adolescence. You certainly have come a
long way since room and you open up Final Cut
Pro and hopefully by now you've got a fairly good
fundamental understanding of this amazing program. Before we look at
exporting our project, Let's talk about
this preview window where we have been viewing
all of our edits on a lot. What you might have noticed is that when you're playing
back your footage, It's sometimes it can
appear a little bit blurry or it may seem
to lego started. And that's even if the
rendering is complete, which we talked about
in an earlier lesson, what this preview
window shows is not exactly what the final export
is going to look like. And that's why it's
called pre view. Too clever, isn't it? But what can we do if
you want to change it? If you actually want to preview in a higher-quality
without having to export. Or moving the cursor
over to the top next to where we change the
size of our preview window, there's another drop-down menu. And if we click this one, you can see that it opens
up a variety of options. The option we're
interested in at the moment is where it says better quality, award,
better performance. Now, these options change how the video in the preview
window is displayed. So ideally, when you're editing, you actually want better performance selected
because especially if you have a slightly slower
or older computer as it's going to reduce the
strain on your processor. However, if you have
a faster computer or you just want to view your edit at the moment in
a higher-quality, you can choose better quality. And you've probably
noticed selecting this increases the preview
quality quite a bit, but you will also
notice that it's based slowdown and
impact your performance. Now, let's export this project. Look into the fall, right? You can see we have an
arrow that points up. This is where you look
to export your project. So there is an
input button on the far left and an Export
button on the forearm. So clicking this button,
you will see that it presents you with a
bunch of different options. Firstly, we have
your export file, which you can see
is the default. This option will give you
the highest quality export. So if you are exporting the project maybe for
like a professional job, you definitely want
to click this. Alternatively, if
you're exporting a project for something where maximum quality is not
necessary, options, such as for Apple devices
or YouTube and Facebook will probably be better
options as these are going to produce smaller file sizes. And you know, when it
comes to large files, you need large storage and all of these become
quite complex. So possibly use one of these until you really need
the high-quality one. So it's these others that we're going to have a look
at in this lesson. Instead of using this
button to export, you can also simply
accesses by pressing Command E. And you'll see
it brings up this window. Firstly, you will see you
have this image here. Now, if you move
your mouse over it, you can get a quick preview
of your whole project. Then if you look on the side, this is we can name
your export file. Now by default it's going to
be named after the project, so we're going to
keep it at that. Then these last
three options are basically a description
of your project. You want to add that and who, the creators and
tags, et cetera. At the moment, we're not
going to add anything here. Then moving down to the
bottom here you can see it gives us other
information about the exports, such as the quality frames per
second duration filed top, and it even shows
you what device would be able to play on. Now let's move to the next tab. This is where you can
change the actual quality. Firstly, you will see
there is a format option. And then as I said, this
is where you can decide if you want your video
high-quality or low file size. So if you want your video
to be a smaller file size, you should select Apple
devices as this font up, takes up a lot less space. And also interestingly, even though it says
Apple devices, this file type is
supported by most devices. Moving down, the next
option is your video codec. And this is essentially how
the video is compressed. But if you're
exporting for Apple devices format for
now rather leave the codec on whatever
it has auto selected. Finally, this next
option is where you can select the actual
resolution of the video. So if we click here,
you can see the highest resolution we can
snake is 1920 by 1080. And that's because
all of the videos we've been using this
project or ten ADP. If I ever, you want your
video to be smallest tiles, you could select
a low resolution and that will decrease
your final file size. But I recommend you don't
really go below 720 beat. Well, enough of that,
let's export our project. I'll just export to Apple devices and leave all the settings
exactly how they are. And then all you do is hit. Choose where you want your
file to save and click Save. You'll notice at the top here, this little circle is
slowly completing. And if you click it, you will see how much has completed as it is
exporting your file. And finally, when it's done, it's in your notification. And you can just click
Show. And that's it. You have officially made
an completed your project. You can view it. You
can share it with you. You're like, wait, every
year like well done. You've created your
first complete project and exported it to.
20. Recap and Do: Well done, great work on making it to the
end of this section. Now we've got a
really special end of session treat for you and you can stay
seated for this. All you need to do
is follow along. Now, what I want you to do is raise your right arm
above your head. Your left arm, if you prefer. Kevin. Kevin. Yes. Portfolio long, this is gonna be it's gonna
be for your own good. So you've got your
arm up in the air. Great. Now, reach down as far as you can about to the middle of your
back if possible. Holds there just for
a couple of seconds. Not lift your hand slightly
away from your back and tap firmly in the middle of your back
a couple of times. Okay. You're done. If you did it, you've just besides getting
a good stretch, given yourself a well-deserved
pat on the back, we would have done it for
you if we'd been there, but we're stuck inside
of this computer. This is the next best thing. No, but seriously, well done on getting this far and you
deserve that town on the bank. This was certainly an
action-packed section which covered are
vast range of topics. But by now, you should be well acquainted
with Final Cut Pro and you are well on your way to being able to
produce your own videos. Well, let's quickly
recap what we have learned in this section. Firstly, we looked at transitions
and how we can use them to make super smooth
transitions in between eclipse. Next, we looked at
how we can read Time eclipse and essentially make them playback at any speed, super smooth and
even in reverse. Then we looked at all the
different ways we can re-frame our shot
using the transform, Crop and distort tools. We then discussed the power of keyframes in Final Cut Pro, and we looked at how you
could use this to make your effects happen in a
smooth and animated way. We looked at how you can
add music to your timeline, as well as how you can use a keyframe with your audio to achieve really
interesting effects. And then we looked at
how you can add text to your video and how you could
change the way it appears, as well as its effects. And finally, we looked
at exporting your video so that you can now
share it with the world. And that brings us to
the end of the section.
21. Section Overview: Welcome to the intermediate
section of this course. This is where we take everything
that we've learned in the beginners exit
and we ramp it up. Now, before we get into things, Let's first consider what we will cover in this
section of the course. To start off with, we will have two different
MTV projects. One of them uses relatively
low res media and the other users high
resolution raw medium. Now, if your computer
is fast enough, we encourage you to try and work with both of the projects. Otherwise, you can just work
with the low-risk projects. Or if you have your own media, you can also use that
to follow along. In this section, we will import our media into our
project as normal. However, this time we
will look at how we can store our media in separate
files for easy access. Then we'll look at a
very important concept which is storylines. And we will discuss
how they work. And often this will build up our project and
you will encounter your first many challenge
of the section where you try to achieve a specific
effect without our help, will then go into the
world of special effects. We'll look at how you can
add these to your video and audio to achieve some really different and
interesting effects. We will discuss another
important concept called compound clips. And we'll see how you can
use this in conjunction with special effects to
achieve even more. And lastly, you'll get to work on one more mini challenge, and perhaps, maybe many years. The wrong word this
time is this challenge is really going to test a lot of what you will have learned in this section
and in previous sections, but of course, it'll be fun. And we know you will
do well, right? That's a quick overview
of what you can look forward to if you're ready. Let's get into it.
22. Importing media: You're officially in the
intermediate section. This is where you will take your skills
to the next level. So as we said at the end
of the previous section, it's a really good idea
to make sure that you're comfortable with all the beginner concepts that
we've already covered. Really, the best way to do this is to try things yourself, create your own projects, dry out the activities
that we suggested. If you feel you're comfortable with the
basics of Final Cut Pro, then you absolutely are ready for this next exciting part. In this lesson, we will
once again be importing more media and we'll be working on new and more
technical projects. With all that, we can
now import our footage. And to do this,
just like before, all we need to do
is move over to find and select the folder
with what our footage. And then simply
drag it across to our media window and drop. Now if you click this Drop-down, you can see Final Cut
Pro has generated a whole bunch of
keyword collections, which is essentially just a way to keep us more organized. And if you click on one of
the keyword collections, you'll see it shows
all the related what it, how is this possible? You might be asking, well, when we drag the folder
over from finder, Final Cut Pro extracted all this information
from find it. As you can see, the
folders are the same. But if you like, you can create your own keyword
collections simply by right-clicking the event and choosing new keyword collection. After creating our
keyword collection, we can now easily drag media into the
respective keywords. This is just one other way to keep more organized
in Final Cut Pro, which is something that
is going to become really important as you create
more and more projects.
23. Storylines: Okay, so we're all set. Our library is organized. We have all the median is three, and we're ready
to start editing. But before we do this, there
is a very important topic that we need to discuss
and that is storylines. Now what we've been working
with them the whole time. But we need to take a closer
look to see how they work. Looking down at your timeline, you'll notice a strip
that is a darker color. And as you can see, all
this media in this area, and essentially any media
such as these clips in this area are part of
the primary storyline. Now, the primary story-line is essentially where the
main action happens. It's what drives
your video forward. If you consider any
movie or video game, there's always a
primary story-line that drives the plot forward. And then the other
side missions, in the case of video
games, all the subplots in the case of movies. Now, all of this might
enhance the main plot, but they don't intertwined
with the main plot. And this is similar to what
we have in Final Cut Pro. Medium in the main storyline
drives the video for it. While the other media
apart from the storyline, is more of a subplot, is it's used to enhance the story in the
primary story-line. So let's see how this all works. But when we drag media down to the timeline
for the first time, you can see it automatically goes into this
primary story-line. As Final Cut Pro expects that you will first create
your storyline. And then you're going to enhance the media with connected clips. Here you can see we've created a short sequence of clips
within the primary storyline. Now if we add media
above or below it. So we've got some
stock footage we have you'll notice how there is a thin line that connects the stock footage to the clip
in the primary storyline. Now, this line indicates that this media is a connected clip. And as connected clips
or are not meant to be a different storyline, but rather than enhance
the primary story-line, you'll notice that if we move this clip in the primary story on the connected clips will
also move along with it. And the same is true if we delete the clip in the
primary storyline, the connected clips will
be deleted as well. Now you'll notice if we add another clip on top of
this connected clip, this clip that we've added does not connect to the
other connected clip, but instead it attaches to the
primary storyline as well. Essentially, any
media we add above or below is going to connect
to the primary storyline. However, this can
create an issue. Let's say we wanted
to create a cutaway, but we also wanted that
cutaway to have a transition. Now you'll notice that
if we try and add a transition to these
connected clips, it, it doesn't want us do that. So at this point,
we've got two options. We can either
right-click both of these connected clips and hit Overwrite two
primary story-line. And you can see now we're able to add a
transition to our clips. However, this might create
confusion when we edit team because it disrupts the flow
of our primary story-line. Instead of moving these clips into the primary story-line, we can right-click and
hit Create storyline. Now essentially what we've done, these attached clips have become their own
separate storyline. But as you can see,
the whole storyline we created is still attached
to the primary storyline. Now, if we try and
add a transition, you can see we're able to do so. And also, if we
drag the storyline, all the clips that move as one storylines in Final Cut Pro. And although it may seem
a little bit confusing, if you use it correctly, you can ensure all your footage stays properly organized
and it's going to help you a lot as you develop your main plot and your subplots in your
video production.
24. Mini Challenge - MTB Projects: In this lesson, we are going to look at how to build
up your project. And then in the next lesson
we're going to look at how we can use video effects to
improve your project. I don't remember how in a
previous lesson we talked about if you're making a
video that plays with music, It's a good idea to import
it into the timeline first and then correlate
the footage to the music. So that's what we'll do now. Simply drag your audio
into the timeline. And now a music track is part
of the primary story-line. So any clips that we add to the music will be
connected clubs. So in this lesson, we
will see how we can use connected clips and
alternative storylines to build up our timeline. Now, instead of going through
each of the edits we make, which are edits you
already know how to do like retiring and
transitioning, etc. We want you to create
a project of your own. So let's jump right ahead to our first draft.
Wow, that was fast. You can do with a bit of
Final Cut Pro editing magic. Now, whether you
decide to work on the advanced MTV project or the beginning of MTV project or your own project
is it's up to you. But for now we're going
to quickly show you a preview of both projects. Here it is. The moment the trail
betrays you with it's slick roots
and jagged rocks. You're doing stump jumpers design, ultimate, railway. Those are the two projects. As you can see, we used a bit more effects and the
advanced MTB project habit. We do have some advanced effects in the beginning
MTB project two. So let's quickly have a look. Firstly, looking at the
beginning of MTV project. Notice how we use the music as the media for
the primary storyline. Now of course, you
don't have to do this. In fact, most times
your music will be a connected clip
within this project. Because the music is the
primary driver of the project, we have put it in the
primary storyline. Above the music, we
attach our clips. But notice how some of these clips are in
their own storyline. And this is so we can
add transitions while keeping them attached to
the primary storyline. Looking down at the music, as this audio is taken
from a different video, that there's a long
section that we can't use. This is where we can use our audio editing techniques to blend the audio
and make it seamless. Have you can also see that because the audio below
is now an attached clip, it's no longer part of
the primary storyline. Now for now, we'll just use a gap to fill the
space by simply clicking option w. And we'll look at a better way of resolving this in
a future lesson. But for now, adding this
gap will do the job. And finally, we created
one more special effect, which is the parallax effect. This brings us Jeff,
first of mini challenge. Now, these mini
challenges are designed to do just like push you
a little bit further. And they not only include making use of what we
have already taught you, but the aimed at seeing
if you can get a little bit more creative in and solve some sport problems. And you are, it's when we push ourselves
that we really learn. But don't worry, if you
don't figure it out. We will show you
afterwards how to do it. Well, what's really, the
most important is that you try because that's where the
learning really happens. You're ready for your
mini challenge, right? Look at this video here. We want you to try and achieve this effect on your own using the different techniques
that you've already learned. Here's a quick tip.
You will need to use the transform tool and keyframing and a whole lot of
patients to get this right. So pause, listen now and try and see if you can
achieve this effect. Did you manage to get it right? Well, if you did, well done, but if you didn't, that's okay. Don't worry. This is somewhat
an advanced effects. So let's see how you can
accomplish this effect. To achieve this,
what you need to do is to use the transform
tool with keyframes. As we said, it's a
little bit tedious, but, but simply by selecting a
clip right at the beginning, adding a keyframe and scaling
it in appropriate amount, in this case to about 130%. And then move to the end of
the clip and then scale out. Now, this goes again to
about a 110 per cent. After this is the real tedious
part comes in where you need to align the end of this clip, the
start of the next. To make your life easy, you can simply drag the start
of this clip to the end of this one and reduce the
opacity to say about 30%. Now, add a keyframe
and scale it. If you find that the bike
and ride or too small, simply use the trim tool
to select a part of the clip where the ride
isn't the correct distance. After that lineup both clips and then move the clip
back to where it was from, and then rinse and repeat. And after some time,
you will have this. Now, it is like this,
all very tedious, but they had a great
effect to your videos. Lastly, looking at the
Advanced Project and ironic, the edits here are
actually far more simple. All we did was create a scene of a mountain
bike coming down a hill. But we use the music is a queue for re timing and
for the scene changes, just like we did in
the road trip project. So if you haven't
already tried this, this is your time to create your own project
and give it a try. The next lesson we
will look at how we can add different
effects to this.
25. Video & Audio Effects: Well, this is the moment
we are finally going to look at videos and
audio effects. And as you know, we've looked at almost all the different options besides for this a fixed panel. And they suddenly a lot that
you can do with this panel. So let's take a look. If you haven't already
click this button here. And we'll open up the
video effects panel. And as soon as you click this, you'll see that Final Cut Pro provide you with a whole lot of different special
effects like transitions. If you move your mouse
across the effect, it'll give you a preview of
what the effect is like. For example, if we
move over aged film, it appears just like
you would expect. And old a film. Or if we hover over Bad TV, you can see how it
makes it appear like it's a really old Bad TV. Now, if we want to apply
this effect to our footage, or we need to do is click and
drag it onto our footage. And that's it. If we now go to the Inspector, we can see that this
effect gives us a whole lot of different options
that we can also adjust, such as the amount
of the static type, blend mode, role, etc. You'll also notice that different effects gives you different options
that you can adjust. So while somebody might not
have any adjustment options, other effects are
only display if you change the
adjustment parameters. So right now, we encourage you to try and explore these
different effects as they really are amazing and look
at how they can be used to make your videos a
lot more interesting. As a demonstration,
let's see how we can use this Bad TV effect. Now here we have an
image of an old TV. Now, if we add a clip on top, you can see that
the TV disappears. But you remember the
pancake timeline. The media is still there. All we need to do is shrink it down with the use of
the transform tool. How will you will notice that
the size of the clip does not match very well
to the TV image. But thanks to the fixed, we can fix that. By going down to the mask tab. We can add an S-shape
mask onto this clip. You'll notice that now we have this almost oval
shape over r cubed. Now if we drag these handles, we can match the clip to the TV. Just like that. To make this look even better, we can drag it another
fixed and strike the, the fifties TV effect. You could drain as many
effects onto your clip as you like to get the look
that you really want. Now if we play back
the video, you can see it looks pretty good. Of course this doesn't
really make sense in the context of this
video that we're doing. But it's just to
show you what is possible with these effects. Well, those are just a
few of the video fixed. There are many more very important video fixed
it we will cover in upcoming lessons such
as green screening, draw masks, color
correction effects. For now, just experiment a little with some
of these effects. Some are a bit more
advanced and others, but really the
more you use them, the better you become. That is it for the
video effects. And this now brings
us to the next spot, which is audio effects. And as you'll see,
this is very similar, except it's with audio. Just like we saw with
the video effects. There are many different
categories of audio effects. We can also check what the
effect will sound like. To do this, we first select the audio clip you
want to check, and then drag it over
the effect and hit Play. If you happy with
the sound effect isn't one to apply it
to the audio clip, then simply drag it over the
audio clip in your timeline. Selecting an effect. We want to use like
this one, group delay. We can drag it over our audio. And now when we play, you can hear there
is a slight delay, which makes it, what do
you see more dramatic? Here at the moment, the trail and Tracy, slick roots and jagged rocks. Also like with the
video effects, we can adjust the parameters of this effect in the inspector. If we click this icon here, you can see it provides us with a whole range
of adjustments. Again, we encourage you to go through these
different audio. Fixed is to see
what each one does. There's doing this will help
you get an idea really of what He's available should you need to try and
use them later. Also look at the
different adjustments that you can make it as these can dramatically
alter the effects do. In future lessons,
we will look at some of the really
useful audio effects. But for now, just
play around with it yourself and discover which interesting effects you think could be used to
improve your project.
26. Compound Clips: Okay, Now that we have looked
at video and audio effects, we need to discuss
something that compliments this in a
really important one. Now, you may be
wondering how you can apply a video effects across
an entire range of clubs. For example, say
we wanted to use this letterbox effect
across the entire video. Now, does that mean we
would have to apply the effect to each
individual video? Well, hopefully by now you've
realized that vodka per, always has ways that you can do things a lot
quicker in save time. And we want to show you that. So how do we get
around having to apply effects to each
individual video clip? Well, this is where
compound clips come in. And compound clips are really very simple
but super powerful. Essentially a compound
clip allows you to take a group of clips and combine
them into a single clip. In fact, if you wanted, you could take
your whole project and turn it into
one compound clip. So let's have a look
and see how this works. Here's our mountain
bike project. And we want to use this letterbox effect to create a more sort of dramatic field. Hey, we want this effect
to play throughout the whole video or even a large portion
of the video without needing to
apply the effect. Clip by clip. We're going to make, need to make use of a compound clips. Right-click and drag our mouse of all the clips that
we want to combine. We then right-click on any of the videos and select
new compound clip. Now Final Cut Pro will now ask us what we would like
to call our compound. And as this is the whole project that we have selected in
this particular example, we're just going to
call it MTB project. Now, you'll notice that our whole project is condensed essentially
into one single clip. This one effect the
actual video at all. And instead, it
allows us to make changes to all the
video clips at once, almost as if we were only
working with one single clip. So now if we grab the letterbox effect and drop
it onto the compound clip, it will appear for the
entire duration of Avenir. If we click the compound clip, you'll notice it behaves
just like a regular clip. For example, if you go over
to the video inspector, we can scale it in or out. We can crop it. We
can distort it. And we can also change the parameters of this
letterbox effects simply by dragging the
border size slider. This brings us to
an important point, returning to the
topic of key framing. If there is any effect
you apply to your clip, it's almost certain that this
effect can be key framed, such as with this border size. Instead of having it
just instantly appear, we can make it even
more dramatic by, by making the effect happened
smoothly, but keyframes. So let's go to the start
of our clip and change the border size to 0
and add a keyframe. Then let's move
about 1 second Ford and change the
border size to ten. Notice that Final Cut
Pro automatically adds additional keyframes
wherever you make changes to an
effect that we've keyed. So now if we play a clip, notice how the effect happens in a smoothing and dramatic way. As this is a little bit of an aside on some additional
things we can do with King. Let's just take a moment
to briefly consider a few other things that
we can do with keying. Firstly, let's say
we wanna get rid of this letterbox effect as
soon as the beat drops. Well, there are a few
ways we could do this, but the best way is moving to the area where
you want to remove the event at a keyframe. Then move one frame
forward just by clicking the arrow key. And then change the
border size to 0. And this way it will
instantly disappear. But even better, we
can move a few frames forward and have the
effect fade out like this. Now, if you recall from
an earlier lesson, we talked about how Final
Cut Pro automatically adds a keyframe when
you change an effect. Now this can be a
little bit wrong and knowing sometimes and getting
almost like ruin your clip. Let's see how we can fix this
by using compound clips. Firstly, let's create a
basic Zoom and effect with transform and key frames. As you can see, it plays
back nice and smoothly. But let's say all our
footage is slightly skewed. We try and fix that
by rotating it and zooming into
minimize the black bars. You'll notice that
this doesn't really work out as all the media before the Zoom in effect does not have the
rotation correction. And all the media
has the effect. But it happens slowly,
which doesn't make sense. So instead of applying the
transform effect to this clip, what we can do is select these clubs and
create a new compound gland. Then we can rotate and zoom in without having
trouble with keyframes. Now, we would need to move
the litter box effects to this compound clip as it
would now appear skewed. Now that we have our
compound curves, how do we edit individual
clips inside of it? Good question. It's
easy to do this. All you do is double-click
on the compound club. As we had two compound clips, we can double-click
on this one as well. And then you go excess to all the media that is
inside your compound. Now if we wanted to back
out to our main timeline, we can simply click this
arrow up until we reach MTBE, which is our project. And let's finally brings us
to removing compound clips. We can do this simply by
selecting our compound clip, moving to the top menu, select and clip and
break apart items. We can do this again with
this compound clip to now, none of our media is
inside a compound clip. But note that any of the
effects that we had applied to our compound clip
will also be garden. You can see there's no longer any letterbox effect that sit for compound clips
that they really, really are useful, not just for making your projects cleaner, but also make it
so much easier for you to apply a fix
to a group of gaps. So give compound clips
are going and see how you can use them to
become a lot more organized, which is really important
as your projects get big. And also how you can use them
to apply special effects across a range of
media in your project.
27. Mini Challenge - Jump & Roll: Welcome to the mini challenge. And as we said previously, many challenges are designed to push you a
little bit further. But by seeing if you can do something just a little bit beyond what
you've been taught. A key to learning is
being prepared to try things for yourself
and try things, even though we haven't
covered the good news is that whether you get it right or not, we will show
you how to do it. But first, we need to give you an opportunity to give them
mini challenge at trial. Now, at this point, you know quite a lot about
keyframes and Video Effects. Let's see how well you can work with both of these
in this mini challenge. What we want you to do
is recreate this effect. Now, if you'd like, film this shot
yourself, just note the camera needs to
be perfectly still. They can't be too much
wind and ideally you need to film it in the shade where they are not
too many shadows. I have this sounds
like too much work. You can download and use
our footage instead. Before we start this challenge
will point out that this, the footage that we are using
is certainly not perfect. There's a bit of wind noise
and slight light change. But then if it weren't perfect, it would not be much
of a challenge. Editing is all about overcoming challenges and fixing mistakes. And often that's the case with the footage that you
end up having to use. Also note that
your first attempt doesn't need to look perfect, as this is often a really, really difficult to achieve. So if you do manage to
get it looking good, then you should really be Brad. And lastly, before you pause the lesson and
tip the challenge, will just give you a few tips to follow to help you
try and get this right. The first is to
remember that Final Cut Pro has a pancake timeline. Second, you will need to use
one of these mosque effects. And third, you will need to
use a lot of keyframing. Remember how we said almost
any effect can be framed. With those tips. Pause the video now
and try and see if you can get
this effect right. Well, how did you do that? You managed to get it right. If you did, then you deserve
a double pat on the back. Went really well done. If you
tried but failed miserably. And I quote you the
words of John F Kennedy. Those who dare to fail miserably can achieve greatly
so well done. Either way. We'll now go over some
of the ways that you can achieve us opening
a new project. We can drag down our footage into the
timeline, just usual. And all of this. We need to find the
start of both scenes. So for the first one, it starts truck before
Josh are active Watson. So we can cut it about here. And then we can look for the
start of the second scene, which also starts
before he walks in. So we will cut it here. The next thing we want
to do is look for the part where he jumps. And at that moment, we want to slow it down. Now, it's important to remember that this video
is recorded and a half frames per second so we can slow it down without it's
looking really statuary. If you remember our
lesson on retiring, there are a few ways
to slow down a clip. We could break apart the section we want to slow
down and then retirement. But that doesn't allow the read time to
happen so smoothly. So instead, we can simply select the range of the clip
that we want to return. Then move our mouse up here and choose a
custom speed of 14%. Notice how just this section is slowed and the effect
happens steadily. Okay? Now as the point where we
need to drag our first clip, either above or below
our primary color. Let's try and drag it
below because then we will only to track this jumping
movement instead of this role. We want to drag it to the start, but we don't want them to
overlap when he walks in. Now this is where we use the mask effect to
make it all happen. We simply drag the effect
onto our primary clip, then match it with the
dimensions of our actor. You'll notice that all
the background disappear. So we need to cut to
the clip at the point where we attached clip joins. Now we can remove the Shape
Mars from the first clip. And that's a bit better. You'll notice if
you play the video, it doesn't quite work as Josh rolls under, he
sort of disappears. So to fix this, we need to use key framing. He jumped to the start of
the video and we go to the Shape mask parameters
under transforms. Here we can add a keyframe
to the position parameter. Now we need to do is move along the video and track
the actor's position. Quickest way to do
this is hold Shift, and then click the arrow to
move along the timeline. Now we can accurately
track his movement. Now all we need to do
is move this mask up to the edge of his feet and
ensure the two don't collide. Okay. Now that it's pretty tract, we can play it back. It looks pretty good. There are few points where his feet, so I would
like disappear. And you can also
notice that the line, now, things are gonna get a little tedious and
has an editor. You always want to be as
efficient as you can be, but while also getting
a great result. However, sometimes quality
simply just takes time. To make this effect much better. What we can use is the
drawer mask effect. Importing it onto the video. You can see it says click
to add a control point. If we click it, it
adds a little dot. This is the fun
part where we add lambda whole actor with
lots of little dots. And when you connect
the final dot removes all the background
outside of the 0. And then you thought
you were done. No, no, no, no, not so fast. Now retract. Moving to an specter. We can keep both the control
points and position. Now some tips. If the actors form
doesn't change, simply move the
whole shape along. If it does change, then
move the control points. Also, if you want to move
multiple control points, you can drag and
select Multiple. Now a quick fast forward, because this is quite
an endless process. That really did take awhile. But if we skim through, we can see it tracks
really nicely now. And to make it perfect, what we can do is drag
up this feather slider. Let's just ensures that
the isn't a harsh line. Instead the mosques fades
into the background. And finally, sit back and
appreciate our creation. So that's it. It's quite a challenge, but that's why it's
called a mini challenge. But doing this is certainly the best way to help you
increase your skills. This goes far beyond the jump enroll effect that we did here, is so much more you can do with what you
have now learned. So for now, feel
free to play around and transitions and make
this effect even better. We know that you can.
28. Recap & Do: Well done on finishing
this section. This was the first of our
intermediate section. So be proud of how
far you have gone. Let's quickly recap what we
covered in this section. To start off, we, we looked at keyword collections and how
they can be really handy, especially on bigger projects to keep things more organized. Then we discussed how storylines
work in Final Cut Pro, such as primary storylines
and connected clips, and how you can create your own separate storyline in a project to
maintain continuity. Then we built up our MTB
project and looked at some fairly advanced
special effects that you can achieve with
transform and King. After this, we went
into special effects for both video and audio. And we looked at how these
special effects could be stacked in order to achieve an even greater effect than if we were to use just
a single effect. Next, we looked at content
clubs and how these can keep you more organized and help you apply effects to your media. And finally, we
looked at how you can use Final Cut Pro effects in combination with
keyframing to achieve some really interesting
results, right? That brings us to
where we are now. And for the do part
of this recap, we really want you to be comfortable with
special effects. And the best way to do that
is to do for yourself. Here's the do. Just like we created this old TV
effect without footage. We want you to think
of your own effect, maybe similar to the skin
effect or the clone effect. What effect can you create? This is your chance to
unleash your creative mind, to think of an
interesting effect, and then show that you can do it with the skills
that you now have. And that's a wrap
for section four. We'll see you in 65.
We will take some of these concepts
to the next level.
29. S5L2: At this point, if you
have been working with this more
advanced MTB footage, you're asserting notice
that a lot of the footage is overexposed and it's
almost seems unusable. However, because this footage is shot in a raw HDR format, we can actually bring
it back to life. This is where color
correction comes in. Color correction is a
very important effect in the world of video
editing and can transform your footage and
allow you to create a very specific style this summer to know
about color correction. But most of that we will look at in the more advanced sections
of this course. But for now, let's
just consider how we can fix this footage to
just make it more usable. If we click on any
of these clips, we can see that they're all overexposed and the brighter
parts are really blown out. If you have explored
the effects you may have come across some of the
color correction effects, such as the color
board and color wheel. If we drag this color border
effect over to our clip, you'll see that nothing changes. Now, this doesn't mean the
effect has not been applied. As we mentioned in
a previous lesson, some effects only appear when
you change the parameters. For the color board. If we click this button here, you can see it presents you with a range of adjustment options. Now, right now, we
aren't going to go into too much detail on
how to adjust color. Instead, we can move over to the Exposure tab and look at the options
that we have here. As you can see, there are
four different sliders and each adjust the media
in a different way. The first is global. It will bring up or down
the exposure of everything. Then there is the shadow slider. This will only adjust the
exposure of the shadows. And as you can see, if we bring this all
the way to the bottom, the darkest areas
go completely back. Then there is the mid tones, and this is the area between the shadow and the highlight. Adjusting this changes
the exposure of what lies in-between shadows
and highlights. And finally, there
is the highlights. This adjusts the brightest
part of the footage, and this is what we want to use to make our footage usable. Again. If we drag down the slide, you can see that we regain all the detail from the areas
that we're overexposed. Now. That's great and all. But we don't want to have to do this for each
individual clip. And as we know,
we don't have to. How can we apply this to a whole lot of
clips at the same time. You remember, we looked at something special in
our previous section. Do you remember what it was? It's compound clips. We can put all of this
media into a compound clip. Now instead of going to our fixed pain and adding a
color board effector clip, what we can do is simply
click this button here. And this allows us to
edit the same options. So we can move over to our Exposure tab and then simply drag down the highlights. This will now apply
to all of the clubs. And we could also
adjust these sliders to compensate for our
highlight correction. And finally, if there is a clip that appears to be just
too dark or too light, we can go inside our compound
clip and individually select the clip we need to
adjust and then adjust it. Color correction is very much
a trial and error process. You can keep adjusting
until you get something that just
looks right for now. We'll leave it at that. In a future lesson, we'll
look at how you can do some really interesting
things with color correcting.
30. Chroma Keying Introduction: Wow, Well, here's do but, but it goes back. What? Am I? Going? Crazy? World is going on. Pretty impressive. But interfere. Be done somewhere else. They traveled topic going. Yeah, well, maybe
not that incredible. Going on. This is something
we see all the time in Hollywood productions and its common name is green screening because actually I'm not standing in this
amazing environment. Look behind me. There's a green screen. That's all it is. It's a
cool technique to create this illusion that the person is standing in a
different environment. It's actually called
chroma Keying. It doesn't have to necessarily
be a green screen, but it's a great
effect that can be used essentially to remove the green screen or
whatever color it is and replace it with another
image or a video. And this is where we'd all these incredible
special effects in these movies where there's volcanoes behind
people in a while, or they standing at
the top of a mountain, or there's a beautiful
beach view behind them, whatever, maybe that's
all chroma Keying. If you take a look around
our little studio here, you will see we are not in any of these
exciting environments. And what we wanna do is
show you how you can use this very powerful
technique in Final Cut Pro. Now there are two parts to it. The one part is obviously
the studio setup. And that's actually
relatively simple. We will come back
to that because you don't necessarily have to have a green screen
or a blue screen. You can actually use
just a painted wall. You've just got to watch the
colors that you're using because I'm white
painted wall will mean that you end up
losing your eyeballs and your teeth with those
colors are removed. So you've got to watch
the color that you do, but you can just use
a basic painted wall and some lighting. But that's just
part of the story. The other part of the story
is in making this happen. There's magic happen
in Final Cut Pro, and that's what we want
to show you as well. We want to show you how
to apply chroma Keying, how to use masking, etc, to actually create this
effect inside Final Cut Pro. Now why would you want to do
is maybe you're thinking, Well, I'm not going to make
a Hollywood production. You never know, you may want to, but it's also great, even if you are not just trying to create
special effects, but if you're trying to do online courses, online
training courses, because what it does
is it allows you to make your material
more engaging. So consider a course
that may be based around some PowerPoint slides. And so you've got
the electro talking. So what are your
options? You just put the slides on the screen
and the students watch the slides as bullet point of the bullet point of the
bullet point comes up. The other option is you can
do which a lot of people do, is they place themselves in
one of the bottom corners. There's a little shot of them talking sitting
in front of the queue. But again, that's
not as interesting. What isn't interesting is if you put yourself as a teacher
inside the slide. So all of a sudden behind you, you're in the slide, just like you can
see my slide here. Now, I'm in the slide. And so what do we want
to cover in this course? Well, to shoot the shop, we wanted to go through
falling objects. We wanted to look
at amazing view. A couple of times. We wanted to talk about
an intro to chroma Keying and how are we going
to show you how you edit it and face
in Final Cut Pro? And then we want to also
talk about our studio setup. Now, this is more interesting
because you're getting into the content and it makes it more engaging
for your students. You may be trying
to demo something, maybe you're trying to demo. We've got other courses,
say like a running course. And I want to talk about the person's running style
again, I could actually be. Yeah, You see how
they're running there? Yeah. That's a great
way of running. That's called gliding. It has the least impact. But now I'm almost yeah,
with the people running. It allows you to put
yourself inside the content. So it has a lot of potential. And we want to show you in
this next couple of lessons how you can achieve
this really easily. These amazing advanced features, whether you want to create
special effects or rarely up your game when it comes to producing online course content. So let's take a look
at how you do it.
31. Chroma Keying: We hope you enjoyed
their children Domitian on chroma Keying, because now we're going to get right back into it and look how we can achieve the
same effect ourselves. Moving our project. You can see we have the green screen footage from the previous list and
down in our timeline. So how can we begin to achieve some of the effects
seen in the previous lesson? But to start off with, we reading to remove everything
outside the green screen. And to do this, we
can simply drag down, I'll draw mosque and outline
the green screen area. Okay, now that we've removed
the unneeded footage, we can go ahead and add
the chroma keying effect, which is under the keen tab, the effect is called KIA. Dragging this down into footage. You can see that it instantly removed the green background. You can see they
all some problems such as all these
gray splotches, which are areas of the green-screen that
have not been removed. Now what, how do we fix this? You remember needing to tweak parameters in
a previous lesson to make a fixed Worthy? Yes. Well, that's what
we need to do here. Looking at the key HR effect, you can see it has a lot of different options
that we can adjust. The most basic correction is
choosing the sample color that this allows you to slit a wide range of colors that you want to
remove from the media. Clicking this and
dragging it over to the gray splotch, you
can see it disappears. Nevertheless, if you
look around the media, you'll see that there is this gray line that
appears we are maskers. If we try and use the sample
color tool to remove this, you'll notice that it completely
messes up the footage. This brings us to a really
important concept in Final Cut Pro the
scene repeatedly. And that's hierarchy. Just how media that is on top takes priority
of the media below. The same is true
in the inspector. Effects placed at the higher
level will be applied first. If we simply move this key
effect above the mask effect, you can see that the
gray lines disappear. This is because Final
Cut Pro is first removing the background
color from the clip. Then it is removing the
area outside the box. This way, effects above
are unaffected by effects below and a fixed below are effected
by effects above. Okay, I know that that's a lots of effects in one sentence, but that's the
effect we want it. Okay, let's move on. So now that we have selected our sample color were really 80 per cent
of the way there. At this point, the rest
of these effects help us achieve the extra 20%
just to make it perfect. Let's look at some of the more important effects
when working with King. To start with, we
have this edges tool. This is similar to the
sample color tool, but it allows you
to more precisely select the edges of your
subject in the green screen. Next up, we have the
strength slider. This allows us to change how
much string the effect has. Generally, you won't need
to adjust this unless Final Cut Pro automatically selected the wrong color
during the Qing process. In that case, you would need
to move the strength to 0 per cent and then
re-select the sample color. Now, let's look at these different buttons
that we have under view. The first one which we have
selected is composite. This allows you to see how the effect is being
applied in real time. Then there is the mat option. This better allows
you to visualize if the effect is being
correctly applied. Ideally, you want your
subject to be completely white and you want your background to
be completely black. And as you can see, there is some gray area down by the feet. So we can remove this with
the sample color tool. Lastly, there is the
original option, which quite simply shows
you the original media. Moving down. Another important tool
is the fill holes. This allows us to fill in
gaps that Final Cut Pro detected as part of the
green screen color. For instance, if you look to the knee area of the subject, you can see that
they are gray areas. And we can fix this simply by dragging up the
fill holes slider. It's almost pretty perfect. Lastly, we have the edge
distance and the split level. The edge distance works in conjunction with the
fill holes parameter. So as it sets how close to
the edge holes can be filled. If the edge distance is low, as you can see, many of
the holes are filled. But this might add, adding wanted green screen. However, if increased, this might feel less
holes closer to the edge, meaning that our
subject might have transparency where it shouldn't. Finally, there is
the split level. By default. Any green left,
we'll turn to gray. Perhaps there's green on the subject after
applying the effect, the green will just be gray. But to bring back
the natural green, we can change the
spill level parameter. Now if we bring this to 0%, any natural green from
the subject now returns. And it has, I wasn't true
really wearing green. There isn't a much
green to return. Okay, So that's
pretty much it for the primary effects to
adjust with chroma key. At this point, we can see
how this effect turned out. All we need to do is drag some of our other
media below the clip, such as this one on
top of the mountain, and there we have it. I have been transported. Of course. Right now,
I'm still way too big. And we can fix this
simply by using the transform tool and readjusting this clip until
the position has cut. Like this. There are many
different adjustments you can make with
the chromic effect. However, before we
finish this lesson, there are just two more really useful chroma
Keying effects that will improve your
footage even more. Firstly, you might have
noticed that there is a slight green border
around the subject. Now one of the handy
effects we can use to fix this is found
under the mat tools. What we can do is drag this,
shrink, expand slider. And you'll notice
that it shrinks, in which removing the green
hue around the subject. Yeah, you do need to be
careful with us, however, as sliding this to match rule distort the
look of the subject. And finally, the last
tool we'll look at is found under the
light rep done here. Yeah. If we drag
the amount slider, it caused the light from our background media into
the edges of our subject. And this makes the
green-screen effects appear more immersive and realistic. Well, that's it for an
intro into chroma key. There still a lot of adjustments and options that can help you get really, really
perfect effects. But for now, this is all
you need to know to create some amazing effects
with Final Cut Pro.
32. Advanced Audio: Welcome to this
advanced audio lesson. In the previous
lesson, we covered the main principles of chroma
keying in Final Cut Pro. We still left our project in a sort of somewhat
unfinished state. So in this lesson, we're
going to look at a few of the effects we use
to finish off this project. And we're also going to discuss an important tool for synchronizing audio
in Final Cut Pro. If you want to try and record your own green screen footage, well, this is your moment. If you have a background preferably green or
blue, such as a wall. And if you get the
lighting right, you should get some
quite good results. If you don't and you really
want to get the shot. Well, you can even use the
blue sky as a background. Nevermind the interesting angle that it's probably
going to produce. But if you have an actual
green or blue screen, that's gonna be even better. What's it for those
of you who want to just keep working
with this footage? Well, that's absolutely perfect. If you're a student, you may have noticed
that the audio and this video is not
quite understand it. It just doesn't sound great. When working on a big project, the chances are that there'll be a separate audio
file for the video. And this means that
you will need to somehow get rid
of the audio from the camera and then replace it with the separate
high-quality audio. If we go into our media window, you will see that we have this audio file
named Zoom 48 TR LR. And this is audio that we need
to switch without cameras, really low quality audio. We simply drag it down to
our timeline and hit play. You'll notice two things. Firstly, this already has a lot more consistent audio ways while this one seems to
have some distinct gaps. And this is due to the
camera's audio picking up far more background sounds and echoes than this
specialized Zoom Mic. The next thing you'll
notice is that these two tracks are
completely out of sync. One way we could fix this is by aligning the
audio manually. And it's definitely
important to know how to do this
manually as sometimes, it just seems Final Cut Pro is automatic way just
doesn't want to work. You'll notice that
in the beginning, I kept my hands now and this is the equivalent of
the clapper board you see the movie makers using. It helps create an audio spike, which can be used to align
both the audio and the videos, audio clips, and zooming
into both the backups, we can ensure that
they are both aligned. Now, if we play back the clip, you can hear that it sounds like one audio clip was that we
still have one more problem. And that is audio drifting where the timing of the
two audio clips isn't actually not identical. Now, likely because this
project is not too long. We don't need to worry about
audio drifting too much. Hey, there, if you
are working with longer audio clips
that the drifting can become a real problem
that you have to deal with in this project. If we move to the
end of the clip, you'll notice that the audio
is ever so slightly off. So let's take a look
now to correct this, what we need to do is moved to the other spike of the audio
near the end of the clip. Then we cut both. After this, we read time, either the videos audio
or that the mikes audio, the audio waveforms match
each other correctly. Then we bring back the cat clip. And finally, we can
mute the video is over here and make it all
into one compound clip. Now, I know that's a little bit convoluted a manual process, but it's well-worth
knowing just in case the automatic way doesn't work
as you'd hoped it would. That's stored in your brain. Let's have a look at the automatic way of
doing exactly this. Okay, this time, all we
need to do is select the video clip and the audio
clip in the media window. Simply right-click and
hit Synchronize Clips. You'll see it brings up a window asking for what you
want to call it, and two checkboxes
which asked whether we want to use the audio
for synchronization, which we do, and whether we want to mute the audio
from the video clip, which obviously we
also wanted it. So we can leave these both as a selected and
we can name our clip. We'll call it main
synchronized clip and hit. Okay. Now we drag our newly created synchronized
clip to the timeline. Drop it to the correct, then listen to it. Idea that the audio is perfectly
synchronized or video, audio has been muted and the audio drifting
has also been corrected. It Final Cut Pro
is auto feature. This time has done it
for us, which is great. But you also now know how
to do it for yourself just in case Final Cut Pro
doesn't quite get it right. Looking at our
finalized project, you can see that we
have are synchronized clip and all our effects
we added afterwards, such as with the water effect. We use the keyframing and transform tool to
make it animated. We use the mask effect to make it appear like my
feet random order. And we of course use the keying effect to
make it all work. I really encourage you to use these tools and the skills that you've learned
from this lesson, finished building
up your project and see how good you can get it. Gamma, got to go and apply. Because that's where the
real learning happens.
33. Custom Generators: Right? So we've looked at
almost every window and option in Final Cut Pro. However, there is still one we haven't actually
properly covered yet. And there are a
surprising amount of effects that you can
achieve with us. And that is generators. Now by this stage, you may have checked out
the generator window. And if you remember from
one of our earlier lessons, you can find this window
under the titles sidebar. Looking over the generators tab, you'll find that Final
Cut Pro gives you a wide range of different effects that you
could add to your video. For example, this beam effect, which you might have noticed from the first
green-screen video. If you scroll down through
these different options, you'll notice that some
of the generators are static and some of
them are animated. However, almost all of the generated clips
can be adjusted. If we move glimmer
down to our timeline. And then if we look
at the inspector, you can see how we can adjust
different options such as particle's speed,
hue, et cetera. Most of these generators
are especially useful when you need a simple background
for your green-screen. So why don't just
take a moment now and draw the different
generated media and perhaps some of them to your project and
see how they work. So gender is all lots of fun. But at this stage, you're a
fairly skewed video editor. And a lot of the time, the generated media
that Final Cut Pro offers just won't cut it. What do we do there?
To understand how we can level up generators? We're going to go inside the project of one of our
edited Final Cut Pro lessons. Firstly, take a look at
the simple effect here. Small sequence like
we have basically, there is a half's pill
shape that expands the previous clip to highlight a portion of the cow intro. And then it goes to
two drone shots of a car driving from
one end to another. And then we have
all these clips, which is our middle. And then finally, our
ending is made up of these different shots
of the hot air balloons. Nonetheless, how can you achieve
this effect by yourself? Because if we go to
generate this tab, you may think that we can use the shapes option
to achieve this effect. However, if you bring this
down to your timeline, you'll notice that
the shape options you have are actually
quite limited. So how can we unlock a virtually endless variety of shapes that can be animated? Well, it starts with not
using the shapes generator, which seems rather
counter-intuitive. Instead, we must use
the custom generator. This is essentially a block of media that can be
changed any color. For example, if we click
this little color option, we can change this
media to this color. Now we can make our shape. And to do this we can use
the draw Mosque of thing. So simply dragging the
effect over our media, we can now create
any shape we want. Although this is a
little bit tedious, shape options are absolutely
endless and it gives us so many exciting
customization opportunities. So now we can draw
our precise shape. Firstly, we can create our draw a shape should look
something like this. Then we can right-click on the shape and change
the points to smooth to achieve a nice
sort of half pill effect. Then finally, we
can move over to the inspector and over to draw a mask and click down
on the control points. Here, we can adjust our point
so that they're all even. Now because we are using
the draw mask effect. This means that we
have a lot we can do with the animation
aspect of the shapes. So if you want to achieve the
same or similar animation, such as the one shown before, we can do that with keyframes. Remember how in the mini
challenge we looked at how you're able to adjust
control points of keyframes. In case you've forgotten
here as a quick refresher. To make this effect, or we are going to do, is moved to the
beginning of this clip. Jump about ten frames forward. Key the control points. Then jump back to the
start of our clip and change all of the y values to whatever is the lowest value. Now, to fix this little
bump we have here, we can right-click
this control point and change it back to linear. Now if we plot, we can see the animation plays back nicely. It's a fixed like this that take just a
little bit more time, but they really make your
videos are a lot nicer. And the added benefit
is that we can reuse it for different scenes. Okay? So we know how to create this nice animated
shape, perfect. But we're not quite done yet because if you
look at this clip, you'll see that the mouse and play head appear
above the shape. Now keying is a really
important tool, can be used in so many
different ways besides that, the classic person in front
of a green screen scenario. So let's see how we can use it to our benefit in listener. Now, you can imagine to
achieve this effect, we essentially need
three layers of clubs, which will be the original clip, our source clip, and finally just the
mouse and the player. To get the missing mass
and play hidden layer, we need to duplicate the
original clip due this weekend. Just Range select a portion that matches our
shape medial end, and then paste it on top. And instead of using
Command V to paste, use Option V as this will paste as an attached cup instead
of a primary storyline clip. Before we do any king, let's add a mass to the proportion of the
clip we want to keep. Now we can add the key
affect our footage. Simply using the sample color. We can ensure it is correct. Now, we basically
80 per cent there. You'll see if you zoom in that
the cursor is a bit faded. To fix it, we can
adjust some parameters. In this case, if we
increase the shrink, expand slider, we can
bring back our cursor. And with that, I'll pick
this pretty much perfect. So there we have it. Let's
listen really shows how, how editing can sometimes be. A little bit tedious. However,
in all of your effort can produce something that
you can really be proud of and that can be something
that is really impressive. And it also goes to show how different effects can also
have so many different uses. That would then
encourage you to take this moment to build some
of your own shapes and create your own animations
is definitely a lot that you can do with a
sudden be creative.
34. Mini Challenge - Spinning Bottle Advert: Welcome to your next
mini challenge. In the previous section,
we covered quite a lot regarding chroma keying
in Final Cut Pro. We're going to put these skills
a little bit to the test. Now for this mini challenge, we want you to produce
the following effect. As you can see, this
video is very short and, and essentially all it is is a canned spinning
towards us with a logo. If you would like, you can try and recreate
this for yourself. Quite simply, all you need to
do is something like this. Rotate a drink. In that case, what
we did is we used a bar stool and propped
up the drink within, simply rotated the bar stool
while recording the can. Of course, this is not exactly
ideal as you will see, because it will come with some
extra editing challenges. But that's great because
we like challenges because that's where the
learning happens and sometimes the
footage you get is an absolutely
perfect and we need to understand how to
make it appear perfect. Nevertheless, this is going to be the footage
we're going to use. And it's a great
way for us to now learn and try the challenge. If you would like to
use your own footage, then go for it there. We totally encourage
you to do that. Now, before you start, a few quick tips regarding effects you will need to use
for this particular project. Now, these include keying, masking, transforming,
keyframing, compound clubs, and a few others. Those hints. Pause the video now
and see what you can achieve. So how was it? Did you manage to achieve this effect without having the sneaky peek is what we're
going to tell you next. Or maybe did you manage
an even do a better well well done if you did an absolutely no
worries if you didn't, because either way,
we're going to show you how we
achieved this effect. So first things first, let's drag our background
footage onto our timeline. Now let's drag our spinning canned footage
onto our timeline. So now that we have it
on the time that we need to work out what part we need. And this is way too long because we want the
can to be spinning in. We will start the
footage at about this point and we can
end it around here. Next. As you can see, this footage has a few issues, as we mentioned, such as being skewed and drifting from
one side to the other. So how do we fix that? To make life easier?
The first thing we can do is go up to View and down to overlays and enable the option
called show horizons. Now with this, we can now fix the first problem of
the skew footage simply by rotating the footage and using this line to ensure that
the angle is correct. Next, if we skim
along our footage, you'll notice that
the can drifts as it's obviously not
perfectly centered, right? To fix this, what
we need to do is center the can
along these lines. Next, click the Transform
tool and add a keyframe. Now we want to keep the
cans sentence so we can move along the footage a bit and see into
the can each time. We keep following these steps
until the end of our class. We play back our footage. You'll now see that the can
stay is pretty well centered. So now we can remove
the horizon lines. With this fixed up, we can
move on to chroma Keying. Simply drag that onto this clip. Now, let's draw a
mask around the can. And this is very simple. Just for the bottom
section of a kid. When you click to add
this control point, hold down and drag to make the line appear to
match the cans curve. Now you can see that the cane
appears a bit transparent. And if you remember,
I'm sure you do. We can fix this by simply
dragging the fill holes slider. We can lastly add
a bit of light, wrap to it and make it
a bit more immersive. Now that that's
done, we can create the effect of the Ken spinning. You'll notice that we can't
exactly transform the clip to achieve this as it will mess up our drifting corrections
that we've made. So to overcome this, we can just right-click the clip and hit
new compound clip. With that, we can now
position our club and use keyframes to make it appear
to spin in like this. We can now crop the clip
and slow down the section. The last three things to do
or have the can fade in, add our text, and
then add our audio. Select the start of this
clip and it Command T and adjust the length. Then we can add the text and using transform and keyframe, we can make it slide
in from the left. And finally, we can add our
audio by just going through the sound effects tab
and searching for water, ocean to and drag that down. To finish things off.
Cut all the extra media, and fade the ocean out. Alright, so that's how we did. How did it compare
to how you did it? Several ways in which you can achieve things
in Final Cut Pro. It's all about
learning and doing, and there's not necessarily one absolutely best way
or we encourage you to try and do these things yourself because that's
really where you learn. And if you did it
in another way, that's absolutely fantastic. So we'll see you in
the next lesson.
35. Tracking Part 1: It's time to move to one of the last important tools
that we haven't yet, Kevin, and that's tracking. Now, this is essentially an automated way to
key frame a shot. So for example,
we have this shot here where a person is
walking down a road. Now, let's say we wanted to have some texts
follow her movement. We could of course use keyframes and key the text to the person. But even easier. We can have Final Cut Pro do
this automatically for us. Moving over the text window, we can drag this custom text
over to our preview window. When you do this, you'll notice Final Cut
Pro automatically tries to recognize objects such as
this person dropping it. You'll see that Final
Cut Pro creates this box around our subject. We can adjust the
size and position of this box to get a better track. Now, just click the
analyze button. And Final Cut Pro
will do the magic and automatically track
the subject position. If we expand the text over
the entire clip and play. You'll notice that
this text follows this person position. Now if you want to change
the position of the text without messing
with the tracking, you can simply drag this handle
to the desired position. Otherwise, you
could also move to the Transform tab and change the position using
the transform option. Now one thing you might notice is how the
track appears a little bit jittery and it loses a
track for a few moments. So one way to get a better track is to rather
select a smaller area. We can do this by shrinking the tracking box to around
our subject's head. And again, click Analyze. Now this time, if we
play back our footage, it is far smoother. But we can take
this even further. By default when we track Final Cut Pro users
and automatic method. However, sometimes that doesn't necessarily give us
the best result. Some of the track you
will probably notice bounces a bit and it's
not entirely smooth. So this is where we can experiment with different
tracking methods. If we click on the clip, we are tracking and
move to the bottom. You can see the analysis
method is currently automatic. We can change this
to point cloud. We can expect tracking that is but less accurate,
but much smoother. So again, moving to our tracker, we can re-analyze this clip. Well, and that track is
pretty good right now. But we still have one issue. And that's the text rotating. But if you click the text, you'll notice that this box appears in the transform menu. Click this to choose to enable and disable different options. So if we uncheck the rotation option and
play back the video, you'll now see that there's no longer any rotation, right? So that's it for an
intro into tracking. In the next lesson,
we're going to take a deeper dive in and look at some even more advanced things that you can do with tracking.
36. Tracking Part 2: Welcome to this more
advanced lesson on tracking. Now firstly, you didn't
present too many challenges. So let's look at a slightly more difficult
tracking scenario. Here we have some footage
of a person riding a horse. Final Cut Pro doesn't only
allow you to track ticks. You can also track media
effects, objects and more. So, moving to our media window, we can click on this
maps pin image over here and drag it onto our
subject, then hit Analyze. Again, we can move to the Transform tab and scale
and position that image. Now we can play
back, I'll click. You'll notice that
along the clip, there are a few moments
where a Git is. One way we can fix this is
by moving downtown club, right-clicking and hitting
show tracking editor. Now, if we move to a part
of the clip where Judas, we can select it as a
range and click Analyze. And with that, it's fixed. Now, this still does not work. There is what's called the
brute force way to fix it. And that is by simply moving
the trekkers position frame-by-frame to ensure it always is in the right position. However, the track becomes completely lost for
the rest of the clip. Go to the frame where
the track becomes lost, readjust the tracking position, and then click the
analyze forward arrow. And this should fix
these types of errors. Nevertheless, you'll
still notice that the track isn't exactly smooth. So again, we can change the
track method to point Cloud. Now before reanalyzing the clip, we need to make the Tracking
Area a lot small as a point cloud teens
to get lost when tracking large areas in
this type of scenario. With this area selected, we can now track. As you know, we can fix the rotation issue by
simply moving the object, clicking this button and
unchecking rotation. Now if we play, you'll notice
our track is bar smoother. However, one thing
to note is how the object size doesn't track. You may think we can
fix this simply by moving into the inspector
and enabling scale. However, when we do this, you will see that the
object completely distorts and the scale
doesn't track well. This is because in
this type of scenario, our tracking data
isn't that great. So instead of trying
to automatically adjust the scale and
position of the image, we can do this manually through
transform and keyframing. Moving over to our
Transform tool, we can manually
scale our image and make my trekking position
corrections just like this. Finally, when we play back, the trick is smooth
and complete. That's pretty much
it for tracking. There are a few more things to know that we won't discuss
them in this lesson. So for now, try it out yourself. Look at this tool and
see what interesting, fascinating, exciting
results you can achieve.
37. Importing Effects, Text & Transitions: Although Final Cut
Pro provide you with a vast range of different
tools and effects, you'll come to find
that sometimes you just need more
and more tools, more effects, more options. That's just the way it is. This is where plugins and
motion templates come in. Using plugins you able to truly transform your Final Cut
Pro work space and adding different templates enabled
you'd have access to a far larger variety of transitions and effects
and titles and more. Think of Final Cut Pro,
sort of like a car. Right now. Your final Cut Pro has
all the standard options. Have it, you can make all
sorts of modes and upgrades to make your car really
suit your personal needs. First, let's look at how we can add another transition
to our collection. If we open our transient menu, you can see all the transitions we currently have installed. Sure, there's quite a lot, but sometimes we just need
something that just as here. There are two ways that we
could solve this problem. Either we could import
our own custom trans, decisions from motion, which
is a whole another story. Or you can download transitions or effects that
have been made, but others. If you move over here
to your browser, we can start looking
for transitions. Now there are many places where you can find free templates
and plugins have it. You often find your
options are quite limited. Places like pixel film
studio, emotion, VFX, and motion array are
popular for having a vast set of different
templates and plug-ins. However, most of the time
you'll either need to pay for the template or you will need a subscription for
their service. Nonetheless, the OLS,
the places where you can find free plugins. And often most of the time
these you can find simply by searching Google or YouTube for free FCPA x plug-in
or templates. But as always, show, you know, be careful where you
download your plugins from. Often. You'll find plugins that are available through Shopify
stores like this. And I'm going to ask
you if all sorts of information, emails,
names, passwords, so just be careful
of what you're sharing and where you're
getting these from. These many of these larger
sites that do offer some free templates
and plug-ins as well. Look at this zoom
backwards transition from mixed kit install, all you need to do is
download to your computer. Open up the zip file, then open up a new
finder window or tab. Then you need to find
your movies folder, usually by clicking Command and the up arrow you until you
see this particular folder. Then if you click here, you will find motion templates. Again. Click this and finding
the transitions folder. Now we can move back to our
downloads and simply drag this transition into
this transitions folder. Now if we move back
to Final Cut Pro, you should now see
the new transition we added in the
transitions drop-down. And if you don't see it yet, either search for
the transition or restart, Final Cut Pro. And if all that doesn't work, the fall may just be
corrupted or incorrect. We can check out a new
transition by bringing it into a point between
two clips and aggregate. And then you have it, how
brand new transition as well, this one, it really doesn't give you too many options to adjust. But we got what we paid for. As for adding titles generated
a fix or compositions, that the process is really
very much the same. Instead of moving our downloaded
folder to transitions, we move it to the respective folder of
what you've now downloaded. Finally, when it comes
to downloading plugins, this often requires installing
separate applications. Let's check out this free
plug-in called MQM rake. To install this, the
process is pretty simple. You'll have to click
here gigaton pay. Then we'll ask you to download
there and store them. If you do not have a downloaded, you will need to
create an account. After all that, you can
install the plugin. You will need to
restart Final Cut Pro. You will now see your
newly installed plug-in under the titles menu
right here, M cam rig. If we drag this over
to our timeline, you'll see it provides
many different options to create smooth zooming. In effect, you'll find that some plug-ins will provide
more options and others, and some even come with their
own menu system built-in. That'll said, this is
your time to go out there and find some
cool templates and plug-ins of you own. As always, be careful where
you get your downloads, your time now to expand and customize your Final Cut
Pro to suit your needs.
38. Effects Presets & Paste Attributes: Well, now that you know how to download and install
templates and plugins, we can do something
quite similar by creating our own templates. Let me show you what I mean. Let's say I have this clip here. As you can see, I
have a whole bunch of different effects
and a whole lot of different
adjustments to the club to create a very specific look. Now, what if we want
to use this sort of signature look that we have in a bunch of different
projects or clubs. But instead of manually selecting all the
effects and making all the adjustments each time, what we can do instead
is to save our time, is simply save our
effect as a preset. If you open the video inspector, you'll see this option
called save effects preset. You can also find this
option in the File menu. If we click this button,
you will see it opens up a window that allows us choose
the name of the effect, what category it saved under what you've
been a new category, as well as what attributes we would like to keep
in this effect. Finally, there is the option
to choose to either maintain the keyframe timing or stretch the keyframes to
fit the length of whatever clip we
are adding it to. So in our case, we
can name our affect, my custom effect one. We can keep it under
the basic scatter. You should be fine. And we'll keep everything
else just as it is. Osdi, we can save our preset. And now if we move over to our fixed window
and then basics, we can find our Customer
effect that we just added. Now, we can now simply add this effect to any clip we like. Doing this imports
all the attributes of the effect to our clip, and it gives us
the option to make all the same adjustments
in the inspector menu. Now, this is definitely
a good way to save time, especially if you are going to use a specific effect
in multiple projects. But what have you don't need to use the same effect
in multiple projects. What if it's just for a few
clips or even a single clip? Now, we don't have
to create a new preset each time we want
to do this instead, what we can do is
click on the clip, which has the desired
effect. Click Command C. Move to the clip. You want to apply the attributes to weave into multiple
clips by holding command and clicking and then
press Command Shift V. You'll see it opens
up a window to paste all the attributes from the copied clip to
the other clubs. And this also has some
options to choose what attributes you want to
keep and whether you want to maintain the keyframe timing. And the shortcut can significantly speed up
your editing and also help ensure that all
your edits and g of x are consistent
with one another. So at this point, I
encourage you to try and create your own
interesting and useful effects using effect presets to ensure you become an optimal editor.
39. Consolidate Media and Finalise Main Project: Well, this isn't a
precise for our recap. And do, this is the last of the shoe lecture for
the intermediate section. Wow, By now you've got a vast understanding
of Final Cut Pro, the environment, and
that's absolutely awesome. With all this, you now have
your project that you've hopefully created
and it's now time to wrap things up literally. In this lesson, I'm going
to show you how to wrap up an entire library
for long term storage. Let's see what we mean by that. Let's move over to one
of our big projects. And in our case, let's
look at the MTV project. Let's say you've finished the project and you just
want to keep a backup. Or alternatively,
you want to give the project to a
different person so they can continue working on it. If we were just to
give the person the library file or save
that for long term. They are potentially a few
issues with the related media, which is stored in
different locations. If you can remember from
the earlier section, we kept the media in
a different folder and never imported it in order to essentially
save storage. Now, if someone else were given your final
Cut Pro project, they may find that they
are missing media errors. Or even if you came back
later to the project, you may have deleted the media from outside of the project. And that's going to
result in the same era. Also, if you click
on the Library, you'll notice that it takes a large amount of
storage on our desk. Also, this number
can quickly become exponentially larger as your
project size increases. So how can we combat
these issues? Well, first, we can have
all our media wrapped up inside of the library
simply by clicking on it. Moving up to File here. We'll choose to include
the original media. And with that, you
will just need to wait a while for or obviously
the media to import. You may also notice that the library size
becomes a bit larger. And this brings us to our second issue of
storage and file size. So how can we shrink the
file size of a labyrinth? Well, again, if you have
the library selected, then go to File, delete generated library files. And here we can choose
delete all the render files, optimized files,
and proxy media. You don't need to worry. This isn't deleting
your originally. It's mainly deleting
the optimized files and the generated
files that it creates. This just means that if you have to move back
into this project, you may have to wait a
bit for all of this to be re-rendered in order for
it to edit more smoothly. But if we click here,
you'll then notice that our Lowery file size has
dramatically reduced. And this is great
because now we can easily store our
library long term and everything is included
and we can easily transfer it to someone else
if they need to work on it. And so that is our
rep on this project. And I encourage you to
do the same for yours.
40. Importing Proxy Media: Well, this is the advanced
section of this course. And this is where things
rarely pick them. Before we start looking into any advanced topics
we need to ensure, you know, how to
achieve certainty effects that we've taught you. If you remember from
the overview lesson, we said we were going to
work on this project. So basically, you will use all the footage to re-create the effects we
showed you, plus a lot more. But as always, if you
have your own footage, you can also use that
instead of our footage. Now we know how to import
media into Final Cut Pro. But before we do that, we need to talk about one thing. And that is proxy
media approximately is really useful when
you're working on a large project with lots of
different edits and effects. And this project is just that. To dramatically increase your computers
editing performance, we can convert our
media into proxy media. If you're working with
larger formats such as four, K, six K, etcetera, proxy media essentially shrinks your footage down to
a smaller format. So if you're working
with eight K footage, using proxy media will
make it seem like ten ADP, $40, even 720 P footage. Align your computer to proceed much faster during the editing. However, when you do
the final render, the original quality
media will be used. Before creating any proximity. We will create a new library. Now, remember how he
suggested that you should create a separate library when working on the
bigger projects. We will do just
that and we'll call our library advanced project as this is going to be for
our final major project. You can choose to
name it whatever you like and follow along. So how can we create
proxy medium? We learned with importing
media that they are two ways to import
media and your library, dragging and dropping files into media or using the
Import window. However, when it
comes to proxy media, using the Import window
method is probably the best. So click the Import button. And before importing the clips, if you click on
this button here, under trans code, you
will see it opens up these options of
codecs and frame size. For maximum efficiency, leave the ProRes codecs
selected for frame size. This is where you need to decide just how much extra
performance you need. 50% will shrink your videos, do 50% of the size and 12%
will shrink over the years, even smaller to 12 per
cent of the original size. For this important, let's
keep it at 50 per cent. To import and create
your proxy files. Just select the files
or folders that you wish to import and click import. You'll notice now that Final Cut Pro is busy
transcoding your footage. And this may take a bit of time, so you can leave Final Cut Pro doing its little thing
until it's finished in. Now's a good time to go and grab yourself a cup of coffee. Once it has finished processing
all of your footage, all the media in this window
will be proxy for, meaning. It will put a whole
lot less strain on your computers processes. Quickly checking
this, we can move one of the files over
to the timeline. And if we click on the
View drop-down menu and select proxy only, you'll notice that your video resolution
dropped slightly. So now if we were to open
a different project, which we did not create
proximity or four, you can see it displays
the message missing proxy. Alternatively, you can
select proximity preferred, and then it will only display proxy media if you have
created for your project. Finally, as you know, you can also import media simply by dragging it and dropping
it into this window. So how can we have a generate proxy media
using this method of input? Well, if we go over to
Final Cut Pro Preferences either by clicking Command
and camo or Final Cut Pro. And then if you move
to the input tab, here we have a few options
that we could use. Option we are interested
in is transcode. Firstly, there is the
create optimized media, which is by default
already checked. Then they is create proximity. And just like with the
other input window, we can change the
video size and codec. If we select this option than any media that we
drag over to import, will automatically be
made into proximity. But really, unless you're working on a lot
of big projects or your computer is
too slow to handle your normal work that we
suggest leaving this off, it's better to
rather just create your proxy media when you need it in the way that
we showed you earlier.
41. Mini Challenge - Advanced Project: Now that we have our footage imported and compressed
into proxy media, we are ready to start working
on our advanced project. Now we're going to dive right in and put your
skills to the test. So to start things off, we have, of course, Meli challenge for you using the
footage that you have. We want you to recreate the first bit of this project,
what you've come this far. So let's see what you've got. In this advanced section,
we're going to put all of the skills you've
learned to the test. We rarely want to make
sure that you remember how we achieve all the
advanced effects that we've taught you? Because repetition,
repetition works. So if you think you've
got what it takes, this is your mini
challenge time. Pause the video now and try
and recreate those effects. Well, we hope that went well. Let's take a look at how we did. To start off with, we need to locate the footage
we want to use. And in our case, we
selected these clips. Now you may notice we have separate audio tracks
for all these clips, as well as separate camera
angles for some of them. So the first thing we need to do is synchronize the clips. And if you remember from
the previous section, we can do this by simply
selecting the media we want to synchronize and selecting
synchronized clips. Thankfully, for us,
these clips have beneath the organized
into files, meaning we can
find related media simply by going to the
correct keyword collection. And just like that, we can
move the Synchronize Clips to the timeline and cut it
to the correct point. Because we are dealing
with raw footage, you'll find there are many different
retakes and mistakes, but these are normally
just the challenges you face as a video editor. Once you've found the
correct end usable footage, we can use this in our project. Our first effect is the speed through all of different projects
that we worked on. To create this, the first
thing we need to do is loud all the footage and order it however you would
like it to be ordered. Then we can select all the media and hit new compound clip. Now, this is where things
get a bit confusing because you may have noticed we use the
subway shadows effect. However, if you try using it, you'll find that it has no
real adjustments for scale. So this is where we can again
utilize compound clubs. So what we'll do is scale
out and position this clip a bit higher than
speed up this clip. And finally, we will again
hit new compound clip. Now we can add the effect to this compound clip and scaling. Finally, we can adjust
the subway shadow. Because we use
compound clips twice. We could both speed up and apply effects
to all our clips, as well as giving extra
adjustment options to our effect. Well, with that, let's
move to the next effect, which you can see is
this transition here. For this, we use the drawer mask with keyframes and we
added in a sound effect. So the first thing we
can do is synchronize this clip and bring it
over to the timeline. We then need to
cut both clips to the correct position so that
it sounds like one sentence. If you remember from the jump
and roll mini challenge, we can achieve a lot with masks. One of the things masks are really good for is creating
custom transitions. So let's do just that. Firstly, we can go to mosques and bring draw
masks into outlet. Then what we wanna do is move to embark the halfway point
in our transitions. So where the tree is about here. Then we can change our preview
window to 25 per cent. So we can add control points
outside the visible window. And now we can add four
points outside outlet. Up to this. We can align these two points
with the angle of the tree. Then we can add a bit of a
feather to make it more fluid. And finally, we can keep
our control points. At this point, we
have two options. We can either go for the
time-saving or the precision. If you want precision for
each frame you go forward, you need to readjust
the key points so the lines with the tree. But if you want to save time, what you can do is move
near to the last point in the clip and move the control
point to this position. Then make the last
corrections at the end. After this move to the
first the tree appears, and move the control point
to the correct position. Finally, correct for
the first few frames. After this, you can
run through the clip. And if they are points
where it starts to go a little bit or if you
can make corrections. Okay, so now that we have
this mosque effect done, let's see how we can combine
it with the other clip. To do this, we simply
take the clip we need and place a blow this
club with the effect. Then to create a
more smooth effect, we have this clip keyframe
in from the left side. Then we add a nice whoosh sound. Lower the volume, and
there you have it. Our effect is complete. Finally, we have
this last effect where we have a clone come
in to say repetition works. Because we know you
already know this effect. We'll just quickly run over it. So we first took this
clip and zoomed in, as you will see, I don't entirely
out of the frame. And next we find the section of the clip where I come in from the side and we cut
and put it on top. Lastly, we had a
simple mask with a little bit of feather
to create this effect. And to finish it off, we added a transition
between these two clips. So the scene change
is not so noticeable. And you'll also see that there
is an echo in the audio. And if you remember
from previous lessons, we can simply add
this by moving to our fixed window and searching
for the desired effect. And this case it's echo delay. Then we can add
this also to audio. So that's pretty much it
for the primary fixed we used and that's it for
our mini challenge. So see you in the next lesson, we will go over some of
our more advanced topics.
42. MultiCam introduction: As you've seen from
the first lesson, we have been using separate audio for all of our videos, but it
doesn't stop there. Sometimes you will
find yourself with multiple cameras
and audio sources. And things will
get very messy and confusing if you stack too
many layers on your timeline. Thankfully, Final Cut Pro has a very easy way of
dealing with this, and that is multi-camera. With multi-camera,
you can quickly create a rough draft
or your project. Then after you have
your first draft, you can go in and
create precision edits. It's especially useful
for discussion panels, allow the veins or interviews, video courses, and certain
types of shoots way you use more than one
camera and microphone. So let's see what
multi-camera is all about. Moving over to our collection that has multiple
cameras and Mike inputs. We can select all these clubs. And instead of hitting
synchronized clips, which we could do, we instead click new
multi-camera clip. Doing this, you'll see
it makes us fall with the full boxes indicating
it's a multi-camera clip. If we drag this over
to our timeline, you'll see that it
appears as one clip, just like the
synchronized kept it. But if you double-click it, you can see all the
different layers can kinda like a compound gland. Here on the side
you can see that it has a little monitor
and sound icon. This to indicate where the video and audio
is appearing from. However, this is not how we
switch between the clips. Instead, what you
do is you go out of the multi-camera
clip, moved to view. And then where it says angles. Click that. And just like that, you'll
notice that you can now see all of the available angles. Now, before we look
at the angles, Let's first crop the clip to where the video
actually starts. Moving back to the angles view. You will see that when you
hover your mouse over it, it changes to a scissors. This basically implies
that we are making a cut and we are
choosing an angle. So if we click, you'll notice that it's
suddenly changes angles. But your auteurs notice
that while doing this, that all your changes as well. So how can we select our main mic input while switching between
the video sources? Well, quite simply, all you need to do is change your
selection tool. If you look to the top here, you'll see there are these
three different buttons. And as you may guess, each changes what it has happened to the
multi-camera clip. The first one select
video and audio. The second one
selects only video, and the third one
selects only audio. Therefore, we could select our
main audio with this tool. And clicking on this tool, we can seamlessly switch
between both our video streams. Now that you have a basic
understanding of this, you can go into your
project and start making some cuts and
some angle changes. As you will see down
on the timeline each time you change
the video already and put it reflects as a
cut down on the timeline. So let's say we don't like
the cameras selected here. Now, we can simply
go to the start of the curtain and
change the camera. And then just like
that, it's switched. Okay, so that's the basic
idea of multi-camera. We will see how we can take
this to the next level when working on our very
advanced projects later.
43. Index & Roles: An important part of editing big projects is
keeping organized. Because when you are dealing
with a lot of media, things can quickly
get very chaotic. And when you get disorganized, it becomes nearly impossible to find the footage you need, and this can exponentially
increase your editing tab. Now, in our previous lessons, we've looked at many
different ways in which you can be a little
bit more organized as an editor by properly
storing your footage with relevant file names or by organizing your diary
with keyword collections, as well as using
multi-camera clubs. But there's something
more we can do to ensure we stay better
organized on the timeline. However, before we look at this, there's one last window
we must look at, which we haven't really
properly discussed yet. And that is the index window. If you look at the
bottom-left corner, you will see that there is a button with the
word index on it. If you click this button, it opens up a window that displays a bunch of
different media. However, this video is not
all the media that we've imported instead is immediate. We currently have
down on our timeline. You will see that
this first clippers, the first step we
have on our timeline, and the last clip,
as you might guess, is the last clip we
have on our timeline. We named our media property. We can easily find it using the search tool
at the top here. Otherwise, we can also
go down to the bottom here and select audio,
video or titles. And this way we can easily
make adjustments to all our audio where our videos, if we need to touch as pasting effect presets on deck clips with Command Shift V. So you can see that the index is very useful for
locating your medium, for applying a fixture media
and a whole lot more here, but we're just getting
started here as roles is where the real
organization magic happens. So let's take a look
at those. By default. Final Cut Pro will
assign roles to your media as soon as you
imported into your project. And you'll notice
the different roles by the color of the clubs. For instance, basic footage from our camera will be assigned
this dark blue color. And the same goes for audio
like I'm Mike inputs. However, you will notice that
effects such as this one have a light blue
color and this means it's been assigned
the effects for. Further, if you import
music onto the timeline, you'll notice that
it is allocated. There's green color. And this is nice and
colorful and fun. But what if we want to use
this to assign our own Ross? And we're glad that you were
thinking that question. There it goes. It's pretty easy to do and really powerful. Moving to a club, such
as audio clip, yeah, we can change it to effects or music simply
by right-clicking. Assign audio roles than on a
roll like effects or music. And you'll notice as
soon as you do this, the color of the changes. That said, we still don't
have that many options, especially when you look
at assigning video roles. Because if you look, the
only option we have here, our video and titles, which doesn't do
much for helping us keep our project
clean and organized. However, the real power
comes in with custom roles. So instead, when you right-click this video,
click Edit Roles. Now you'll see it
opens up this window, which is where you can really take things
to the next level. What we can do is
click this plus icon where it says
Add via roles. Then we can name the wrong. We will just call
it inside take. As you can even choose the color of the
role, we can do that. Now we can click Apply, and then we go back to
assigning a video roll. And we can now
select inside take. And with that, you will now see that our clippers
turn this new color. And so having an
eclipse color-coded is great and very efficient way of helping us harness the
real power of indexing. This time, instead of having
the Clips tab selected, we can choose roles. And with this, you'll
notice that we now have the option to easily find different types based on
roles within our project. Let's say for instance,
I wanted to find all the clips that
we're inside takes. I could simply click inside
take and Final Cut Pro will highlight all the clubs that have been associated
with that role. But this is even more useful
when it comes to audio. You'll notice that inside
this multi-camera clip, we have assigned both of
these mikes different roles. One of them is Craig Mike, and the other is Denmark. However, these mic inputs are buried in the multi-camera clip, so it's really not that easy to find them if we
wanted to make edits. But because these have been
associated to the o roles, we can now just click
the small button here. And suddenly the audio is
exposed and we can now edit it. And then When we're
done editing, we can make them hide back by
clicking the button again. As you can start to see, Rolls has the ability to give
us an incredible amount of organization and it allows us to keep our timelines
nice and super clean. It also makes editing a lot
faster and more efficient. At this stage, go
into your project. It doesn't even have
to be this one, but to start adding custom
roles to both your video and your audio and see how
organized you can get yourself. You'll be very thankful
in the long run if you get used to using roles. What's stopping? You? Get rolling.
44. Project Snapshot: In games use sometimes have a checkpoint where you can
save your game progress. You mess around
knowing that if you die you can respond
it at the checkpoint. Well, let's see how we can do much the same type of thing in Final Cut Pro without edits. Let's start with the simple one. How can we save the current
state of our project so that we can always return to
it if we feel things have gone a little bit off course and not like we planned. Or perhaps you just
want to create an alternative version
of the project. Grading the responding
type checkpoint is think very, very simple. All we need to do is go over to the Media window,
find out project. Right-click it and
hit snapshot project. As soon as we do this, you
will see that it creates a new project that has the name of our original
project followed by snapshot and then
the current date. You will now see that
we can make as many different edits to
our original project and our snapshot
will stay the same. The project snapshot acts like a normal projects
so you can edit just the same. But hold on. Not so quick. Because you'll notice that when you right-clicked
our project, we also had the option to
duplicate the projects. So what's the difference
between creating a snapshot of the project
or duplicating the project. Good thinking, good question. Well, when we
snapshotted project, we will be creating a completely independent version
of the project which is in no way affects or affected by
the original project. However, this is not quite the same with a duplicated project. If you have worked with
compound clips or logic, which at this stage
we hope you have, because they're so versatile, you will quickly come to find
out one thing which is both useful and a little bit
annoying at the same time. And that inherited edits, which is another way
of saying if you make changes in a compound clip, these changes will apply to all the instances that you
have used the compound clip. But let's take a look
at what this means. Say, we have this
compound clip here. And as you can see, we
use it in two places. If we go inside the
compound clip and add an effect like
this one here. If we move out, you'll notice that for each time
we use the compound cup, the effect appears
for each time we lose this compound
clip in our project. Now, this is something very important to remember as you can easily mess up a large portion
of your project thinking, you're editing one compound clip when reality you're
making changes to every bit in your project where you use the
same compound clip. Now, there's a way
to avoid this by simply duplicating the
compound clip using Command D. But what does this
all have to do with duplicate projects anyways,
ball, Let's have a look. Say I duplicate this project. Then if I go inside the compound clip and
stop making changes, these changes will happen in our original project.
As you can see. However, when we use snapshots, this does not happen
as it is independent. Right now that you
understand how to save your checkpoints
in your projects. And you understand the
responsibilities that come with compound groups go in and
get wild with your projects. Because remember, you can always return to where
you lost, save it. Long live responding.
45. Auditions: You know how to save
your entire project with snapshots so that you can come back to it or create
alternative versions. But what if you don't want to snapshot or duplicate
your whole project? You just wanna do this
for a single clip. Well, thankfully we
can do that too. I don't know if you've ever
watched those shows on TV like America's Got Talent or Britain's Got Talent or whatever country you're in
has got talent. But it, but it just
shows. You will see that they are auditions in the beginning and the best performers get
to be in the shot. But we can do the exact same
thing in Final Cut Pro. Let's take a look at auditions. Moving over to the timeline, you can see we have included the scene where we just say that this
is the final answer, Bonds who redeems the Final Cut Pro magic used in
professional development. We don't know if this take
feels best in our video. So how can we use auditions to give the
other clips a chance? To start off, let's find
an alternative take of this line simply by going to the timeline and our media
window and find a one. Let's give this
outdoor take a try. If we select the
correct range of blip, where I say the same line and move it on top of our clip
we're seeking to replace. And then click Add to audition. You'll now see that there
is the small spotlight on our clip indicating
that there are multiple clips in the audition. Every click this, you'll
see this window pop up. And this shows you all the clips that are up for the audition, as they obviously
can be many of them. The good with the star on it is the one that is
currently being selected. So simply by clicking on the
other clip and hitting done, you'll see that it switches
to our outdoor take. Of course this is the exact
same position we need it so we can trim it and edit
it however we like. And if we decided
we don't like it, you can simply click
this button again, moved our original and hit Done. And just like that, we're
back where we started. But I think I prefer
the second clip, so we will stick with that. You might have noticed that when we have this
auditions window open, there is a duplicate button. And as you might guess,
if we click this, it, yes, it duplicates
the current gap. Now, this is very
useful as we have multiple versions
of the same clip. So we can make changes like
adding effects are trims, and later we can pick
which version works best. As we said, the ability to have multiple versions
of the same clubs. Very useful. But how can we do this for a regular club that doesn't yet have
auditions already on it. Because if we right-click, there is no way we can create an audition without adding
a new clip on top of it. Thankfully, Final Cut Pro
has a way for us to do this. We have to do is
move up to the menu, click clip, then audition, and finally duplicate
as audition. You'll see now that our clip has the
addition symbol on it. And if you click it, you can see we have a duplicate
of our original clip. Meaning we can create
different versions of the script that
involve different edits or even media like titles. And if we don't like it, we can return to our original. And finally, once
we are certain, we are happy with the clipboard, the effect we are using, we can finalize it. And this is the equivalent
in other auditions, getting the red buzzer, the one that we don't want, and the selected
one getting maybe the golden buzzer and
winning the prize. So to do this, all you need to do is go back up to the menu,
moved to the club, then go to audition, and finally to
finalize audition. And as you'll now
notice, there is no longer an audition
icon under our clip. And you can easily
see which clips don't need to be finalized
and which are complete. Just note, you don't have
to finalize your additions if you would prefer to
leave them as they are, the project will still
render normally. So with that, it's
your dime to start auditioning some clips and see what makes it
through to the finals. Let's see. I've got talent.
46. Custom Luts: In the past lessons, we have talked about
color correction and how we could use it to make a
Sydney unusable shot usable. But there is so
much more that we can achieve with color grading, I can really
transform your shot. In fact, it can change the
whole look of the film. But before diving into some
hardcore color grading, there is a simpler
way of doing things. And we always like simpler ways. That is, with LUTS. Well, is it an acronym
for look up tables? These really templates
for color grading. But pretty much everything
you can achieve with lots. You can achieve with
color grading, however, it's a faster way at
achieving a certain look. So instead of spending hours
basically calibrating, we can make use of lats. Let's take a look
at how this works. Moving over to the next panel, we can move over to color. And if you scroll down a bit, you'll find this
effect called custom LUT. A normal effect. We can drag this over to a clip in our timeline
and get it to work. You'll notice that the clip
hasn't changed at all. And this is because
we still need to choose the latter
we want to use. So if we click on
our clip and then move up to video inspector, you'll see that we now have the custom LUT
within our effects. Now at this stage, if you
don't have any nuts important, you'll notice that the really
isn't any options for you. However, just like
we learned with importing customer
effects and transition, really isn't that
difficult as you are so many sites that
offer free lots online. But as we said before, always be careful from
where you download and make sure it's a
legitimate website. But once you have
downloaded your lats, you can easily import it simply
by moving over to choose custom lot and then
simply selecting the folder that has your
downloaded custom lots. For instance, with this footage, if we select this light here, you can see it dramatically
changes the color profile or the footage and it seems
a little overpowering. But this is normal
with blacks, is. All we need to do now is move
to the option where it says mix and bring the
slide at lower. Now you can see we have
dramatically changed the look of our footage without doing
very much work at all. Although lots to give us a bit less customization
and tweaking abilities, a really efficient
it's speeding up your workflow and are
brilliant and also getting ideas of
different color fields that go find yourself
some labs for your own footage and see how different you can make your
footage look and feel.
47. Adjustment Layers & Color Correction Automatic: Now it's about time we
tackle a crucial edit, which has color correction. Now before we do anything, we need to disable our
proxy media as you don't want to be
color correcting or grading proxy footage is you won't be able to
see the true results. So while we can
simply do is change our view from Proxy to
optimize the original. Now that that's done is just one more thing
we need to do, which is add an
adjustment layer. Basically, an adjustment
layer enables you to quickly apply effects such as color
corrections large so, or any effects to a portion of clips without needing to
create a compound gland. It's a bit of a workaround, is currently Final Cut Pro doesn't give this as an option. Now that we have the
adjustment layer imported, let's see, I'd works. Moving to our titles window, we can simply search
adjustment and there it is, our adjustment layer. The way this works
is very simple. All you need to do is move the effect over
to your timeline. And we can then adjusted to
the position of the clips we want to make the correction
to just testing this out, we can grab an effect like aged film and move it over to our adjustment
layer like this. Now you'll notice that any
clip we have underneath the adjustment layer
has aged film. Look. Now we can easily move
the adjustment layer over any clip we want to
achieve the same effect. And we can easily
disable or enable the adjustment layer
simply by clicking V. So that's the basic idea
of adjustment layers. And as you can
see, it makes life very easy for quickly
applying effects, just selection of clubs. However, if you don't want
to use an adjustment layer, the color grading process
is exactly the same. Instead of having the
adjustment layer selected, you will have your
clip selected. And with that, let's now see how we can use color correction and color grading to properly
transform our medium. Before we do anything,
we need to understand the difference between
color correction and color grading. In short, colored
correcting is all about ensuring the colors of your clip look natural
to the human arm. Where something might look
tinted in a certain way, we can color corrected to
make it appear more natural. Secondly, color grading is all about changing the
field of the clappy. It gives the
atmosphere the emotion that transform your videos star. And if you've ever
watched the movies, likes the Matrix movies, you'll know that it's known for its classic
green tint to it. And that's what color
grading is about. To start things off. Let's select a portion of the clip we want
to color, correct? Generally, you'll want to select the whole timeline
when calibrating to ensure that your color grade is consistent throughout
all your clips. However, when color correcting, we can still make minor adjustments on
a clip by clip basis. Just like with the
audio synchronization, we can start off with using
the automatic method. Moving our mask just
below the preview window, you should see a magic
one looking button. If you click this, it'll
give you a few options. We can balance color. Match color will show color. Inspector, let's start
with balancing the color. Now, this is what we use
to quickly color correct, to make the colors
appear more natural. Picking this, you'll notice that the colors shifts
ever so slightly. However, the change
happens only when we have our adjustment layer moving
over Tau video inspector, you can see that Final Cut Pro has the automatic
method selected. If we click this, we can
change it to white balance. And as you can see below
in the footage series, we need to select something of the footage That
should be pure white. Now, generally, if you
are well-prepared, you can have something
like a white piece of paper in your shot to ensure you can properly
balanced your colors. In this shot. The closest we have to this is this white top. Clicking this, you will see the colors dramatically shift. Because what Final Cut
Pro is trying to do is make the top appear
closer to white. It makes it more warm, removing the blue hue that
was originally there, because the top really
isn't a perfect white. We don't get a perfect result using the white balance method. So for now we can just
keep it as automatic. Next, let's take a look
at color matching. This time, instead of
ensuring colors are correct, color matching ensures that
colors are consistent. For example, if
you have a lot of warm sort of say sonship shots, then suddenly you have
more cold midday shot. We can use color
metric to make it appear more even
as we did before, we can click the one
icon, then match color. Now you'll see that opens
up a second window. Right? Now you need to select the shoot that you want
to use for the reference. Doing this will
make the shot at P or more like whatever
the shutter. So in our case, we will choose this frame where I am walking
in the forest. And as you can see, this is more warm
and appearance. So when we hit Apply match, you should notice
that it now appears more like our reference
shot, which is great. But that's it for the
automatic method. In the next lesson, we'll
look at how we can do this ourselves and get a lot
more precise with it.
48. Color correction Manual: Now we've seen the
automatic method, which is always nice to have. Let's look at the manual method which gives us a
lot more control. Firstly, to help us better
visualize what is happening, we can open up the videos scopes by simply clicking on view, then video scopes, or you
can click Command seven. Here, there are lots of
different tools that help us understand the color
information in our shots. With this tool
called RGB Parade, you can see each of the red, green, and blue channels. So if our clip is very blue, we'll see this channel
and a higher level. Just to give us more space, we can hide our media window to see the color information
more clearly. And with more space, we
can have some more tools open by clicking view and
a view with three windows. The tools we'd like to
have open or RGB Parade, RGB overlay and vector scope. Also make sure with vector
scope that you have the skin tone indicator enabled. Now one cool thing you
can do now that we have another workspace is we
can go up to the window, then workspaces, and then save workspaces as you can call
it whatever you like, and we'll just call
it color workspace. Now, whenever we want, we can quickly get
this view just by moving up to Workspaces and
choosing this workspace. Right? Now, we really have a
lot of information, so let's see how we
can work with it. The first thing we do is open up the color inspector as
we have done before. However, instead of
using this color board, we can click up here and
open the color wheels. This gives us easier options. To ensure our colors
are balanced. We want to ensure
that all three of these peaks are relatively
similar levels. And to do this, we can use the temperature
and tint sliders. The temperature slider mostly changes the red and blue colors, while the tint slider is
mainly impact your greens. With both these tools, we can ensure that the
colors are at some levels. Of this. We need to correct the
highlights and the shadows. To keep things organized. It's best to make our
color correction in stages so we can move to the top and add a
new color wheel. As for shadows and highlights, what we generally want to ensure they remain in-between 0. As anything outside of this range is a loss
of information. How about this is
just a rule of thumb, is in very dark scenes you
can expect complete blacks, or when looking at the sun, you can expect blown
out whites as well. Describing the adjustment layer. Then looking at our RGB values, you can see they
exceed the 100 range, meaning some of the
colors are blown out. Unfortunately because the
footage shot raw format, where there is a
flatline on our colors, is where we have lost
some of the information. However, we can still do our best to get a more even shot. Moving back to our
second color wheel, we can use the shadows and
highlights slider to make sure these values don't pick
above 100 or below 0. How about you should
note that you can't simply rely on these
values to integer colors. You need to look at the shot and see what
looks unnatural. How about with that said, what we like to do is bring
the peak of the highness just before they had 100 and the peak of the shadows to just
before they hit 0. This way we don't lose any information and we get
the most dynamic range. But this is again, just a rule of
thumb and it can be a lot different on a
clip to clip basis. And it just requires you getting a feel of
what looks right. And as you can see in this shot, we have bright skies
and dark shadows, so we can utilize the
full dynamic range. However, if we were in a dark
alleyway, it's unlikely. We want our highlights to
reach anywhere near 100. So as we said, you need to look and see what feels
right for your shots. You're adjusting the
shadows and the highlights. You can move to the mid tones. You do need to be careful
with the slider as you can, make your clip
appear rather faded. Now, the last step in
our color correction is adjusting the
saturation of the colors. Just like before, we can
add another color wheel. And with this one, we can change how
saturated our colors are. Looking at the vector scope. It, it helps us visualize
how saturated colors off, because based on our
are spread apart there. For instance, if we raise the global color saturation
and using this slider, notice how it spreads out. Again. This really requires a feel for how saturated you
want your colors. But using this chart, we can ensure that all of our clips have relatively
similar color saturations. Just like with the
highlights that we can adjust saturation in different areas
such as highlights and shadows or mid tones. However, we suggest
using global for most instances as this gives a more even color saturation. And finally, one last
thing to pay attention to is this skin tone, a line here. When you have people
in your shot, you want to ensure their skin
tones align with this line. Although we haven't looked
at this effect yet, we can adjust the
midterm Wilton sure that the skin tones spikes
a line with a line. And this ensures that a natural skin tone is obvious
in all of our subjects. If you want to show what these color
wheels are all about, don't worry as we will look at them a little more
in the next lesson. That's it. Those are the fundamentals of color corrections
is a huge topic, but to be as efficient
as possible, we can also paste this
color adjustment layer to all our shots
that are in similar, in our scenes and for
completely different scenes, we can go in and make some minor adjustments
again things right? So this is your moment to
go into your project and start playing with
correcting your colors.
49. Color Grading: Alright, now that you understand the fundamentals
of color correction, the next step is color grading. And as we mentioned earlier, you always want to first
ensure your footage color is correct before applying
any color effects to it. Now that all our clips
have been balanced, it's time to grade them, to get their style, their look and feel of everyone. Before we do anything.
It's important to understand that when it
comes to color grading, there obviously is no
strict set of rules. It's all about style and art, and I'm really just
experimenting until you've got that looking at fuel
that you're looking for. Essentially you
are the artist and these tools are
your paint brushes. So that's it. Let's explain how these
metaphorical paint brushes can be put to work. First things first, to ensure the color
correction is even, we'll add an adjustment layer of all the clips
in the Thailand. Now remember, we can always go in later and change
the color grade. The first thing we can do is go in and add a
new color wheel. So firstly, let's understand
these four wheels. The first wheel at
the top is global. And this is a wheel that mostly affects the
overall image. So instead of specifically adjusting the shadows
and the mid tones and the highlights,
it changes at all. To better understand how
colors are being adjusted, we will open up the
RGB Overlay window. If you looked at the centre
of this global circle, you will see that
there is a dot. When you move this around, notice how the overall
color of the image changes. And if we look at an
RGB Overlay window, notice how each of
the colored channels move depending on where
we move this dot. If you wanted to move this
circle back to the middle, simply double-click on it. Next, if you look to the left
and right of the circle, you will see two
sliders adjusting. The one on the left changes
the color saturation. The right of the slide, it affects the
brightness level of the image as seen
in the RGB overlay, the entire waveform
moves up and down. Now that we understand how
the global slider works, restore all pretty
straightforward. You can see how each
of these sliders works by adjusting the brightness
with the shadows. You can see this primarily affects the darkest
points of the footage. The highlight affects
the lightest points to the footage and the mid-tones
effect, what is in between. Therefore, if we adjust something like the
colors are saturation, these are primarily
affect the points we are adjusting like that with
the highlights changing, the color will mainly affect the colors of the lightest
parts of the image. However, do not think just
because we're adjusting highlights does not mean mid tones or shadows
will be unaffected. If you look at the RGB overlay, these areas are also affected, although maybe not
quite as much. Within the color wheel, there is an important tool that lets us choose what
colors we want effect. If you move your
mouse to the top, you will see this
small little window. If you click it, you will
see it gives you the option of adding a shape or
mosques or a color mask. Firstly, looking at
the shape mosque, you'll notice that it
opens up this window, then asks us to select
either inside or outside. Selecting the inside and
making color adjustments. You can see that the
color adjustments happen only to the media
inside the mask. And as you would
obviously expect, if we select the outside, this makes the color adjustments to the media outside
of the mask. With this mask, we can move
it anywhere in our footage, as well as having the
ability to change the size, its dimensions,
and even further. Next, if we look
to the color mask, you will see that it
prompts you to select a color with this
color picker tool. So let's say for example, we just wanted to change
this white part of the wall. Yeah, we can use select this
color with the color picker. And then you'll notice
our color adjustments only apply to the
selected color. And just like before, we can choose to effect inside or outside of the
color that we've picked. Right? So that's a basic
understanding of how the color wheels
affect the footage. And in our next lesson,
we'll look at how we can use these to create
a specific effect. But for now, play around with
the color wheel and try and see if you can create an
interesting look of your own.
50. Color Grading Recreating Effects: To better understand
how calibrating works, we're going to create
a very popular thing, which is an orange
and teal. Look. If you remember that
the color lots lesson, we mentioned that color lots are grateful both
achieving an effect, but also for giving
you an idea of how different effects
styles my block. To get a reference for
an orange and teal. Look, let's add in this
custom Orange and Teal and then reduce the mix
to what looks right. Now, let's see how we can
achieve something similar using the tools provided
without any lights. Moving over to our
adjustment layer, we can start with our
basic color wheel. Now, we know how each of these wheels affects the
colors in different ways. So, how do we begin to achieve this orange
teal looking effect? Well, your first
thought may be to drag the global color slider to teal color to affect the
entire profile of the image. And this would be
partially correct. However, because we don't want our skin tones to appear
with a sort of teal hue. Before dragging
our global slider, we need to add in a color mask
to select the skin tones. And doing this, we can
select just the skin tone. So to ensure we have only
the skin tone selected, we can click on this
View Mask button. You'll notice that with
our first selection, it only snakes half of the face. And even if we drag the other Harvard dyslexia
law over the face. And to overcome this, what you can do is hold
down Shift, then select. You'll notice that it adds this little plus icon
onto the color picker. And with this, we can ensure all the skin tones that
are required are selected. And what you'll
also notice is how it snakes more than
just the skin tones such as a bit of the back
wall and painting and desk. We can also deselect these
colors simply by holding Option and dragging
the color picker over the affected areas. And you'll notice this
time it has a minus icon. Using this weekend,
have the color more specifically select
just the skin area. However, in this
instance, because we want orange juice to stand out, we won't try and
minimize all the colors. We just want to reduce the wall. Well, now that we have our
skin tone color selected, we can select the
outside of the mask. And now we can drag our global slider to Dan
over to the teal color. Not know about too much is
the pointer of color grading is generally to be set up
next to give it to him. Yet, but more of a deeper look. We can reduce the
brightness just a bit. If we look back at
our large effect, you will see that it
is pretty similar. The main difference
is in the whites such as the painting
and the window. To bring back a more pure white. And these elements, we can
add in another color wheel, and this time we can select
just the pure whites. And as we want to only
change these white colors, we can leave inside selected to bring a bit more
white into these parts, we can reduce the color
saturation on our global slider. We can also increase the brightness and our
highlights slider. And then looking back
at our custom LUT, you can see that we have created a look that appears
very similar. If not, I would say even better. And we have the
advantage of being able to make other very slight
color adjustments do. Now because our footage is short and very
different lighting, the color selection might be a bit off when it
comes to skin tone. Such as looking at
this outside clip. That the beauty of
adjustment layers is we can simply crop out each section and re-select the skin color. We can even add in
a bit more orange into the skin to
make it appear more natural looking and to achieve a better orange teal effect. So now that you have an idea
of how color grading works, go ahead and add some costume grades to your projects to get
an interesting look. Just like an artist, the best way to learn is to
experiment and remember, just like Bob Ross says, We don't make mistakes. Just happy little accidents.
51. Important Practices: The awesome spatial
practices that you should know that will help you
even more in the long run. And the first of
these is markets. Now, they are really
straightforward to use it. And if you move to your
timeline and press M, you will see a small blue arrow that appears over your clip. And these are very useful
for a variety of reasons. They can help you line up media. They can help you keep
track of where things are. They can mark a
point and your clip. If you have snapping enabled, you will notice that your play heads schema's steps
to the market. You also see that if we
drag footage the market, it will snap to the
start and the market. And also if you
have two markers, they will snap to each
other's positions. Moving to our index window
and then clicking on tags. You'll notice that we can see all the markers
in our timeline. And if you double-click
on a marker, you'll see it gives
you the option to name it whatever you want. And this can really help
us keep track of things, especially when we
use the index window. Double-clicking the market gives us the ability to change it from a market to a to-do. Now, if we have this selected, you will see how it changes
to an orange color. And when we click the
completed checkbox, it changes to a green color. Finally, there is
a chapter option. This gives us the ability
to highlight are a range of clips which could be
chapters in your movie, or it could also be
different areas of a clip that might need more work
until they are complete. So as you can see, markers are very useful
in your timeline. However, before we
end this lesson, there's something possibly more important we must look at, and this is the
video animations. Looking at this clip,
you'll notice that we have a couple of effects
such as transformation, having a zoom in,
move to the left, a letterbox effect as well
as the opacity changing. Of course, we can go into the video inspector to
change these fixed. However, doing so, it makes
it very hard to visualize. All are fixed and keyframes. So instead, we can click on our club and simply
click Control V. You'll see it then
opens up this window that shows all effects
and keyframes. Moving this transform keyframes, you'll notice how the point at which the video
transforms moves. We can do the same
with the litter box, decreasing the amount of
time the animation happens simply by moving these
keyframes closer together. But moving around keyframes is not the only
thing you can do. If you right-click
on the keyframes, you will notice that you
can also delete them. But even more than this, we can also add additional
keyframes simply by holding down option
and then clicking. If we move down to the opacity
effect and click this box, you'll see that it gives us
more specific adjustments. Holding down option here, we can add a new keyframe. If we move this keyframe down, we can reduce the opacity again and then add another and
increase the opacity. This effects window is
a very useful tool. Need to adjust,
edits and affects. It takes a bit of time to
get used to how it works. But the more you use it, the more you realize
how much more effective and it makes
you go into your footage, adding some effects,
It's keyframes, and see how you can make
precise adjustments.
52. FCPX Preferences: By now you have check this out. We're pretty sure, but in
case you haven't, knits, have a quick look at Final
Cut pros preferences. We won't go over all of them, but let's quickly go over
what are some of the options that you probably should try and adjust simply by clicking
Command and coma. You will see this window
appear next to quickly go over the adjustments and what changes you may want
to make yourself. The first option is to change how your timeline
time is displayed. Now, right now, we have it
on the default setting, but we can change
it to show frames. And this means instead of time that you're at in
the window is going to show you the frame
that we normally find a better to work in time rather than frame,
but that's up to you. The next thing to look
at is color correction. By default, this has
color board selected. We suggest changing
this to color wheel as then it will then open up the color wheel
instead of the board. When you open up the color tool. Moving to the next
tab, which is editing, you see it gives
you the option to adjust default values such as duration and image
is displayed when we imported onto the timeline. Or we can adjust the default time of
transitions or audio fades. So say for example, you always find yourself
reducing the transition length. You could change the
default value here. Next, under Playback, you will
see this option rendering. Now here you can change how long until rendering
starts. Now. This is after what amount of time since you stop moving the mouse around
in Final Cut Pro, it should start
rendering your footage. Now, we're going to give you a tip on how to save
mass amounts of storage. However, this will only work if your computer is very fast and the project
is not too large. If you have this abled
background rendering, this will stop Final Cut Pro
creating massive libraries. So if storage is an issue, this is something you can do. However, you might notice
a performance drop, but this is a great
way to save space, especially on a
smaller projects. Next, looking at the
player background, right now we have the
default which is black. We could change this to a
checkerboard for example. And in this way,
we can maybe get a better look at the borders
of our preview vendors. Moving over to import settings, we can do things like automatically balanced
colors or, or find people. We can also have Final Cut Pro, try and fix all the problems. We suggest not having
this on as default, as you can always do this off to your footage
is important. Lastly, we have destinations. This area is useful if used
programs like compressor, we, you add custom
export options. Well, that is an overview of some of the preferences and some of the things that you might
want to adjust this to make your life a
little bit easier.
53. Course Outro v2: Well done, You've done it, you've reached the
end of the course. Fantastic. That's an
incredible achievement. We really hope that
you've enjoyed your learning journey with us. This is not the end of your
learning because as you know, learning carries
on and on and on. Learning is really an
ongoing adventure. But what a great stock equipped
with what you know now, you're ready to do
amazing things with Final Cut Pro would really
appreciate if you just take a moment and drop us a review
in the course and really helps us and gets us to more
great students like you. And if there's anything missing or something we
didn't make clear, please just don't hesitate
to send us a message. We want this course to
be the most engaging, fun, and impactful
course available. And they're really only
happens with your input. You now have the knowledge
and skills to work on pretty much any type of project you want
from small to big, from YouTube, home movies
do professional video. In. The next step in your
learning journey is to challenge yourself
with the project. It doesn't matter what
it is, whether you want to create an
online course or, or video material
for a business. Or even if you just want to
create videos for yourself. Setting a goal and working on your next project is
how you progress. As a Final Cut Pro video editor, you've got the tools. You've now got the skills. Take your camera, grab
some good footage, and get into Final Cut
Pro and start editing and creating is so much
that you can do. And if at any point
you get stuck, we're always here to help you. So feel free to
reach out to us with any questions or issues
that you may have. We really hope that you've enjoyed this
learning journey as, as much as we enjoyed
sharing with you. Thanks so much for choosing
to be part of this course. We wish you all the best in
truly becoming Final Cut Pro.
 Craig Blewett, Teach to inspire