Transcripts
1. Class Introduction: One of the most valuable
skills that you can learn as a video creator is how to
talk in front of the camera. Whether you're just starting
out or you have experience, this class will have insights on how to efficiently and
effectively film yourself for a talking head
video like this one. Hi. My name is Scott Lu and I'm a video
creator on YouTube. I've created over 100 videos at this point and I'm here
to share my knowledge on how I personally record
Talking Head Videos. In this class, you'll go through three essential components
of filming yourself. Number 1, camera
and composition. We'll start with how to
dial in the best settings for your camera and how to achieve
a good composition. We'll also talk about
the best lenses for Talking Head Videos
and teleprompters. Also note that
throughout each lesson, I'll be covering all the
equipment I use and recommend. Number 2, audio. I'll cover how to properly
set up a boom microphone, optimize the levels and use
proper microphone technique. I'll also discuss the
importance of using backups and other microphone options
for Talking Head Videos. Number 3, lighting. We'll take a look at the
three-point lighting system and how to ensure your image
looks clean and pleasing. I'll also include a checklist
of everything you need to do right before
the recording. Aside from those three
main components, we'll also cover some mental
challenges that come about when you're trying
to record yourself. In addition to all of that, I'll give you tips
on the two different styles of Talking Head Videos,
scripted and freestyle. Finally, I'll go over how I edit a talking head video
from start to finish. It'll be one of my more in-depth editing tutorials
I've done so far. The class project
will be to create your own talking head video. There will be a
lesson assignment for each of the lessons, so be sure to follow along if you want to make the
best out of this class. There's also a worksheet
available for download that outlines the class
and class project. So be sure to download that. Talking Head Videos are
a staple of YouTube and one of the most common
video types out there. By the end of this class, you'll have all the knowledge you need to confidently
make your own. Let's get started.
2. Getting Over Camera Shyness: One of the biggest hurdles when recording yourself
is camera shyness. Whether that takes the form of not wanting to talk in
front of the camera or just not wanting to watch the footage of yourself
during the editing. It's something that
all video creators that show their face
needs to get over. In this lesson, I'm going to
give my personal best tips on how to get over camera shyness. It's a different
process for everyone, but hopefully some of these
tips can resonate with you. First off, understand that
camera shyness is natural. We as human beings are very keen and careful about
our own self-image. We don't want others to
see us in a bad light because it makes it seem
like we don't fit in and that we won't be
accepted by others. Our natural instinct is to
want the tribe to like us, so that we can thrive in life. Recording yourself on camera when you feel like
you don't know what you're doing
is like purposely exposing yourself
in a bad light, because you don't have
the confidence that what you're creating will turn out polished and presentable. That's one of the reasons
that bad feeling comes about. You're essentially fighting
against your nature. But luckily as human beings, we are very adaptable. The more that you do it, the more that it'll
feel normal to you. Not only that, but you'll get a lot of
practice from doing it often, and with practice
comes confidence. This class intends on
accelerating the practice and confidence aspects
of recording yourself. By going through this class, you'll understand all
the technicalities of recording yourself and what it takes to
make it look good. However, even if you have
all the skills in the world, the final hurdle is to learn to be comfortable with yourself. I think that for me personally, I had to break through
a lot of resistance before I ended up feeling comfortable in
front of a camera. I personally am prone to acne, my hair is always a mess and I do feel insecure
sometimes about the way I look. But somehow over time by continuously putting
myself on camera and releasing it to the public, I started to just let go
of those insecurities and I became comfortable
with myself. Just keep trying your best in
an uncomfortable situation and eventually you'll strengthen your will and mental fortitude. Basically the moral of the story is keep practicing the muscle and you'll get over camera
shyness completely. Let's finally get into the technicalities of
recording yourself now so that you can at least have the confidence
in the process, which should help a lot. Also by following along
with the class project and actually producing a video where you're recording yourself, you'll be practicing
that mental muscle. So I highly encourage you to take action on
the class project. It's a step forward in
the right direction to conquering your
camera shyness.
3. Video & Composition: In this lesson,
we're going to cover the first essential component, which is the camera
and composition. Throughout these processes,
throughout the components, I'll be mainly talking
about my personal setup. But, of course, a lot of
these concepts can be applied to any camera or any microphone, for instance, so just keep
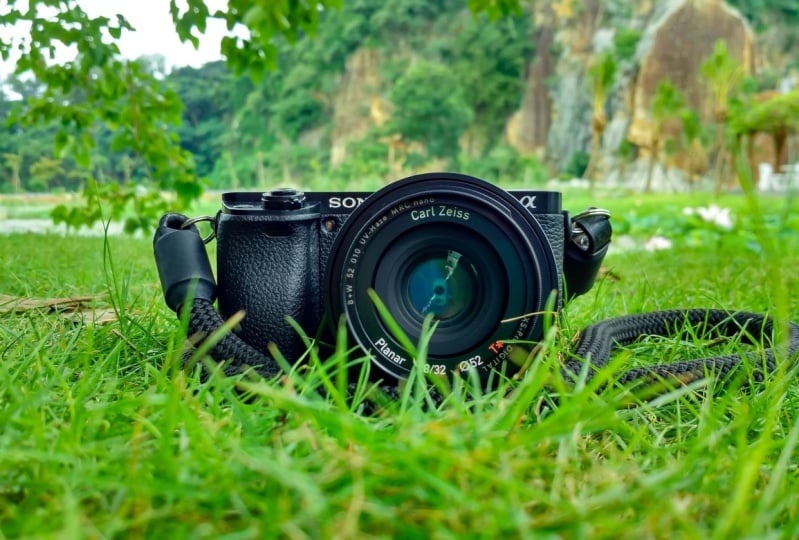
that in mind as we go along. My camera, the one that
you are currently seeing me through is the Sony A7 IV. Personally, this is
my favorite camera. It has 10-bit color
4k and right now I'm recording in 24 FPS
as well as S-Log 3. If you don't
understand what a lot of those things mean,
don't worry about it. For now, just know that this
is the camera that I use. Personally, I've
owned other cameras. My camera right there
that's recording, the camera B is the Sony A7C. That camera is only 8-bit color, but it's still really good, and I'm just recording
it in its natural mode. I've also owned the Sony A7 III, as well as the Sony A
6600 or Sony Alpha 6600. These cameras, in my opinion, are some of the best
mirror-less cameras that you can get and are
the ones that I recommend. Of course they are at
a higher price point, so I do recommend other mirror-less cameras
like the Canon M50. We can talk about
cameras all day but what really matters
for a talking head video when it comes to
cameras is number 1, try to get a camera
with a flip-off screen. That way you can
actually see yourself while you're recording so that you can adjust
the composition without needing to
go back and forth. Honestly, that's probably one of the more important things for talking head videos that's just specific
to the camera. Out of the cameras
that are recommended, the Sony A7 III
doesn't have that, so you might want to
go with the A6600 or the other ones. The other three
cameras also have no limit on how long
you can record for. For instance, the
Sony A7 III has a recording limit of 30 minutes, and I believe the
canon mirror-less camera also has that limit. Those are just two specs to look out for when buying your camera. Next, let's talk about lenses. Lenses actually play
a more important role in recording yourself
than you might think. As an example,
right now I'm using a 35-millimeter lens to
record myself this way, and an 85-millimeter lens to record myself using Camera B. The reason why the
focal length matters, Number 1, if you want to use
something, for instance, like a teleprompter,
you want to be close to the teleprompter so that you can
actually read it. That's why 35-millimeter
works pretty well. If you actually go less
than 35-millimeter and it's too wide, depending on what
teleprompter you're using, you might actually see the
inside of the teleprompter, so that's not what
you want either. For this point, people
might argue with it, but the 35-millimeter to 50-millimeter range is
more representative of how we naturally
see with our eyes. For instance, if
you were to look through a 16-millimeter lens, it looks way too wide and that's not how
our vision works. Then something like
the 85-millimeter, it looks more
flattering on the face. It thins it out a bit. It's almost like a nice
filter versus more realistic. Then anything above that
80-millimeter mark, we're starting to get
into telephoto lenses, which also look pretty
flattering on the face but personally, 85-millimeter
for me is my favorite, and that's why I use it more
than other focal lengths. Try to keep that in mind when
you're buying your lenses. Another spec that you want to pay attention to when buying your lens is the aperture
or F-stop number. Right now the lens
that's in front of me has an F-stop number of 1.8. The lower the f-stop number, the more separation you
have with the subject and focus compared
to the background, which is going to be
more blurred out. That's why personally for me, I like having a lower F-stop
number for my main camera. Another thing to
pay attention to when you're buying
your camera and your lens is whether you're buying a full-frame
camera or not. If you buy a full-frame camera, then the lens that you buy has to also be for a
full-frame camera. Just make sure that
you pay attention to those details when
buying these things. Otherwise, you
might end up buying an APS-C lens for a
camera that's full-frame. Also to note, the Sony
A6600 is an APS-C camera, which means that it's going
to have a crop factor with whatever lens
that it's using. This means that if I were to put my 35-millimeter lens
on the APS-C camera, it would end up being somewhere around 52-millimeters instead. Be sure to pay attention
to those specs when you buy your
camera and lens. Let's move on to composition. Composition is actually rather simple for a talking head video. For the main camera, you just want to be as
centered as possible. Don't worry if it's not
completely centered because we can fix
this in editing, but you want to try to be as centered as possible
in the beginning. There's also something
called the rule of 3rds. Most cameras have a setting where you can make
the grid lines for the rule of 3rds pop up. I recommend turning that on. I always have it
on for my cameras. Basically, one of the rules
is try to have your eyes around the level of
the upper third. Next, you want the
height of your camera to stand around the
range of from your chin to about your forehead. This high range ensures that you're level
with the camera and that the camera
is not coming from an angle below you or above you, that looks unflattering, and that's basically it
for the front camera. In terms of Camera
B, the composition that I use the most
of is either putting myself again in the middle and sticking to similar
rules or putting myself on one of the 3rds
in the columns, and that's basically
it for composition. If you are recording
with a second camera, I also recommend that you
try to make the angle between the two cameras
at least 30 degrees. That's a rule that most
filmmakers agree on. However, if you
can't achieve that, I do find that angles around 20 degrees still
work pretty well. Basically, it's a guideline, not a set rule. From there let's go into
the camera settings. Firstly, like I mentioned,
I set my camera to 24 FPS. Most cameras have the
option of 24 FPS, 30 FPS or 60 FPS. Sixty FPS is mainly
for capturing action or if you're trying to
go for some slow-mo shots, so if we're talking head
videos, let's avoid that one, it's between 24 and 30 FPS. There's a pretty big debate between these two but overall, the rule of thumb
for me personally is to just go with whichever
is easier to use. For instance, the
Sony A7C over there has a crop factor whenever
it's set to 4k 30 FPS. That's why I personally set
my frame rate to 24 FPS. It makes it easier for there
not to be a crop factor, so I don't have to worry about my 85-millimeter lens turning into a 120-millimeter lens. But if you don't
have to worry about anything like you're not
worried about file size, you're not worried
about crop factor or anything of that sort, and you're just
trying to figure out which frame rate
is better for you or better for a talking
head video in general, I would go with 30
FPS most of the time. It looks more natural
versus 24 FPS, which is more cinematic
and a film like. From there I set my camera
to the highest setting, which is 4k, and then I record. Basically with this camera, I use S-Log 3 primarily
because it has 10-bit color and I can color grade it
the way that I want to. However, that is beyond
the scope of this class, so don't worry about
picture profiles and just record with whatever
you're comfortable with. The assignment for
this lesson is to dial in the best settings
for your camera. For me, that is 4K
24 FPS S-Log 3. For my camera, there's a setting where I can save this preset to one of the
numbers on the dial. I'll set that to number 1. Whenever I shift it to number 1, it's going to be
4K 24 FPS S-Log 3 with the ISO of 800 and
the aperture wide-open, meaning the lowest number
I can go, which is 1.8. For shutter speed, the rule
of thumb is to just make it double whatever
your frame rate is. For me, that's 1 over 50
because 24 FPS times 2 is 48. For this camera, 1 over
50 is the closest. After that, set up your
camera so that you have good composition overall and then we'll move on
to talking about audio.
4. Audio: In this lesson, we're going
to cover audio equipment. This is the second
essential component, and audio is like
half the video, and that's why I put
it before lighting. Personally, for me, a
video without good audio and a bad image is
much more bearable compared to a video
that looks really, really nice and has bad audio. Let's go ahead and cover
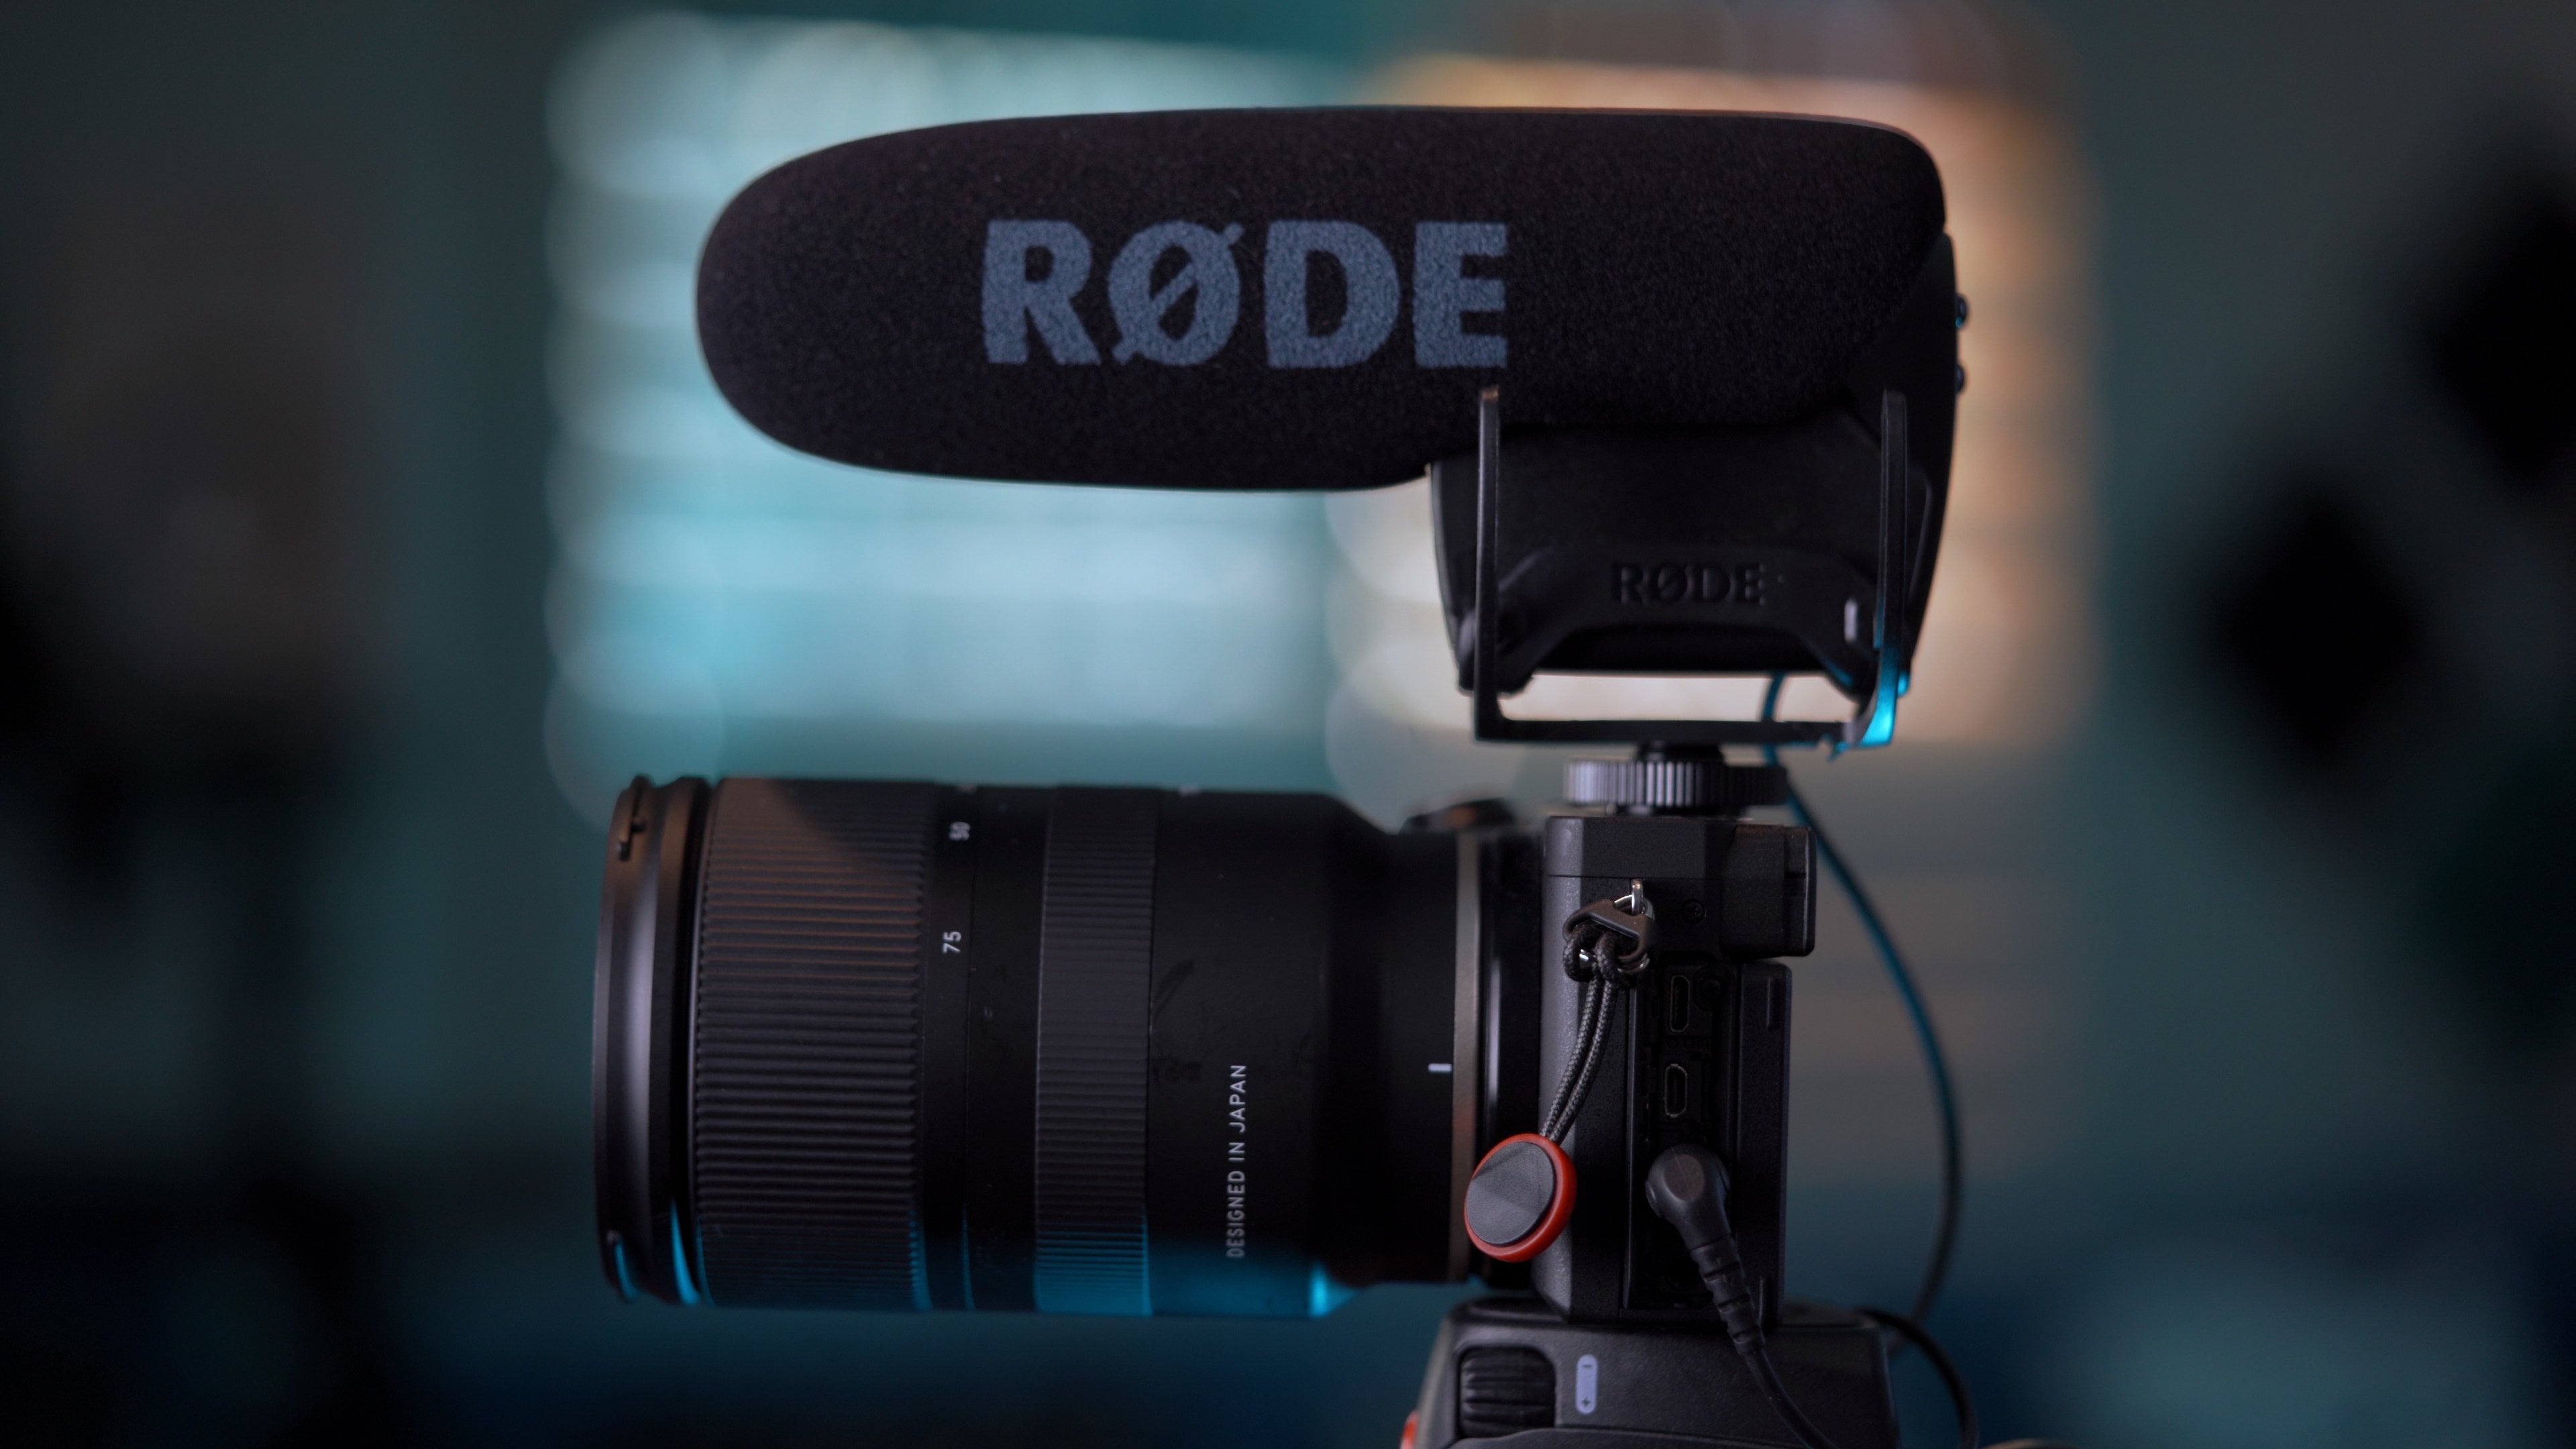
how to achieve good audio. Firstly, the easiest
thing you can do for a talking head video is to just use a camera
mounted microphone. For me, personally, right now I'm using
the Rode VideoMic Pro and it's just sitting
on top of the camera on the hot shoe mount. All you got to do is mount it, connect it, turn it on,
and it's good to go. If you want to
optimize the levels, then what you can do is set the camera's recording
level to its lowest possible
because the preamble of the camera is a lot weaker and more noisy compared
to the preamble of the camera
mounted microphone. The Sony camera, you
can turn it all the way down to one in terms of
audio recording level, and then for the
Rode VideoMic Pro you can dial up to plus 20. However, for me personally, I found that the
difference is negligible, so I just have it set
to audio record level about 10 or 12 depending on whether
I'm outside or indoors. Then I have the
Rode VideoMic Pro just set to its normal level, and then I adjust it and post. I do have classes on how
to optimize audio as well as which microphone
is best for you if you want to check out
those two different classes. But for this class,
we're mainly going to be talking about the
boom microphone. Right now I have a boom
microphone right here above me, pointed right towards
my chest area. The technique for boom
microphones is to point towards your chest area
versus your mouth. This is because, if
you go backwards, it's still capturing
the audio okay, and then if you go forward, it's still capturing the
audio okay compared to if you were to have this
thing pointed at your mouth. If you were to move forward,
even by a little bit, it would capture it
a lot less clearly compared to having it
pointed at your chest. You also want to have
it pointed downwards. Having it pointed
downwards means that the floor is going
to absorb the noise, and if you have carpeted floor, that's even better because
we're trying to avoid reverb, which is basically sound
bouncing off walls, bouncing off solid surfaces, and making your voice sound
really echoey and washed out. Those are two very important
tips when using a boom mic. However, what equipment
should you use? For me personally, I
like using the Zoom F6, which is an audio
recording device that's considered
a field recorder, but can also be used
as an audio interface. This is my favorite
for one reason. It's a 32-bit float and the second reason is that
it has six input channels, meaning it can record six
different microphones at once. Let's start with 32-bit float. What this means is that when you're recording
in 32-bit float, there's no such
thing as clipping. Meaning, if I were
to talk really, really loud into this microphone and create loud noises,
it's not going to clip. For a 24-bit recording, which is the normal
recording that most audio recording
devices have, that will clip if the
noise is too loud. It also means that if I recorded with an audio level
that's too soft, I can still bring it up but the noise levels will
also not be overly loud. If you were to do
the same thing with the 24-bits recorder, a lot of noise will be
brought up if you increase the gain of the
whole clip and post. Basically what
this means is that the Zoom F6 gives
more room for error. If you make mistakes
with the audio levels or you just get overly
loud and excited, you don't have to
worry about it, and that's why I love
this 32-bit float device. For me personally, I use a mic stand to
boom my microphone. I do have an actual boom arm plus a stand that can hold it. However, I do find that this
is the most convenient. What I personally do
is I mount the Zoom F6 to a quick release plate and then I mount it to a clamp that clamps onto the
mic stand itself. From there, I attach
the XLR wire, wrap it along the mic stand, and then connect it
to the microphone. The current microphone
that I'm using is the Sennheiser MKH 50. This is a very pricey microphone that is great for
indoor booming, but there's a lot of
other options out there. For instance, the Rode
MDG5 is a popular and much cheaper microphone that you can use as
a boom microphone. There's not too much
else other than that for how to set up
your boom microphone. As long as you have
it on a mic stand and it's pointing downwards, and you have surfaces around you that aren't super
hard and reflective, you should capture good sound. What I recommend is using the boom microphone alongside with the camera
mounted microphone. Your camera mounted
microphone will serve as a backup for in case your boom microphone fails
for whatever reason. Trust me, if you
record for long enough and you've recorded
like 100 videos plus, you will encounter a moment, just one moment where you
forget some setting in the boom microphone and your camera
mounted microphone comes in clutch and saves you. It's just bound to
happen at least one time if you're going to be doing
this for a long time. Another good option for
recording talking head videos are lav mics or
lapel microphones. Personally though, I would
only use a lapel microphone as a backup microphone because
boom microphones sound, overall just richer and fuller. The standard technique
for recording a lavalier microphone
is just to clip it on somewhere near the mouth and then attach it to
a recording device. My personal favorite one
is the Tentacle Sync E, which is also a 32-bit
float recorder. Again, if you want
to dive deeper into the microphone world, I have a dedicated
class to that, which is a staff pick, as well as a class on how to enhance dialog audio
in Adobe Audition. But for now, that
covers how to set up your audio equipment for
a talking head video. The assignment for this
lesson is to go ahead and set those things up, and then we'll move on to
setting up the lights.
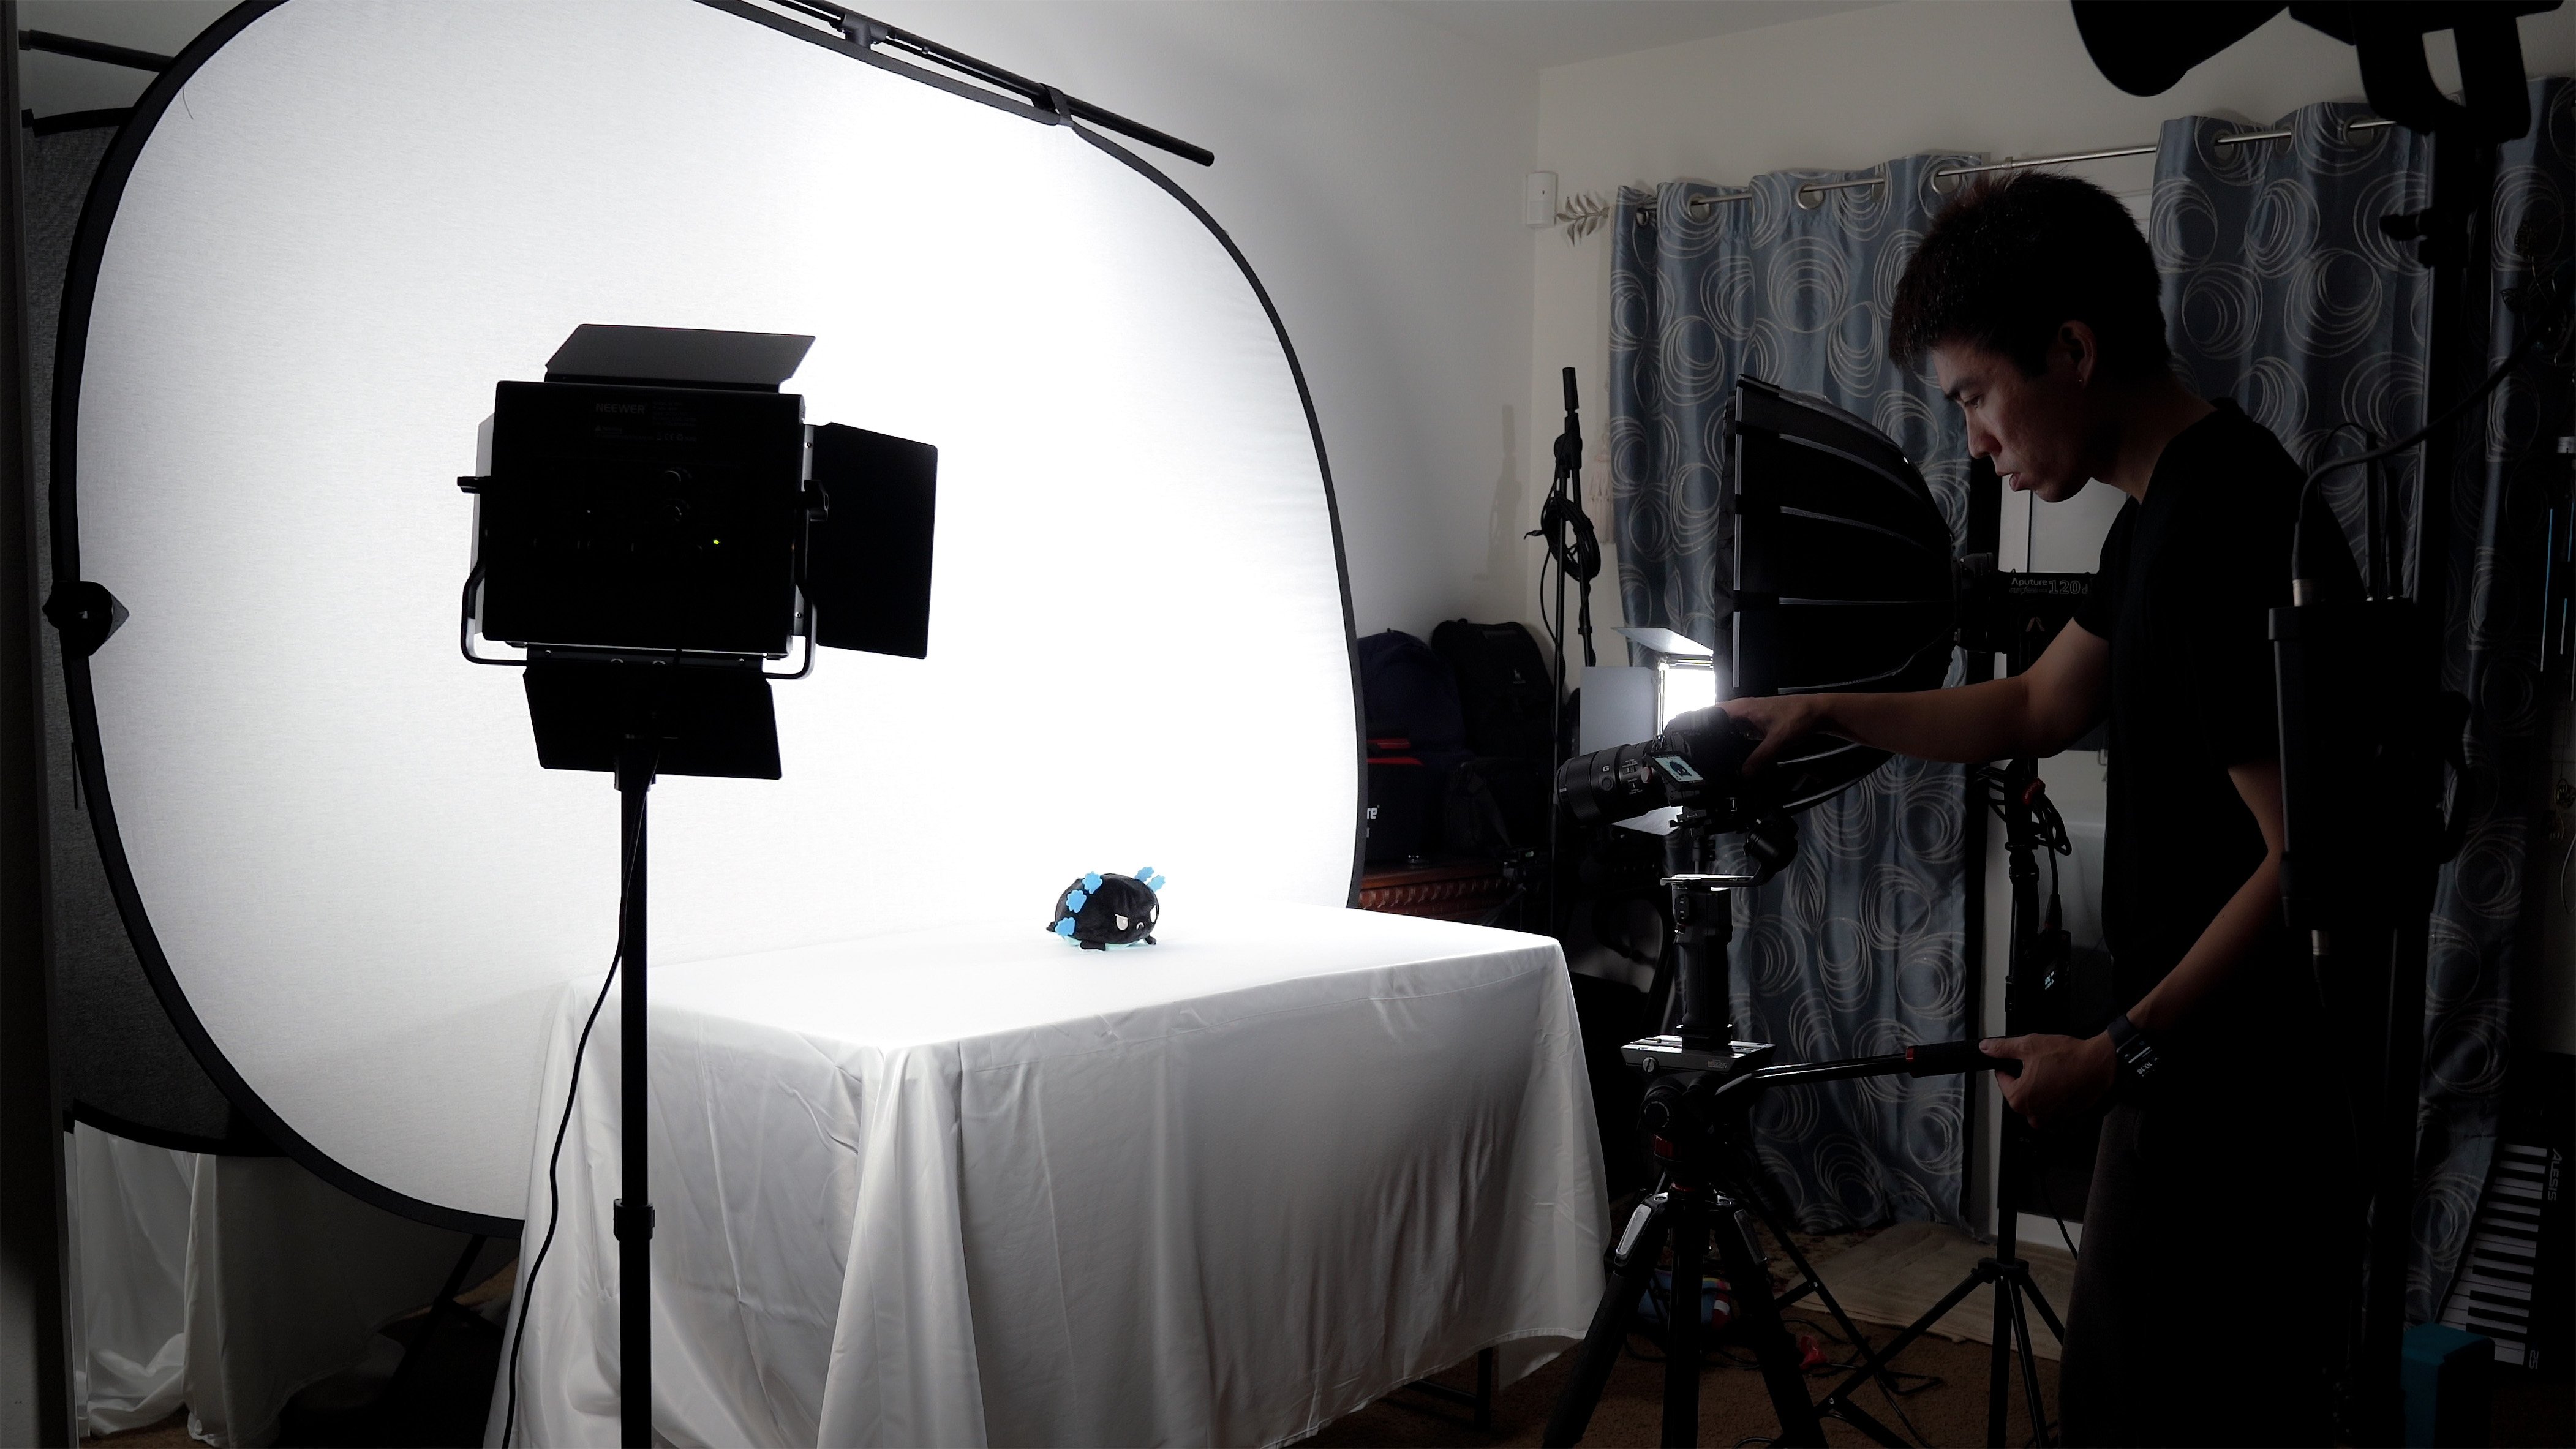
5. Lighting: In this lesson,
we're going to cover the three-point lighting system and how I personally
set up my lights. What is the three-point
lighting system? It's basically consisting
of three things, which is the key light, the fill light, and
the back light. They have different names
for different systems, but basically the key light is whatever light is
in front of you, so for me that is going to be my aperture light right here, which is the
aperture 120D Mark 2 and I have a Softbox, which is the light dome mini, which acts as a
diffuser making the light shining on my skin
and just me in general, softer and less harsh. Next, we have the fill light. This is a light that
basically counteracts whichever direction
your key light is in. For me it's on my right side,
the camera is left side, and it's bringing light
to this side of my face while this side of my
face is slightly dark. What I would want is
a light on this side. In my case, I'm just
using a ceiling light to cover the
darker side of my face. It's up to you how much
you want your fill light to cover your face. If you want a more fuller,
bright, vibrant look, that's more welcoming, more
nice, more commercial like. Then you want to fill up and make the lighting very even so that you appear
more friendly. If you're going for a
more dramatic look, then you might not even
need a fill light at all. For me personally, I'd like the dramatic look
so that's why my fill light, as you can see on Camera B, is not very present. Then let's get into
the back light. For me personally, I use a
whole bunch of back lights that are mainly
consisting of colors. First, we'll talk about
the ceiling lights, which are the aperture B7Cs. These lights are what I
mainly use to add color to my images and they connect to an app called a Sidus Link, which I can use to control
which color I want and change at any moment's time. The light right behind me
is the PavoTube light, it's the smallest version and it also has the option
to change into any color. One thing that I really
loved about it is that the backside of it is magnetic, so I can place it on any
metal object and it'll stick. The light that I actually have
right behind me that acts as more of a backlight is
the Aputure MC lights. These are basically similar
to the PavoTube lights, except that there
are rectangular and they come with a Softbox. Usually the three-point
lighting system, you only need one backlight and it's basically to get this, the shine on the back of
your head or your hair or just behind you in general. Personally, I didn't buy all
of these lights out once. I mainly just had the key lights and then I had an LED panel
light beam, my backlight. However over time I accumulated all these small back lights and for me it makes
the overall image look more interesting and that's why I have them. That is basically the
three-point lighting system. If you're worried about
purchasing all these lights because they are expensive, there is the option of just
using natural lighting. Basically, find a
place in your house where there's a good window with the natural
source of light, which is the sun, and then have it faced
somewhere in front of you. Probably not directly
in front of you, but 45 degrees is a good
spot for a key light. But I do highly recommend
that you eventually invest in a real key
light and backlight. Those are really
the only two lights you need, because
for the fill light, you can actually
use something like a white panel or a white screen. Next, let's talk about
nailing exposure. The question is, how bright do we set
each of these lights? The general idea is to have the key light be
the brightest one so that the subject
is lit up the most. But you don't want to overexpose
your skin or underexpose so how bright should
we actually set it? The easiest way to set
up exposure correctly, in my opinion, is to use a setting in your
camera called zebras. For me, after
accessing of zebras, I turn the dial so that I
go to the custom settings and then I go to standard, I go down to 60 and
then plus or minus 5. At this setting,
what I want to see on my face or the zebra stripes. some people say that
65 plus or minus 5, or 70 plus or minus 5
are better numbers. But it's really highly dependent on whatever setup
that you're using. For me, I'm using S-Log 3 plus something called the
phantom lots to edit, I'll mention them later. But basically the lead
system that I use indicates that I should be
using these numbers. Whatever system
that you're using, just try to pay
attention to essentially what their guidelines
are for how to set up exposure for your skin. Generally, those numbers should be good numbers
to follow though. For the system that I'm using, the aperture 120D will be
set to around 50 percent and then for the back lights, I essentially just eyeball it. What matters the most is that the subject is more
bright compared to the background and
that's essentially yet for how to let yourself
for a talking head video. The assignment for this lesson is to set up your key light, setup your fill light, and
then set up your backlight. From there we'll move
on to talking about the two different types
of talking head videos.
6. Scripted vs Freestyle: In this lesson,
we're going to cover two different types of
talking head videos. The first one is scripted talking head videos and the
second one is freestyle. Basically in this class so far, I've had a mixture of both
scripted and freestyle videos, and both of them come with
their own pros and cons. For instance, if you
scripted your video, you'll spend more time in
the scripting process, and then most likely
you will want to use a teleprompter so that you
can read it without mistakes. If you're going the
scripted route, it'll most likely be a
better crafted video since you spent more
time on the script. However, on the other side, if you're going the
freestyle route, it will probably feel looser
and a bit more spontaneous. It gives you an
opportunity to show your personality a bit more. But the downside is
if you mess up a lot and you're not
good at the skill, you're probably going
to have to spend more time in the
editing process. In my opinion, these are
two very different skills. For me personally,
the majority of my videos are scripted videos. That's why for freestyle content like the one I'm
doing right now, it's not as
well-polished overall. However, I am
working on the skill of freestyling in
front of the camera. I recommend that you try
both methods as well. If you go with the
freestyle method, I highly recommend that
you actually create an outline for the
video regardless. An outline is basically
just the main topics with subtopics that you
have as bullet points. That way there's an actual
flow to the video versus you just talking about anything
at all at a random moment. On the other side
of things, if you go with a scripted video, I highly recommend
using a teleprompter. The one that I'm using is the Parrot Padcaster
and in my opinion, it's all you really need. It's very cheap, less than
$100 at this current moment. Basically, all you need
to do is download an app on your phone called parrot and copy and paste your script. For me, my script is always
written on a Google document. Then I copy it from there. Then I paste it onto
the parrot document. Then once you open it up, you can set it the
way that you want to. You will need to
mirror your screen. Decrease the margins a little
bit so it doesn't look like your eyes are moving
left and right and that you're reading. Then adjust the
speed according to how fast you want to go and adjust the font size to whatever that
makes it legible. You can look at my settings here and copy them if you'd like. But from there, all
you need to do is thread in the teleprompter, slide in your phone underneath, and then you have
yourself a teleprompter that you can read off of. For me, I've been only recently using this
teleprompter during this year. Before that, I still
scripted my videos and tried to just
memorize the scripts. I find that this takes
a very long time and it requires a
whole lot of takes which defeats the purpose
of having a script. It's up to you which
method that you choose, but I do highly recommend
trying out the teleprompter. That's just a quick rundown
of the two different styles and the tips I have for
the two different styles of talking head videos. The assignment for this
lesson is to choose which style you want to
do for the class project. Next, we'll be talking
about the checklist.
7. Recording Checklist: In this lesson, we'll
cover the sequence in which you should set
up your equipment, and I'll provide a
checklist for you so that you won't ever
forget a crucial step. First off, the camera. Turning on the camera
and dialing in the right settings
is the first step. For me, that's turning
the dial to one, where it's 24 FPS and S-Log 3, auto white balance,
and the ISO of 100. Next, I turn on
the RODE VideoMic and do a tap test to check
that the levels are right. After that, I turned
on the Zoom F6, move the boom mic into place, and perform a quick
microphone check for levels. For me, I have a
32-bit float device, so I don't need to worry
about it too much, but it's still best practice
to test the levels. From there, I turn
on the key light and then all the other lights
and adjust the brightness. This is when I adjust the
composition of the image and place my wooden board
under me to mark my location. After that, I set up
the teleprompter, if I created a script for
the video, and if I did it, I just have my phone
out with the list of bullet points for my
freestyle talking video. From there, I recommend that
you do a little warm-up before you start
talking to the camera. Talk to the camera about
absolutely anything. The whole point is to just
get your voice warmed up and increase your
overall energy. Be overly enthusiastic at first, and then dial it back a little. With that, everything is
ready for you to record. I highly recommend
that you always use a checklist
when you start out. There's a lot of moving
parts and it's really easy to overlook something
when you do it a lot. For me personally, I like to keep all the equipment necessary for a talking head video laid out right next to each other. By leaving it on standby mode, the setup time is
significantly decreased because I don't need
to position the tripod or set up the boom microphone
or the lights from scratch. Setting things up from
scratch takes a lot longer. Ease of access is very
helpful in this case. If you have the space, try to dedicate a spot for recording your
talking head videos, if you want to be as
efficient as possible. However, I will say
that it's good to practice setting things up
from scratch sometimes, just so you don't
forget how to do it and so that you practice the skill of setting
things up quickly. But once you have it down, a default setup can
be very helpful. Anyways, the assignment
for this lesson is to finally start recording
your talking head video. You have everything ready to go, so now you just need to hit that "Record" button
and start talking. In terms of the topic, you can choose anything
you want to talk about. If you're stuck, just
talk about an object that you feel passionate about or something that
you really like. As an example, I would
choose my piano, camera, the Zoom F6, my desk setup, my laptop, and so on. Don't overthink it, just record or write the script
and then record if you're using a teleprompter.
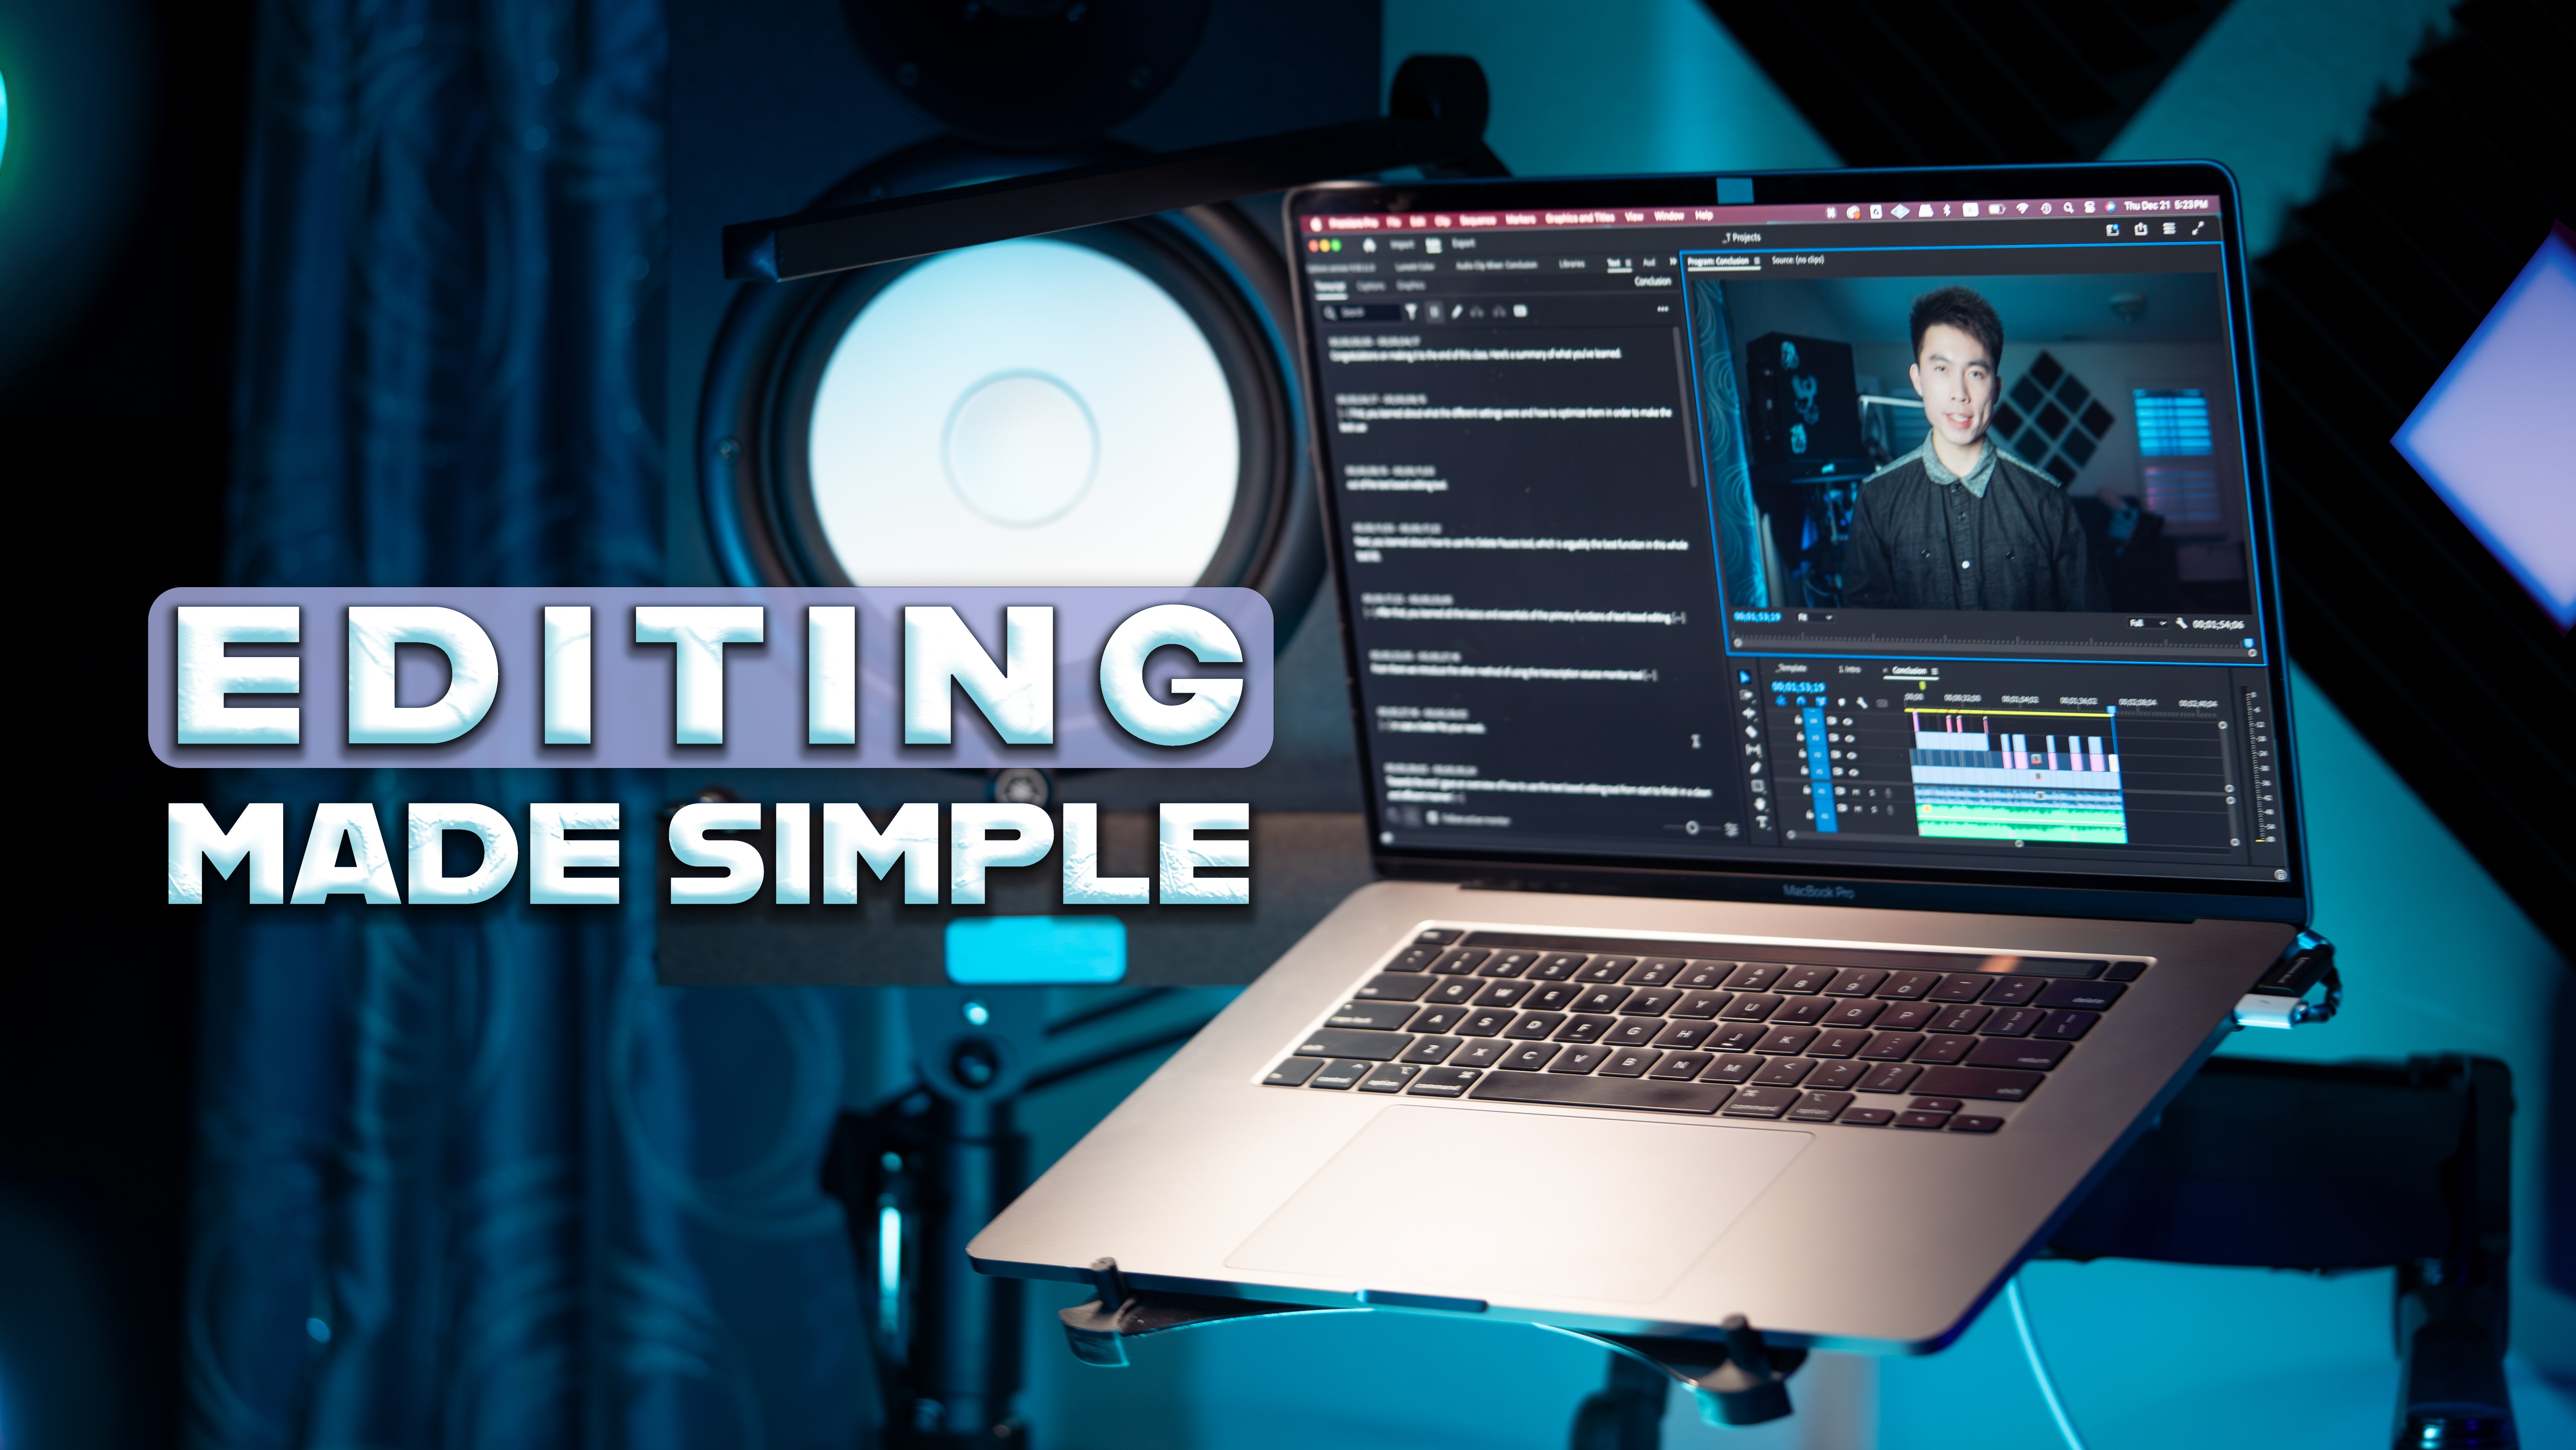
8. Editing Walkthrough: Audio & Cutting: In this lesson, we're going to do the
editing walk-through. This is going to be a
little bit different from what you're used to. Most of the time
I write a script and try to make the lesson
as concise as possible, but this time I'm going
to dive deep into actually how I edit
from start to finish. If you're looking for
a more concise lesson, I will be eventually creating
a course or class to that. It's going to be
editing in Premiere Pro and it's going to be like
the best techniques on how to optimize and make it as fast as possible for cutting. If you're interested in
more concise lessons, be sure to hit that
"Follow" button and check out my class later on, but for now, let's go ahead
and get into the deep dive. Right now I already
have Premiere Pro open and what I'm going to do is go through the importing process. I've already imported
the footage into my computer from the SD card. Both Camera A and Camera B
are here in the video folder. I'm just going to go ahead
and import that first. I'm going to drag it
in, Film Yourself. Then I'm going to
import the audio. Right now it doesn't matter
too much that it's not organized because
what I'm going to do is highlight
everything, right-click and then Create Multi-camera
Source Sequence. I have the settings on audio. I leave the name as sync just because it's easier that way. Enumerate Cameras, Stereo, Camera 1 and Automatic. Then I click "Okay", and I
wait for this to finish. What multi-camera source
sequence does is it syncs up the audio with the video and if it can't find
any synchronized clips, then this message will pop up. I'm just going to click "Okay", and it's created four
different sequences. Right now, this is all
of basically what I've recorded for these classes. What I'm going to do is just go ahead and show you
how I edit one of the lessons since basically it's like a talking head video. Right-click and then you can click "Edit" or
"Open timeline." I have shortcuts
for this usually, so it's a lot easier for
me to do it quickly. For this one, I'm
going to go ahead and go with the scripted content, which is this one, I believe. I'm going to go ahead and
exit out of everything else. This is basically how I synchronize audio with
video really quickly. I have both the
Camera A and B here. From this point on, I actually
don't really need to use the multi-camera method
I can if I wanted to. For instance, let's go ahead
and create a sequence. I use the shortcut. Basically you can right-click a new sequence from
clip is what I did. Then you can just drag. I believe it was this
one, so let's rename it, Scripted Content and then
you can drag this on. The cool thing about the multi-camera source
sequence method is that, as you can see, this is Camera A and then if I click "2", it'll switch to Camera B. It's pretty cool to just be able to switch back and forth and you can also turn
this preview right here into the multi-camera mode. From there you'll see
all of the cameras that were synced up. I only had two Camera
A and Camera B. If you play it and then switch
while it's being played, you'll see that
after you stop it, it makes the cuts for you. I have a whole class
dedicated to actually how to use the
multi-camera method. I'm not going to worry
about that too much here. Check out that class if
you're interested in it, but for now, me personally, if I only have two cameras, I really don't care that much about using the
multi-camera source method. I'm just going to
copy everything and place it into this
timeline right here. I'm going to rename
the timeline. Still going to be
Scripted Content and I'm going to get
rid of this thing since I don't need it anymore. From here, I highly recommend this is going to be my
concise editing methods, but I like to use E as add edit to all tracks for our
keyboard shortcuts. You can bring up
keyboard shortcuts by going to Premiere Pro tab and then Keyboard Shortcuts and then you can look
for it, add, edit. Click on this area and then just type in
whatever you want. For me, that's E. I also have automatic saving on, so that's why does
that sometimes. I just like chopping
off the front and end just to make sure
everything is aligned. I get rid of the audio
that was from the camera. It was basically there
just for sinking purposes. Then this audio right here, you can see it's
very low right now, but let's go ahead and edit
that in Adobe Audition. I have the three
audio from here, and it's basically
linked up with Premiere, so I don't have to
worry about it. We have multiple. I believe it's the first one. I clapped every time I
recorded a different lesson. Let's go ahead and just
normalize this really quick. You can access that by
going into favorites and then normalize to
negative 3 decibels is what I just did. Again, I have a class dedicated
to enhancing voice-over. That's basically
what I'm doing here. I'm going to do it quickly. I'm going to hard limit
up to negative 18 just to make these claps softer. That's what they are, claps. What I'm going to do next is use the super fast method
that I came up with, which is drag this
into match loudness. Honestly, I might
as well do this for the other ones while I'm at it. What I'm going to
do is just target loudness set to negative 28. This is in the Match
Loudness window where you can just
bring it up here. Then these are the parameters I set and let's run this thing. What that just did was it made the loudness
negative 28 for all of them. Negative 28 LUFS, it's just like a measurement of loudness and the
standard for mono files, which is what this is, is negative 19 LUFS. What we're going to do from here is I created a preset of, basically I made a favorite. I recorded a favorite
that contains a whole bunch of
different actions that will essentially
bringing it up to negative 19 LUFS or
somewhere around there. Most of the time it ends
up being negative 20. Let's just go ahead and try it. I call this Favorite
Optimize Audio Quickly. Again, if you're interested
in how I set this up and what all this is doing, it's going to be in
my voice-over class, but this is just me showing you a quick method of doing it. The rundown is that I did an EQ where I did a
high-pass, low-pass and then I did dynamics, which is somewhere around these, like in-between
negative 2 and 3. You don't really
need the auto gate or the expander that
much, in my opinion, unless you have a really
noisy recording setup, but I include it anyways. Threshold I set to be around
usually negative 20ish, when it's at negative 20 LUFS. Then after dynamics,
that's pretty much it. Like after dynamics
you normalize it. Try to get it as close to negative 19 LUFS
such as possible. Right now it's negative 23 LUFS. I suspect that's because
there's a lot of claps that made the normalization
harder to do. Let's see, these are claps. Let's go ahead and just raise
it up by three decibels and then I'm just going
to do a hard limiter at negative 3 decibels as well. One of the most valuable
skills that you can learn, insights on how to
efficiently and finally, I'll go over how I edit. Make sure to follow along
if you want to make. The audio sounds pretty
good to me overall, except I made it hard to find where the clapping points is. I'm going to go to the history. You can actually see what my
Favorite did here as well. Started with the parametric
equalizer and then dynamics. This parametric
equalizer right here is just a very simple standard. Increase just a little
bit at the high-end and decrease a little
bit at the low end. That's it. Normalize amplify. Let's do it right here. There's a clap right
there, I believe. Clap right here and
clap right here and maybe right here too. These markers are essentially just going to help me figure out where I should be
cutting right here. As you can see, the changes
were reflected from Adobe Audition to Premiere,
which is really cool. I'm just going to make
these cuts real quick. These are all going to
be separate videos. This is probably just
me starting off, so I don't need that. A video right here, a video right here,
a video right here and a video right here. Then now I can do
the hard limiter. Then I'm going to save, you have to save for it to
reflect on Premiere Pro. Finally, I outlined a checklist for whenever you record a talking head video and we went through the editing
process together. This is the conclusion
right here. That's what I'm going to do. I'm going to go ahead
and edit the conclusion, since it's probably one of
the simpler videos to edit. This walk-through
won't last super long. The reason I'm doing that is
just to create a new sequence very quickly based on the
same settings as my camera. I don't really care which
one I did it off of, I'm just going to delete it. Boom, we have something
to work with right away. The first thing I'm
going to do is actually, I should have done this earlier, but I'm just going to highlight all of these a different color. I set it up as a Command
Control A To make a teal. You can also do that by
just right-clicking, go into Labels and then choosing
the color that you want. But it makes it
easier to distinguish this is Camera A and
this is Camera B. Most of the time
the way I work is, I will just leave it
like that for now so I have the main camera. The main camera is
shot in S-Log 3 so we can color it
later just because it's smoother playback when there's less
effects on the clips. Let's go ahead and enter
the cutting phase. The way that I cut
is very simple. I use the audio waveform
to just indicate where I should be cutting. Right here it looks
like a phrase, right here it looks
like a phrase, and basically, I
start from the end if it's scripted content, because it's easier
in my opinion to just know that the last take. For me personally, the last take is usually the best take, so I use the last take
most of the time. If it sounds good and
I hear the same thing, I'll just cut it
instantly versus like if I were to start
from the beginning, I will listen to a bad take, listen to another bad take, listen to finally the good take, and then erase two bad takes. But I listen to two of them so it takes up more time versus just listening to the good take and then cutting the bad ones. An easy way to do
it even quicker that I haven't utilized
too often quite yet is you can transcribe the sequence. This is in the text
window right here and you just find
Text and open it up, Transcribe Sequence, and then hit that
"Transcribe" button. Adobe Audition will create
basically captions for you. If you see repeating texts, then it's clear that it's
basically the same thing. That way you don't even
have to listen at all, you can just use your eyes. I'm also going to change this
back to the normal view. After that's created, you
can hit "Create Captions". I leave everything as default especially since I'm not
actually really going to use it. As you can see here, I'm not too worried about
the image right now, it's mainly just editing. The text is also laid out here, so we have free rein to
just edit really quickly. The shortcuts that I'm using
are the native Q and W. Basically, what these do, if you have a cut point
right here and you use W, it erases everything
from wherever your timeline cursor
is to that cut point. I'll make it obvious
by making this red. Actually wait, that's
going to make it harder, but okay, here I'll
just zoom in a lot. This area right here
is going to be deleted in between the blue cursor and this cut point if I hit "W". Then I undid, and
then if I hit "Q", it's going to go
to the cut point from the left side to the
blue cursor like that. That is essentially a
really fast way of editing and my preferred way. Just make sure that you
have these toggled on, otherwise it won't work. Video Channel 1, 2, and 3, just make it all blue, it's the fastest and
easiest way to do it. If you'd like to check
out what I'm up t o, you can find me on YouTube. Everything sounds good. Basically these
points right here where there's just no
audio or no talking, I just cut them. You can play it back
to see the transition. But it's clear that these two
are the same as these two. I'm just going to go
ahead and cut it. This is the same right here
so I can cut that as well. Let's listen to this transition. We can make it a
little bit shorter. That feels fine to me. Everything looks good. I'm also zooming in and
out of the timeline by clicking equal
sign and minus. Let's listen to this transition. There's definitely a
lot of space there, so I'm just going to
cut out the space. Feels good. This is the same thing as I
can see based on the text. It looks like all the
text is different here so it does look like I didn't make any
mistakes, fortunately. Then boom. That's basically
all the cutting. Based on the cuts, I can tell where I
would want Camera B or Camera A to pop up. There's definitely going to
be B-roll across this one so I don't have to worry
about it too much. But for now, what I can
do is just alternate it. I'm going to hold Shift and
then click on these ones. Then what I did earlier that
I didn't really explain too much is I enabled
and disabled. I'm going to click
"Enable" right now and this pause backup,
so now it's visible. It will alternate
between the main camera and the secondary camera
every time there's a cut. That's what I usually do
for my talking head videos. That's why I don't really
need the multi-camera method because this one is
just faster actually. This is like a short version
of what I would normally do because this is only a minute. Usually some of my
talking head videos range to five minutes, but that's essentially the
entire process that I do, is just go over the whole
thing from back to forward. For the shortcut for enabling and disabling since
I had mentioned it, what I like to use is
just Command Shift E. If you highlight this clip, you can disable
it and enable it. It's just a fast way of seeing the bottom layer
or stacking layers that you're trying to
choose between two things and you can actually
highlight both of them, you hold Shift,
click the other one. If you do the shortcut, then you can alternate
between the clips and see which one you
prefer basically. That is essentially how I cut
things up in Premiere Pro. In the next lesson, we'll
cover how I add effects, B-roll, and some color.
9. Editing Color: In this walk through,
I'm going to go over four main things, Number 1 is color, Number 2 is how I add on B roll, Number 3 is how I add text
and some motion graphics and then Number 4 is
how I add on music. So this one's going to be
a bit of a longer one, but let's go ahead
and get this done. Let's go ahead and
start off with color. Color is actually pretty simple, at least the method
that I use to color my footage for
talking head videos. What I personally do, and I'll give multiple methods just in case you don't really
have the same camera as me, but I'm going to delete this subtitle track
just to get it out of the way and have more
space to work with. I don't actually need subtitles so just reorganizing this. Then what I personally do
is I go to Lumetri Color, it's a Window that you can make it pop up by just going to this Window tab right here, and then looking
for Lumetri Color. Then I go to the Source, because the Source basically edits everything that is
this video clip right here, it will apply the
color effects to it. So that is the entirety of this whole row
that I made teal, so video Layer 1. That way I don't have to
add an adjustment layer. So this is another method
that people use pretty often, which is they add an
adjustment layer right here, new item, adjustment layer. They add it on top and they pretty much do the coloring
on the adjustment layer. This is so that there's
no destructive editing so that you're not
permanently affecting this but honestly, for my purposes
for talking head videos, I don't need to do that
because I would need to apply it to every single
adjustment layer. Then change it once
this camera B pops up and it's a lot of work
that is unnecessary. So if you're color
correcting and color grading B roll footage
it's understandable, but for talking head videos it's not really necessary
in my opinion. So what I'm going
to do is my method, like I said, go to the Source. The first thing I do is go
to the Creative tab and add a lot or lookup table. The one that I have personally, they're called the phantom lots, it's something
that I had to buy, but I'll just go
ahead and apply it first so that you can
see how it looks. So as you can see, it's definitely changed
from before and after. Just applying the lot alone, honestly, that's
pretty much good. You don't have to really do too much else other than that but if you wanted to, you can go into the
basic corrections, white balance, you can find
something that's white. For me, there's not too many things that are
white because I have very colored backgrounds
so I'm not going to change white balance because
it looks good overall but if you wanted to, you can find something
that was white. I guess skin tone wise,
it's a bit better. You can tell using
Lumetri Scopes. Basically, if you were to
create a mask, I'll use that. I do that by going into
effects control using the pen tool and then going
over my face like this, I'm just creating a triangle. You can tell through the
Lumetri Scopes right here that if the skin
tones are too red, they'll be pointing in the red direction and if there
are too yellow or orange, they'll be pointing towards the yellow direction or green, sometimes your skin
tone is a little green. So right now, it's actually
perfect skin tones, like I mentioned earlier you can always rely
on your sight, but for me I can just tell that my skin tones looked correct. I've done enough editing where I can tell if it looks
too green or red. I'll show you an example of it moving so if it's too green, which it will probably
never be like that green but if it's a little bit green, then you can tell it's towards the yellow side for
this Lumetri Scope. If you're not seeing this one, you have to right click
the Lumetri Scope area. You go to Window, Lumetri Scopes is
right here and then right click and it is
the Vectorscope YUV. I just moved this position, so when it's greener
or more yellowish, it will point towards
here and you want to add red or magenta to
fix it basically. So this is like adding
magenta right here, which fixes the skin tone but let's say it's green, let's go to the mask. I'm using shortcuts to
switch between the tabs. Right now, I changed
it to shift X as Effects Control
and then shift C as Lumetri Control or Lumetri
Color and those windows, you can bring them up by
just typing it in and adding your shortcut right here so
let's switch between them. Effects Control, I'm going to remove the mask really
quick so you can see that it's definitely greener now and we'll just go back
and fix it, very simple. That is pretty much
how you do skin tones. If you don't want to
affect the entire thing, only your skin is the issue, then you can use HSL Secondary. Just select where your skin is, this is the hue saturation and luminance so if you want
to select more of it, you just expand these but right now, this
selection is only on my skin. So if I were
to change the color, it would mostly just remain on my skin and not
the background. That is how you basically just change your skin tones without changing the
colors in the background but obviously, for me, I didn't really need
that because I shot with correct white balance
and good exposure. Most of the time as long
as you're doing that, you don't have to do
too much correction. Back to the lot, if you don't want to buy
a lot, for me personally, since I am shooting
with the Sony A74 what you can do is go to their website and just
download their free lot, that is for S log3, which is the one that
I'm shooting with. It's absolutely free and
I've used it before. It pretty much does a similar thing where they just
color correct it. So you don't need to actually
go buy any lot at all, you can just use the ones that whatever your
camera manufacturer, their company,
whatever they have for free, and it should work. This phantom lot, it's supposed to match a camera
called the Arri Alexa, so it's matching a look that is a bit different from
just color correcting. That's why I personally like this one and that's why I bought it but it's not
necessary to buy it. That is pretty much it for color in terms
of color correcting. If you want to grade
it a bit further, you can give it a bit more contrast if
you like that look. If it's too dark, you
can expose it higher, that's what this Lumetri
Scope is for as well. You can see 0 -100, this one is the Waveform Luma. Basically, you don't
want anything to go below zero or above 100. Although, this small
sliver right here, which is the window, I don't really care too much
if it's clipped meaning that it's completely white, there's no more information. So if I increase the highlights just to make
it overall closer to 100, because generally the rule of thumb is to try
to make this as spread out as possible
so you're getting the most contrast in terms of the shadows
and the highlights. So I could do that, but again, this is all pretty subjective so as long as it's not super
crushed in the middle, or it's not clipping into complete blackness or complete
whiteness you'll be fine. You don't really
need to particularly always expand it as
much as possible. It's just if your film making and you're trying to grade something as
best as possible, that's what you would do
but for talking head video, it's not completely necessary, but it's just something to
note if that's what you want. Whites and blacks are
basically just the lower ends. It goes from blacks is
the complete darkness, you're controlling whether or not the things in
the image that are black either become
brighter or even darker. Then shadows are
not quite black, but the more darker things, and the hair and anything
that's a shadow basically. You're basically controlling
the most black things and then the lesser black things and then the lesser
bright things and then the most white things. That's how these
sliders work right here but again, personally for me, I was very purposeful
with the way I lit things up in terms
of the lighting. So I don't need to adjust
it too much in post but these are what
these main sliders do in case you want
to adjust them. But that's basically
all I do for color. I usually do it in source, it looks like I accidentally
did it in the clip itself and not all
of them at once, but that's easy to fix. I'm just going to go
into this right here, click on this "Copy"
so command C, go to "Source," and then I'm going to paste
it in "Source." I just doubled up so I'm
going to delete this one. Now you can see there's
a red line under these. It's applied to every
single one of them, where back then it
was just applied to this single clip and
not the other ones. So that's the benefit of applying your effects
to the Source and not just one clip at a time. That's the way I
personally do it at least. That's pretty much it for color.
10. Adding B-Roll & Effects: Let's move on to adding B-roll. The way that I handle B-roll is I usually have a script
and then based on the script, I go shoot whatever I feel is necessary
depending on the script but luckily for this, let's go ahead and listen to it. First, you learn how to get
over your fear of tensions. It's something that will take time and practice
to break through. Next, you learn how
to set up your camera with the best settings
and composition. After that you cover
how to properly set up your audio. [MUSIC] For the conclusion,
I'm basically just reiterating what you
guys have learned. What I need is B-roll
of the camera stuff, and then a B-roll
of the audio stuff, and the B-roll of
the light stuff. Luckily, I've already
shot all of it. It's very simple to find because I have a
folder called B-roll. Like I said, I just
look at the script of that particular video
line by line and go, do I want to shoot
B-roll for this? If I'm talking about
the Rode VideoMic Pro, then I just shoot
B-roll for that. Then if I talk about
the F6 audio recorder, I shoot B-roll for that. Then I just bring
it back here and then add it one at a time. I try to go along
with the script, so it's like easy to add because it's in
chronological order, but the easiest way to look at B-roll is to
double-click and create a bin. Then I use icon view right here. That way you can see
after it's loaded, what you're about to
add onto the timeline. As you can see, there
are things that I shot. I double-click it
just to look at exactly where the goods sections
are that I want to add. It looks like what
I did here was I just focused in on the A7C. After it focuses in, I'm clicking in and out, which is I and 0. Then I just drag
video only onto here. I like making this
one red as B-roll, or at least a different
color from this one. I set the shortcut for read as Command Control R and its rows. Alternative way, like
I mentioned before, you can right-click it
label and then do that, but shortcuts will save
you a lot of time. I basically set up and use
shortcuts so much that I forgotten how to do
the original way. Sometimes I forget that
this is actually here but this one is also
shot in S-Log 3, so I need to actually apply. I created a quick
preset for it as well. [MUSIC] All it does is add
this light on it. That's it. You can do that by going
onto the effects control, right-clicking and say preset. I could probably do a
bit more work on it. It looks like it can use
a bit more contrast. On the darker and it's
not quite reaching zero. Let's add some
blacks and shadows. That is good enough for me. It still looks pretty good. I think I want two, not just one shot. Sometimes when it's like
a repeat of B-roll, I just go into the
other timeline. For instance, I've edited
every other lesson as well. All I need to do is
grab a shot from here and put it in here. You want to not have these two selected so that you
can paste onto Video 3. I set up a shortcut
that is shift 1, 2, 3 where it just
toggles the videos. I can easily do that quickly. Then toggle them back on
because these blue toggles, they control a lot of things. Like for instance, if this
is too long of a break, and I wanted to use the
method of editing of q and w, if I don't have these
two things toggled, and I didn't have this,
it wouldn't quite work because if I
click Q right here, it's going to go to
whatever is toggled on, which happens to be
the audio as well, but let me toggle that off. There you go. It works
for the audio too, but say you had just Video 1. It still works this way
because you have Video 1 but if you don't have
these toggled on, then you'll be confused to
why q and w are not working. That's why I always
keep them on unless I need to pay something.
Let's grab that back. Let's go ahead and show you guys how to add
some keyframes real quick. This one is just so
it's not as static. I'm going to just add a
keyframe where I'm upping the scale not too much, 110. I set a keyframe at the very end and a keyframe at
the very beginning. You can click this symbol right
here to add the keyframe. I just adjust it by
scooting left and right, but I'll keep it at 100
so that it zooms in. Next, you learned how
to set up your camera. That is not quite
subtle enough so I'm going to just do 105. Next, you learned how
to set up your camera with the best settings
and composition. After that, we covered how to properly
set up your audio equipment and
lighting equipment. I say audio and then lighting. I'm just going to do that
for marker purposes. I could just add
markers by clicking M, but I personally don't
like the way markers look, so doing this is enough for me. Again, the intro has most of the B-roll organized already, but this is basically the
process of adding B-roll. It's a very simple
process overall. The reason that you see some
of these things already have this thing is because I did it earlier
for the previous lessons, but again, just I and O and
then just drag the clip on. Also, a very neat trick that I like doing is moving this
blue cursor quickly. I set up the shortcut
of command and minus to just go to the
previous track point, and then plus for the next one is just a fast way of moving around that I've gotten used to. It's like instinctual in a teleprompter compared
to freestyle talking. Finally, I outlined
a checklist for whenever you record a
talking head video. We went through the
editing process together. Editing process together. For that one, I can just add
a screen recording thing from the editing timeline. Looks like that's not
the one, this one. [MUSIC] Basically, just
select anything that works. This works. Makes it
this and paste it on. Again, that was a bit much and that's the process
of B-roll basically. We went through the
editing process together. The checklist, I don't mind just showing myself saying that. I'm about to regroup the
editing process together. I hope you were able to
connect your class project and create your
own [inaudible] . Please feel free to submit
your class project below and I'll try my best to review
it and give you feedback. Finally, I want to
thank you for making it to the end of this
class. It's been fun getting to talk
about some videos. The rest of it is
basically just me talking. Now, let's talk about some motion graphics
and some effects stuff that I usually use for my video and that's
premier composer. It's basically a plugin. You can find it after
you download it. The way you download it
is through a website called MisterHorse.com and
then you go to their products, Premier composer,
products, Premier Pro, and Premier composer right here. It's actually a free plugin, but there are stuff
that you can buy, but they do come with
free presets so you don't need to buy anything
for you to use it. But personally, I did
buy some of their packs but you could just use
their startup pack. I'll just use this
starter pack so then you guys can get a
sense of how to use it. After you download it, you'll
see something like this and let's go ahead and just use the zoom out
preset right here. You need to have the blue cursor in-between
the cut points. That's what I did earlier. I had it in-between
here and it takes some time for this to preview, for the preview to load but hopefully, you
can see it through. Next, you learned how to set
up. You can hardly see it but basically, it
applied the preset where it zooms out into
the next scene. That's what I usually
use for my transitions. I'll go ahead and apply
one right here as well. Let's just do the
shading of the story but since this is the
conclusion video, you guys can see the
effects at the very end. That's one of the reasons I decided to edit the
conclusion video. Then you basically can see the final result of the editing. I just thought that made the most sense and
that's why I chose that, but the Premier
composer also has tech stuff that you can
add, which is really cool. I don't really use too
much of the starter pack anymore because I did
buy the other ones. This is an awesome set of stuff. It's like a tool that speeds
up your editing like crazy. What I did personally is I added my favorite ones onto
a timeline that's 4K. Then I just group
them together and I can just copy it and
then paste it on here. Boom, now I have one where I can just edit the text
in premier composer. You just have to select
one of them by holding Alt or Option and then now, I can change it into
whatever I want. I also grouped up
the transition. Just like zooms
in and zooms out, that's just a super-fast way of having these at the ready, copy and pasting them
onto the timeline. [NOISE] This is like a method that I have not
really seen anyone use. I just thought it made the
most sense to do this. You don't have to redo
it over and over again. Yeah, that is my method. It's like a template, but the cool thing
about this is that you can actually add sound and transitions to the template if you were to use something
called Essential Graphics, where you can open window and
it's essential graphics and you can create templates
and stuff in After Effects. I mainly create
in After Effects, these templates right here. That's what I have
been using for some of the topic headers is
this one right here. It's actually in 1080, but
I've been just up-scaling it. This is basically something I created in After Effects
and just brought it over, but you don't have to
do that as long as you're using the plugins and the timeline method pretty
well, it's not necessary. I personally think that
this Essential Graphics way is actually slower, but that is how I personally handle motion
graphics and text. It's definitely not
a common way I feel. I think that most
people would go the Essential Graphics route, but yeah, that's just my two
cents on how I do things.
11. Adding Music & Exporting: From there, let's add the music. For me personally, what I usually use in terms of copyright-free
music and stuff, I go to the YouTube
Music Library. For this, you actually have
to have a YouTube account. You go to YouTube Studio, go down to your Audio Library, and you can basically find some copyright-free
music right here. Other choices, you could
find copyright-free music if you subscribe
to something like Epidemic sound or Soundstripe, those are two services
that I previously used that I no longer use just because you have to pay for
those on a monthly basis. These days, I've just been using YouTube's Audio
Library basically. After I find some
copyright free music that I like either on YouTube
library or on Google, just looking it up and finding
sites that have it for free, that is copyright-free. I just go to the timeline
and I add it right here. What I do is I add the
music over and over again so that the one that I use a
lot is a song called Lottery. Once you add it, what you
can do is just clone it, which is what I did
here multiple times. I just hold Alt and
then you can clone it. I cloned it multiple times, also you can go into the Window, which is Audio Meters
or Audio Clip Mixer. There's multiple of
them that you could do, but I use the audio
track mixer mainly and then I do negative
25 on Audio Track 1. I never really have to do
too much with the music because the effects are
applied right here. But after you have
that in a timeline and you just create
a new timeline, either based on this
clip right here or you can just do command
N to create a new timeline. But I created this timeline. Now I can just add
it at the very end. There's going to be no video, it's mainly for the music so I'm going to delete that by holding option, deleting it. Then I cut off
whatever I don't need. I don't like having
the beginning because the beginning
is a little soft and the music hasn't
fully come in yet so this is what I do,
stretch it all the way. At a cross constant power, it's a cross fade. You can do that by
command Shift D and that'll just
add the transition, assuming that you have the transition as the
default, right here. Set Selected as
Default Transition and that's what I have as the default one,
is constant power. That's pretty much it. We have completed
the conclusion. From there, you just need to
command M or go to export, basically, so you can go file, export and choose the location, filenames, stuff like that. Right now I have it as adaptive, like match source
adaptive medium bit rate. Obviously this depends
on what you're doing. You can make it as high
as possible if you want. I think I'll actually do that, and then video, more. Render at maximum depth, use maximum render quality and you can actually see
the bit rate right here. Target bit rate right now is 60 and that's quite high actually, but I did choose
the highest one. This will affect your file size by a lot so if you
are dragging it down, you can see that
the file size right here goes down considerably. But let's just leave it at 60. Basically, all it does is
it makes this video like look the best that it can if you're setting
it to be higher. But of course, if you
were to set it super low and then you export it, it's not going to
look very good. Any motion is going to
look very wonky and weird so you do want this to be
like a decently high number. At least 10, it depends on what you're doing. For me it's 4K, so around 4K, ideally you have
this around 30-40 and that's a pretty
important number right here when
you export things. That's pretty much it. Let's go ahead and
export this thing. That is pretty much how I
edit my talking head videos. Just as a summary, what
I did was, number 1, I edited the audio
in Adobe Audition, dynamically linked it and then we did like a
multi-cam to sync things up. Then we brought it into
a normal timeline. I cut it up from the
end to the beginning because it was scripted content and I could use
captions to just see where I repeated lines and
I just took the final tick. From there, what we did
was we added color. I use the source setting
basically to edit all videos or all clips that was from
the same recorded video. That's how I added
the color to that. Showed you guys how to basically
look for lots and showed you guys the basics of
manipulating contrast, highlights, shadows, that stuff. Then we took a look at
Premiere Composer which is the plug-in
that I use most of the time for a central graphics and text and
transitions as well. Basically, any effects that you see on my videos most of the time I use
Premiere Composer. So that was effects and then we looked at how I added music, and from there, we
just export the video. Hopefully, this
whole walk-through was a learning
experience for you guys. I know it was a lot in a
condensed period of time and I did use my habits of just
shortcuts and stuff like that. But hopefully, by
seeing the work, you guys can understand how the workflow looks like
when you get used to it. Again, I will have classes
where it's a bit more in depth in terms of the
editing in Premiere Pro, because I haven't quite created a class specifically
for Premiere Pro yet, but I will definitely
look forward to that. This walk-through
in particular was mainly just to give you guys an idea of each step of the editing process
in a quick way. Again, it's very much
how I personally edit things and it's not
necessarily a standard way. The video has
finished exporting. Now you guys can check
out the conclusion video next to see the finalized work.
12. Class Conclusion: Congratulations on making it
to the end of this class. Here's a summary of
what you've learned. First, you learned
how to get over your fear of camera shyness. It's something that
will take time and practice to break through. Next, you learned how
to set up your camera with the best settings
and composition. After that, we covered
how to properly set up your audio equipment
and lighting equipment. We also talked about using a teleprompter compared
to freestyle talking. Finally, I outlined
a checklist for whenever you record a
talking head video, and we went through the
editing process together. I hope you were able to finish the class project and create
your own talking head video. Please feel free to submit
your class project below, and I'll try my best to review
it and give you feedback. Finally, I want to thank you for making it to the
end of this class. It's been fun getting
to talk about some videotapes with you. If you learned something
or enjoyed the class, I'd appreciate it if
you gave this class and review and hit
that follow button. I'm looking forward to
making more classes and I'd love for you
to be a part of it. In the meantime, if you'd like to check
out what I'm up to, you can find me on YouTube. My channels are called
Dreamlit and Scottie loop. Anyways, best of luck
with your projects, and I hope to see you
in the next class.