Transcripts
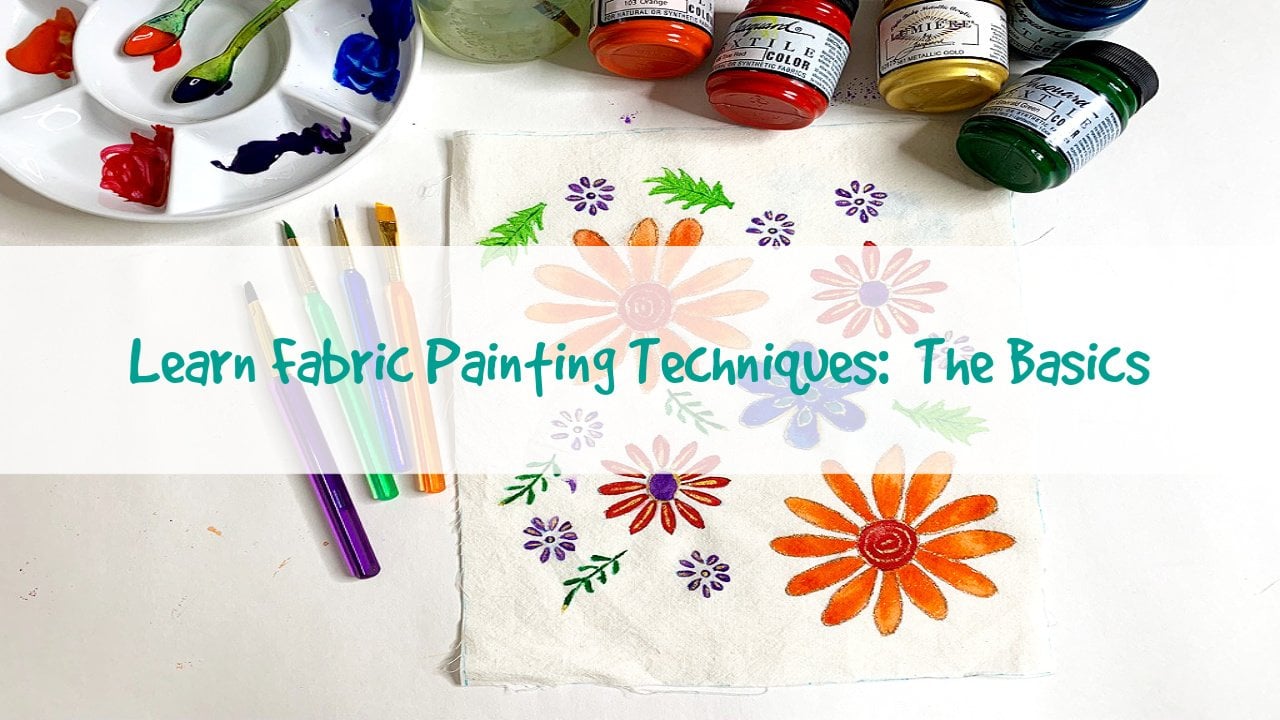
1. Introduction: Hi is Rekha and I am back to teach my six steal share class. I am a fabric artist, pattern designer and creative entrepreneur. I sell unique handmade gift items and still painting kids on my website divine in why dot com I also saw on etc. And I fell in Amazon, handmade in today's class. I'm going to show you how to paint whimsical apples on a Tito. All cover everything from what types of paints to use, how to transfer your pattern on to the tea towel. How to apply the fabric paid how toe embellish your design with additional details. Now this is a beginner level class, but I do have another class called fabric painting the basics and I do recommend that you watch not one first in order to get like a really understanding of the basics of fabric painting before taking this class. But if you haven't that's no problem. I will still be covering enough of the basics so that you will learn how to paint with fabric paints for your class project. You will download the owl pattern that I have provided and you will just follow along, follow on each class and paint along with me. So you ready to get started? Let's go
2. Class Project: a class project will be hand painting whimsical owls on this 20 but 30 cotton tea towel using jacquard fabric paints. Now walk you through step by step will start with downloading the pattern. Then I'll show you how to trace the pattern onto the detail, how to apply fabric pains and how to create a very simple repeating pattern. By the end of this class, you'll have created your very own hand painted tea towel and remember to share your finished towel on the project section. You can also share with me on instagram and use the hashtag painting with divine and why or tag me at divine and why.
3. Supplies: I'm now going to go over the supplies that we will need for this class. First of all, you will need a tea towel that approximately 20 by 30 inches that's roughly half a yard of fabric cotton T town Are linen cotton blend and mix. Any kind of cotton fabric would be perfect. You'll need a range of paint brushes. Brushes that are smaller are round. Final brushes are better. You can use watercolor brushes. You can use brushes that are intended for fatter painting. But what color brushes air perfectly fine. I like to have a few small round brushes. A few flat brushes will be doing the majority of our paintwork with a round brush, so you probably want to have, like, a variety of ground small brushes to use. You want to download the pattern that I have provided. It's in the project and resources section of this course. Download that, and I'll give you further instructions on leases and for our paints. We're gonna use the card textile hates, and we're going to use a variety of just the regular Jakarta textile, along with a card mere. I really loved here paint because these are pearlescent and their metallic, and they really give a beautiful effect when you paint on fabric. Now, you also wanna have about 2 to 3 pieces of cotton Muslim fabric that air cut down to nine by nine inch squares. And what we're gonna do with this is we're gonna use these pieces of fabric to practice our brushstrokes and to test the colors as well before we actually start painting on our tea towel. And finally, we want to create a sample on this cotton fabric first of what your owl design is going to look like, so that we can use it as a template. And we can just see our color palette clearly here, so that when you are painting onto the tea towel, you could follow along with this and know exactly what colors to use. And other supplies that will be needing for this class are some water containers. Just two or three would be great. I just use these old glass jars that I had. You could use a plastic container, anything that you have, we'll also be using like thes fashion liners by Marib. Ooh, one in gold and one in silver along with a black Sharpie. Uh, this is intended for fabrics the Sharpie, and you can use a paint train. But to be honest, I really like using the paper palate because it just makes cleanup really easy. You can just add your paint here, use it and then just rip off the page and then throw it out and then started new palette. So I have really started to like thes paper palates as opposed to a traditional paint palette. But feel free to use whatever you have on hand. And also all the supplies that I'm covering with you in this lesson are included in a list in the Project and Resources section. There's a list of everything that were that were going to use so that you can reference that to make sure you have all the supplies you need for this project.
4. Prepare Work Space: to prepare your tea towel. All you need to do is to iron it to remove any wrinkles or fold lines, and you can just use a cotton heat setting on your iron and just try to get it as smooth as possible, which will make it easier when we want to paint on it or your workspace. I suggest that you have some paper tallow and place that on your table. And when you start painting on your tea towel, I would place the paper towel just directly under the area where you're going to paint so that you can paint your motif. Here. The's fabric paints will seep through a little bit. And you know, the main thing is, you don't want the paint that shows up on the paper towel. Teoh, stay in any other part of your towel, so just be mindful of that so I would place the paper towel underneath paint, let dry and then move the paper towel around to your next motif so that you could painted there and not have any of the paint stains. Uh, go back onto your towel
5. Download Pattern: now go to the Projects and Resources section and download the pattern that I've provided. Now, if you would rather design your own pattern and use that instead, by all means, I totally encourage you to do so. Whether you use the pattern that I provided all your own pattern, all the steps that we go through in this class will be the same. So if you're feeling creatively adventurous, I encourage you to come up with your own whimsical animal pattern. Now, after you download this pattern, you'll want to print eight copies of it and then follow along the square outline and cut each pattern copy down to a six by six inch square.
6. Painting Practice: Overview: before we actually paint this Al Matif on our final tea towel. What I always do is to first create a sample on the fabric squares that we cut out earlier as part of the supplies. So I like to creep practice and create, like, a little template. So I know what the paints will look like, what my color palettes gonna be. And just overall practice first before actually going to paint on the actual tea towel. So to do that, you've got your nine inch square has already cut. And the first step, what we want to do is to tape this out pattern onto the back of the fabric. So I'm just going to use I'm just gonna center it the best that I can, and then I'm just going to use some washi tape and just take the pattern down onto the fabric
7. Painting Practice: Trace Pattern: Our next step is to trace this owl pattern onto the fabric. And you can do this in one of two ways. You can use a water soluble marker, which I often use thes It just will create like a light blue marking. So you can do that. You can also just use a regular HB pencil and just make very light markings. You don't want it to be too dark. So for right now, I'm gonna go ahead and use this pencil, and I do like to have a light box. Now, if you don't have a light bucks during the daytime hours, you can actually hold up this fabric with the pattern taped onto, like in front of a window, where you have really good natural light and then trace it that way. But my preference is to use a light box, and what you're going to do is just completely trace this pattern. Uh, now you'll notice on the pattern that I did have some additional details just around the owl's face right here. And to be honest, when I actually painted, I'm not going to paint the small little lines that you see here. So when we trace this onto the fabric, we don't necessarily need to add that additional detail of these tiny little lines. So I'm not gonna do that when I'm tracing. And also, um, I will. Just when I traced the eyes, it's just going to be a circular motion. I'm not gonna do the little extra zigzagging kind of lines, cause that's not really what it's gonna look like when I actually do my tea towel. So just keep that mine in mind. When you're tracing your pattern, you don't have to do these little detailed lines around here and then around the eyes just make it a circle. Don't worry so much about the zigzag. - Now that the owl pattern is traced onto the fabric, I'm gonna go ahead and remove the pattern that we had originally taped. And, um, and there you have the penciled pattern. It is light. As you can see, it's fairly light on DSO when we paint. You know, you'll just have to pay close attention to the pencil lines, and it's okay to improvise. That's the thing when you actually start painting, you could improvise a little bit. Um, just Teoh add your own style. So don't worry if you can't see it like 100% when we start painting, you'll get the feel of it and you'll be able Teoh your you'll have the pattern to follow along just the paper pattern, and so you'll be able Teoh follow along and then know exactly where the paint.
8. Painting Practice: Owl Motif: Now the fun begins because we're going Teoh, start applying the paint to our al motif on our practice squares and everything that we're doing with the practice squares. Those are the exact same steps that you're going to apply when you actually come to paint the towel. So let's first talk about the colors that we're going to use her the colors that I chose for this Almaty. Now, of course, I want you to choose whatever color palette that you would like to dio. But what I have chosen for the our body, uh, would be in yellow and the owl face that's gonna be in Golden Rod and the beak will be in orange. So that's the owl part. And now for the wings, the wings air going to be a mix of these colors True gold pearlescent, violent pearlescent, Turk wise metallic silver, a little bit of metallic gold and also pink. So those air this is the main color Pollack that we're going to use for this owl. So again you can use different colors, so feel free to use different colors. But the to the codes that I have chosen for this project and before we start to paint our owl. Let's just practice some brush strokes on one of those other pieces of the square fabric that we cut earlier. So go ahead and get your paper palette. Or if you're using a paint train, that's perfectly fine. Either one is works, and I'm using a paper palette. And I'm going to start with, um, yellow so we can shake it a little bit. Open it up and I like to use thes small little plastic spoons to scoop out some of the paint and add it to my paint tray. Do that right here. Okay, so now watch. See, Like, I'm gonna you start with a flat brush and then just show you few strokes Now, normally, what I would do, I may not even wet my brush. Or if I do wet it, I just very, very little bit wedding. The brush. Not much at all. I don't want too much water. I just want to be able to mix the paint, so I'm gonna just makes the paint on my palette. And then I'm just going toe practice to see how the strokes look. And this is the consistency you do want it to be. You wanted to be a little bit thicker so that you can actually really see the paint color. Now watch what happens if I'm adding more water. It's just gonna dilute it. So that's how you dilute the color onto the fabric to make it a little bit lighter. You just would add a little bit of water. Now, another thing to keep in mind. If your brushes too wet and you pick up the paint, it's gonna run. And as the paint is drawing, it's gonna run more into the other colors. So you have to be really careful not to use too much water unless that is your intent to create, like a very watercolor effect. But for our project and for this owl. We don't really want that watercolor effect. We want to avoid the colors running into each other, so I would really be using water very minimally. You proud? You want to just focus on the paint on. Lee had a little bit of water to make the paint a little smoother, but very little so that you wanted the pain to be more concentrated so that it doesn't run and blend into the other colors where you don't want it to. So take a few minutes and just practice them brush strokes with a few of the different paint colors so that you get a feeling for how the paint works on the fabric before we actually start painting our owl. Okay, so we're gonna first start to paint the owl body in yellow. And, you know, I've got my paintbrush soaking in the water, so I already know that it's gonna have too much water on to the brush, and I don't want that. So I'm going to make sure I just have a scrap rag, always with me, And I just want to make sure I get that excess water off the brush. And so my brush will be damp but not too wet. And I've gone ahead and added more of the yellow to my paper palette. So I'm just gonna, uh, spread the paint a little bit and again, Be careful. So you you want to have enough paint on your brush, but you don't want it to be too much because you wanted Teoh be on the, you know, going onto the fabric smoothly. So here I know my our body is here, this part. So I'm gonna go ahead and I'm gonna use a flat brush for the owl body and some of the larger areas. And then for the wings and any of the smaller areas, I'm going to be using the smaller round brush. So I'm just gonna paint along my pencil lines. And don't worry right now. If you see the pencil lines through the paint, we're gonna be adding like gold later on to cover that up. So again, when the pencil lines there light, I'm also going to keep my pattern near me so I can see the pattern and then just compare it to my fabric so I'll know where to paint. So we're just gonna first of all, paint the body, okay. And then also, I'm gonna paint the years in yellow and the top part of the head and actually gonna switch my brush. I'm going to switch to the small around brush for this now for the owl face. I'm going to use the color golden rod. And the owl face is all in this area around the beak around the eyes, just in this area, and I'm gonna use this smaller brush for to paint the L face. Okay, next for the owl body and the eyes, I'm going to use pearlescent white, and I'm gonna switch back to the flat brush. Make sure you clean your brush thoroughly that there's no weather colors on there and test on the paper towel to make sure that you don't have any other color residue on their, especially when you're working with white. And I've got I've added the pearlescent white to my palette Here. I'm gonna pick that up, and I'm just going to apply it to my owl body. I really love the pearlescent white. It has that sort of silvery look to it. It just adds a little bit more than just using ordinary white. But you can also use ordinary white or any color really that you would like to use. So again, just remember to have your pattern nearby so that you can compare your pattern to your tracing. And if the tracing is too light, you'll still be able to follow along. So I'm gonna dampen my brush just a little bit because the color is a little bit on the thicker side. So I just wanted to be a little bit more fluid. And you can see if I picked up a little bit of the yellow from my water container that had from the previous yellow paint. So there's a slight tinge of yellow, but I think it's fine. It's gonna work for this. So it's OK, so make sure you go all the way up to the these feathers here. So now we're gonna paint the wings around the face and then, of course, along the body as well. I'm using this very small brush, and the colors I'm gonna use are pink pearlescent, Turk wise, a little bit of the metallic gold, some of the true gold and then pearlescent purple. So this is my color palette for all the wings and the way I'm going to go about doing this is I'm going to do all the pink, um, wing wings first. So I'm just gonna randomly pink pick like areas where I want to add the pink and just do all of that. I'm actually gonna do the face around the face first before I do the wings along the body. So I'll just add the pink around the face at various points. Um, and then the same thing. I'm gonna do the true gold, the purple and the pearlescent. So it's just gonna be randomly around the face, and then I'll do the wings on the body for and should continue with the wings. I'm going to just pause and uses true gold and paint just around the, uh, face thea l face so that we have this part right here so that I want to paint this part around the face and another thing just to keep in mind. I mean, I'm moving pretty quickly through this, but just to keep in mind that you just want to give look a little bit of time for the paint to dry so that you don't risk, you know, running into, like, the colors running into each other. So just keep that in mind as well. Okay. So as I'm painting the wings along the body, what I'm gonna do is alternate between the pink. I'm gonna add silver and the pearlescent Turk wise, I'm gonna be mixing those in. And then for this middle wing, it's going to be the pearlescent purple and the metallic gold. I'll just alternate. And then for this third wing was closest to the body that's going to repeat what the outer wing is. So is going to be the pink and then mixed in with the pearlescent Turk wise as well as the silver. And then I'm going to repeat that same style on this side of the body as well. And then I'm going to go back around the face and then add in the Turk wise the purple just randomly. Whatever I feel needs to be added. And I'll probably add some metallic gold as well. Okay. Okay. So this is what our owl looks like so far, the wings were painted the face and body is painted, and now all we really have left to paint are the feet and the beak. And for that, I'm going to use orange and get those painted. Okay, So next we're going to add, um, the details of a golden silver with our fashion liners, So just make sure before you actually apply it here onto your alma TIF Just tested on a paper towel. So you get a hang of how much pressure to apply and how much to squeeze. So what I want to do is now go and outline, uh, the owl body with the gold. So I'm gonna go ahead and do like this and cover the pencil lines and make sure that your the rest of the owl is completely dry before you start to apply this fine liner and we'll do the same thing here for the and you'll see here that I've made it a little bit of a jagged line and I want to go all the way up to the top here. And likewise, I want to outline the head as well in the ears. Okay, so definitely let that dry. First, you can actually go back. If there's any gaps, just fill that in, let it completely dry. And once it's completely dry, then you can use the silver fashion liner and outlined the feet and the beak with the silver. Now, at last step is to add in the details. Using this fabric marker is called stained by sharpies and black, and I'm just gonna use it to draw in the eyes and then also add in a little bit of detail and outlining onto the wings. But before you do that, make sure that you're a painted owl is completely dry because you don't want to have any smudges or anything like that. So make sure it is completely dry before you start adding in the details with this fabric marker called stained by Sharpie.
9. Paint Tea Towel: Trace Pattern: now the steps that we took to paint this out. Matif on our practice squares these air the exact same steps that we're going to repeat now when it comes to painting on our tea towel, and you could just see that the motif is going to be repeated eight times now. Remember, in the earlier lesson, we downloaded the pattern, made eight copies and cut it into squares. So we're now going to use those pattern pieces and arrange it on our tea towel in a tiled pattern. So now we're gonna pin the pattern pieces to the riverside of the towel, and you can see that I've just lined it up, kind of like a checkerboard style where I started. I pinned the pattern in the top corner, the right and left top corner, and then one where the corners air about maybe 1/4 of an inch or so, just lining it up there, and so that it's in the middle of the two. But it's dropped down, and then again on the sides, you'll have a pattern piece on each side, and again it drops down close to where the corners are again. About 1/4 of an inch. We're so we're half a niche. It's just approximate. You just want to make sure you're gonna visually just make sure it lines up, and then you'll have the pattern pieces on the bottom corner as well. So that would be the first step. Go ahead and pin the pattern pieces to the tea towel in a checkerboard style of layout. Now we're gonna trace the pattern onto the tea table just like how we did it in an earlier lesson when we practiced on the fabric squares. So we're going to do that same step again. And you can you either use a pencil or water soluble marker, and you might just feel to see the pattern clearly with enough bright light and you can just start to trace. Or you can use a light box, which is always my preferred method to get better clarity and better visibility of the tracing. So I like to use a like books now. The difference between what we're doing now on the tea towel and what we did before in the practice squares is that you're gonna have to trace eight times to make sure you trace each owl onto the towel. So that's eight owls. You'll need to just make sure you trace each one carefully onto the Tito.
10. Paint Tea Towel: Owl Motif: Now, the final step is to paint each individual owl on this tea towel. So that's eight hours in total, and you're gonna paint each one and you're gonna follow the exact same steps that we did earlier when we did the painting practice and how we painted that Almaty von are fabric square. You're gonna have that fabric square right next to you, so you can use that as your template and remember, like, what colors do you use and where you placed each color and use that as your guide to then paint each individual out?
11. Heat Setting: The final step is to heat. Set your towel with a cotton heat setting on your iron so you want to iron on the reverse side of the tea towel. Make sure you go over every al motif with the heat and the heat. When applied to the paint's, it will just make it permanent. So that means you can wash your towel afterwards and the colors will be set and they won't wash away. So that's the final steps. Let's just take a few minutes to heat. Set your towel.
12. Thank You: I hope you enjoyed this class painting at whimsical owl on a T. Tell now you can apply the same technique to paint this hour. Anything else? You can paint it on a pillow, a T shirt, a napkin or a scarf. So have fun with it. And remember to share your finished design with me uploaded to the project section. And you can also share it with me on instagram and tag me at divine and why? And if you have any questions, please post it in the discussions and I'll be sure to answer you there.
 Rekha Krishnamurthi, Mixed Media and Digital Artist