Transcripts
1. Introduction: [MUSIC] Have you ever stared at a blank page wanting
to create something but you lacked inspiration and maybe even
felt really stuck? You are not alone. In fact, studies on creativity
have proven that when you give somebody unlimited
freedom to create something, that the result is actually stifling rather than inspiring. Imagine this. Imagine I tell
you to create something, anything, and for the materials
you can use anything. For most people, that would be very intimidating. Now imagine that I
invite you to create a collage where people
floats and fly. To me that's a lot
more inspiring, and I even start to get
an image in my head. And that is the power of creative constraints or
creative limitations. A great way to impose a creative constraint
is to follow a prompt. And that's exactly what we're going to be doing in this class. We are going to be
following seven fun collage prompts that will inspire
you to create seven unique, perfectly imperfect
pieces of art. I'm Kelley Bren Burke. I'm a digital artist
and illustrator living in Minneapolis,
Minnesota. I fell in love with
digital art in 2017 when I got my first Apple pencil
and the Procreate app. Just instantly in love. Then a few years later, I felt deeply in love - even obsessed - with collage. I think you could be
obsessed with collage too. This class is for
people who want to explore and spark
their creativity. When creating the collages, I'll be using the Procreate app, my iPad, and an Apple pencil. But these prompts will apply
equally to analog collage, if that's what you prefer. To support you with this, I have given you lots and lots
of great digital freebies. They include Procreate brushes, Procreate color palettes, and lots and lots of isolated elements ready
for you to collage. The elements include
vintage people, modern people, animals,
backgrounds, and lots more. If you want even more freebies, go to my website
kellybrenburke.com, and there's more digital
collage freebies for you there. I can't wait to see
what you create. I love collage, you'll see that all
throughout the class. I love looking at collages. So please post your collages
in the class project area. Are you ready for a new
creative adventure? Let's get started. [MUSIC]
2. Class Project and Resources: [MUSIC] I hope this class helps
you spark some creativity and maybe even get out
of a creative rut. Together, we will be exploring seven different
prompts for collages. The prompts are Play With Size, Float and Fly, Explore Ephemera, Limited Color Palettes,
Add Graphic Shapes, Add Colorful Rays, and
finally, Flowers and Leaves. For each prompt, we'll go
through this process together. We'll explore inspiration
for that particular prompt. I'll create a quick collage
inspired by that prompt. And then it's your turn
to create your collage. Let me show you
the resources that I've provided for you and
how to download those. I want you to have lots of
fun creating your collages. So I have some great
free resources for you. I am on Safari and I am looking at the About
section of this class. Here you'll find
the prompts listed. At the bottom, there are class resources and these are all
clickable links. So if you click any of these, it will take you directly
to where you want to go. For example, my Pinterest
Collage Board is right here. I have a lot of really fun
collage freebies for you. Here we have 50 plus
collage freebies which are isolated images. You can save these
by tapping Download. And you can download
all of them or just the ones that
strike your fancy. There are lots of fun
elements here for you. When I'm pulling together
collage elements, I'm always asking
myself the question “Would I want to use
this for a collage?” So they're really curated to be inspiring and
perfect for collage. I hope you have lots of fun. This also has a link to my first collage
class in Skillshare. it's called Collage
Animation in Procreate. You might want to check
that one out as well. This is what the
cover looks like. Let's go over the Project
and Resources section. It has the links again
for your convenience. Also for your convenience, I pulled together the
resources in a PDF. This PDF is clickable as well, as long as you
save it as a PDF. You're welcome to use your
own photos, of course, and use your own images,
whatever you'd like. Whether they’re personal or
images you source elsewhere. But I did want to make
it easy for you to access some fun, curated images. There's also a section
here for Discussions. Please ask me if you have any
questions. And for Reviews. If you like the class,
I would certainly appreciate it if you
left me a review. It would help other
students find the class. Next, I'll walk through posting your projects in the
Class Project gallery. Now let's review how to create
a project in Skillshare. This is what it
looks like when it's time to upload projects. So right here, you could
upload the main image. You can see here that this
is a horizontal file. I don't believe
there's a way to edit it, so this woman is
centered, unfortunately. This is just the cover. You could also replace the image if you didn't
like that, and you wanted to see an image that
looked better in that place. So let's try, for
example, these women. They look good. So I'm going
to hit "Submit" there. For your project title, you can call it
whatever you want. You are welcome to share all seven collages that
you create or just one. It's totally up to you, whatever you're
comfortable with. But if you were doing all of
them and starting with the first one, Playing With Size - you could put #1 and find an image where we are
playing with size. This one works, so
I'm going to tap - pull that one in there. There it is, and then
I can navigate down here and add a second one. I've already created
a file here with my seven class projects and
this one I want to delete. So let's just show
you how to do that. I would tap "Edit Project", and this is one that
I don't want it. So I'm going to tap delete, and then I can scroll down and the rest of
my prompts are here. I hope you have so much fun
exploring these resources. [MUSIC]
3. Find Free Images for Collage : [MUSIC] Welcome back. In this lesson, we are going to explore my two favorite
sources for images. The first one is flickr.com
that's F-L-I-C-K-R.com. I love Flickr for vintage
images. And you find those vintage images in a place on Flickr
called The Commons. You go to explore and
then you tap on "The Commons" and you get to this
page that I was already at. The important part for Flickr is not to search
in this top box. Because if you search
in the top box, you'll find all images, but a lot of them are all rights reserved or not freely usable. That's why you scroll down here and you search
in The Commons. I search all things
in The Commons. With my collage, I tend
to like happy people. I will search things like smile and this is what comes up. There are 21,000 freely usable images in The Commons
that respond to smile. What I'm looking for here are just things
that catch my eye, things that evoke emotion. Let's see this woman. This is a good example
because I like her. I like her vibe. I like her smile, but the
picture just is not super good. It's pretty grainy. Some of that is
good for a collage, but I would not
personally use her for an image just because
it's a little too grainy. Let me back up and see what else we have here under “smile”. This is cute, she's adorable and it's a
good image to use for collage because there's
nothing overlapping her. She can easily be isolated or separated from her background. If you like images in Flickr, you can create
galleries to save them. I have a number of
different galleries and I've already saved her to my kids gallery. And other
galleries I have are groups, animals, Ladies Home Journal and then I also have some for other
tutorials that I've done. What I'm going to do is I'm
going to save this image. I am going to download it. And here it offers
me different sizes, which is helpful for collage. It's better to have a
large image and shrink it down than to start with a
small image and enlarge it. I'm going to go ahead and
download the original, which is 4,208 pixels
by 5,056 pixels. I'm going to tap
"Download" and then it will go to my download
file right here. Later on I'll show you how to isolate this photo
from the background. But let's just keep
looking through here. This is sweet too, it's cute. This is a great one. I'm pretty sure I've
already saved it and this would go in my group gallery. Let's go ahead and look at my own galleries and I'll
show you a little bit more. If I go to "You" in galleries, I am on here under my name
Kelley Burke. And I'm just going to show you
one specific gallery and that's Library of Congress. Here it is. Now, one of the reasons I
like Library of Congress, they're all freely usable. And the image quality
is pretty good for all of them and you can also get large
size images here. Let me show you how to do that. Let's go with her. I like her curls and her
dress and her shoes. What you're looking for
here is just again, no known copyright restrictions.
That tells you that it's free to use. And then
also with the Library of Congress - this is pretty unique to the Library of Congress
in what I've seen. It will say, "Higher resolution is available."
There'll be a link. I'm going to tap
on that link and here you'll see different
sizes available. There's a small JPEG, a larger JPEG, and then a tiff, which is
very large at 39 megabytes. Sometimes I'll go for the
biggest image, the tiff, and sometimes I'll go for
the medium-sized JPEG, which is 92 kilobytes. I'm going to tap on that
and then I'm going to press on that image and then I'm
going to add it to photos. Let's move on to my other
favorite resource for more modern photos, unsplash.com,
U-N-S-P-L-A-S-H.com. This is the homepage
and if you scroll down, you can see what images
are available here. This is just the first page. What's trending
right now or new. You can also search. And let me just search movement. Because if there's movement, that's often a dynamic image. Well, these are cool images. It would not be
great for a collage because I can't separate
it from the background. I don't know where the background begins
and the image ends. Same for this one,
although this one might be a cool background image. I can imagine blurring this out. This has possibilities. I'm going to save it to
one of my galleries here. It's called collections instead
of galleries in Flickr. I'm going to save this
to background textures. I like her. I'm going to save her. Again by tapping "Plus" I'm
going to save her to people. The other thing with Unsplash
is if you scroll down, you'll see other
images like that. First we have
advertised images that are for sale on i.Stock and I usually skip over those and keep looking for
Unsplash images. There's some really great images here. That's interesting. I'm going to save
that one to people. And let's see what else
is like her underneath. I like this one and I
will save her to people. Again, if you wanted
to browse my images, you can find me on Unsplash
and look at my collections. I'm going to do this guy. Is it an ostrich? I think so. Let's
call it an ostrich. If I'm wrong, I'm wrong. I'm going to tap "Download" here and it will ask me if
I want to download it. Indeed I do and it will
go to my download file. That is how I source
images for collages. In the next lesson, I will
show you two different ways of isolating your images
from their background. I will see you in
the next lesson. [MUSIC]
4. Isolate Elements in Procreate: [MUSIC] Welcome back. In the last lesson, we looked at resources for finding great digital
images online. In this lesson, I'm going to
show you two different ways of isolating the images
from their backgrounds. The first way is to use Procreate to isolate the
images from their background. Let's just say we want
to separate my dog, Murphy, from his
background, just for fun. Here's Murphy. I'm
importing him. This is him. He just
makes me laugh. We're going to isolate him from his
background real quick. What I usually do is I
make the image smaller. It's more manageable. I go to Wrench > Canvas > Crop and Resize. We
just want Murphy. We don't want the
chair and the pillows. I'm just bringing
it in closer there. I'm going to trace
around him real quick to show you isolating. I'm on Freehand > Add again, so I would just be
tracing along inside. Go around his collar, and then go back to his fur. Just to show you real
quick where we're at, we started there and I'm just going to
close this up here, tap that circle, and so we get these
jagged lines, three-finger dropdown,
Cut and Paste. It all looks the same. But now the area
that we've isolated is on its own layer and
Murphy is on its own layer. And we don't need
this background, so I'm going to delete it. Here you can see that I
didn't go in close enough. What I do there is I'll
erase it a little bit. You can be as fussy or non-fussy
about this as you want. Collage is very forgiving, and that's one of the
things I like about it. If we go to Airbrushing - Airbrushing is a set of brushes that comes
with Procreate. I like to use the Hard
Airbrush as an eraser, so I'm on Eraser > Hard Airbrush. Then I'm going to make it just a little bit bigger
over here, my eraser. Then I'm just going to clean up this place where the
background got involved. Since he's white and the
background layer is white, we could add a color that's
very different below him. Let's do this peachy
pink and fill the layer. I'm tapping on this
Layer > Fill Layer and it fills it with this
color that's selected. Now we can see more easily what we've already isolated
and what we haven't. Magic wand > Freehand, and then I just keep on
tracing right inside Murphy. It's hard to see what's going on here because it's
shadowy on his back, but I'm just going to do that. I don't want the
blanket in there. Using your own photos
is a great way to make collage a little
bit more personal. You can also do something
like this for a gift. Oops. We are almost done here. I'm coming to that peach area. Now I can bring the circle
around to the other part, connect that, and then we do a three-finger drag
down, Cut and Paste. Here we have our peach layer, here we have
Murphy's background, and here we have Murphy. I'm going to delete
the background. We don't need that. This is not necessarily perfectly isolated,
but it's fine. It's just an example
of what we would do. If we wanted to use
him in a collage, we could put something - I don't know - anything -
like a flower in front of his leg or a butterfly
or whatever we're doing. That would cover up the
place where the blanket was. Again, if we wanted
to save that, I turn off the background color. I turn off the peach. and I go to Canvas > Share and save as PNG. [MUSIC]
5. Isolate Images in Canva: [MUSIC] The second way of isolating
images is through Canva. Canva is an app and a website. C-A-N-V-A. The cool thing about
Canva is that you can isolate images from their
background really easily. This is part of their
paid service, Canva Pro. So if you have a free version
of Canva, this isn't option. But if you are isolating
a lot of images, it can totally be worth it. I'm going to go to
Recent Designs here, and I'm going to tap
on Create a Design, and then I'm going
to tap Edit a Photo. I never take a photo from here. The ones I look at
are Photo Library, which is my Camera Roll, and the Files, which
is my Downloads. I'm going to grab a file
that we downloaded earlier. I'm going to grab this little girl with
the ice cream cone. It shows you the
size of the picture. This is roughly 4,000
pixels by 5,000 pixels. Then I'm going to
hit Edit Photo. To edit this photo and to
remove the background image, I would tap on it, hit Edit Image, and then there's
Background Remover. This is really quick. This should go really
well because she's pretty distinct from
her background. The great thing about
this is it will catch the little wisps of hair really nicely in a way
that's difficult to do when you're doing the freehand
isolation in Procreate. You can see here she has been perfectly removed from her
background in seconds. I am going to move
her into Procreate by tapping this Arrow and then Save With Transparent
Background. Then I'm just going to
bring it into Procreate. I'm just going to do one more. I had that ostrich that
we saved from Unsplash. I'm going to do Edit
Photo > Choose File. I wanted to see
how Unsplash would do with all the
little ostrich hairs, fur, [LAUGHTER] feathers? I
don't know what you call it. Edit Photo, and I'm going to tap Edit Image again and
then Background Remover, and then Canva is working
on it here, you can see, and we'll see how
it does with this. It looks like it captured
all those little details. It also captured
this little stump. Canva got a little
confused here, and I don't blame it. I backed up, so we can look at
our original thing. Let me just go forward again and see
what that looked like. I'm going to do Share > Save With Transparent Background, and then move it into Procreate. Canva is great for removing
background images. It's great for graphics,
highly recommend it. But if you don't have Canva Pro, you can easily use the
isolating thing in Procreate. Let's head back to Procreate. Here are the two things
that we isolated in Canva. I just love her, she's so cute. If I turn the background
color off again, we get this checkerboard
background. I think I might fill
the layer again with this peach so
we can see better, what is her, and
what's the background. That is really cute. Look at
what a good job they did. Look at there, these
little tiny wisps of hair. Those are really hard to isolate when you're just
tracing around here. That's a really good example
of how Canva can do this. The one thing is that Canva will make it a little bit smaller. If I remember correctly, this was a 4 by
5,000 pixel image. It did take some of the
background out, but not much. It is now 1,700 pixels
by 2,000-some pixels. It's still a decent size, but that is part of the
trade-off with Canva. We'll take a larger image and make it a
little bit smaller. Now let's look at
our ostrich friend, and I'm going to bring that peach background
in again for him. I'm going to tap Layer, fill the layer with
color, bring him up. I don't know. I assume
it's a boy ostrich, I don't know anything
about ostriches clearly. I'm going
to bring him up. Here we have some of the
grass or whatever that was in front of him and
also the stumps. What I'm going to do
here is I am going to go to Wrench >
Canvas > Crop & Resize. I'm just going to bring this in. The other thing with PNGs, with a transparent
backgrounds is they take up more space than a JPEG, or something that doesn't have
a transparent background. When I'm saving a
PNG in Procreate, I often will crop it
and close like that. I don't want this stump. An easy way to get rid of that is to tap on the ostrich layer, grab that arrow, and then I
would just bring it down. Once things are off the page, and you let go of it, then they're are erased. That's an easy way just
to get rid of that stump. You can see here
again that Canva did a great job with his feathers
or fur or whatever that is. I'm going to be
googling afterwards. We do have these
lines of the grass. I'm just going to erase a
little bit here to clean it up. Again, I have my Hard
Airbrush eraser. If you wanted to really clean up those areas where there is the grass or whatever
in front of him, you can go to Magic Wand > Freehand like we did
with the cut and paste. But here I am just drawing an area that's close
to the grasses. Three fingers drag down, and I'm going to hit Copy. Then I'm going to do
three-finger drag down > Paste. Now you can't see
it, but we have a second layer that I
isolated above here. What I'm going to do is
I'm just going to move that in front of the grass, and I'm going to make sure
the shadows are lined up. You see here we have
removed the grass, and I'm going to pinch
these layers together. We could do the same
right over here. Magic Wand > three-finger
drag down > Copy > three-finger drag down > Paste, and then move this
little area over here. Pinch it together. It's not perfect. If you really zoomed in, you could see that, but
nobody is going to do that. Rather than cleaning up
this area down here. I think I'm just going to bring him down a little bit and just get rid of that area. It's off the page, it's going to just be
deleted, and there we have our ostrich head. [MUSIC] This is really interesting. Those eyes, aren't they just
wild? It's a cool color. What we have here are two different ways to isolate an image
from its background, either using Procreate or Canva. Now that you know the
basics of starting collage, we will start our daily
prompts in the next lesson. I will see you then. Thank you.
6. Play With Size: [MUSIC] Hello and welcome to our
first collage prompt. I am so happy that
you joined me today. When we are doing
these collages, what we'll do is we'll
look through Pinterest for inspiration
for our collages. I have a Pinterest board full of collage
ideas and you will find that in the Class Resource
section in Skillshare. This is my general
collage board. Then I have collage
boards that are broken down into different
prompts or themes. Today's theme is Play with Size. As we scroll through here, notice which ones
catch your eye. Think about how you might
want to play with size. Do you want a really
teeny tiny person? Do you want an outsized person compared to their environment? Think about what you would
want to do with this. When I scroll through here, there's certain ones that
catch my eye every time. I love this collage with the black and white then
the limited color palette. I think that's really lovely. This is one I always notice, we have the outsized
woman balancing and another limited
color palette. Let's just keep scrolling. A lot of these collages
are playful and fun. This one always catches my eye. The collage artist is
Annette von Stahl. This one is a little bit
unusual in that just the legs of the woman are small compared
to the size of the man. Let's move into Procreate
where I will quickly create a collage that plays with size. I've prepared a canvas
for each one of these. This is a 12 by 16 canvas
and I added a paper overlay. Then what we're going to
do is we're going to bring this city into the new canvas. How I'll do that is a
three-finger drag down and then it'll come up with
our Copy and Paste menu. If I hit "Copy" and go
into the new canvas, do a three-finger drag
down and then Paste, there is our city. Our city doesn't quite fit, but that's fine. No worries. I'm going to tap on this Arrow
and stretch out the city, so it fits in there
just perfectly. That looks really good. The next thing I'm going
to add is this woman and I have already isolated
her from the background. If you don't know how to isolate
an element in Procreate, please make sure and
go back and watch the lesson on isolating an
image from its background. I have already isolated
her from her background. Because she has a balloon
hand here and not a hand, hand [LAUGHTER] that
sounds really funny, but you know what I mean, I took this hand and I
copy and pasted it. Let me just show you real quick. I hit this little Ribbon. I'm on Freehand. I circled around here. I did a three-finger
drag down for Copy and then a three-finger
drag down for Paste. Then I took this arm, Flipped it Horizontal,
and then I just adjusted it
over her hand here. This isn't perfect, but you can figure out how I did
that there. Here she is. I'm going to do another
three-finger drag down > Copy. Here we are in our canvas. I'm going to do another
three-finger drag down and hit "Paste" and there
is our happy woman. At this point in time, it's
looking a little gray, right? We've got this gray city
and this gray person. What I'm going to
do is I'm going to add a layer above the city. I'm going to tap
on the City layer. I'm going to hit "Plus"
to add a new layer. I'm going to put a
little blue in there. Let me try this one. That covers up the
city, but no worries. We can play with the Blend mode here or bring down the Opacity. I'll start by doing that. Then, what I'm going to do is
play with the Blend mode of the city to give it a
more interesting effect. I'll just show you
briefly how I do it. The best way to get to learn blend modes is just
to play with them. On the City, I tapped N and
it's a normal blend mode. That's almost always
how they start. But if you look
here and go down, you can go through the
different blend modes. As you can see, sometimes
nothing is happening. I'm just going to turn off that blue so we can see it better. Here we have something
that happens. This blend light is Hard Light and it gives it
an entirely different look. We have Vivid Light, Linear Light, that might
be the one to go with. Pin Light, they're pretty close. Hard Mix. I think I'm going to
go with Pin Light. We have our city blend
mode that changes up the appearance a lot, and
we have the blue overlay. I think that looks pretty good. I might change the blend
mode there to Multiply. When you have a
Multiply blend layer, it just means the
color is interacting with the layer below it,
or the layers below it. I have my opacity down. I'm going to have mine
at 80 percent right now. Here we have our woman, we have our city, and now I'm going to make
sure my woman is centered. So I'm going to tap
on this Arrow up here and get her centered. When you see this gold line, you'll know she's
pretty much centered. I like her there,
she's leaping up. The next thing we're
going to do is create a quick rainbow above her. There's many different
ways obviously, that you could create a rainbow, but I'm going to go with
these cool multiline panes. I am going to choose a
rainbow color palette. That looks pretty good. I can still edit the
shape here on this Arrow. I have a number of
different choices here. I think I will go to Warp, Advanced Mesh, and
I'm just moving these lines in a little bit. I think that looks good. I'm going to recolor this
into rainbow colors. But first, I'm going to group
the rainbow and the woman together because I want
to move them together. Now if I'm on Group
and I hit that Arrow, I'm still on Warp,
I don't want that. I want to be on Uniform so
everything stays the same. I think I'm going to make
just a little bit smaller. Next, I'm going to
re-color my rainbow. I have a couple of color palettes that I'm
giving you in this class. I'm going to give you a
Rainbow color palette as well as a Retro
color palette. Look for those in the
Class Project area. To re-color my rainbow, I started with the pink. I'm going to move
on to the orange, and I'm going to color
drop into each layer. Onto the thing, green. This is a unique
pasteli rainbow. This is how I did my collage, where I was playing with size. I hope that was helpful. Generally, I'm going into a bit more details when
I'm doing tutorials. But since this one is
about the inspiration, I am moving quickly
through the creation part. You can start creating and think about what you
might like to do today. As you could see through me
with my Pinterest board, I love looking at collages and I would love to see your collages. Each day, as you
finish your prompt, I would love it if
you would share your collage in the
Class Project gallery. I'll have my collages there
for you to look at as well. I'm looking forward to
seeing you tomorrow for the next prompt, Float and Fly. [MUSIC] See you then.
7. Float and Fly: [MUSIC] Welcome to Day 2 and
a fresh new prompt. Yesterday's prompt was
Playing with Size, and today's prompt
is Float and Fly. Let's look in the Pinterest
board for some inspiration. There are all ways
that people float and fly and defy gravity
in collages. It's one of the things
I really love about collage; that anything
is possible. I like this woman. She's floating with these
little bubbly balloons. Another type of collage that
I added to this section were just people that were
just airborne in general; these two retro women are
floating from the moon. I like that one a lot. This one always catches my eye. I noticed this collage
artist the other day, Mille Rose. I really
love her work. This woman is just kind of suspended by the ceiling and
there's so much to look at here with the frogs and the butterflies, and everything. I think it's just
really beautiful. This one is very sweet. Often in collage,
people are very different from their
environment like you'll see a vintage person in a
modern environment. In this one, these
people look very much of this
environment which is interesting and they are
just suspended on the moon. You'll see a lot of
moons in here and suns and all that kind of thing. So, think about whether
you want your people to float or fly or jump. Another thing people do is tie people up and I think the
effect is interesting. I'm glad they gave her a
scissor so she can get off. There's another one here
where people are just, I don't know, perpetually
stuck I guess. I tend not to do that
with my collage people, but you do you and do
whatever you want to do. These are different ways to
float and fly in collages, let's go into
Procreate and create a collage where
people float and fly. This is the image
I started with. I isolated these women and I probably found them originally
on Flickr; the Commons, which I talked about earlier in the section on sourcing
your materials. I isolated them from
the background and I added the sky background that I probably
got from Unsplash. Let's move the sky
into the Canvas. Three-finger drag down > Copy. I have my 12 by 16 Canvas
with my paper overlay. Another three-finger
drag down and Paste. You can see it doesn't
fit that well, so we'll just scale it here. That looks good. Here we have our clouds
in a 12 by 16 Canvas. I found my isolated women, so let's bring them
into the canvas. Let's hit Paste
and there they are. So, what I'm going to do is
I'm going to copy some of these clouds and have them as another layer that
are above the women. It gives more of effect that the women are really
in the clouds. To do that, I'm going
to tap on this Ribbon, I'm on Freehand, and
what I am going to do is trace around
some clouds here. This is a similar
technique to what we used when we are
isolating our people. I curve that around, three-finger drag down > Copy, and then three-finger drag
down > Paste. So now it looks the same but if we turn
off our background layer, you can see that we have
the clouds above here. I did that messy. I think that'll work out. What we're going to
do is we're going to turn the layer with
three women back on. We're going to
drag it down under the clouds and that's
a cool effect. What I think I wanted to do, maybe to make it look
even more different, is to take that cloud layer, tap this Arrow, and hit Flip Horizontal. That way it has even more
variation from the first one. What I'm going to do with this blend mode is
I'm going to play around and see which
blend mode I want. What I didn't tell
you about blend modes before is they always start on Normal and these blend modes above give you a darker result. The blend modes below normal generally give
you a lighter effect. Because I want a lighter effect, I'm going to scroll through
here and see what I like. With luminosity, I
can't see through to the women which is the effect
that I'm looking for here. Blend mode may not get me
where I want to go here. I'm going to go back to Normal and see if I can just
lower the Opacity. Here the clouds in
front of them are at a 78 percent opacity. You can see their legs. What I'm going to do is grab the airbrushing, Hard Airbrush, that is default
with Procreate and just soften these lines here. I'm going to make it big. So that way it looks more soft edged, and organic. I'm just going to
continue softening these edges with
the hard airbrush. It looks just more
organic and cloud-like. What we have is the
top cloud layer at 78 percent and
we have our women. I think I'm going to
add another layer above and just add a few stars. Here is a light pen, one that comes with
Procreate. I'm going to grab a
white and just dot around and it just will give it a little bit more interest. What I don't want to
do here is make a line; I'd prefer it like a a dot. Vary your pressure
if you're using this brush and we will just give it a little
bit more visual interest. Here we have our
finished collage with our stars, our cloud layer, our women, and our paper texture and clouds
on the bottom. I would love to
see how you create a collage where you have people floating or
flying or leaping. I want you guys to have fun
with this and experiment and create a collage
in your own style. Whether you are doing an
analog collage or digital, please post it in the
Class Projects section. I will see you
tomorrow when we move into our third prompt, which is Ephemera. I'll see you soon.
8. Explore Ephemera: [MUSIC] Welcome back. I'm so glad you're
joining me again for our third prompt,
which is Ephemera. We've already played with size, we have floated and we have flown and today we are going
to play with ephemera. I didn't really understand
what ephemera was until maybe the last year
when I started collaging. I'm going to start by reading
the definition of ephemera. Ephemera are things
that exist or are used or enjoyed for
only a short time. The sentence that correlates to that is there were papers, letters, old boxes,
all sorts of ephemera. Now let's go into Flickr, and I have a gallery
of ephemera saved that is available
for use in Flickr. Again, I'll have that linked in the Class Project description. This is an example of ephemera in the form of a vintage ad. I think vintage ads
are really interesting and pretty brutal actually, but you can get some
cool images from them. For your ephemera, think about what you
might want to use. You could use an old
theater program, an old ad; I really like using handwritten
things from the past, whether that's a
letter or a postcard. There are all things
that you can use here. Ephemera in collage is
really fun to use, whether you are creating a
digital or analog collage. The images are
pretty easy to come by on Flickr and other places. Next, we're going to go into Pinterest to get
more inspiration for collages that
include ephemera. As we scroll here, think about what
catches your eye. I believe this is a collage
from Hollie Chastain. She's a collage
artists that I really like and I have a book of hers. I'm not sure what this
is that she used. My best guesses that it's
something from a library, but I could be wrong. You'll see maps
here and diagrams and just scraps of paper
with writing on it. A lot of these collages
do have people in there, but you can also get
some interesting results by using just a variety
of ephemera together. I think this one's really
visually interesting. I like this, it's a
minimalist collage where she's using sheet music. This one is really
beautiful and it has a variety of ephemera
in the background. Now that we've seen
some examples, I'm going to create a collage using ephemera in Procreate. Let's head over to Procreate. Here is my gallery with my pre-selected items for
a collage with ephemera. I have my 12 by 16 Canvas here, with the paper
texture ready to go. I'm going to bring in this image that I might
have gotten from Unsplash. I'm going to bring it with the old three-finger drag down > Copy > open our new Canvas > Three-finger drag down to Paste, and here we have our water. I'm going to stretch it across. I want to keep the fish here at the edge as much as possible. I'm going to be careful
about how I'm sizing it. That looks good. I'm going to put this
layer on Multiply, so it interacts with the
paper texture. Let's just look at the
difference real quick. This is Multiply
and this is Normal. It gives it just a
little bit more texture because it's interacting
with the background. This is Normal and
this is Multiply. A Multiply blend mode is
something that you would use to interact with the
layers beneath it. Next, let's bring in
this purple galaxy, and I'm going to put
it on top of here. This is something that I discovered from
playing with collage, putting different images
above each other. It's often a galaxy
above something else to get an
interesting result. I have my galaxy
stretched above here, and I'm also going to put my galaxy on the
Multiply blend mode. Here it gets really dark, so what I want to do is bring the Opacity down
with this slider. I think that looks pretty good. I'm going to bring the Opacity
down for the ocean layer a little bit, about 75 percent. I think that looks good. Next, let's add our singer, hold on a second while I grab
her from another gallery. Let's bring the singer into
the collage, there she is. I'm going to bring her
down to the bottom here offset not
exactly centered. I think that's a good
placement for her. Next we're going to
add our sheet music. Pretty sure I got
this from Flickr. Let's hit Copy, bring it back. I'm going to experiment
with putting my sheet music below
my other textures. Let's see how that works. I'm on the paper
texture layer and the layer above that
three-finger drag down > Paste with my sheet
music, and expand that. I think that looks pretty good, and what we're going to do again is play with blend modes. I think I liked the Luminosity
blend mode on this. I'm going to stick with
Luminosity for my sheet music. I'm going to do one last thing, I'm going to add a
shadow to our woman. I'm going to duplicate her. I'm going to tap on
the layer below. I'm going to get a true black, which I often have saved
with the color palette. I'm going to Alpha
Lock the layer below. I'm going to fill the
layer > un-Alpha Lock it, so we can Gaussian Blur it. Go to Magic Wand > Gaussian Blur. Here you'll have
a percentage here that you can slide to meet. I generally do for a shadow somewhere between three
and seven percent. I'll go to five percent here. With shadows you want to see where the light
is coming from and the light looks it's
coming this way, so we'll move the shadow accordingly by bumping
it a little bit. I'm on the shadow layer
and I'm going to bring it down and to the left. I'm going to tap 1, 2, 3, 1,2 3,4, 5. I'm just playing around
here to see it works. A lot of times with shadows, to see the effect, I'll
turn the layer on and off. With shadows, I will also always change the blend
mode to Multiply. This shadow effect here
is pretty subtle and it's because she has a
dark background. But I'm going to bring it
over just a little bit more. Sometimes with shadows, I
will bring the opacity down, but I won't do that
here because the shadow is pretty subtle because
of the dark background. To review again, we
have our paper texture, we have our ephemera sheet music on the Luminosity blend mode, we have our ocean layer at 76 percent and a
Multiply blend mode. We have our lavender galaxy at 35 percent with
Multiply blend mode. The shadow is also on the Multiply blend mode and
the opacity is not reduced, and then we have our singer. Now it's your turn to
play with ephemera. I'm really excited to
see what you create. You know what I'm going to say, please share it in
the Class Project. I really love to see
what you create. Have fun creating your
collage with ephemera. The next prompt is
Limited Color Palette. I think that's a really
good lesson [MUSIC] that you will find useful. I love a limited
color palette myself. I will see you tomorrow.
9. Limited Color Palette: [MUSIC] Welcome back. I'm so glad you're joining
me for our fourth prompt, which is limited color palette. Let's look at our
inspiration in Pinterest. Here is my Limited
Color Palette Board. Here's a collage that
we looked at earlier. I think it was in the
float and fly lesson, but it's also here in the
limited color palette section. You can see here
that collages often will incorporate a variety of the prompts that
we're talking about. There's playing with size here, there's floating and flying, and there is a limited
color palette. As you're creating
your new collages, think about what types of different effects that you
might want to combine. When I say limited
color palettes, I'm often referring to one, two, three, or four colors, and I don't count black and white and gray
among those colors. The black, white, and gray
are kind of freebies. You'll see collages that just
have a couple of colors. This one's interesting with
the yellow and the blue. We have this with the
different shades of pink. I love a limited
color palette and I'm almost always using a
limited color palette. That is, because I really
liked the results, I just find them
really eye-catching. Whether you are a beginner
or more seasoned artist, playing with a
limited color palette will often give you
a great result. A lot of these limited
color palette collages are kind of muted until we get
to the bottom here. We have these bright
girls with the outline, this open mouth with a raise. I really like this one with
the pink and the blue. A limited color palette
does not have to mean muted or dull at all. Next, we will go into
Procreate and learn about how Procreate will help you
with color palettes. Procreate has some different
ways to explore color. We're going to look at the Disk, the Classic, and the Harmony. If you look at the Disk here, you can change the hue by going around this color wheel here. Once you find a
color that you like, you can experiment
with different colors within that hue by looking at lighter colors or darker
colors and go from there. I'm going to find a color that I really like to start with and I'm going to
start with this blue. Within this blue, we could create a couple of
different color palettes. Let me just pop this blue
into the main color here. You can choose your favorite
color for this project. We have teal, and we're going to start at the bottom
with monochromatic. Monochromatic is
keeping the same hue, but experimenting
with different tints and tones within there. I'm keeping this parked there, and I'm just seeing all sorts of different colors that I can get. That is what a monochromatic
color palette is. Limitations can
actually increase your creativity, I have found. You might want to explore a
monochromatic color palette. Let's look briefly at the
Classic color palette. You can do the same thing here. The hue is parked right
there and you're just getting different
colors within there. I go back and forth. I used
to prefer the Classic, sometimes I like the Disk. Now, let's go to Harmony, which is my favorite way to
play with color in Procreate. If you tap up here, you can see that
there's different types of color relationships here. I'm going to stick
with the first two, which are Complementary
and Split Complementary. I find those the most useful. Complementary means opposite. So complementary colors
are really poppy together. This is that same teal and
orange is its opposite. Again, with the orange, you can play around with
different hues within there. A limited color palette, I don't feel like it's
very limited actually. I think there's so
many different ways you can go within here. There's a Marc Chagall quote that I really like
about color and it goes something like this: "All
colors are friends of their neighbors and lovers
of their opposite." Here we are with opposites, our main color of teal, and opposite of orange, those will really pop together. The one I use probably
the most often, though, is a Split Complementary
color palette. Sticking with this teal and moving to split
complementary, we have colors that are
not exactly opposite, but opposite this color. Here we would have
our teal again, and we would have a gold color, and then a purple color. Let me drag these here. Again within those hues, you can get infinite varieties of the yellow and fuchsia, again, and still have a
limited color palette. I didn't fill in my
Monochromatic color palette. I'll just choose some
to go with that. I'll choose a light
blue, medium, and a dark version
of that. So, here we go. Here are three different
types of color palettes. Now it's your turn
to play with color. Create a collage using a
limited color palette. By that, I mean between
one and four colors, not including white, black, and gray, which are freebies. Please share your collage. [MUSIC] I'm excited to see
what you create. I will see you tomorrow
for our next prompt.
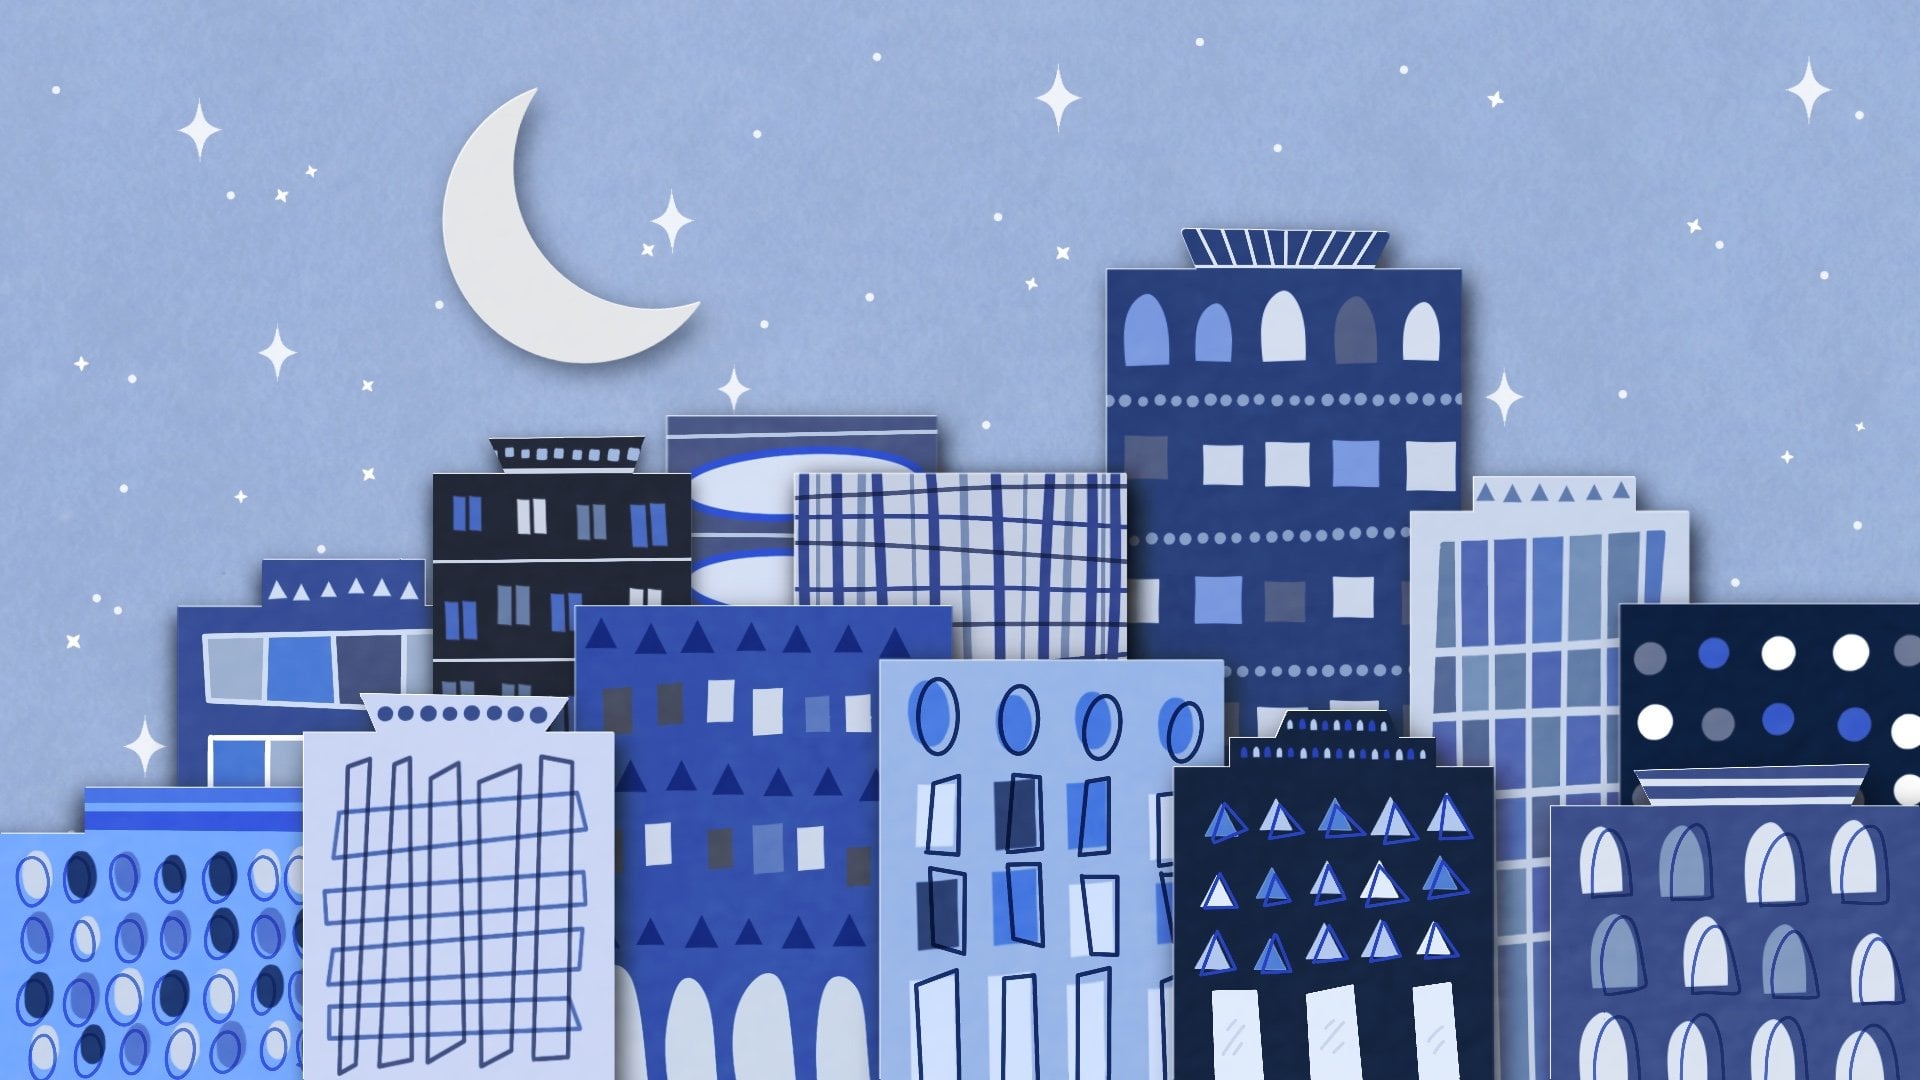
10. Add Graphic Shapes: [MUSIC] Welcome back. We are over halfway
through our seven prompts. Congrats for sticking with it. Today we're going to do
a fun prompt and that is Graphic or Geometric Shapes. Let's look at some
inspiration in Pinterest. When I'm talking
about this prompt, we have options like triangles, lots of circles, some squares, and rectangles, You get the idea. There's so much fun to be had
with these graphic shapes, and there's a lot
that you can do with just a little here
as you can see. I don't know if you
have shapes that you tend to like the most. I use a lot of
circles in my work. Here's one with circles. It looks like a
paper collage to me, although I could be wrong. Now that we have been exploring
these different prompts, you can see here
that one collage could meet a lot of
prompts criteria. This one has a limited
color palette, it has ephemera,
and graphic shapes. That's an option too when
you are creating a collage, you can stack the different prompts together as you please. You can use graphic shapes, ephemera, and a
limited color palette. I like these works right here. This one always catches my eye. It gives the impression that
this red circle was cut out of that negative space
there with the blue strip, and I think that's
a cool effect, and that woman is so glamorous. The artist's name is
Cristiana Couceiro. When we get into Procreate, I will show you some
tools that will help you make some crisp
graphic shapes. Let's go into Procreate. Here we have my ingredients
that I'm going to use. I'm going to do circles
with different textures. I created a lot of
these textures myself in an app called Distressed FX. I'm giving you some of these textures in your
freebies with the class, so remember to check those out. Here we have our canvas. It's 12 by 16. It has a subtle paper texture, and then it has
another paper texture, and I put it in a blend
mode of Multiply. Now we're going to
bring Marilyn into it. Here she is. I'm going to do a three-finger
drag down to copy her, go back to my canvas and
bring Marilyn into my canvas. I think I want her about there. We'll play around with it. So we have Marilyn
and the background. Right now I'm just
going to group these together and turn those off, and I'm going to show you how I create graphic
shapes in Procreate. Procreate's QuickShape
will help you a lot. You can draw wobbly circle
really bad and it will say Edit Shape up here
and you can keep it as an Ellipse or you
can make it a Circle. We can also do a super sloppy rectangle
or square and you can say Edit Shape. And then you can play with different shapes.
<garbled> Easy for me to say. You can play with
different shapes such as a quadrilateral, a rectangle, a polyline, or an ellipse. I
didn't know that. I did not know you could turn
a square into an ellipse. Interesting. A triangle
works the same way, just a messy triangle, and I even did a little
weird thing up there, and I can make it a triangle. Now that we've
explored ways that Procreate can help us
create graphic shapes, let's begin our collage. We have our background. I'm going to bring Marilyn up out of the background
because that's how I like to arrange my layers. I'm just going to
have her sit on a couple of textured circles. Let's draw a circle. I still have my monoline brush and that's the default
Procreate brush, and I'm just going to draw a
rough circle here and tap, "Edit Shape" and Circle and I am going to
color fill that. It's not quite the right size, so I'm going to go to Wrench. I want to be on Uniform. I will just change
the size here. I am going to group Marilyn
with this ball she's sitting on because I'm generally going to be moving
them together. I'm going to move this
ball again so she's like she's sitting on a little
exercise ball there. I'm also going to
create another circle and have her lean
her hand on it. To do that, I'm just
going to duplicate this original circle
by swiping and I'm just going to make
this other circle a different color so we
can differentiate. I am on Uniform and I'm going to make this
circle a little bit smaller and let Marilyn
rest her hand on it. I might want this other
circle a little bit smaller, just to make it more
interesting for me. I am going to add some more
texture and shadows to this and I'm going to use
these textures that I created. I'm just going to copy this
and I'm going to go to the teal ball layer and I am going to
three-finger drag down > Paste. That covers the whole
area but I'm going to do a Clipping Mask to this ball. I have the teal ball, the purple texture above it and then I'm going
to tap Clipping Mask. That is a Clipping Mask and then you get
this little arrow, so this is clipped
to this circle. I am going to just pinch
these two together and now we just have this purple circle. We're going to do the same
thing with our pink circle. I'm going to do this one. I'm on the pink circle. I'm doing a three-finger
drag down for a Paste and then I'm going to tap
"Clipping Mask" again. I'm going to grab this Arrow
and experiment with how I want the texture to be
on top of the ball. You can see here, there's the texture right there, and I could make it smaller
or bigger or whatever. I think I want some kind of
shadowy effect there. I am again going to
merge these two layers together with a pinch and I'm going to turn
on the other layers. Here we have a collage with
Marilyn and these circles. So, now it is your turn to create a collage using
geometric shapes. You can use circles,
squares, triangles, rectangles, teardrops,
whatever you want to use. I would love to see
what you create. Please share it in the
Class Project area. While you're in the
Class Project Gallery, please take a look at
other student's work and leave them an
encouraging note. It will certainly
make their day. I will see you tomorrow
for our sixth prompt, which is Colorful Rays.
I'll see you soon.
11. Add Colorful Rays: [MUSIC] Welcome back to
our sixth prompt. For the last prompt, we explored different
geometric shapes, and this time we are
exploring Colorful Rays. Let's look at some
inspiration within Pinterest. There are all sorts of
colorful rays here. I think this is, again, a really fun thing to
play within collage, all sorts of things you can do. It looks like this is
an embroidered collage, which gives a
really cool effect. You can use this technique in analog collage as
well as digital. This one has a lot of
different textures. Here we have more ephemera
layered onto the rays. A lot of times you'll
see colorful rays coming from a camera or binoculars or horns. I've done it before
with a record player. This is an example of
not so colorful rays, but I think it's an
interesting collage, again, with the ephemera, and the rays coming out
of their funky glasses. This one also is an embroidered
collage. Ain't that cool? [LAUGHTER] kind
of colorful rays? Let's go back to my board. This is a neat effect again. I really like the combination of these different textured strips. I think that's a
really cool effect. This one is cool. We have this old mirror, it looks like an old photo. So many fun ideas. Now that we've explored
some inspiration, let's go into
Procreate where I will create a collage
with colorful rays. I created these rays earlier. But just so you can see
how they're created, I'm going to go back
to the gallery, I'm going to create
a new canvas, I'll just stick with 12 by 16, and I create these rays by
using the Drawing Guide. Wrench > Drawing Guide >
Edit Drawing Guide, and there is a Perspective
Drawing Guide. If I tap right here, there we have these rays, and that's what I would
use to create it. You can put these rays
wherever you want. I often do right about here. Then you have your
drawing guide, and then you can choose your color palette
and make your rays. If I was going to
do three colors, I would go pink. Then every third one, it would be pink, and I
would color it in later. Then I would do the
same for yellow. I would create a new
layer above there and do the yellow
after the pink. Then I would come in with the third color on
another layer, blue. Then later on I
would color it in. I've already done it though. Let's delete that canvas and
look at the one I created. This is the flattened
version right here. I'm going to hit
Copy > Paste, and there are our colorful
rays, ready to collage. One more thing you
can do with the rays, that's really cool, is you can change the
color really easily. If you go to Magic
Wand > Hue, Saturation, and Brightness, look at that. Then you can play with the
saturation or the brightness. Lots of different effects from just that one colorful
ray that I created. We have our colorful rays, and now I'm going to
bring my person in. I'm going to do it
three-finger drag down > Copy, bring her into our collage, Paste, and make her a
little bigger, I think. I'm going to create a
circle for her to sit on. Here we have our paper texture, we have our colorful rays
that have been flattened. I'm just going to put
them in multiply so they can interact with
that paper texture. I'm going to grab a yellow, and I'm going to create a
circle for her to sit on. I have my monoline there, I'm going to create
a messy circle, and let Procreate
help me, Edit Shape > Circle, color fill that. I'm going to turn her off
to see what we want to do. I think I want to
bring my circle to the center of my rays. Now I'm going to
bring my woman back, and I'm going to
have her sitting within this yellow circle here. Yeah, that looks really good. Here we have our
woman with the heart. I call this one
Looking For Love. I can't wait to see how you use colorful rays
within your collage. Please share it in
the Class Project. I will see you tomorrow
for our final prompt, which is Flowers and Leaves. I'll see you tomorrow. [MUSIC]
12. Flowers and Leaves: [MUSIC] Welcome back to our
last day of prompts and congrats for sticking
with this journey. I hope you are having lots
of fun exploring collage. Yesterday, we explored
Colorful Rays, and today we are exploring
Flowers and Leaves. Let's start in Pinterest
and get some inspiration. I love playing with flowers and leaves in a collage and
I hope you will too. Let's look at some
inspiration here. What I see the most in collages
with flowers and leaves are a woman with flowers
and leaves around her head. You will see that an awful lot in a lot of different ways. This is Twiggy, this is a model from the '60s. Or you can do
something else like have flowers come out of a book. I didn't notice that
before, the butterfly in front of her
eyes, that's cool. [MUSIC] Ope! This one has music,
we don't, woooah party! Oh gosh! I do not want this at all. Okay. This one is a
little bit different. She has records for her head
and then flowers around her. You can have the flowers
surround somebody. I really like doing that effect. I've done that a couple
of different times. We have a couple here which
is a little bit different. Or we have sometimes
a trio of friends, I think that's
cute, with a circle behind them and then
the little scribbles. I provided you with flowers and leaves within your
freebies for this class. So you'll find some
flowers and leaves there. There's no end to the flowers and leaves
that you can find on free sites like
Unsplash or even Flickr. Let's go into Procreate and
we will look at my collages with flowers and leaves
and we will create one. This is a collage, I'm
not going to recreate this one for class because it
was pretty time-consuming. It took me a couple of hours. But I have flowers and
leaves all around her. So if we open up
the layers here, there's all these
different flowers and leaves on top of her, and here is the woman
in the middle-ish. I put black and white flowers on her sunglasses and she also
has some shadows there. Then there's a lot of
flowers also behind her. But we're going to do
something a little bit more simple than that one for this
collage that I'm creating. I started with these
charming women that I believe I
found on Flickr. I think they're from Australia. They look like they're
from the '50s. I separated these
front flowers and them and I got this right here. Let's bring them
into our canvas. These ladies are a little
too small, but that's okay. I will stretch them out to fit the canvas and I'm going to bring them down
to the bottom, and there are our ladies. We're just going to add
some different pictures on the background and
see what we like. We have these flowers that I'm going to add
to the background. They're above the
ladies, but that's fine. We'll move it. First, I'll
just stretch them out. For this one, it doesn't cover the entire
bottom but that's fine, they're just going to be behind the ladies and I'm not using a blend mode on the women, so that is fine. That's an option. There's another option
that I like for them and that's
this flower meadow. Pretty sure both of these
meadows or from Unsplash. I really like these orange
flowers right here, so when I bring it down,
I'm actually going to drag it this way. So we have two pretty
backgrounds for our women. We have this one or that one, and I cannot frankly decide
which one I like better. So let's start with
these darker flowers. What I'm going to do is give these women some
highlights and shadows. So, Duplicate > Duplicate > Alpha Lock. We have a white here, so we're going to
fill the layer. If I hold here, it'll bring up the last
color which was a black. I'm going to Alpha Lock
that and Fill the Layer. I'm going to un-alpha lock the black because I'm going to
give that a Gaussian Blur. I'm going to give that
a Multiply blend mode because I like to do
that with shadows. Now for the highlights,
we want to see where the light is coming from. It seems like it's just mostly coming from the top and
maybe a little bit this way. Let's just have it
come from straight on. We have our white layer and I'm going to tap it one
pixel this way. Really subtle effect. We have our highlights here, and now we have
our shadow layer, which we are going to
give a Gaussian Blur, Magic Wand > Gaussian Blur. I'll do six percent on this one. We can turn it off and see
what the effect is there. Because the background is dark, it's a more subtle
effect with the shadow. I'm going to move the
shadow just a little bit down and to the left. Fun fact about me, I do not know left from right, and so I have to make an L with my fingers. You
guys know this right? [LAUGHTER] This hand makes an L, so it's my left hand and this
hand does not make an L, it makes it backwards L,
so it's my right hand. There you go. Left and right. My husband is sighing
in the background. He's my editor, but we're
going to keep this in. So we have our shadow, which is subtle here,
and our highlights. I'm going to group our ladies together with the shadow
and the highlight. I'm going to turn off the dark
flowers and we're going to look at them with the
lighter background. Here the shadow is a lot more obvious and too obvious for me, so I'm going to move it over a little bit and
then I'm going to bring down the opacity. Yeah, you can see that it's a huge difference
between a shadow on a dark background versus a light background.
Big difference. Here we have our
ladies in the garden, I think that's
just really sweet. That was our 7th prompt. A big congrats to you for
finishing in this class, but we're not quite done. [MUSIC] There's one more
quick video with a few next steps. I will see you then.
13. Final Thoughts: [MUSIC] Thank you so much for
joining me in this class. I hope you had fun as we explored seven prompts
for creating collage. If there's one thing that you
take away from this class, it would be this. At its best, creativity is fun, imperfect play and exploration. It's not about being perfect, it's about exploring
and having fun. I can't wait to see
what you created and shared in the Class
Project Gallery. If you also like to share
your art on Instagram, please tag me @kellybrenburke. If you want to
explore more collage, check out my other
Skillshare classes. Thank you so much for joining me and I hope to see you soon. [MUSIC]
 Kelley Bren Burke, Artist & Educator