Transcripts
1. Making Collage Papers Intro: Hi, my name is Sarah Tobias. I am a former librarian
and an artist. I am a writer. And my biggest challenge to date has been being
consistent with my art. I have let fear
getting in the way, in so many different ways throughout the
years that I would start and stop and
start and stop and so often say someday I will. Now that has changed. No more someday, I
make art every day. I love to create collages
as a way to relax. Yes, I said to relax rather than worrying about what anyone else thinks when I make art for me, I am in my happy place. My heart rate goes down. I totally in the zone. And I wanted to share with you that I hope by
taking this class, you will not only create your own collage papers
and a final collage, but discover the fun
of creating for you. Just you, no one else. There's no good, there's no bad. It's all about
enjoyment and doing it out of the pleasure of creating, instead of worrying about
what anyone else thinks. Meet me in the next video
and I'll tell you all about what we're going to do
and then we'll get started. Thanks for joining me.
2. The Collage Project: Welcome to the next video. It's time to talk
about those projects. In this little course, we're going to make several
different collage papers using different techniques so that you just have a variety of ways you can play and have
a good time from using white crayons and
watercolor paints to make it your own
tissue paper collage. I think they call
that a collage. Collage. I don't know. We'll play with pens and markers and little
bits of paint. You can use those
and cut them out as almost like stickers while we're making the collage papers, I want you to be thinking
about an affirmation, a quote, something that inspires
you and your creativity. Something that helps
you move through the fear of perfectionism, the fear of getting it done, the fear of what are your fears? I know those are
two fears that have often cropped into my work, but what things stop
you from creating? Think about a phrase or a quote, or just a few words that work for you to help
you move forward. And we'll take those words. We will create a collage
with our new collage papers. It might be something
like this insane. Embrace my mistakes. Actually I think it says
embrace your mistakes. I made this one kind of quickly. I wanted to play with papers that I even thought
were mistakes. Embrace your mistakes is a
phrase that helps me remember. Mistakes are just
a way of learning. And when it goes wrong, I can quit there, or I can choose to move forward and figure out what went
wrong and try again. I'm all about trying again. That's our project. I can't wait to see
you in the next video. We're going to
have a lot of fun, make lots of papers, and an awesome
affirmation that you can keep secretly in a little
notebook for yourself. Or maybe you do
want to post it on social media so
everyone sees what you have created and maybe it will inspire
others as well. But that is all up to you
and that's the final piece. There's nothing you
can do wrong in this class except not take it. So let's get going. See you in the next video.
3. Discover the Fodder of Life: Hi, Welcome back to discovering
the father of life. In other words, collecting what many people
might consider to be garbage or recyclables and putting them to fun
use in your collage. This is from a napkin with plastic where there
was wrapped around it. And I liked the spirals, so I saved it for future use. Tickets from a train, brochures from different
places that I have visited. This is music, old music that
I actually got my garden. It was a garbage day
and with the wind came a couple of
pieces of sheet music. And I quickly grab them and decided they could go into
my collage leaking stuff. Other things you might collect, there's the tissue paper out of a shoe box or from a gift bag. You may also discover some greeting cards that come in the mail that
are really pretty. They may be used as part of a collage or maybe
it's just inspiration. Other things that
I have thrown into my little collage kit or a little funny sketches
that I have made. So I save them because someday they might just be the perfect
thing to go into collage. These are little paint
strips testing pink colors. I hope this might end
up being fun as kind of a pattern sometime you can also print out photographs and use just bits and pieces of
photographs in your artwork. The other little things, this probably most people
would throw in the garbage, but you never know it might come in handy for a collage someday. I tend to save my
little scraps of paper. I also love opening the mail and discovering the very fun
insides of security envelopes. There's so much variety in them, and it's quite fun and exciting. Old books, I found this
one for twenty-five cents. It's actually was
a neat old book, but it's in horrible
condition in many ways. But these colors are really fun and can be playful collage. You can also print
from a book, a page, and cut out from that
so that you're not necessarily destroying a
book that you really like. But maybe it has
phrases or a section that you love and would like
to add to your collage. So you can do
something like that. So go on, start scavenger ring, find a bunch of different
things that you would like for your collage making and
just gather them up. You don't have to do anything
with them right now. We can put them to use
with our end project. See you in the next video.
4. Watercolor and Crayons Do Mix: Welcome back. This is the first
demo where we're going to play with
watercolor and crayons. Some people say they don't mix, but we will show
you that they can. I have here watercolors
in a variety of forms. This is just a little
palette that I keep and take with me
lots of different places. I made it in a mint box. Then I have this tray
that's already got some paints poured out
from tubes like this. I like working with the tubes. You get a lot for your money. And that's how I actually make my little palette
to take with me. Then here are our
Kranz, the white ones, the one I want to play with now, I highly recommend trying
the white 1 first. It's a little bit magical, and then you can go ahead and
play with some other colors if you like making this and
want to make more papers. If you don't have watercolor, you can take acrylic paints and water them down
to a thin wash. They will work just fine and
we'll wash over the crayons. Or you could use some India ink and thin
that down a little bit. So it's more like a wash. If you don't have any of those, but you like drinking
tea or coffee, you can even use
the dregs of those. I have two brushes, a little bit fat, one, round 12, and then 1.5 inch really inexpensive brush
for my wash, some water. And that's all we need. But we don't need
those at the moment. First, we want to
start with our crayon. So grab a white crayon and all you need to
do is make squiggles. Something you could
do spirals like this. As you can see, you can't see
what's actually happening. But that's the fun
and magic of it all. So I am just making
kind of spirals. They're really messy
ones I can tell. But I wanted to make
it fast, simple. Let go of any possible fears and worries about what
it's going to look like because you really
can't mess it up. It will be fun as something that you can
cut out no matter what. So that one is all spirals. And then this is
quinacridone rose. I like this color very
much and pretty thick. To get it bright. If you want a paler color, then you just thin out
the paint as you can see. If it's water ear, it's going to be thinner. If you paint really fast. It won't dry. So you can, whoops, spilling, like I said, this can be messy. But then I'm going to add some, this is gamboge Nova. It's a more orangey
based yellow. And I think it makes a really
fun combination with this. And that's it. That's
one sheet of paper. So you can go on and make more. I'm going to set this aside. Alright, I made that one. And then I'm just going to
truly squiggle around here. Because I wanted to do it fast. Again. Fast is easy. But you can do things
in a little more. Slow pace if you want to. This time, I am going
to use my opera pink. It's another color that I
have fallen in love with. Somebody, used it in a
thing that I watched and I was blown away
by the brightness. Because watercolors June
really on this bright. But it's very bright. And then here, this other
palette is a reading or purple. These are actually washable
paint temperatures. I'm going to try
it out because I really never have and
I gets really thin. So don't add a lot of water. This one gets thinner, like getting much red out of it. It's a strange texture too. But globally. So here we learn as we go. But the tempera paint doesn't really need water added to it. They don't see the
craziness much, but we'll see what happens
actually when it dries. Because I've noticed
a lot of times when I work that after things dry, you notice the
background details. So again, think about it this 11 more as quickly as possible. Maybe instead of a squiggles, you want to be a
little more specific. So you could do the
alphabet J, K, L, M, N, O P Q R S T U, V, W. Everybody is singing along q, t be, the end of the
alphabet has been reached. Alright, so I've
used that fat brush. Let's test out this
thinner brush. And what happens if we take
this quinacridone coral? Again, this is, this is
much thicker and this is quinacridone
rose, a combination. I kinda like that.
And you can see, it looks almost like
maybe I didn't press hard with my crayon little
opera pink in here. So just play, have
fun with your water. Thin it out as much as
you need to to spread it. I'm finding that I
prefer the airbrush. So if you have a fat brush, it definitely goes
on much more easily, more smoothly. I
just grabbed yellow. That's okay. The top. Let's see what happens. We have three sheets of paper basically all in
the same color tone. I like making
multiples and kind of similar color tones because
then you can combine them for different elements
on the same thing. And that is all there is to
doing it with Creon relief. It will show you this is
one I did the alphabet using pinks and reds and a purple and then I
did a blue wash over it. Then there's this using
a red with pink paint and yellow with an
orange and hearts. So you can see there's loads
of different ways that you can make this type of paper. Have fun. Make a few sheets, let them dry and they'll probably wrinkle
up a little bit, but just toss them
under a heavy book after they're dry and they'll
flatten out in no time. I will see you in
the next video.
5. Two for One: Watercolor and Doodles: Welcome back to the next video. I hope your first sheets
of paper or drying nicely. And you had fun and played with your crayons
and your paints. Now, we're going to play
with the paints again using basically the same paint. I just pulled a blue palette with one little yellow in there. And we're going to use
that paper as well as a sketchbook or
another little sheet of paper that you can
pull off to the side. And we're going to set
that aside for a moment. After we make the
background for our paper, we're going to go ahead
and play with some pens. These are Posca, markers, jelly rolls, Sharpies, you can use any kind of
panic can be a Bic pen. It really doesn't matter. It's up to you. Let's put those aside for right now because we don't
really need them. And paint a piece of paper. This is the low blue, which is kinda got a
tinge of green in it. And it's got a lot of
water going on here. Toss in another, see if I can darken
that up a little bit. And then take B, this one, this is cerulean. Blue, knows roughly similar. Alright, have fixed that. Turquoise never fails to
add some life to the sheet. This is lemon yellow, and I don't want the dots there. Then once again, set that aside, use my sketchbook and
use my smaller brush. And this time, we're just going to take these colors
that we just used. Here's the civilian blue
and make some dots. Just fill up your page with the palette
that you were using. We're going to use
this sheet just to create some simple ideas. It's kind of helpful to do a little practice pieces and see what you do like
and what you don't. For colors. I made this sheet
and I was playing, these are all Jelly Roll pens that I played with
different colors. This blue, these are the
moonlight jelly rolls. And they tend to go on really
nicely over watercolors. I did the same thing again here. This is the opera. Pink was my main color, and then I mixed a
variety of colors. And again, played
with those pens, these are a great place to play. And then you can actually take them and you could
cut all of them out and keep them in a little package for
future collages. And these can just be little
elements to your collage, like almost like
a little sticker. So those are some options. Here is the page that we have. I said all this stuff and I was drawing these little loops and realize that my camera was too far out for you to actually
see what I was doing. What I said was this is just
kind of a Zen doodle idea. And I was just doing these little loops
over and over again. And they look to me like
they could be fish scales. They could be a
part of a flower. They could be, I don't know. You name it if you want to. This is mine. But when
you come up with yours, name it whatever you
want or don't name it, so that when it's, when you're looking
through your things, coming up with possible
ideas of stuff that you can in a certain
way, shape or form. So there's that
style right there. Posca pen. This one is
called Pink number 13. It's a fat one. So maybe I just want to
put poker dots in it. I found these Pentel
sparkle pops, pens and they came in a set of, I think, eight colors. I love spirals. So maybe we'll do some
spirals and keeps spiraling hoops and see what
happens with that idea. I will say this over
and over again. If you don't love it,
it doesn't matter. You are learning from
these experiments. And the worst thing
that can happen is you decide you
don't like it anymore. Actually, to me, the worst
thing that could happen is that you would not learn
from playing with it. These are the Jelly Roll goals. If you turn the paper in
different directions, you'll be able to see
the gold and the green. Along the way. I bet you can come up with
different ways to do things. Now, you have a test sheet. You have more fodder for your collages that you can use when we get to
making our project. And you hopefully have
an idea of what you want to put on your final piece. So looking at these, I love, I love the bright colors, but not in the mood
to do that many dots. So my next favorite actually
is this with the pencil, I will go ahead and stay with
the hearts and peace signs. The key is, just to start going, keep moving around the page. I try not to make lines. It's just a matter of
tossing them in there. Don't forget, you may need to sharpen your
pencils as you go. There's a lot of landscape here. Alright? I'm almost done. How did it go for you? I will be honest and say It's not my
favorite thing to do. I don't mind it, but it's probably more of
a winter sitting around kind of thing that I would
probably pick up and do more than doing this
as a summer project. It's another technique that you can use if you enjoy doing it. Do it. If you don't
enjoy doing it, you don't have to effort to it. Again, one thing I
want to recommend is that when you do
something like this, and I actually forgot
with this one, as before you start adding
any elements to it, go ahead and scan or photograph your sheets so
you have the plain version, then you can print that out. I put some notes on the supply list about
scanning and printing and giving you some ideas and
ways that you can go about that if you don't
have your own scanner and color printer, if you really like a piece
that you have and you have the right paper
making prints of it gives you the opportunity to use them over and over again. I will see you in
the next video. Bright, bold, fun,
but not messy. I hope you're enjoying
yourself and getting lots of collage papers make
6. Bright, Bold and Fun, But Not Messy (Maybe): This is three
different ways that we can basically get
to the same end. You could use regular
tempera paints, may be that you
have from your kids or maybe you've saved them
for yourself with a plan. There's those, you can use acrylic paints and then I'm going to use these
tempera paint sticks. I learned about these from
Vanessa Brantley Newton, and got them for Christmas. And I like them for
multiple reasons. They're really thick. You can't do detail super well unless you may be
scraped part of it off. But they also are
strived very quickly. They come clean easily off of a surface and
things like that. But they also stay
on really well and have a nice deep color to them. And for me lately I have been going for walks and
enjoying the summer. And I have seen so many pink and purple
and red combinations of Petunia does. And they look gorgeous. So I thought it would be
fun to just play with that idea of just a whole
bunch of Petunia does, or flowers together to
fill up my piece of paper and see what happens. So as you can see, I am not really trying
to mimic the shape of a petunia more just give
the sensation of a flower. Generally, my collages
don't have a, they never use the whole piece. So in the end, being perfect and coming up with the perfect petunia shape isn't going to matter because
you won't see it. That's a lot of red. Let's see if I went too far. If I did, Who cares? Started again, it's
a piece of paper. Again, I'm working on just a basic piece
of printer paper. And I like doing that. It's thin, it's inexpensive, and it cuts up really nicely
for traditional collage. I like it even for scanning
for my digital stuff, because again, it's thin. You aren't likely
to get a lot of shadows or things like that. And so that's just kind of a lot of the benefits of
doing it this way. But even this brown paper that
I have under here just to protect my surface is
something that can be used. Look at the difference
in that color for making your own
collage papers. So if you have a
piece of brown paper, I want to test it out,
see what happens. Worst-case scenario, you get
something you don't love. I don't throw my things
away that I don't love because evidently I will find a use somewhere that
a little snippet off of it or something else that I can use it at some point
in some collage. So I just keep them to wait and see
what's going to happen. And somewhere down the line, maybe next week, next month, three years from now. Who knows? I will have this
piece of paper that works perfectly for whatever I am working on at that time. So don't hesitate,
just have fun. That's the whole goal,
is imperfection. Allowing yourself to be
feel free and not worry about what you're thinking or what you think other
people might think. I know this looks a
little bit weird. Kinda looks like
pinwheels to me, but I don't mind it. And I'm also
wondering if I should slip green in here. And just little
tiny spots to mimic again that flower or sensation
and the leaves of it. But I'm going to
just keep going for a little bit and get
everything pretty much done. This whitespace, these
large spaces of white, it becomes almost
too much white. So if you are doing this, a little bit of
whitespace is good. A lot of white-space,
Not so much. So make sure you keep going, filling in spaces
all the way around and look at where
that whitespaces. And you can see there, that's kinda fun the
way that overlapped. Some of these are thinner, more see-through kind of paint. And then you get
this really dense red and this really dense pink. So it's kinda fun to
see what happens. And as you can see, there is no wrong in this. Because the only bad
thing that can truly happened is you didn't get the effect that
you were hoping to get while you were playing. Maybe you've got some ideas of how to get the effect you want. And you can go back and try
again to see what happens. I'm going to keep coloring
and we'll speed this up so that you don't have
to sit here, though. Do tend to like watching videos of other people doing
things like this. I find it really quite soothing. Here we go. Let's finish it up. Alright. One last look at what I'm doing and kind of seeing if there's anything left
that needs to be filled in. I will toss it in there. I kind of like it. I like the way the colors are and the way that green
actually I think, made the purples,
pinks and reds pop. So that's it.
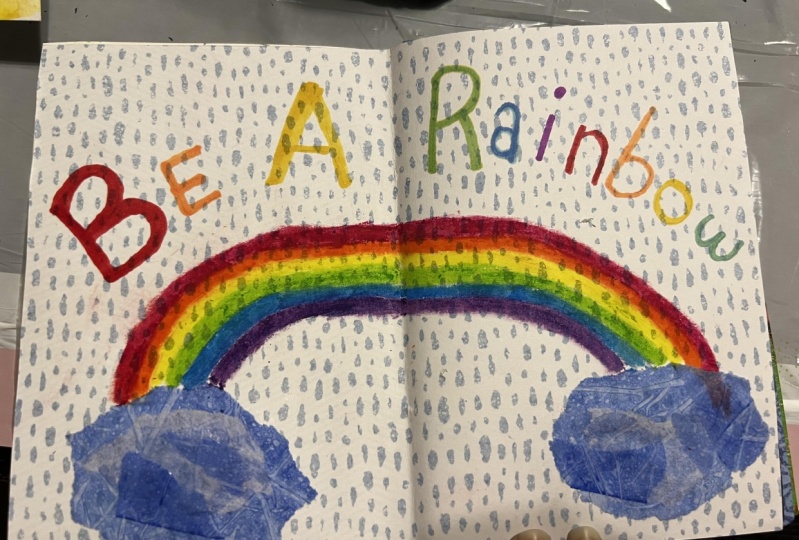
8. Affirmation Collage Part One: Here we are with
the final piece. We're going to make a collage
with the papers that we have gathered and you may discover you don't
have everything you want, it's okay to make
more as you go. The first step is
to have an idea. So for me, I chose the phrase Bloom where
you are planted. And last night before bed, I made a little drawing. I do want to make it little tiny pot
and then I want to have a big flower at the top. So the first thing that
we wanna do is figure out the lettering and
kind of get that in place and create the rest
of your collage from there. So there are lots of ways
you can do lettering. I am not a calligrapher. And if you are, that's fabulous. And you can use calligraphy
for your lettering. You can cut out. This is a page from a book and I got some
poke weed berries on it. But I think that's okay. And another page from another book and going
to use some words. And then I'm also going to
use letters to create a word. And I think I will also hand letter in
some of the letters. So we'll play with that first. I want to use a
sunflower for my flower. So I've pulled some
of my yellow papers. I also pull a sheet of
green for stems and leaves. I think I'm going to make the pot out of
something like this. And I did some stamps. I don't know if I'll
use them or not. That's something an
added thing at the end. The last piece of paper that I grabbed is this
piece from the book, The Hitchhiker's
Guide to the Galaxy. It's a favorite book of mine. It's more having plenty of stuff to work with
and whittling it down and taking stuff out versus feeling lost because you
aren't sure what to do next. So I just gathered a bunch of things that may or
may not end up. In the final piece. I am going to do my
piece in my sketchbook. So here's my sketchbook. Have my letters. I know what I'm trying to spell. I thought might be
interesting to see. Planted is the word not plant. And you can cut your letters or you can
tear them out and around. Might be interesting to use different size
letters to create a word. Another way that you
can do your lettering if you want it to
be all one size, is to type it up on your
computer and print it out. You can use a variety
of sizes even that way. And just type it if you want to. Maybe I will write
this on tissue paper. Maybe I'll do it a few
times just to kinda play. So you can write it
in different ways. You can go back and add. Maybe make it thicker. Like it better if it's
a little bit thicker, doing it like this
gives you some choices. Maybe you like some
of the letters, maybe you don't like any of them and you keep
starting over again, play with your lettering. Remember to think
about the size of the paper that you
are working on. So you've chosen your
paper in advance. Play with those, cut them
out the rest of the way. And we'll play with
them on paper. I'm not sure where I
want them at this point. So now it's kind of like
playing with the puzzle. Okay? I'm not a 100% sure. I think I really like
the letters, the, where you are planted
at the bottom. And I think that the
bloom is going to go either down this side or
somewhere up at the top. I'm actually thinking
about making it so the flower expands above
the piece of paper. But we'll see how that works. As you can see. I started with this for my
bloom and changed my mind. I took a piece of
paper that I have painted and just cut out some block letters
free hand from them. And I liked the brightness. And the way that it kind
of blends together.
9. Affirmation Collage Part Two: My pot is actually made from a photograph of conglomerate. And I like the texture of it. I like how it's tiny
and I like how it also implies something growing out of the crack of a sidewalk. And then I'm starting
to cut some leaves. And one of the things
that I really like about sunflowers is their leaves look a little bit heart-shaped. I often will cut more than
I need for a project. You think, oh, I'm going to
put all of this on here, and then you start to change
your mind as you move down. If you cut out extras, just put them aside, put them in a little
Ziploc baggie. And you have them maybe for
another project meeting, we reshape them at another time. Then we get into the
flower part. As you go. You may want to take our little
reference photograph of what you're doing. That way. If you sneeze or you move your paper in such a way that it
blows your papers, stuff out of the way. You can go back and
find how it was that you had it if you
really liked something. It also allows you to experiment because you can have a
photograph with it like this. Or you could take a photograph
and move your letters up in different places
and play around with it. So I hope that you are playing. I hope you found a phrase or
affirmation or quote that inspires you and gives you a
desire to continue creating. And I thing. What I will do is take a
piece of blank white paper, make my flower on here. And then I can cut out around
it and put it back on here and possibly even leave the white of the other
piece of paper above. Nothing's glued down so you don't have anything
that's permanent. But even if you have
glued it down and you go back to it afterwards, you can sometimes use a
little bit of water to get the pieces back
off and start again. Or you can trim around the
pieces and start again. I'm not going to glue this bloom down yet. I'm going to go ahead. I'm going to glue the flower first so that I can cut it out. I really haven't taken
that much time on this. I did have the idea in my head. I had a little sketch of an idea and I had been
thinking about it. Once you have those
kinds of things going, let go of worrying exactly
what's going to happen and allow it to just flow
and see what happens. When it comes down to gluing. It may get a little wonky. I generally use glue
sticks for by gluing. These papers are thin enough
that that works really well. Glue the other ones. So it's an overlapping thing. Sometimes you can get your glue on and then don't press it down. Glue the next one if
it's gonna go under it. If it's not sticking, just peel it up a little bit, add a little more glue
and stick it down. I got a little too close there, so I peel back a few pieces. Thank you. To make to spread it out. Again. There's that extra pieces. So I ended up making
a little bit smaller. I'm going to go ahead. So I'm going to stick
the flower here. And I am going to make a longer stem and probably
some larger leaves. I'm glad I didn't choose
to glue that down. I also think I'm
going to pull in the other last petals and
toss them in underneath. First, we'll glue that down. I'm going to replace this stem. I'll let it hang off
the top right now, I think as I'm looking at this and as has gotten much bigger, I really want to make
a much larger leaf. At least one. I put the B right on top of it. A B on top of a flower. This is when you
start really playing and seeing what
your options are. And eventually you just say, okay, this is good. I find more often than not, when when things change, when my plan changes
a little bit, it's usually because
my instincts and my intuition are kicking in and I am actually coming up with something that
I like even better. There is an artist whose
name is Rachel Hazel and she does a lot of sketch bookmaking and art-making in
her sketchbooks. And she talked about how
she loves the idea that a sketch book gets thicker as you make things and then
it is bursting with life. And so I like this idea that not only will
it make my sketch book Fat, this piece is about
bursting with life. I cut out this
little beasties job, which I may put in here by also have these little
circles that I had just cut out randomly and might put them here
to fill in some space. I have the butterfly
stamp in there. I'm undecided. Those are things that you
can kind of just sat down, work on the other parts of it. Gluing anything down that
you still need to glue down. You need to glue
the underside of the flower, these letters. And then I will decide, uh, kind of like this around and brings you back
into a circle. So I like the way
that's working. I'm going to finish this up, figure out how to fold it and
not hopefully just try it. And then I will show
you the final piece. This is my sketchbook
where I made my Bloom where you are planted. And as you can see, I have it folded down here. I did finally managed
to get it attached. It requires a lot of
folding and unfolding. So I don't know if I would
it exactly this way again, but I do like how it
turned out on the whole. I think it's bright and
fun and nice reminder. And the fact that it is so big. When you stick your
finger in the book, this page is always
going to stick out and remind me to bloom where I'm planted
even if I don't open it up.
10. Making Collage Papers Conclusion: That's it. We use our scissors, we used our glue, we cut, we make so
many pieces of paper. I know I did during this. And I found some new techniques
that I've enjoyed doing. I had lots of fun
making my collage. I hope you enjoyed working
on it too and came up with something that truly
inspires you to keep going, to keep creating, whether
it's making collage papers, making collages, doing
another form of art. Thank you so much for
coming to my class and participating and
creating papers and your affirmation collage. I hope to really hope that you really did it at that you will
share it with me. I gave you a list
at the beginning of the class with affirmations
that you could choose from. If you chose something different and it's something you
are happy to share, I hope you will share
those affirmations. I will add them to my list for future people taking this class. And I hope you will share, at least in the
class project area, a picture of your affirmation or one or two of
your collage papers. Also, if you by any chance, came up with an idea for ways to make collage paper that
I didn't share with you. I'd love to hear
about those as well because I'm always
looking for fun ways to make collage papers that I can incorporate into my artwork. Thank you again
for participating. I had a great time
making this class. I hope you had a great time.
 Sarah Tobias, Teacher, artist, writer, librarian